Paint Splat Snowman Craft
This quick and easy Paint Splat Snowman craft is perfect for little hands and young kids. With minimal prep and supplies it’s so easy to make on a cold winter day when you are stuck inside. Pour paint on a piece of cardstock, press and let dry then decorate your snowman!

Normally, a melting snowman would make me a little sad. But this paint splat snowman craft is too cute! With just a few simple supplies, you can make an easy snowman paint craft that looks like the cutest melting snowman. It’s a great last minute craft idea and perfect for all ages. Add in some winter color by number pages and a snowman handprint craft and you’ve got a fun day filled with winter art creations.
The best part about this craft is that it’s essentially mess free, even with paint. The paint is just smushed between two pieces of paper, so there’s no paint brushes or fingerpaint mess to clean up later. It is wonderful craft for kids of all ages, but especially for littles who need something simple!
Why You’ll Love this Paint Splat Snowman Craft
- You can make your winter paint splat art in just about 40 minutes. Not too long of a craft, but still fun and engaging!
- Cutting and glueing are great activities to help refine fine motor skills. Putting paint on the paper and peeling the sheets apart will be great practice too!
- This is a really easy group craft. You can even pre-make the paint splat papers and cut out the decorations. Then all that will need to be done in a group setting is for each child to decorate their snowman!
Supplies Needed
- Cardstock – Use whatever color you would like for the background color of each snowman. Then you will need black, orange, and brown cardstock to create the decorations.
- Googly eyes – If you don’t have googly eyes, you can make “coal” eyes from black cardstock or draw eyes on the snowman.
- Hole punch – A single hole punch is the easiest way to make even sized circles that will be used as the smile and buttons on your melted snowman.
- Scissors – If you are making this craft with young children, consider using safety scissors.
- Glue stick – A regular school glue stick will do just fine to attach all the decorations!
- White acrylic paint – This will create the base of your paint splat snowman craft.
- White paint pen – To easily make a mess free paint splatter background, use a white paint pen!

How to Make this Paint Splat Melted Snowman Craft
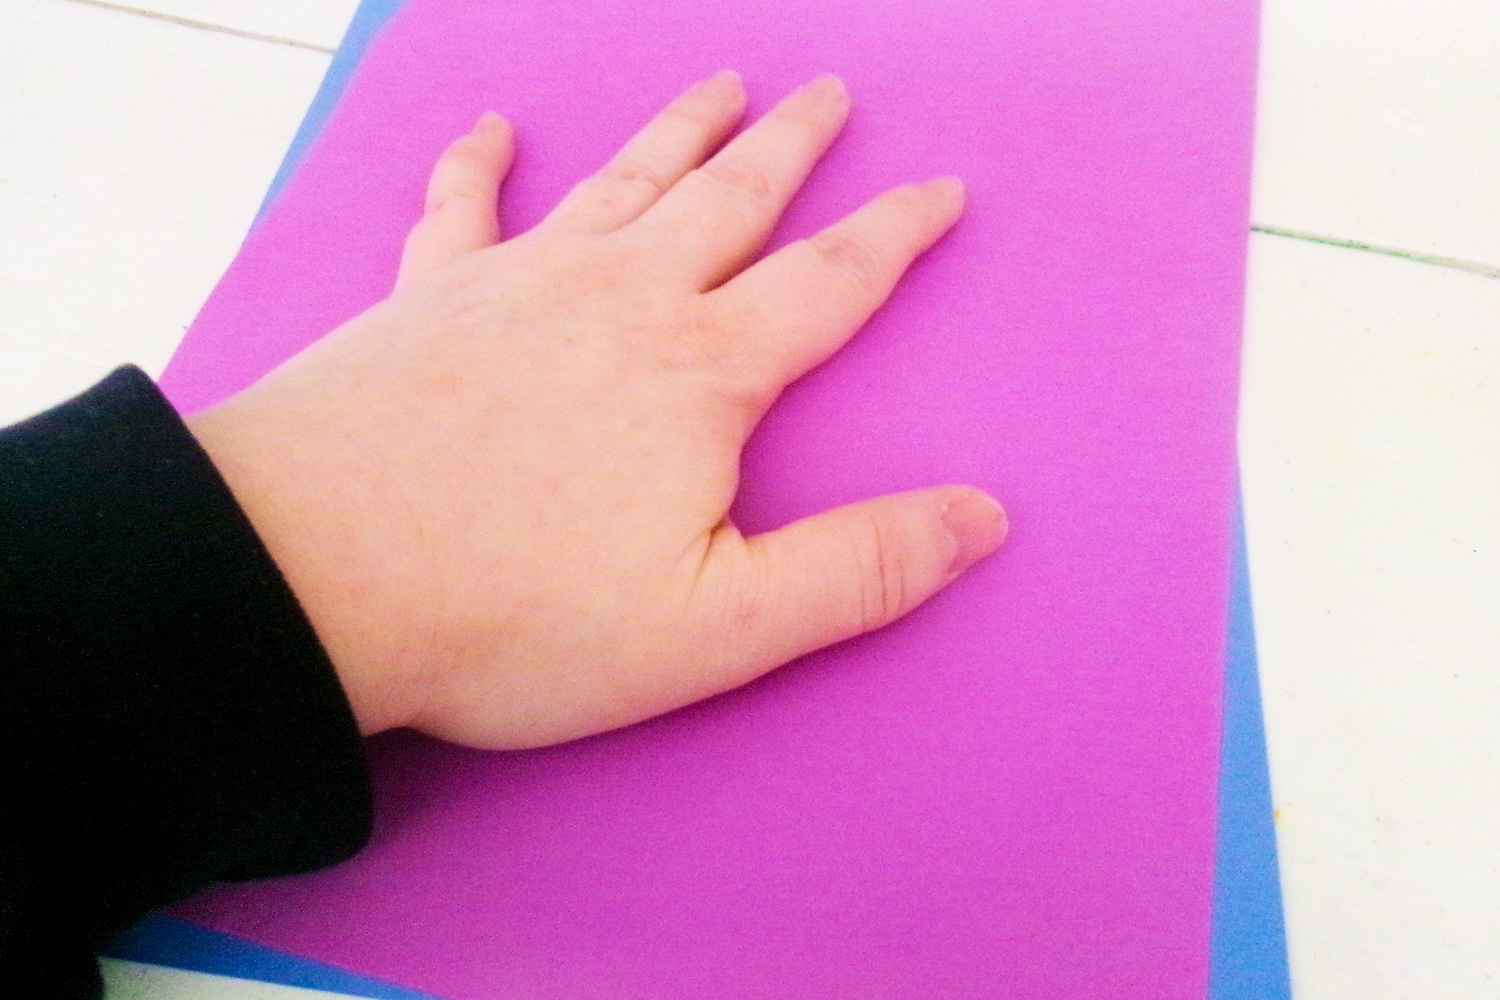
- To start making this easy craft, pour a generous amount of white craft paint onto a sheet of cardstock. You can use any color you want!
- Then grab another sheet of cardstock and press it down onto the sheet holding the paint. Press it with your hand and try to make sure it spreads out as evenly as possible.
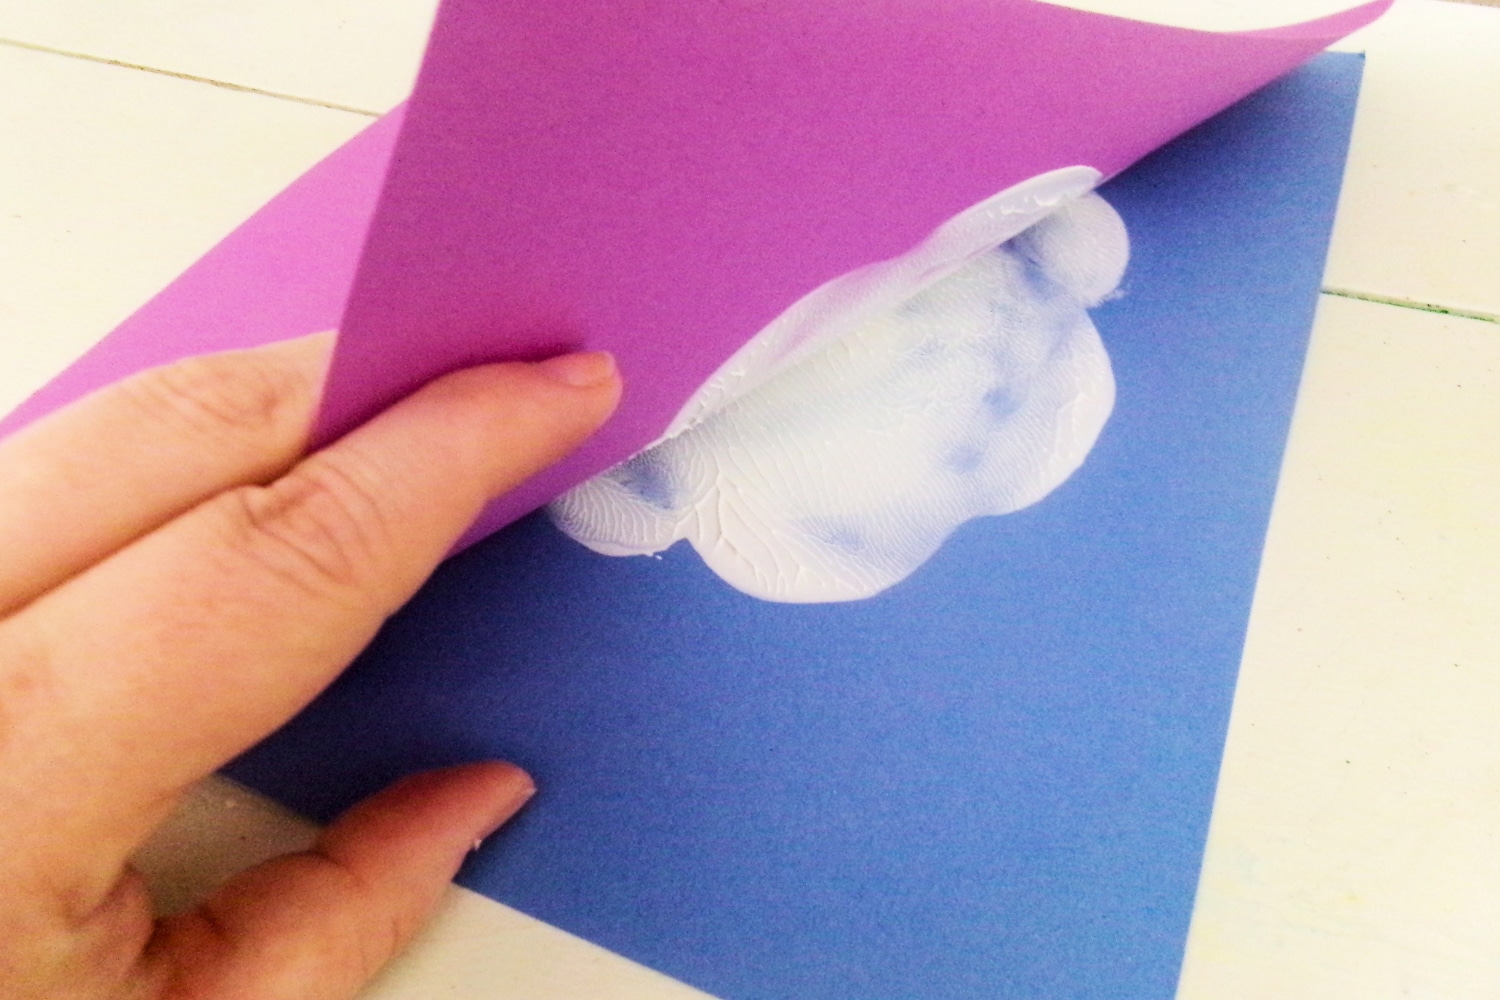
- Carefully peel the top sheet off of the bottom and there should be a nice paint splat in the center of both sheets of cardstock. If it doesn’t look the way you want it, feel free to start over!
- Let the paint splat snowman craft base dry completely before you continue on.
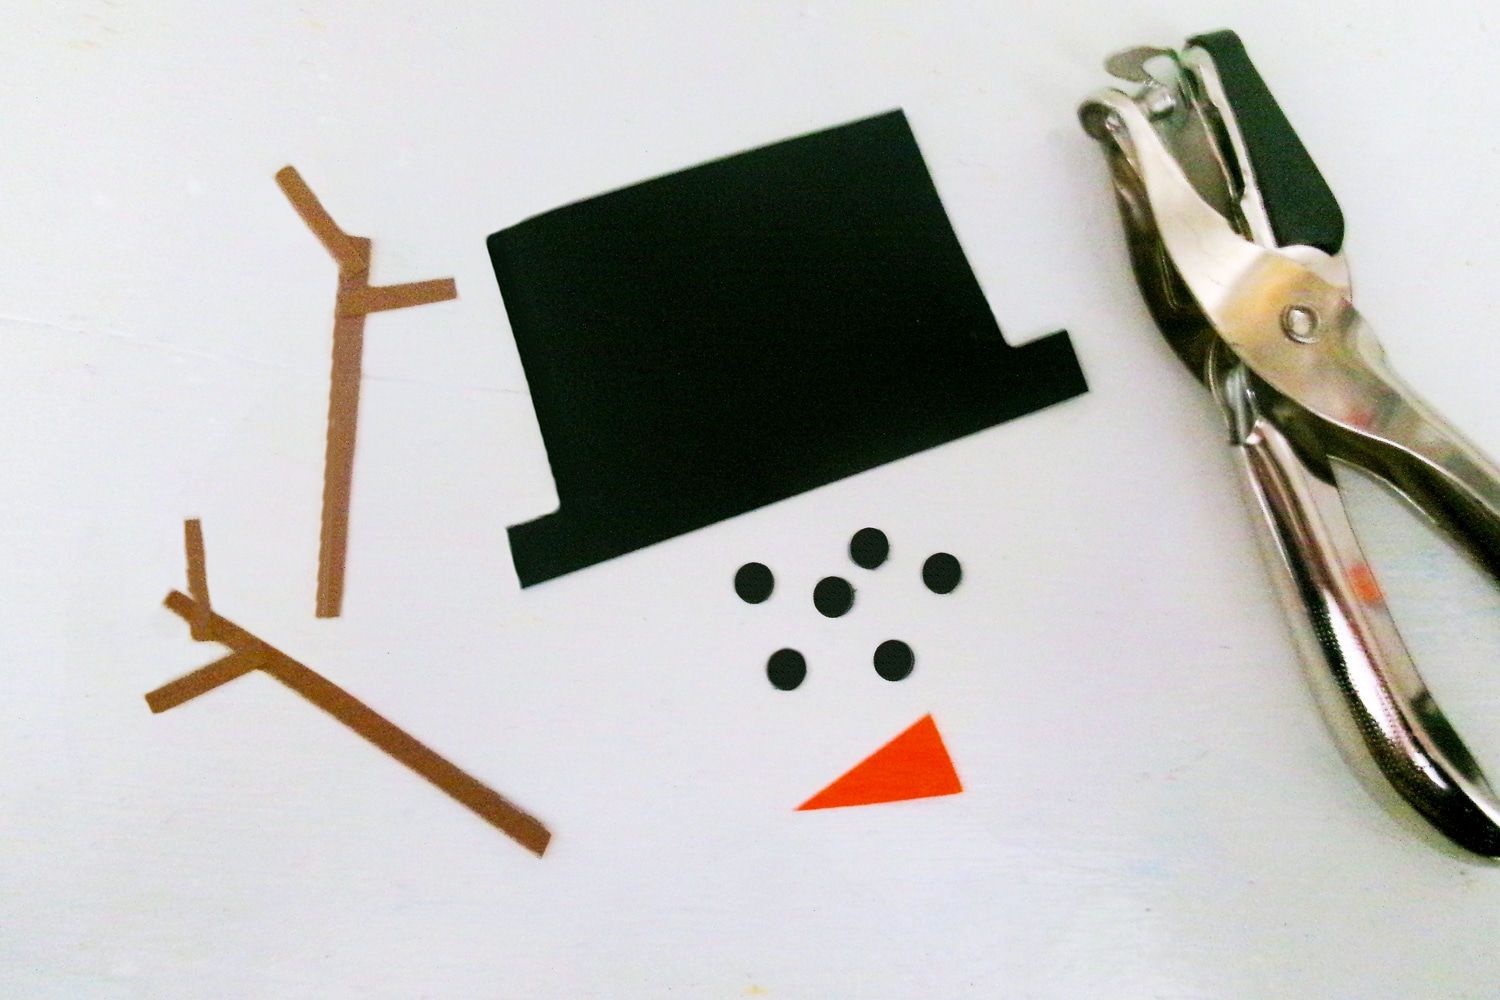
- While it dries, cut out a top hat shape from black cardstock. Then use a hole punch to punch out 6 small black circles. Grab a sheet of orange cardstock and cut out a triangle carrot nose. Lastly, cut two thin strips of brown cardstock and 4 smaller strips to create stick arms.
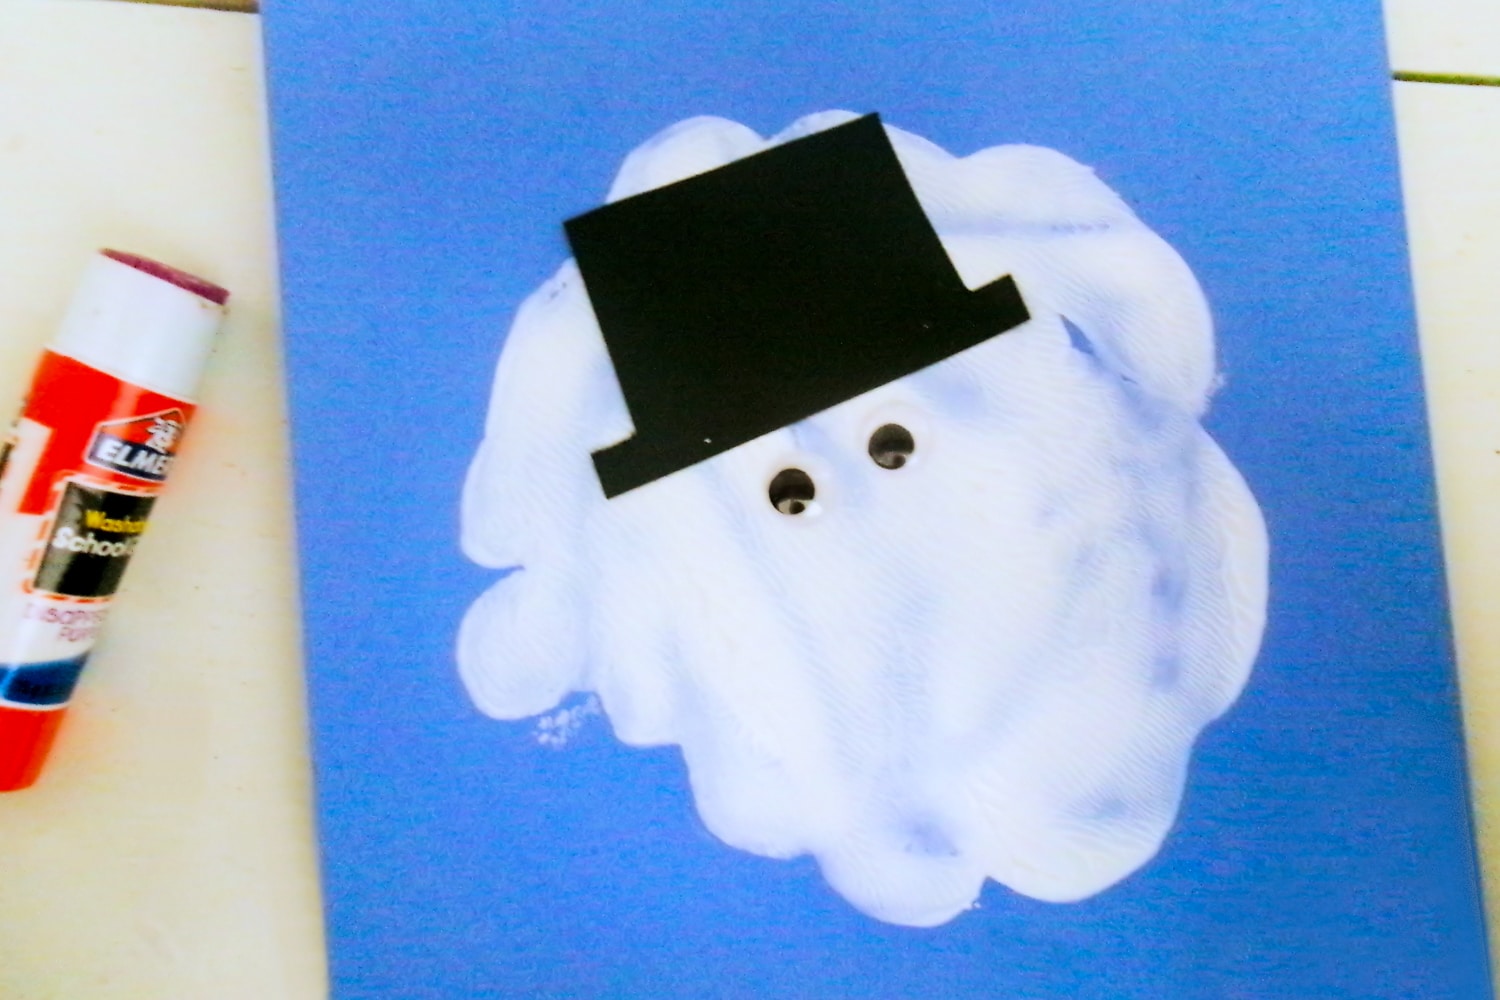
- Glue the brown pieces of cardstock together to create two separate arms. Then once the paint is dry, glue the hat and googly eyes on the paint splat.
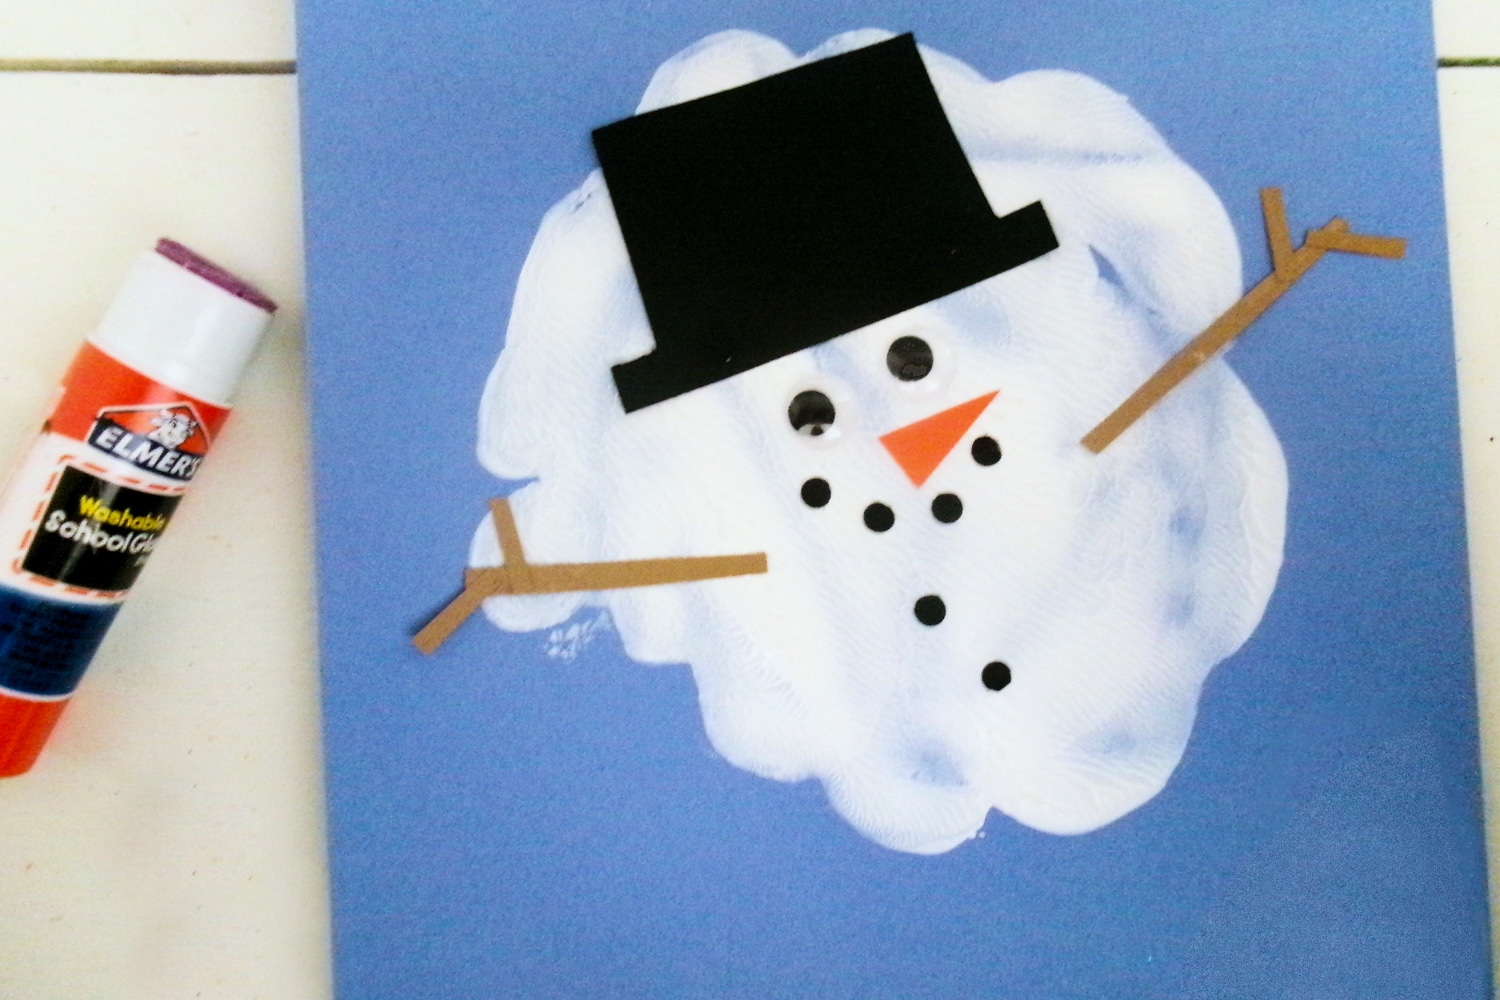
- Add the small black circles for the mouth and buttons, then glue the nose and the arms on too.
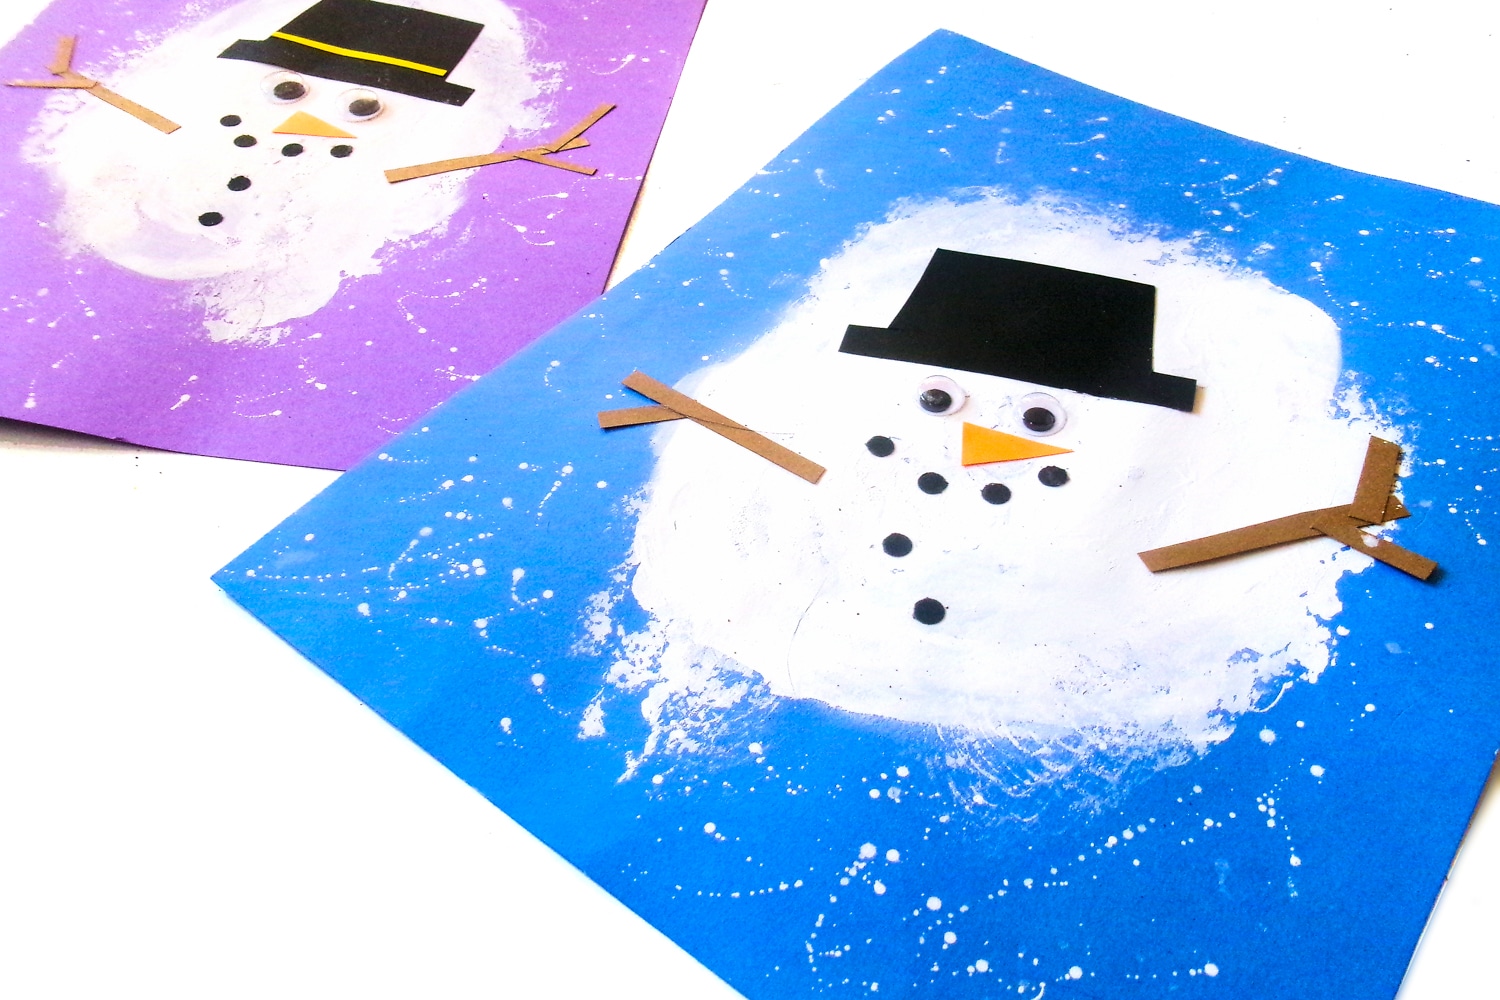
- To finish the snowman paint craft, use a white paint pen to splatter paint across the cardstock as a fun addition to the background.
- Allow paint and glue to dry and your snowman is complete!

What can I use if I don’t have a paint pen?
To create paint splatter without a paint pen, all you’ll need is a paint brush and white paint. I would recommend doing this wherever you don’t mind paint splattering a bit because it could get a little messy.
Take the paint brush and dip it lightly in paint. Then hold it over the sheet of paper and use your thumb or finger to brush over the bristles of the paint brush to make the paint splatter on the paper. Allow it to dry as you would the paint pen.
Pro Tips for the Best Paint Splat Melted Snowman
- Don’t press the paint in between the pages for too long, or it may start to peel up the cardstock. Just press gently and evenly and then peel the paper up.
- Feel free to add tons of other decorations to this adorable snowman. You could put another strip of paper on the hat, add stickers to the background, sprinkle some glitter in the paint before it dries, and use things like pom poms and pipe cleaners for more decor.
- You can label each paper with your name, or even name your melted snowman! And a great way to display this craft it to stick a magnet on the back of it once it’s complete.
Have the most fun on those extra chilly days by staying inside and making adorable winter crafts, like this one. This Snowman Sock Craft would be so much fun too!
More Winter Crafts You’ll Love!
- This Snowman Clothespin Craft is a great classic craft that every kid should make at least once in their lifetime!
- These Snowflake Suncatchers look so pretty hanging in the window and shimmering the afternoon sun.
- Make a Paper Plate Penguin for a cool and cute winter craft. It can easily be used as educational material too!
- Print Winter Drawing Pages and let your child’s imagination and creativity do the rest!
Paint Splat Snowman
Ingredients
- White Paint
- Cardstock – black brown, orange, background color of choice
- Googly eyes small
- Single hole punch
- White paint pen
- Scissors
- Glue stick
Instructions
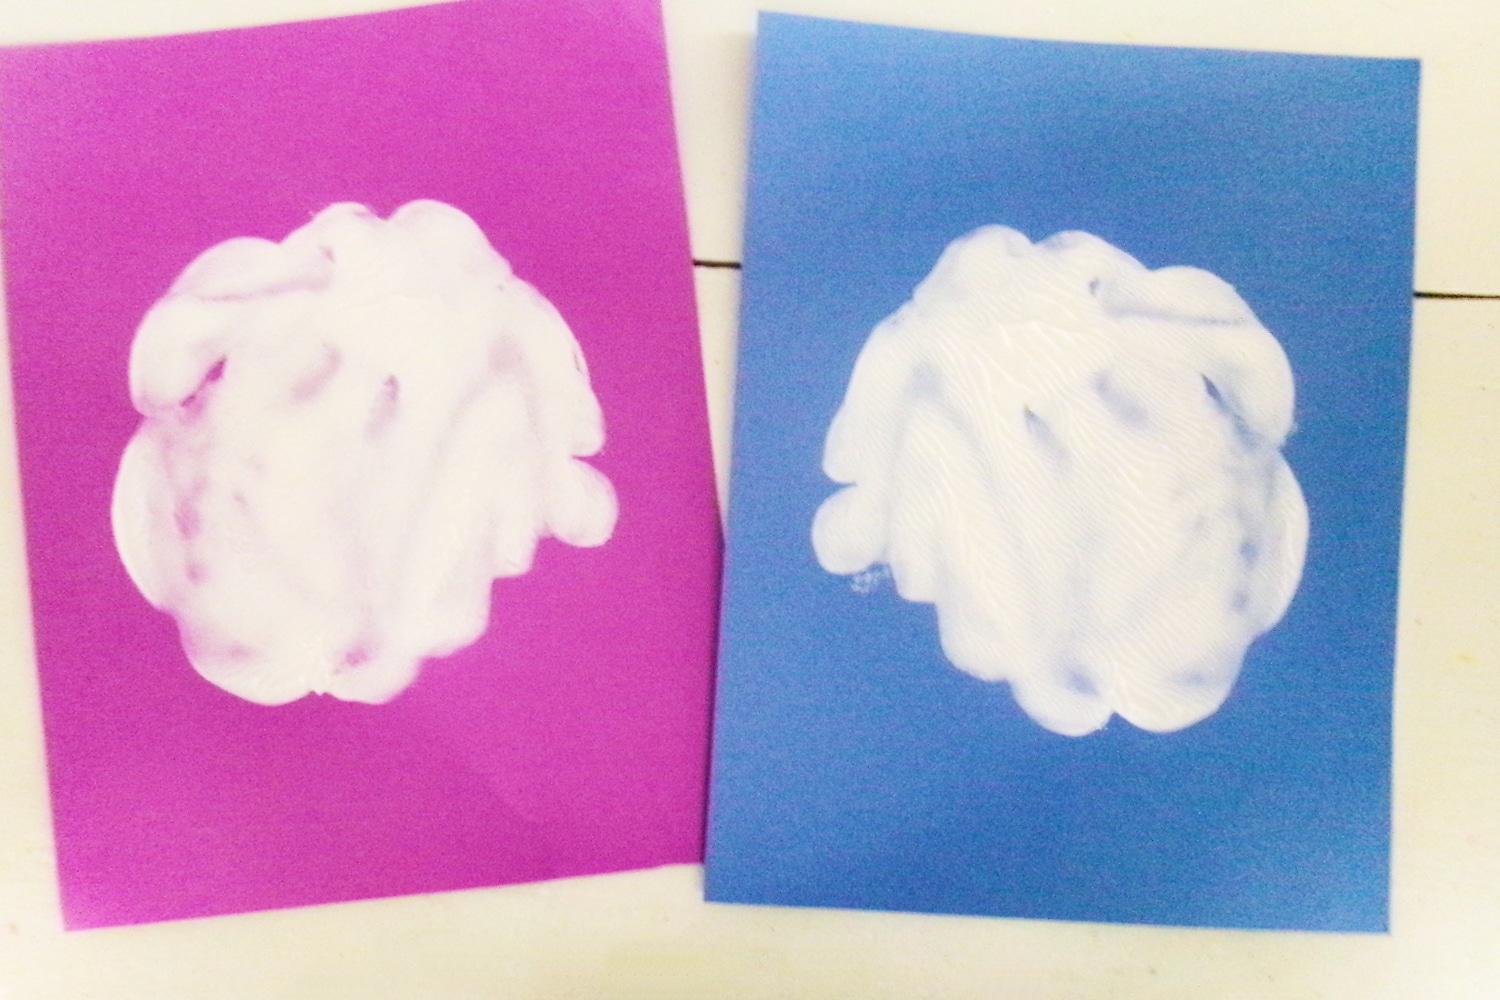
- Begin by pouring a generous amount of white acrylic paint on a sheet of cardstock. We used blue and purple cardstock for our backgrounds on this project, but you can use whatever two colors you’d like.
- Now, press the paint in between the two sheets of cardstock. Press it in with your hand and try to make sure the paint is as evenly spread as possible. Tip: Don’t press for too long, however, or the paint may start to peel up the cardstock!
- Next, carefully lift the top sheet from the bottom. You should, hopefully, have a nice round-ish paint splat on both sheets of cardstock.
- Let the paint dry completely.
- While the paint is drying, cut a simple top hat shape from black cardstock. You will need to cut a simple orange triangle nose, as well. Also, use a single hole punch to punch about 6 small black circles. Finally, cut two longer thin strips of brown cardstock and 4 total smaller thin strips. Glue these together for the stick arms.
- Then, when the paint is completely dry, glue the hat and eyes in the paint splat.
- Glue 4 of the small black circles for the mouth and the last two for coal buttons. And glue the nose somewhere, too, as well as the stick arms. Remember he’s melted, so his pieces can go where you want them.
- Finally, use a white paint pen to splatter paint across the cardstock to complete this fun melted snowman winter scene.