Paper Plate Penguin
It’s wintertime and the kids are bored again! If it’s to cold to play outside then it’s the perfect time to make this Paper Plate Penguin craft. With minimal supplies and an easy template it’s a quick and easy winter craft that’s cute.
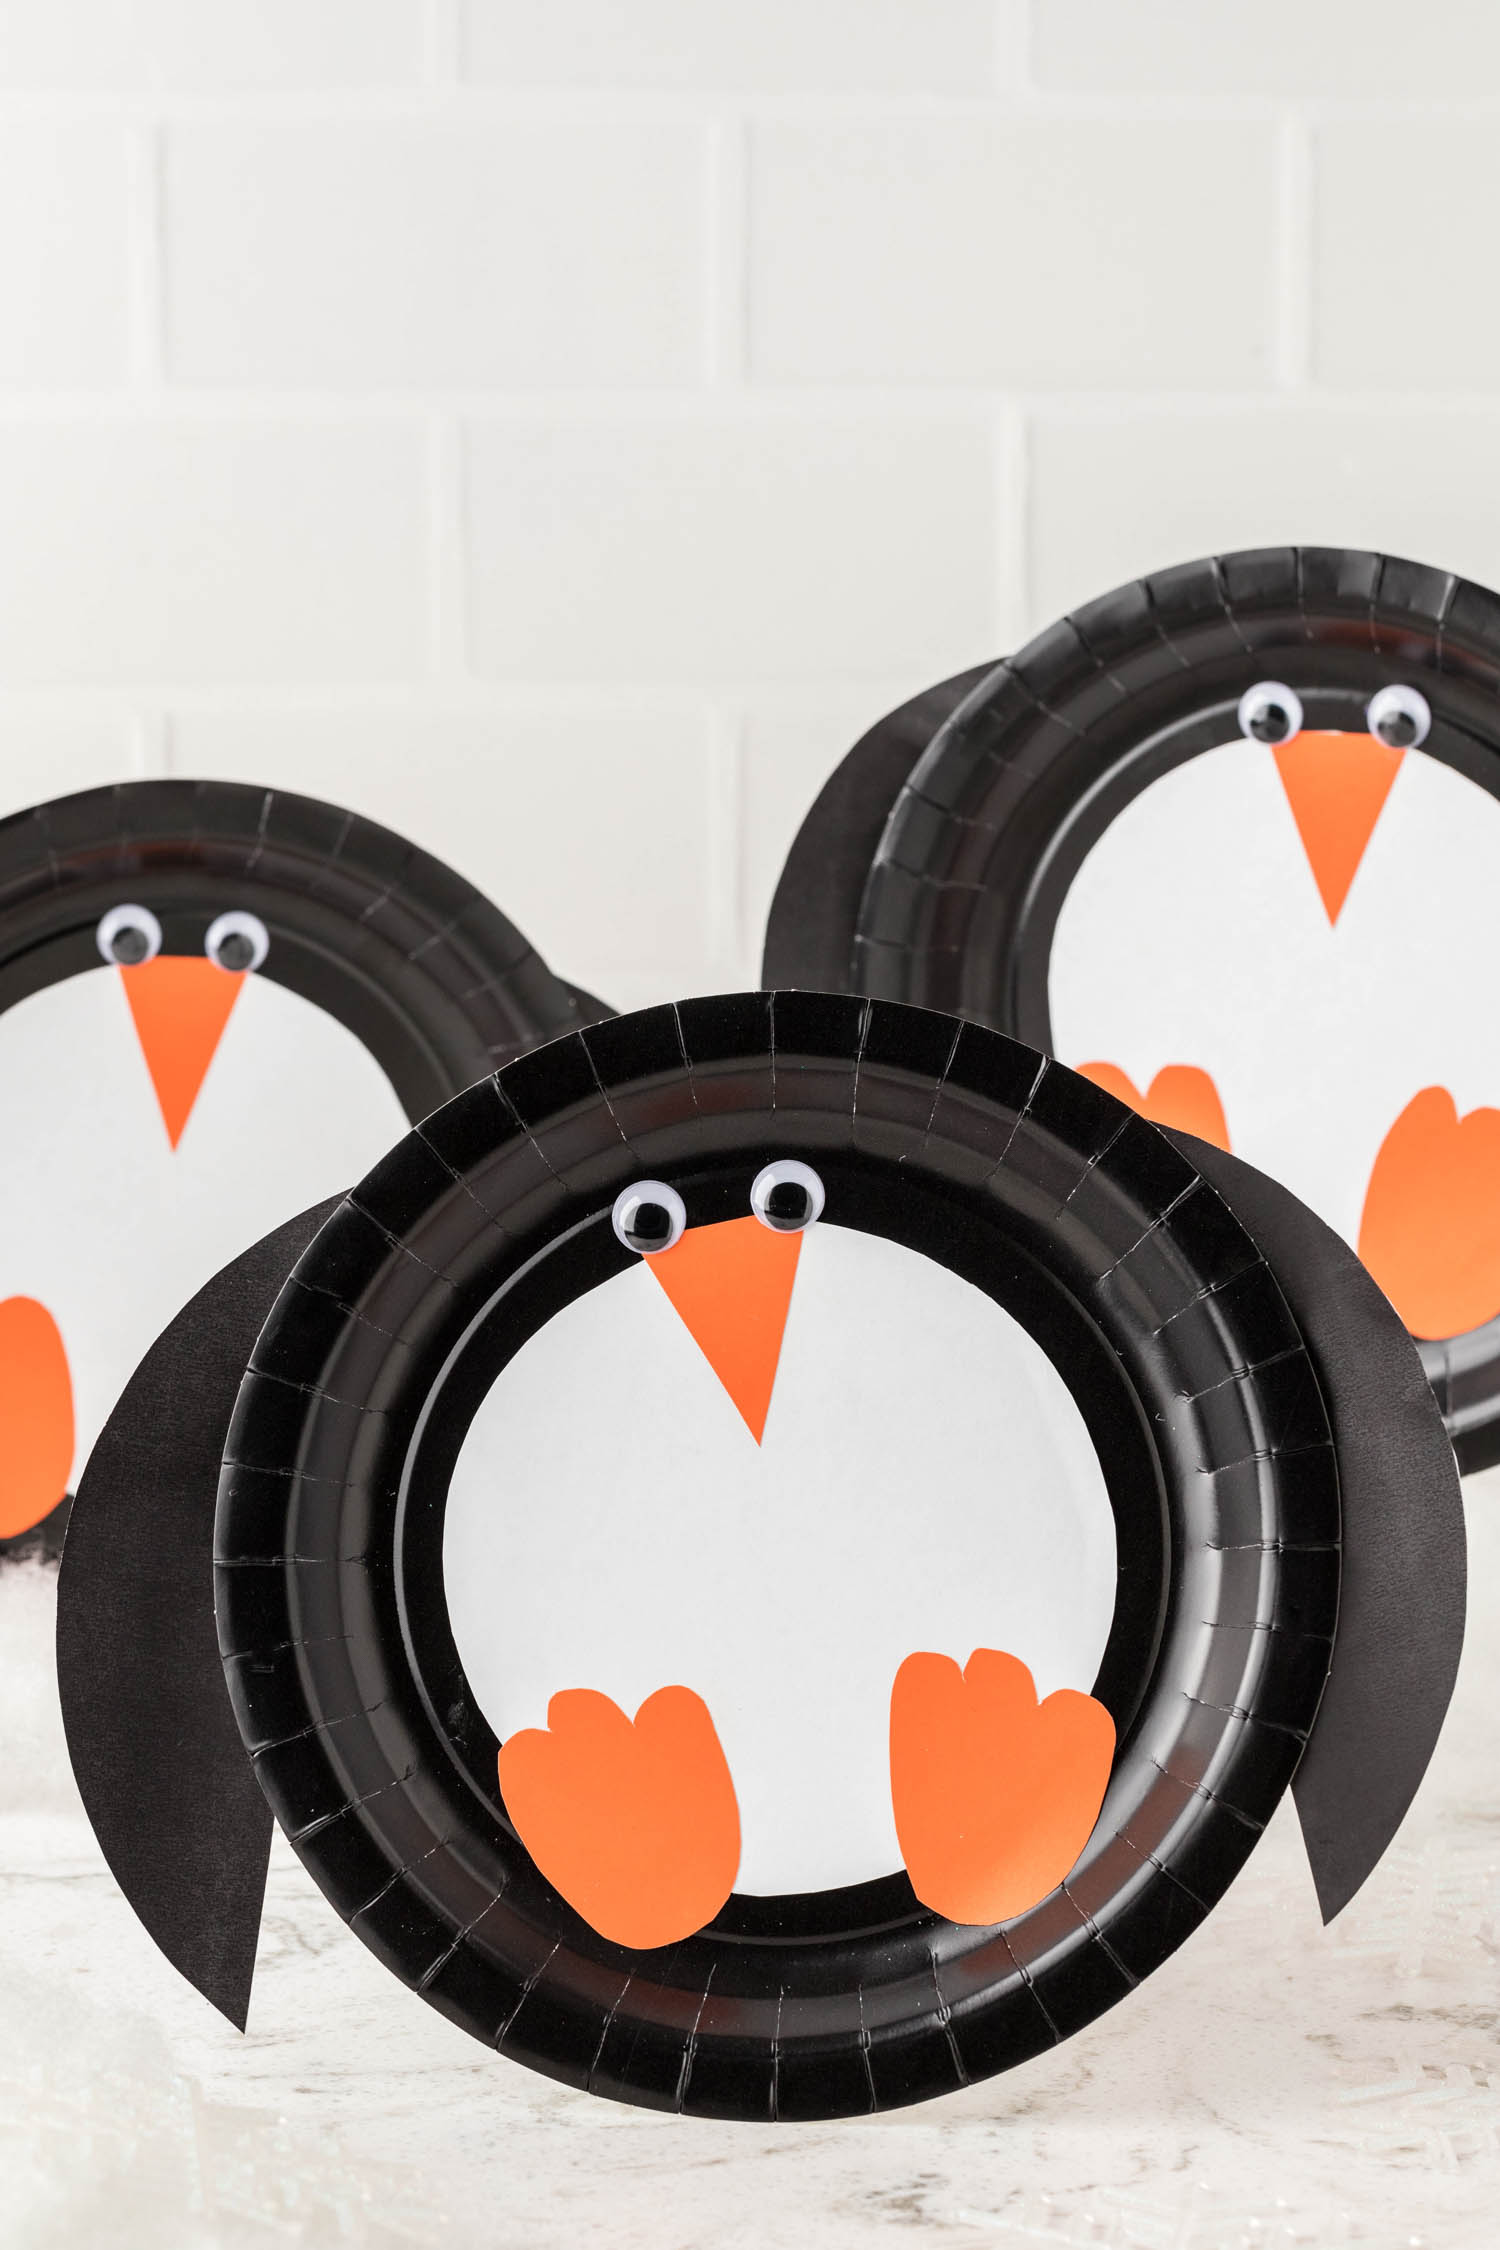
This precious little craft is the perfect way to keep the kids entertained on winter break and create a fun little friend to play with. I love this paper plate penguin since it doesn’t involve too many supplies and is really easy to make. To make things extra fun, I like to plan a fun snack like this no bake s’mores bar, and watch a penguin movie, like Happy Feet!
This craft is also great to teach your kids about zoo animals. You could make a shark paper plate craft too! So, even if it’s not winter, you could make this before your zoo trip and talk all about penguins as you make it. And when you see the penguins at the zoo, your kids will be extra excited. So grab those supplies and get creating!
Why You’ll Love this Paper Plate Penguin Craft
- This paper penguin is a simple and creative craft for kids of all ages.
- The activities of cutting and glueing help promote fine motor skills in young children.
- Paper plate penguins are a perfect craft for large groups of children to create during craft time!

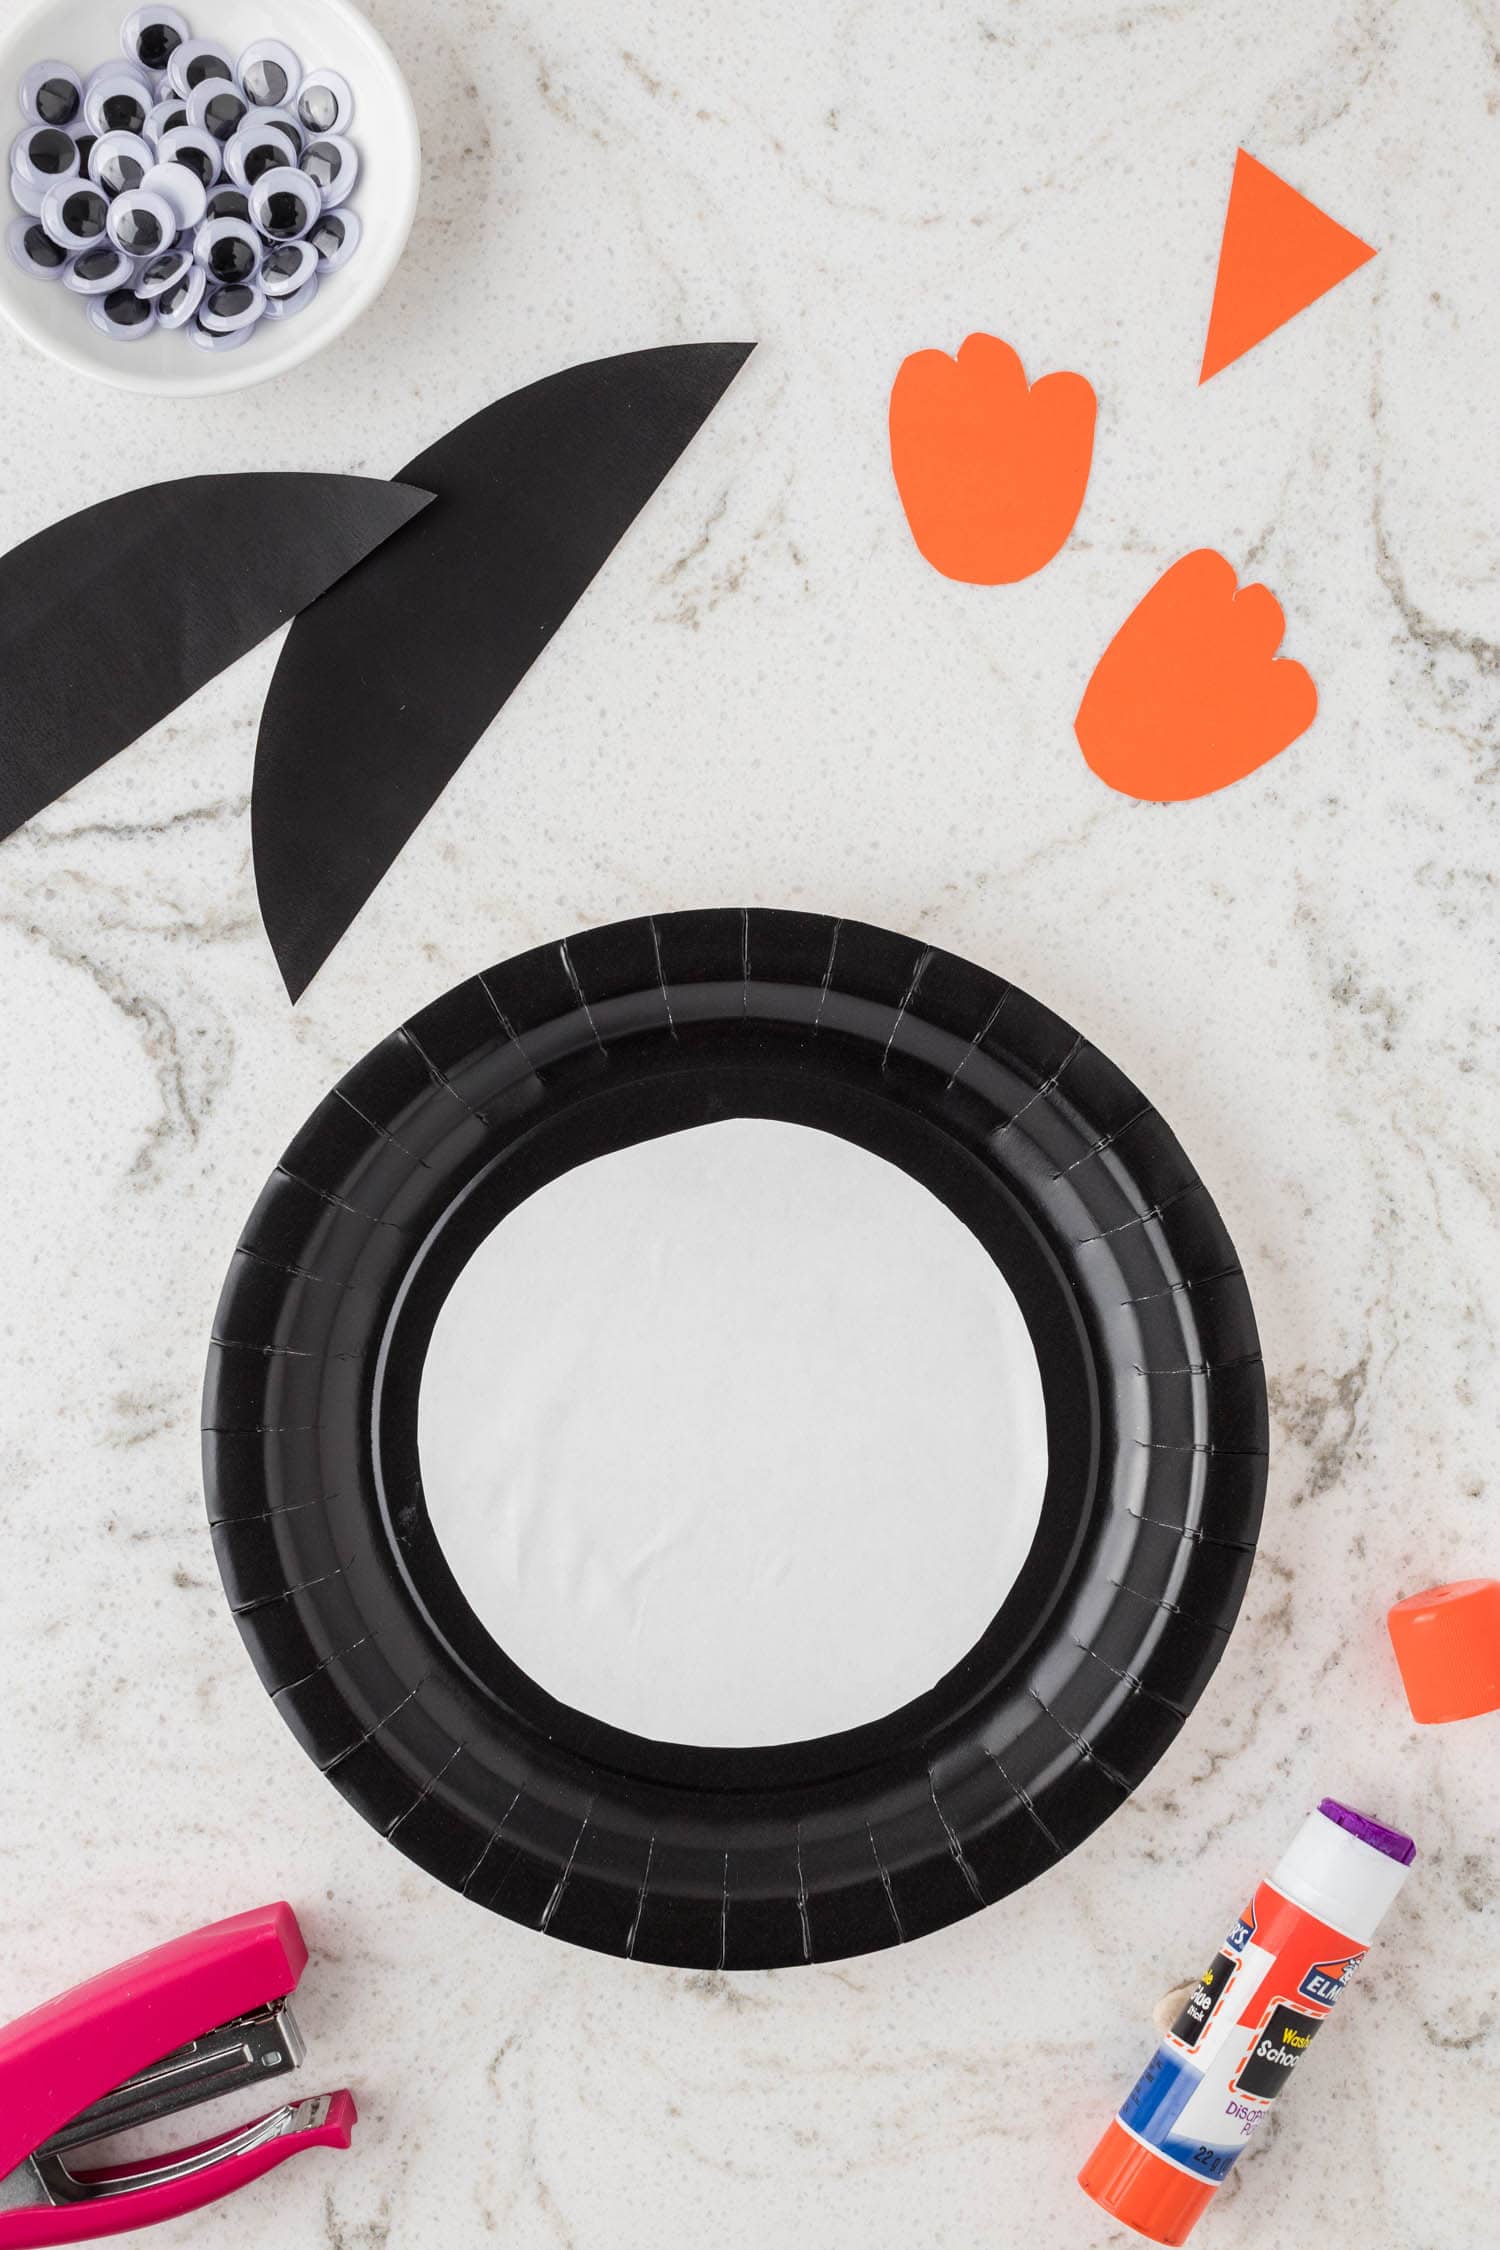
What You’ll Need to Make a Paper Plate Penguin
- Link to Penguin Paper Plate Craft Template – You’ll need to print out this template to complete the craft.
- Black Paper Plate – You can find colored paper plates on the party aisle at your grocery store, or at a your local party supply store.
- White Paper – Use white paper to print out the template, which will become the penguins body parts.
- Orange Card Stock – This will become the penguins little feet and beak!
- Stapler – You’ll need a stapler to help attach the wings to your penguin.
- Glue Stick – Any regular glue stick or craft glue will work for this craft.
- Pencil – Use a pencil, a pen, or any other writing utensil. You’ll just need it to trace a few things.
- Googly Eyes – You can’t have a complete penguin buddy with out some cute googly eyes!
- Scissors – If you are making this with young children and they want to cut out their own pieces, safety scissors will work just fine.


How to Make a Paper Plate Penguin
PREPARE: Using craft paper or a disposable table cloth, cover your work surface. Then, print out the template provided above.
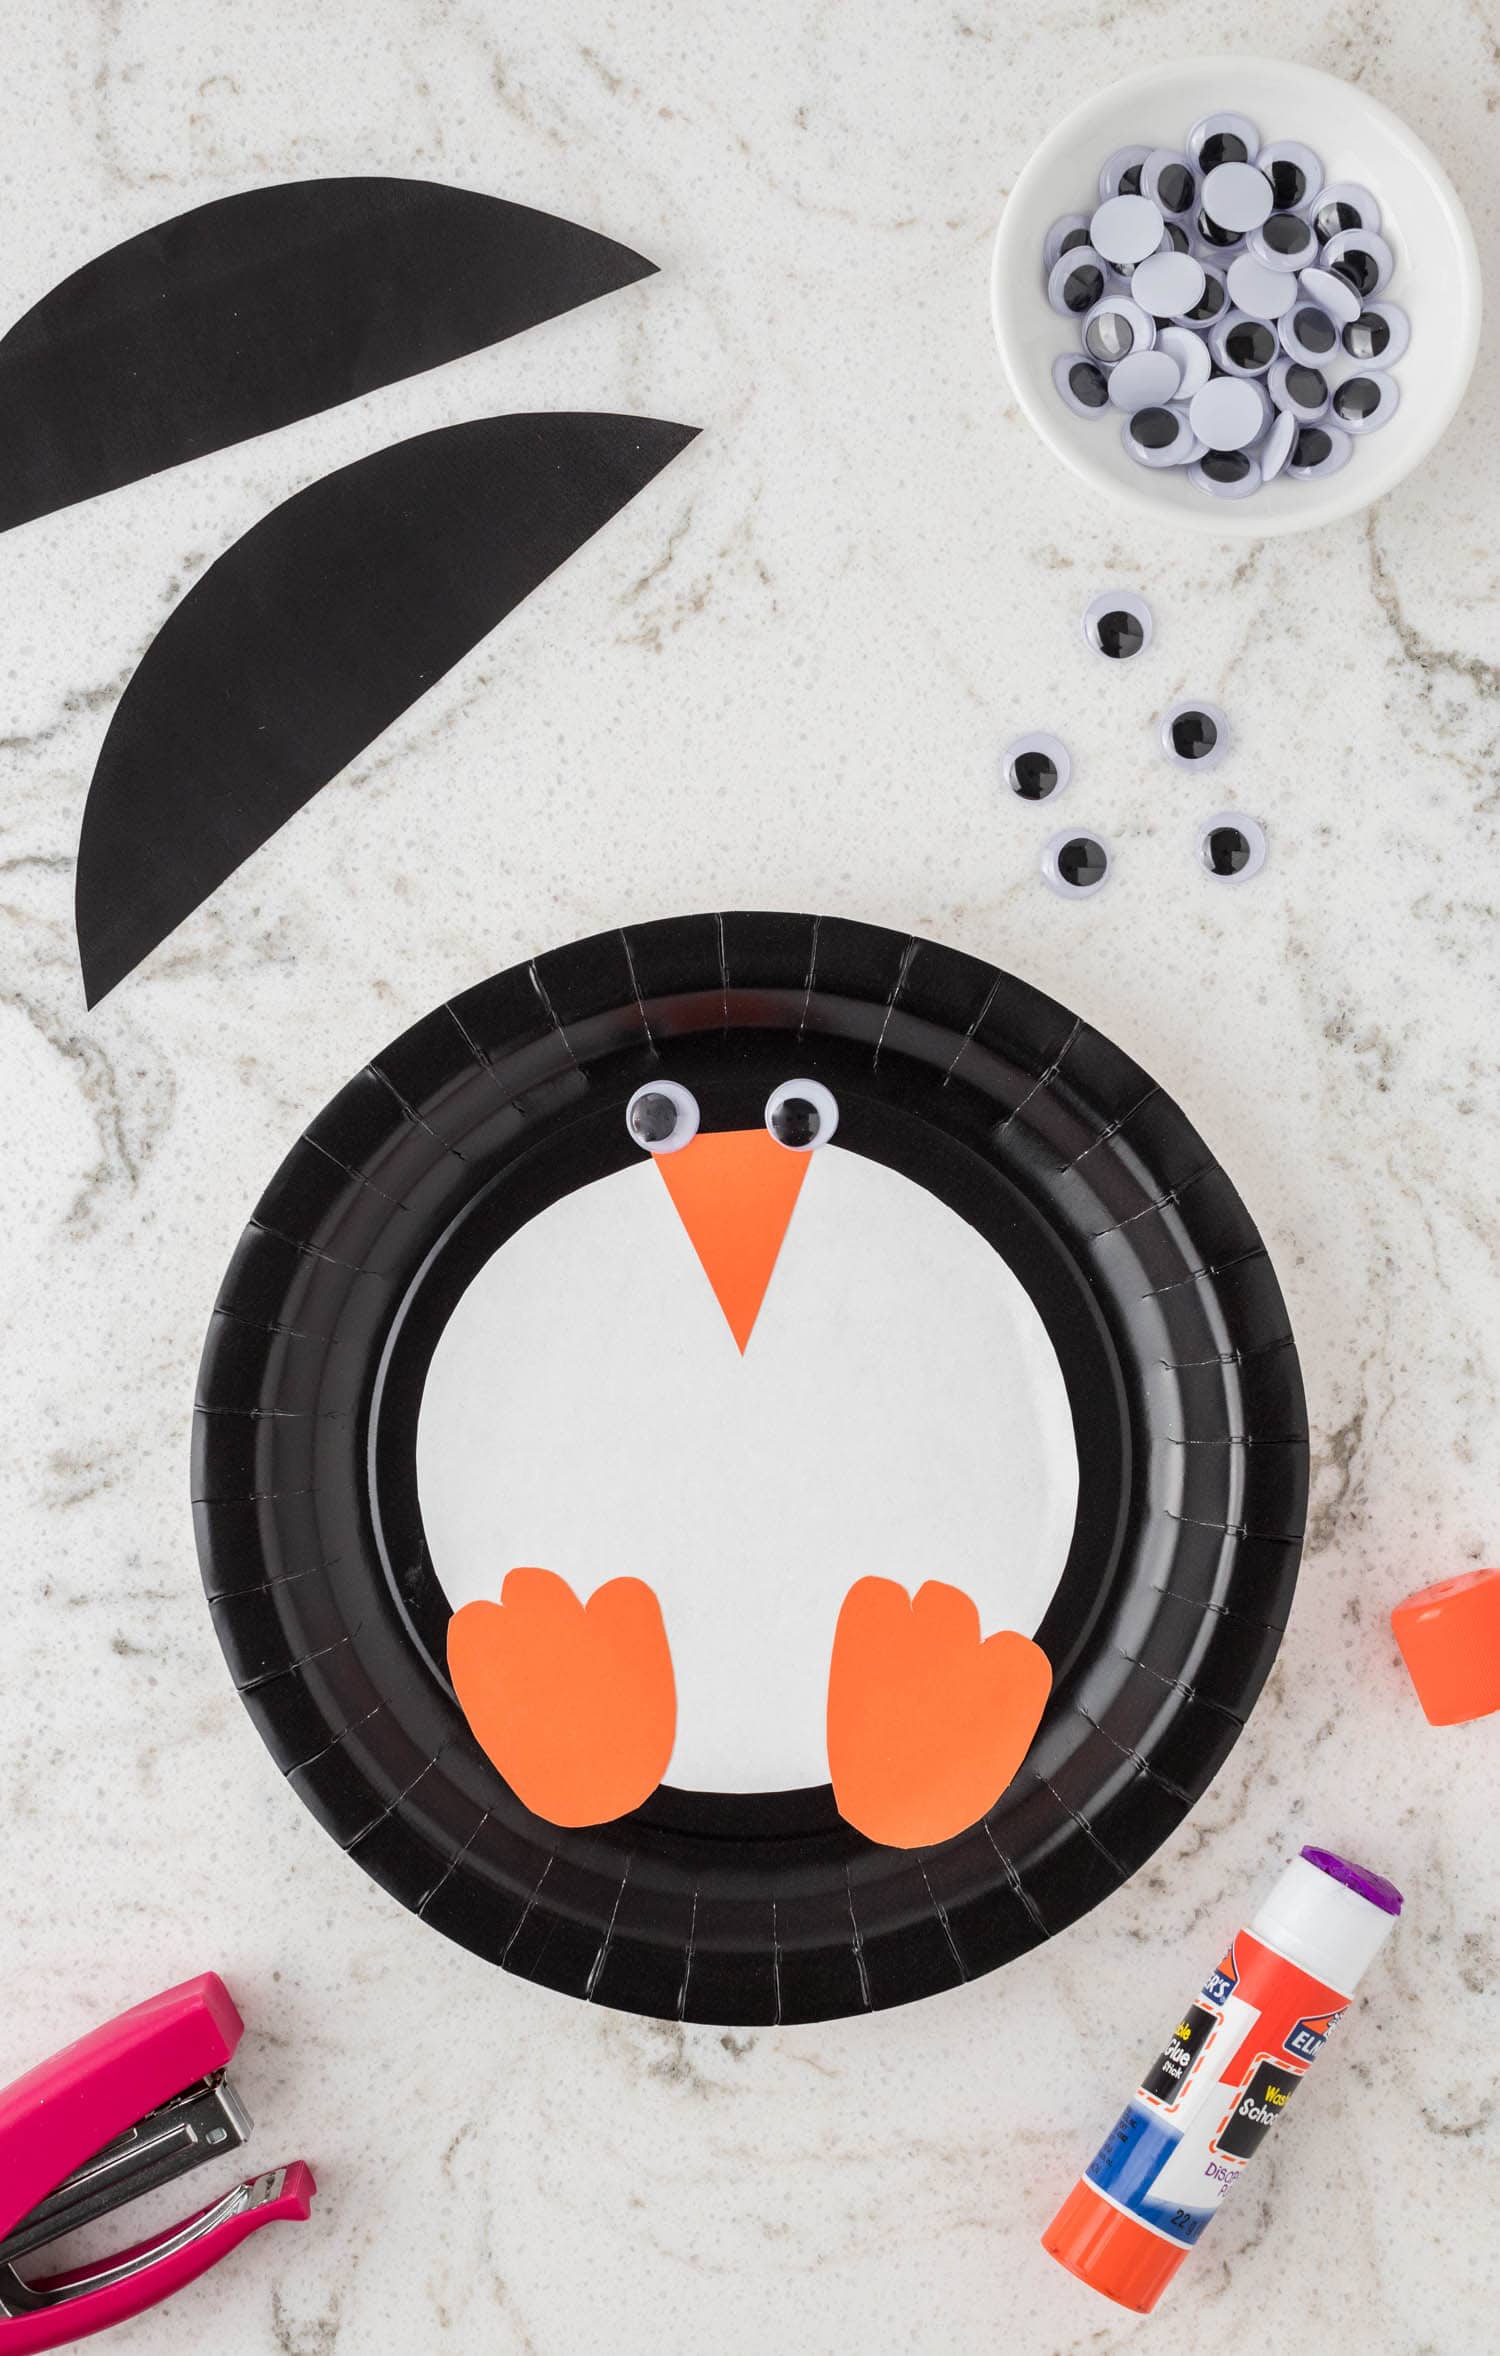
CUT: Cut out the shapes on the template, then trace the beak and feet onto your sheet of orange card stock and cut them out and set aside.
GLUE: Use your glue stick or craft glue to attach the white “belly” to the center of your black paper plate. Then glue the orange beak to the top center of the circle belly. Glue the feet on either side of the bottom of the belly. Finally, glue the googly eyes above your penguins beak.
ATTACH: Staple the wings to either side of your paper plate penguin. If you don’t have a stapler, you can use glue.
Let all the glue dry completely and then your penguin friend is ready!


Can I paint a white paper plate black?
Yes! If you can’t find black paper plates, feel free to paint a white paper plate black. Be sure it is completely dry before beginning your craft.
Pro Tips for the best Paper Plate Penguin
- If you need this craft to go a little bit faster, pre-cut all of the shapes so that your children only have to glue everything to the paper plate.
- Want to display this masterpiece? You can either punch a hole in the top and strand ribbon through to hang it, or add a small magnet to the back to display your paper plate penguin craft on the refrigerator.
- For large groups, be sure to pre-print plenty of templates and pre-trace the beak and feet so that the children completing the craft only have to cut the shapes out.
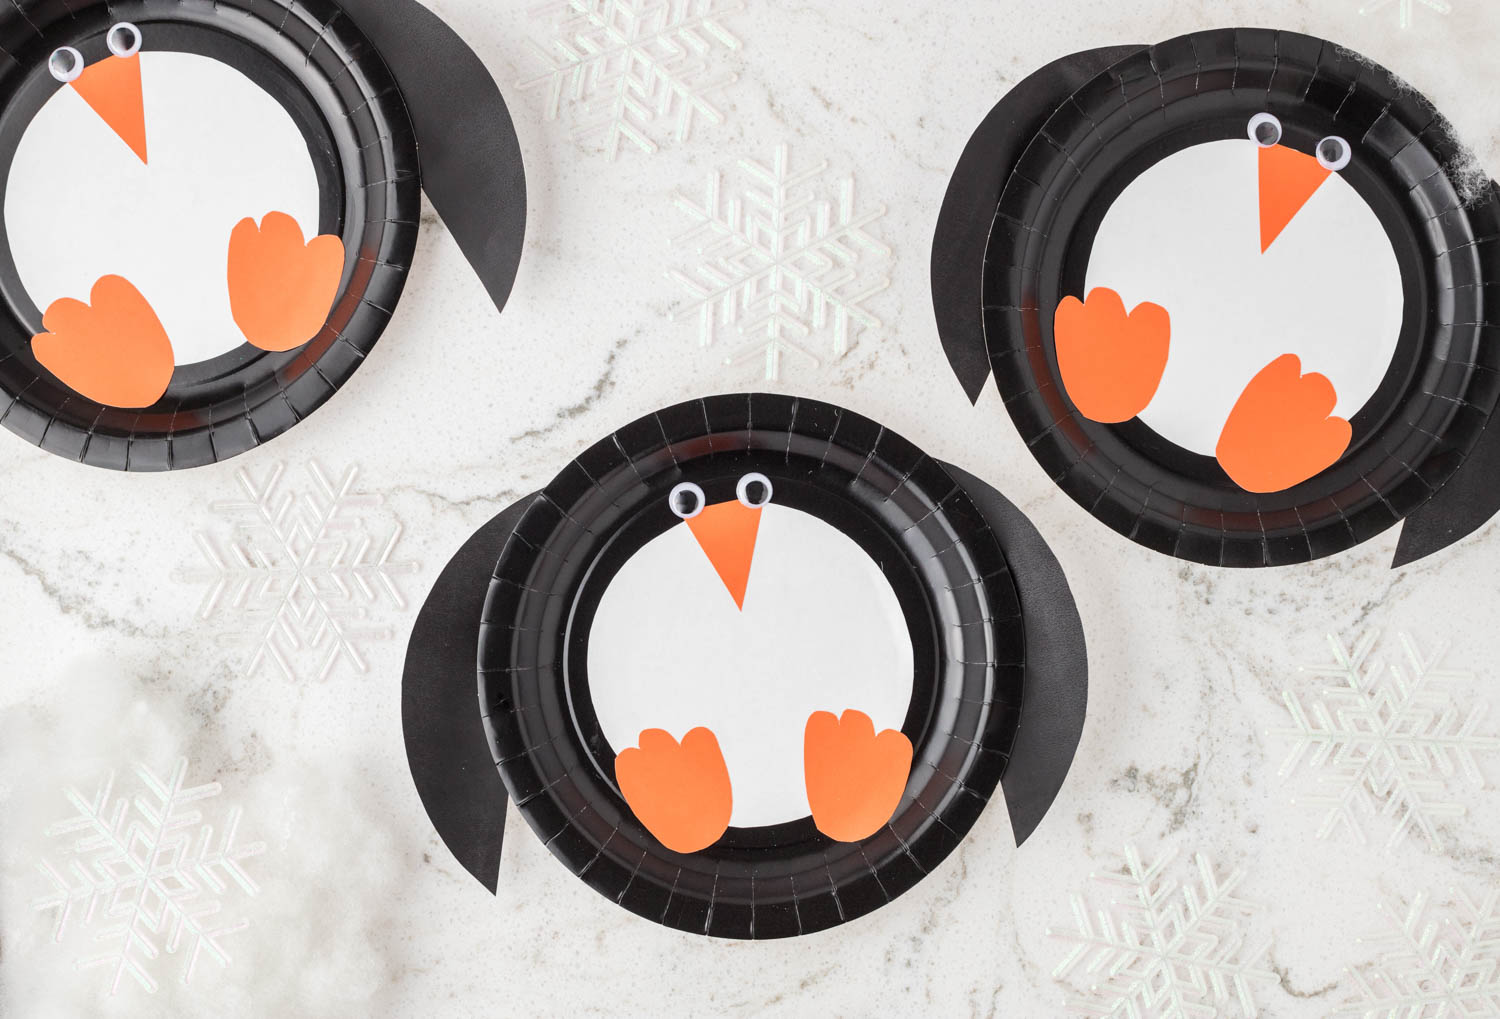
This paper plate penguin will provide hours of entertainment and creative play once complete. Perfect for a rainy winter day!
More Winter Crafts You’ll Love
- This Snowflake Suncatcher Craft is so much fun and creates a beautiful decoration!
- Need a super quick activity? This Printable Winter Activities Packet is a great way to keep the kids entertained.
- This Paper Polar Bear Craft is another perfect winter craft to teach about a beautiful animal!
- These Snowman Preschool Printable Activities are fun and simple.

Paper Plate Penguin Craft
Ingredients
Instructions
- Cover your work surface with craft paper or a tablecloth and gather all the supplies for this project.
- Use the provided template to create the penguin’s belly, wings, nose, and flippers. You can draw them freehand if you don’t have access to a printer. Cut the penguin wings (half-moon shape) and belly (6-inch circle) and set them aside. Cut the nose (triangle) and the flippers, trace them onto the orange card stock, cut them, and set aside.
- Once all of your penguin’s “parts” are cut out, glue the “belly” (6-inch circle) to the middle of the black paper plate. Press to secure. Next, spread a thin layer of glue on the back of the “nose” (orange triangle) and “flippers.” Place the “nose” at the top center of the “belly.” Place the “flippers” equally apart at the bottom of the “belly.” Press to secure all body parts.
- Glue 2 googly eyes just above the penguin’s nose. Finally, glue to staple the penguin wings to each side of the paper plate with glue or a stapler!
- Your penguin is now complete and ready to play on a winter’s day!
Notes
- If you need this craft to go a little bit faster, pre-cut all of the shapes so that your children only have to glue everything to the paper plate.
- Want to display this masterpiece? You can either punch a hole in the top and strand ribbon through to hang it, or add a small magnet to the back to display your paper plate penguin craft on the refrigerator.
- For large groups, be sure to pre-print plenty of templates and pre-trace the beak and feet so that the children completing the craft only have to cut the shapes out.