Yarn Wrapped Christmas Tree Craft
Looking for a fun and easy holiday craft for kids? Try making these yarn wrapped Christmas tree craft! It’s the perfect Christmas craft for at home or in the classroom with minimal supplies and time needed.
“It’s beginning to look a lot like Christmas!”🎶 I’ve had this song stuck in my head for days now, how about you? And with Christmas time, comes Christmas crafts! So this adorable, easy and fun yarn wrapped Christmas tree craft is just in time for the season. I love to make decor items and DIY Christmas ornaments year after year with kiddos. It just never gets old and there are always more craft ideas to discover! These fun yarn trees have quickly become one of my favorite crafts, simply because it’s so easy and always turns out really cute.
You just cut a tree form out of some leftover cardboard and then wrap pretty green yarn around it until you’ve got as many DIY Christmas trees as your heart desires.You can make loads of other homemade decorations too. These paper snowflakes are just darling and a tissue paper wreath is a wonderful creative craft! Before you know it, you’ll be ready to decorate for the holidays with unique items, crafted by special hands!
Why You’ll Love this Yarn Wrapped Christmas Tree Craft
- This is a really affordable craft. Repurpose some cardboard, then grab a few basic craft supplies and you’re ready to go!
- Cutting, wrapping and glueing are all fantastic activities for kiddos working to refine their fine motor skills. A fun activity with extra benefits!
- These make a super sweet gift for grandparents, teachers and friends. Each one is unique and special, and a handmade gift always means a lot!
Supplies Needed
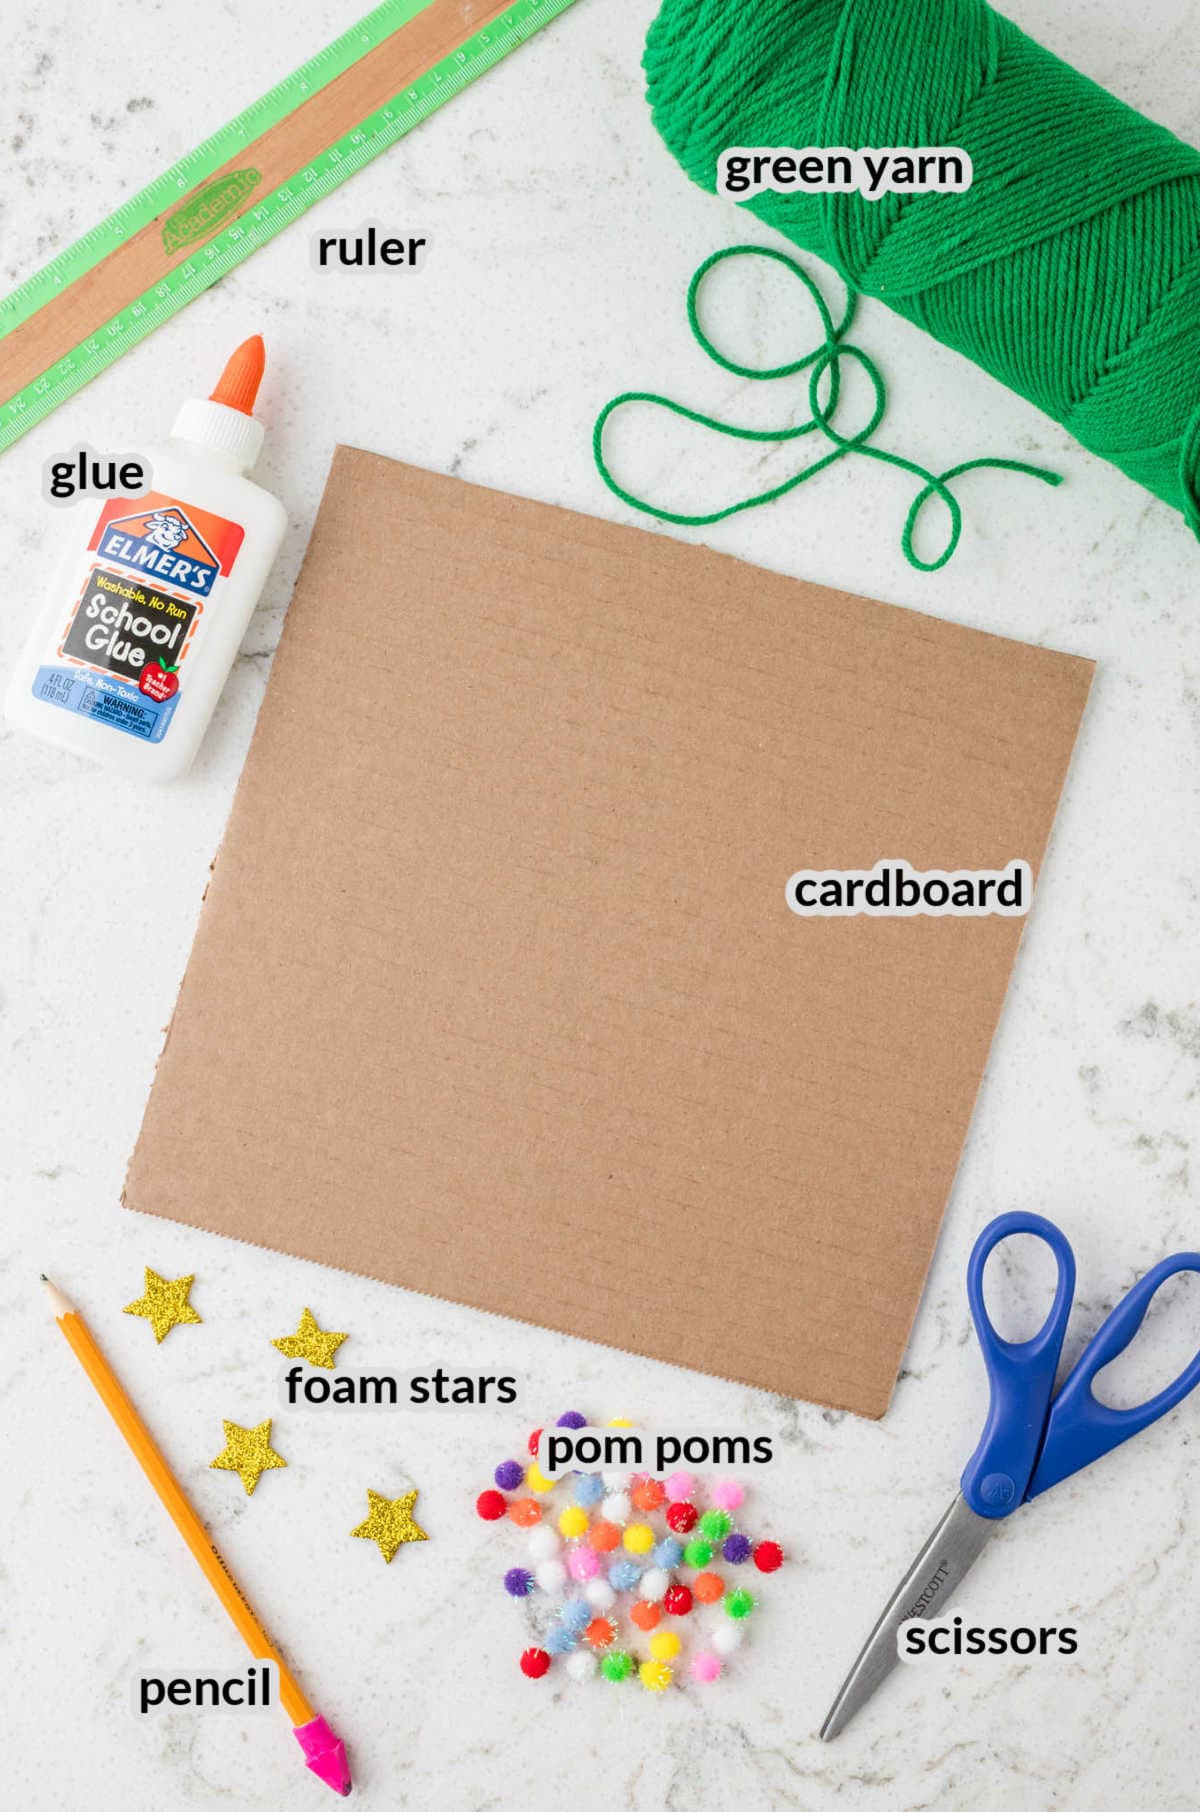
- Cardboard – Any piece of cardboard will work! Cut up a box from a delivery for thick cardboard or glue a few pieces of a cereal box together.
- Green yarn – This is key to making a Christmas tree. You can change up the color of the yarn if you prefer, but I like the classic green! Different colors can be very fun though!
- Ruler – You’ll need a ruler to trace and measure out your Christmas tree shape. If you don’t have a ruler, just grab any straight edge and you can estimate the size.
- Glue – Regular ol’ school glue works perfectly for this craft. I recommend using liquid glue for the best results, but you can also use a bit of hot glue. You just need something to attach the pom poms to the tree.
- Scissors – If you are making this craft with littles, consider using safety scissors to protect those tiny little fingers.
- Pencil – Grab a pencil or a pen, either will work. You just need something to trace with!
- Pom poms – For this craft, those cutie little craft pom poms become the ornaments for you tiny tree.
- Foam star-shaped sticker – Every tree needs a topper! Use stick-on foam stars for the perfect finishing touch on your yarn wrapped Christmas tree.
How to Make Yarn Wrapped Christmas Trees
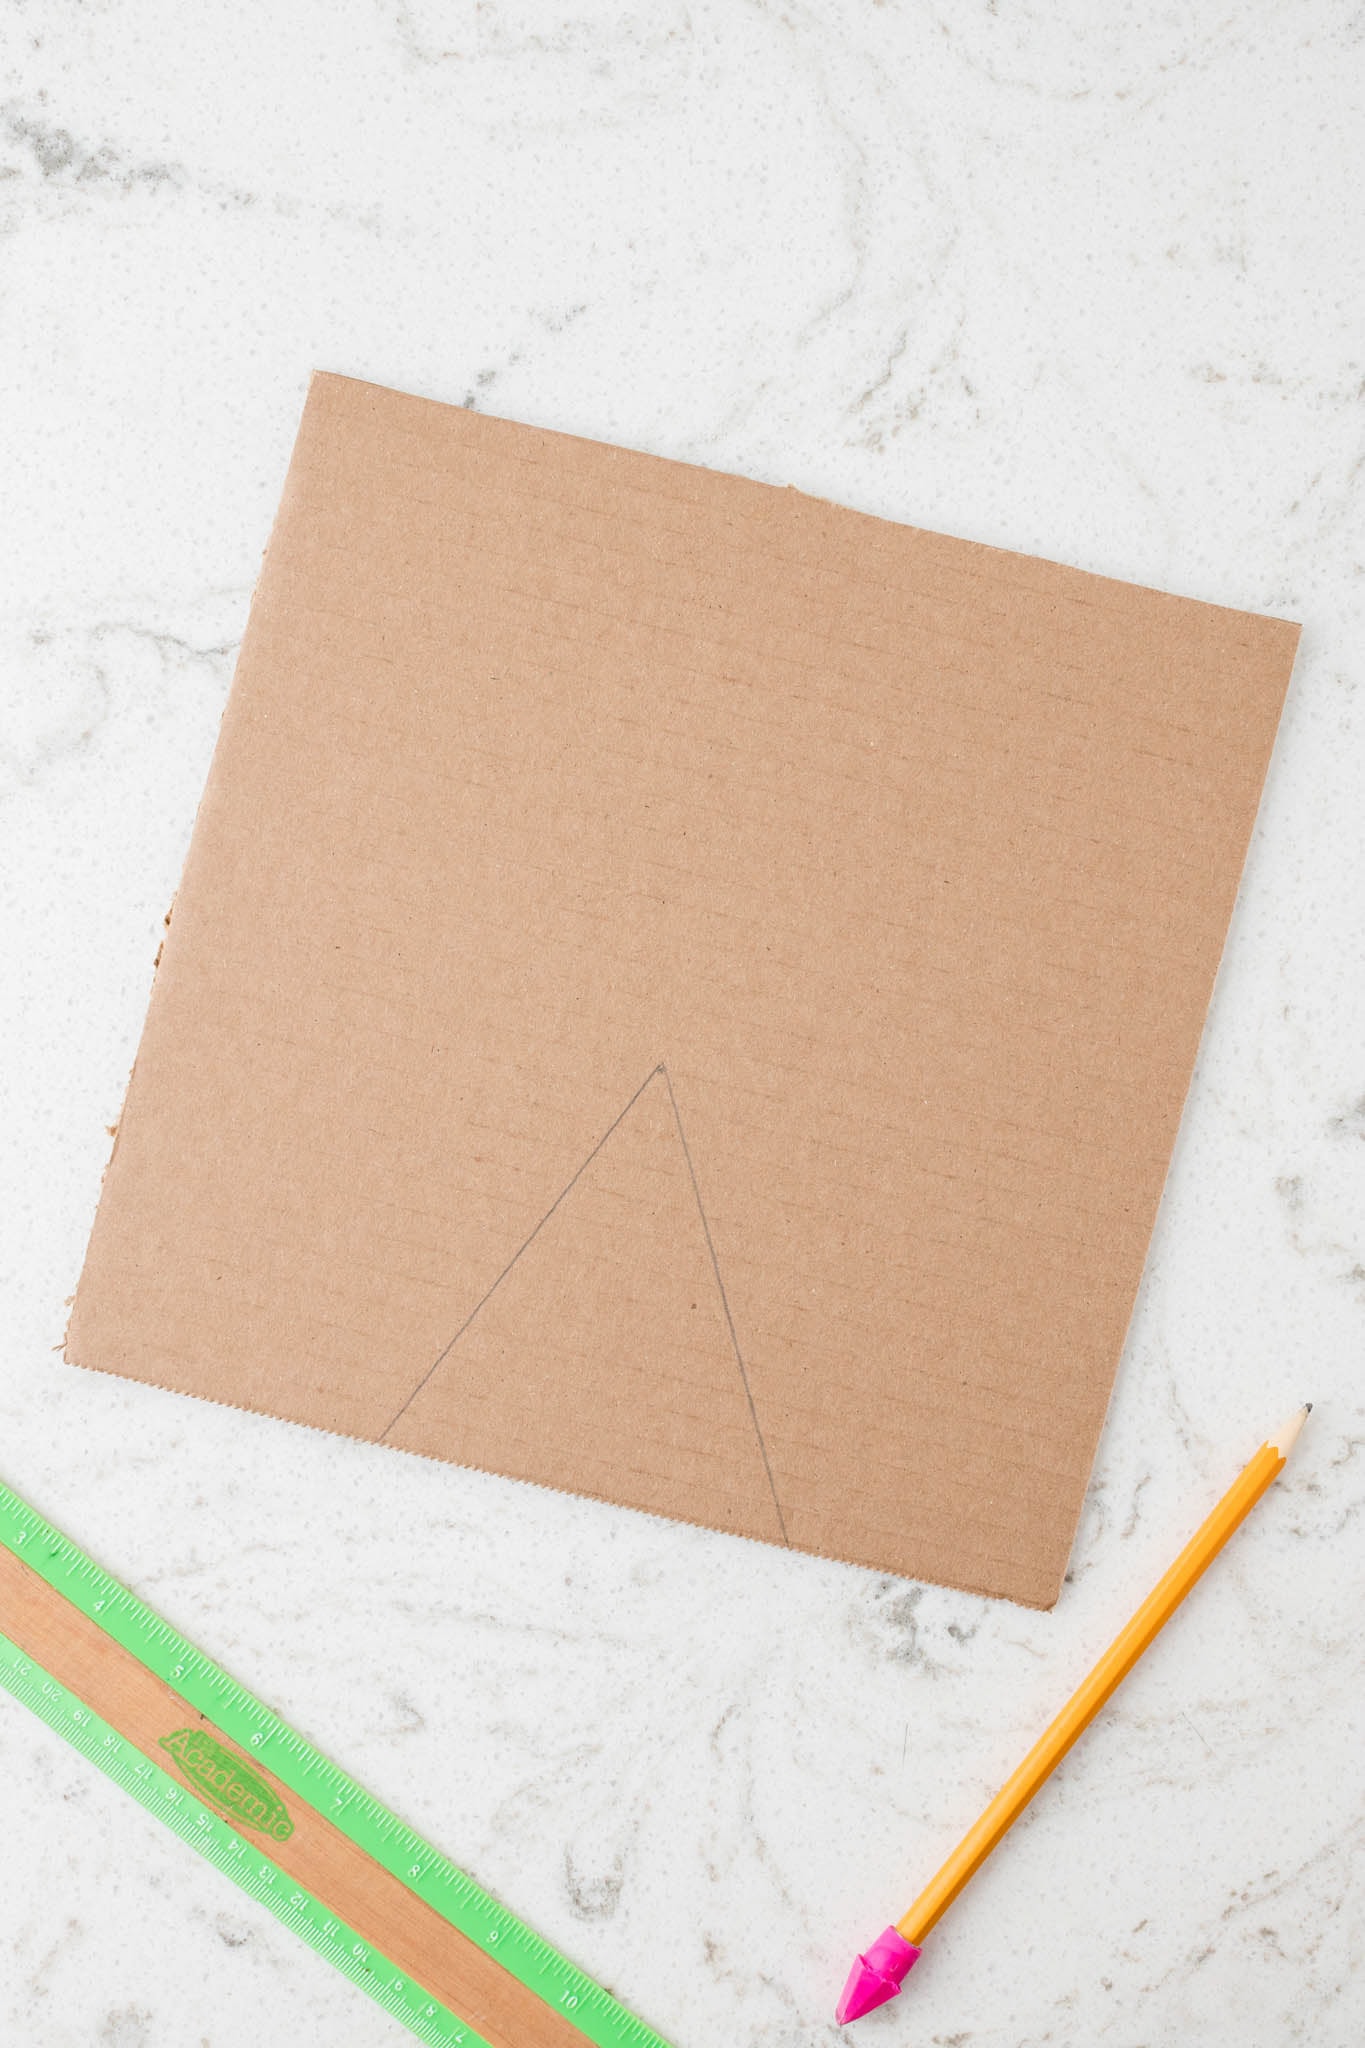
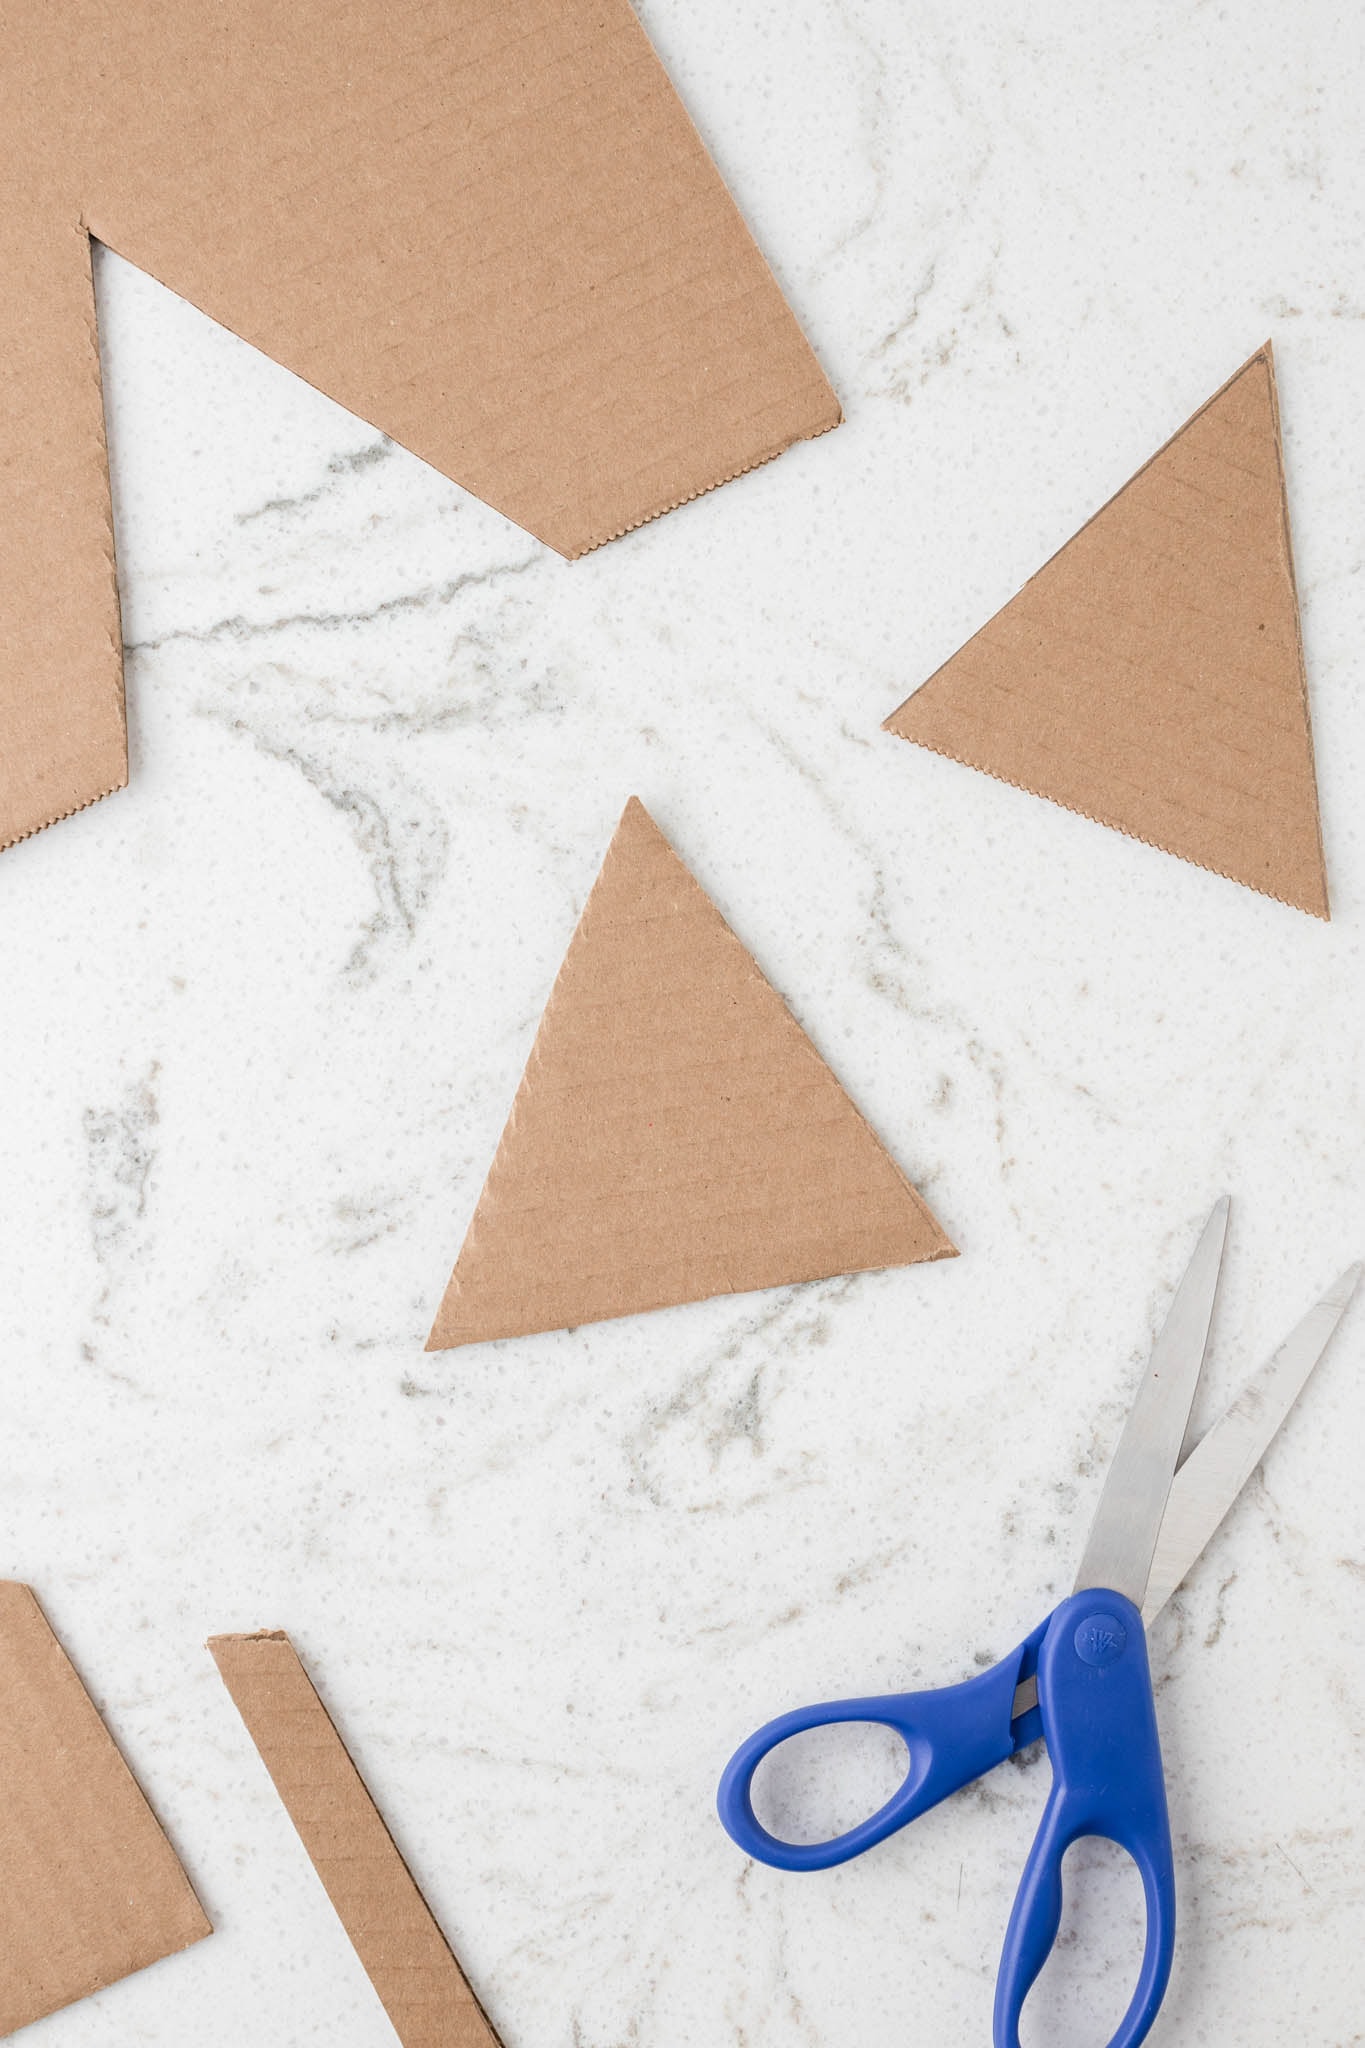
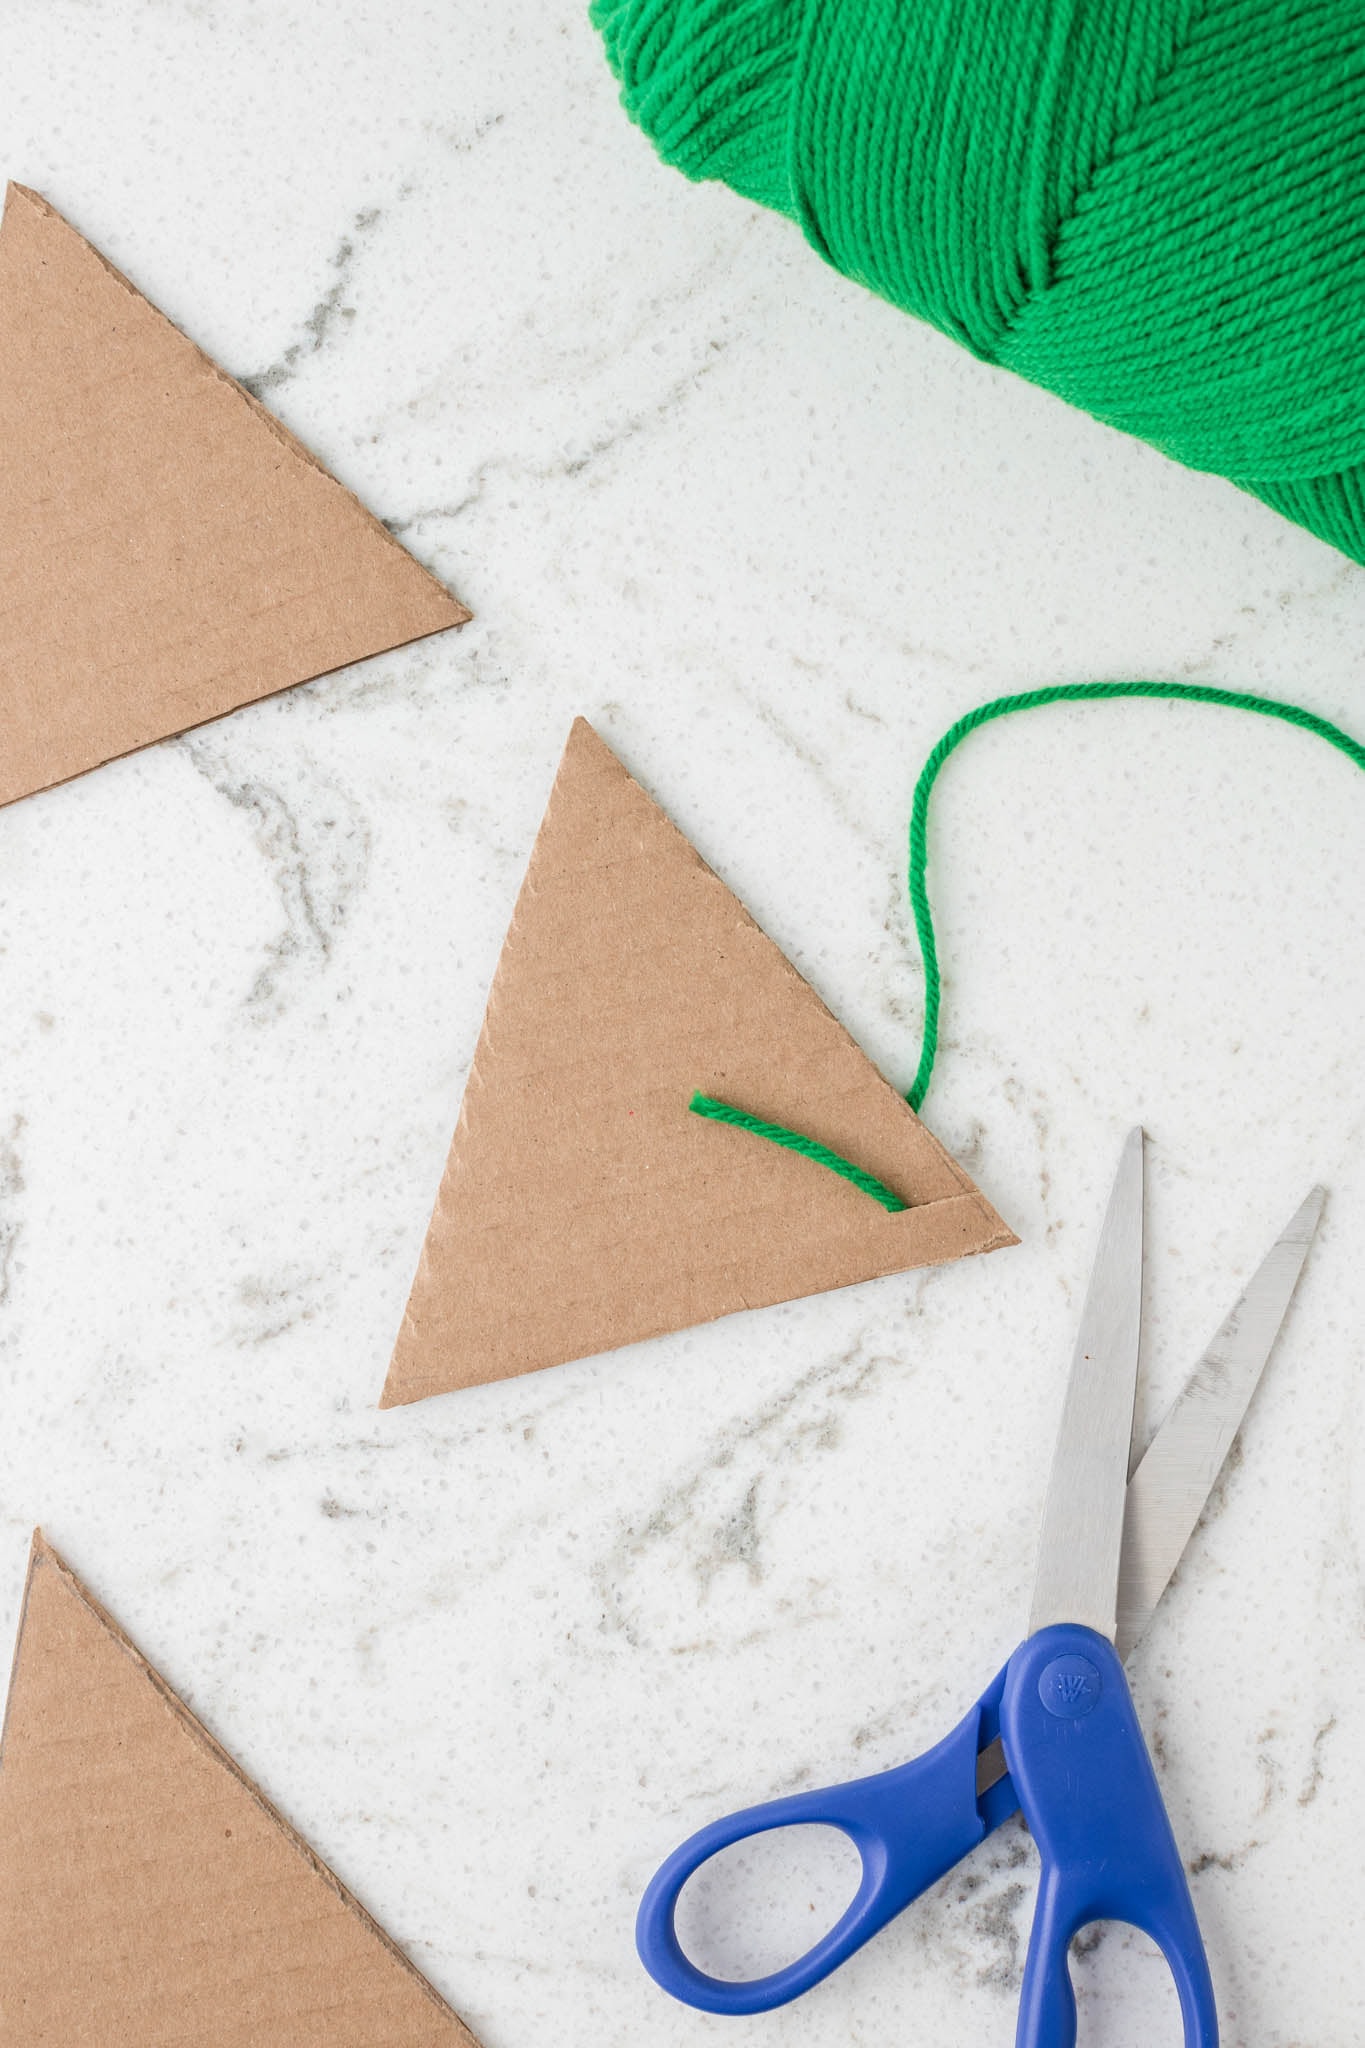
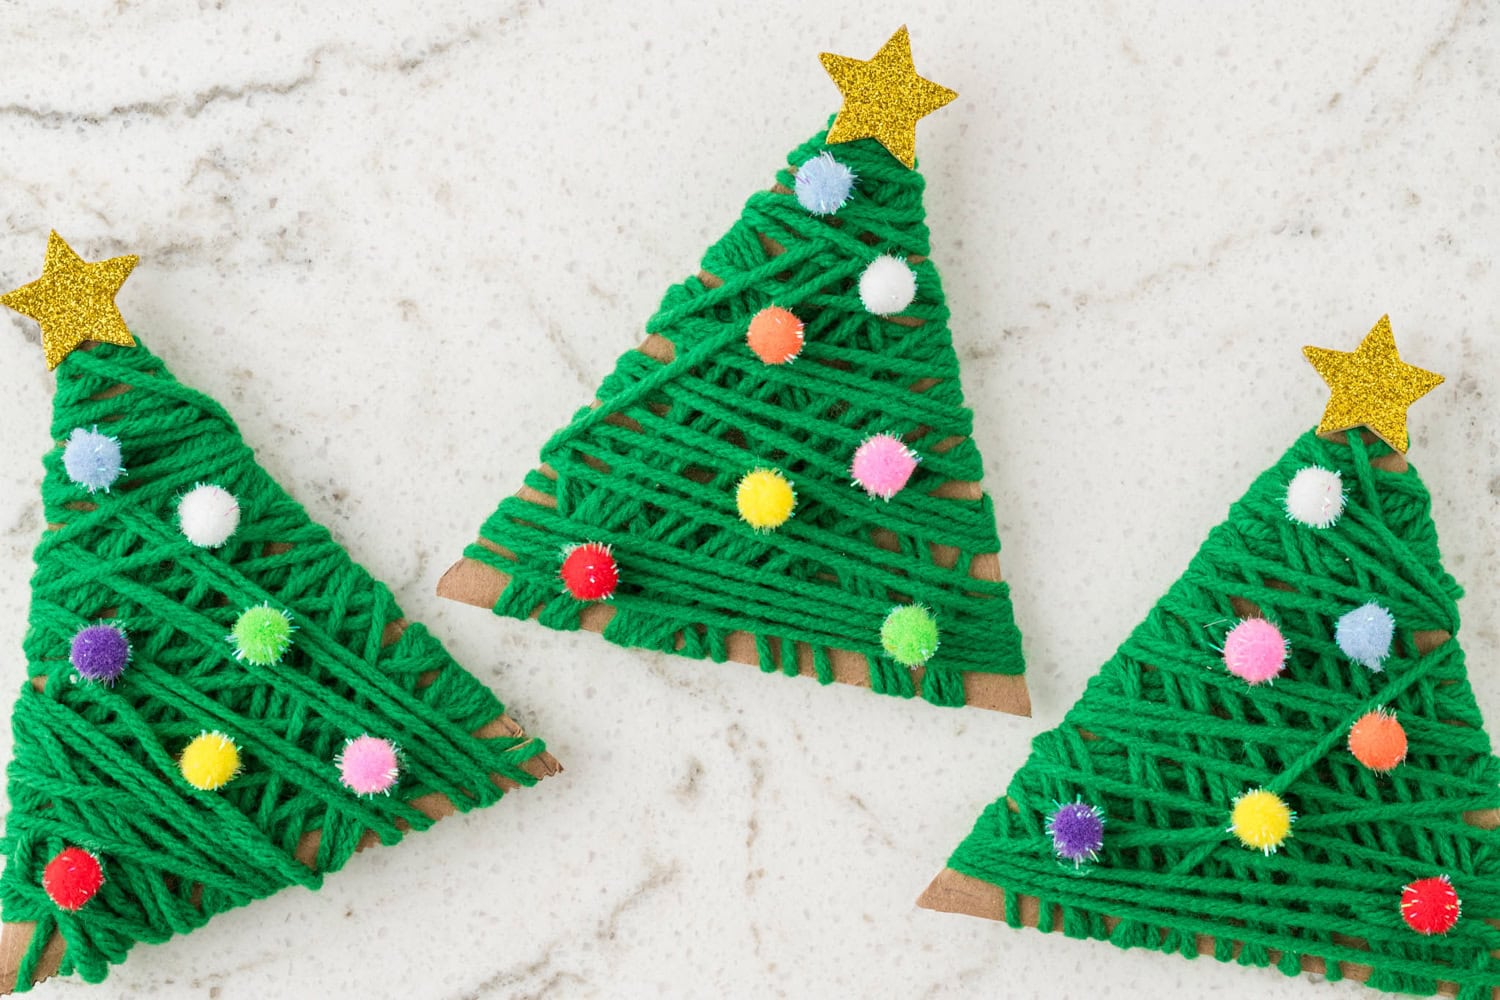
Using a pencil and a ruler, trace a triangle about 4 inches tall, then cut the triangle out of the cardboard to form the base of your tree.
Cut a tiny, ¼ inch notch in the side of the triangle towards the bottom. This will give you a place to secure the end of the yarn.
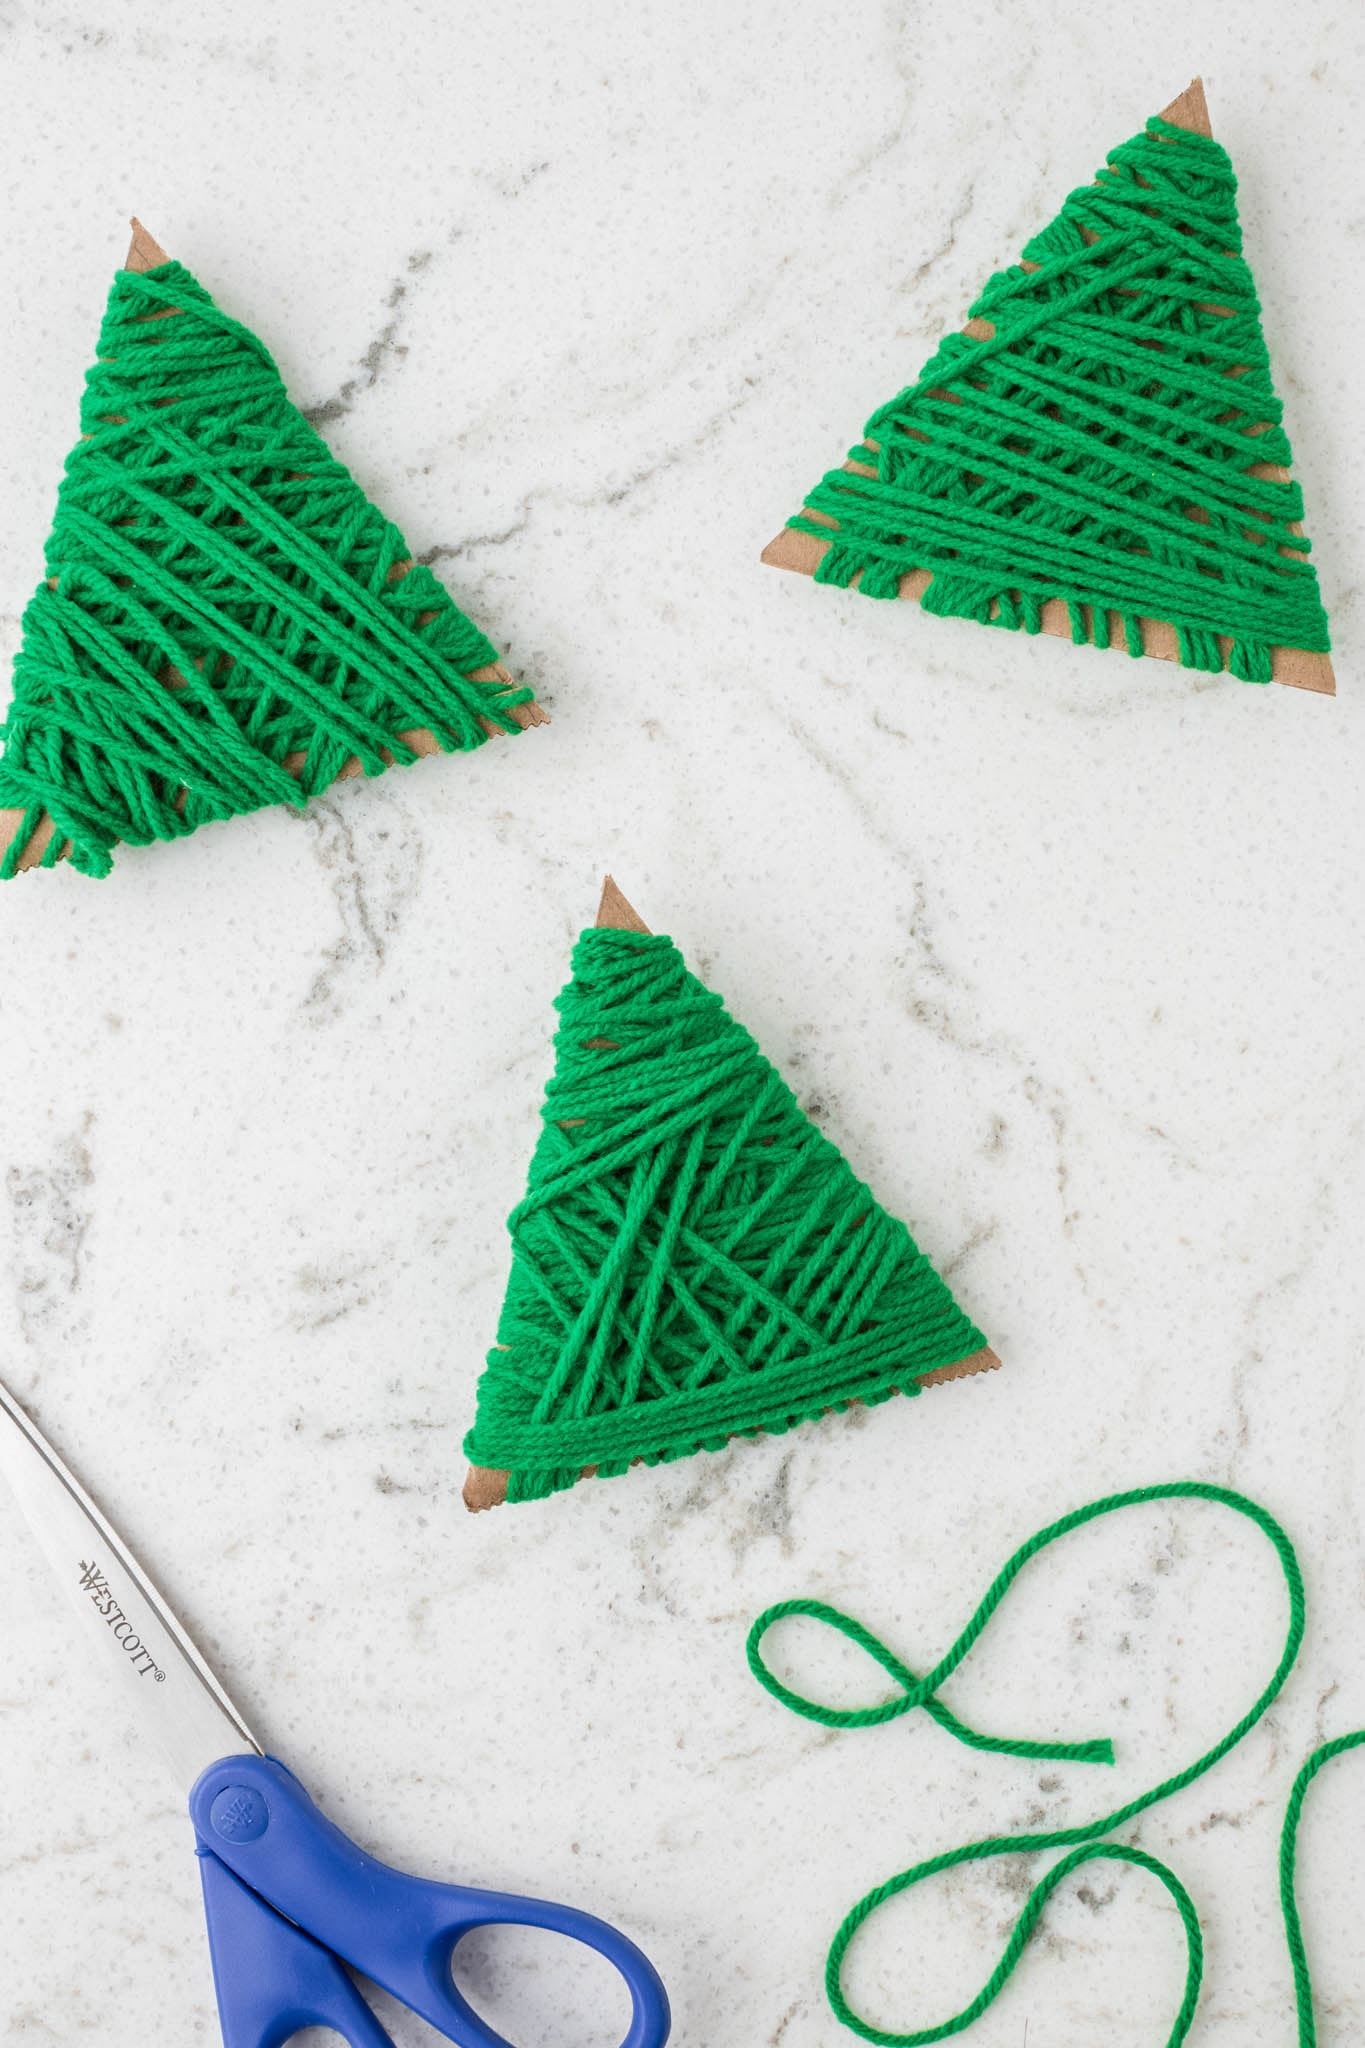
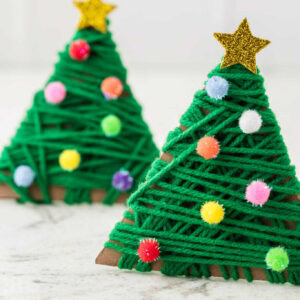
Secure the end of the yarn and then begin wrapping it around the cardboard triangle, making sure each layer sits close to the previous layer. Alternate directions while wrapping and continue until the entire triangle is completely covered. Secure the other end of the yarn by wrapping it around the back and tucking it in the wrapped yarn.
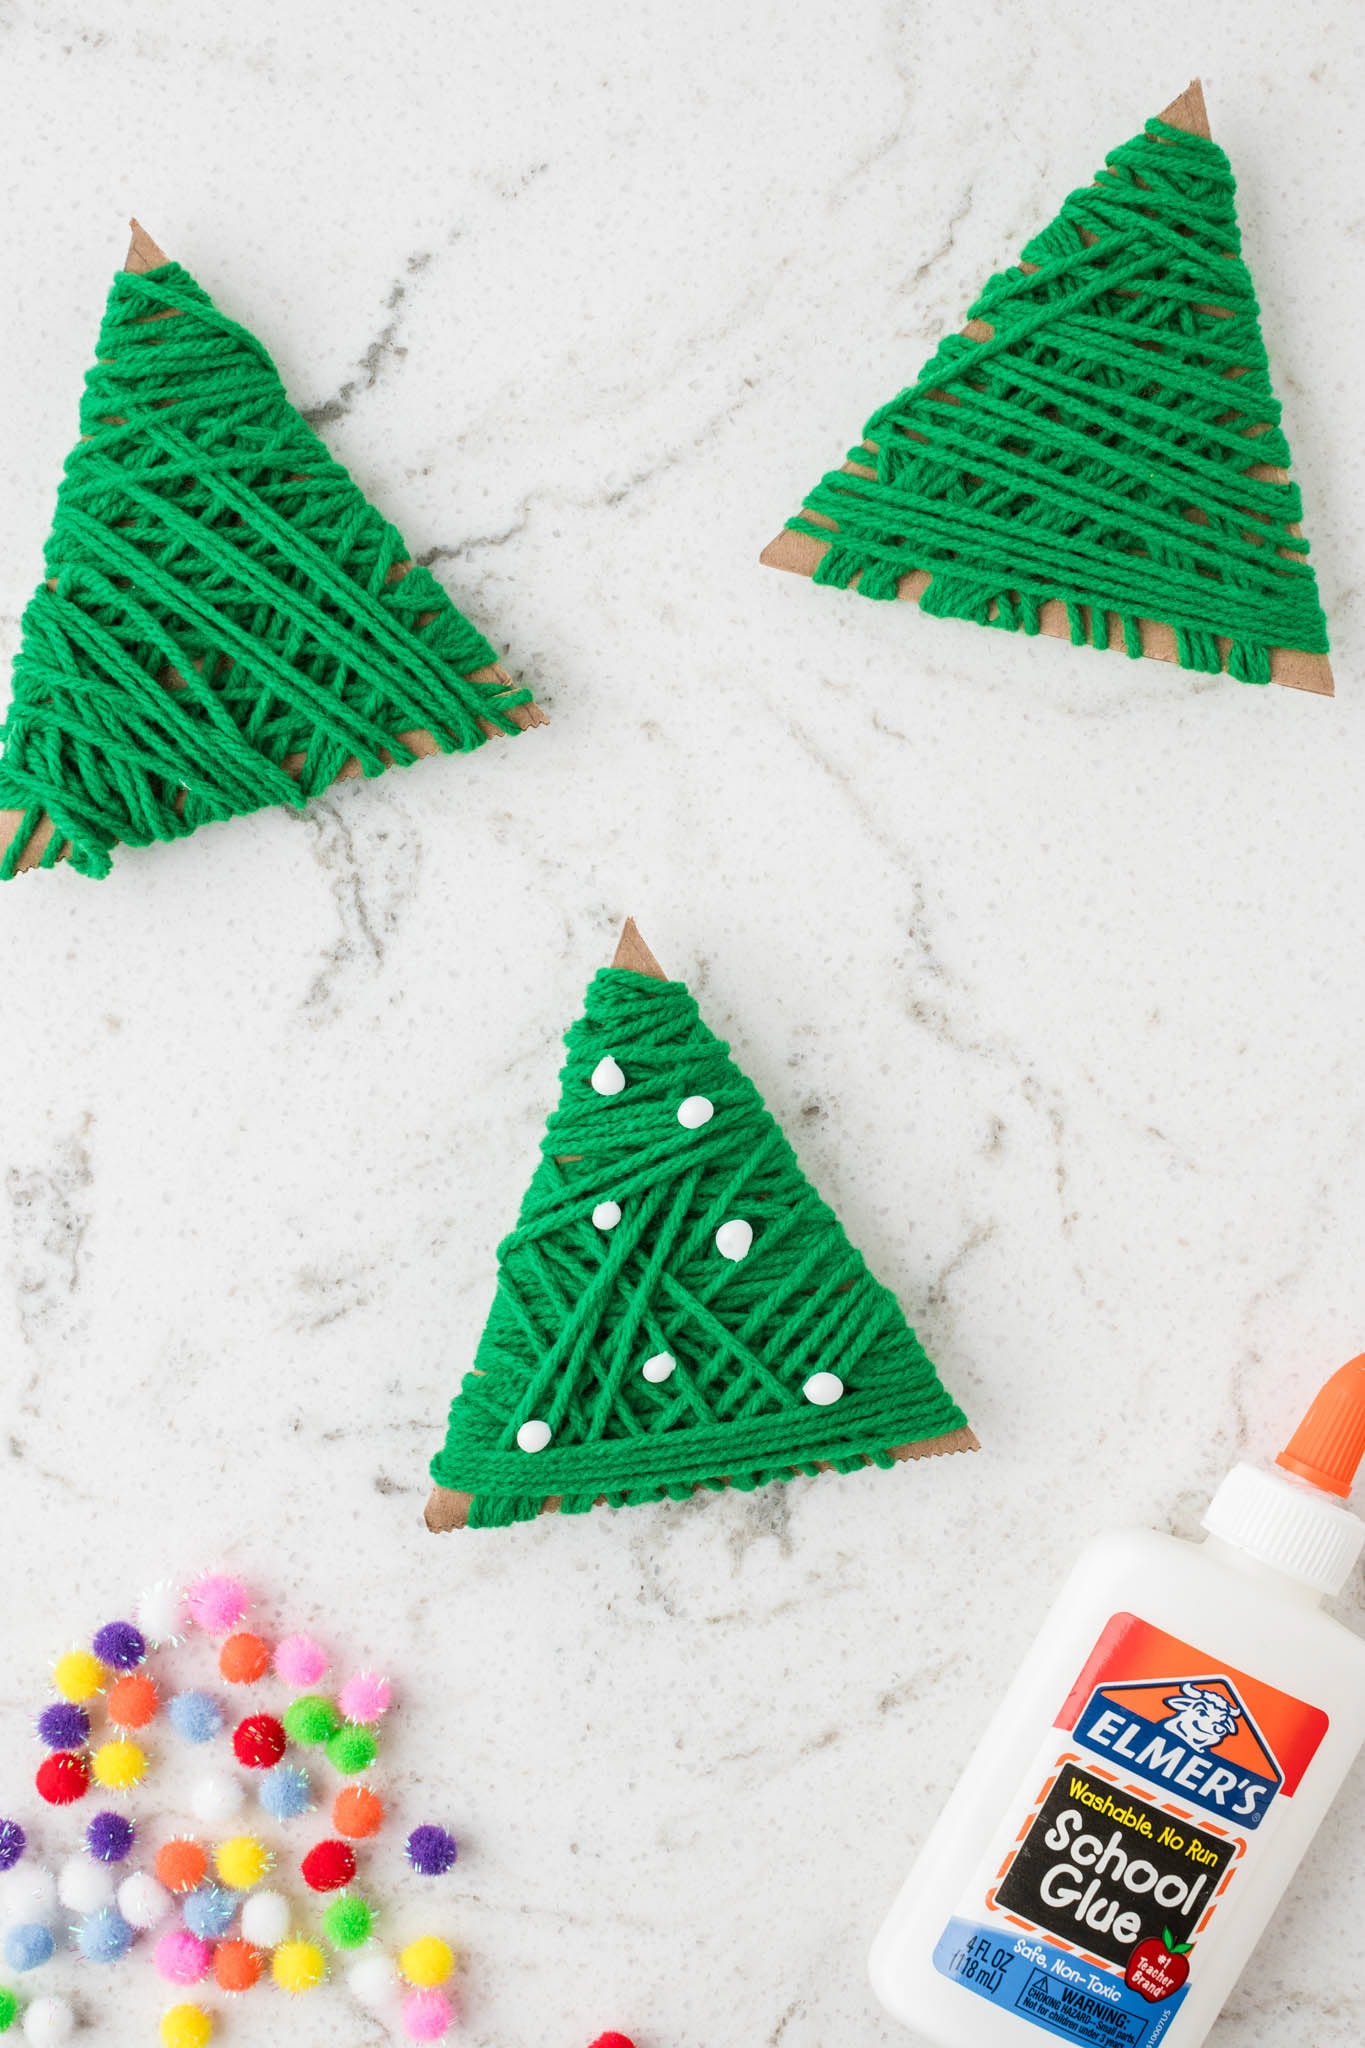
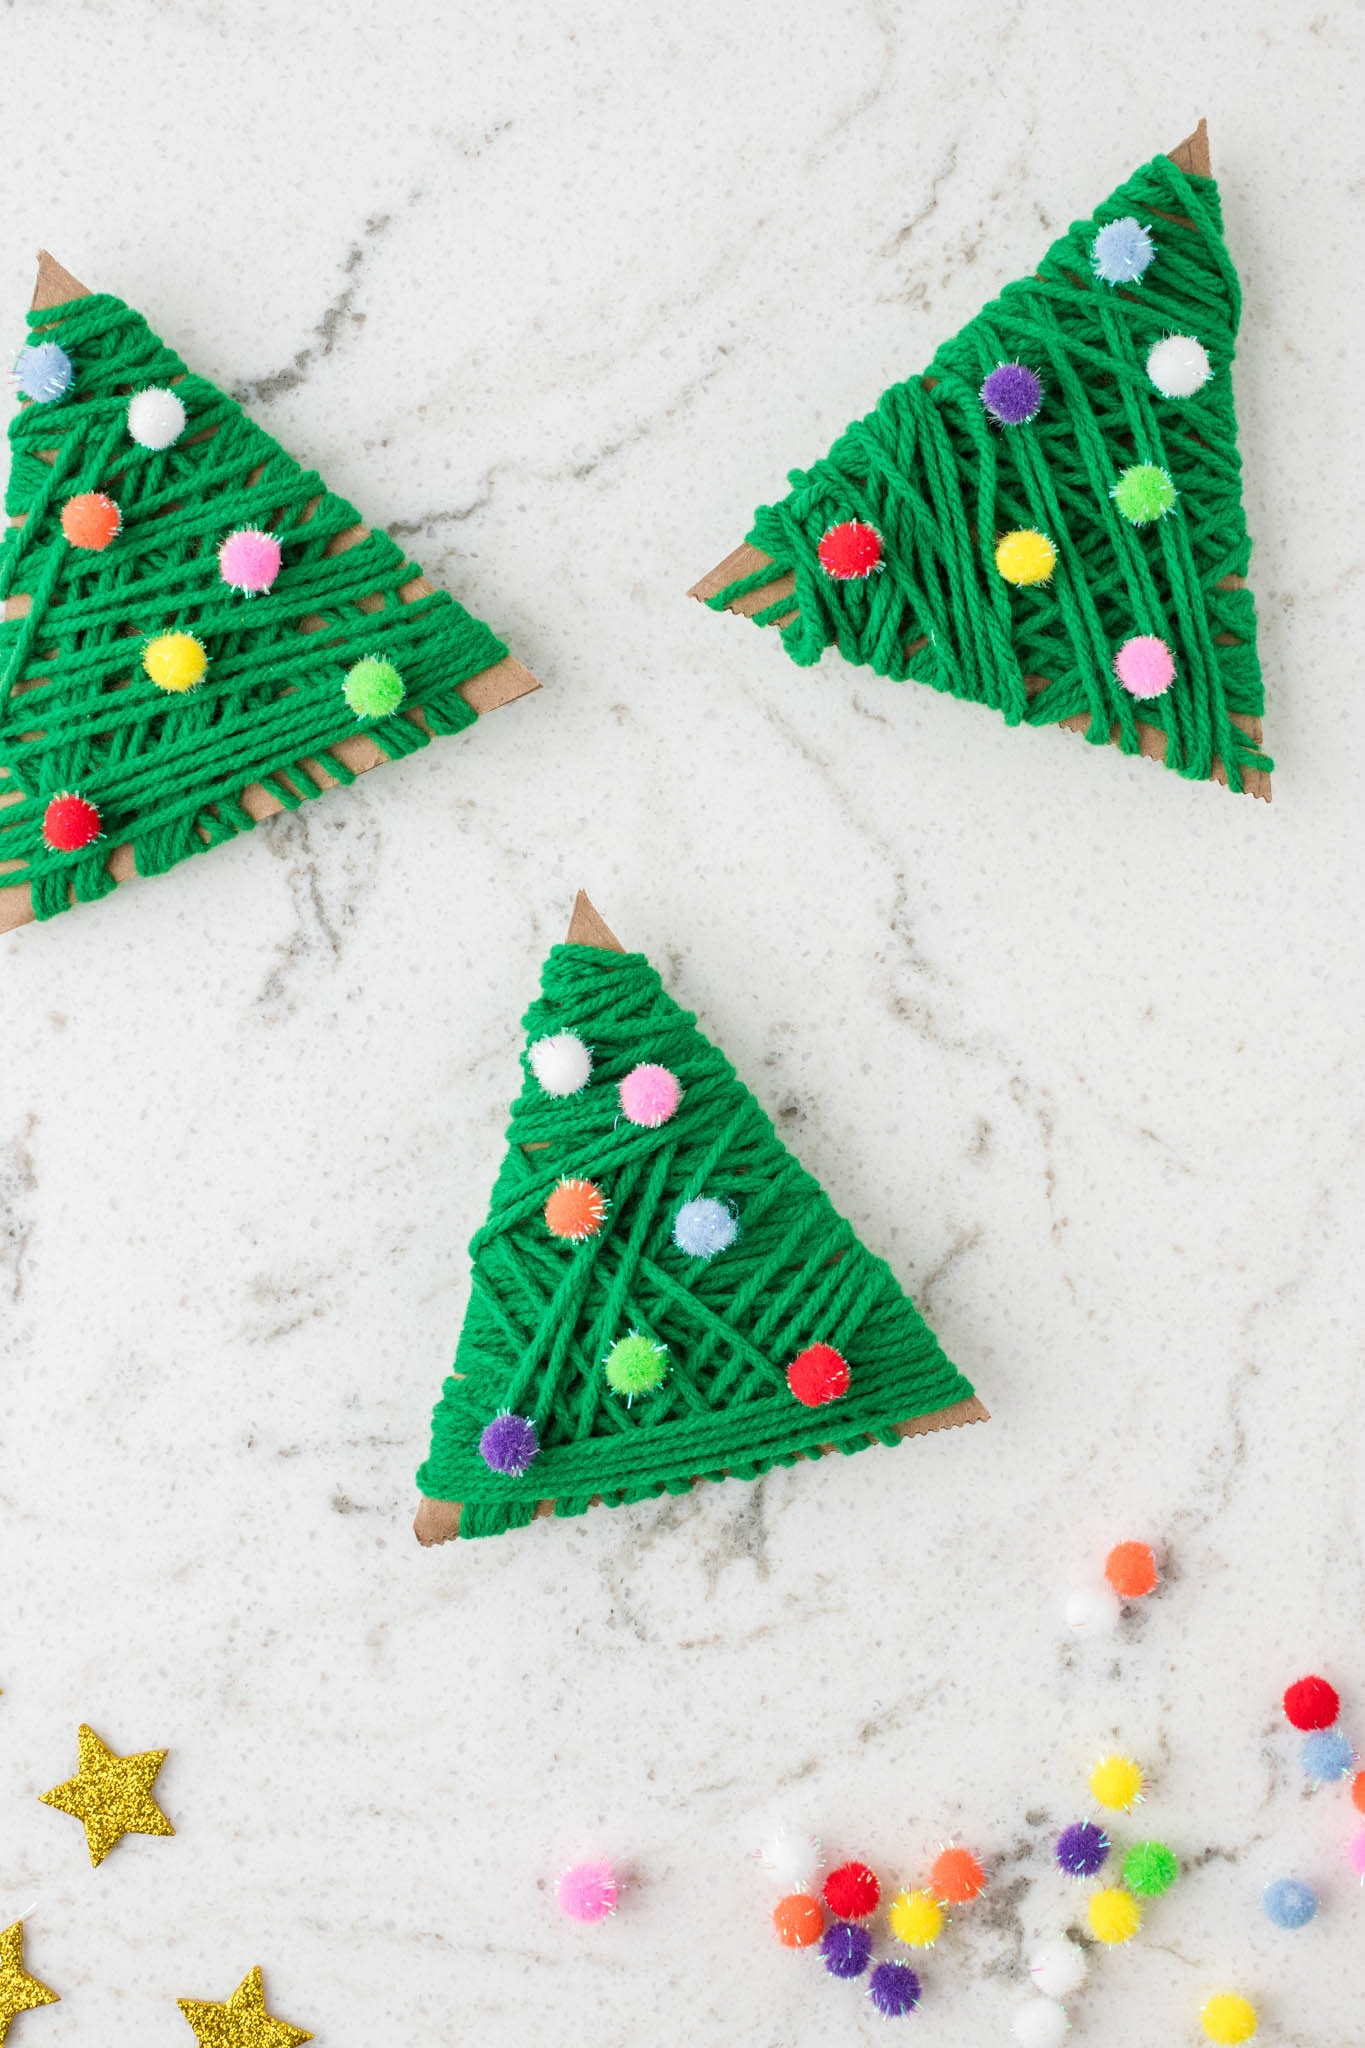
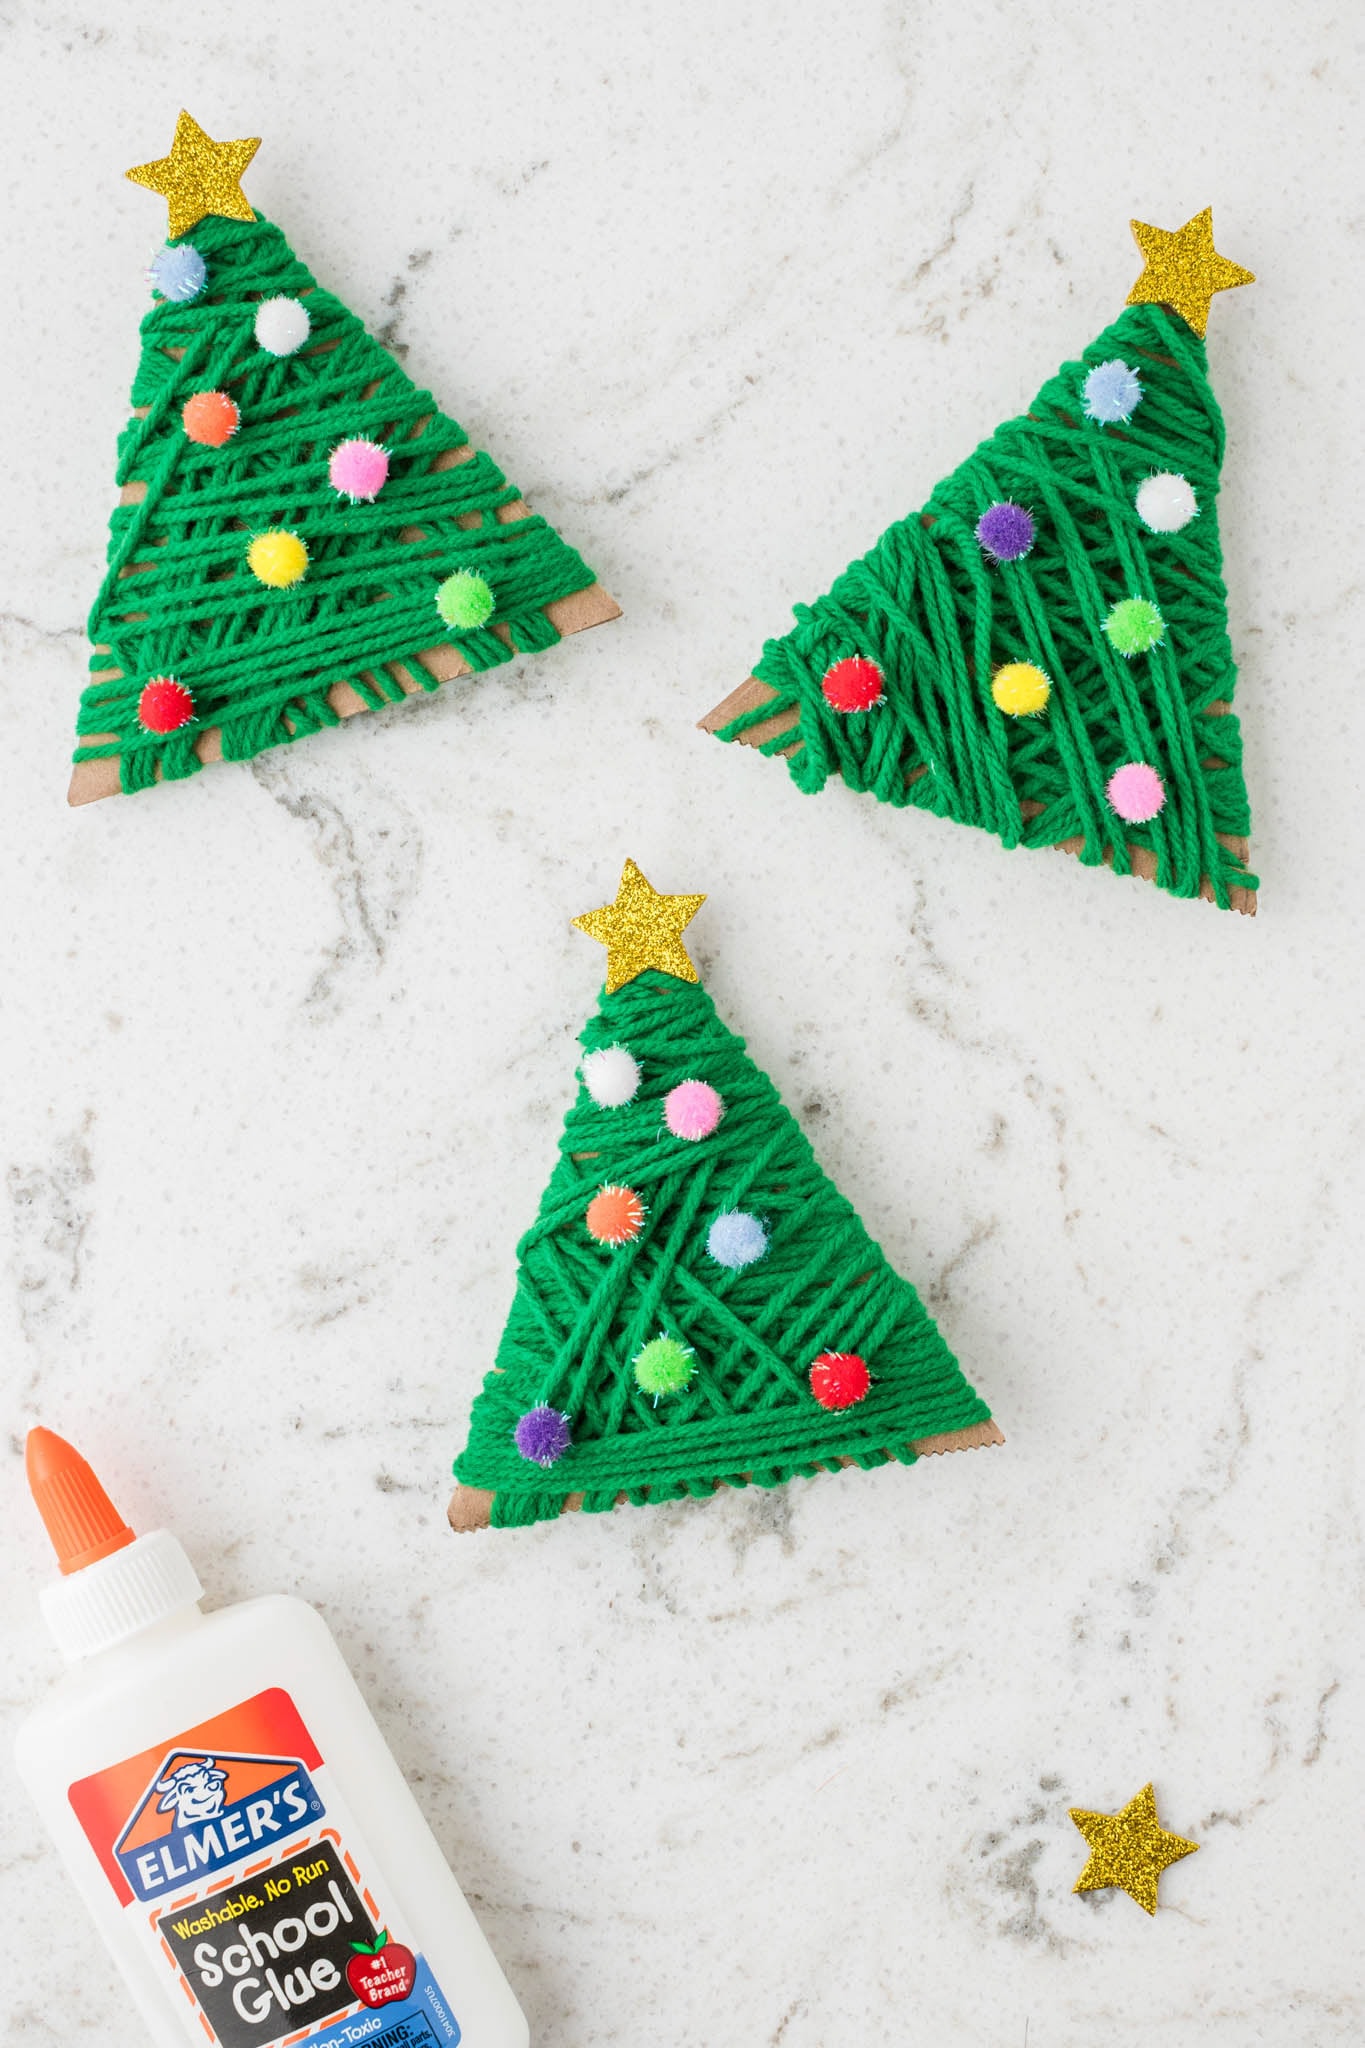
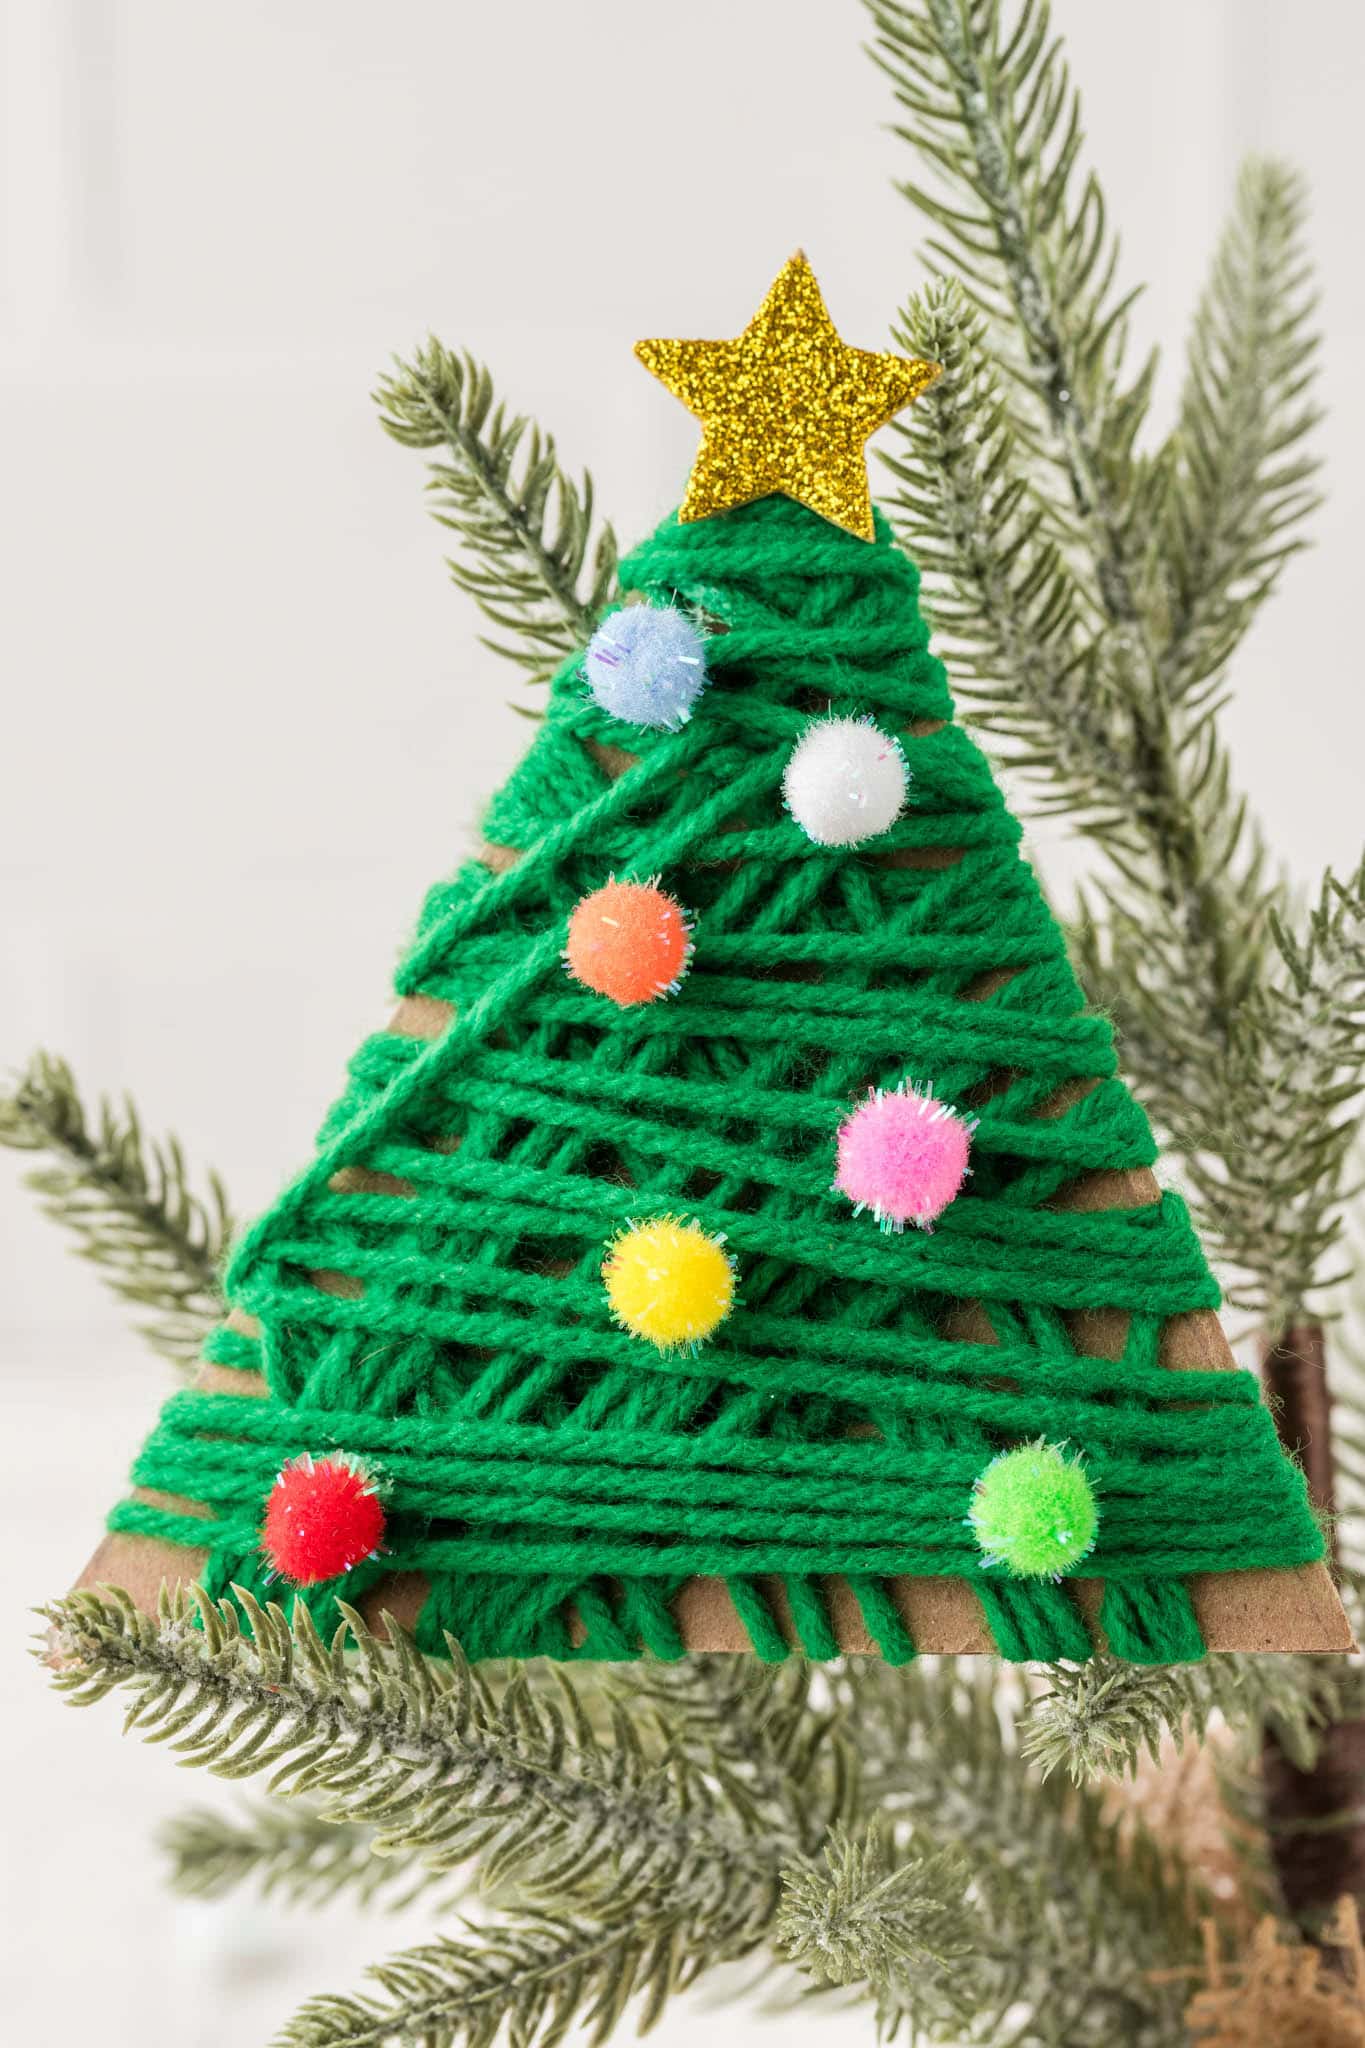
Once the tree is fully wrapped, use dots of white school glue to attach pom poms as “ornaments” on your tree. Glitter pom poms can be added for some sparkle, but any pom poms will do.
Finish by sticking the foam star-shaped sticker to the top of your tree for a festive touch. Allow everything to dry thoroughly before displaying.
What can I use if I don’t have cardboard?
If you don’t have cardboard, then cut the base of the tree out of some cereal boxes or a similar box. Cut it out multiple times and stack the pieces on top of one another and glue together to make it more sturdy. You can also use thin, small wood rounds for this craft! You’ll just need a way to trim it down into a triangle.
Pro Tips for the Most Fun!!
- You can make these DIY yarn Christmas trees in various sizes! If you make an extra large Christmas tree, use chunky yarn to cover more surface area.
- Decorate your yarn wrapped Christmas trees however you want. I love to add a pop of color with these craft pom poms, but you can find loads of fun things in the craft stores to use as decorations. Buttons, rhinestones, ribbon, etc. Anything your imagination can come up with! Different yarn colors are also fun to change up your easy yarn Christmas crafts.
- Turn this yarn Christmas tree into an ornament by using a hot glue gun to attach ribbon or twine to the top of the cone shape. Hang your Christmas decorations on your tree, on a wreath, or anywhere else you want!
I can’t wait to see how all of your yarn Christmas trees turn out! This craft is just the most fun and festive, perfect for the holiday season.
More Christmas Crafts!
- Make your gingerbread house building way less stressful with this Milk Carton Gingerbread House Craft!
- Countdown the days till Christmas with this adorable Santa Countdown Craft! Great for littles who keep asking “how many days until Christmas?”
- Keep an eye out for Santa with these homemade Santa Binoculars. Spark that imagination and curiosity!
- This easy Handprint Christmas Tree Ornament is a keepsake that you’ll enjoy hanging on your tree for years.
Christmas Tree Yarn Craft
Ingredients
- Pencil
- Ruler
- Cardboard
- Scissors
- Green yarn
- White school glue
- Pom poms small
- Foam star-shaped sticker for the star on top
Instructions
- Using a pencil and a ruler, trace a triangle about 4 inches tall. Cut the triangle out of the cardboard to form the base of your tree.
- Cut a tiny, ¼ inch notch in the side of the triangle towards the bottom. This will give you a place to secure the end of the yarn. Secure the end of the yarn and begin wrapping the yarn around the cardboard, making sure each layer sits close to the previous layer. Alternate directions while wrapping. Continue until the entire triangle is covered. Secure the other end of the yarn by wrapping it around the back and tucking it in the wrapped yarn.
- Once the tree is fully wrapped, use dots of white school glue to attach pom poms as “ornaments” on your tree. Glitter pom poms can be added for some sparkle, but any pom poms will do.
- Finish by sticking the foam star-shaped sticker to the top of your tree for a festive touch. Allow everything to dry thoroughly before displaying.