Paper Bag Snowflakes
Create beautiful and unique snowflakes with just a few simple materials and steps. Follow our easy guide to learn how to make paper bag snowflakes for festive decorations or fun winter crafts.
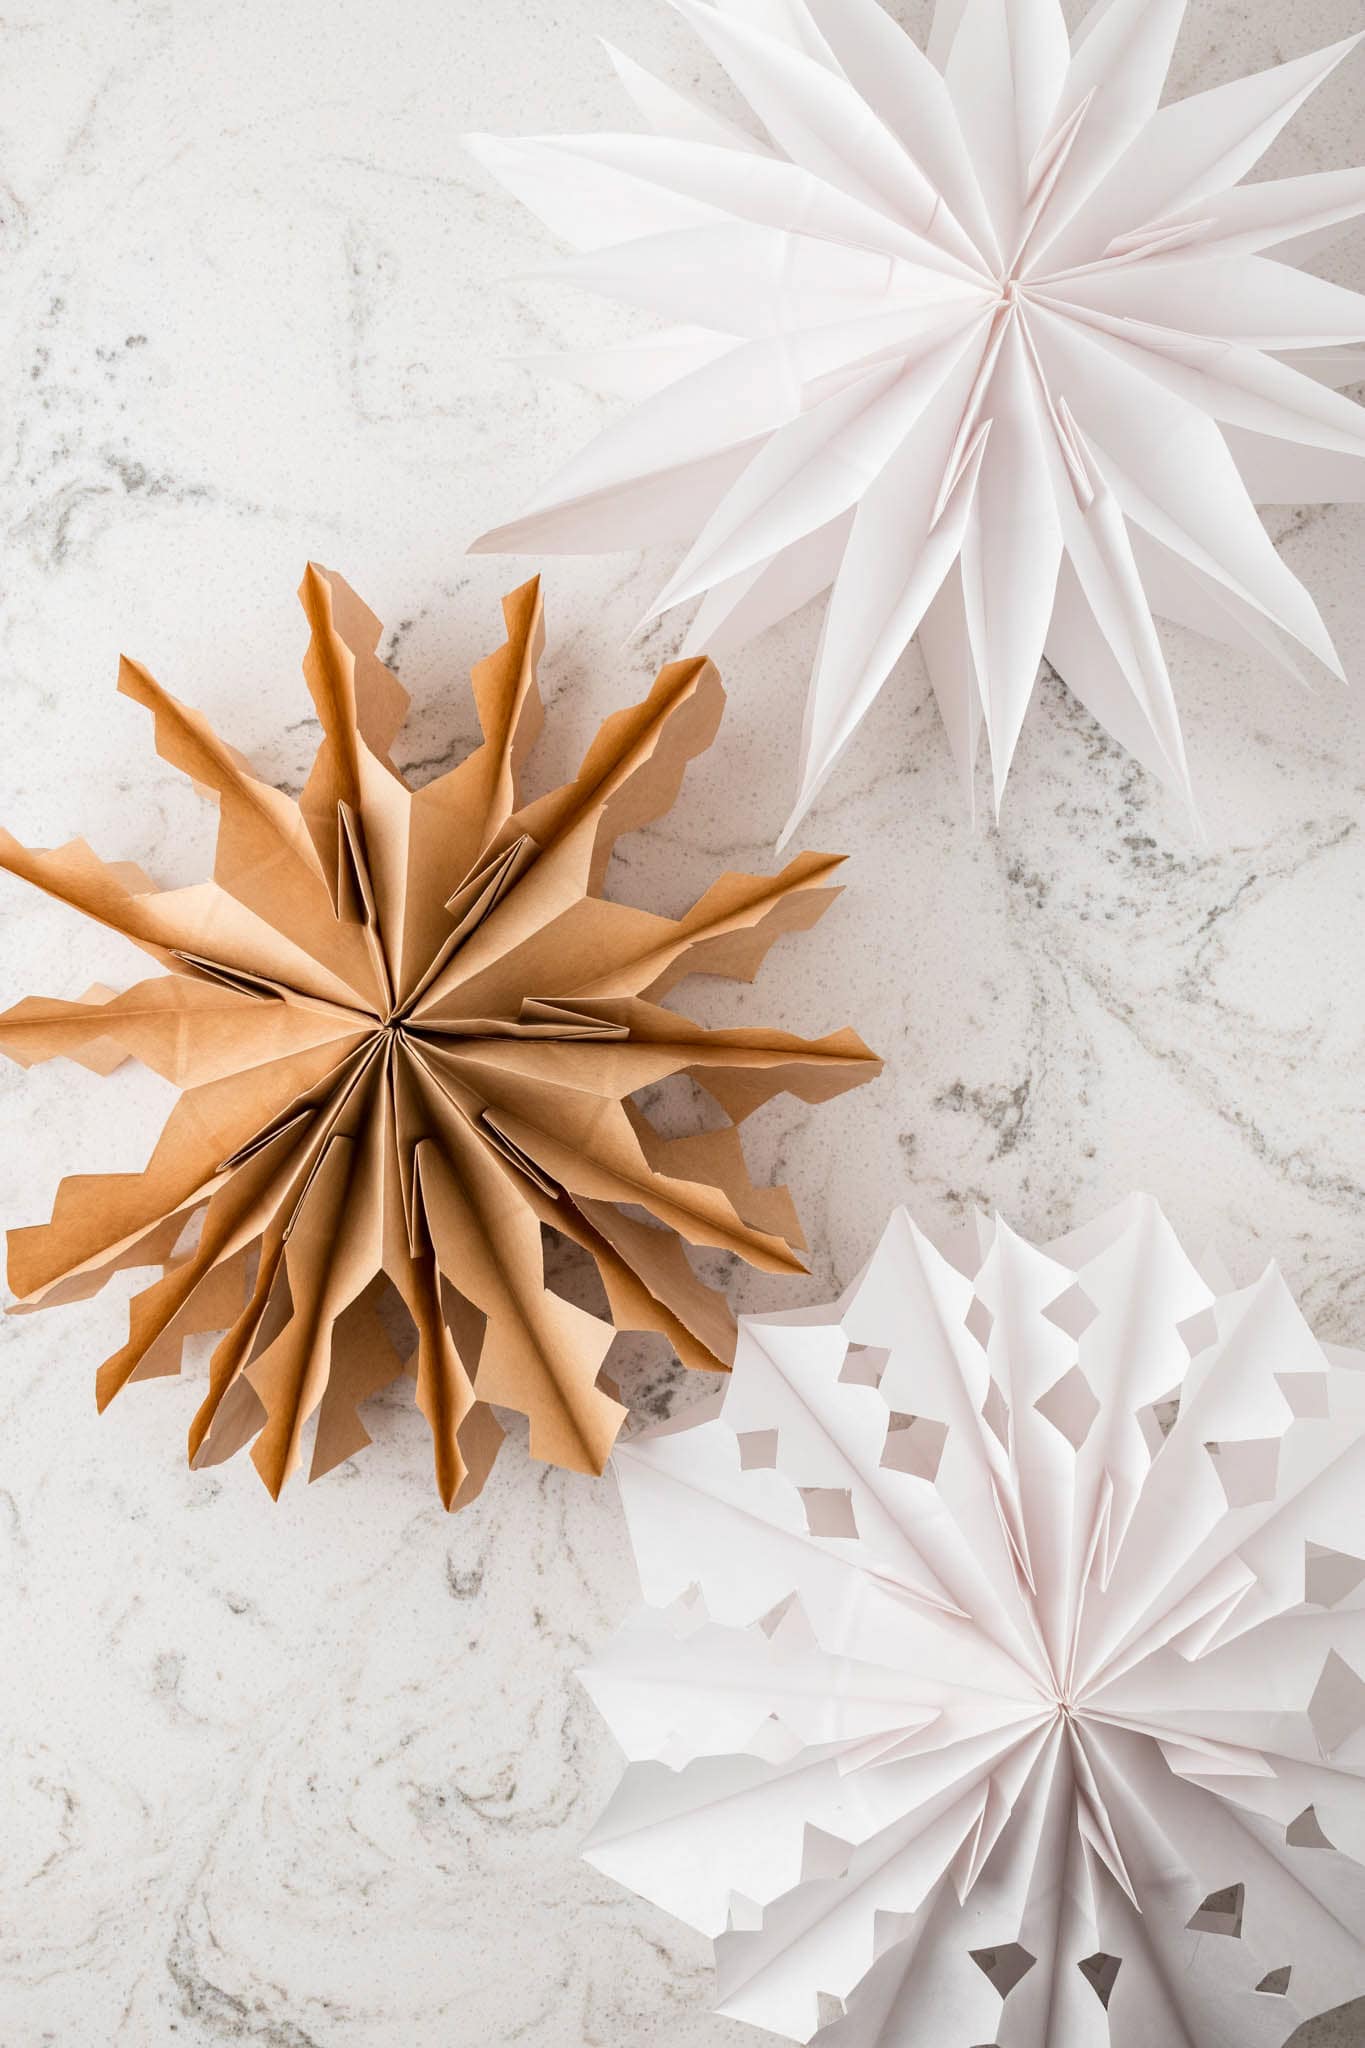
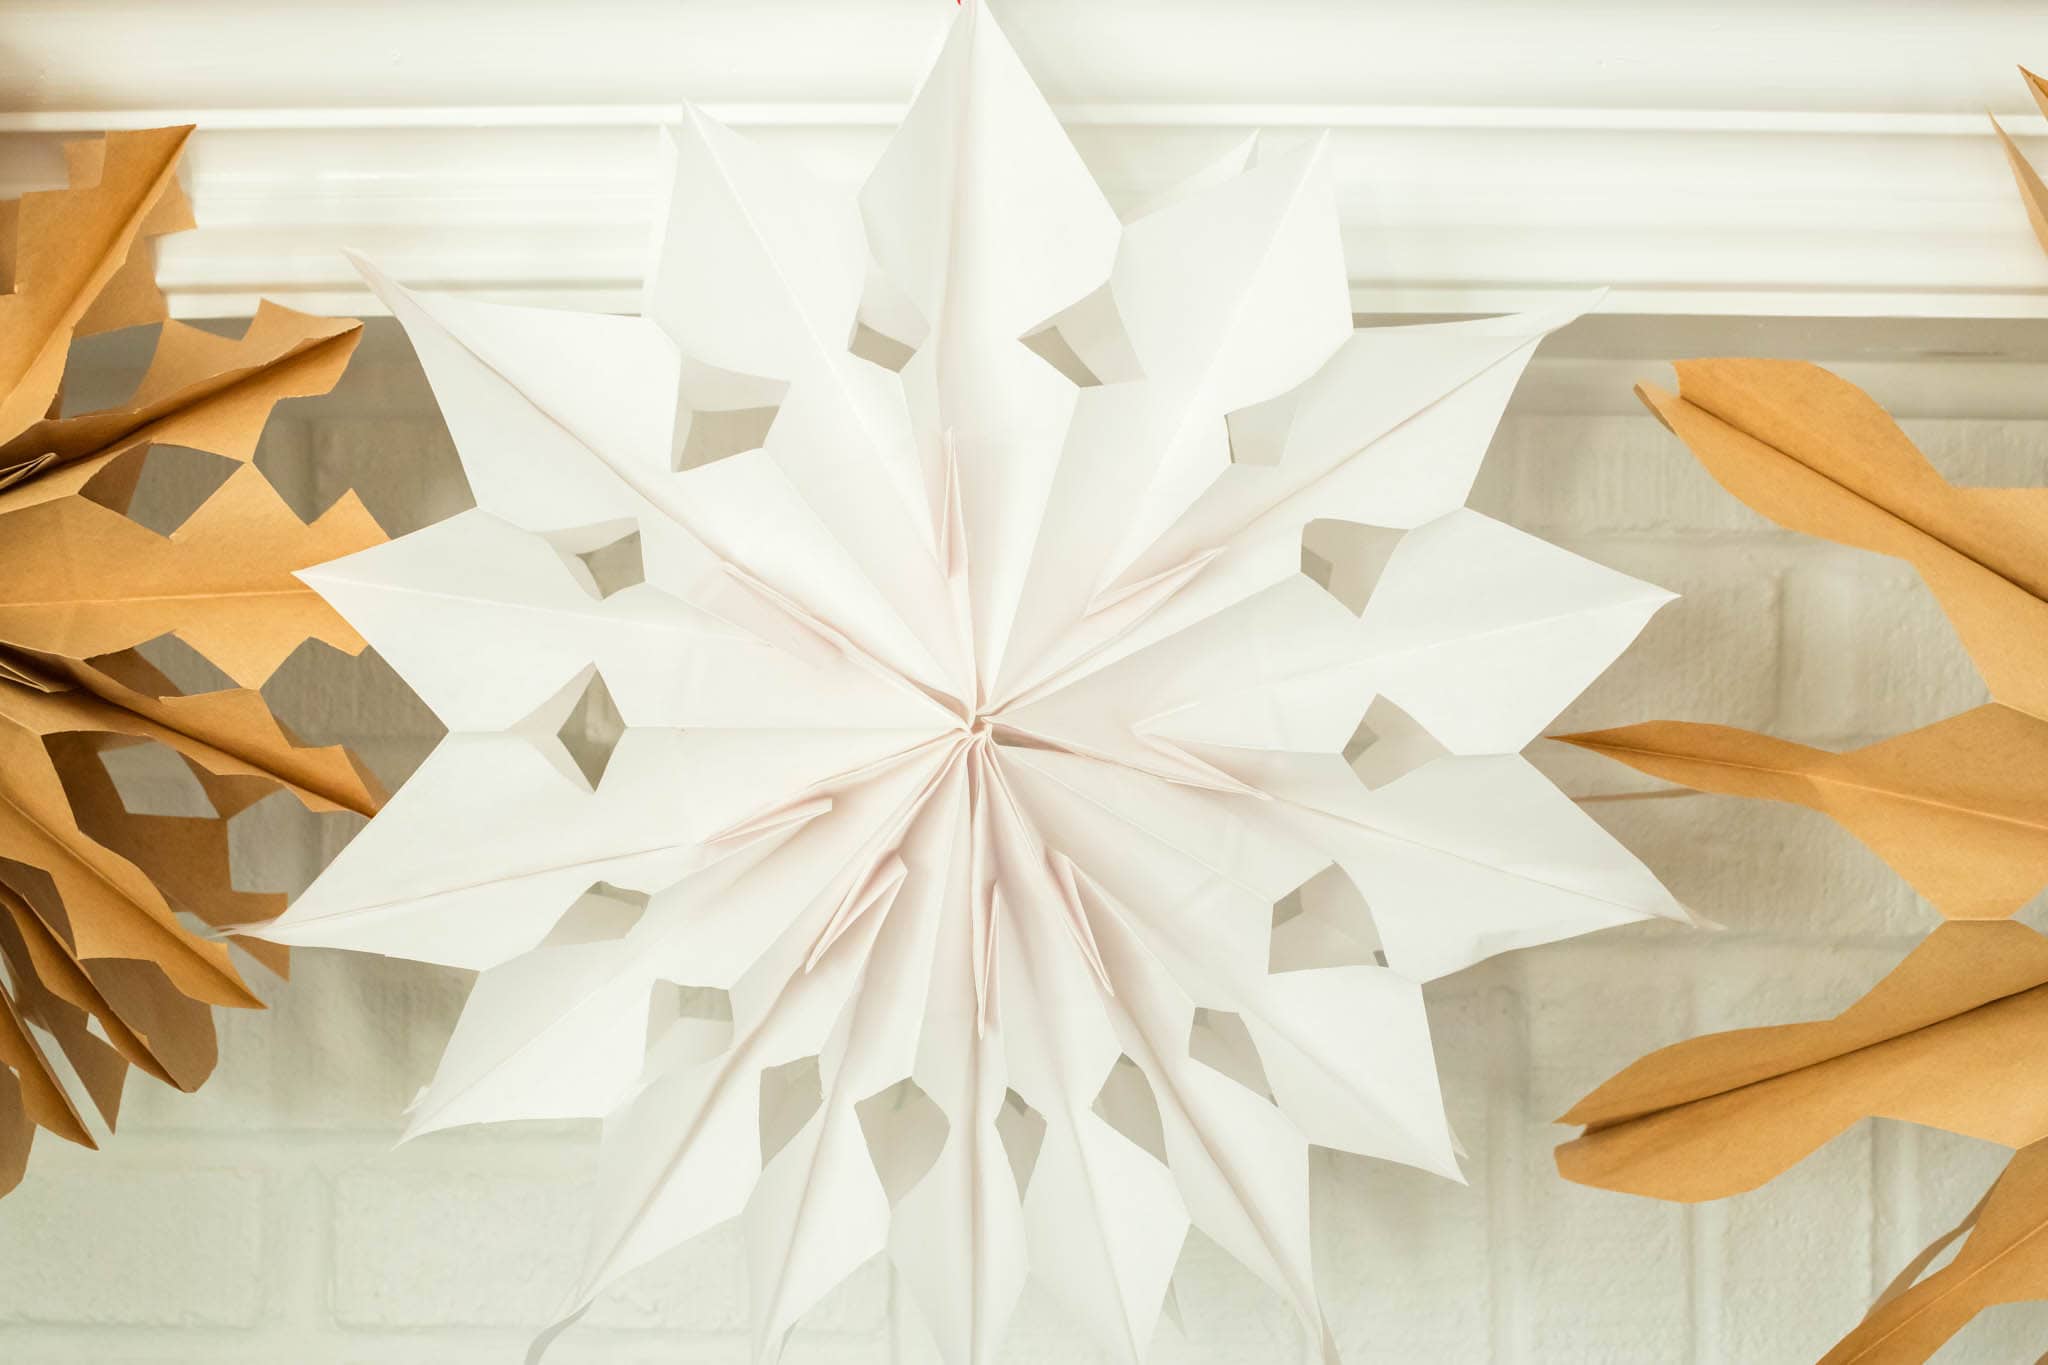
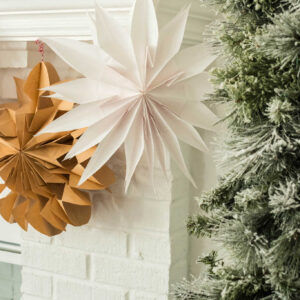
Who needs store-bought Christmas decor when you can make incredible decorations during craft time instead! These delightful paper bag snowflakes make for easy holiday decorations that are seriously so exciting to create. The process is really easy, but you end up with an elaborate and elegant snowflake that you can hang anywhere and everywhere you want. With the help of some strategically placed command hooks, you can have a snowflake blizzard for your Christmas decorations!
Not to mention, there’s an endless amount of pattern ideas when making homemade snowflakes — you can have a variety of snowflakes hanging, making this a super unique way to decorate. The fun part is that this is an easy craft for kids! So you can get the kiddos involved in decorating this year with a low effort DIYs that has a high impact on the ADORABLE factor! While you’re at it, make some snowflake suncatchers to add to your decorations. Before you know it, you’ll have some of the prettiest homemade decor ever!
Why You’ll Love these Paper Bag Snowflakes
- You can make snowflakes out of paper bags in under 30 minutes. Quick, easy, so stinkin’ cute and truly such a blast to create!
- I love the affordability of this DIY! White and brown paper lunch bags are really inexpensive and you likely already have all of the other supplies needed.
- Homemade snowflakes encourage creativity and imagination. It really is an open ended craft and you can make any kind of design and shape that you want.
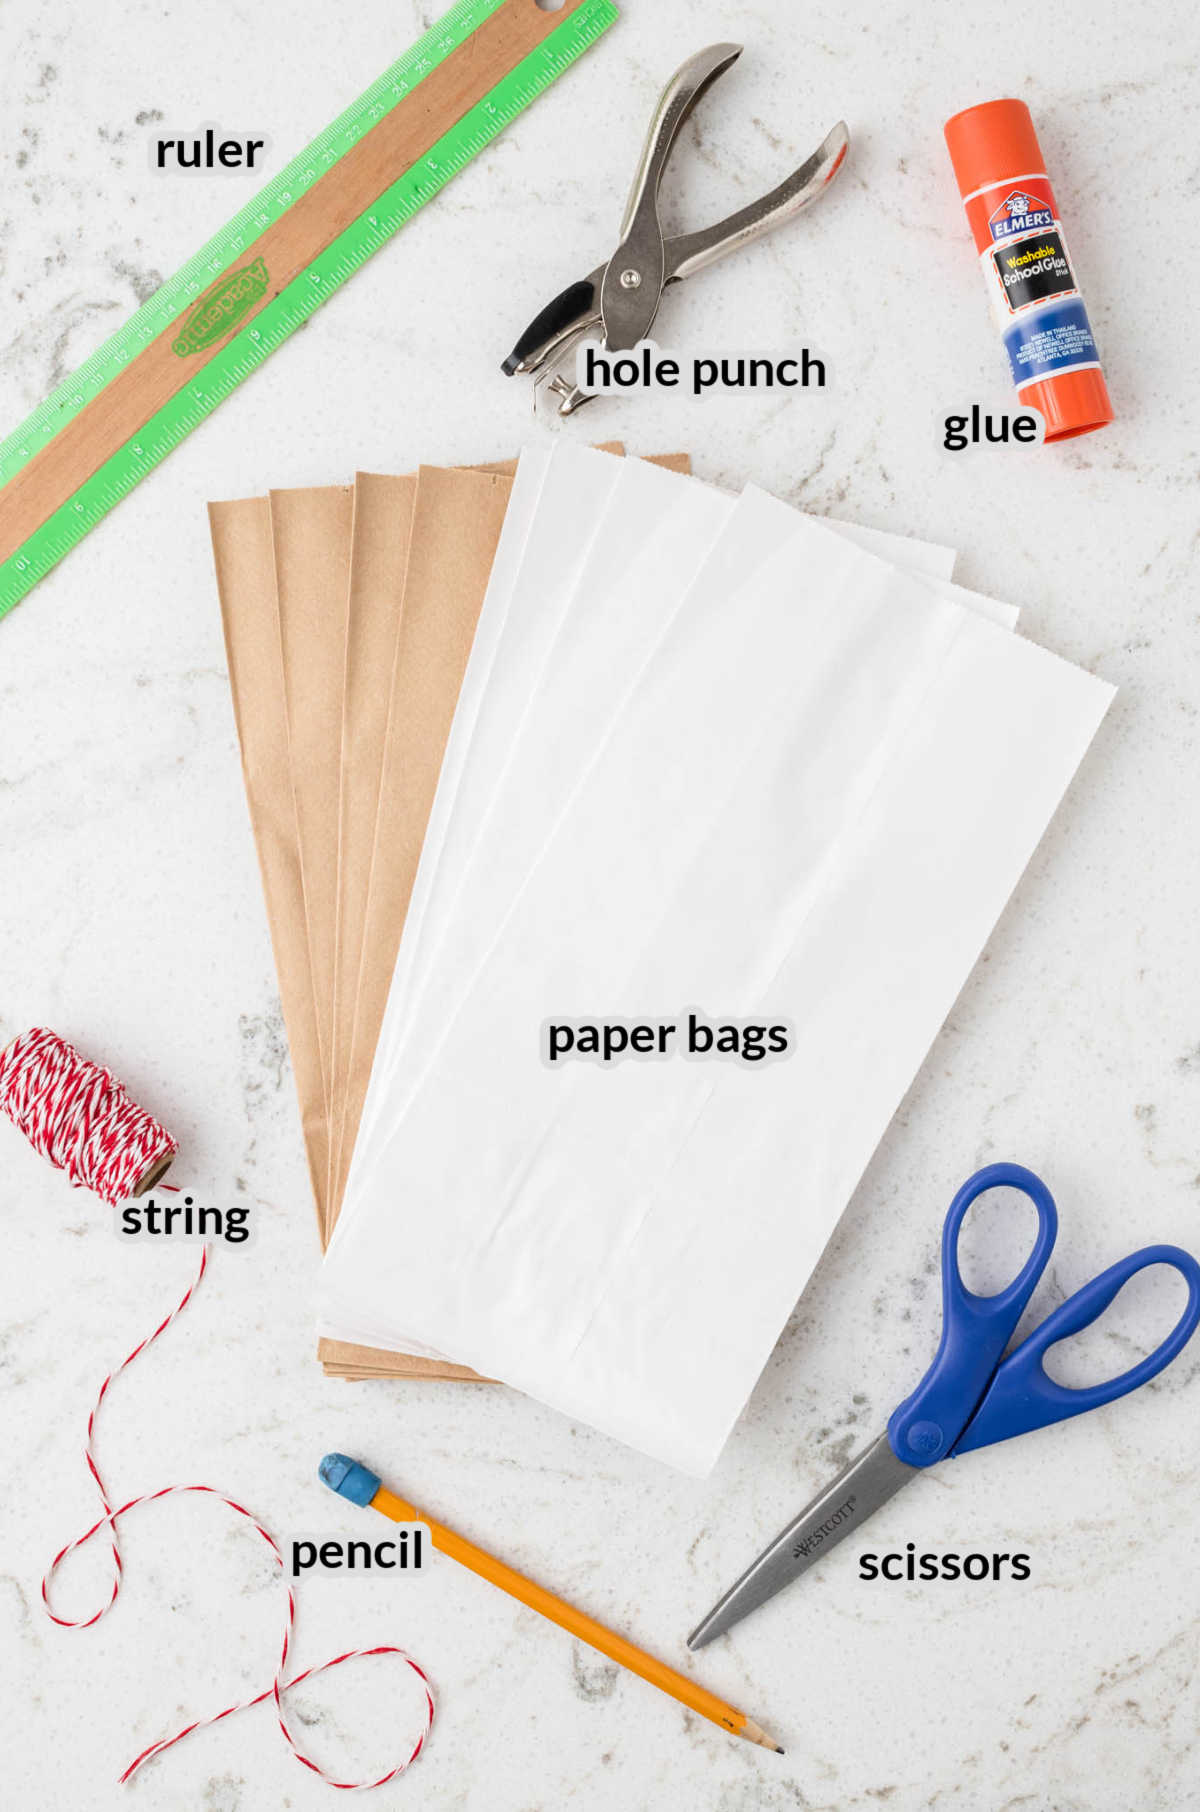
Supplies for Paper Bag Snowflakes
- Paper bags – You can use both white or brown paper bags in this craft. They both make super cute paper snowflakes!
- Glue stick – A regular school glue stick is all you need to attach some of the paper bags together to make the snowflakes more sturdy.
- Pencil – Use a pencil or a pen to draw the pattern on the paper bags before cutting it out. It’s easier to cut a snowflake design when you have an outline to follow.
- Ruler – Grab a ruler or another material to use as a straight edge when you draw your pattern to make lunch bag snowflakes.
- Scissors – I recommend using the sharpest scissors that you have so that it’s easy to cut out different shapes and different patterns. If you’re making these with littles, you may need to cut the paper bags yourself.
- Single-hole punch – You’ll need a single hole punch to make a hole at the top of the bag to tie a string and hang your snowflake. If you don’t have a single-hole punch, you can use some scissors or a sharp pencil to poke a hole!
- String or twine – Grab some string or twine to pull through the hole to easily hang your snowflake.

How to Make a Paper Bag Snowflake
Begin by covering your work surface with craft paper or a tablecloth to protect it. Place a paper lunch bag on your work surface with the folded side down.
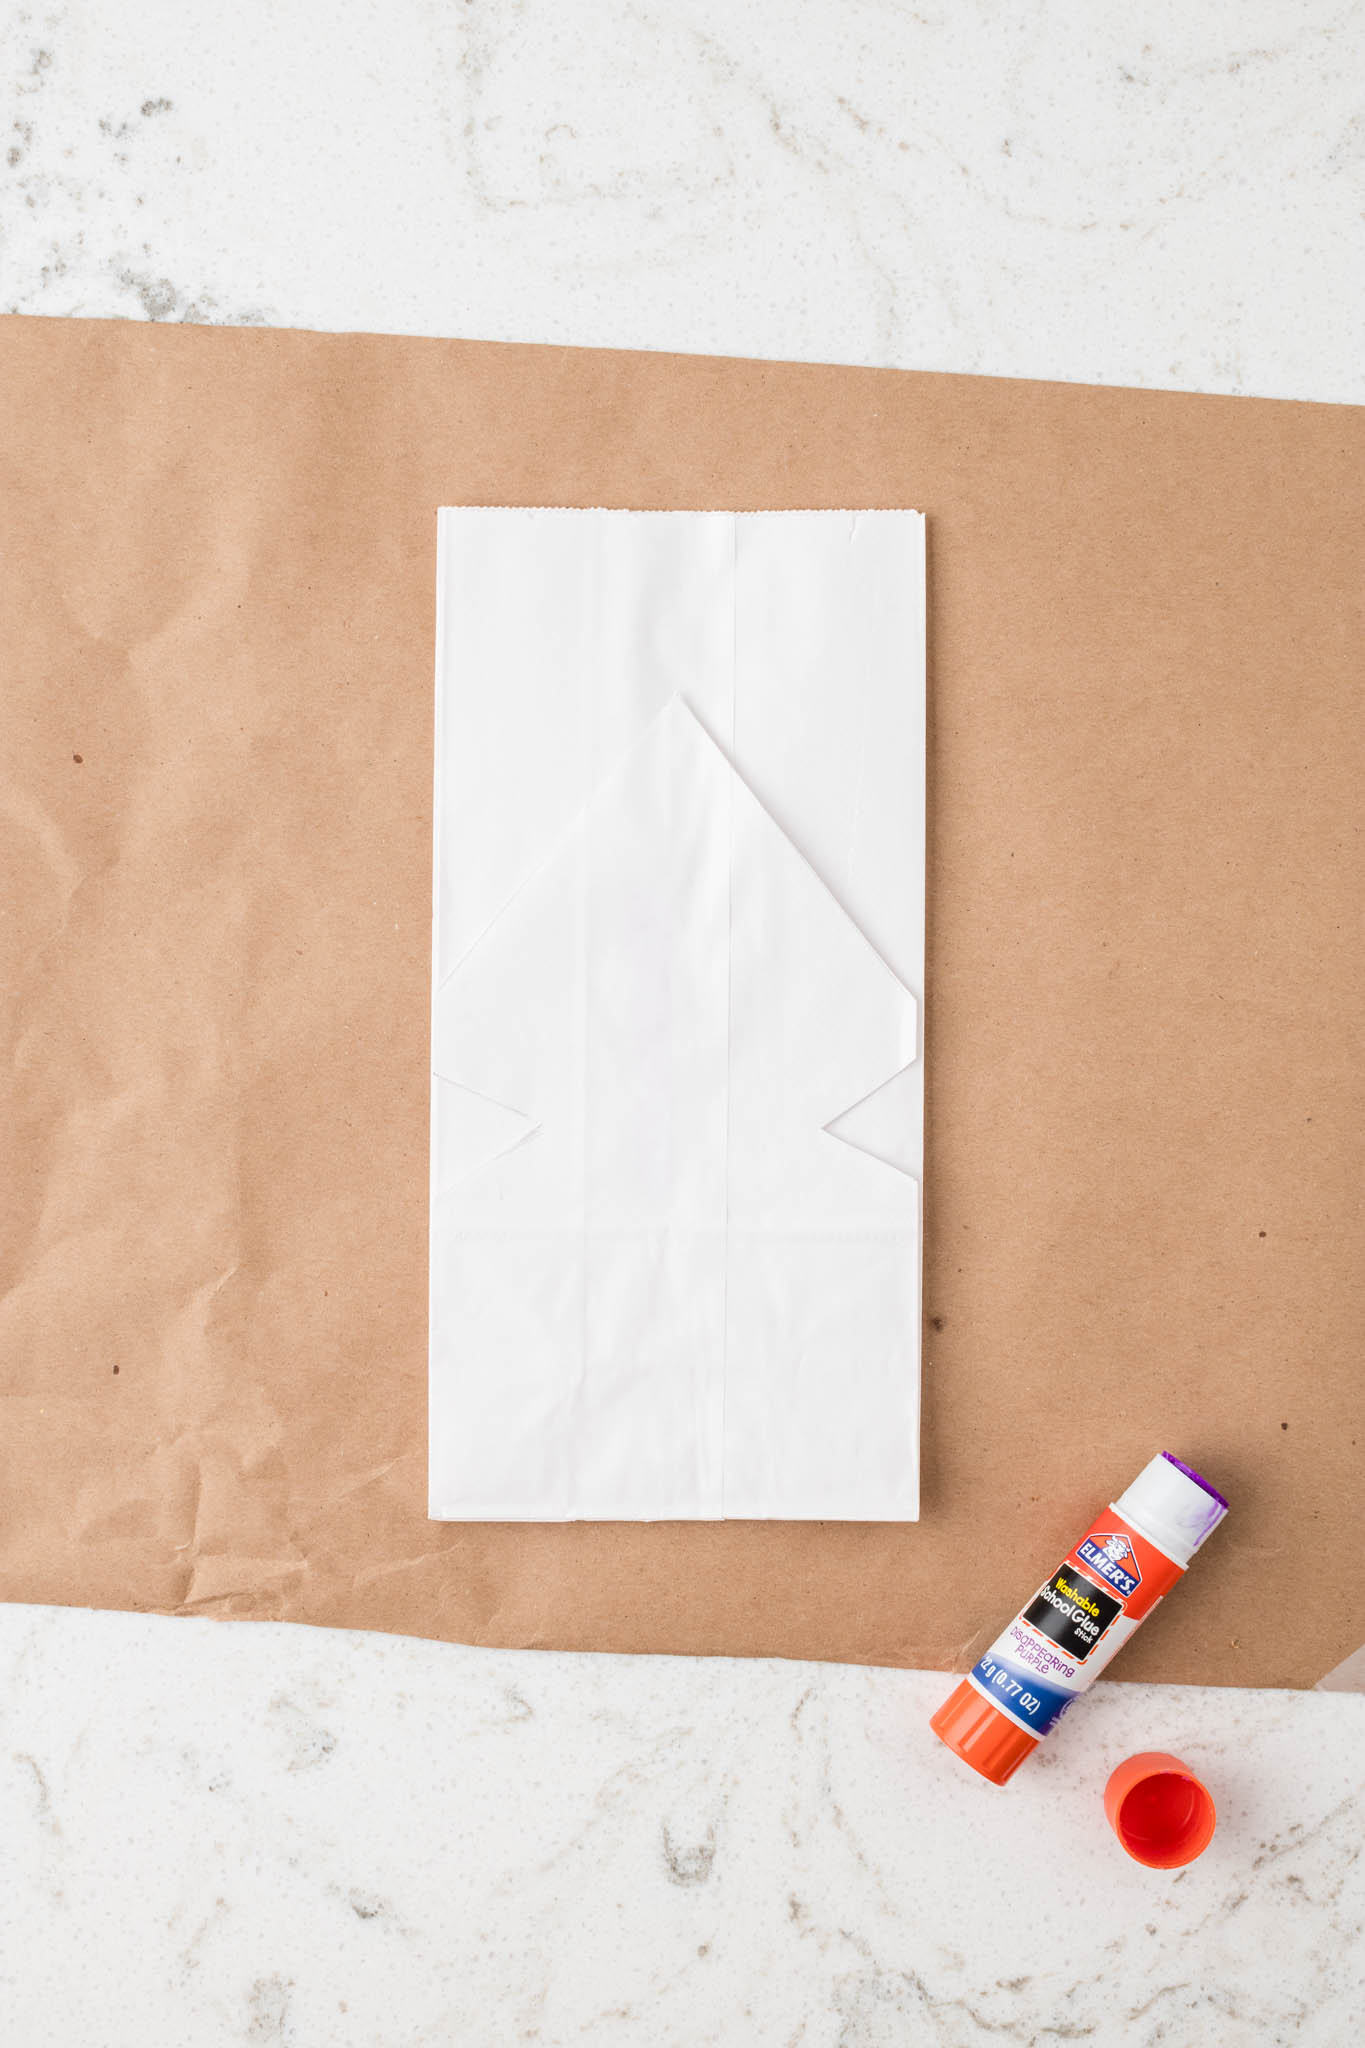
Apply glue in the shape of an upside-down T and then place another lunch bag on top of the first bag, aligning the edges. Repeat this step until you have 3 bags glued together.
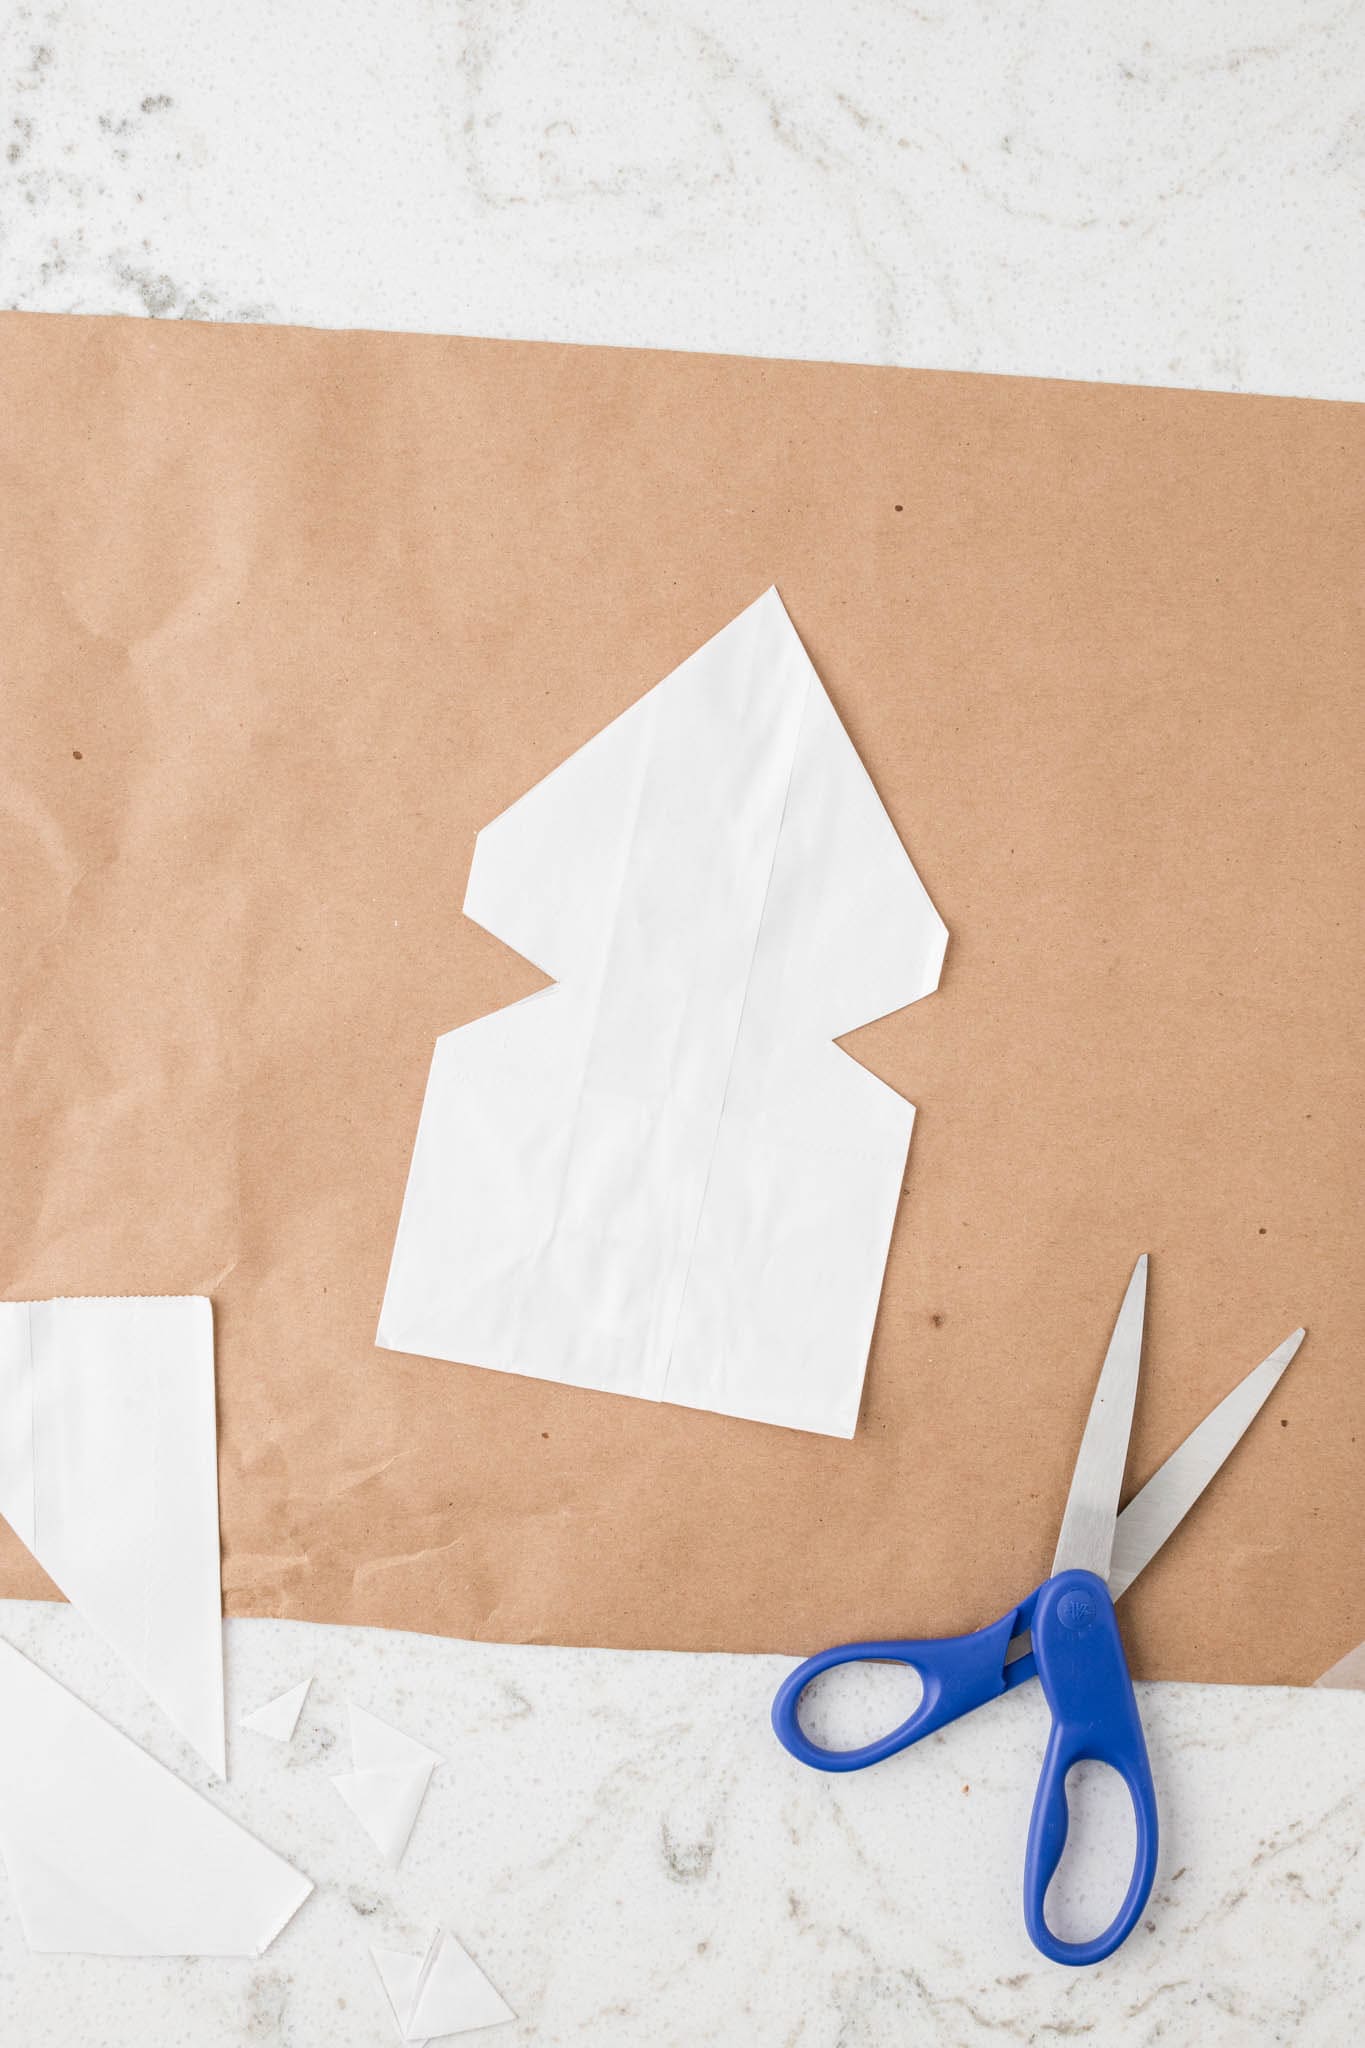
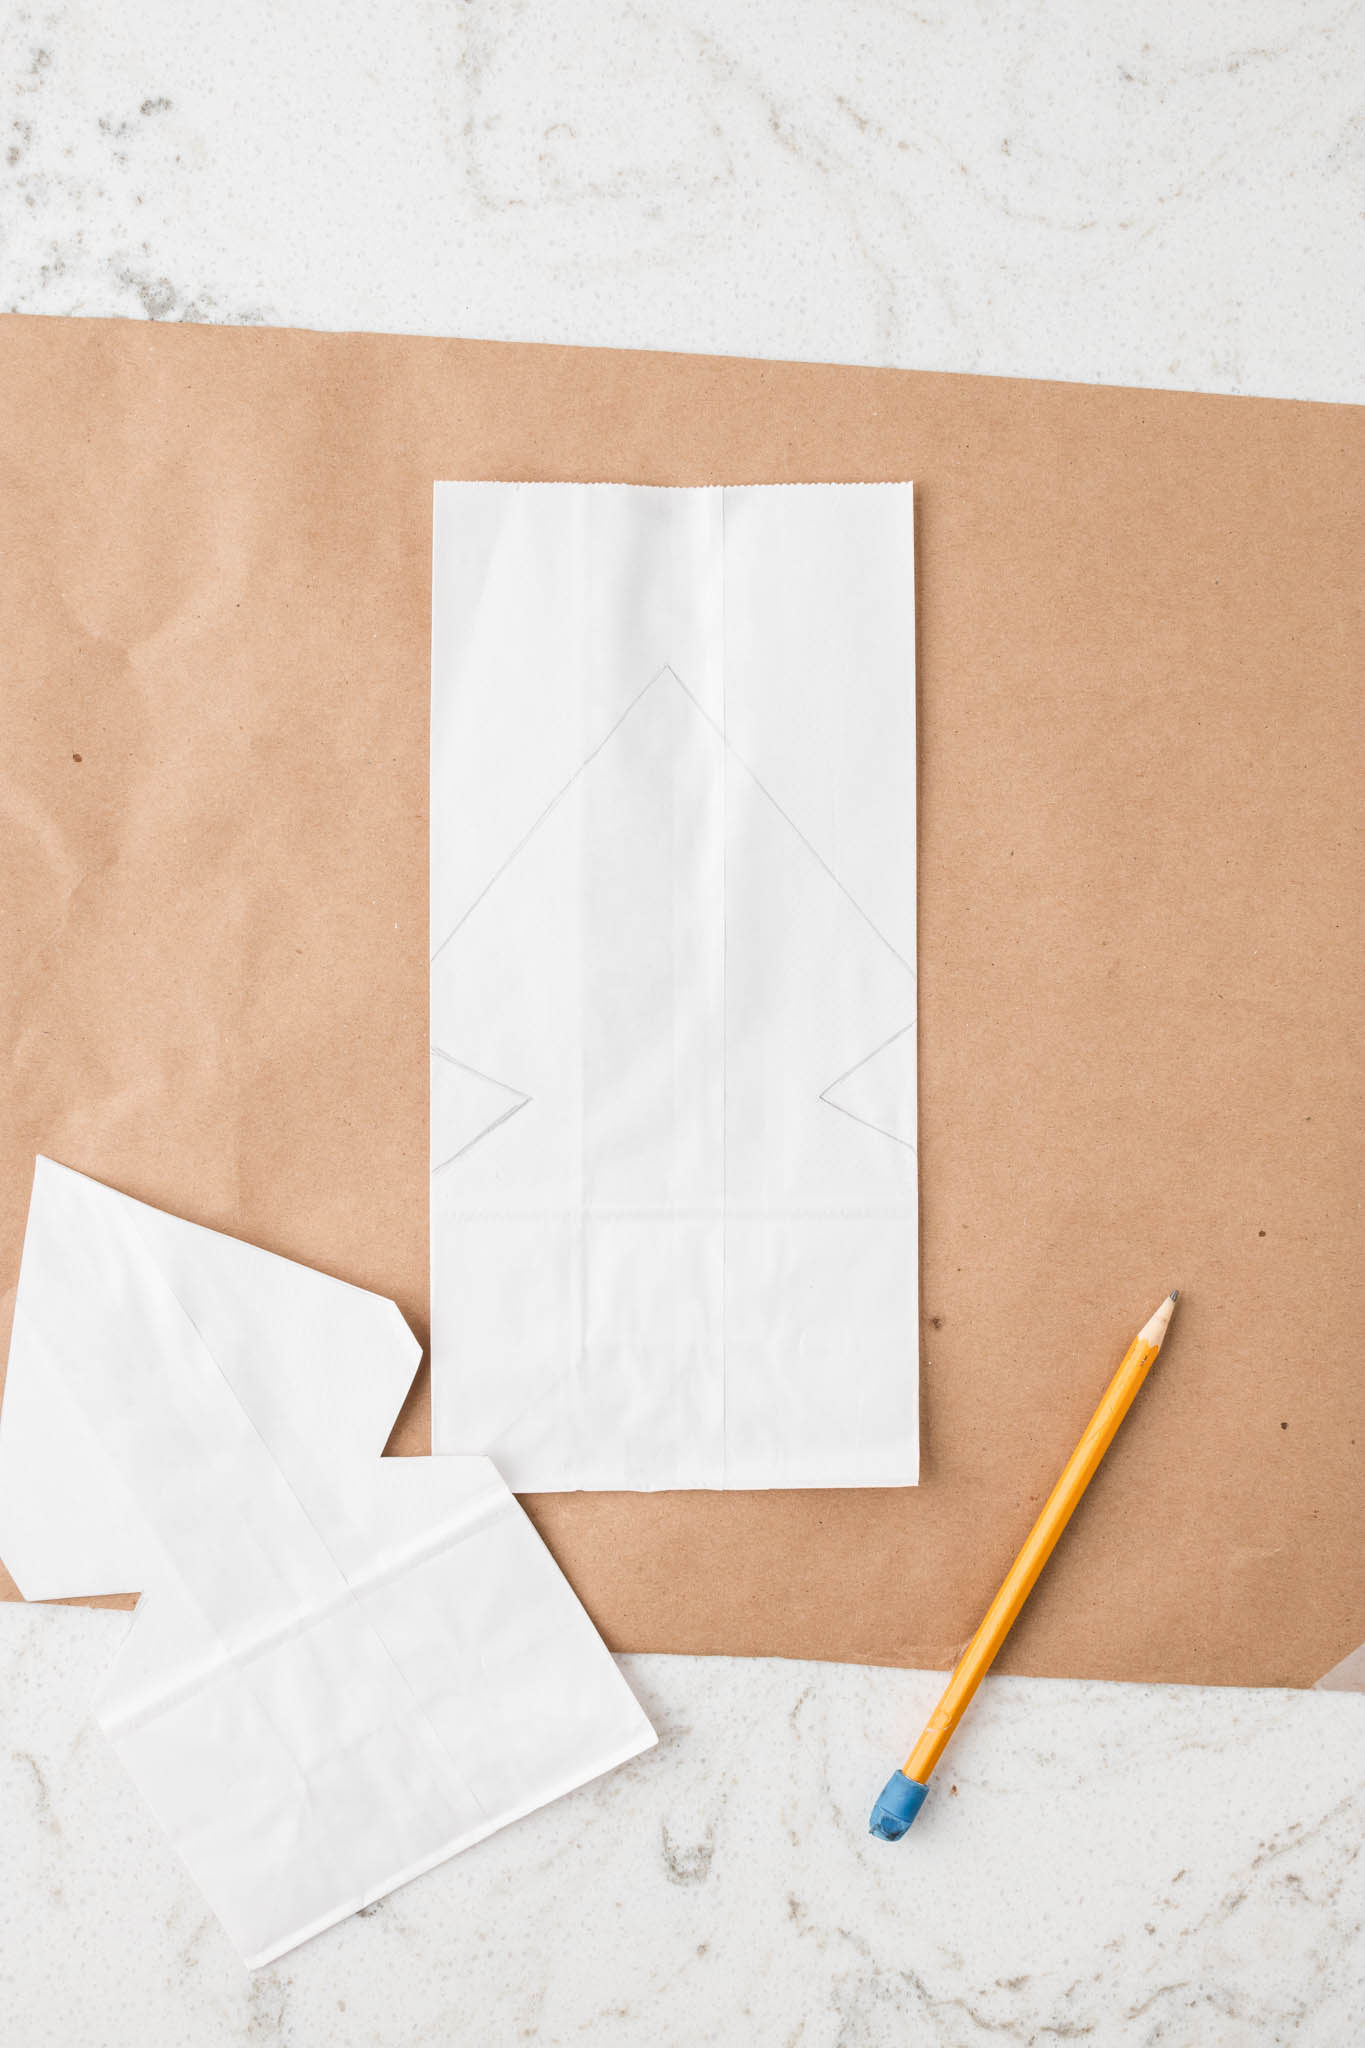
Draw your snowflake pattern on the face of another bag with the pencil and ruler and the carefully cut it out with scissors. Use this as a template to trace the pattern onto another bag, then cut it out and set it aside.
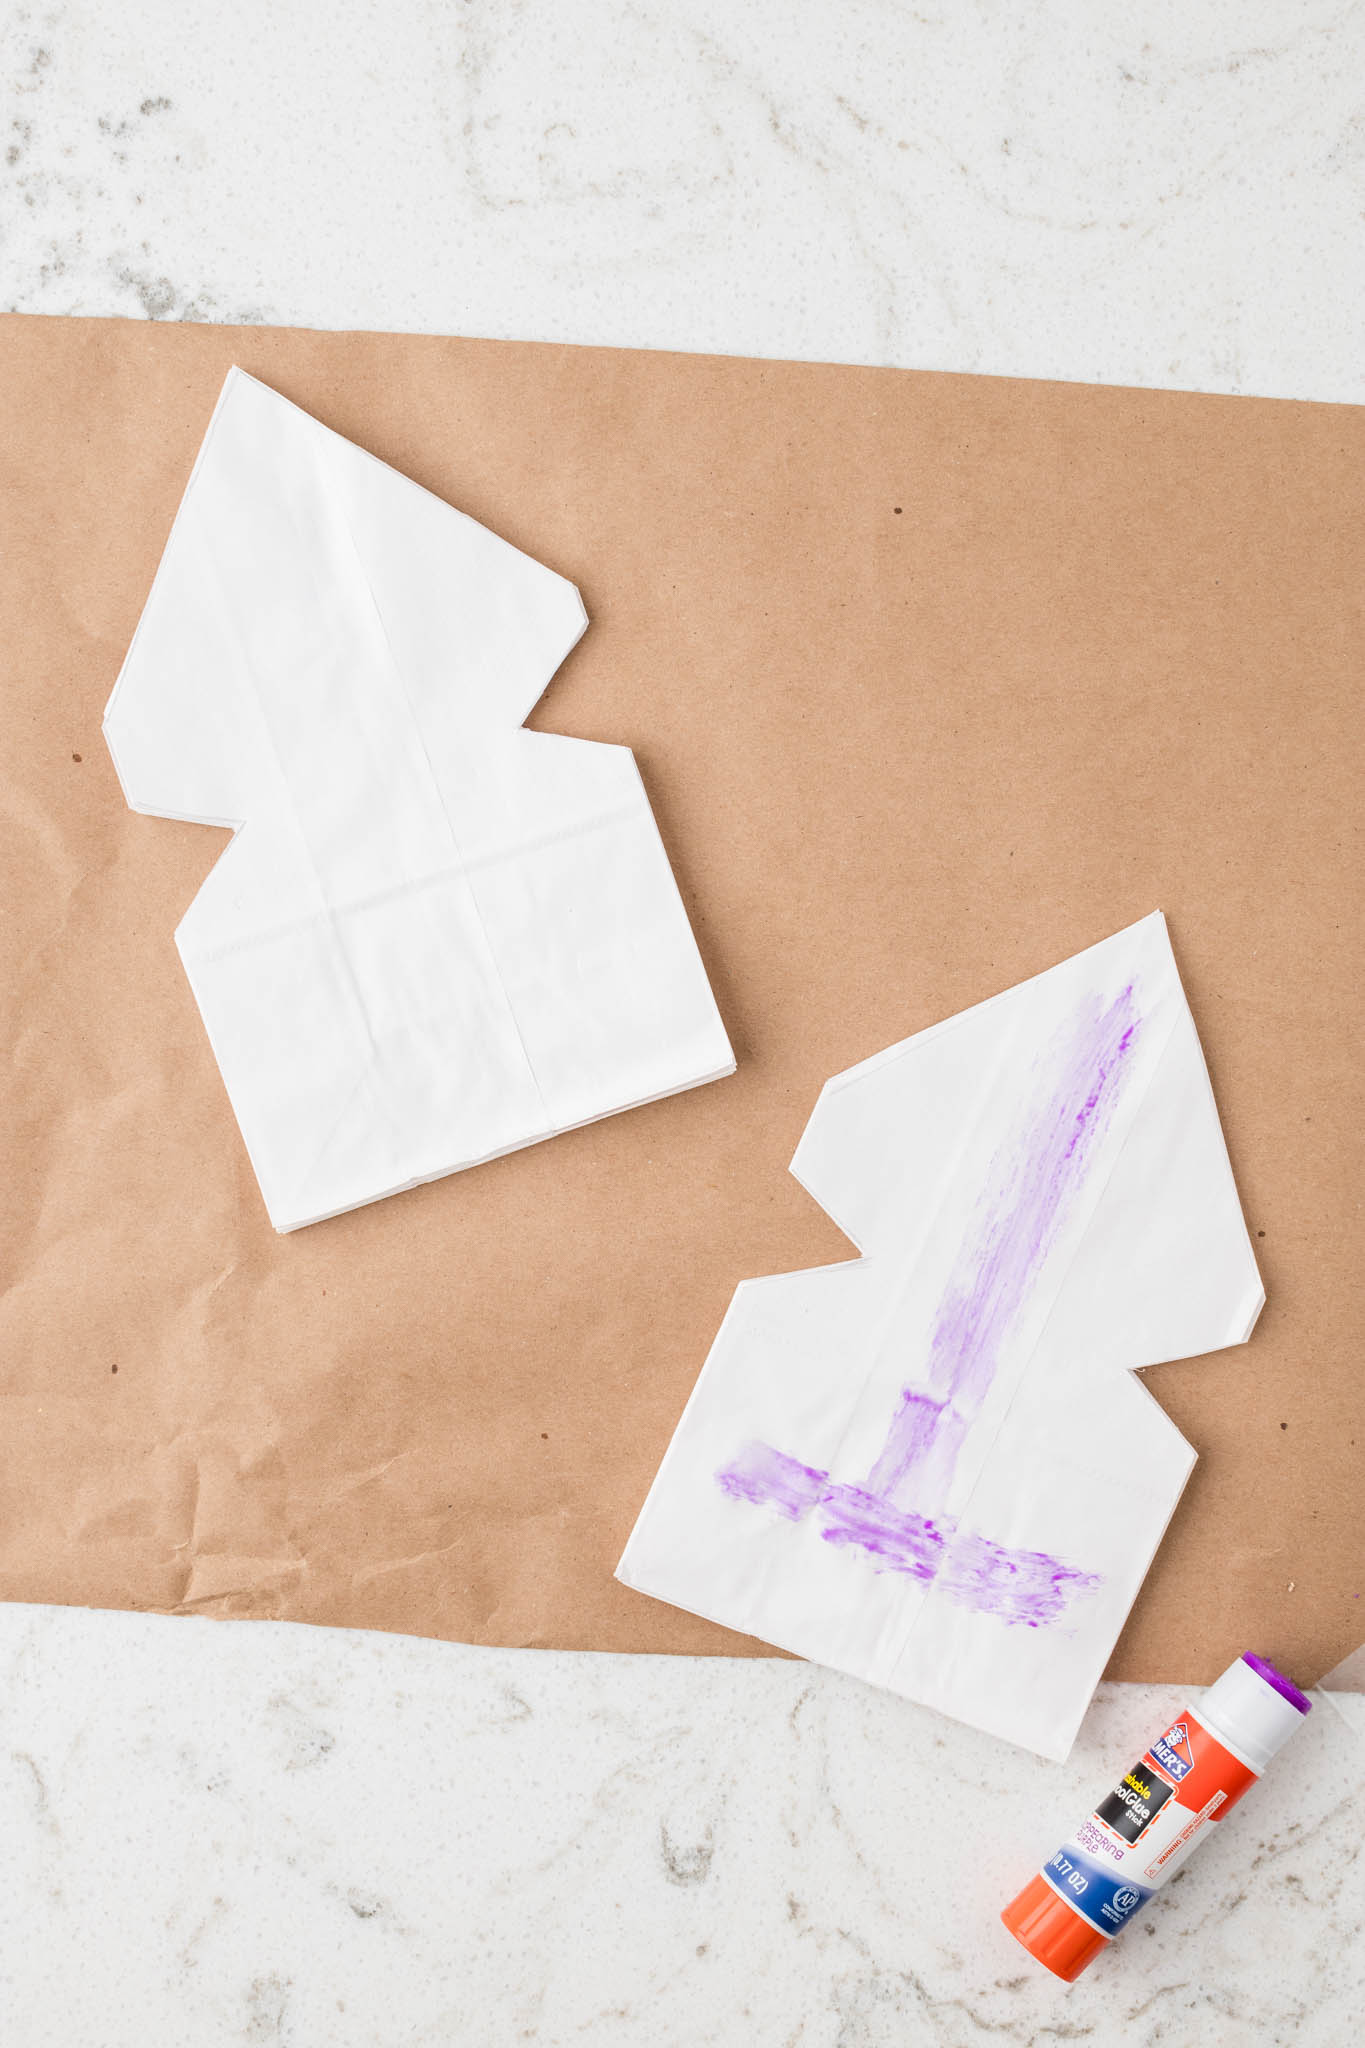
Glue the cut snowflake pattern to the stack of 3 previously glued bags. Carefully cut the stack of bags into the same snowflake pattern using the top bag as the guide and set aside.
Repeat steps 2, 4, and 5 to make another set of bags. Next, take both sets of bags, apply glue, and align them neatly so they are in a stack. Allow them to dry for a few minutes to ensure they are secure.
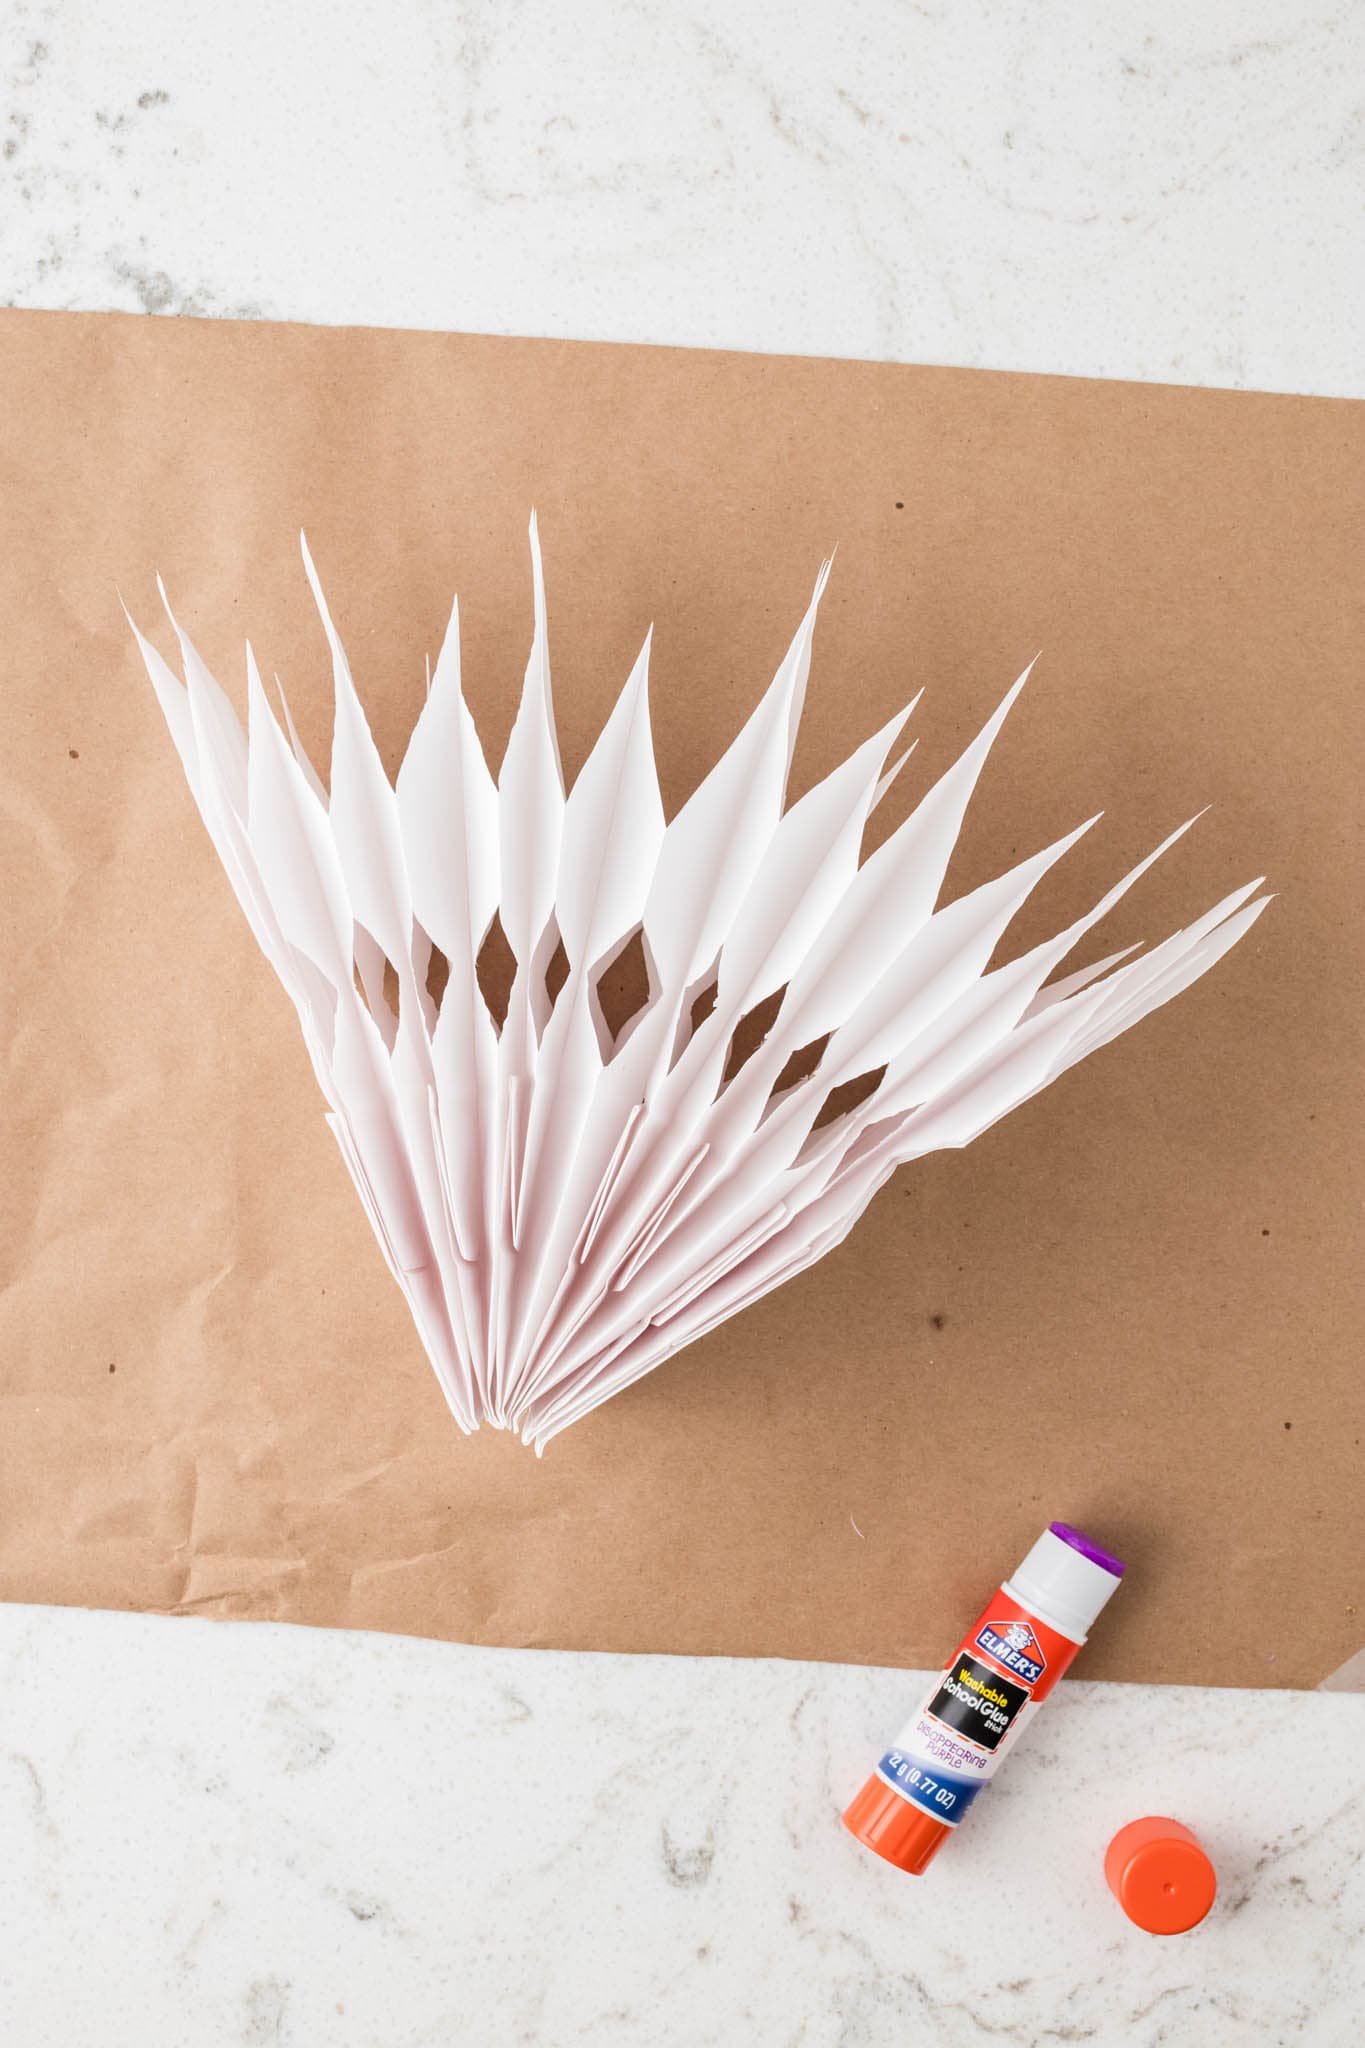
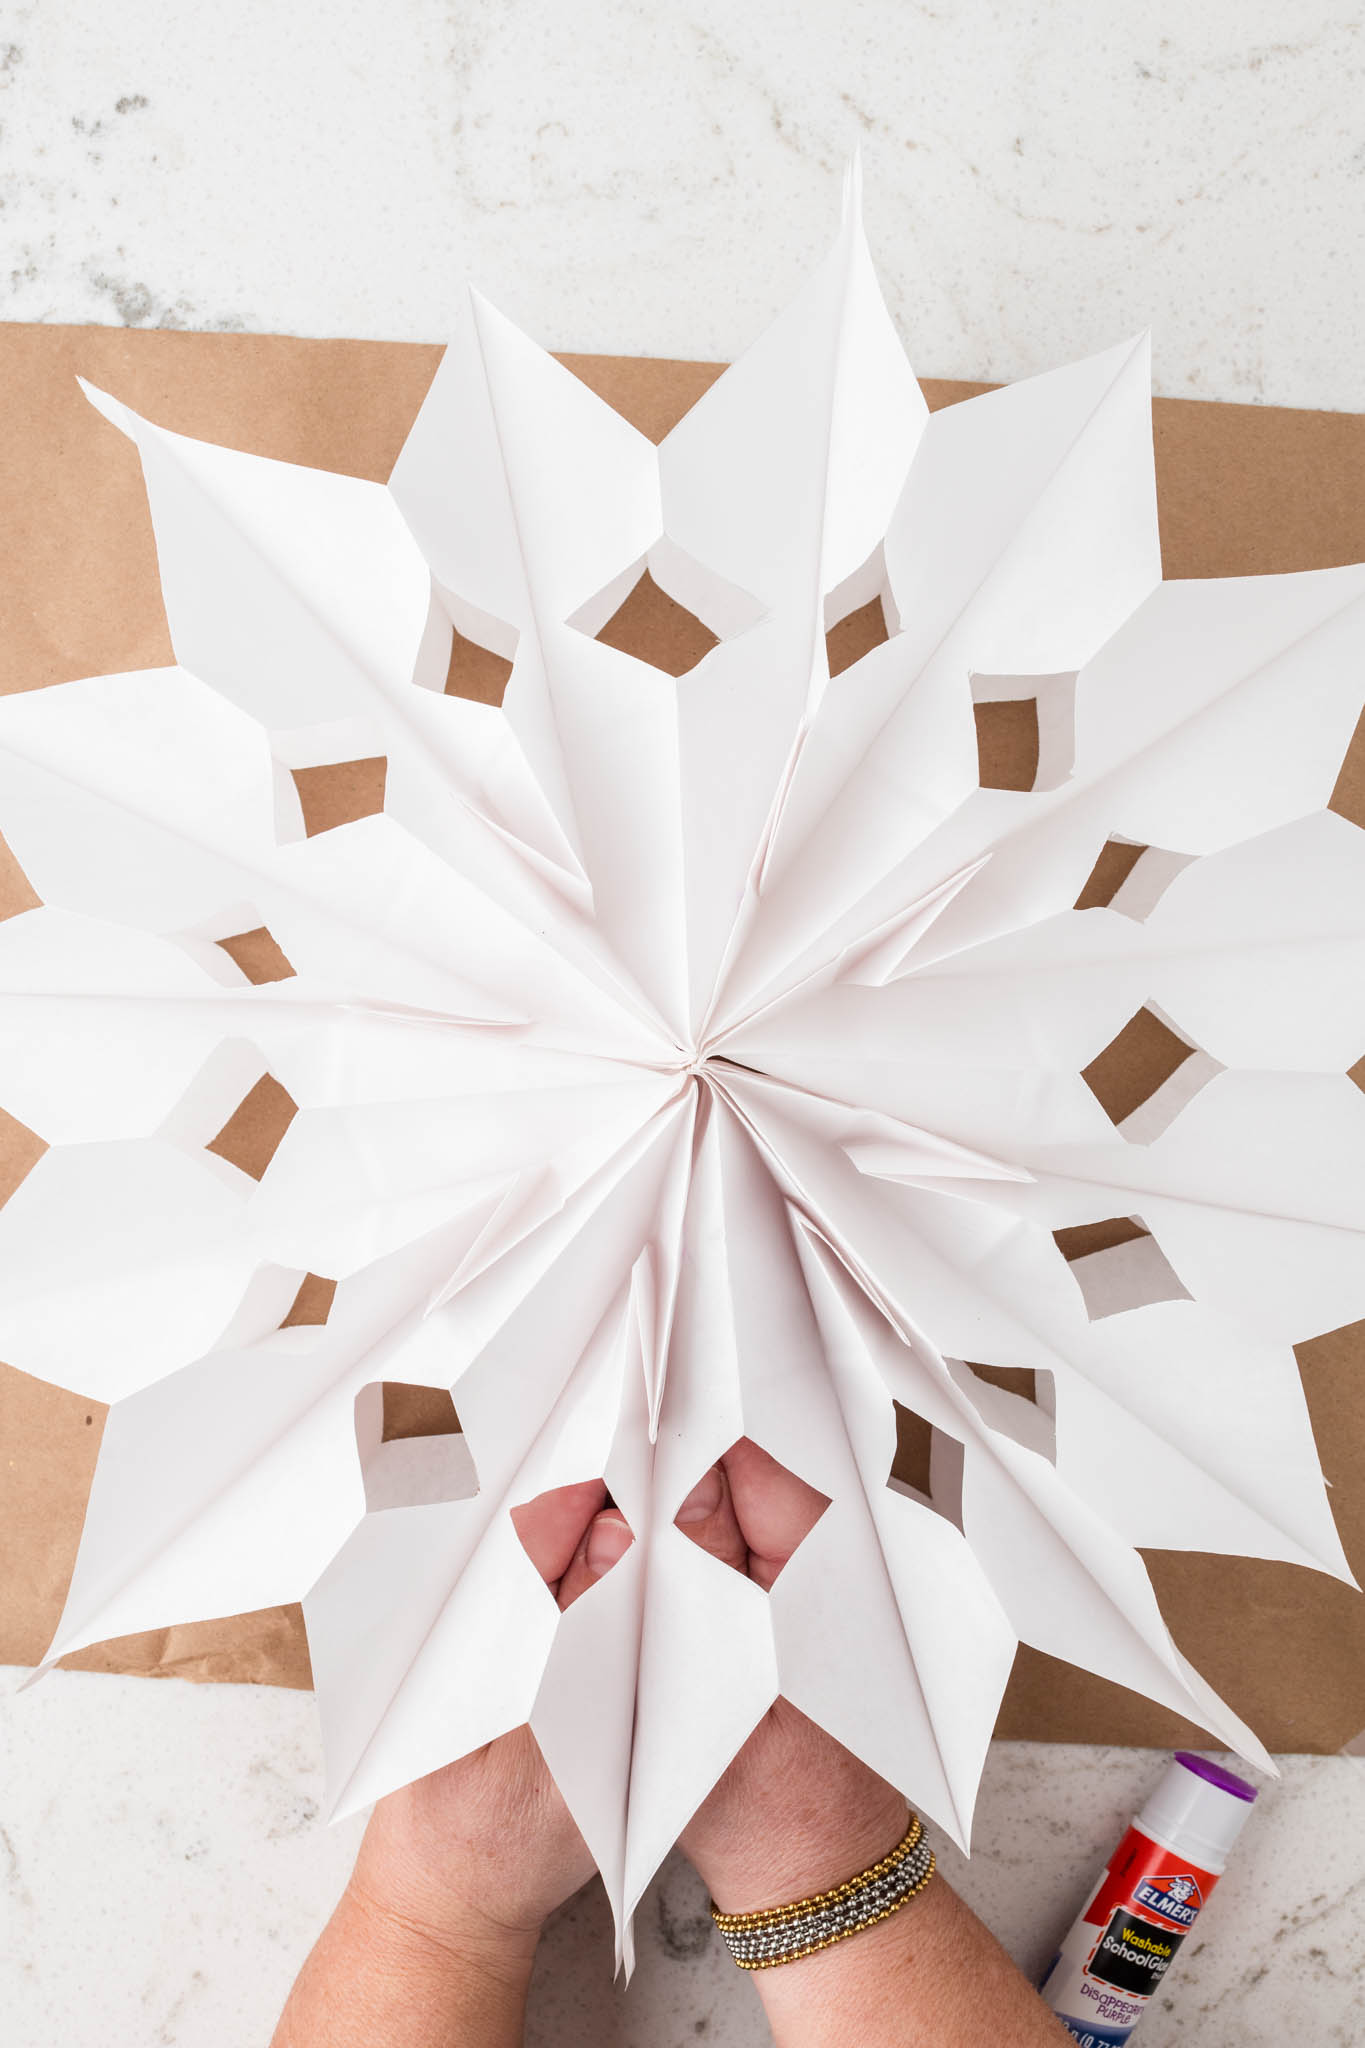
Add glue to one side of the stack of bags. Fan the stack of bags out. Gently place your hands inside each outer bag, carefully pressing them together to secure and create the snowflake. Allow the glue to dry for at least 10 minutes.
Punch a hole near the top, thread the string through, and tie a loop for hanging. Hang wherever you want to enjoy them!
What is the best glue for paper snowflakes?
A simple school glue stick is all you need to glue the paper bags together. I don’t recommend liquid glue because it will take a long time to dry. A hot glue gun tends to get a bit messy. So a regular ol’ glue stick will do the trick!
How many bags do you need for paper bag snowflakes?
For one paper bag snowflake, you will need 8 paper lunch bags. So plan accordingly if you plan to make multiples!
Pro Tips for the Best Paper Bag Snowflakes
- Feel free to add some glue to the snowflakes and sprinkle glitter over it! Spray adhesive would be a great way to cover the whole surface area and then get the glitter to stick when you sprinkle it on.
- Punch holes in the sides of your snowflakes and string them onto twine or string and make a snowflake garland.
- Use different colors of lunch bags to create an explosion of snowflake colors! As long as they’re paper bags, they will work for this craft.
‘Tis the season for the prettiest and most festive activities! Grab those supplies and happy crafting!
More Christmas Crafts You’ll Love!
- This super cute Ugly Sweater Craft is a fun Christmas creation that you won’t soon forget.
- Make a Christmas Tree Suncatcher when you need an easy activity to occupy your littles!
- We love to make homemade ornaments, and these Christmas Stocking Ornaments are super cute!
- Little hands can make the sweetest craft with this Handprint Christmas Tree Craft.
Paper Bag Snowflakes
Ingredients
- 8 lunch bags white or brown
- Glue stick
- Pencil
- Ruler
- Scissors
- Single-hole punch optional, for hanging
- String or twine optional, for hanging
Instructions
- Begin by covering your work surface with craft paper or a tablecloth to protect it.
- Place a paper lunch bag on your work surface (folded side down). Apply the glue in the shape of an upside-down T. Place another lunch bag on top of the first bag, aligning the edges. Repeat this step until you have 3 bags glued together.
- Draw your snowflake pattern on the face of another bag with the pencil and ruler. Carefully cut out your design with scissors. Use this as a template to trace the pattern onto another bag. Cut it out and set it aside.
- Glue the cut snowflake pattern to the stack of 3 previously glued bags.
- Carefully cut the stack of bags into the same snowflake pattern using the top bag as the guide. Set aside.
- Repeat steps 2, 4, and 5 to make another set of bags.
- Next, take both sets of bags, apply glue, and align them neatly so they are in a stack. Allow them to dry for a few minutes to ensure they are secure.
- Add glue to one side of the stack of bags. Fan the stack of bags out. Gently place your hands inside each outer bag, carefully pressing them together to secure and create the snowflake. Allow the glue to dry for at least 10 minutes.
- Punch a hole near the top, thread the string through, and tie a loop for hanging.