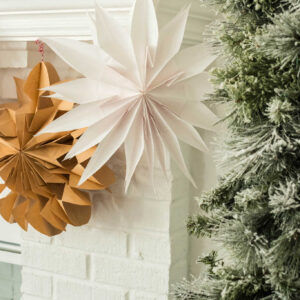
Paper Bag Snowflakes
Make stunning, one-of-a-kind snowflakes with just a few simple materials and steps! Our easy guide shows you how to create paper bag snowflakes, perfect for festive decorations or fun winter crafts.
Print
Pin
Ingredients
- 8 lunch bags white or brown
- Glue stick
- Pencil
- Ruler
- Scissors
- Single-hole punch optional, for hanging
- String or twine optional, for hanging
Instructions
- Begin by covering your work surface with craft paper or a tablecloth to protect it.
- Place a paper lunch bag on your work surface (folded side down). Apply the glue in the shape of an upside-down T. Place another lunch bag on top of the first bag, aligning the edges. Repeat this step until you have 3 bags glued together.
- Draw your snowflake pattern on the face of another bag with the pencil and ruler. Carefully cut out your design with scissors. Use this as a template to trace the pattern onto another bag. Cut it out and set it aside.
- Glue the cut snowflake pattern to the stack of 3 previously glued bags.
- Carefully cut the stack of bags into the same snowflake pattern using the top bag as the guide. Set aside.
- Repeat steps 2, 4, and 5 to make another set of bags.
- Next, take both sets of bags, apply glue, and align them neatly so they are in a stack. Allow them to dry for a few minutes to ensure they are secure.
- Add glue to one side of the stack of bags. Fan the stack of bags out. Gently place your hands inside each outer bag, carefully pressing them together to secure and create the snowflake. Allow the glue to dry for at least 10 minutes.
- Punch a hole near the top, thread the string through, and tie a loop for hanging.
Tried this recipe?Please leave a comment below or pin it to your Pinterest account!