Origami Bookmarks
Looking for a fun and creative activity for kids? Learn how to make colorful and unique origami bookmarks that will keep them entertained for hours!
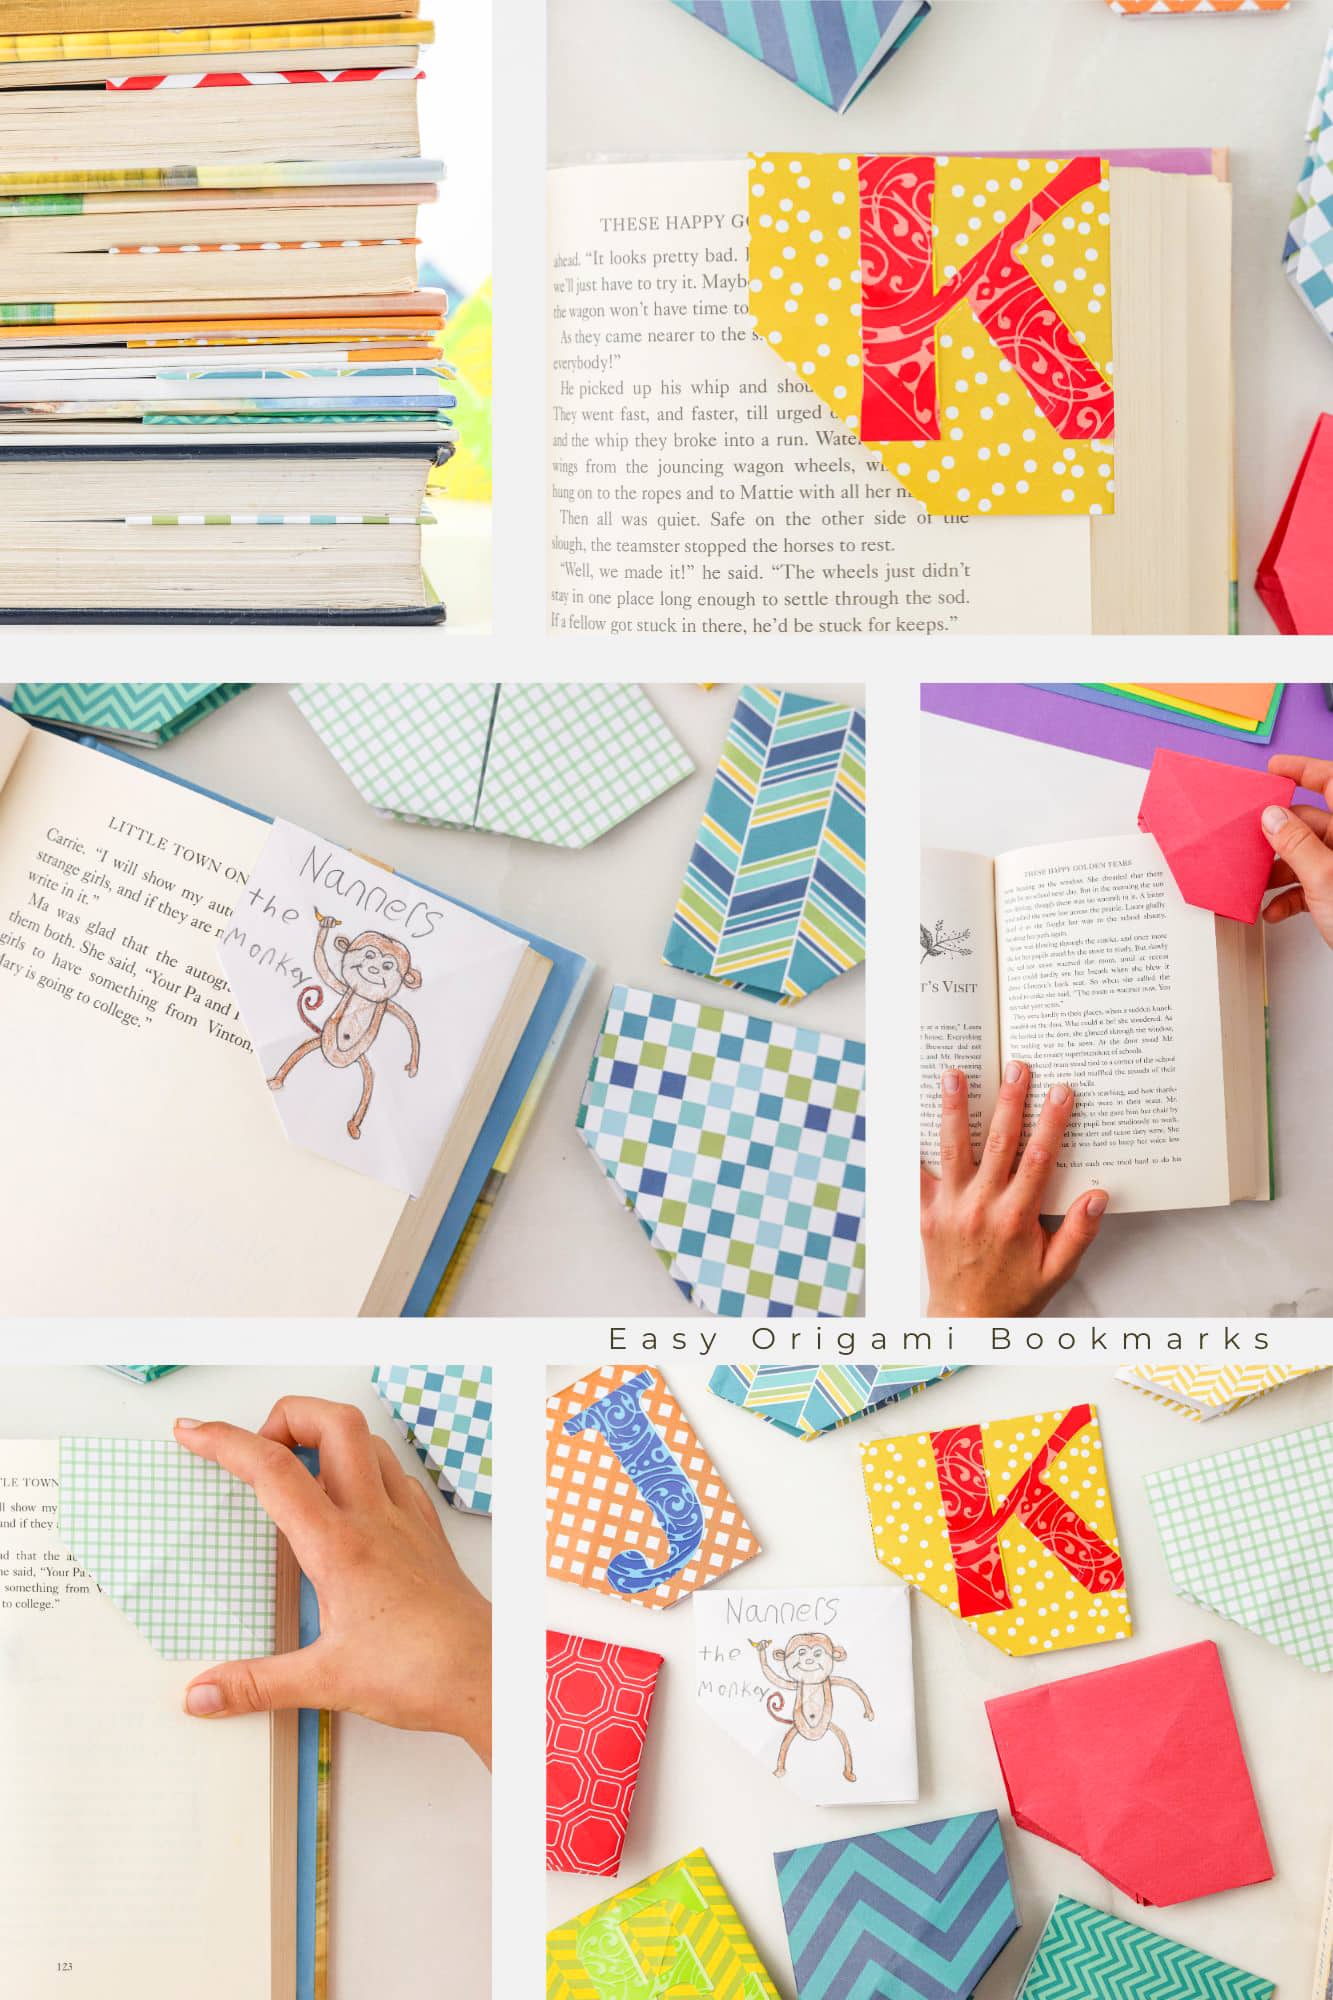
Stop dog-earing those pages and make these super cool origami bookmarks instead! I hate getting books from the library and seeing those old creases and folds in the corner of a book page. I mean, really — it affects the life span of a book and how well it’ll hold up over the years! That’s why I love to create bookmarks with the kiddos. Around February, we’ll make these Valentine’s Day printable bookmarks. But I really love to keep the kids creating, so these easy origami corner bookmarks are a really fun project for them!
If your kids are bookworms, then they’re really going to love this easy activity. Not only that, it’s a really fun craft for them to teach to their friends too. No one at the lunch table is cooler than the kid who knows how to do origami and has lunch box jokes every day. So let’s get started on this DIY bookmark and see what you can create!
Why You’ll Love these Origami Bookmarks
- Simple origami projects have many different educational benefits. It’s a wonderful visual representation of geometry, a fabulous activity for hand-eye coordination, and has also been shown to reduce anxiety and stress.
- This craft is very affordable! You can even skip pens and stickers to make it even cheaper. Not all crafts need to be super expensive.
- Making fun bookmarks is a great way to inspire a love of reading. When your kiddos have a cool bookmark, they’ll want a book to read so that they can use it!
Supplies for Origami Bookmarks
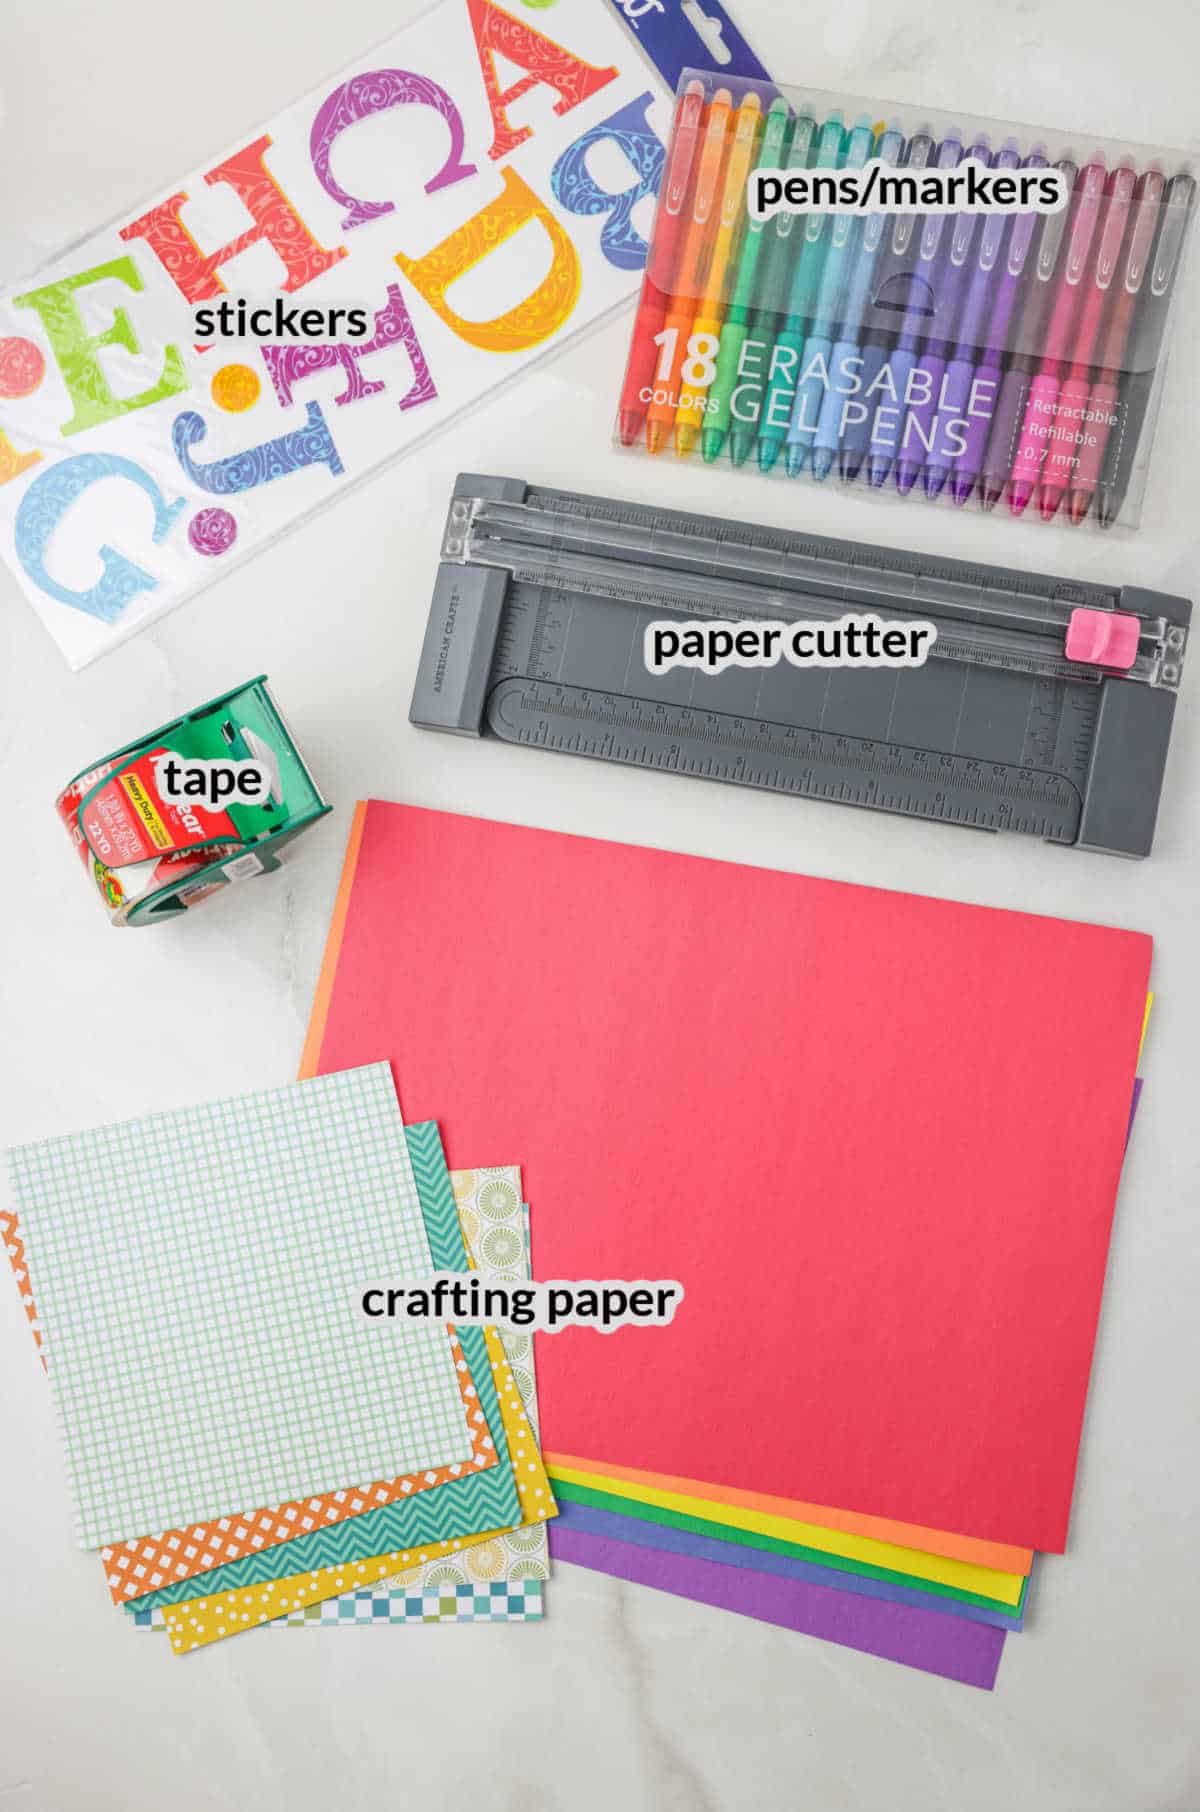
- Crafting paper – Construction paper, scrapbook paper and even simply plain computer paper will all work. You just need something that is relatively easy to fold.
- Tape – You’ll need some tape to secure a few things in this bookmark. So make sure you’ve got some on hand!
- Paper cutter – A paper cutter is the easiest way to ensure even cuts, but you can also use scissors if you cut slowly and evenly.
- Pens or markers – Use some pretty pens or colorful markers to decorate each origami bookmark however you want. This is where you can get super creative!
- Stickers – Add extra fun into the mix and use some stickers as decoration on each origami bookmark.
How to Make Origami Bookmarks
Does making origami seem too daunting? With these origami bookmark step by step photo instructions, you’ll be able to easily follow along! So let’s get started:
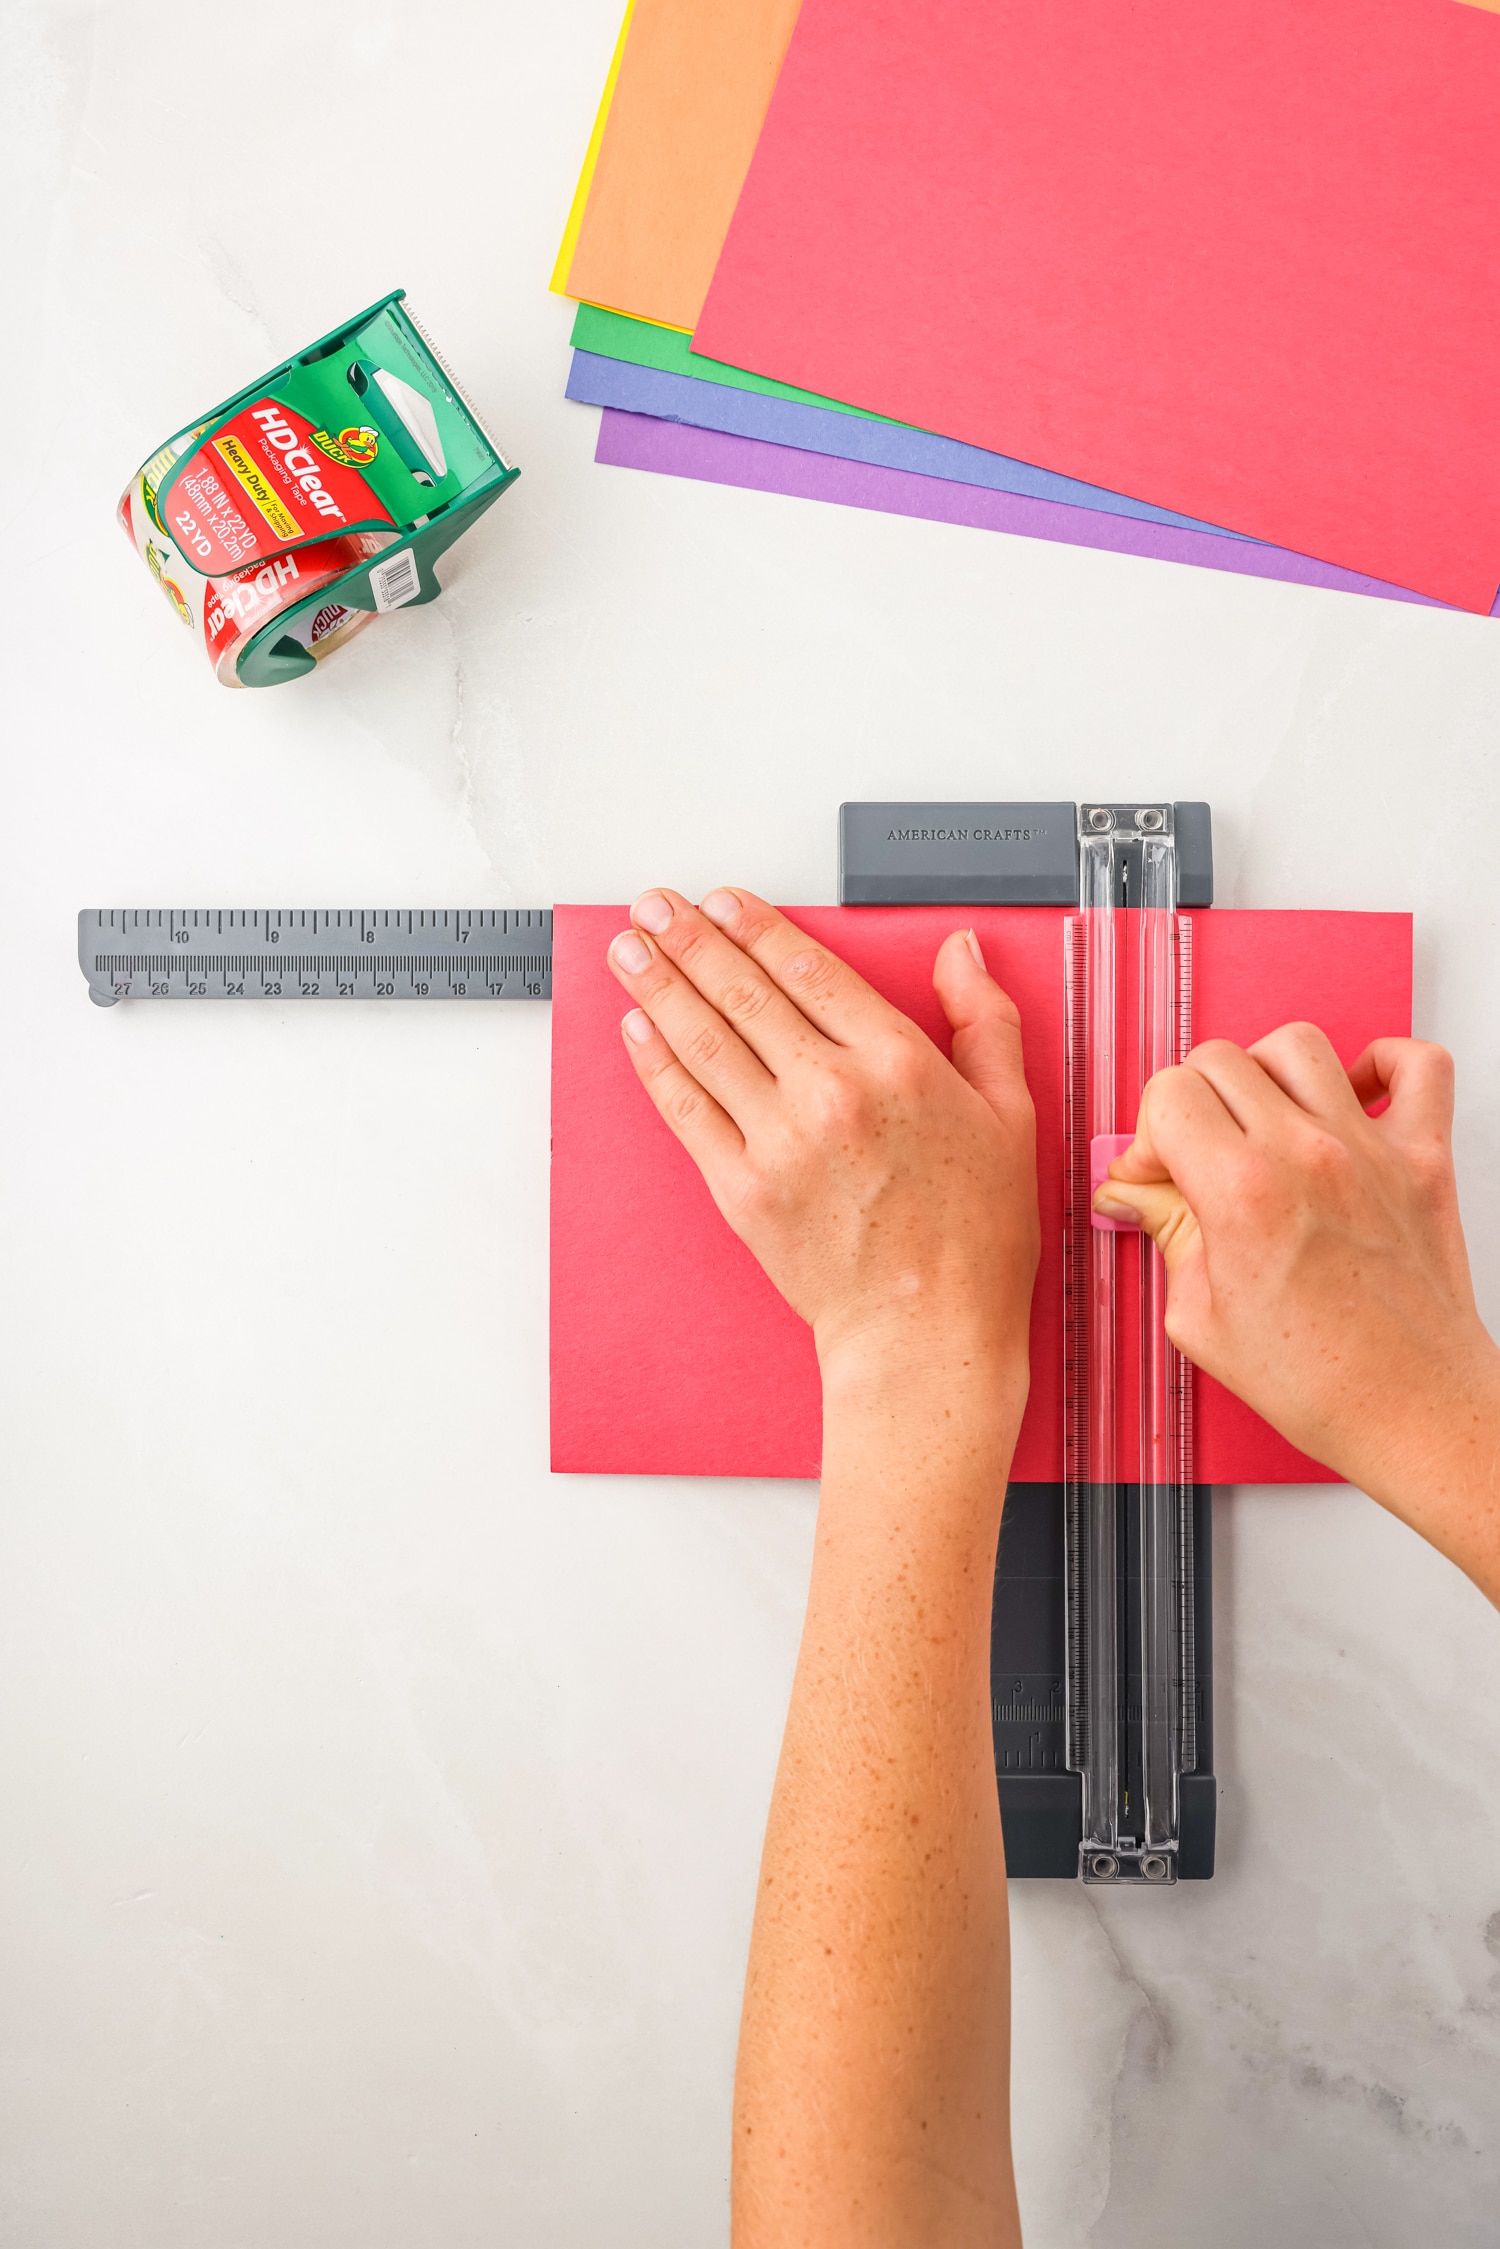
Grab a square piece of paper, or cut your paper into a square. For this tutorial, we used a 6 inch by 6 inch perfect square of construction paper.
Fold the square in half to create a triangle, then unfold it. Next, fold each of the two corners up to the crease that you just made to meet in the middle, then unfold that one too.
Fold each of the the bottom corner and top point again to meet up with the newest, closest crease and leave those corners folded. Then fold the paper in half on the crease in the middle. You will have a triangular shape without the top of the triangle.
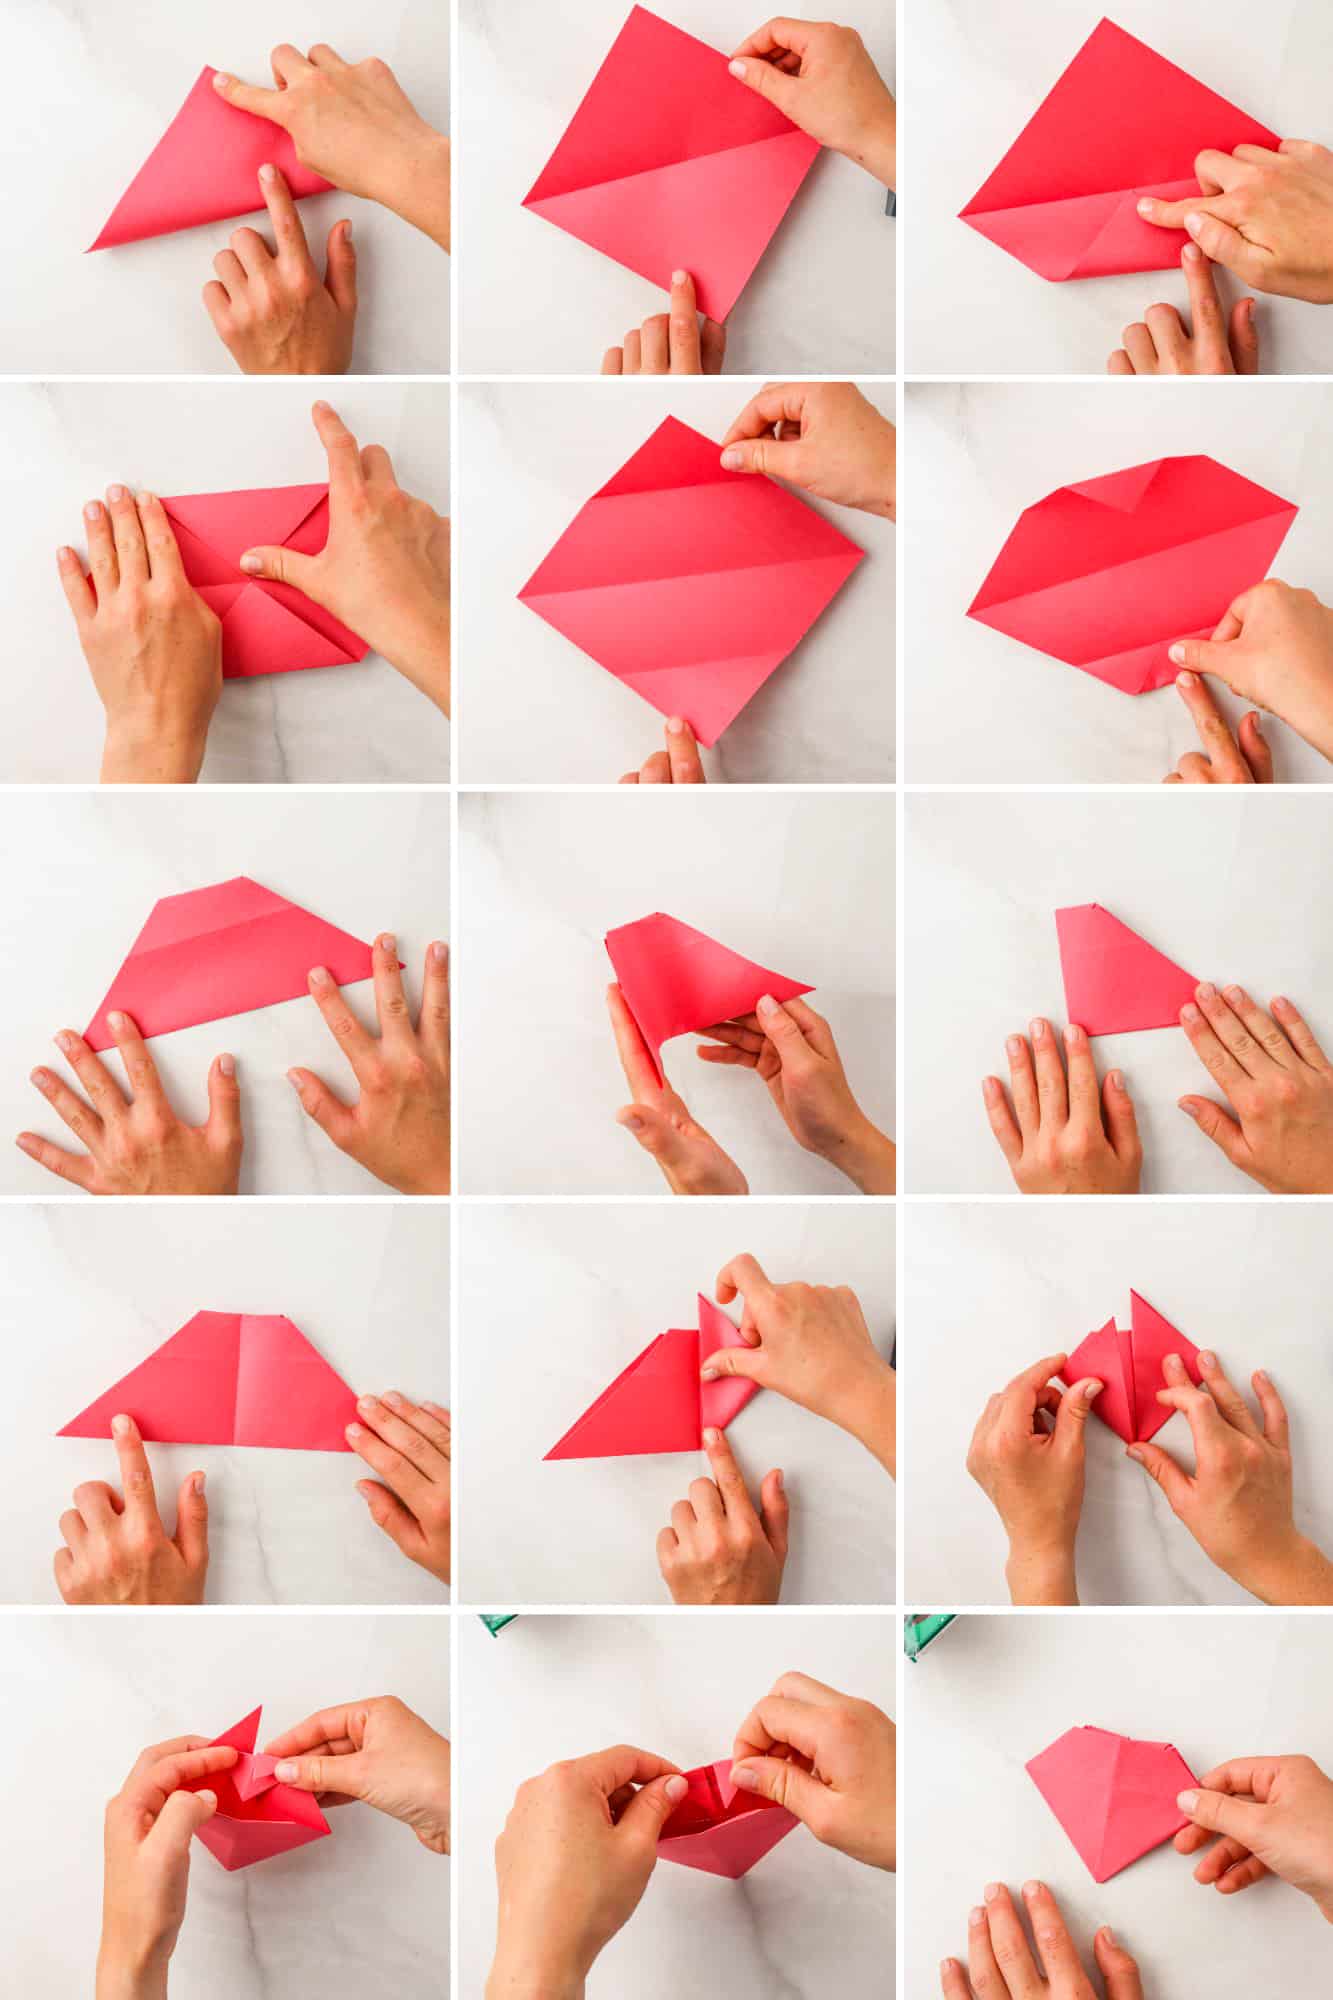
Next, fold the paper in half, matching the left corner to the right corner, then unfold.
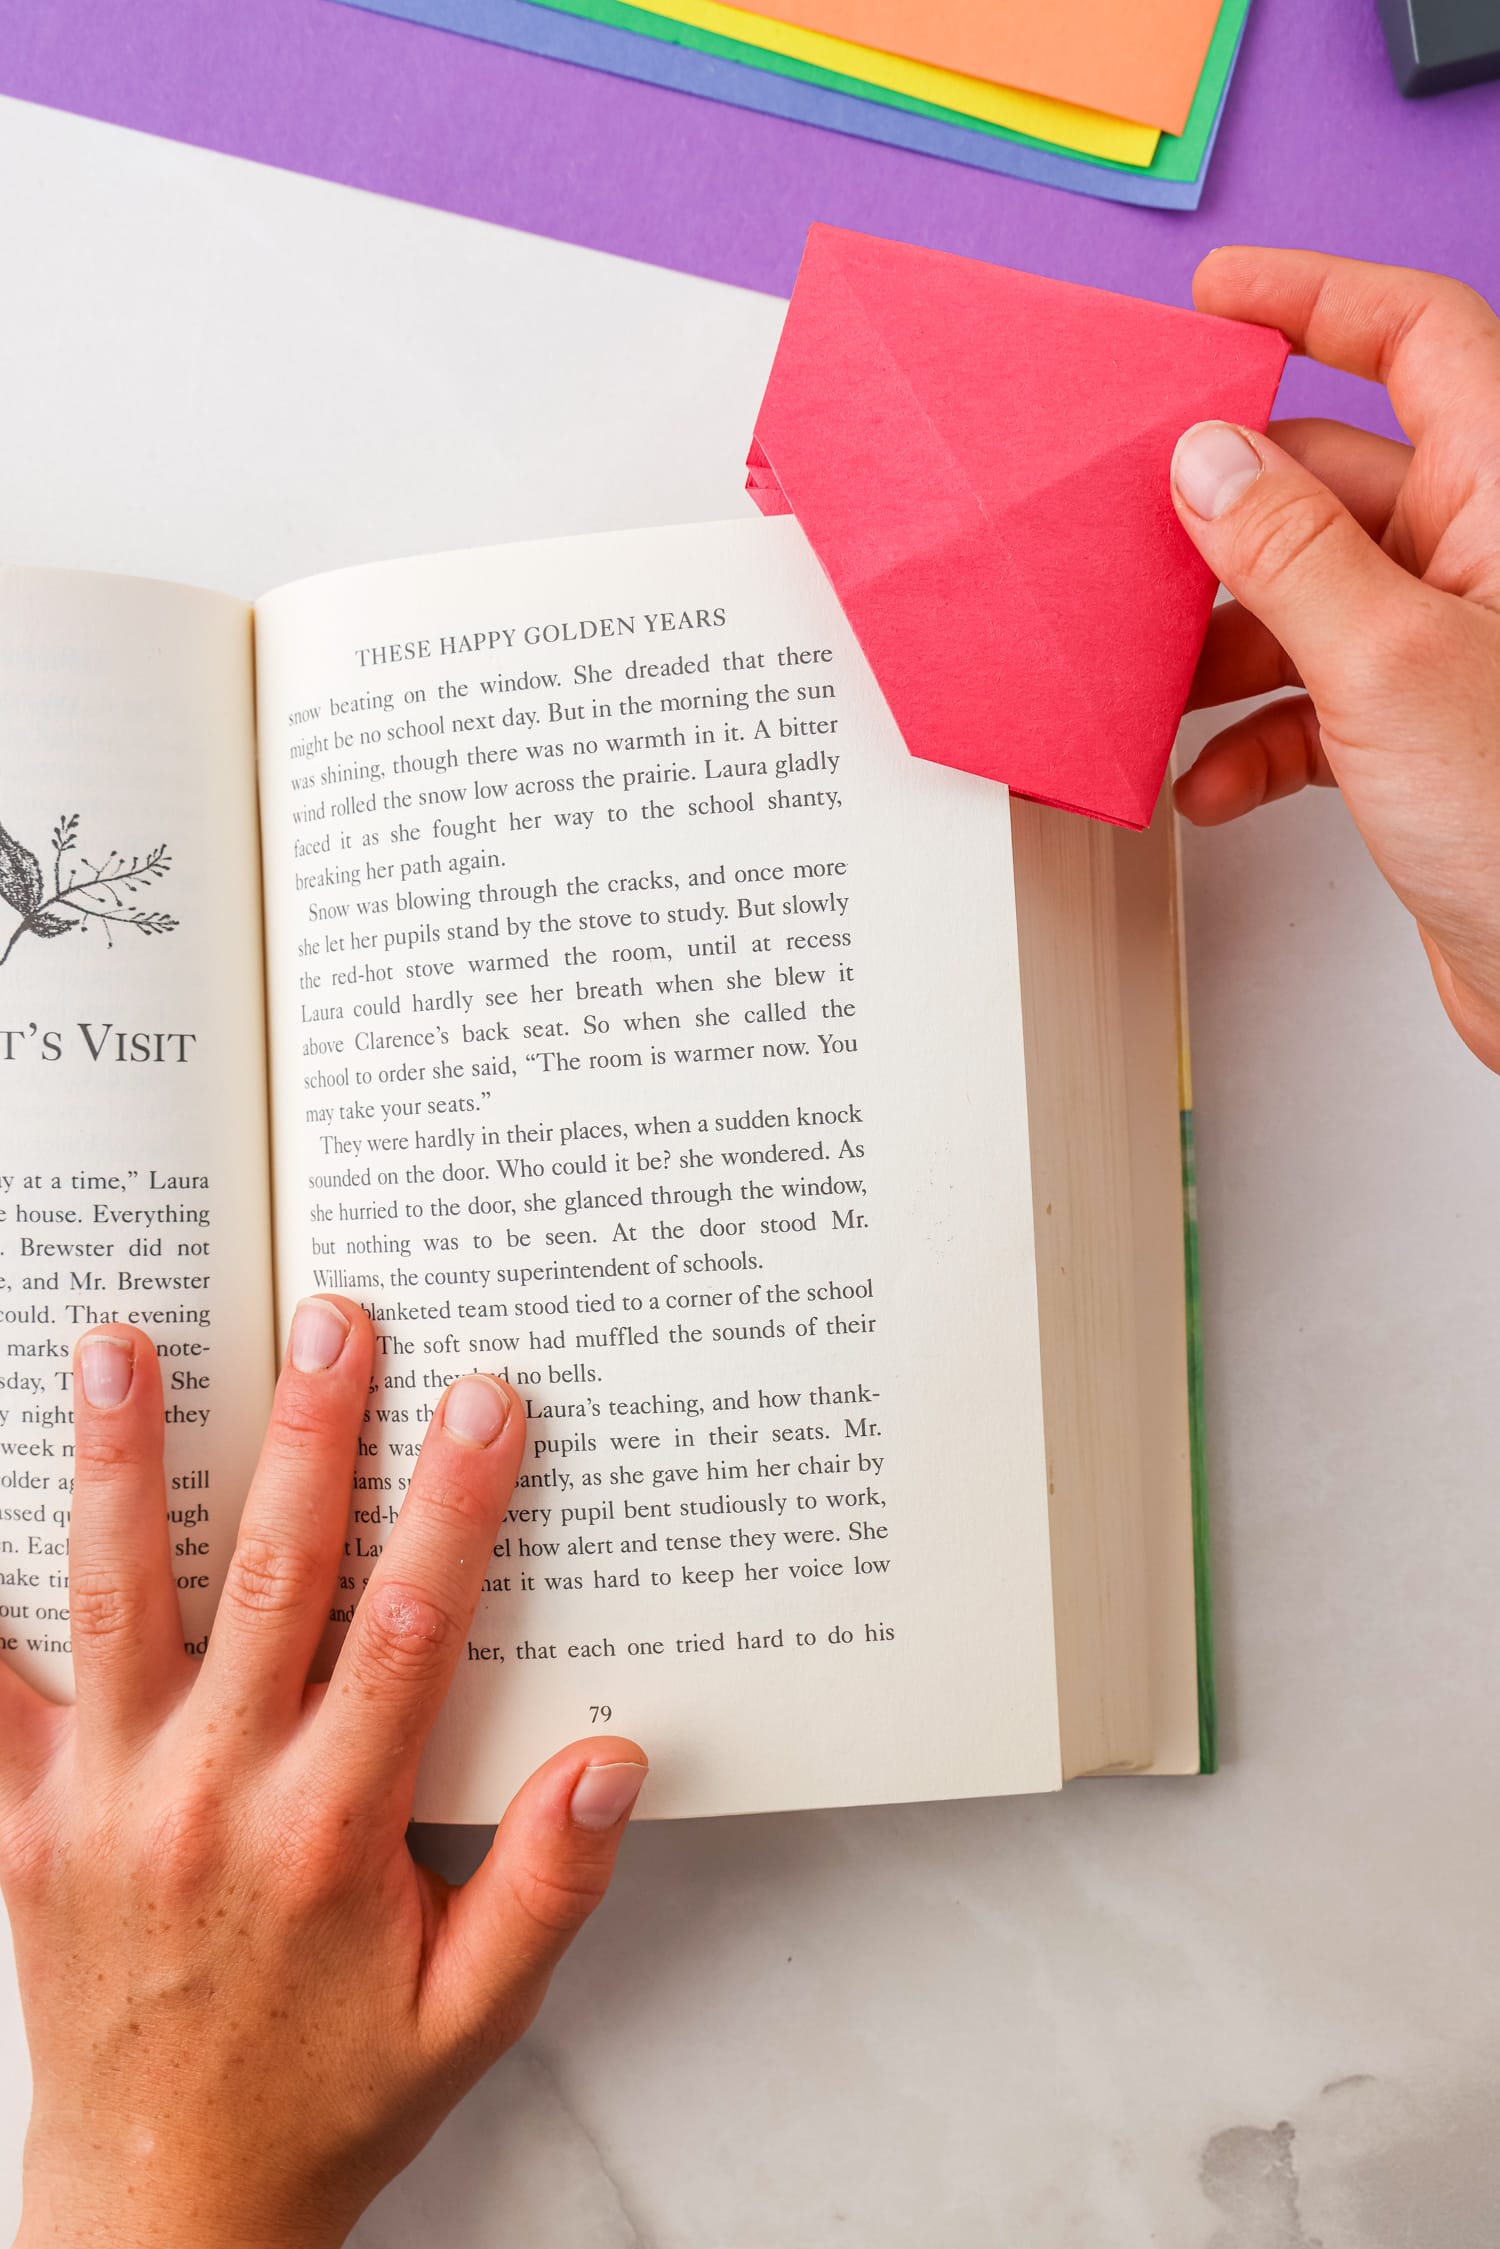
Take each side to meet with the new middle crease. The edges will run parallel to each other, and you will have two mini triangles at the top. This step will form the “pocket” in which you will insert your page.
Open up the middle and then fold the mini triangles down to the inside. Secure this step with with tape.
You’re book mark is done! Now it’s time to decorate and use in a chapter book, textbook, or any other fun reading material.
What paper is best for origami bookmarks?
Origami paper, construction paper and scrapbook paper will all make great origami bookmarks. For convenience, you can purchase paper that is already cut into a square! Then you won’t have to cut off the excess of a paper and carefully ensure that it is a perfect square.
How to make cute origami bookmarks
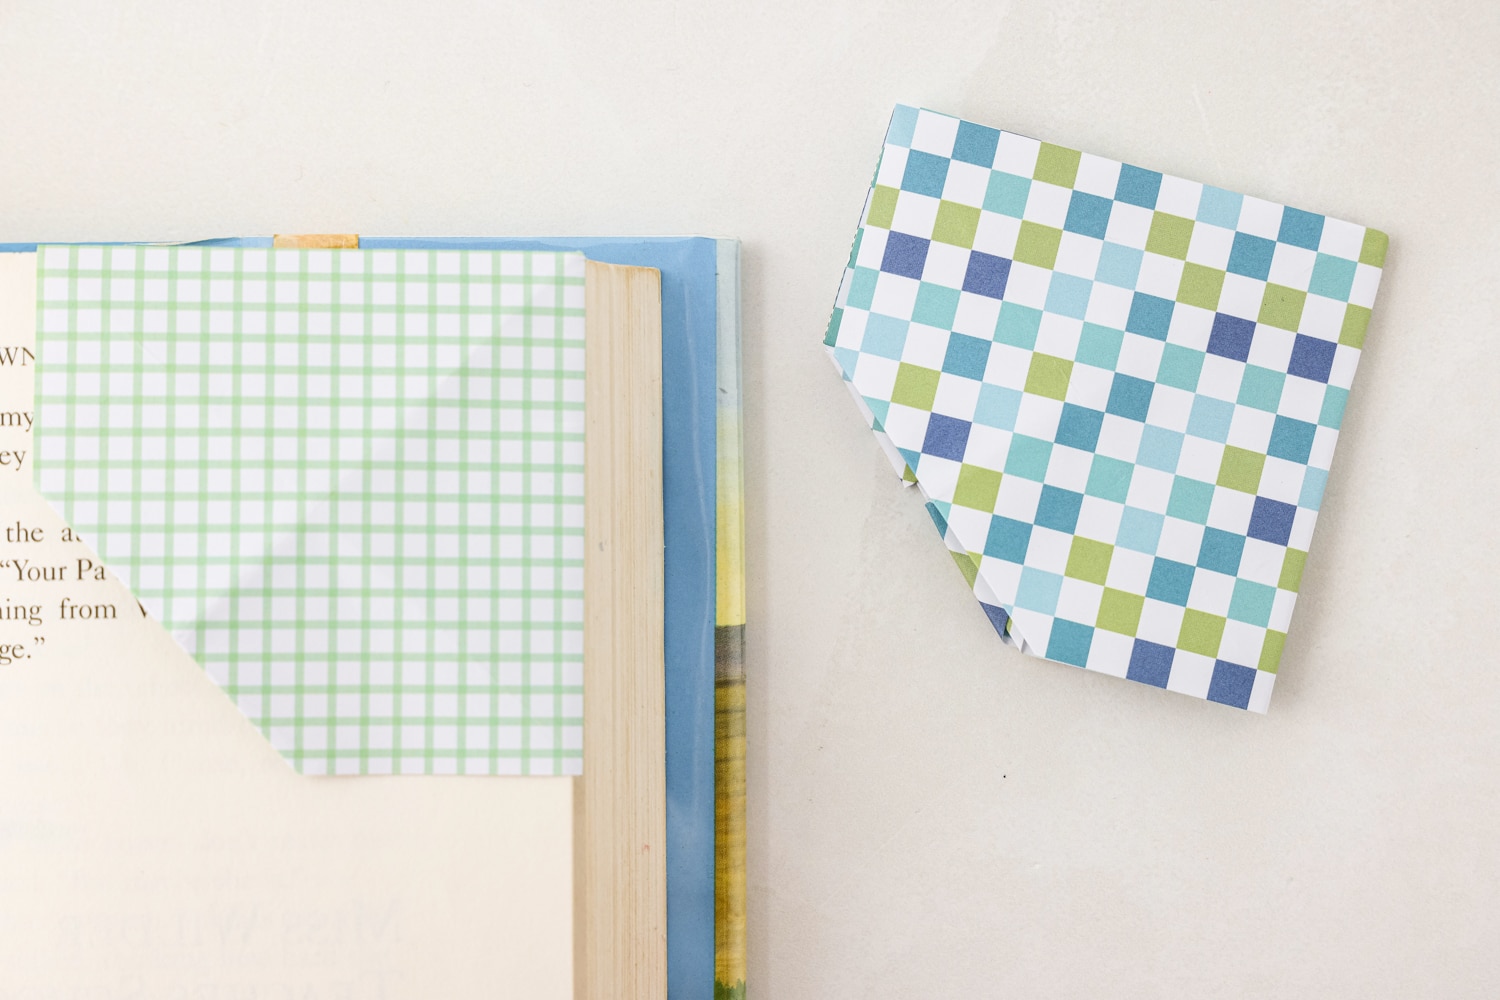
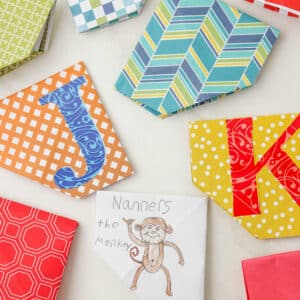
To make the CUTEST corner bookmark designs, use printed paper and then add extra decorations onto it. You can use a glue stick to attach crafting materials, or simply draw on each side of the bookmark with pens, markers, and crayons. You can also decorate with stickers!
It’s all up to you to determine how best to decorate each fun bookmark!
Pro Tips for the MOST Fun!
- If you find that your bookmark needs to be a little thinner, place a heavy book on top of it for an hour or so. This will help flatten it out and crease it well so that it won’t be bulky in your book.
- Decorate both sides of the origami paper bookmark so that you can put it on both the right and left top corners of your books.
- To avoid frustration, be sure that younger children make these bookmarks with adult supervision. You can help them line up the folds so that they are even and keep track of what step they are on!
Every little book worm needs fun ways to keep track of what page they’re on! This one is just so much fun. Make some DIY dried flower bookmarks too.
More Fun Crafts You’ll Enjoy!
- Now that you have learned how to make an origami bookmark, you should learn How to Draw Farm Animals!
- These DIY Felt Envelopes are great gift material, imaginative play supplies, and extra exciting craft time!
- Make your own Puffy Paint for an exciting sensory craft time and science experiment all-in-one.
- With this Easy Salt Dough Recipe you can create all kinds of super unique gifts and crafts.
Origami Corner Bookmarks
Ingredients
- Crafting paper construction paper, scrapbooking paper, plain white paper
- Paper cutter or scissors
- Tape
- Optional: pens markers, crayons, stickers, etc. for decoration.
Instructions
- If you are not starting with a square piece of paper, you will want to cut your paper into a square. For this tutorial, we used a 6 inch by 6 inch square of construction paper.
- Fold the square in half to create a triangle. Unfold.
- Fold each of the two corners up to the crease that you just made to meet in the middle. Unfold.
- Fold each of the corners again to meet up with the newest, closest crease.
- Leave corners folded.
- Fold in half on the crease in the middle. You will have a triangle without the top tip.
- Fold in half using the side corners of the triangle. Match them up, corner-to-corner, to form a crease. Unfold.
- Take each side to meet with the new middle crease. The edges will run parallel to each other, and you will have two mini triangles at the top. This step will form the “pocket” in which you will insert your page.
- Open up the middle and fold the mini triangles down to the inside. Secure with tape.
- Time to decorate and use! Your easy origami bookmark is ready to hold your place in your next reading adventure!