DIY Dried Flower Bookmarks
Learn how to make your own pressed flower bookmarks with this easy and fun DIY tutorial. Personalize your bookmarks with your favorite blooms and add a unique touch to your reading experience.
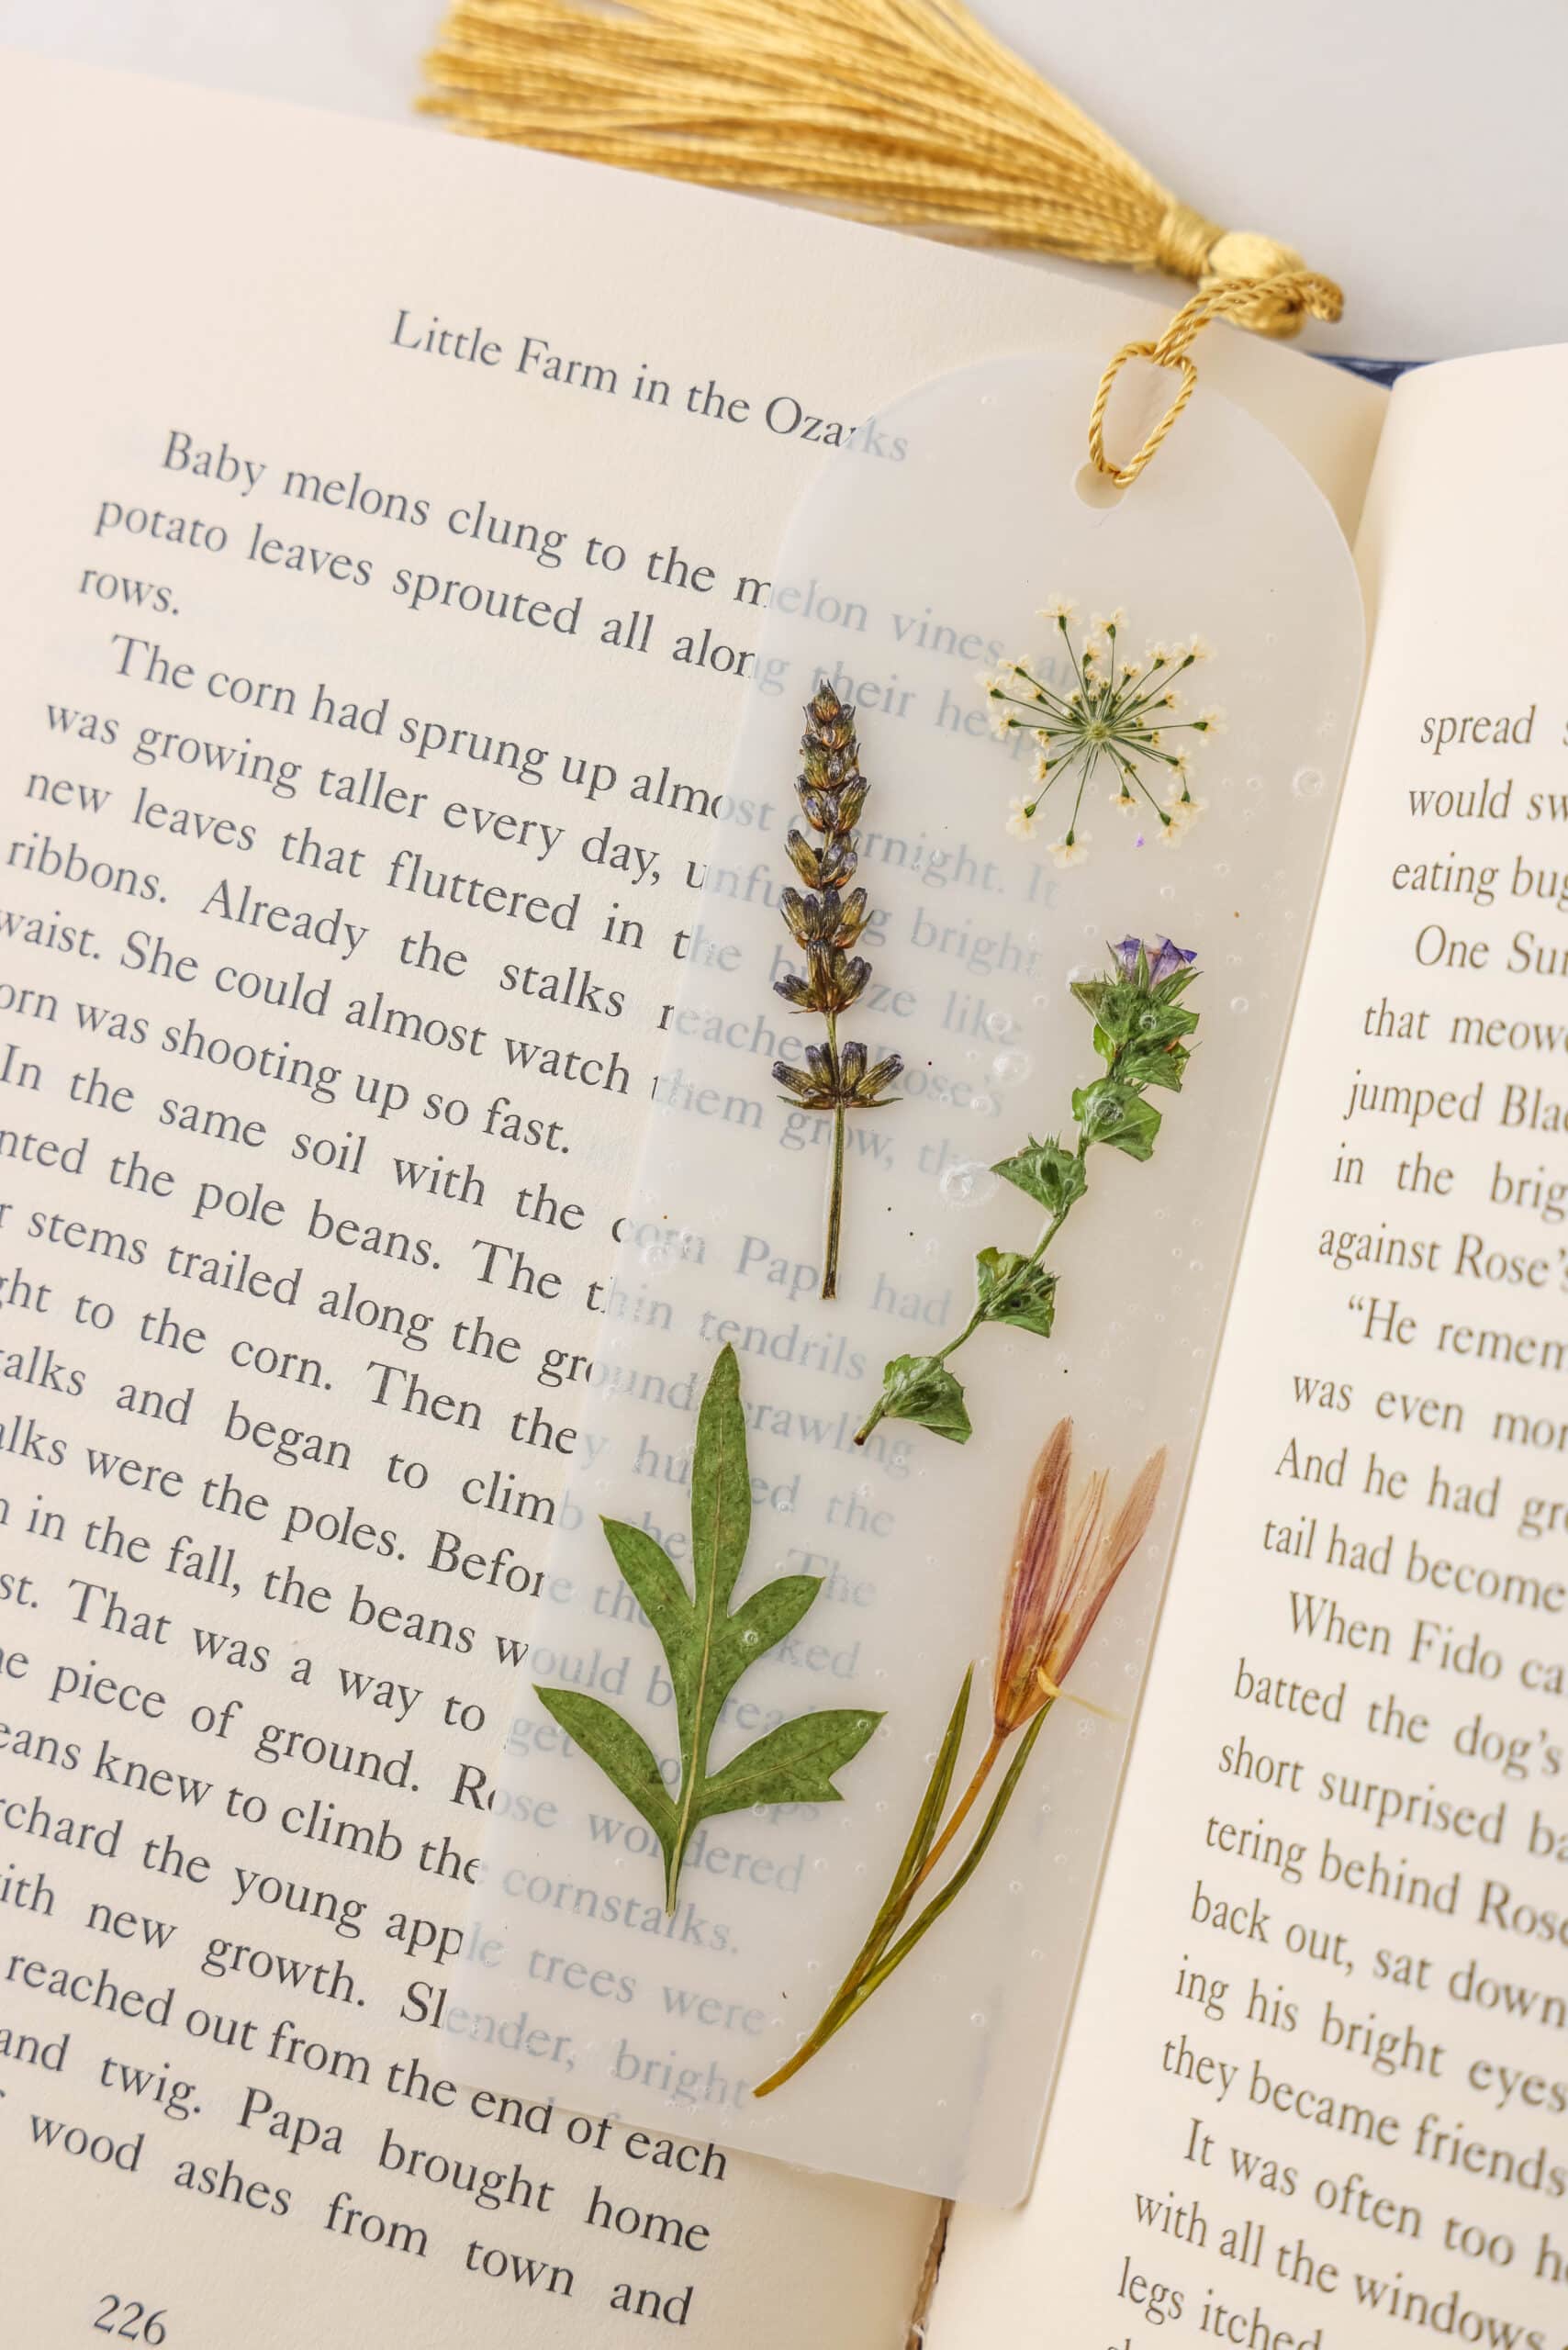
Are your little nature lovers bookworms too? Then you’ve got to make these DIY dried flower bookmarks! With a little bit of patience and a whole lot of love, you can create the prettiest way to mark your spot in your favorite book. Whether you love daisies, violets, or forget-me-nots — you can use any and all of your favorite blooms to make a colorful creation. It’s the best craft for a little bookworm and it’s something they’ll actually use too!
Around Christmas time we like to color these cute winter bookmarks. And during the month of February these Valentine’s day bookmarks are the best way to mark your spot in a cozy read. But when springtime comes, its best to make bright and cheerful crafts like these DIY Dried Flower Bookmarks. Grab some fresh blooms, or ones that are already dried, and let’s get started.
Why You’ll Love these DIY Dried Flower Bookmarks
- This easy is a great way to preserve pretty flowers! Pick some unique blooms on a vacation, in your favorite spot, or simply in your backyard and then preserve the memories for years to come with a cute bookmark.
- Pressed flower bookmarks are a great homemade gift. Create these acrylic bookmarks to give as gifts for mother’s day, birthdays, bookclub gatherings, and simply just to make someone smile!
- Let your creativity shine with this open ended craft. You can use any combination of flowers, place them any way you want, and truly make each bookmark unique!
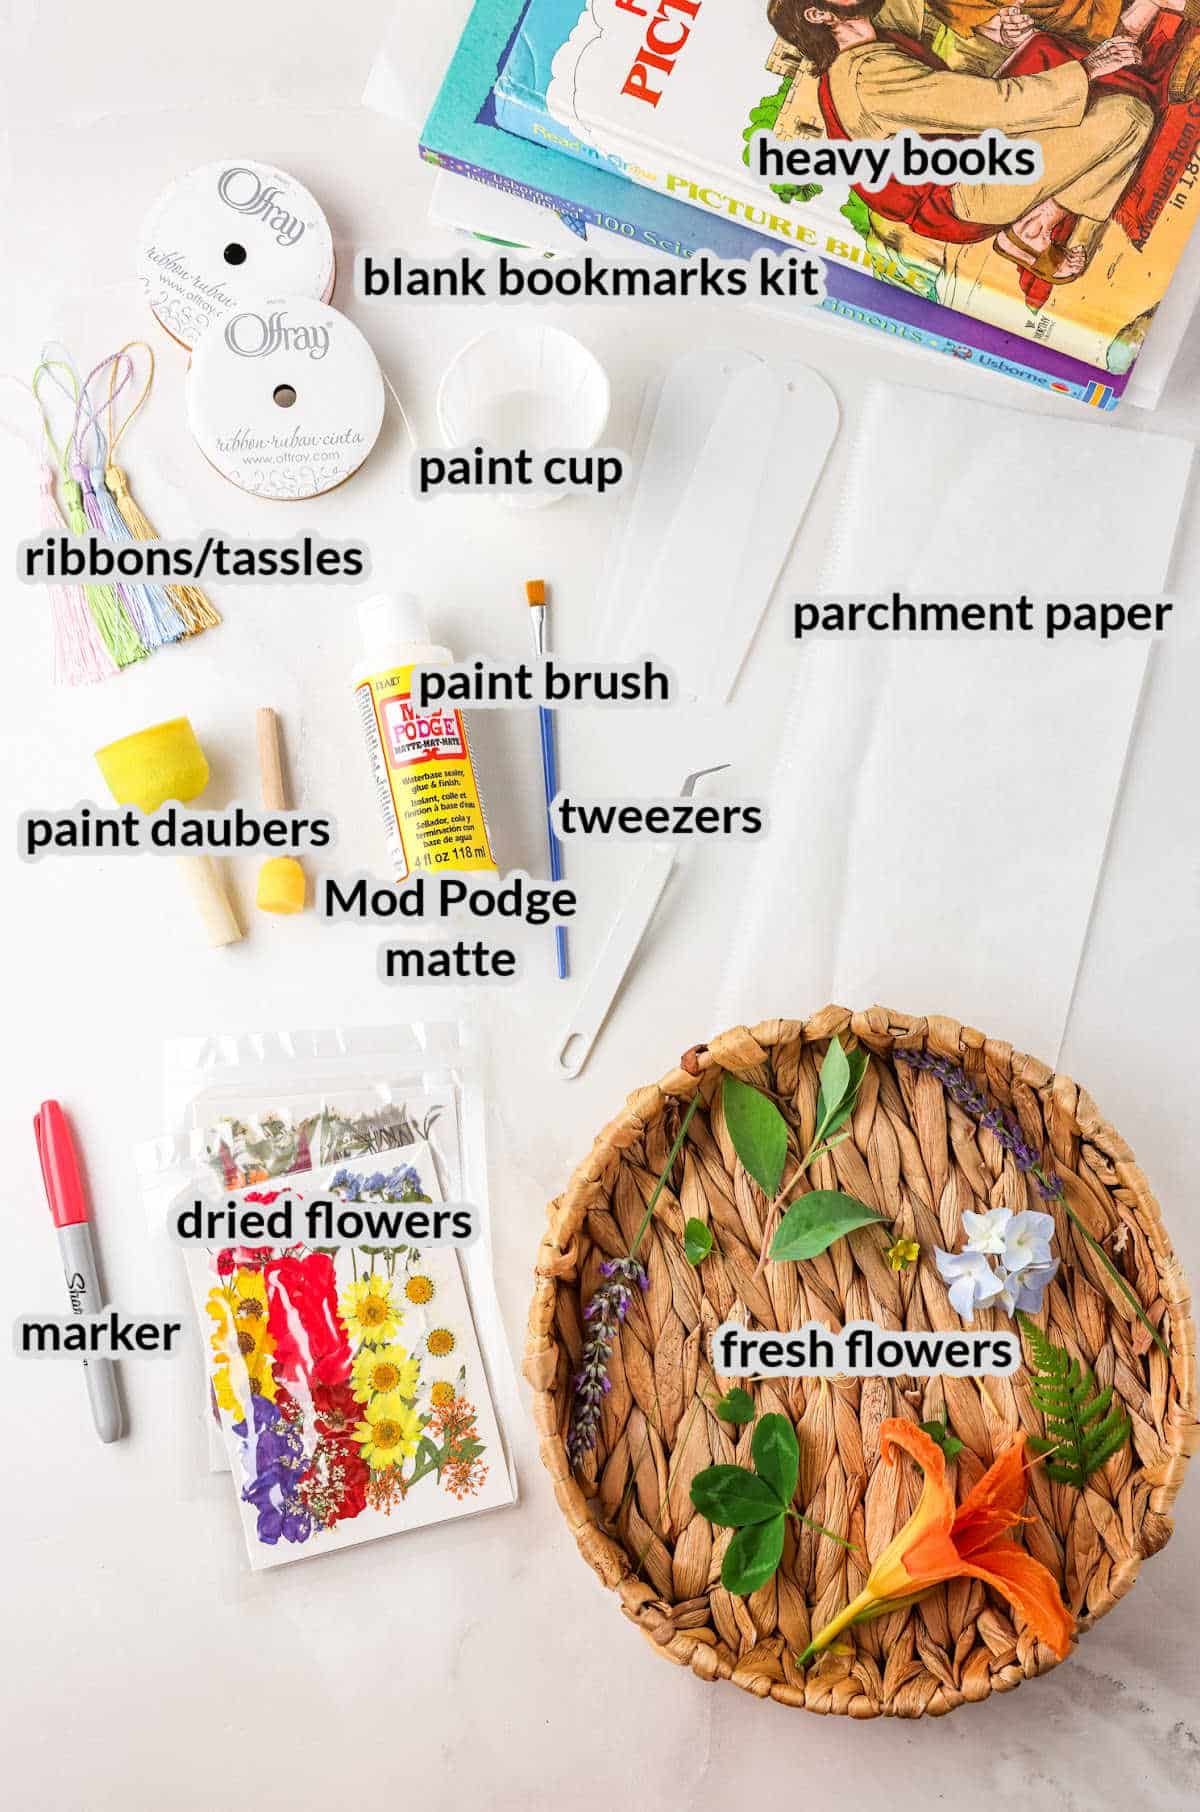
Supplies for DIY Dried Flower Bookmarks
- Fresh flowers – You can dry your own fresh flowers if you’d like! Gather some pretty wildflowers on your nature walk and the dry them to use in this craft later.
- Dried flowers – If you would rather skip the step of drying your own flowers, then you can grab dried flowers to use instead. Order these online or look at your local hobby store to see what they have!
- Marker – Use a permanent marker to write on the parchment paper that you use to press the flowers. You can also write on your bookmark!
- Paint sponges – These little paint sponges have a flat head that makes it easy to add Mod Podge across the surface of the flowers.
- Mod Podge matte – Use matte Mod Podge to seal your bookmark and protect the flowers.
- Blank bookmarks kit – You can find these at your local hobby store or online! The craft aisle of Walmart may have them too.
- Tweezers – I have found that tweezers are the easiest way to place flowers onto the bookmark.
- Paint brush – Grab a simple small paint brush to help adhere Mod Podge to certain sections of the bookmarks.
- Ribbons or tassles – A pretty bookmark is made extra cute with a ribbon or tassle on the end. Use whatever colors you want!
- Parchment paper – If you want to dry your own flowers, you’ll need some parchment paper so that you can press them in between books.
- Paint cup – A disposable paper or plastic cup is what I often grab to use as a paint cup.
- Heavy books – In order to press flowers well, you’ll need a few heavy books!

How to Make a Dried Flower Bookmark
If you purchase flowers that are already dried, then you can skip the first few steps of this craft. If you’re making your own dried flowers, then make sure you read these first steps carefully!
How to Dry Flowers
Gather some pretty flowers to dry — choose whatever you like! I recommend using smaller flowers with thin petals, leaves, and greenery as these things will dry the best. Larger flowers may not fit on the bookmarks without being trimmed.
If the flowers are too bulky, they won’t lay flat in a book, making it hard for the bookmark to do its job! I have had success drying lavender, honeysuckle flowers, small hydrangea clusters, small ferns, strawberry flowers, small leaves, and pretty weeds.
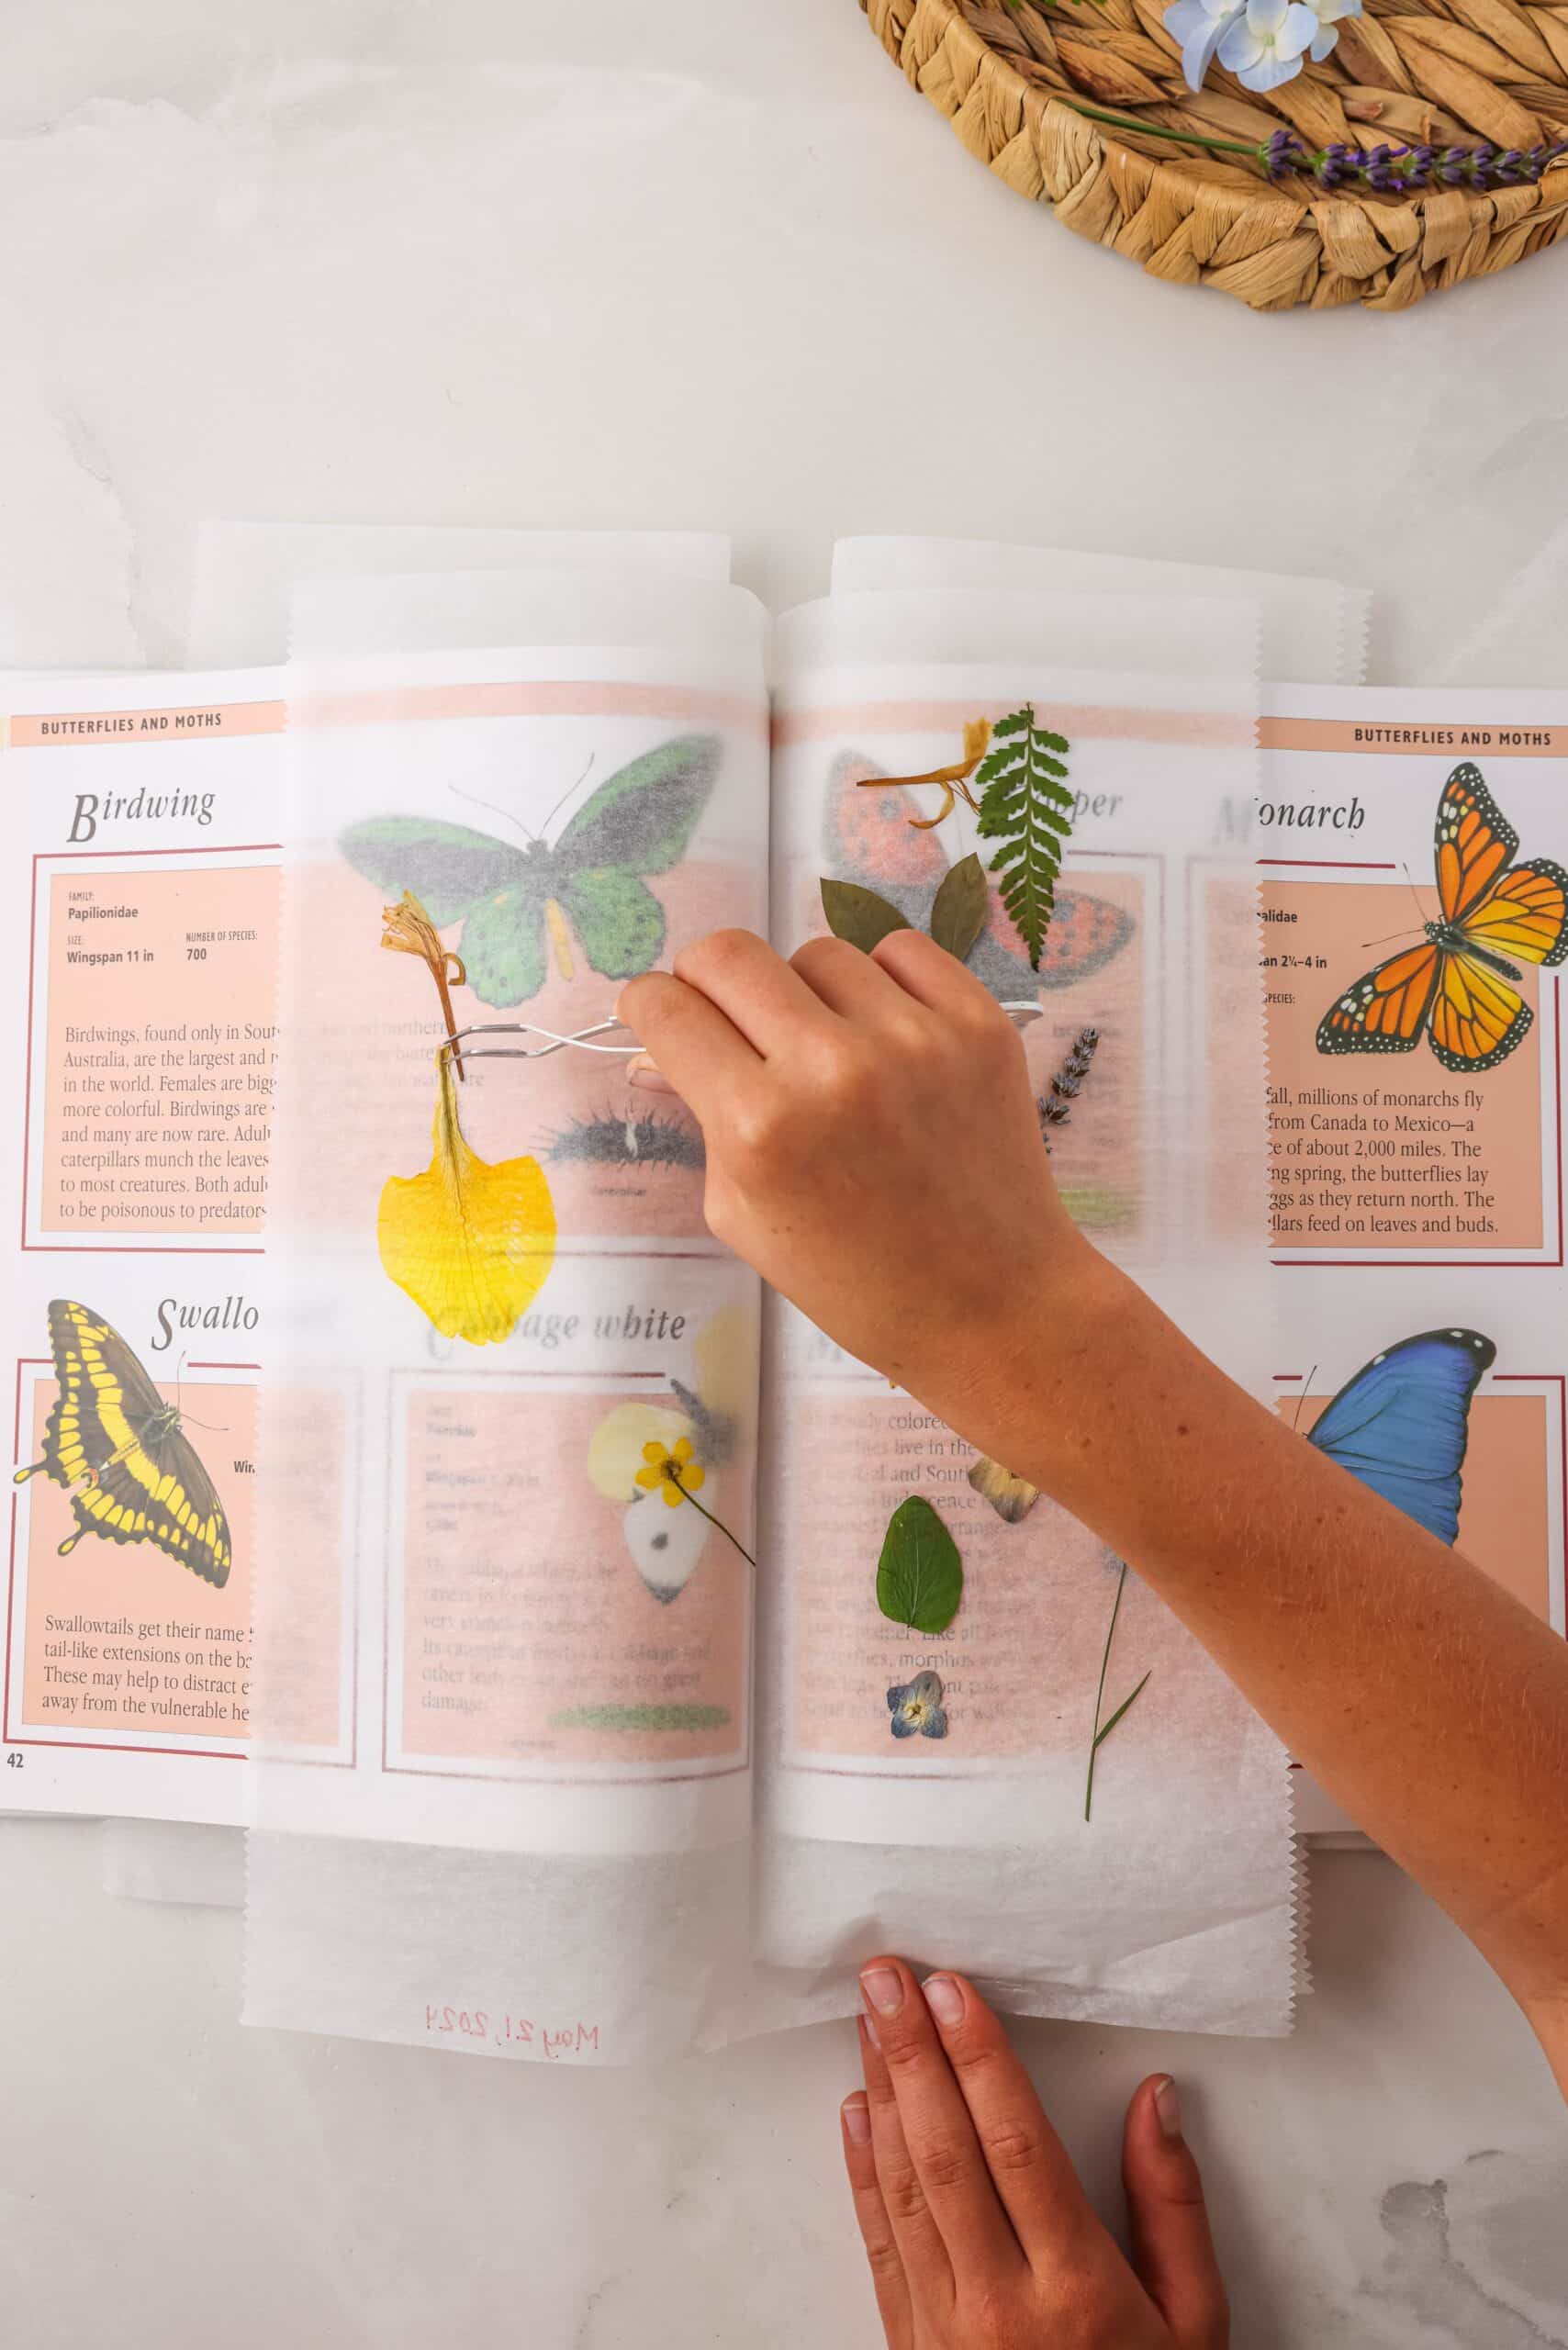
Once you gather flowers are gathered, lay them out on parchment paper in a book. Choose a spot near the middle of the book and place the flowers carefully in a single layer. Lay them as flat as possible. Some flowers will not lay perfectly flat, and that is ok! Just do your best to make them as flat as possible.
Write the date on the parchment paper and close the book. Taking note of the date will help you remember when your flowers should be ready. They’ll need at least 2 weeks to dry.
Carefully close the book and add weight to the top to help press the flowers. I use more heavy books for added weight. After 2 weeks have passed, open the book to reveal your DIY pressed flowers!
How to Make DIY Dried Flower Bookmarks
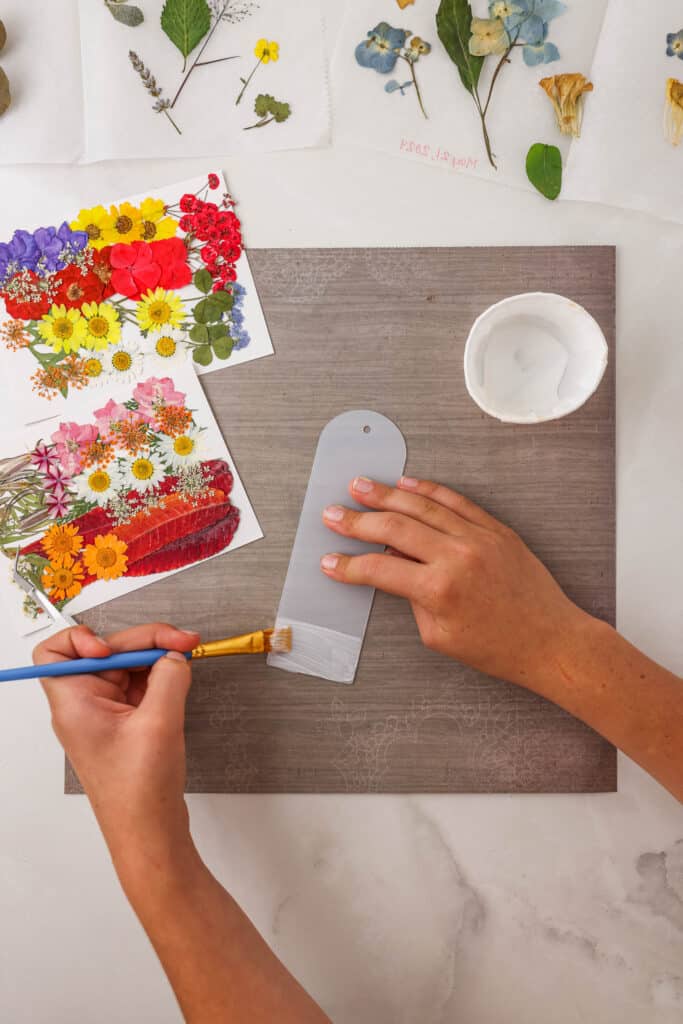
When you are ready to make the bookmarks, gather your blank bookmarks, tweezers, paint daubers and brushes, Mod Podge, ribbons and tassels, and a paint cup.
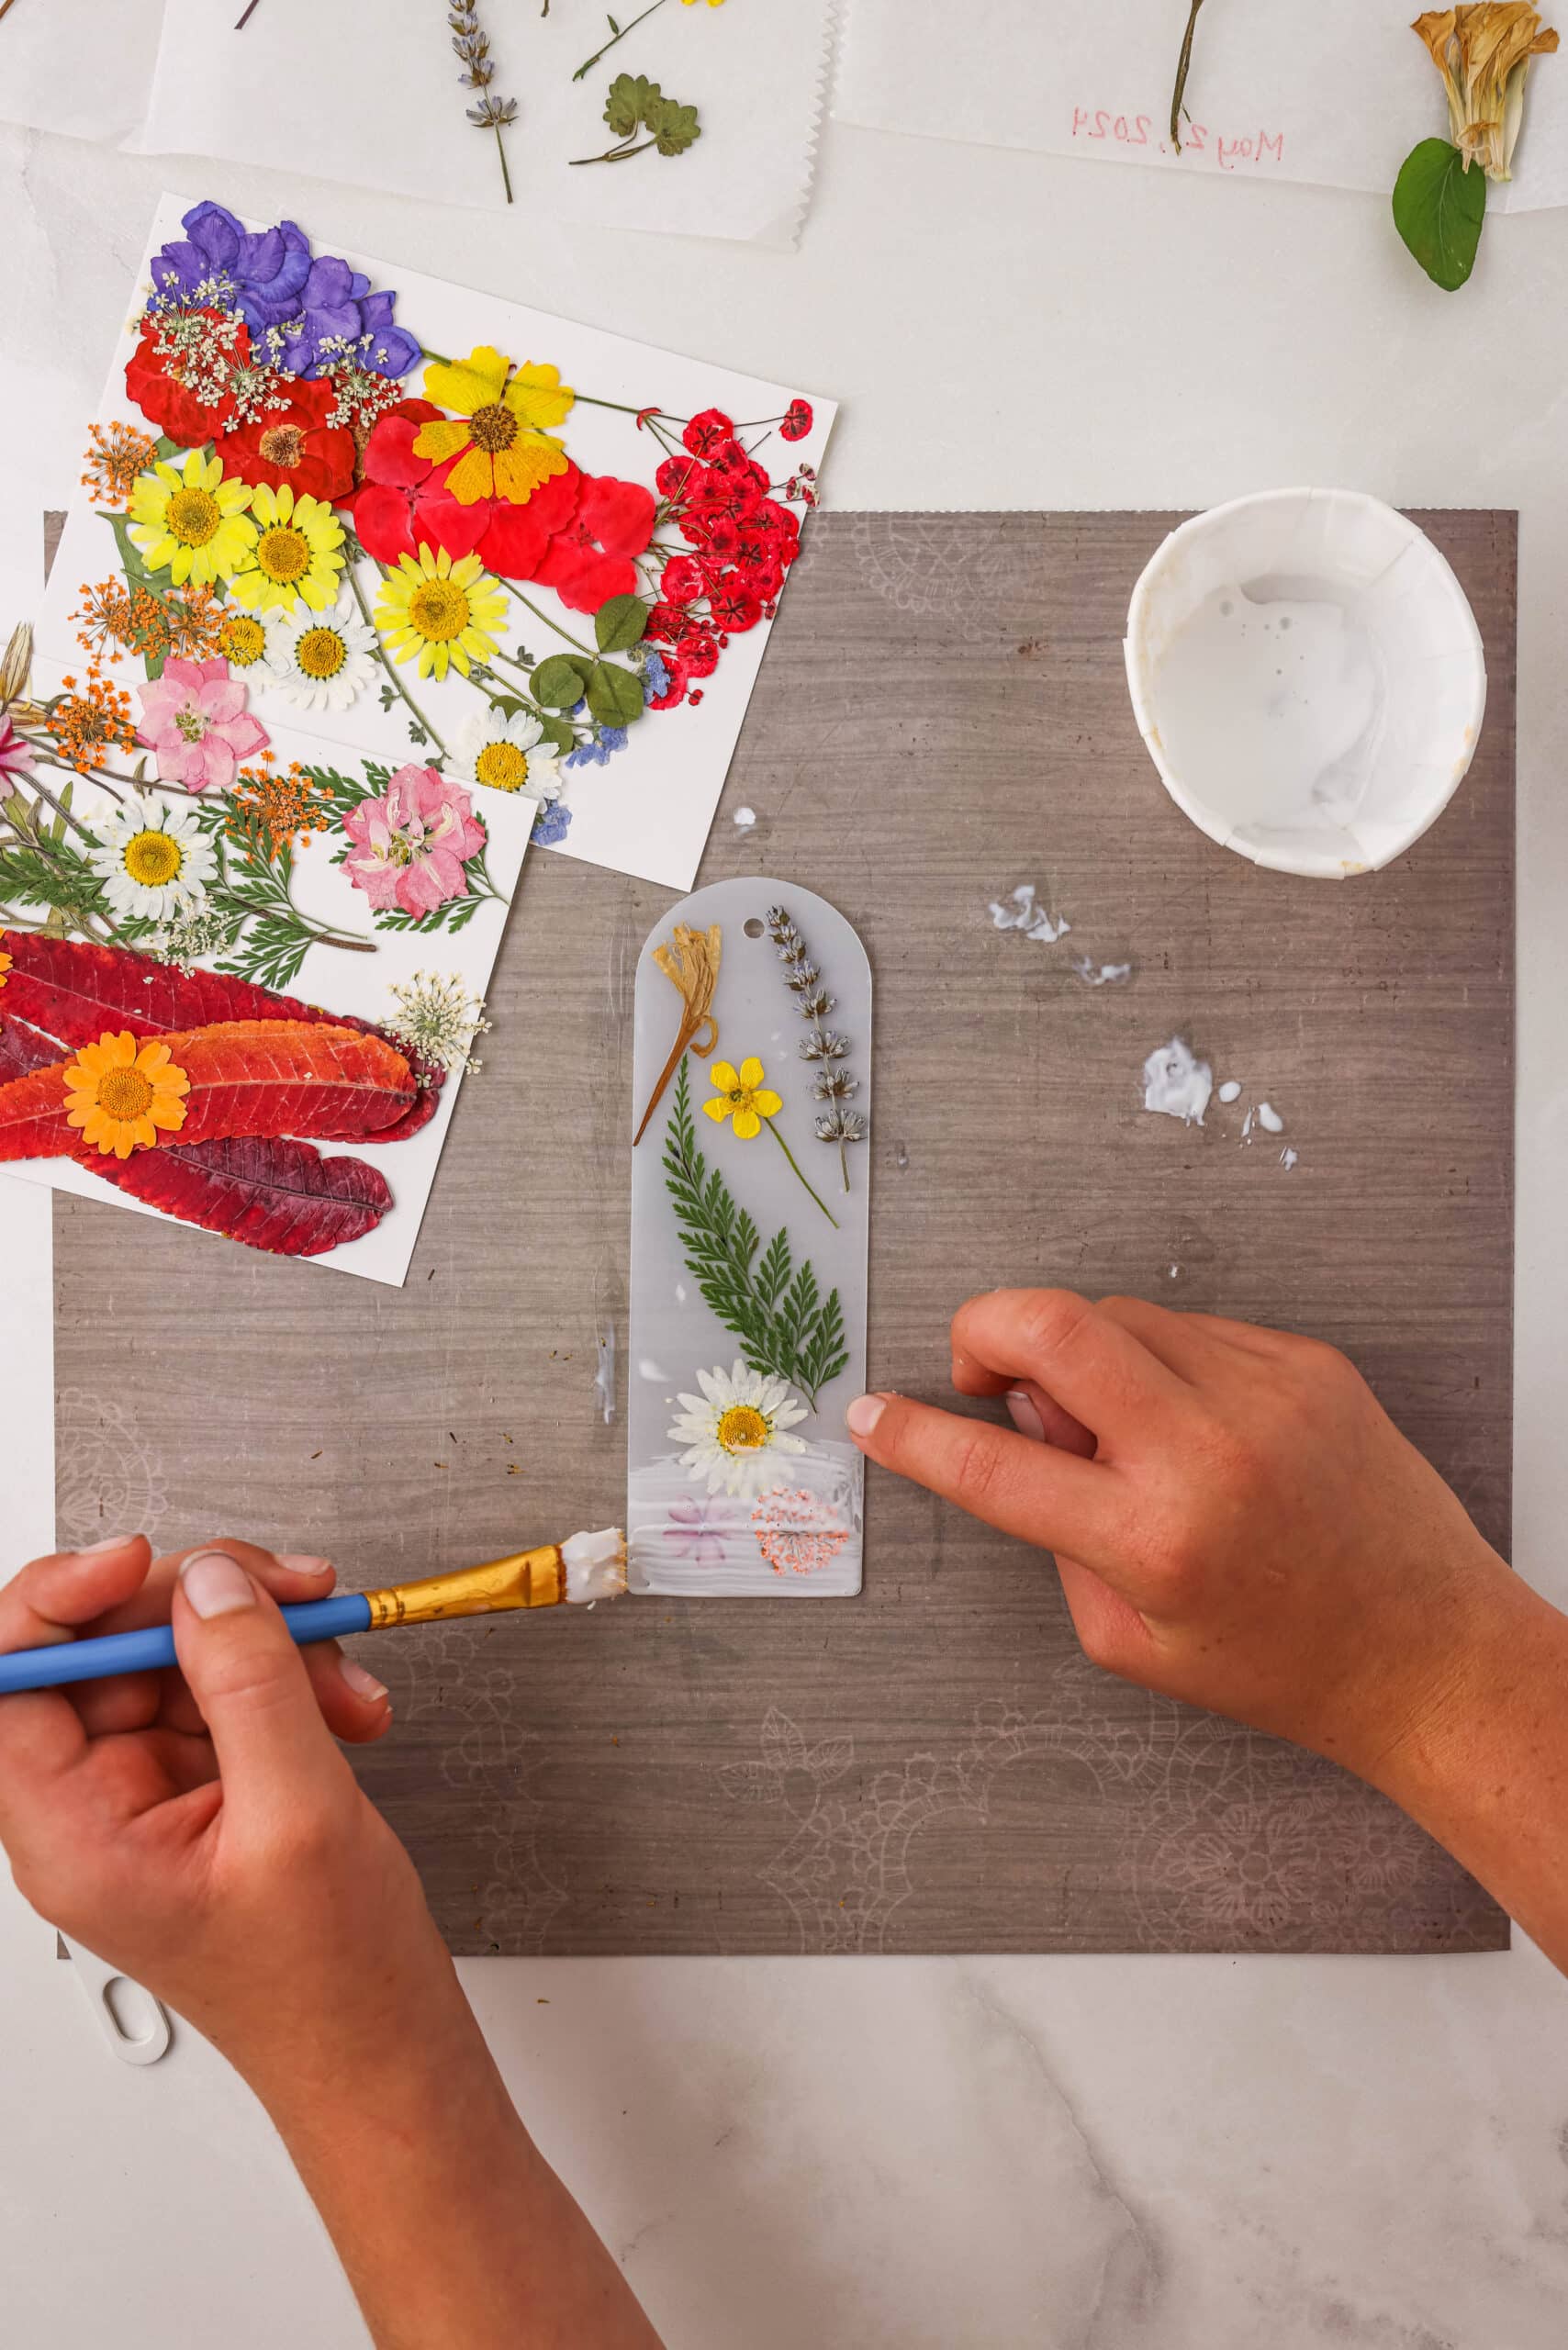
Paint a thin layer of Mod Podge onto a blank bookmark and then paint a small section at a time so that the glue doesn’t dry as you work.
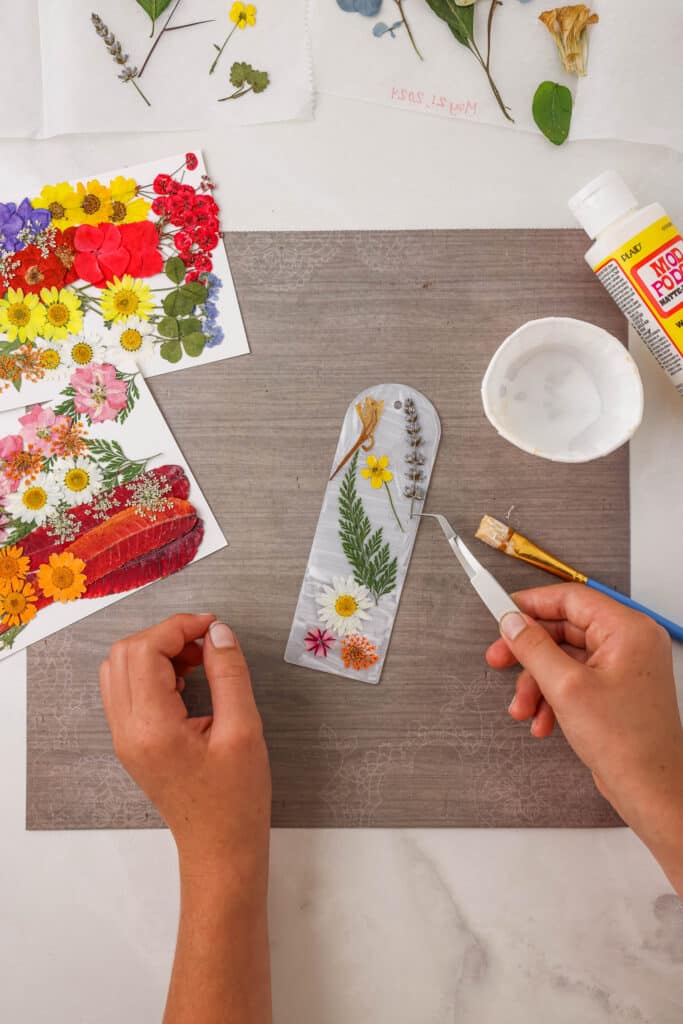
Carefully remove the flowers from the parchment paper that you would like to use to decorate your bookmark. You can use tweezers for those delicate, paper-thin petals. Take your time and be gentle.
Place each flower carefully on the bookmark and let the glue dry for about 30 minutes.
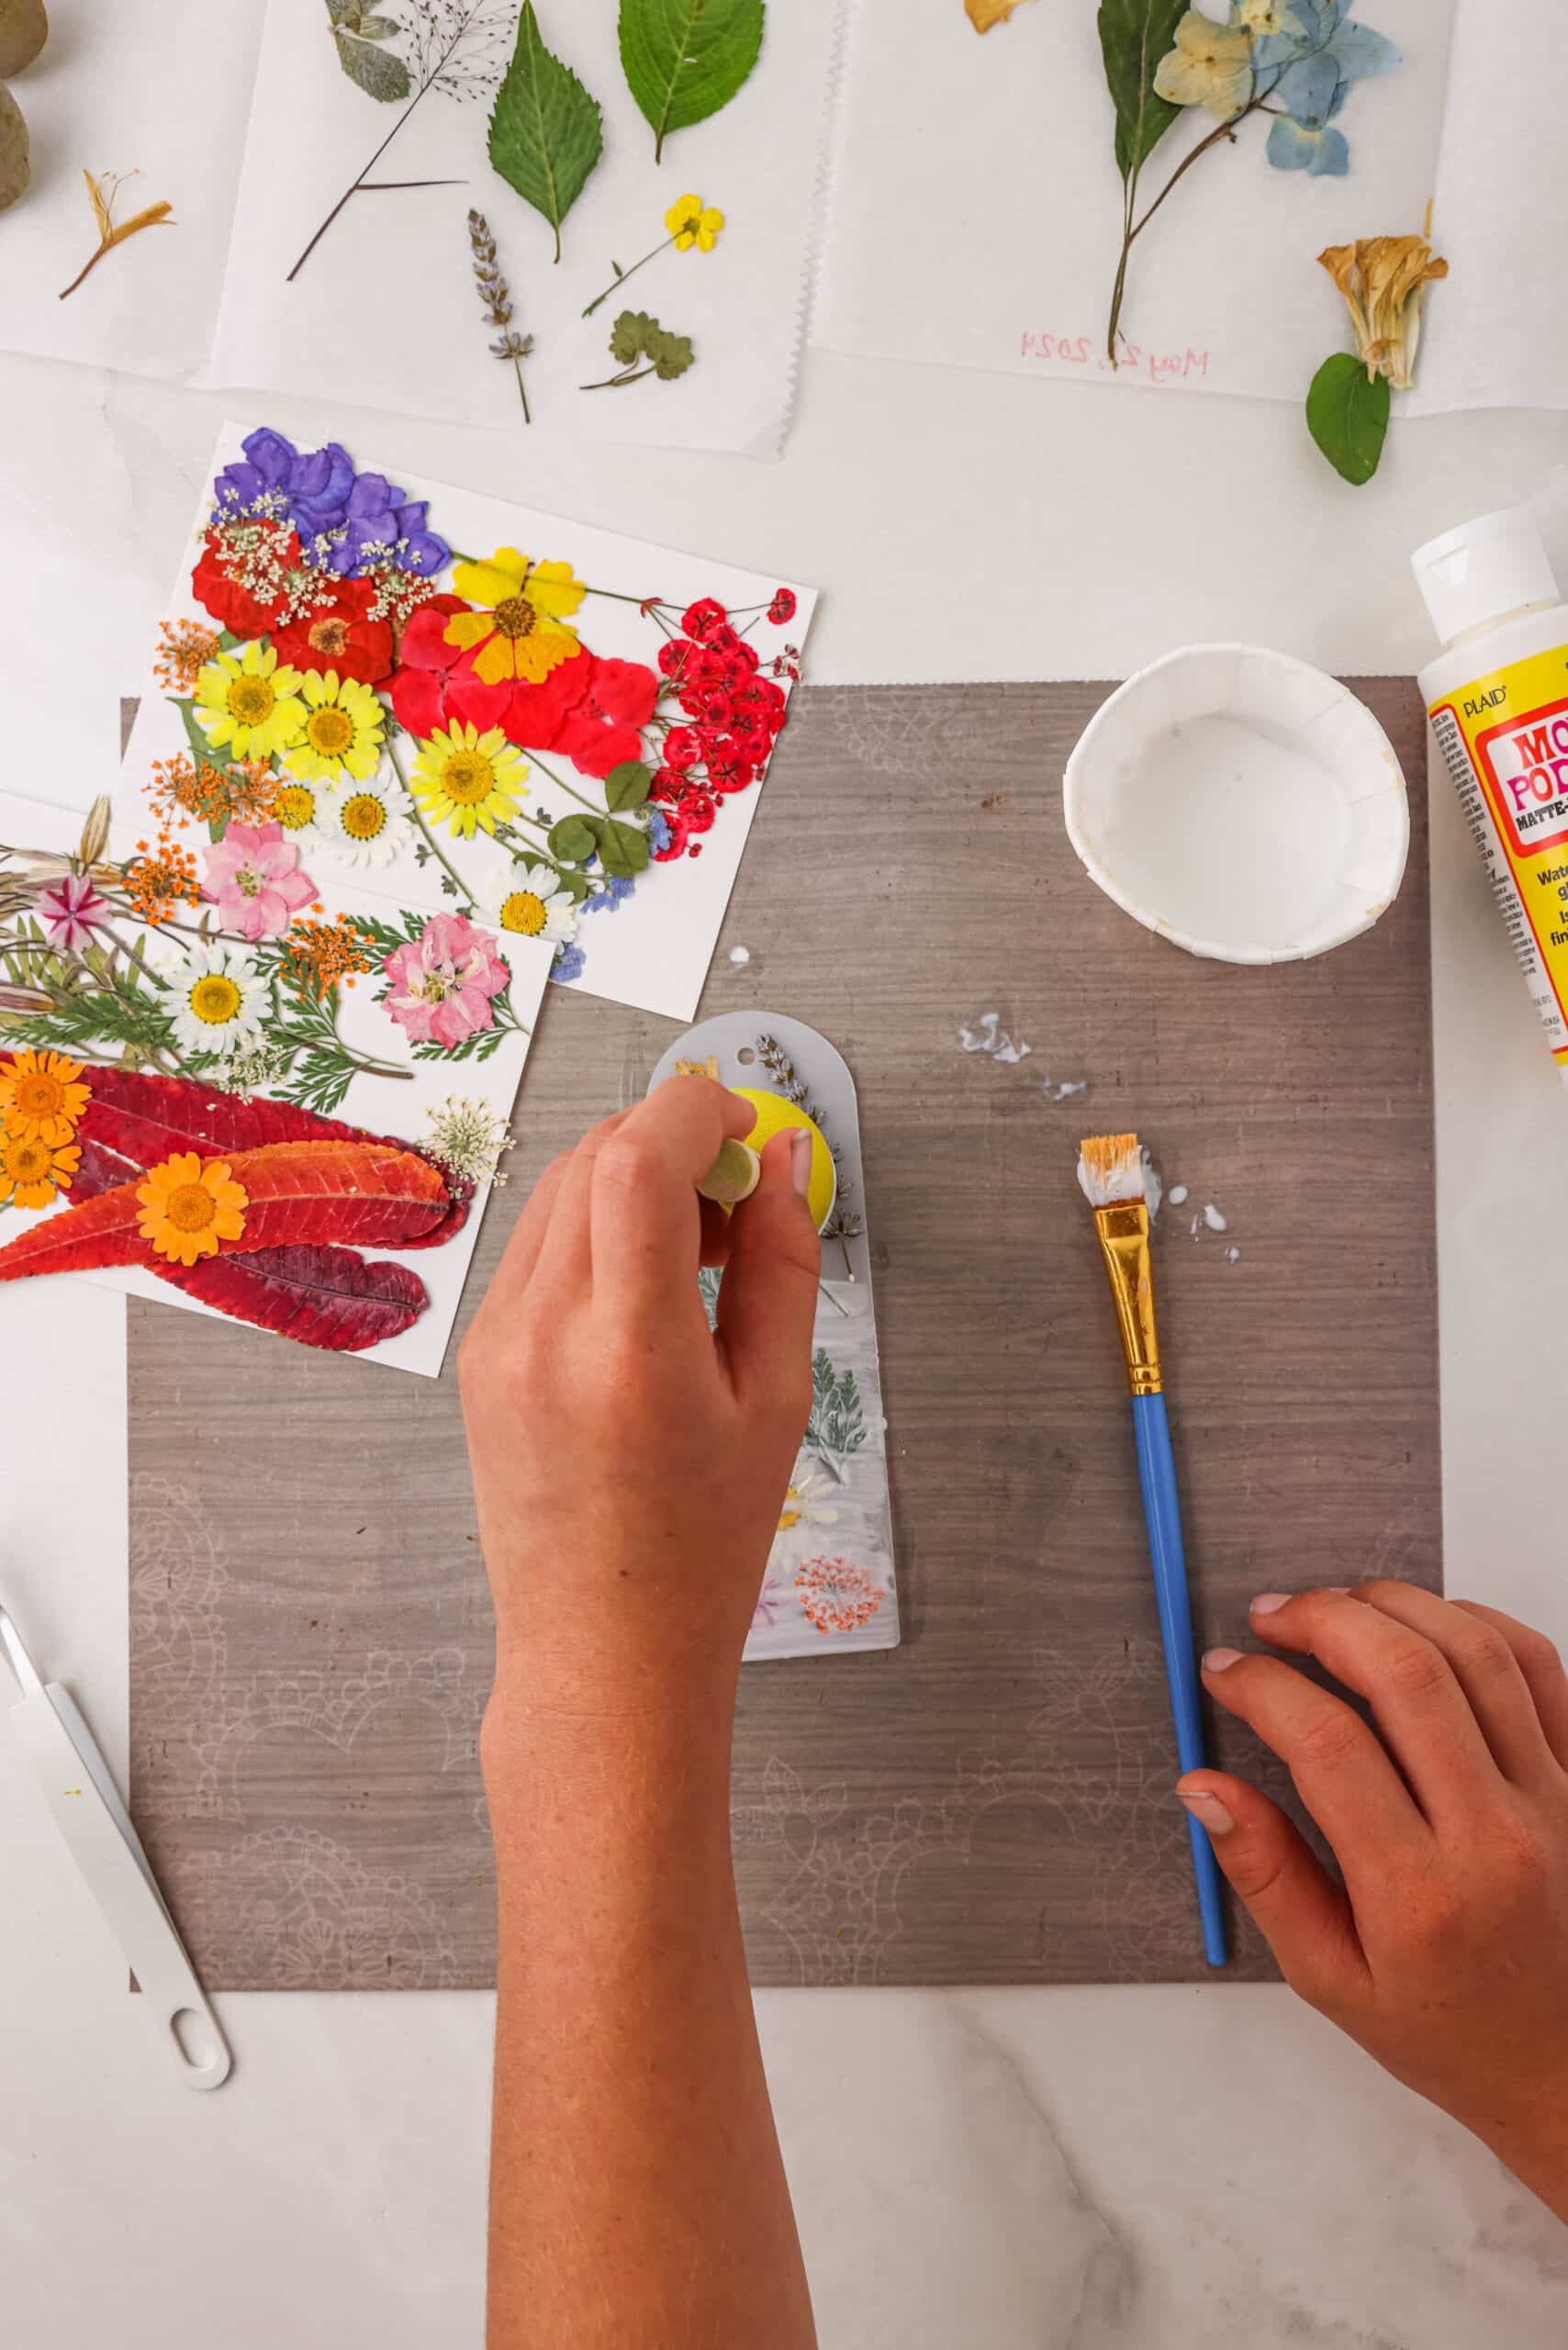
Paint over the flowers with a thin layer of Mod Podge. Some flowers may do better with a paint dauber instead of using a paint brush since you can gently press the glue on instead of brushing it on. It will look like you are covering your beautiful flowers at first, but don’t worry!
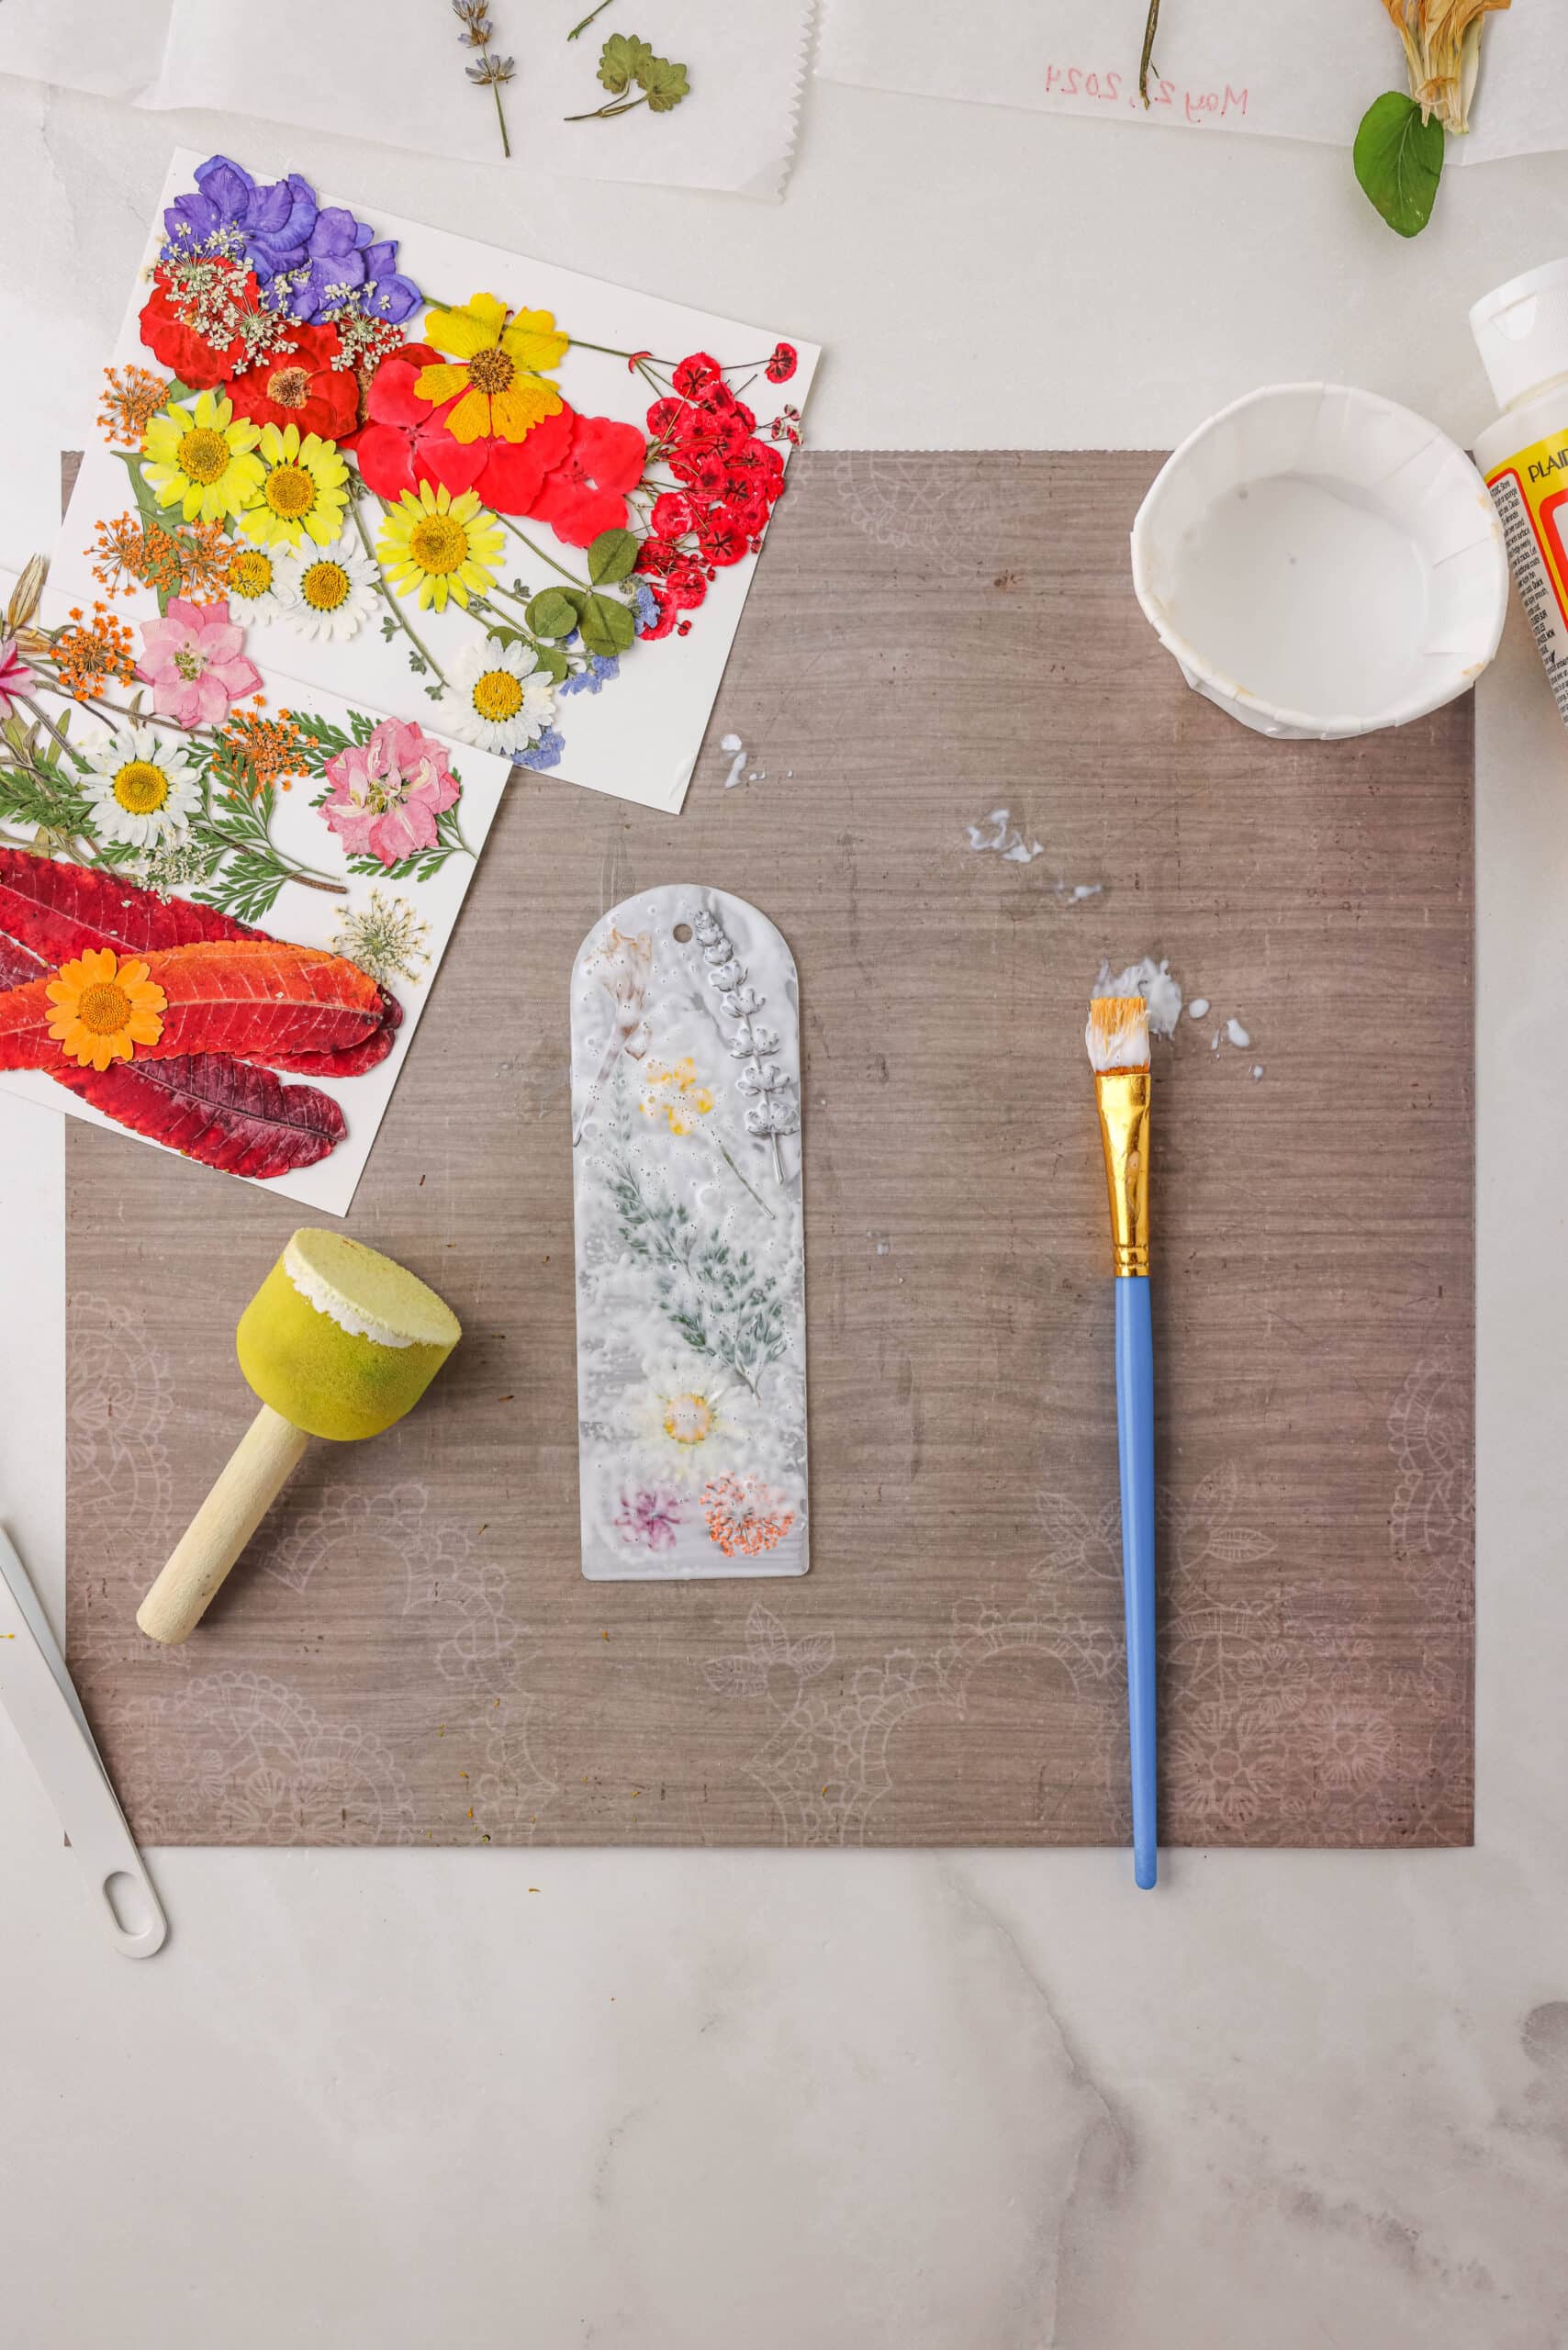
The Mod Podge will dry clear and it is used to secure those little flowers to the bookmark. A second top coat may be necessary for some flowers, and that is ok! Just let the glue dry between coats.
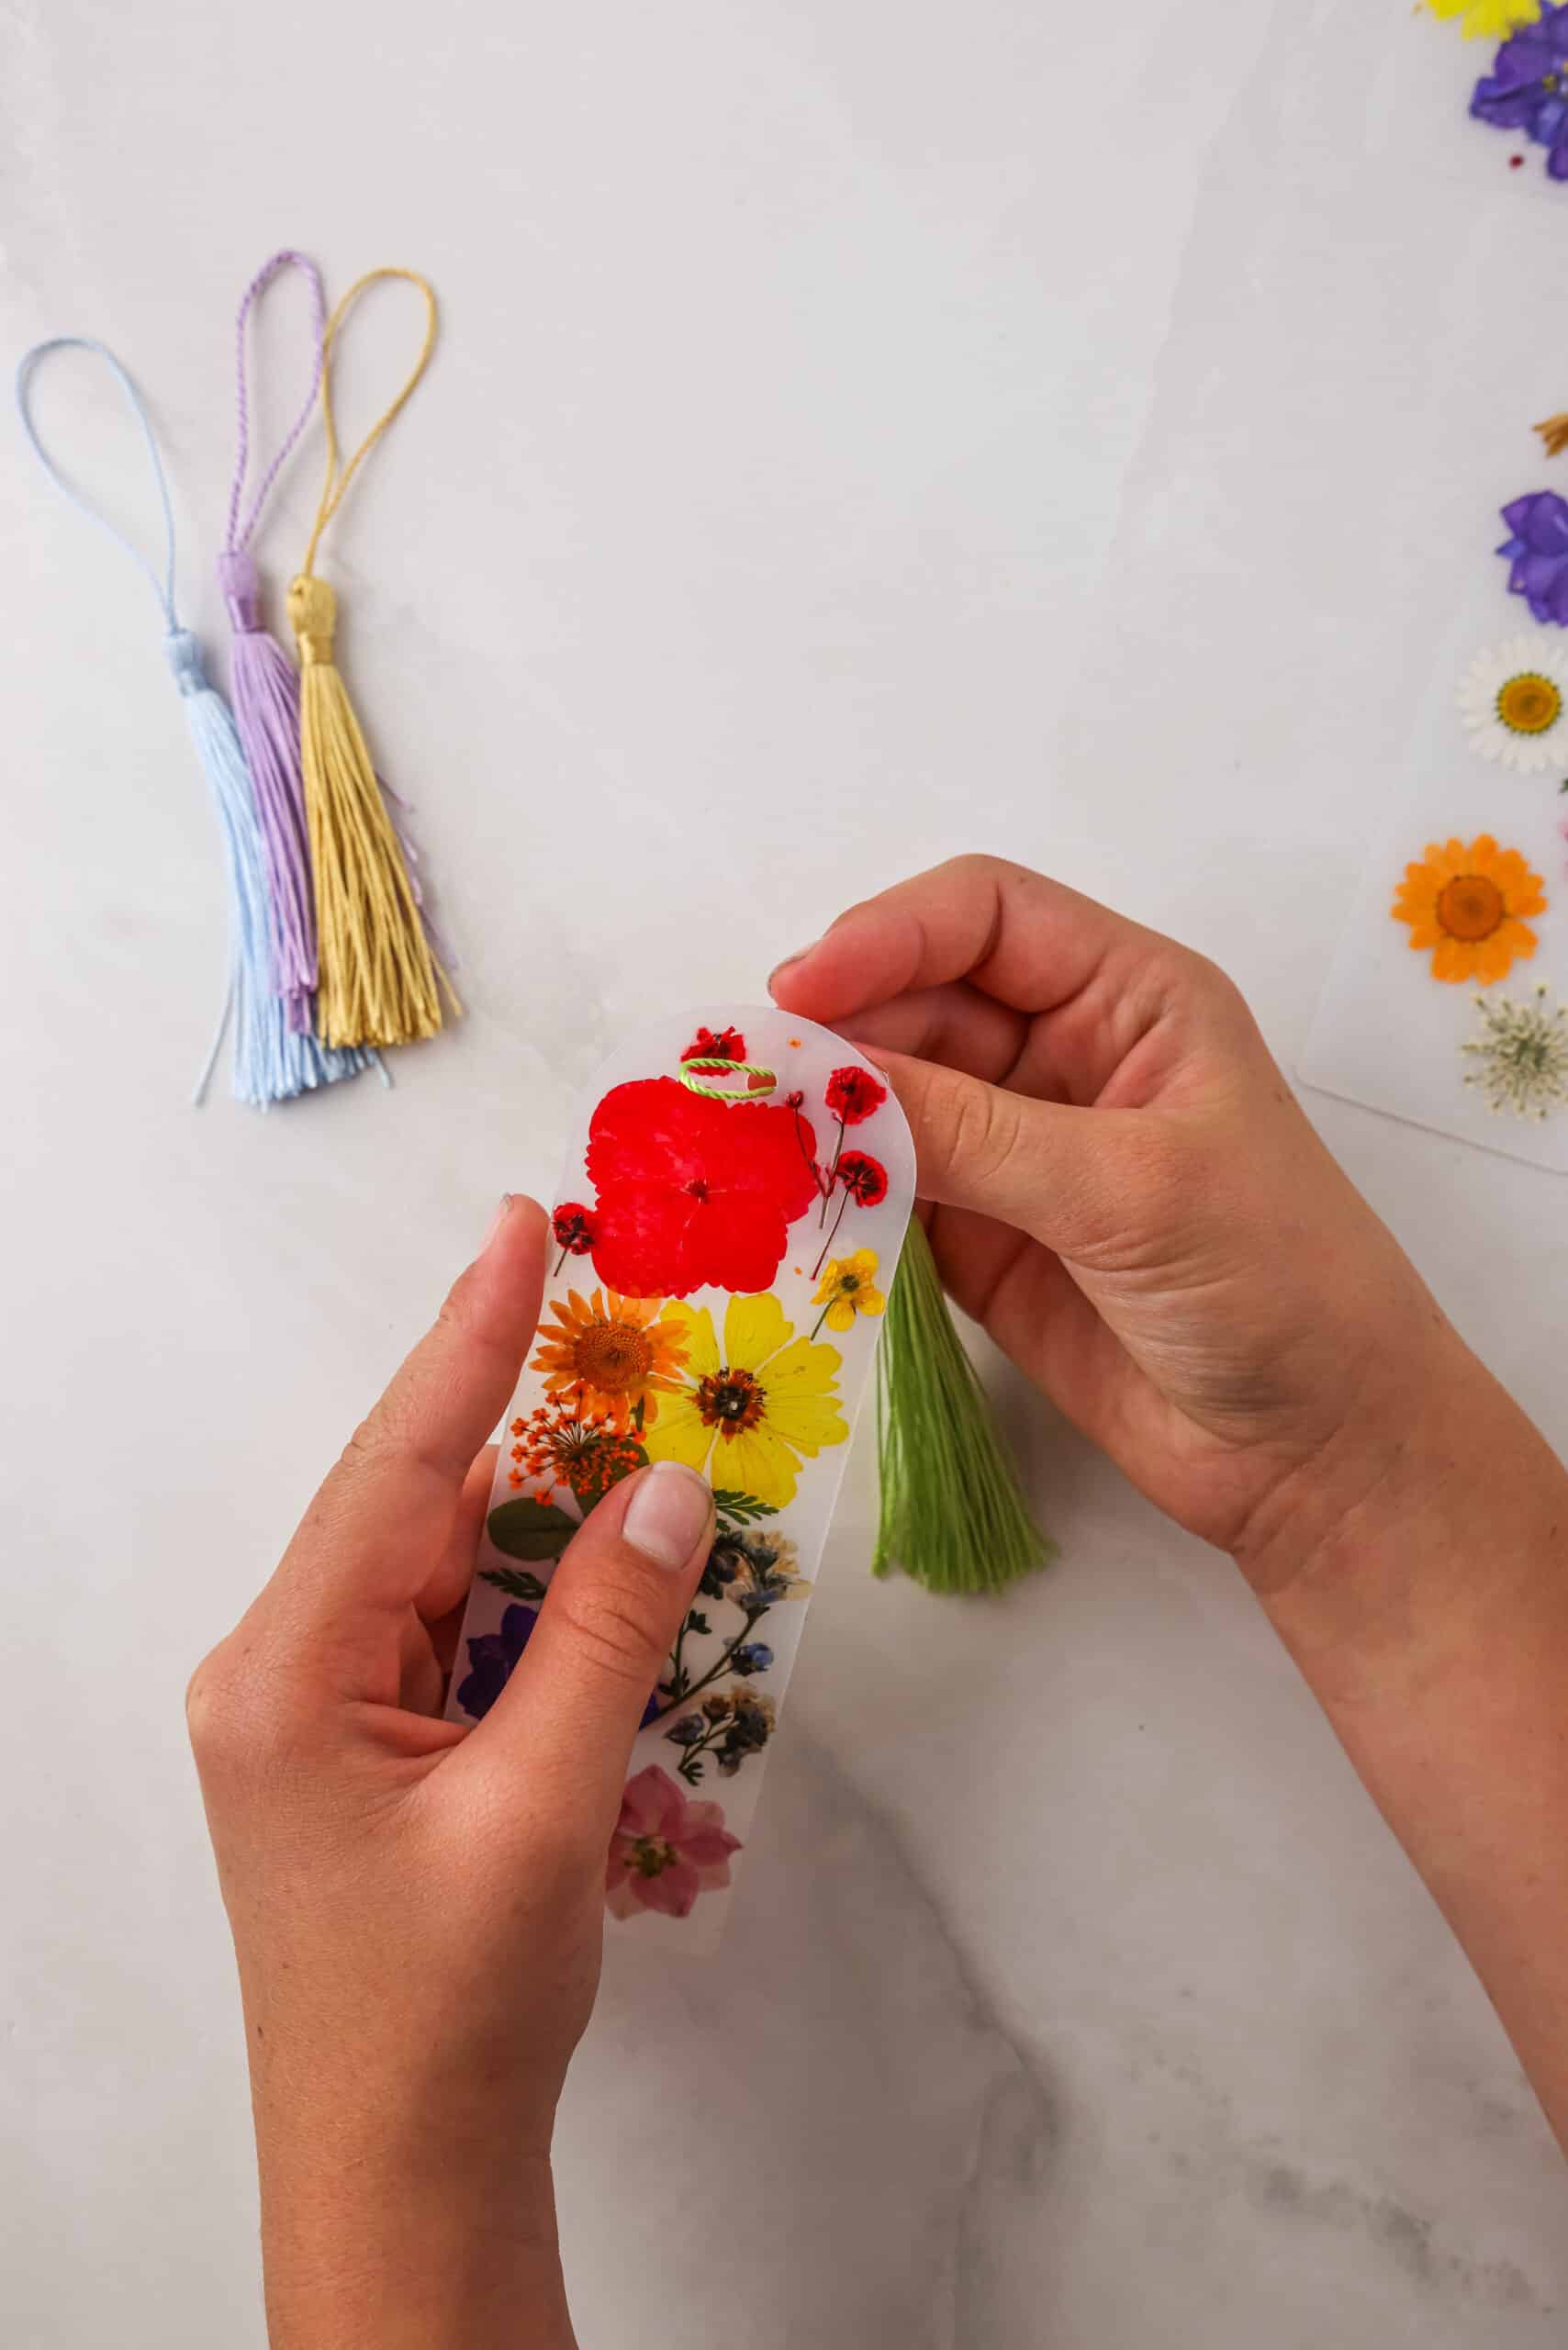
Grab your favorite book and read while you wait for the top coat of glue to dry completely! When you are done reading, you can loop a tassel or tie some ribbon through the hole in the top of the bookmark and you will have a brand new bookmark to hold your spot!
How Do You Secure Dry Flowers?
For this craft, use matte Mod Podge to secure the flowers. When you add it onto the flowers, it will look like you are covering them. But trust me, it will dry clear and you will be able to see the pretty colors!
What should I store dried flowers in?
If you have leftover dried flowers, you can keep them! Either transfer them to an airtight container or a plastic zip top bag with the air squeezed out. Just make sure they’re all laying flat. You can store them in a book too, but just beware that they can more easily slip out and get lost and/or crushed.
Pro Tips for the Best Bookmarks!
- Use a combination of colors to give your bookmarks extra eye appeal. Pinks, purples, oranges, greens, and yellows are what I typically gravitate towards. But you can use any color you want!
- Make sure you don’t use flowers that are too thick or they won’t fit well inside of your book. You need thin, flat flowers for the best results.
- When you add Mod Podge, be very gentle with the flower petals and make sure the sealant is applied in an even layer.

I can’t wait to see each of your creative DIY Dried Flower Bookmarks! It’s truly one of the coolest ways to preserve pressed flowers.
More DIY Crafts You’ll Love!
- These DIY Photo Candles make a fabulous gift. It’s such a sweet way to display family photos.
- If you notice lots of birds on your spring nature walk, then make these DIY Bird Feeders to give them a little snack!
- Skip the store bought stuff and make this really fun Homemade Slime instead.
- Create masterful art work with this super duper fun Puffy Paint.
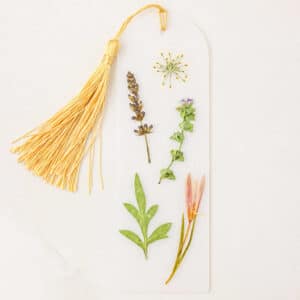
Dried Flower Bookmarks
Ingredients
- Blank bookmarks kit
- Fresh flowers
- Dried flowers optional
- Parchment paper
- tweezers
- paint daubers
- paint brush
- Mod Podge matte
- Ribbons/tassels
- Paint cup/palette
- Heavy books
- Permanent marker/pen
Instructions
- Gather flowers to dry. I recommend using smaller flowers with thin petals, leaves, and greenery as these things will dry the best. Larger flowers may not fit on the bookmarks without being trimmed, and if they are too bulky, they won’t lay flat in a book, making it hard for the bookmark to do its job! You can also simply order dried flowers and skip the wait! I have had success drying lavender, honeysuckle flowers, small hydrangea clusters, small ferns, strawberry flowers, small leaves, and pretty weeds.
- Once your flowers are gathered, lay them out on parchment paper in a book. Choose a spot near the middle of the book. Place them carefully in a single layer. Lay them as flat as possible. Some flowers will not lay perfectly flat, and that is ok! Just do your best to make them as flat as possible.
- Write the date on the parchment paper and close the book. Taking note of the date will help you remember when your flowers should be ready. Give the flowers at least 2 weeks to dry.
- Carefully close the book and add weight to the top to help press the flowers. I use more heavy books for added weight.
- After 2 weeks have passed, open the book to reveal your DIY pressed flowers!
- Gather your blank bookmarks, tweezers, paint daubers and brushes, Mod Podge, ribbons and tassels, and paint cup.
- Paint a thin layer of Mod Podge onto a blank bookmark. Paint a small section at a time so that the glue doesn’t dry as you work.
- Carefully remove the flowers from the parchment paper that you would like to use to decorate your bookmark. You can use tweezers for those delicate, paper-thin petals. Take your time and be gentle.
- Place each flower carefully on the bookmark.
- Let the glue dry for about 30 minutes.
- Paint over the flowers with a thin layer of Mod Podge. Some flowers may do better with a paint dauber instead of using a paint brush since you can gently press the glue on instead of brushing it on. It will look like you are covering your beautiful flowers at first, but don’t worry! The Mod Podge will dry clear and it is used to secure those little flowers to the bookmark. A second top coat may be necessary for some flowers, and that is ok! Just let the glue dry between coats.
- Grab your favorite book and read while you wait for the top coat of glue to dry completely! When you are done reading, you can loop a tassel or tie some ribbon through the hole in the top of the bookmark and you will have a brand new bookmark to hold your spot!