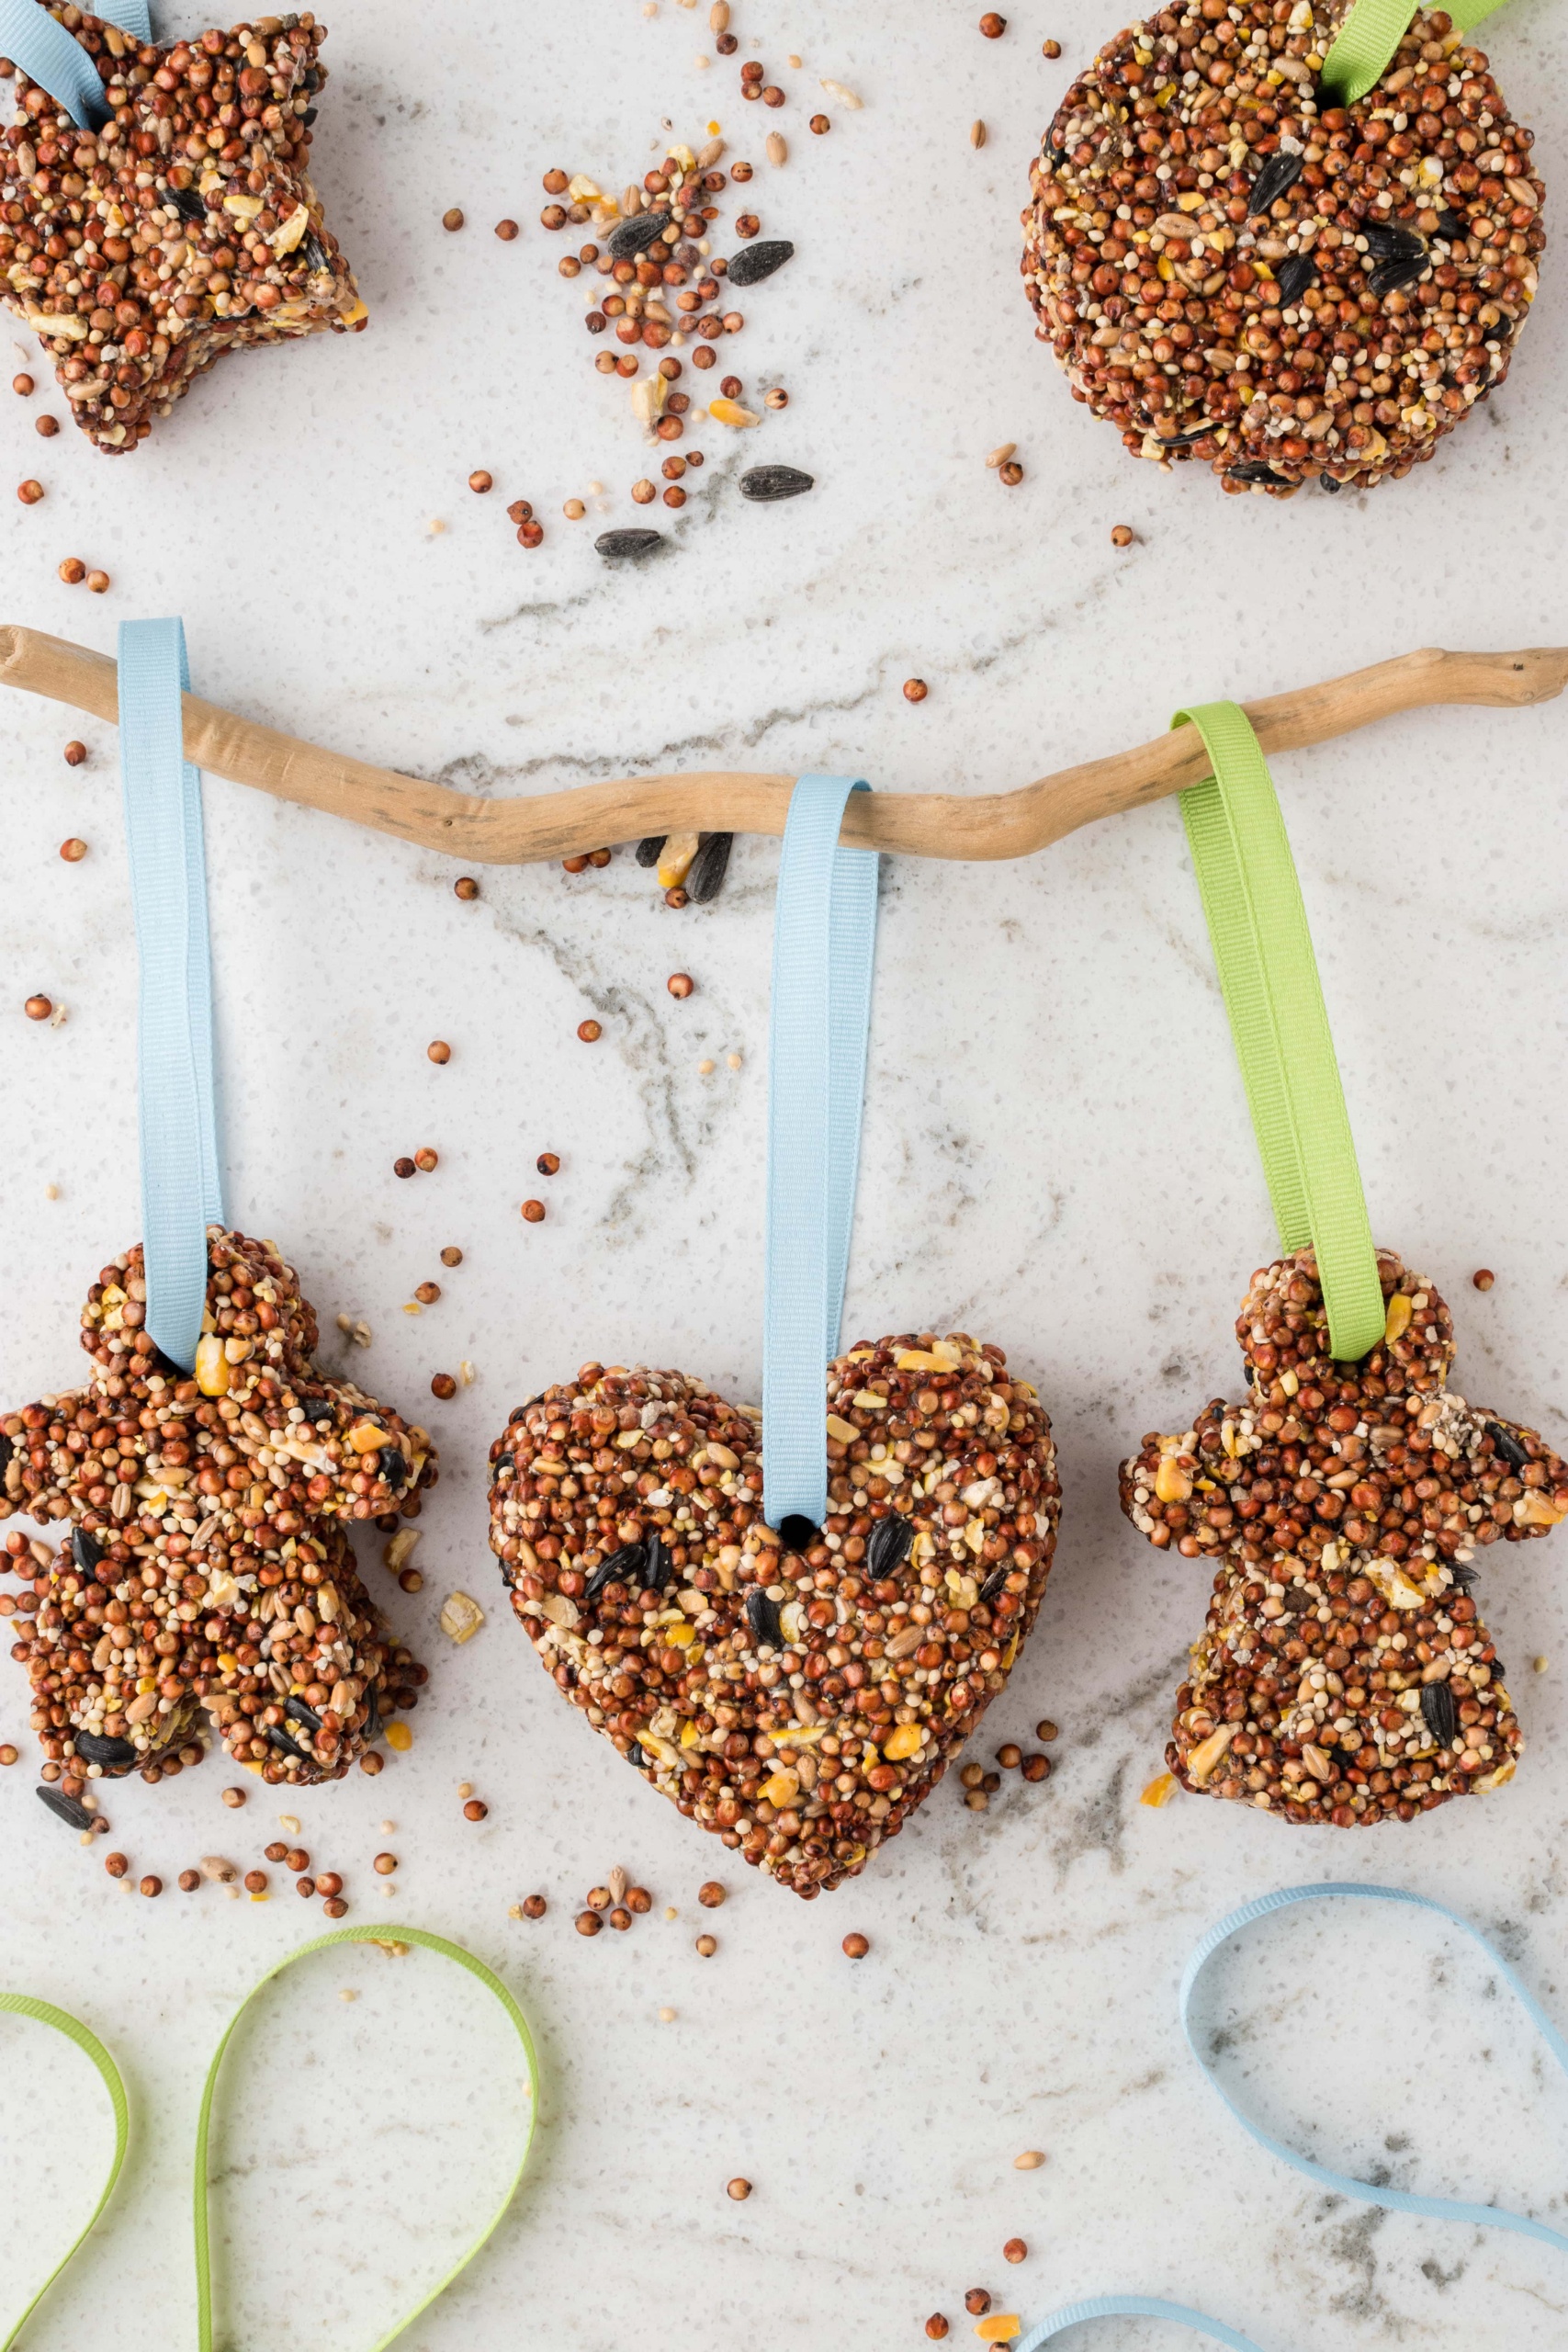
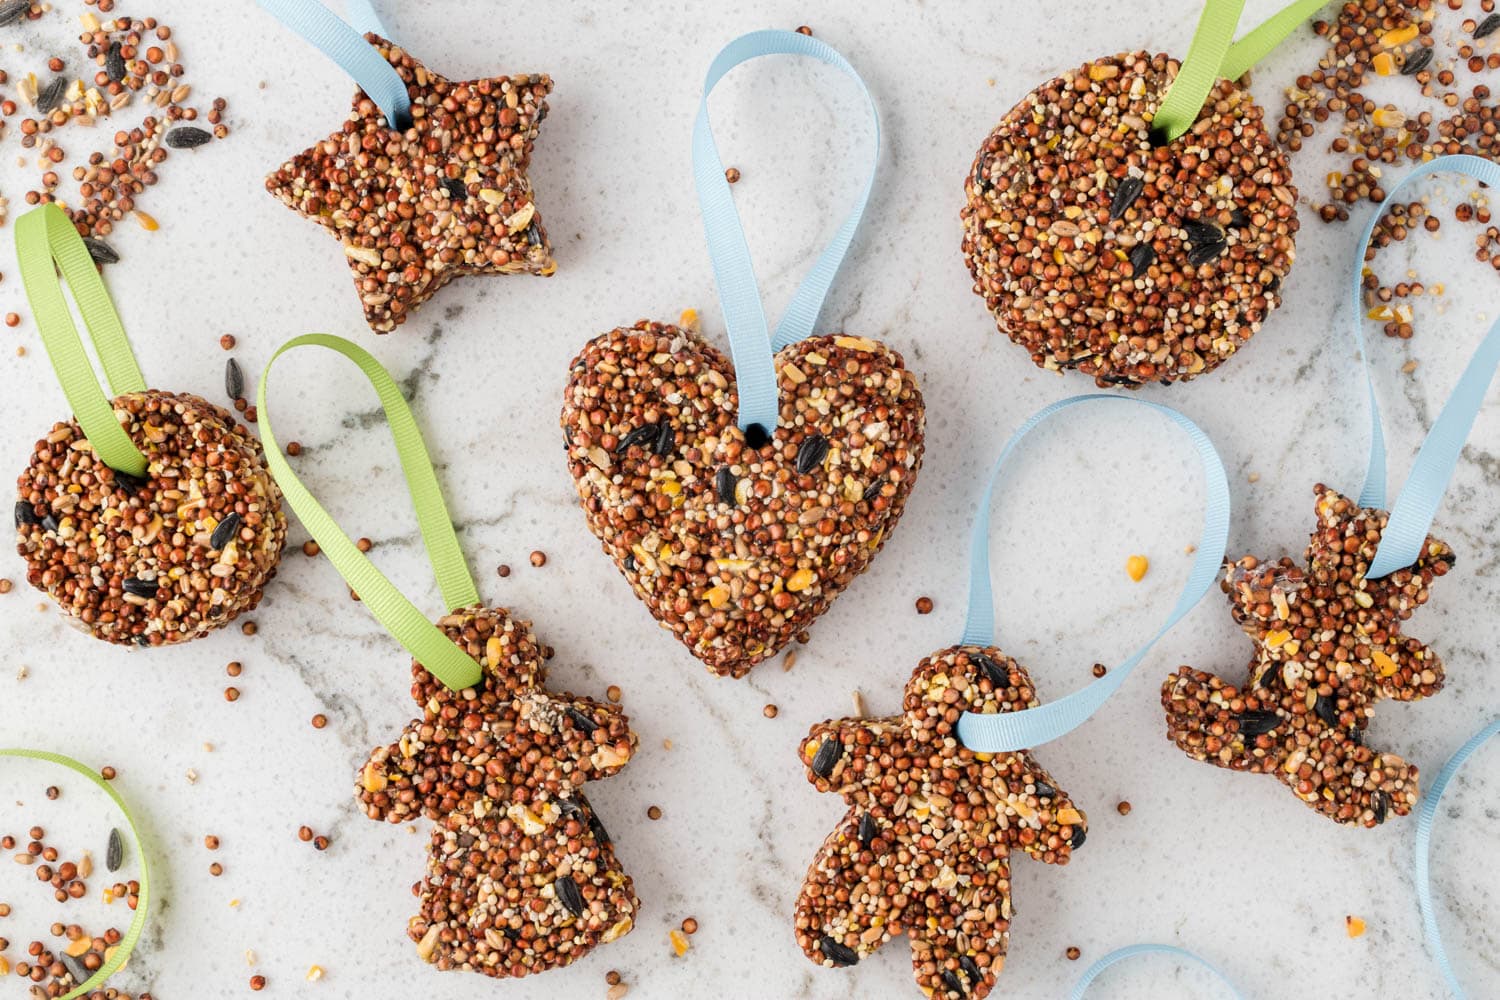
Bird Feeder Craft
Learn how to make your own DIY Bird Feeder at home. It’s the perfect easy craft to do with your kids. It’s made out of easy to find ingredients and safe to make for birds. My kids loved this bird feeder activity and had so much fun picking out the shapes of their bird feeders!
This DIY bird feeder craft is a blast to make in the Spring or Summer when the birds are out and about! If you’ve got kiddos who love nature, they’ll have so much fun bird watching after making their own bird feeder.
There are multiple different ways to make a fun bird feeder, but this one is great since you can choose different shapes. If you don’t have these supplies on hand and want to make a bird feeder without running to the store, check out toilet paper roll bird feeder or orange bird feeder as other options.
You can make as many homemade hanging bird feeders as you want with this easy step by step craft! Have fun, and happy bird-watching!
Why You’ll Love This Craft
- You only need really simple materials to make this easy, affordable bird feeder craft. You’ll likely have materials leftover to make more bird feeders another time.
- Many DIY bird feeder crafts require peanut butter, but this one does not. It’s the perfect bird feeder craft for those with a nut allergy!
- This easy DIY bird feeder is a great activity for homeschooling, weekend fun, or kids who love nature. You can use it to teach your kiddos about birds and even have a bird watching party after you make them and see what birds you can identify.

Supplies Needed to Make this Easy DIY Bird Feeder Craft
- Parchment paper – Line a baking sheet with parchment paper so that the birdseed doesn’t stick to the pan as the feeders dry.
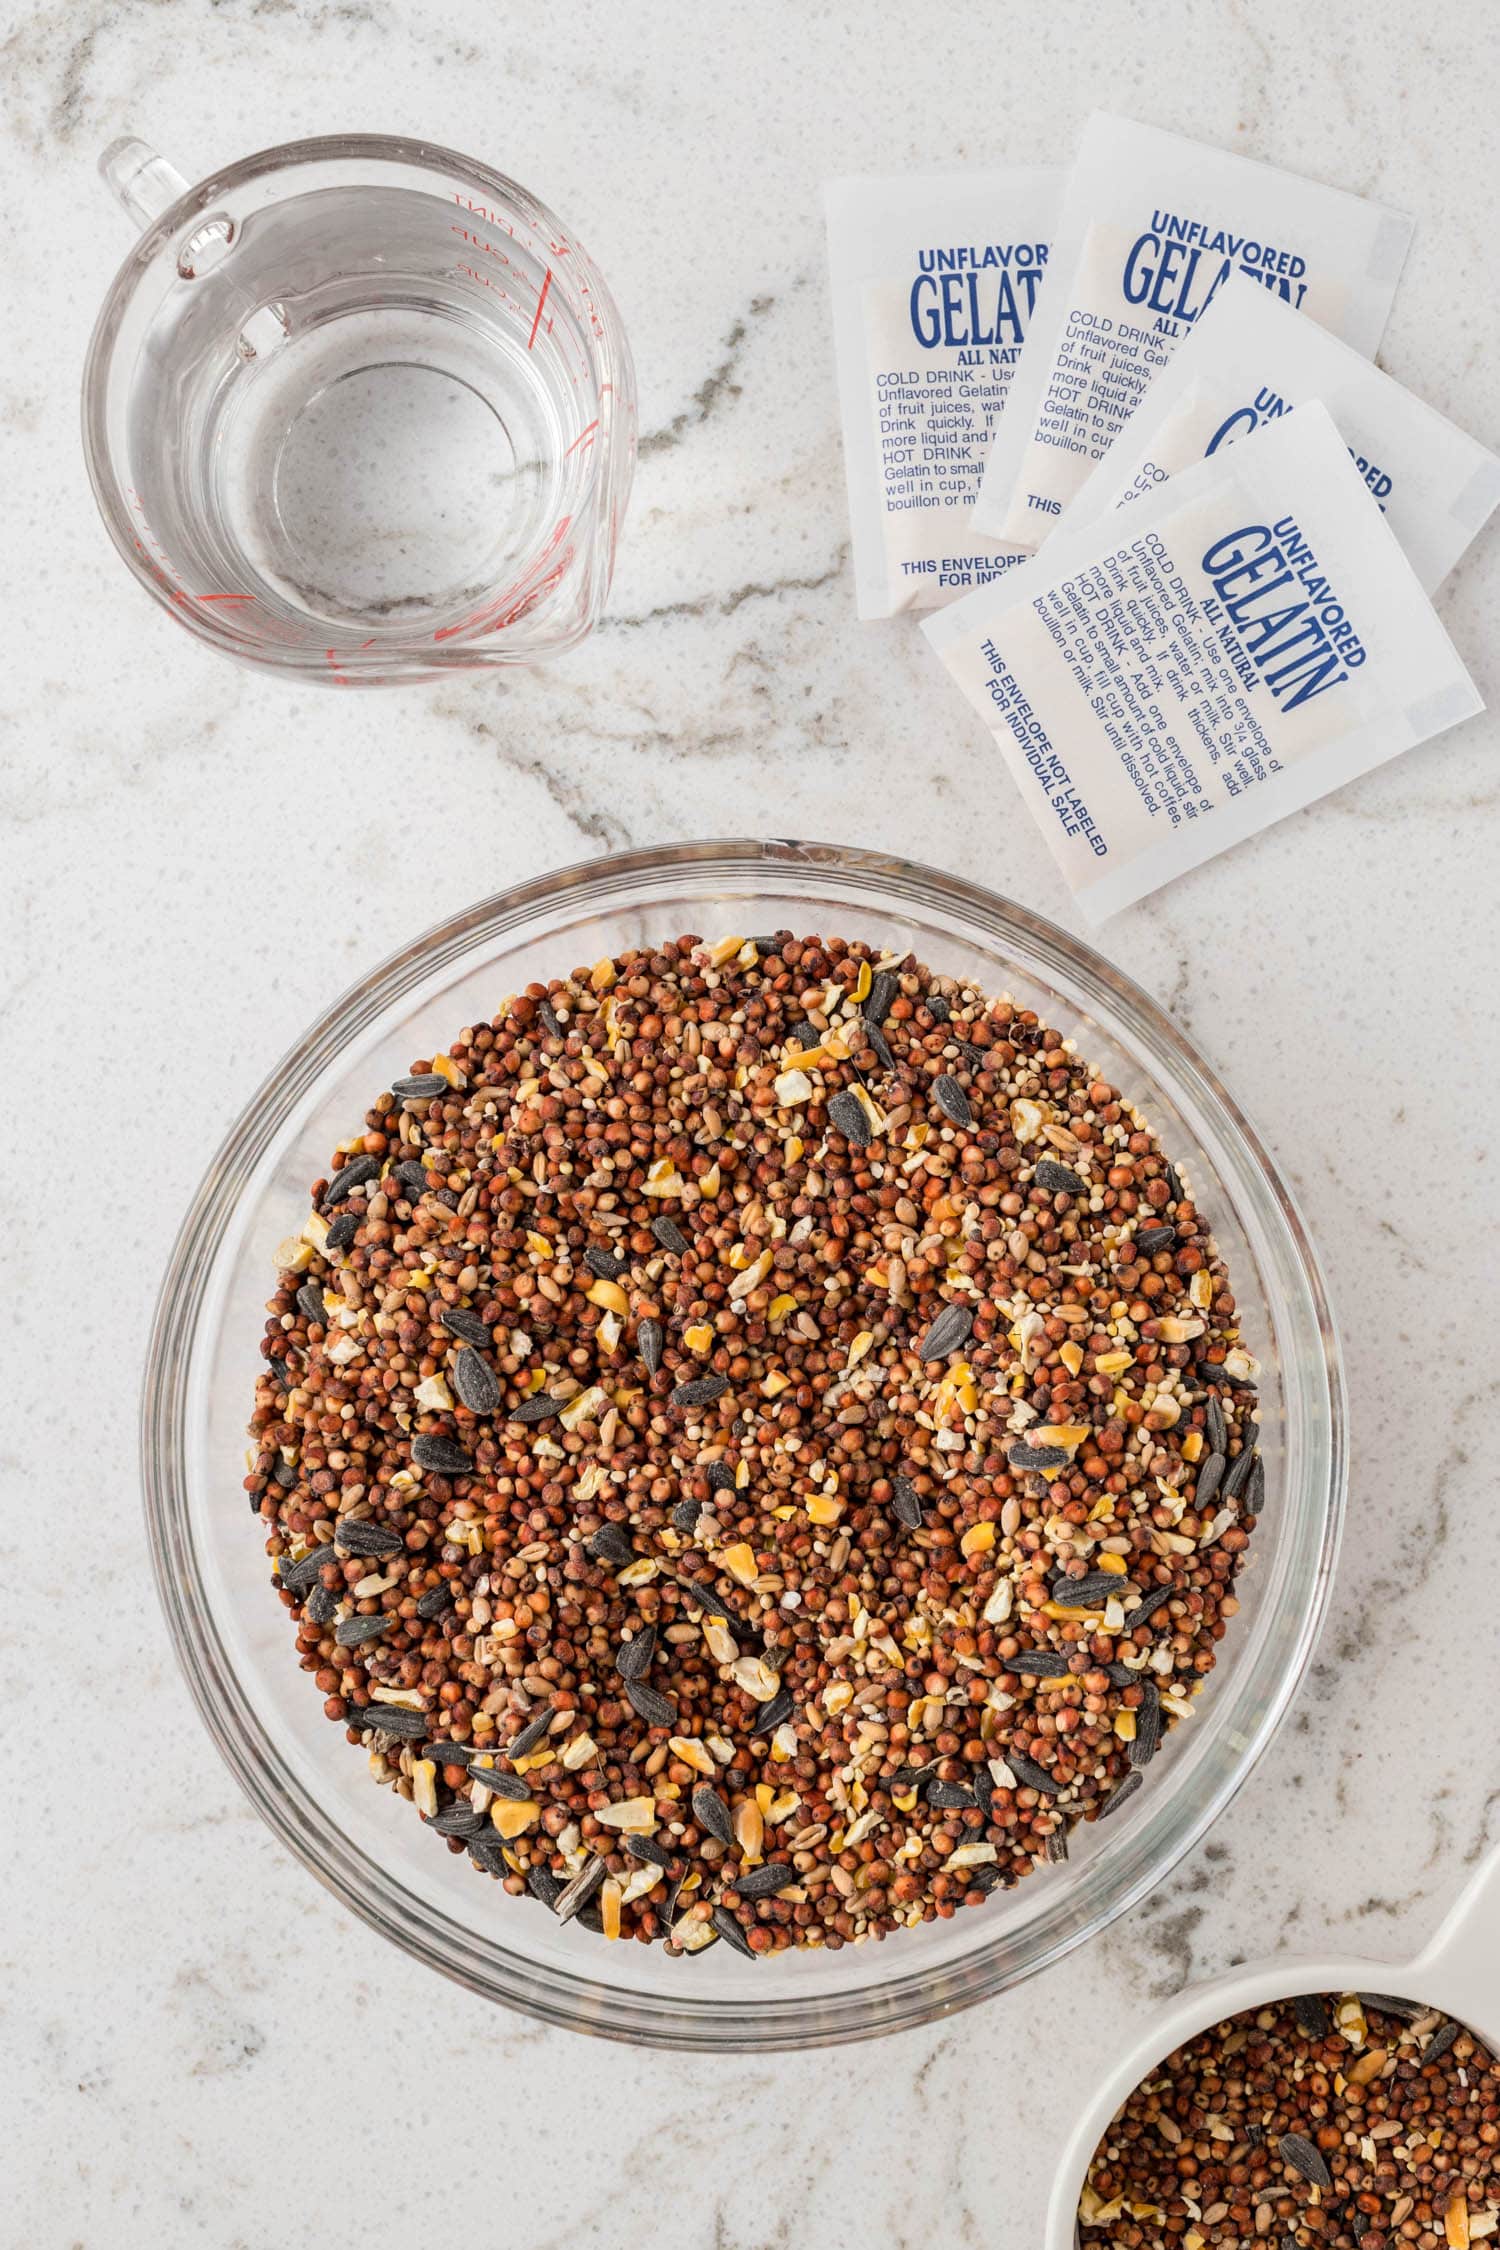
- Wild bird feed – It’s best to use wild bird seed when making a homemade bird feeder. You can typically find this in the garden section of your local grocery store.
- Water – You’ll need a little water to activate the gelatin used in this project.
- Clear gelatin – Clear, unflavored gelatin is safe for birds, not to worry! It will act as the binder to keep all of the bird seed together.
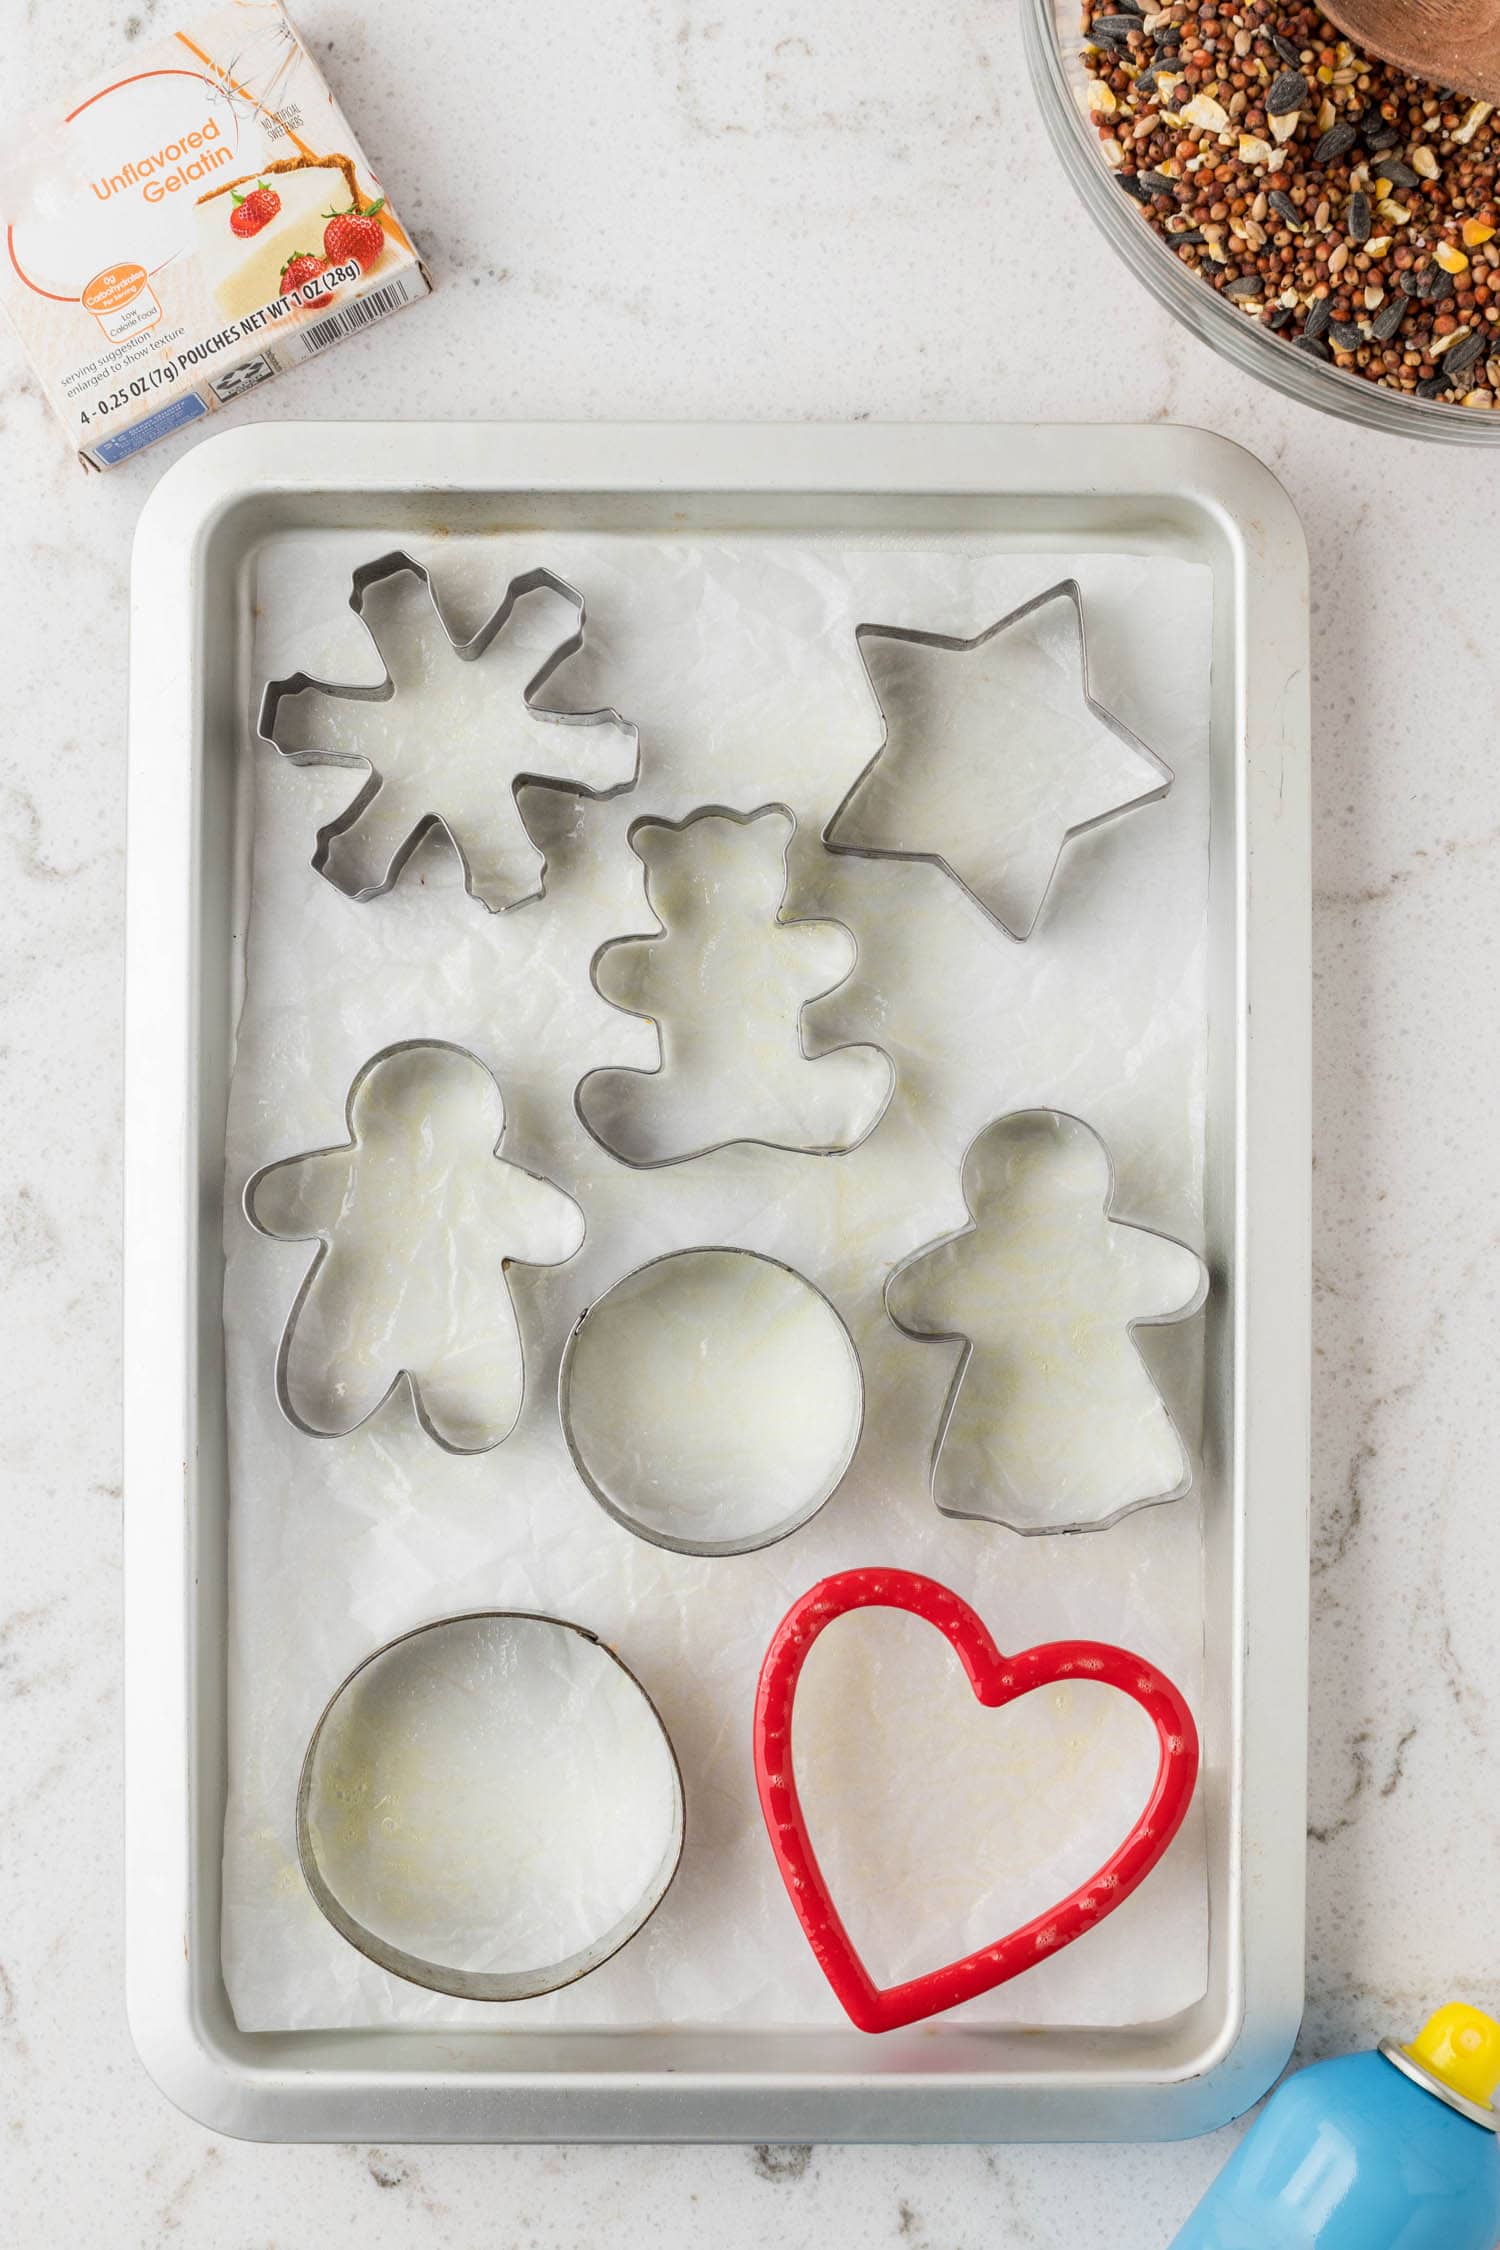
- Cookie cutters – Use any size and shape of cookie cutter that you want! I use cutters that were about 2 ½ inch wide by ¾ inch deep. It’s best that they are at least this big so they don’t fall apart from being too thin or too small. No cookie cutters? No problem! Press the seed mixture into a muffin or donut tin.
- Cooking spray – Spray each cookie cutter with cooking spray to prevent the bird seed from sticking to them.
- Straws – I just used a straw to punch a hole in the feeder to strand the ribbon through, so you can use something else if you’d like. You’ll just need a hole that is big enough to fit ribbon through.
- Ribbon – Use any ⅜ inch ribbon to hang this feeder from. You can also use twine, fishing line, or a strong string. Whatever you’ve got on hand will work great!
- Mixing bowls – You’ll need a couple of glass mixing bowls to complete this craft.
- Liquid measuring cup – Accurately measure the water for mixing the gelatin.
- Whisk – Use a whisk to mix the gelatin into the water and help it begin to activate.
How to Make a Bird Feeder
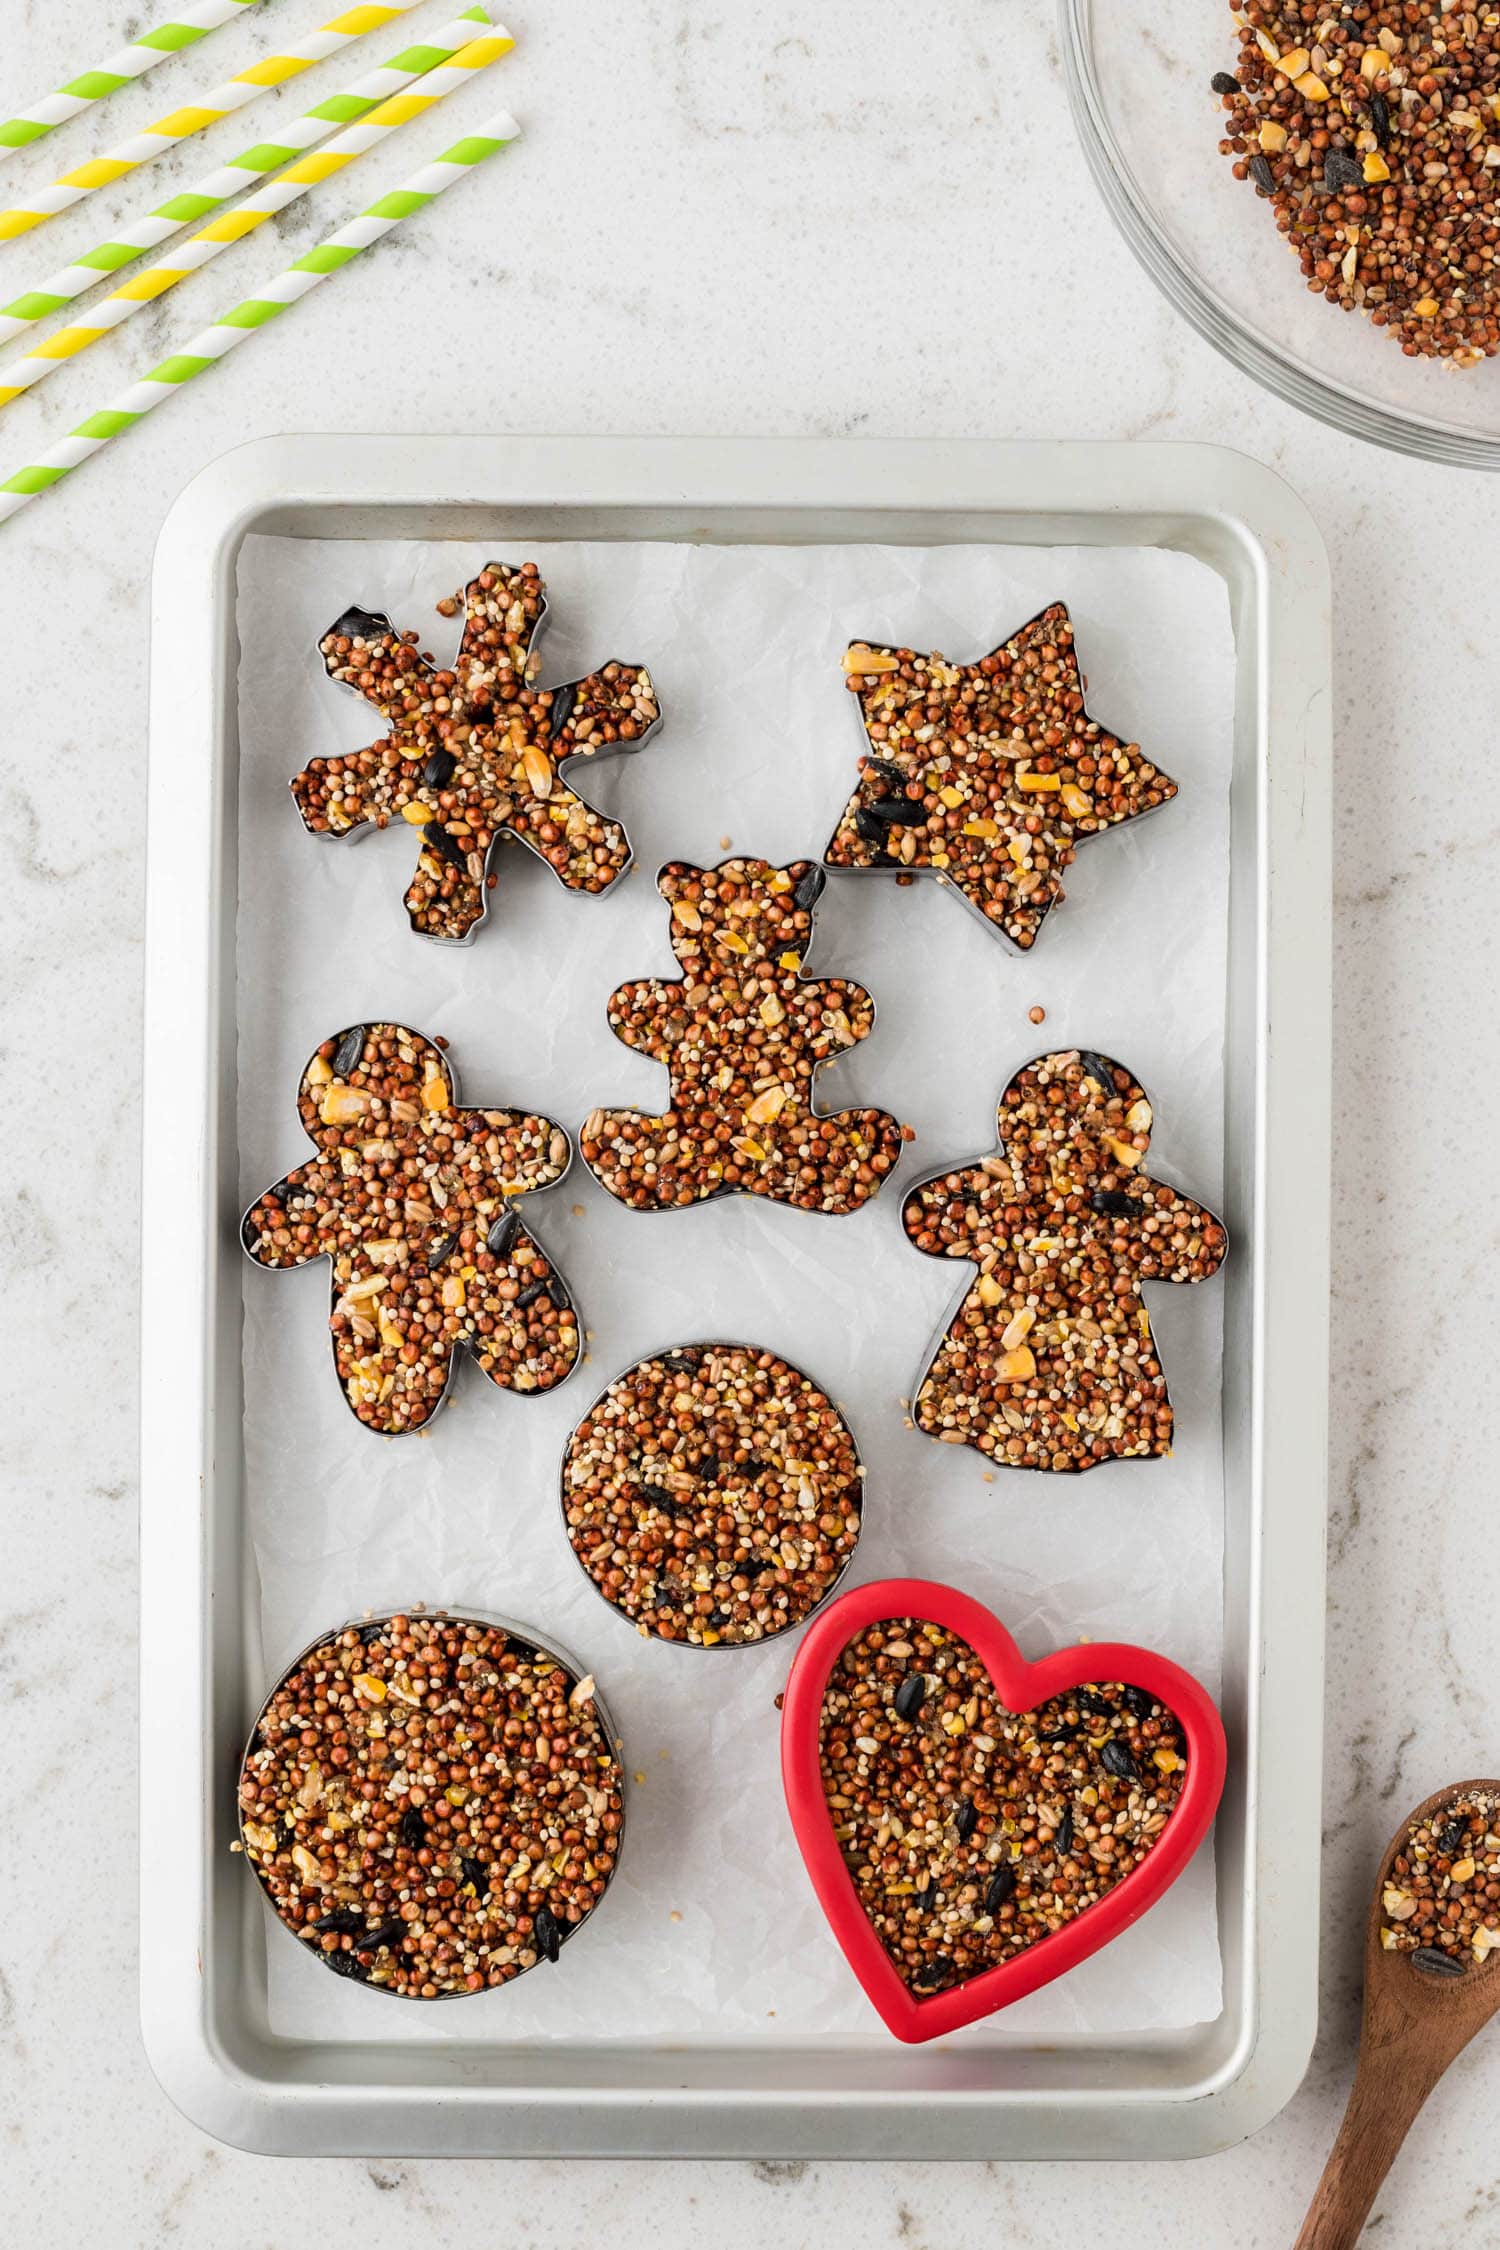
Line a baking sheet with parchment paper and place your chosen cookie cutters onto the sheet. Spray each cookie cutter well with cooking spray.
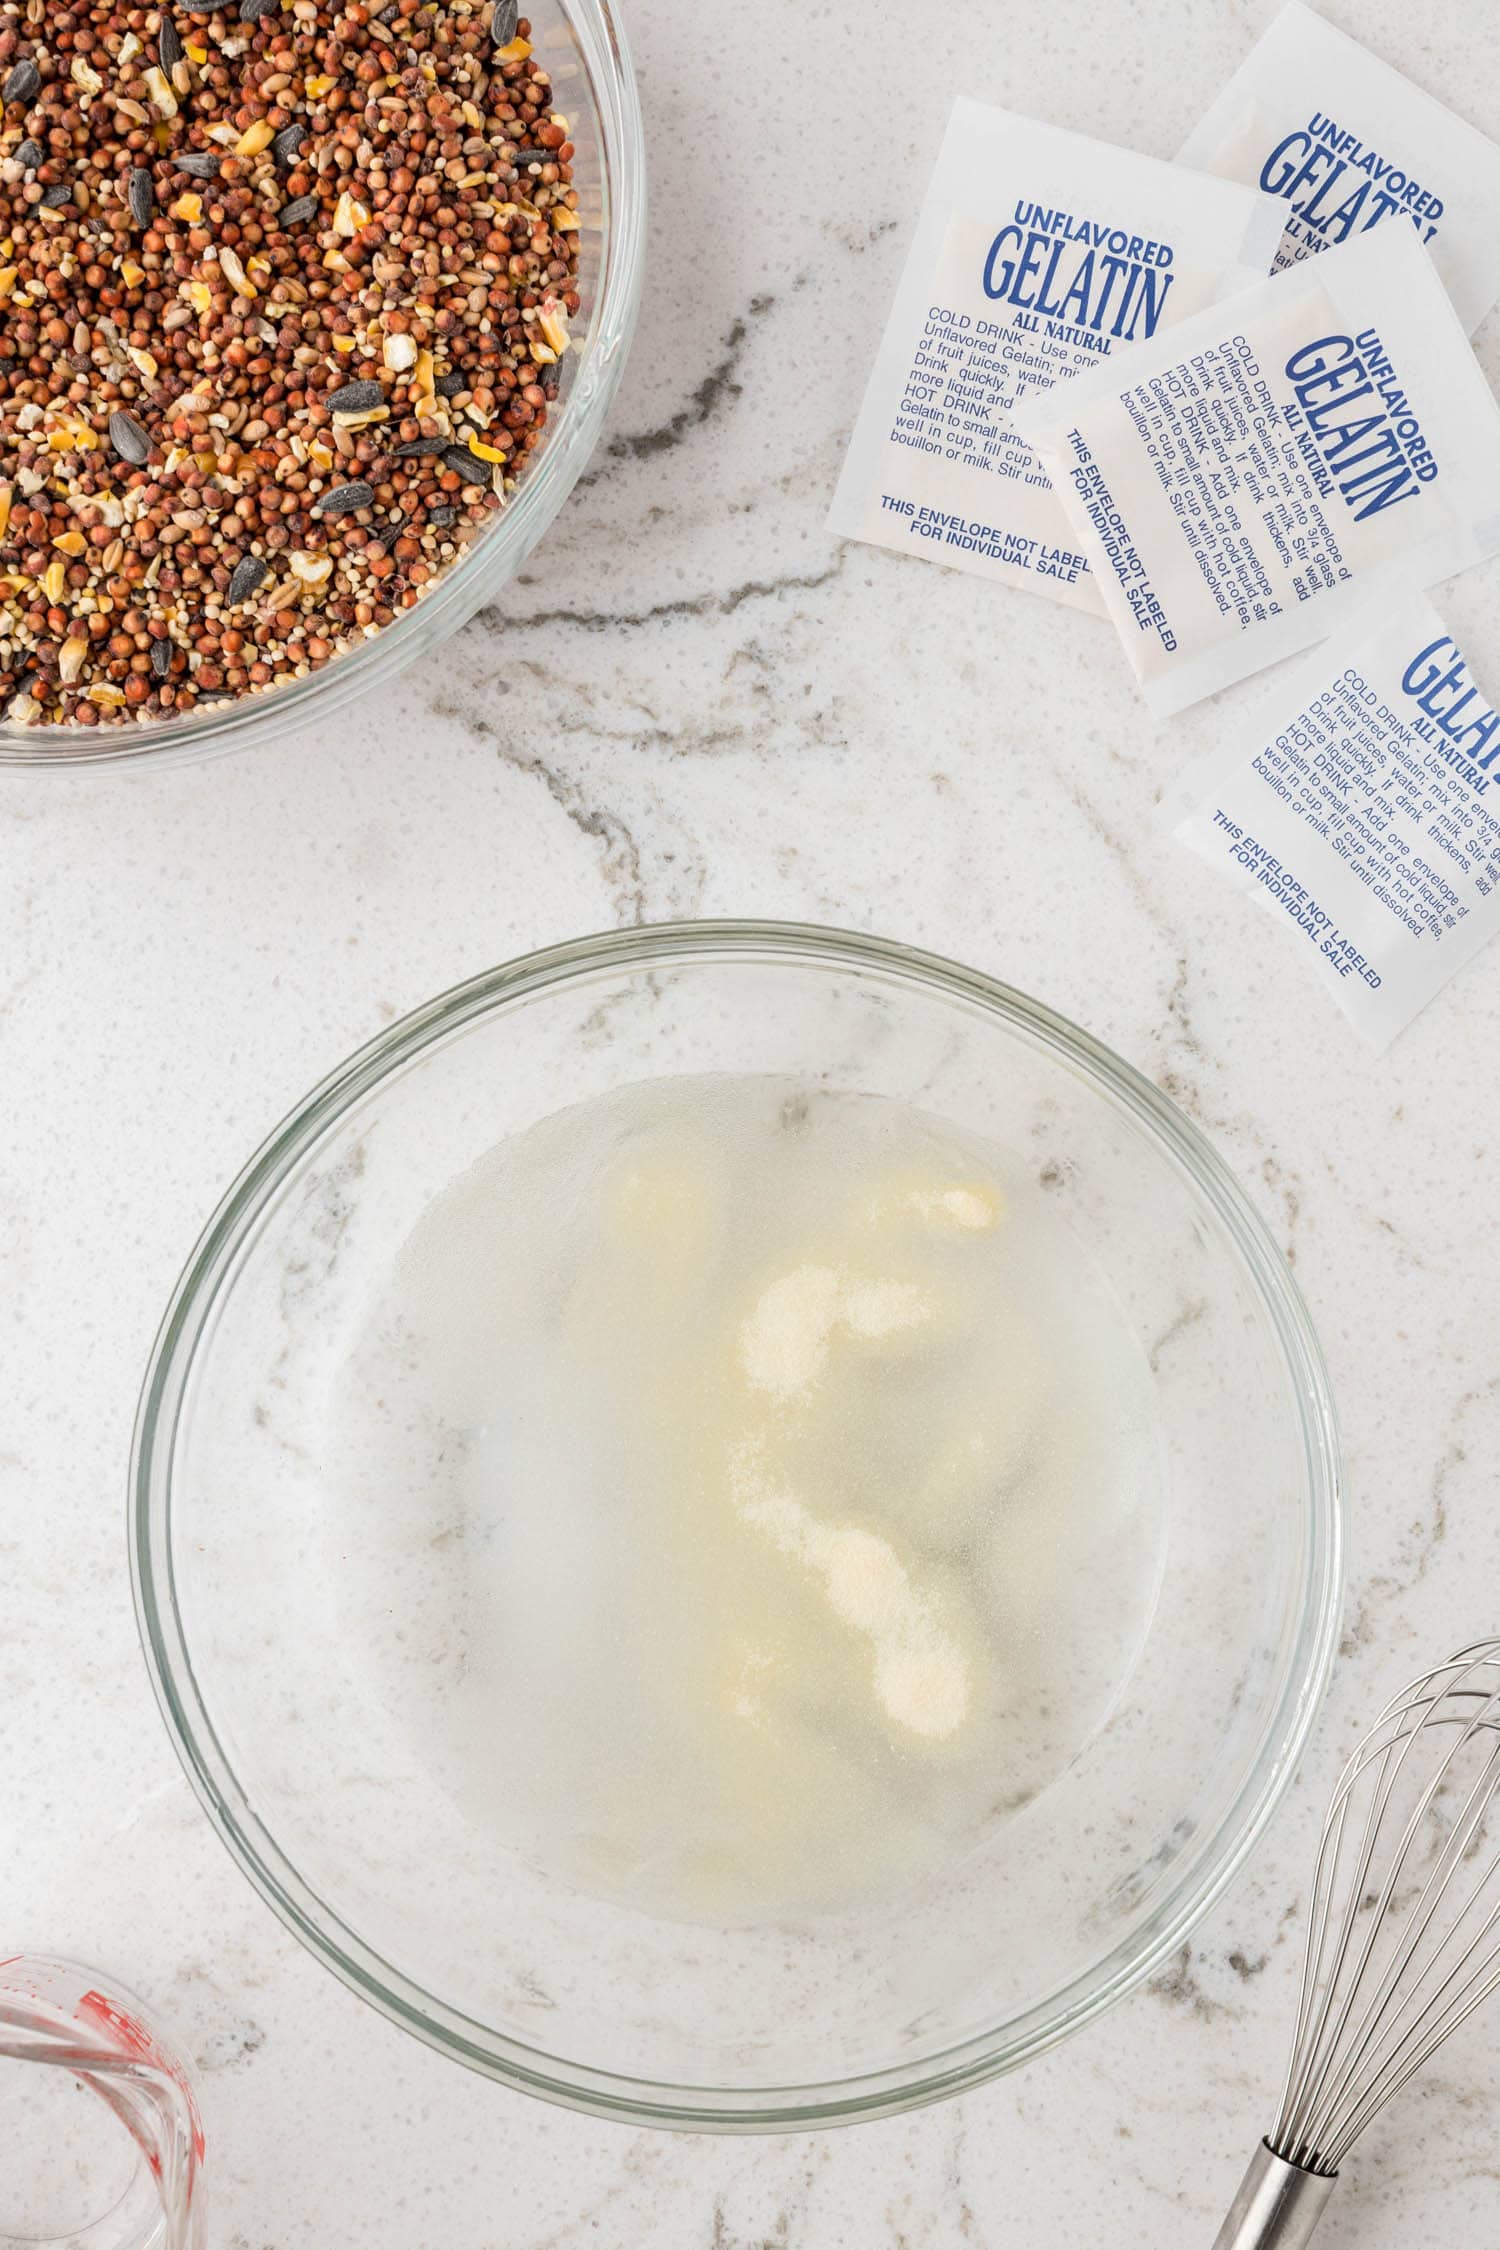
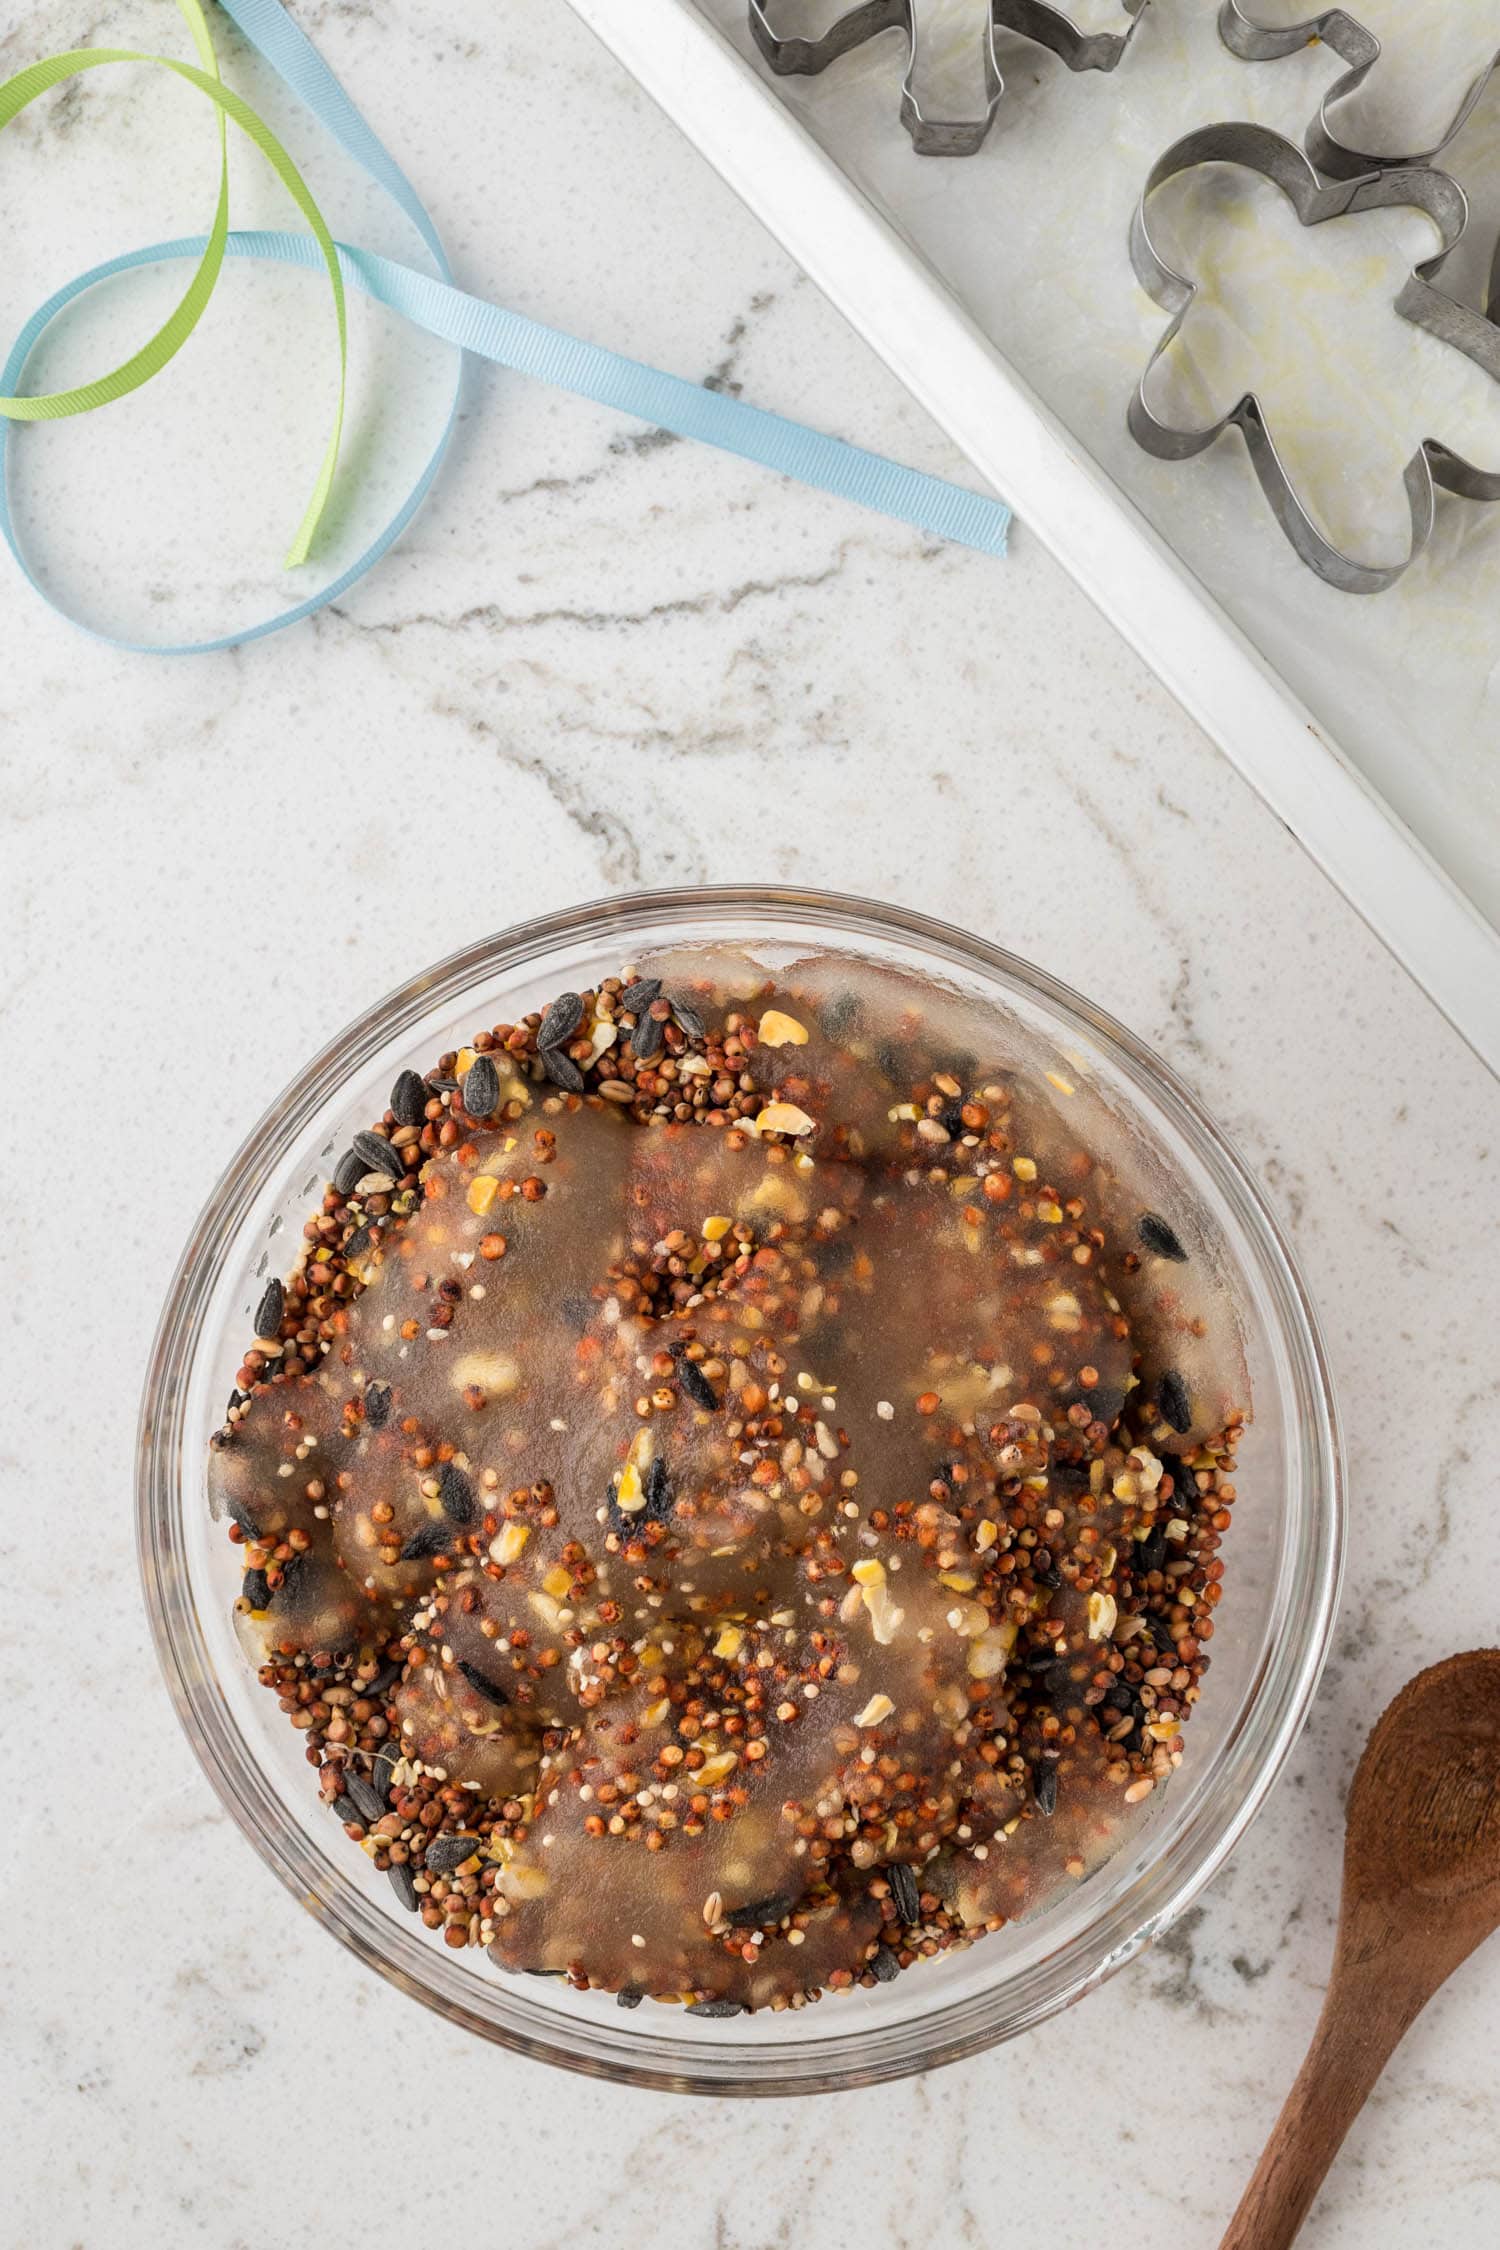
Pour 2-3 cups of wild bird feed into a large glass mixing bowl and set it aside. Then, grab a medium mixing bowl and pour half of the water into the bowl. Sprinkle clear gelatin into the water and whisk to mix. Then whisk in the hot water until all the gelatin powder dissolves.
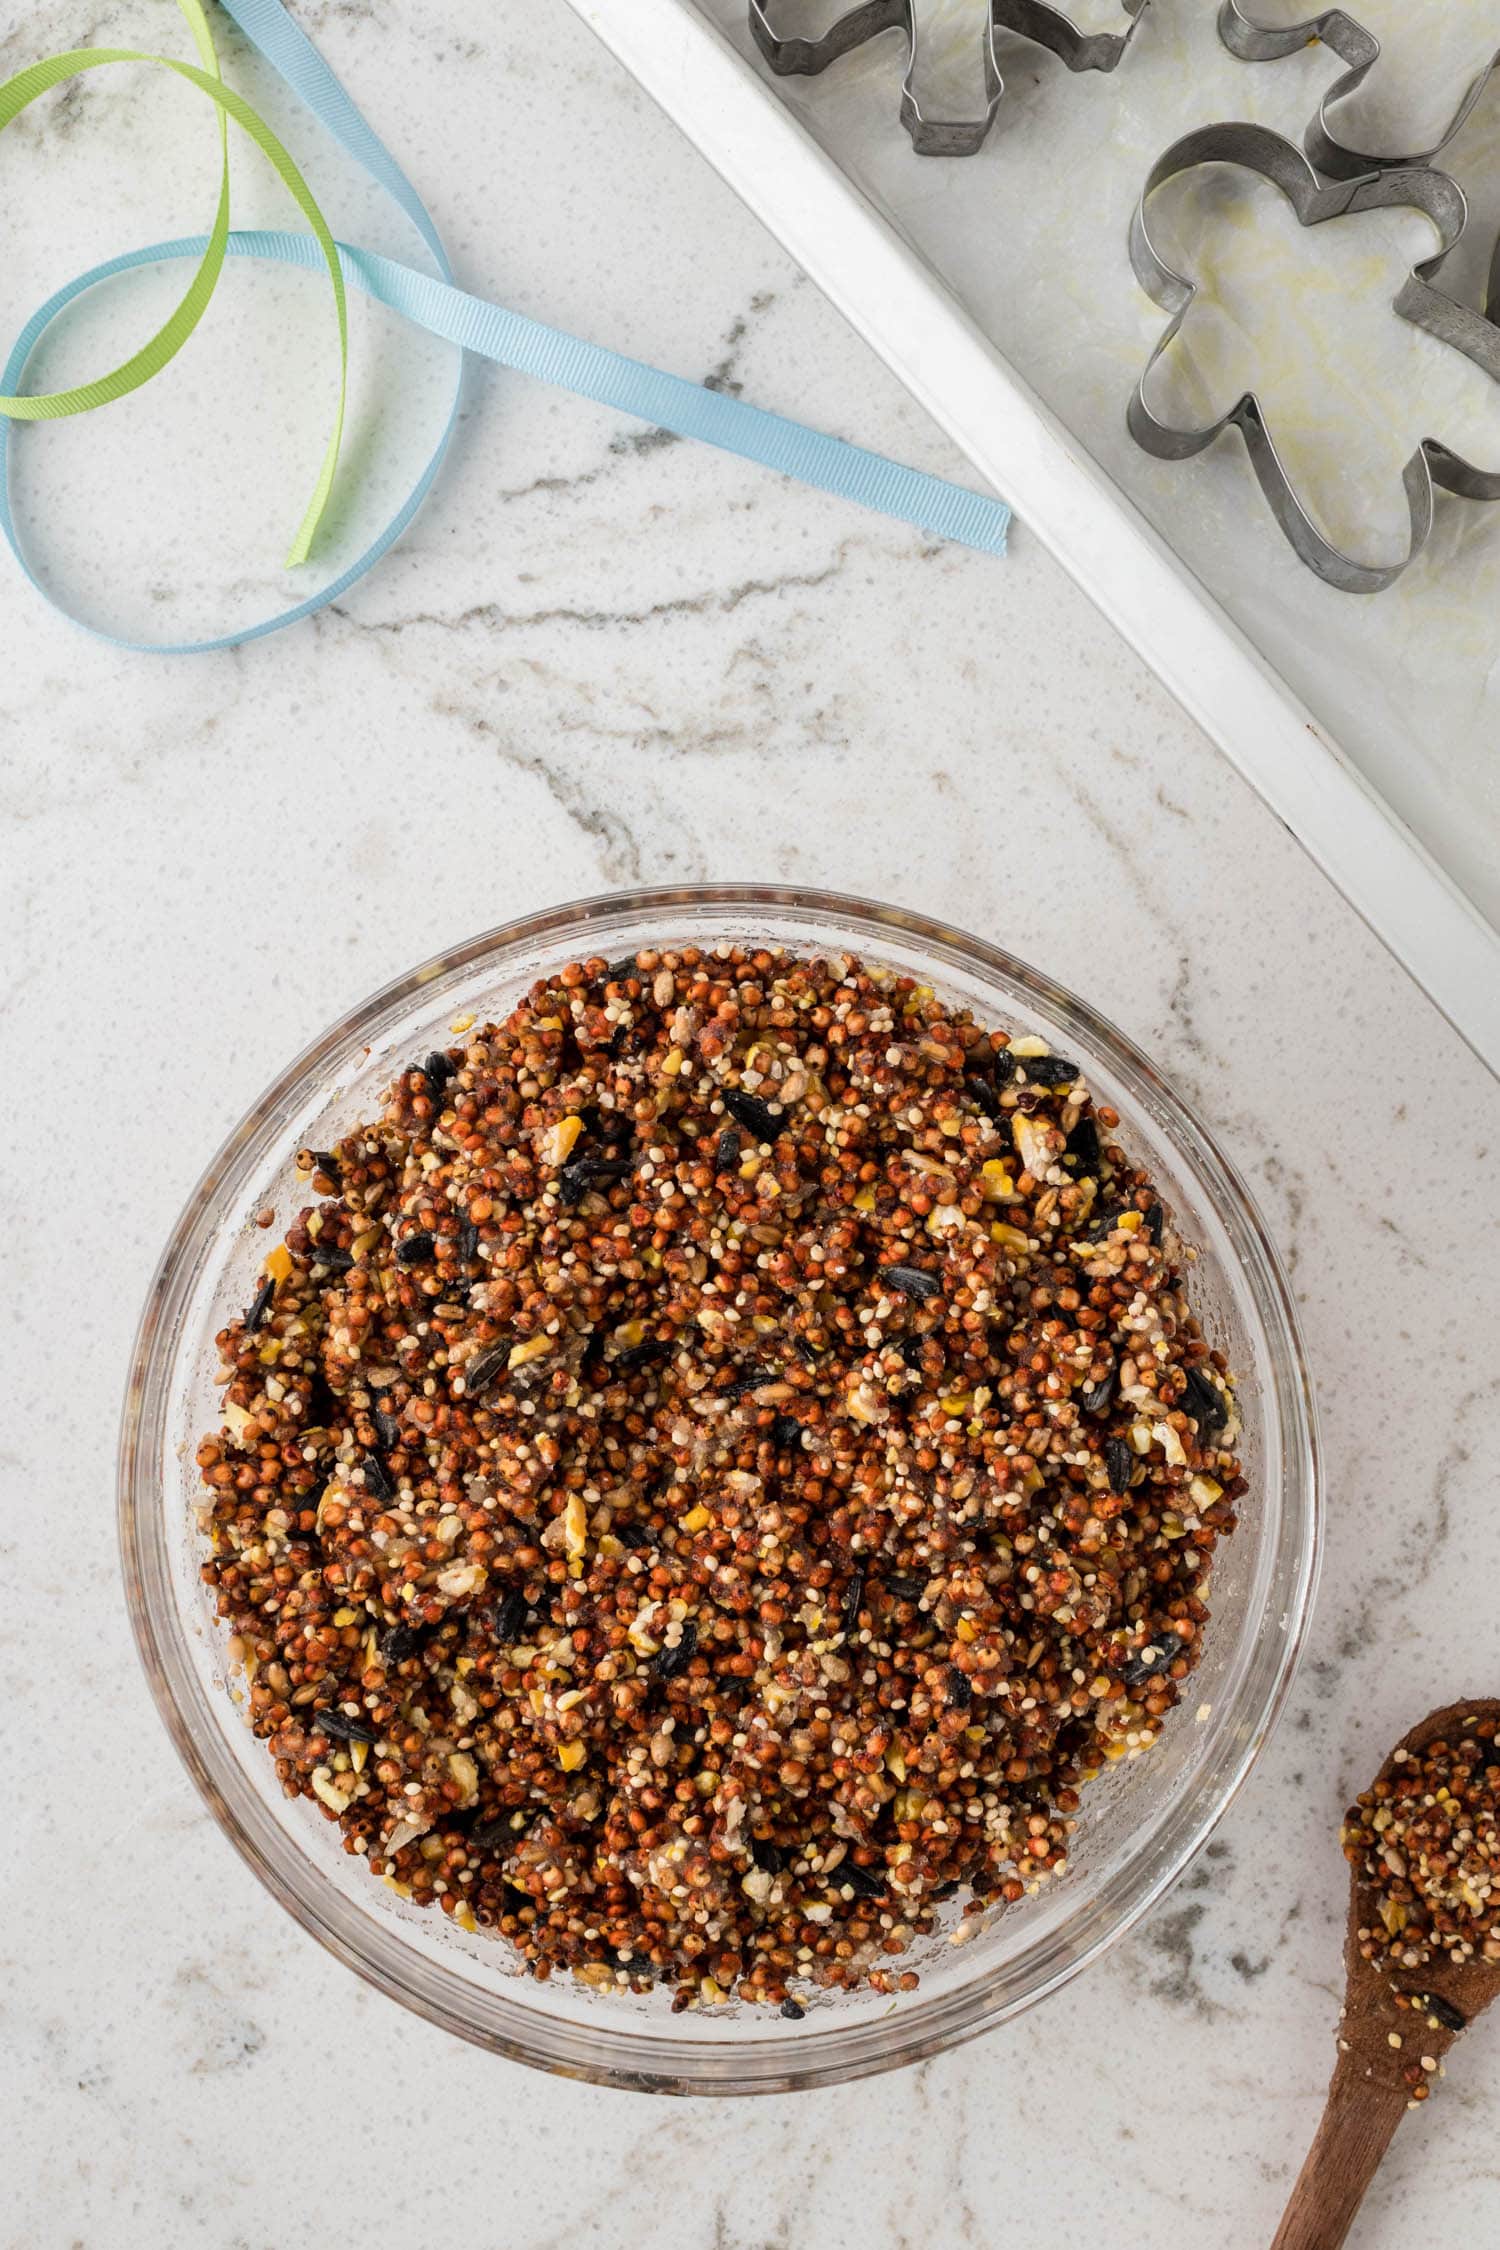
Pour the gelatin mixture into the bowl with the bird feed and stir until the liquid is absorbed. Then, place the bowl in the refrigerator for 5 minutes and allow the gelatin to cool and set.
Cut the straws into 3-inch sections, then spoon the bird feed mixture into the cookie cutters. Press the mixture into the cookie cutters and make sure it is even. Then, place the straws about a ½ inch down from the top of the cookie cutter and push it all the way through.
Place the entire cookie sheet into the fridge overnight, or at least for 8 hours.
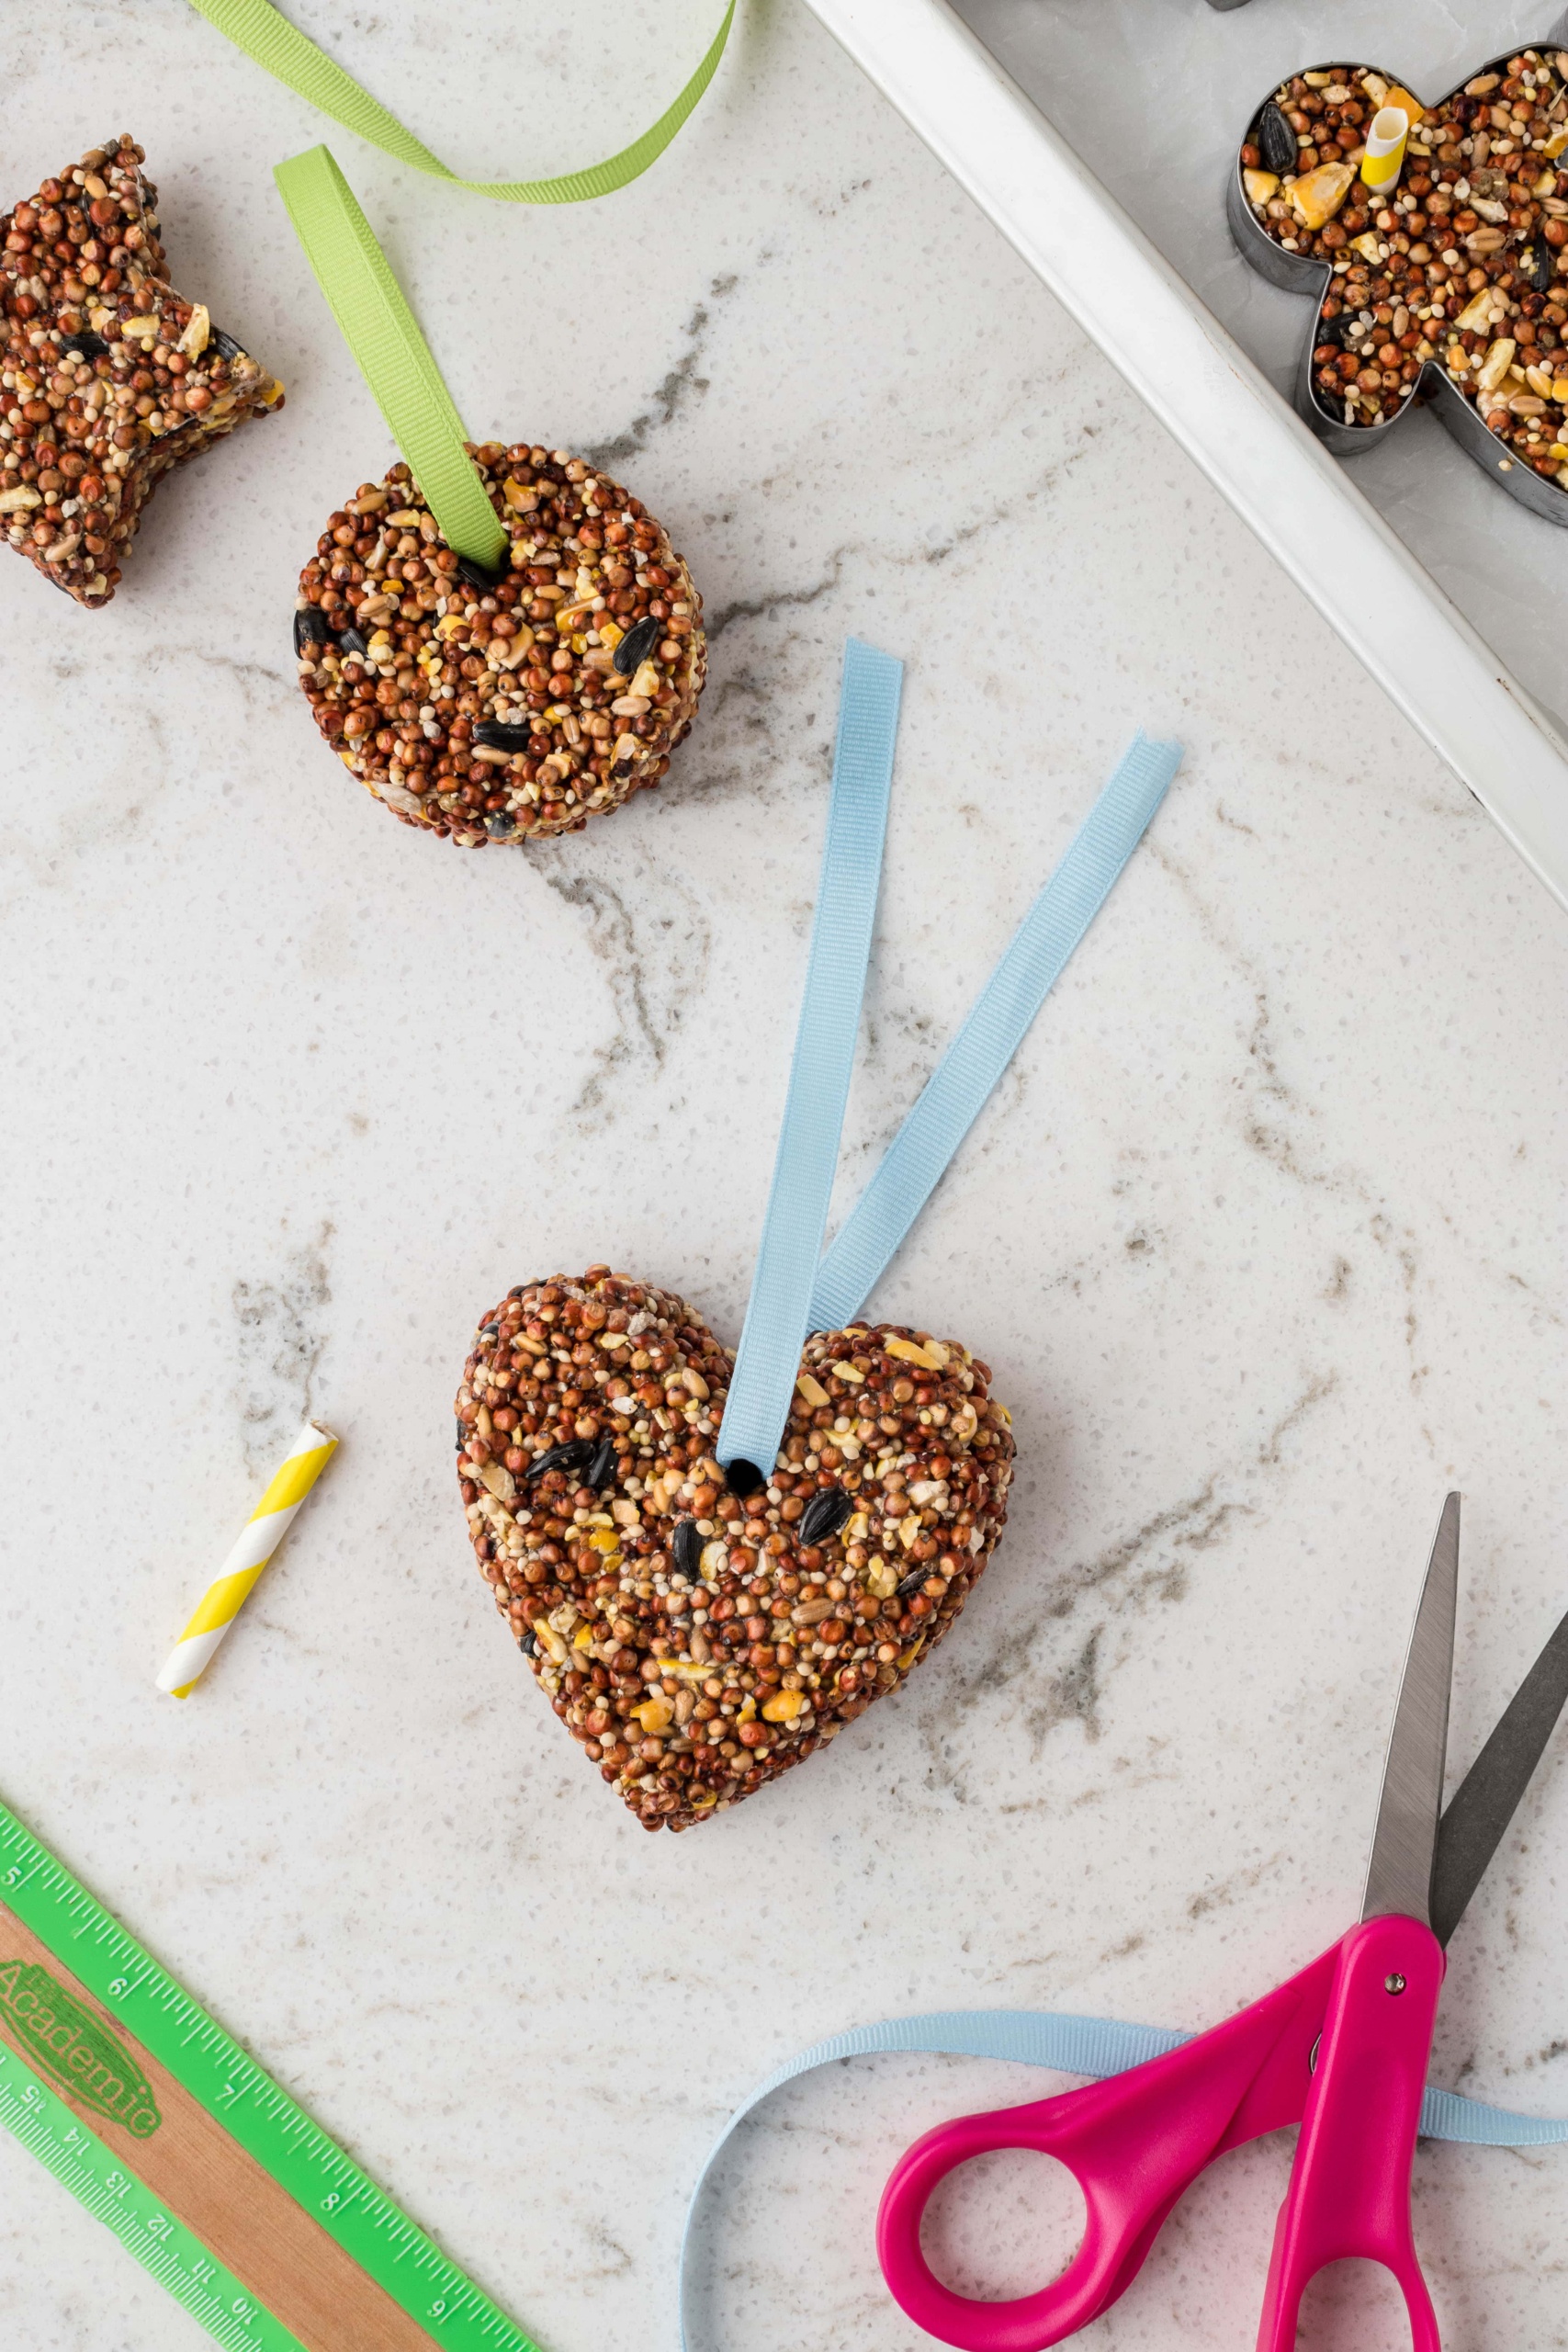
Once set, gently remove the cookie cutters. Then, push the straws through the hole to clear it for a ribbon to pass through.
Cut your ribbon to the desired length and thread it through the hole. Tie a knot or a tight bow at the end so that is secure. Allow each DIY bird feeder craft to dry for 24 hours before hanging it outside.
Once it’s fully dry, it’s ready to go!
Storage
Keep any extra birds feeders in an airtight container or ziplock bag for up to 3 months. Make sure they are kept in a cool, dry environment.
Pro Tips
- Be sure you poke the hole for the ribbon down far enough so that the top of the bird feeder doesn’t break.
- Use multiple different cookie cutter shapes to have a wide variety of feeders.
- Feel free to add some dried fruits or nuts, like cranberries and pecans, to the bird seed for an extra tasty treat for the birds.
- The amount of bird feed and gelatin needed will vary depending on the size of your cookie cutters.
- Be sure to press the bird feed/gelatin mixture firmly inside the cookie cutters. This helps prevent them from falling apart.
I hope you have so much fun making these little treats for you backyard bird pals! And don’t forget to make some DIY garden stepping stones to go in your garden with the bird feeder.
DIY Bird Feeder Craft
Equipment
Ingredients
- 2-3 cups wild bird feed
- 1 cup water divided
- 4 to 5 packets clear gelatin (.25 ounces each)
Instructions
- Prepare a cookie sheet with parchment paper. Place your cookie cutters on the cookie sheet and spray the inside with cooking spray.
- Place 2-3 cups of wild bird feed in a large glass bowl. Set aside.
- Grab a medium glass bowl and pour half of the water into the bowl. Sprinkle the gelatin into the cold water and whisk to mix. Heat the remaining water in the microwave until boiling. Whisk the hot water into the gelatin mixer until all the powder dissolves.
- Pour the smooth gelatin mixture into the bowl with the bird feed and mix until the liquid is absorbed. Place in the fridge for 5 minutes to allow the gelatin to set and cool.
- Cut the straws into 3-inch sections. Spoon the cooled bird feed mixture into the cookie cutters. Press the bird feed mixture firmly into the cutters. Place the straws about ½ inch down from the top of the cookie cutter, pushing them through to the cookie sheet. Doing so will create the hole for the ribbon to hang it.
- Place the cookie sheet into the refrigerator for at least 8 hours or overnight.
Gently remove the cookie cutters. - Next, remove the straws by pressing them through the hole to ensure it is clear for the ribbon to pass through.
- Finally, cut your ribbon to the desired length and thread it through the hole.
- Tie a knot in the end to secure. Allow 24 hours to air dry inside before hanging for best results.
- Now your DIY bird feeder is complete and ready to hang outside!
More Great DIY Crafts
- You can create matching family 4th of July t-shirts by DIYing a Red, White, and Blue Tie Dye T-Shirt! Make them for everyone you will be celebrating with and you won’t lose track of anyone while you’re out and about at the patriotic festivities.
- Make your own Christmas keepsakes with this fun Cinnamon Ornaments craft. You only need two ingredients, so the kids can make them any time they want.
- You can make your own Homemade Snow Globe during the cold winter days. Simple to make and a great teacher gift for holiday time. You can make them with or without liquid, but glittery faux snow is always a must!
- Want to make some homemade Halloween decorations? This Easy DIY Ghost Garland is so cute and makes the friendliest looking ghosts around.
We love these bird feeders! The kids actually made them for gifts for their grandparents!
Glad you enjoyed making this craft!
Hello!! Such a cute idea!! Just wondering if the gelatin is okay for the birds?
Yes! Plain, unflavored gelatin is considered safe for birds.