Monster Oreo Pops
Need an easy no-bake Halloween Treat? Make these delicious Monster Oreo Pops. Start by dipping Oreo cookies into melted chocolate, then decorate with sprinkles and candy eyes. These Oreo Pops make great party favors, gifts or after school snacks for the kids. Plus, it’s a great Halloween activity!
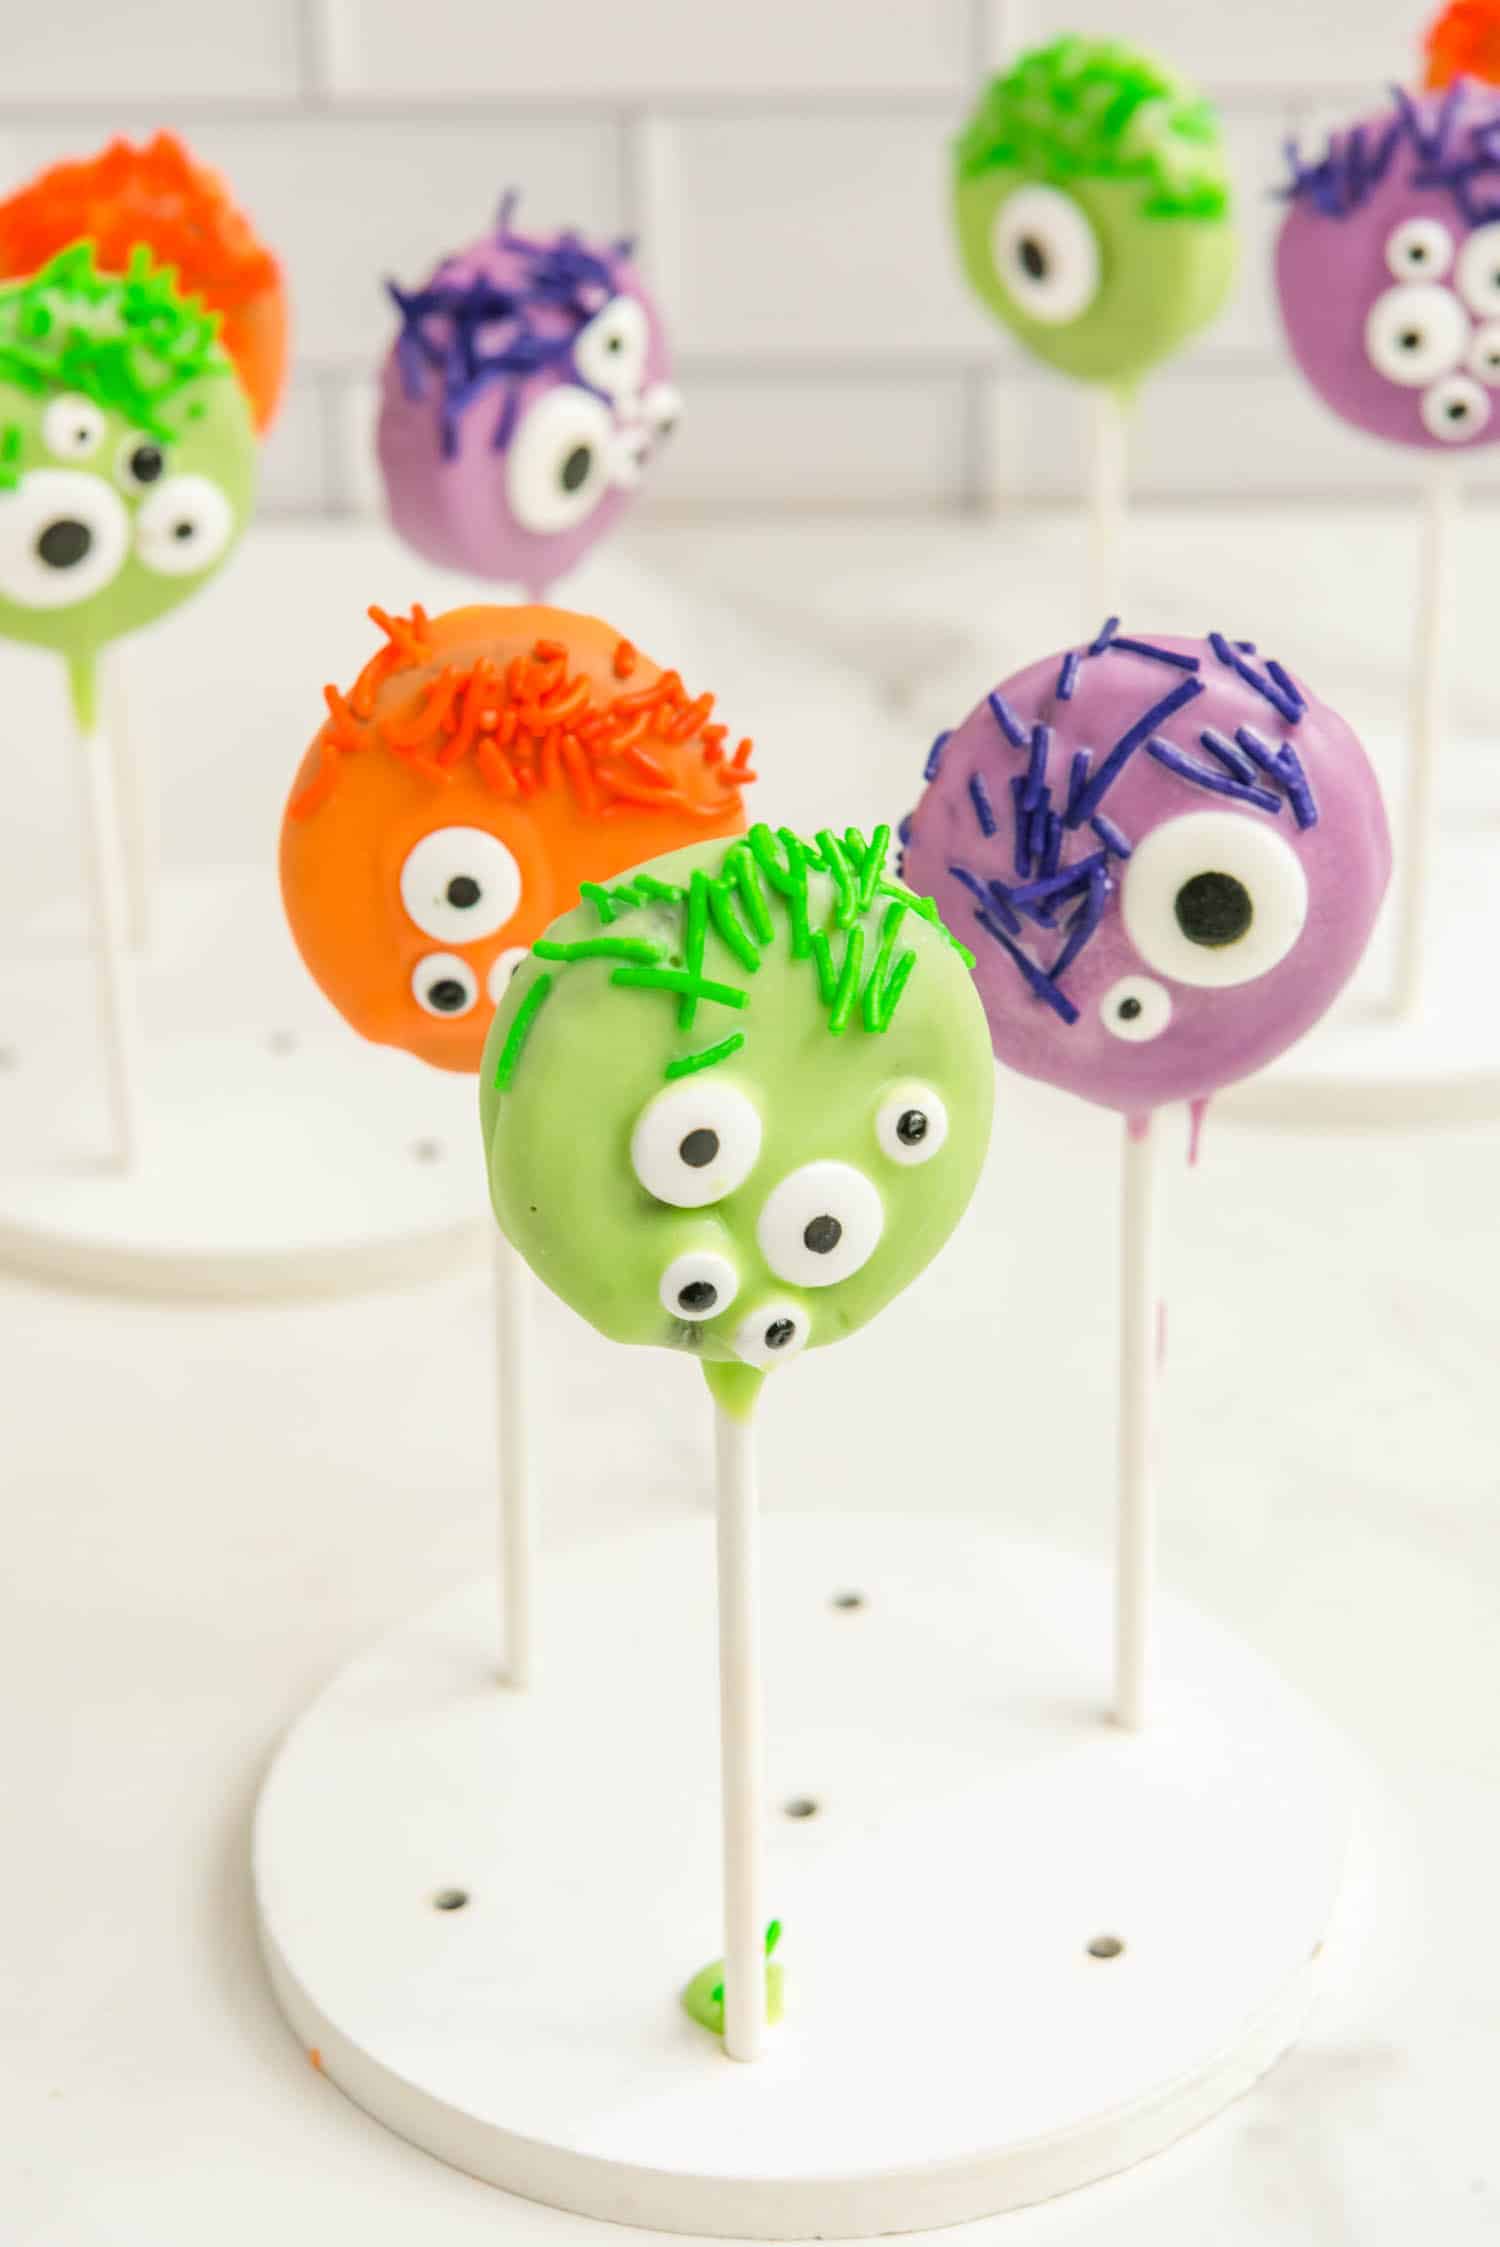
Monster Oreo pops are such a fun Halloween treat! The recipe is super simple and perfect for little hands to be involved in the process. This no bake sweet treat is a great way to make a themed dessert without all the extra time and effort.
Sometimes people can make Halloween a little too scary, which is why I like to keep our party foods and activities really cute. Oreo pops, Oreo spiders and ghost cupcakes are some of our favorite treats. These yarn ghosts and coffee filter bats are some of our favorite crafts!
You’ll love how Halloween Oreo pops turn out. Oreos are always a crowd favorite, so this dessert is always popular. Plus, whenever I find kid-friendly recipes that your little chefs can get involved in I’ll always share! It’s never to early to pass on a love of cooking and baking.
Why You’ll Love Monster Oreo Pops
- These monster Oreos are so cute that they can actually serve as a centerpiece on your dessert table if you want them to!
- You only need about 30 minutes out of your busy schedule to prep a batch of Halloween Oreo pops.
- Wrap each pop in cellophane and tie it with a spooky ribbon. Voila, easy gifts or party favors for Halloween!

Ingredients for Halloween Oreo Pops
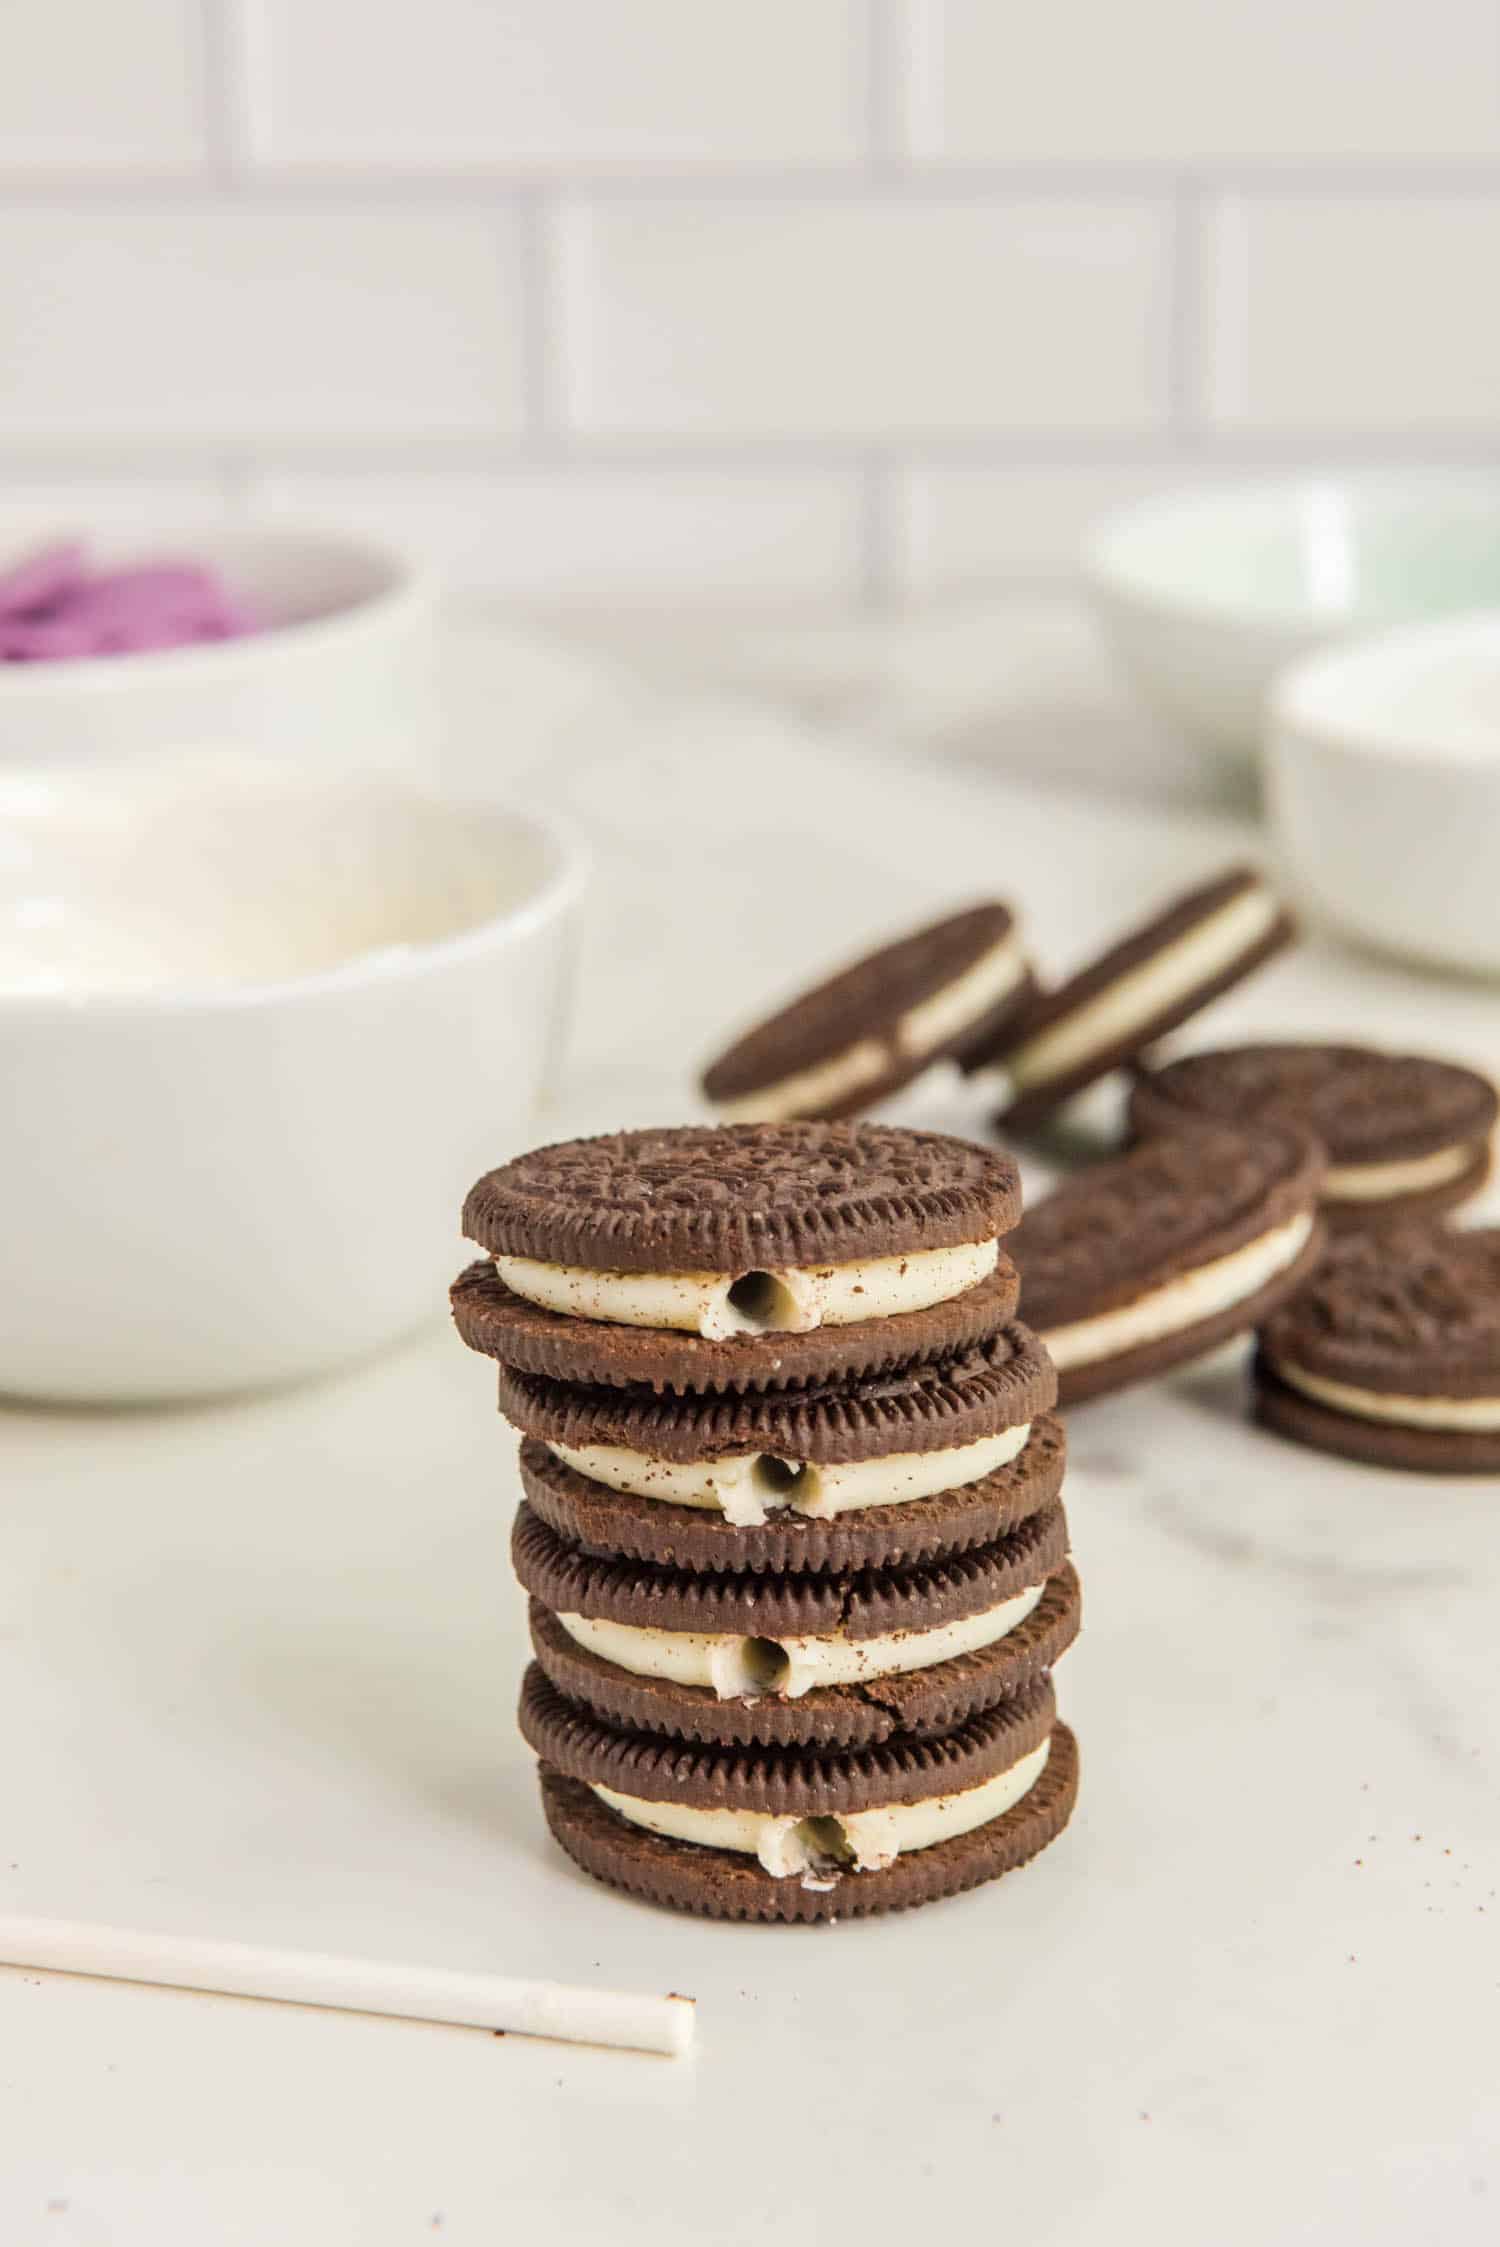
- Double stuffed Oreos – Double stuffed Oreos are a little thicker than normal Oreos so they’ll be much easier to dip in chocolate.
- Crisco shortening – Shortening will help thin out the melted wafers making it easier to dip an Oreo into.
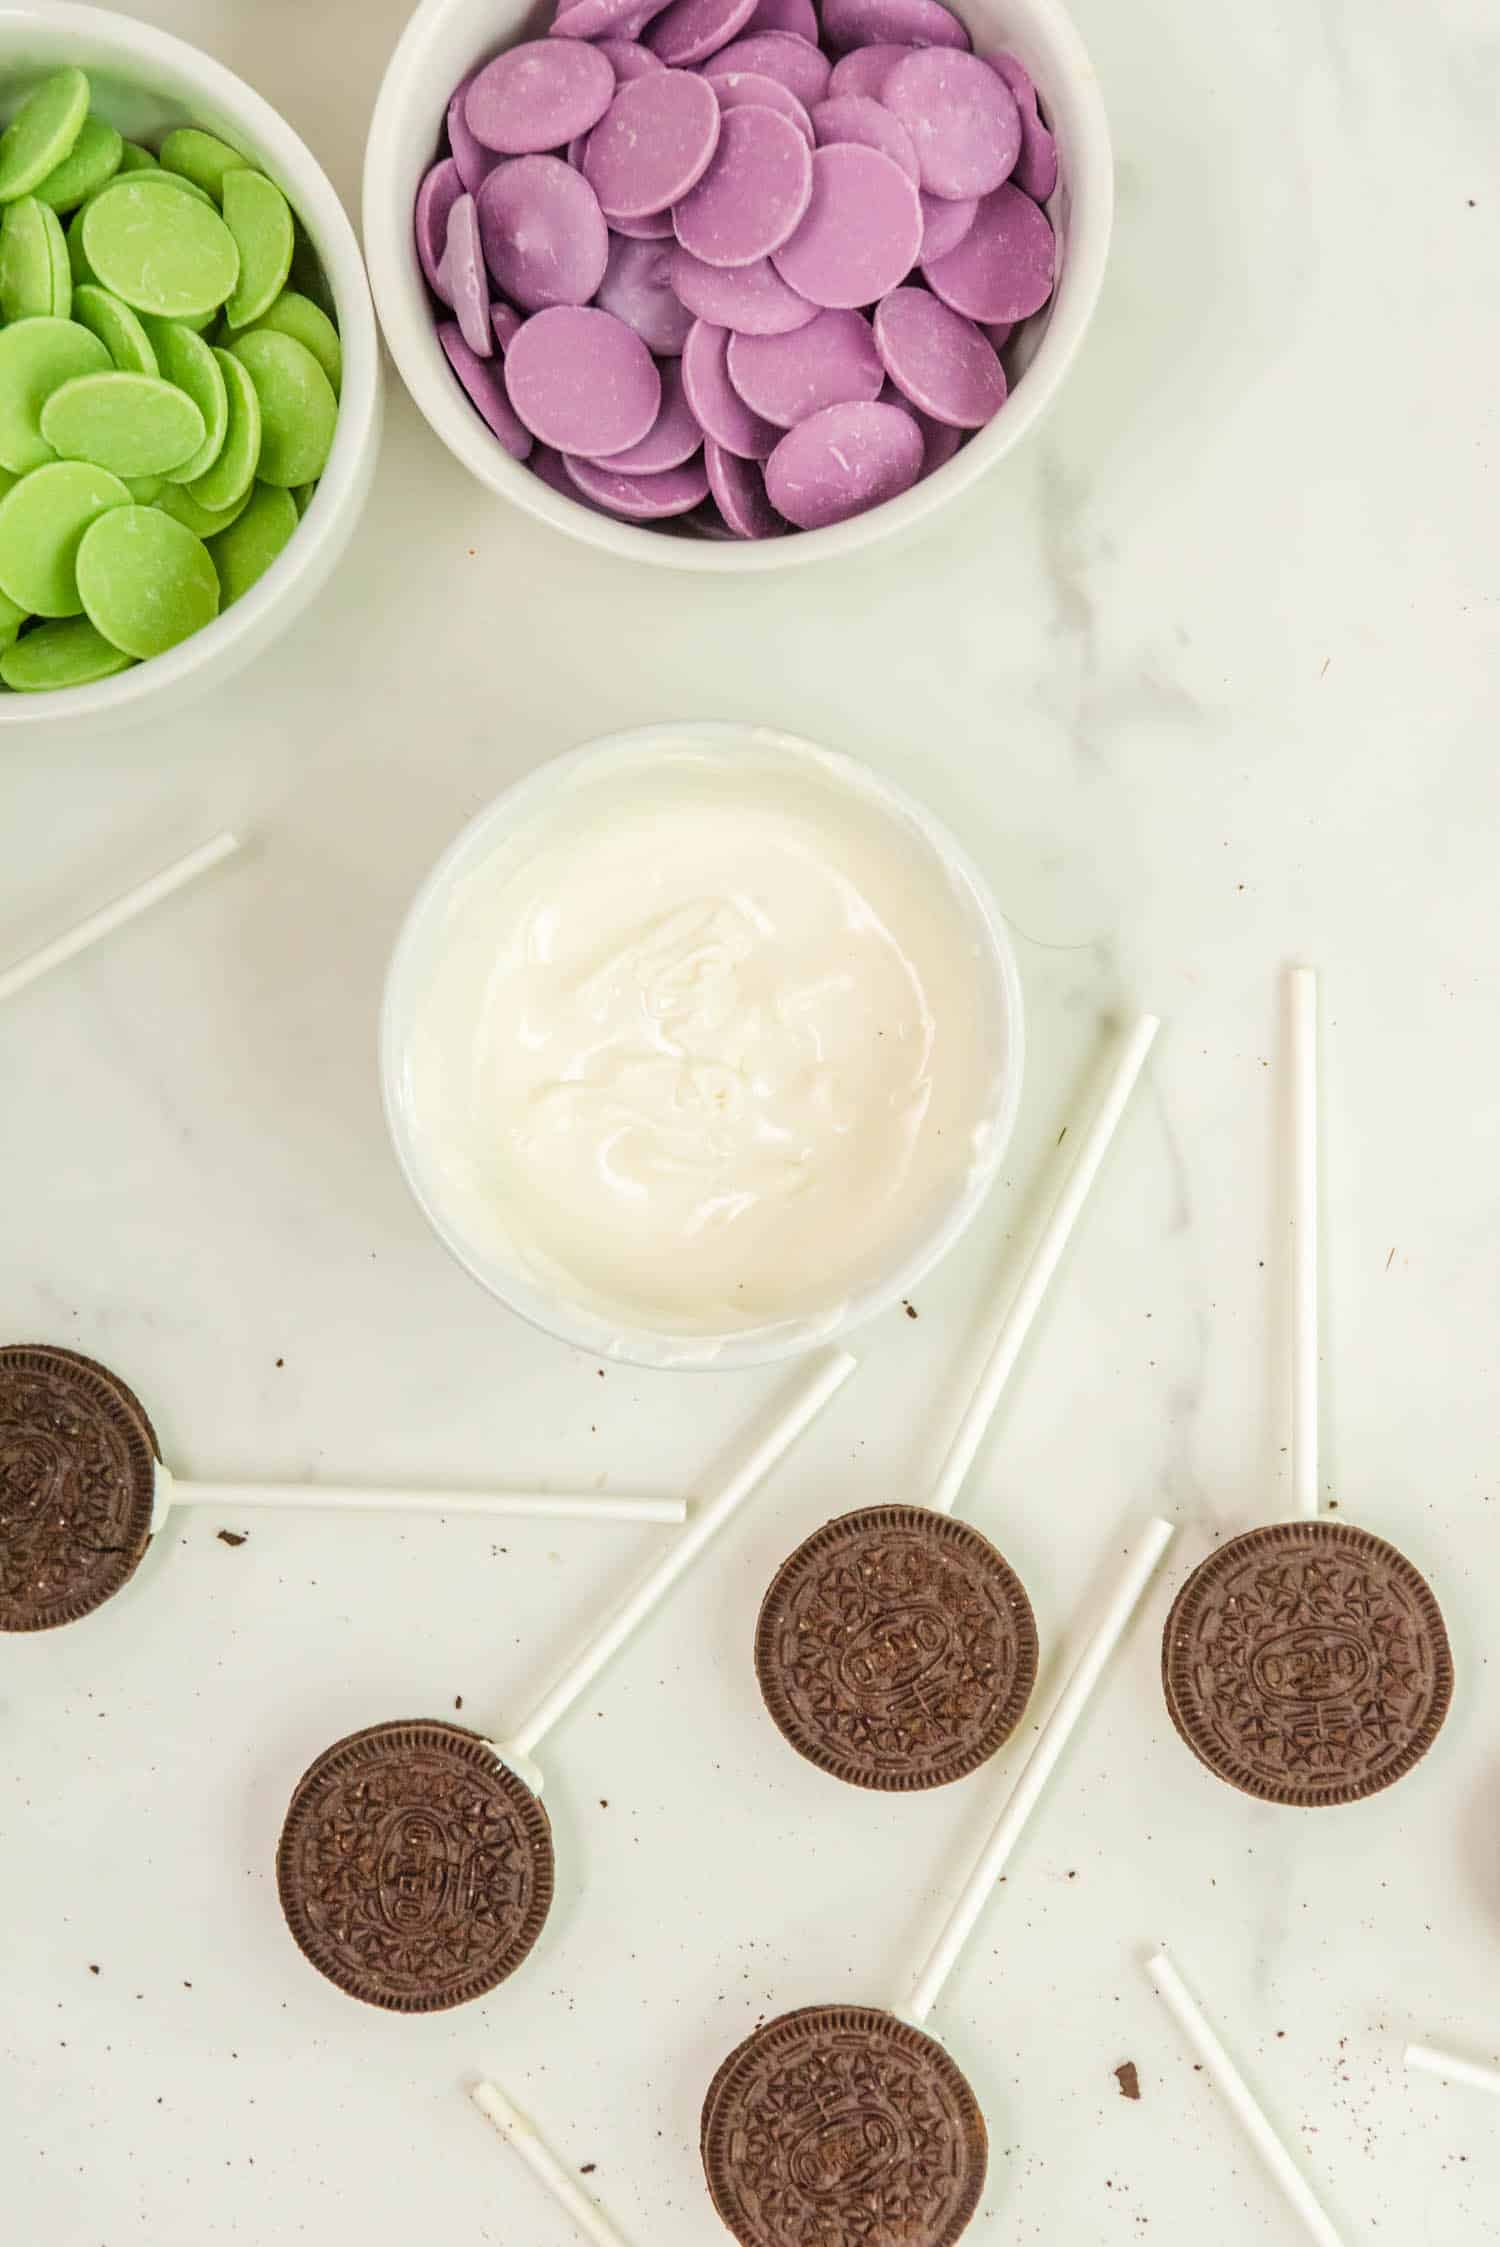
- White chocolate melting wafers – Melted white chocolate will act as a “glue” to hold the cake pop stick in the Oreo filling.
- Colored melting wafers – I used purple, green, and orange colored melting wafers but you can use any colors you want. Look at your local craft store for the largest variety to choose from!
- Cake pop sticks – If you can’t find cake pop sticks, popsicle sticks are a great replacement.
- Colored jimmy sprinkles – I like to use matching sprinkles to whatever color melting candy I chose, but feel free to use different colors.
- Candy eyes – If you have difficulty finding candy eyes, you can also purchase them online! But check you local hobby store first.
Helpful Tools
How to Make Monster Oreo Pops
To begin, grab a cake pop stick and poke a hole into the filling your Oreo cookies. The hole needs to be about ½ inch deep. Be careful not to break the cookies during this step and don’t leave the stick in the filling.
Next, place the white chocolate into a microwave safe bowl. Heat on 50% power for one minute, then stir the chocolate and place it back in the microwave. Heat in 30 second intervals until it is a smooth and creamy consistency. Do not over heat or the chocolate will seize.
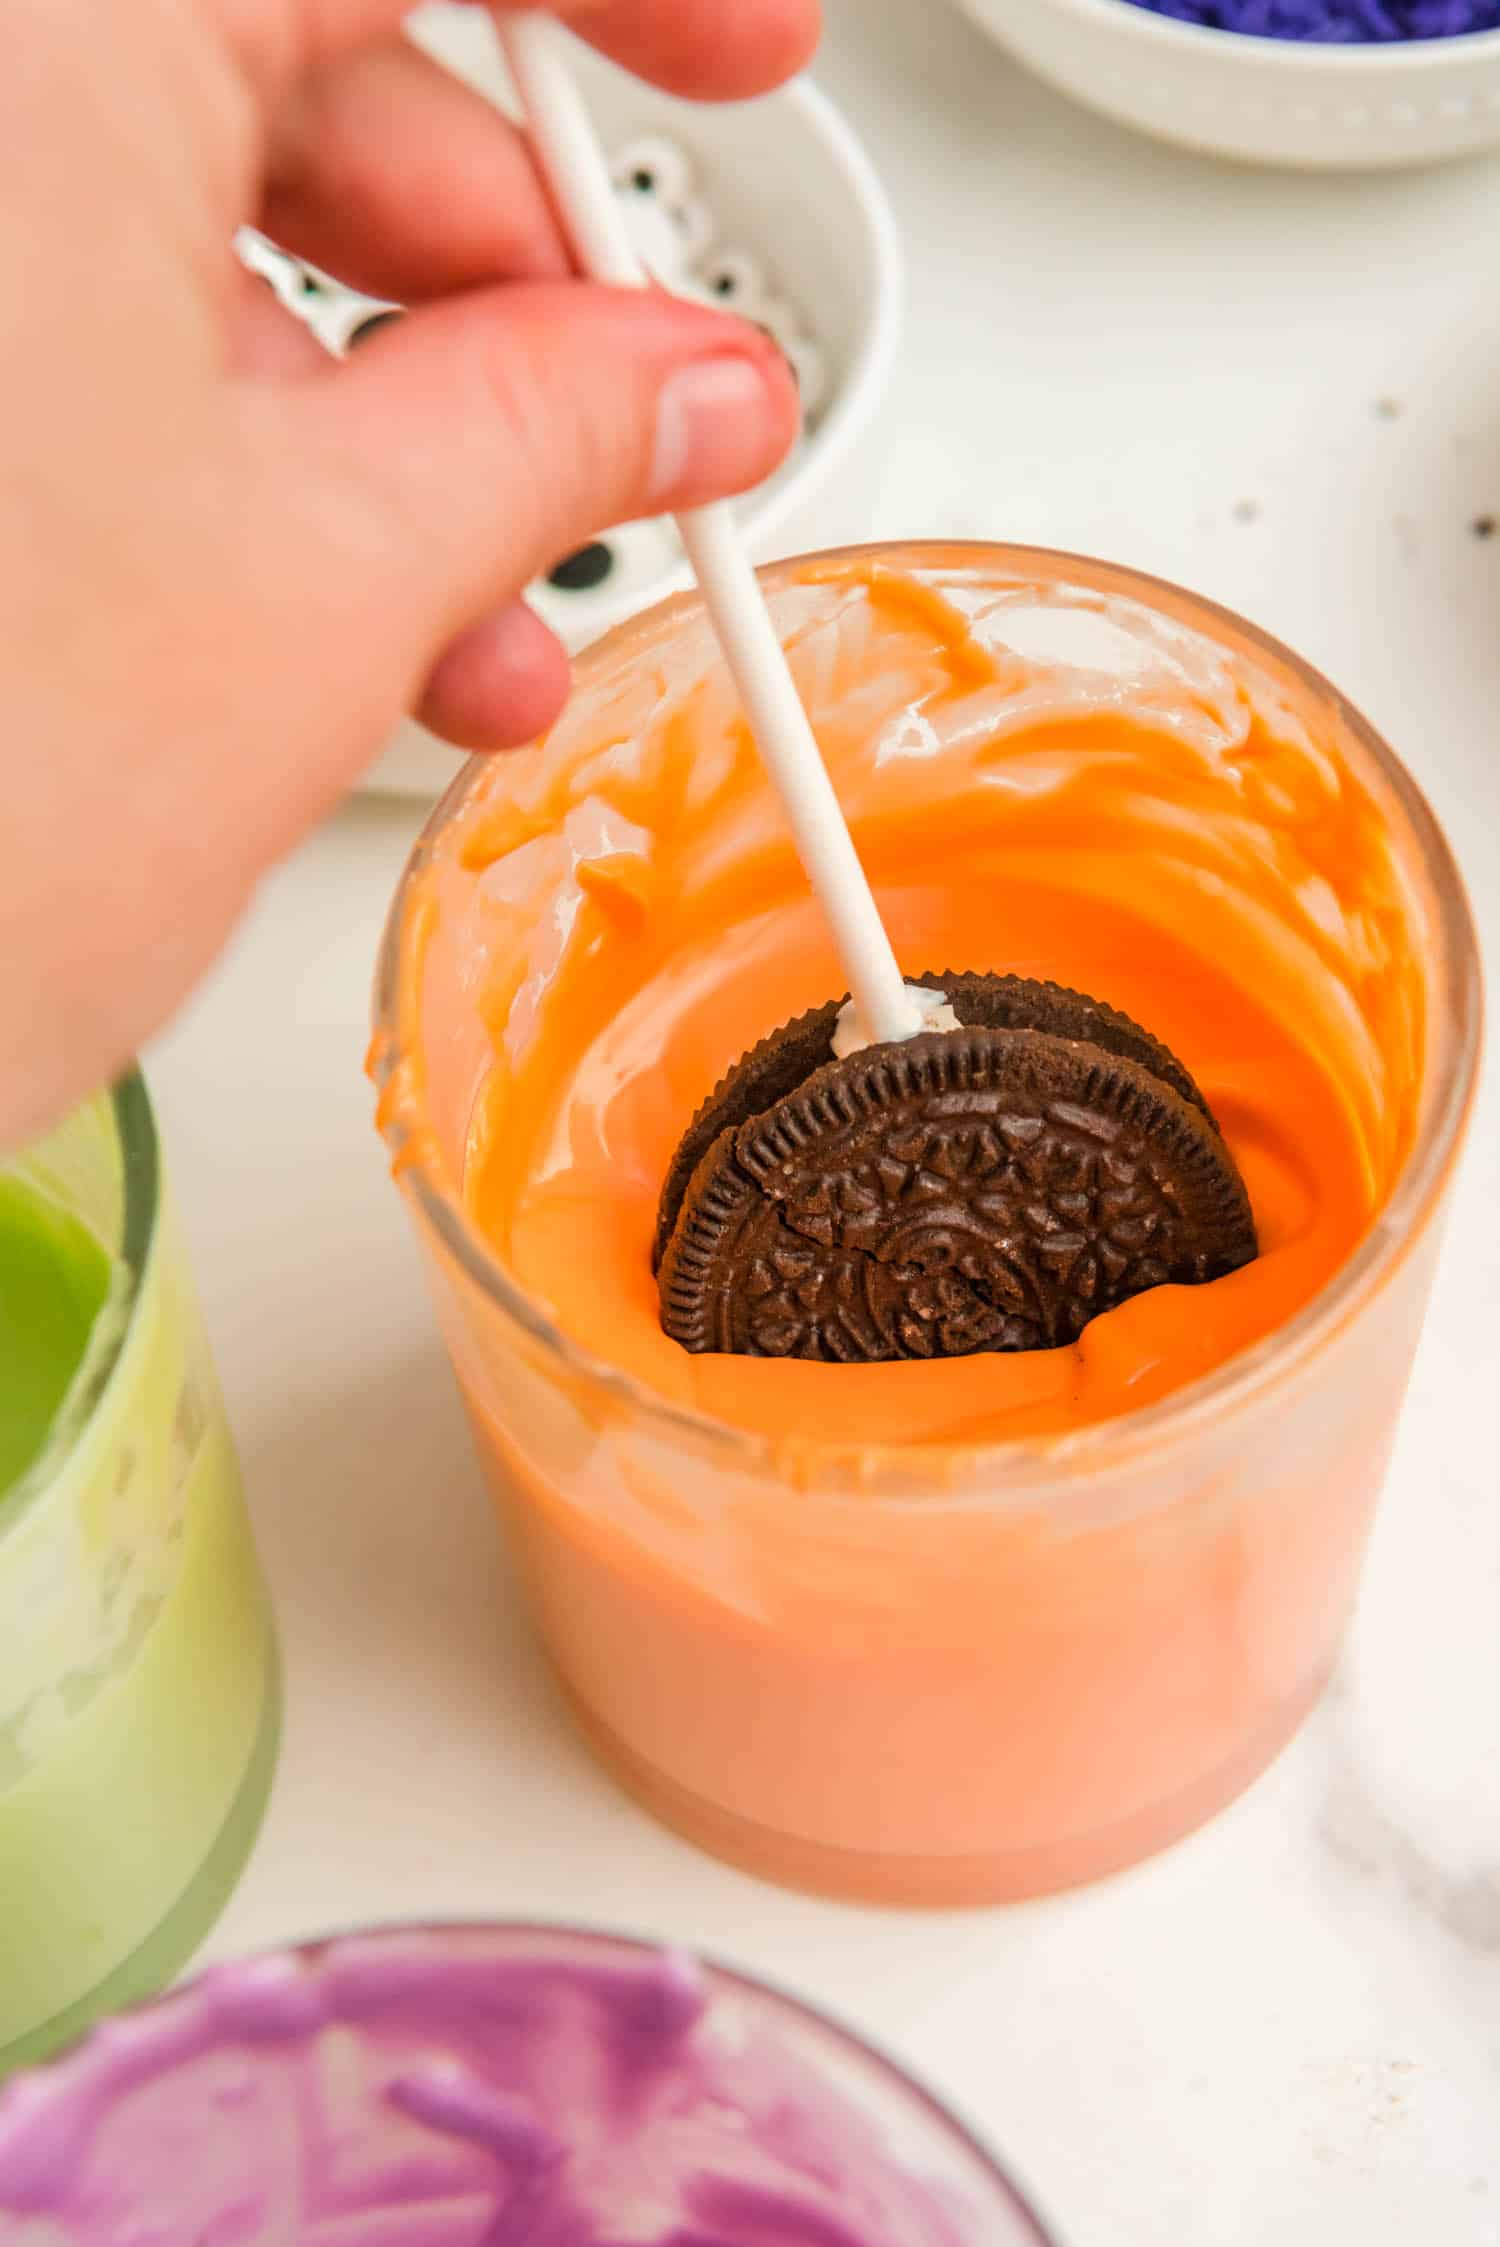
Take the tip of each cake pop stick and dip it into the melted chocolate. Immediately place the chocolate tip into the the holes of the Oreos. Allow the Oreos to set for a minute, this will become a kind of “glue” that will secure the stick in the cookie.

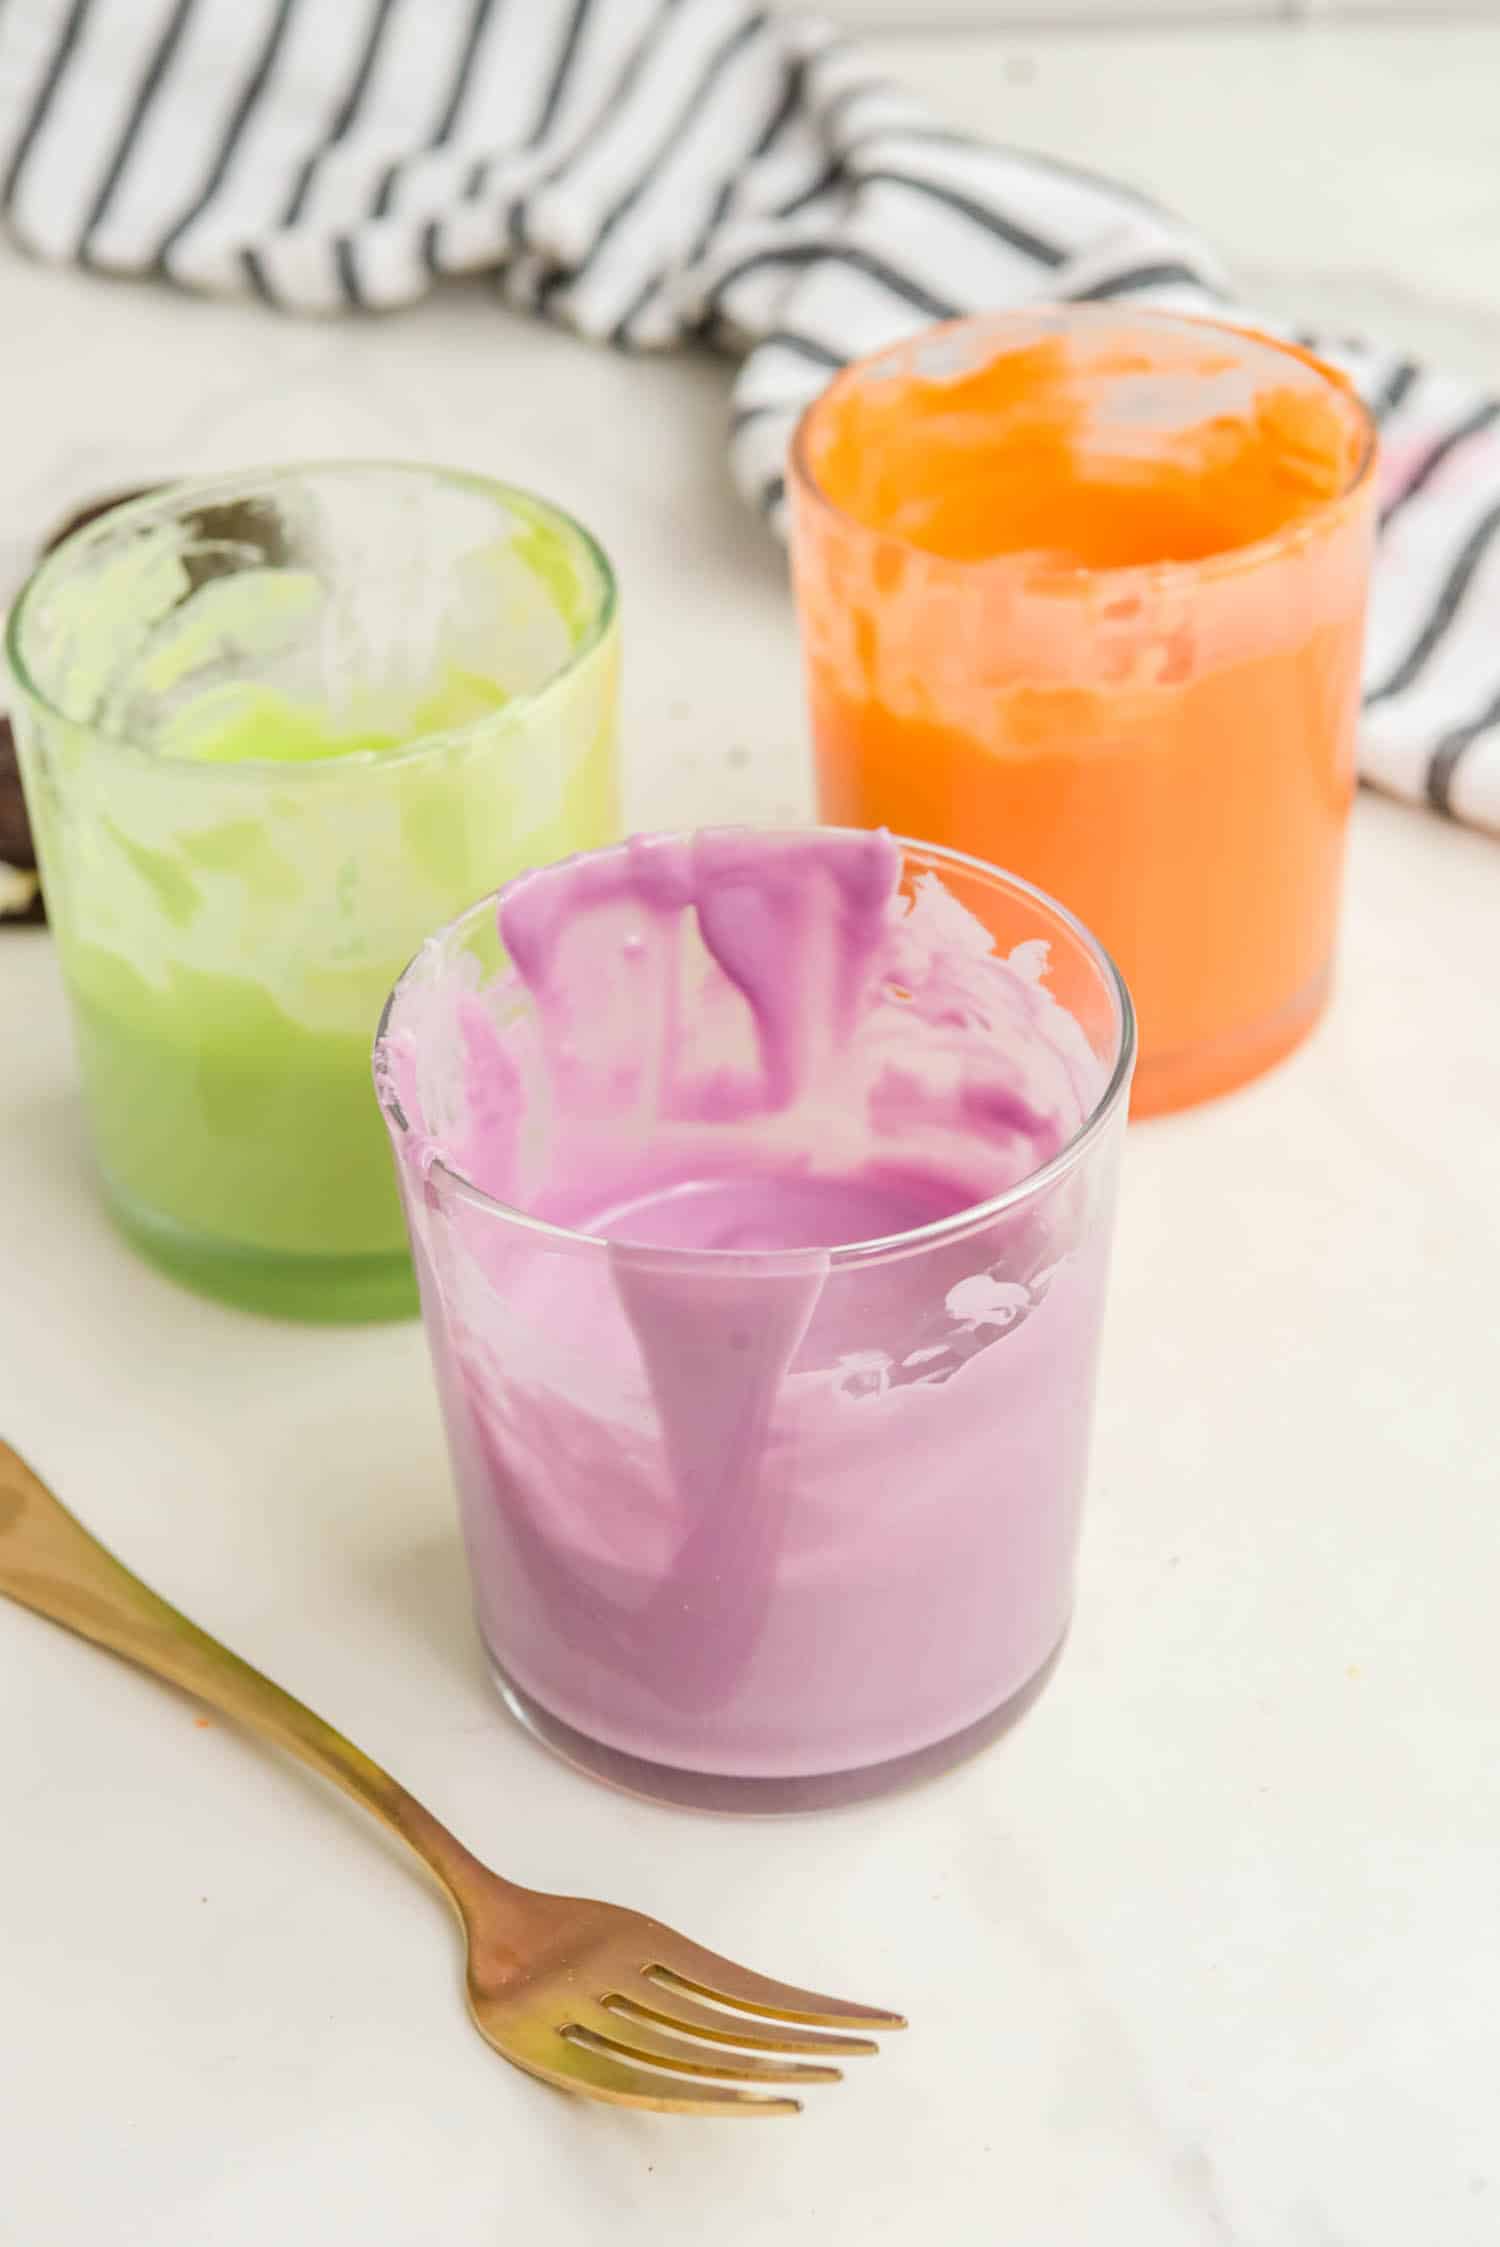

After you’ve done that, place the colored melting wafers in microwave safe containers deep enough for dipping. Heat on 50% power for one minute, then stir with a fork and add 1 tablespoon of Crisco shortening to each bowl.
Microwave the wafers again in 30 second increments, stirring well in between. Heat the wafers until they have a consistency like salad dressing and are smooth and silky.
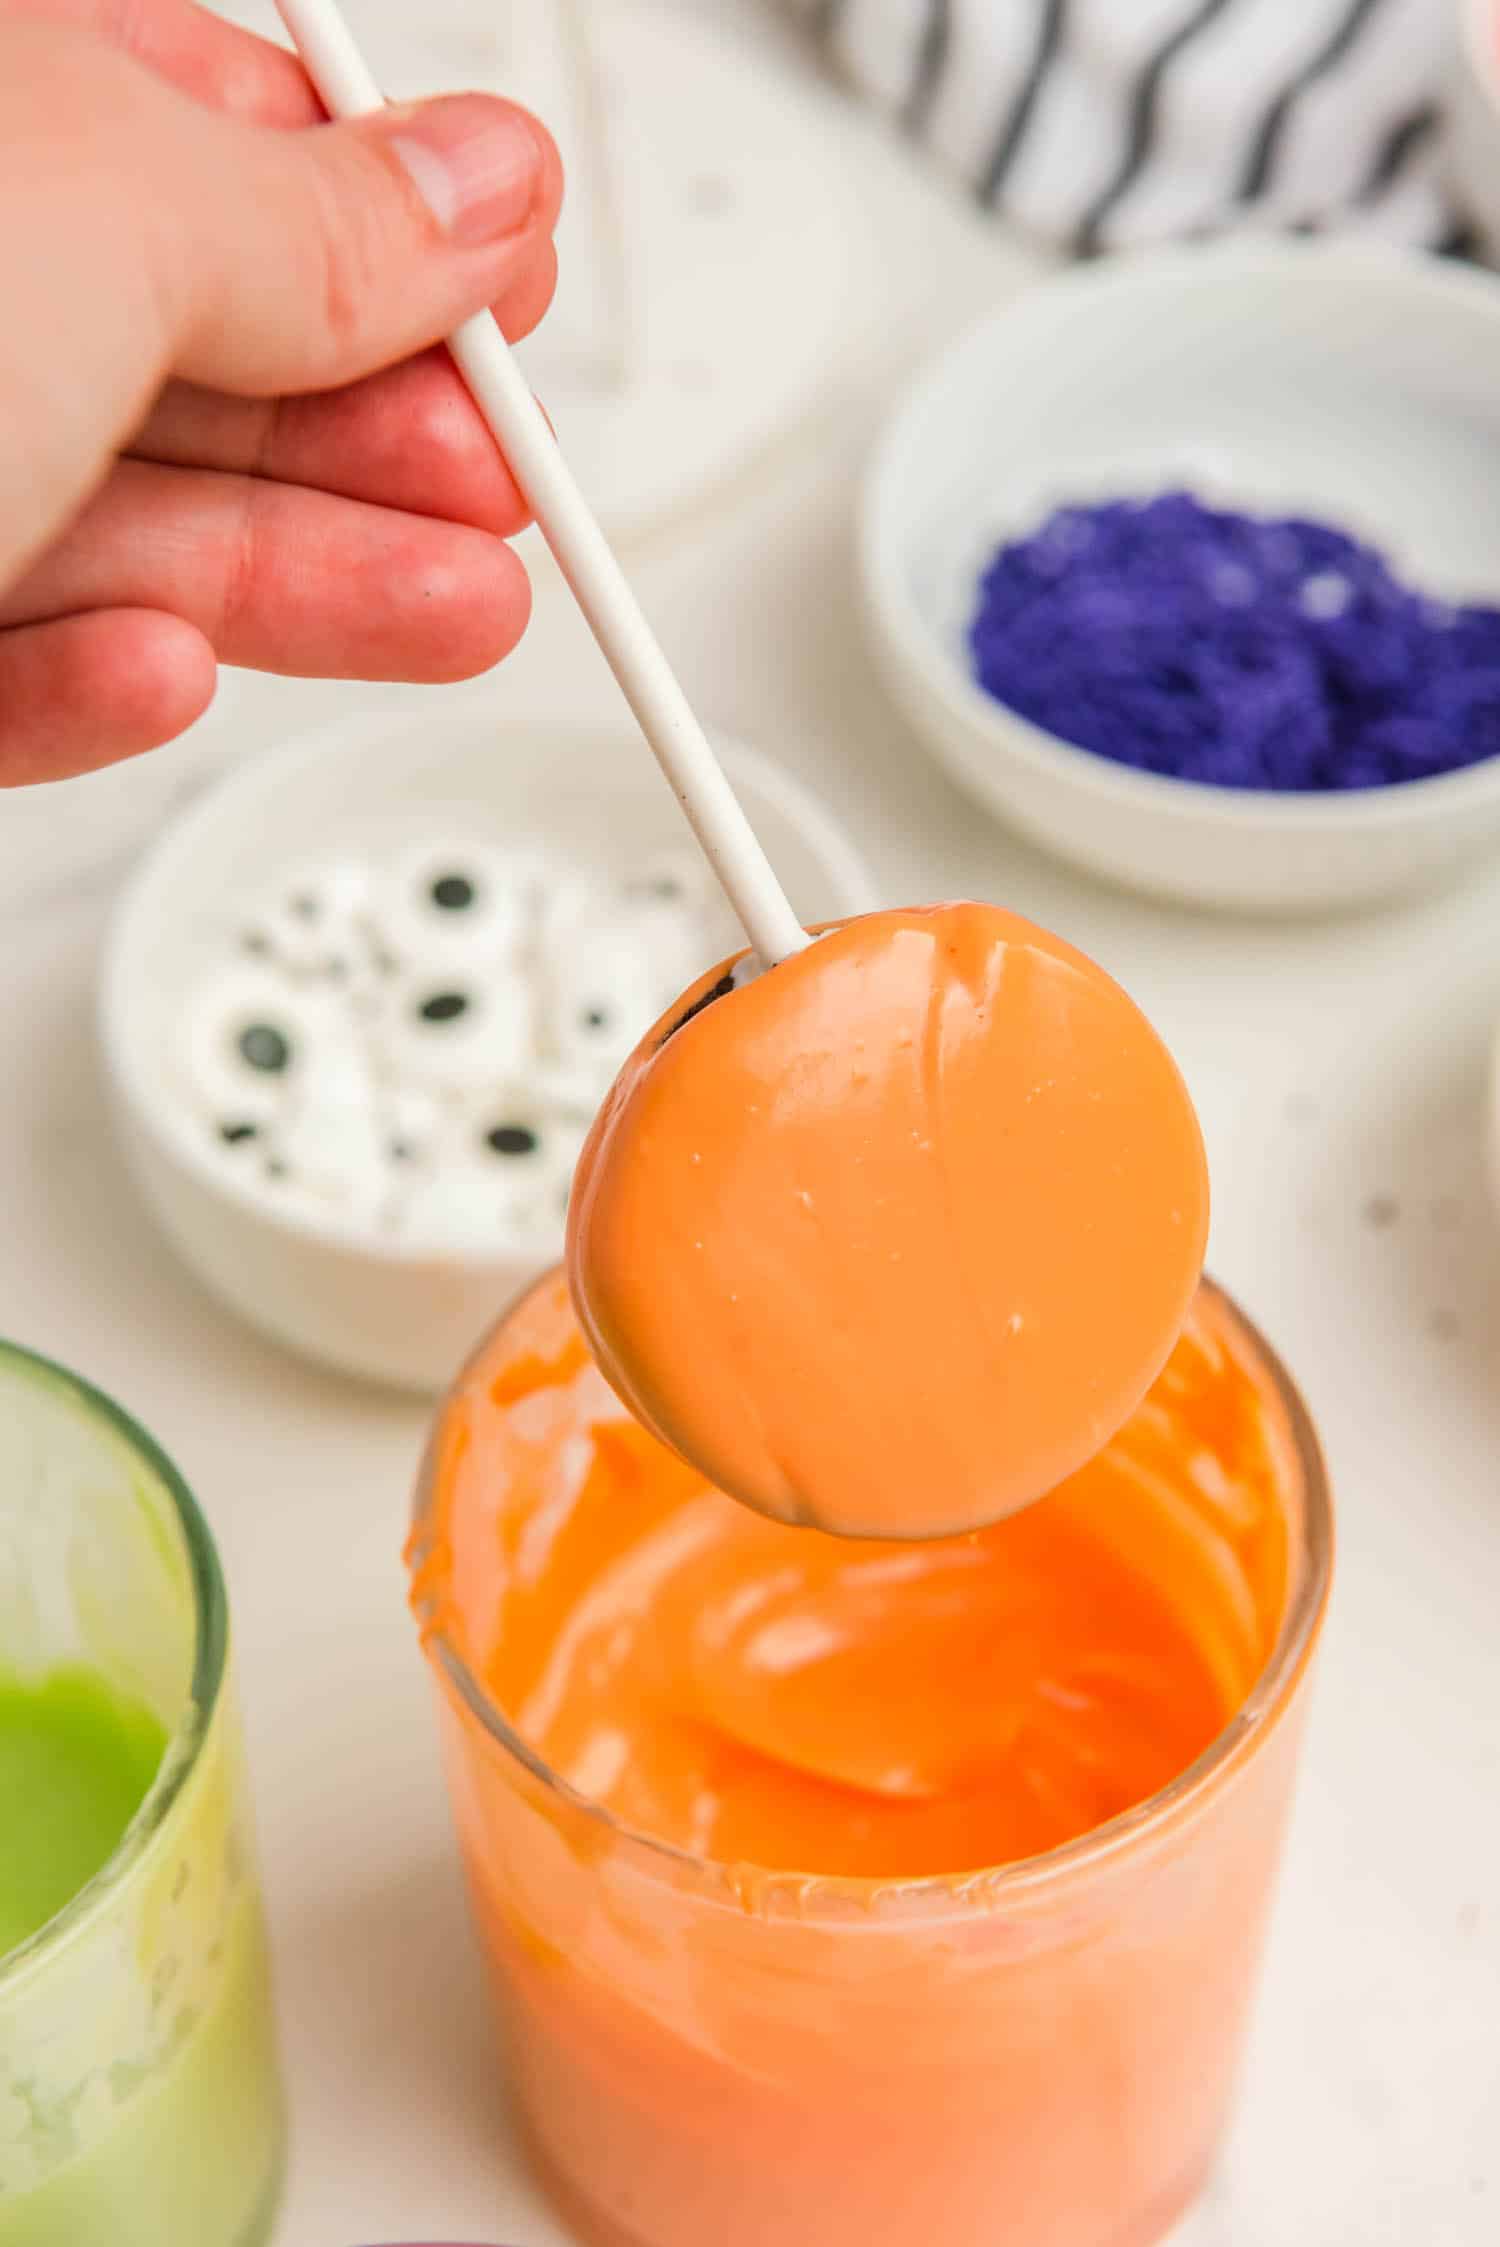
Dip each Oreo into the melted candy, ensuring you cover the whole cookie and allow excess to drip.
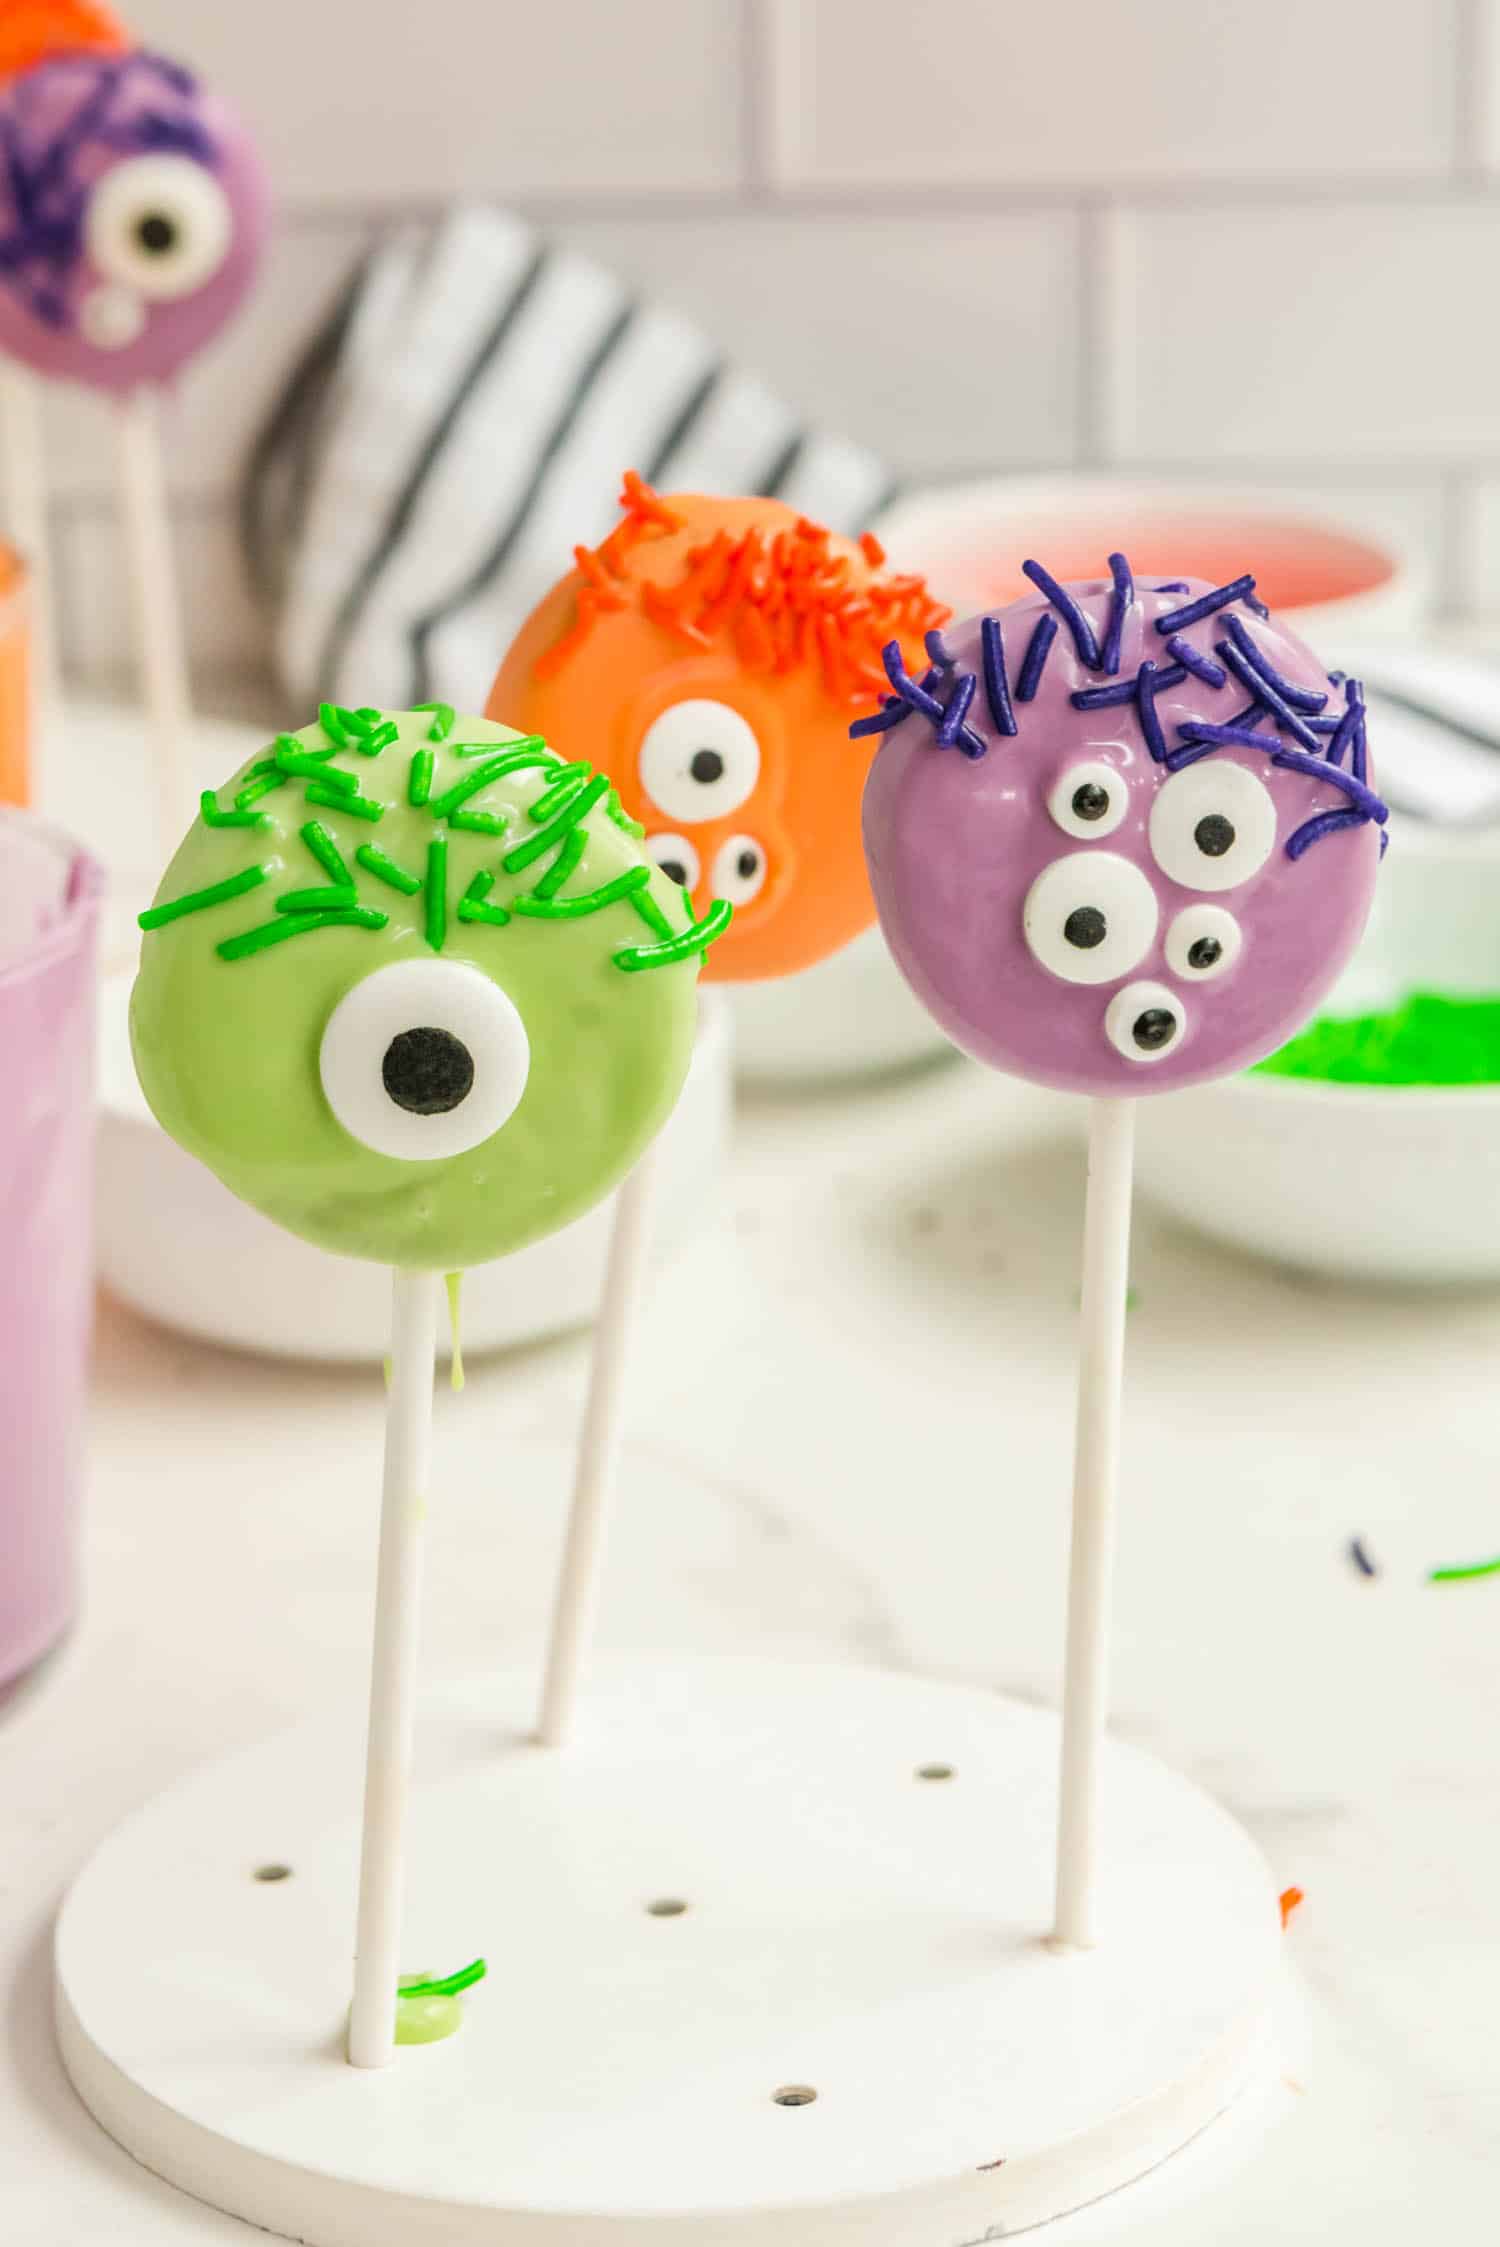
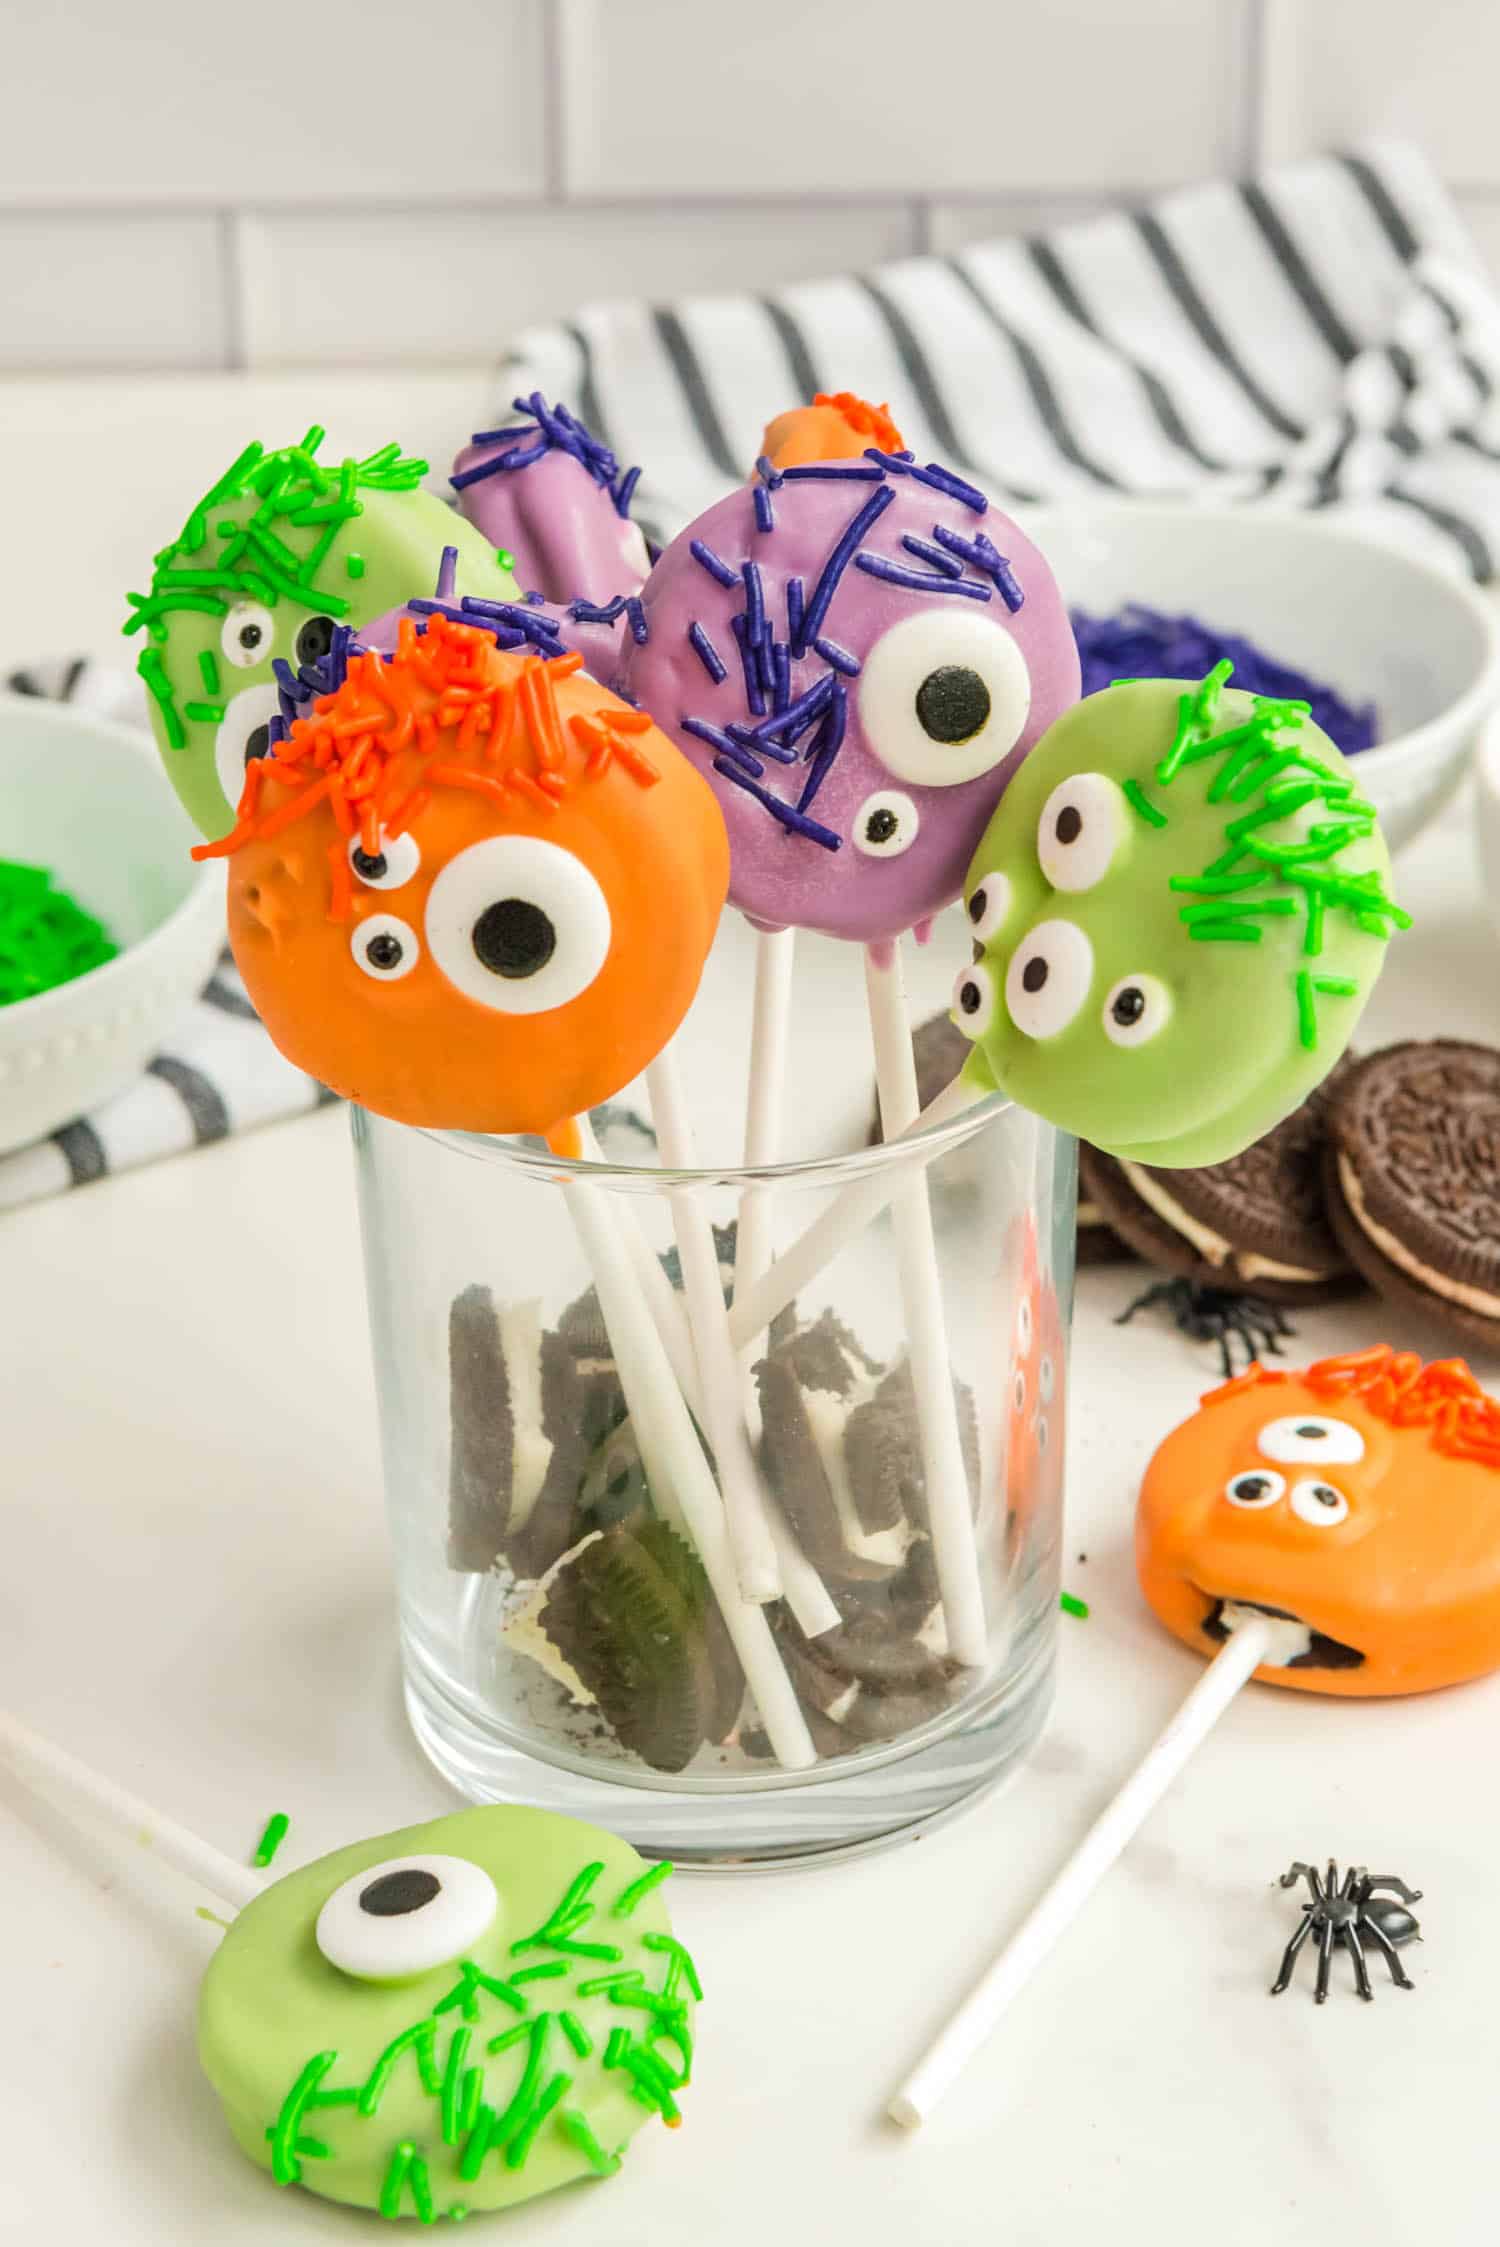
Before the chocolate sets, add sprinkles and candy eyes to the monsters.
Place each completed Oreo monster onto a cake pop stand to stay upright. Allow the pops to set in the fridge for 30 minutes before serving. Enjoy!
How to Store Leftover Halloween Oreo Pops
You can store Oreo pops at room temperature, in the fridge, or in the freezer. Either wrap them individually in cellophane or place them in a plastic bag. Or, store multiple Oreo monsters in an airtight container with parchment paper between the layers.
Oreo pops stored at room temperature will last for about 3 days. Keep them in a cool area, away from heat.
FRIDGE: Store in the fridge for up to a week. Avoid moving the pops back and forth from room temp to the refrigerator as the constant change in temperature could cause them to sweat.
FREEZER: You can freeze these too! They will last for 2 months in the freezer. Freeze individually, or in batches with parchment paper between layers.
Can I use different cookies?
I wouldn’t recommend using anything larger than an Oreo, but you can definitely try other cookies. The small chips ahoy cookies could work. You can also use the different flavors of Oreos! Golden Oreos would taste delicious.
Pro Tips!
- If your chocolate is really hot, the candy eyes and sprinkles may immediately fall off or slide down. If this happens, just allow the monsters to rest upright until the chocolate hardens enough to support the decorations. Use the rim of a glass!
- Having trouble dipping the Oreos in chocolate? Add ½ tablespoon more of Crisco to the chocolate and return it too the microwave. Microwave until it’s thinned out and you are able to dip the Oreos.
- Add different sized eyes to your monsters for the most silly and fun look!
Spooky season is upon us, so celebrate well with the adorable treats!
More Halloween Fun
- Make use of those empty toilet paper rolls and make a Toilet Paper Roll Mummy Craft.
- DIY decor is the name of the game with these Easy Glitter Ghosts!
- Mummy Brownies are another really easy dessert you can make for the Halloween season.
- If you have any leftover candy eyes, make these Halloween Monster Cookies!

Monster Oreo Pops
Ingredients
- 24 Double Stuffed Oreos
- ½ cup white chocolate melting wafers
- 12 ounces green candy melts
- 12 ounces purple candy melts
- 12 ounces orange candy melts
- 3 Tablespoons Crisco shortening divided
- Green purple, and orange jimmy sprinkles (long not round)
- Candy eyes multiple sizes
- 24 Cake pop sticks
Instructions
- Take each cake pop stick and gently poke a hole about ½ inch deep into the Oreo filling. Do this carefully so as to not break the wafer. Do not leave the stick inside.
- Add white chocolate melting wafers to a small microwave safe bowl. Heat on 50% powder for 1 minute. Stir and return to the microwave for additional 30-second bursts, stirring in between, until silky smooth.
- Dip the tip (about ½ inch deep) of each cake pop stick into the melted chocolate. Place the chocolate dipped tip into the hole you made previously. Do this for each Oreo and allow them to rest until the chocolate is hardened.
- Add the colored melting wafers to deep, small microwave safe containers (glass tumblers work great!). Heat on 50% power or on defrost mode for 1 minute. Stir with a fork and add 1 Tablespoon of Crisco to each. Return to the microwave for additional 30 seconds bursts, stirring in between, until smooth and silky. It should have the consistency of dressing.
- Carefully dip oreos inside the chocolate deep enough to cover the entire cookie. You may need to work the cake pop stick side to side .Allow any excess chocolate to drip off.
- Immediately add sprinkles and candy eyes to each Monster pop. You can do this in any formation you wish. See notes for additional design tips.
- Allow monster pops to rest upright (use a cake pop stand) inside the refrigerator for 30 minutes before serving.
Notes
-
You can store Oreo pops at room temperature, in the fridge, or in the freezer. Either wrap them individually in cellophane or place them in a plastic bag. Or, store multiple Oreo monsters in an airtight container with parchment paper between the layers.
Oreo pops stored at room temperature will last for about 3 days. Keep them in a cool area, away from heat.
FRIDGE: Store in the fridge for up to a week. Avoid moving the pops back and forth from room temp to the refrigerator as the constant change in temperature could cause them to sweat.
FREEZER: You can freeze these too! They will last for 2 months in the freezer. Freeze individually, or in batches with parchment paper between layers.