Heart Flower Bouquet
Make this quick and easy Heart Flower Bouquet out of paper! All you need are a few inexpensive craft supplies you might even have on hand. Cut out paper hearts, arrange them to make a flower and wrap them in brown kraft paper for an easy craft.
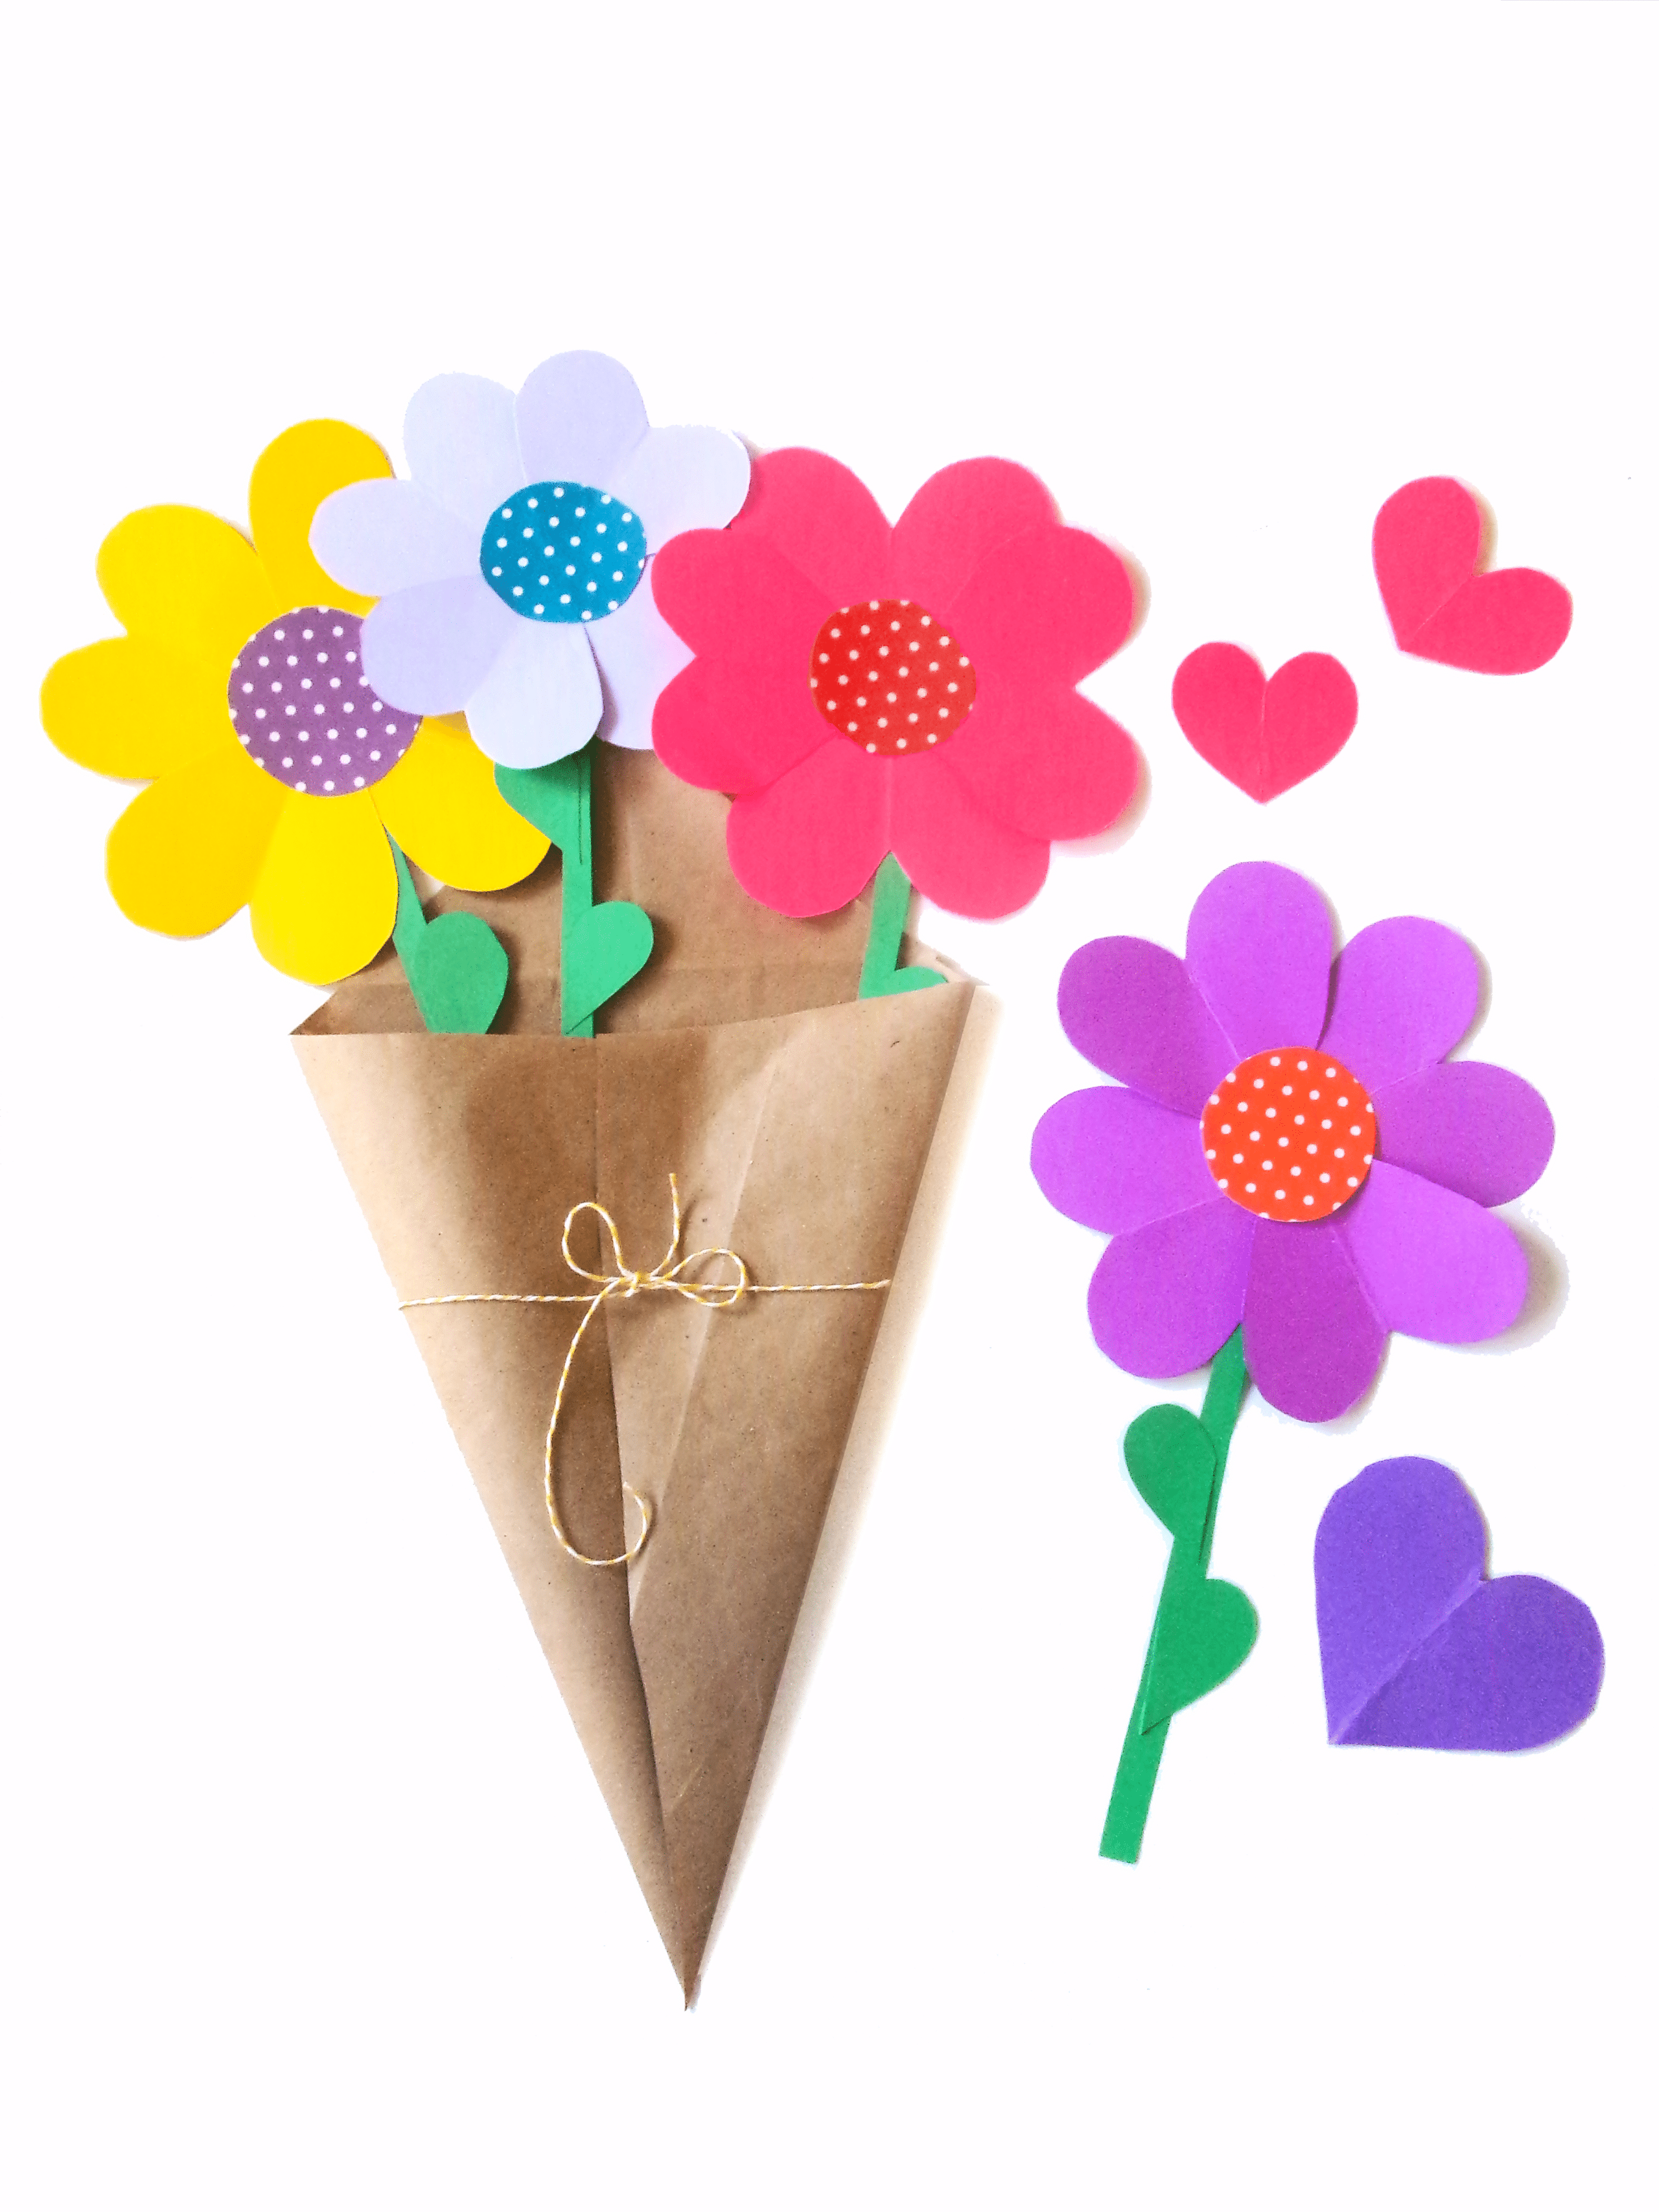
Isn’t this cute paper heart flower bouquet just adorable? It’s a wonderful handmade gift that your kids can make for Mother’s Day, Valentine’s Day and even as an easy Spring craft. Heart crafts like this one and this heart suncatcher craft always turn out so sweet and adorable. This wonderful heart flower bouquet is just the cutest craft that will brighten anyone’s day!
Homemade crafts a great alternative to store-bought gifts and cards. Sure, a regular Mother’s Day card or Valentine’s card is a sweet way to say “I love you”, but crafts made by kiddos is just about the sweetest thing ever. Once you’re done with this craft, you’ll have forever blooms with a personal touch that are the most adorable sentimental gift ever!
Why You’ll Love this Heart Flower Bouquet
- Cutting and glueing are great activities that help refine fine motor skills. You can have fun and grow with the littles all at the same time!
- This is a super affordable craft since all you need is cardstock, glue, twine, scissors and kraft paper. In fact, if you do crafts often then you may already have everything you need to make this paper heart flower craft!
- You can finish this craft in less than a half hour. Easy peasy and the cutest thing ever!

Supplies Needed
- Cardstock – You’ll need multiple different colors of cardstock to make the flowers. Use polka dot for the center of the flowers, colors of choice for the petals and green for the stems.
- Brown kraft paper – Brown kraft paper will be folded up to make the bouquet paper. If you don’t have kraft paper, you can use a brown paper lunch bag or even a brown paper shopping bag.
- Twine – Use some twine or ribbon to tie around the bouquet as a pretty little addition to the final product!
- Scissors – If you are making this with younger children, consider using safety scissors.
- Glue stick – A regular school glue stick is all you need to make this adorable paper flower bouquet.
How to Make a Paper Heart Flower Bouquet
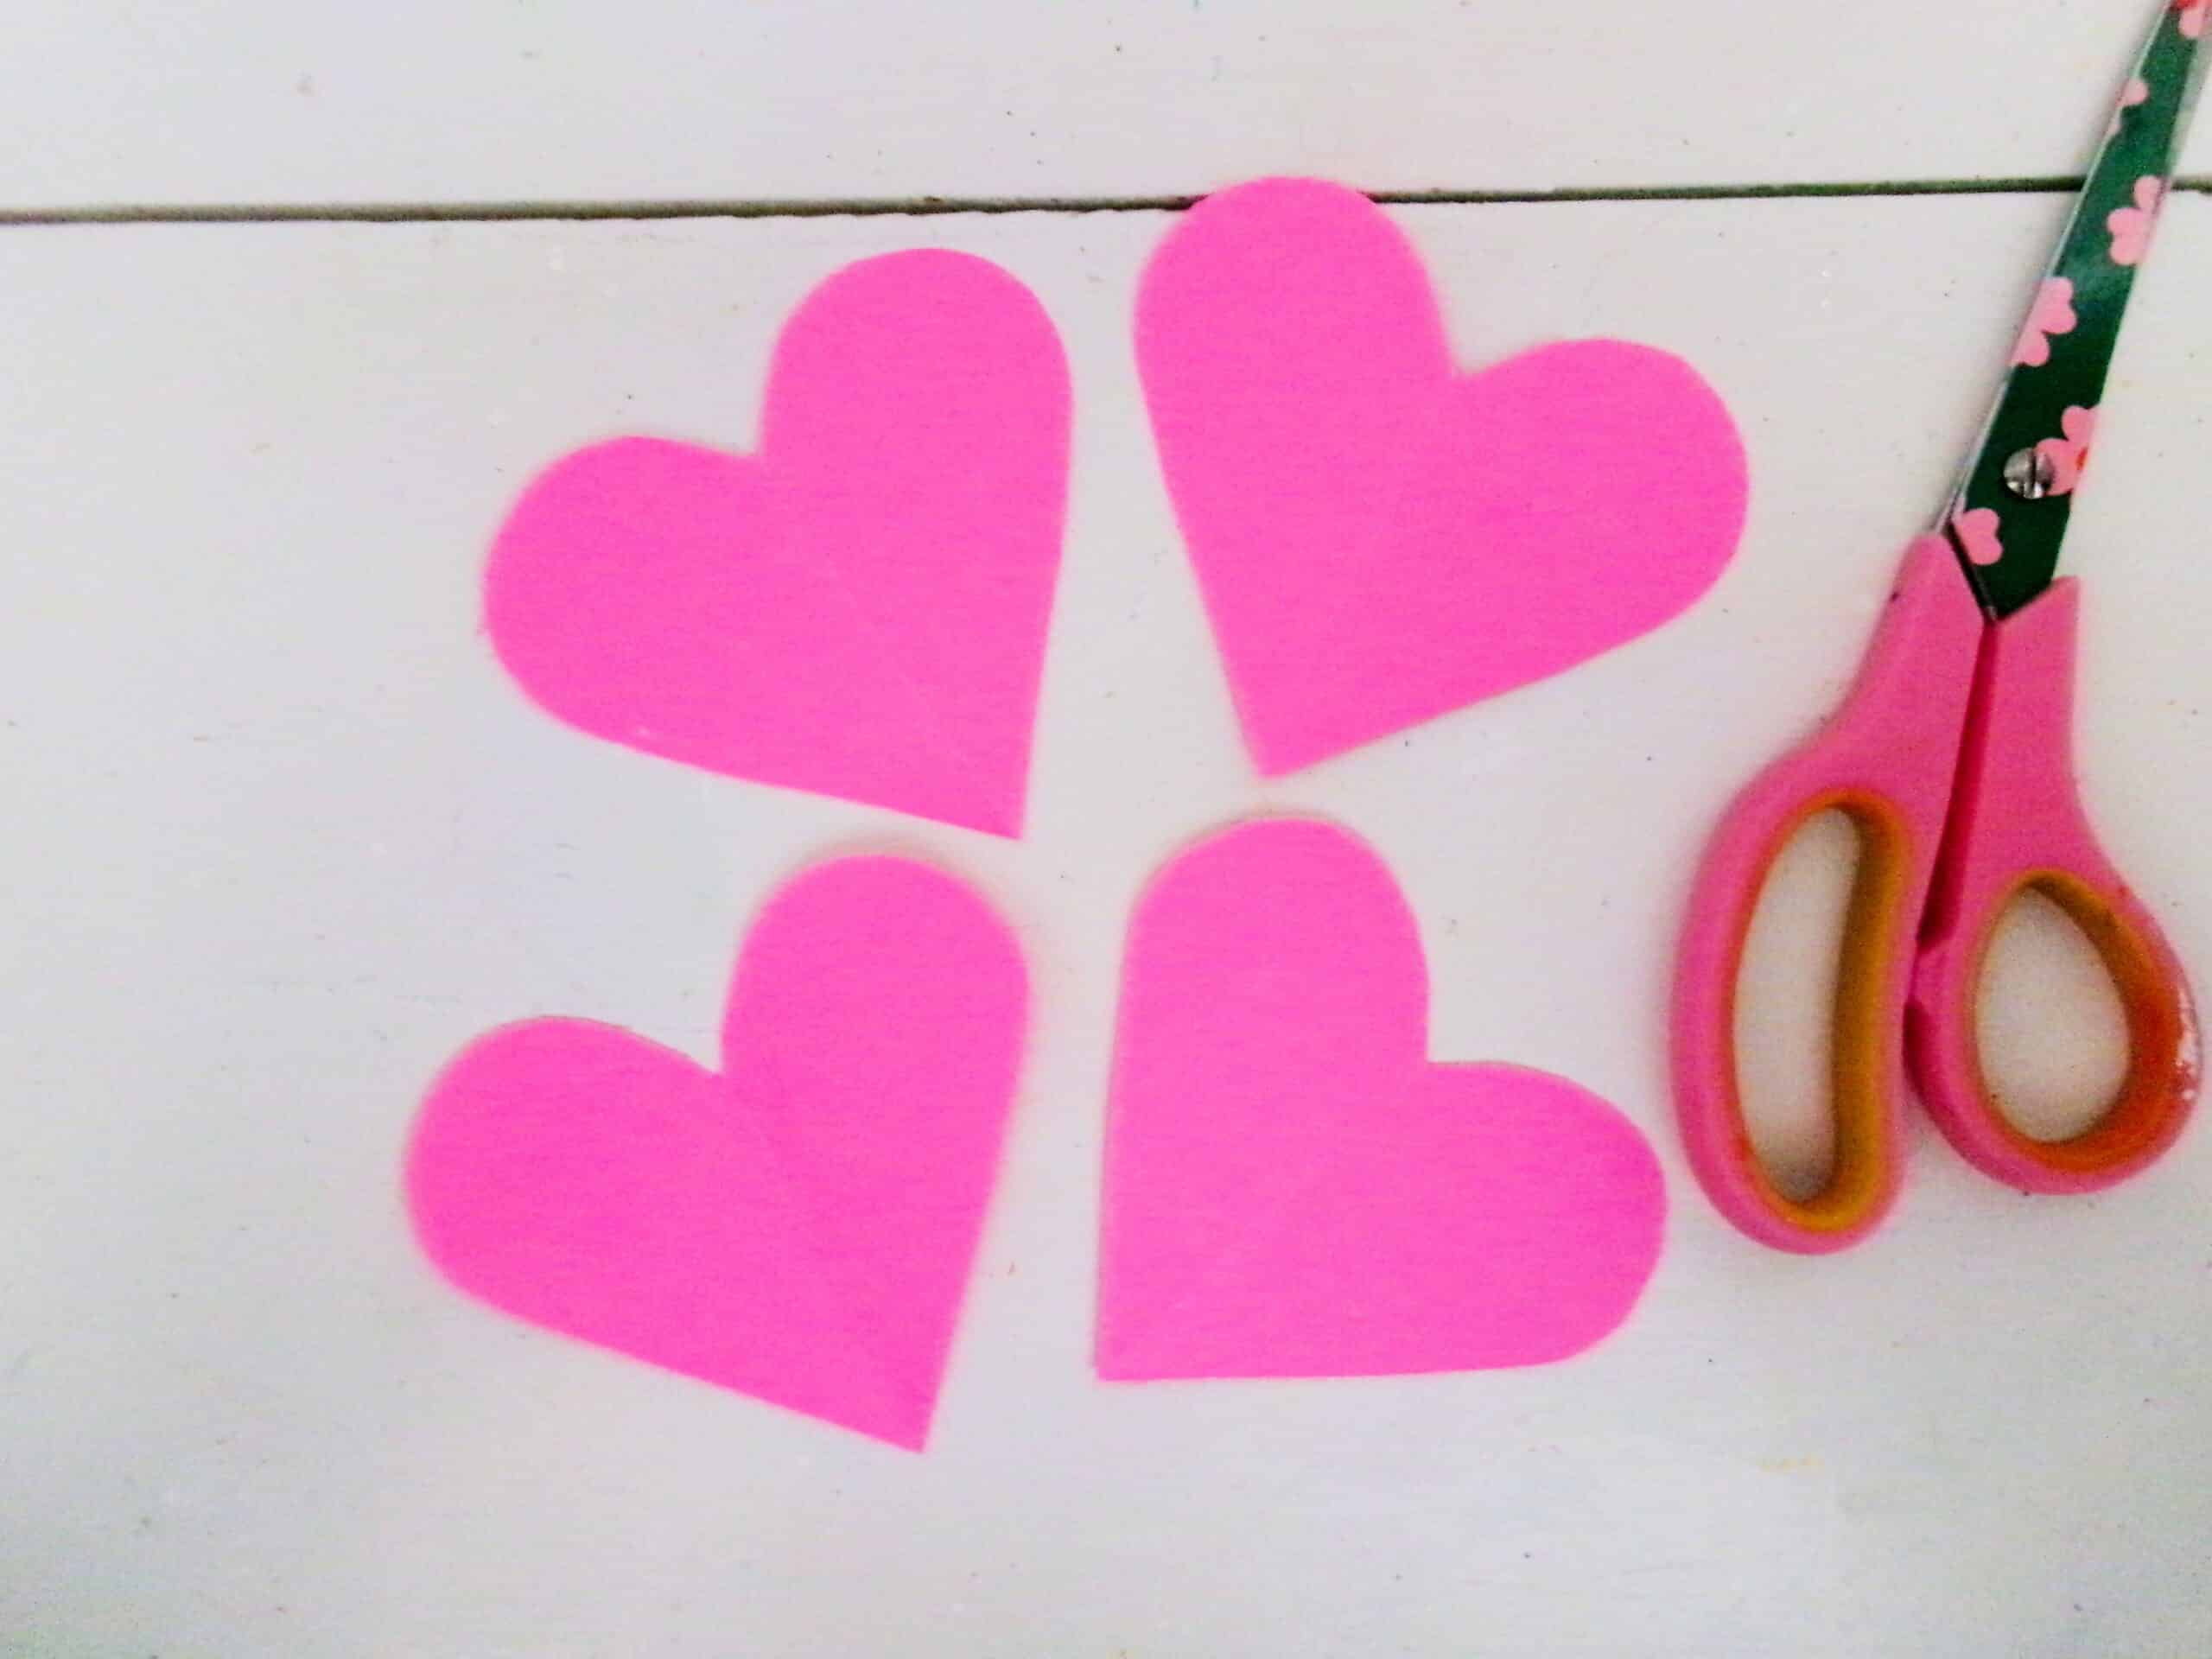
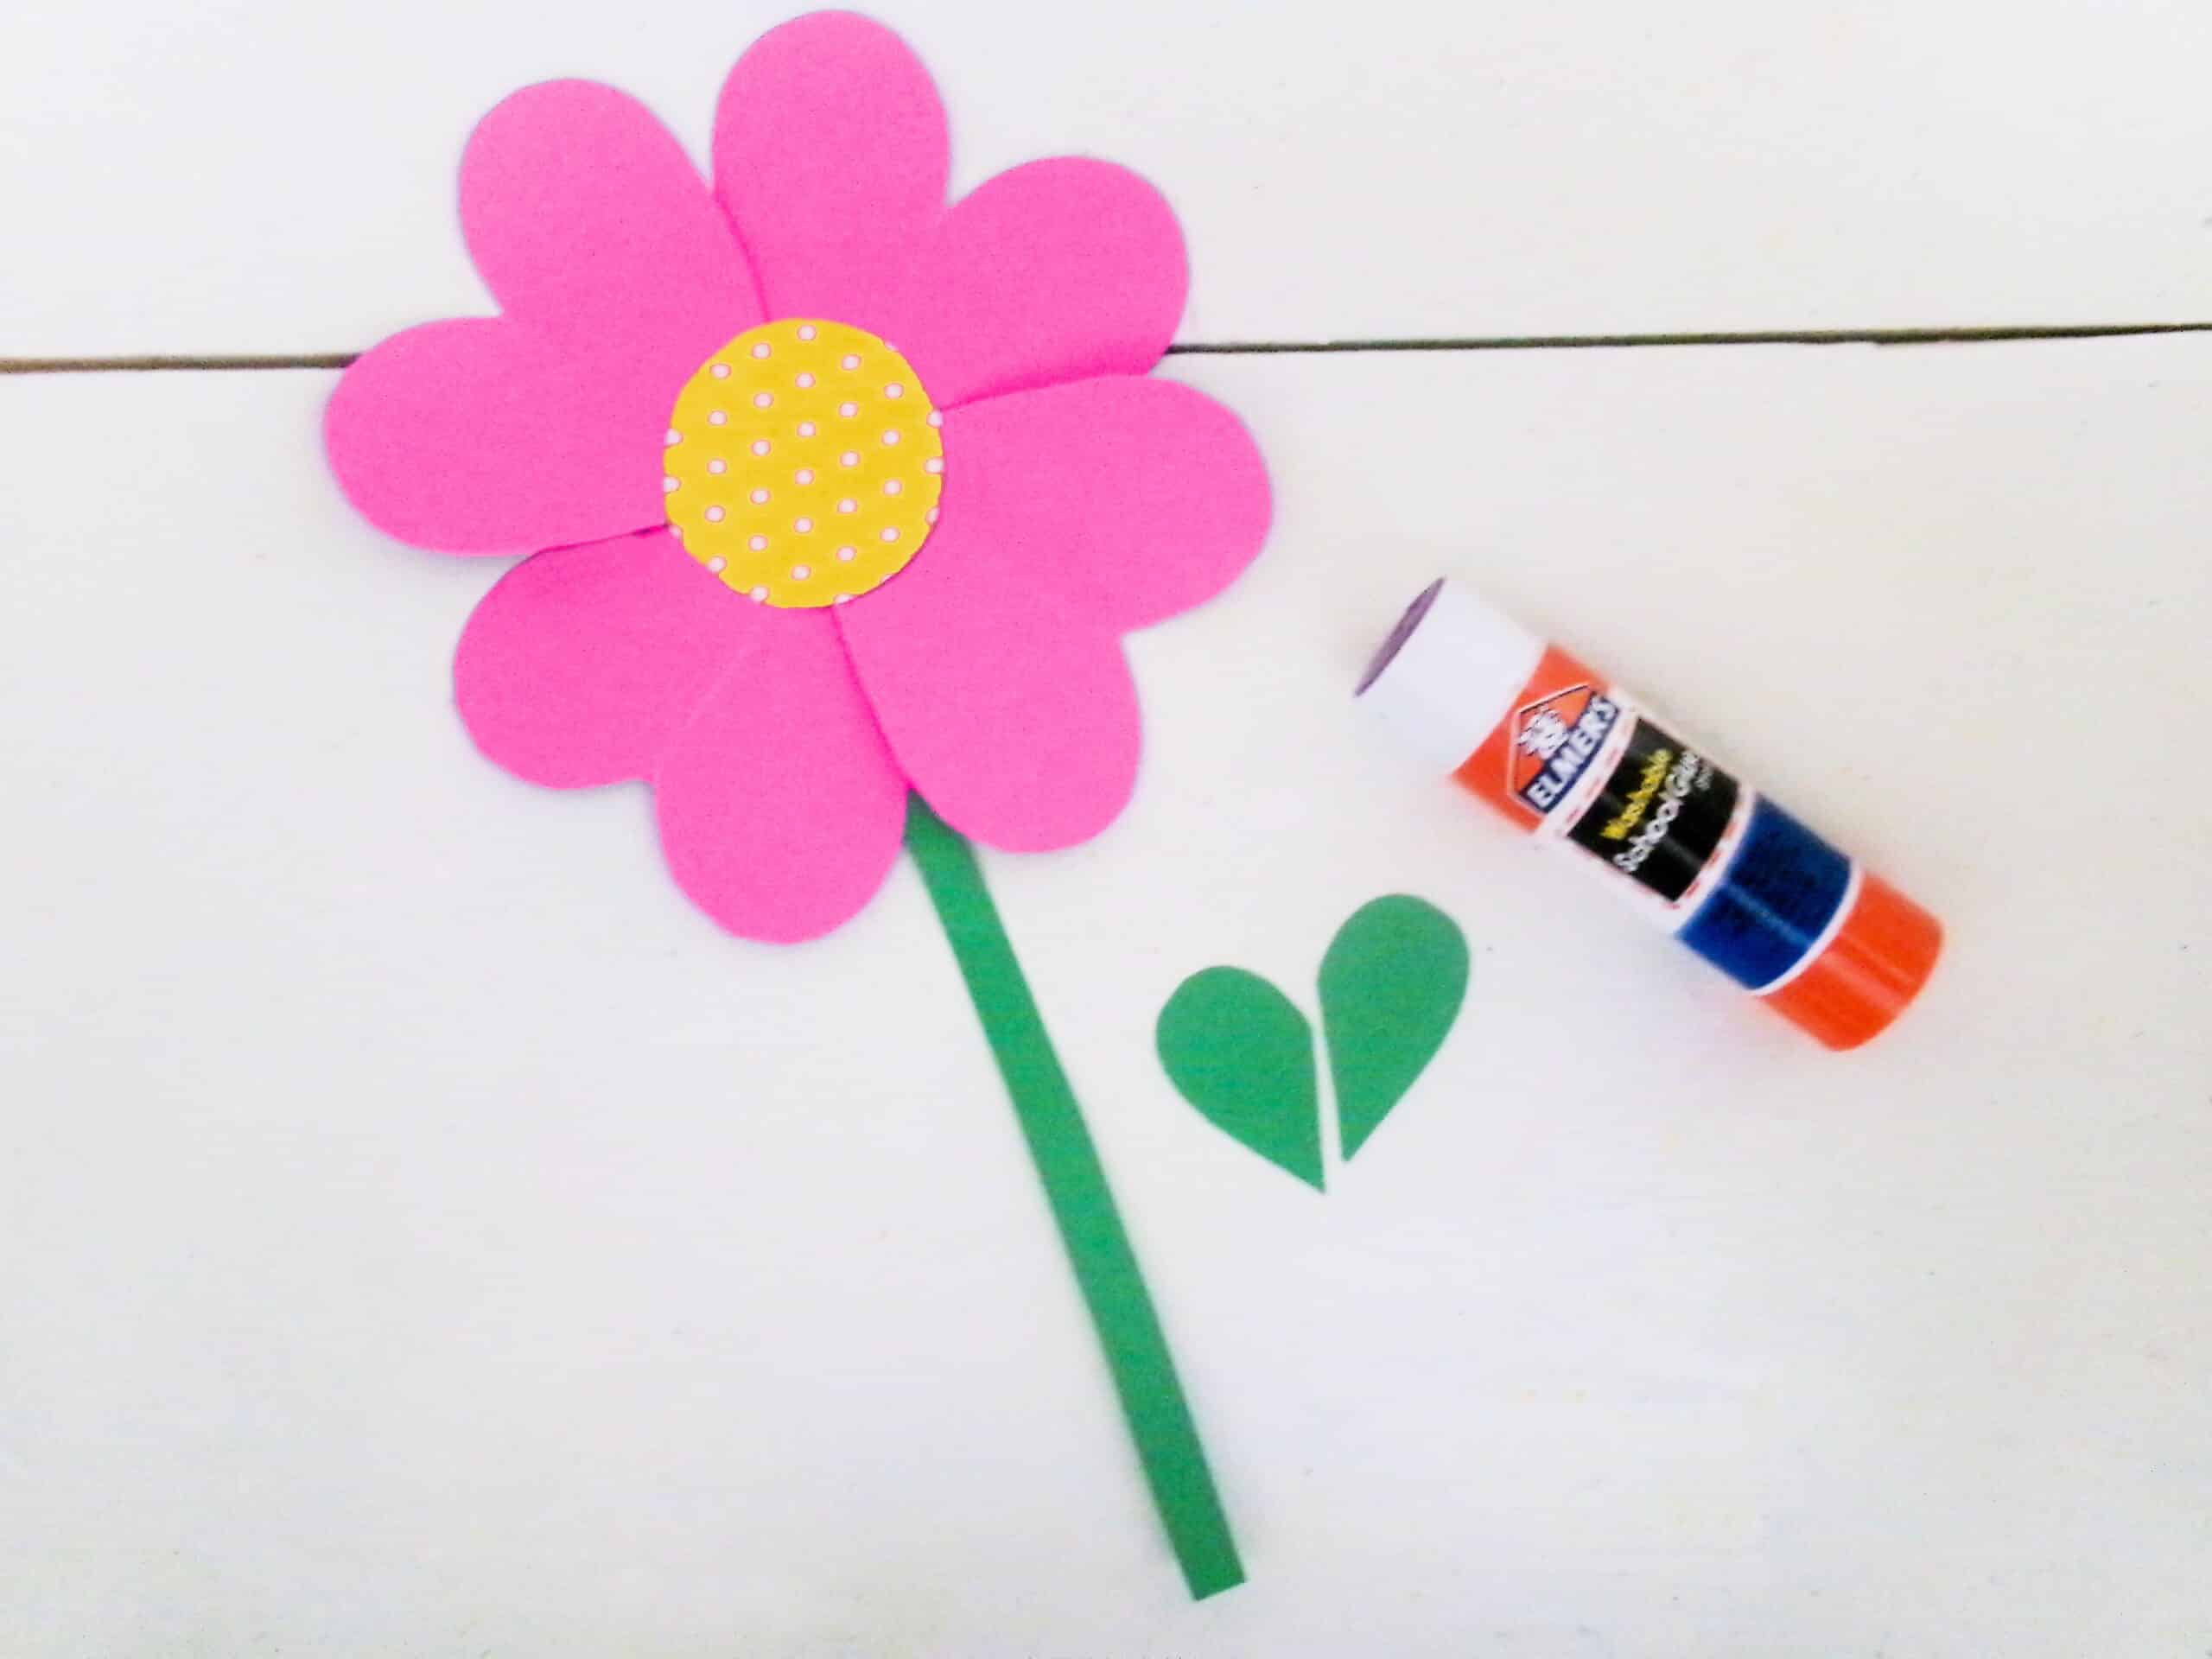
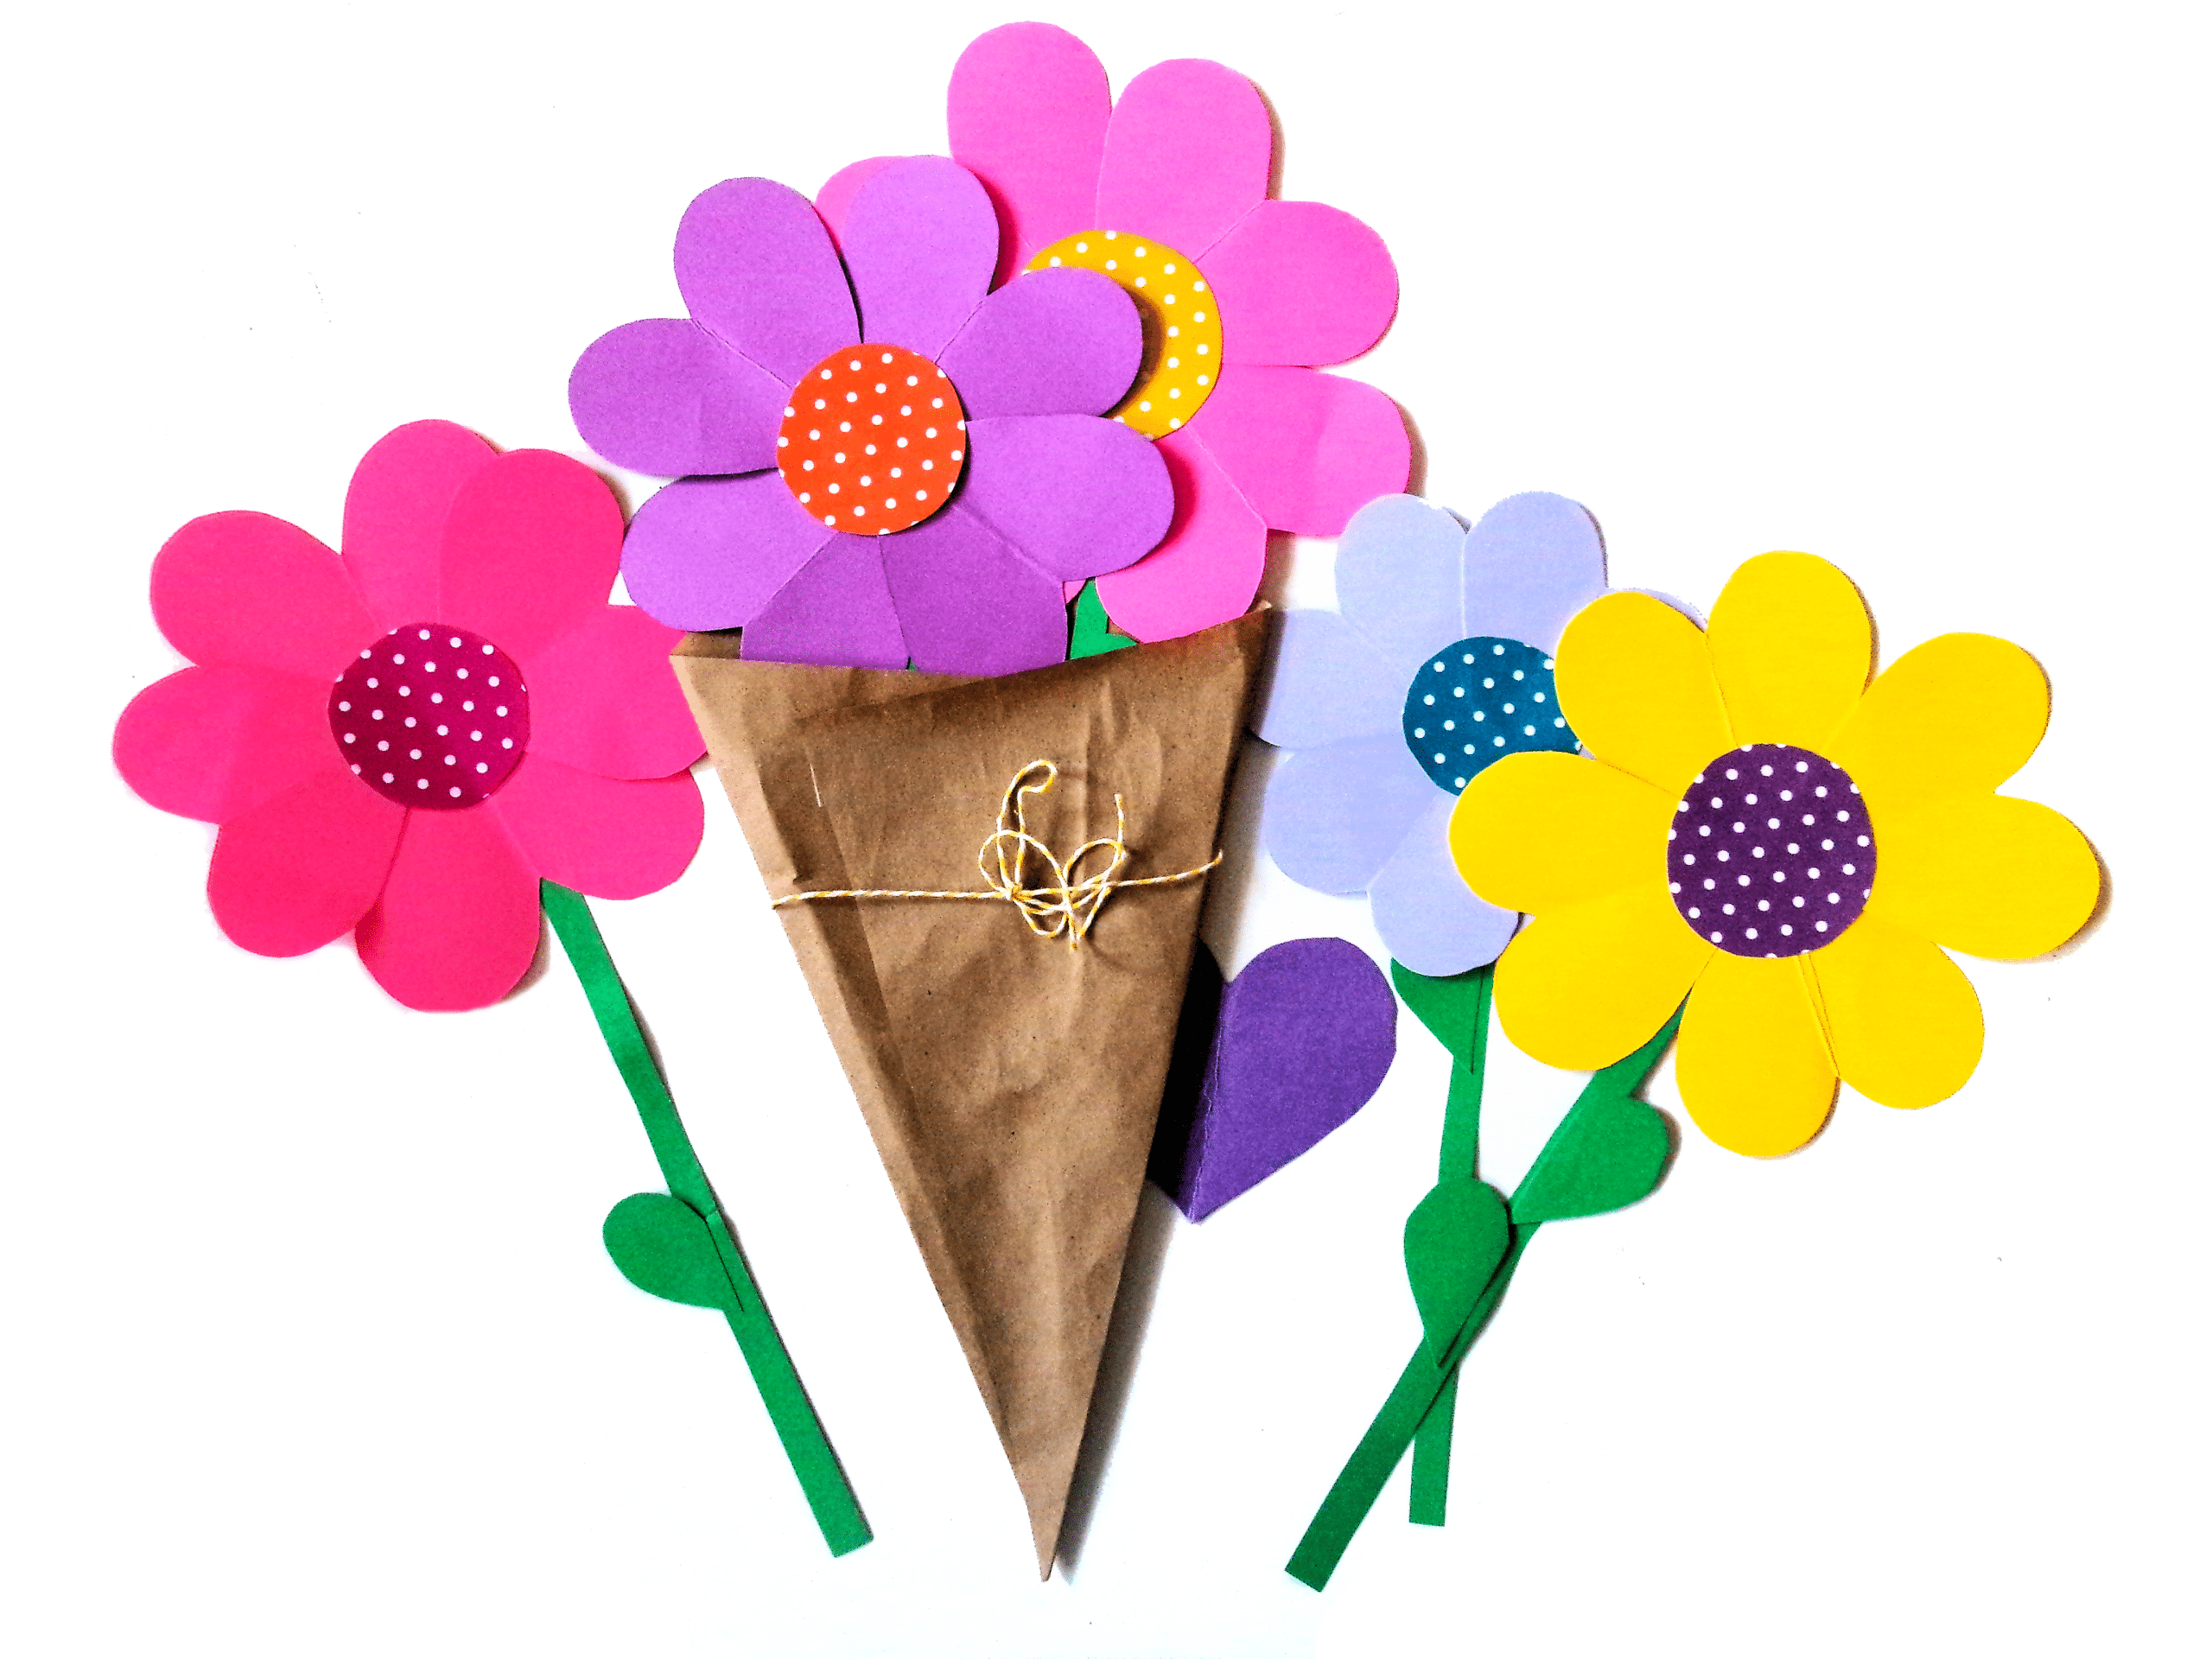
Cut four hearts from the cardstock of your choice. They can be any size you want, but make all four the same size.
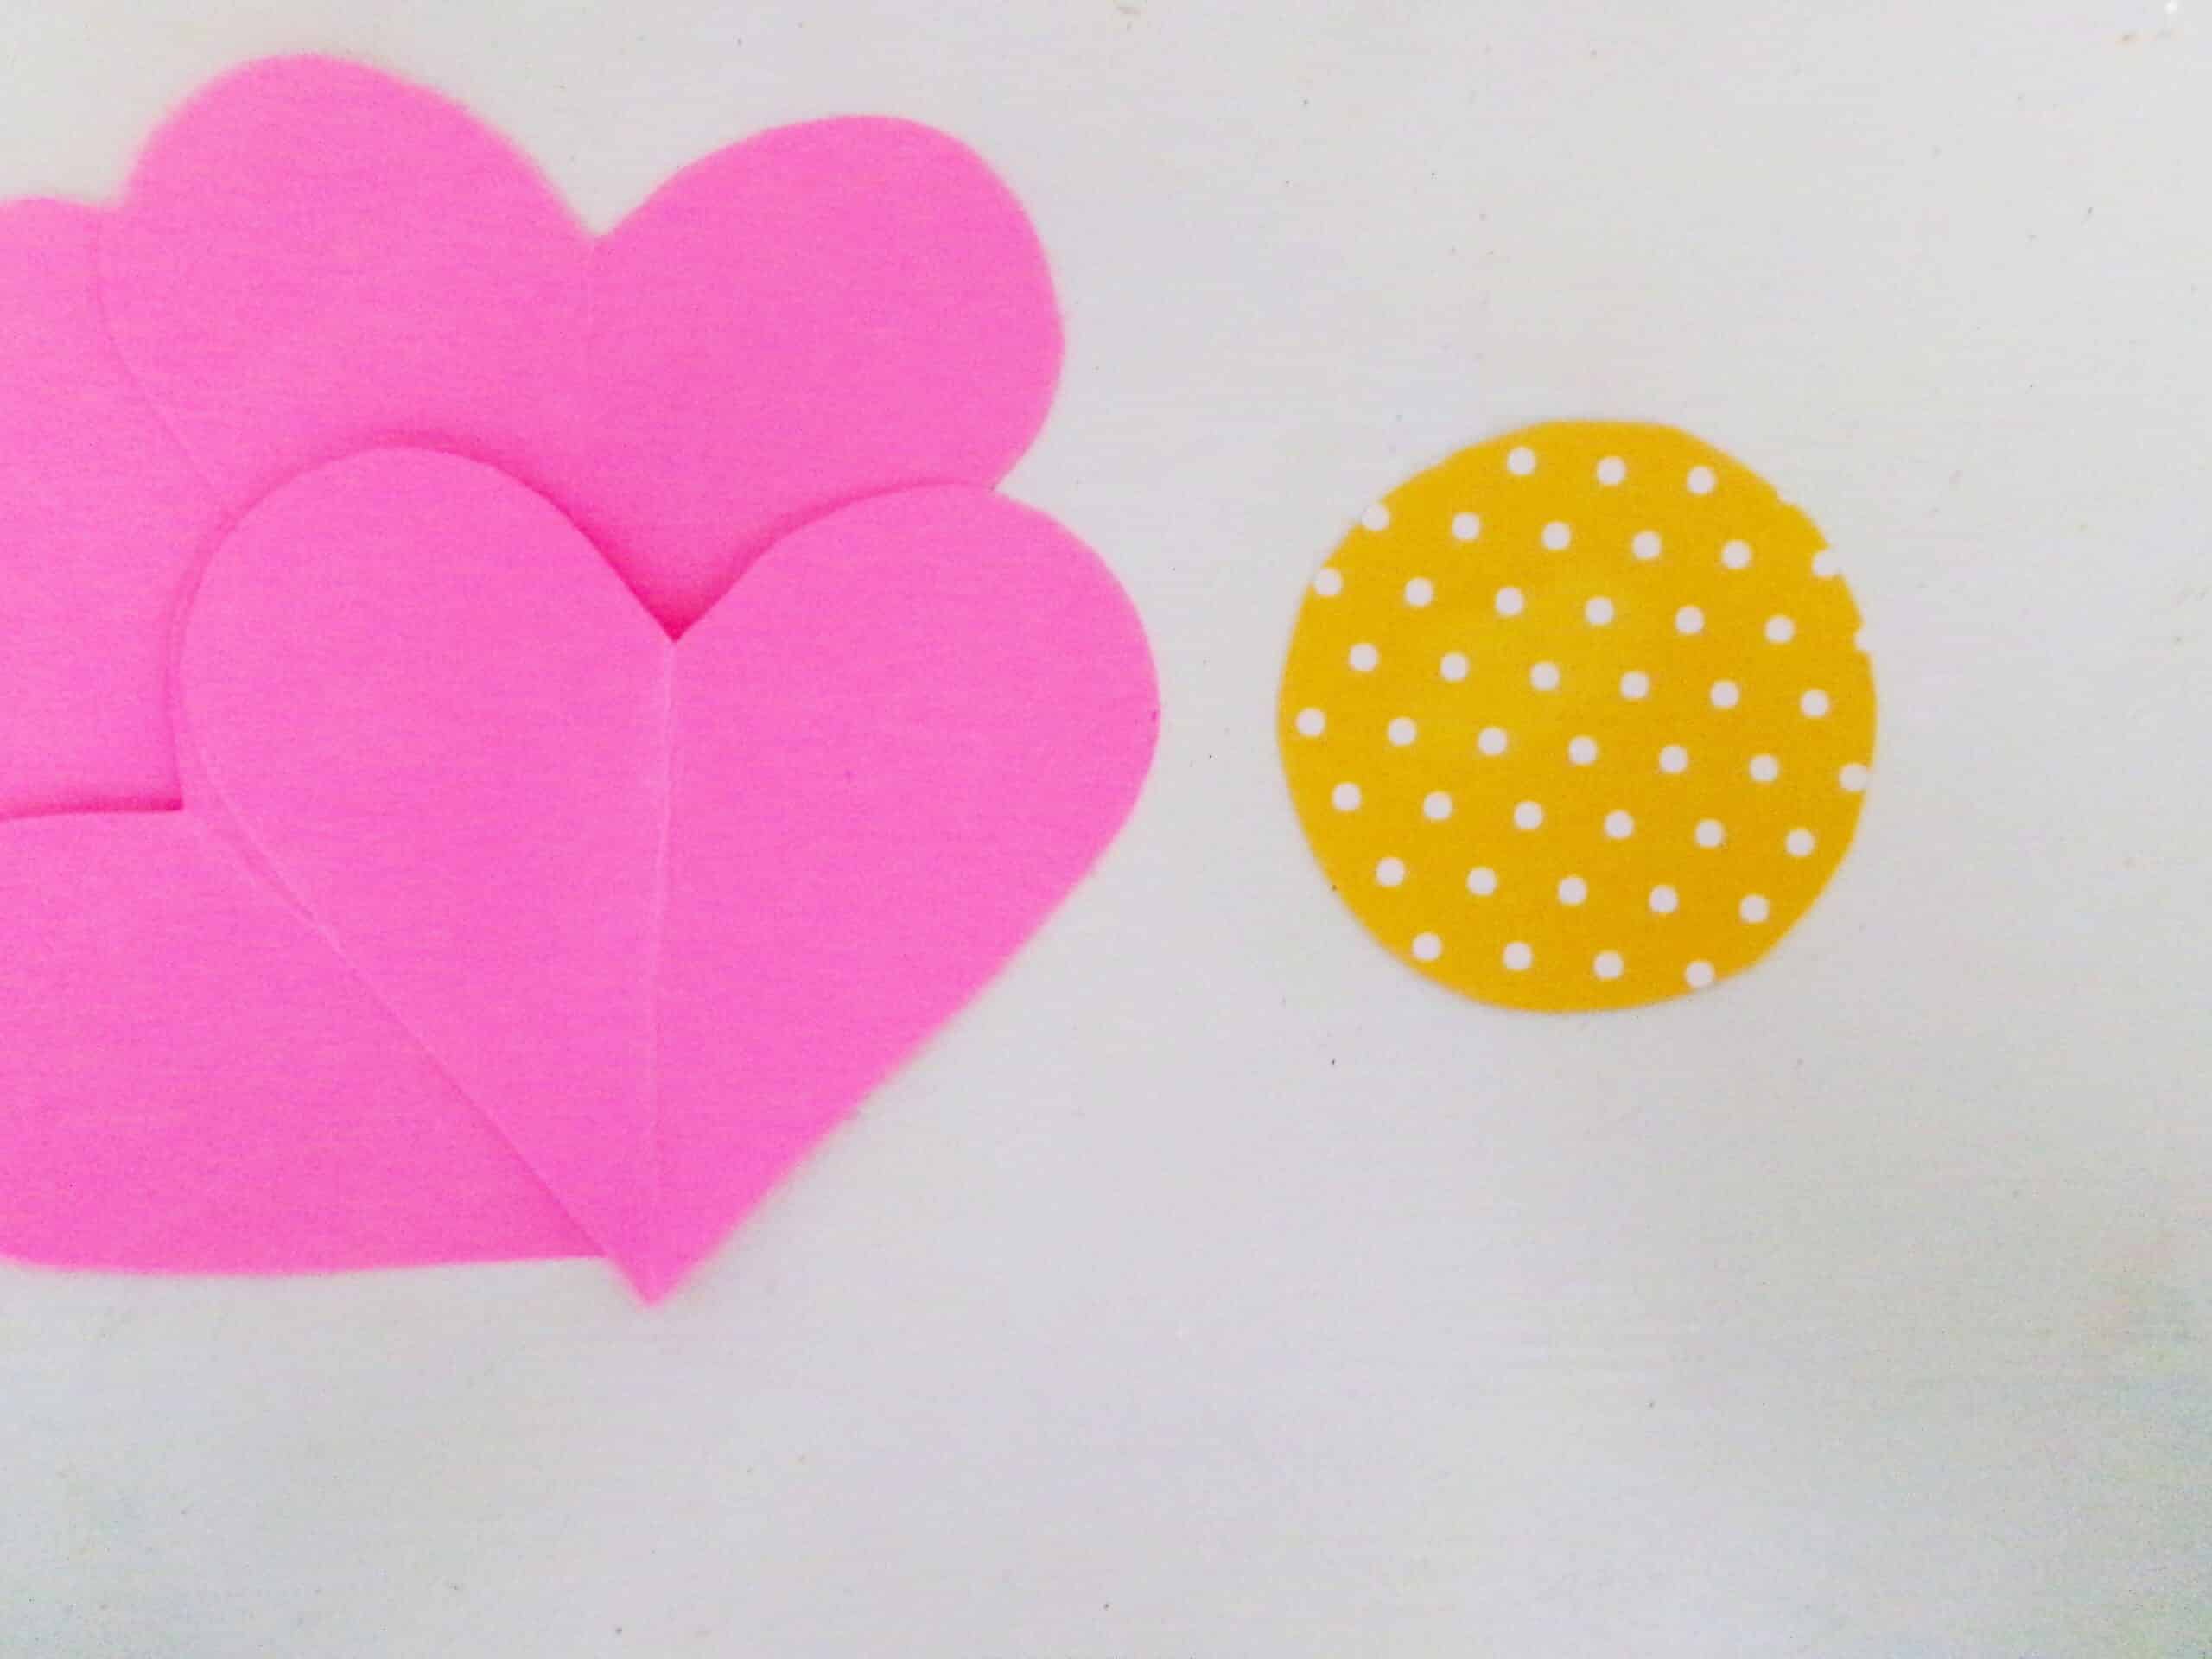
Next, cut a circle from the polka dot cardstock in a different color of choice that matches the size ratio of the heart petals.
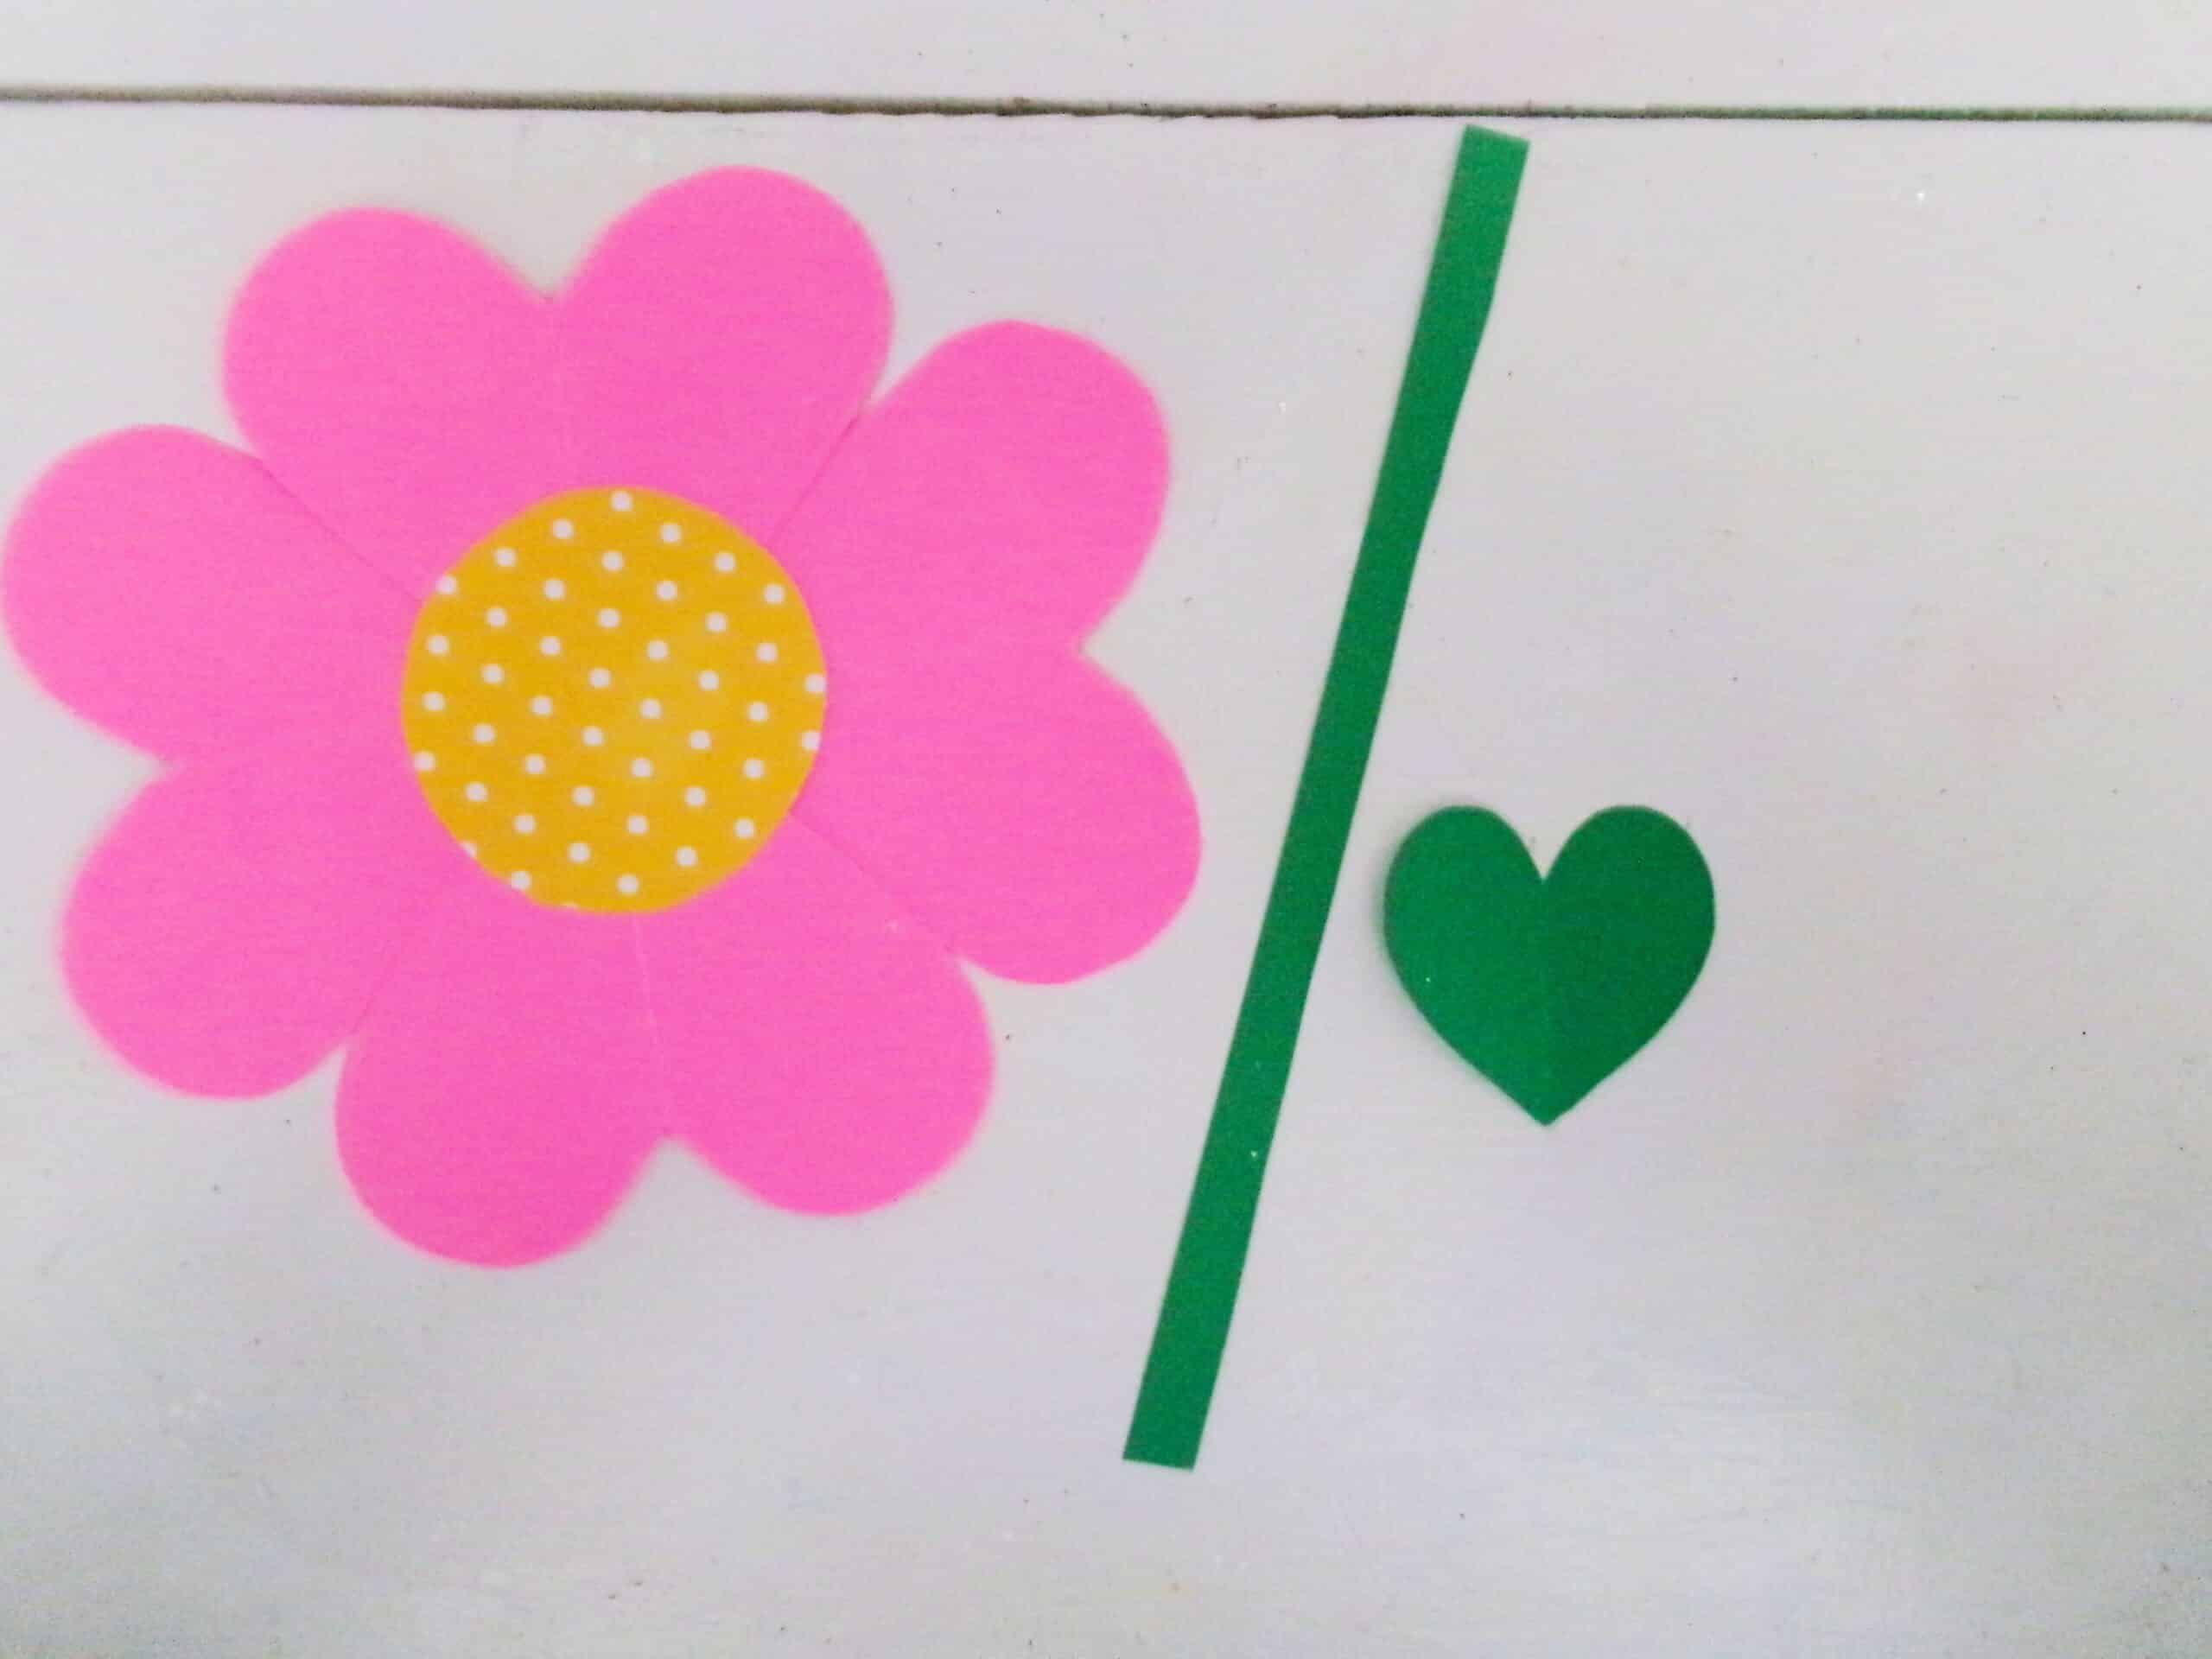
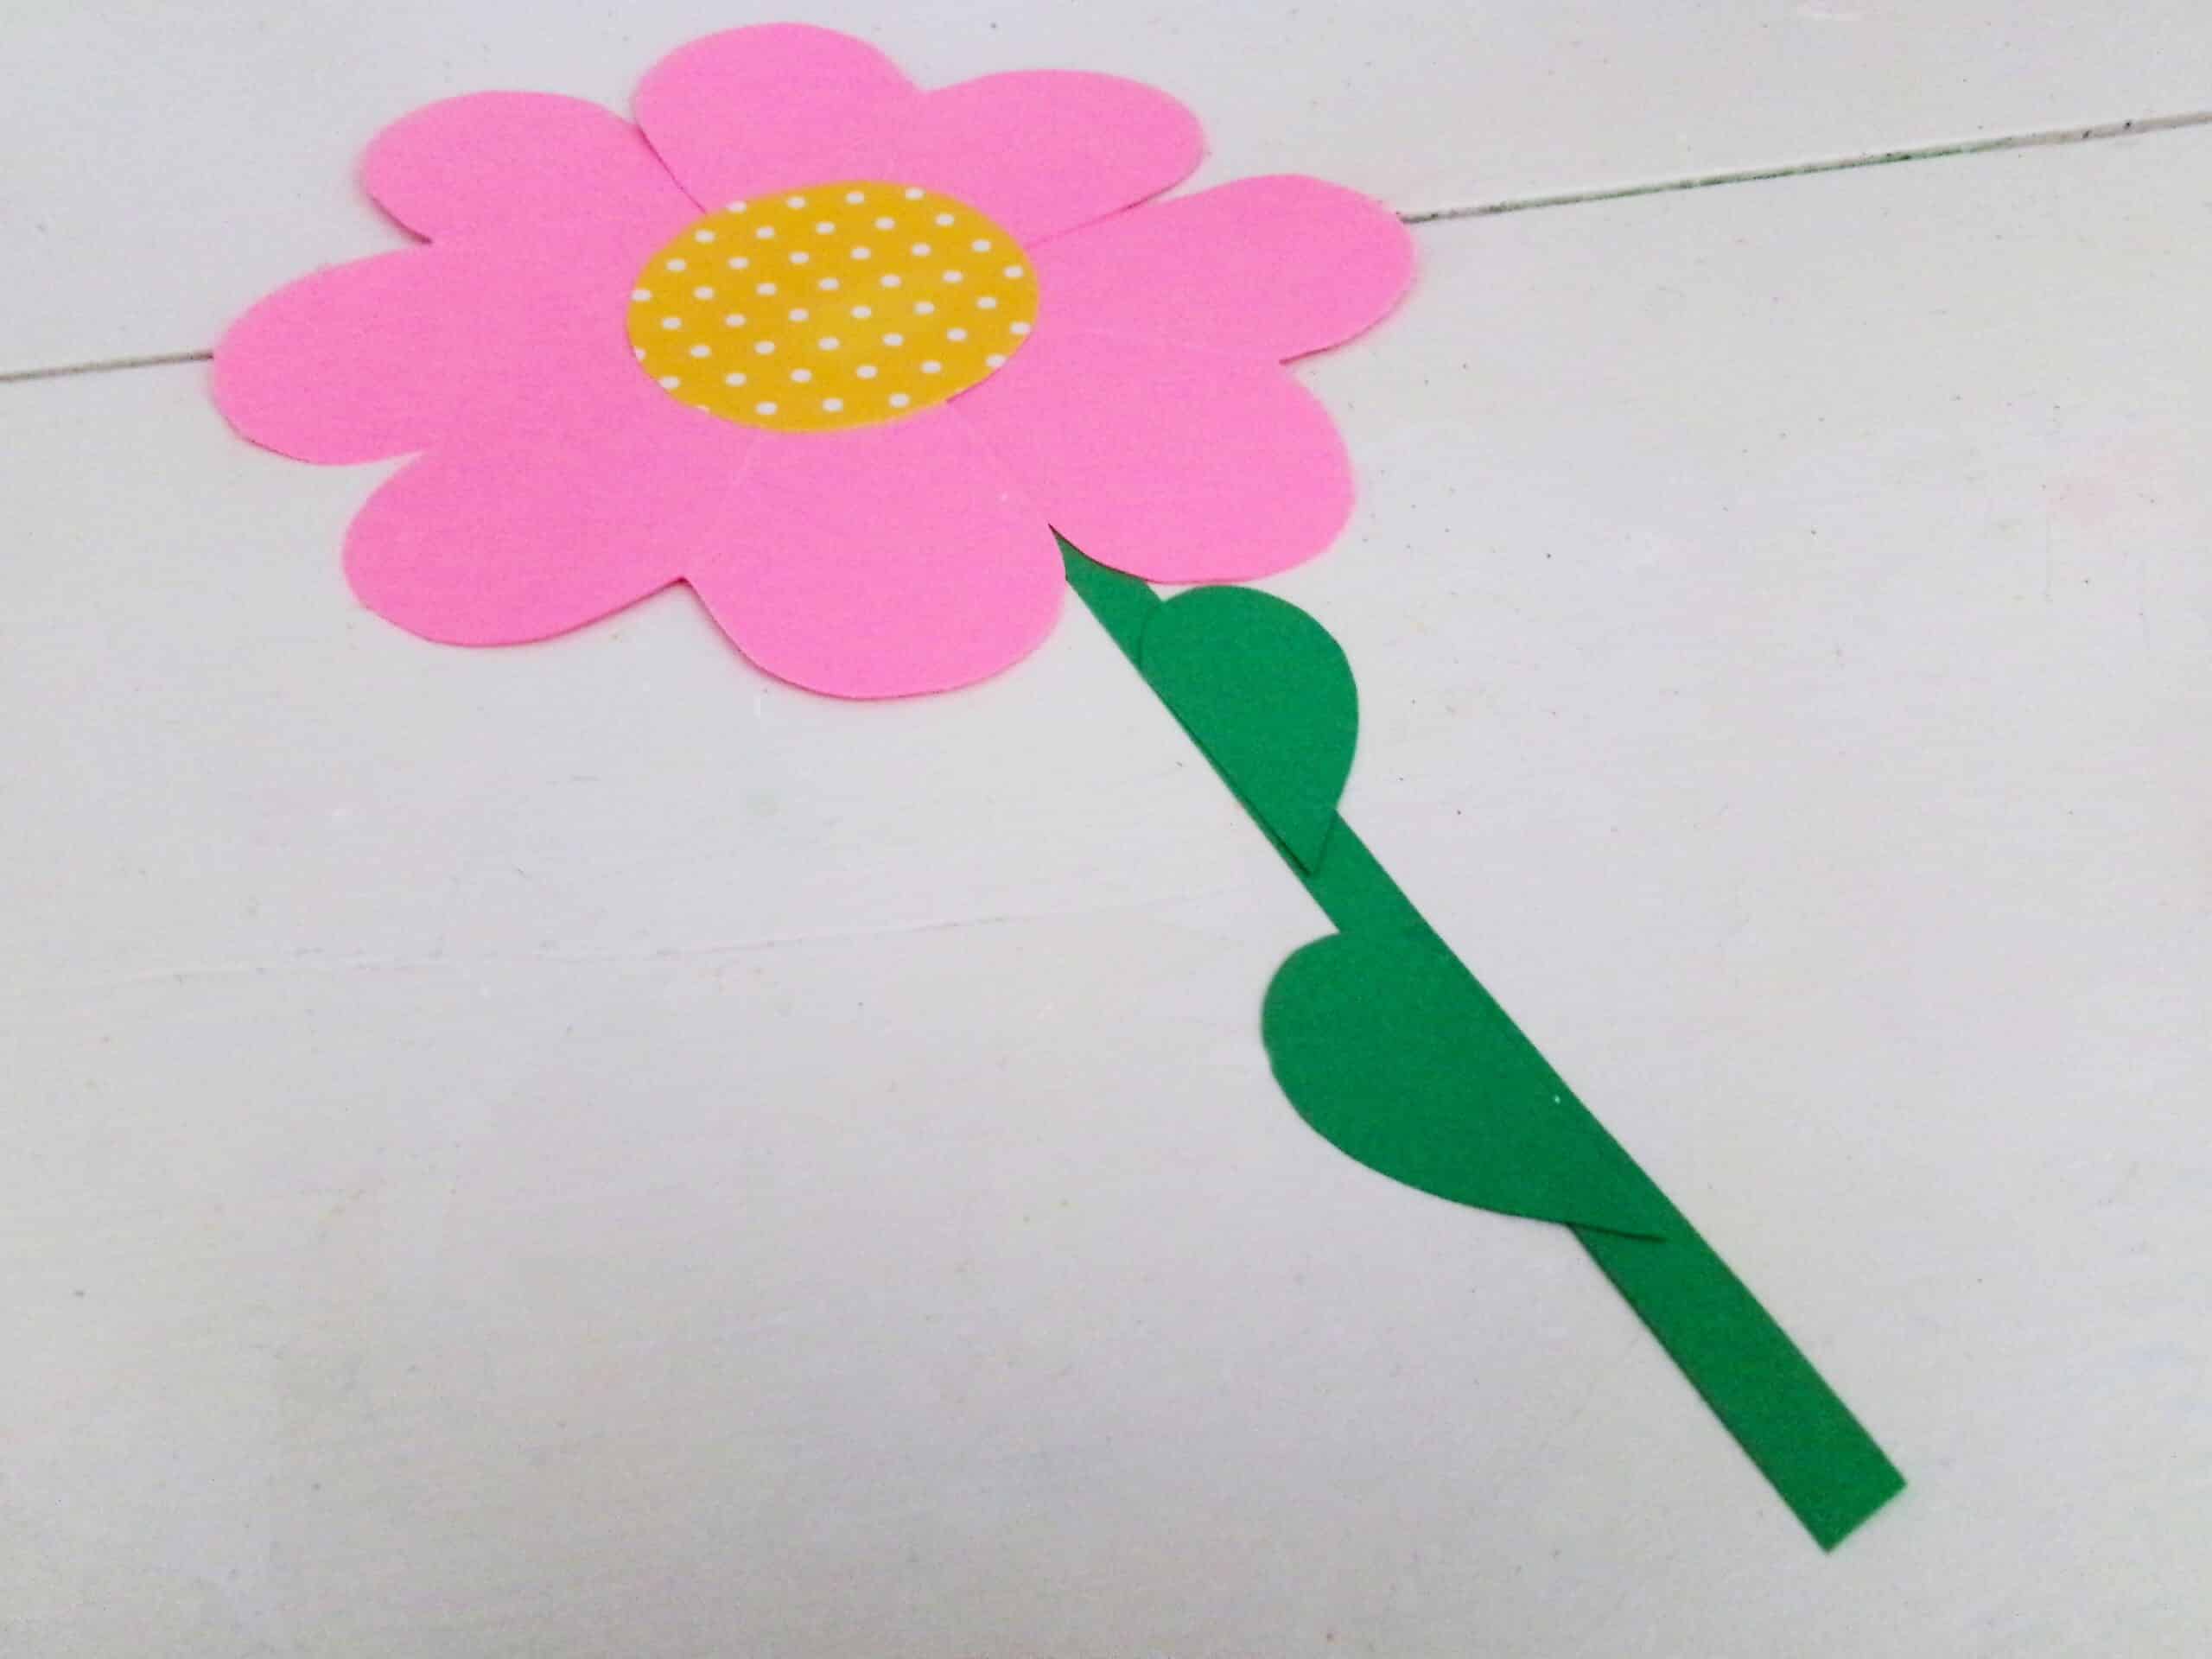
Glue the tips of the hearts to the back of the circle, overlapping them to make a flower head. Then cut a flower stem out of the green cardstock, along with a small heart. Glue to stem onto the back of the flower.
Cut the green heart in half and glue them onto stem as leaves.
Repeat these steps to make as many flower as you want!
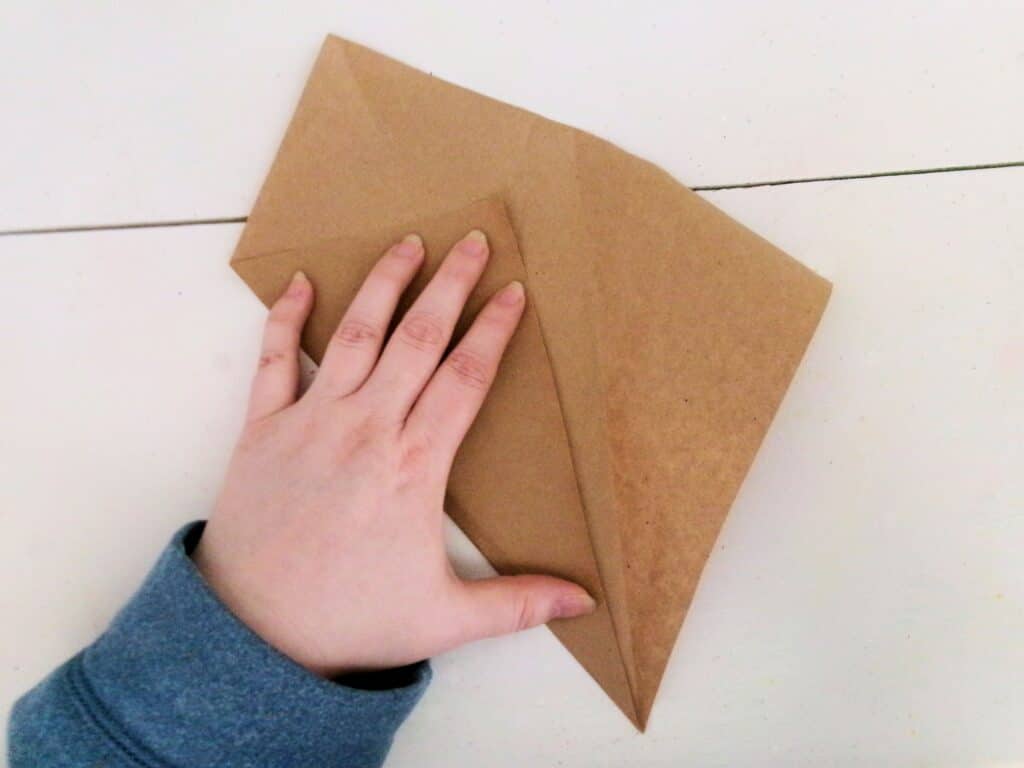
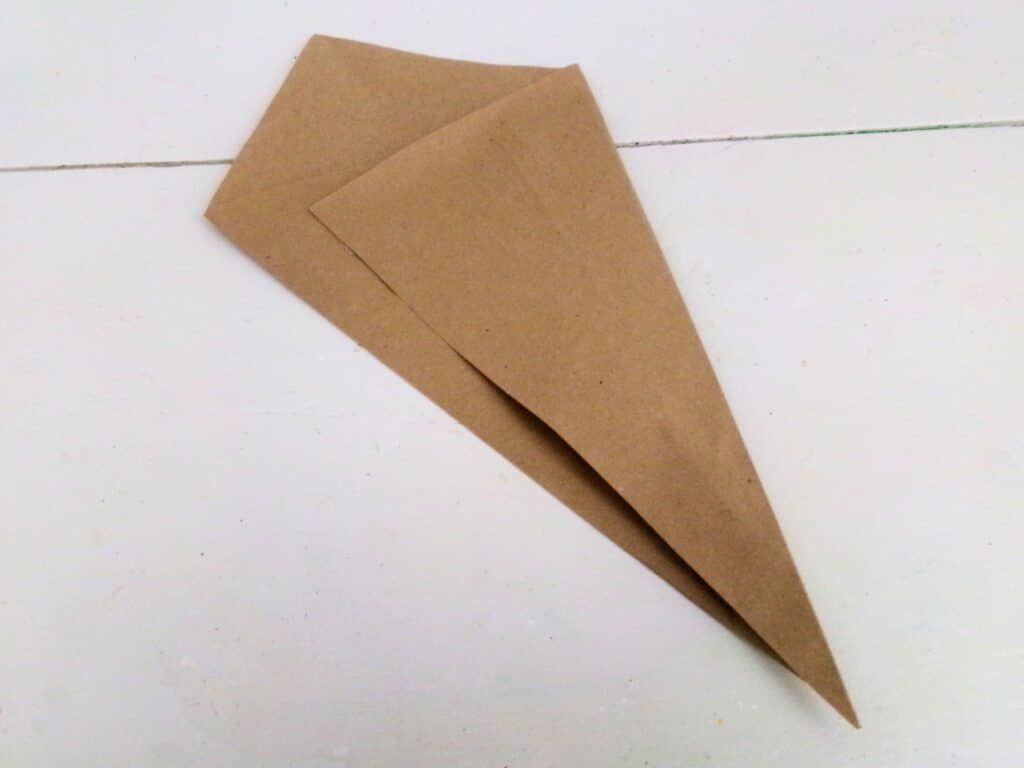
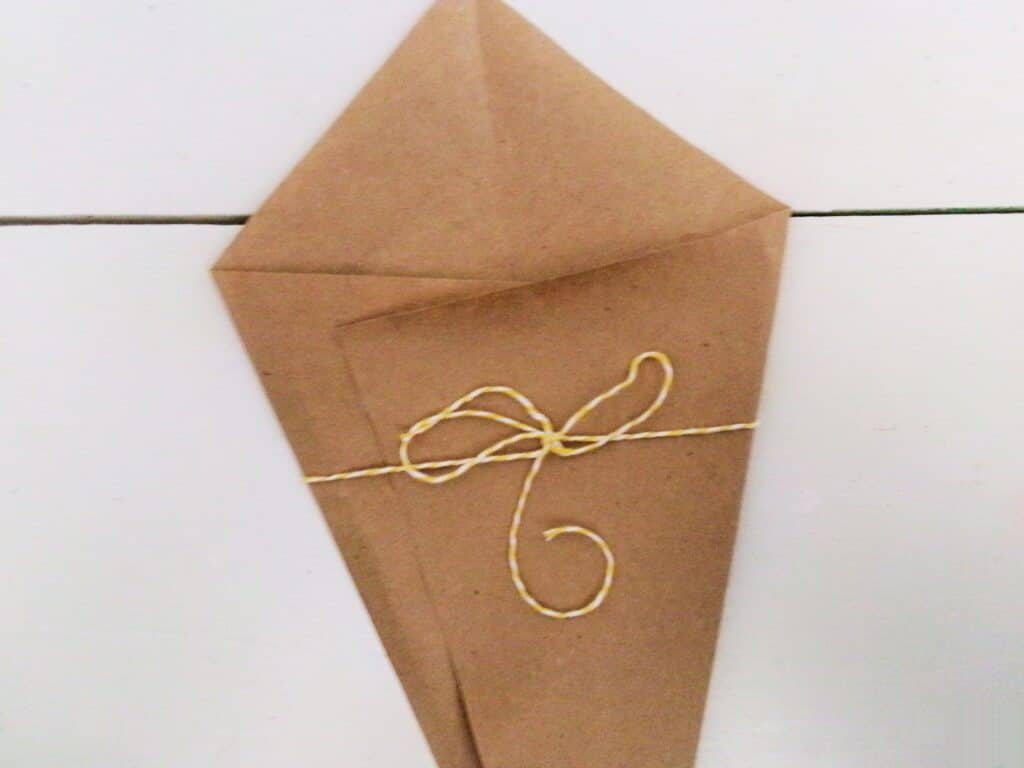
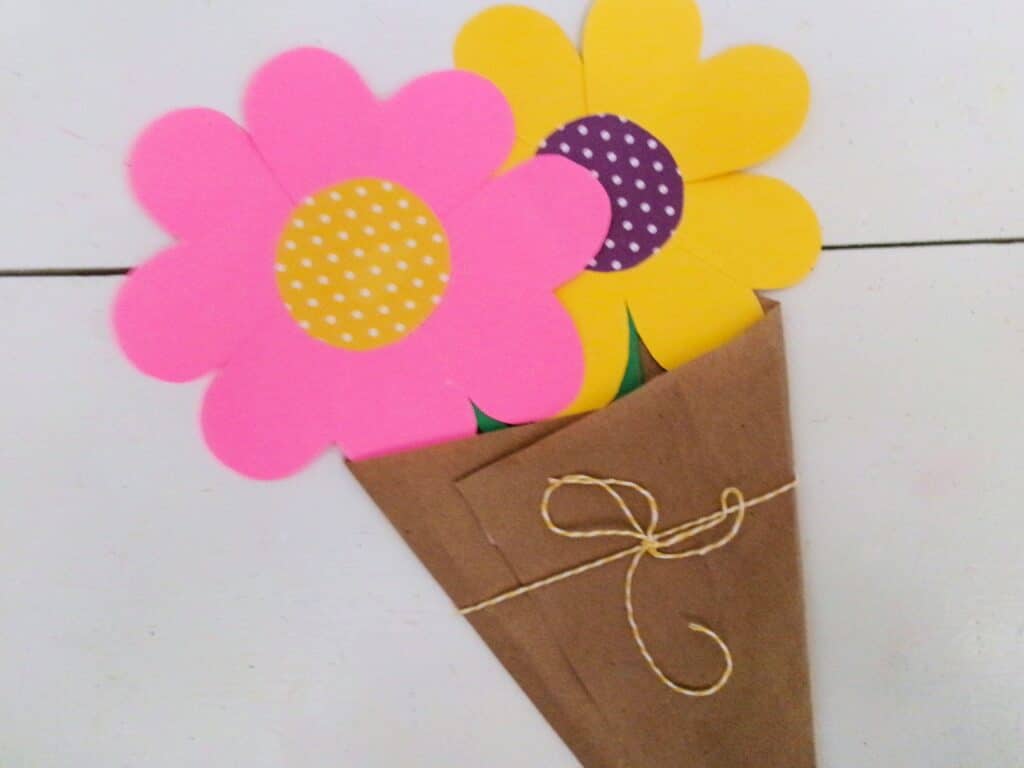
Then, cut a large square of brown kraft paper and place it in front of you like a diamond shape. Fold in the side corners to make a pocket that the flowers can go into. Glue the sides together, being careful not to glue the pocket closed.
Finally, cut a string of twine and glue the center to the back of the kraft paper wrap. Bring the twine to the front and tie it in a bow.
All that’s left to do is stuff the wrap with heart flowers and your bouquet is complete!
Can I use construction paper instead of card stock?
You can totally use construction paper to make the hearts if you do not have card stock. However, just keep in mind that they won’t be as sturdy as the card stock is. However, I do not recommend using tissue paper. If you want to make tissue paper flowers I have an entirely different craft for that that is super fun!
Pro Tips for the Best Heart Flower Bouquet
- Add lots of fun things to each flower to make them unique and special. You could put craft rhinestones on them, stickers, use a fun pipe cleaner or two, glitter, and so much more.
- You can actually make wreaths out of these flowers too! Make just the petals or multiple flower heads and glue them together in a circle to make an adorable wreath.
- Feel free to personalize the bouquets with either the crafters name or the name of whoever they plan to gift the bouquet to!
This precious easy paper flower bouquet is so much fun! Just cut paper in a heart shape, turn that into flowers, and wrap them in a precious little bundle.
More Cute Crafts You’ll Love
- This Flower Pencil Craft is a great gift to give classroom teachers at the end of the year, or even for Valentine’s Day!
- Make an extra tiny bouquet of flowers with these sweet Pipe Cleaner Flowers!
- This Valentine’s Handprint Craft is the sweetest keepsake craft. Moms will love it!
- A Handprint Flower Pot Craft would be another perfect homemade gift. You can even turn this one into a card!

Flower Heart Bouquet
Ingredients
- Cardstock – green polka dot, colors of choice
- Brown kraft paper
- Twine
- Scissors
- Glue stick
Instructions
- Begin by cutting 4 hearts from the cardstock color of your choice. You can make the hearts any size or shape you’d like, but they should all be the same.
- Now, cut a circle from polka dot cardstock in a different color of choice. Again, the circle can be any size you’d like.
- Glue the tips of the hearts to the back of the circle.
- Then, cut a stem and another small heart from green cardstock.
- Cut the green heart in half.
- Glue the stem to the back of the flower.
- And glue the hearts along the stem for leaves.
- Next, make a wrap by cutting a square of brown kraft paper.
- Position the kraft paper square like a diamond and fold in the side corners. You should have a pocket for the flowers to go.
- Glue the sides together, making sure not to glue the pocket closed.
- Lastly, cut a string of twine and glue the center to the back of the wrap. Bring the twine to the front and tie in a simple bow.
- Now, all that’s left is to insert all the heart flowers in your beautiful forever bouquet.
Oh, this is so cute! I love the bright colours that were used too ☺️🌈