Heart Suncatcher Craft
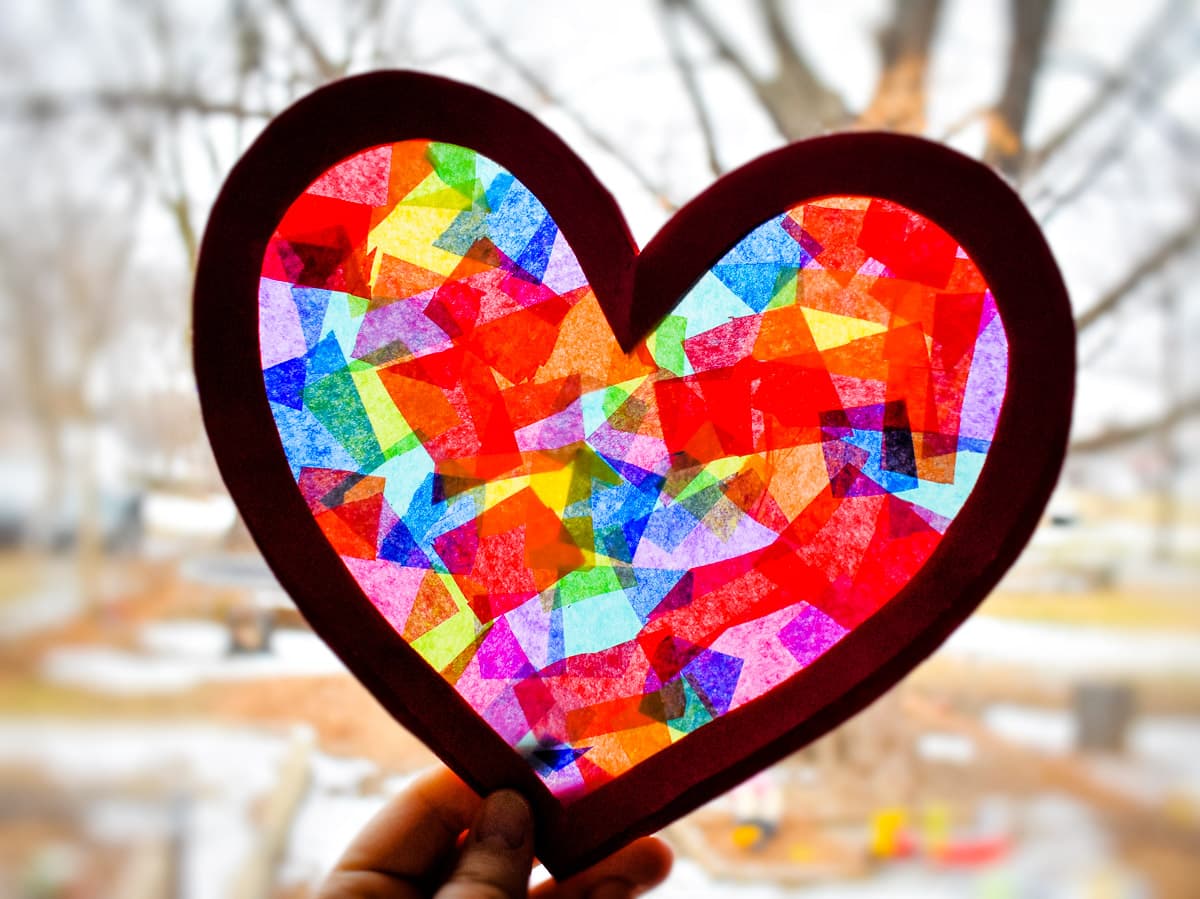
It doesn’t get easier than this Heart Suncatcher Craft! It’s perfect for decorating your windows for Valentine’s Day! Simply cut out a heart outline and apply contact paper to one side, then stick squares of tissue paper to the contact paper and finish it with another piece of contact paper on the back. An easy no-mess craft idea!

This Heart Suncatcher craft is the perfect easy craft idea for Valentine’s Day! With only a few supplies needed it’s quick and fun for kids to do and no prep for you! If you’ve been searching for heart crafts for toddlers, this is the perfect craft to start with!
Do them at home as an easy craft or during school and send them home for a surprise for parents.
They would also make a great craft activity for any Valentine’s Day parties you might be hosting.
Why You’ll Love This Heart Suncatcher Craft
- This is a great craft for kids of all ages. Only a little bit of cutting with scissors and lots of sticking fun colored tissue paper onto contact paper!
- You can hang these in your windows for an easy Valentine’s Day decoration or even hand them out to family and friends like a Valentine’s card.
- You probably have everything you need in your craft cupboard already!
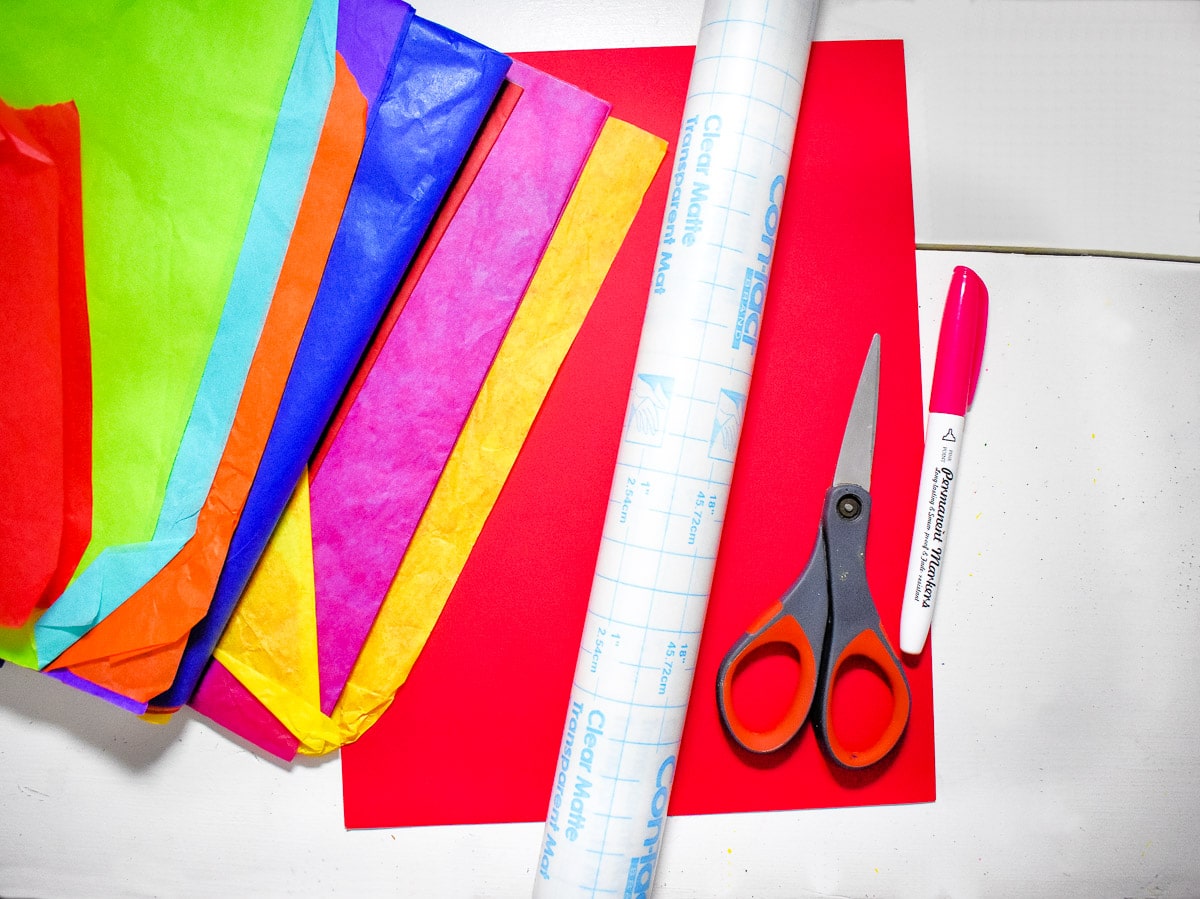
Supplies Needed to Make a Heart Suncatcher!
- Cardstock – red, pink and purple are great for Valentine’s Day but use whatever you like
- Tissue paper – all sorts of colors will really make this colorful heart pop!
- Clear contact paper – this is sticky enough to make the craft and is mess free
- Scissors – the big shapes are great for younger kids to practice their cutting skills
- Marker – a Sharpie is great, but you can use whatever you have on hand.
The best part is you probably already have everything you need to do this craft so you don’t really need to plan ahead.
This is an easy craft idea that you can do on a whim when the kids ask for a Valentine’s Day craft!
How to Make a Heart Suncatcher
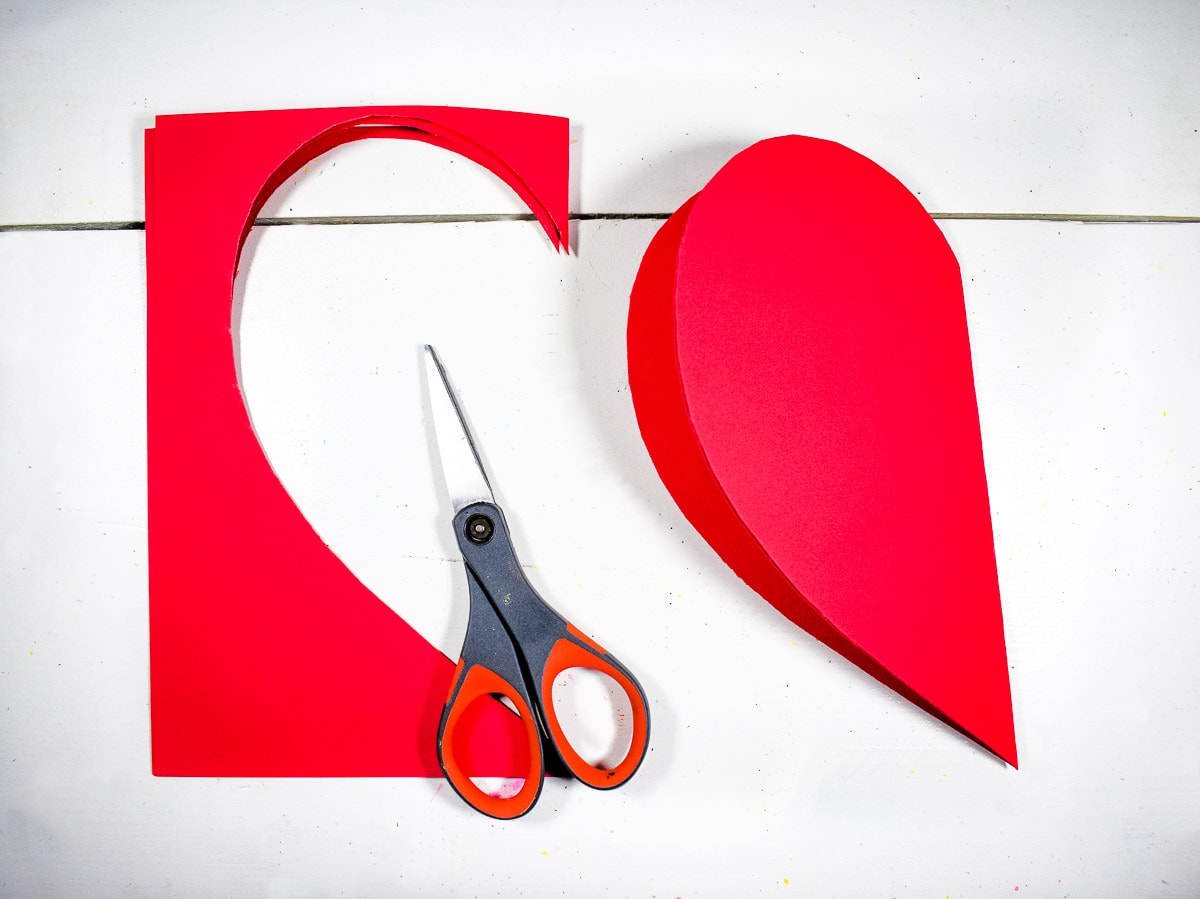
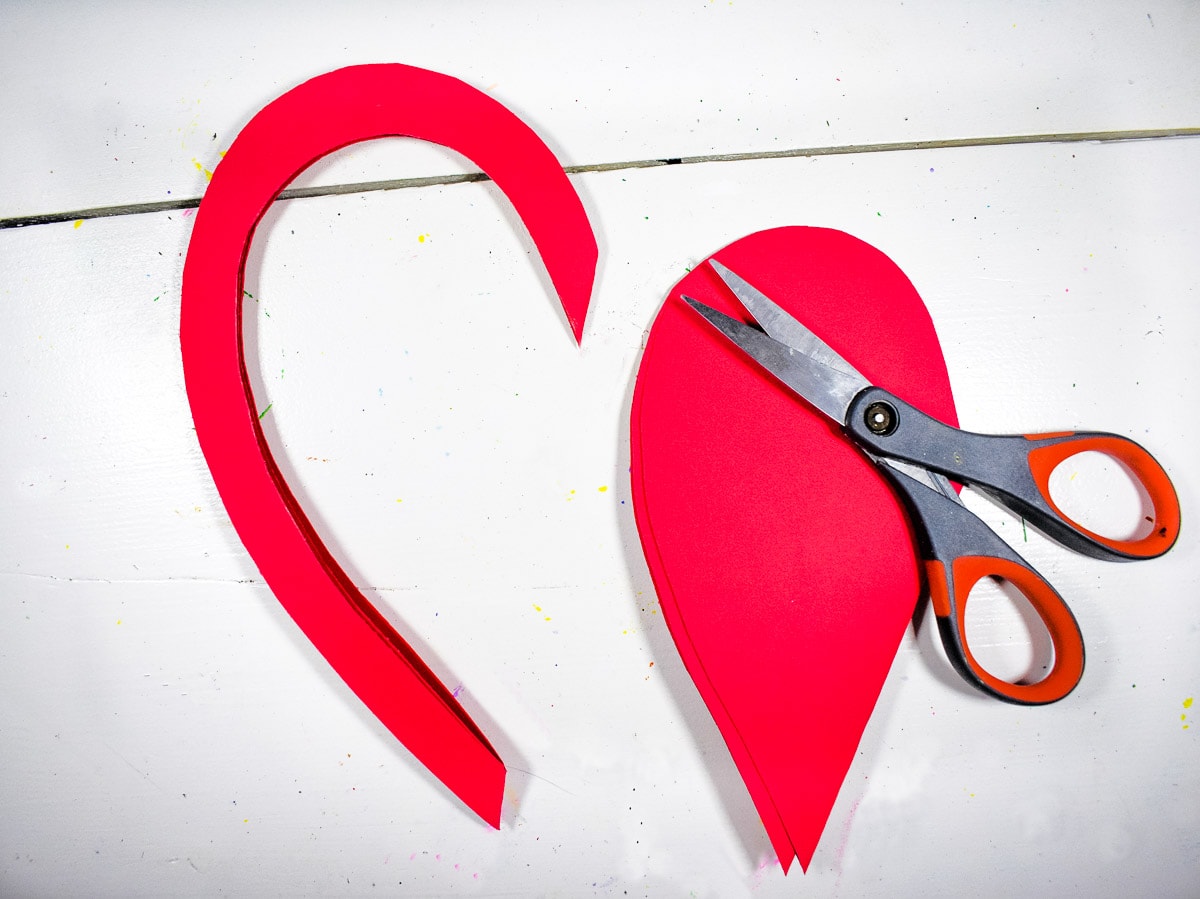

Cut out heart: Fold two sheets of cardstock together and cut out large heart shape. You need the hearts the same size, and this is the easiest way of doing that. Next, cut hearts out from the inside leaving at least an inch border. Unfold the hearts.
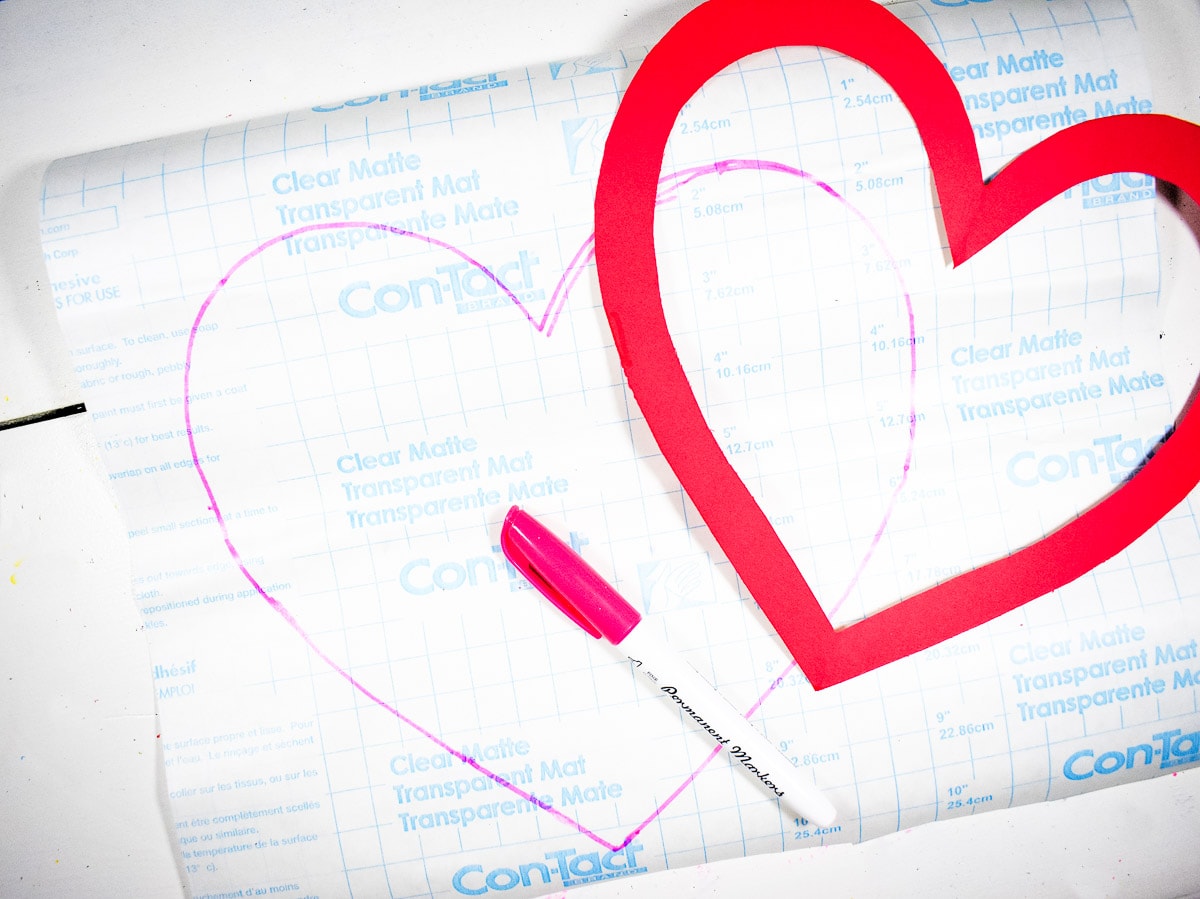
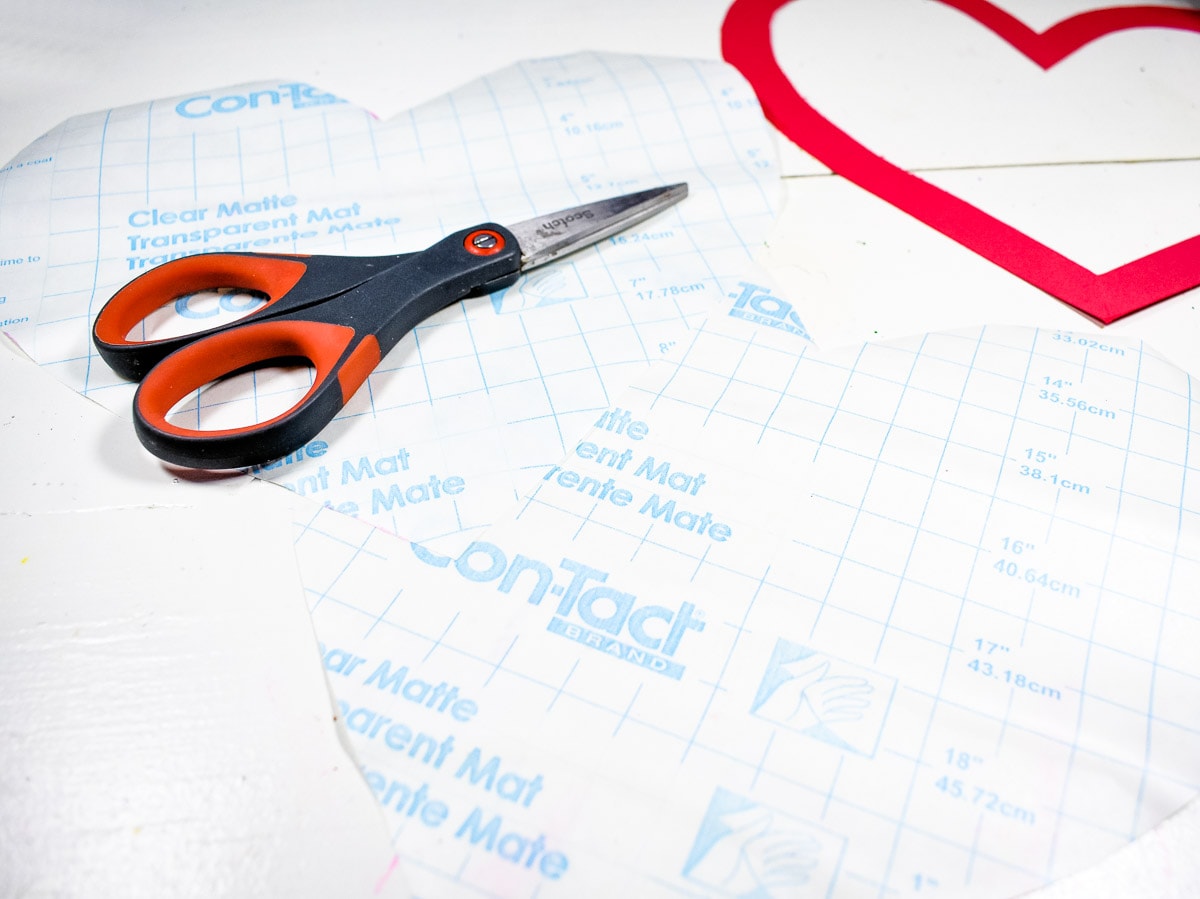
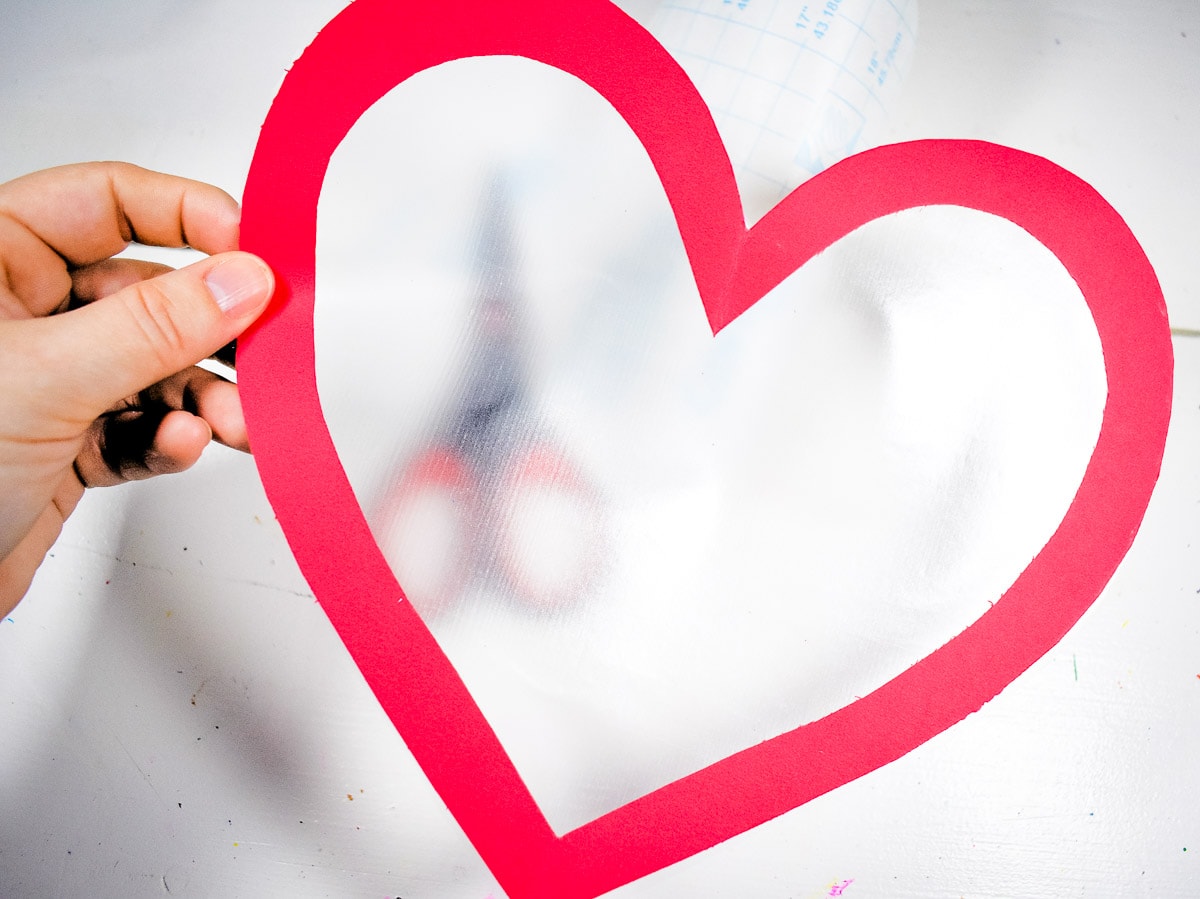
Apply contact paper to heart: Next, trace the hearts on two sheets of clear contact paper using a marker and cut inside the lines to cut out the hearts from the contact paper. With the sticky side of the contact paper facing up, apply one of the heart outlines to the contact paper. Repeat for other heart and set one of the hearts aside.
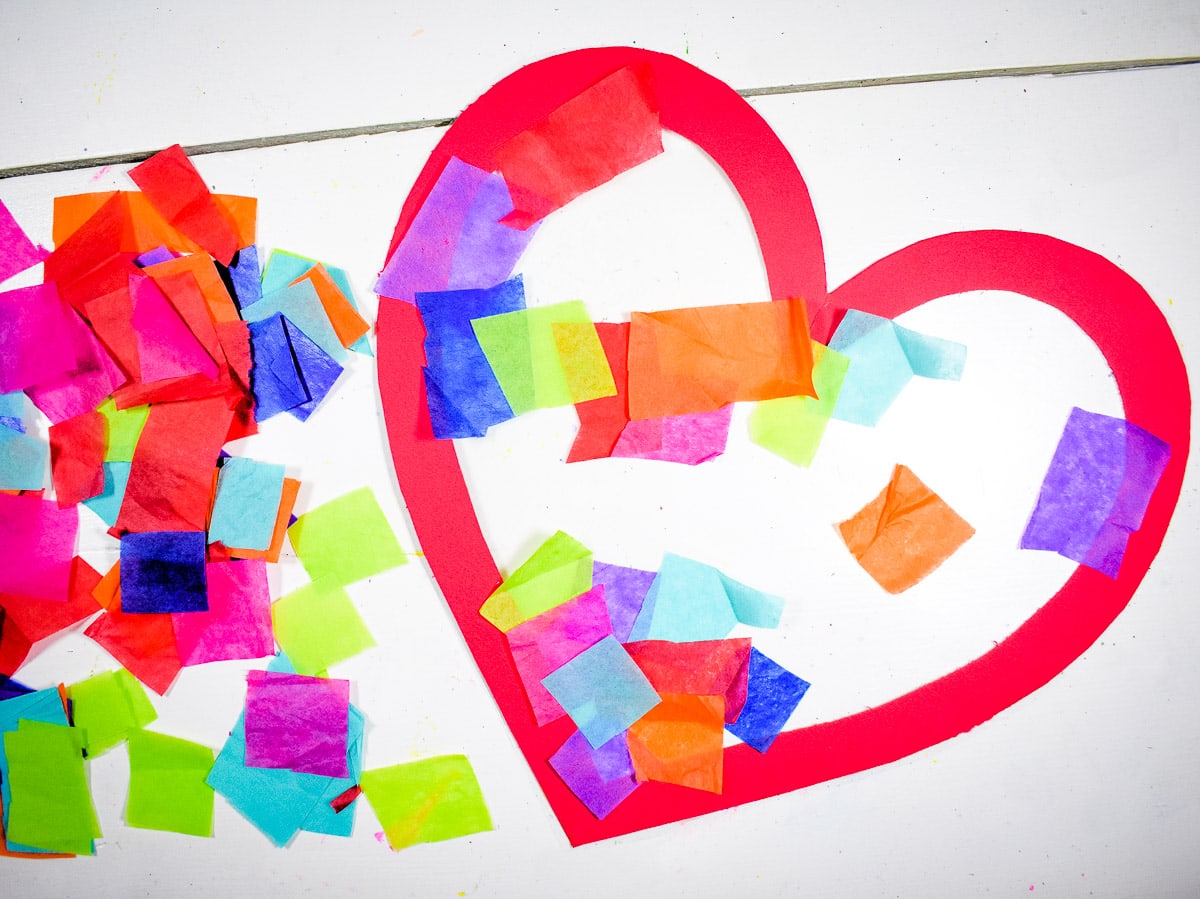
Apply tissue paper to heart: Cut a bunch of small pieces of tissue paper. Begin randomly laying the tissue paper onto the sticky contact paper. Once filled, position the other heart over the tissue paper heart, so they stick together. Trim any excess hanging over the edges.
Pro Tips
- Construction paper will also work but will be a bit more flimsy than card stock.
- Hang sun catchers on your window with a pretty ribbon. String them along the window like a garland!
- Make lots of different sizes to really make this Valentine’s Day craft a decorating event.
Make this fun contact paper suncatcher, as well as other Valentine’s crafts like this paper bag heart handprint tree! Kids big and small will love adding all of the fun color to this fantastic craft. Fill your windows to celebrate heart day or put them up any day of the year!
More Easy Kid’s Contact Paper Suncatchers
- Make these super fun Shamrock Suncatchers around St. Patrick’s Day.
- These Easter Suncatchers are so much fun and there’s different shaped templates to choose from!
- Memorial Day or Fourth of July would be a great time to make some red, white and blue stars!
- A snowflake suncatcher will liven up your windows on a dreary wintery day.
If you take a picture and share them on Instagram make sure to #kidsactivityzone or tag us @kidsactivityzoneblog so we can see them!

Heart Suncatcher
Ingredients
- Cardstock red, pink, etc.
- Tissue paper assorted colors
- Clear contact paper
Instructions
- Begin by folding two sheets of cardstock together and cutting out large hearts. You need the hearts the same size, and this is the easiest way of doing that.
- We used two different shades of red for our Valentine’s Day heart suncatchers, but pink would be nice, as would purple, too.
- Now, with the hearts cut out but still folded, cut hearts out from the inside leaving a border at least an inch wide.
- Once cut out, unfold the hearts.
- Next, trace the hearts on two sheets of clear contact paper using a marker.
- Cut inside the lines to cut out the hearts from the contact paper.
- With the sticky side of the contact paper facing up, apply one of the heart outlines to the contact paper. Repeat for other heart.
- Then, cut a bunch of pieces of tissue paper. Begin randomly laying the tissue paper on the contact paper.
- Once filled, position the other heart over the tissue paper heart, so they stick together. If there is any excess over the edges, those can be trimmed at this time.