Easter Suncatchers
Brighten up your windows this spring with this Easter suncatchers craft — a simple and beautiful project kids can make with colored tissue paper and free printables. These cheerful suncatchers capture the light and make seasonal decorations that are perfect for Easter baskets, classroom displays, or at-home crafting.
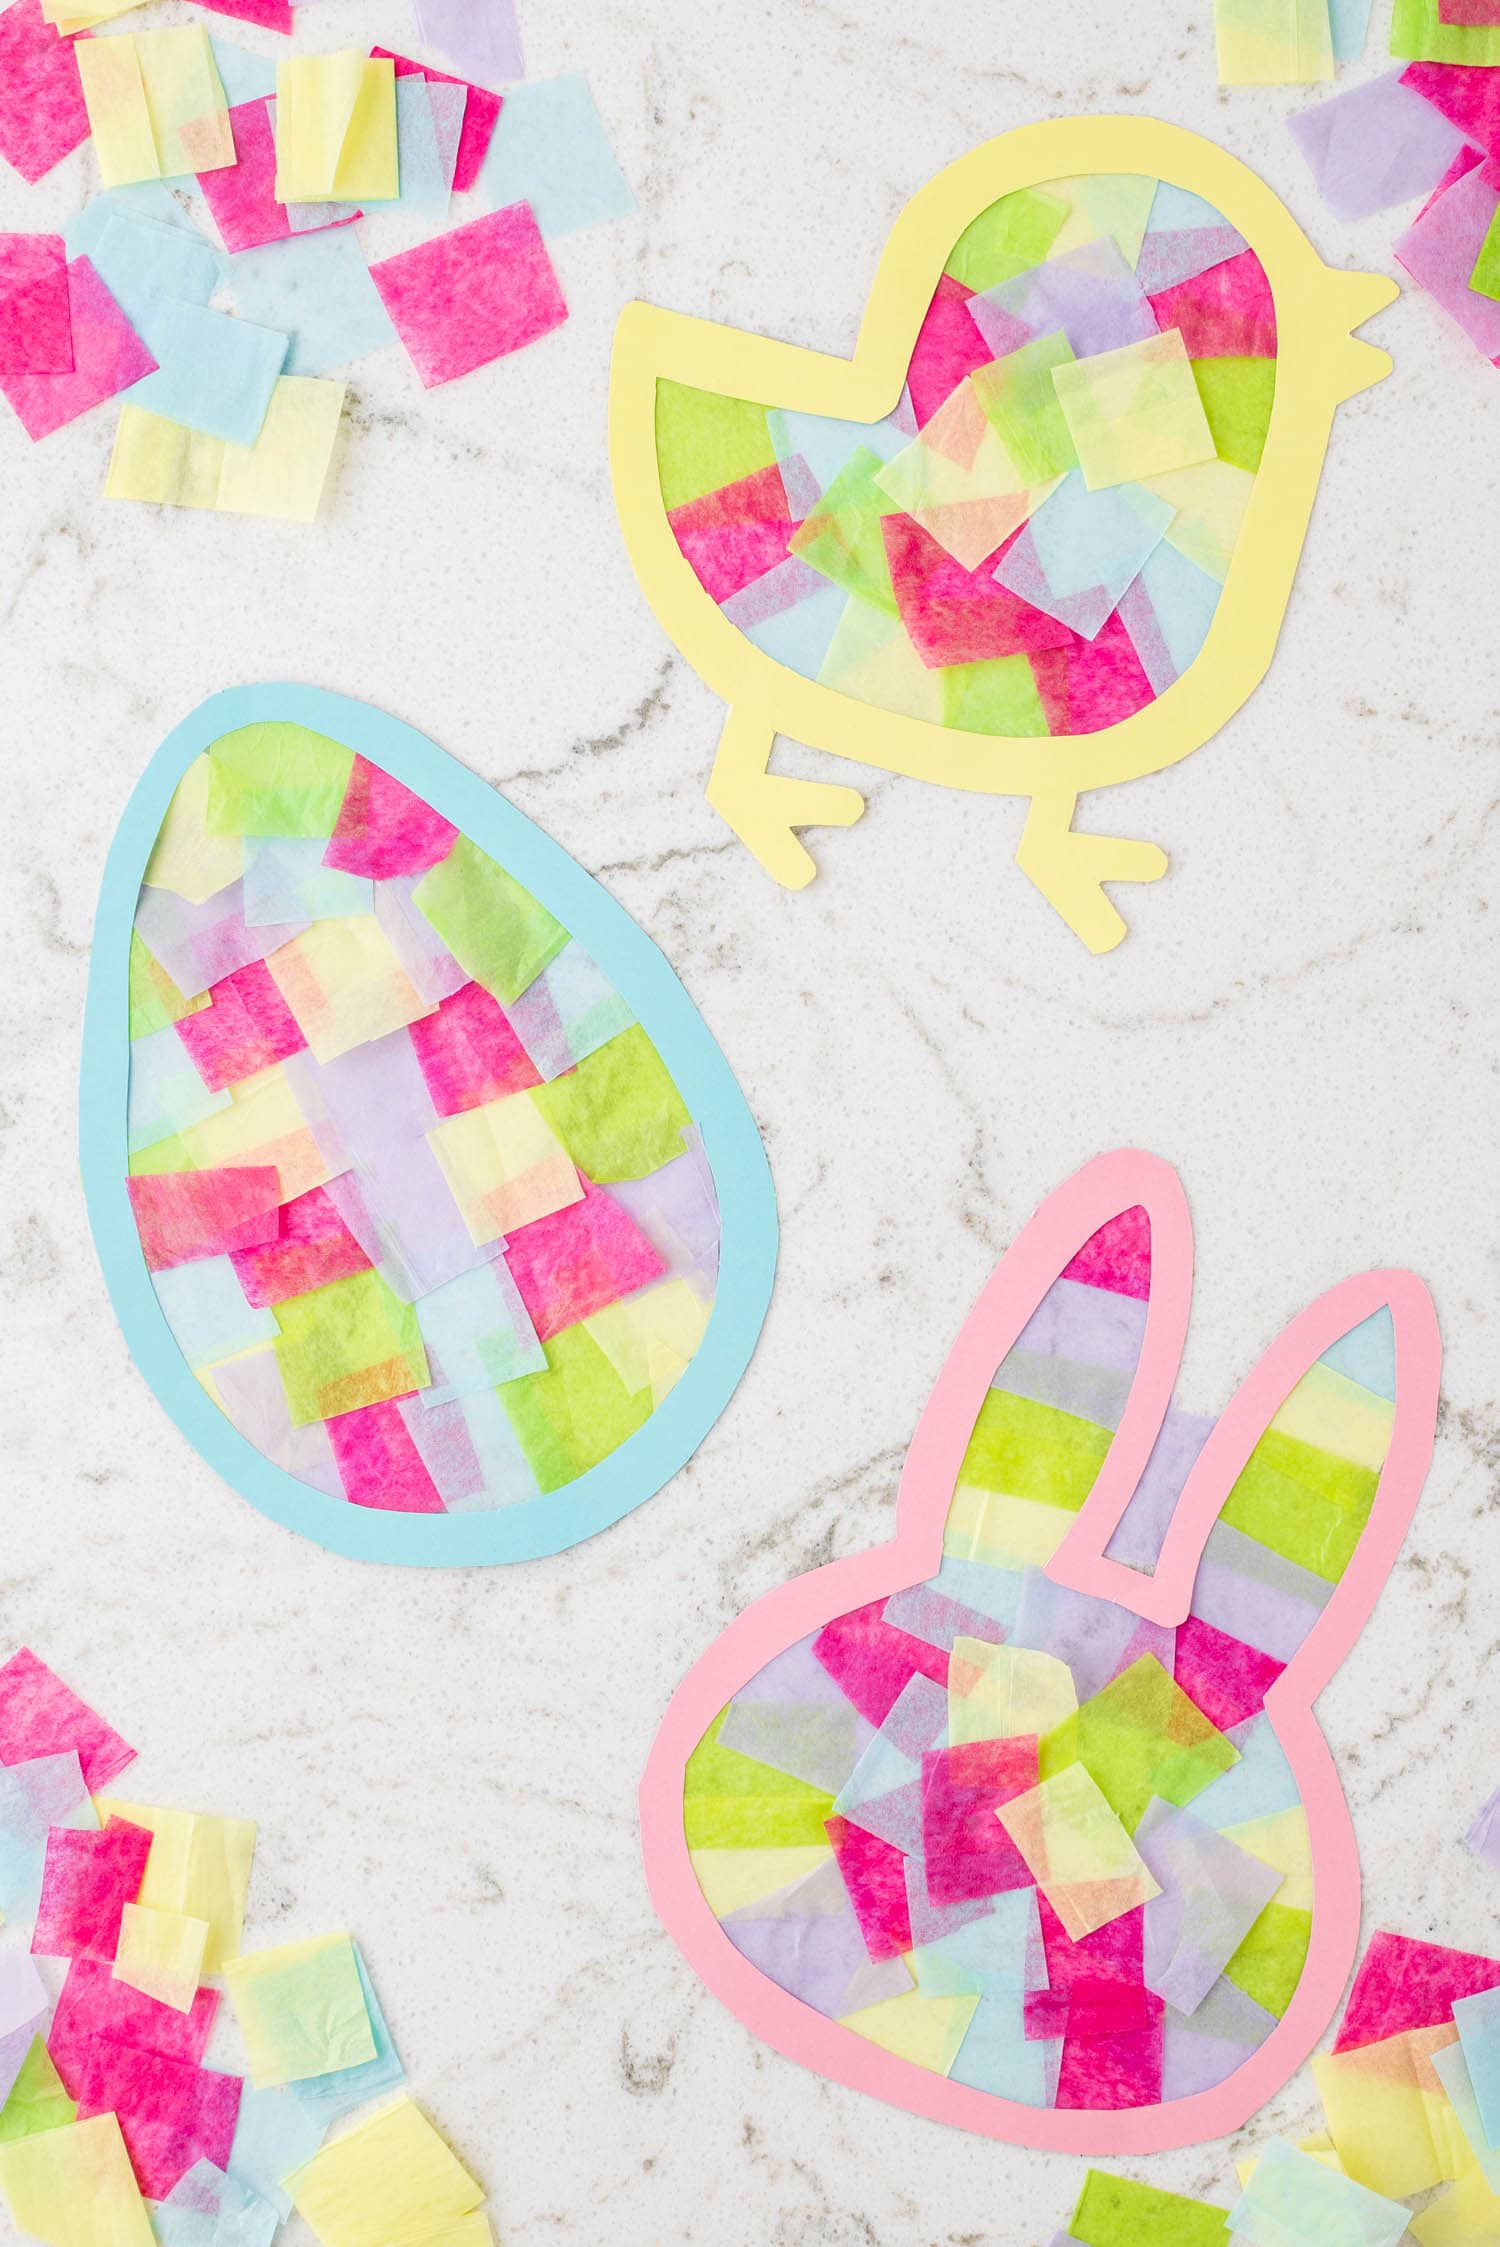
You can never have too many fun Easter crafts and if you’ve ever wondered how to make a suncatcher craft, you’ve come to the right place.These Easter suncatchers are really simple to make and turn out so cute! My kids love making suncatchers and hanging them in their bedroom windows so they can watch the sun shine through.
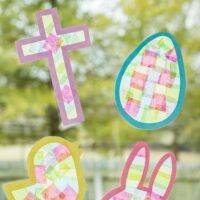
This Easter sun catcher is a great activity for children of all ages all the way from toddlers to older children (and even adults!). And there are four different free templates to choose form! You can make an Easter egg suncatcher, a bunny, a chick, or a cross. We make suncatchers for so many holidays. This Turkey Suncatcher is so cute for Thanksgiving!
Whichever Easter template you choose will turn out adorable. These easy contact paper suncatchers are sure to be a hit at the kids’ craft table this Easter. And don’t forget to make a tasty snack of Peeps Rice Krispie Treats to munch on while you create!
Why You’ll Love This Craft
- Cutting and pasting these easter sun catchers are great activities to help refine fine motor skills.
- This Easter sun catcher craft is a great way to create cute DIY Easter decorations to place around your home.
- These are great for you children to hand out as gifts to their grandparents, aunts, uncles, and friends!
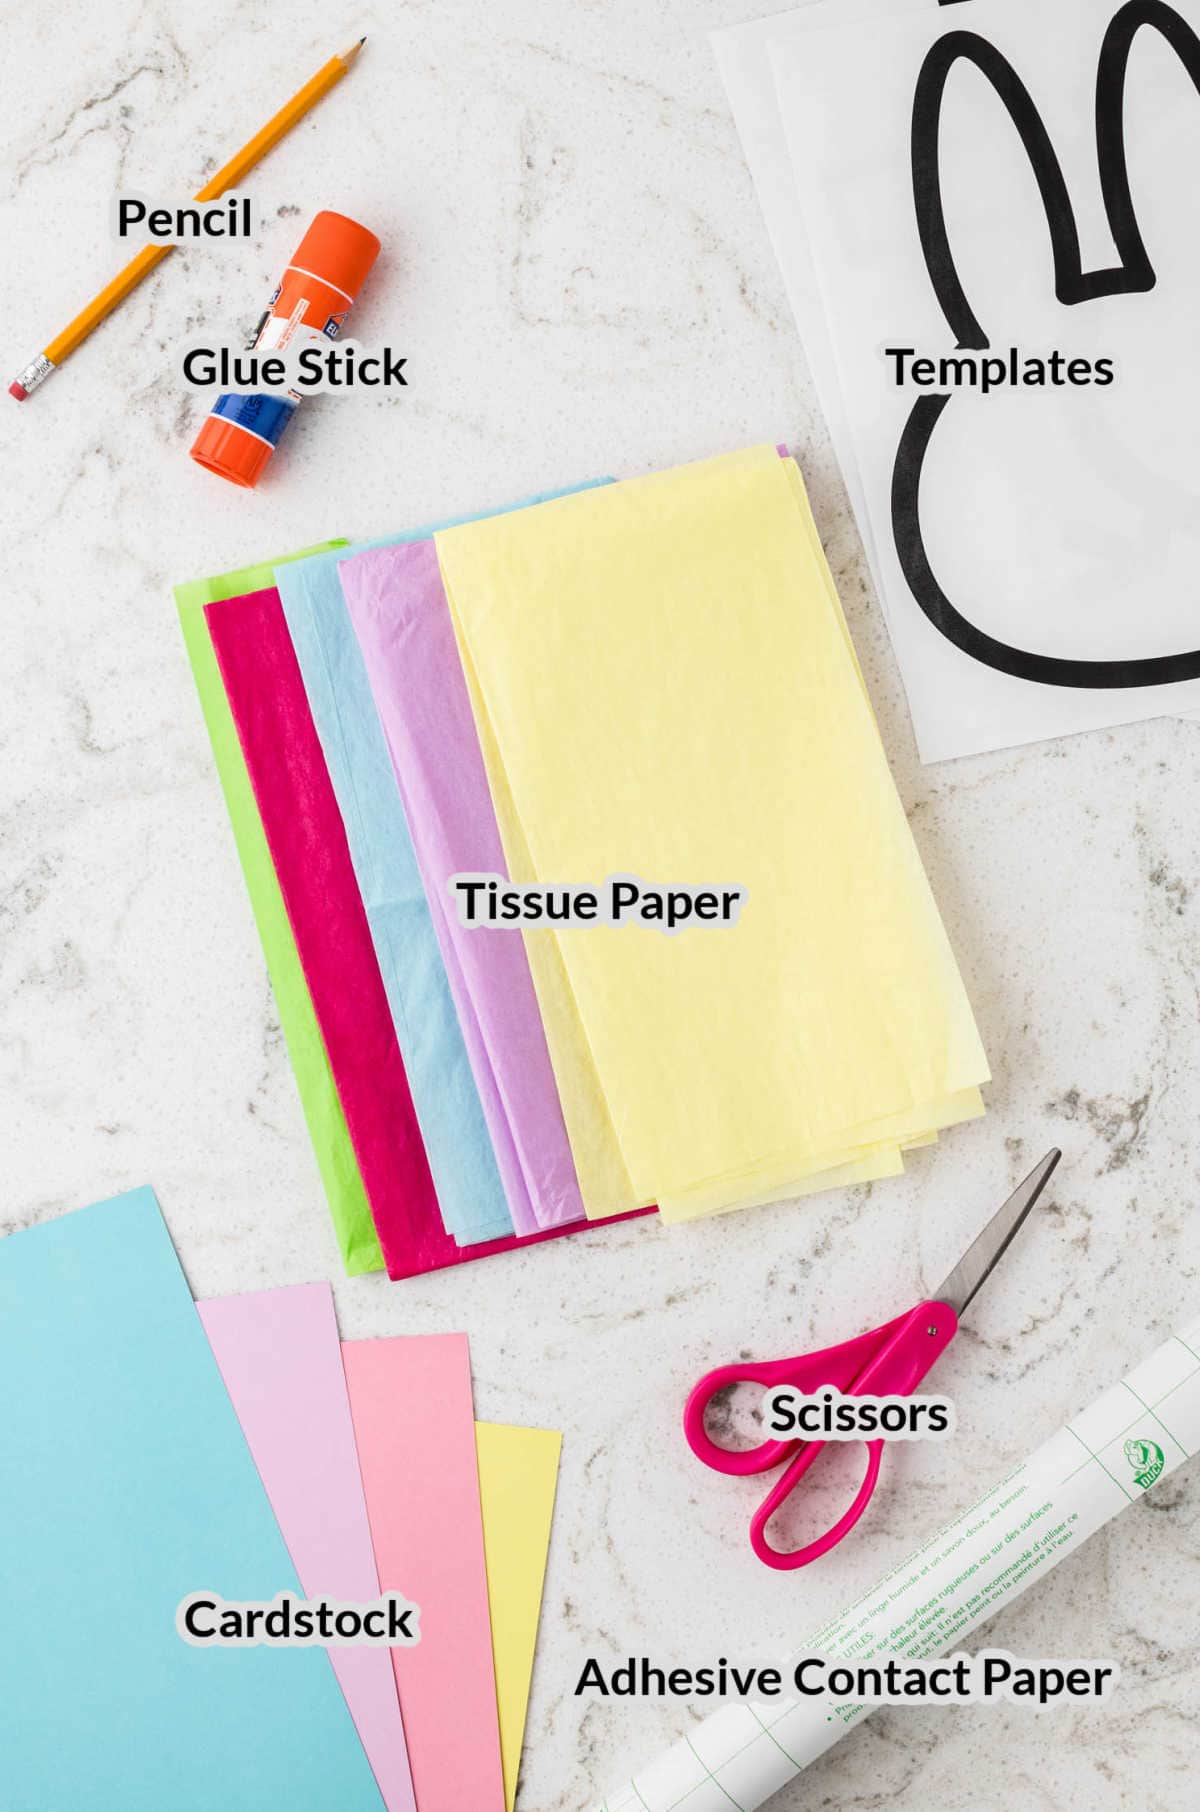
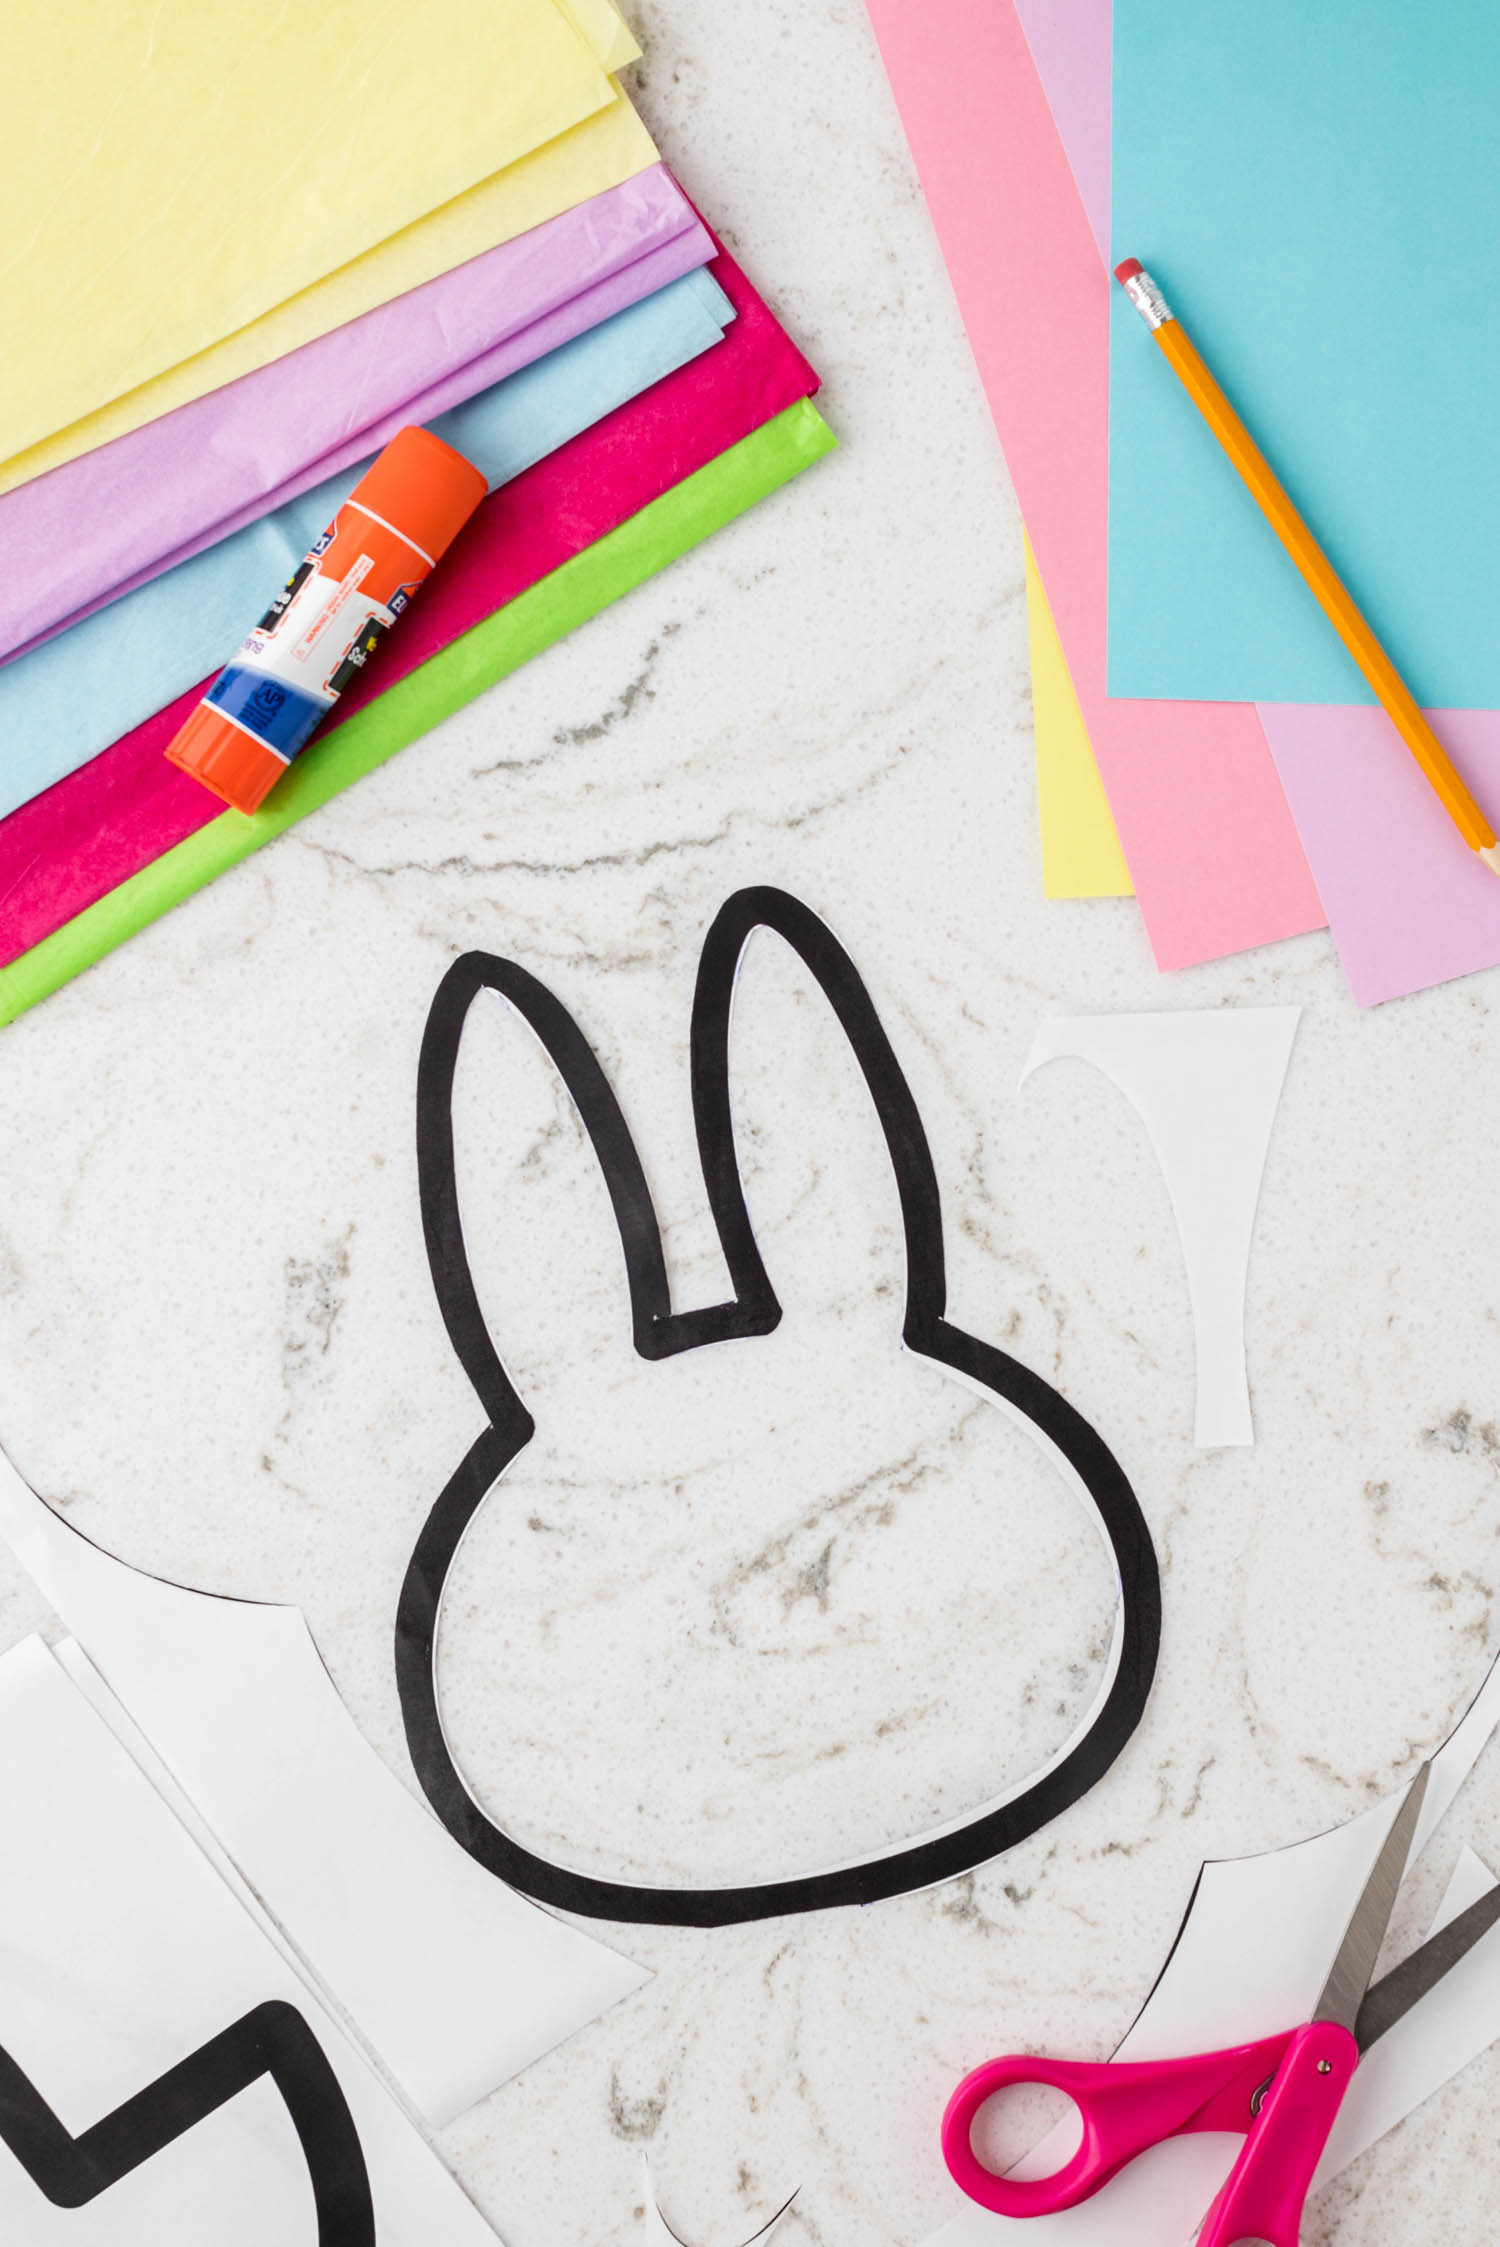
Supplies For Easter Suncatchers
- Card stock – I love using pastel colors of card stock for these Easter suncatchers. You can use any color you’d like, and you can also use construction paper if you need to!
- Adhesive contact paper – Craft stores are sure to have this but if you cannot find it, you can use Press n Seal in its place.
- Scissors – You’ll need some scissors to cut out the templates and shapes of your suncatchers. You may consider using safety scissors if you have younger children who would like to cut things on their own.
- Tissue paper – I also use pastel colors here, but you can use any color you’d like.
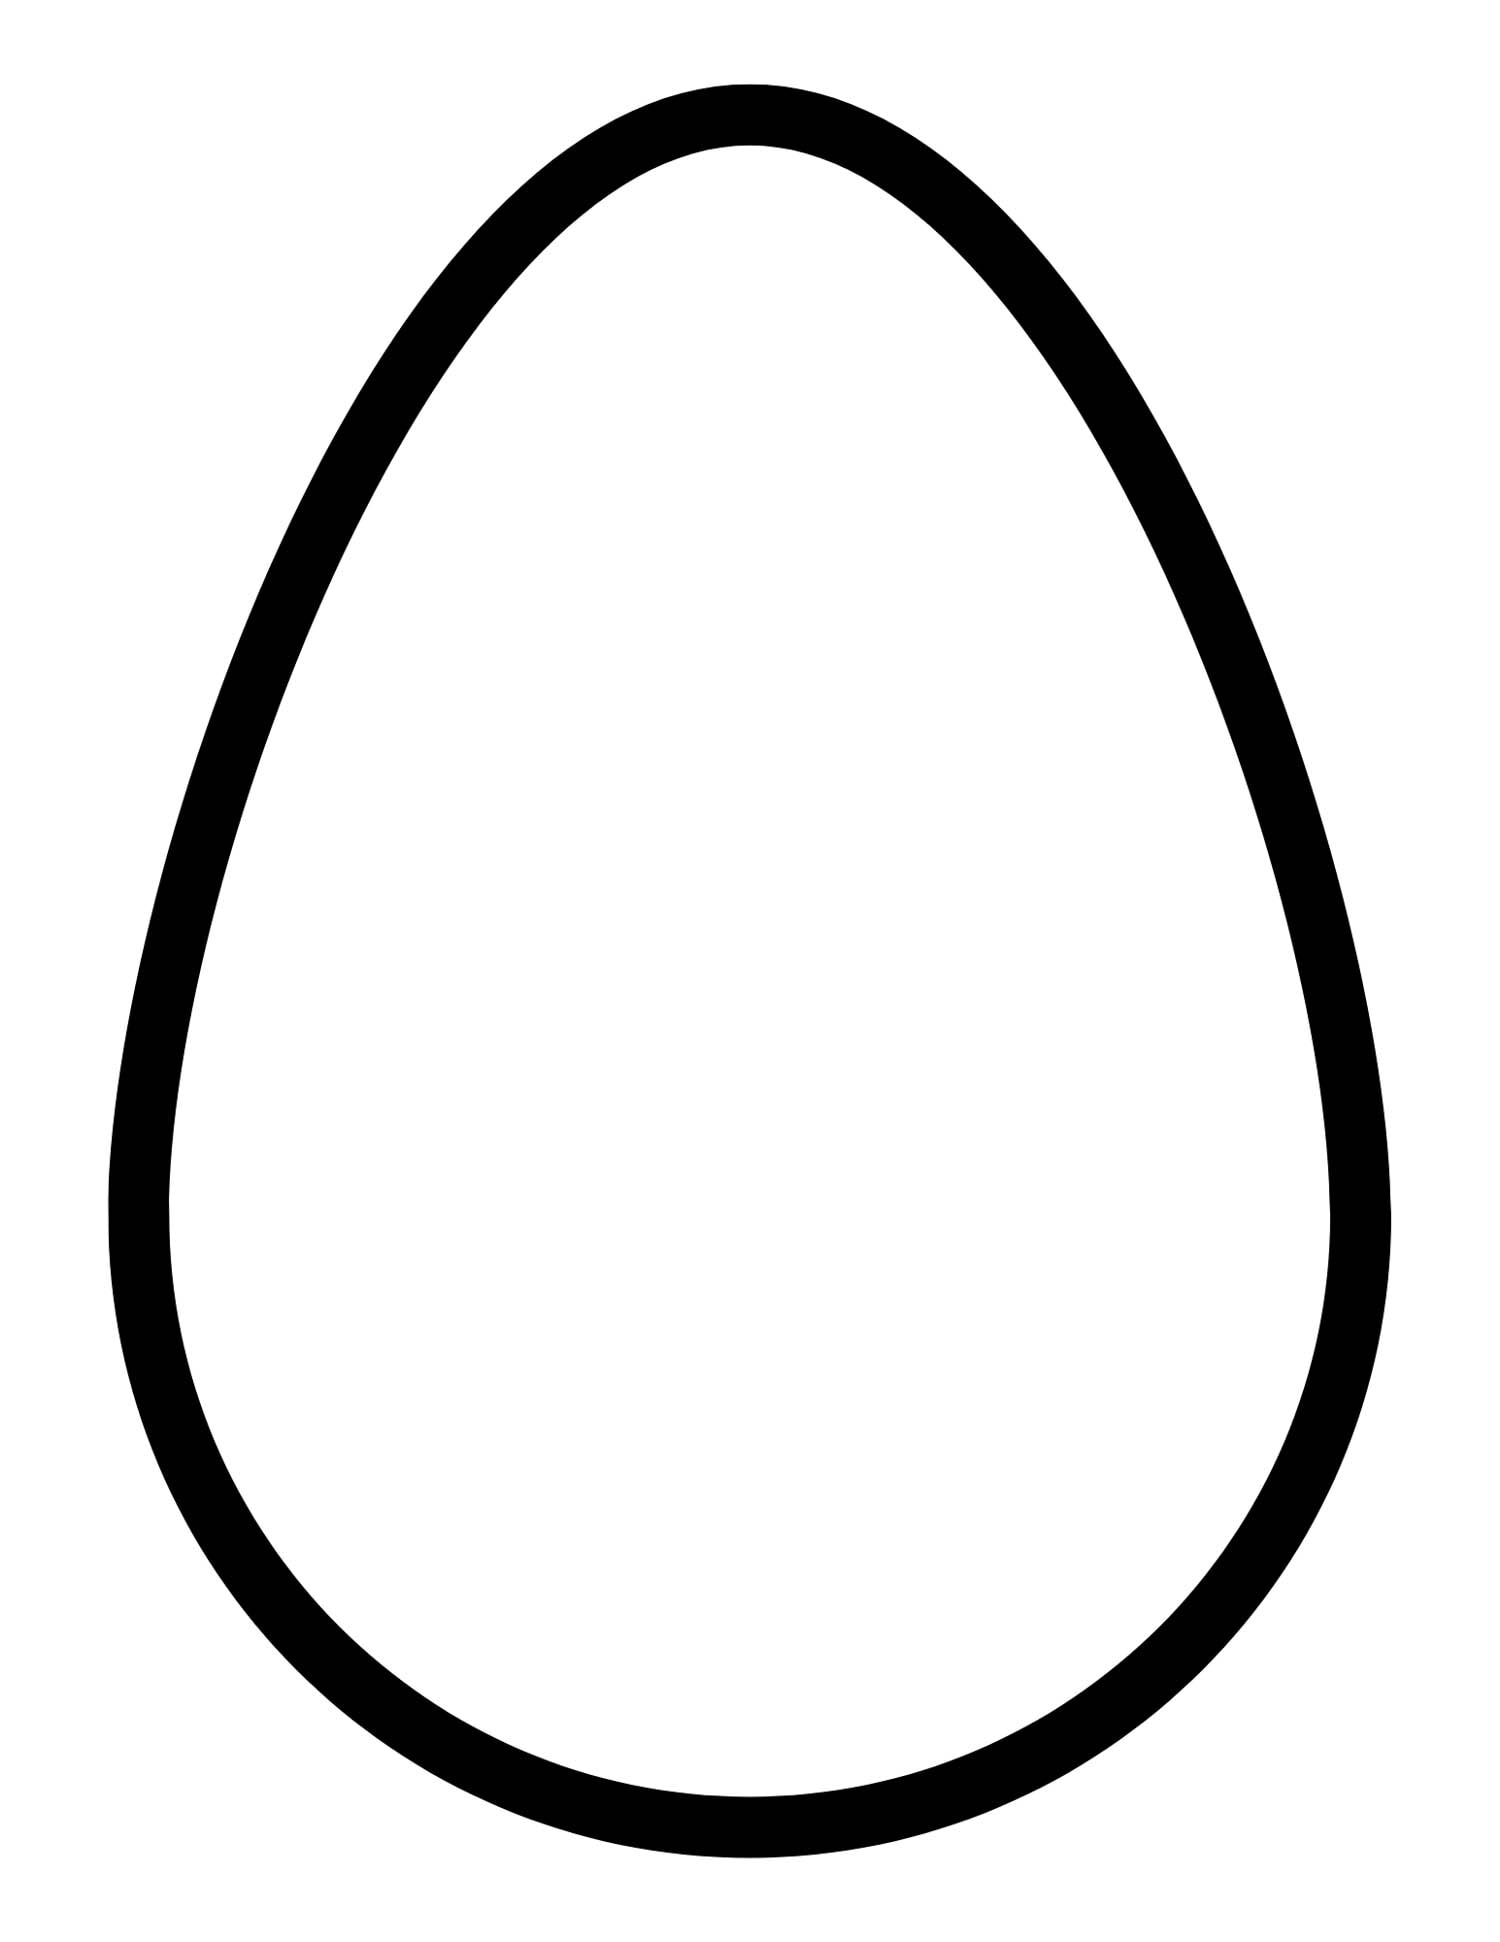
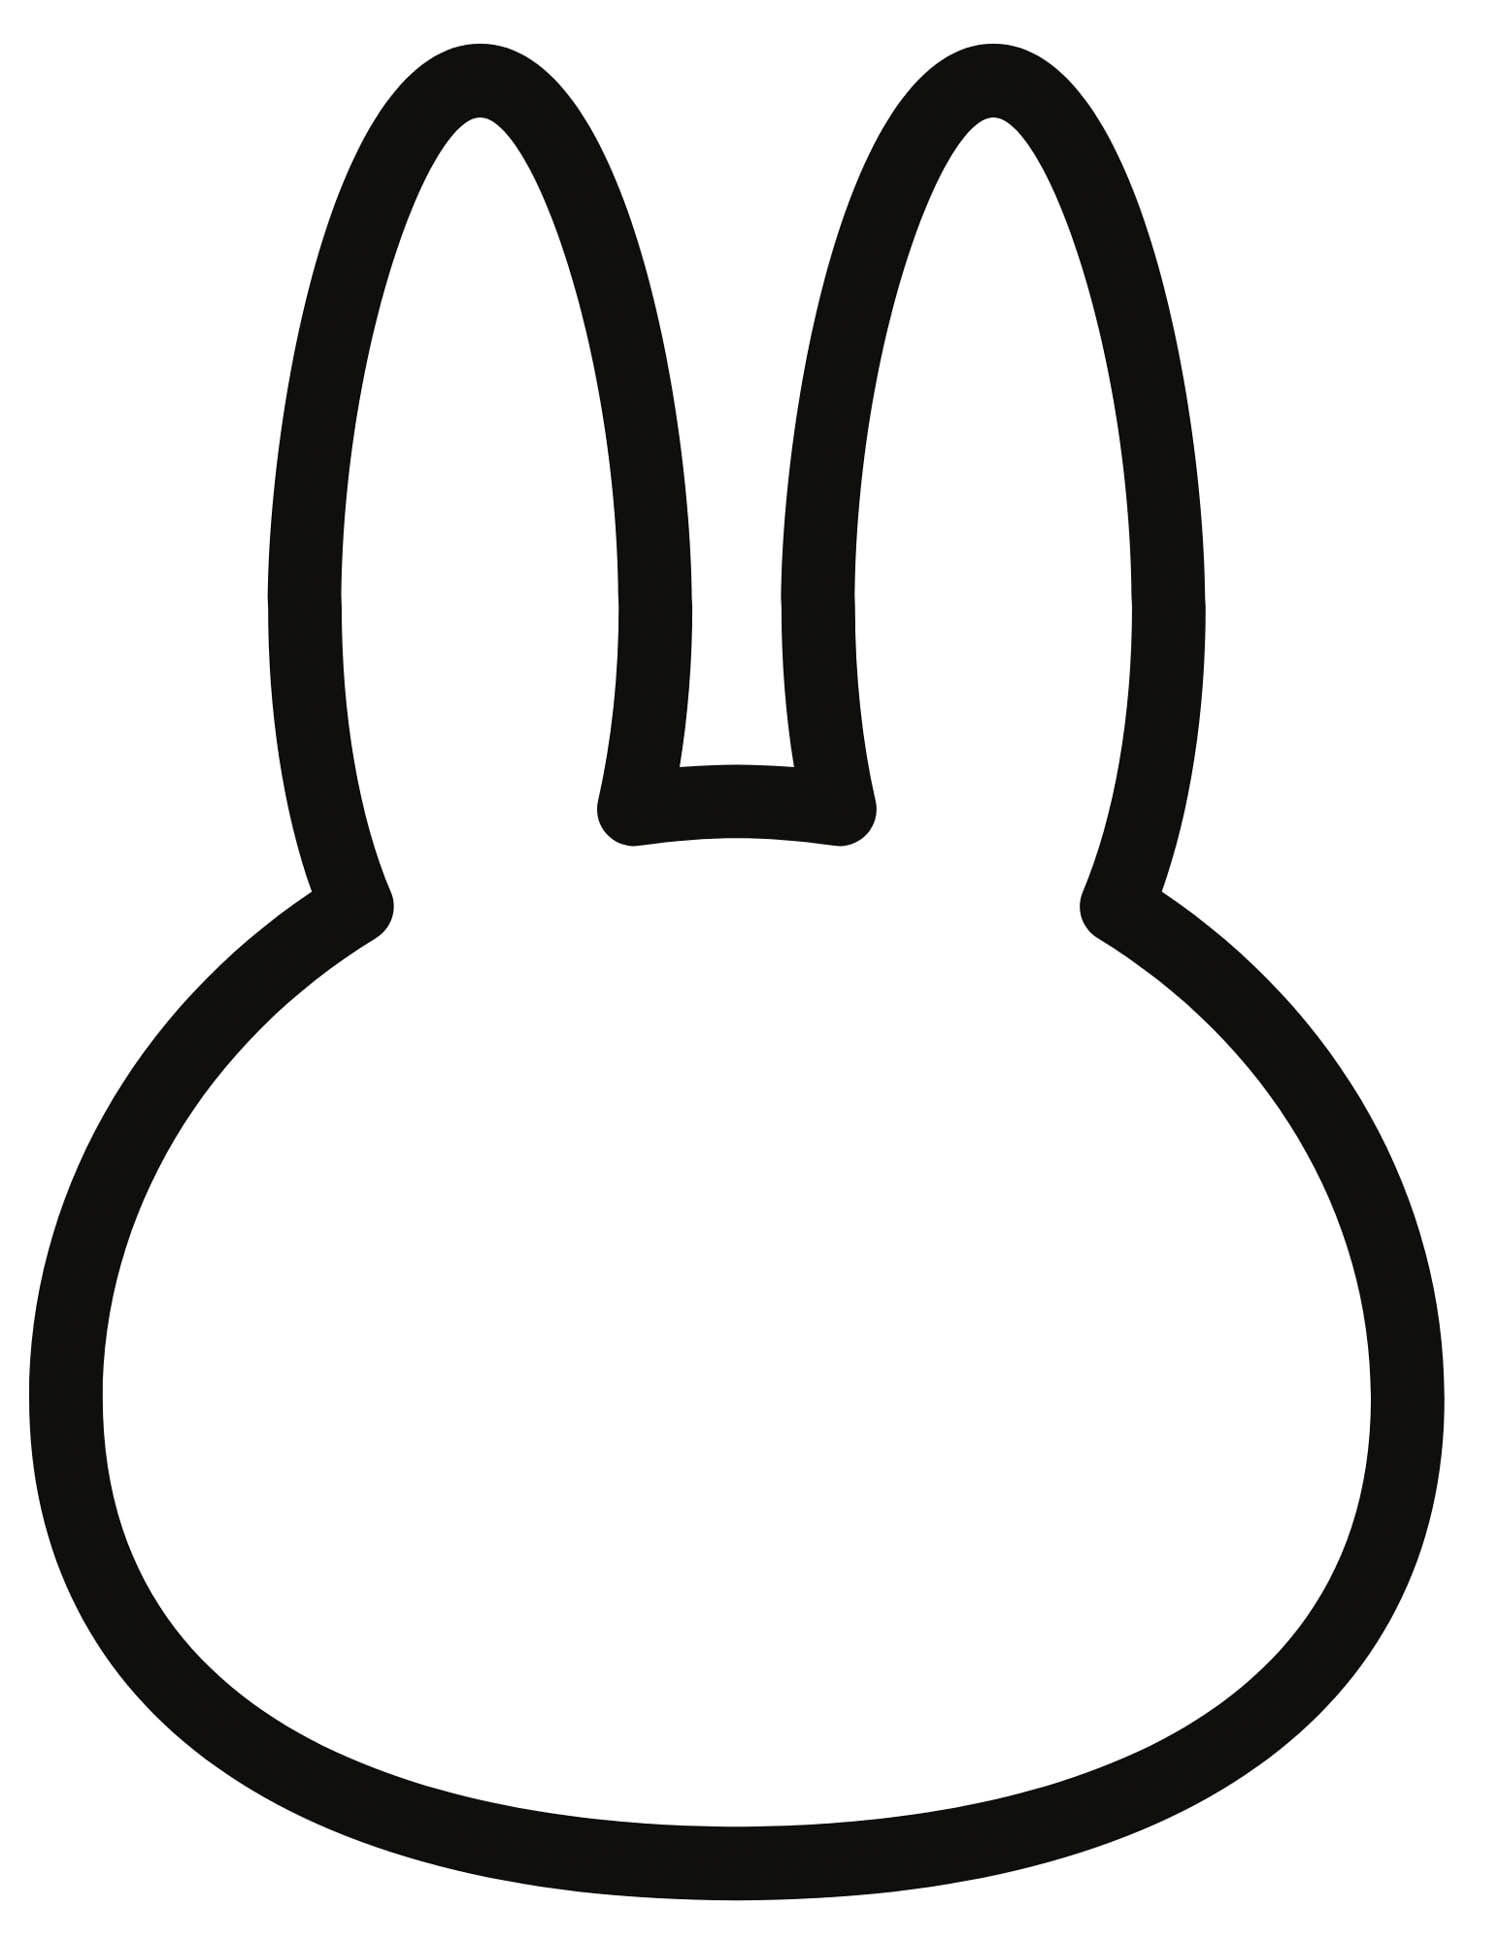
- Templates – There are four different cute Easter templates to download to make into a suncatcher.
- Glue stick – Any glue stick or craft glue will work.
- Pencil – A pencil or any other writing utensil will work to trace the templates.
What’s Included
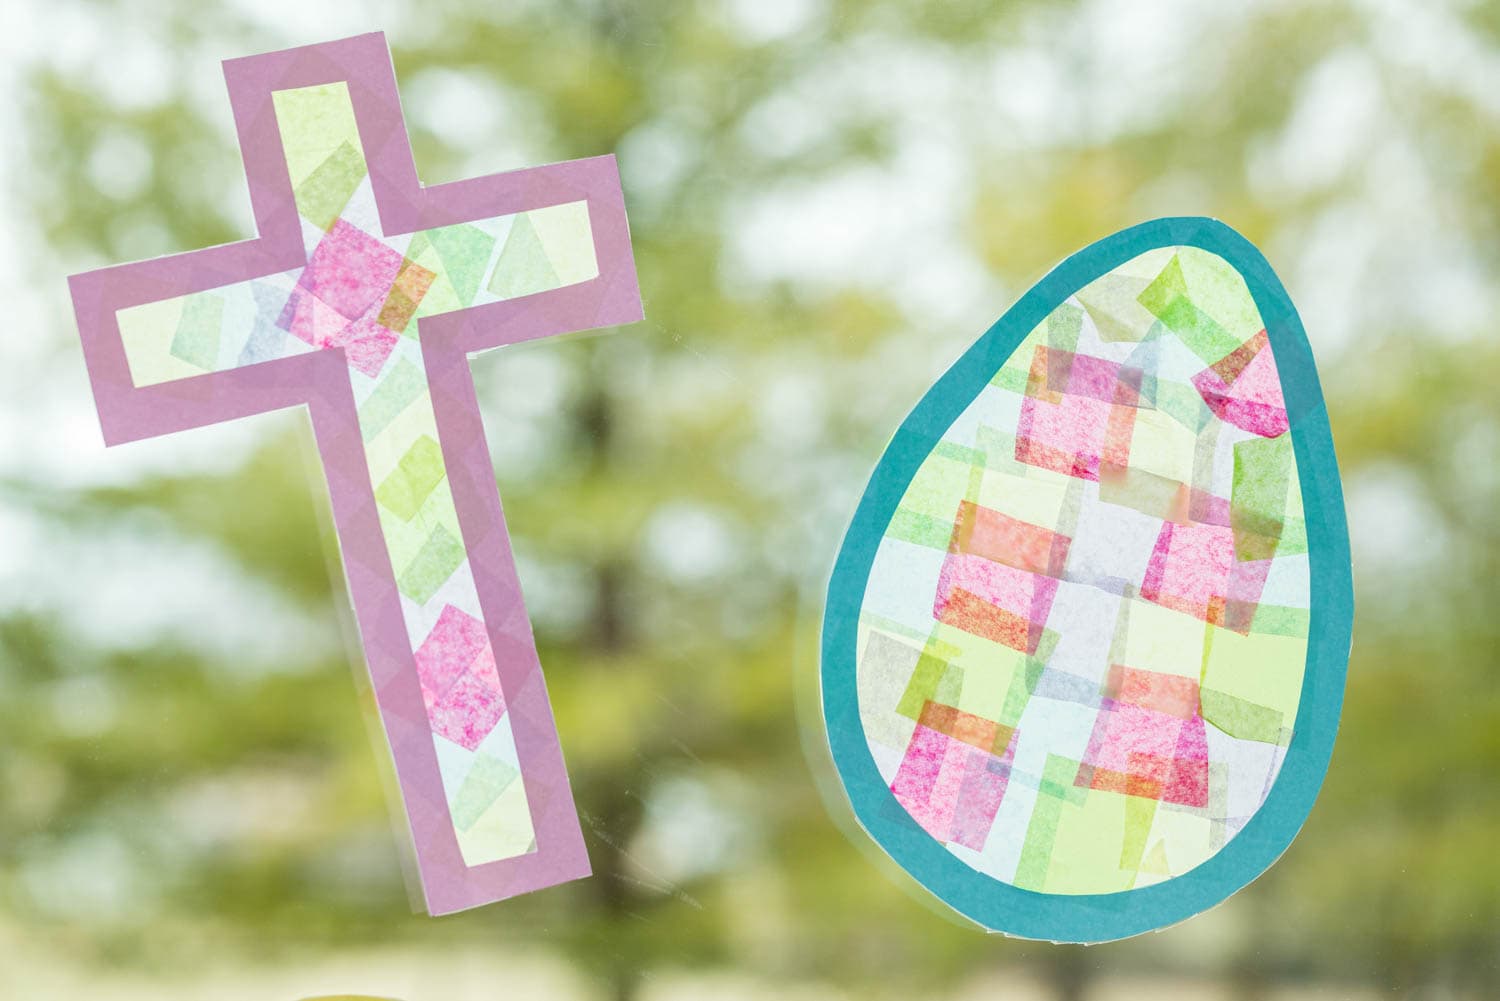
- Cross template – This is a great one for a Sunday School activity.
- Easter egg – You can’t do an Easter craft without eggs!
- Chick – Symbolizes new life and rebirth.
- Bunny – Probably the most popular sign of Easter.


How to Make Easter Suncatcher Crafts
Begin by printing out the templates. You can print whichever ones you’d like and how ever many you want!
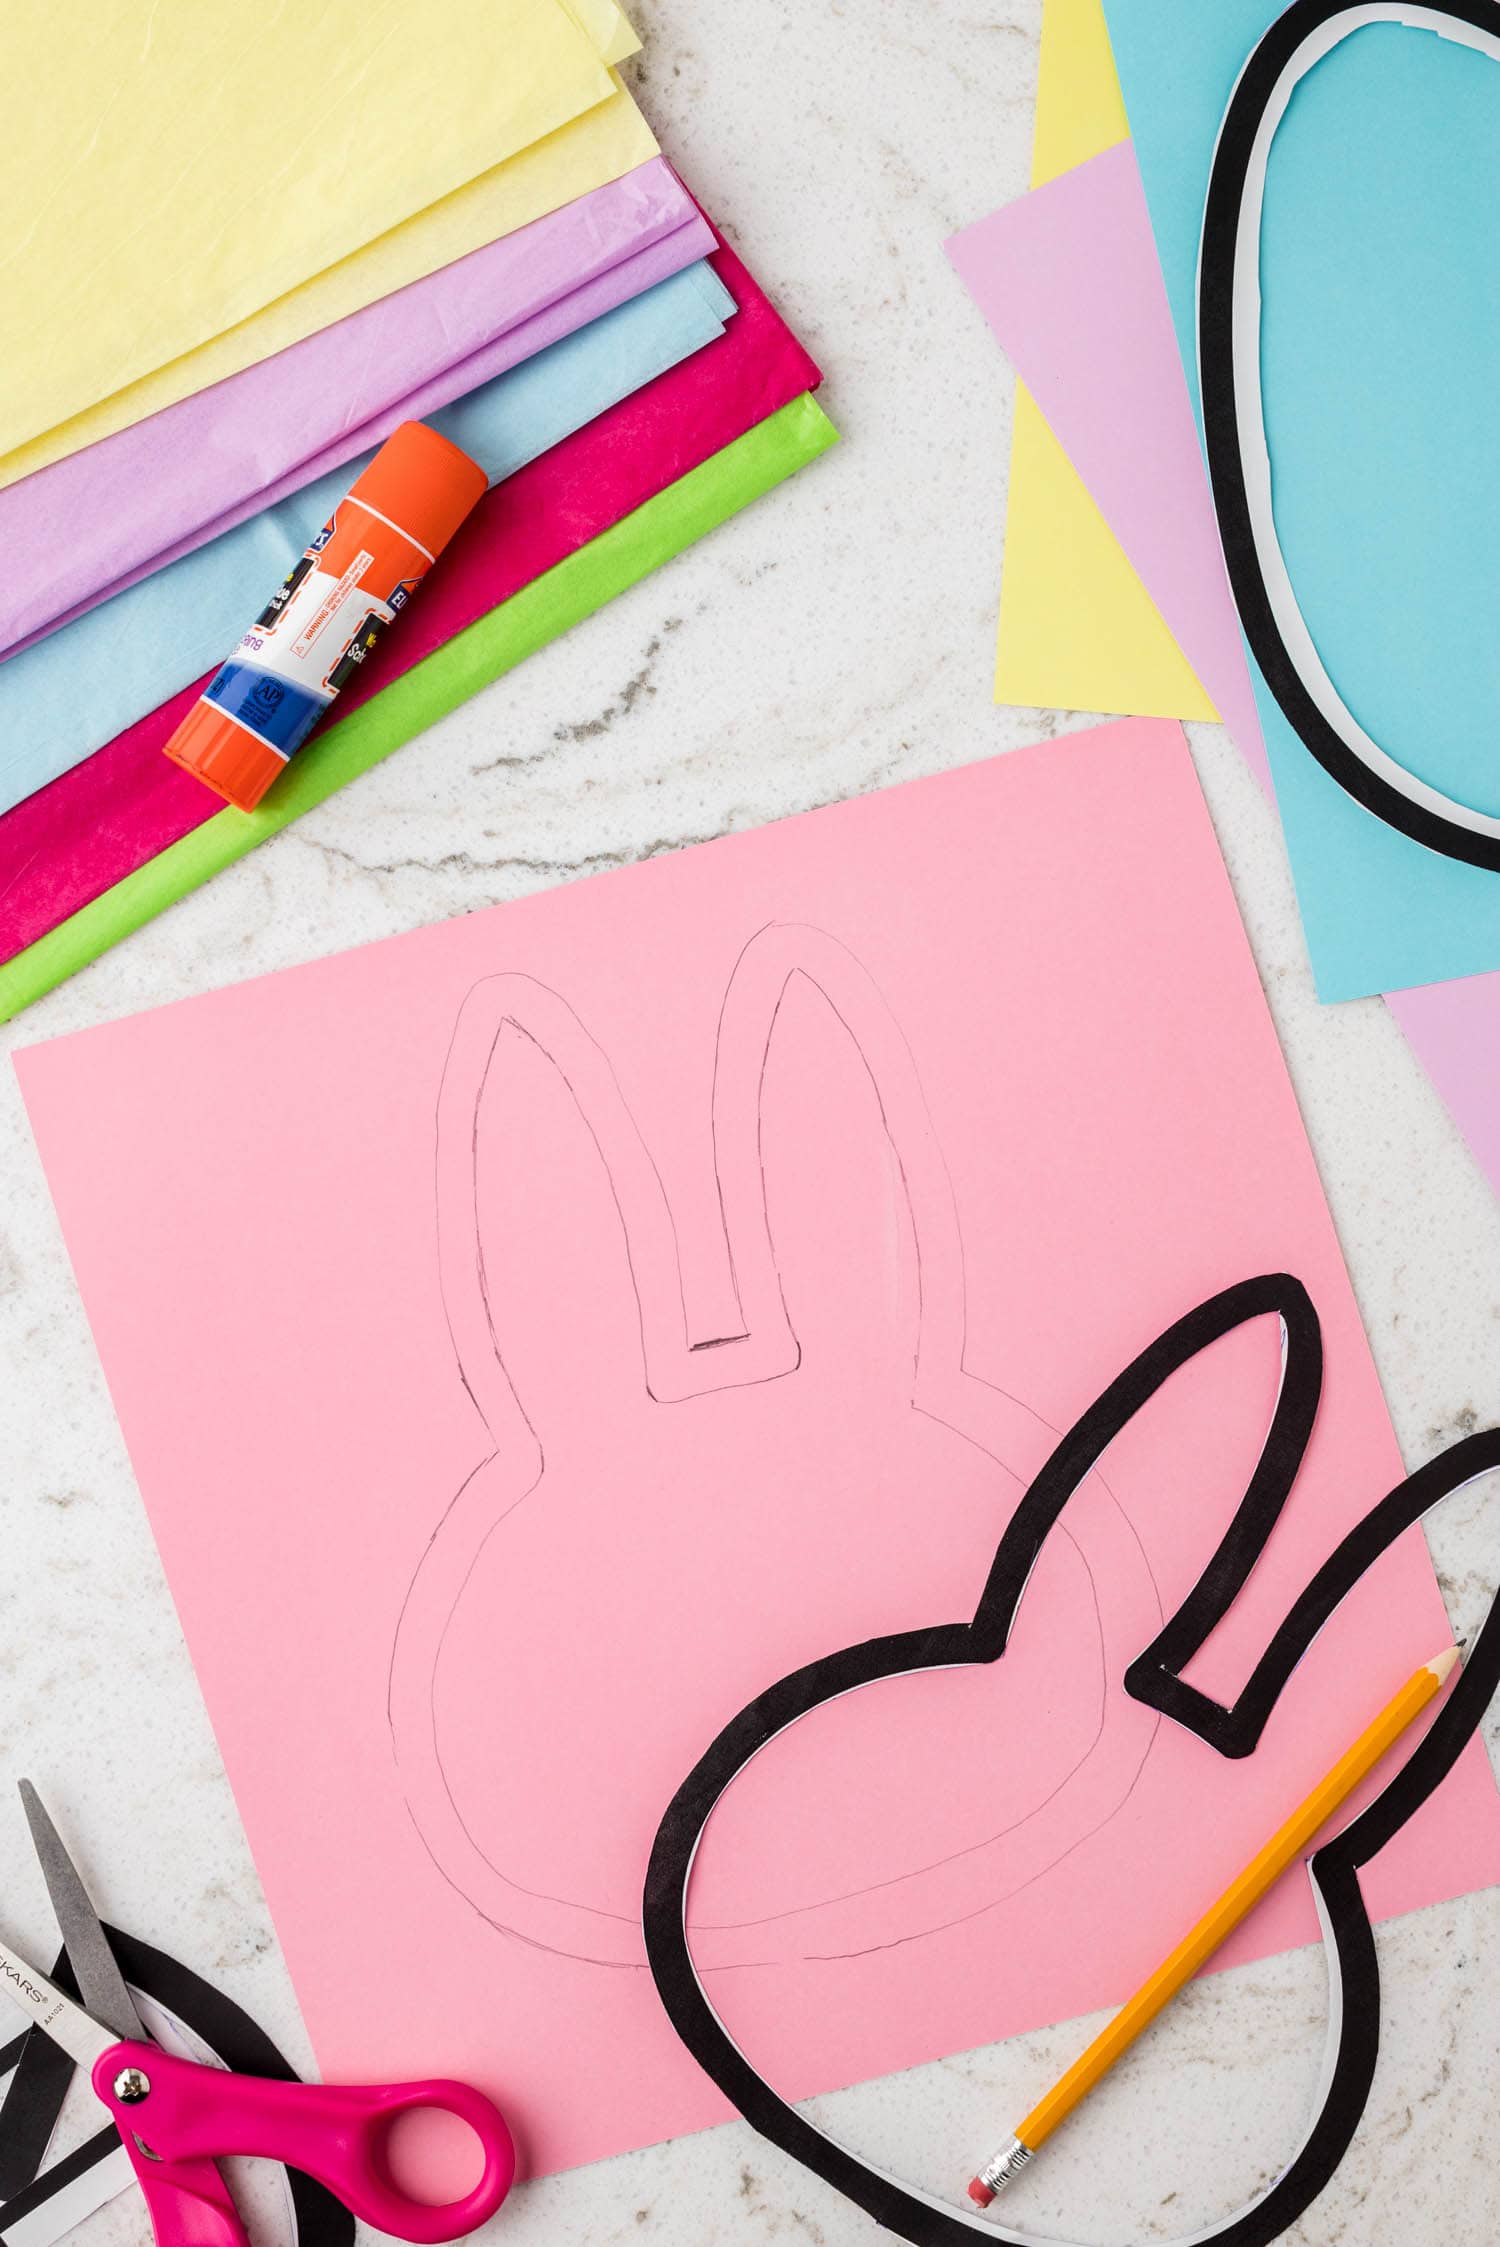
Cut the template around the outside edge and then cut out the center. Leave a 1/2 inch border around the entirety of the template.
Then, trace the outline of the shape onto your desired color of cardstock and cut it out.
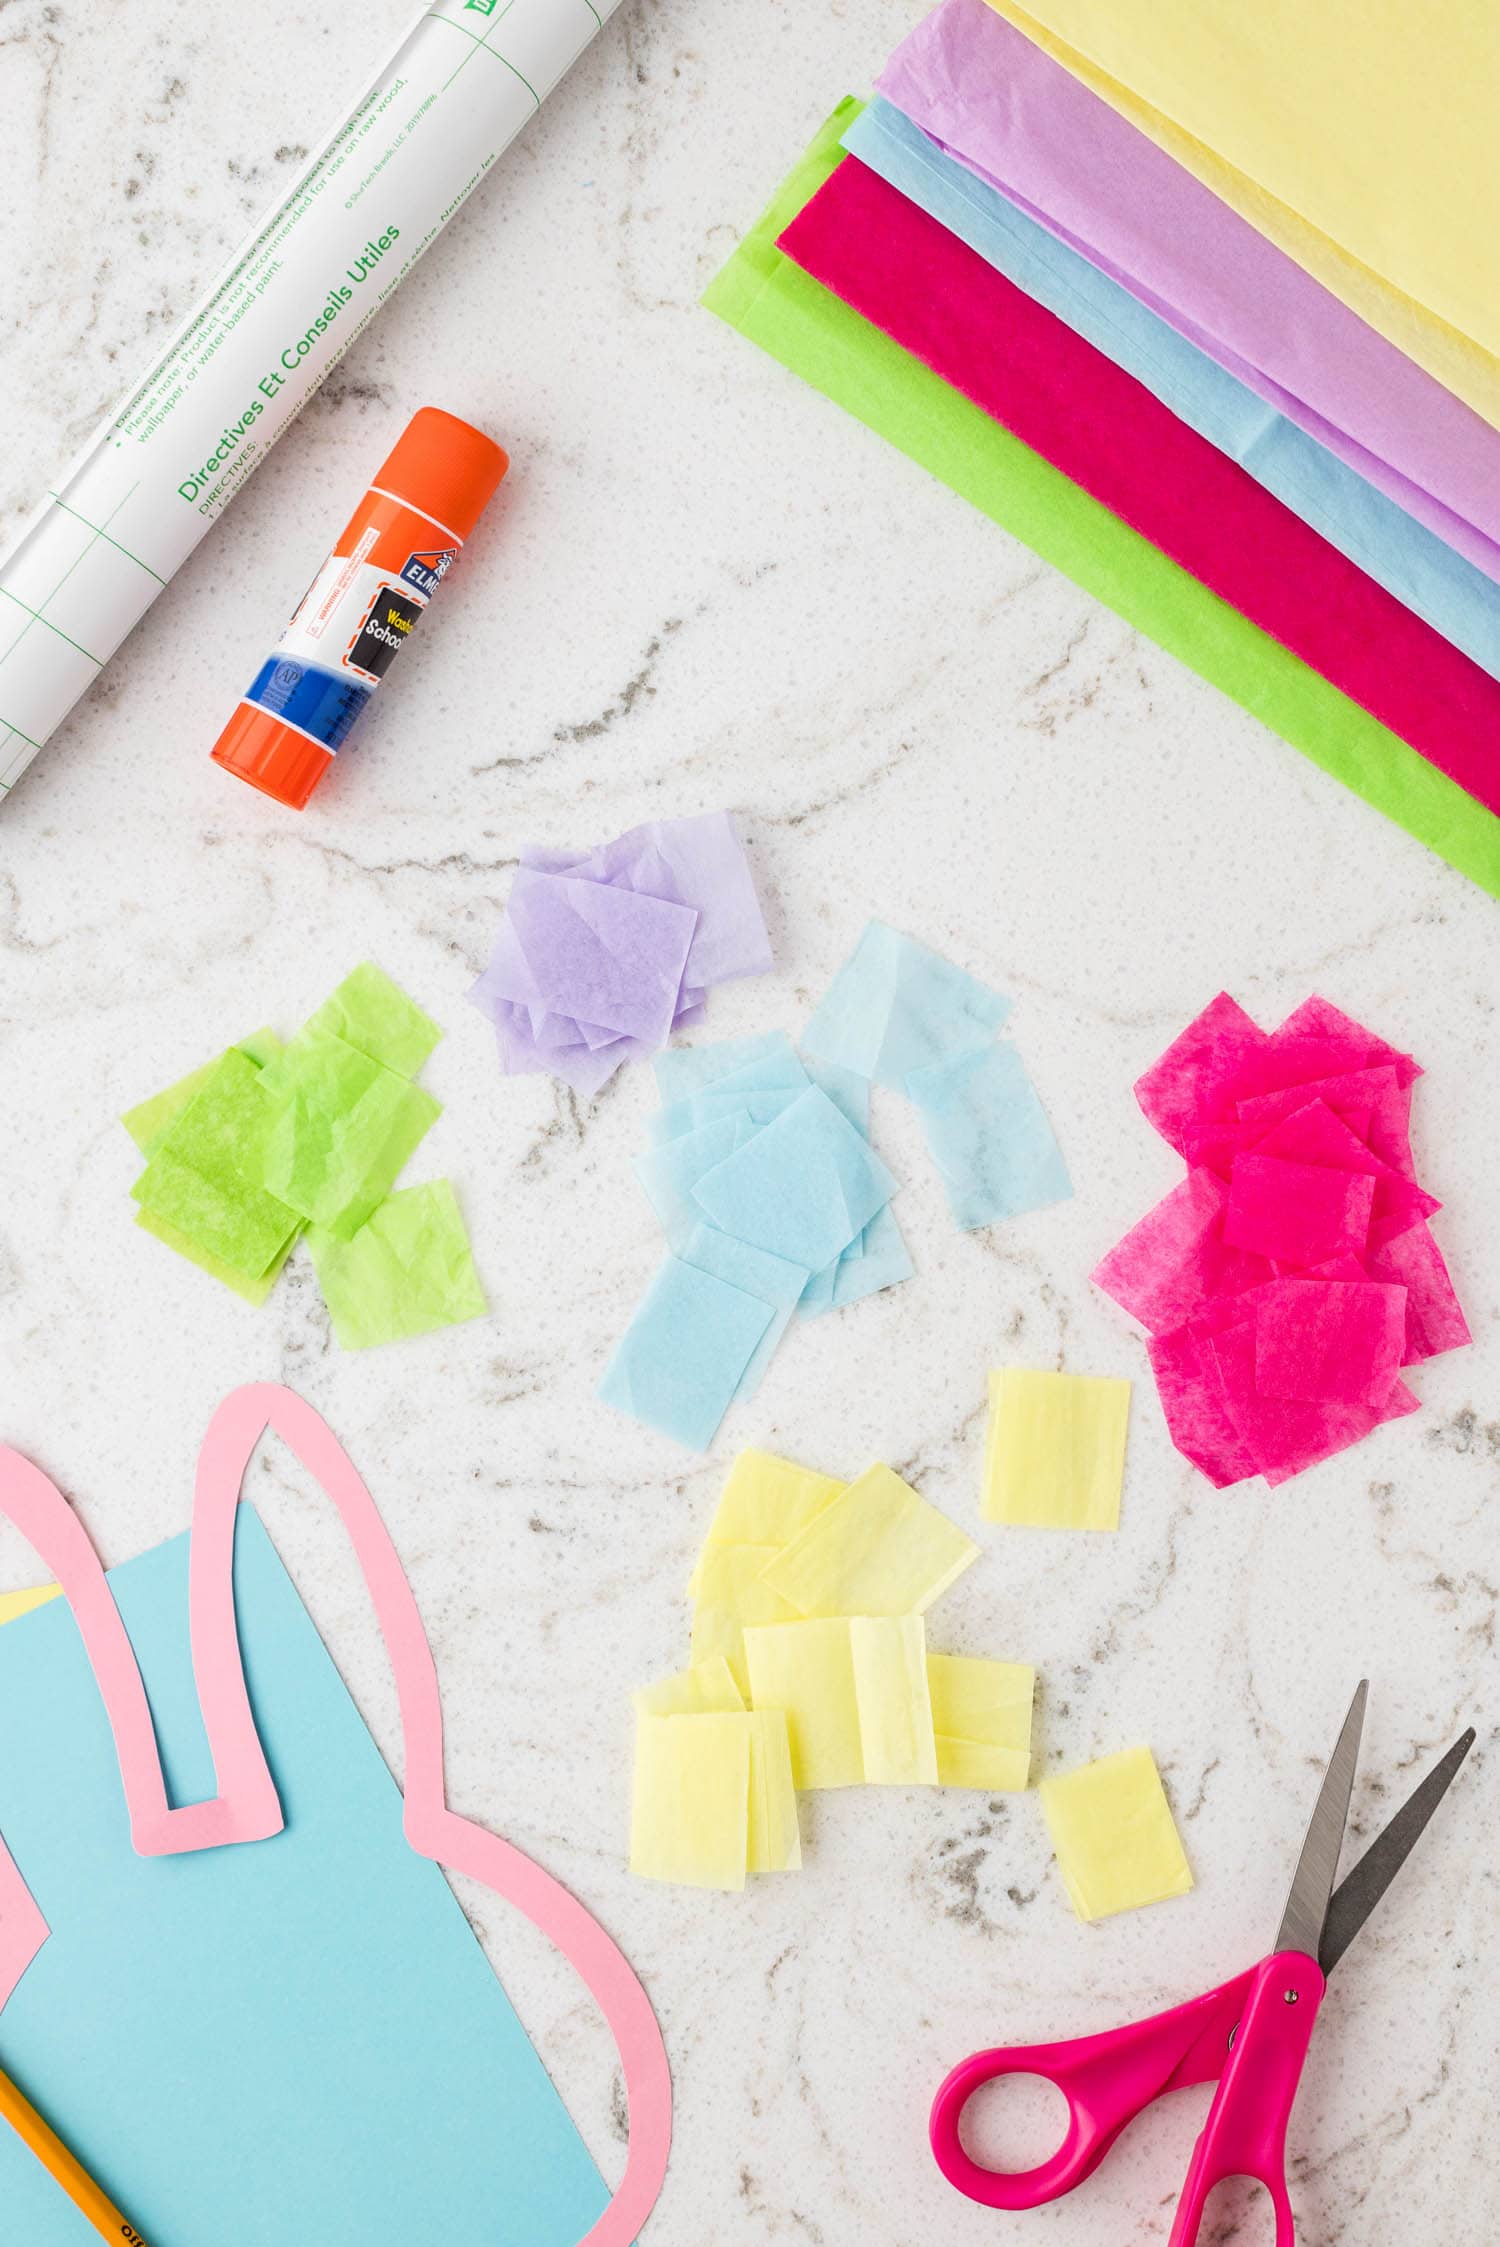
Prepare the tissue paper by cutting it into 2 inch squares. Be sure to use multiple colors for the small pieces so that you can create a stained glass effect.
Next, cut a piece from your sheet of contact paper that is just larger than the shape that you’ve chosen and cut out. Place the piece of contact paper sticky side up on top of your chosen shape. Then, place the cut tissue paper pieces within the center area of the shape that you cut out.
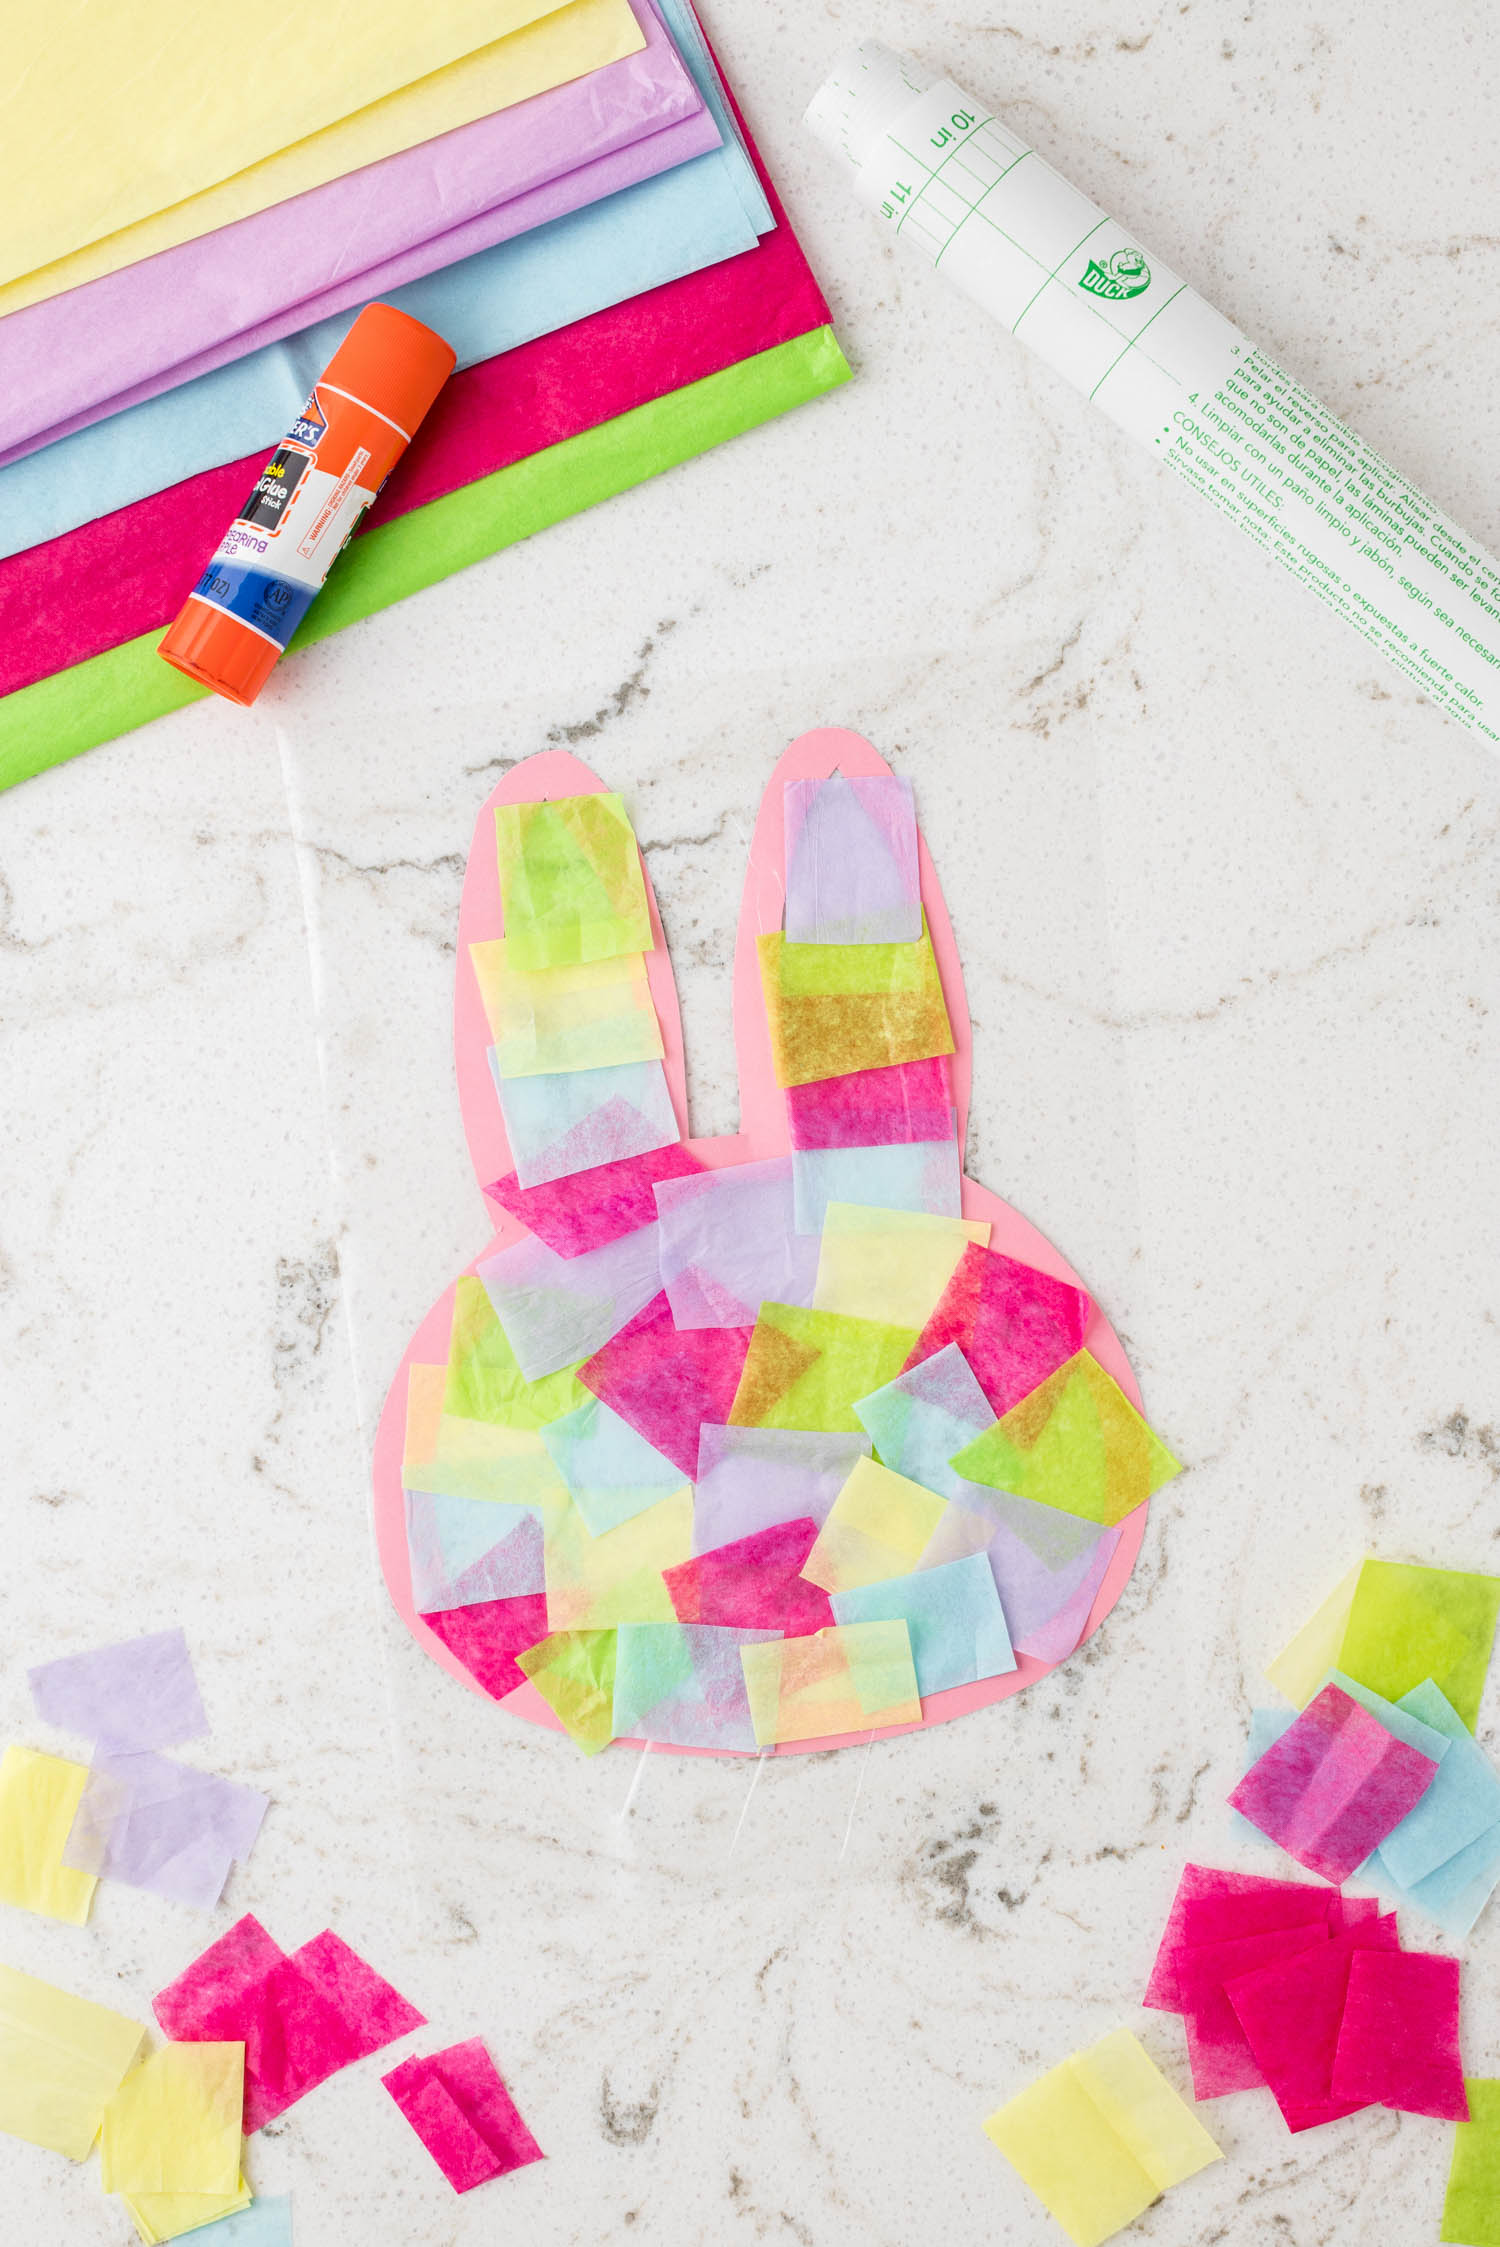
It’s ok to overlap the tissue, the pieces will stick! Don’t leave any empty space.
Slide the card stock shape out from underneath the contact paper and place a thin layer of glue on the edge. Press the shape onto the affixed tissue paper and allow the glue to dry.
Cut off the excess contact paper and then enjoy!
Pro Tips
- The best way to hang your stained glass Easter suncatchers is in the brightest window of your home! It will shine bright all day long.
- Feel free to grab some glitter glue or Easter themed stickers and decorate the outside edge of your Easter suncatcher. You can also write your name or the name of someone you want to gift a sun catcher to.
- To speed up this craft, pre-cut templates onto various colors of cardstock and pre-cut the little pieces of tissue paper. This would be a great idea if you are making this craft with a large group of kids.
Enjoy your beautiful little creations and all of the beautiful color they bring into your home! They’re so much fun to make.
Easter Suncatchers
Ingredients
- Card stock pastel colors
- Pencil
- Scissors
- Tissue Paper pastel colors
- Adhesive contact paper clear
- Glue stick
- Templates Bunny, Chick, Cross, Egg
Instructions
- Let’s start by printing out the template. Print out whichever template you like or all 4!
- Cut around the outside and inside of the template, leaving about a 1/2-inch border. Trace the template onto a piece of pastel-colored cardstock. Cut the desired shape. Set aside.
- It’s time to cut your tissue paper into 2-inch squares. Using multiple colors will give a stained glass effect.
- Cut a piece of clear contact paper that is just larger than your bunny, chick, cross, or egg. Place the contact paper sticky side up over the top of your shape. Start placing your previously cut tissue paper squares. They will stick to the contact paper. It’s ok to overlap the tissue paper squares. Repeat until all negative space is filled.
- Take the card stock bunny, chick, cross, or egg and place a thin layer of glue on the back around the border. Place it on top of the contact paper and tissue paper. Press to secure.
- Finally, cut the excess contact paper, and your Easter suncatcher is ready to shine.
More Easter Crafts and Activities
- These Easter Secret Messages are a super fun, free printable activity. They are great for big kids and little kids to work on together.
- Need to keep your kids entertained while you make Easter brunch? Check out these Easter Color by Number printables.
- Salt Dough Easter Eggs are the perfect keepsake craft. Hang them on your Easter tree or around the house.
- Follow this step-by-step to learn How to Dye Easter Eggs.
Being prepared was the magic…The young toddlers loved this activity
Glad you liked this activity!
The kiddos loved making these and putting them on the front windows for Easter! Such a cute idea!