Star Suncatchers
Quick and easy 4th of July or Memorial Day Star Suncatcher craft that is easy to make with a star template and looks so pretty hanging in your windows! Simply cut out your star, apply it to contact paper and decorate with tissue paper. Easy kids craft perfect for summer!

These tissue paper star suncatchers are so fun and patriotic! We LOVE the 4th of July around here. I mean, what’s not to love? Good food, friends, family, pool parties, fireworks, and celebrating freedom! So, why not add another fun activity to a day that is jam-packed full of excitement? This kids suncatcher craft will even catch the attention of some crafty adults!
These star suncatchers are the perfect 4th of July craft! If you’re hosting a party and there are a lot of littles running around, it can be hard to keep them entertained until the big fireworks show. This is the perfect solution. You only need a few simple materials and then they can let their creative juices flow while they make stained glass suncatchers!
Why You’ll Love This Activity
- Cutting and glueing are both great activities to help develop fine motor skills.
- Make 4th of July suncatchers and use them to as a fun DIY party decoration. No more need for the party supply store. Plus you probably already have everything you need at home in your craft closet.
- Star suncatchers are really adaptable. Use whatever colors you want to make this craft work for any holiday or season.

Supplies needed for a Patriotic Suncatcher
- Star template – Print out the provided template and then cut it to trace onto the cardstock that will become the outline for your suncatcher.
- Cardstock – I used glittery cardstock, but you don’t have to! Use whatever color and whatever kind that you would like.
- Scissors – If you are making this star suncatcher craft with young children, consider using safety scissors.
- Marker – You’ll need a marker or some other kind of writing utensil to trace your star.
- Glue – A simple glue stick will do just the trick in this craft!
- Tissue paper – For Memorial Day or 4th of July, use red white and blue tissue paper. But feel free to change up the colors for other holidays!
- Contact paper – If you can’t find contact paper, press n’ seal works perfectly.
Can I use construction paper instead of cardstock?
You could, but I wouldn’t trust it to be very sturdy. Card stock won’t tear as easily and will provide some structure to your sun catcher. But if construction paper is all that you have on hand, go ahead and use it!
How to Make a Suncatcher
- Print out the star template, or freehand a star if you don’t have a printer. Carefully cut out the template, leaving the outline of the star intact.
- Trace the star onto a piece of cardstock and then carefully cut it out.
- Next, cut a piece of contact paper that is a bit larger than the star. Remove the backing and place it onto a clean, flat surface with the sticky side facing up.
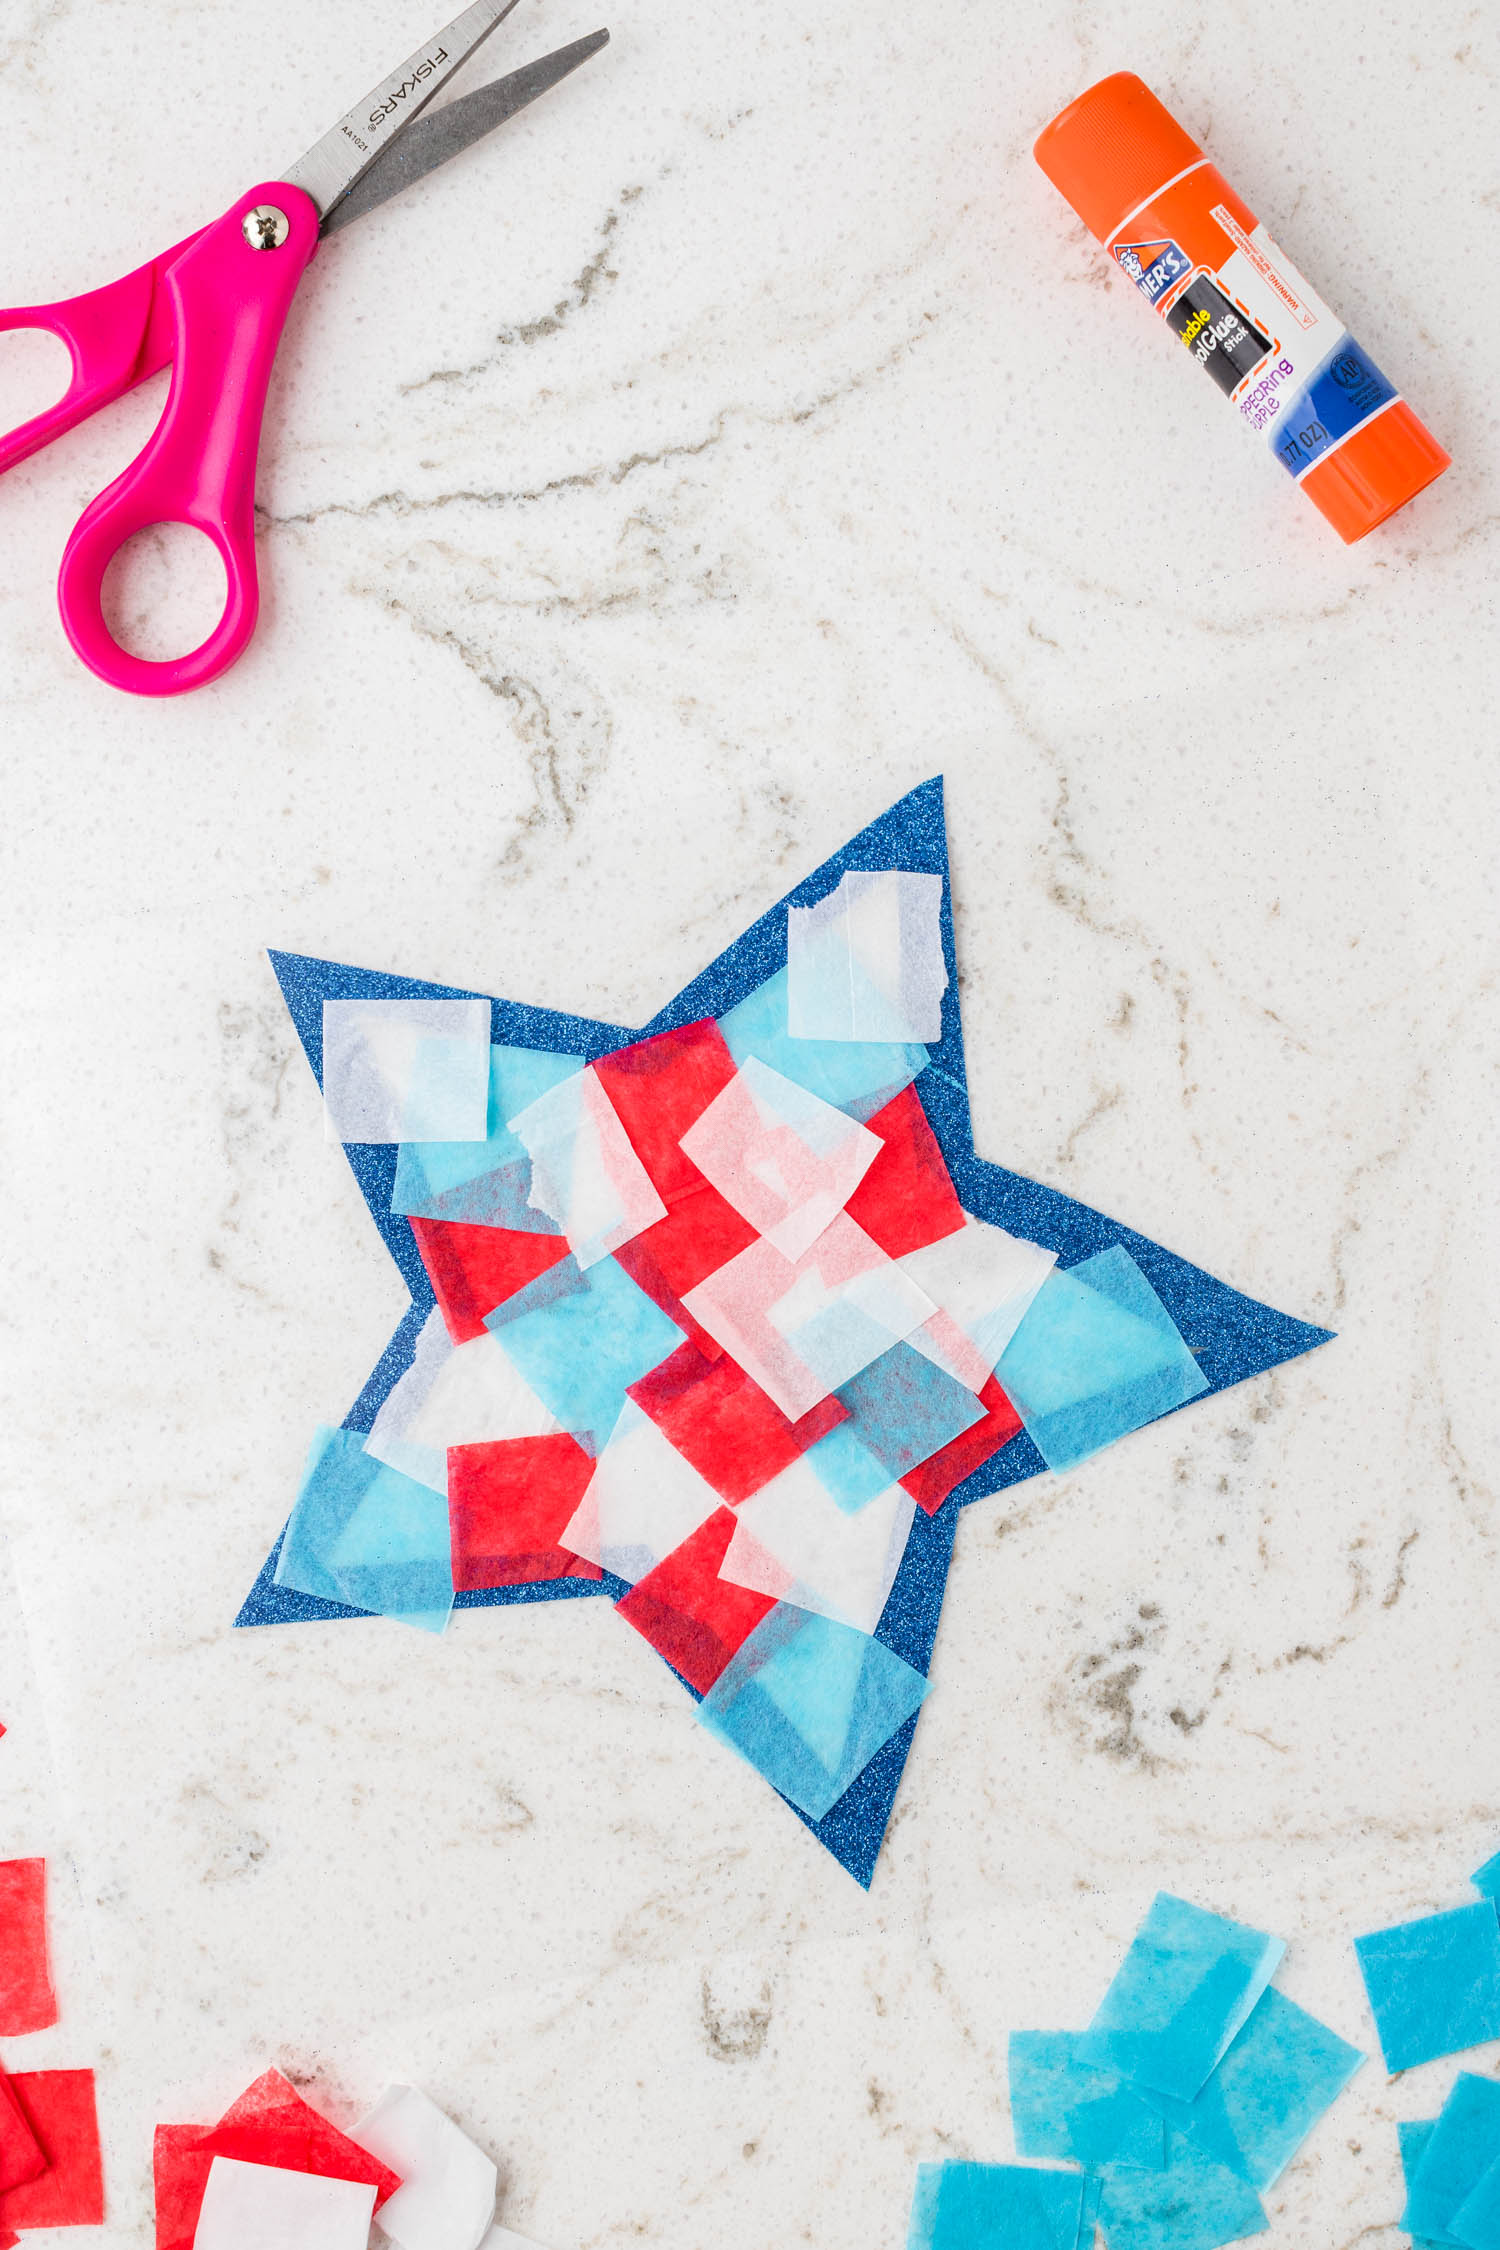
- Slide the star underneath the contact paper and then cut tissue paper into 1-inch squares. Place the little squares of tissue paper all over the contact paper, within the empty section of the star.
- Gentle press the tissue paper down to secure it to the contact paper. It’s ok if pieces overlap, I actually encourage it so that it looks more like stained glass!
- Once all the tissue paper is in place, slide the star outline out and place a thin layer of glue on one side of it. Place the star over the tissue paper and press it down to secure it. Cut off the excess contact paper from around the edges.
- Allow the glue to dry and then your star suncatcher is ready to hang in the window!


Pro Tips!
- Make a suncatcher garland by punching a hole into the top of each one, and stringing yarn or ribbon through to hang them up.
- If you don’t use glitter cardstock, feel free to decorate the star outline with glitter glue or stickers. Gotta add a little pizzazz!
- Hang them in the sunniest window in the house for the prettiest effect and display.
- Use a hole punch and a ribbon to hang your suncatcher.
- Smaller kids who aren’t as experienced with scissors can tear the tissue paper rather than cut it.

Celebrate the stars and stripes with the cutest star suncatchers! Have a blast making them and don’t forget to make a yummy snack of bottle rocket kabobs!

Star Suncatcher
Ingredients
- Star template
- Glitter card stock
- Pencil
- Scissors
- Glue stick
- Contact paper clear
- Tissue paper red, white, and blue
Instructions
- First, let’s print and cut out our template. You can freehand a star to make your template if you don't have a printer.
- Using the template, trace the star onto a piece of cardstock. Cut out the star.
- Now cut a piece of clear contact paper slightly larger than the star. Remove the backing and place the contact paper on a flat surface with the sticky side up.
- Place the star underneath the contact paper. Next, cut your tissue paper into 1-inch squares. Create your design by placing the tissue paper squares on the contact paper staying inside the star. Gently press the tissue paper onto the contact paper to secure it. It is ok to overlap the pieces.
- Once all your tissue paper is in place, grab the cardstock star and place a thin layer of glue on one side. Place the star over the tissue paper and press to secure it. Cut off any excess around the edges.
- Your suncatcher is ready to hang on your favorite sunny window!
More Suncatcher Crafts You’ll Love
- Snowflake Suncatchers sound like an oxymoron, right? But hey, there’s still sunshine in the winter so you might as well catch it!
- This Christmas Tree Suncatcher is a favorite to make around the holidays.
- When St. Patrick’s Day rolls around, it’s so much fun to brighten up your windows with Shamrock Suncatchers.
- Choose one of four templates for an Easter Suncatcher! Choose from a bunny, egg, chick or cross.