Tissue Paper Flowers
You’ll never guess how easy these impressive and beautiful Tissue Paper Flowers are to make! The supplies you need are basic and easy to find. Step by step directions on how to make flowers out of tissue paper.
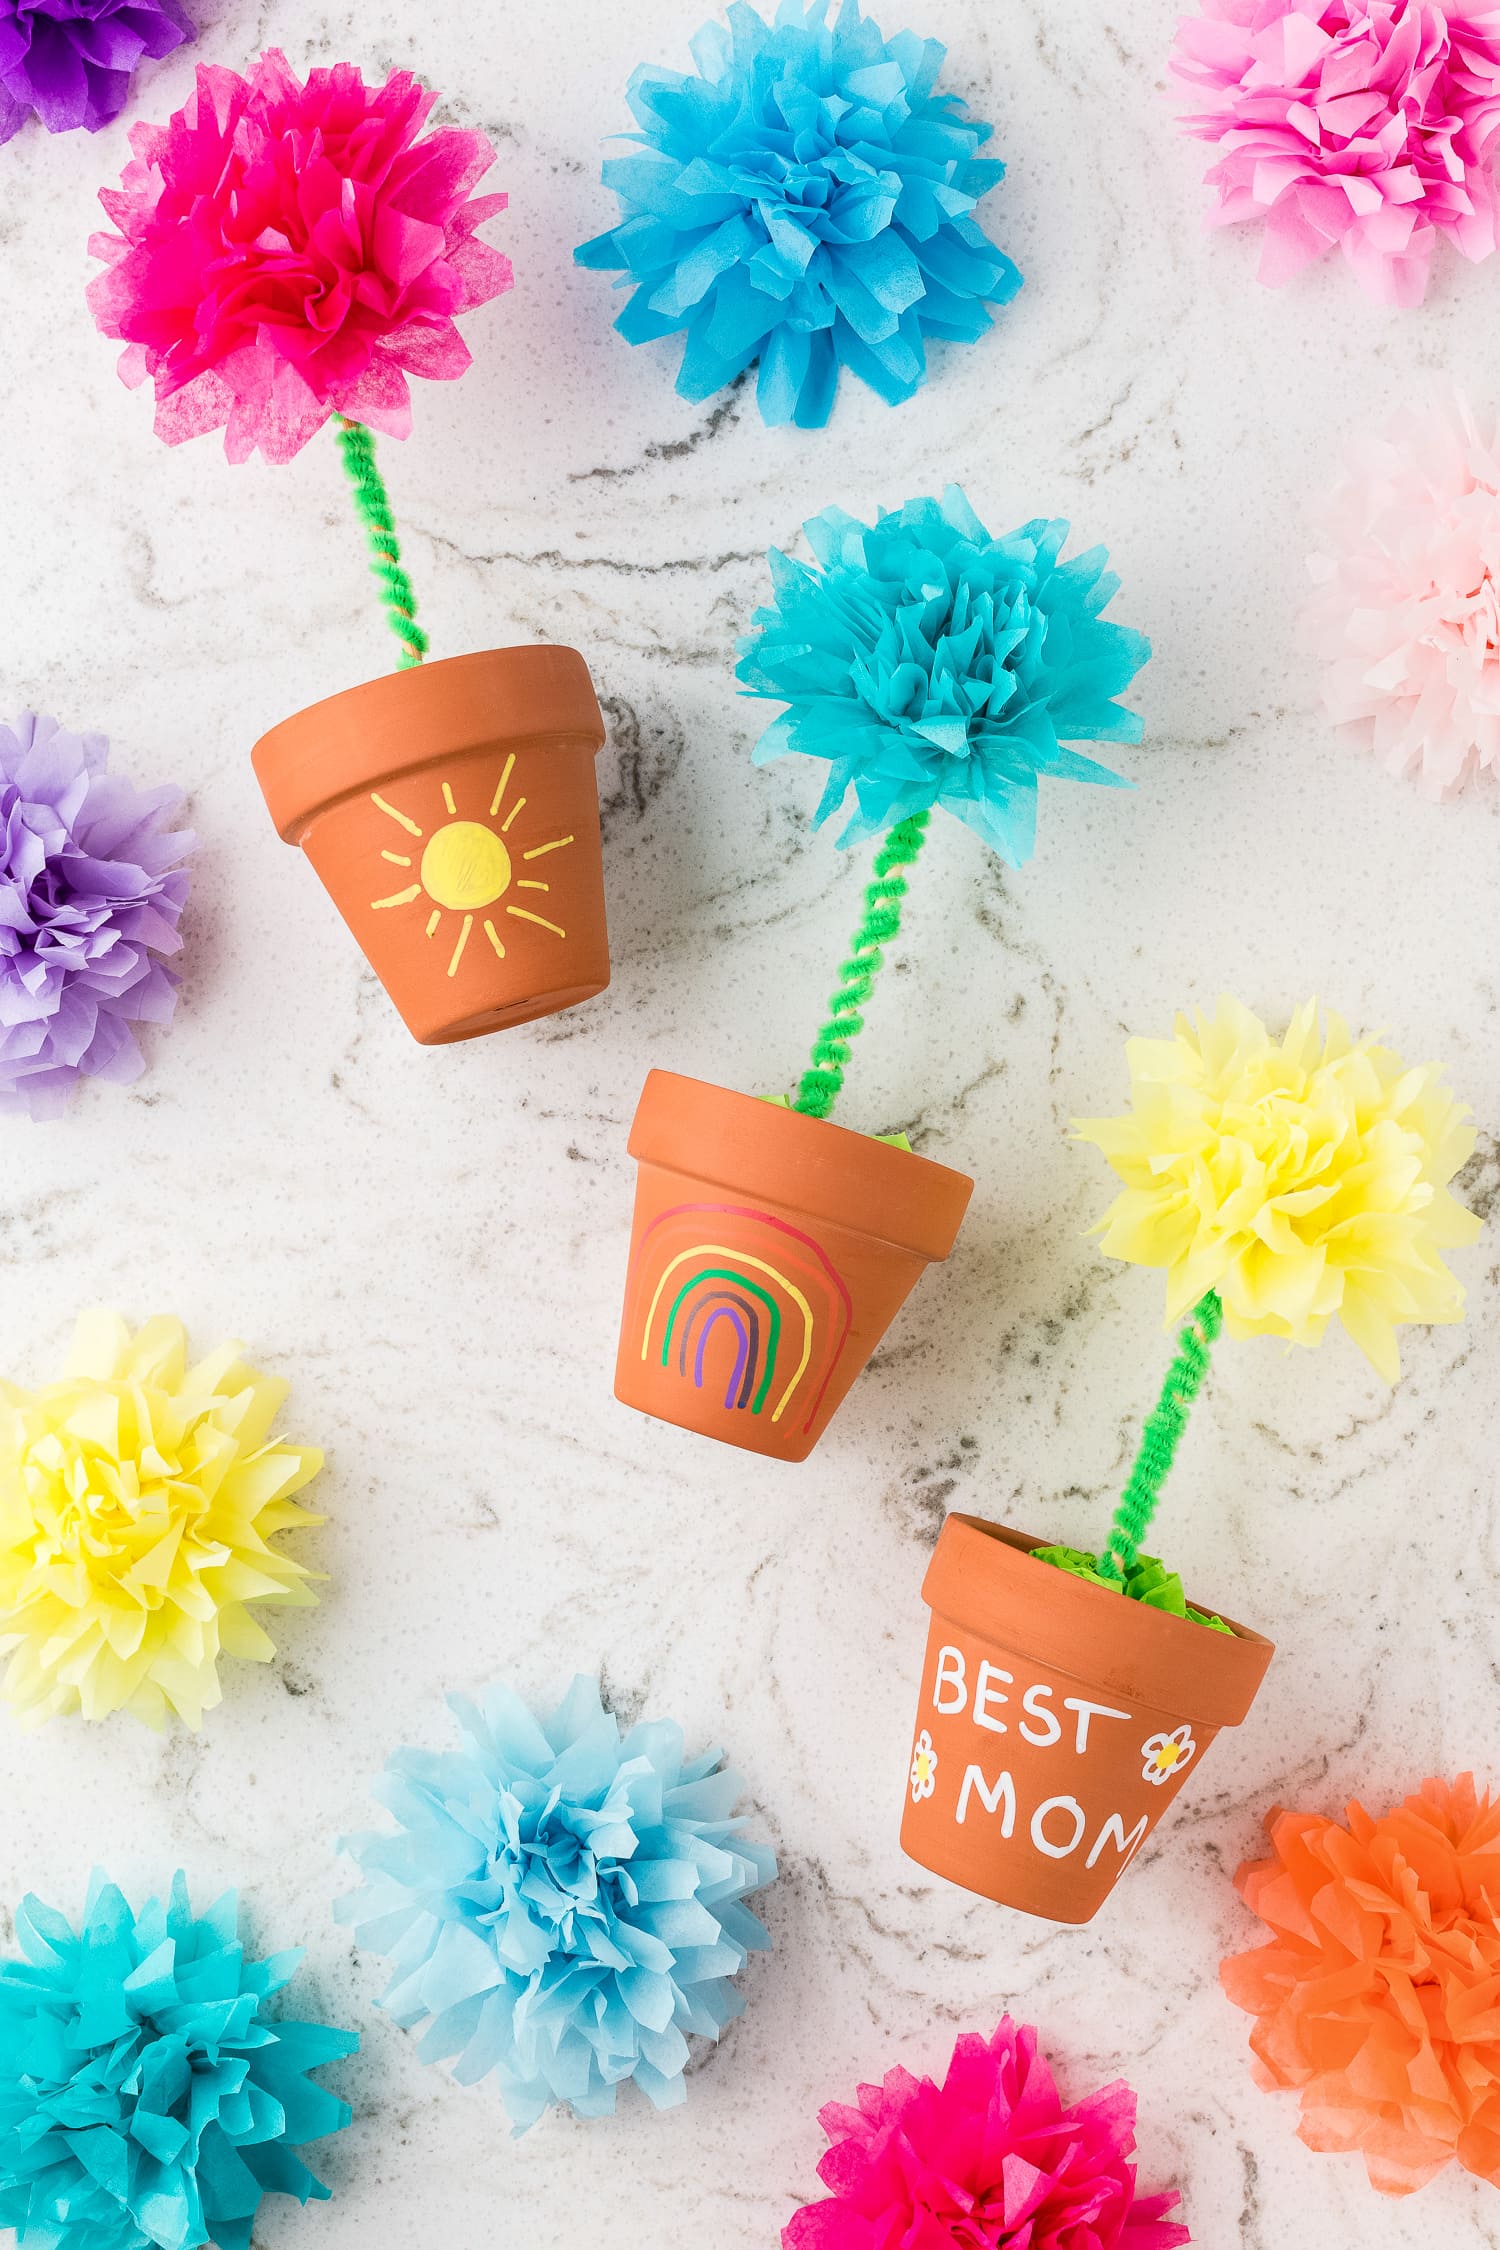
Follow the simple steps and you will have beautiful potted tissue paper flowers. Mix and match tissue paper colors to make the petals and really liven up any space. Kids might even want to use tissue colors that match their bedrooms and use their own tissue paper flowers to decorate their room.
These DIY paper flowers can easily be used as centerpieces for fun bridal showers or baby showers where the kids are invited. They will feel proud to have helped decorate and they can be taken home as prizes for winners of fun shower games.
Have fun creating these easy paper flowers that will brighten up any space and put a smile on everyone’s face when they see them! These also make great table decorations at any time during the year, so keep these supplies on hand for any time the crafting bug bites!
Why you’ll love this craft!
- This is a great craft for school aged kids to work on with minimal help so they can work on problem solving and independence.
- Kids can really let their creativity shine through when they are decorating their pots.
- Use this simple craft as an adorable gift or for Mother’s Day, Teacher Appreciation Day, Grandparent’s Day and so much more!
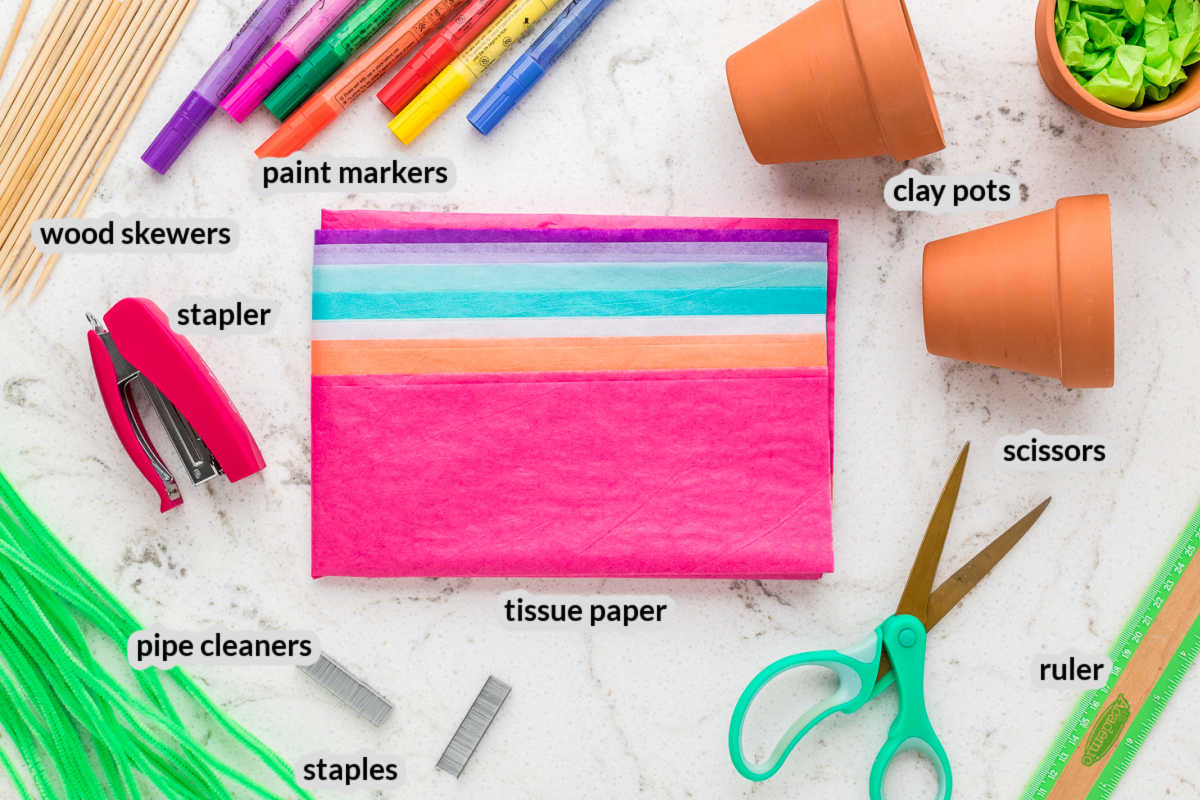
Supplies Needed to Make DIY Tissue Paper Flowers
- 3 inch clay pots – We used clay pots as they are inexpensive and easy to decorate. You can often find them at the dollar store or craft store.
- Paint markers – We used acrylic paint markers but feel free to use your favorite paint or craft markers!
- Tissue Paper – We used 20-inch x 26-inch sheets of tissue paper but any size can be cut down to fit your flower size.
- Ruler – We used a classroom ruler but you could also use a measuring tape.
- Scissors – Make sure your scissors are clean and sharp!
- Stapler – Just a regular office stapler will do here.
- Pipe cleaners – We used green craft pipe cleaners to make the stem. In a pinch, you could also use green ribbon.
- Wooden skewers – A wooden skewer works best because it has a sharp end to stick through the green tissue paper in the pot and make the flower stand up.
How to Make Tissue Paper Flowers
These flowers made out of tissue paper look impressive and difficult to make, but I was surprised by how easy they really were.
You can learn how to make them too with our easy step-by-step directions and pictures found below to walk you through making them.
This craft is best for kids that are in upper elementary or older. If you have younger kids you will need to supervise them closely while they make this craft.
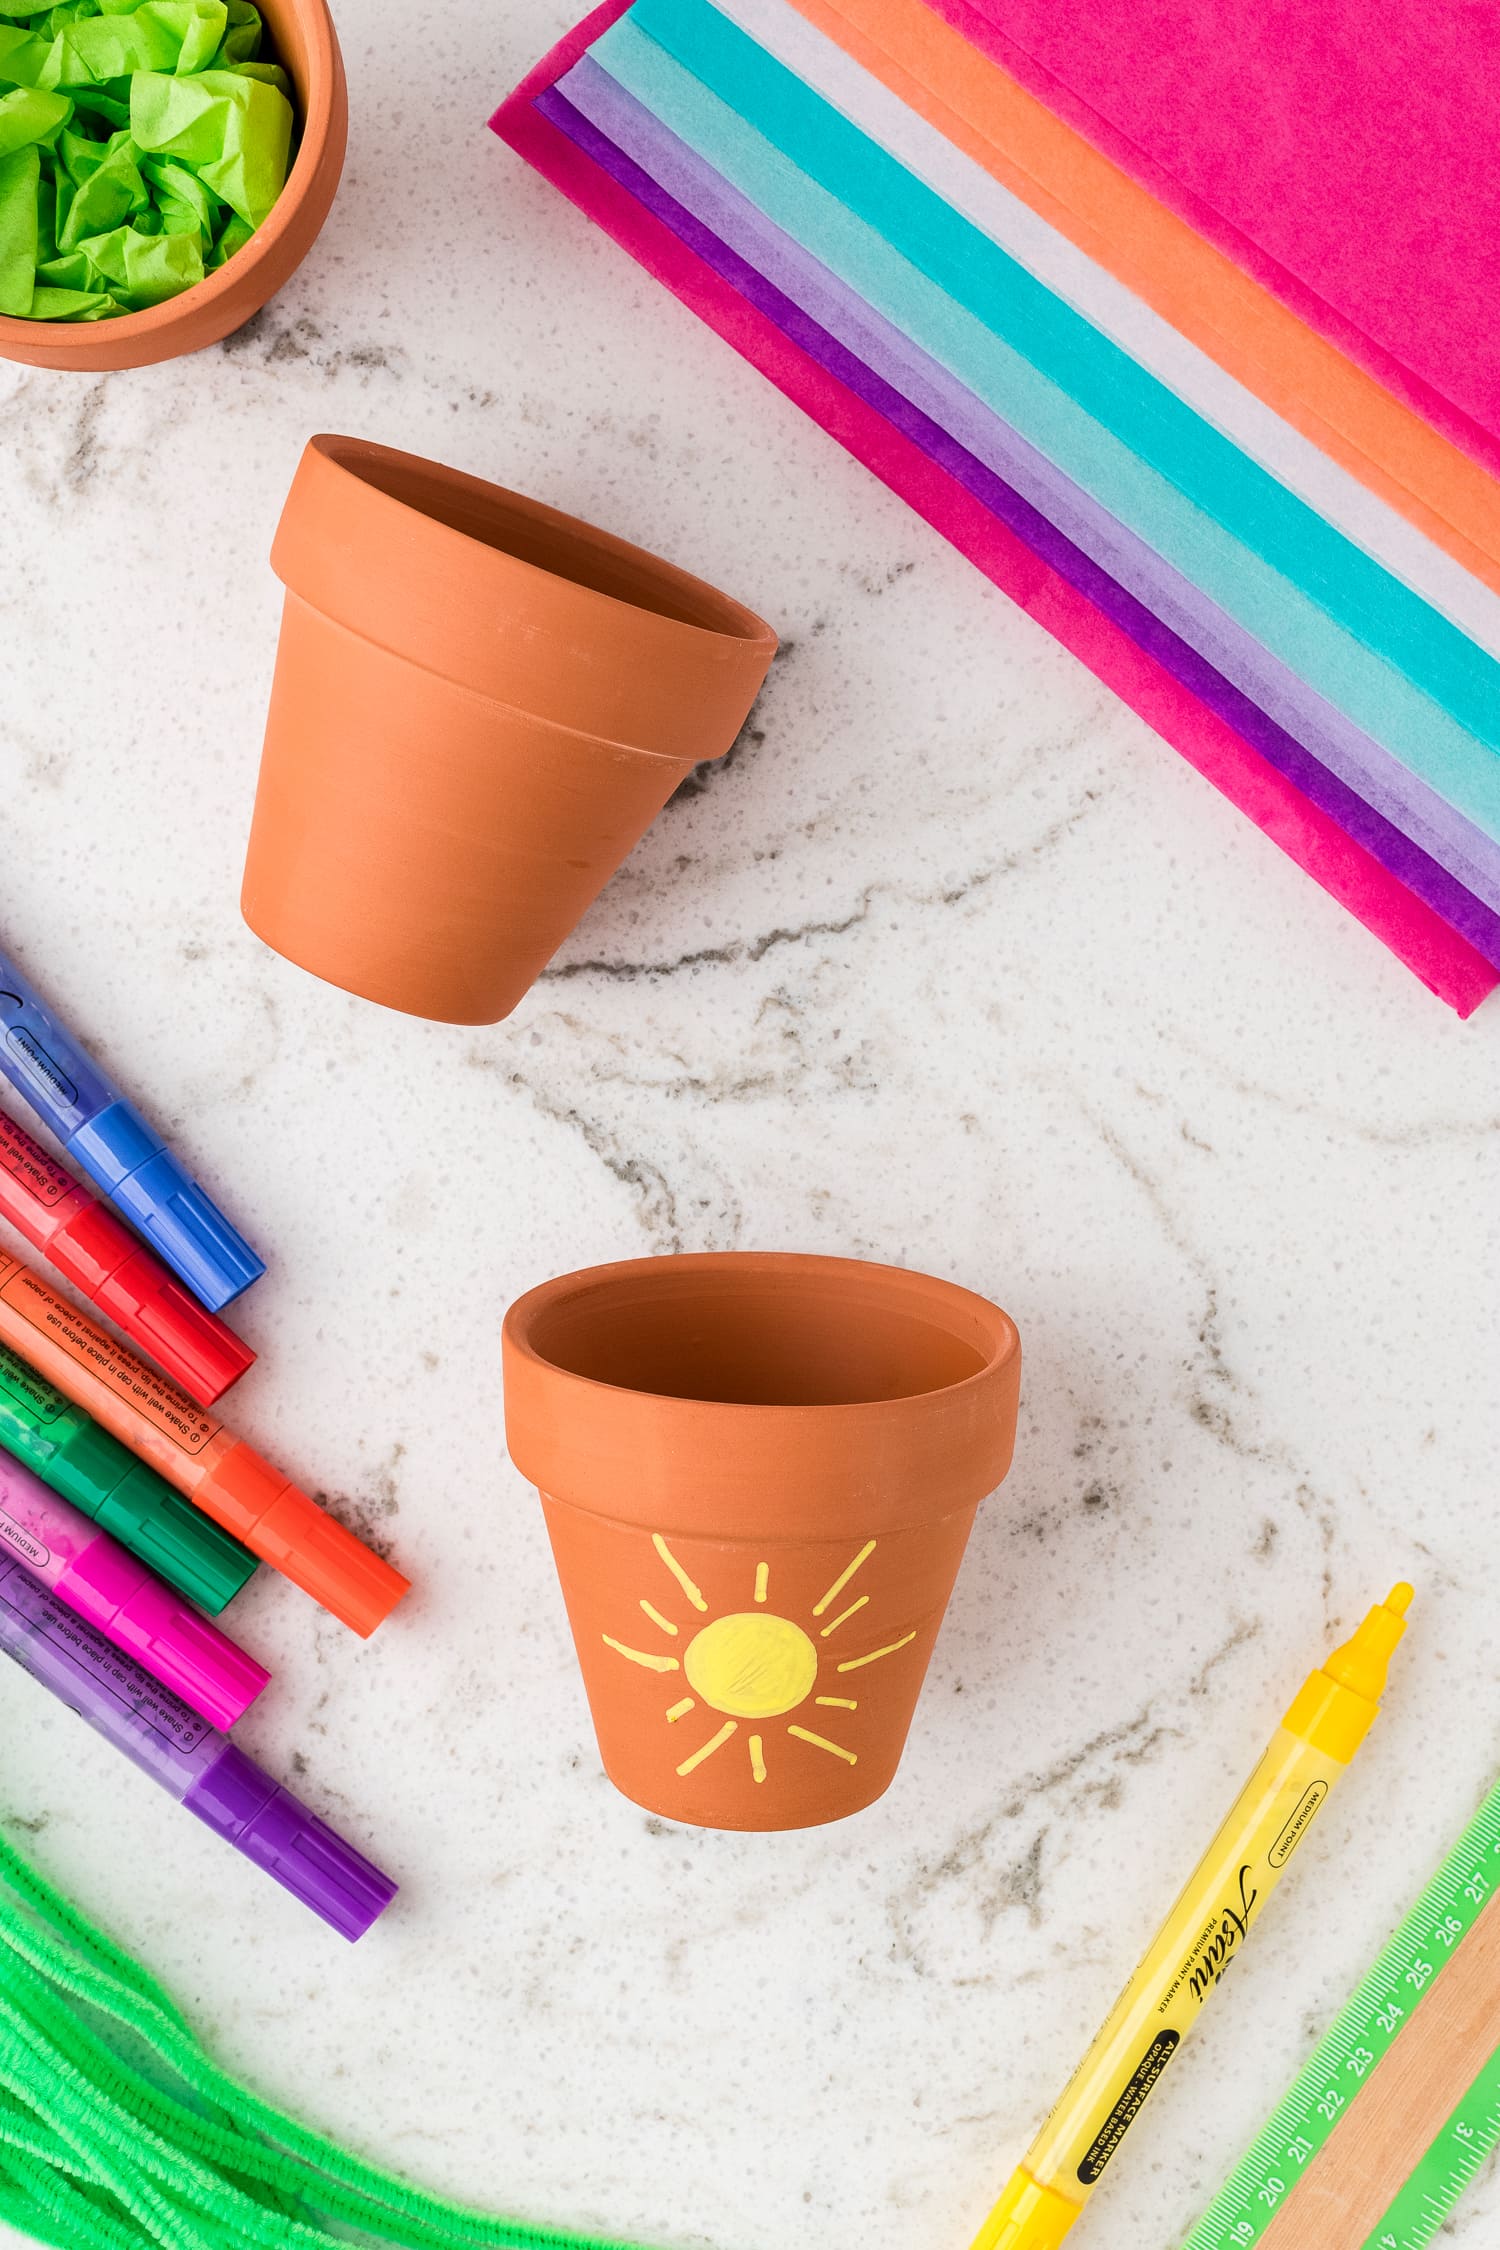
Decorate the Clay Pot
If you are going to be putting your flowers in a clay pot to display them, the first step is decorating the pot.
We used paint markers which make it easy to draw a design on the pot! The possibilities are endless with what you paint on the pot and kids can find inspiration anywhere.
You can include a monogram, quote, name, draw a picture, make a design, etc. Be creative and have fun with this!
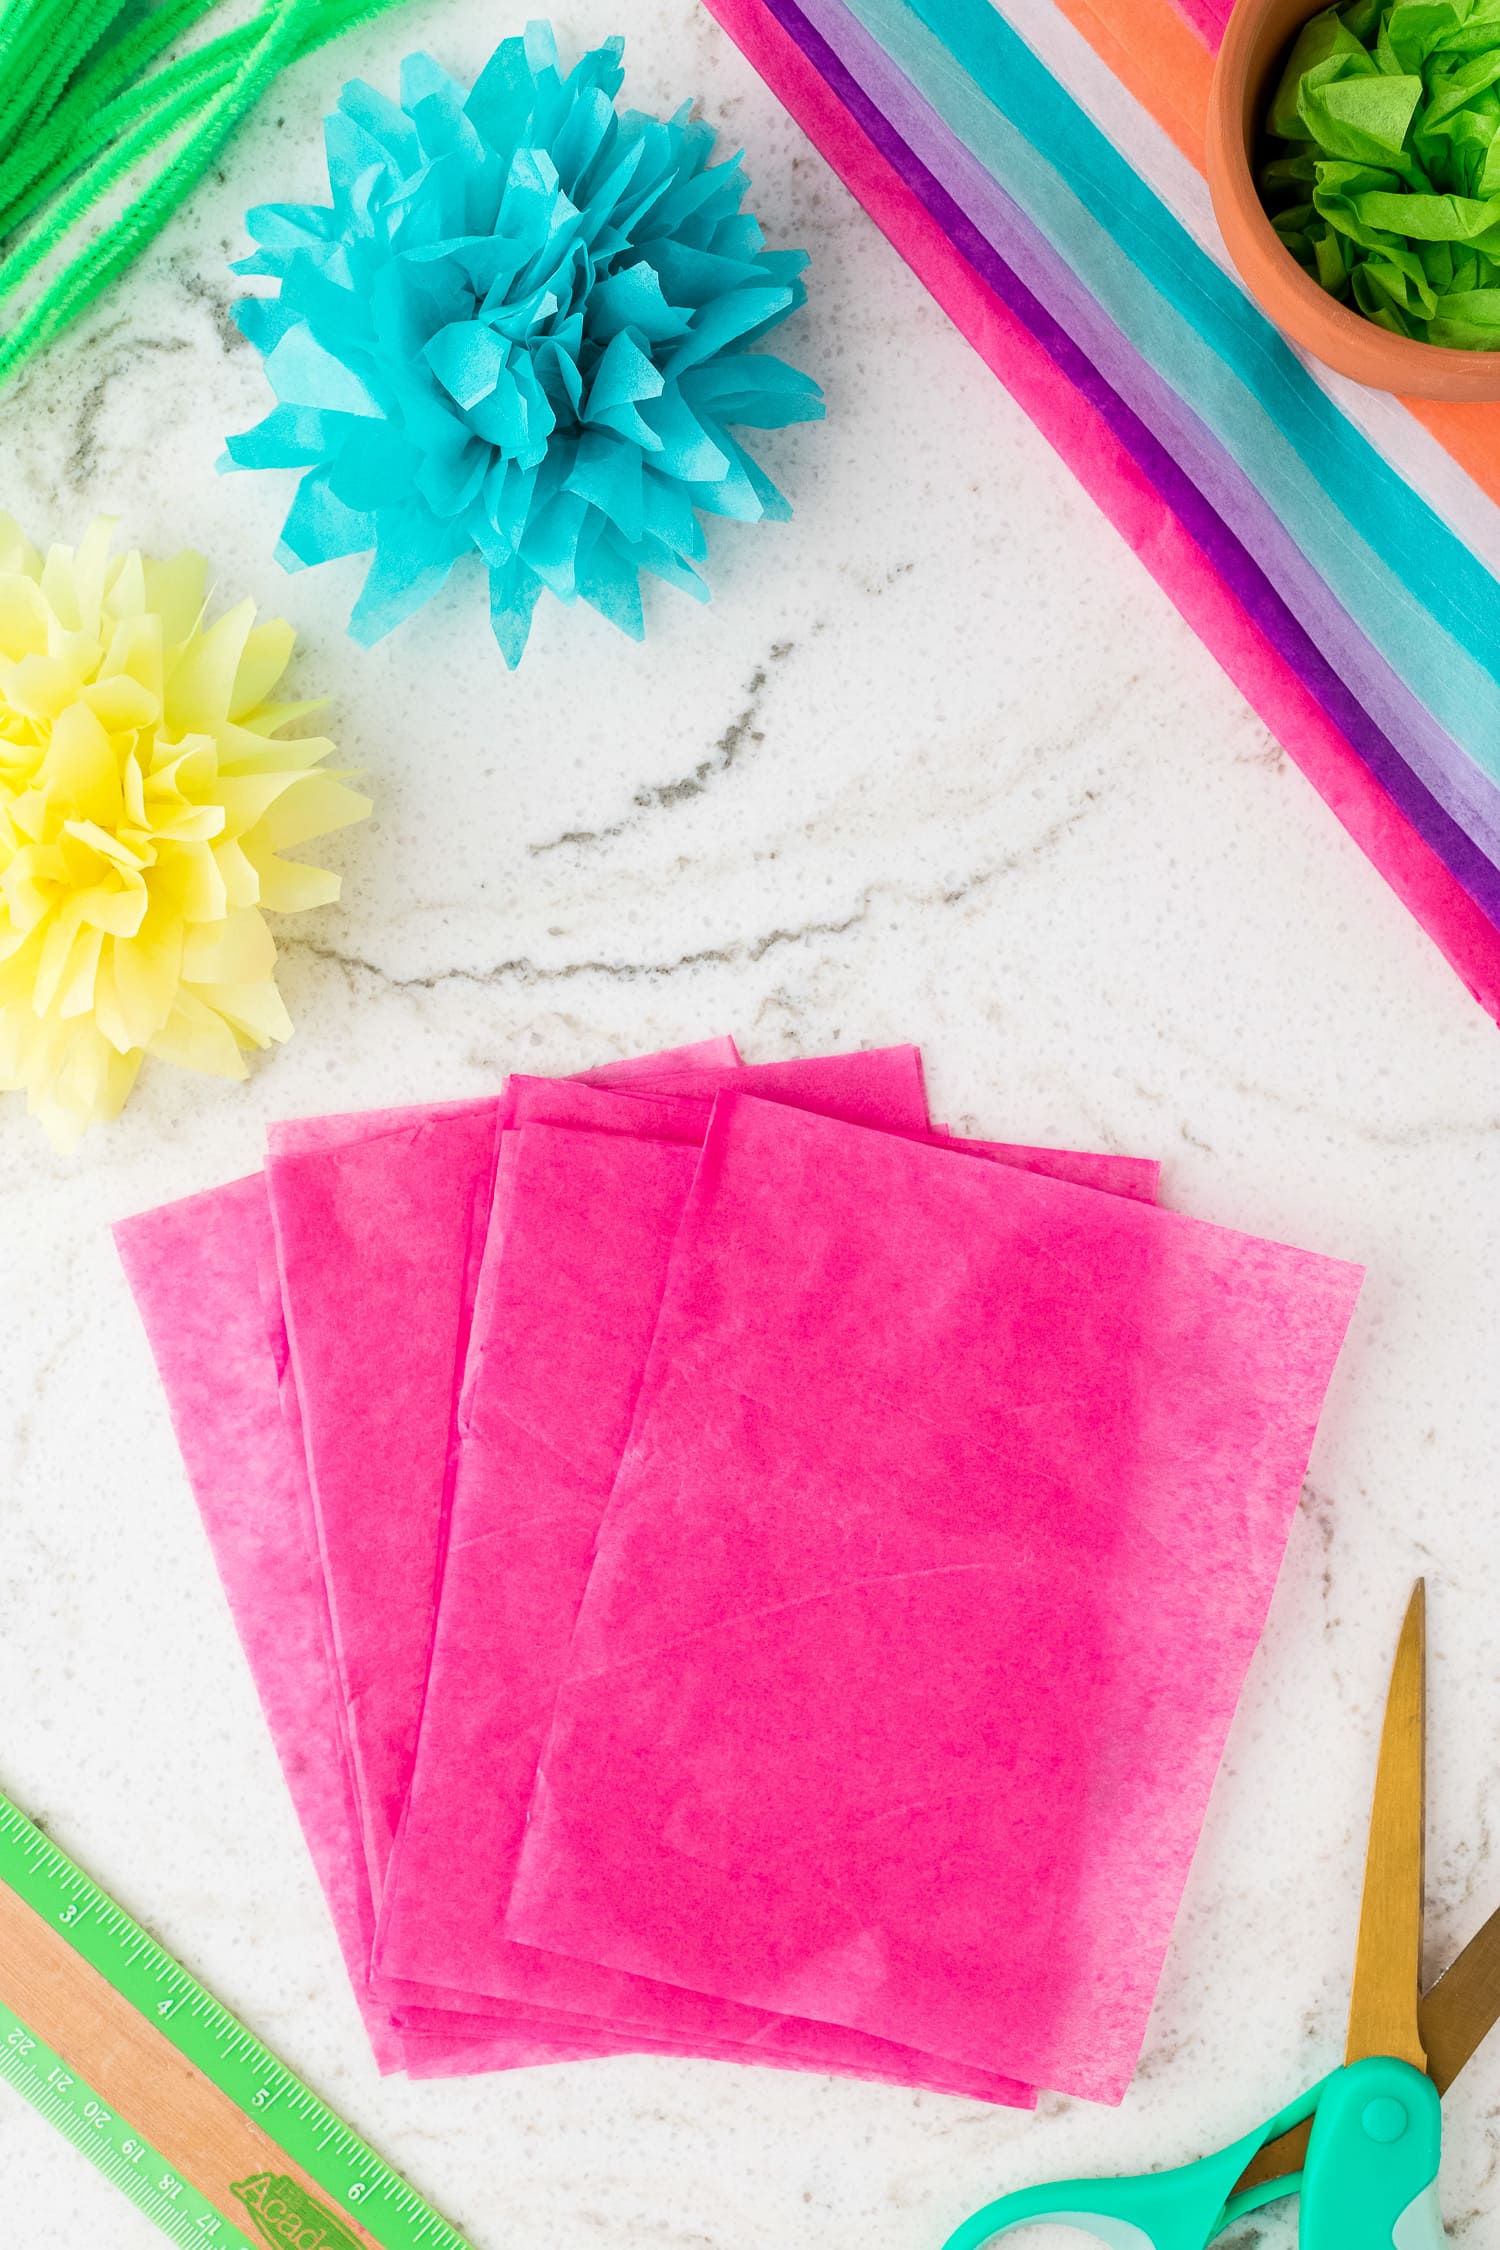


Start Building the Tissue Paper Flower
Prepare the tissue paper for your flowers by cutting it into 5-inch x 6 ½ inch sections. Stack and set aside.
Take 6 of the 5 x 6.5-inch pieces of tissue paper and stack and straighten them evenly.
Next, fold the layered tissue paper sheets using an accordion fold, folding it back and forth until you reach the end of the paper.
Holding the folded stack horizontally, staple the center of the tissue paper folds vertically.
With a pair of scissors, cut the corners of the ends of your folded tissue paper strip diagonally on each corner.
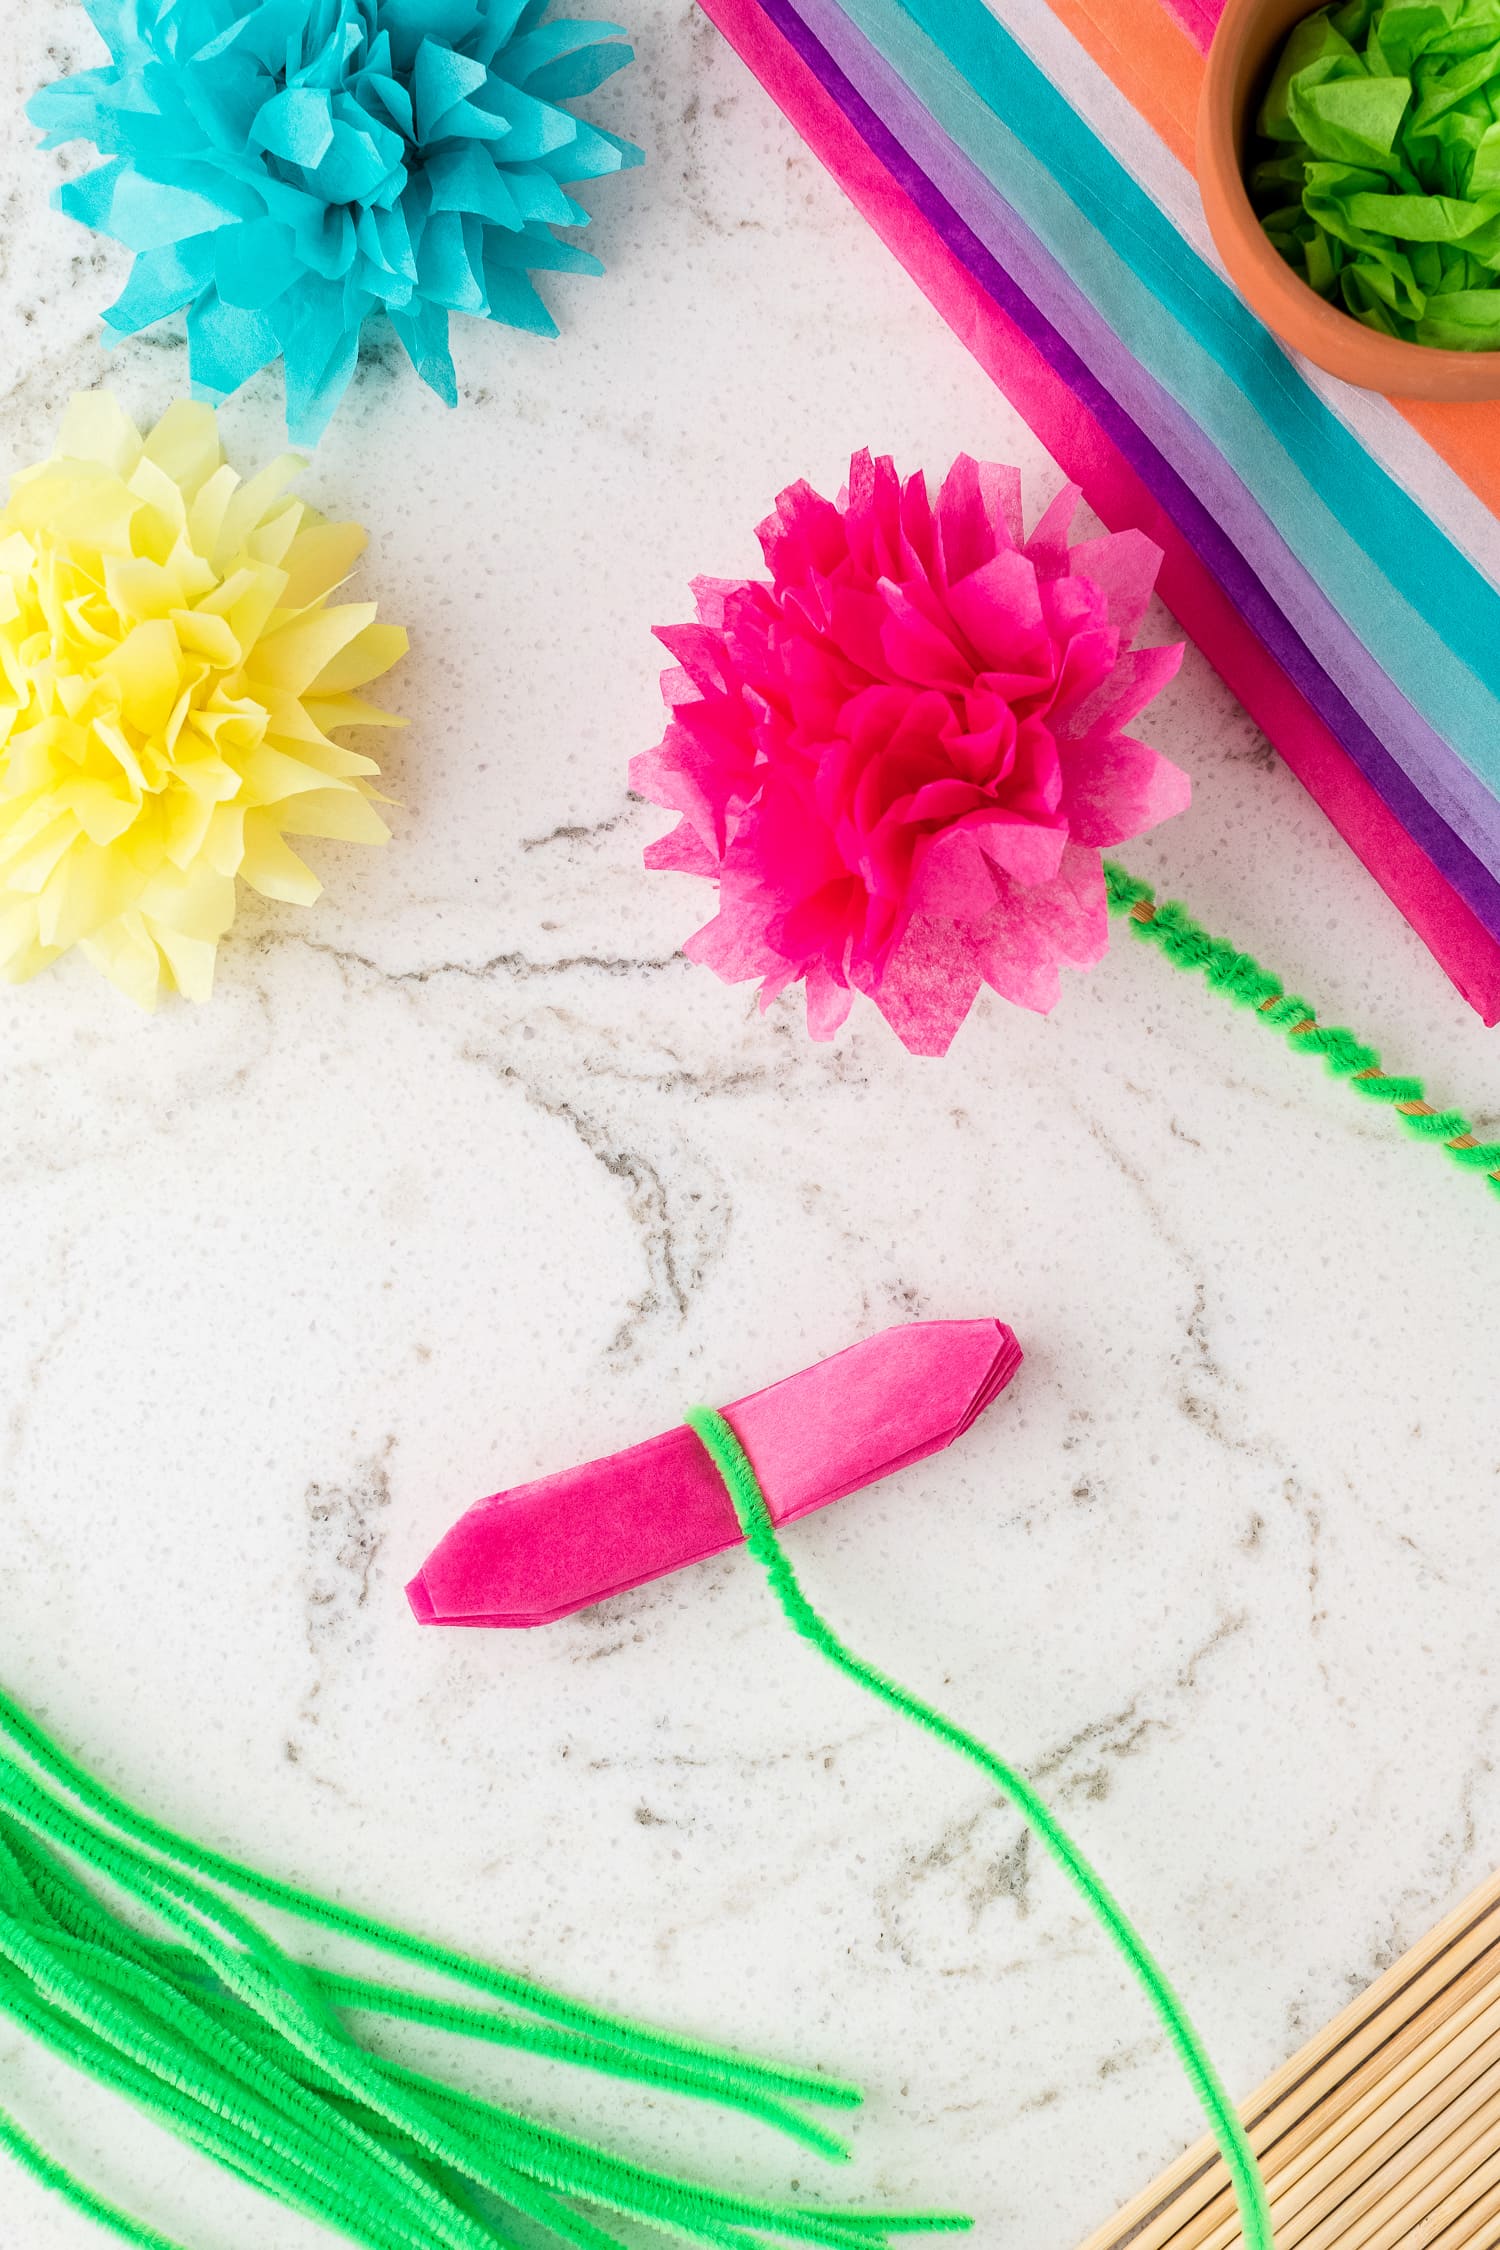
Finish Building Tissue Paper Flower Craft
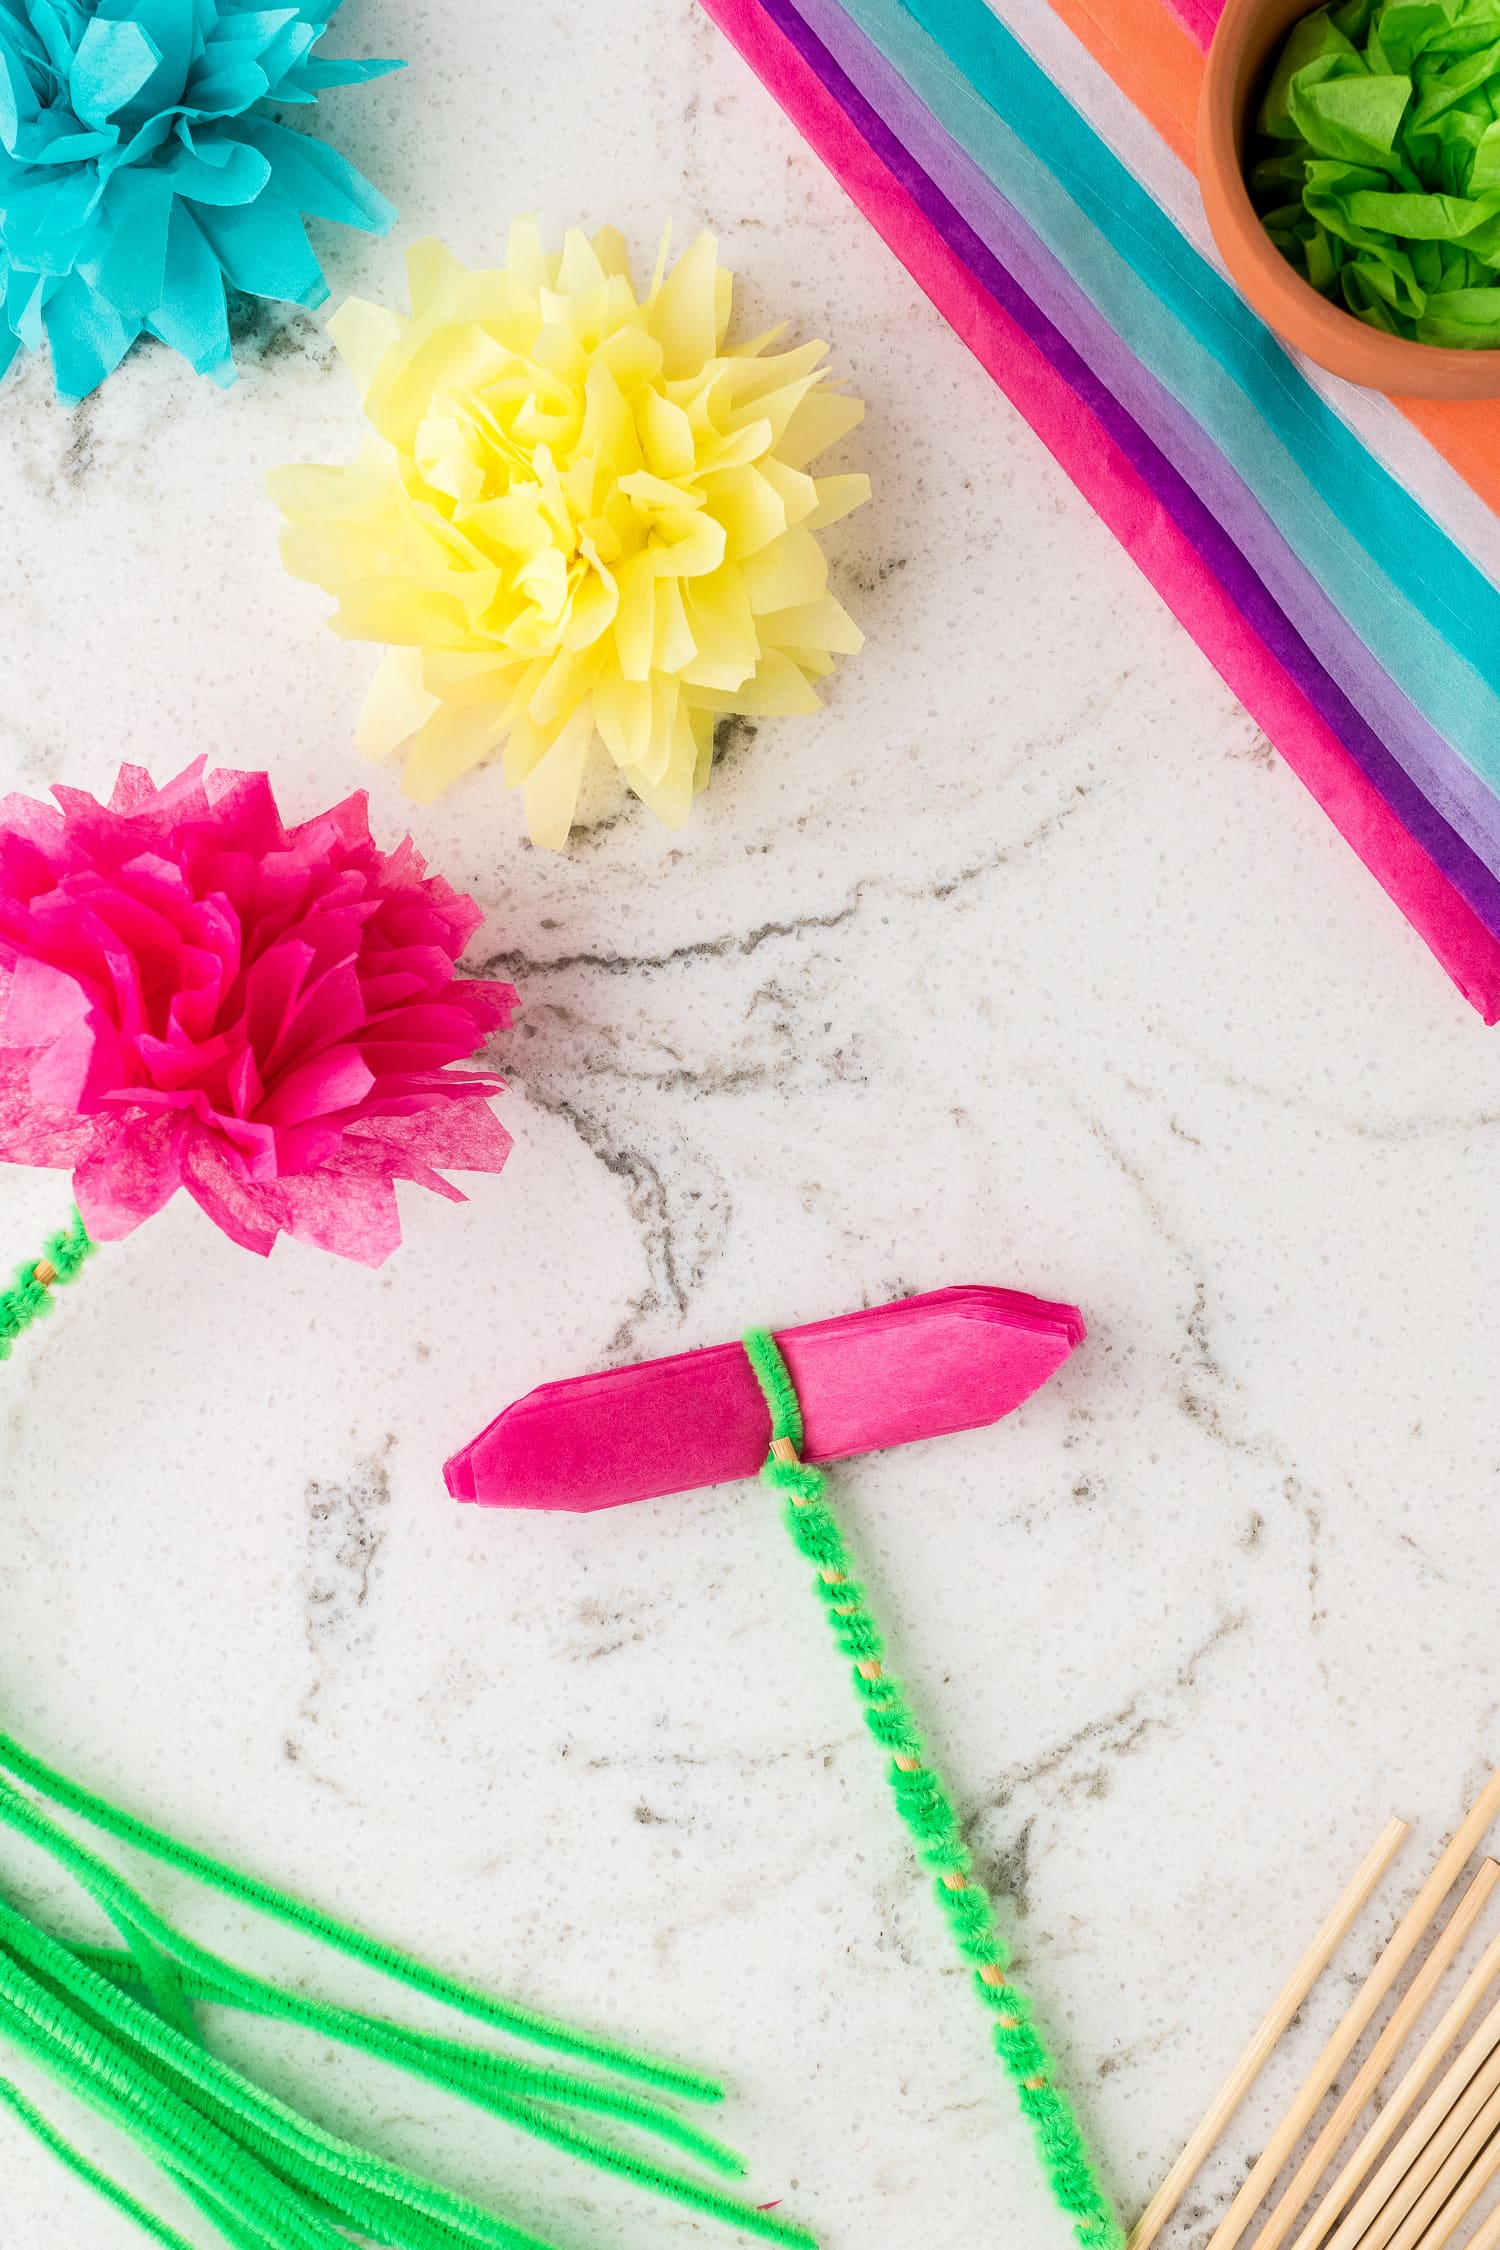
Once the corners are cut, twist a green pipe cleaner around the center, about where you stapled the folded paper. Loop and twist the pipe cleaner and secure it below so that it will act as the stem of your flower.
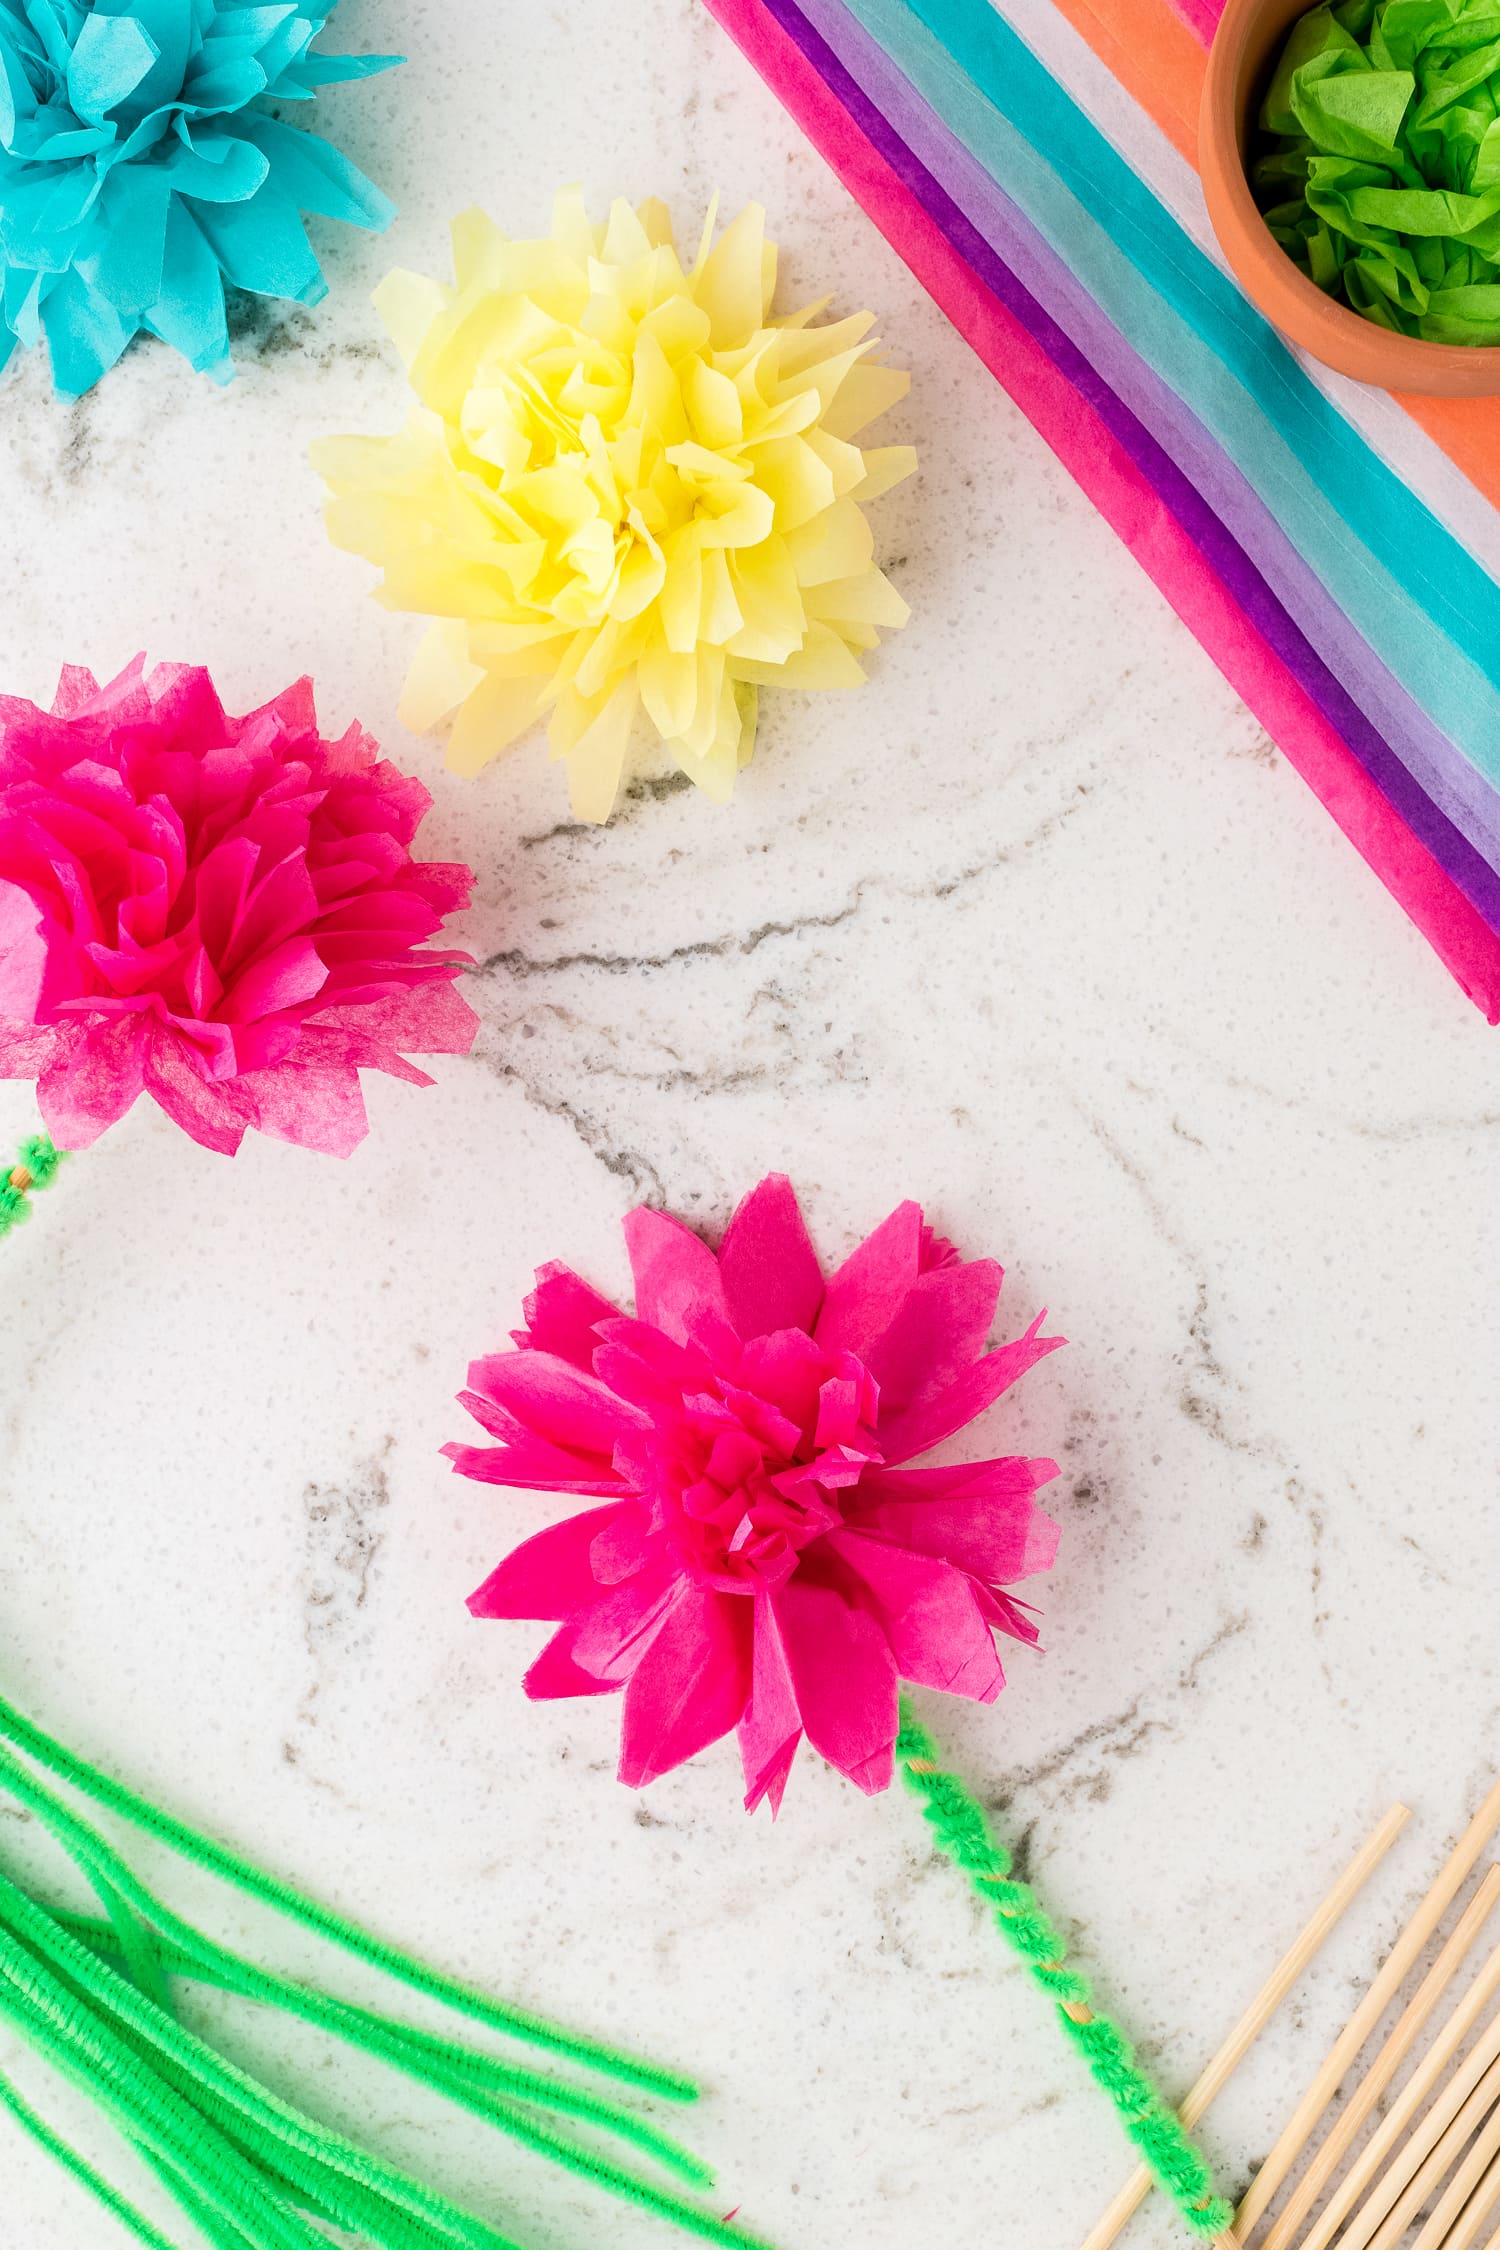
After the pipe cleaner is secured, it’s time to fluff your flower and really make it pop! Gently, peel the top layer of the tissue paper towards the center of the flower. Alternate this step, back and forth on each side of the flower, until all of the layers of tissue paper have been separated and fluffed.
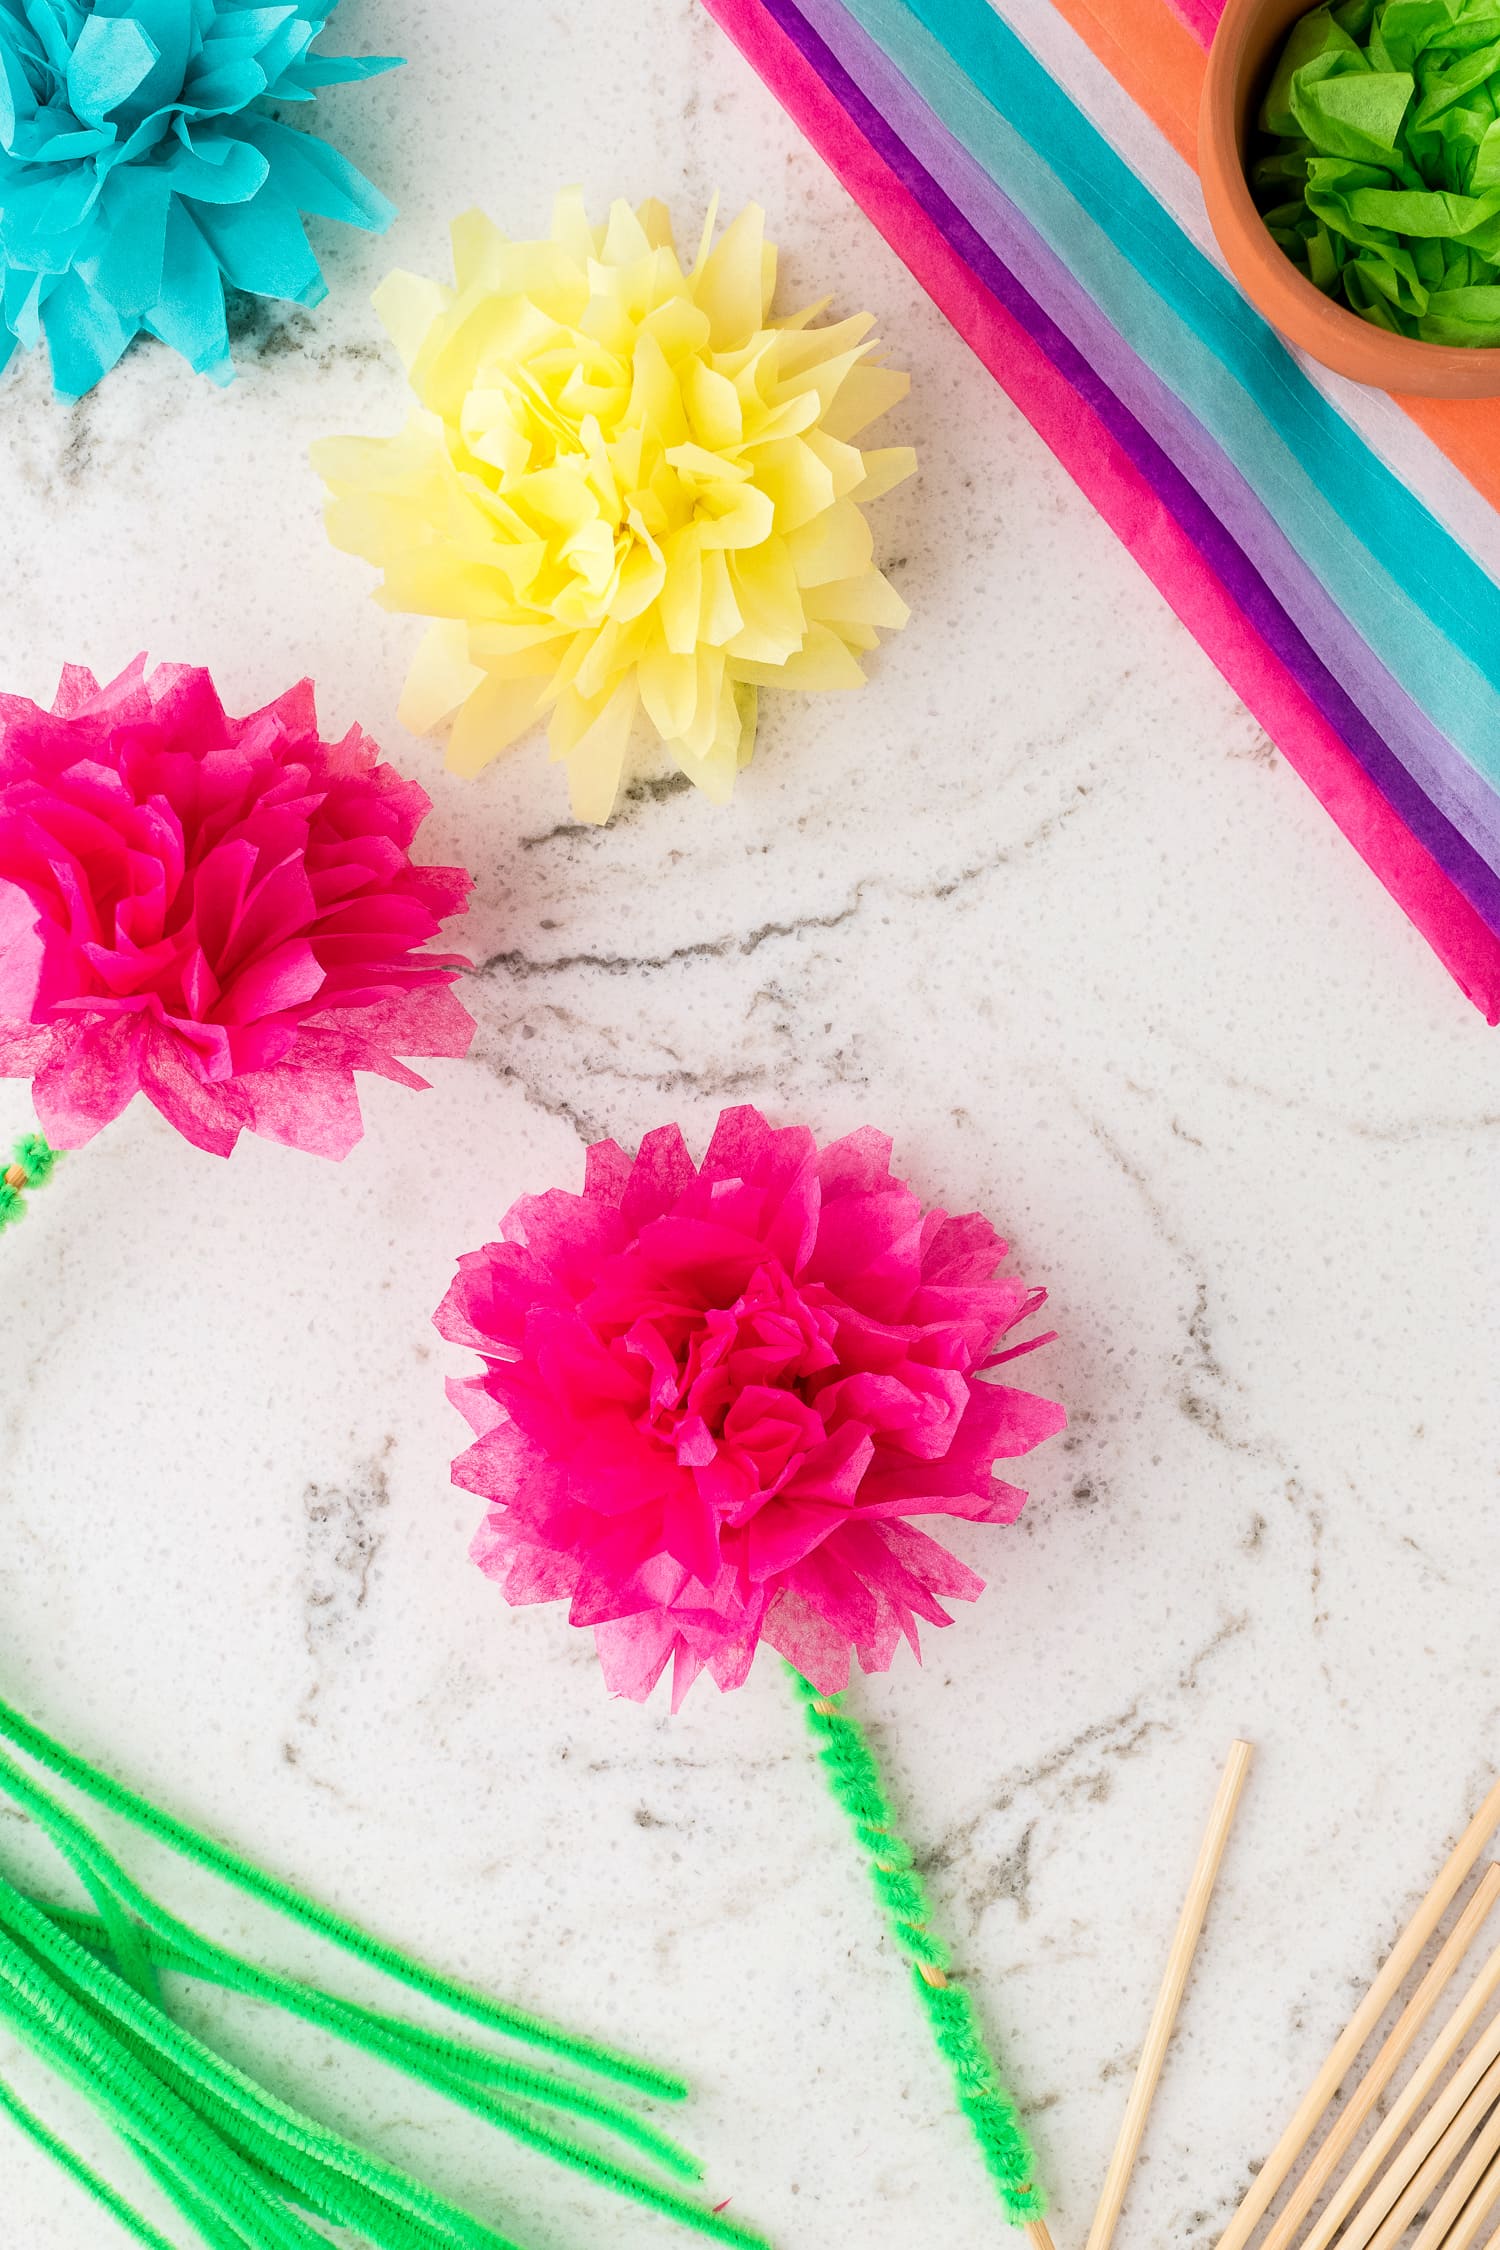
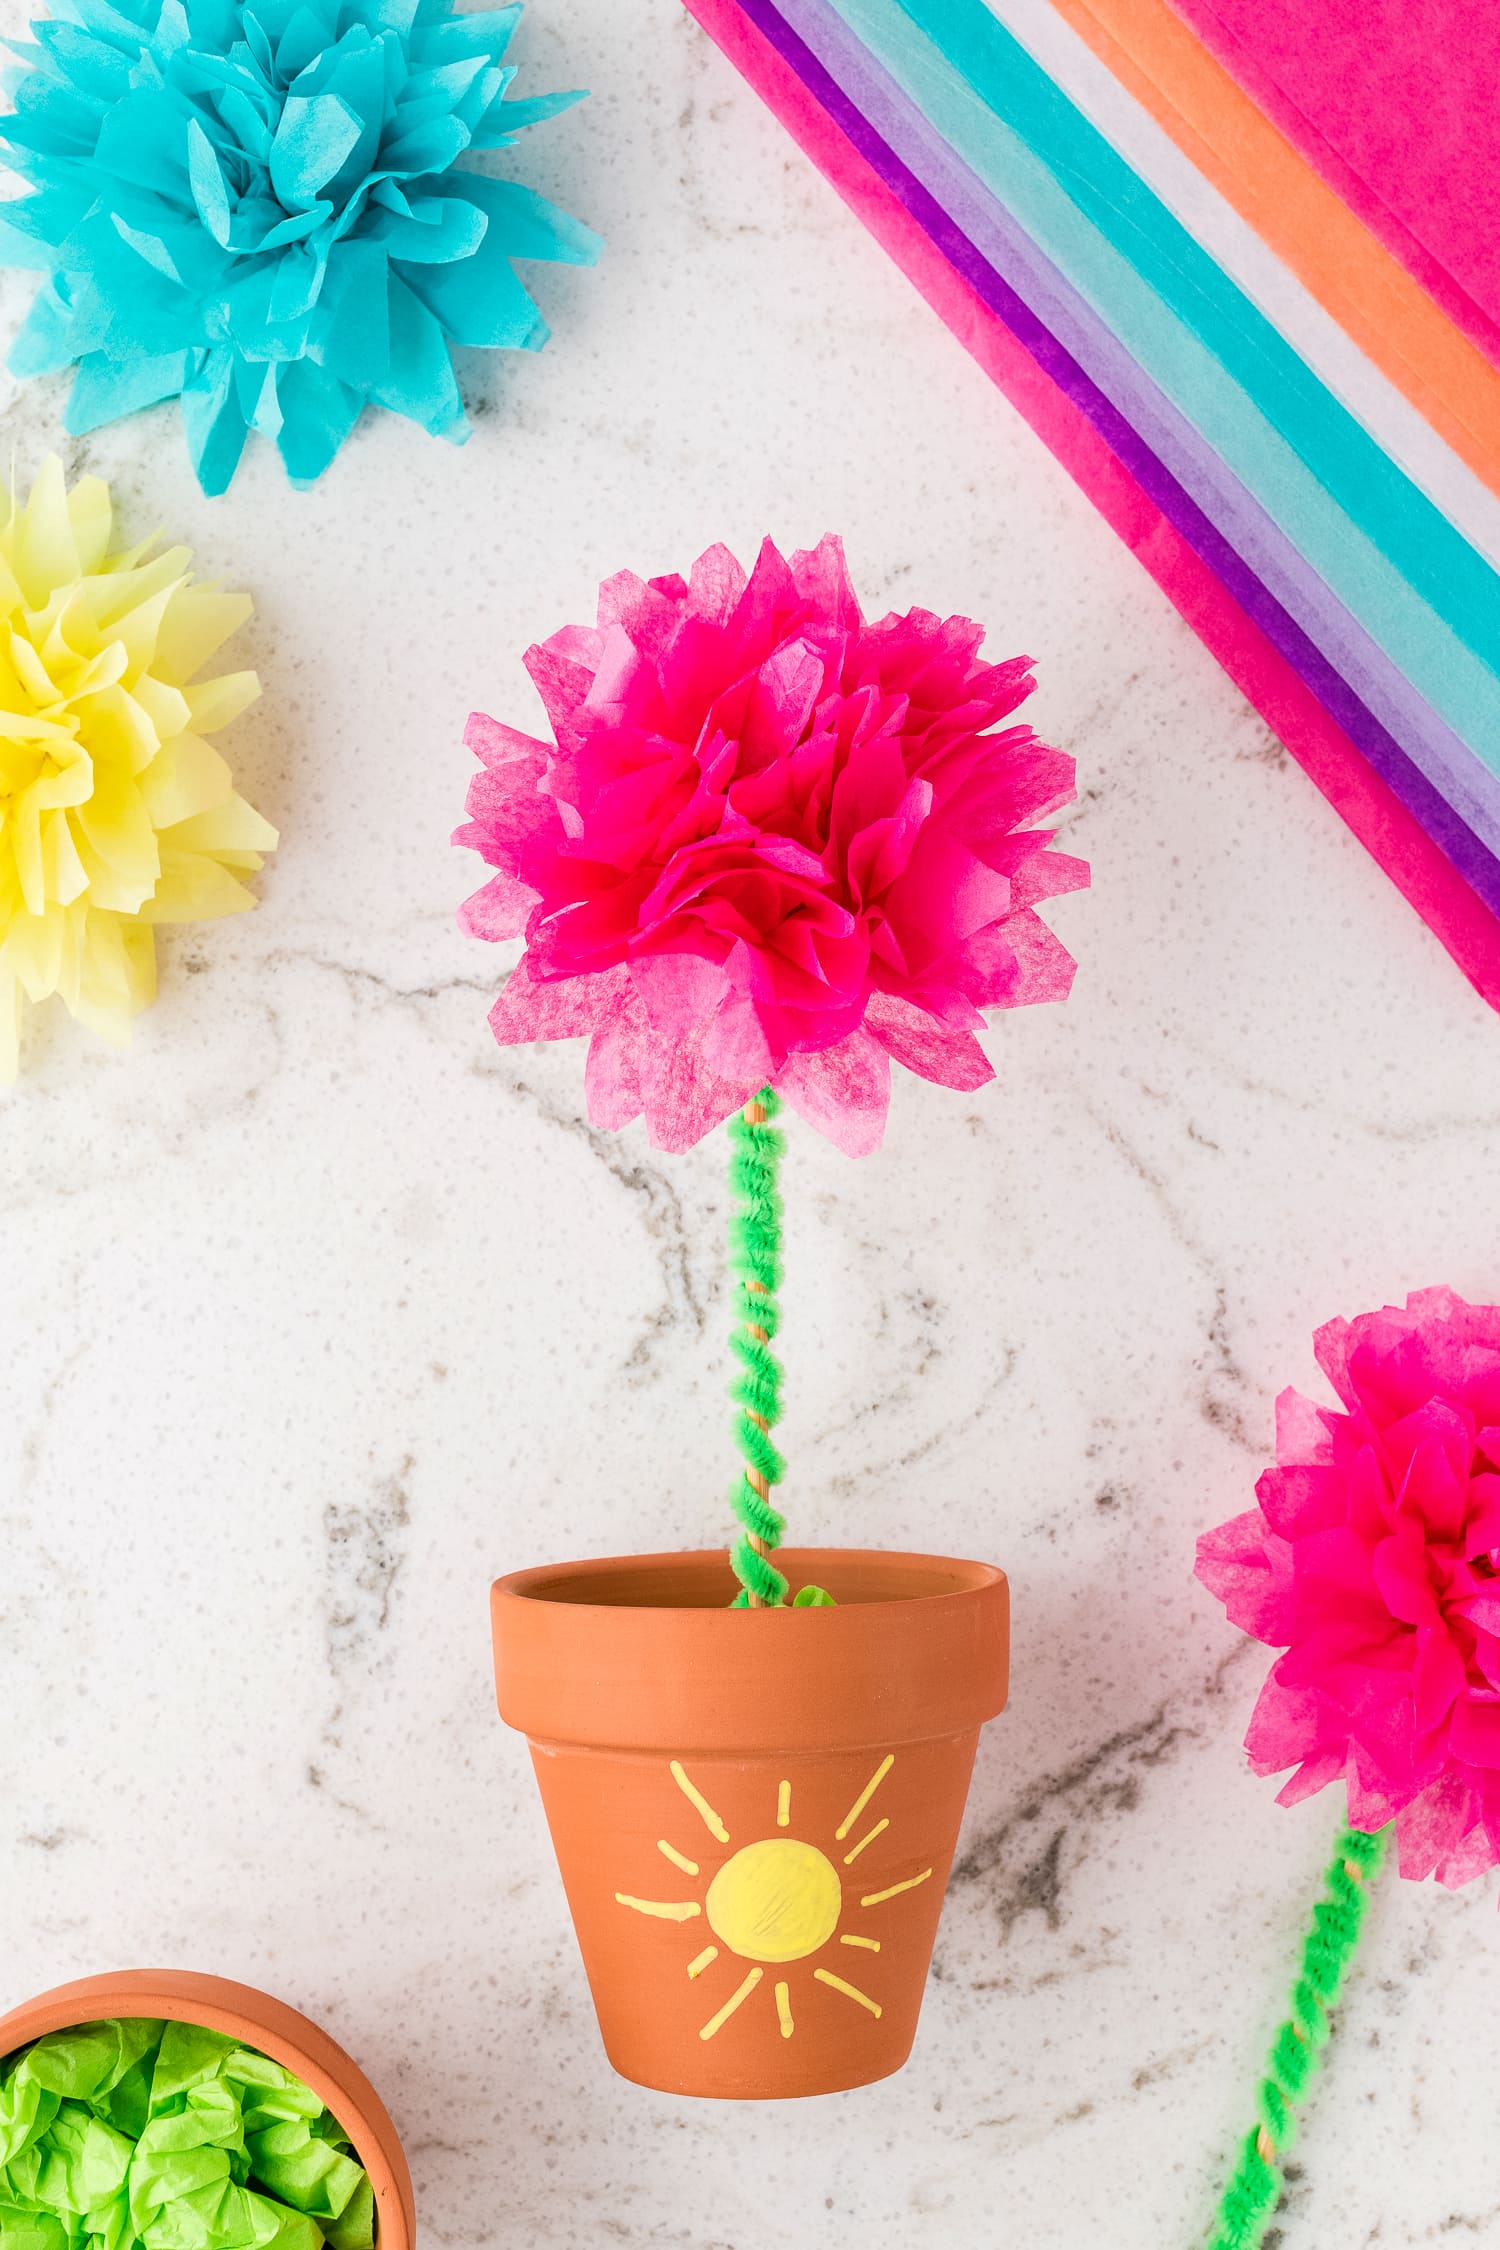
The resulting flower is fluffed and ready to go! You can stop at this point and use the flowers to decorate with or give them a stem and “plant” them in a clay pot!
Next, it’s time to finish the stem for your flower. Start by twisting the green pipe cleaner that is attached to your flower around a small wooden skewer or popsicle stick. Make sure the sharp end of the skewer is pointing down. Add another pipe cleaner and repeat the process until you reach the end of the stick. Set aside.

“Plant” Your Tissue Paper Flower
Next, crumple a piece of green tissue paper and use it to fill the bottom of the pot.
Place your flower into the center of the pot, piercing the stem/stick into tissue paper until it is secure and the flower doesn’t wobble.
Your tissue paper flower and pot are complete! You have just learned how to make flowers out of tissue paper!

Make a Multi-Color Flower!
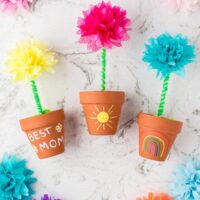
A great variation is to layer different colors of tissue paper when you fold them in the accordion. This will give you a fun, vibrant multi-color flower in the end! It is so much fun to try out different color combinations.
What Size Should Tissue Paper Be Cut to For Flowers?
Cut the tissue paper stack into 5″ x 6.5″ sections for these tissue paper flowers. You can switch up the sizes as long as you cut every piece of tissue paper into a rectangle.
How Many Sheets of Tissue Paper Make a Flower?
For this craft, we use six pieces of tissue paper for each flower. If you want smaller or larger flowers, you can try using less or more sheets.
DIY Mother’s Day Gift Idea!
These Tissue Paper Flowers in a clay pot make a fun homemade Mother’s Day gift idea or the perfect gift for Grandparents Day, Teacher Appreciation, Valentine’s Day etc.
Write a message to Mom on your clay pot when you paint it and let her know how much you love and appreciate her.
These fun, festive and vibrant flowers made with tissue paper will put a smile on her face when you giver her the gift.
It makes the perfect gift to make in your classroom, Sunday School etc. to have the kids give to Mom!
Pro tips!
- If you are having trouble getting your flower to stay upright in your pot, you can put a small piece of styrofoam in the bottom of the pot to stick your skewer into to anchor it down.
- If you have a few extra green pipe cleaners, you can twist them onto the base of the flower stems to make leaves.
- If you don’t have clay pots or time to paint them, that’s okay! You can add the flowers to a small vase, too.
- Cut the ends of the tissue paper strips in different ways, like rounding the edges for a rounded petal, to make different styles of flowers and petal shapes.
- If you change up the flower size, I recommend for big flowers to use two skewers so the flower is a little more sturdy in the pot.

These easy tissue paper flowers are so much fun to create and so pretty to look at when they are all done. Brighten up a space and someone’s day with these thoughtful DIY flowers.
More Fun and Easy Craft Ideas for Kids!
- Cute and easy yarn butterflies are fun craft to make and cute to decorate with.
- Your kids will have so much fun making this Coffee Filter Butterfly Craft and it’s so quick and easy with minimal prep and cleanup.
- Turn your toilet paper rolls into this easy Toilet Paper Roll Butterfly Craft! The kids will have so much fun decorating their butterflies!
If you take a picture and share these Tissue Paper Flowers on Instagram make sure to #kidsactivityzone or tag us @kidsactivityzoneblog so we can see them!
Ingredients
Instructions
- First, let’s prepare the pot for our beautiful flower! Start by using a paint marker to personalize your flower pot. Get creative! Set aside for at least 5 minutes to ensure your artwork is dry.
- Now gather the tissue paper, scissors, and at least a 12-inch ruler.
- Prepare the tissue paper for your flowers by cutting it into 5-inch x 6 ½ inch sections. Stack and set aside.
- Take 6 of the 5 x 6.5-inch pieces of tissue paper and stack and straighten them evenly.
- Next, fold the layered tissue paper accordion style, folding it back and forth until you reach the end of the paper.
- Holding the folded stack horizontally, staple the center of the folded paper vertically.
- With a pair of scissors, cut the corners of the ends of your folded paper diagonally on each corner.
- Once the corners are cut, twist a green pipe cleaner around the center, about where you stapled the folded paper. Loop and twist the pipe cleaner and secure it below so that it will act as the stem of your flower.
- After the pipe cleaner is secured, it’s time to make your flower pop! Gently, peel the top layer of the tissue paper towards the center of the flower. Alternate this step, back and forth on each side of the flower, until all of the layers of tissue paper have been separated and fluffed.
- You can stop at this point and use the tissue paper flowers to decorate with or give them a stem and "plant" them in a clay pot!
- Next, it’s time to finish the stem for your flower. Start by twisting the green pipe cleaner that is attached to your flower around a small wooden skewer or popsicle stick. Add another pipe cleaner and repeat the process until you reach the end of the stick. Set aside.
- Next, crumple a piece of green tissue paper and use it to fill the bottom of the pot.
- Place your previously made flower into the center of the pot, piercing the stem into tissue paper until secure and the flower doesn’t wobble.
- Your tissue paper flower and pot are complete!
I absolutely loved making paper flowers as a kid and loved sharing this craft with my kiddos!