Paper Plate Turtle Craft
A fun kids craft for summer! This easy Paper Plate Turtle Craft is the perfect summer craft to keep kids busy. With supplies that you might already have it doesn’t get easier than this paper plate craft.

This paper plate turtle craft is such a fun summer activity! If your kids love reptiles, then they’ll have a blast creating this fun turtle friend. Plus, if they’re begging for a pet turtle, they can just make a paper plate pet!
You can make some other easy reptile crafts too. This tissue paper turtle is a really cute craft and this toilet paper roll turtle craft is so fun!
Hot summer days can get really boring when the kids have to stay indoors, but having plenty of crafts to do will keep them entertained. Grab a few simple supplies and make this easy turtle craft!
Why You’ll Love this Paper Plate Turtle Craft
- It only takes 25 minutes to make this little reptile friend! And if you paint the plates ahead of time, it’ll go even faster.
- Painting, cutting, and pasting are all really great activities for children who need to work on their fine motor skills.
- This craft is great for children of all ages! Older kids can make it on their own while younger kids may need a little help. Either way, it’s fun for all!

Supplies Needed to make a Paper Plate Turtle
- Paper plate – A cheap white paper plate will work great! But you can use whatever paper plate that you have on hand.
- Acrylic paint – Choose a green acrylic paint to use on this paper plate turtle. Avoid any bright lime green paint or a green that is too dark.
- Googly eyes – Use two regular sized googly eyes for this fun little turtle.
- Green card stock – Green card stock will be more sturdy, but you can use green construction paper if that’s all that you have.
- Glue – Any liquid craft glue or glue stick will work great for this easy turtle craft.
- Scissors – Consider using safety scissors if you’re making this craft with younger children.
- Circle paper punch – If you don’t have a circle paper punch, you can easily use a small circular object (like a cup) to trace circles and cut them out.
- Paint brush – Any craft paint brush or foam paint brush will work for this craft!
How to Make this Paper Plate Turtle Craft
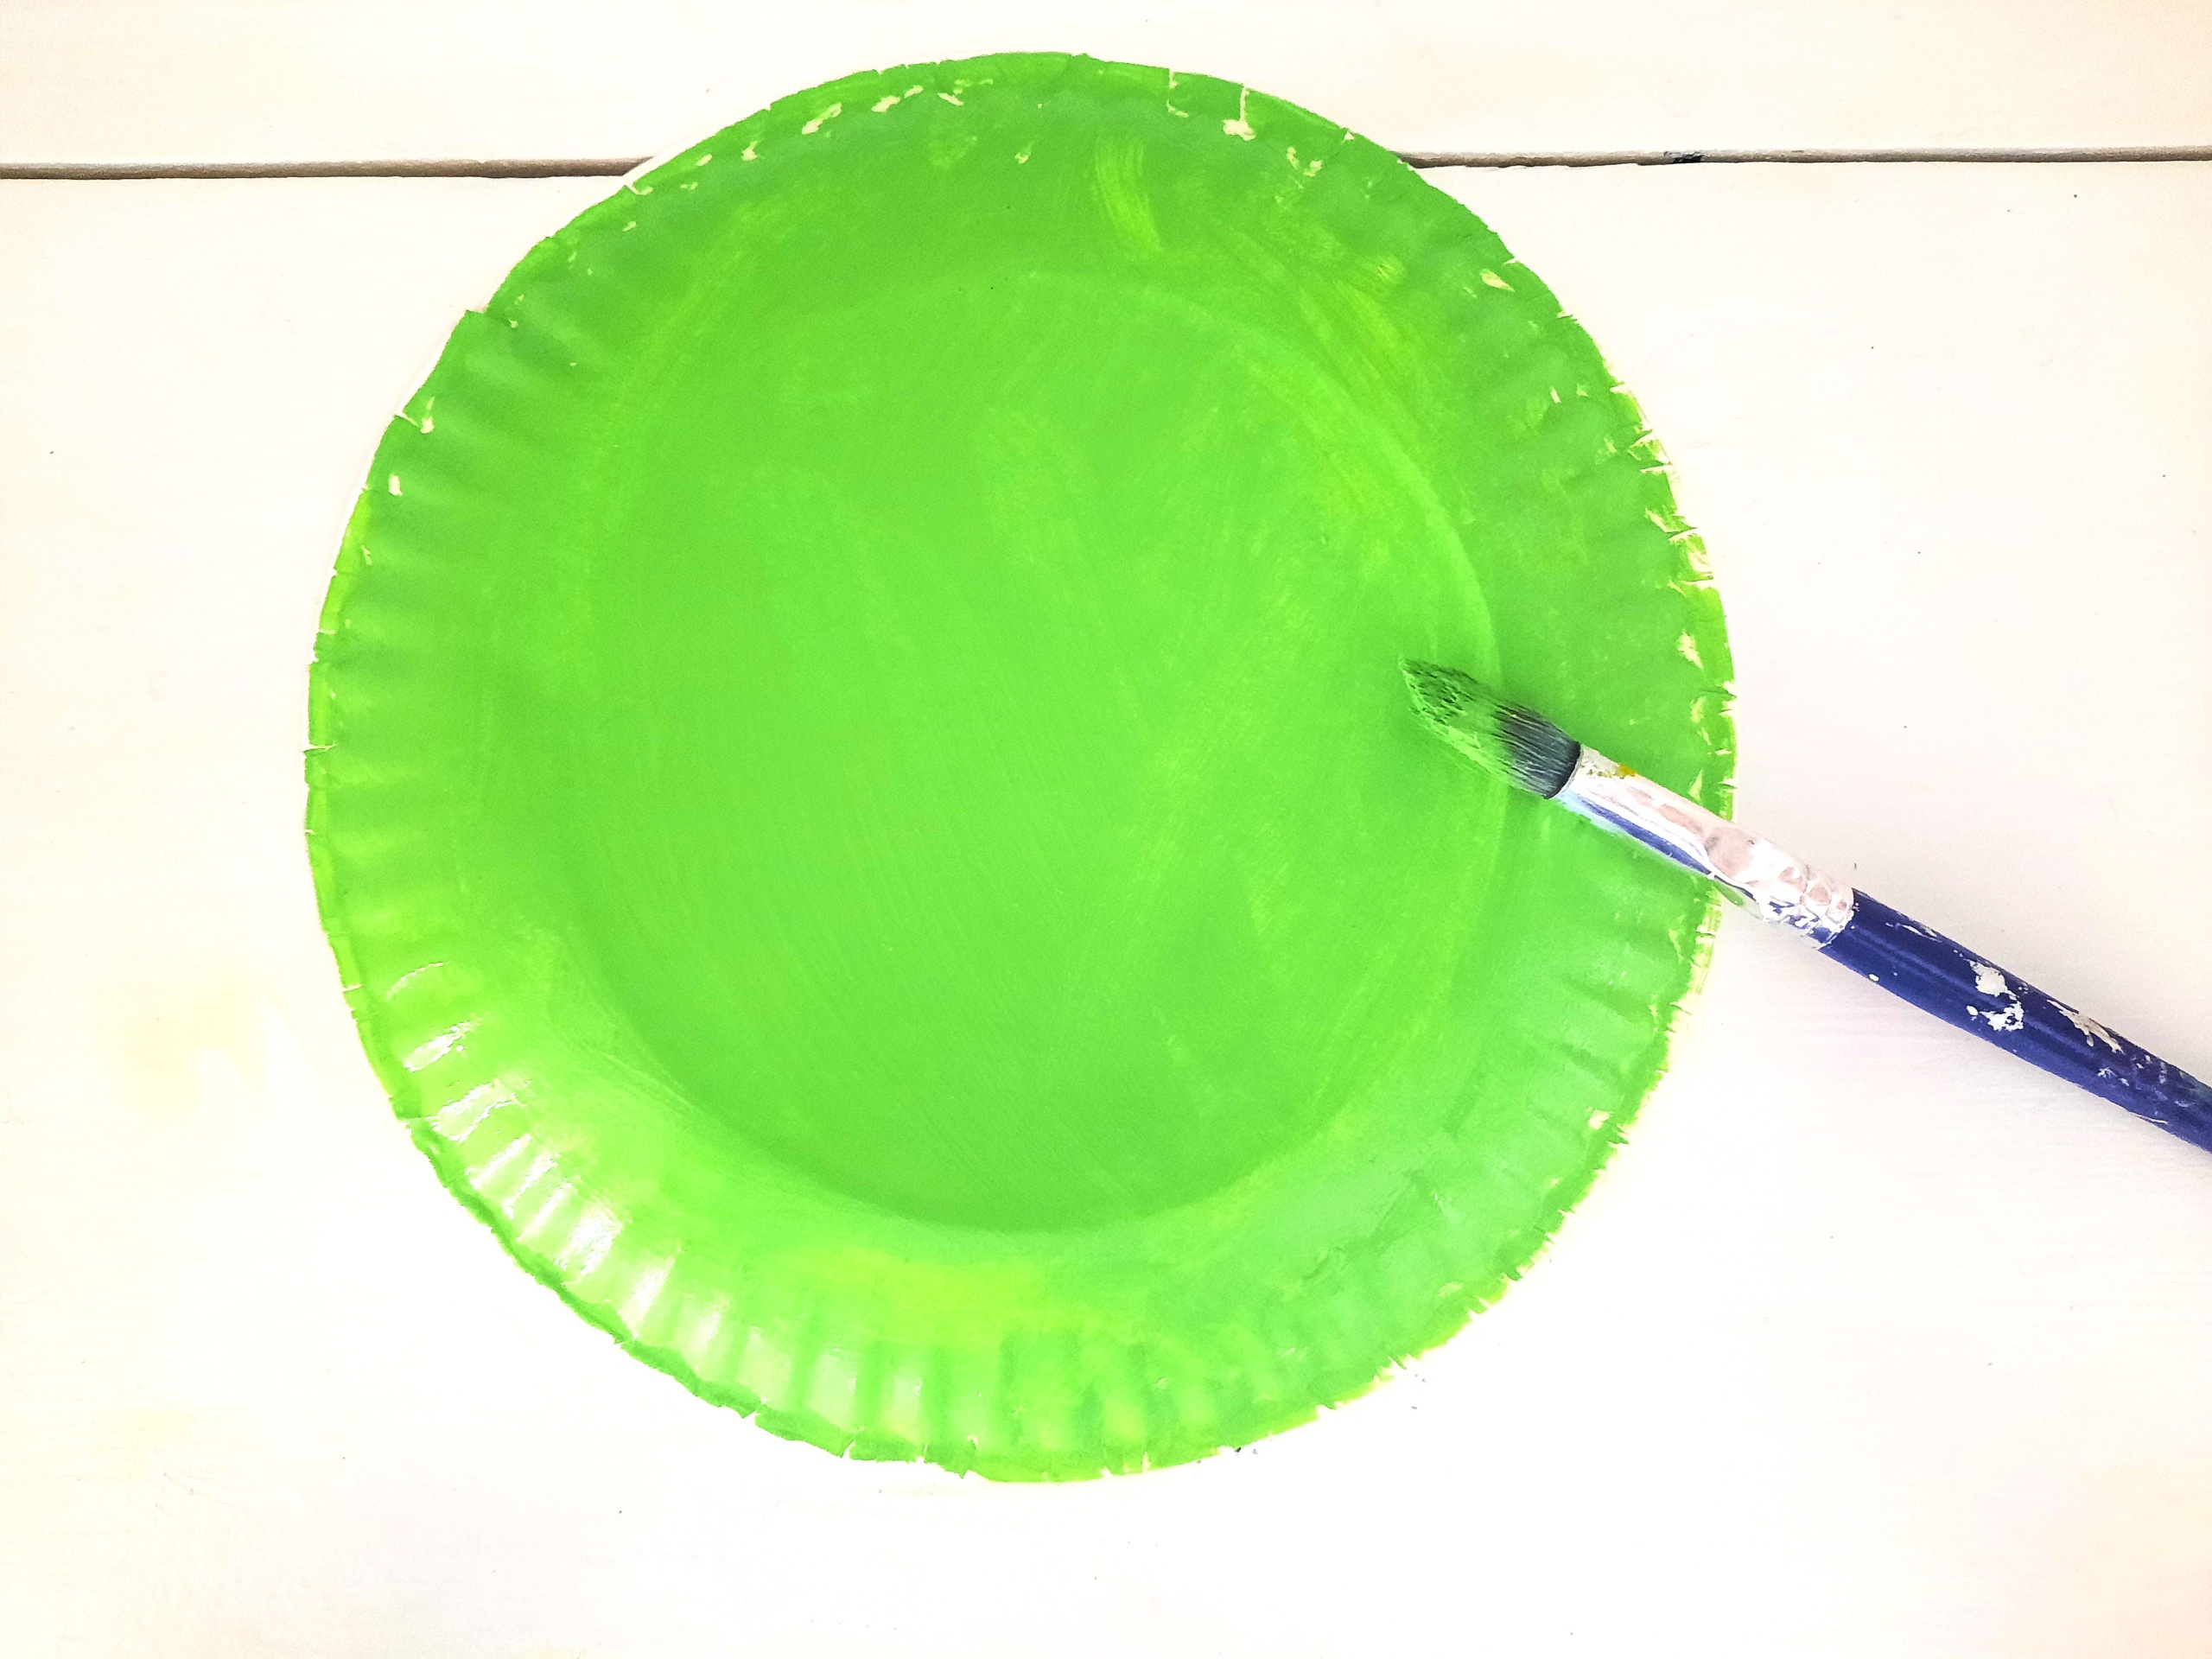
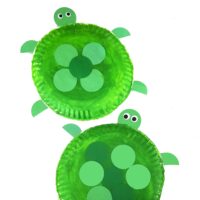
- Flip the paper plate over and paint the back of it green to mimic a rounded turtle shell. Let the paint completely dry.
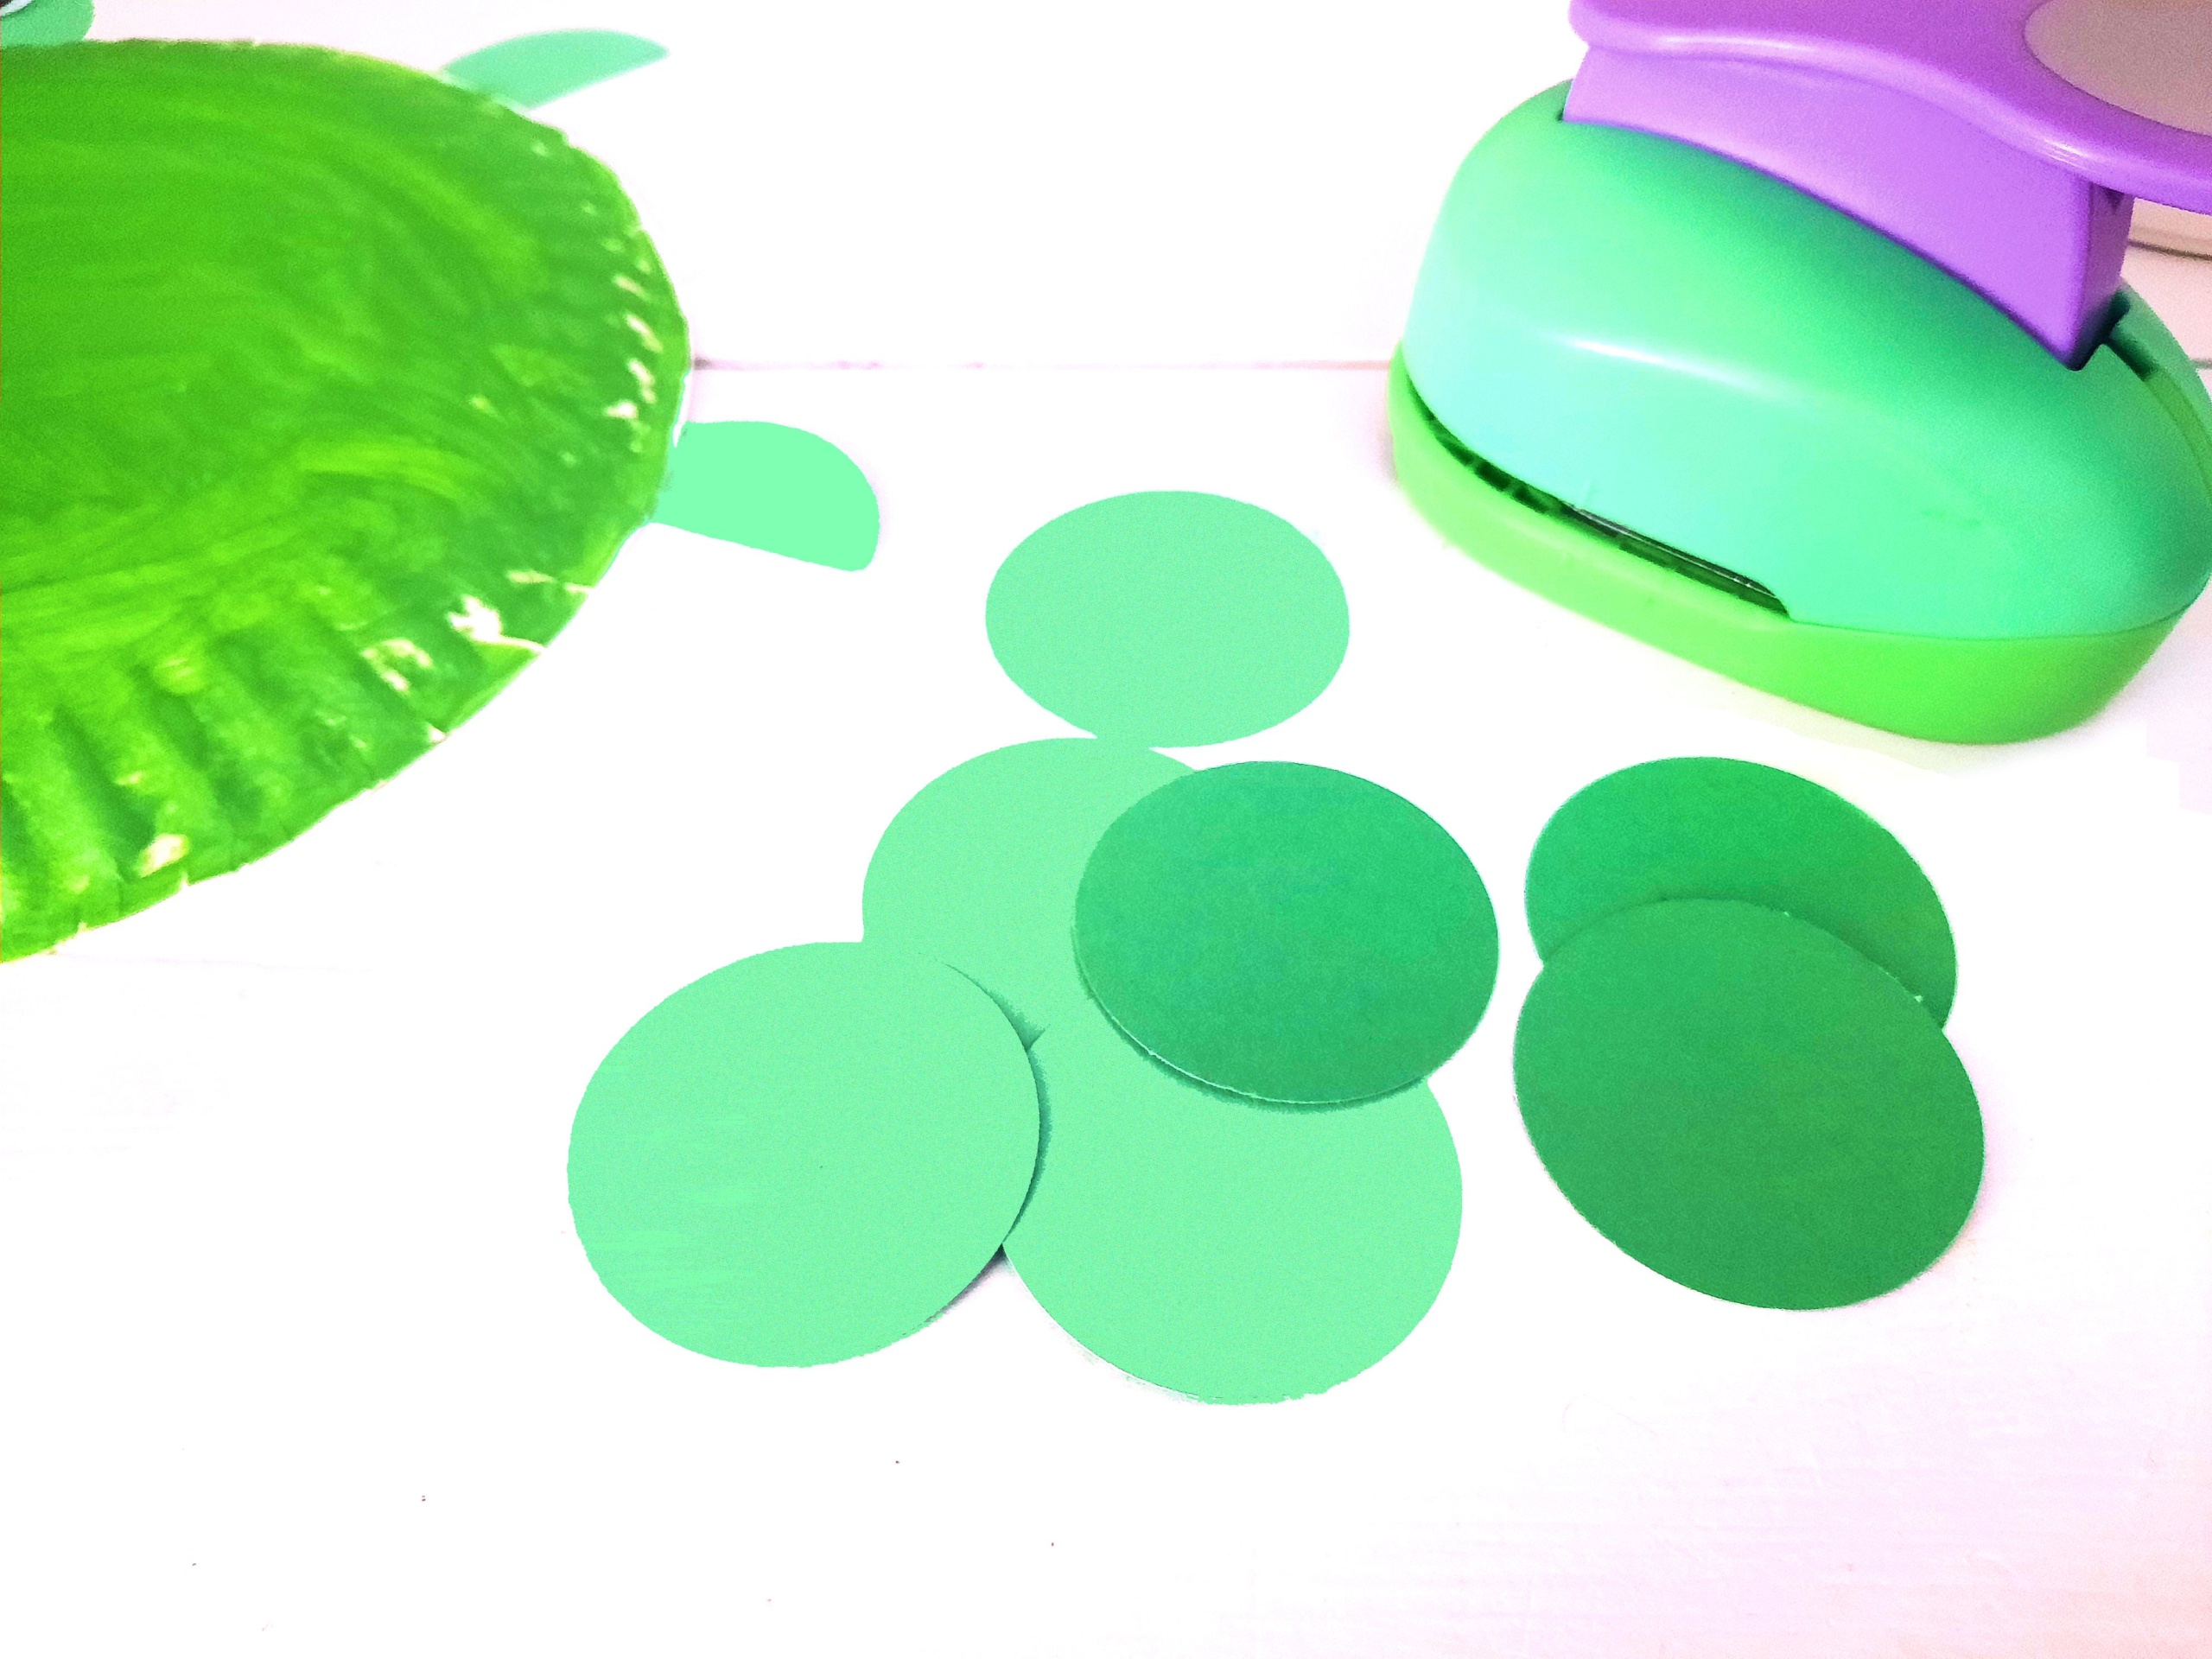
- While the plate is drying, punch out large green card stock circles with the paper punch. You can also freehand the circles and cut them out. You’ll need three circles total for the head, arms, and legs and then a few circles for the shell.
- Cut two circles in half and set aside one for the head of the turtle.
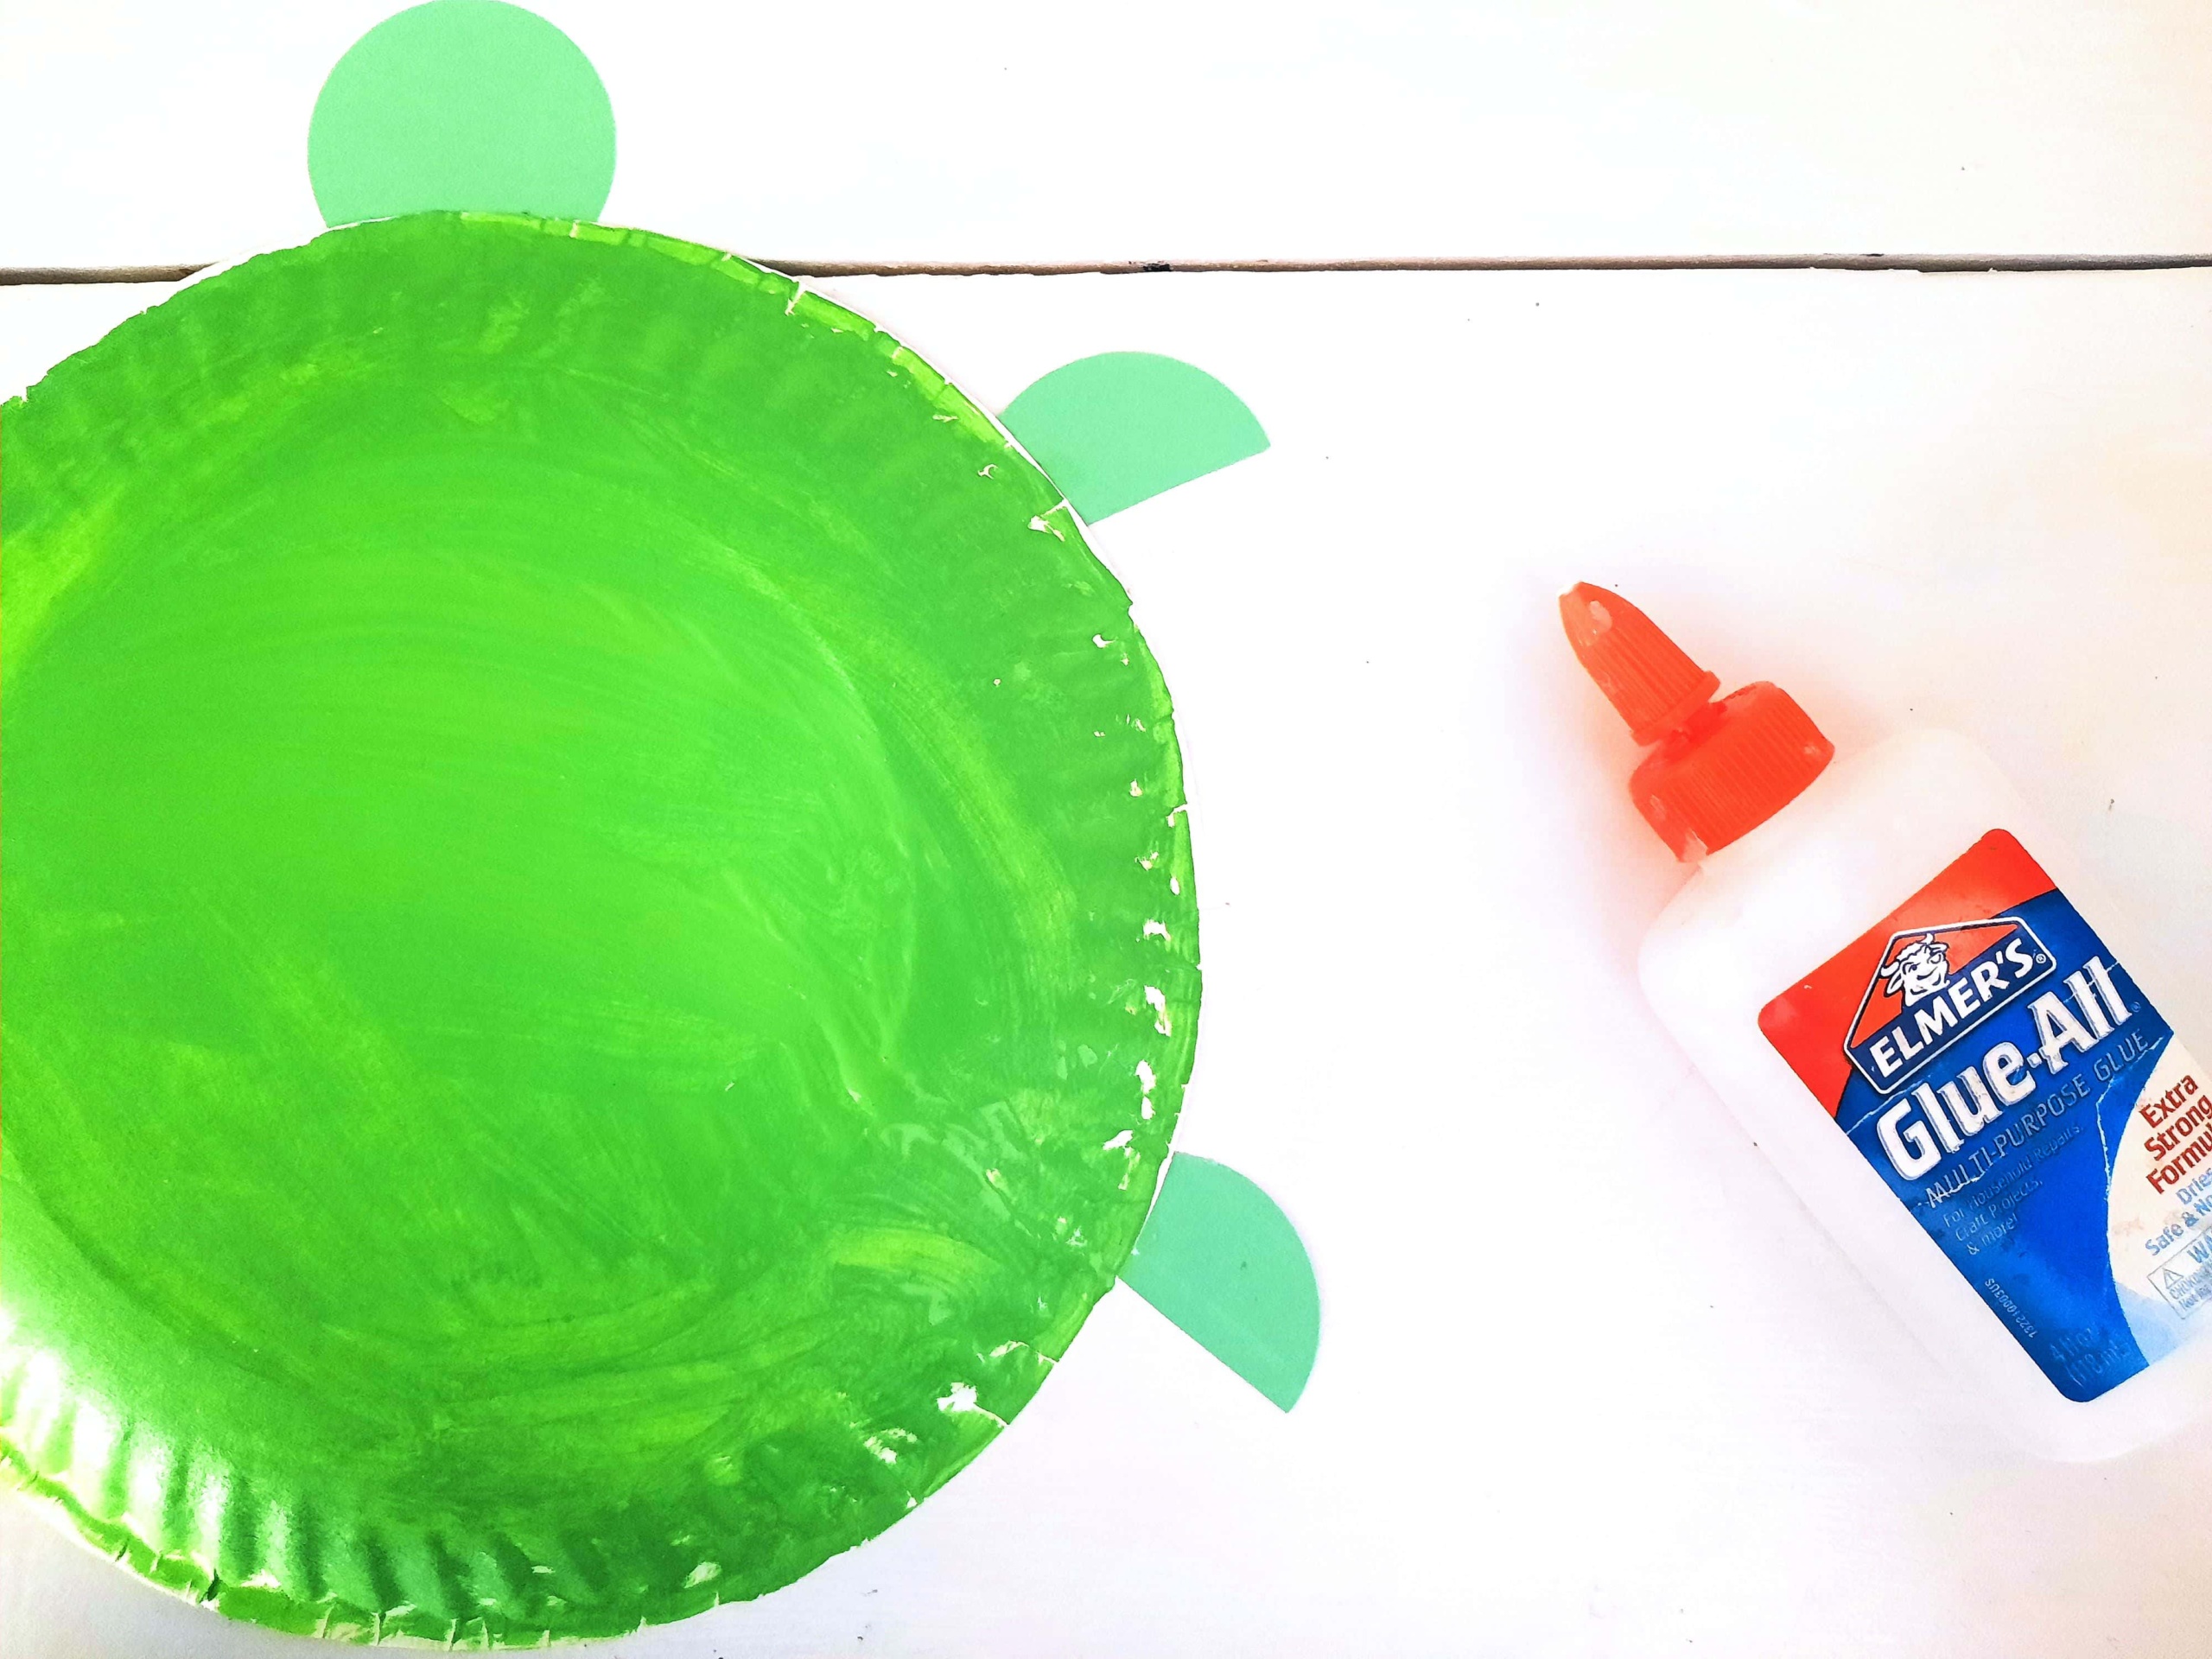
- Glue the full circle to the top of paper plate, and then glue the half circles on the sides as arms and legs.
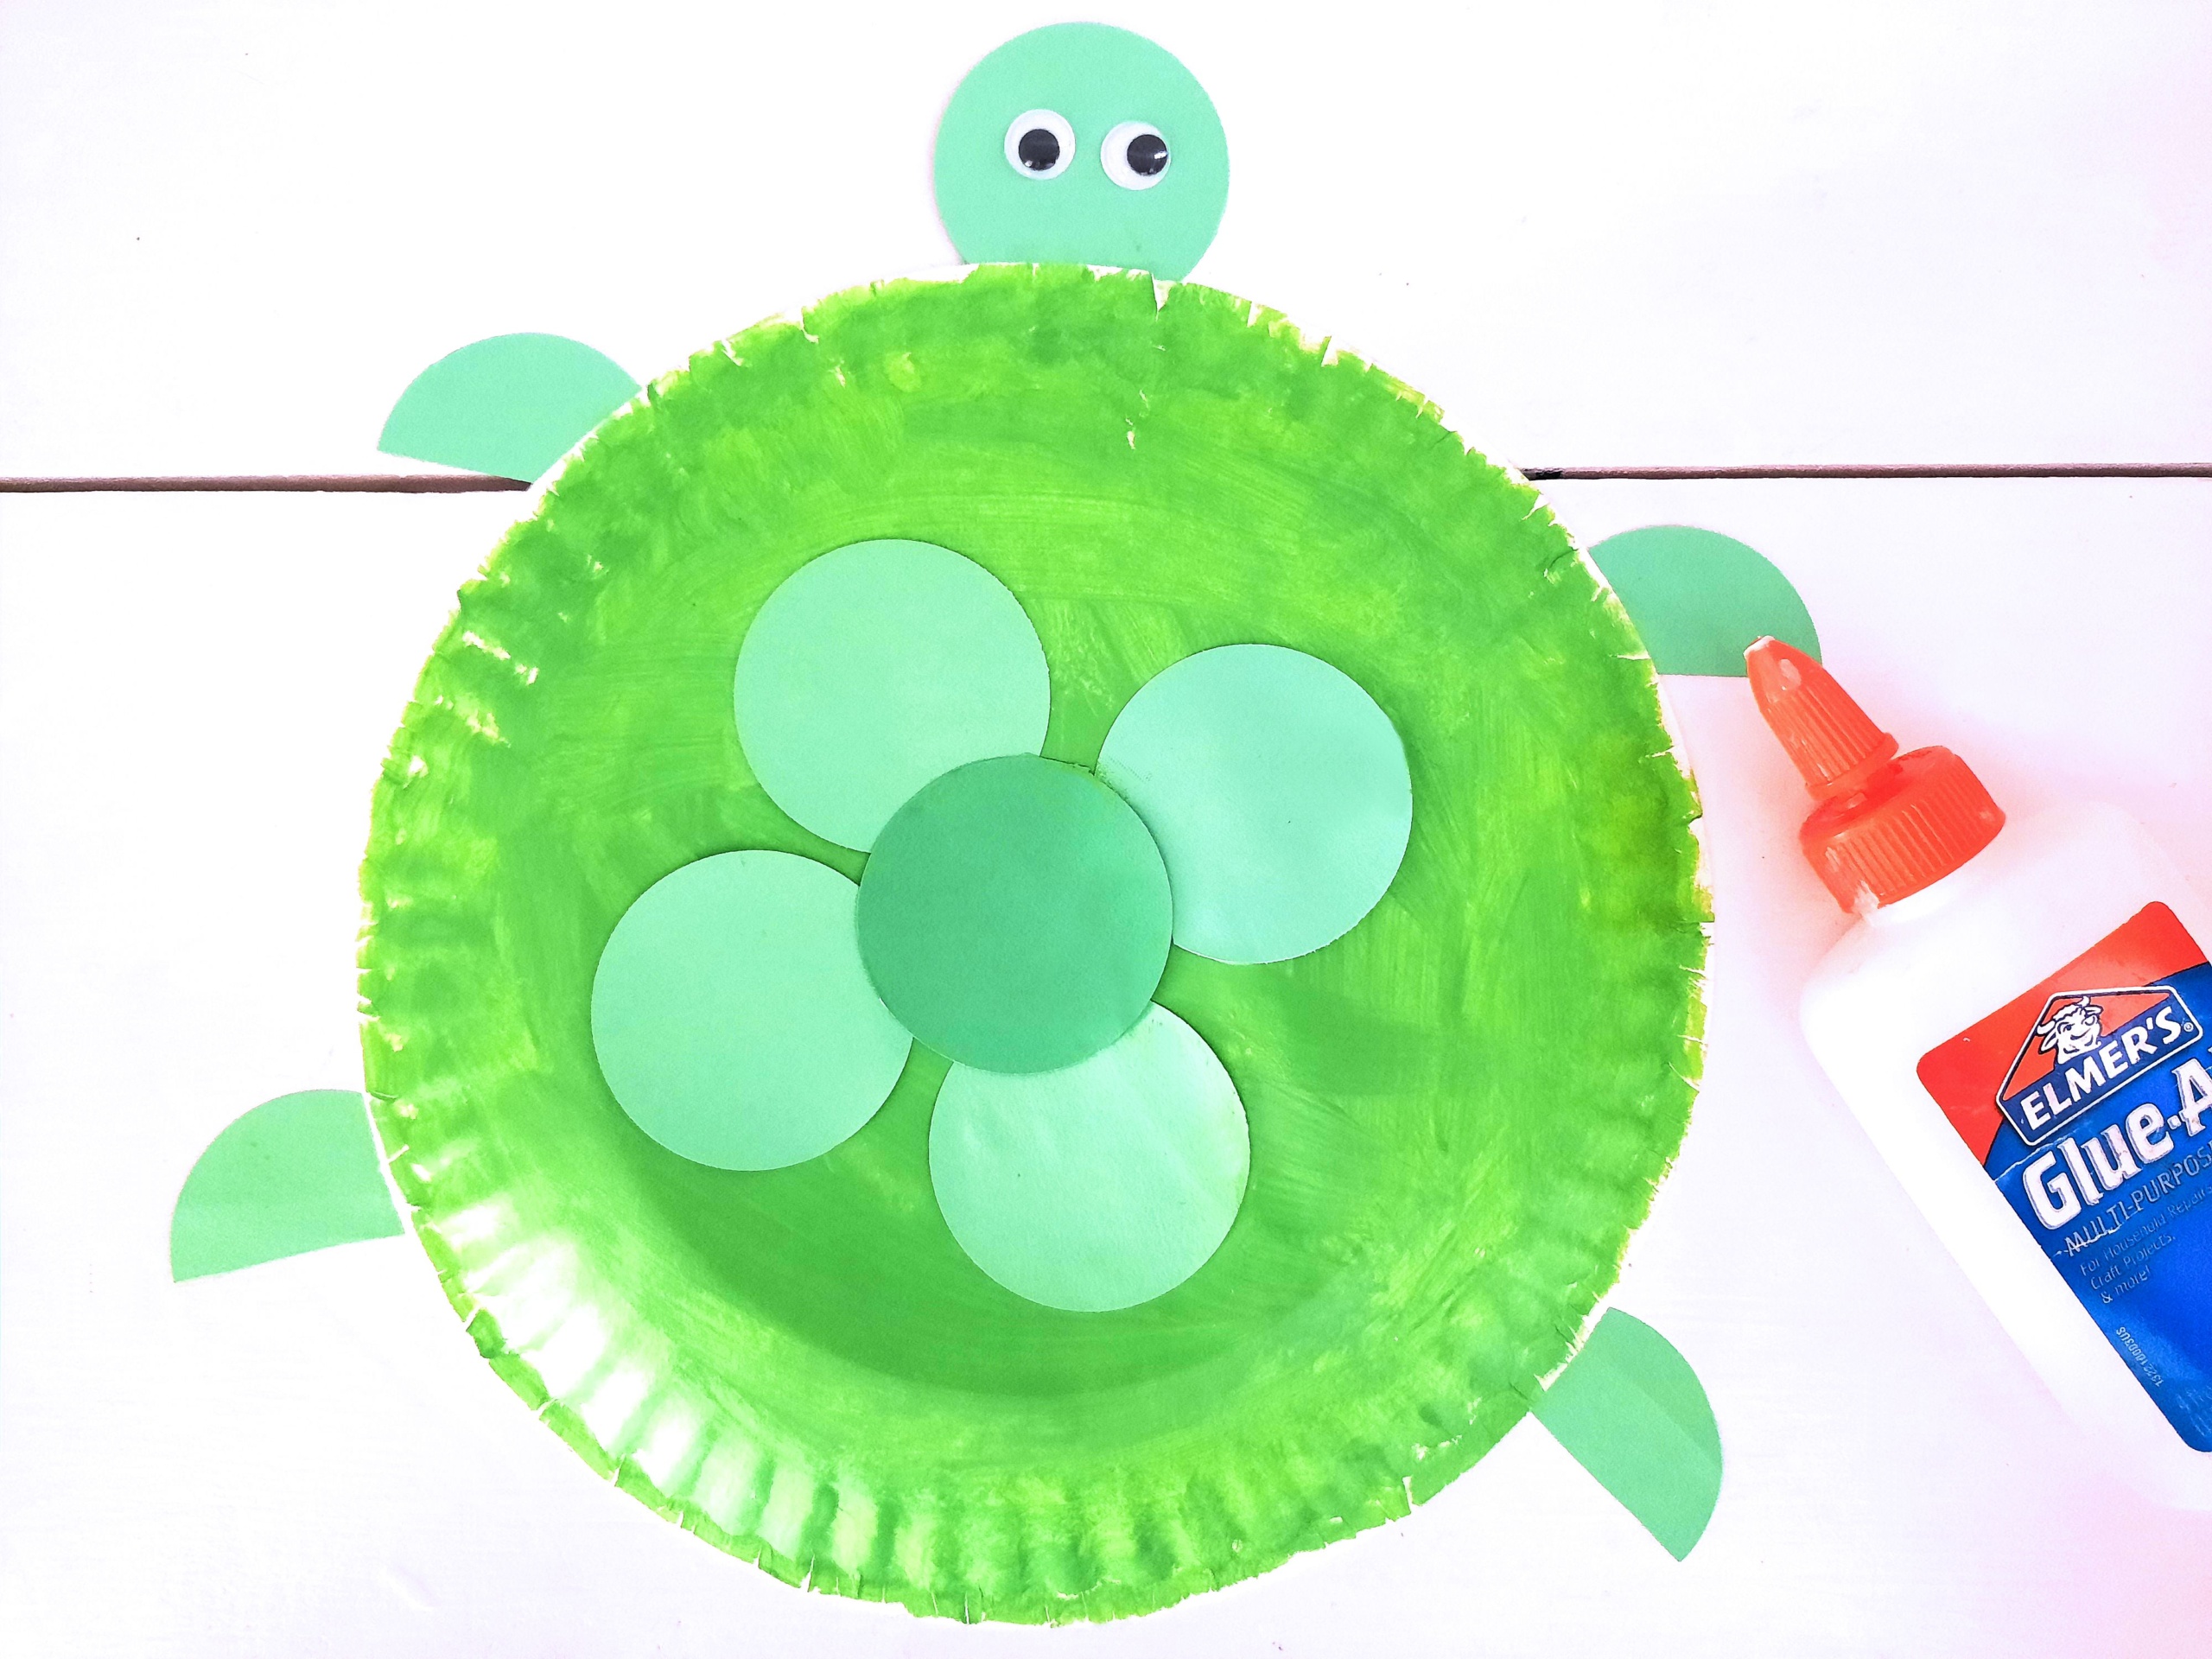
- Add googly eyes onto the head of the turtle. Then, glue the remaining circles on top of the paper plate in whatever pattern you like! This will create a turtle shell pattern.
- Allow the glue to completely dry and then your paper turtle craft is ready to go!


Can I use green plates?
You can absolutely grab green plates from the party section of your local grocery store. However, check to see if the back of the plate is green and not just the front. Many party plates are only colored on the front, so buying green plates may not save you any time.
Pro Tips for the Best Paper Plate Turtle
- While the paint is wet, sprinkle green glitter onto the plate! Once dry, shake off any excess glitter and you’ve got a glittery turtle friend!
- Instead of placing circles on top of the “shell”, you can free hand a shell pattern with a permanent marker. It’ll give a more realistic look too!
- Use a deep dish paper plate to give a more raised and tall look to the turtle shell.

I can’t wait to see your reptile friends! Grab these supplies and make a super cute paper plate turtle for a craft time full of fun.
More Paper Plate Crafts You’ll Love
- There are so many uses for paper plates, and this Paper Plate Fork Fireworks craft is one of my favorites!
- Looking for some more summer fun crafts? Then check out this adorable Paper Plate Sunflower Craft.
- Make more under the sea fun with this Rainbow Fish Craft.
- Do your kids love to be a part of New Years Eve celebrations? Have them make this Paper Plate New Years Eve Noisemaker for some extra fun!
- This Paper Plate Chick is the perfect easy Easter craft.
Paper Plate Turtle Craft
Ingredients
Instructions
- Begin by painting the back of a paper plate green, so that the turtle ends up with a rounded shell. Let the paint dry completely.
- While the paint dries, punch some large circles out of the green cardstock. You will need 3 total for the head, arms, and legs as well as some for the shell.
- Now, take 3 green circles. Leave one intact and cut the other two in half.
- Glue the full circle to the top of the paper plate.
- Then, glue the half circles around the plate for arms and legs.
- Add googly eyes.
- Finally, glue the remainder of the circles onto the paper plate shell in a pattern of your choice.
Notes
- While the paint is wet, sprinkle green glitter onto the plate! Once dry, shake off any excess glitter and you've got a glittery turtle friend!
- Instead of placing circles on top of the "shell", you can free hand a shell pattern with a permanent marker. It'll give a more realistic look too!
- Use a deep dish paper plate to give a more raised and tall look to the turtle shell.