Paper Plate Scarecrow
Turn a paper plate into a cute scarecrow! This adorable Plate Plate Scarecrow is an easy, approachable kids craft for fall. They will have so much fun creating and decorating their very own scarecrow.

Oh, the joys of a silly little scarecrow! These fun fall themed characters are so cute. They may not “have a brain” but they sure do have the most adorable and joyful little face. This simple paper plate scarecrow is really easy to make and great to keep the kiddos occupied during fall break and Thanksgiving break. You can use this in a classroom setting to!
If you need an even simpler craft for pre-school aged kids, then check out my fall tree pom pom painting. But keep in mind, you can pre-paint the plates and pre-cut all of the pieces for this scarecrow craft for kids a bit easier to put together. Turn this cutie craft into an easy DIY decoration and let your kids proudly proclaim that they made this all by themselves! Those are truly the best memories.
Why You’ll Love this Scarecrow Paper Plate Craft
- This craft only requires affordable supplies that you can reuse on plenty of other super fun crafts. Your wallet will thank you.
- Cutting, painting, pasting, and drawing are all activities that help refine fine motor skills. Your kids will have so much fun creating a master piece that they won’t even realize they’re working on their motor skills!
- Crafts like this are a great way to let kids use their creativity and imagination. Think of these instructions as the basic blueprint, but feel free to add anything you want to make your scarecrow unique and special!

Supplies Needed to Make a Paper Plate Scarecrow
- Scarecrow Hat Template – Use this to trace and cut out your hat pieces.
- Cardstock – I used brown cardstock as the main base for the scarecrow hat, but you can use any color. You can also use any color you want as the hat band on your scarecrow!
- Paper plate – A cheap plain white paper plate will work perfect in this paper plate scarecrow craft!
- Acrylic paint – Grab a skin tone colored acrylic paint and use it to paint the paper plate face of your scarecrow.
- Paintbrush – Use mall to medium sized craft paint brush, or even a foam paint brush, to paint the paper plate.
- Googly eyes – Large googly eyes are the perfect proportions for the paper plate and cardstock scarecrow hat.
- Scissors – If littles want to cut out their own shapes, they can use safety scissors! Both safety and regular scissors will do the trick.
- Black marker – Feel free to use a permanent black marker or a washable black marker.
- Glue stick – Grab a school glue stick to easily attach all of the pieces to your scarecrow.


How to Make a Paper Plate Scarecrow
- Cover your workspace and then begin by painting a paper plate with tan acrylic craft paint. Let the paint dry completely.
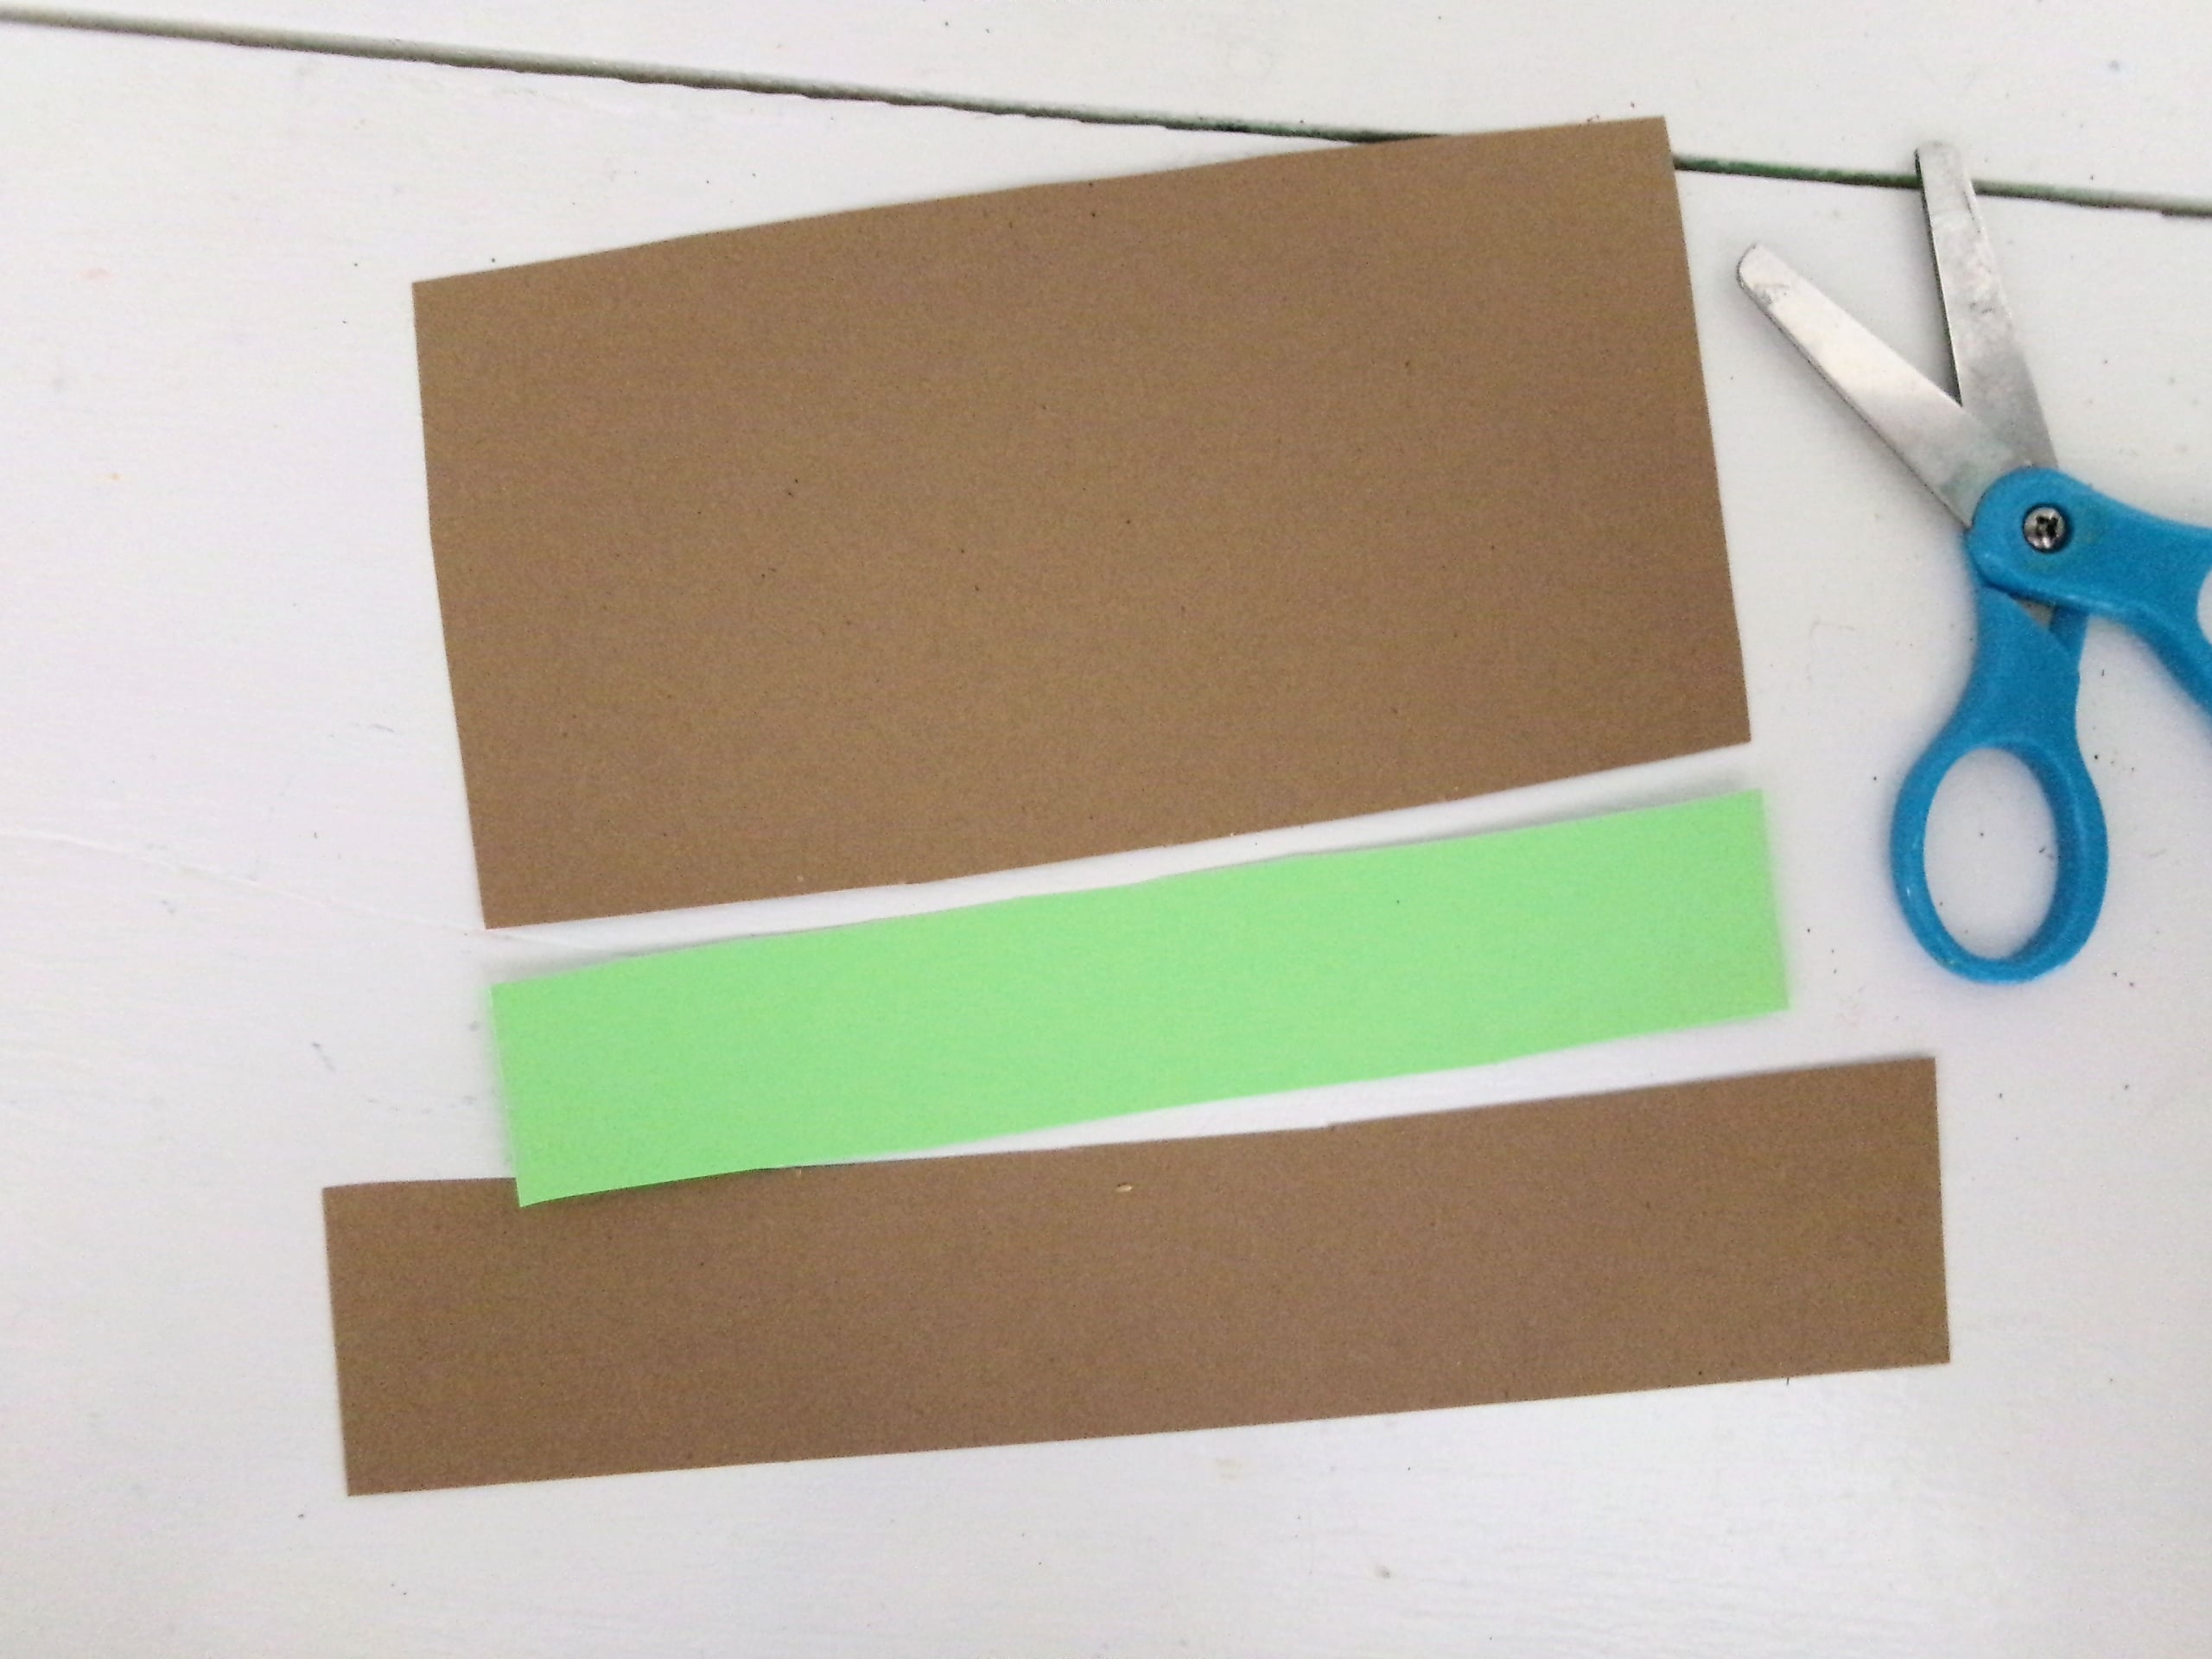
- While the paint dries, print out the template for the hat. Trace the longer and larger rectangles onto brown cardstock and cut them out.
- Then trace the smaller rectangle onto your choice of cardstock and cut.
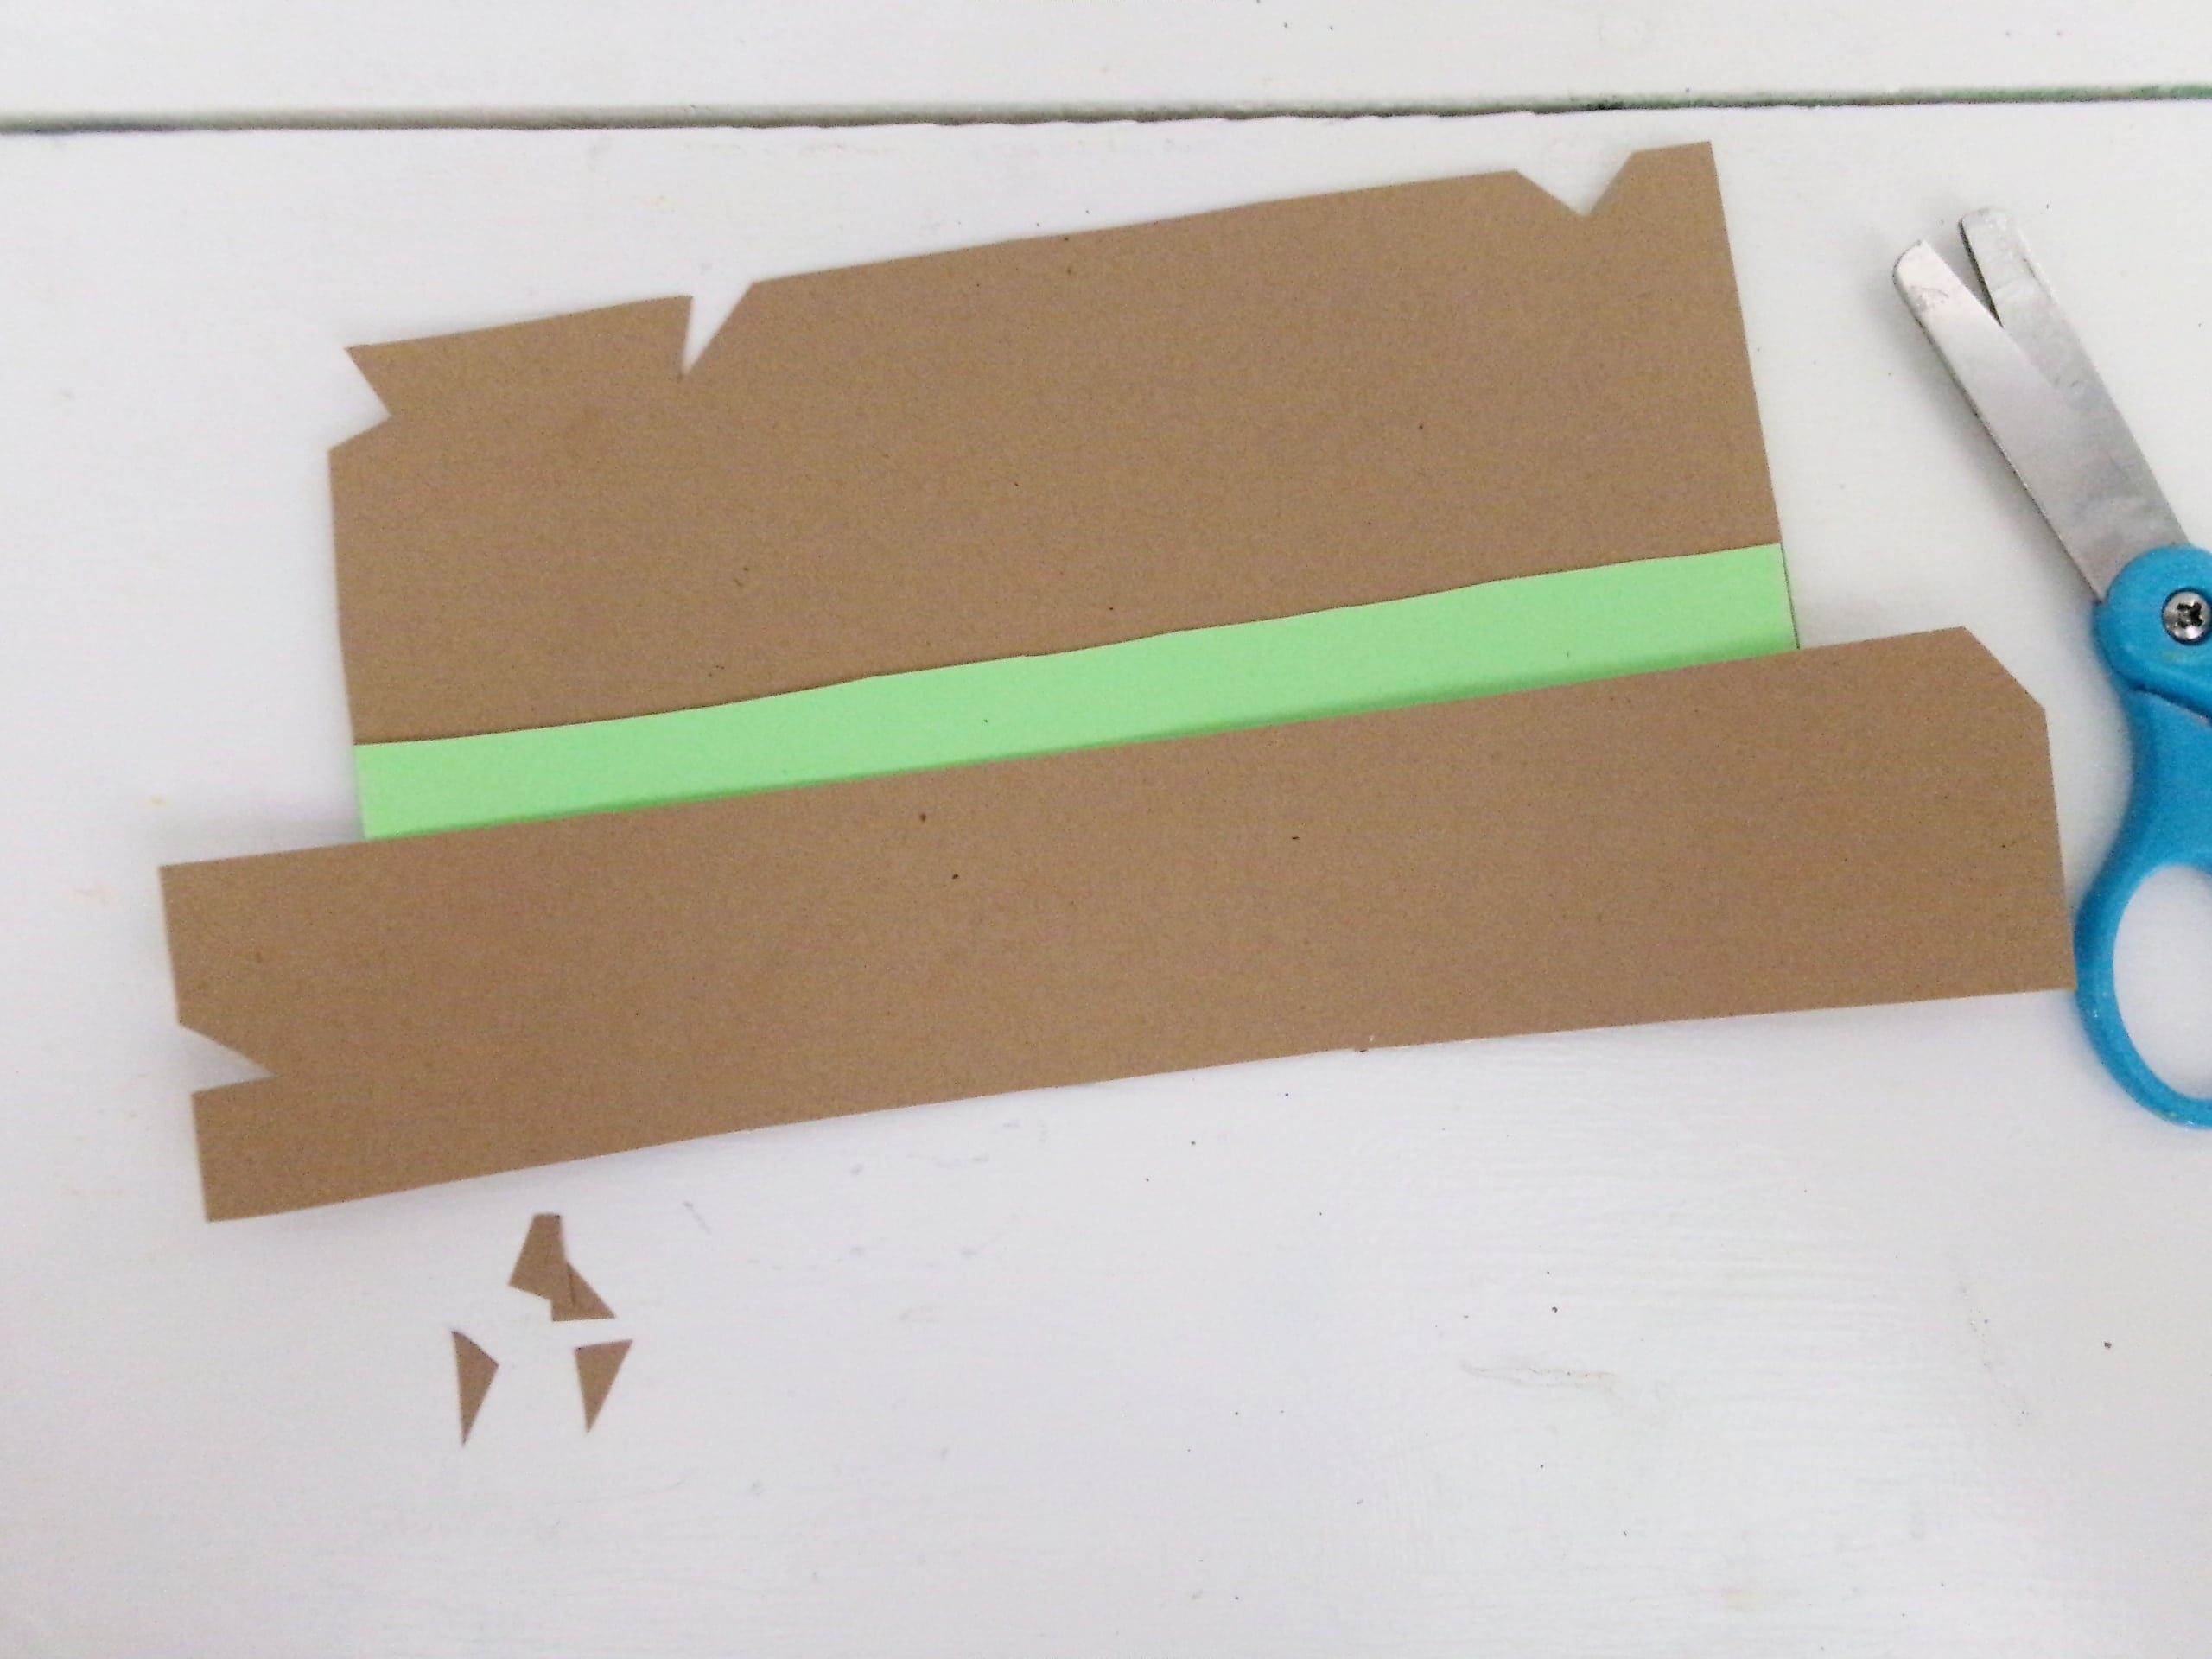
- Glue the colored band onto the larger rectangle, then glue the long rectangle onto the bottom of the hat.
- Use your scissors and make some notches on the edges of the hat to make it look tattered and old. You can also use a black marker to make a few crosshatch marks on the hat.
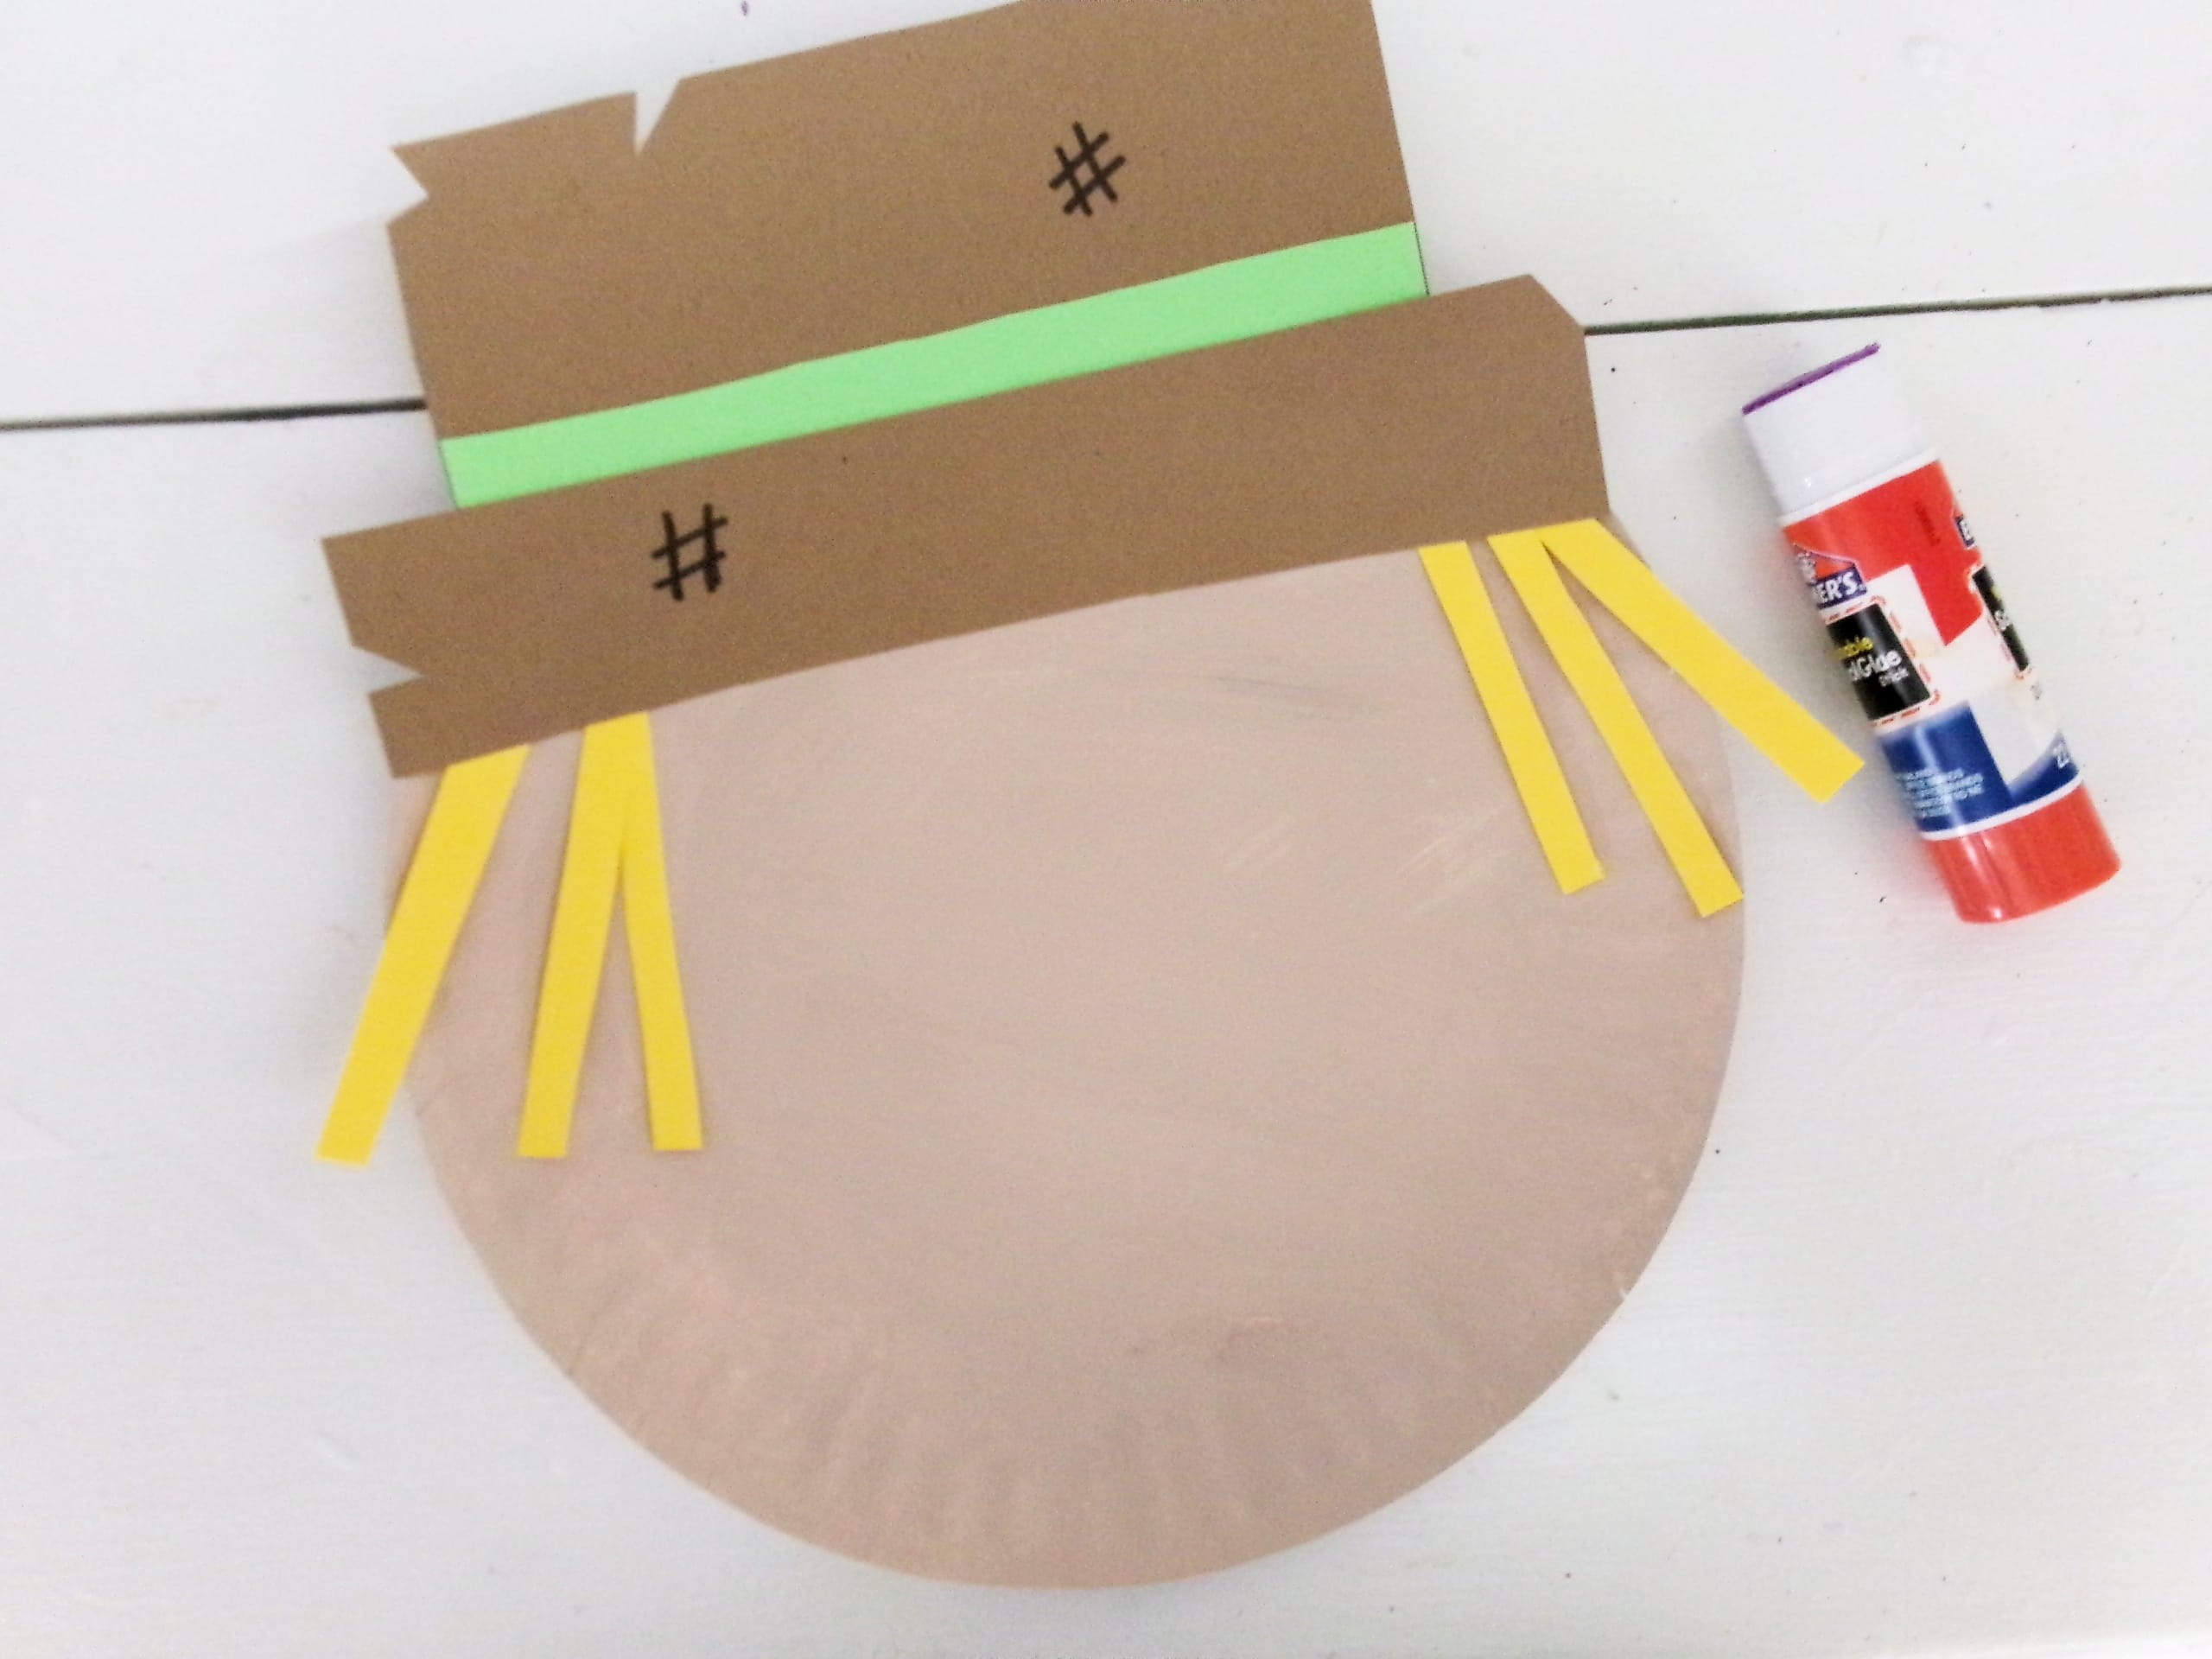
- Then, cut six thin strips out of yellow cardstock and cut a small triangle to use as a nose.
- Glue three of the yellow strips onto the back of each side of the hat to mimic straw-like strands of hair.
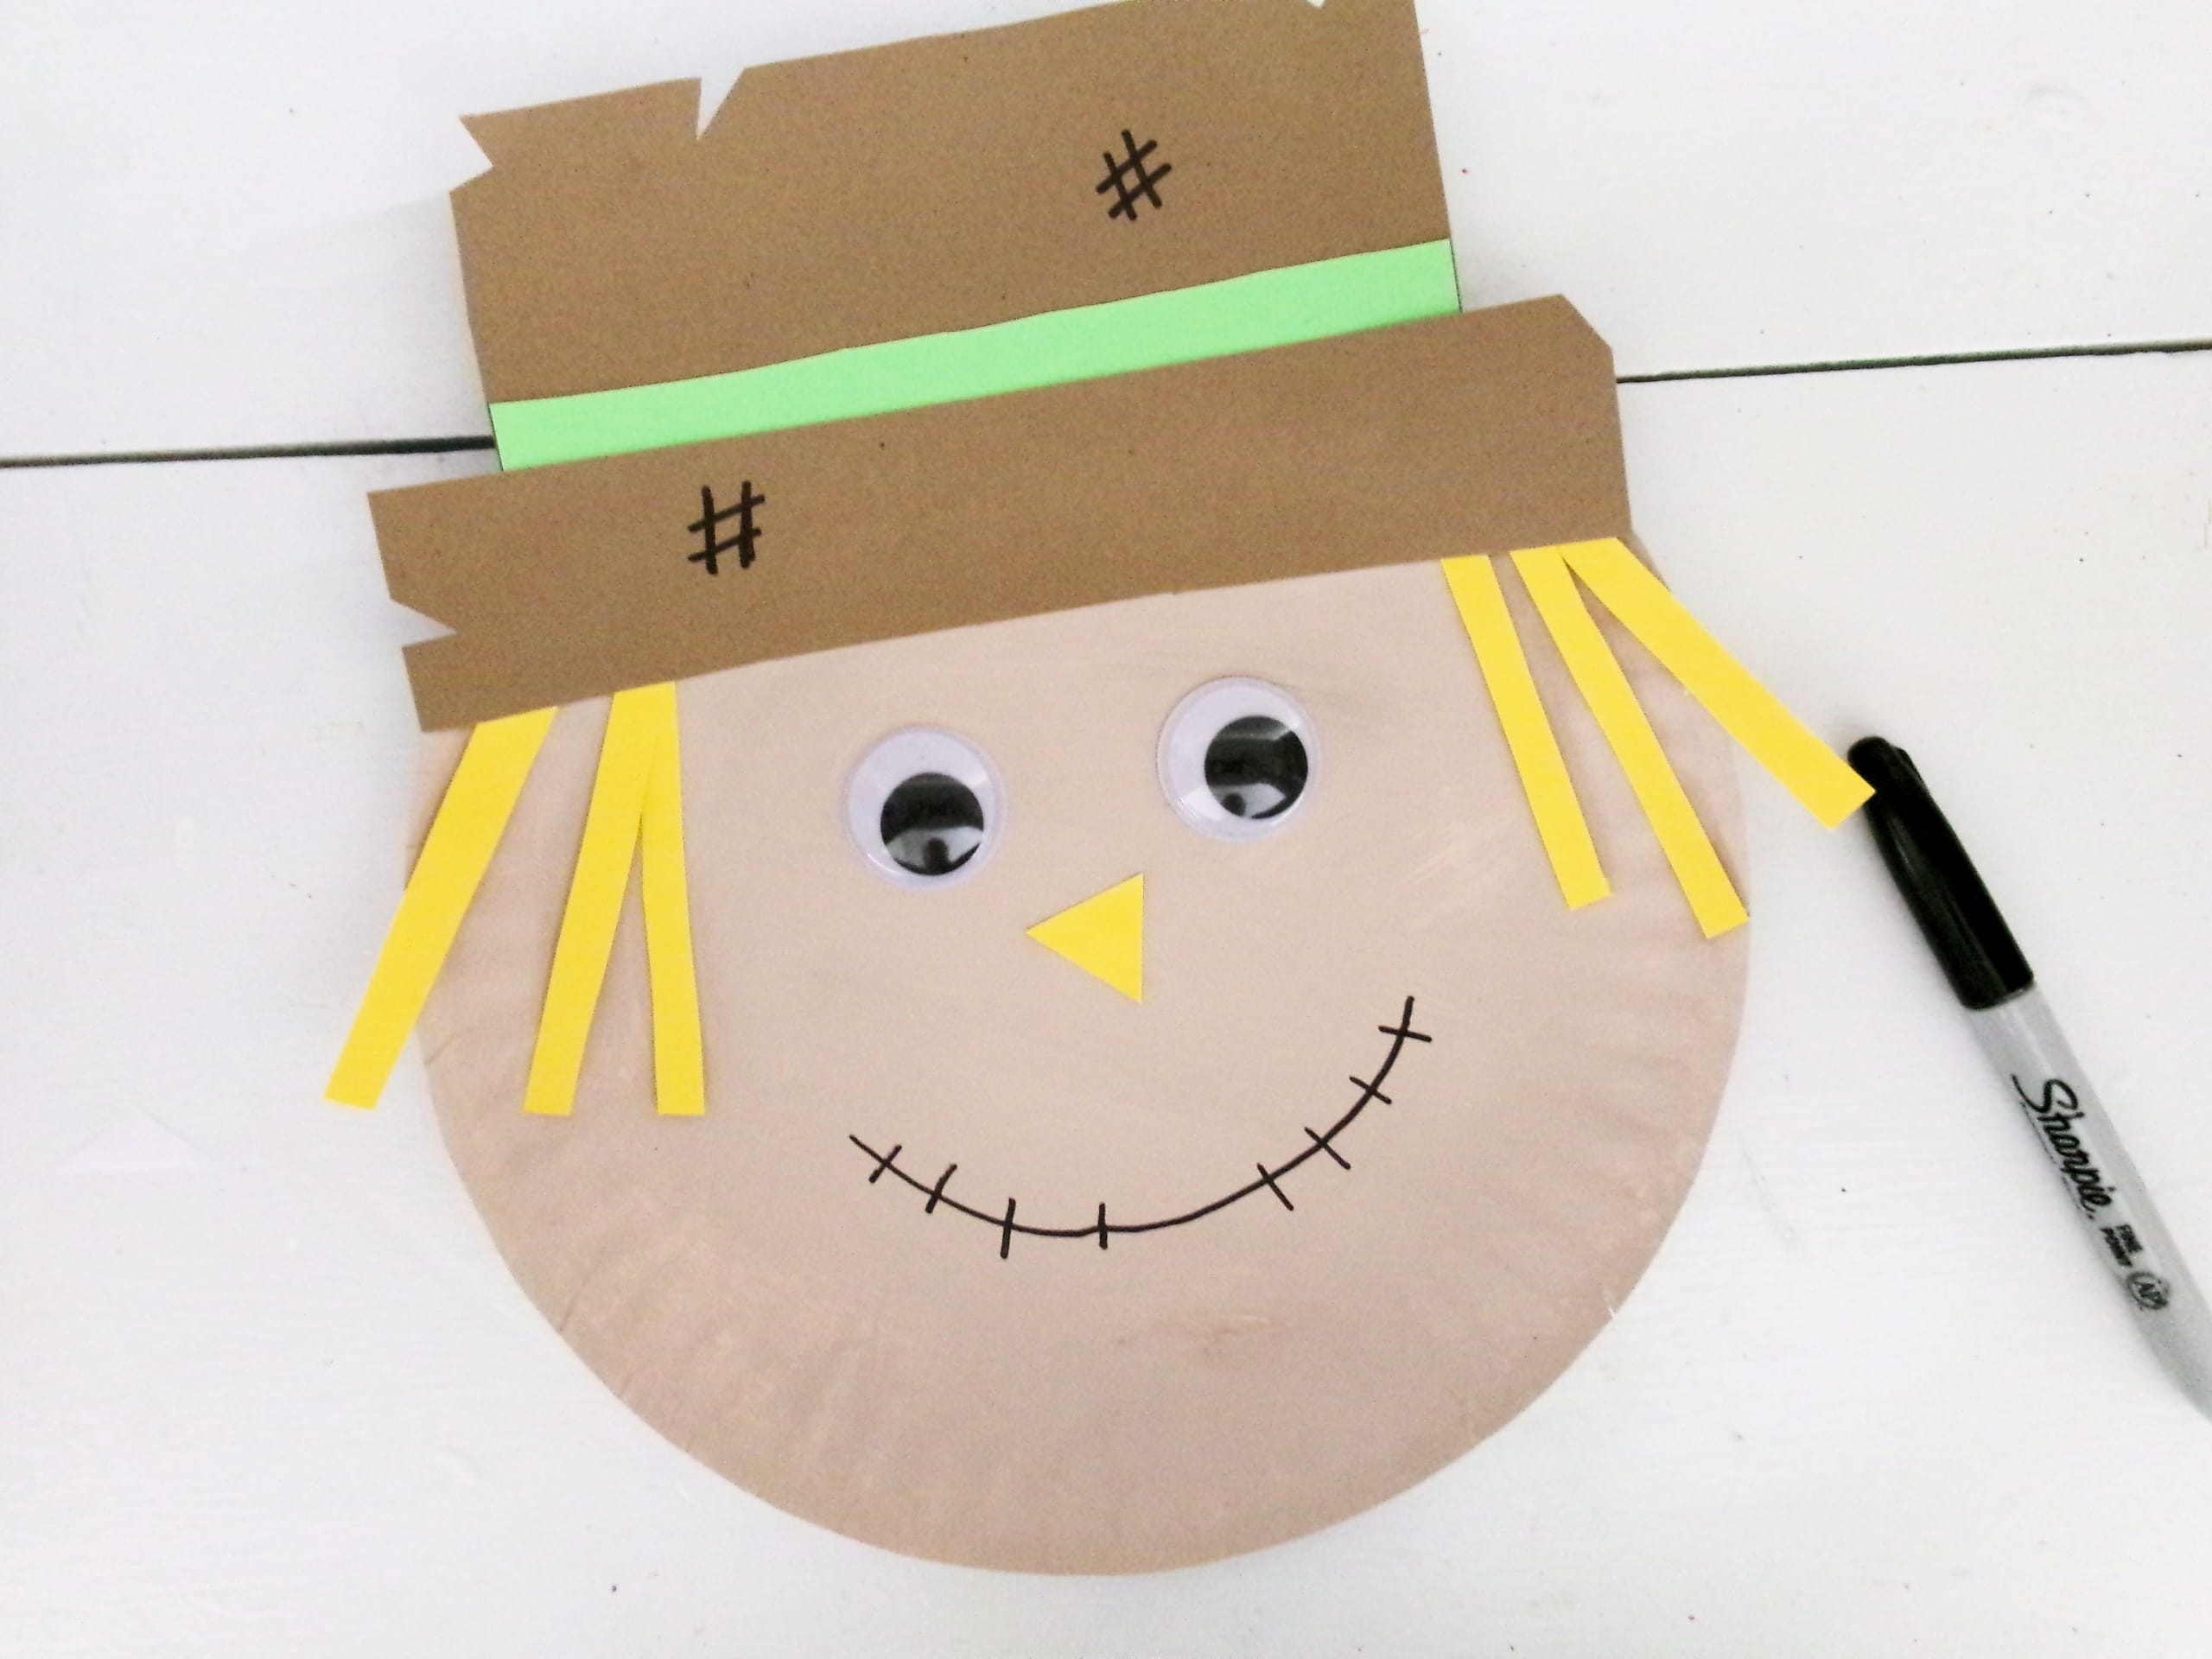
- After the painted plate is completely dry, glue the hat to the top of the plate. Add googly eyes and then glue the previously cut triangle nose below the eyes.
- Finally, use the black marker to make a smile for your scarecrow. Then your scarecrow is ready to go!


What substitutions and additions can I make to my paper plate scarecrow?
Feel free to use a strand of pretty ribbon as the hat band instead of cardstock to give a little extra texture and style to your scarecrow! If you don’t have brown card stock for the hat, you can use a brown paper bag and even some thin cardboard.
You can use real straw for the hair instead of cutting strands out of paper! A button nose would also be quite adorable for this scarecrow.
Pro Tips!
- Speed up the process of making this paper plate scarecrow craft by purchasing beige paper plates from the party section of your grocery store!
- Turn this into a paper plate puppet by gluing a large stick or paint stirrer to the back of the plate.
- Making this craft in a large group setting? Write each child’s name on the back of the plate so everyone can keep track of their scarecrow friend!

This adorable little friend will make your fall activities extra fun! Display him proudly after your hard work is complete!
More Fall Crafts You’ll Love
- This Pine Cone Painted Fall Tree Craft is a great art activity for younger children. Exercise that creative muscle!
- Combine your nature walks and craft time with this Fall Leaf Pom Pom Painting.
- Make a DIY Bird Feeder for all of the birds as the weather begins to get more chilly!
- Want more scarecrow friends? Check out this popsicle stick Scarecrow Craft.

Paper Plate Scarecrow
Ingredients
- Scarecrow Hat Template
- Paper plates
- Tan paint
- Cardstock – brown yellow, color of choice
- Googly eyes large
- Black marker
- Scissors
- Glue stick
Instructions
- Begin by painting a paper plate tan. Or, you can do what we did and mix a cream color with brown. Let the paint dry completely.
- While the paint is drying, print the hat template. Trace the longer and larger rectangles on brown cardstock and cut out. Trace the smaller rectangle band on the color cardstock of your choice and cut out.
- Glue the band to the bottom of the larger rectangle.
- Then, glue on the brim of the hat.
- Now, you can use your scissors to make some notches around the hat, as if it’s torn up and tattered.
- Also, use a black marker to make some crosshatch marks randomly around the hat.
- Next, cut some thin strips out of yellow cardstock. You will need 6 of these. You will also need to cut a small triangle from the yellow cardstock.
- Glue 3 of the yellow strips to each side of the back of the hat.
- When the paint on the paper plate is fully dry, glue the hat to the top of the plate.
- Add googly eyes. Glue on the triangle for a nose, as well.
- Finally, use the black marker to make a simple mouth for the scarecrow.
Notes
- Speed up the process of making this paper plate scarecrow craft by purchasing beige paper plates from the party section of your grocery store!
- Turn this into a paper plate puppet by gluing a large stick or paint stirrer to the back of the plate.
- Making this craft in a large group setting? Write each child’s name on the back of the plate so everyone can keep track of their scarecrow friend!