Paper Plate Pumpkin Craft
Get into the fall spirit with this easy paper plate pumpkin craft! This simple project is perfect for kids of all ages. Let your child create a unique and personalized pumpkin using their favorite colors and decorations. Hang your finished pumpkins for a festive touch to your home.
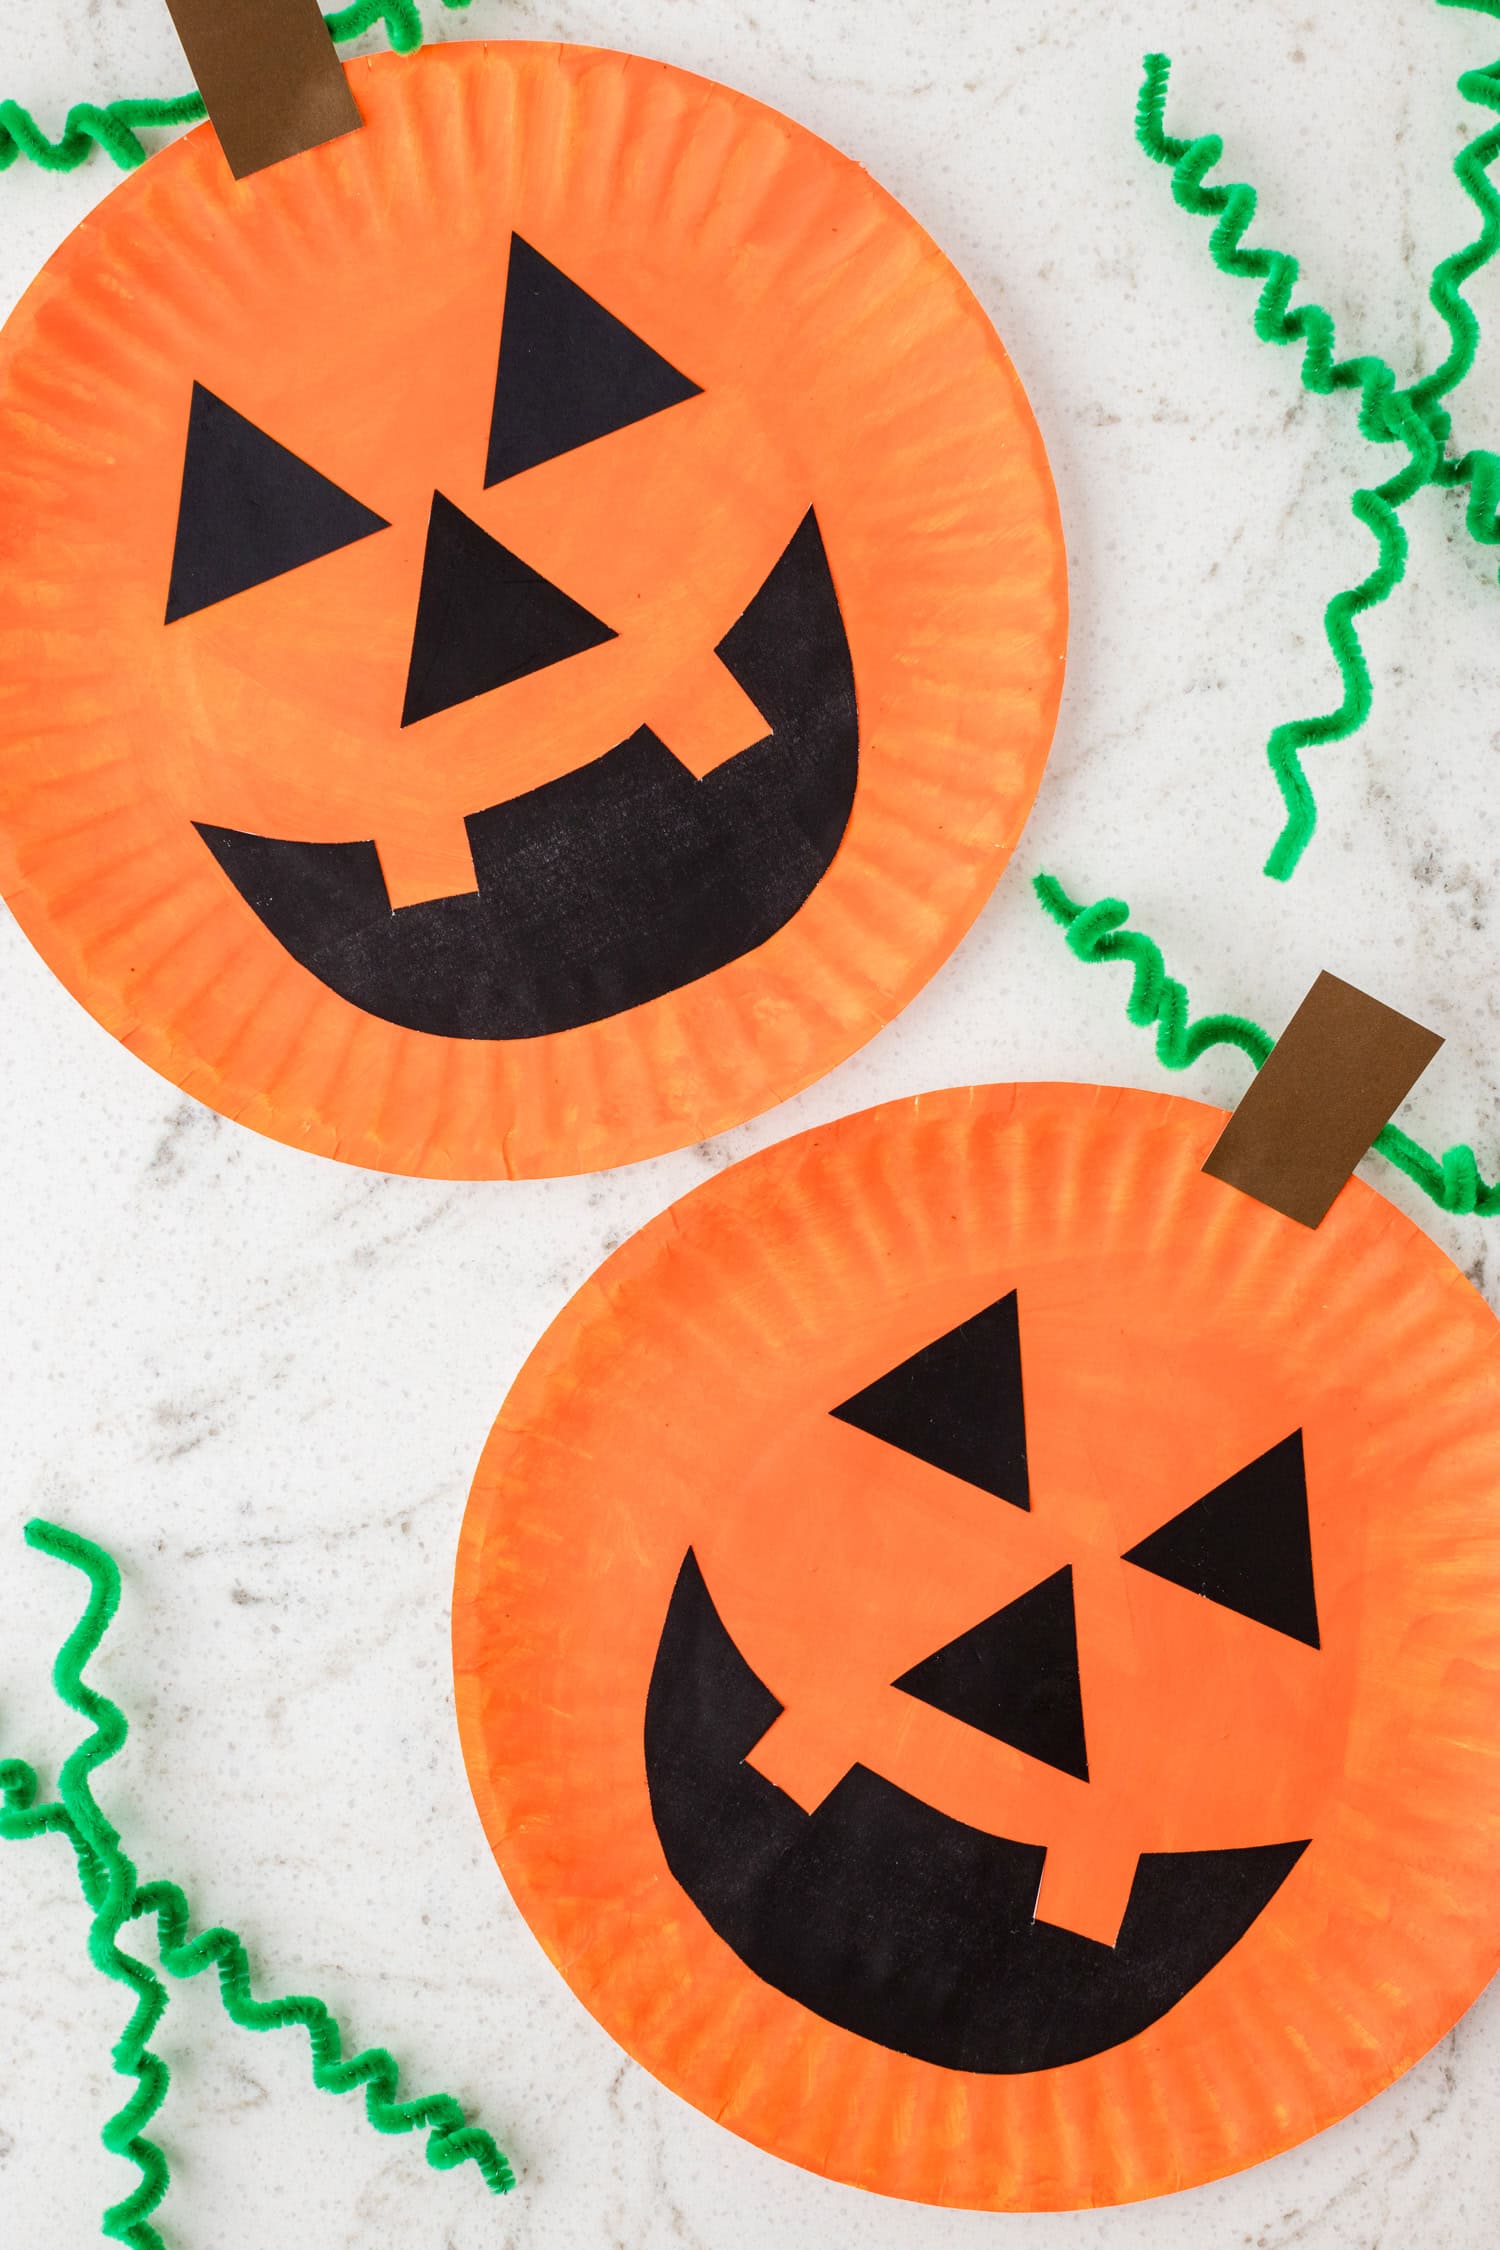
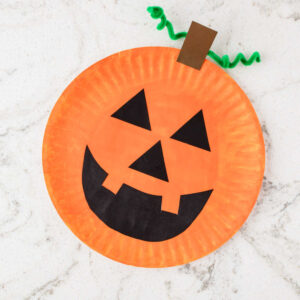
Ready to turn an ordinary paper plate into the cutest jack o lantern ever? This super easy paper plate pumpkin craft is so much fun! It’s the perfect craft for kids of all ages and makes for the most adorable Halloween fun. Paper plate crafts are so easy too. It’s why I have loads of them, like my paper plate octopus and paper plate scarecrow, and this cutie paper plate pumpkin.
Whether you need a fun craft to fill your kids’ time during fall break, or you simple want cute fall inspired craft time ideas, you’ll love this activity! Just grab you craft supply bin, make sure you’ve got some orange paint, and you’re ready to go. You can make this not-so-spooky jack o lantern in no time at all!
Why You’ll Love this Paper Plate Pumpkin Craft
- Painting, cutting and glueing are all great activities that help to refine fine motor skills. It’s way more fun to practice these skills during craft time, am I right?!
- This Halloween paper plate craft is super affordable. Most of the materials come in bulk — which means you can keep any leftovers on hand and make tons of different crafts with them later on.
- Make your pumpkin in just 20 minutes. The perfect craft for short attention spans or craft times where you have a limited amount of time to work with.

Supplies Needed
- White paper plate – A cheap white paper plate is all you need to be these base of this adorable paper plate pumpkin craft.
- Craft paint – You will need orange acrylic craft paint to paint the paper plate. It’ll turn it into a beautiful pumpkin color!
- Foam paintbrush – Use a simple foam paintbrush to paint an even layer of orange onto your paper plate.
- Construction paper – Black and brown construction paper will be used to create the face and stem for your little jack o lantern friend.
- Template for eyes – If you don’t have a printer, then you can free hand the shapes for the nose, mouth, and stem. But this pumpkin face template really makes things extra easy!
- Pencil – You’ll need a pencil or pen to trace all of the pumpkin face parts in the template.
- Scissors – If you are working with little kids, make sure you grab some safety scissors to protect those little fingers.
- Glue stick – A simple school glue stick is all you need to attach each of the little decorations that you cut out.
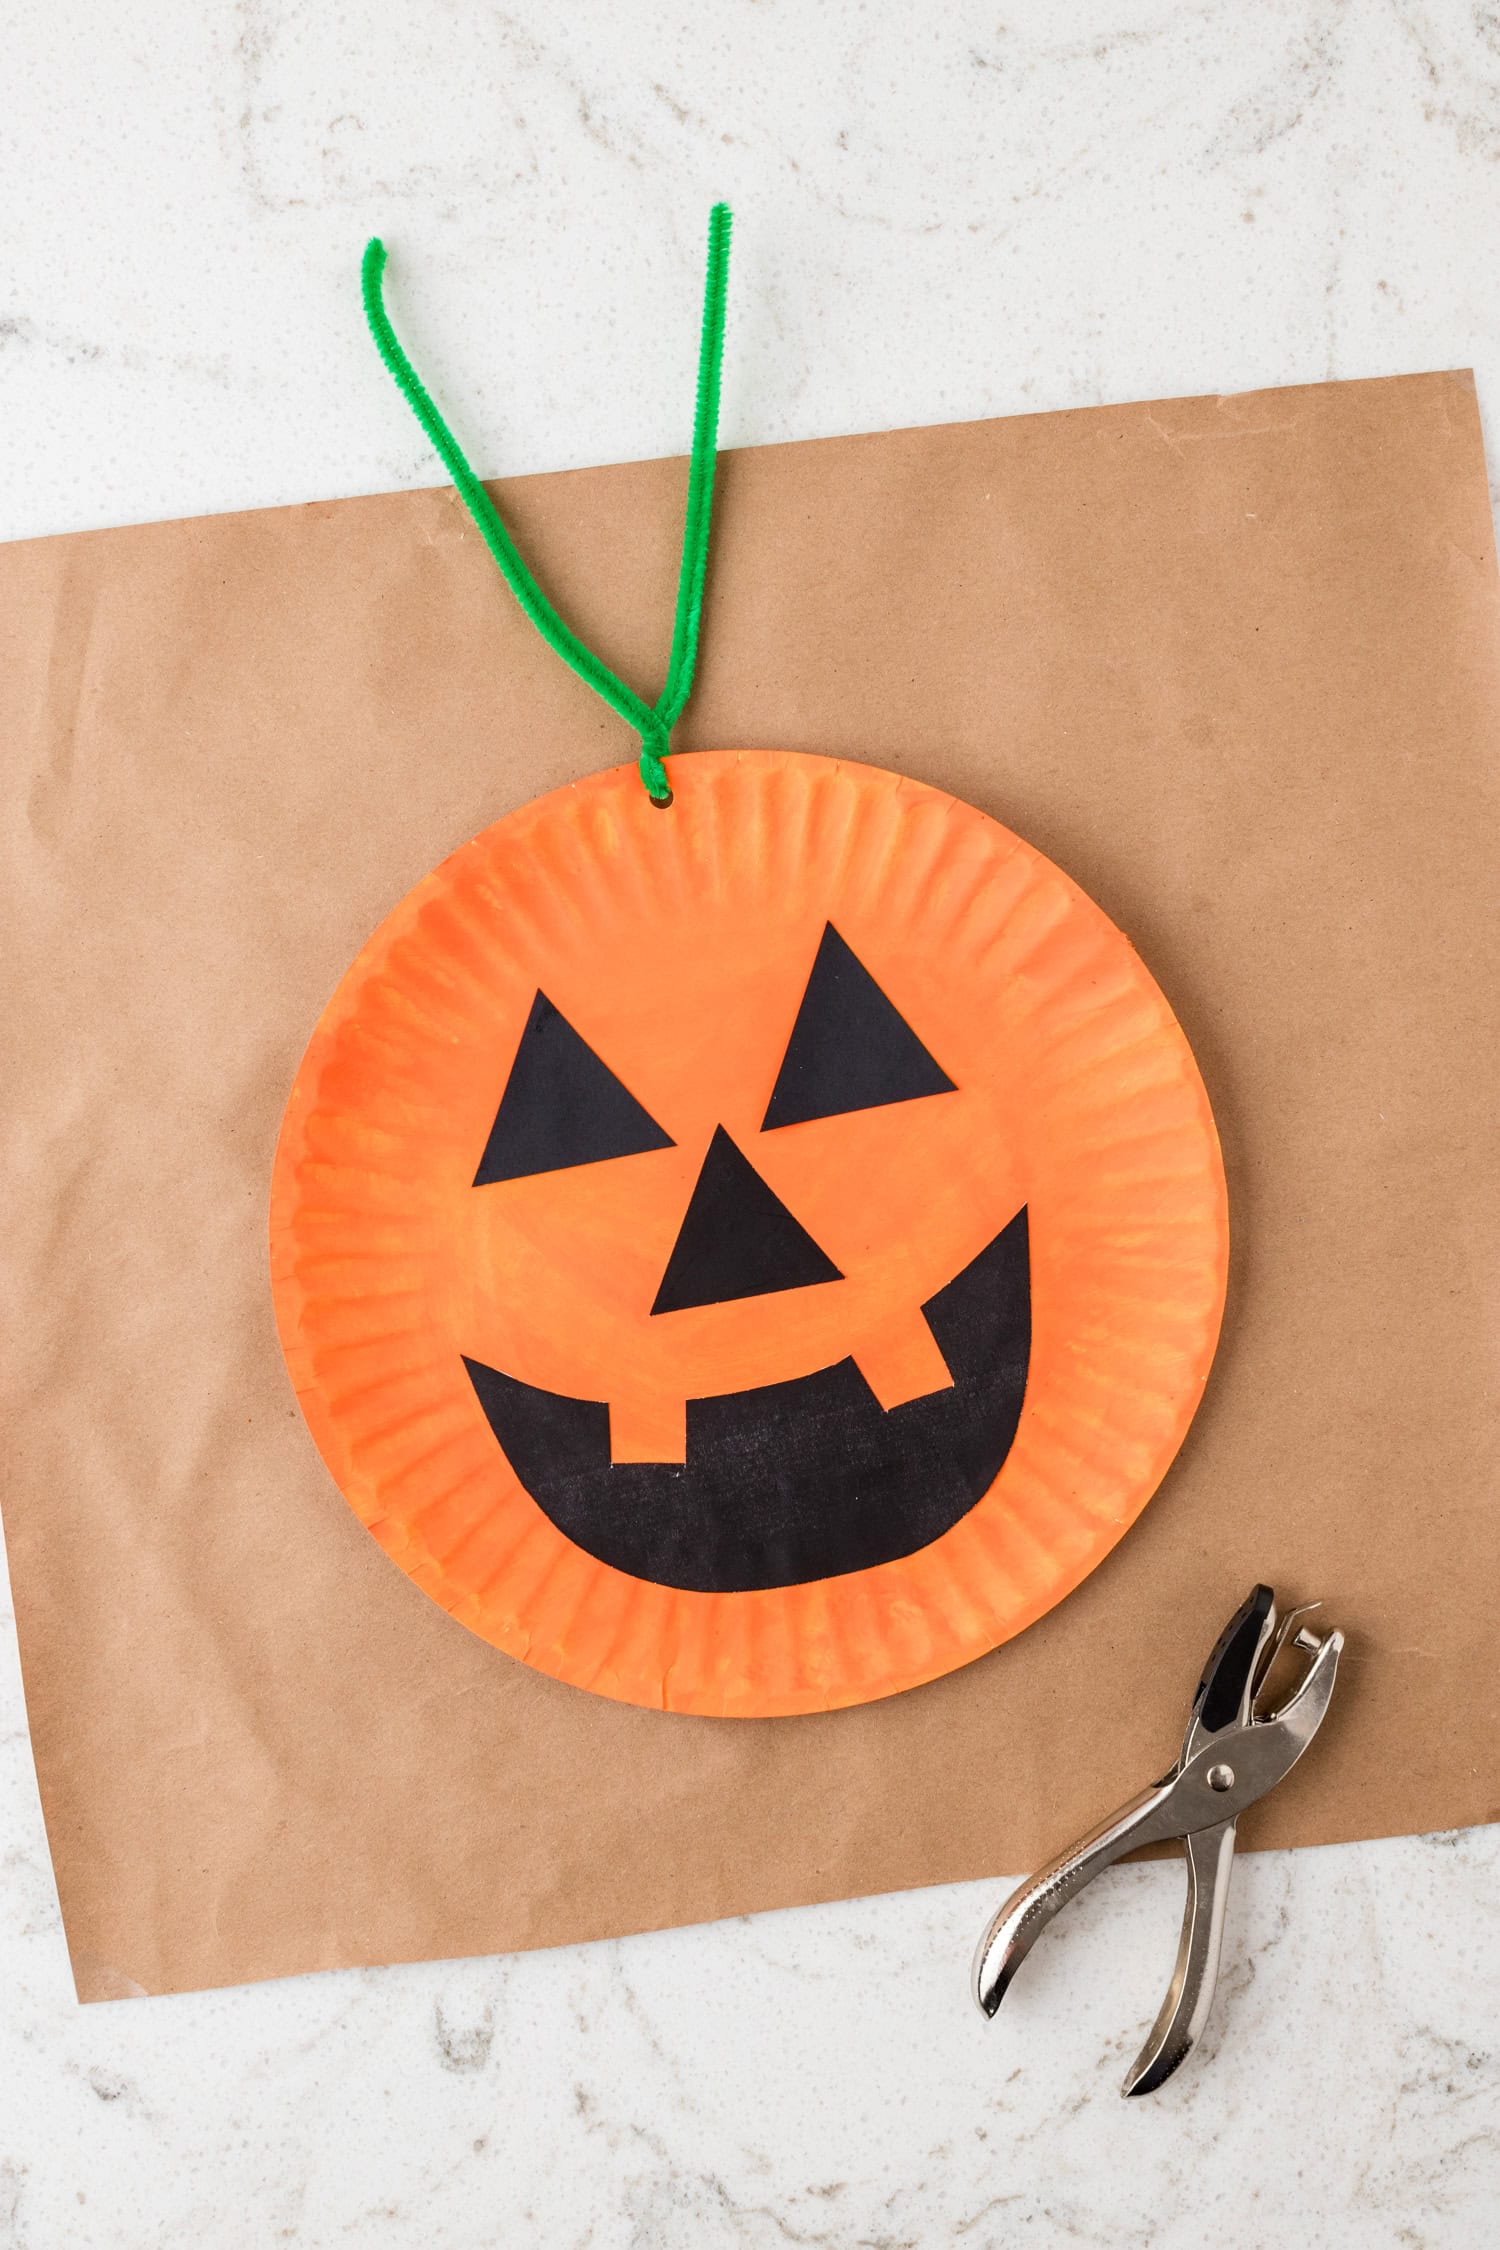
- Hole punch – Grab a single hole punch to use at the top of the pumpkin paper plate craft. You’ll thread a pipe cleaner through it to make the green vine.
- Green pipe cleaners – Green craft pipe cleaners will become the cute little vine on top of your paper plate jack o lantern.
How to Make a Paper Plate Pumpkin
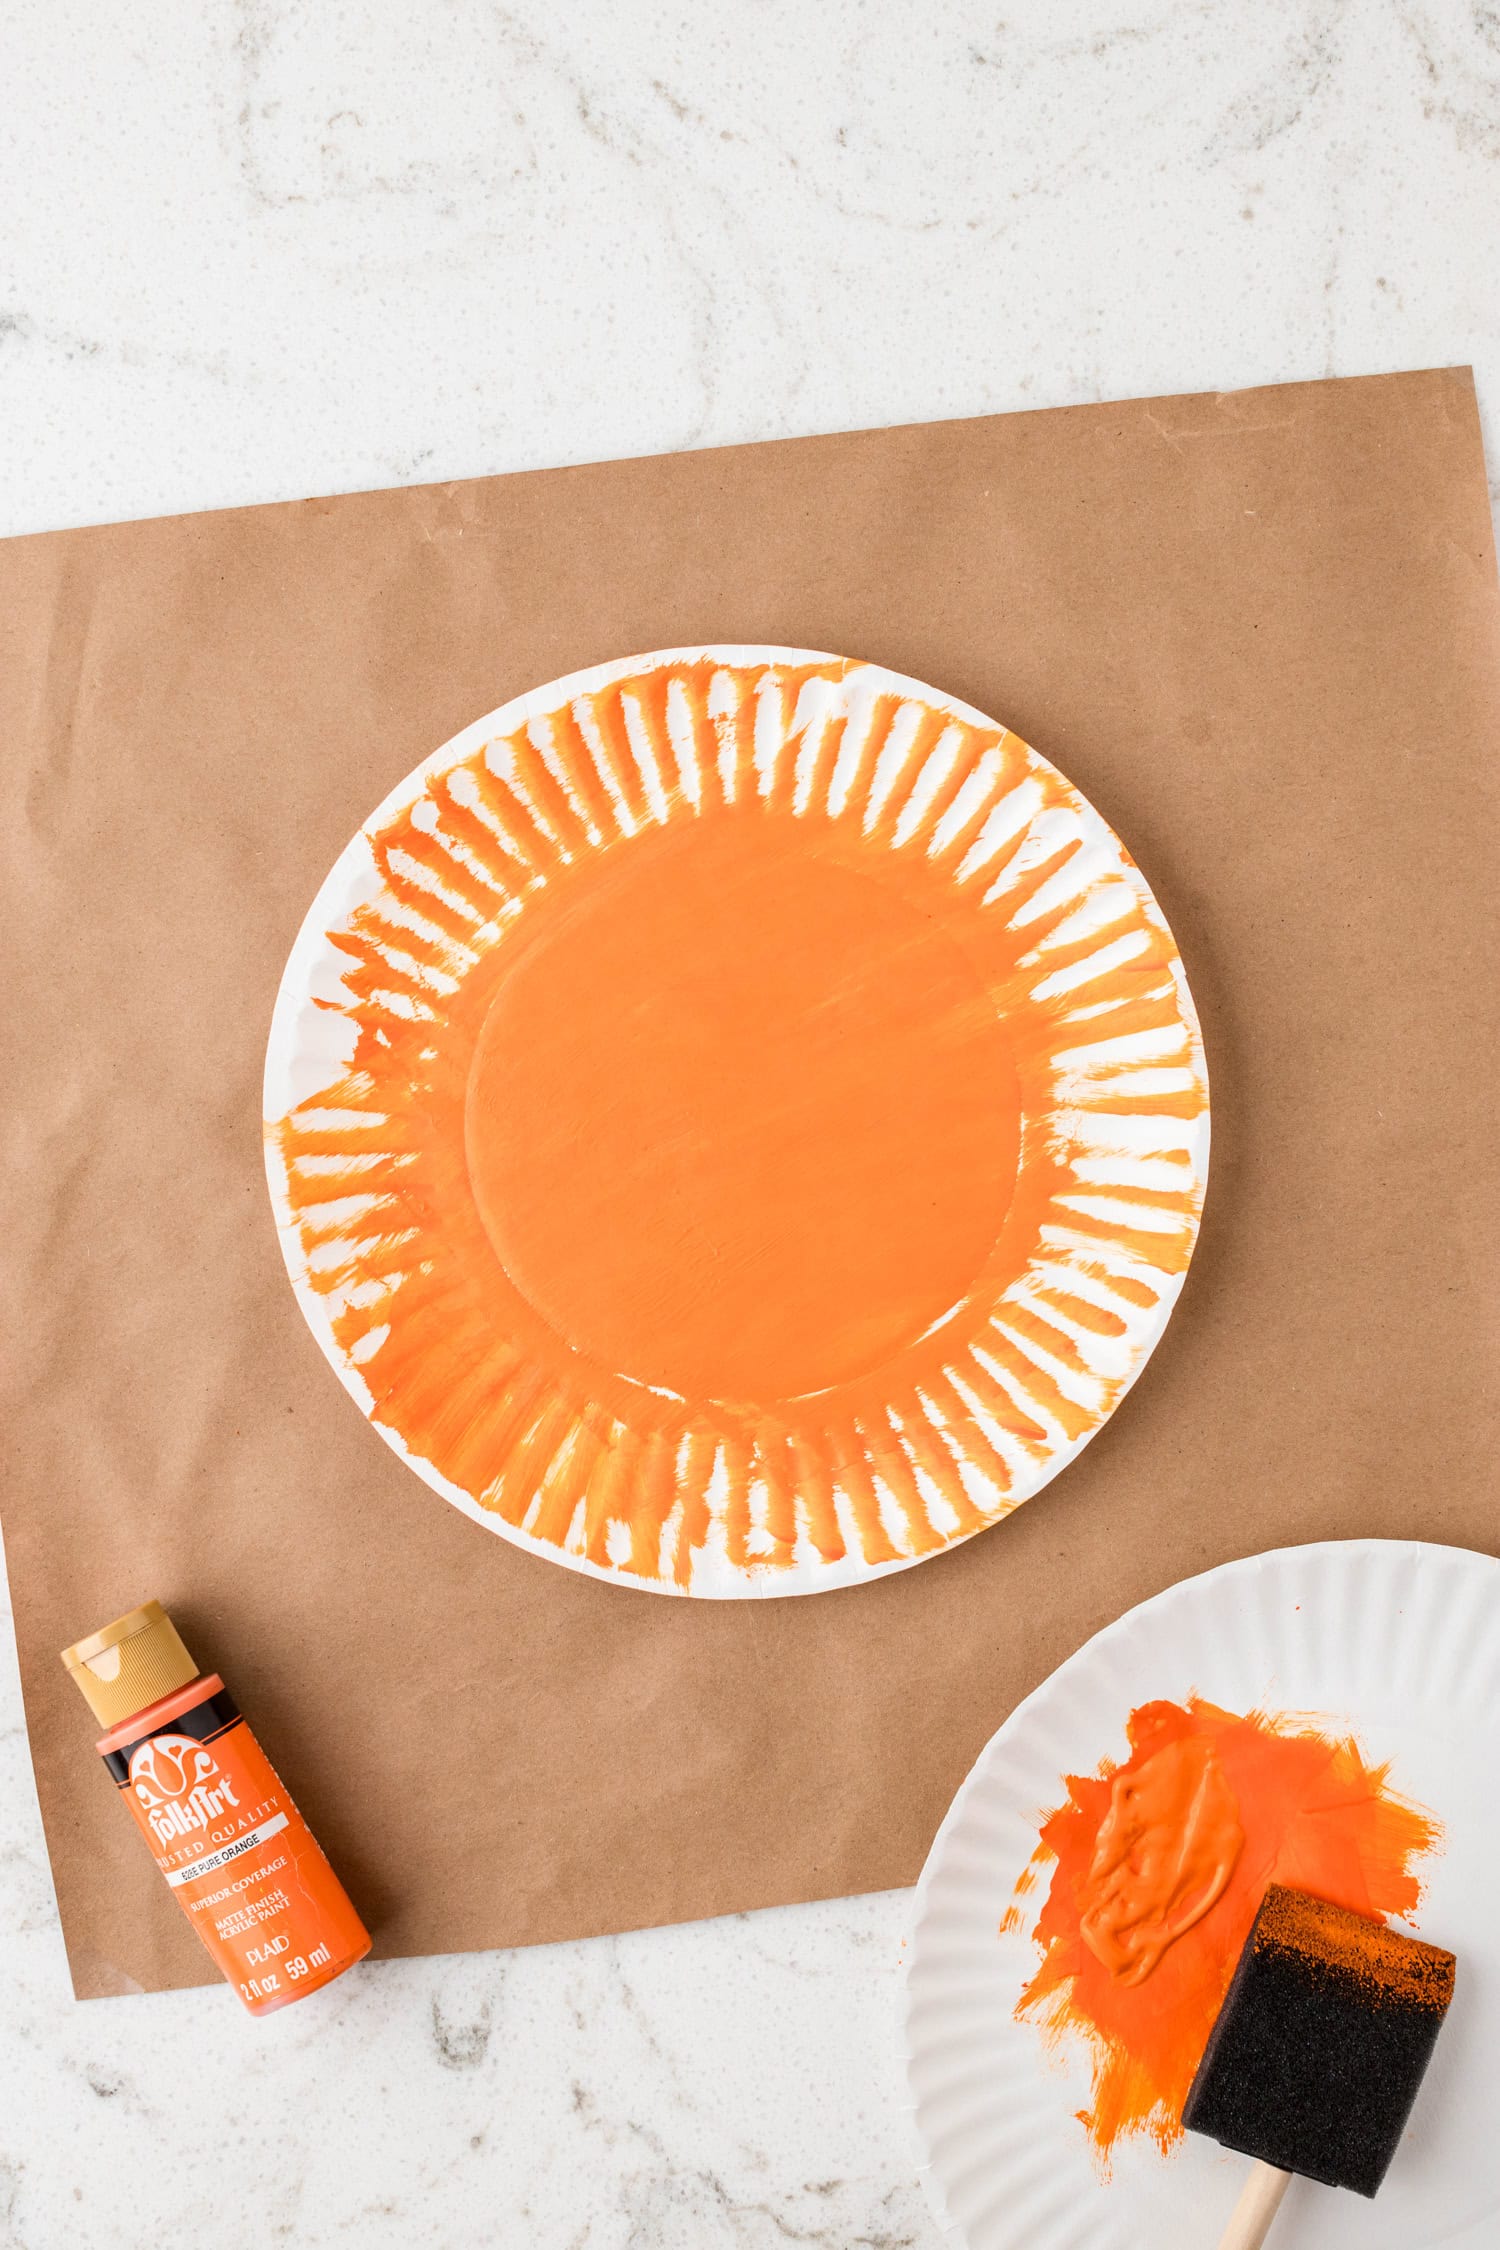
Start by covering your work surface with craft paper or a disposable tablecloth to protect it from spills. Grab a white paper plate to use as the base for your pumpkin.
Paint the entire front of the plate orange using the orange acrylic paint and a foam craft brush. Allow it to dry completely before moving on to the next step. It should take about 10 minutes for the paint to dry.
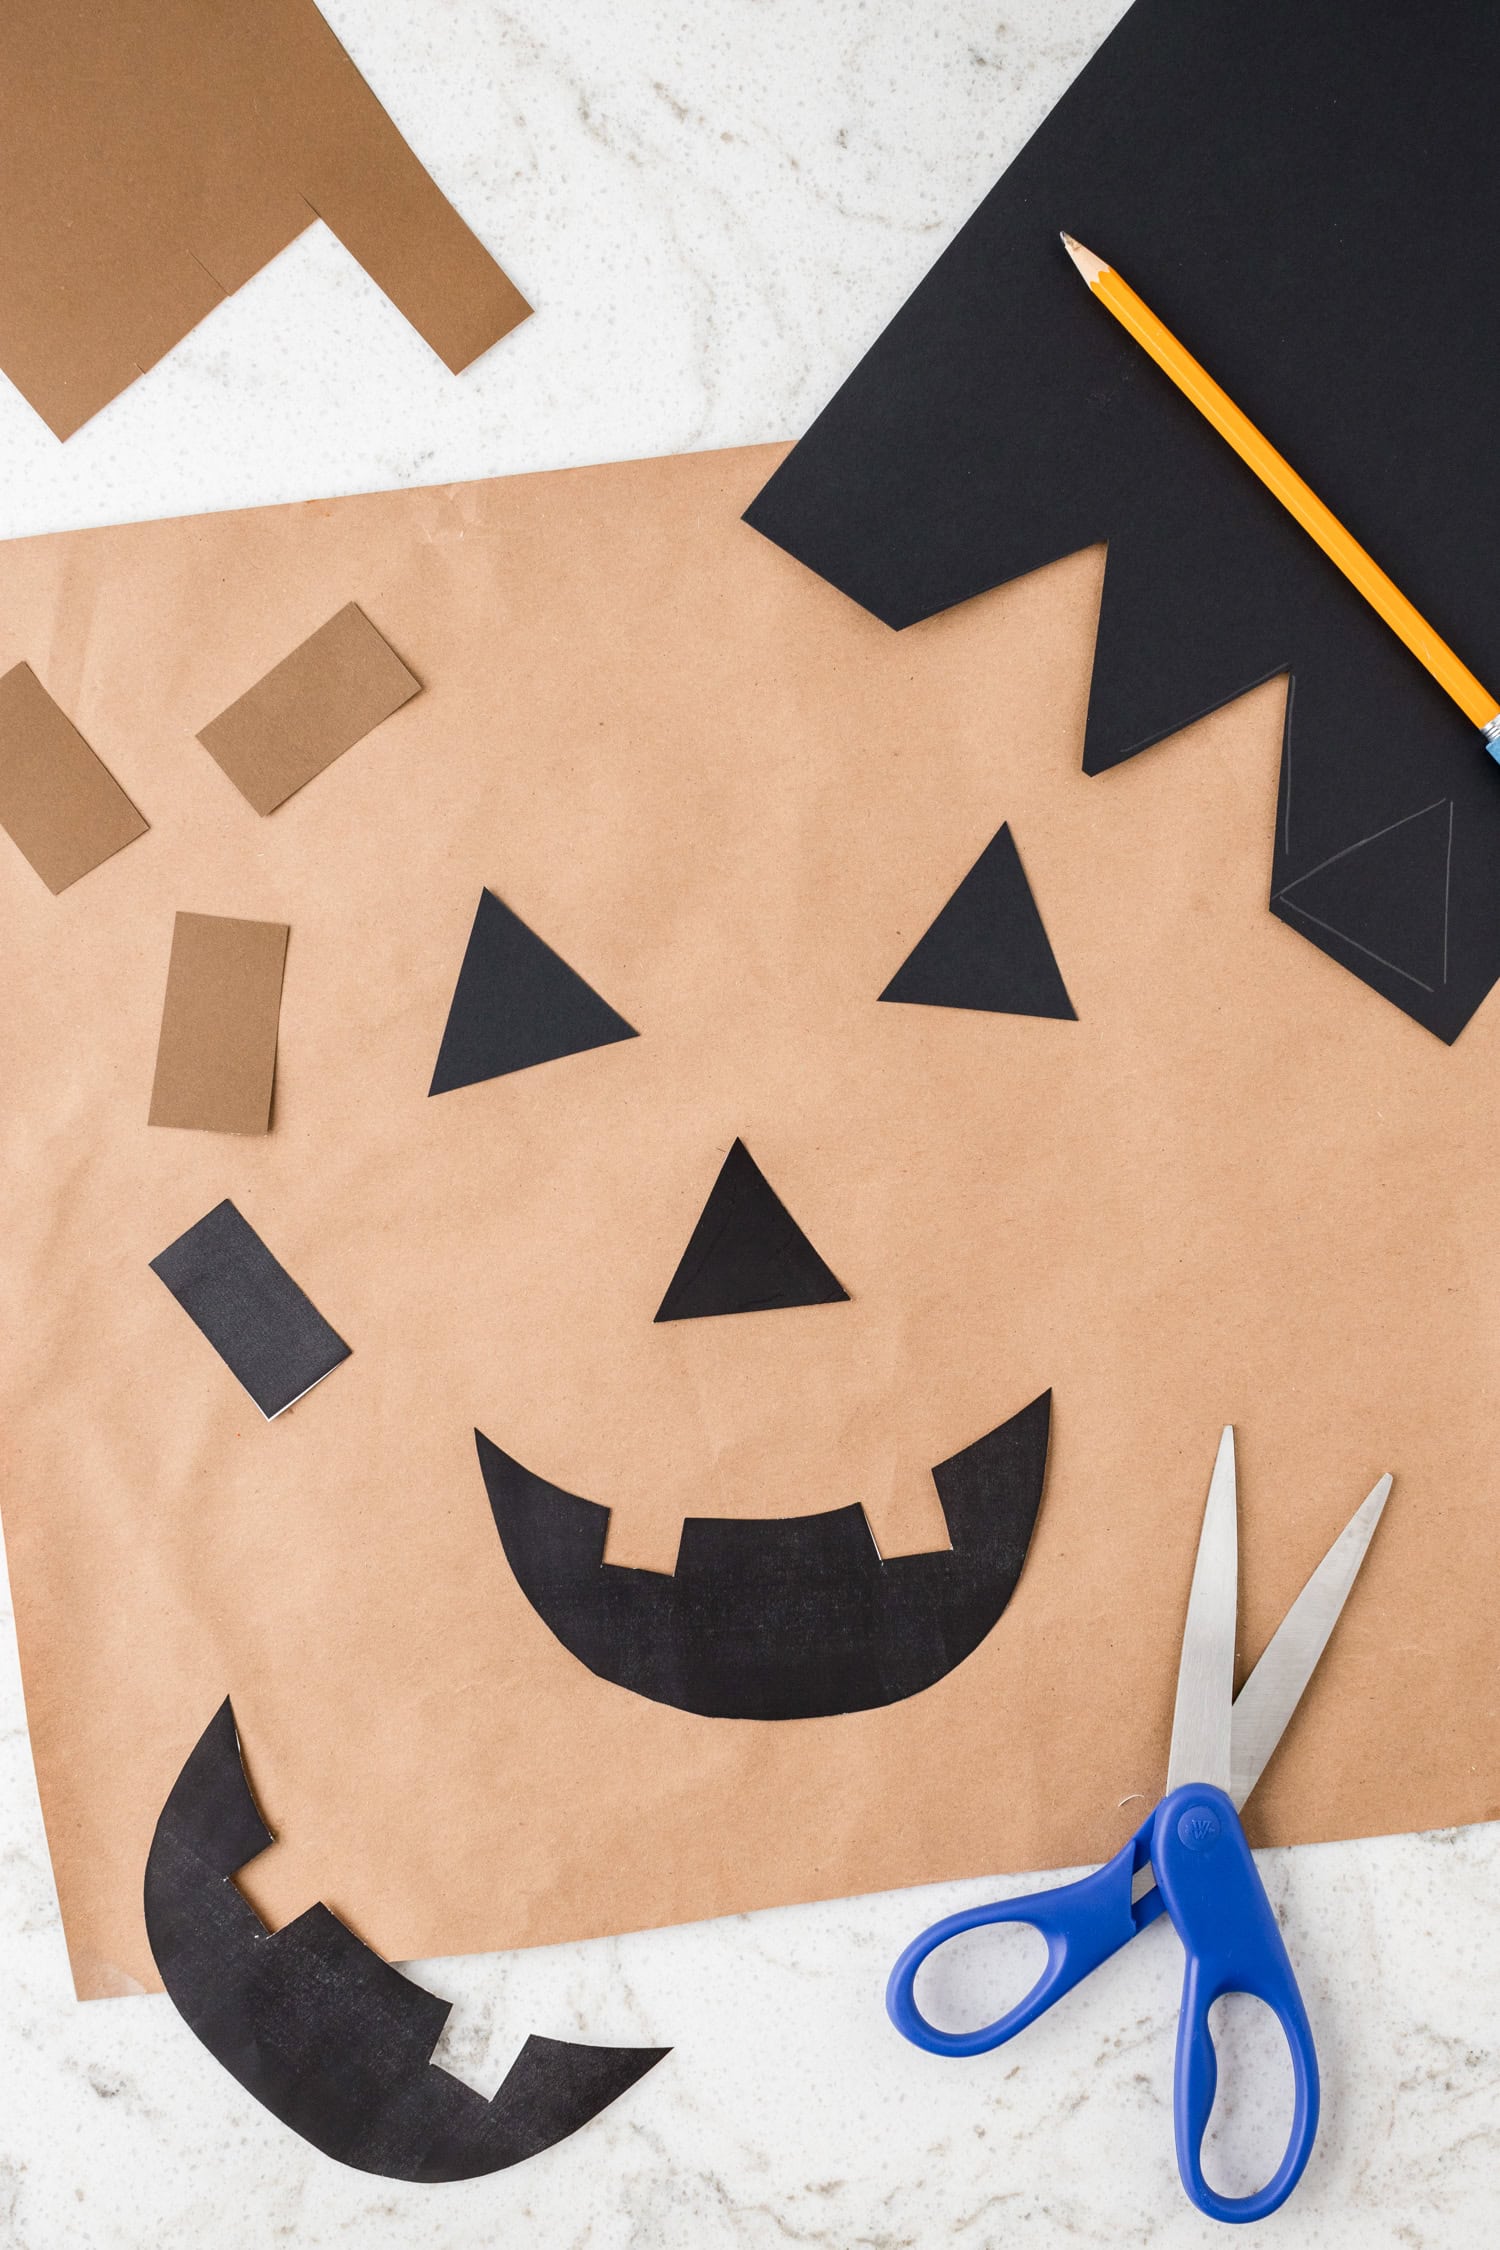
While the plate is drying, you can work on making the eyes, nose, and mouth. Cut the shapes from the template and then trace them onto the black construction paper. You can freehand the shapes if you don’t have access to a printer!
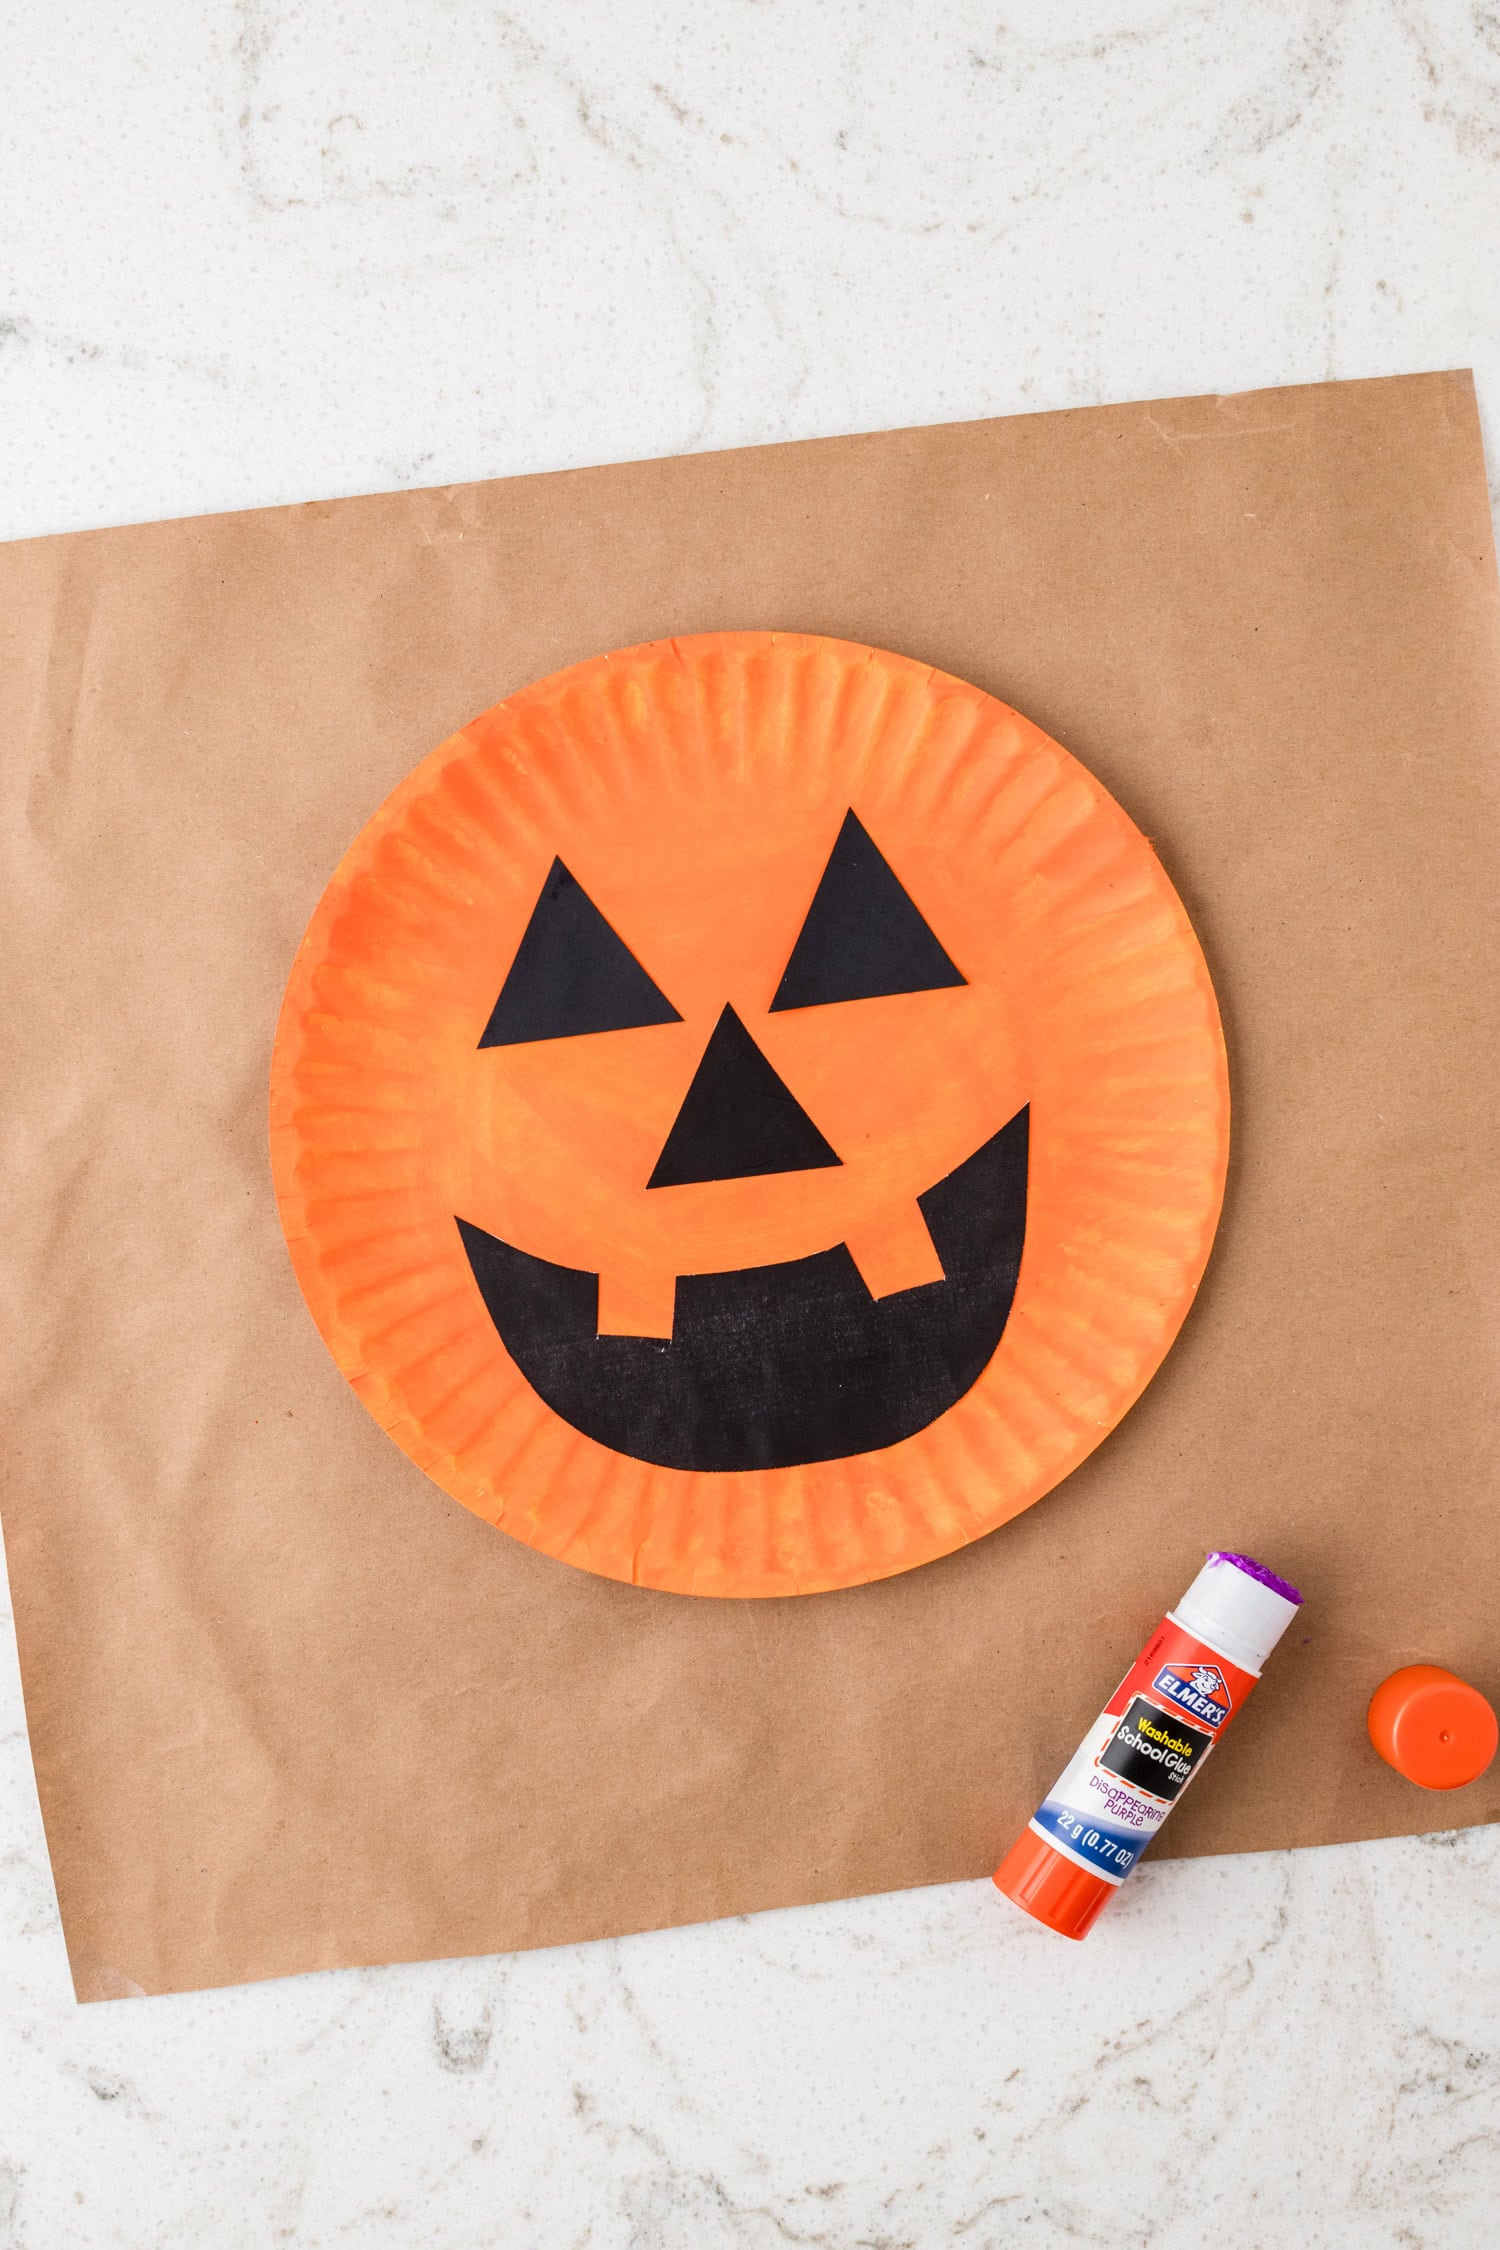
Cut out all the shapes and set them aside until the plate is dry. Once the paint has dried, glue the eyes, nose, and mouth onto the pumpkin face.
Punch a single hole in the top center of the paper plate and then thread the pipe cleaner through the hole and twist it a few times to secure it.
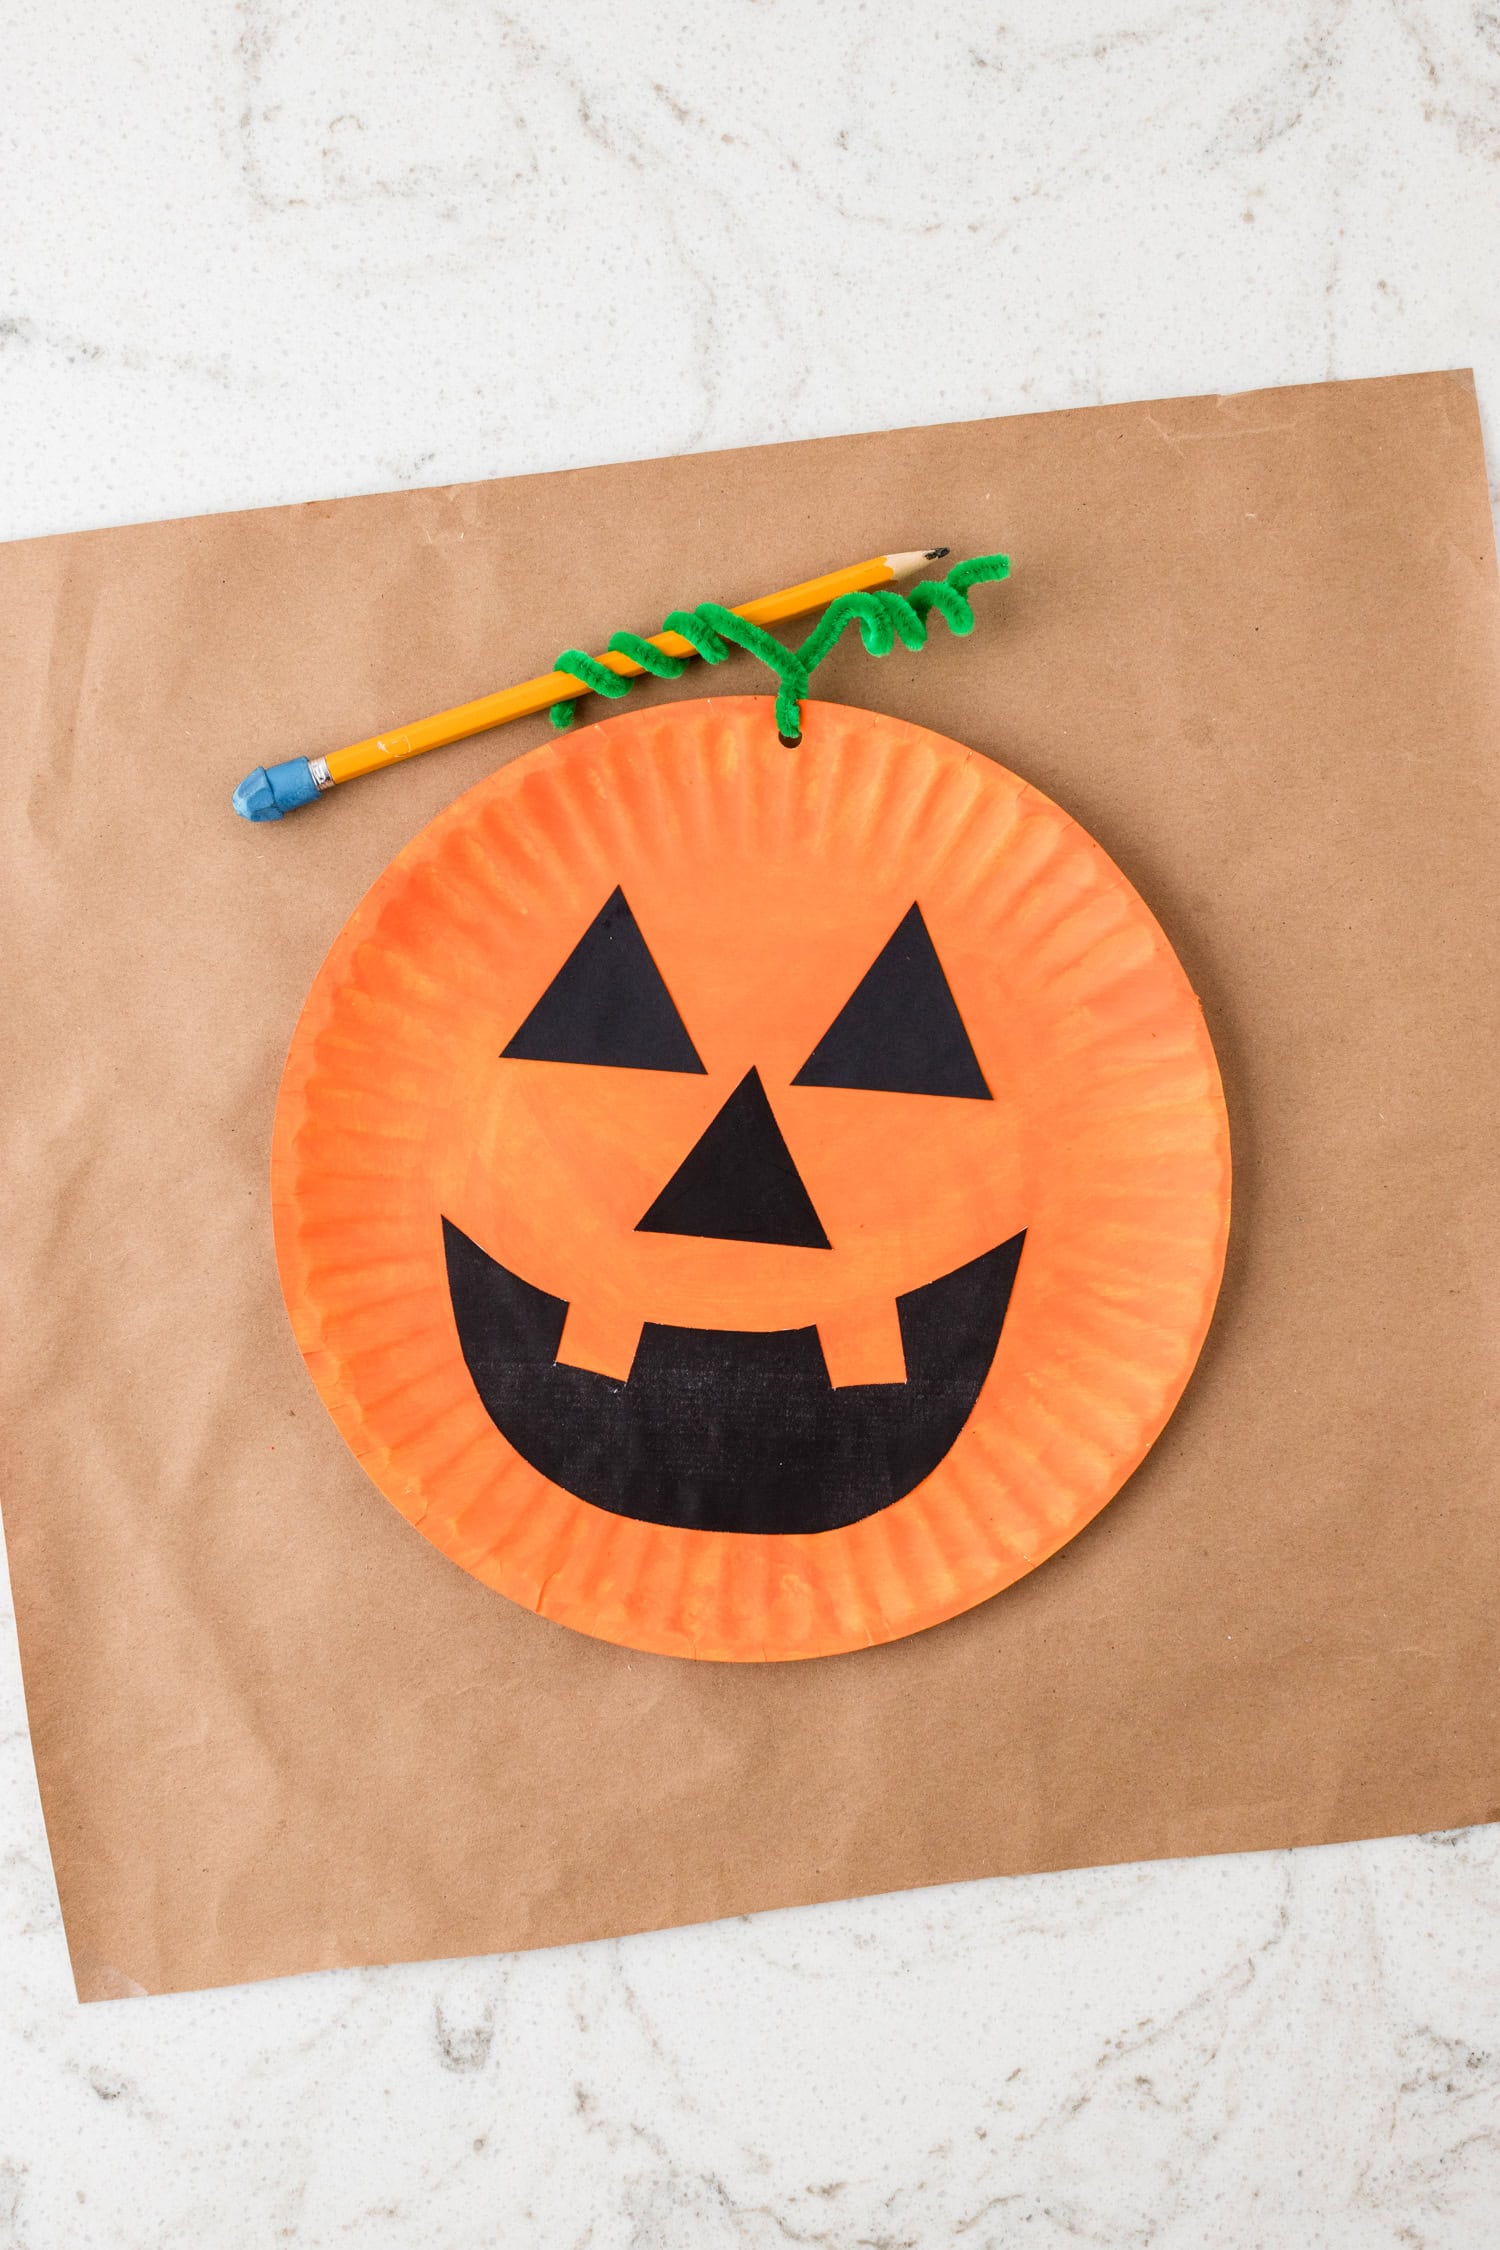
Twist the green pipe cleaner around a pencil to create a spiral vine shape. Make one or two vines, depending on your preference.
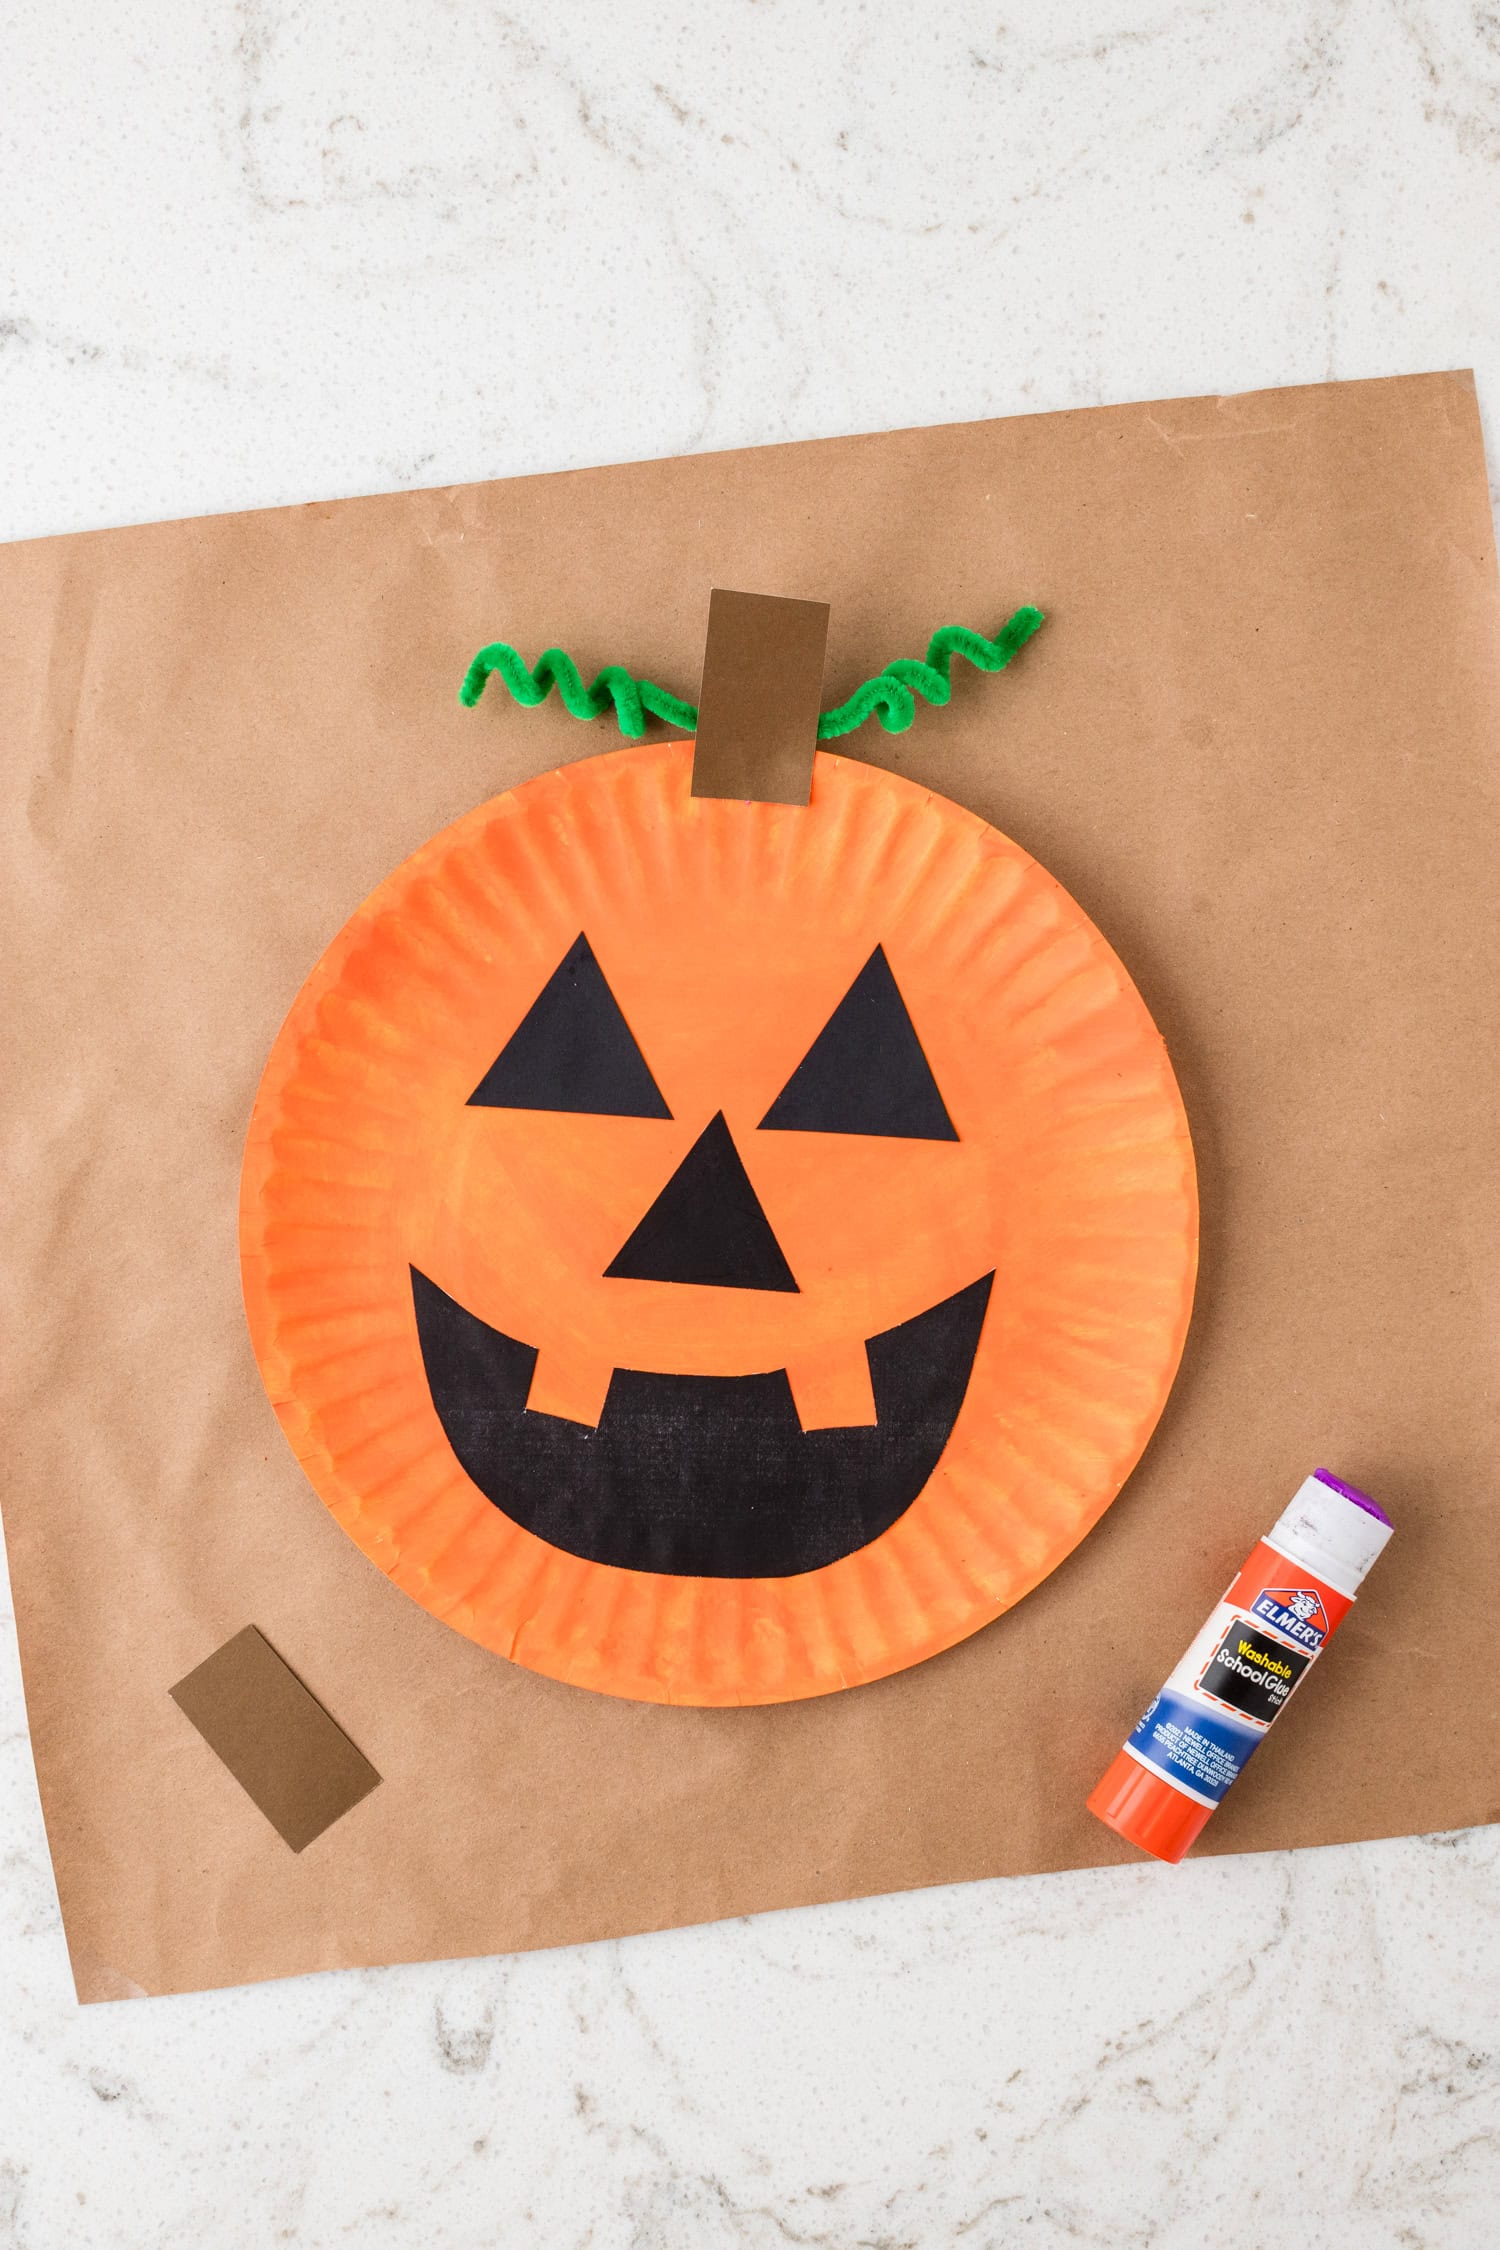
Trace the rectangle from the template onto brown construction paper and then cut it out to make the stem. Glue it to the top back of the paper plate so it sticks up above the top of the plate.
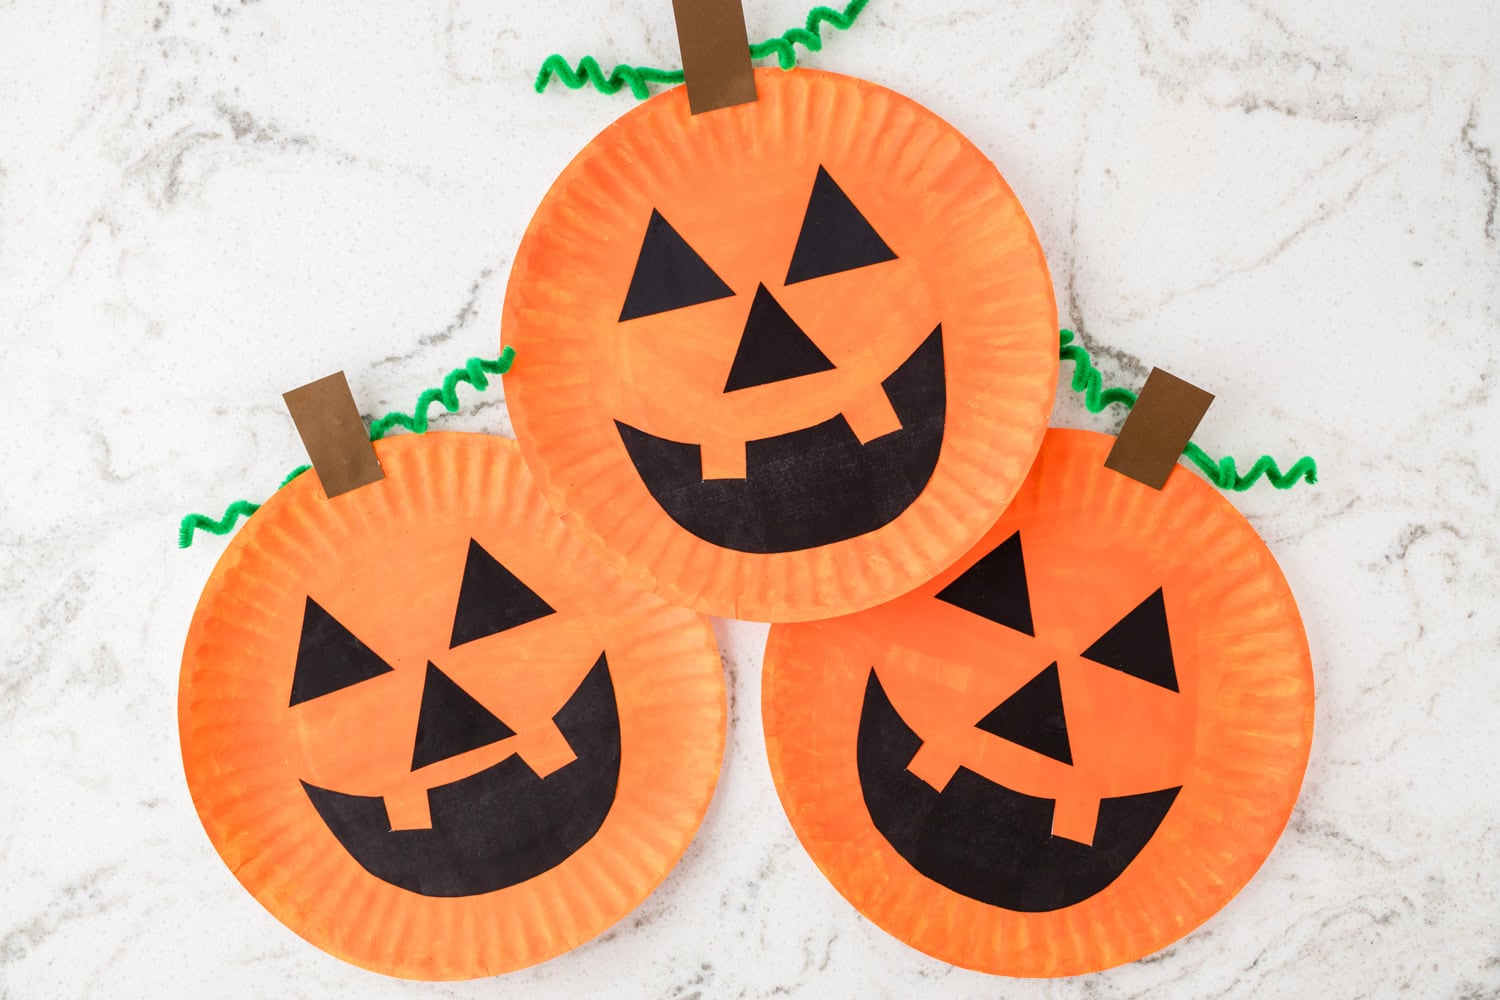
Your paper plate pumpkin is ready to be displayed! You can hang it up using a string or tape it to a wall or window.
What can I use if I don’t have a paper plate?
If you’re dying to make this craft but don’t have a paper plate on hand, don’t worry! Grab a piece of cardboard or even some thick orange cardstock. The card stock may not hold up as well as the paper plate, but it will still work. Just cut out a circle and get to decorating!
Pro Tips for the Best Paper Plate Pumpkin Craft
- Save some time by grabbing orange paper plates for this craft! You won’t have to paint, so it will be less mess too. And it’ll cut out all the time that you’d have to wait for your paper plate to dry.
- Making this craft with a large group of kids? Then I recommend either having the template pieces pre-traced onto construction paper, or even cutting out each piece for the kids. This will save you the hassle of having to help multiple kids trace their pumpkin face features.
- Let that creativity soar! You can make this craft anything you want it to be. Add glitter, stickers, buttons, pom poms, rhinestones and anything else your imagination can come up with.
Halloween doesn’t have to be ALL spooky! It can be adorably cute too, and this fun pumpkin paper plate craft is just that!
More Halloween Activities You’ll Love!
- These Halloween Handprint Spiders are just about the cutest spiders I’ve ever seen. I don’t mind these creepy crawlers at all!
- Who needs store-bought decor when you can make these adorable Yarn Ghosts. So much fun!
- Need an easy activity that requires no prep work? Then print these Halloween Correct the Sentences Worksheets.
- Make cutie Handprint Ghosts as another un-spooky Halloween craft.
Paper Plate Pumpkin Craft
Ingredients
- White paper plate
- Craft paint orange
- Foam paintbrush
- Construction paper black and brown
- Template for eyes nose, mouth, and stem (optional)
- Pencil
- Scissors
- Glue stick
- Hole punch
- Green pipe cleaners
Instructions
- Cover your work surface with craft paper or a tablecloth to protect it from spills. Grab a white paper plate. This will be the base for your pumpkin.
- Paint the entire front of the plate orange using the foam craft brush. Allow it to dry completely before moving on to the next step. (about 10 minutes)
- While the plate is drying, let’s make the eyes, nose, and mouth. Cut the shapes from the template and trace them onto the black construction paper. (You can freehand the shapes if you don’t have access to a printer) Cut out all the shapes. Once the plate is dry, glue the eyes, nose, and mouth onto the pumpkin face.
- Punch a single hole in the top center of the paper plate. Thread the pipe cleaner through the hole and twist it a few times to secure it.
- Twist the green pipe cleaner around a pencil to create a spiral vine shape. Make one or two vines, depending on your preference.
- Trace the rectangle from the template onto brown construction paper. Cut a small rectangle to make the stem. Glue it to the top back of the paper plate so it sticks up above the top of the plate.
- Your paper plate pumpkin is ready to be displayed! You can hang it up using a string or tape it to a wall or window.