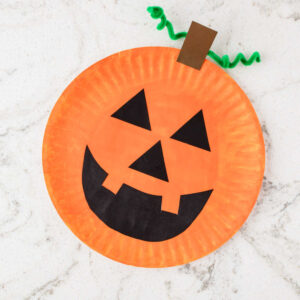
Paper Plate Pumpkin Craft
Get creative this fall with this easy paper plate pumpkin craft! It’s a simple project perfect for kids of all ages.
Print
Pin
Servings: 1 pumpkin
Ingredients
- White paper plate
- Craft paint orange
- Foam paintbrush
- Construction paper black and brown
- Template for eyes nose, mouth, and stem (optional)
- Pencil
- Scissors
- Glue stick
- Hole punch
- Green pipe cleaners
Instructions
- Cover your work surface with craft paper or a tablecloth to protect it from spills. Grab a white paper plate. This will be the base for your pumpkin.
- Paint the entire front of the plate orange using the foam craft brush. Allow it to dry completely before moving on to the next step. (about 10 minutes)
- While the plate is drying, let’s make the eyes, nose, and mouth. Cut the shapes from the template and trace them onto the black construction paper. (You can freehand the shapes if you don’t have access to a printer) Cut out all the shapes. Once the plate is dry, glue the eyes, nose, and mouth onto the pumpkin face.
- Punch a single hole in the top center of the paper plate. Thread the pipe cleaner through the hole and twist it a few times to secure it.
- Twist the green pipe cleaner around a pencil to create a spiral vine shape. Make one or two vines, depending on your preference.
- Trace the rectangle from the template onto brown construction paper. Cut a small rectangle to make the stem. Glue it to the top back of the paper plate so it sticks up above the top of the plate.
- Your paper plate pumpkin is ready to be displayed! You can hang it up using a string or tape it to a wall or window.
Tried this recipe?Please leave a comment below or pin it to your Pinterest account!