Paper Plate Octopus Craft
Create and adorable Paper Plate Octopus craft with minimal supplies and time! All you need to make this easy Octopus is a paper plate, paint, yarn and googly eyes. This is the perfect easy animal craft for preschoolers and kindergarteners.
This super silly, super fun paper plate octopus craft is sure to put a smile on the face of your kiddos! Making an octopus with paper plates, paint, and yarn is about as easy as it gets. You can make this in a classroom setting, incorporate it into your homeschool cirriculum, or just have a fun craft day at home.
Learning about the ocean has always been my one of my kid’s favorite topics. The octopus is such an interesting creature, so making this craft make what we learn extra memorable.
Of course, you don’t have to teach to make this craft. You can simply make it on a rainy day when you’re stuck inside! And bake delicious snacks like no bake s’more bars and pizza crescent rolls to munch on while you create a fun octopus friend.
Follow this step-by-step guide to learn how to make a paper octopus! But don’t be afraid to branch out and make this little guy your own. Add anything you want to it and change up the colors to make it exactly what you want it to be!
Why You’ll Love this Paper Plate Octopus Craft
- Painting, cutting, and tying are all great activities to help develop fine motor skills. That makes this craft a great activity for young children!
- It will only take about 20 minutes to prep and build this paper plate octopus craft. It’s a great craft to use during classroom craft time or summer camp!
- This craft doubles as a toy and a cute decoration. Add a magnet to the back of the plate to put it on the fridge or poke a hole at the top and hang it with a ribbon!
Supplies Needed to Make a Paper Plate Octopus
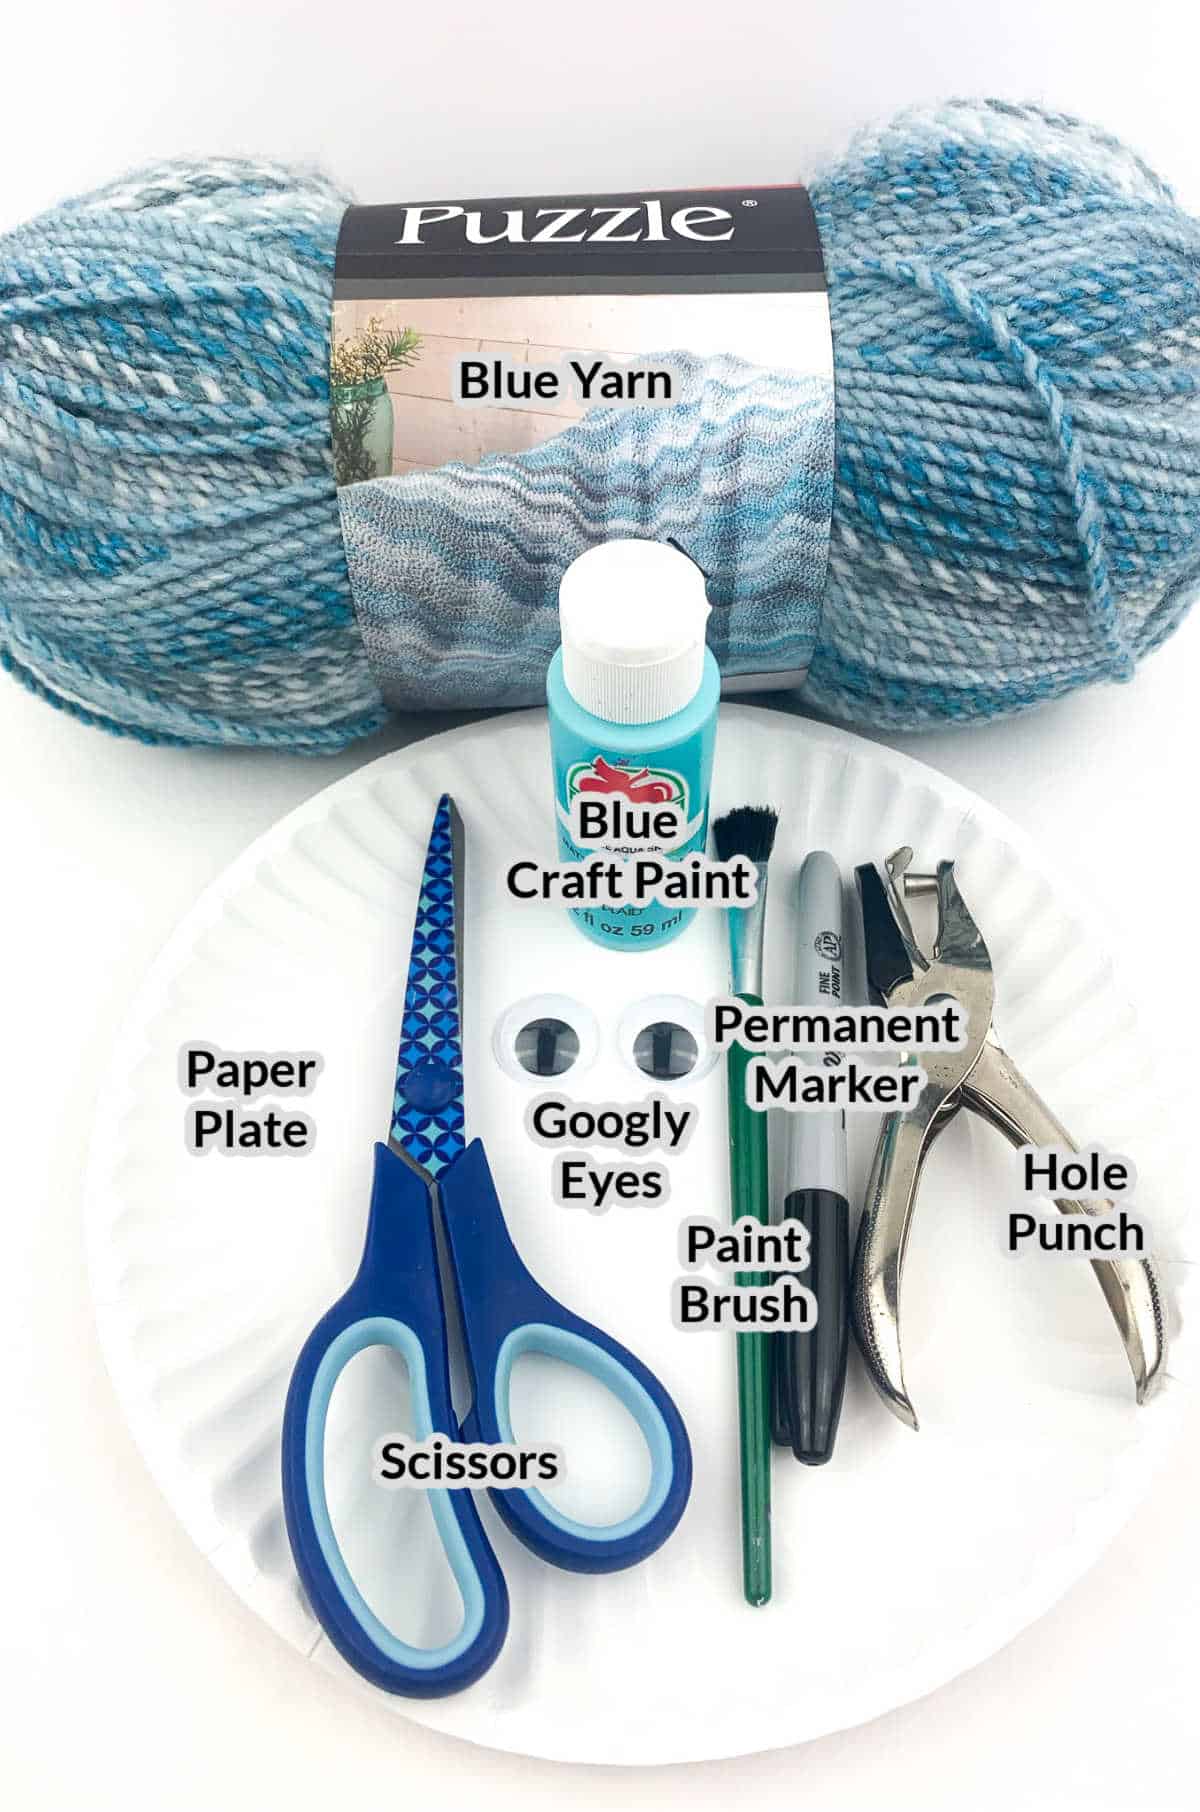
- Blue yarn – Use solid blue yarn or a mix of multiple different shades of blue. This will be your paper octopus’ silly legs!
- Blue craft paint – I recommend using a light baby blue shade of paint. But you can use any other shade of blue you want, or even a different color!
- Scissors – If you’re making this paper plate octopus craft with littles, use some safety scissors. They’ll work fine for this craft!
- Paper plate – The cheap paper plates that come in a large pack will work great for this activity.
- Googly eyes – Use some large googly eyes for this silly octopus! If you don’t have googly eyes, you can draw eyes with a marker or even paint some on.
- Paint brush – A medium to large craft paint brush is all you need to paint the paper plates blue for this craft.
- Permanent marker – If you’re making this craft with young children, you can use a washable marker! It may be a little more difficult to draw on the paint, but it will still work.
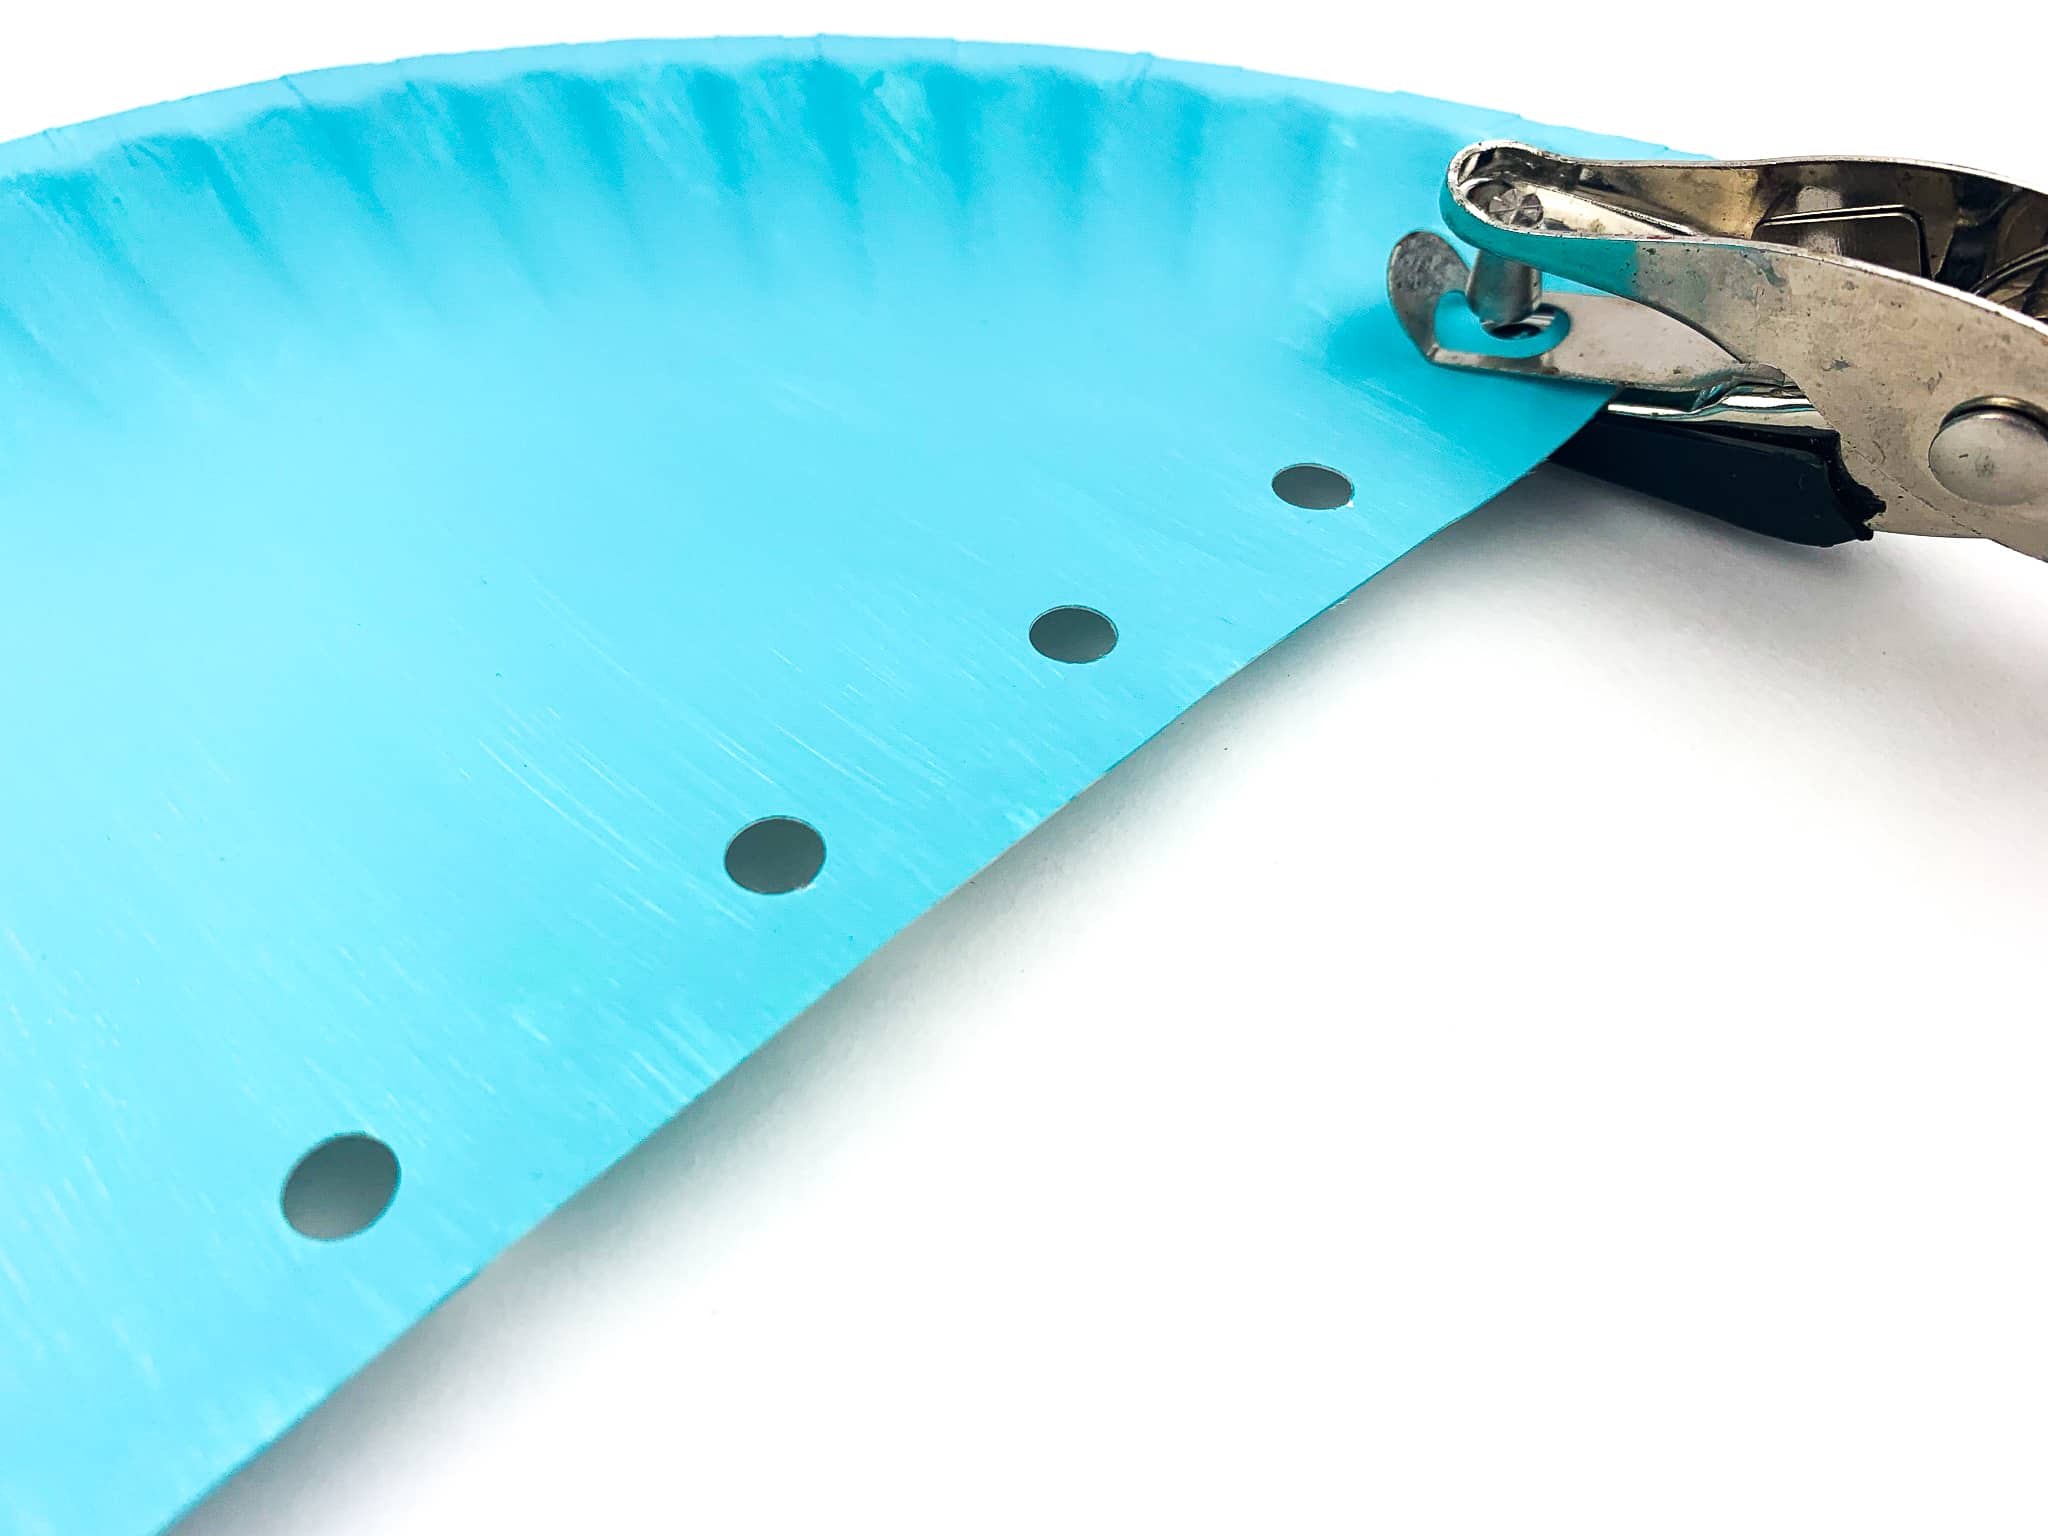
- Hole punch – Use a single hole punch to punch holes along the bottom that you’ll feed the yarn through to make paper plate octopus feet.


How to Make a Paper Octopus
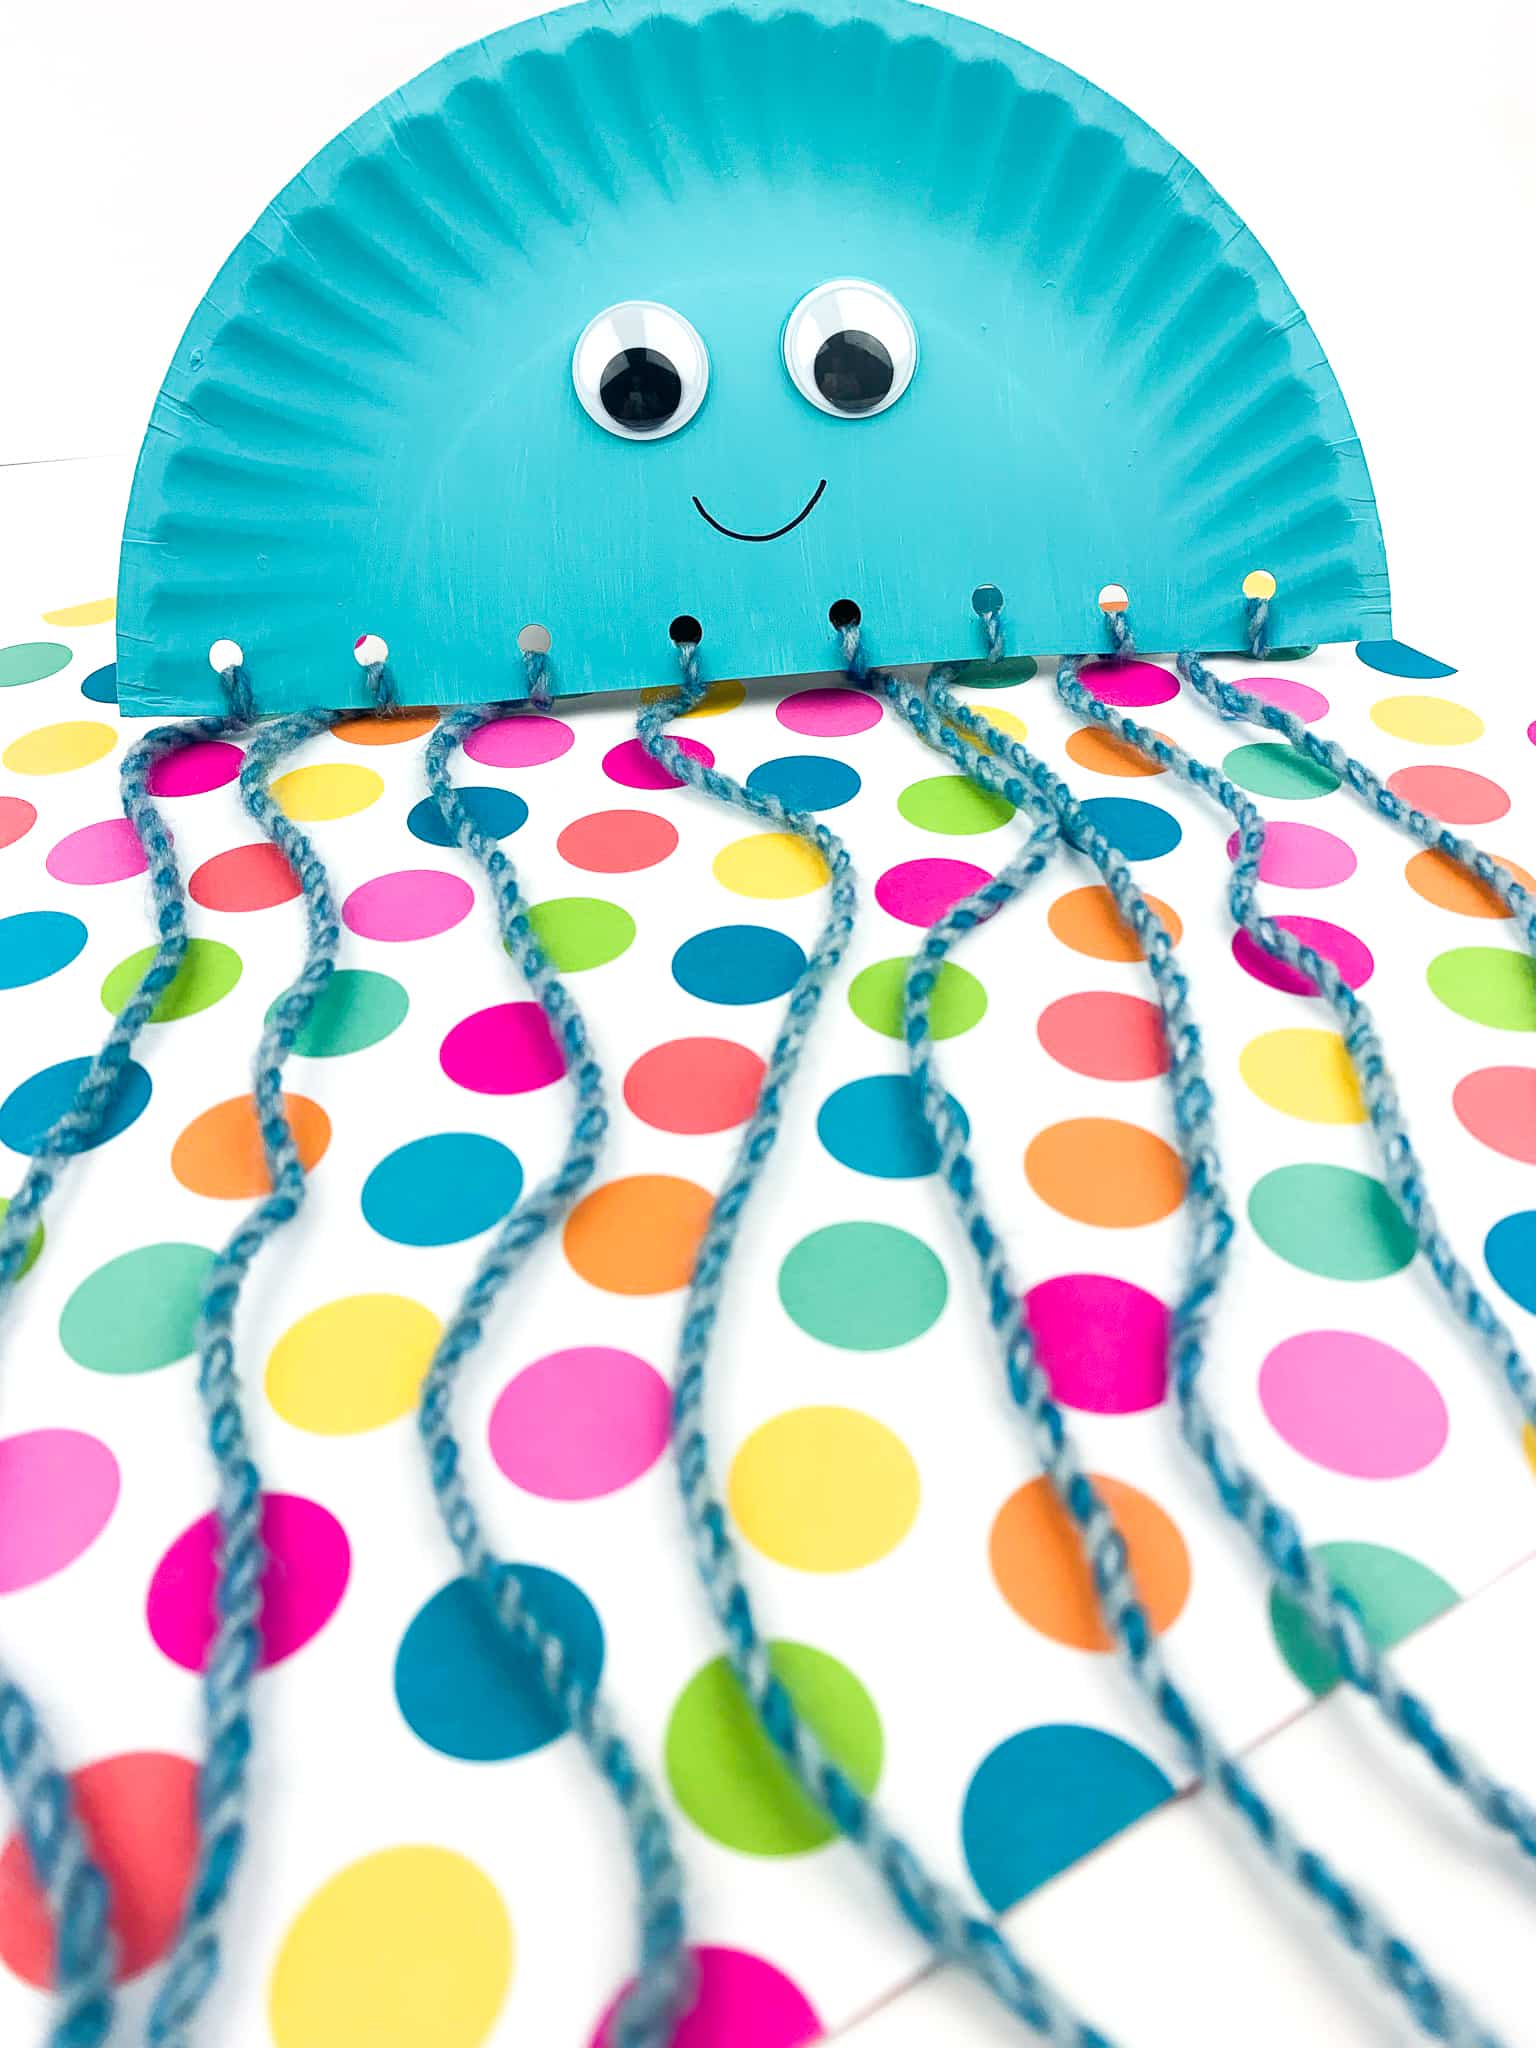
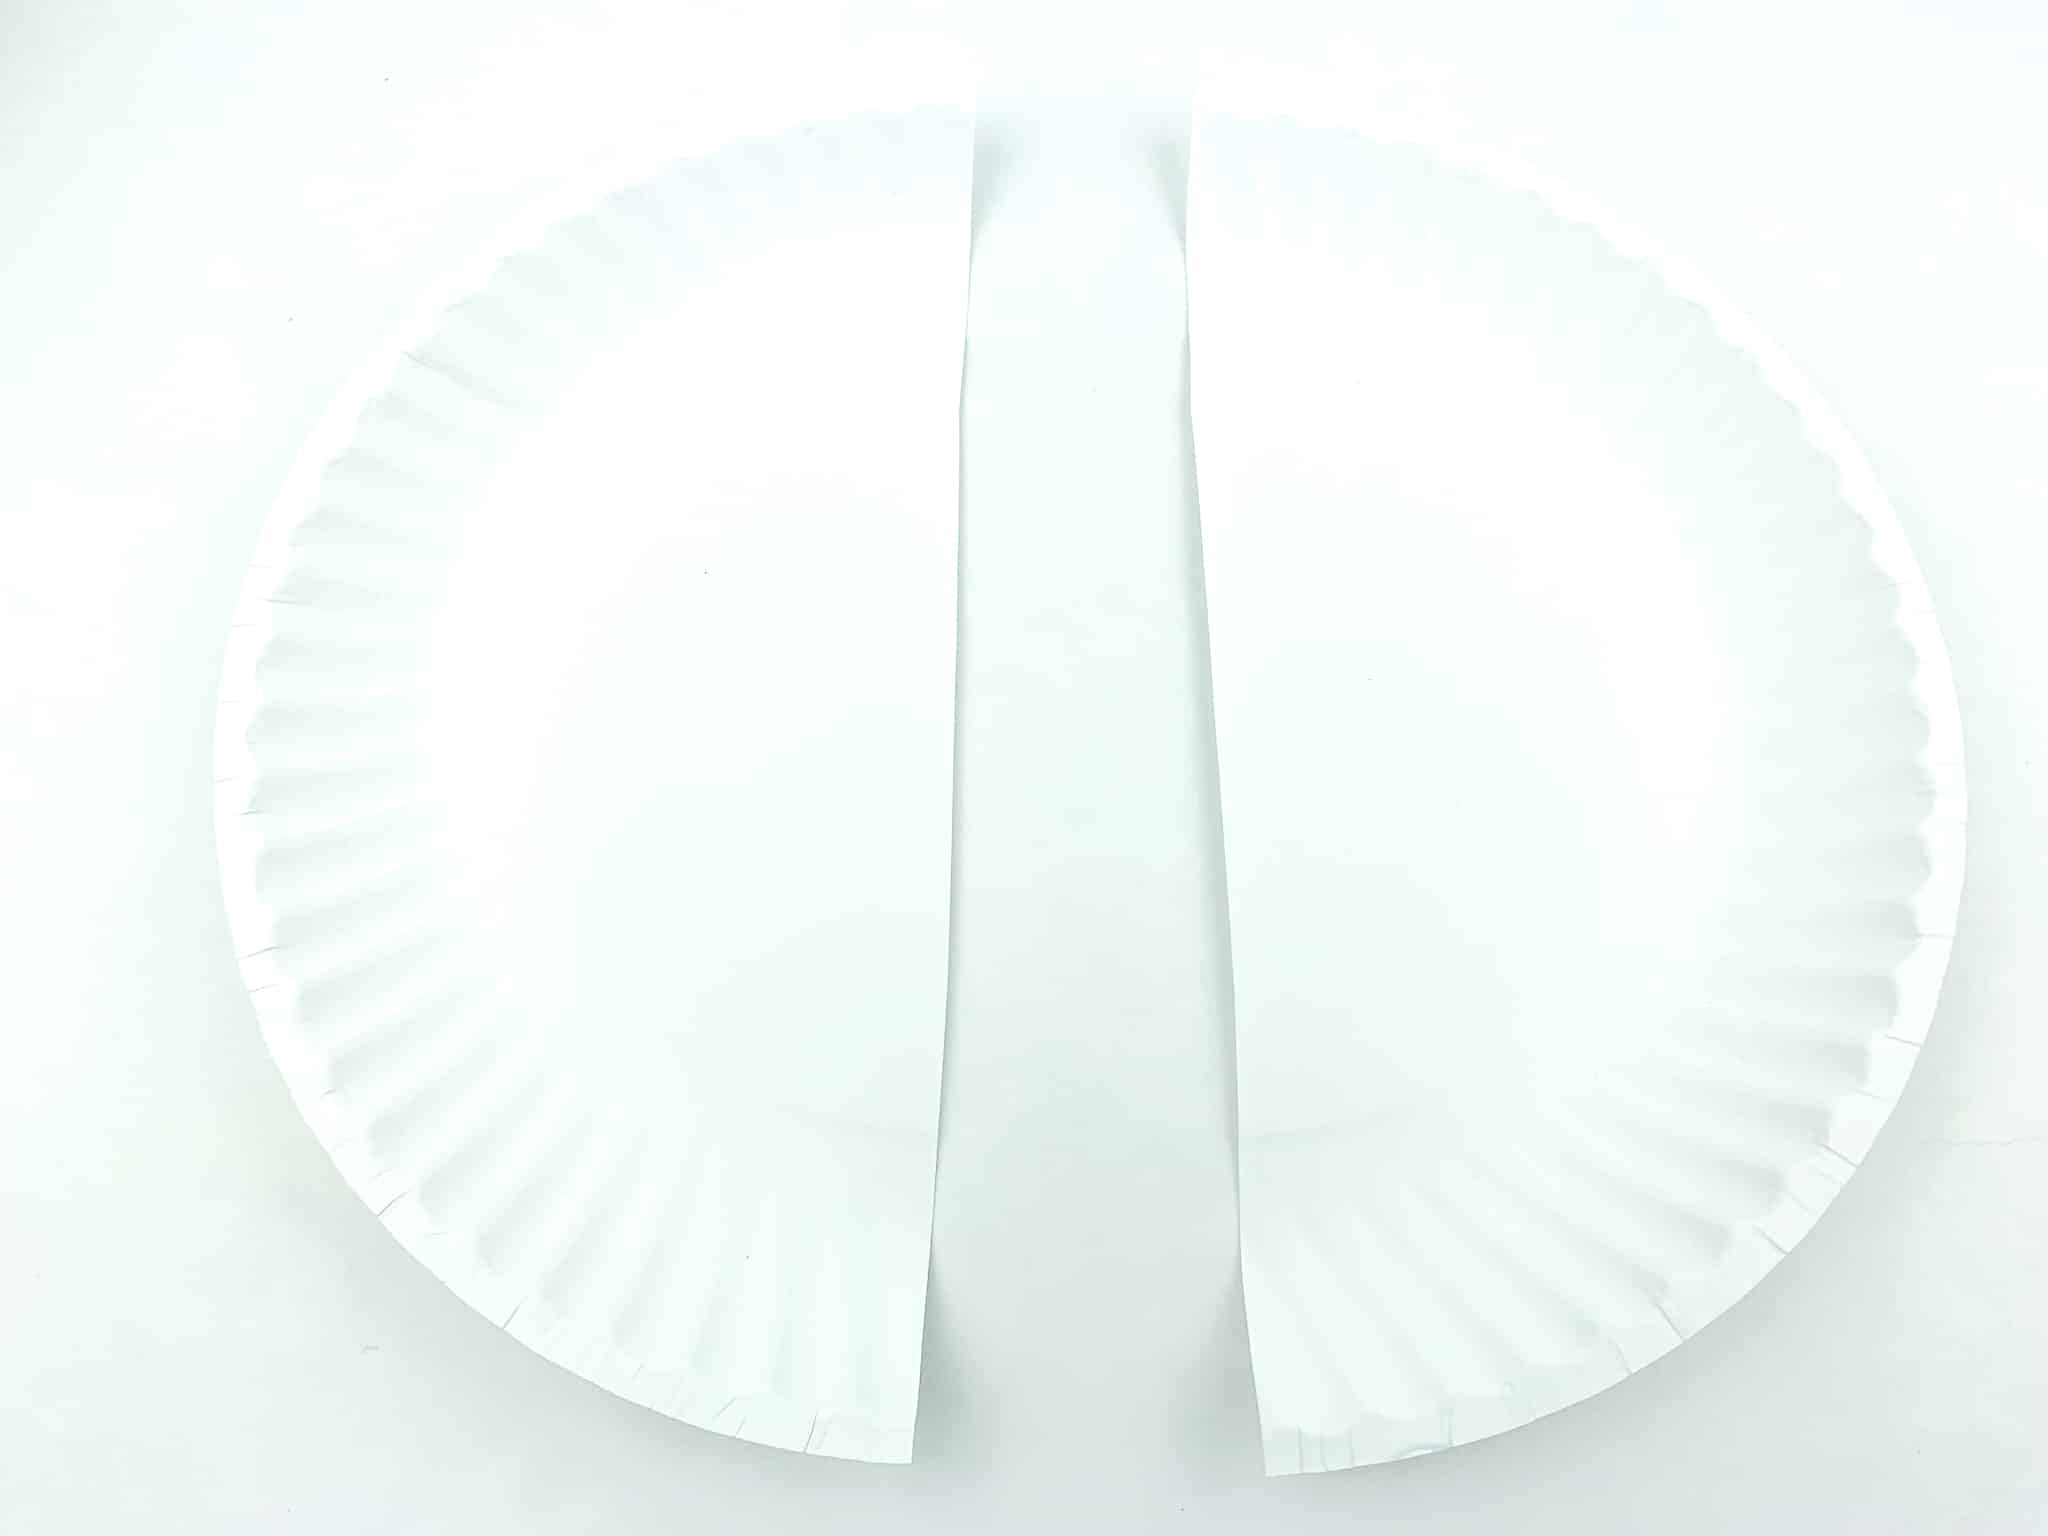
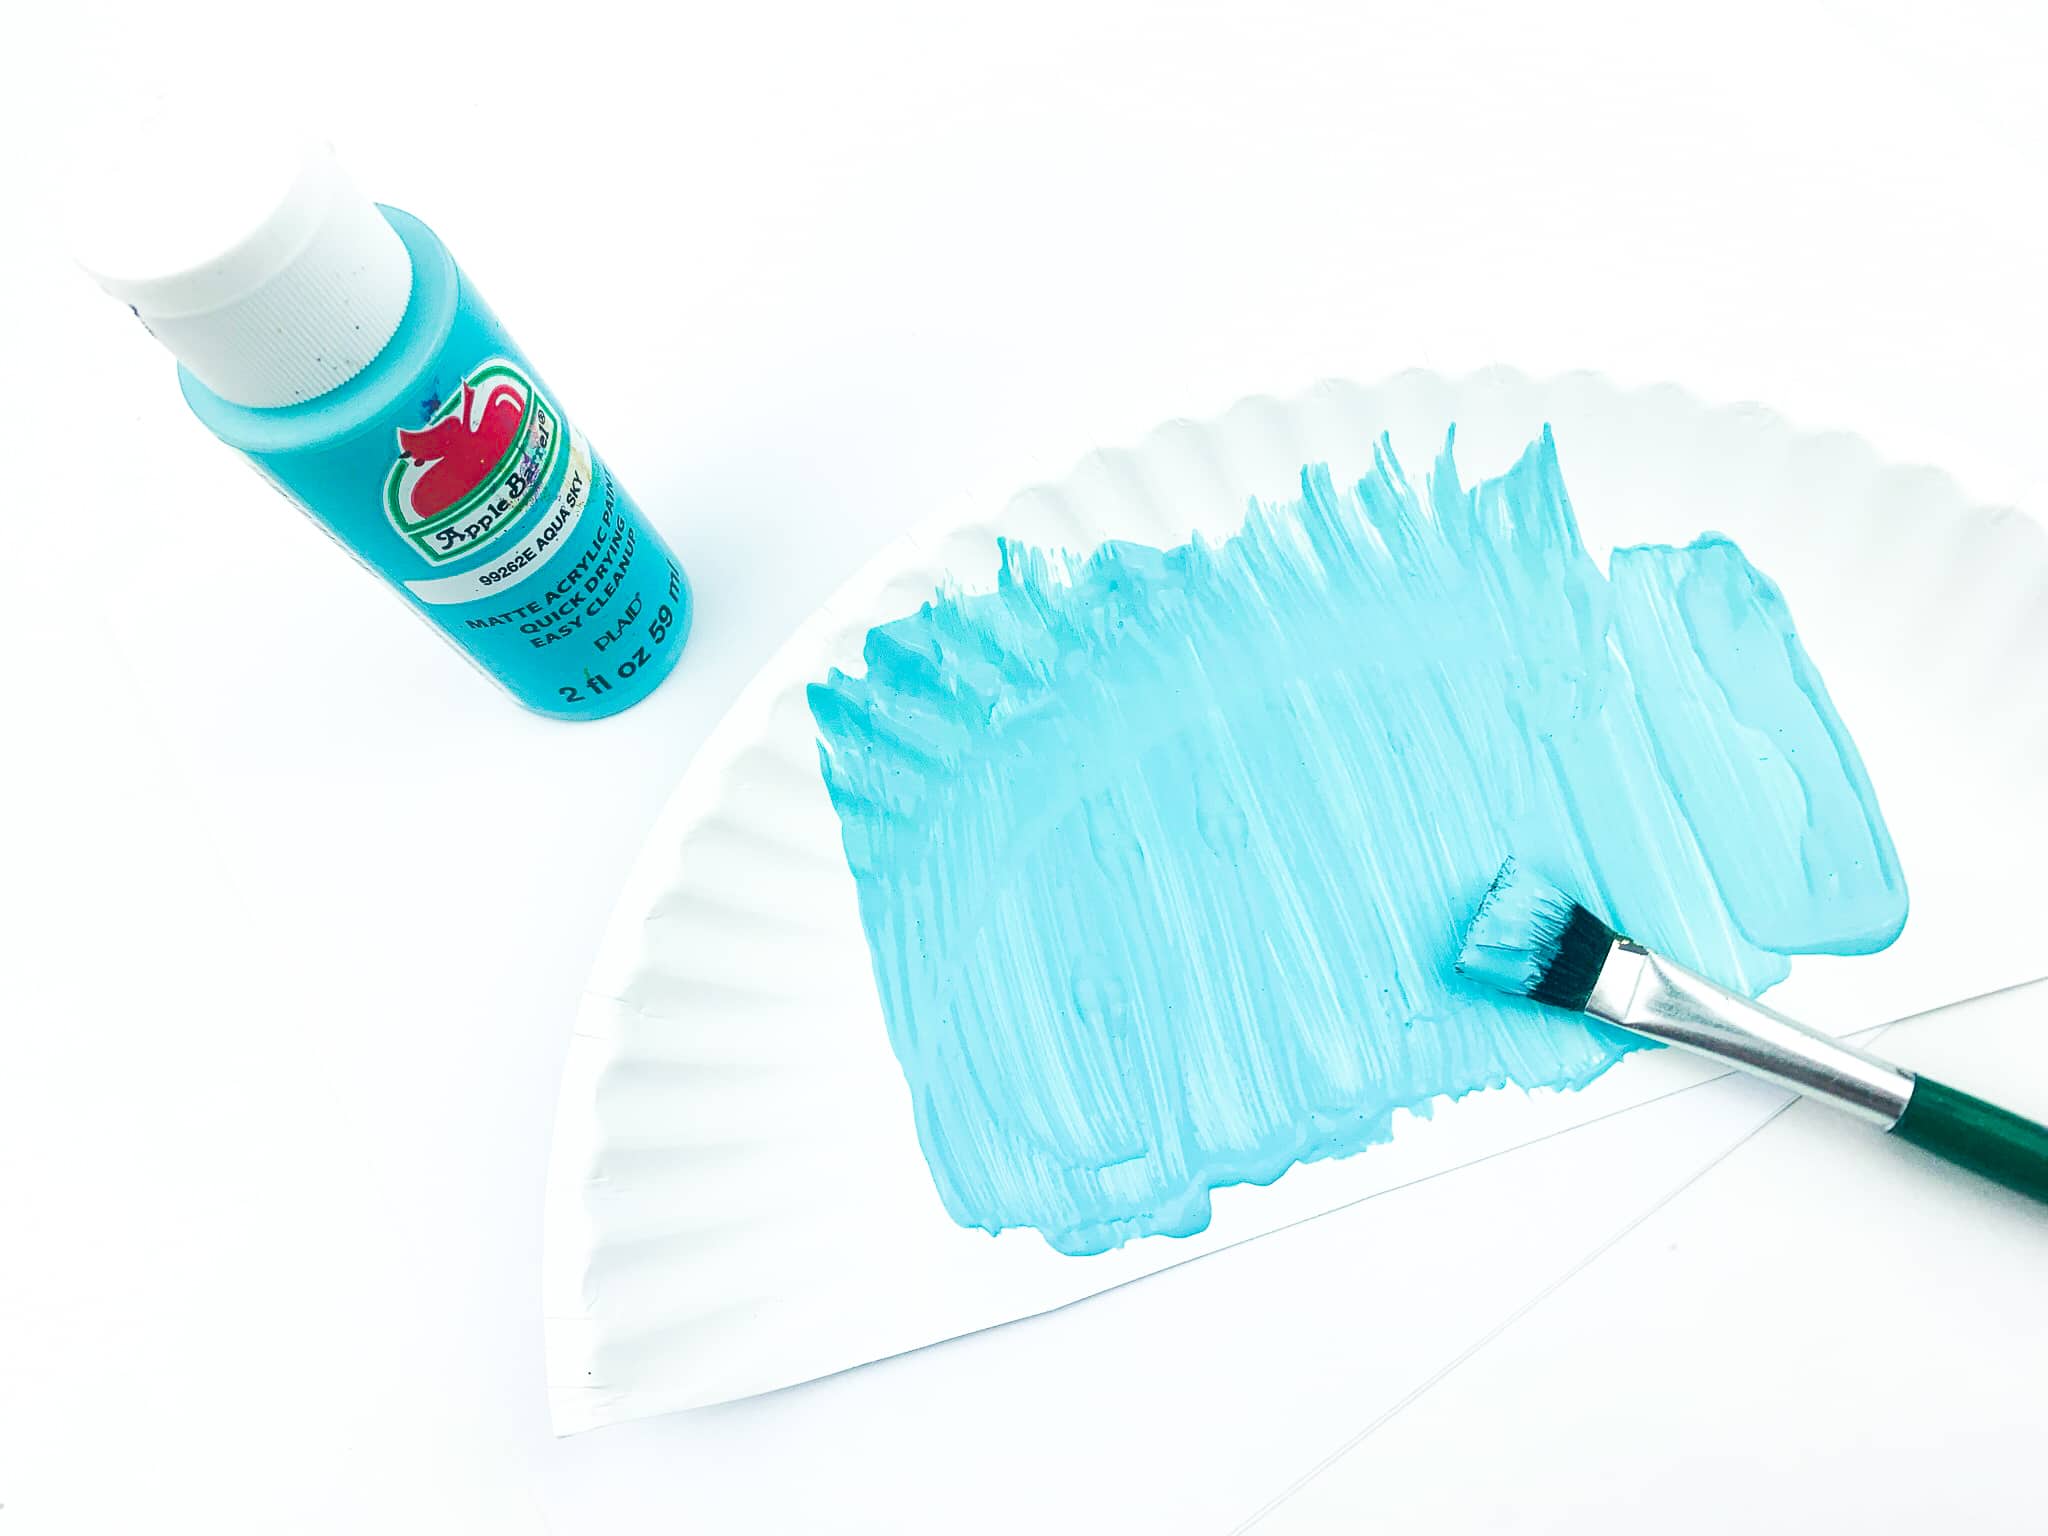
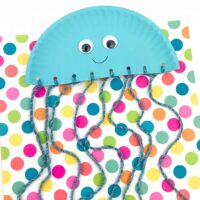
- Begin by cutting a paper plate in half and painting one half blue. Set the paper plate half aside and let it dry completely.
- Once it is completely dry, punch 8 holes evenly across the bottom straight edge. Space them out evenly so that they reach all the way across.
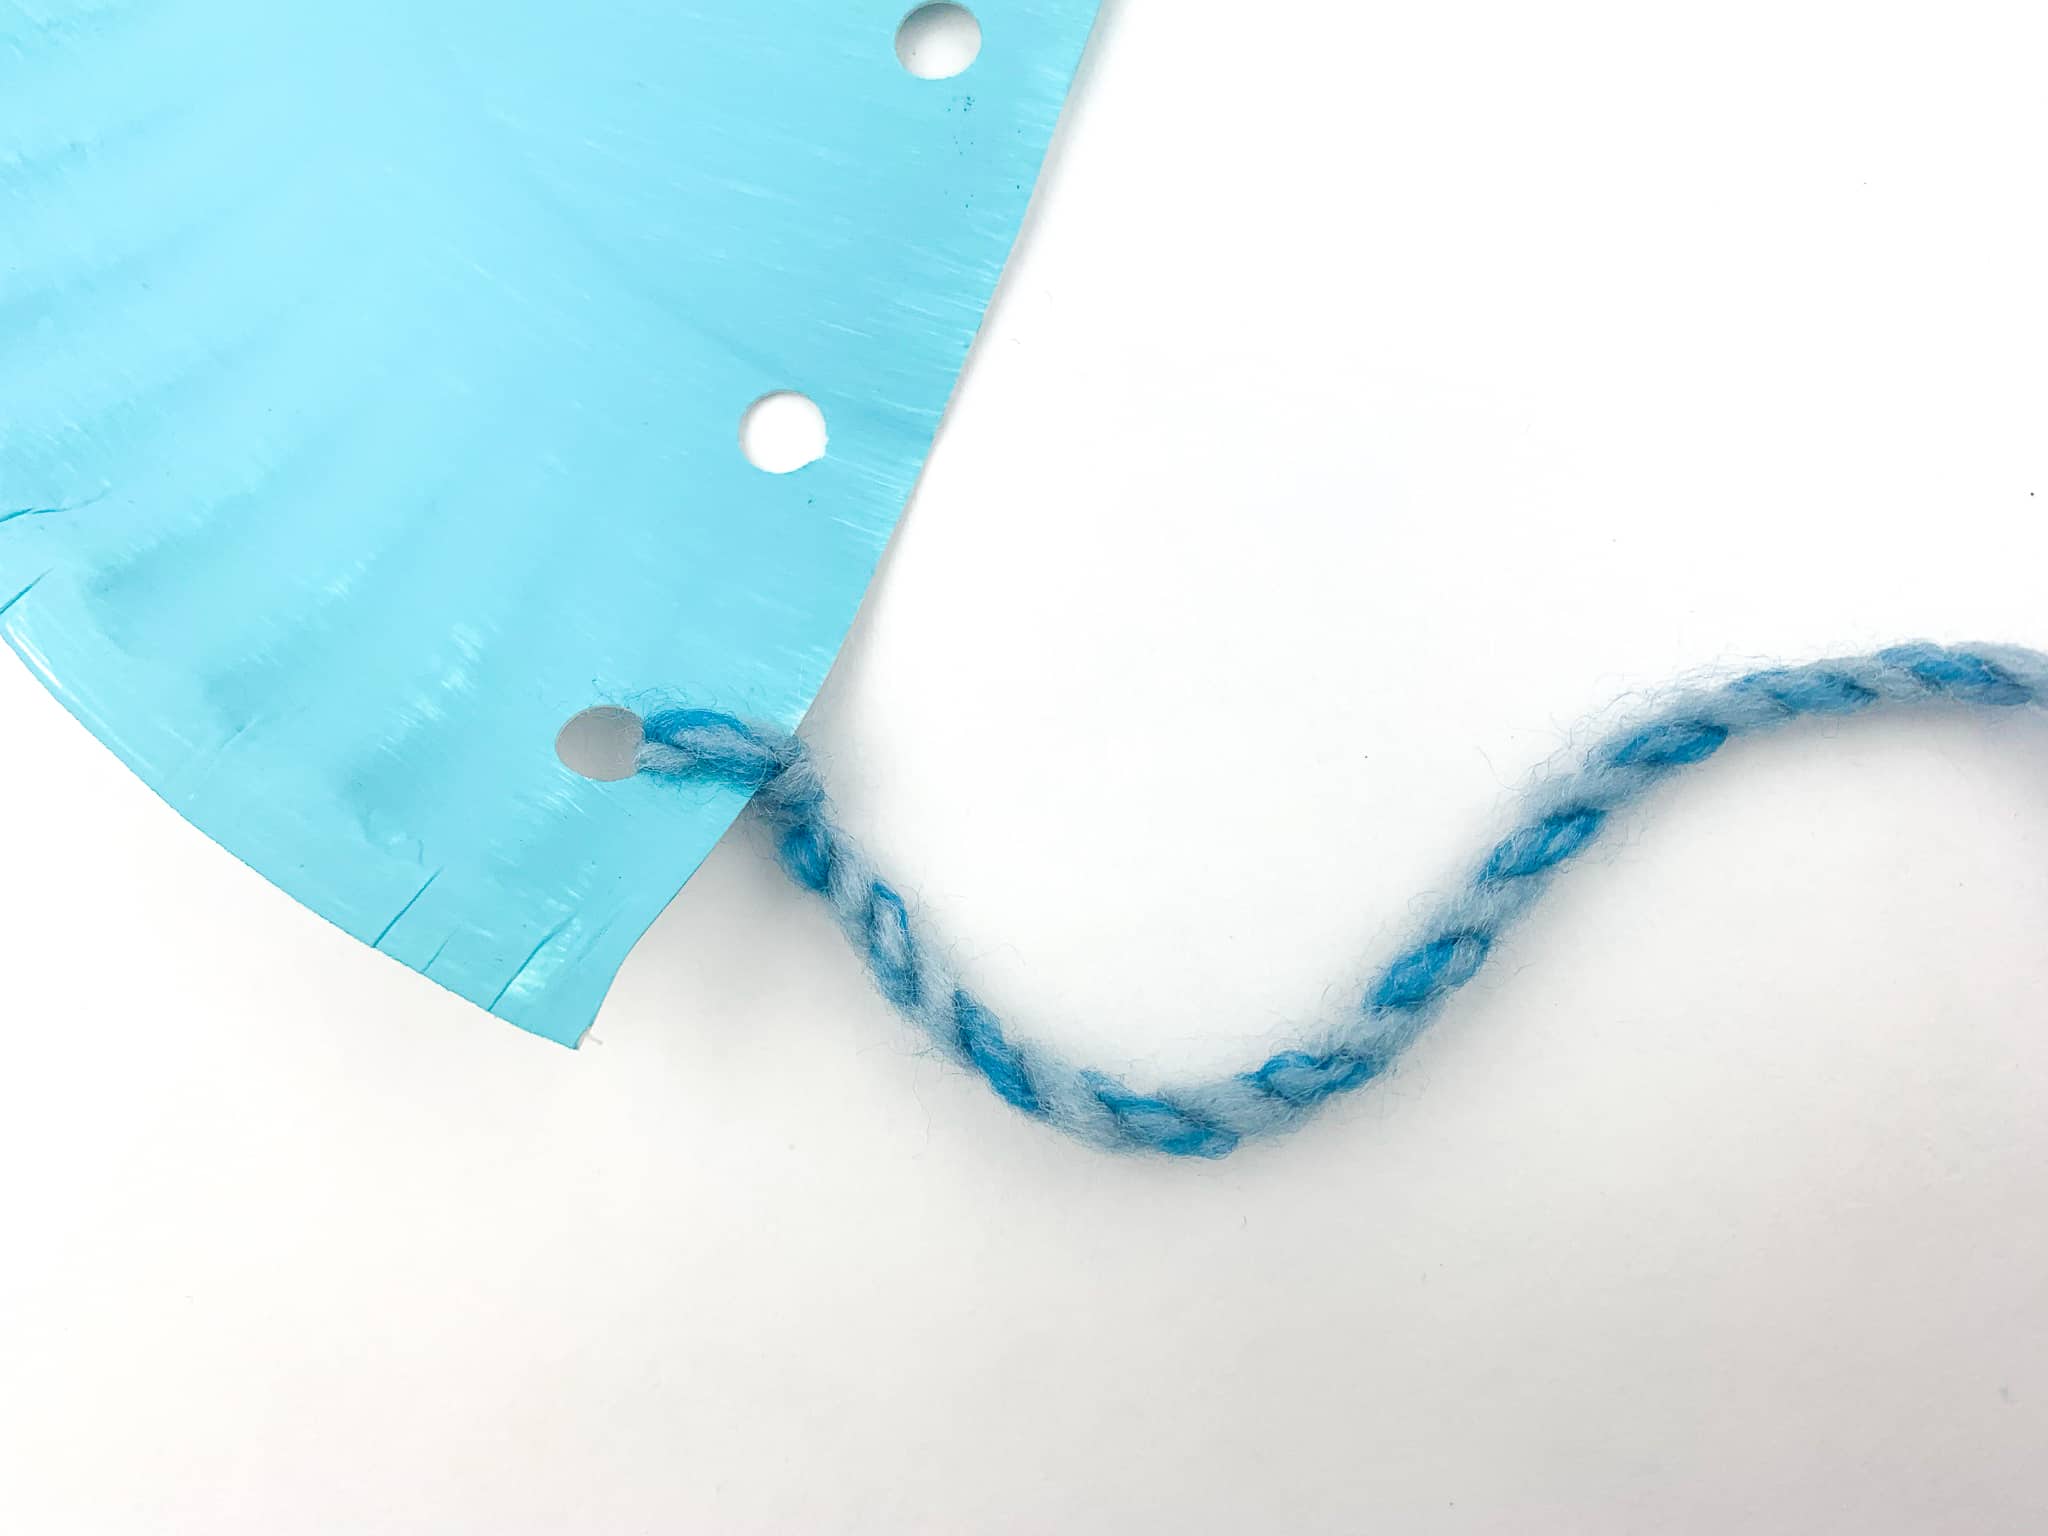
- Cut a 12 inch strand of blue yarn. Cut 8 total strands of yarn.
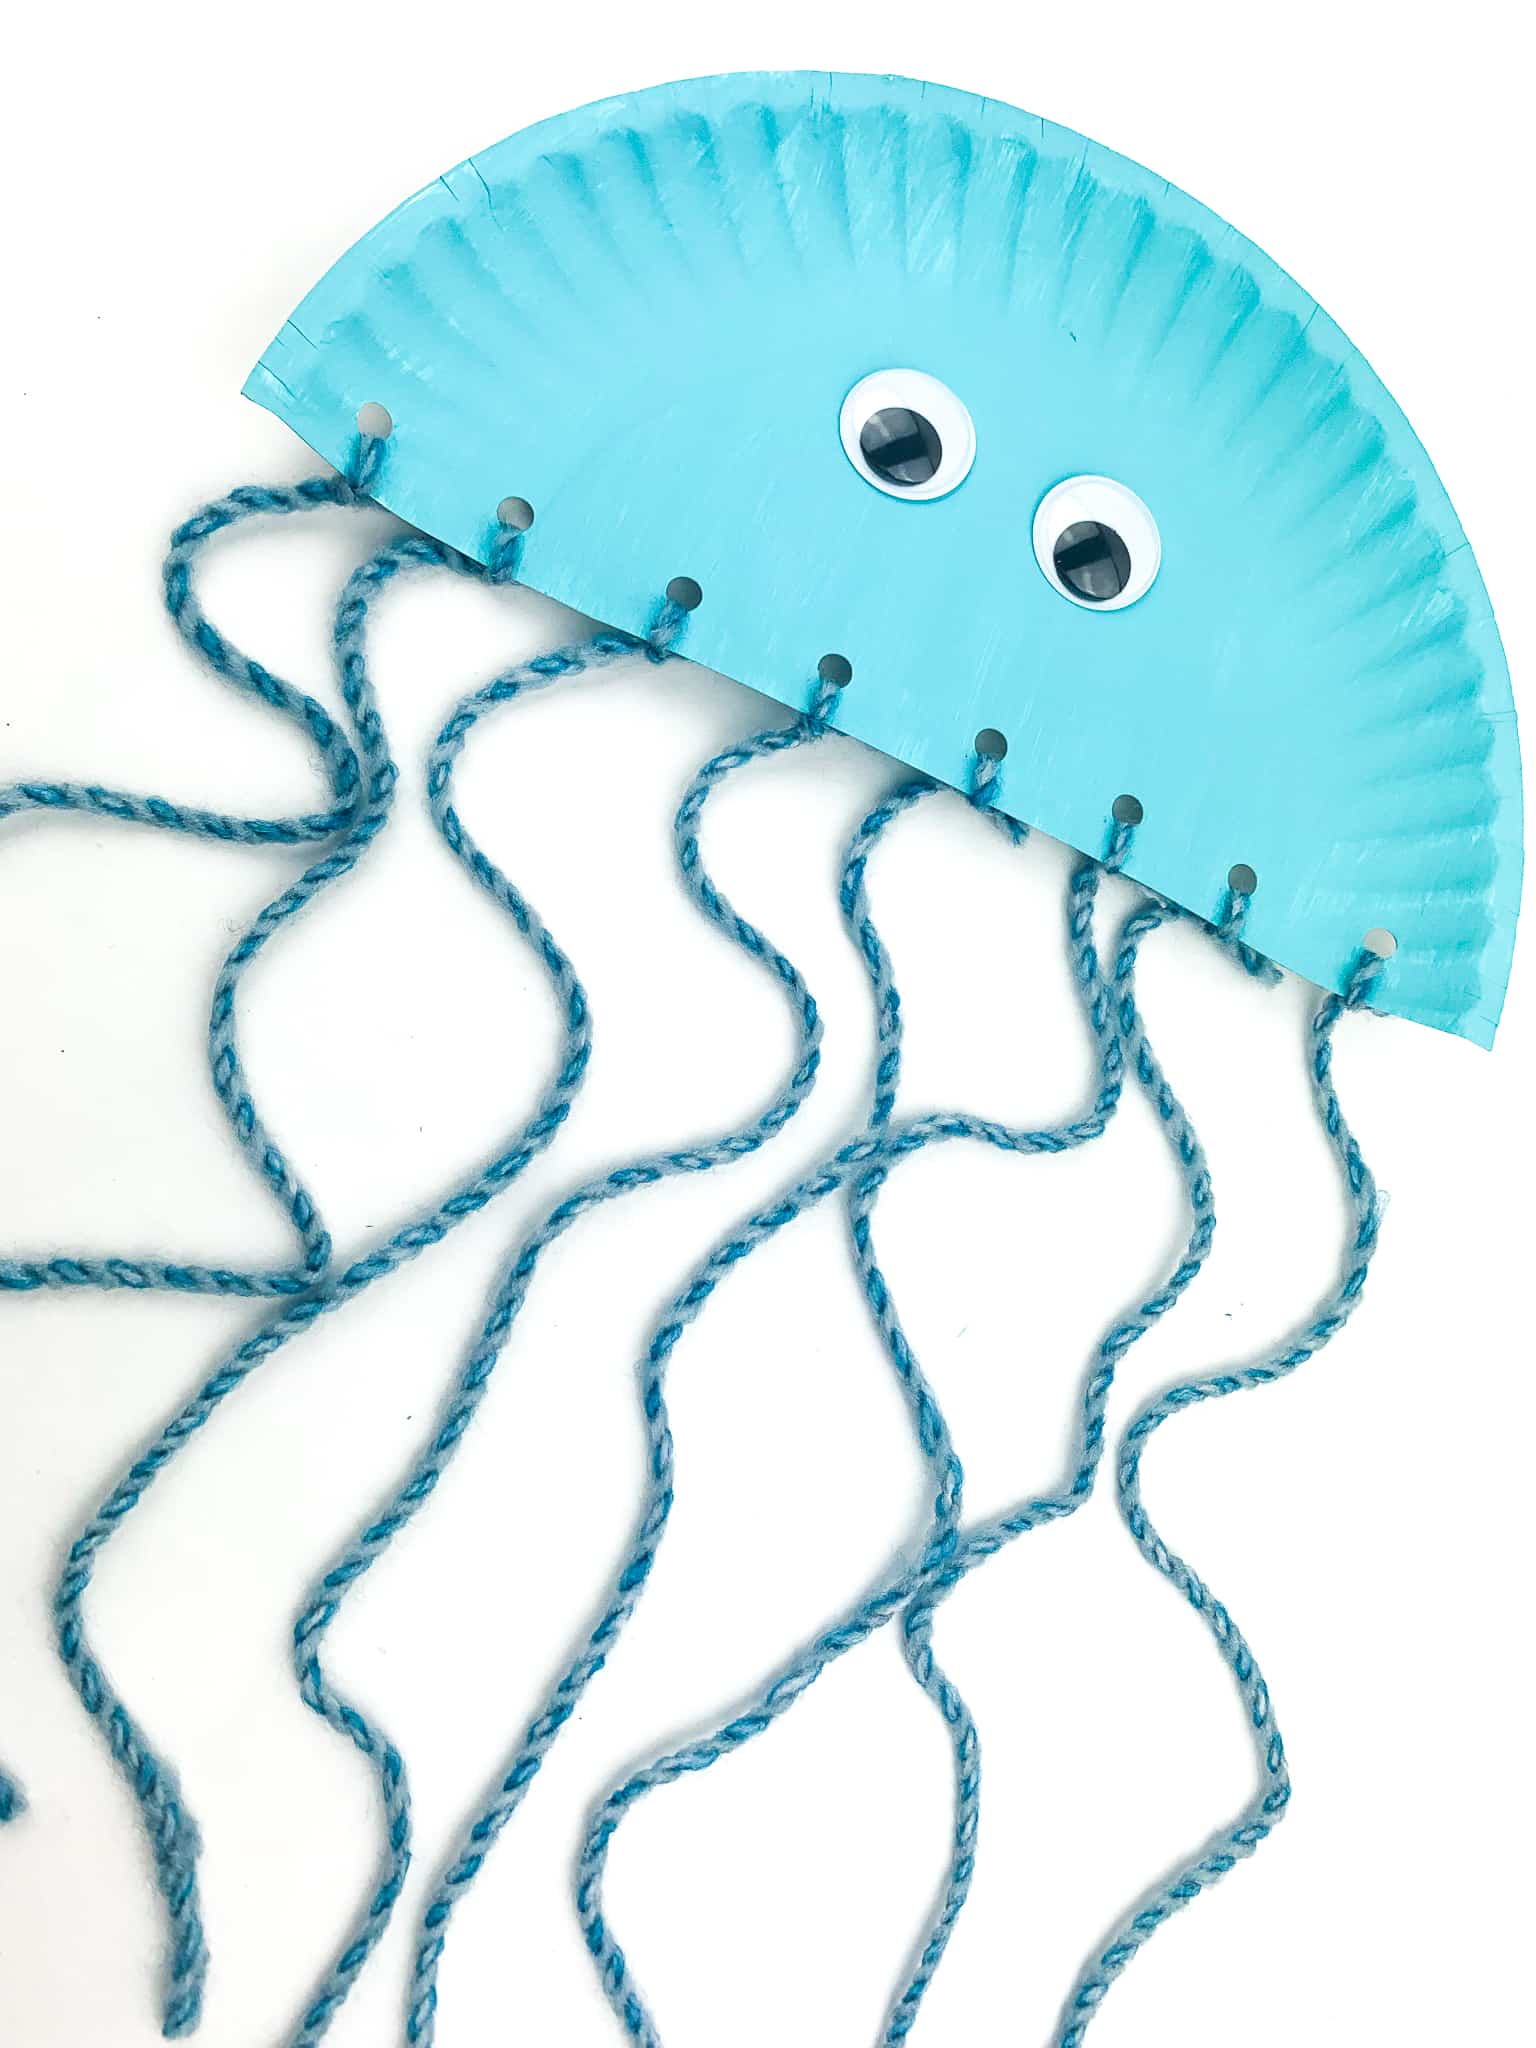
- Then, strand a piece of yarn through each hole and tie the end into a knot on the unpainted side of the plate.
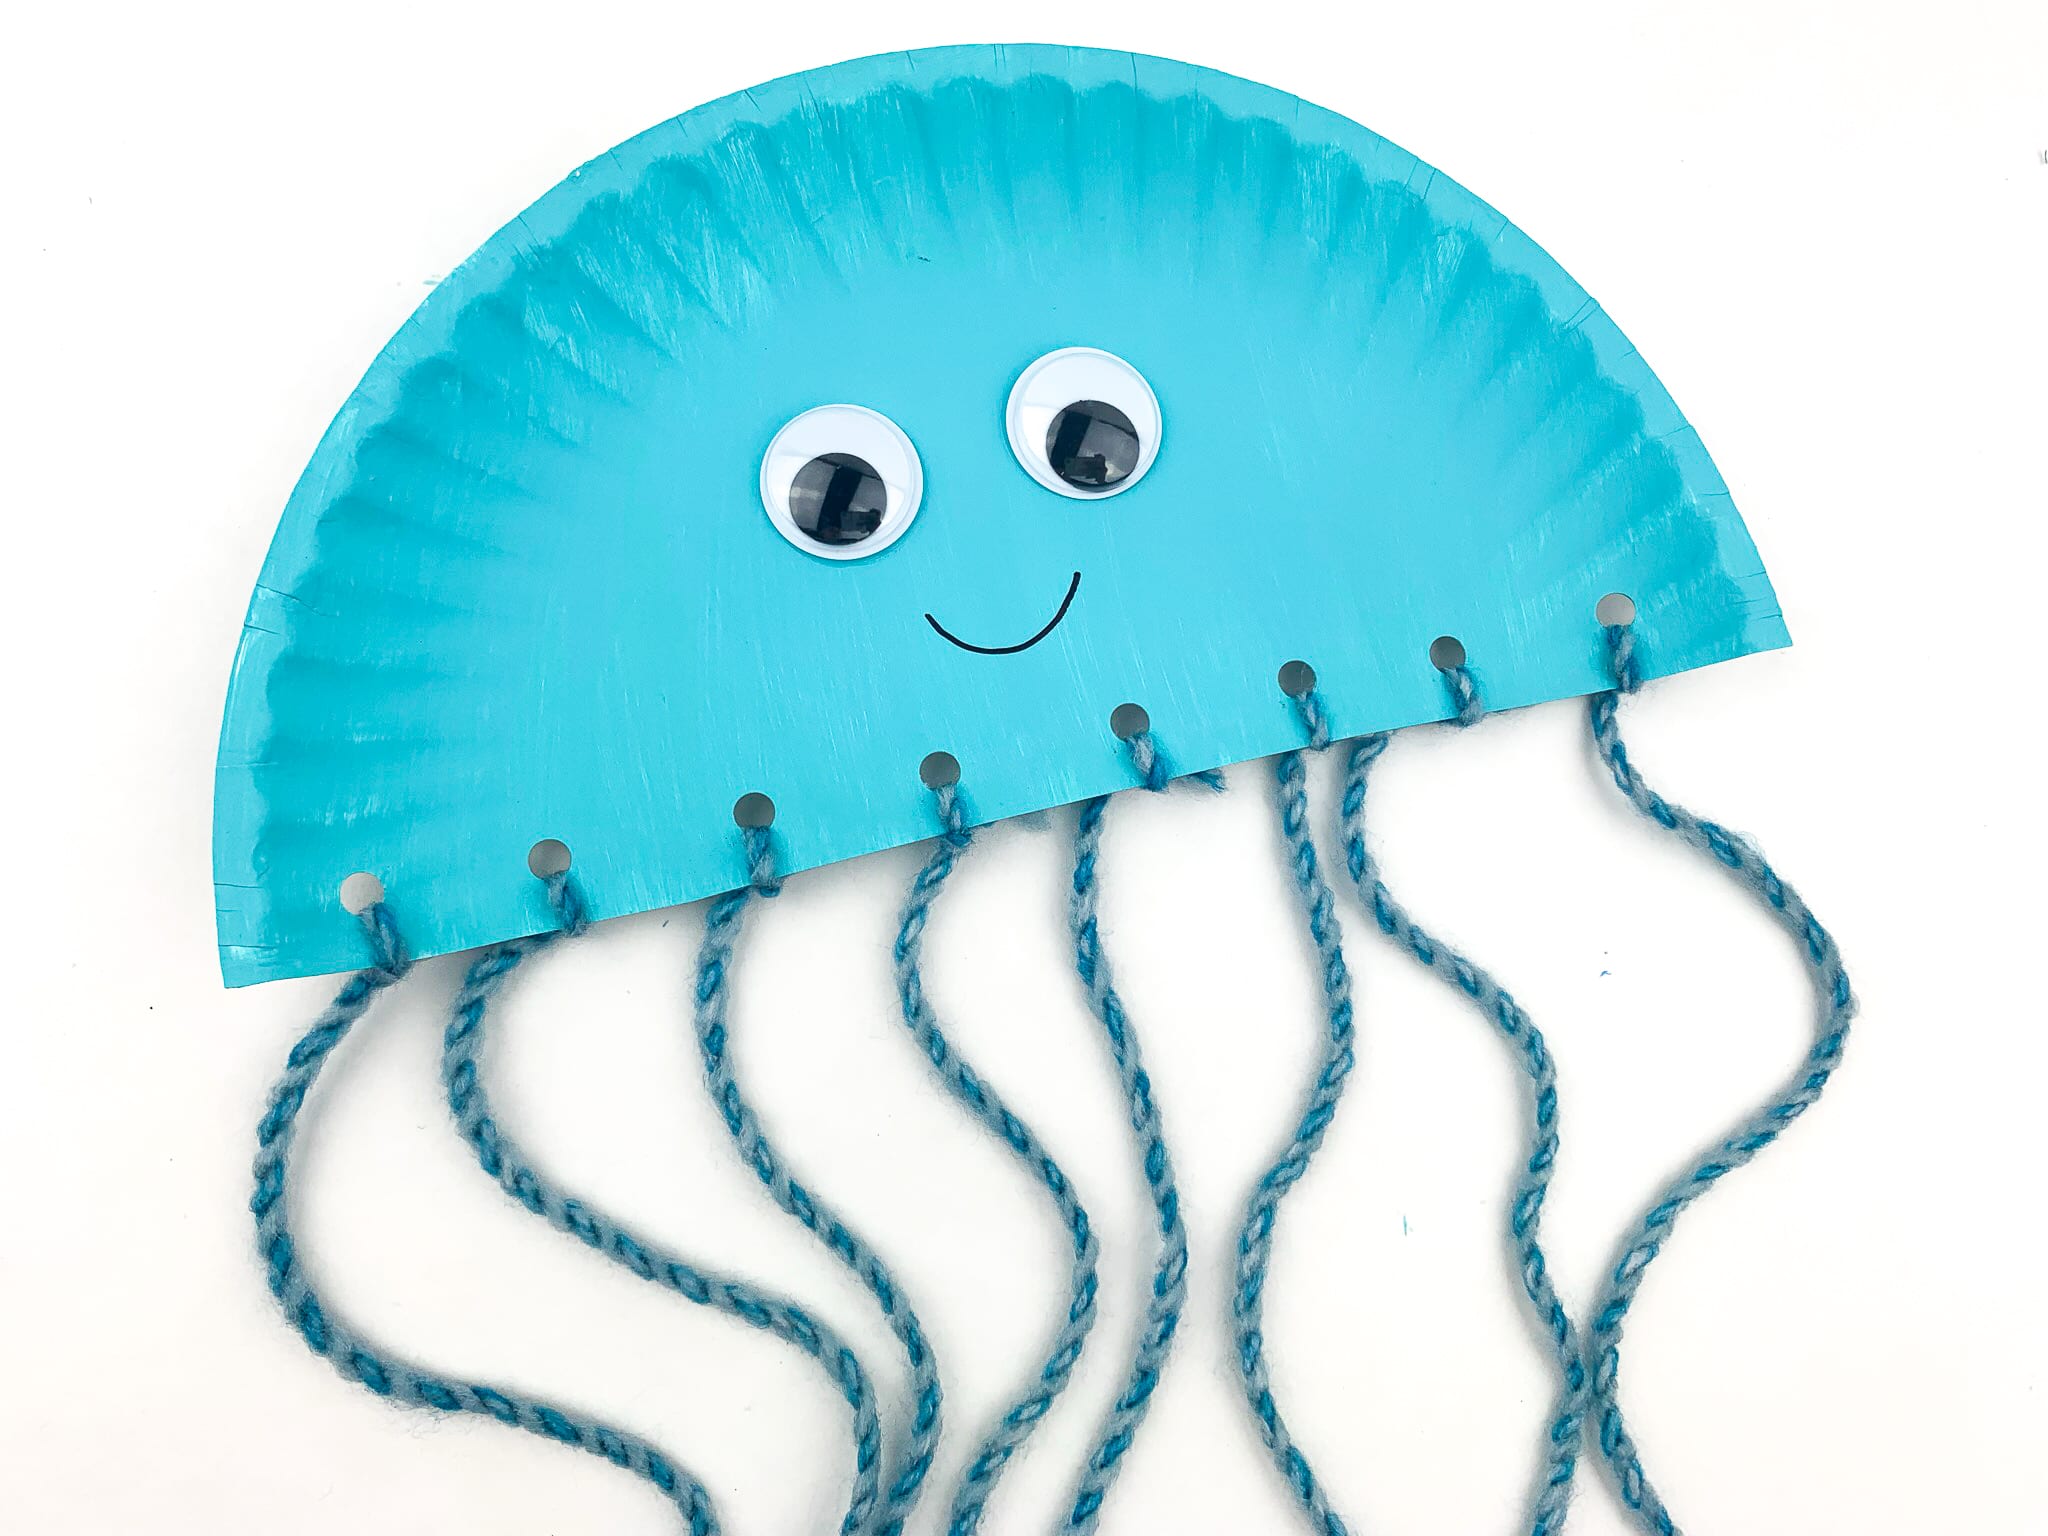
- Glue googly eyes onto the paper plate and then draw a smiling mouth with permanent marker.
- Allow everything to dry if anything is still wet, and then your paper plate octopus craft is ready for play!

What can I use if I don’t have yarn?
Blue curling ribbon would be a great replacement for yarn. Cut extra extra long pieces and curl them. Then your easy octopus craft would have extra silly legs!
Can I use card stock instead of a paper plate?
Card stock will likely not hold up well and will tear when you add the yarn tentacles to your octopus. However, you could carefully glue a piece or two together and then cut out a half circle. It would likely work then!
Pro Tips!
- Save some time and buy paper plates that are already colored blue. You can find them in the party section or at your nearest party supply store.
- Use glitter glue or sprinkle blue glitter on the paint while it’s still wet. Then your little paper plate octopus has some sparkly fun!
- If you make this craft with a large group or class, write the name of each child on the back of the plate before you paint. That way, every child leaves with their octopus and nothing gets mixed up.
Enjoy your day “under the sea” making this happy little paper octopus!
More Fun Activities and Crafts You’ll Love
- Want to make more cute creatures? This Ladybug Handprint Craft is so fun!
- If you need a quick and easy summer activity, check out this printable Summer Color by Number.
- This Paper Plate Flag Craft is the cutest fourth of July decor you can make with your kiddos!
- More printable goodies! Check out this Bug Color by Number.
Paper Plate Octopus Craft
Ingredients
- Large paper plate
- Blue craft paint
- Blue yarn
- Paint brush
- Hole punch
- Self stick googly eyes or glue if they aren’t self stick
- Black permanent marker
- Scissors
Instructions
- Cut the paper plate in half.
- Paint one half of the paper plate blue. Use a second coat if needed. Set aside and allow to dry completely. You could also use a blue plate so you didn't need to paint it.
- Using the hole punch, punch 8 holes into the flat bottom part of the paper plate. Try to space the holes out as evenly as possible.
- Cut the yarn into 12 inch pieces. Complete this step 8 times.
- String each piece of yarn into each hole in the paper plate and tie into a knot. (I place the yarn going through the painted side and tie in a knot on the unpainted side.
- Stick (or glue) the eyes onto the paper plate. Draw a mouth.
- Your paper plate craft is ready for play or display!
Notes
- Use a blue plate so you don't have to paint it to save time!