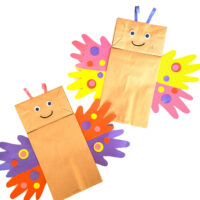
Paper Bag Butterfly
Fun and easy Paper Bag Butterfly craft is so fun to make with kids! It requires minimal supplies, is inexpensive to make and uses the child’s handprints for wings. A fun kids craft for spring and summer.
This precious paper bag butterfly kids craft is great to make in spring or summer! It is also a great craft for kids to make at a butterfly themed birthday party. Complete with some tasty spring sugar cookies and maybe a second silly bug craft like this paper bag handprint bee craft!
I love this paper butterfly craft because my kids can pretty much make it unsupervised. There’s a little bit of cutting and pasting, so younger kids may need some help, but overall this is a really simple craft.
It turns out so adorable and my kids really use their imagination to play with them afterwards. You can put on a puppet show with your diy paper butterfly or take it outside as you go on an adventure searching for real butterflies!
And after that butterfly search, you can do a lesson on with this butterfly life cycle craft. There’s so much fun waiting to be had, so let’s get started!
Why You’ll Love This Craft
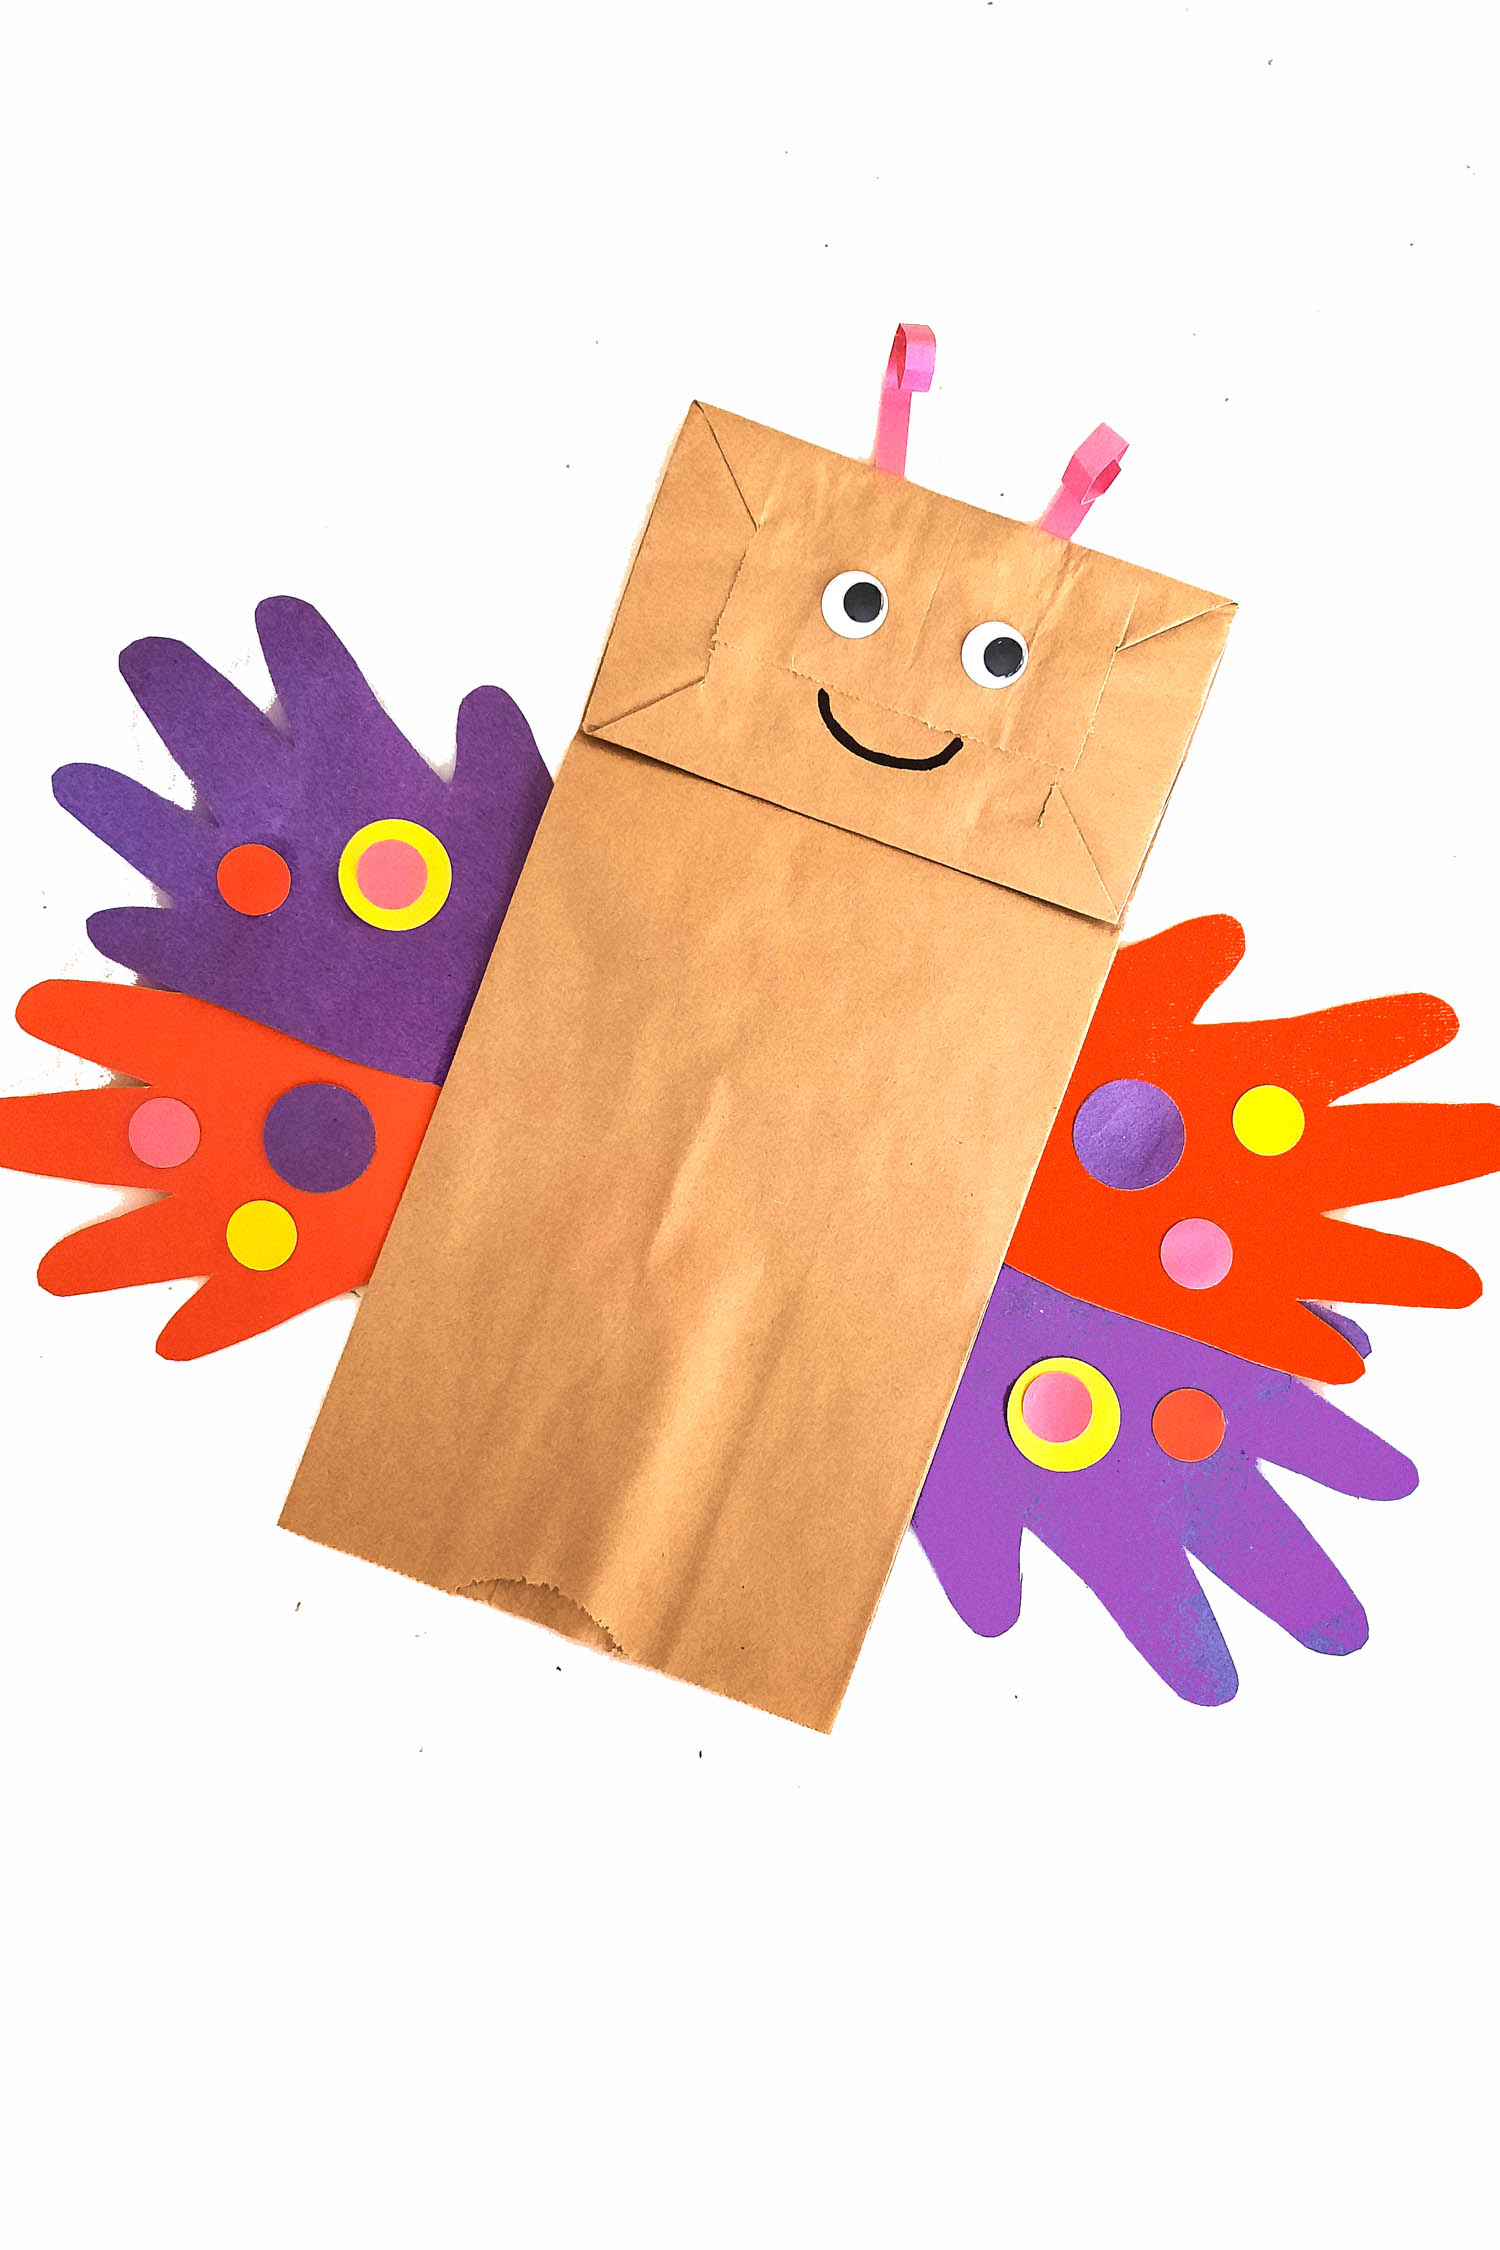
- This sweet paper bag craft uses your child’s handprints as the butterfly wings. It’s a great keepsake craft to look back on one day and remember how little their hands were!
- If you have craft time a lot, you will likely have many of the supplies for this cute spring craft on hand. Either way, the supplies are affordable and leftovers can be used in many other crafts.
- Cutting and pasting are great activities that encourage the refinement of fine motor skills.
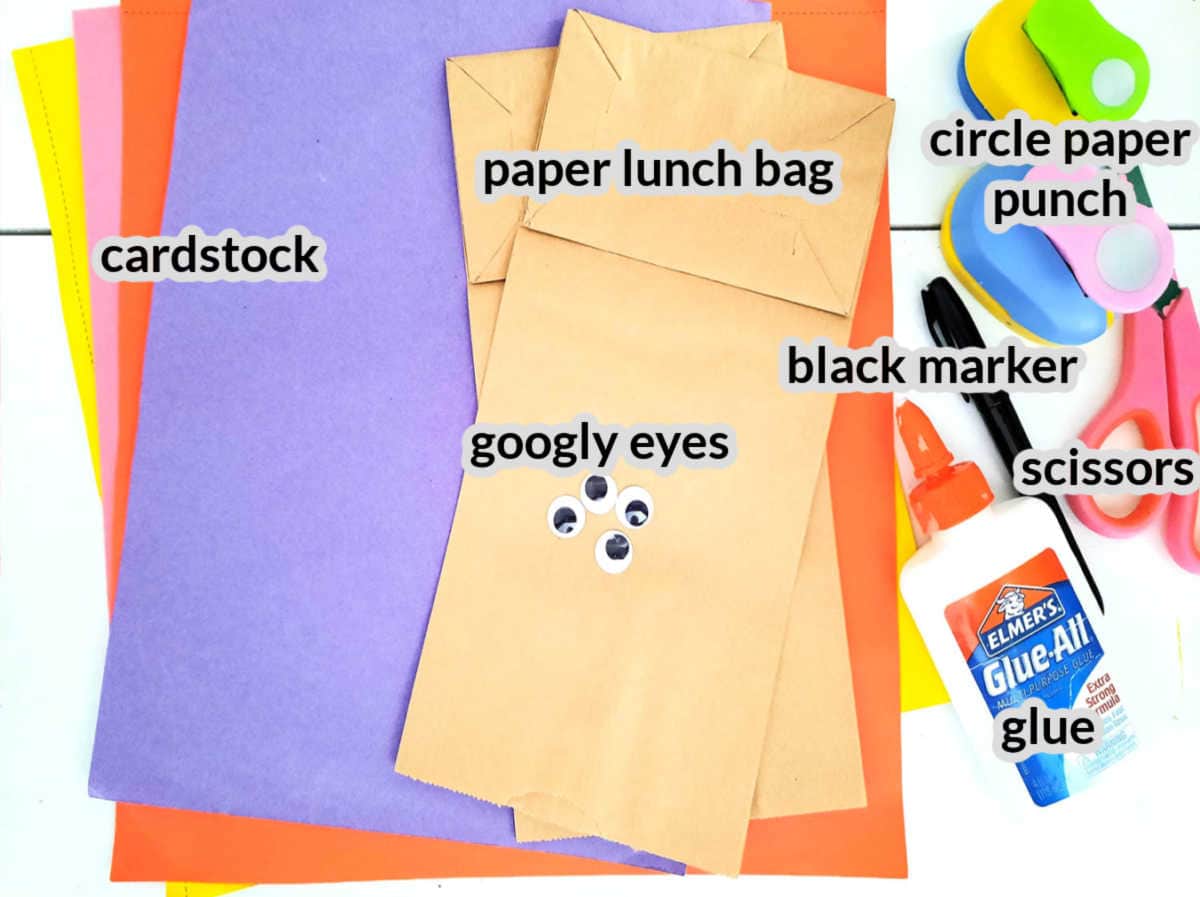
Supplies Needed For Paper Bag Butterfly Craft
- Paper lunch bag – You can typically find these on the aisle with plastic Ziplock bags. If not, they are often sold at craft stores as well.
- Cardstock – You can use construction paper instead of cardstock but the wings for your butterfly puppet might end up a little floppy. You can also use pipe cleaners as the antennae.
- Googly eyes – I used the average size googly eyes, but you could use the large ones too. You can also draw them on with a marker or glue on paper circles.
- Black marker – If you’re working with young children, consider using a washable black marker instead of a permanent marker.
- Glue – Any liquid craft glue will work. You could also use a glue stick!
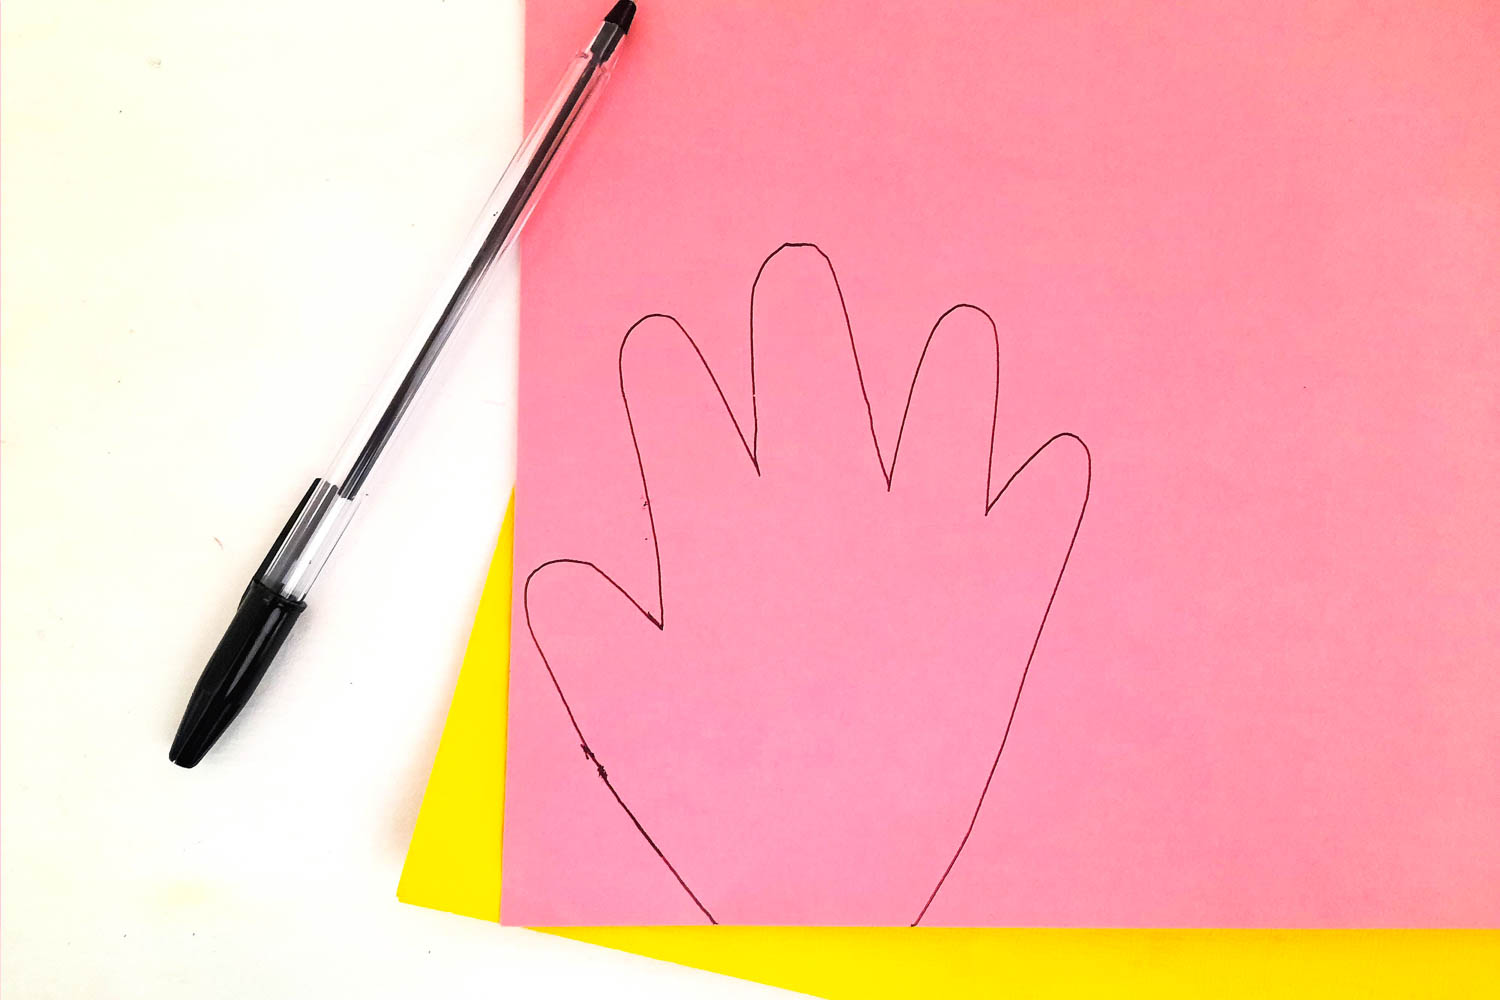
- Pen – You’ll need a pen or pencil to trace your hands to use as the wings.
- Scissors – Safety scissors and regular scissors will both work for this craft.
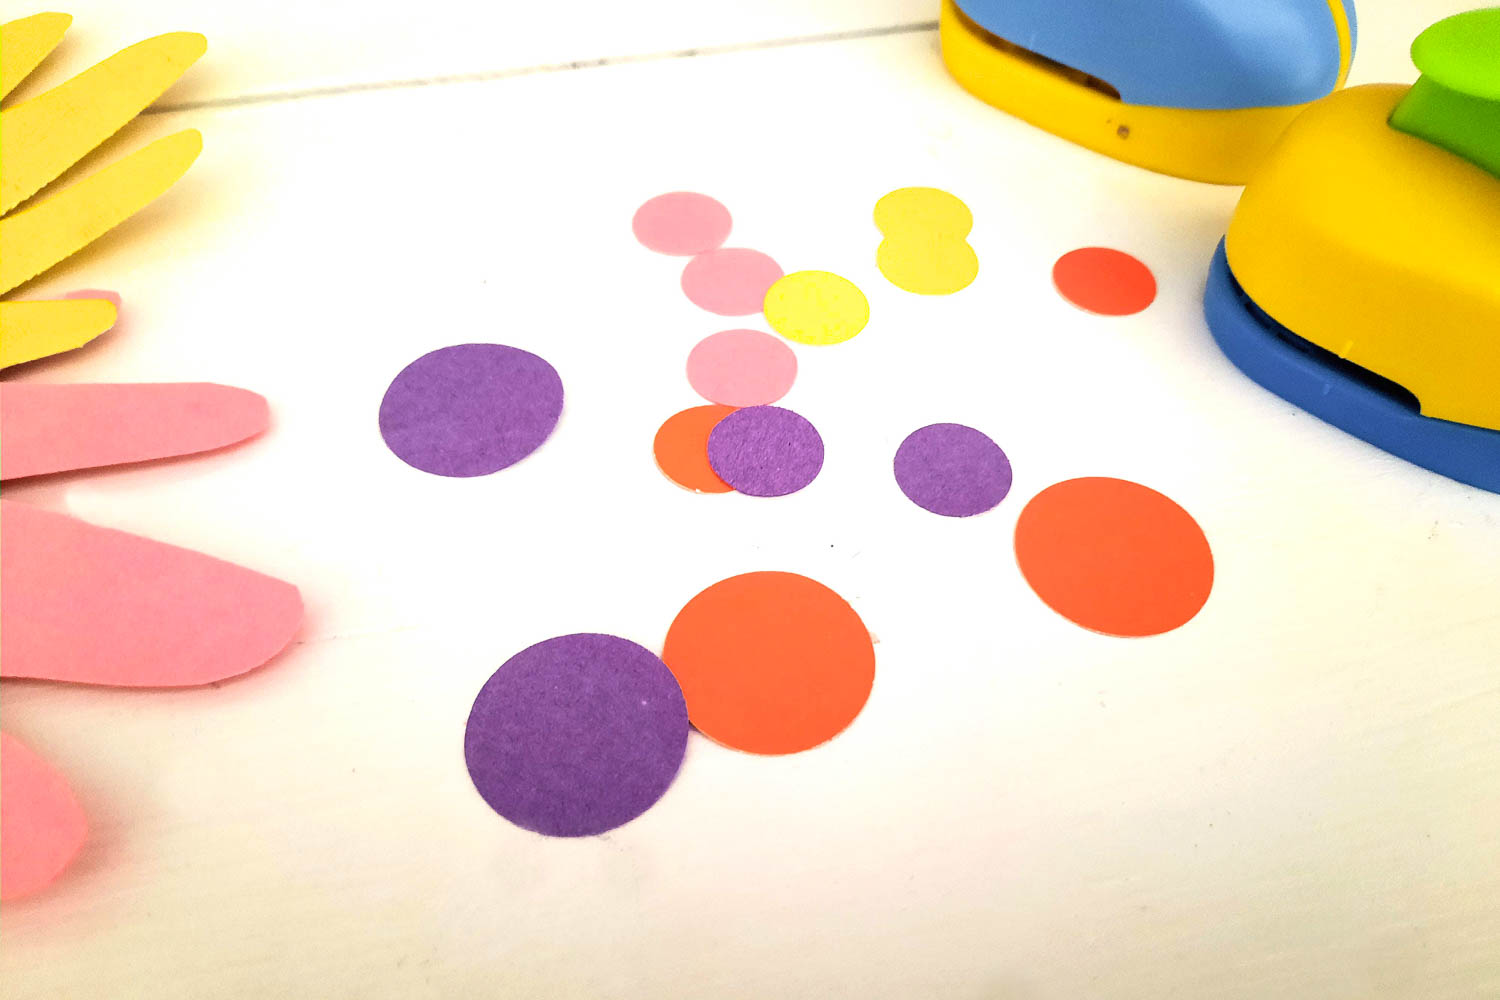
- Circle paper punch – If you can’t find circle paper punches or don’t have them, you can use scissors to freehand some circles. Different sizes of circle stickers would work well, too.
How To Make A Paper Bag Butterfly
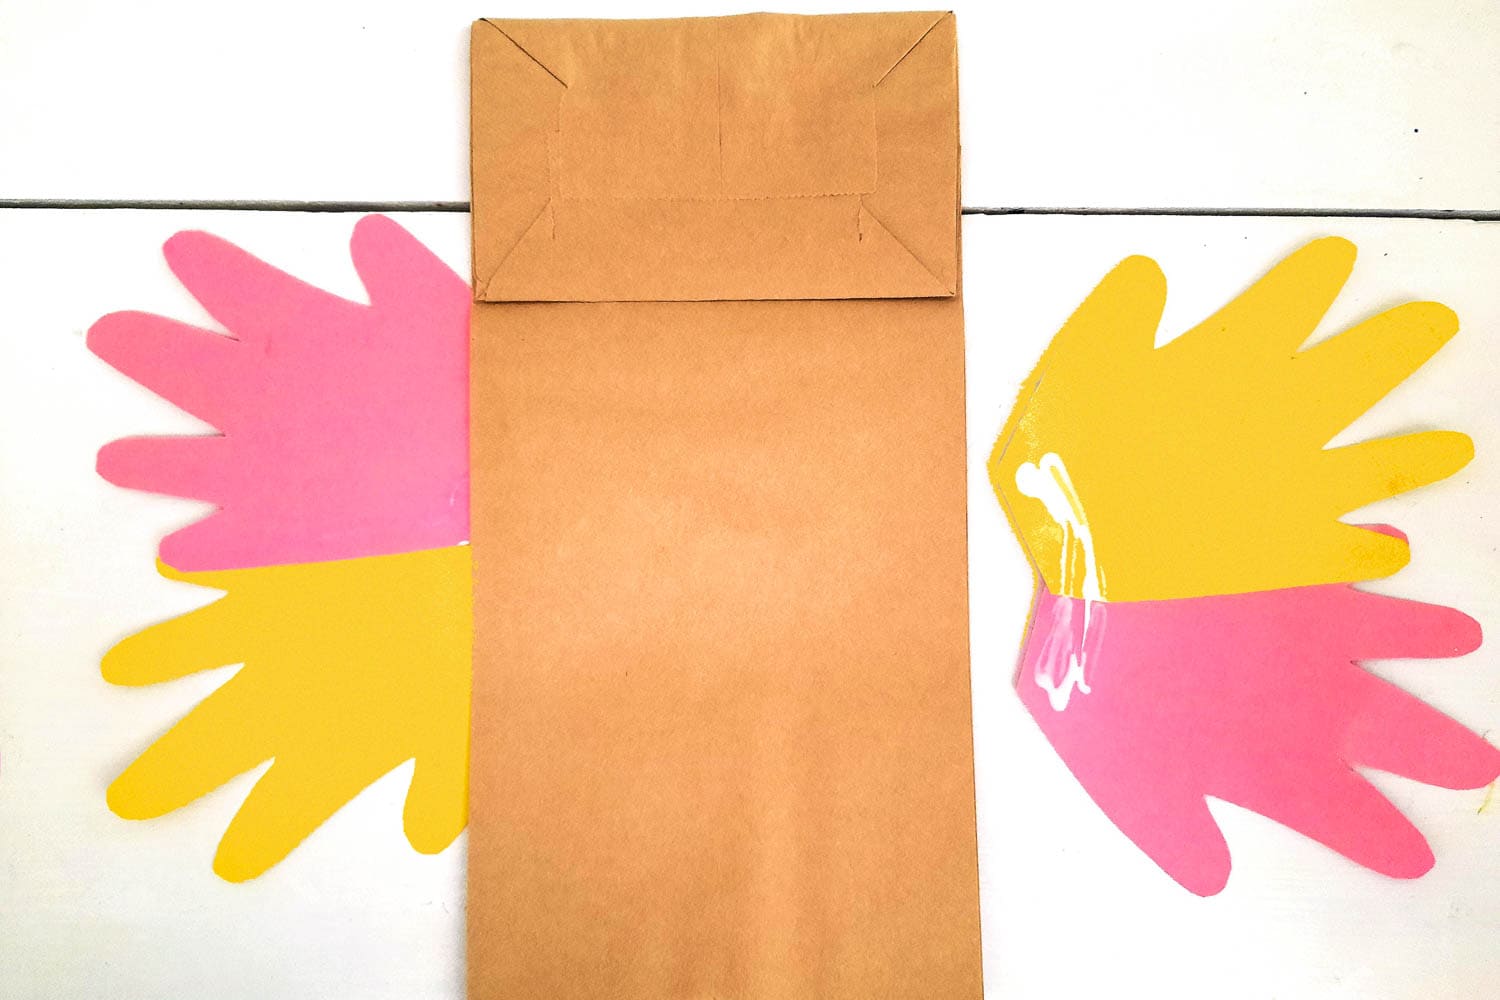
Choose two colors of cardstock. Have your kids trace their handprints on each color. Older kids can probably trace their own handprint, while younger kids might need a little extra help.
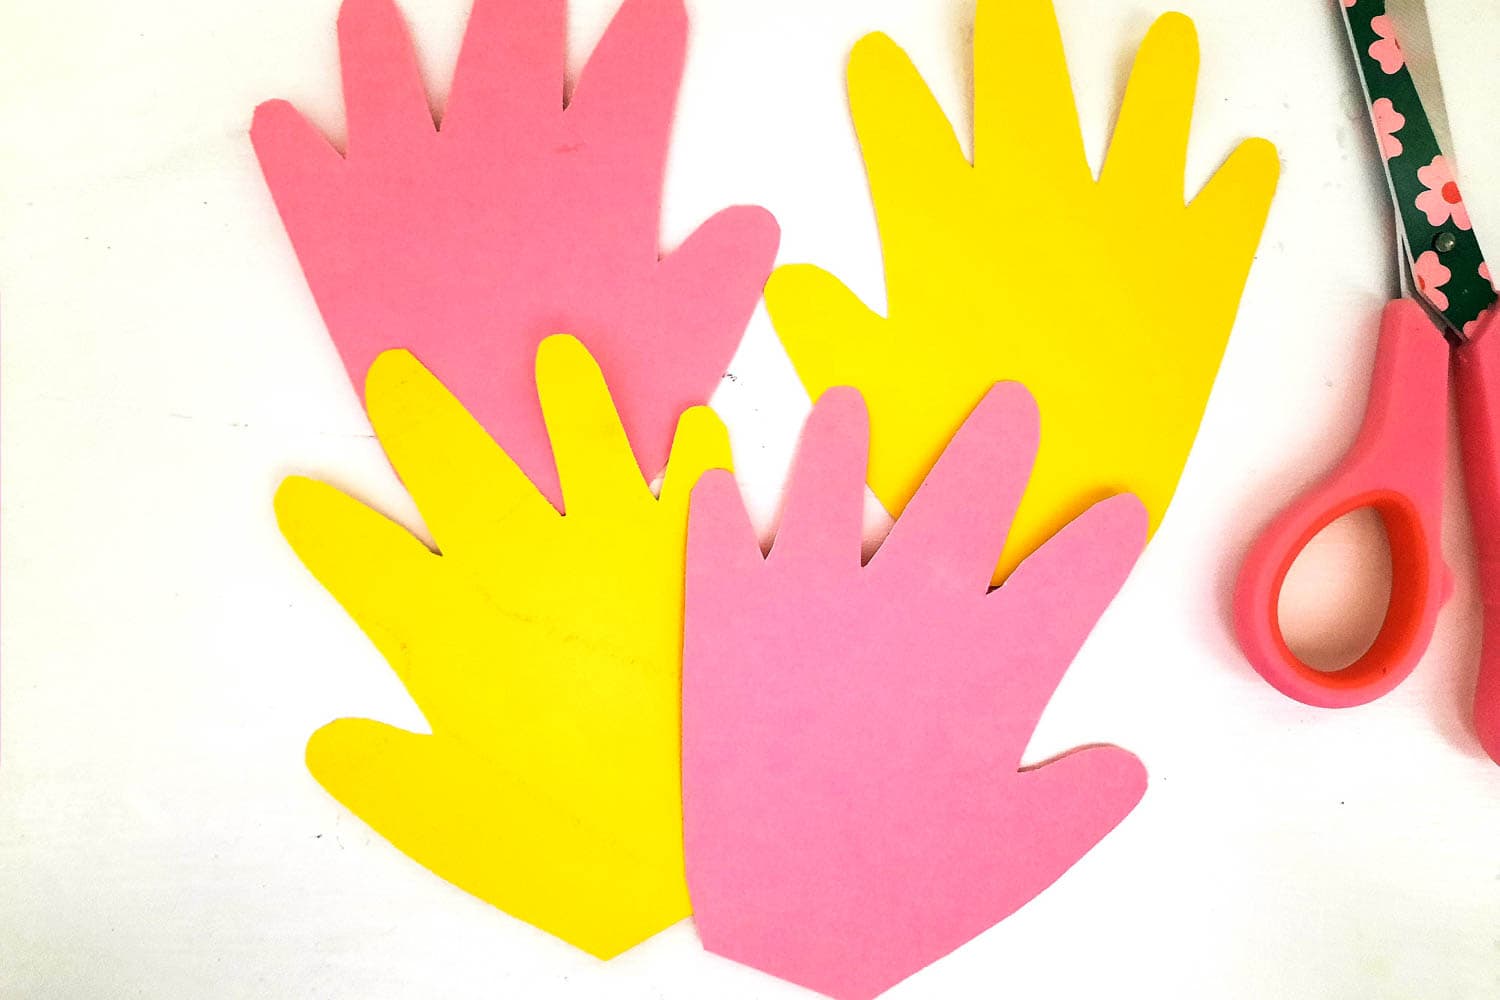
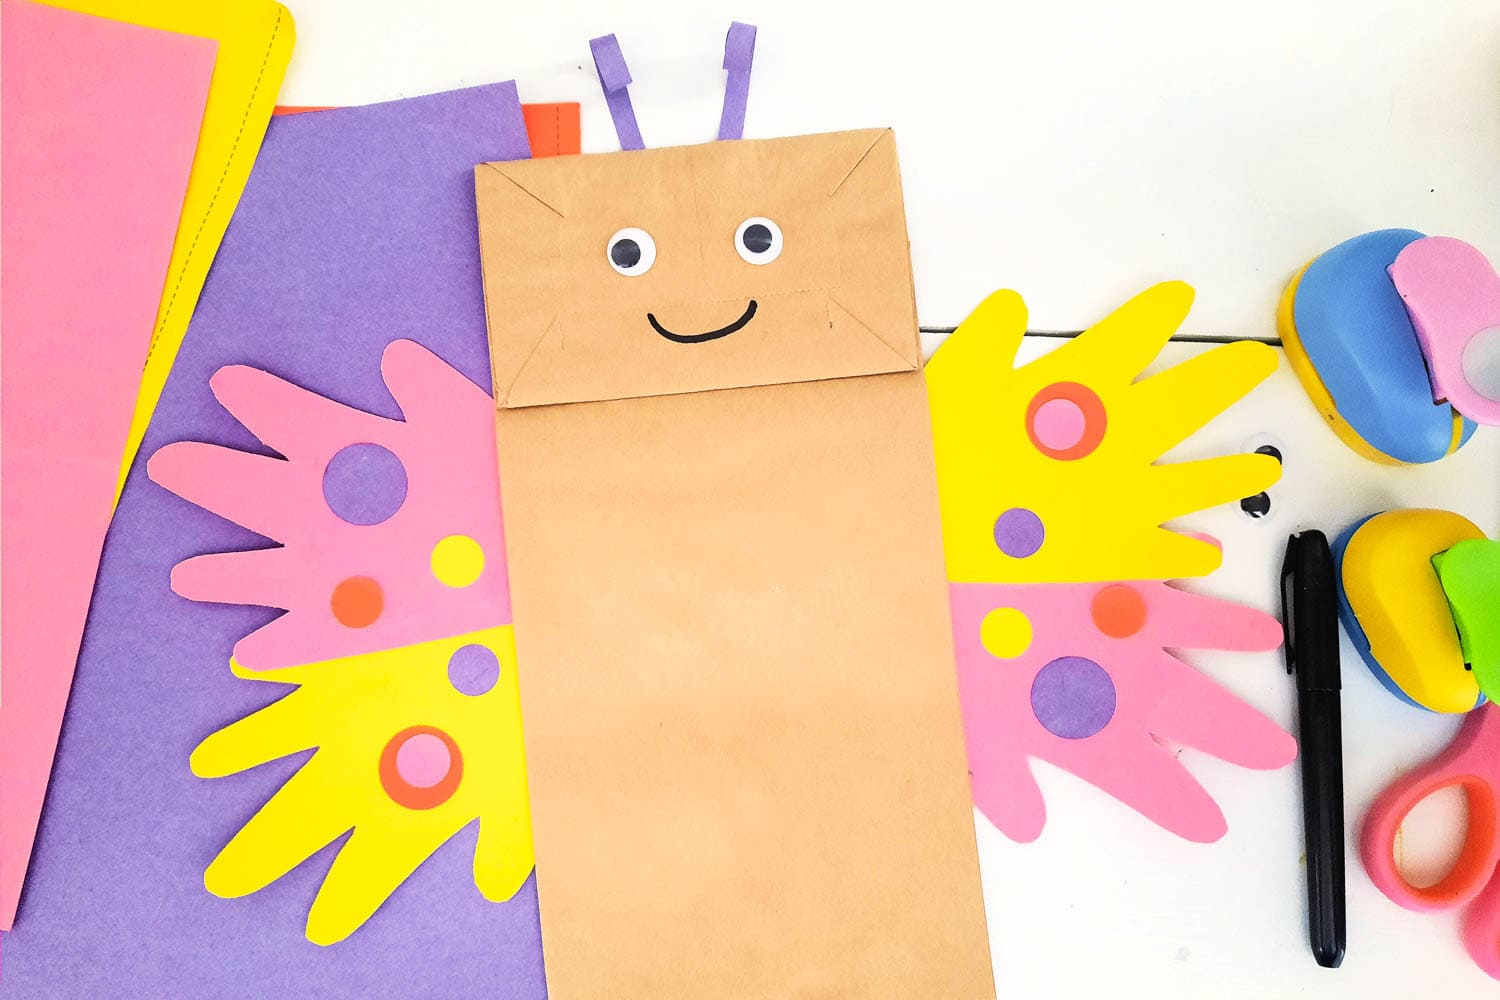
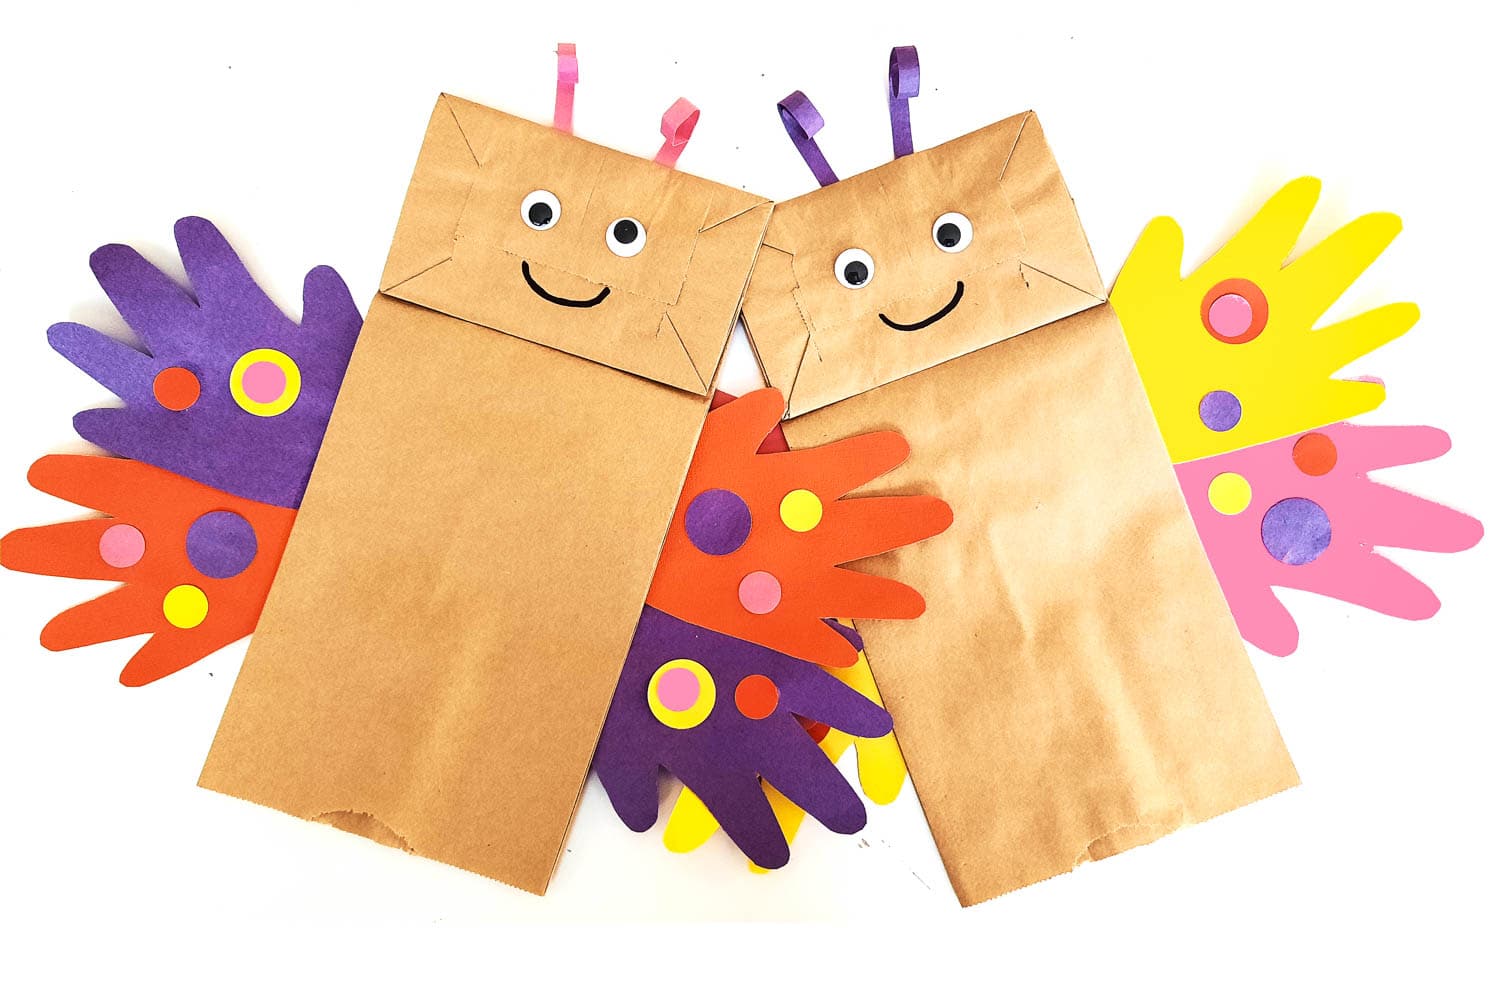
Cut out the handprints and then glue two different colors together, overlapping the pinky fingers. Glue the completed butterfly wings onto the back of the paper bag.
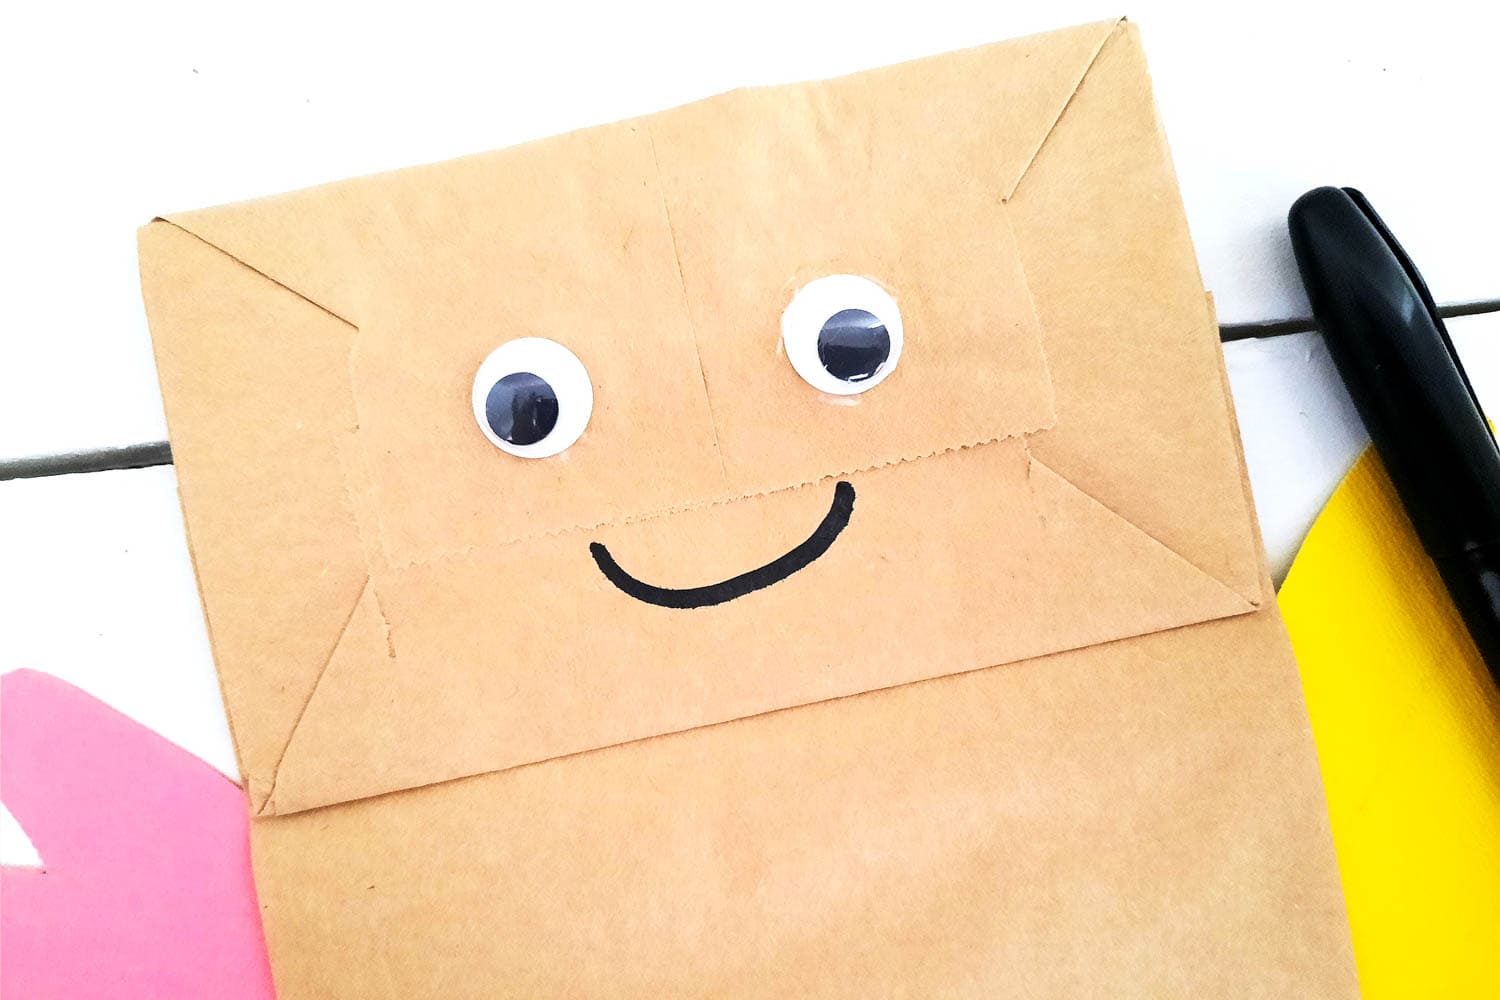
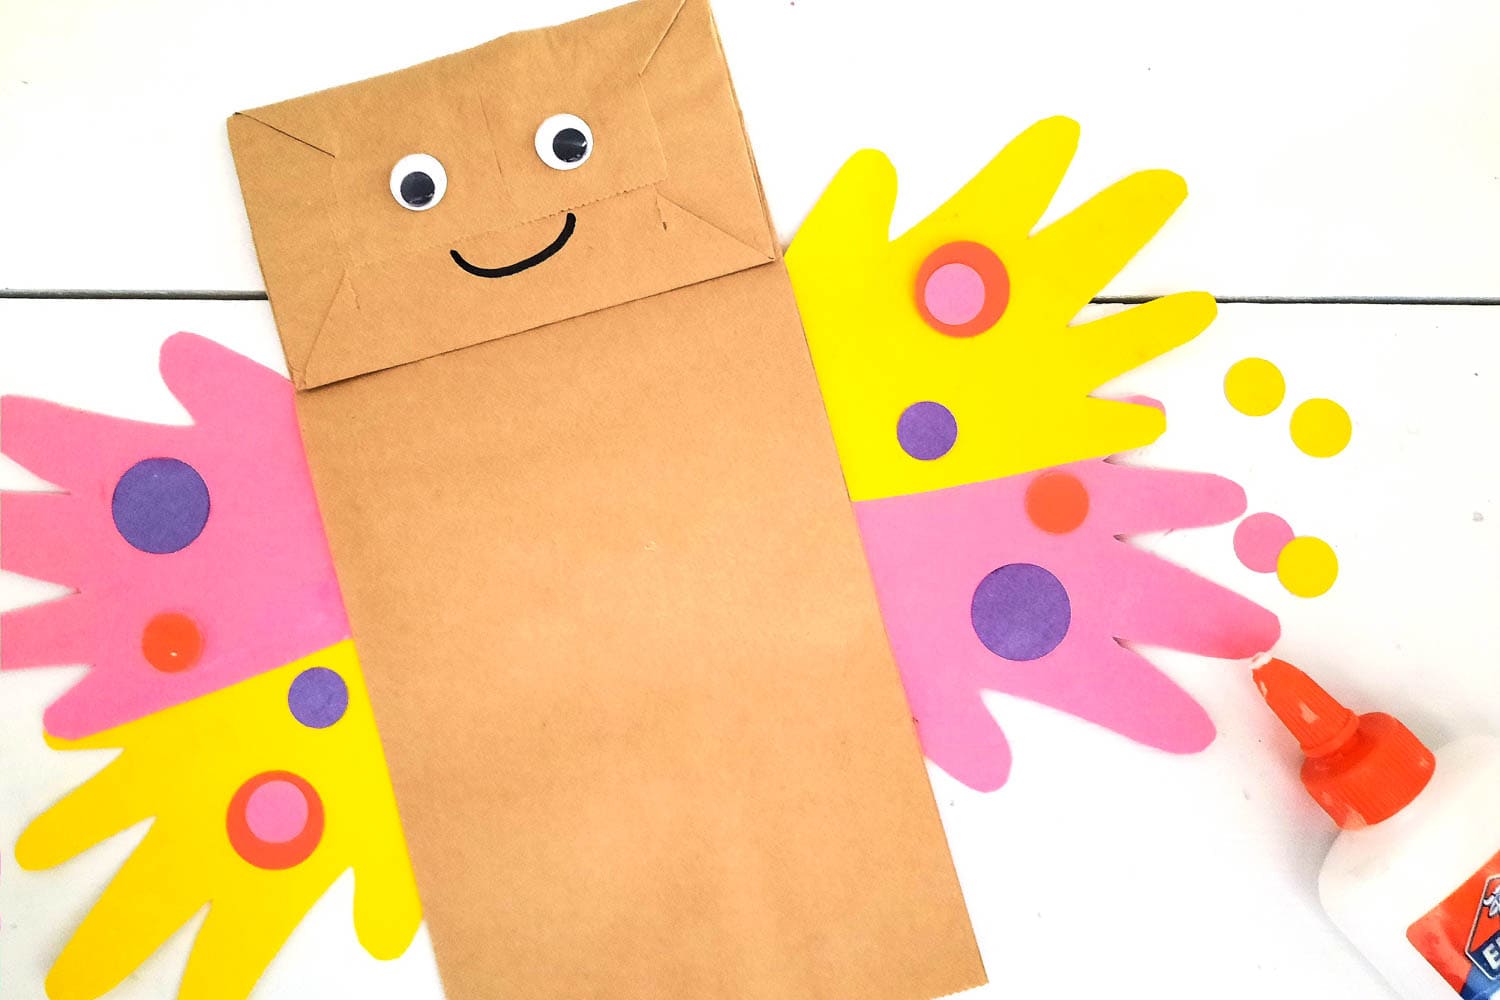
Glue the googly eyes onto the top flap of the brown paper bag. Then draw a mouth with the black marker. You can draw a simple smile or get a little more adventurous and creative with it.
Punch out different sized circles out of various colors of cardstock. Glue them on the wings.
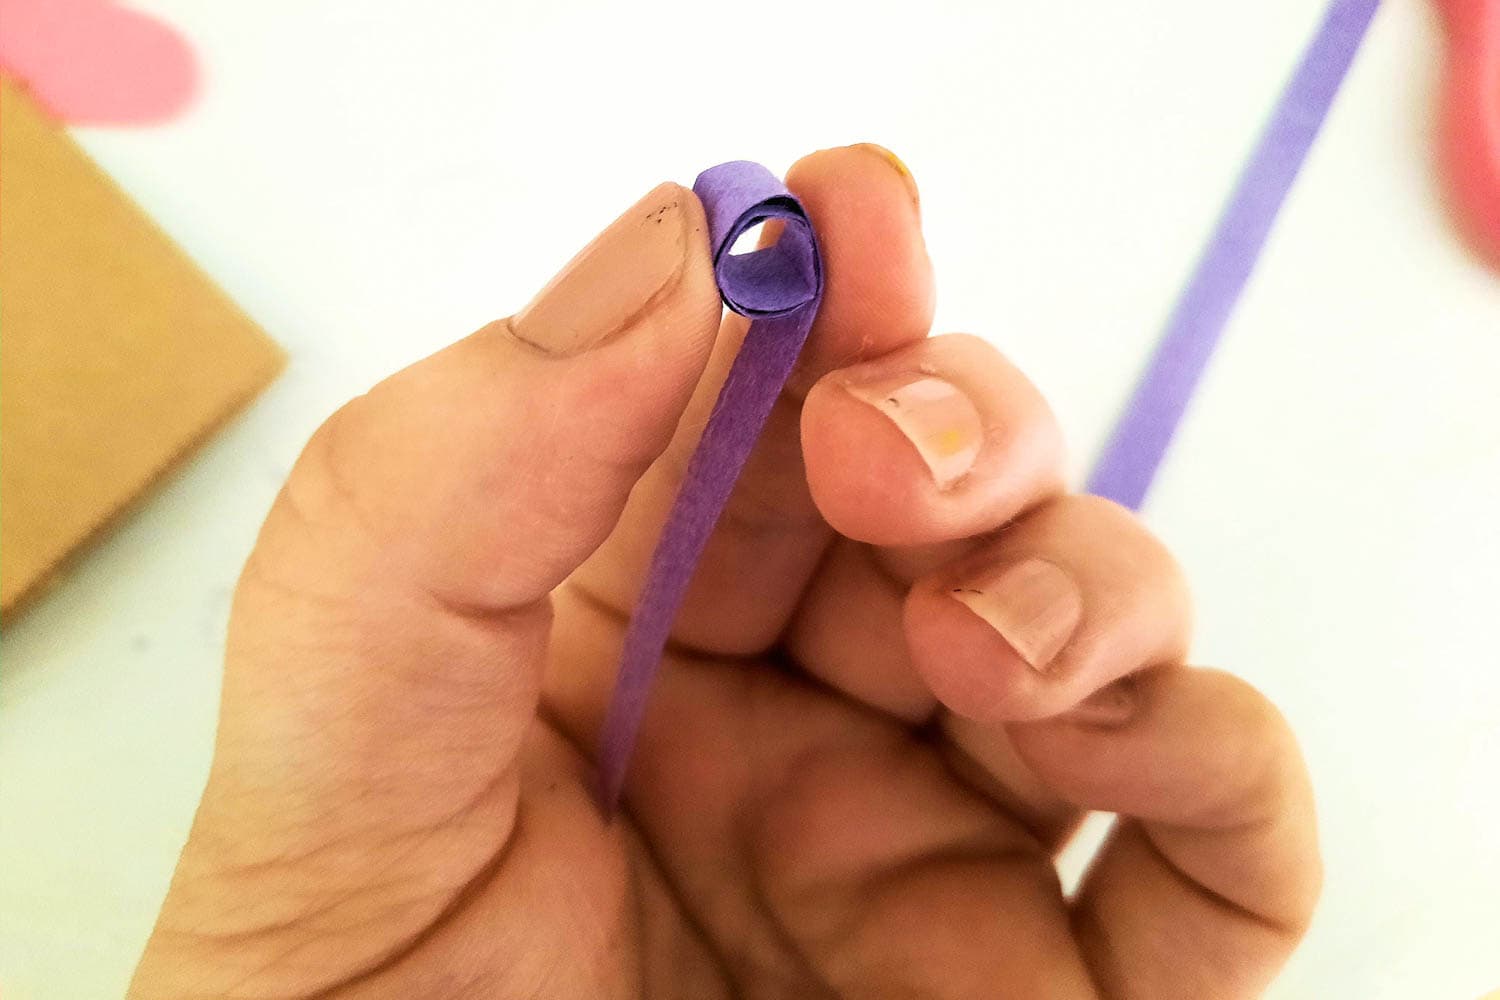
Cut two thin strips out of a third color of cardstock and then twist the ends of the strips around your finger or a pencil to make antennae.
Glue the butterfly’s antennae to the top of the bag.
Allow all of the glue to dry and then have fun!

Pro Tips
- You can make so many variations of this butterfly paper bag puppet! Use different colors and switch things up to make each butterfly perfectly unique.
- Feel free to add spring or summer themed stickers to each butterfly. You could also decorate them with glitter glue, paint or cardstock cut into stripes or other shapes.
- Make sure you use plenty of glue to each part so that it stays secure as you play.
Such a beautiful spring craft that we had a lot of fun creating, and so many different color possibilities. Be sure to make more and see what colors you like best! Make some extra paper bag crafts while you’re at it, like this adorable Paper Bag Love Bug!
Paper Bag Butterfly
Ingredients
Instructions
- First, choose 2 colors of cardstock. Trace your little one’s handprint on both colors. You will need 4 handprints total, 2 of each color.
- Cut out the handprints.
- Now, glue 2 of the handprints together, 1 of each color, side by side.
- Glue the handprints to the back side of the bag.
- Repeat with the other 2 handprints on the other side of the bag to make wings.
- Next, glue the 2 googly eyes in place.
- Draw a simple mouth with the black marker.
- Use the different sized paper punches to make circles out of various colors of cardstock. Glue the circles on the handprint wings in your pattern of choice.
- Finally, cut two small strips of your choice of color cardstock.
- Roll the ends of the strips with your fingers or a pencil to make antennae.
- Glue the antennae in place at the top of the bag.
More Butterfly Crafts You’ll Love
- This Handprint Butterfly is so easy and absolutely adorable. Kids can showcase their creativity mixing and matching their favorite colors.
- If you want to make some DIY butterfly decorations, this Yarn Butterfly Craft is so cute! It would be perfect for a birthday party or even a little girls room.
- This Coffee Filter Butterfly Craft is quick and easy to throw together. With only a few supplies that you have on hand, this activity is quick to prep and there’s minimal mess.
- Need a use for empty toilet paper rolls? This Toilet Paper Roll Butterfly Craft is a great way to up-cycle the collection you’ve got in your craft cupboard.