Butterfly Life Cycle Craft
A great hands on craft that is fun to make when you are observing the life cycle of a butterfly! Not only is it a fun craft, with vibrant colors it’s a great educational activity to pair with a Butterfly Unit at school or when homeschooling.
I’ve got the cutest way for you to teach the life stages of a butterfly! This easy butterfly life cycle craft shows the beautiful transformation that caterpillars make to turn into a gorgeous butterfly. A lot of people think that butterflies only go through molting and take their “new skin” during the spring, but summertime is actually their peak season. From June to late July, the U.S. sees an uptick in butterflies. But there also are some butterflies that show up during the spring, and other during the fall in October and September. So, really this craft has about half of the year where it would be PERFECT to use!
Adult butterflies are truly so pretty and I always love seeing them flutter about. The monarch butterfly is my favorite, but there are so many that are truly beautiful. Of course, my favorite craft butterfly is definitely this handprint butterfly! There are so many sweet memories to be made with crafts like this one, so grab the crafting supplies and enjoy!
Why You’ll Love this Butterfly Life Cycle Craft
- You can complete this craft in just 40 minutes. It’d be a wonderful activity to add into a lesson time or use for a separate craft time too.
- This craft is great for refining fine motor skills. Cutting, glueing and drawing are the best way to work with these tiny muscles that need developing.
- Not only is this fun, but it’s a great learning experience. You can pair this with a lesson on the life cycle of a butterfly and teach as you craft.
Supplies Needed
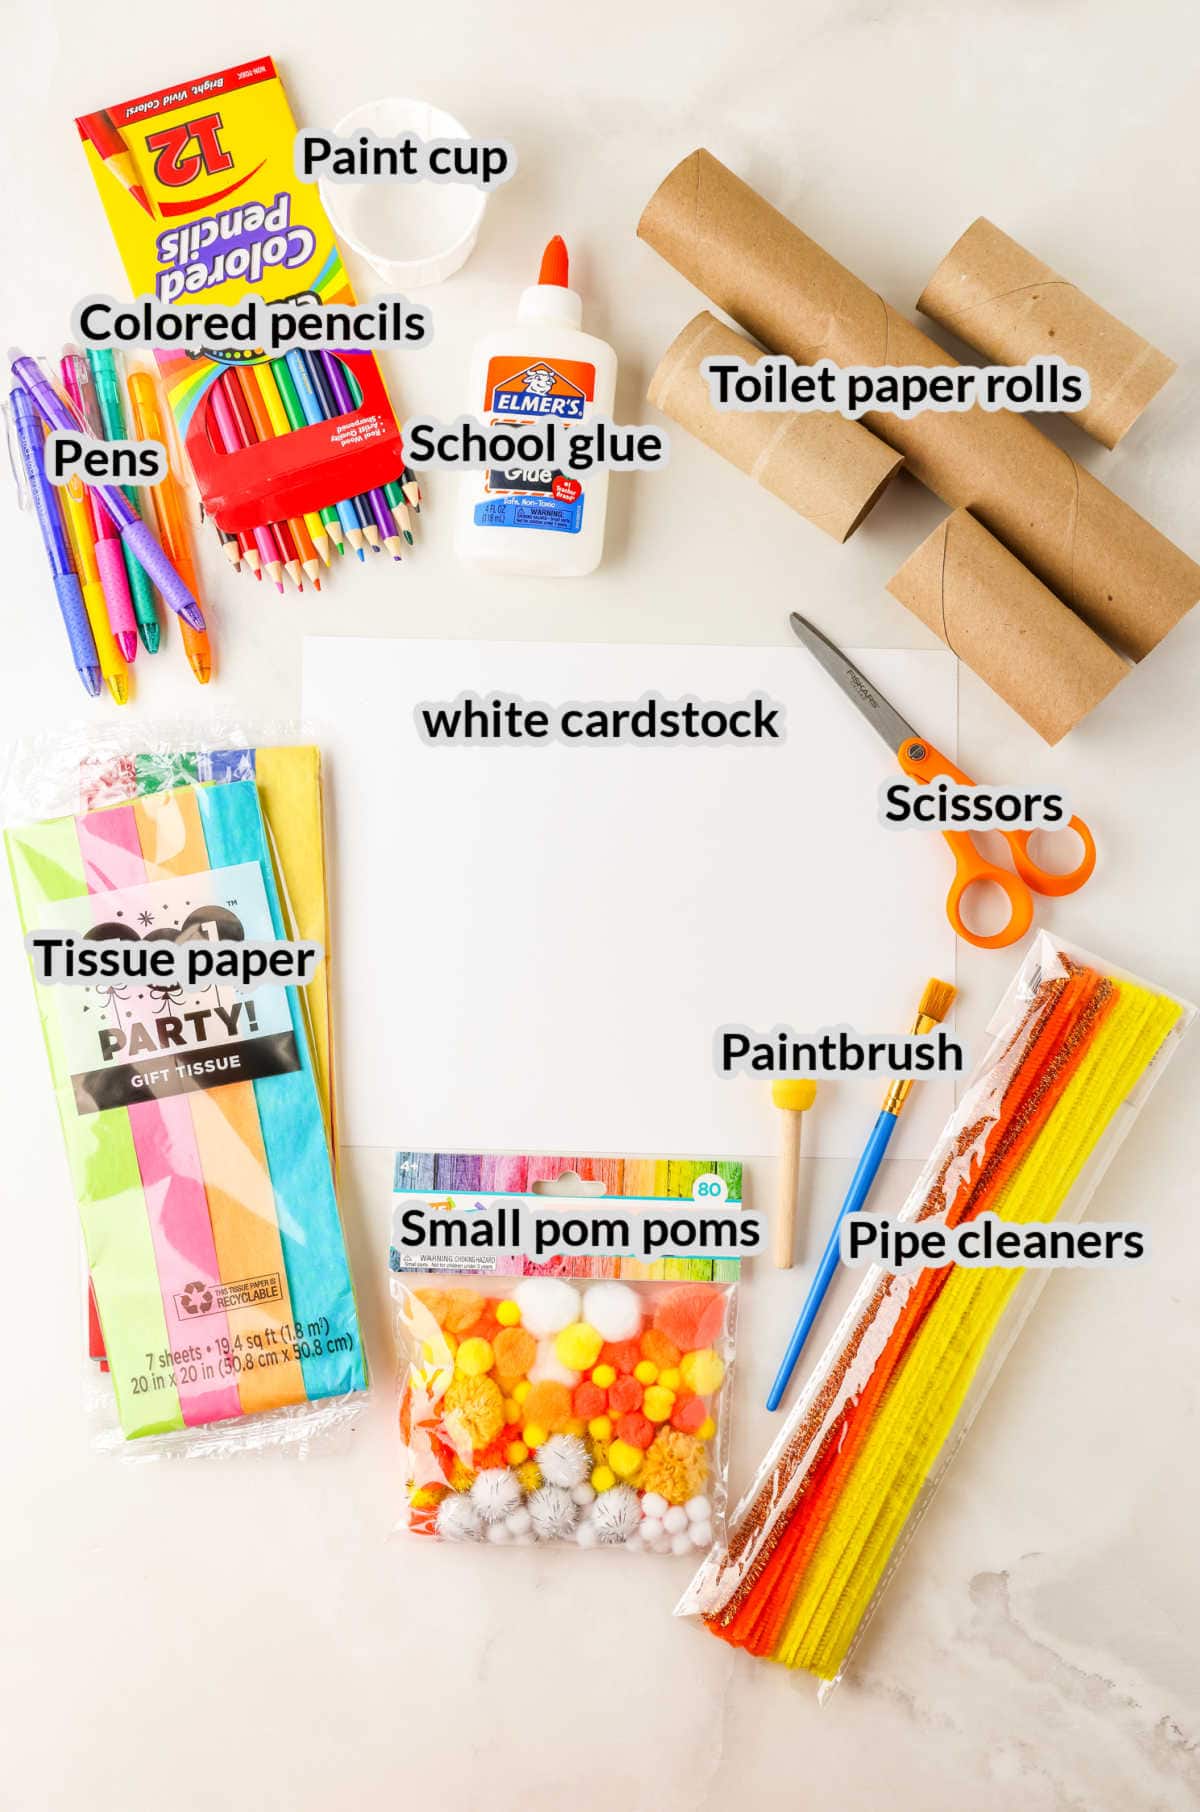
- White cardstock – This will be the base of your craft, which is why cardstock is best to use so that it is sturdy. You could also use a piece of cardboard.
- Toilet paper rolls – An empty paper towel roll will also work. You’ll just need cut it up into little circles.
- Scissors – If you’re making this craft with littles, then consider using some safety scissors.
- Pipe cleaners – Use some pipe cleaners to make antennae for your butterfly.
- Small pom poms – These little craft pom poms will represent the egg stage in the life cycle of the butterfly.
- Tissue paper – You’ll need different colors of tissue paper to fill in the spots for the butterfly and the caterpillar.
- Pens – Grab a pen or a pencil to use for all of your drawing and tracing needs.
- Colored pencils/crayons/markers – Use your favorite coloring supplies to color and draw on your butterfly life cycle craft.
- School glue – I recommend liquid school glue, not a glue stick. You’ll need to be able to “paint” the glue around the cardboard pieces so that they stay on the cardstock.
- Paint cup – A small bowl or paint palette will work, too!
- Paintbrush – Use a craft paint brush to add the glue to the toilet paper roll circles that you’ll secure onto the cardstock.
How to Make this Butterfly Life Cycle Craft
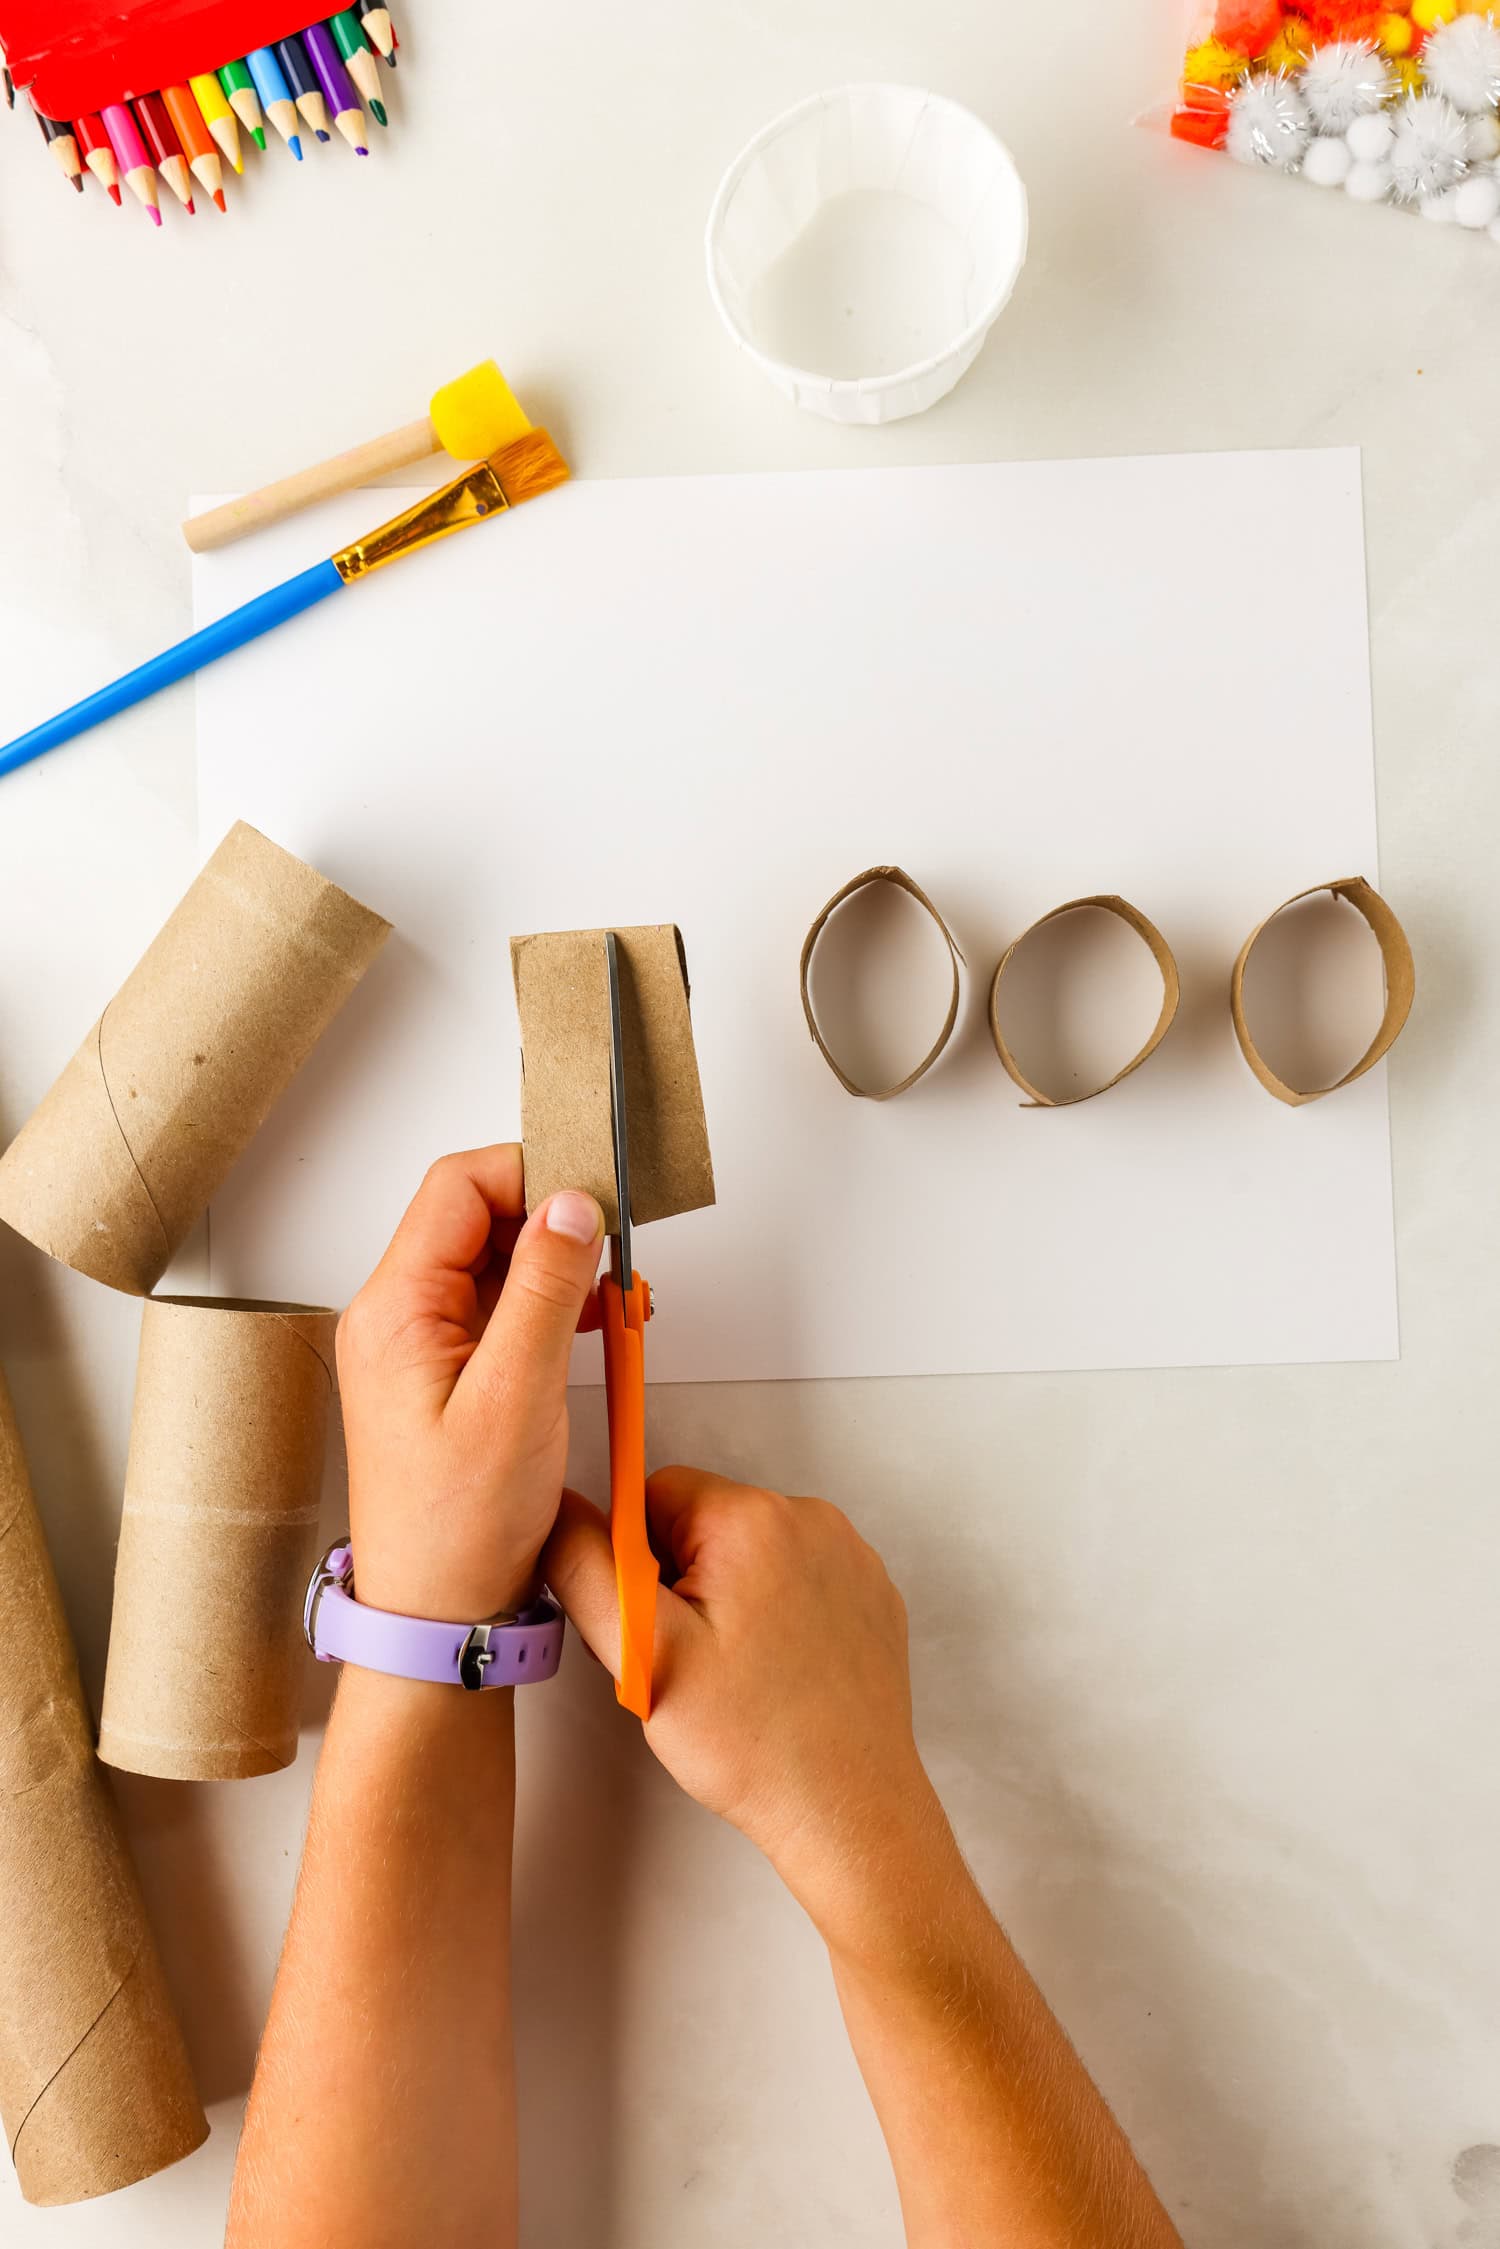
Begin by cutting the cardboard tubes into small sections to form circles. Cut about ½ inch in size, you can measure to be precise, if desired.
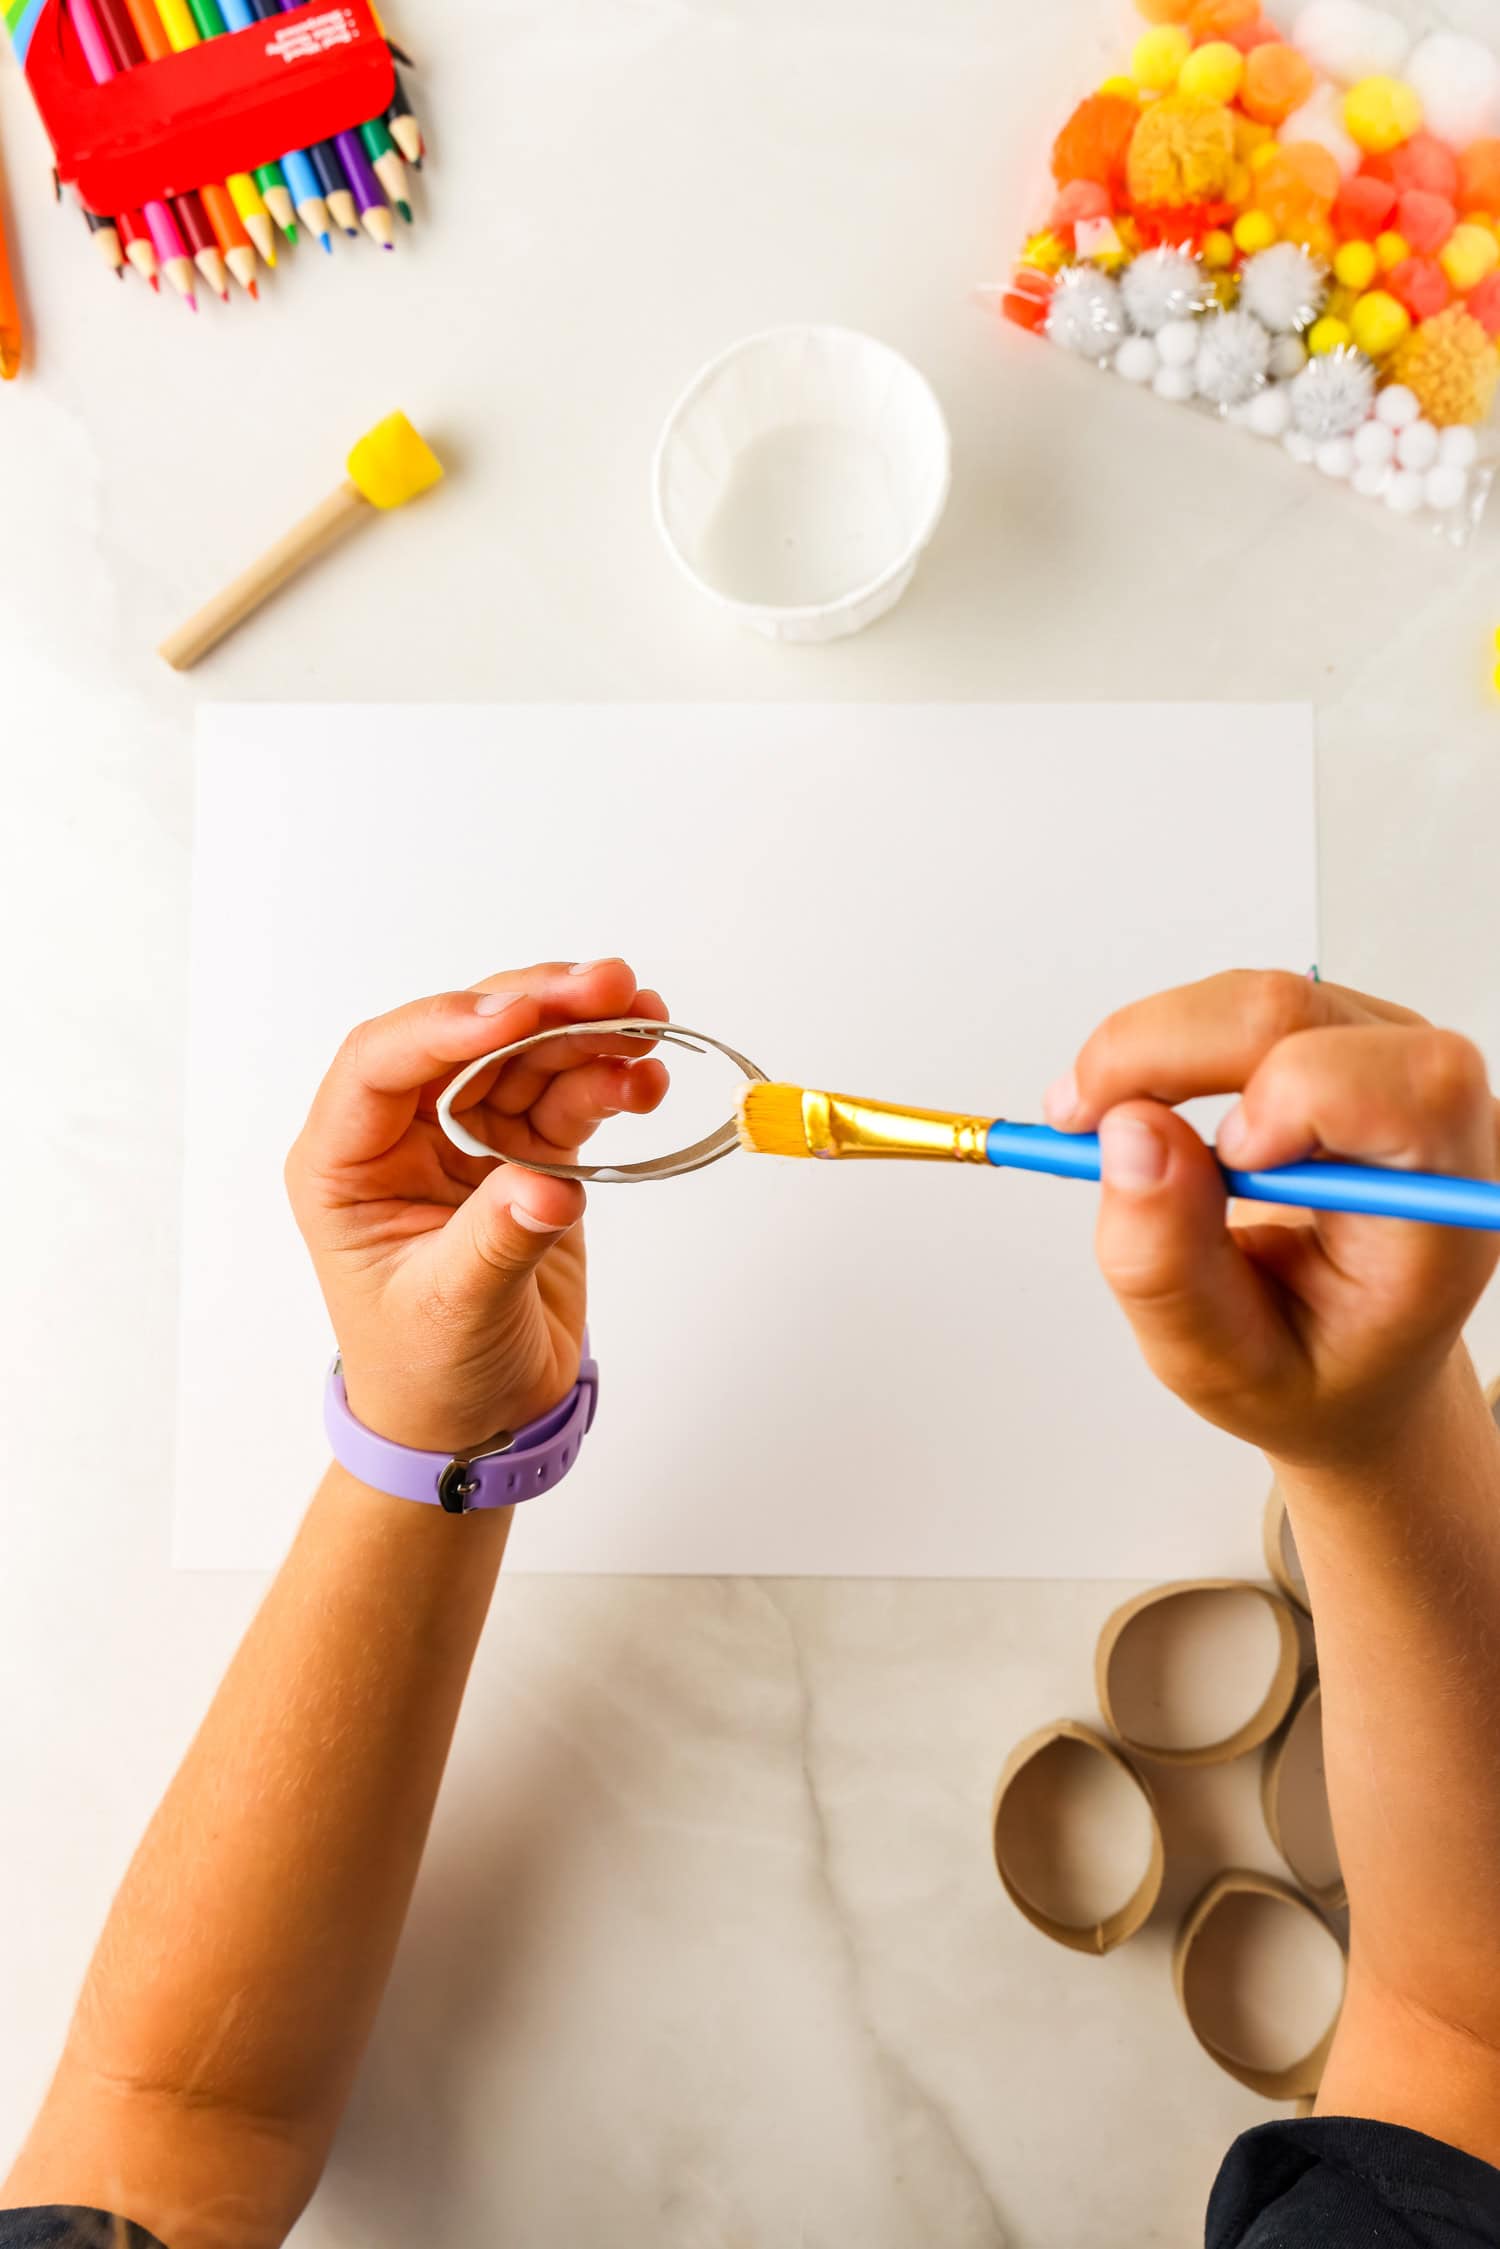
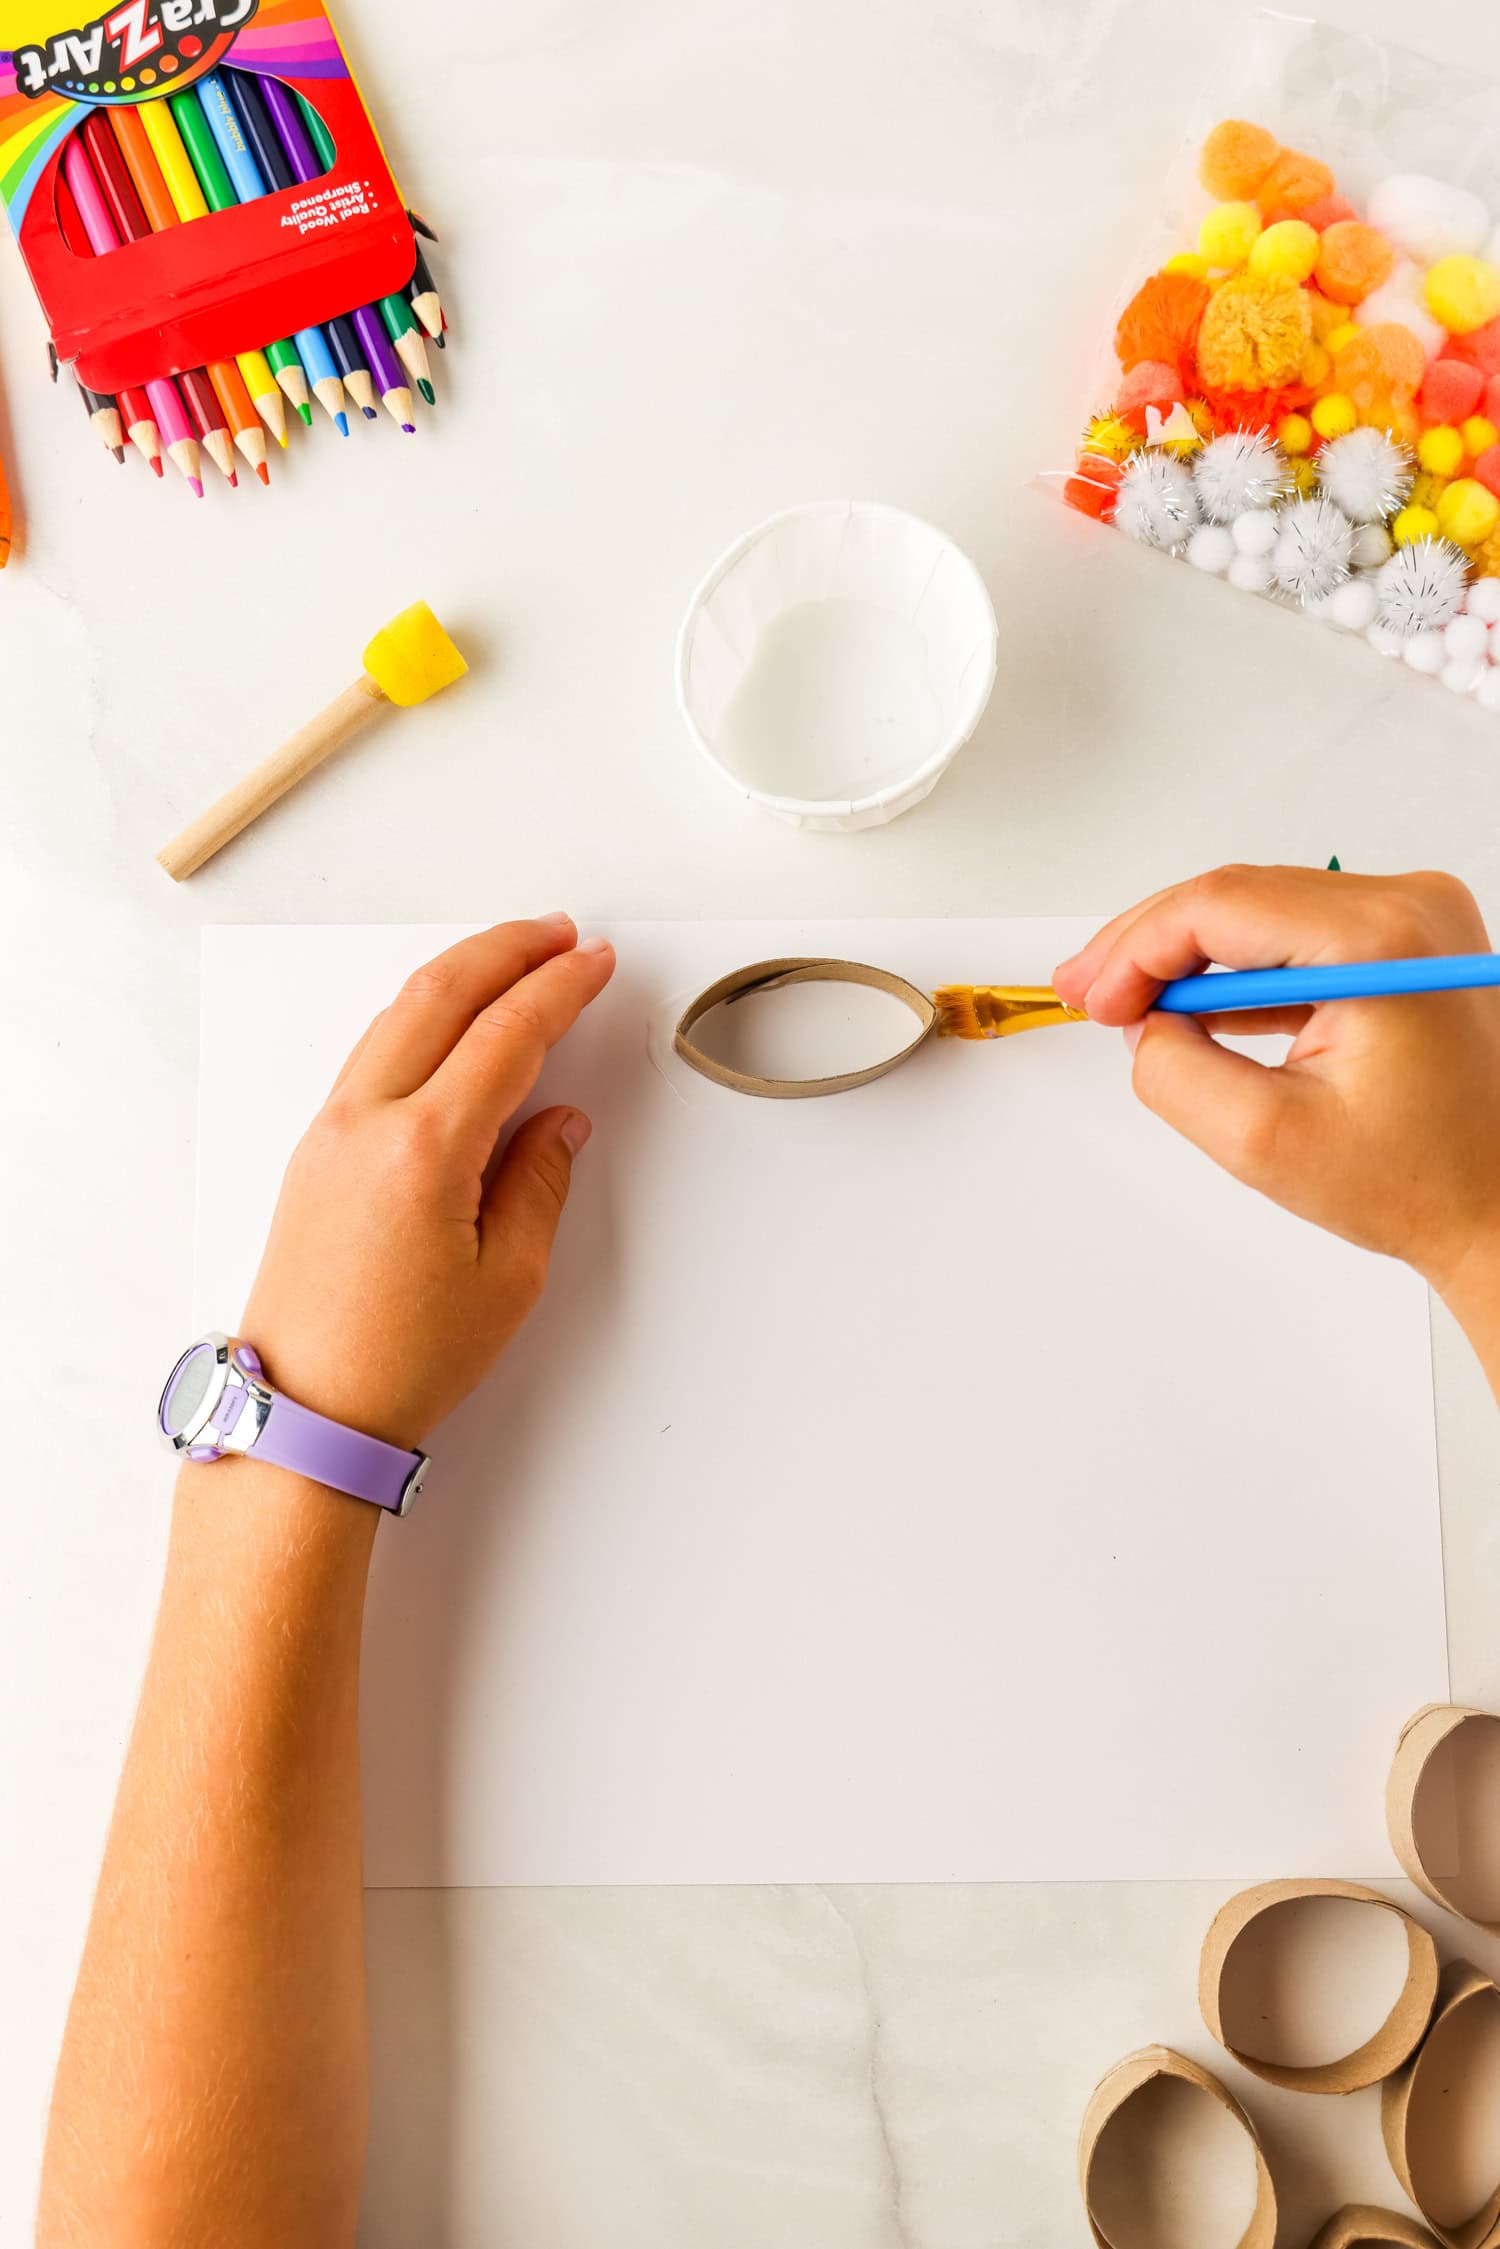
With your cardstock paper turned in the landscape orientation, use your paintbrush to glue one cardboard circle at the top. We are making a leaf shape, so it is ok if it is a little squished.
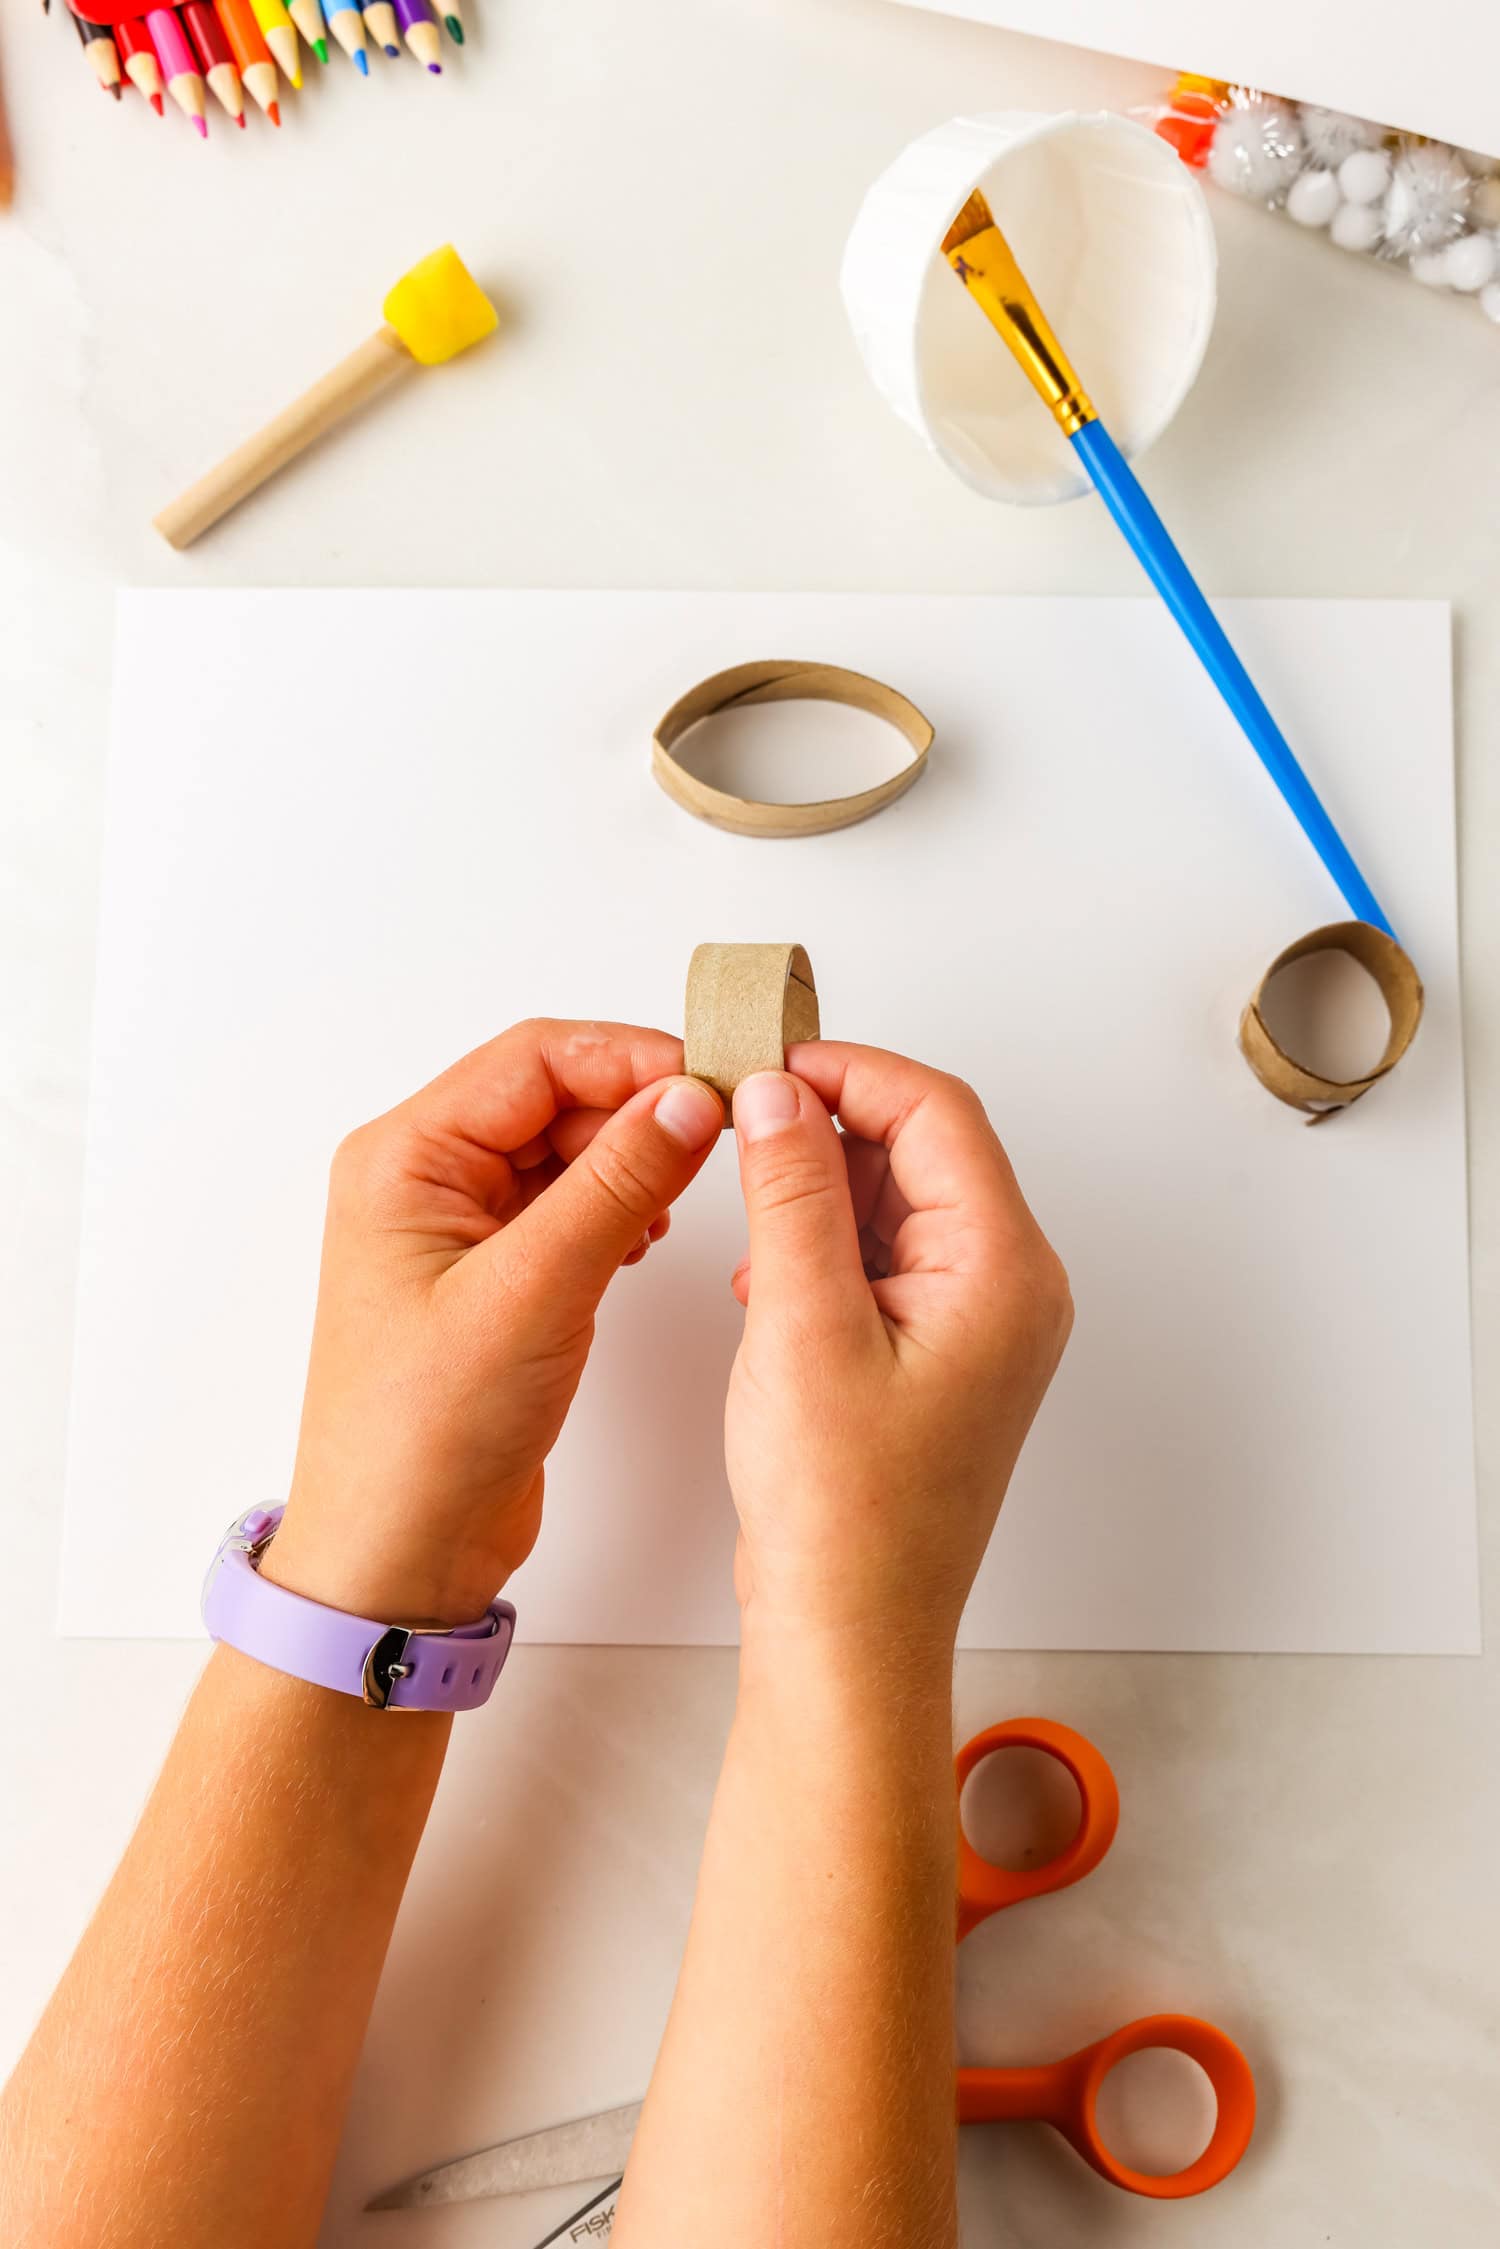
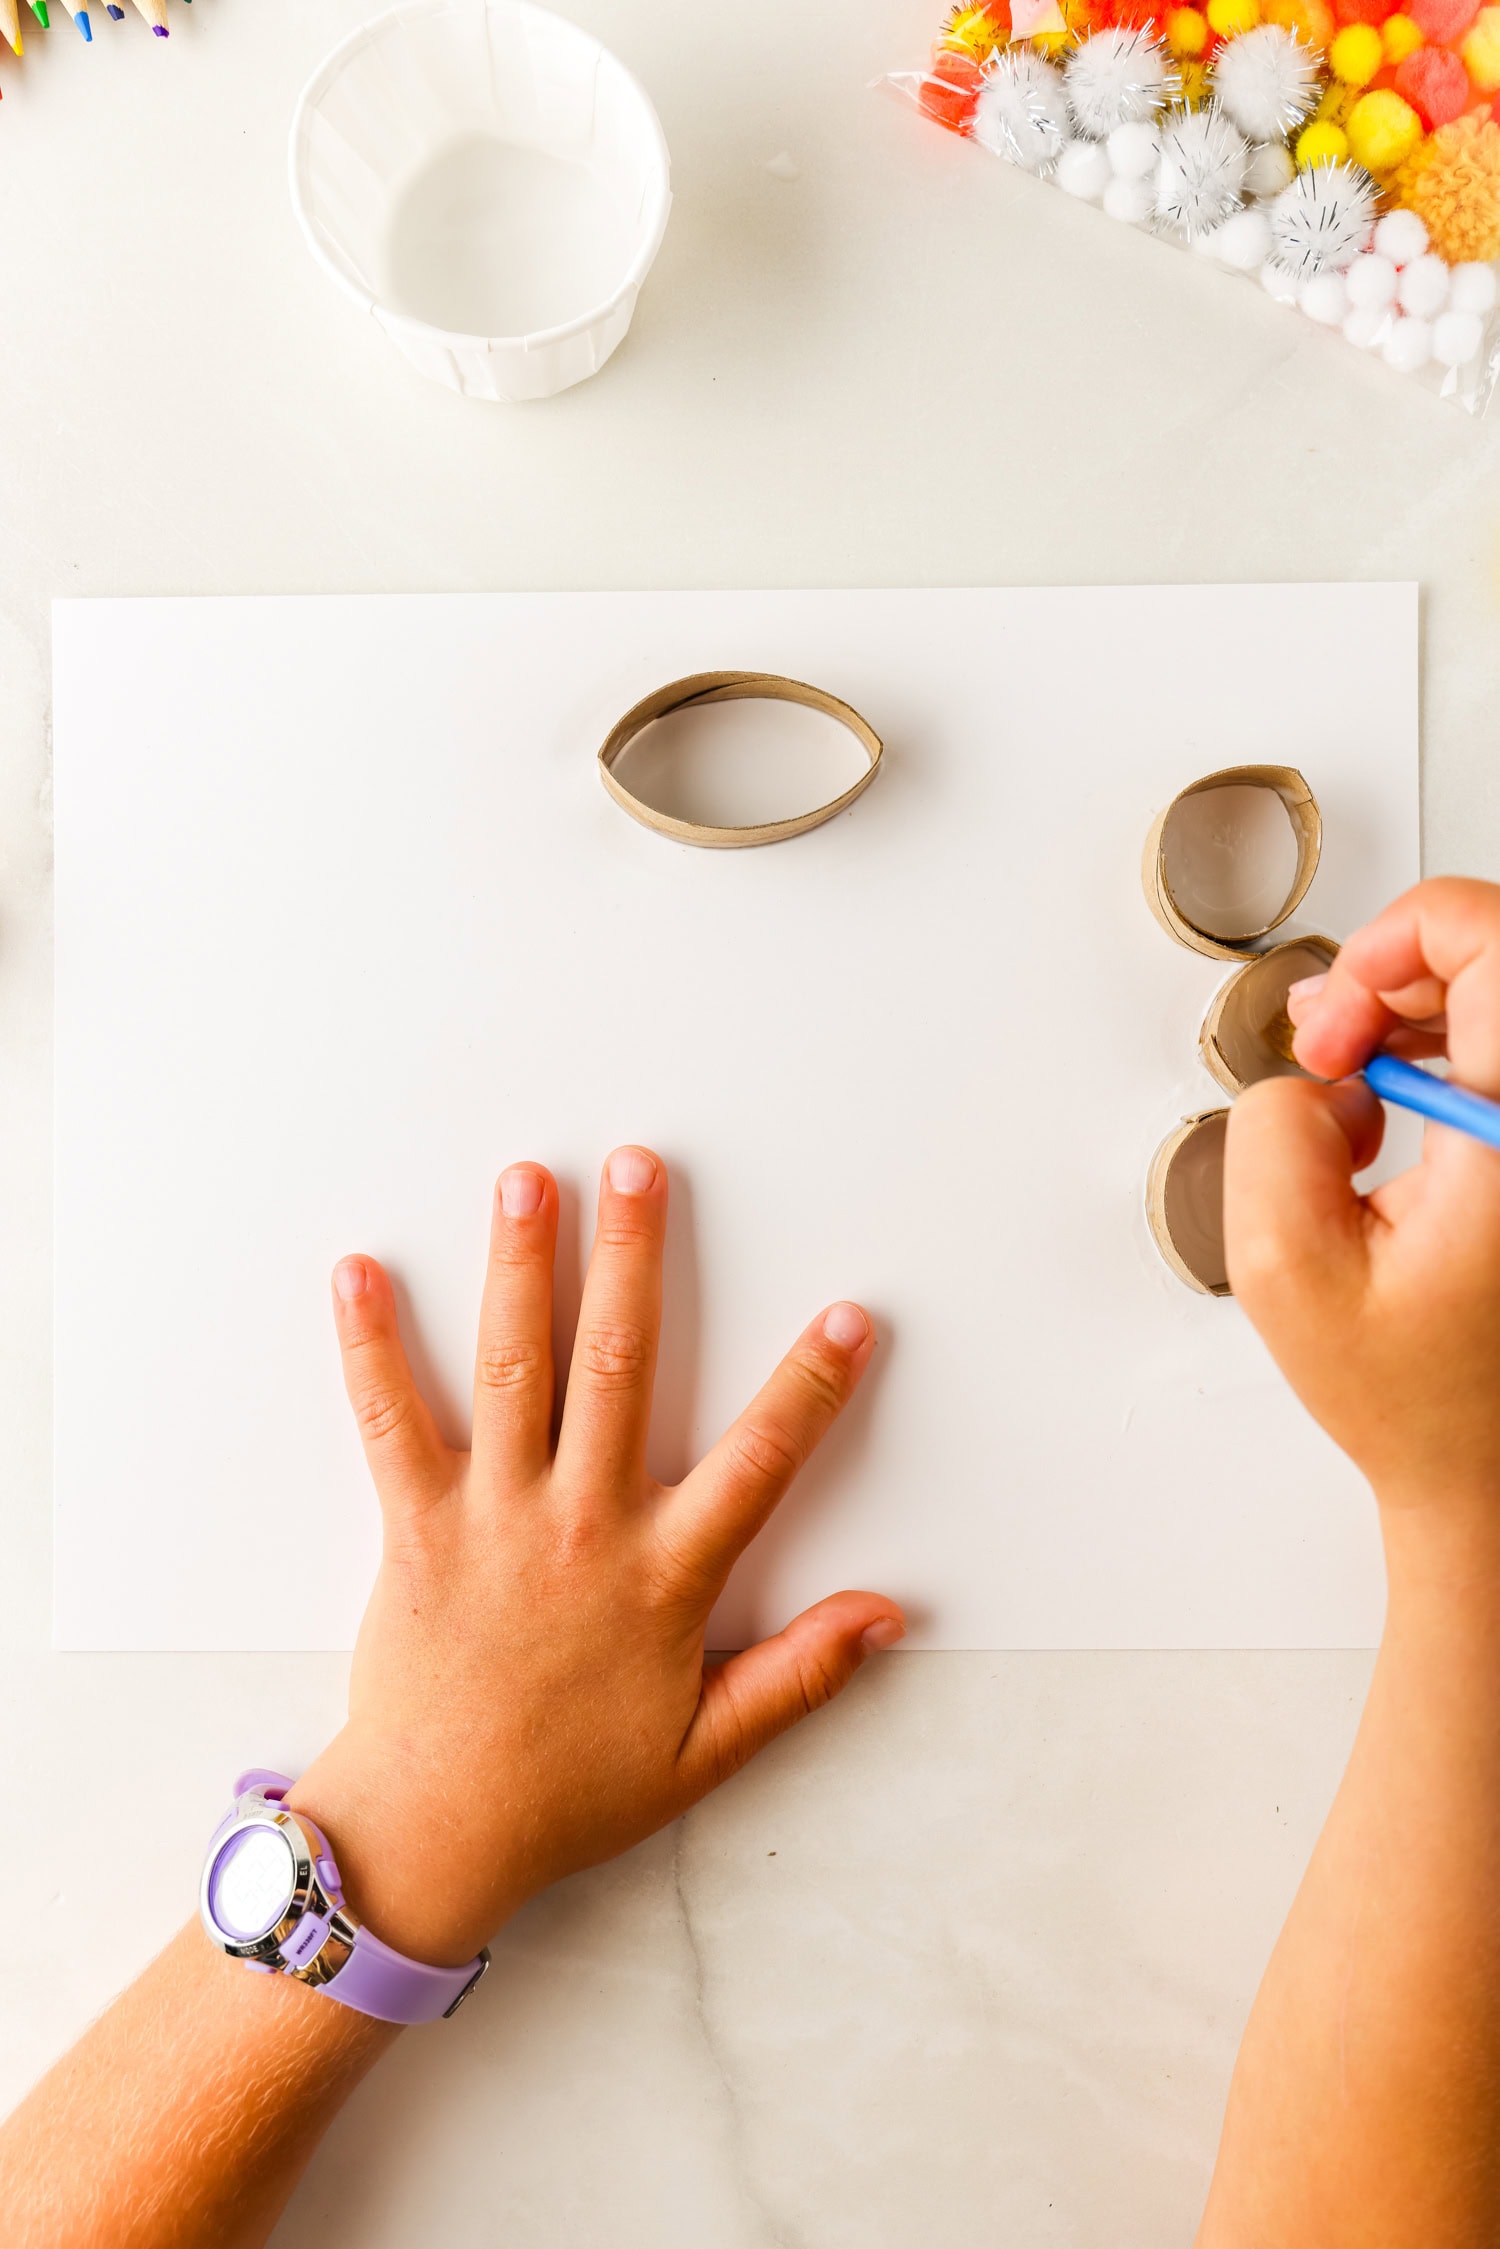
Working clockwise, form the caterpillar, cut 4 cardboard circles right through the middle. The circles need to be smaller to fit enough on the page and form a caterpillar, so be sure to cut them in the middle to form a smaller circle. Glue the sides back together. Hold in place for 20 seconds while the glue dries a bit.
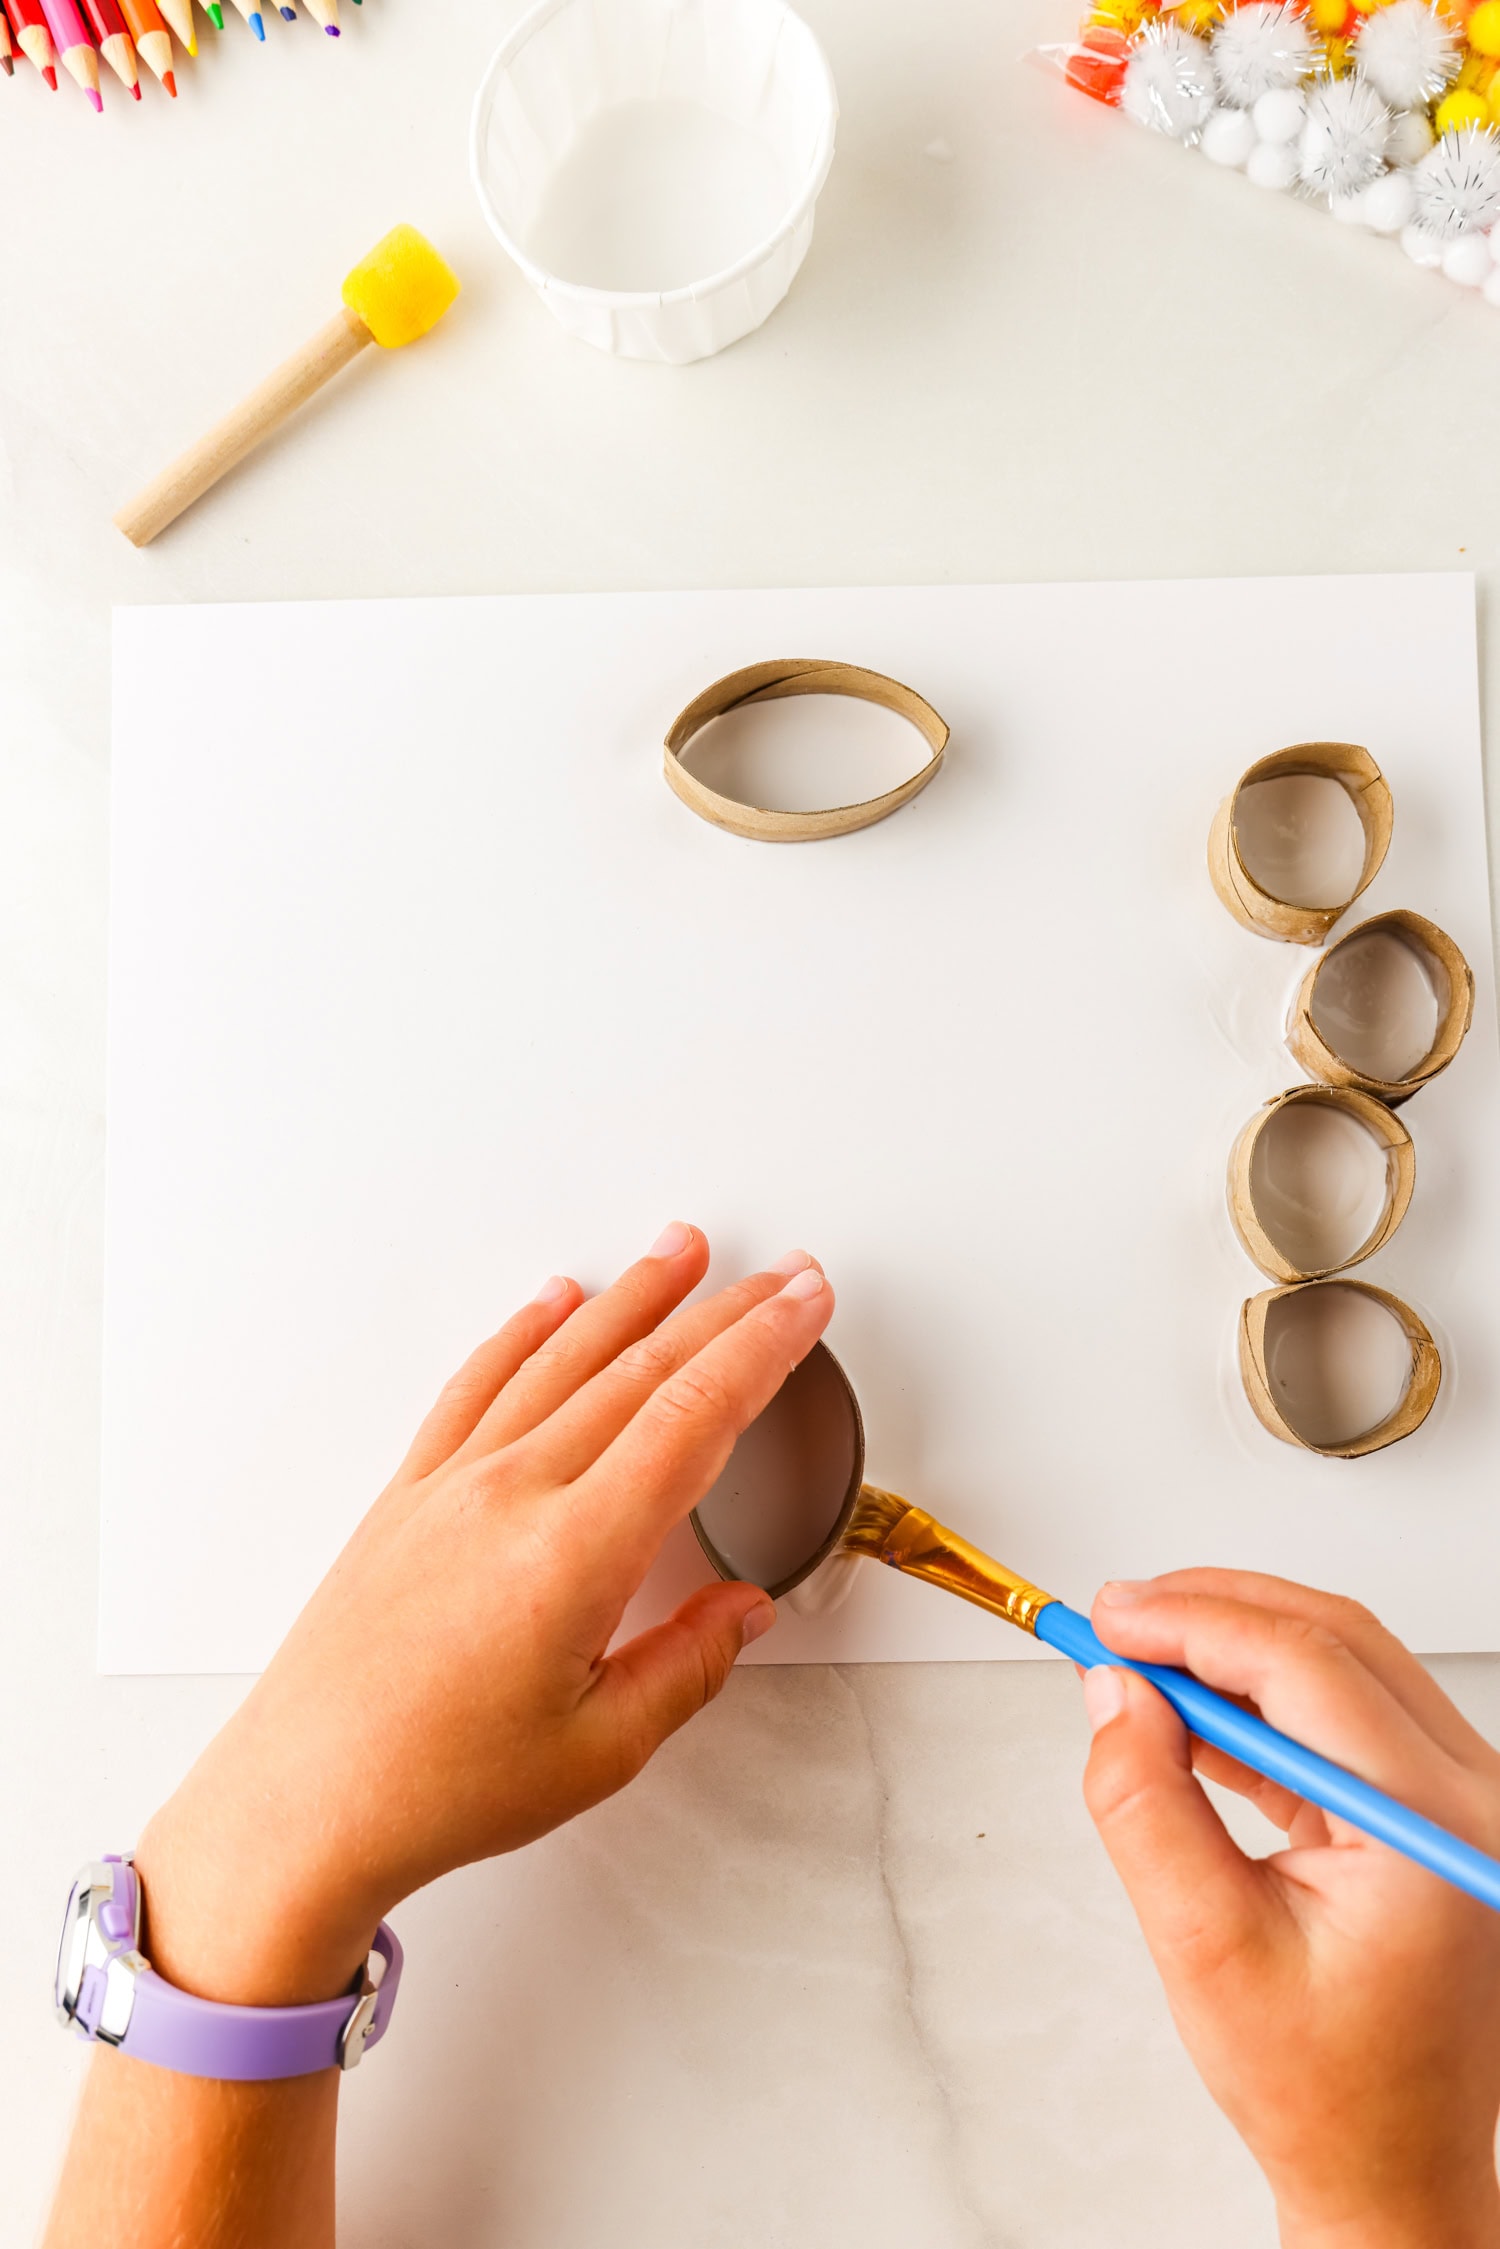
Once the circle holds, glue it on the right side of the cardstock. Repeat with the remaining 3 circles, gluing them in a “squiggly” pattern to form the caterpillar stage.
At the bottom of the page glue one cardboard circle to form the chrysalis.
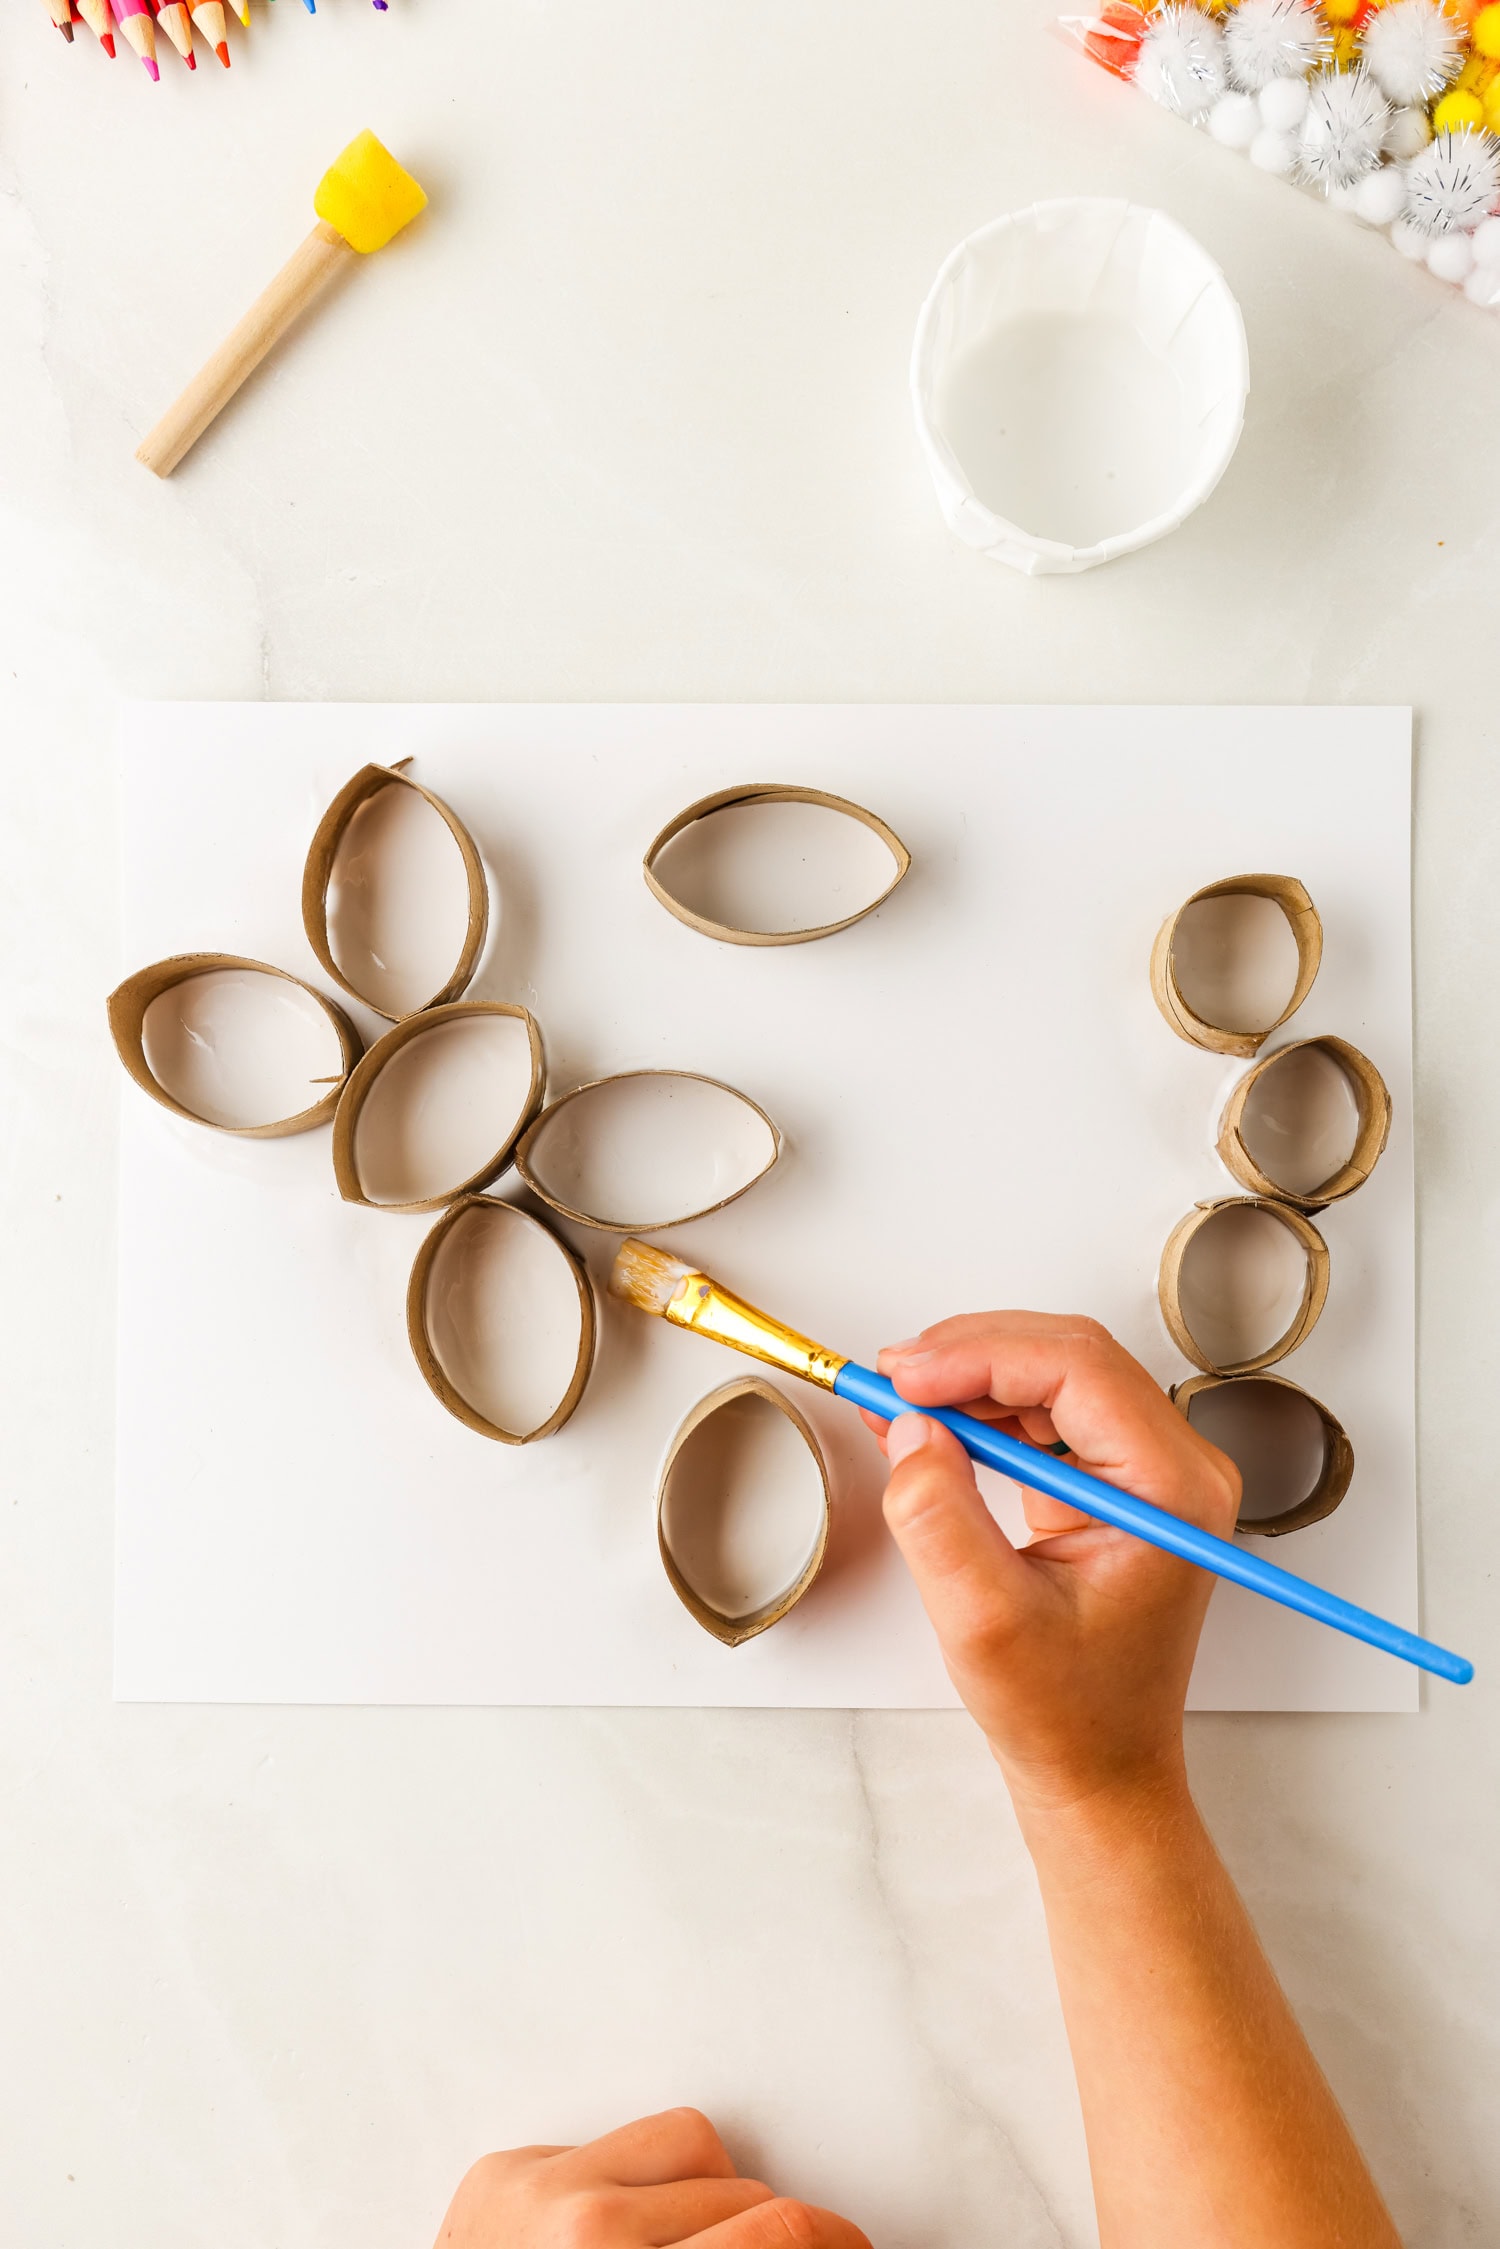
Finally, at the left side of the page you will form the butterfly using 5 cardboard circles; 1 for the body and 2 on each side for the wings.
Leave the page flat for about an hour to let the glue fully dry.
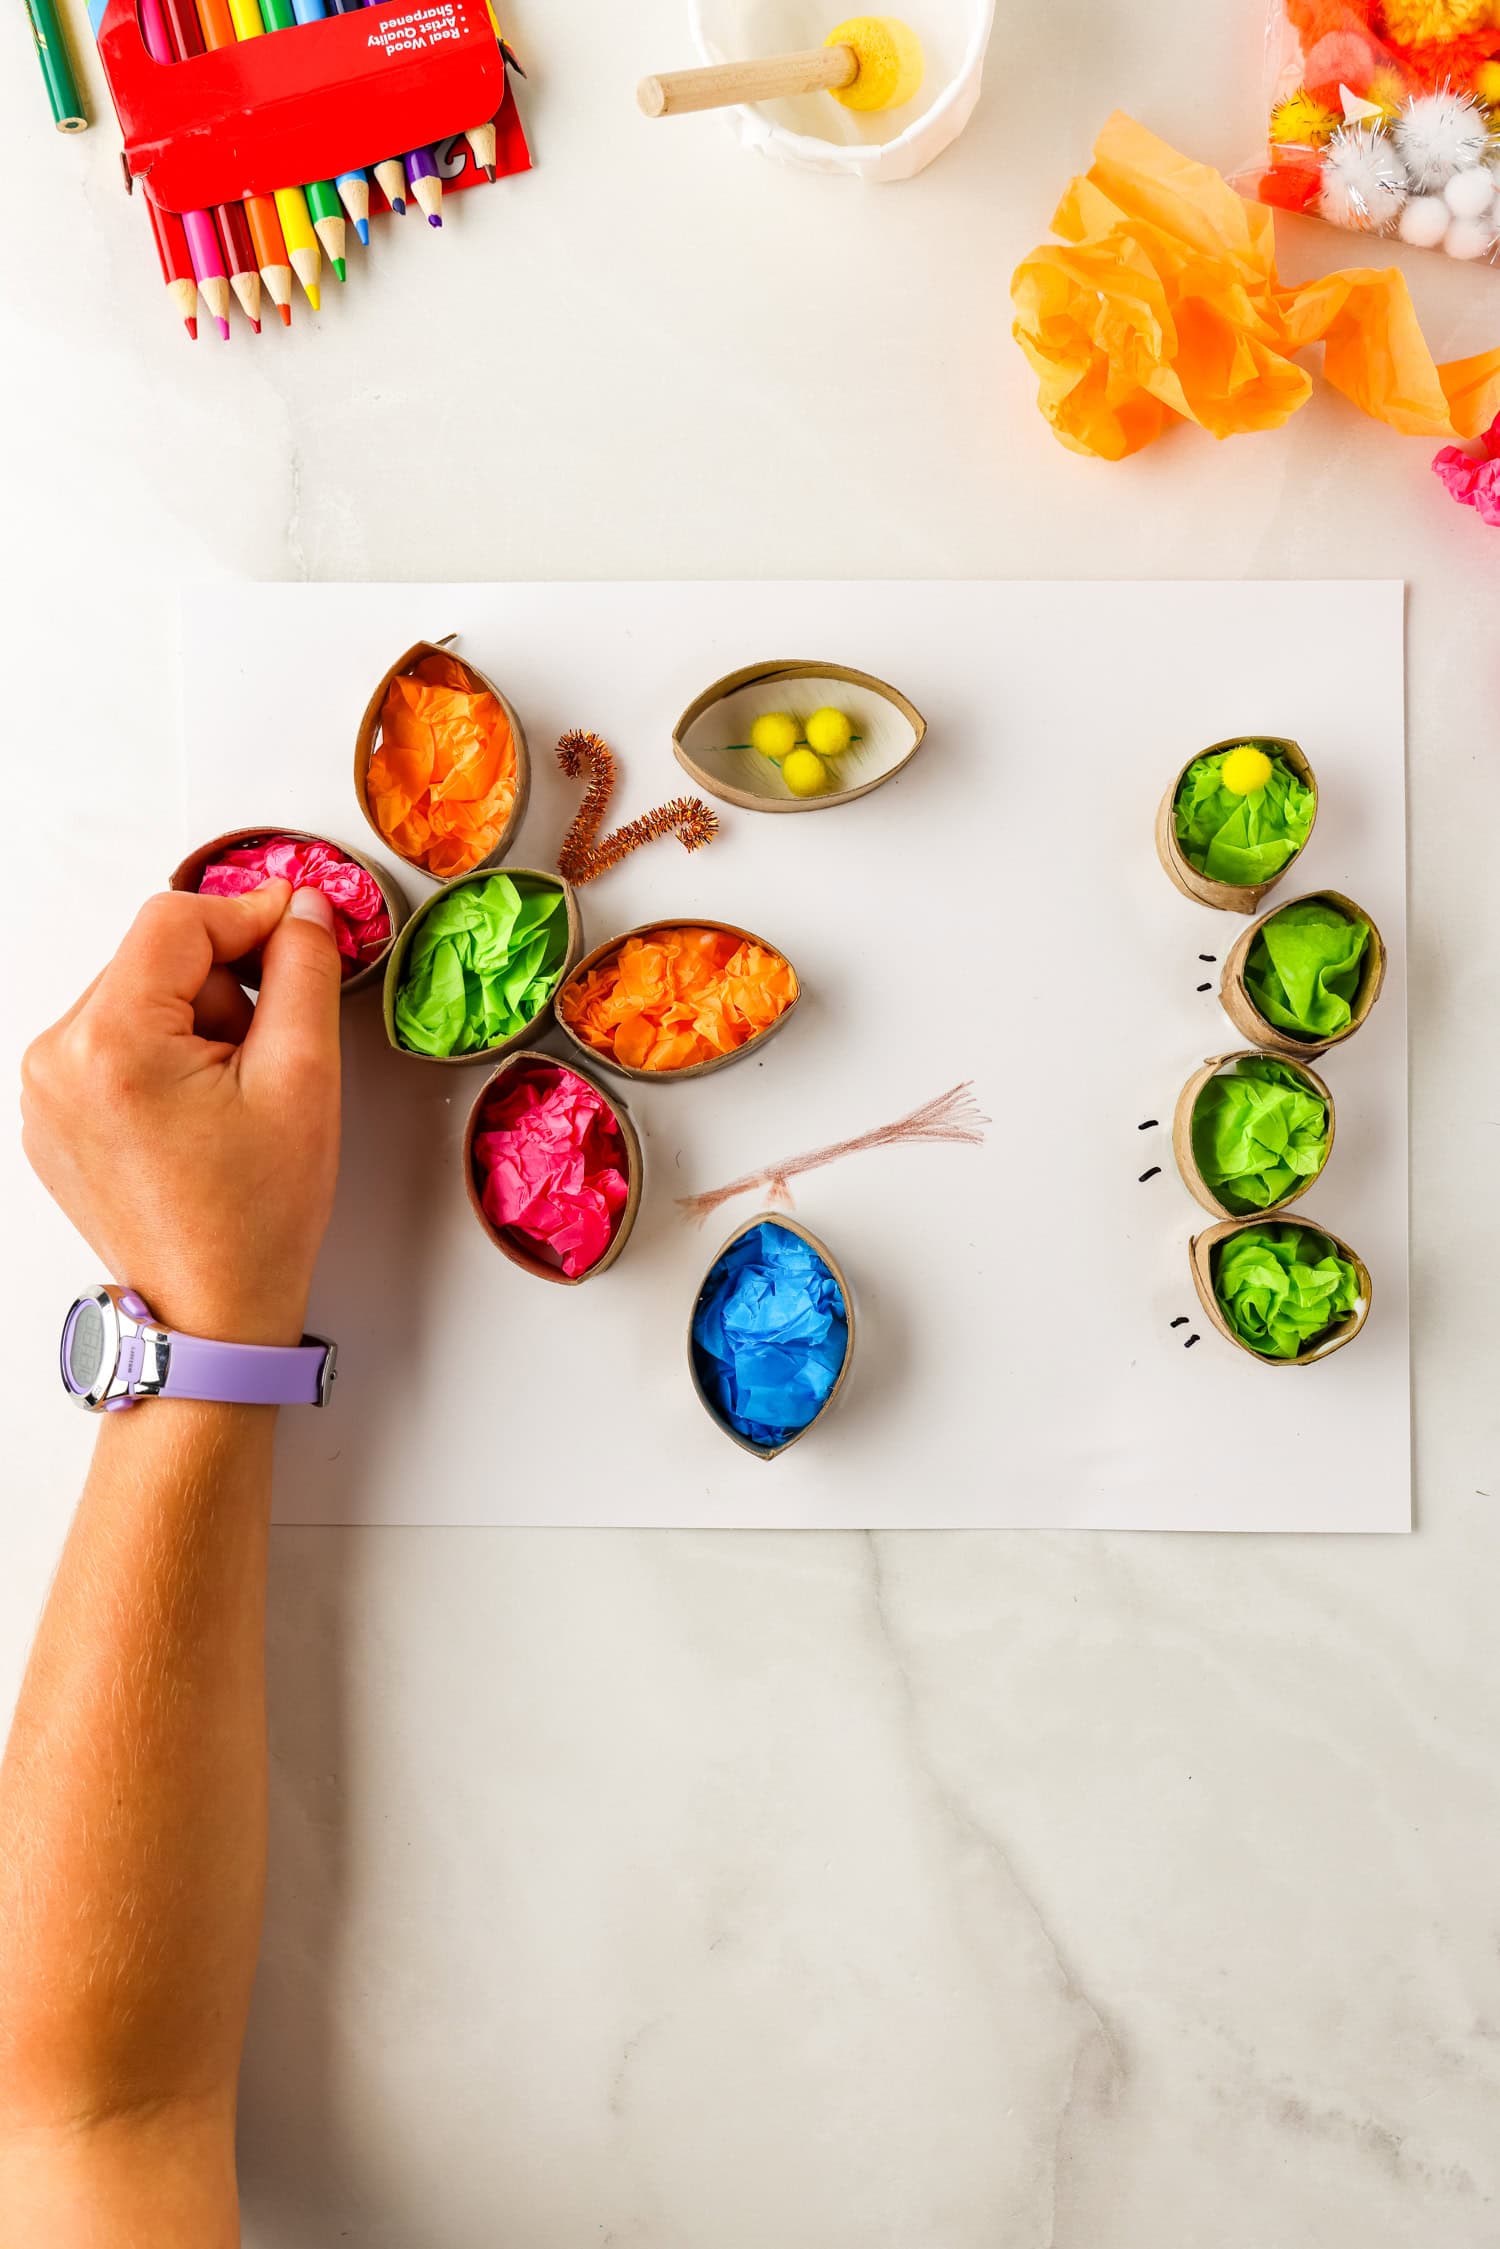
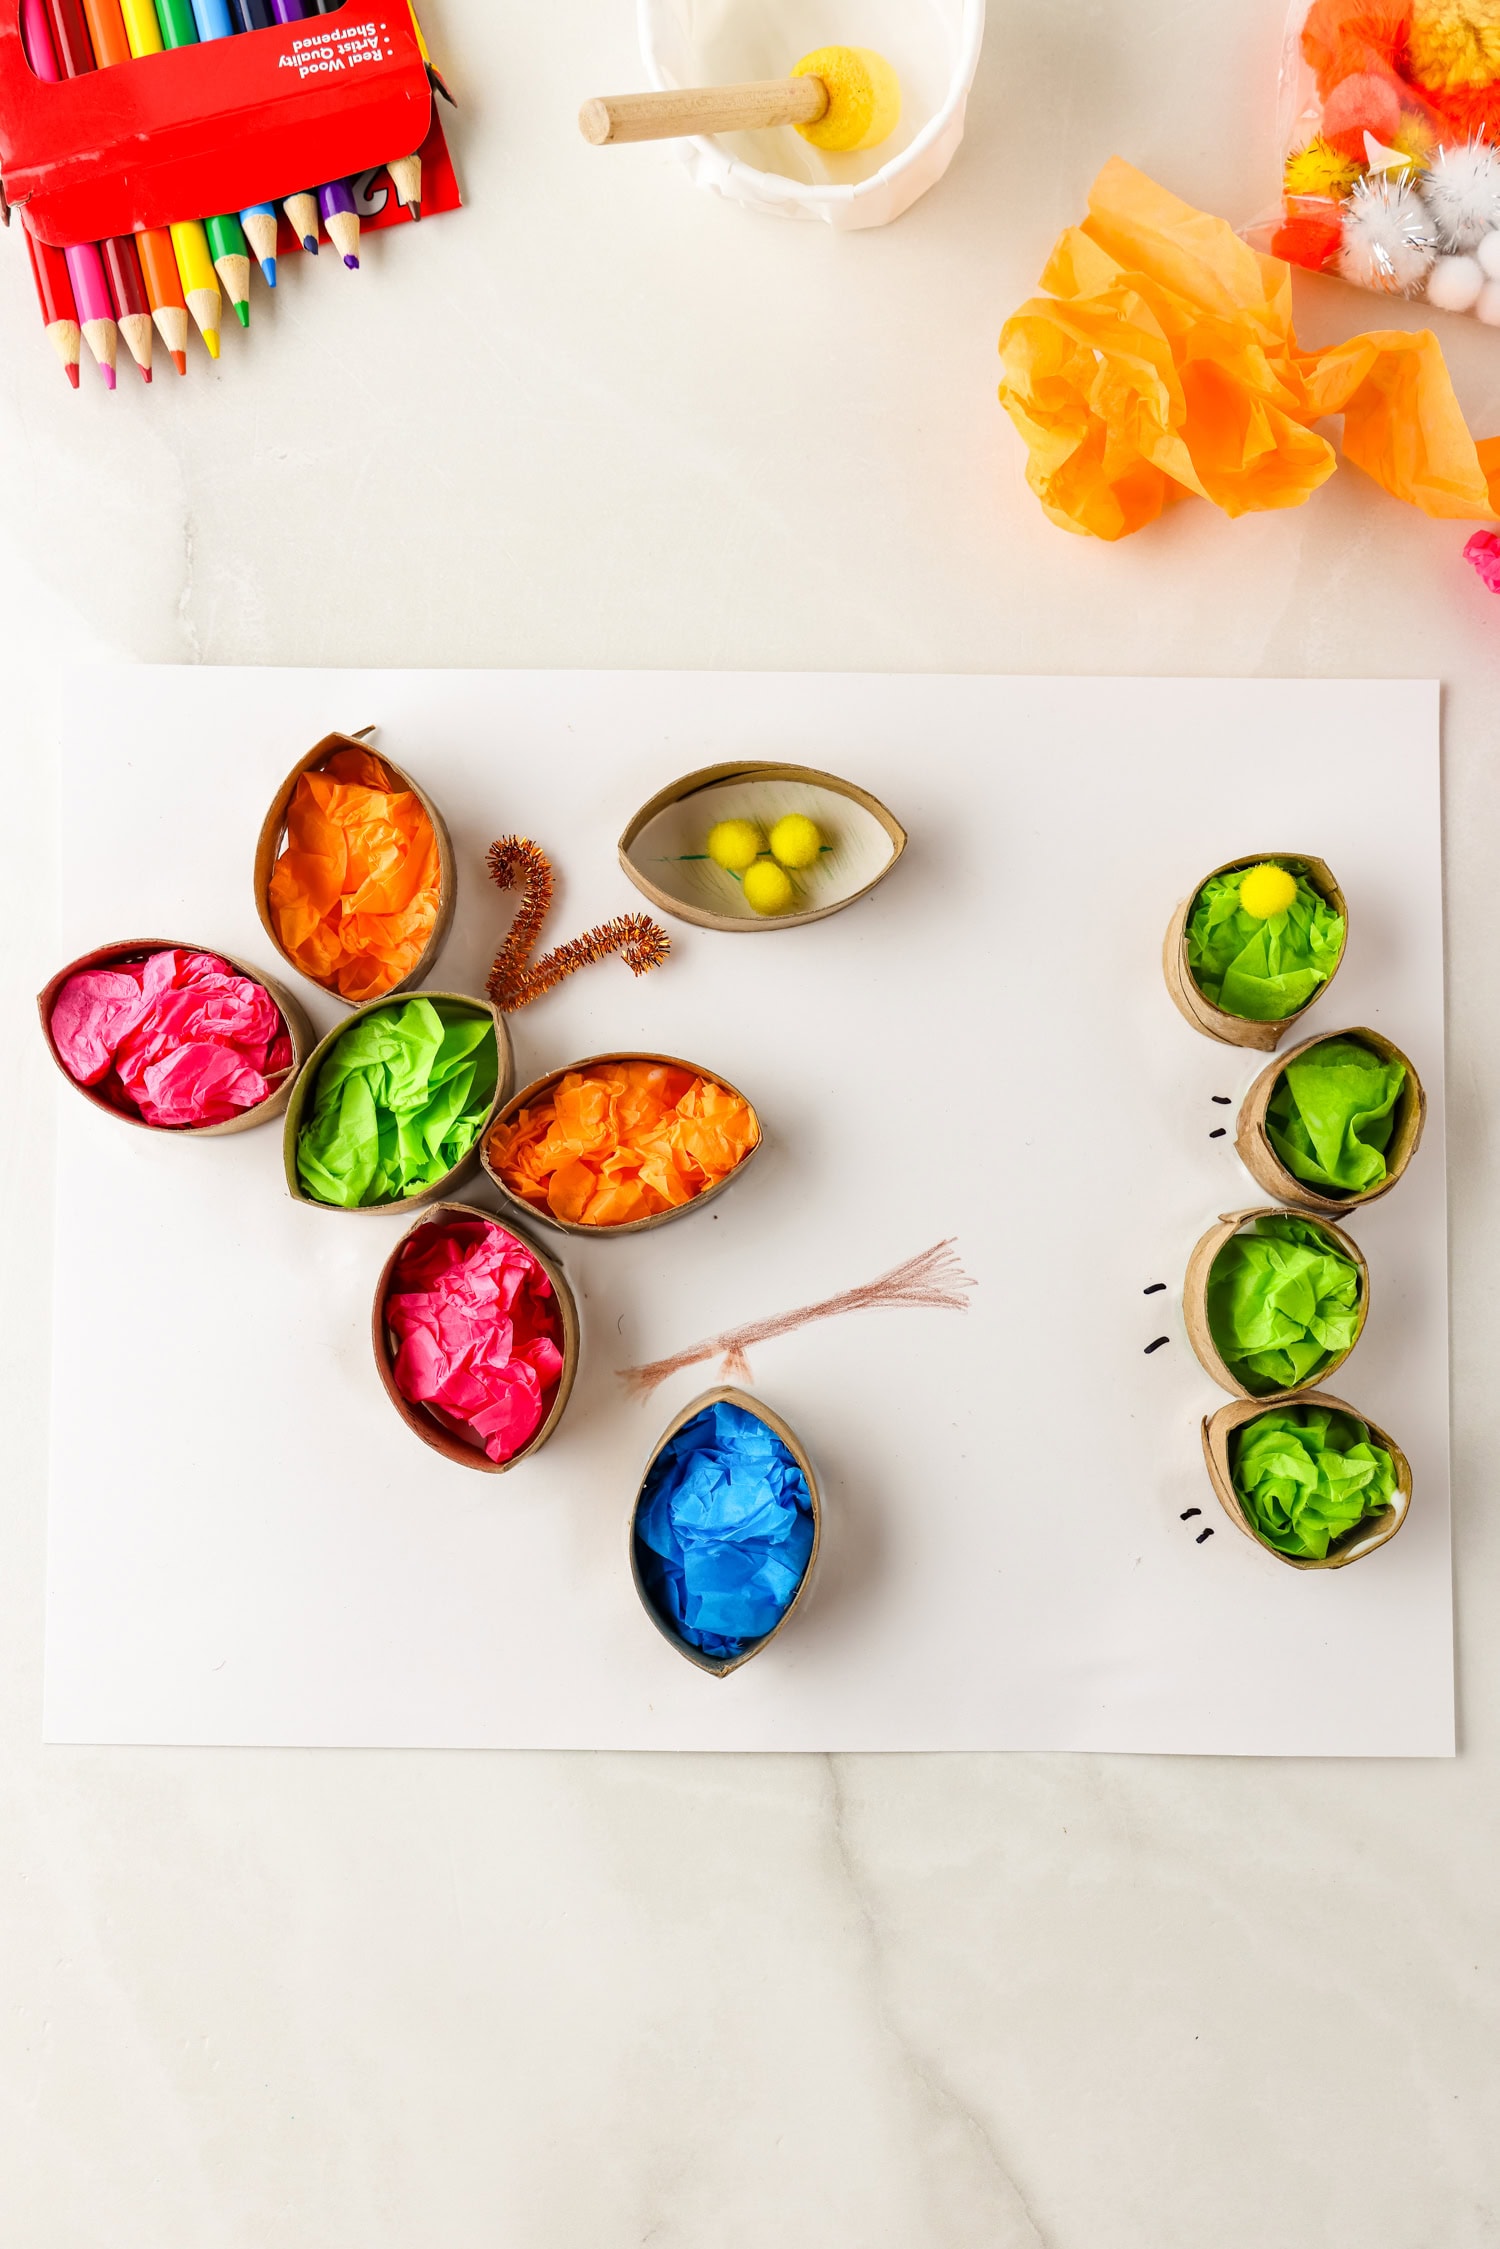
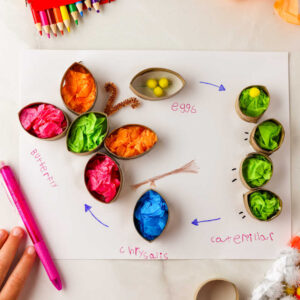
Once dried, you are ready to decorate! Add the details to the leaf with crayons or colored pencils and then glue the small pom pom “eggs” in the center. Then add legs and an eye to the caterpillar, a branch to the chrysalis, and antennae to the butterfly. Fill them in with tissue paper for extra fun and color!
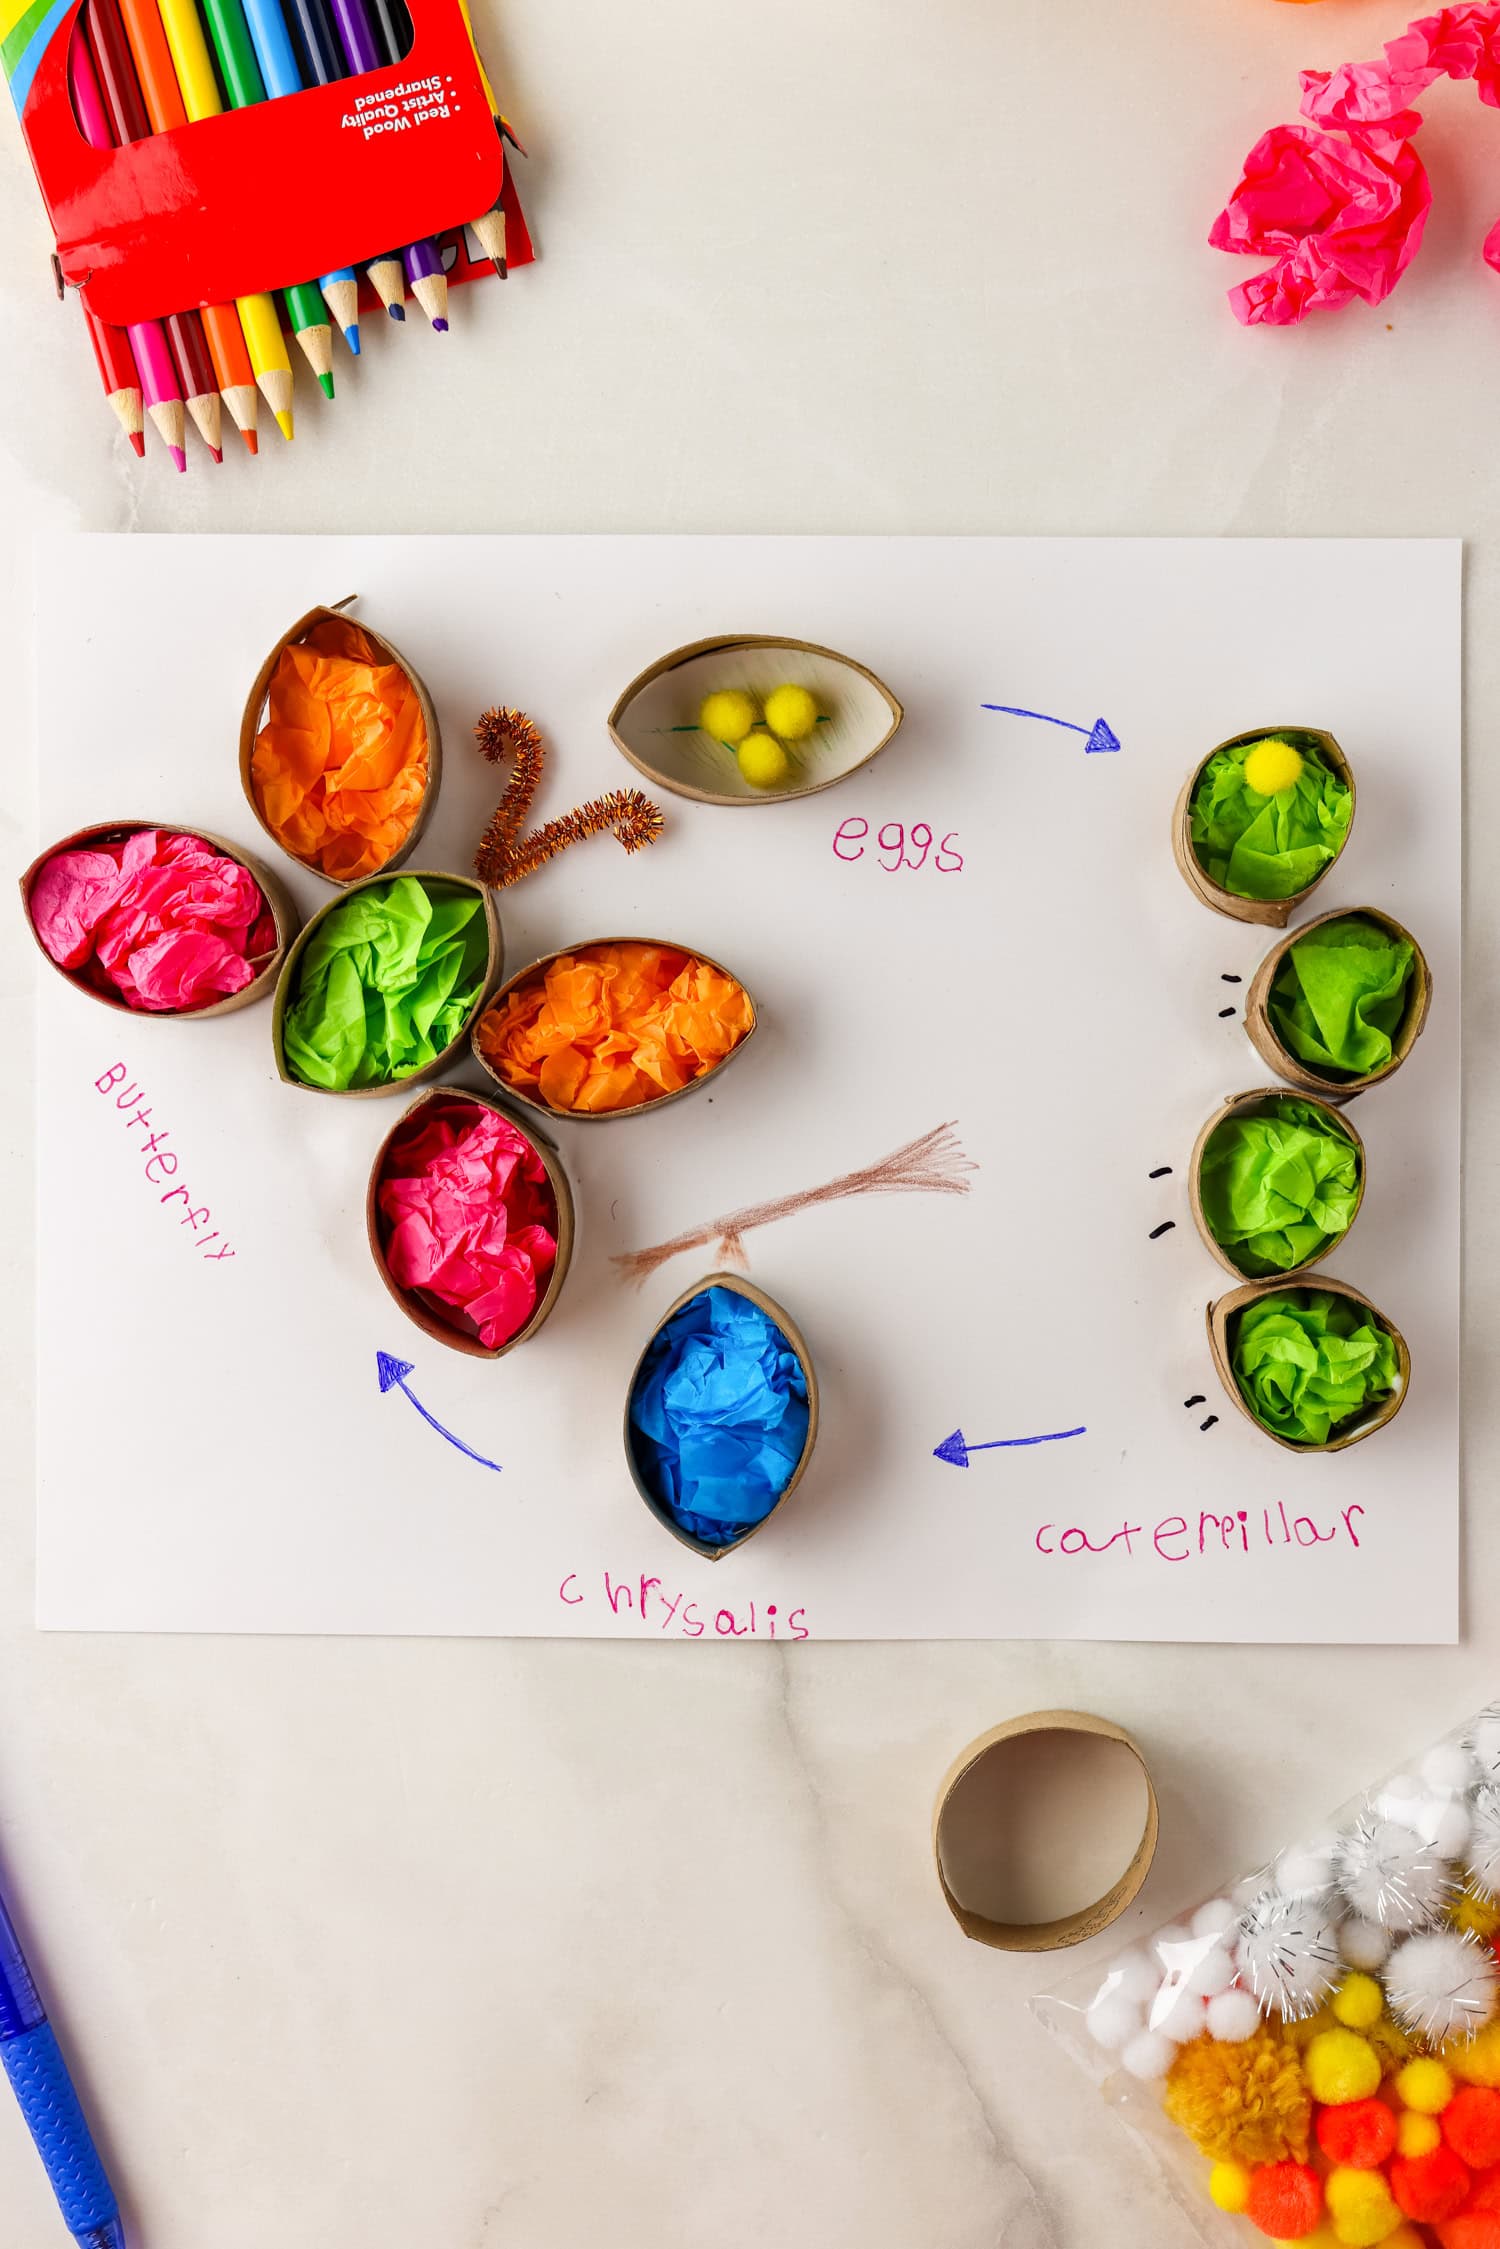
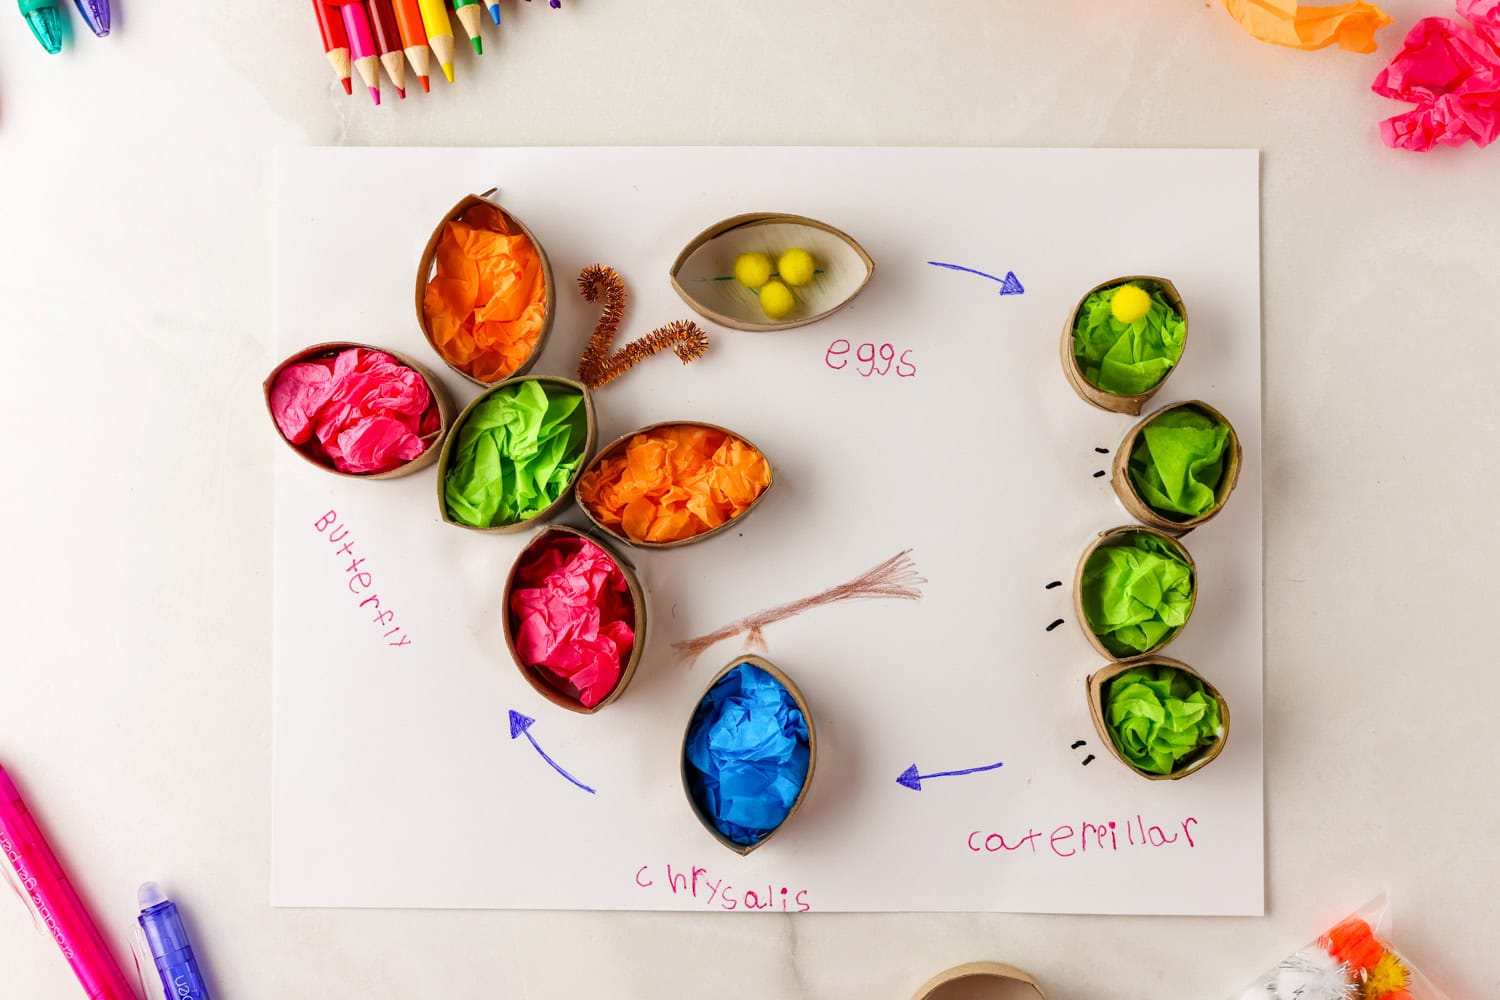
Draw arrows going clockwise around the page to show each stage of the life cycle.
Get in some handwriting practice by adding the words “eggs”, “caterpillar”, “chrysalis”, and “butterfly” to each stage. Once the glue is fully dry, display your life cycle of a butterfly craft to show all that you have learned together!
Questions to Answer While Crafting!
While you are making this craft, you can teach a lesson on the butterfly life cycle. Here are some fun questions to have your littles try to answer as they learn this exciting new topic:
- How long does it take for a tiny caterpillar to turn into a butterfly?
- What is the longest stage of a butterfly life cycle?
- How long is a butterfly in a cocoon? How long does it take to hatch?
- How long is each life cycle of a butterfly?
- How long does it take for a caterpillar to complete metamorphosis?
Pro Tips for the Best Butterfly Life Cycle Craft
- Feel free to use different crafting materials to make the butterfly life cycle stages. Instead of tissue paper, you could paint each circle with water colors or add fun things like puffy paint. You can use rhinestones, glitter, stickers and even real leaves from outdoors to make this craft extra unique.
- Don’t over-do it with the glue or it may make the cardstock too weak. Just use enough to securely attach the circles to the cardstock.
- If you’re working with little kids and creating this in a group setting, then maybe cut the circles ahead of time and prepare the other pieces too. Then you can give each kid the things they need to complete this craft!
Make this butterfly life cycle craft and making learning EXCITING! It’s the cutest way to learn this key life cycle of nature.
More Crafts and Activities You’ll Love
- Make some Paper Bag Handprint Bees for another cute “buggy” craft! This one always turns out adorable.
- Instead of just dyeing the eggshell of your Easter eggs, make some fun Glitter Eggs instead.
- Call those polar bears out of hibernation with this cute Polar Bear Paper Craft. So cute and a really fun winter craft!
- This DIY Bird Feeder Craft is a fun spring time creation that you can put in your backyard to watch all the little birdies.
Butterfly Life Cycle Craft
Ingredients
- 1 piece white cardstock
- Toilet paper rolls
- Scissors
- Pipe cleaners
- Small pom poms
- Tissue paper
- Pens
- Colored pencils/crayons/markers
- School glue
- Paint cup A small bowl or paint palette will work, too!
- Paintbrush
Instructions
- Cut cardboard tubes into small sections to form circles. Cut about ½ inch in size. You can measure to be precise, if desired.
- Form the leaf: With your cardstock paper turned in the landscape orientation, use your paintbrush to glue one cardboard circle at the top. We are making a leaf shape, so it is ok if it is a little squished.
- Working clockwise, form the caterpillar: Cut 4 cardboard circles right through the middle. The circles need to be smaller to fit enough on the page to form a caterpillar, so cut them in the middle to form a smaller circle. Glue the sides back together. Hold in place for 20 seconds while the glue dries a bit. (This is good counting practice! 😊) Once the circle holds, glue it on the right side of the cardstock. Repeat with the remaining 3 circles. Glue in a “squiggly” pattern to form the caterpillar.
- At the bottom of the page glue one cardboard circle to form the chrysalis.
- Finally, at the left side of the page you will form the butterfly using 5 cardboard circles; 1 for the body and 2 on each side for the wings.
- Leave the page flat for about an hour to let the glue fully dry.
- Decorate! Add the details to the leaf with crayons or colored pencils and then glue the small pom pom “eggs”. Add legs and an eye to the caterpillar, a branch to the chrysalis, and antennae to the butterfly. Fill them in with tissue paper for extra fun and color!
- Draw arrows going clockwise around the page to show each stage of the life cycle.
- Get in some handwriting practice by adding the words “eggs”, “caterpillar”, “chrysalis”, and “butterfly” to each stage.
- Once the glue dries, display your life cycle of a butterfly craft to show all that you have learned together!