Ice Suncatchers
Looking for a fun winter craft to do with your kids? Learn how to make beautiful ice suncatchers using simple materials and enjoy a creative and chilly afternoon activity!
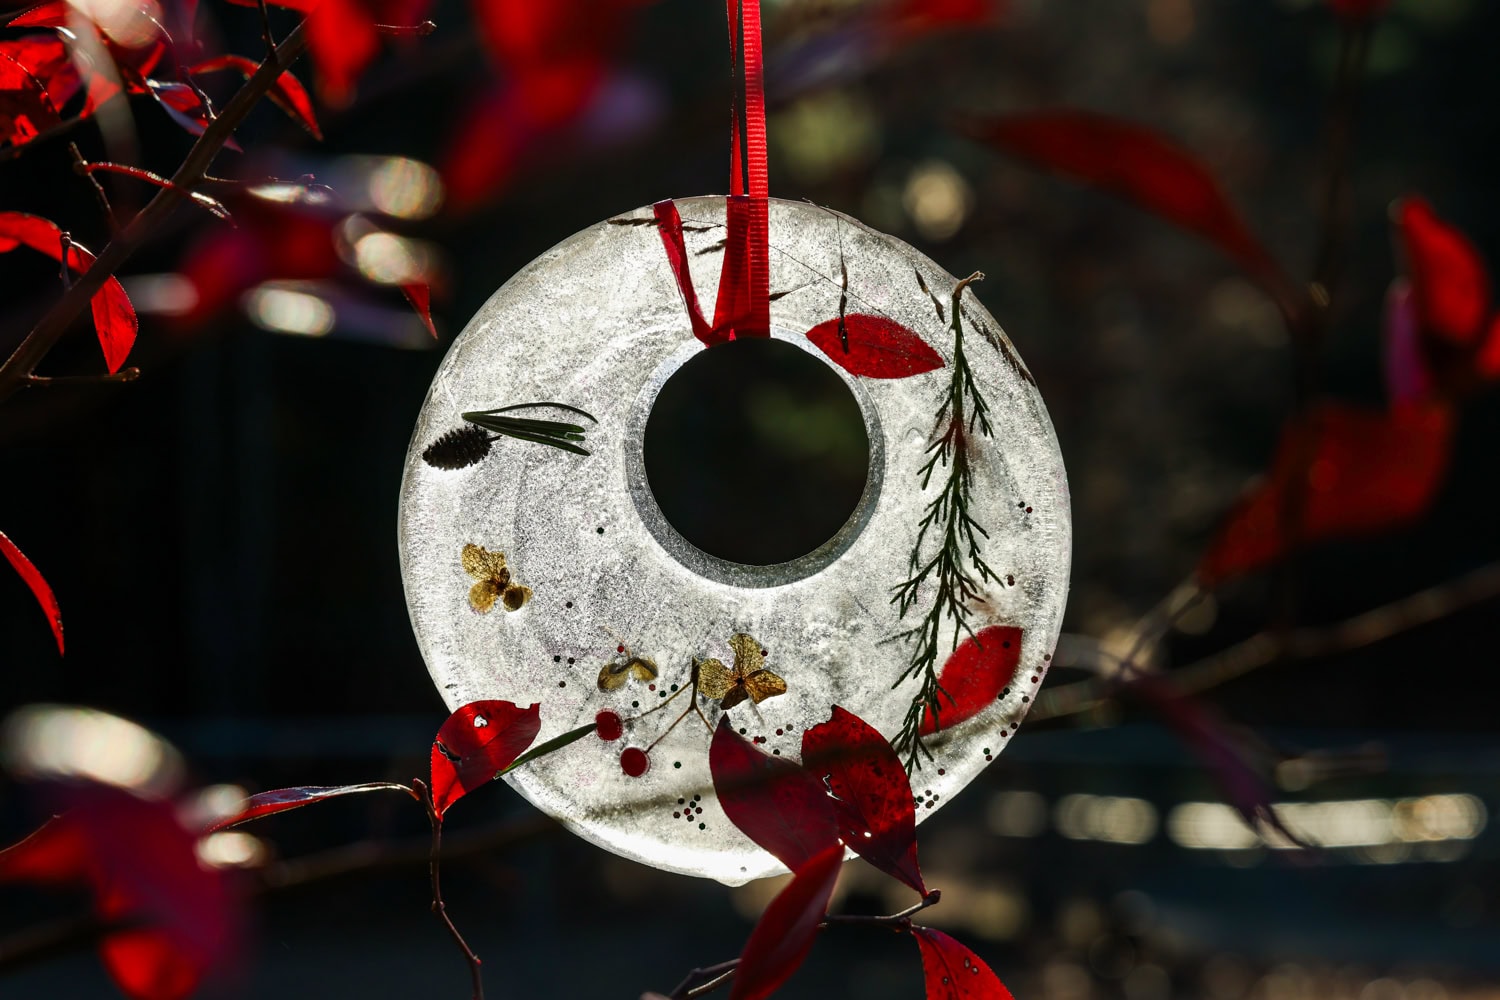
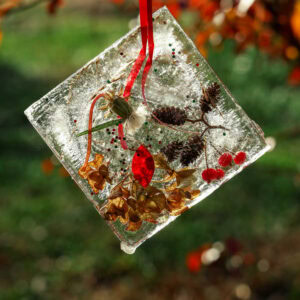
Ice suncatchers — sounds like an oxymoron, right? Well, even though it seems like the two words contradict each other, this really is a super cool craft. If your winters get cold enough, you can hang these pretty, decorated, mini ice sculptures in the trees outside and watch the sun glint and shine off of them!
It’s like the beauty of icicles, but homemade and super fun to create. We love to gather some natural materials when we’re on our alphabet scavenger hunt and then use them to make unique ice suncatchers.
Your going to love how this ice sun catcher sparkles in your backyard! They’re the prettiest winter tradition that we’ve started — I love to see them hanging on the tree branches. No matter what age you are, it can be so much to make memories while creating homemade treasures like ice suncatchers. Make this a yearly tradition and watch how the memories grow year after year!
Why You’ll Love Ice Suncatchers
- For littles, this is a craft and a science lesson all in one. Teach them how liquid becomes a solid when it reaches a cold enough temperature!
- This craft is essentially free. As long as you have some ribbon or twine on hand, the rest is just materials you can get around the house and out in nature.
- You can make this craft with kids of all ages. From toddlers to teens, ice suncatchers are an accessible activity for anyone.

Supplies Needed
- Ribbon – You’ll need some type of sturdy ribbon to tie around your ice suncatchers and easily hang them wherever you want!
- Tape – Use tape to secure the ribbon in place on the muffin pan while the water freezes into ice.
- Glitter – Adding glitter into the ice sun catchers makes them so pretty. The glitter just sparkles in the sunshine and makes these suncatchers just gorgeous!
- Scissors – Making these with littles? Then grab some safety scissors to protect those tiny fingers.
- Muffin tin – A muffin tin makes the freezing process really simple. You’ll just freeze the ribbon hanger right into the middle of the sun catcher.
- Water – You can’t make ice without water, of course. Just room temperature water will do!
- Rocks – If you want to use various containers to make fun shapes, you’ll need some rocks to weigh down some of the small containers.
- Various containers – Grab things like lids, shallow bowls, and fun shaped cups or bowls. I like to make a wreath-shaped ornament suncatcher with a large circle container and one smaller circle container for the center.
- Nature hunt findings – Go on a nature hunt and collect natural materials to make each DIY frozen suncatcher extra special. Things like flower petals, leaves, pebbles, acorns, and pine needles are all natural treasures that will work great in each suncatcher.

How to Make Ice Suncatchers
- Search for things around your garden or go for a walk to find winter plants and unique plants that have left blooms or buds behind from the previous season. You may be surprised at all the beautiful creations that can be found this time of year!
- Plants that have dried are especially pretty, and small plants are best for this craft. If you plan to make a wreath shape sun catcher, don’t forget to grab some rocks so you can weight down the center section. Before you begin, you’ll also need to gather containers and lids that would make interesting shapes.
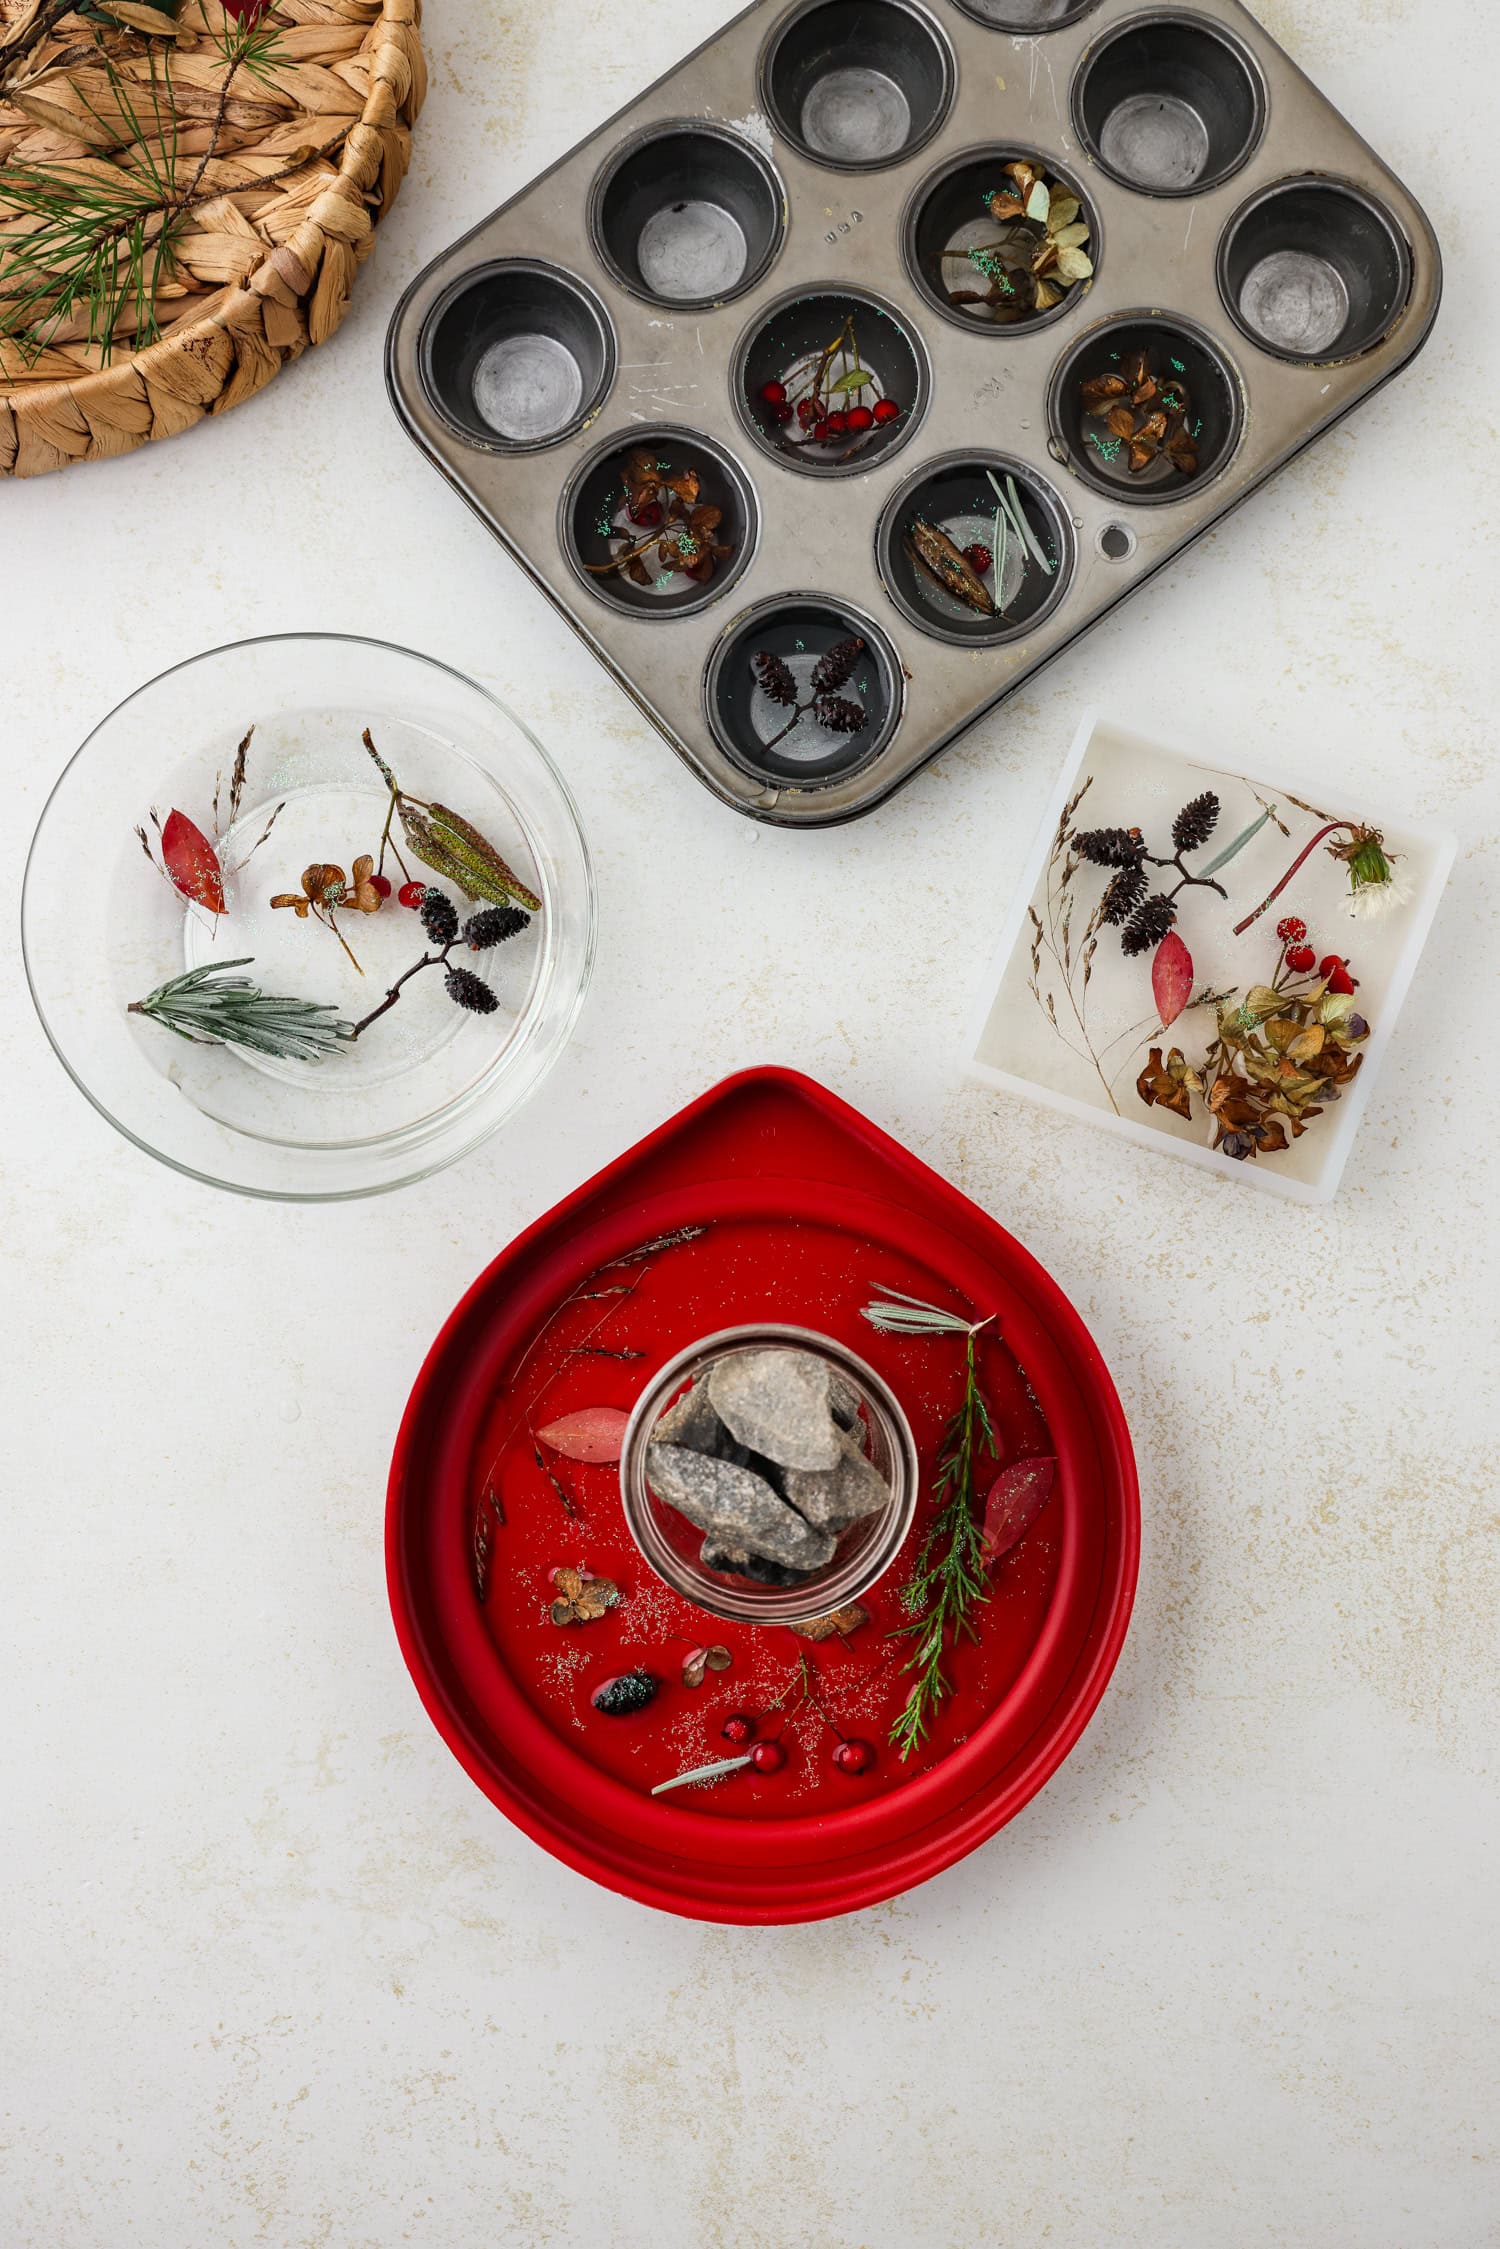
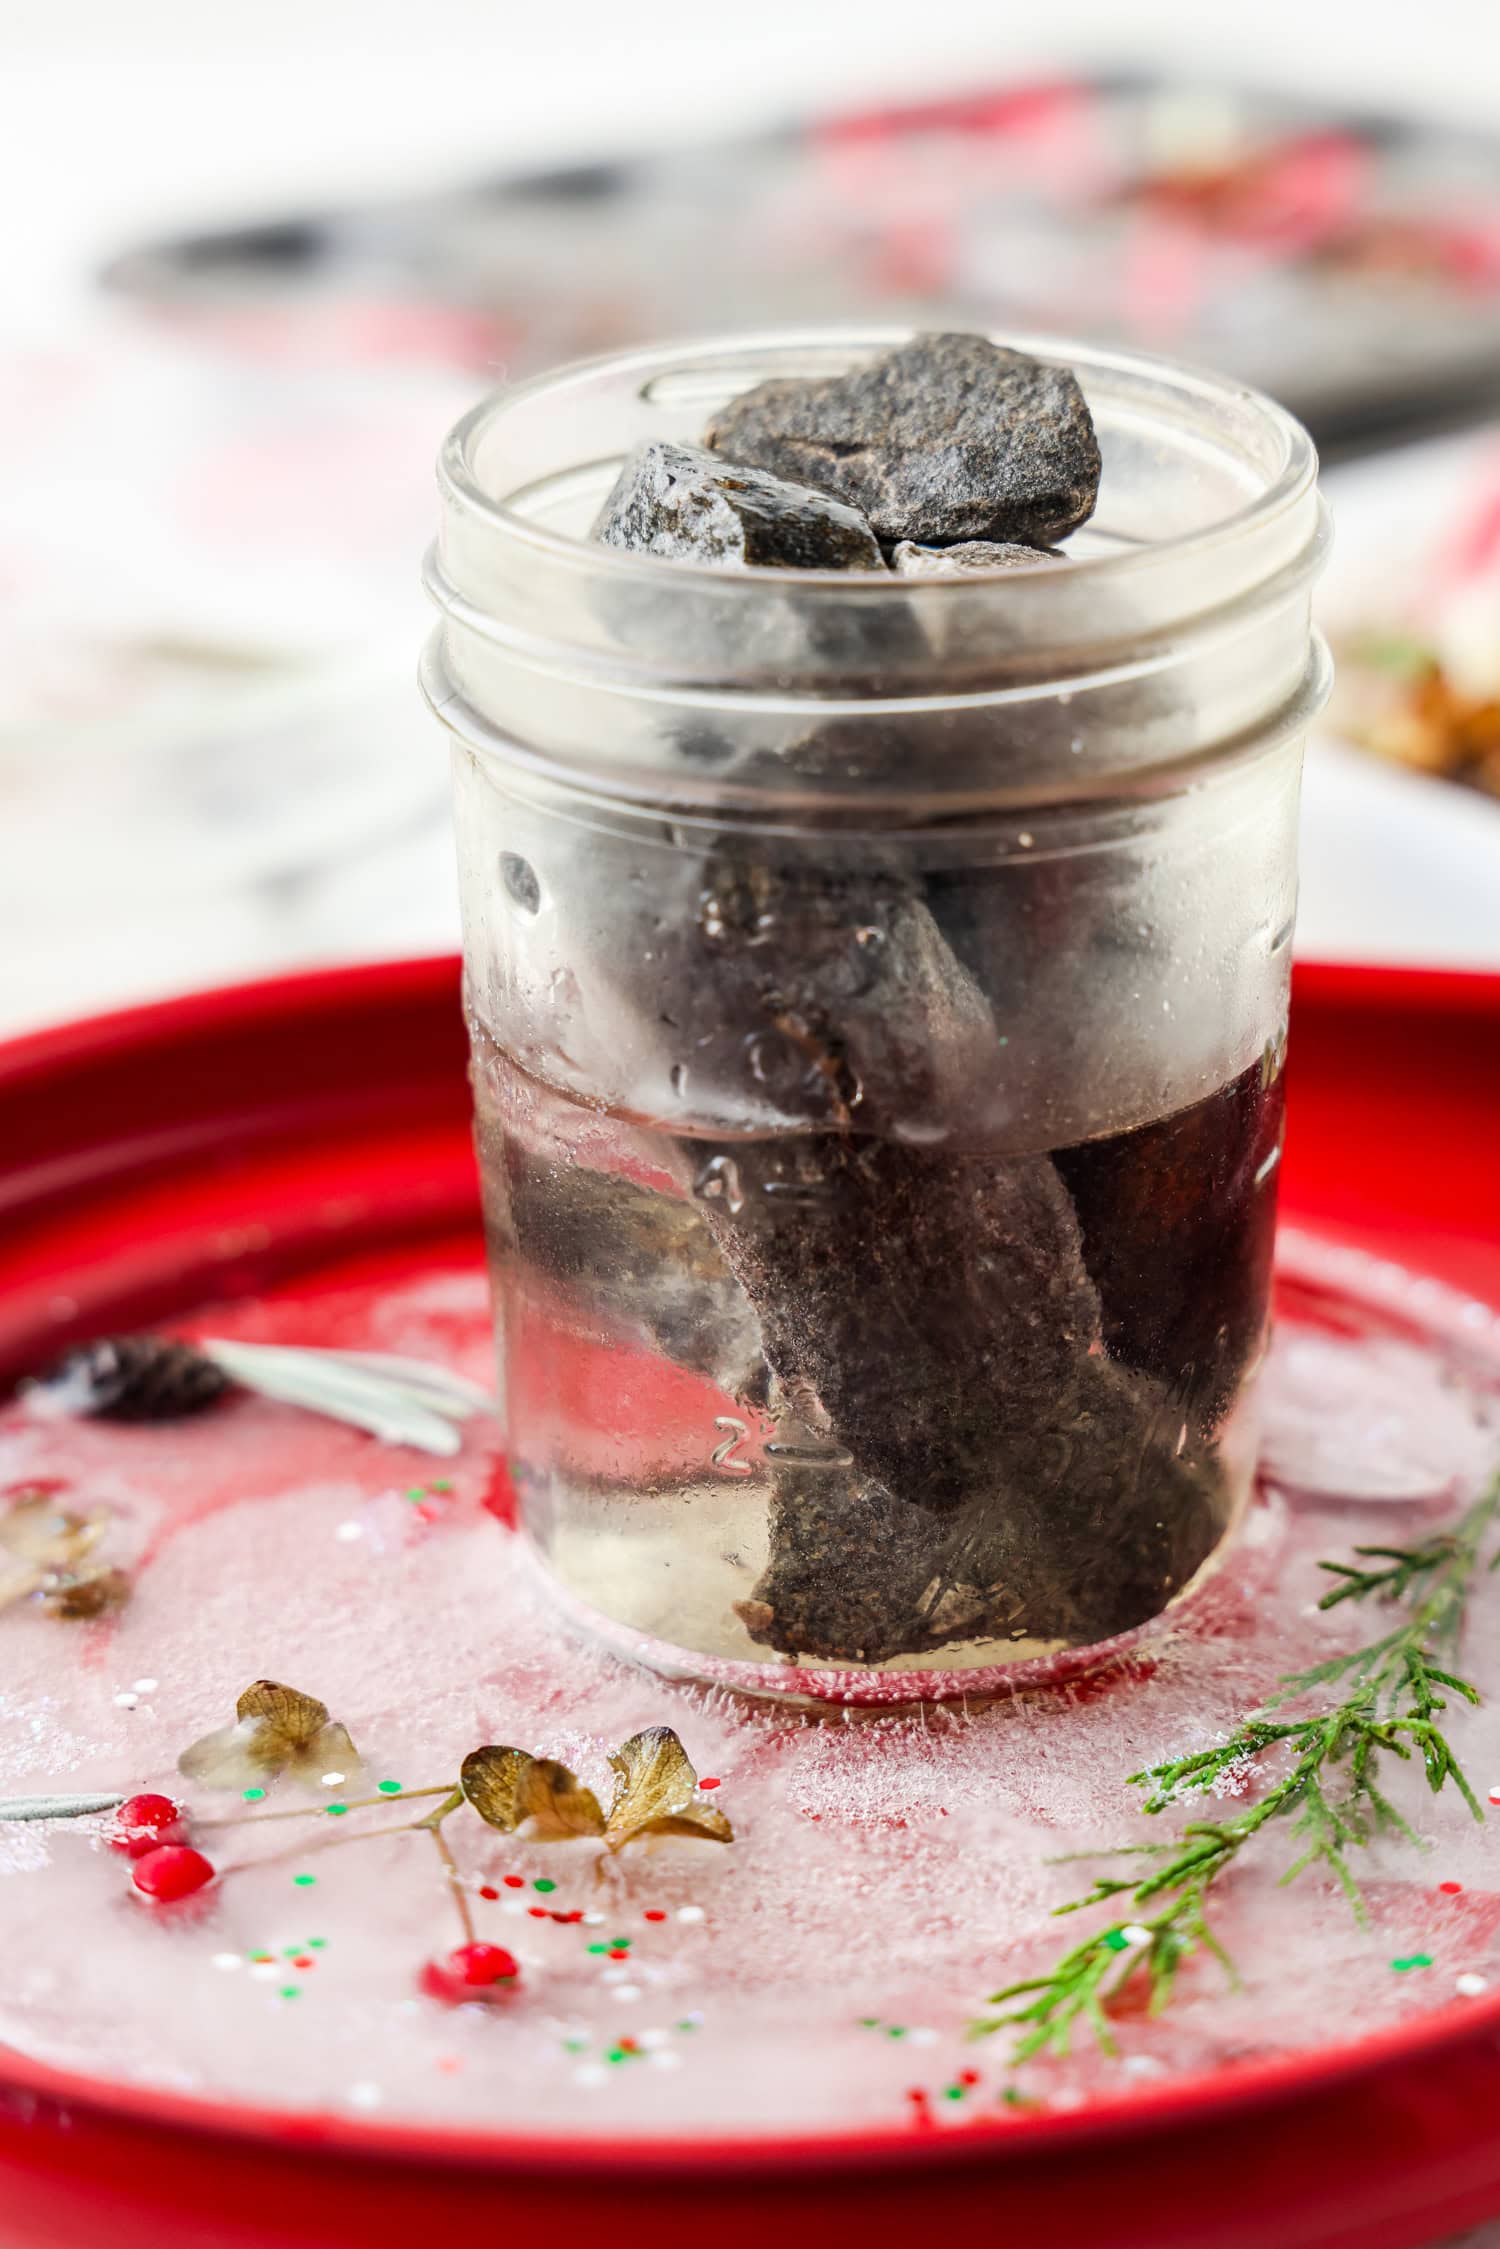
- To make a suncatcher with a hole in the middle, place a small jar in the center of another circular container or lid and fill it with rocks. If you don’t have rocks, dried rice or beans would also work well as long as your jar is weighted enough to not float in the water or let the water flow underneath.
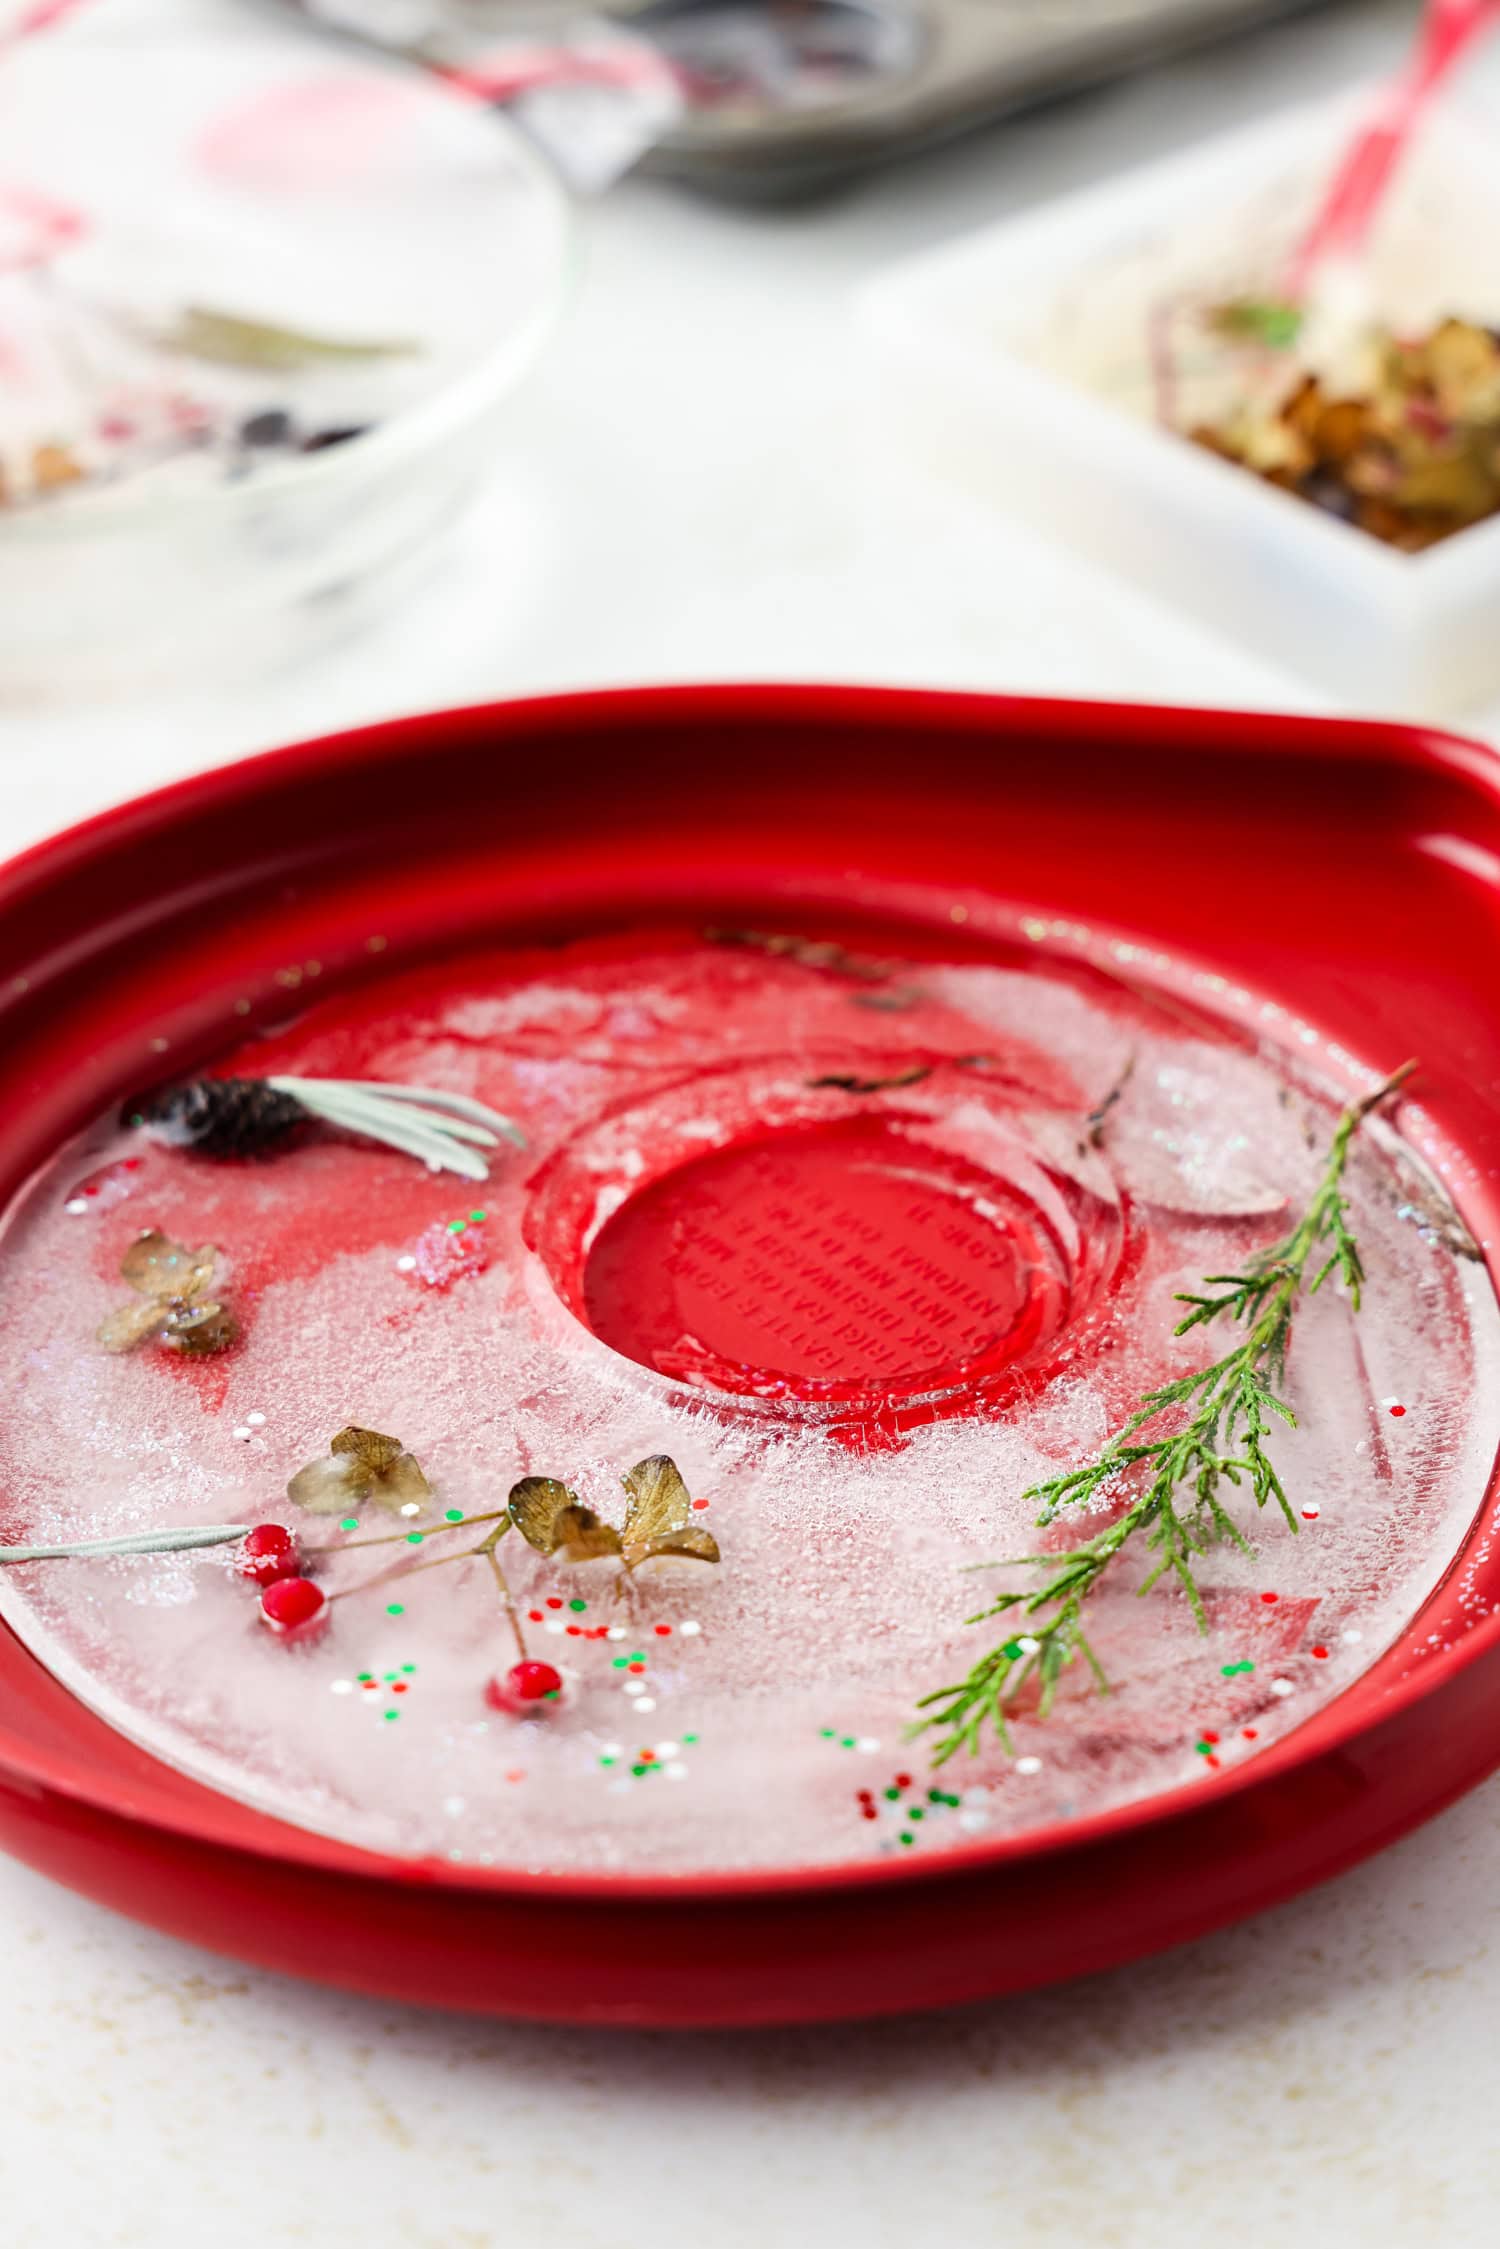
- Once you have your containers, lids, and jars, all situated go ahead and fill them with water. You want enough water for your items to freeze in, but not so thick that it will be hard to remove. This, of course, depends on the size of your container. I filled the mini muffin tin up, but only had about ½ inch of water in the circular lid that I used.
- Place the items that you found during your winter nature hunt into the containers. You can also add in some fun things like glitter for extra sparkle!
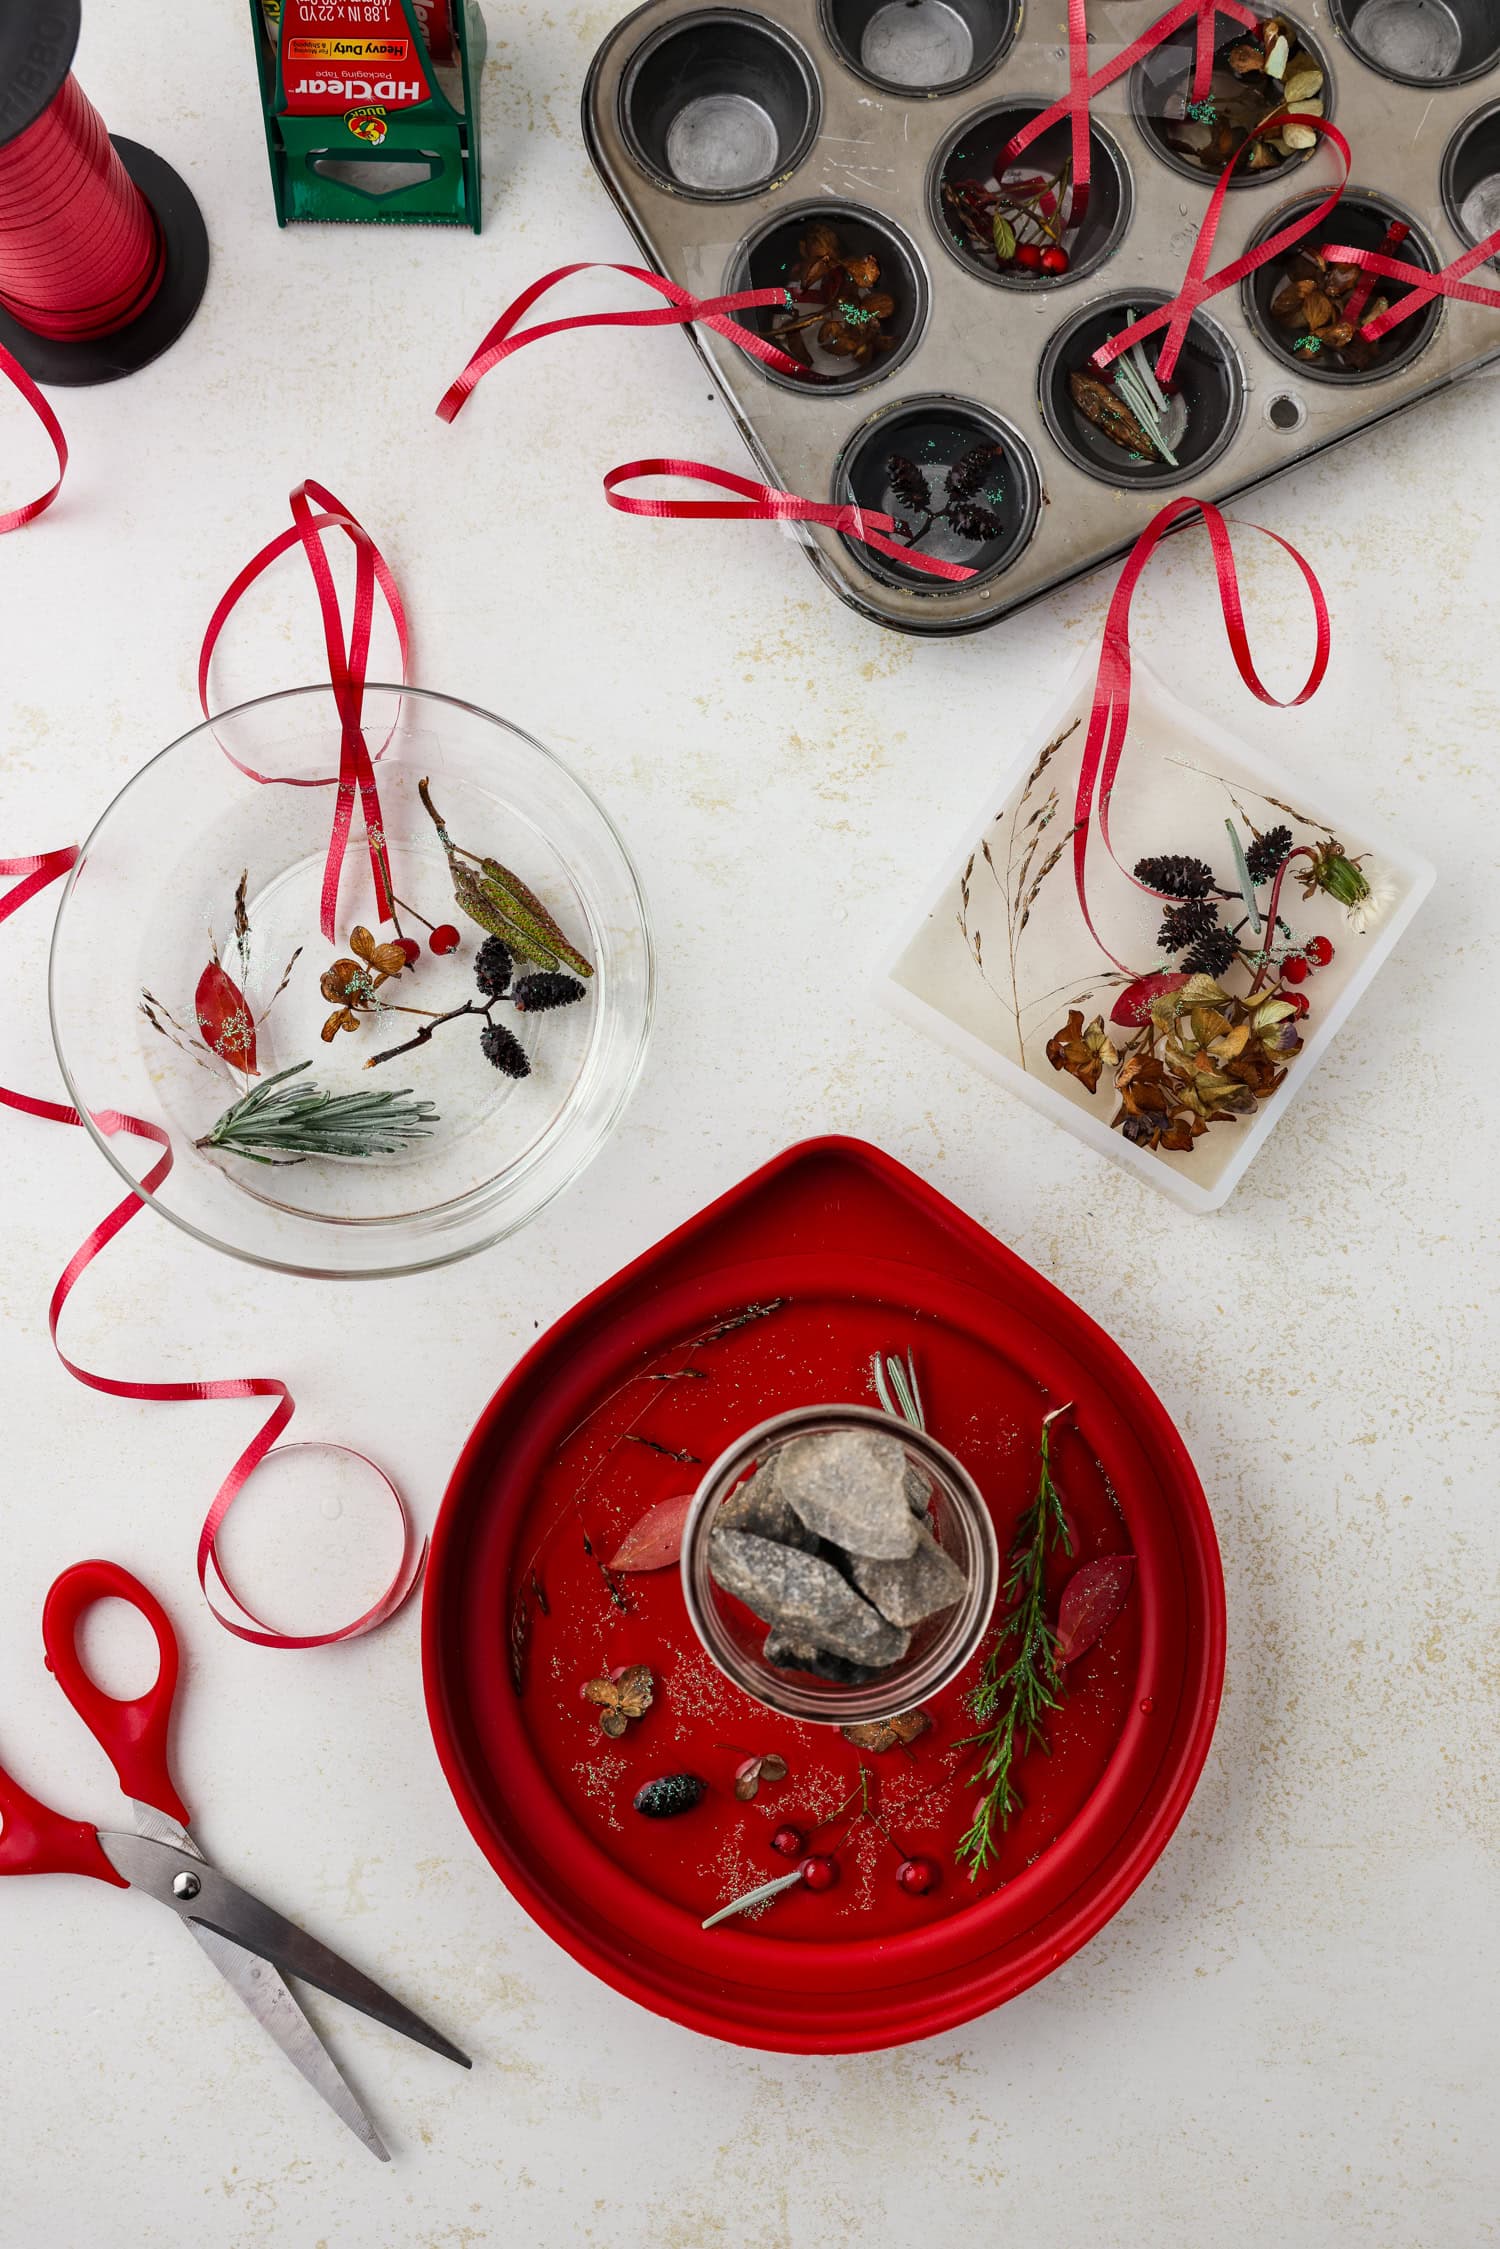
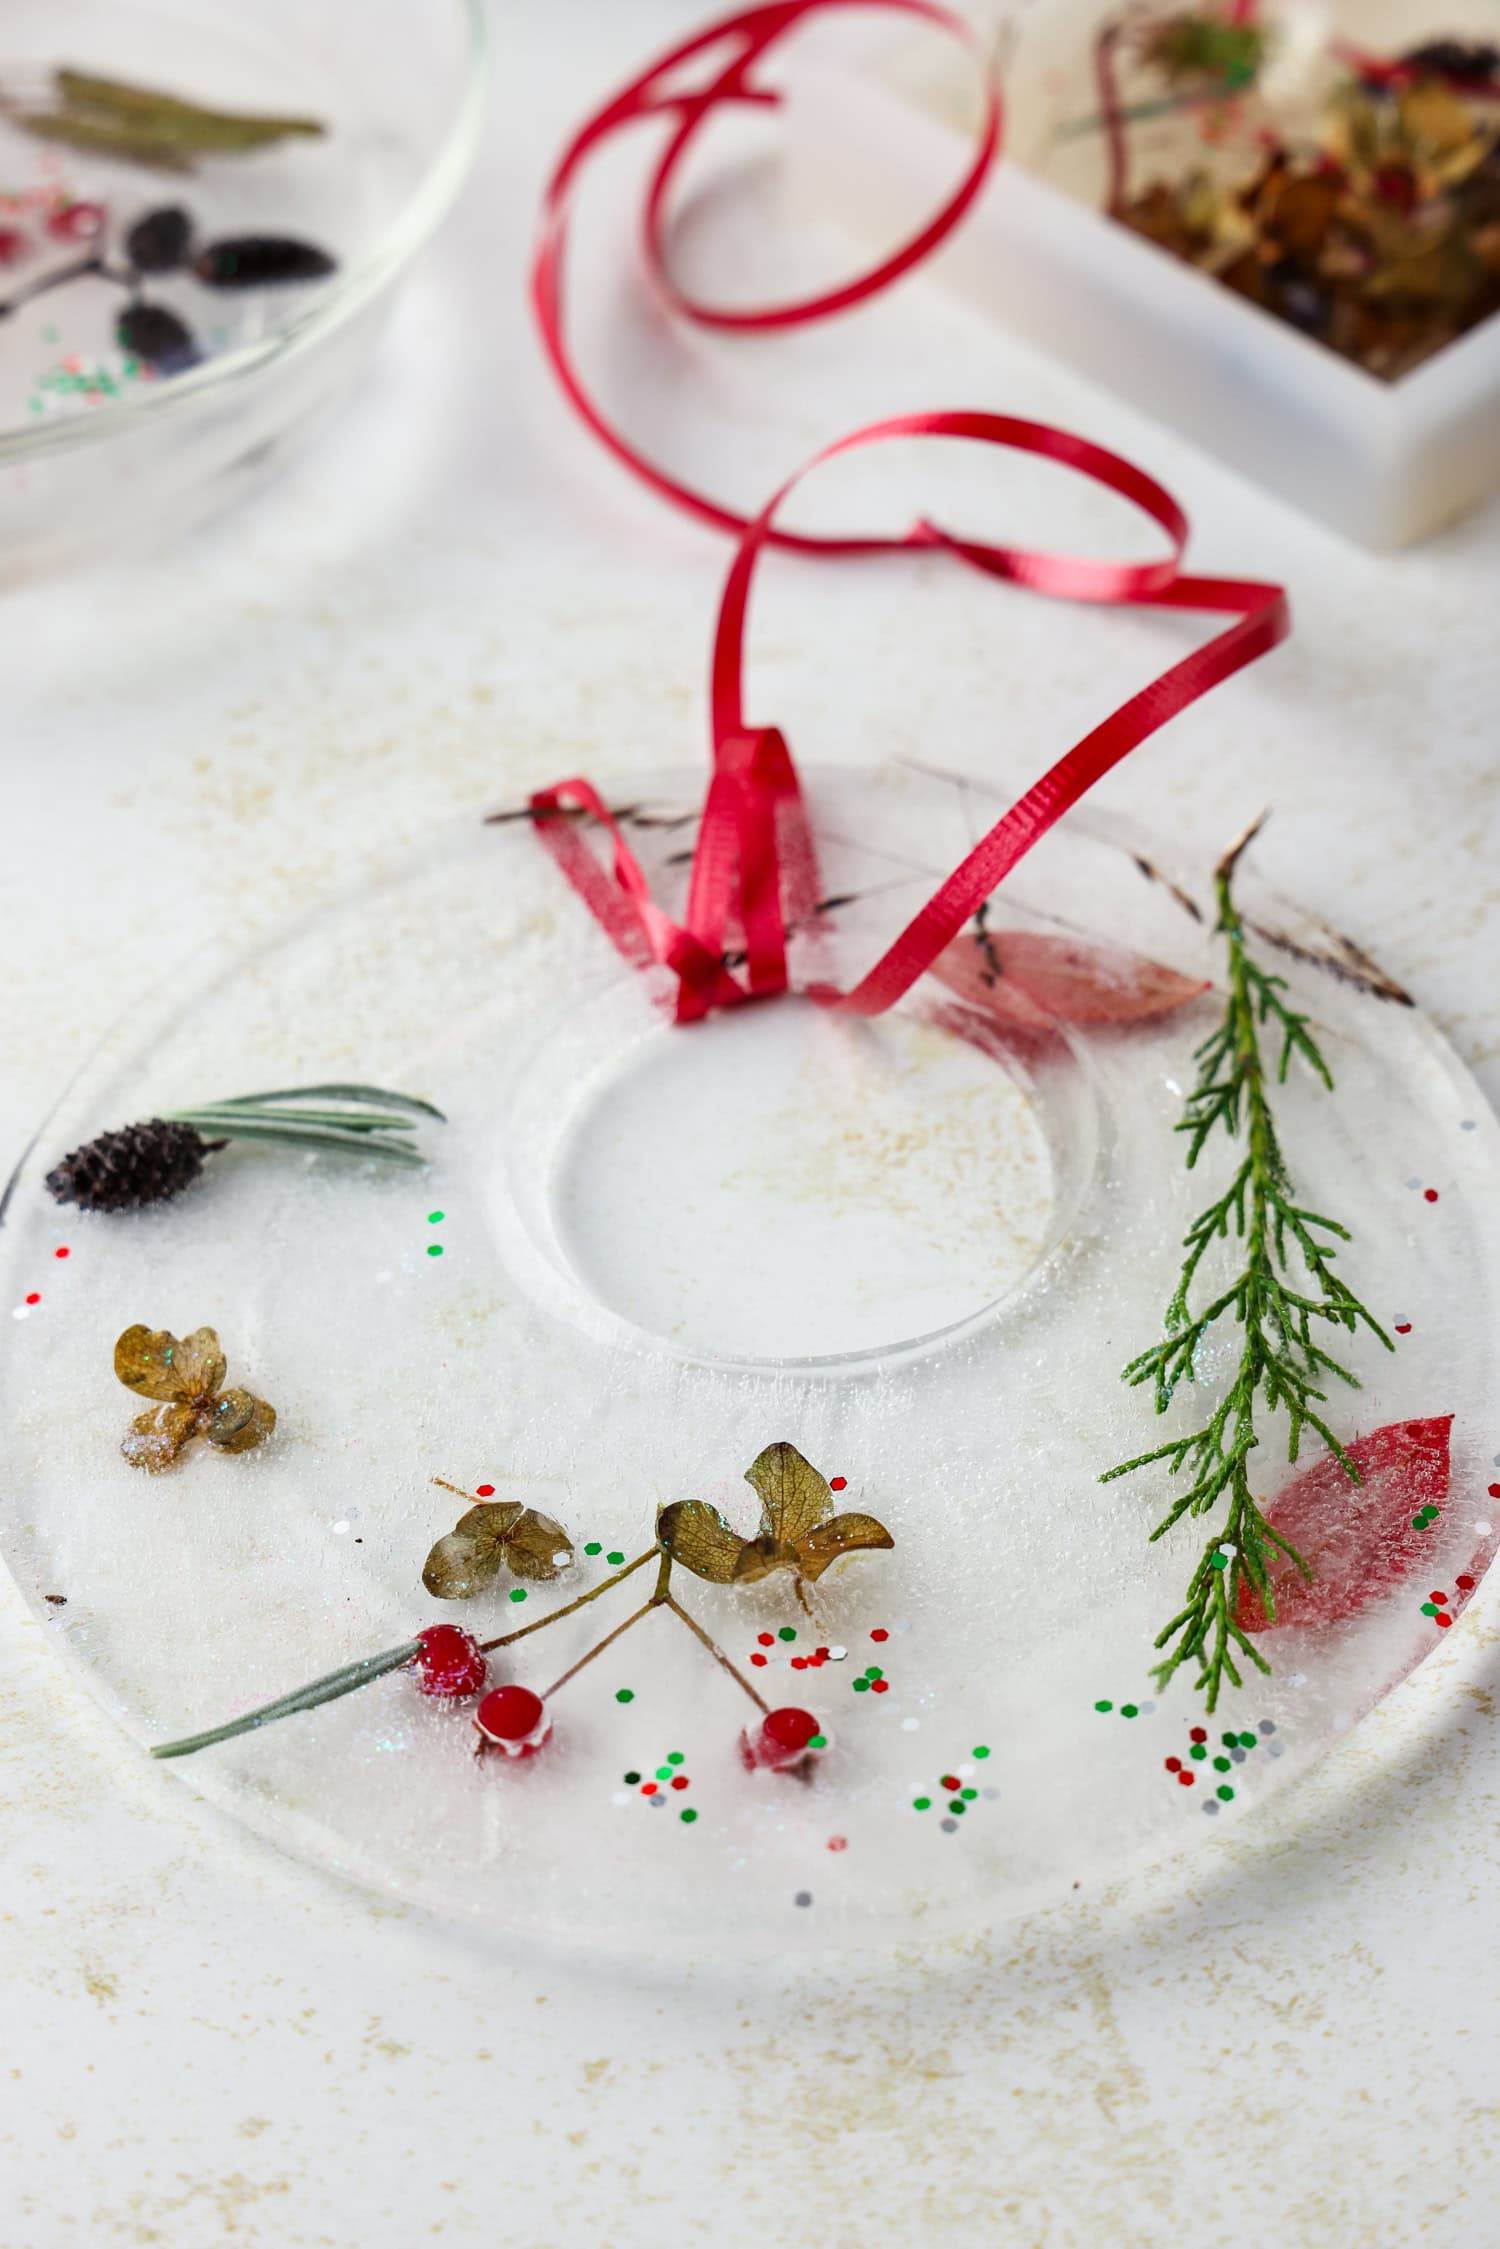
- Cut enough pieces of ribbon or string for the amount of suncatchers you made. Make sure your ribbon is long enough to fold in half and place about 2-3 inches of each end of the ribbon into the water. Our ribbon measured about 12-15 inches each for the larger suncatchers. Place each end of the cut ribbon into the water and secure in place with a small piece of tape on the sides of the container.
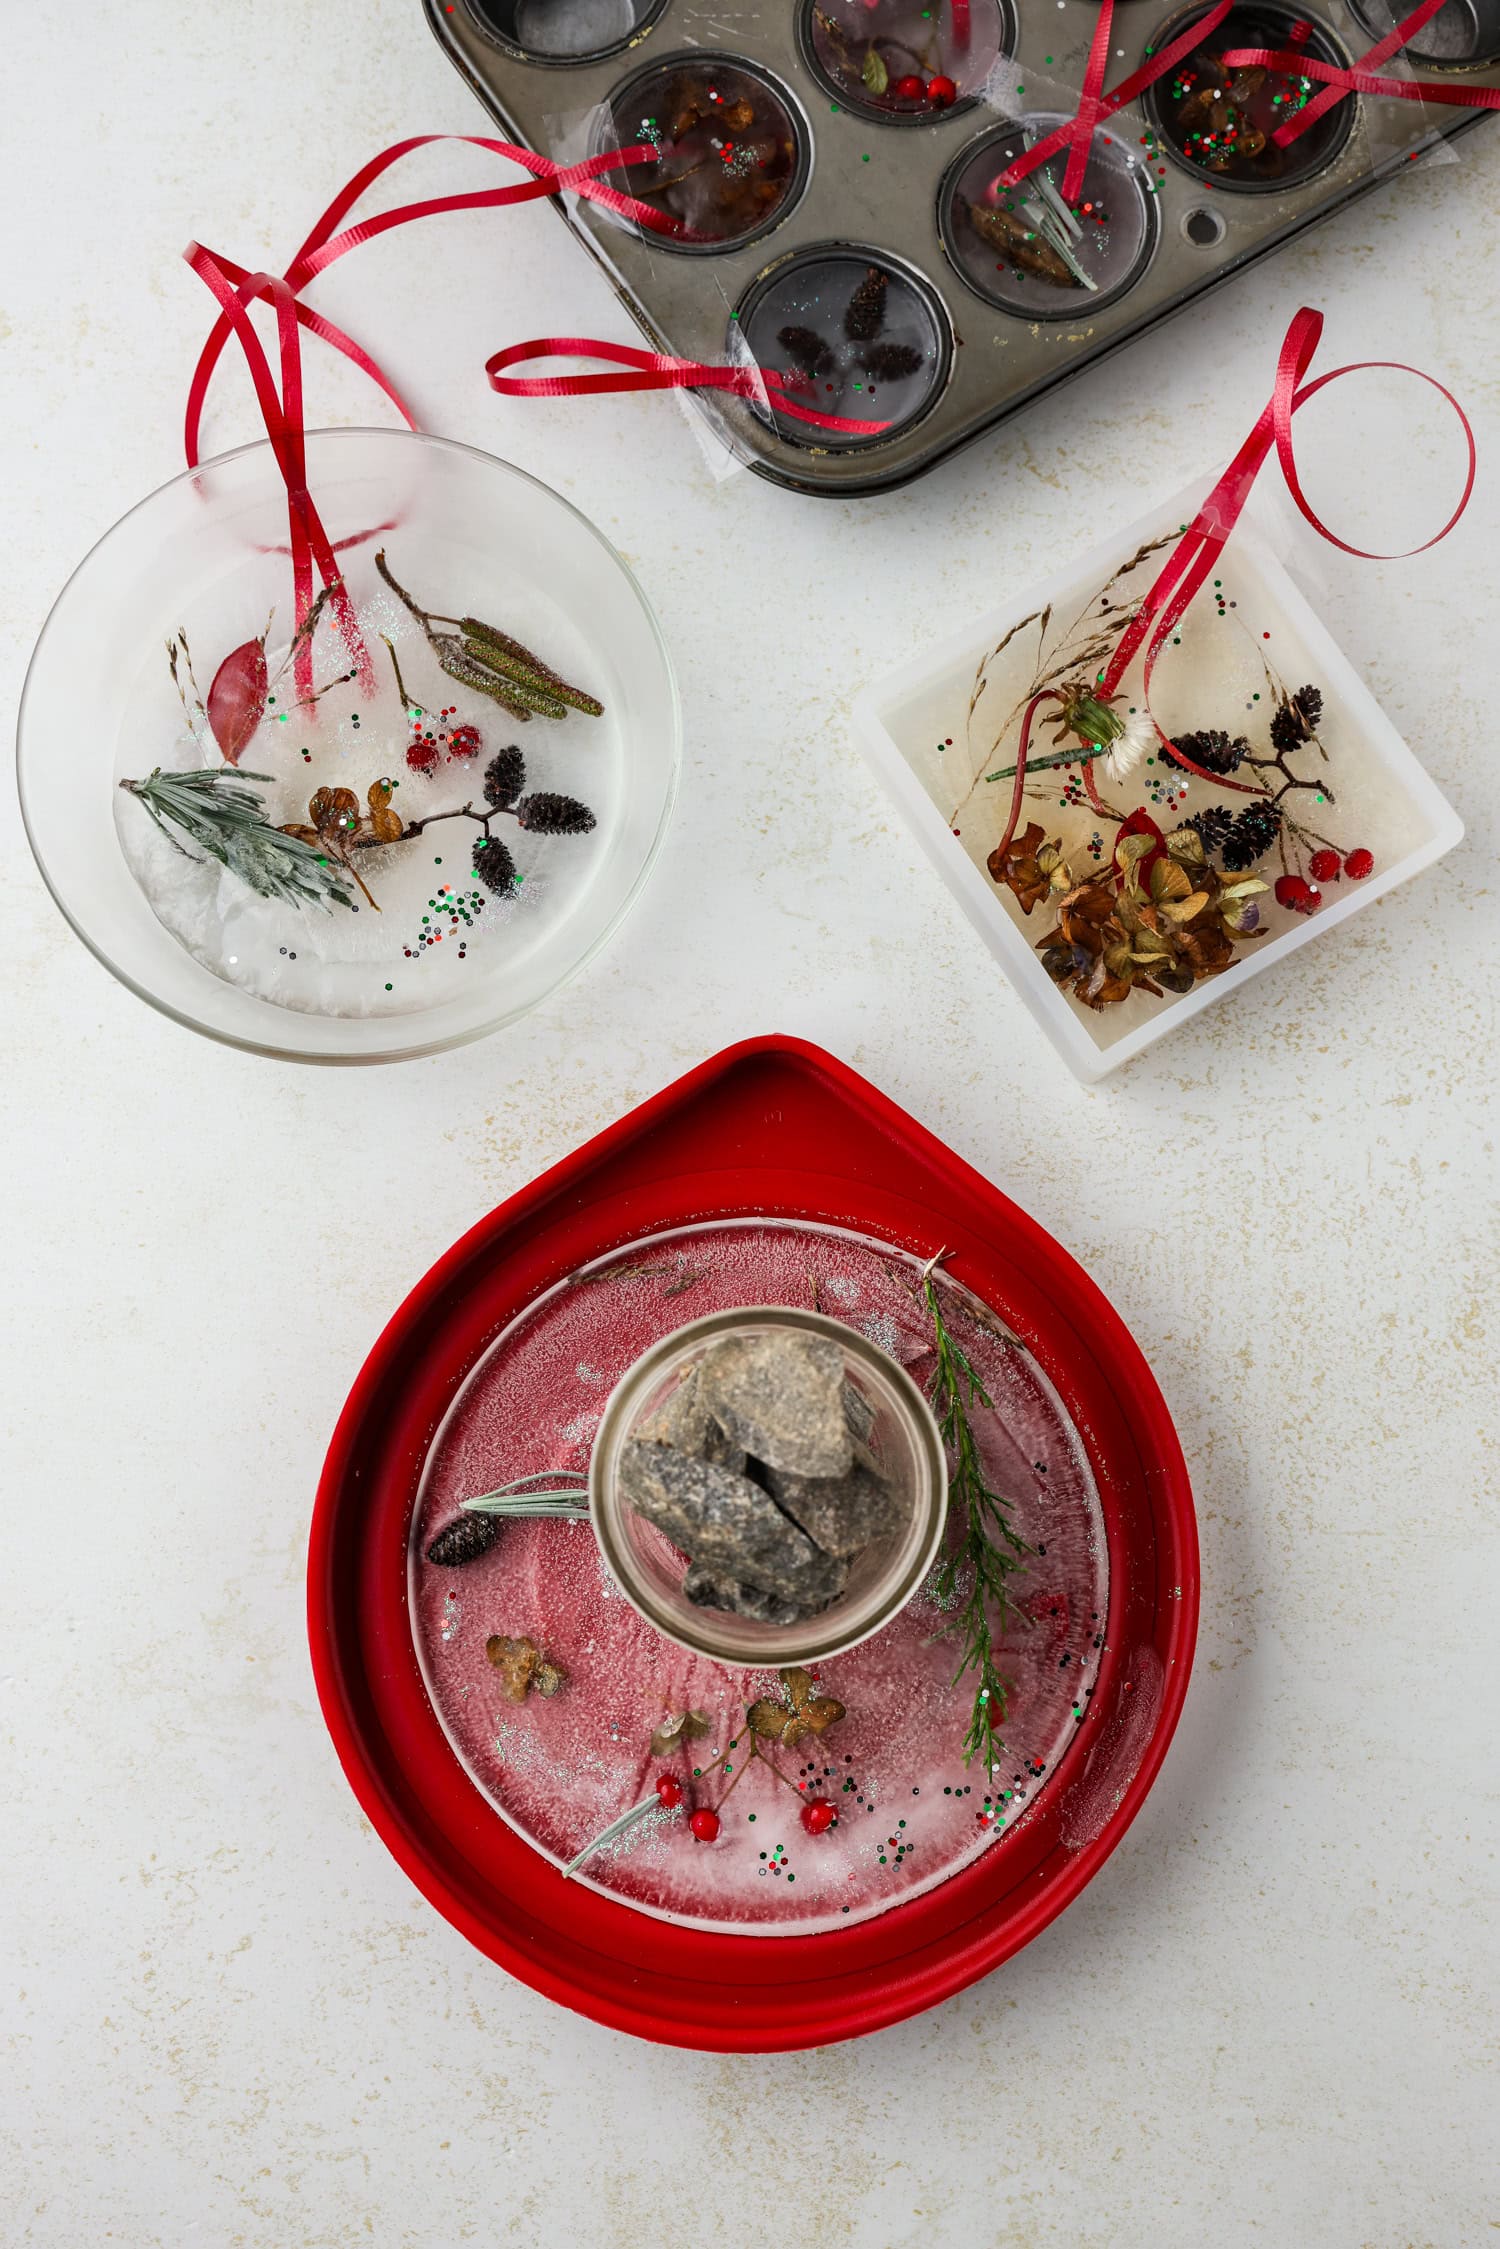
- Carefully place the containers outdoors if it is, or will be, below freezing, or place the, in the freezer until they are frozen.
- Once the water is frozen, set the ice suncatchers out at room temperature for just a few minutes to let them loosen and release from the containers. This should take about 5-10 minutes.
- If you used a small jar and rocks, pour a little bit of warm water into the jar, and the jar should loosen up and pop right out of place within a minute! Place the ribbon through the hole where the jar was and loop it through 2-3 times. Tie a knot at the top.
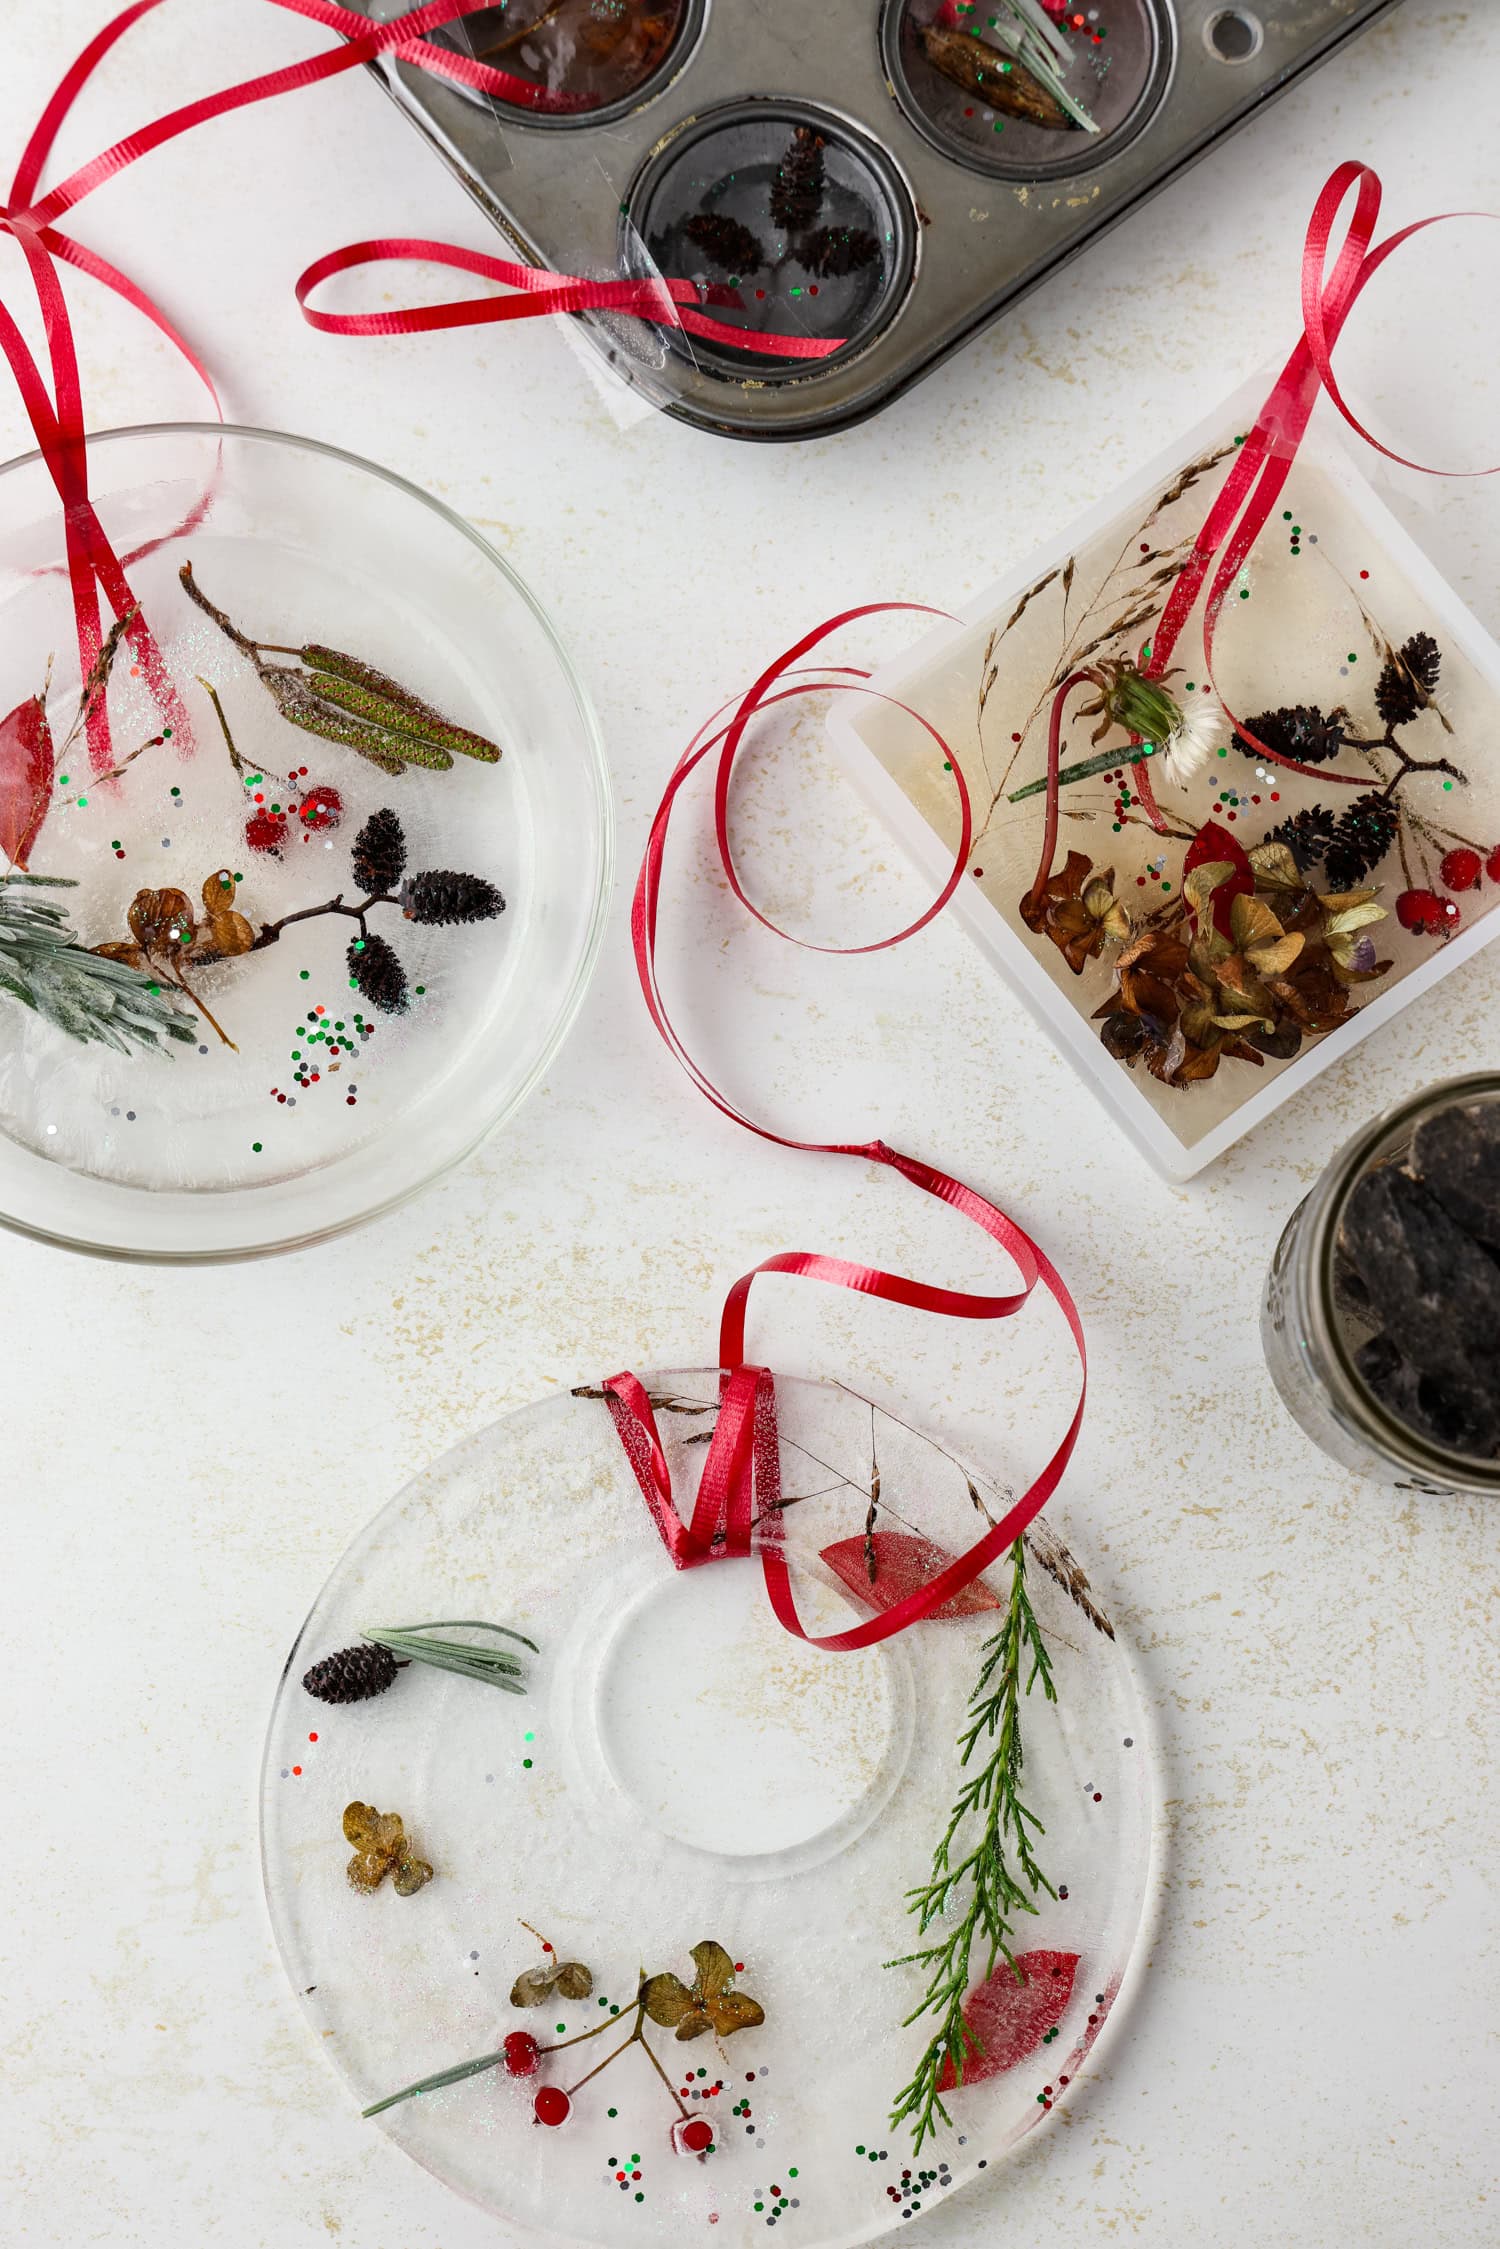
- Once the suncatchers release from their containers, take them outside and hang them up to enjoy! When the suncatchers melt, don’t forget to gather the ribbon and dispose of it!
Pro Tips for the Best Ice Suncatcher
- Some of the items may float and shift when you transport the container outside or to the freezer, so don’t worry about placing them strategically. To avoid shifting as much as possible, you can opt to fill the containers outside on a day when temperatures are below freezing. We like to do this craft together just before bedtime when the forecast calls for temperatures to be at or below 20 degrees Fahrenheit.
- To make your suncatchers last a longer time, place them in tree branches that get some shade and some sunshine. That way it isn’t direct sunlight on them all day long.
- While suncatchers typically go in sunny windows, these are only meant for outdoor use. Don’t hang them indoors or you’ll have a mess once they melt!
- Wanna make different colors of ice? Add some food coloring to each suncatcher before it freezes.
These cutie little ice suncatcher add a little extra pizzazz into your winter outdoor view! Such a fun way to incorporate nature into your craft time.
More Outdoor Crafts You’ll Love!
- These DIY Garden Stepping Stones will transform your spring and summer garden into a sweet and special place!
- Make DIY Bird Feeders and watch all the cute little birds come grab some tasty bird seed!
- If it’s cold enough to make ice suncatchers, then you can also make Frozen Bubbles!
- This Paper Kite Craft is so much fun to make during the spring and summer time.
Ice Suncatchers
Instructions
- Search for things around your garden or go for a walk to find winter plants and unique plants that have left blooms or buds behind from the previous season. You may be surprised at all the beautiful plants that can be found this time of year! Plants that have dried are especially pretty. Small plants are best for this craft. If you plan to use a jar to make a hole for stringing your ice suncatchers, don’t forget to grab some rocks while you are searching for things in nature.
- Gather containers and lids that would make interesting shapes for great suncatchers.
- If you are using a jar and rocks to make a hole for stringing the ribbon to hang the suncatcher, place the jar in the container/lid near the top and fill it with rocks. Leave enough space at the top for water to surround the jar. You can also use small, weighted objects to hold the jar in place. Dried rice or beans would also work well as long as your jar is weighted enough to not float in the water or let the water flow underneath.
- Once you have your containers, lids, and jars, fill them with water. You want enough water for your items to freeze in, but not so thick that it will be hard to remove. This, of course, depends on the size of your container. I filled the mini muffin tin up, but only had about ½ inch of water in the lid.
- Place the items that you found during your winter nature hunt in the containers. You can also add in some fun things like glitter for extra sparkle! NOTE: Some of the items may float and shift when you transport the container outside or to the freezer, so don’t worry about placing them strategically. To avoid shifting as much as possible, you can opt to fill the containers outside on a day when temperatures are below freezing. We like to do this craft together just before bedtime when the forecast calls for temperatures to be at or below 20 degrees Fahrenheit.
- Cut enough pieces of ribbon/string for the amount of suncatchers you made. Make sure your ribbon is long enough to fold in half and place about 2-3 inches of each end of the ribbon into the water. Our ribbon measured about 12-15 inches each for the larger suncatchers. Place each end of the cut ribbon into the water and secure in place with a small piece of tape on the sides of the container.
- Carefully place the containers outdoors (if it is, or will be, below freezing) or in the freezer until they are frozen.
- Once the water is frozen, set them out in room temperature for just a few minutes to let them loosen and release from the containers. This should take about 5-10 minutes. If you used a small jar and rocks, pour a little bit of warm water into the jar, and the jar should loosen up and pop right out of place within a minute!
- Place the ribbon through the hole where the jar was and loop it through 2-3 times. Tie a knot at the top.
- Once the suncatchers release from their containers, take them outside and hang them up to enjoy! When the suncatchers melt, don’t forget to gather the ribbon and dispose of it!