How to Make a Sticker Book
Want to create a personalized sticker book? This step-by-step guide, complete with pictures, will show you how to make your own sticker book to show off your favorite stickers.

Learn how to make a sticker book in just a few steps! This adorable little book is a great way to get your kiddos involved in an exciting DIY activity. They can create the coolest book with just a few simple supplies. We love to make this craft whenever we find fun stickers somewhere. It’s the best way to actually use them but make sure that they don’t end up on furniture or something else.
DIY crafts are always so much fun! This DIY photo candle is a perfect gift and DIY bird feeders are something we always make during the spring time. When you need something to fill craft time but then keep your kiddos occupied after the fact too, then make this adorable sticker book. The perfect no-screen time activity! Who wouldn’t love that?
Why You’ll Love this Sticker Book Activity
- This create your own sticker book activity only takes about a half hour! It’s great for craft time and even perfect to create in a classroom setting.
- If you’ve got kiddos who love to put stickers all over things, then this is a great way to redirect that creative energy. Instead of placing stickers on furniture, clothes, etc. they have an exciting booklet to put them in instead.
- Folding, hole punching, and threading the pipe cleaners through the holes are all great activities to refine fine motor skills.
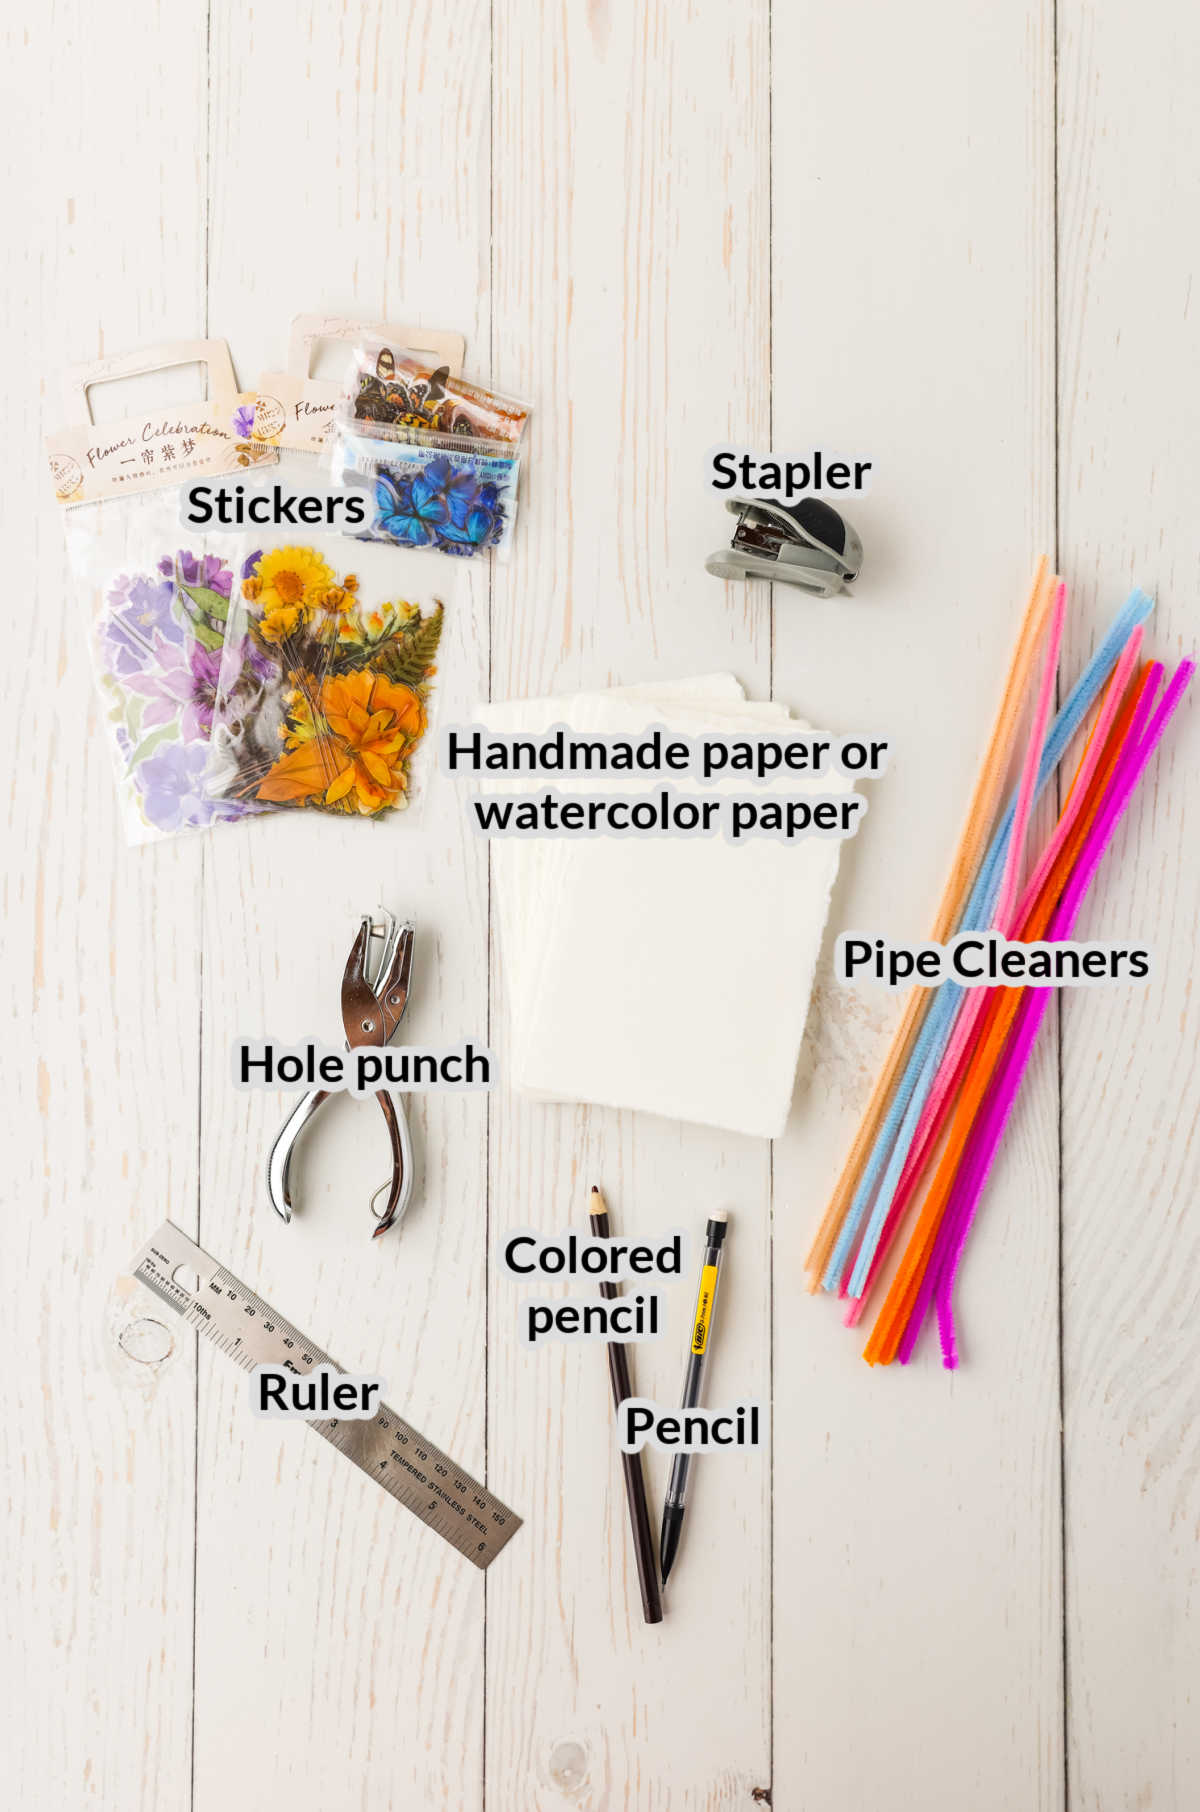
Supplies Needed For a DIY Sticker Book
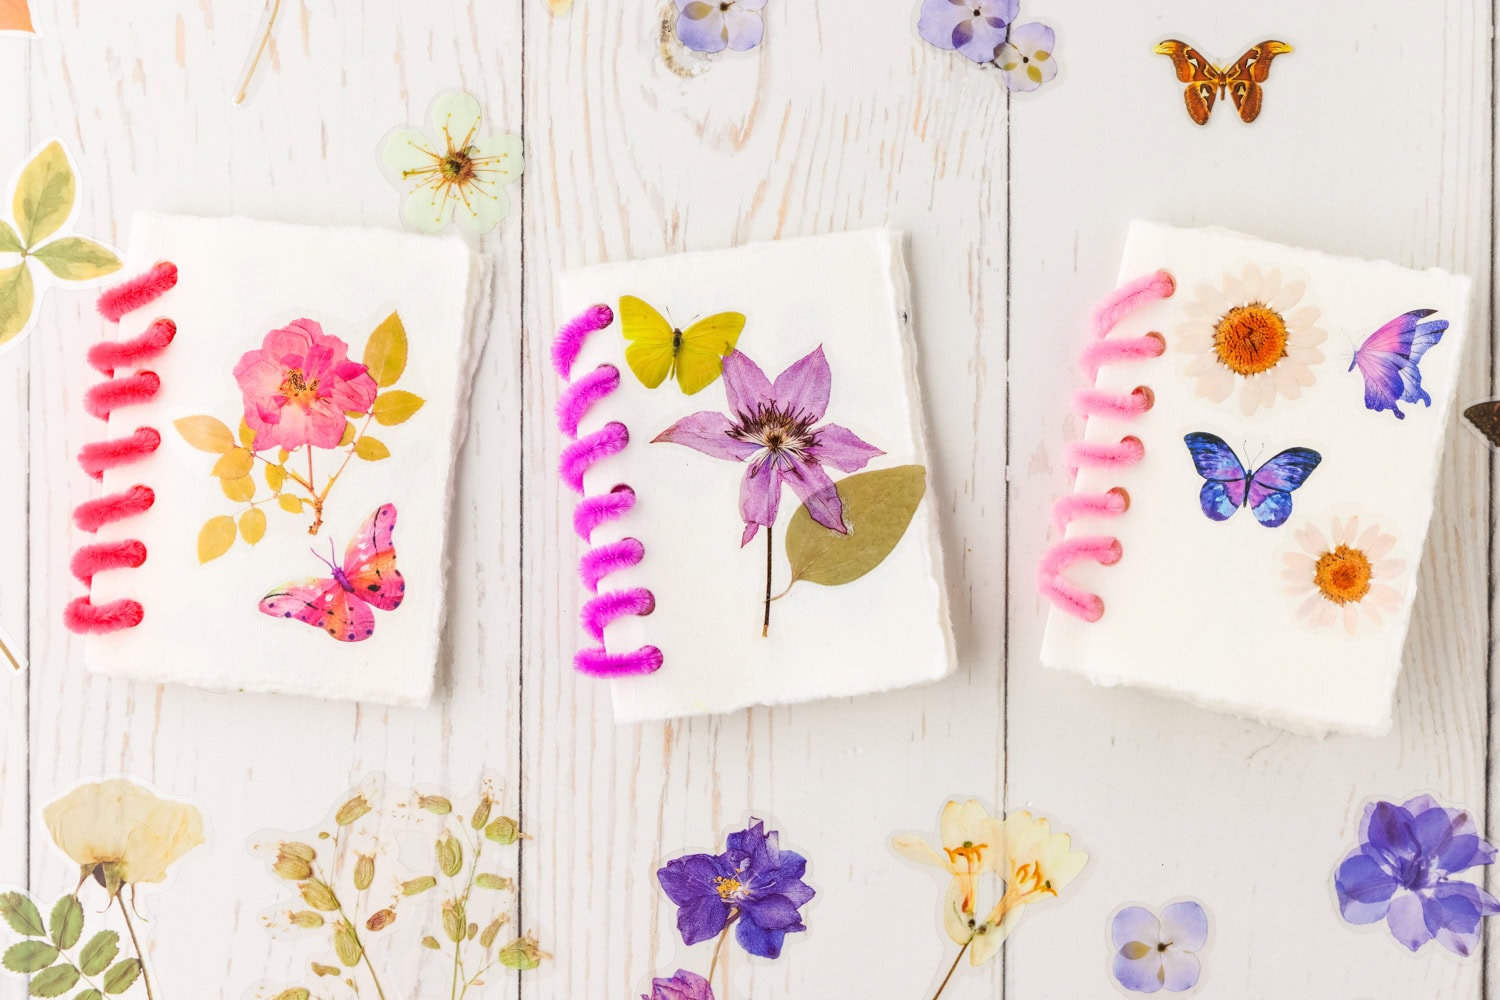
- Handmade paper/watercolor paper – I find that this paper is like a cross between a canvas and construction paper. It just seems to be more durable! But you can use card stock if that’s all you have on hand.
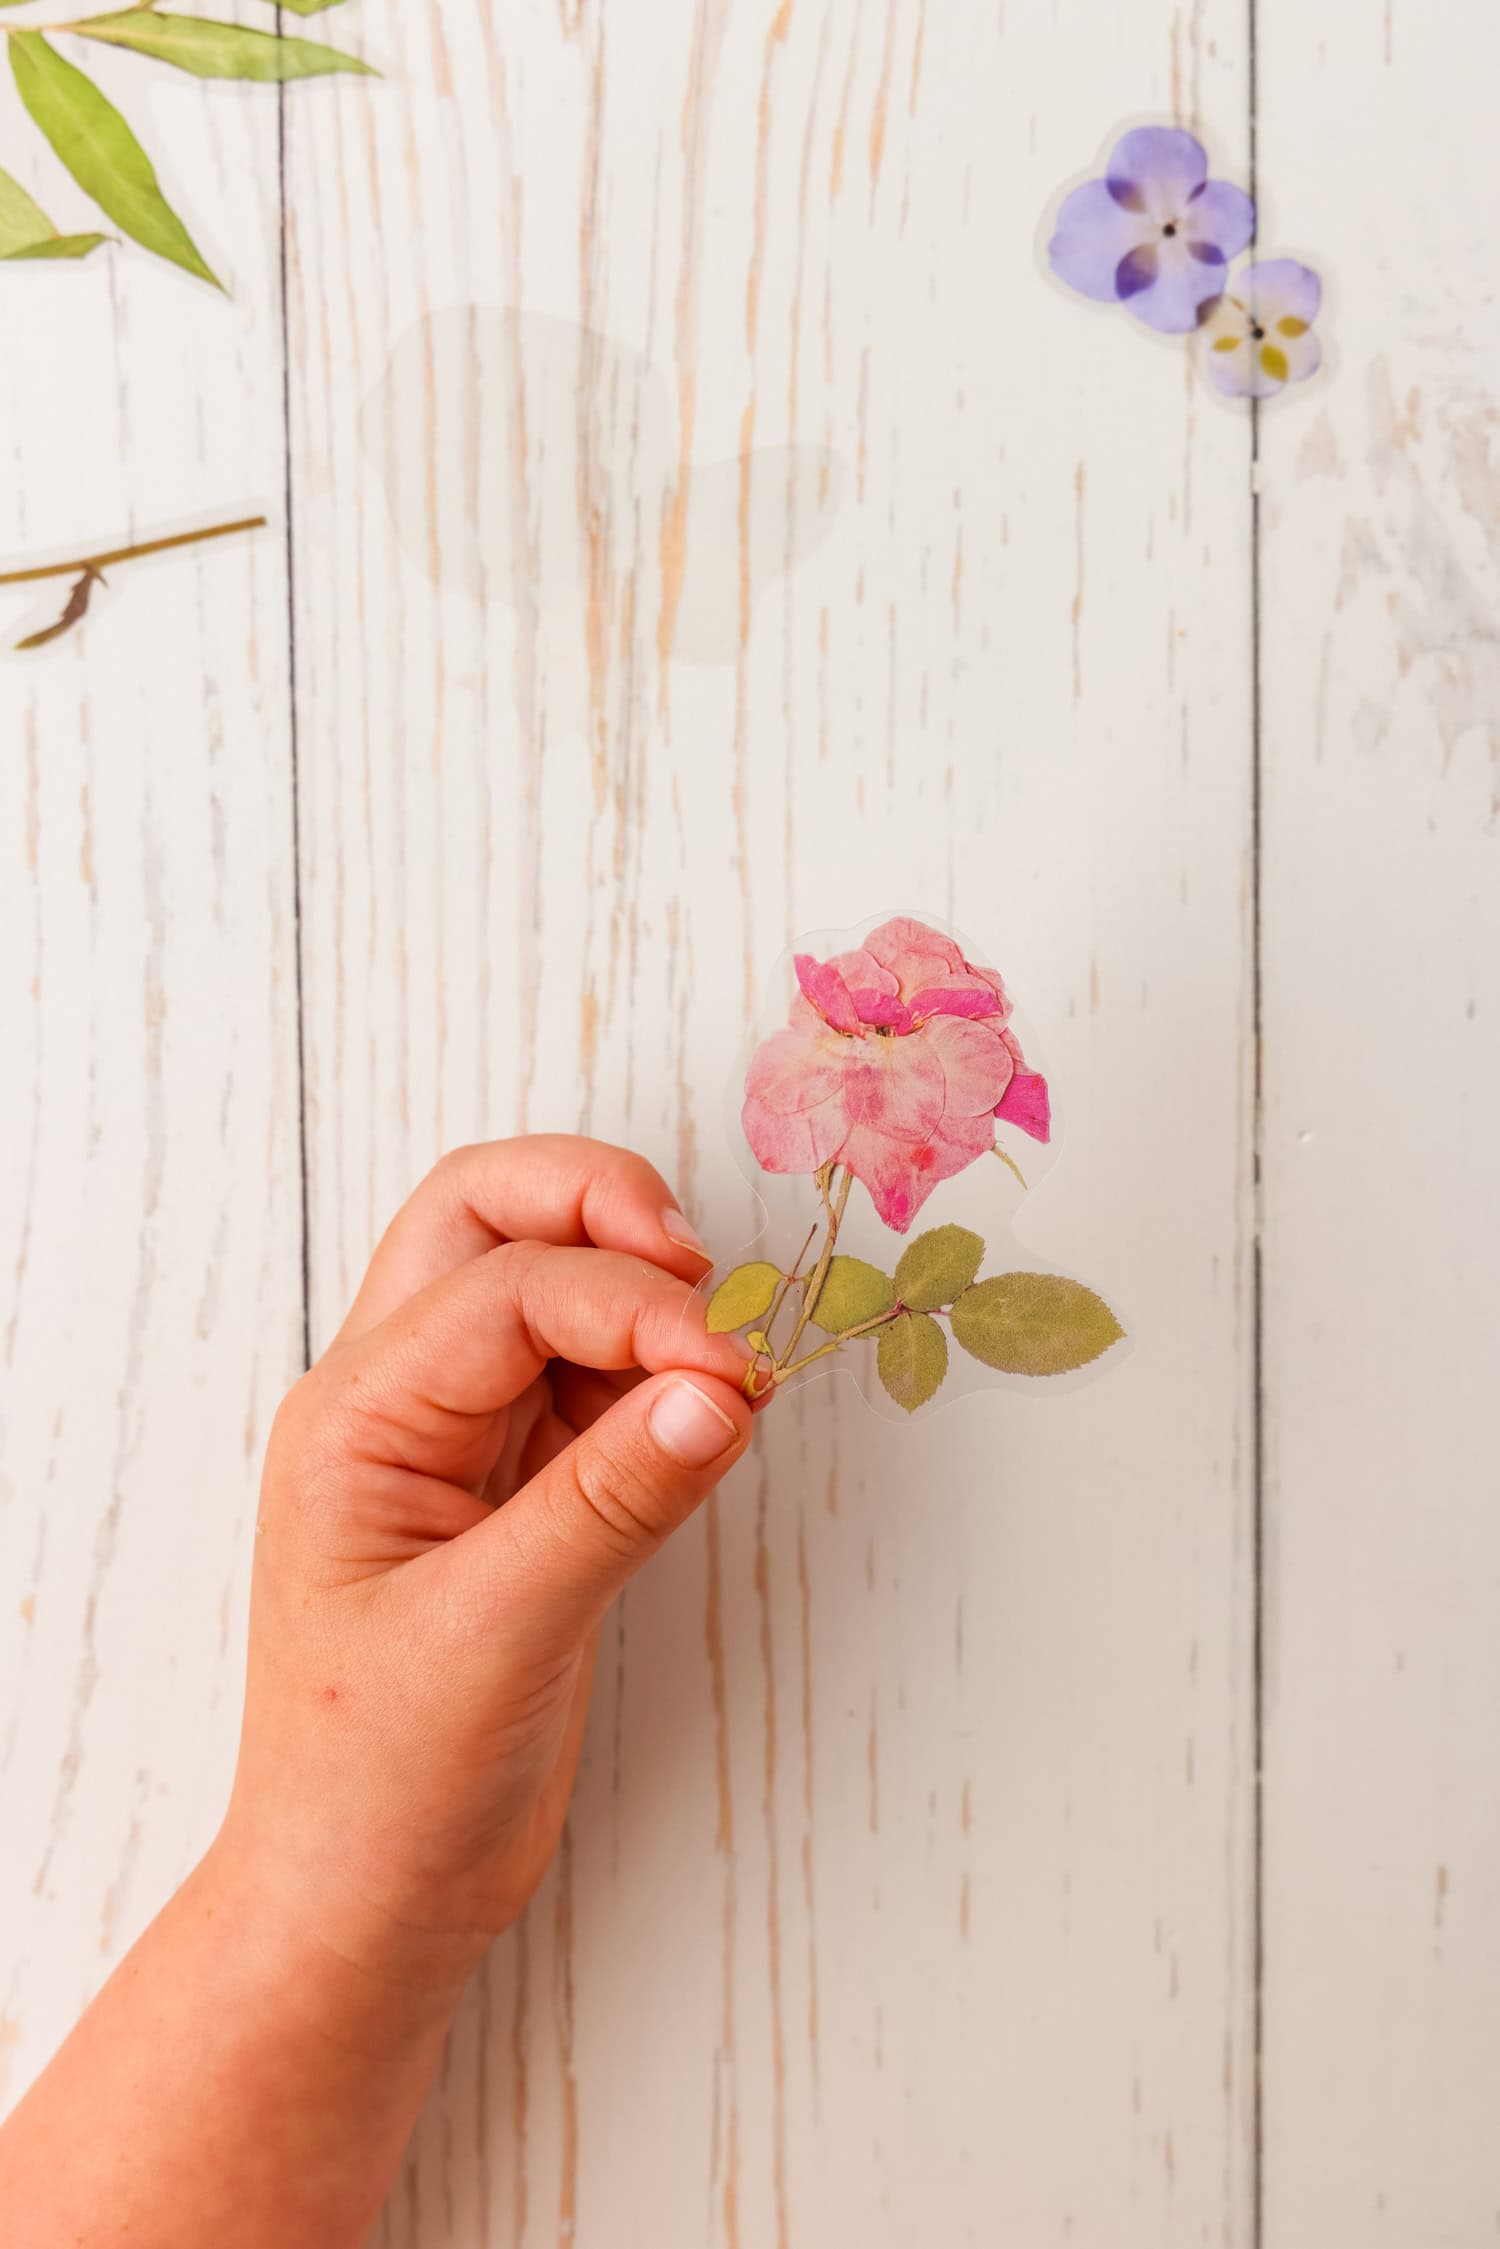
- Stickers – Grab any and all of your favorite stickers! You can collect the coolest stickers when you have a convenient place to put them.
- Pipe Cleaners – Pipe cleaners make the perfect binding for a homemade sticker book! Just use a hole puncher to make holes and slide the pipe cleaner through.
- Hole punch – A simple single hole punch will punch through the sticker book pages and create enough holes to make a binding for your custom sticker book.
- Ruler – Use a ruler to help make sure that everything is even!
- Stapler – Use this to help secure the pipe cleaner binding to the book.
- Pencil or Colored pencil – You need a pencil, or other writing utensil, to help mark the layout of the holes that the hole punch will create.
How to Make a Sticker Book
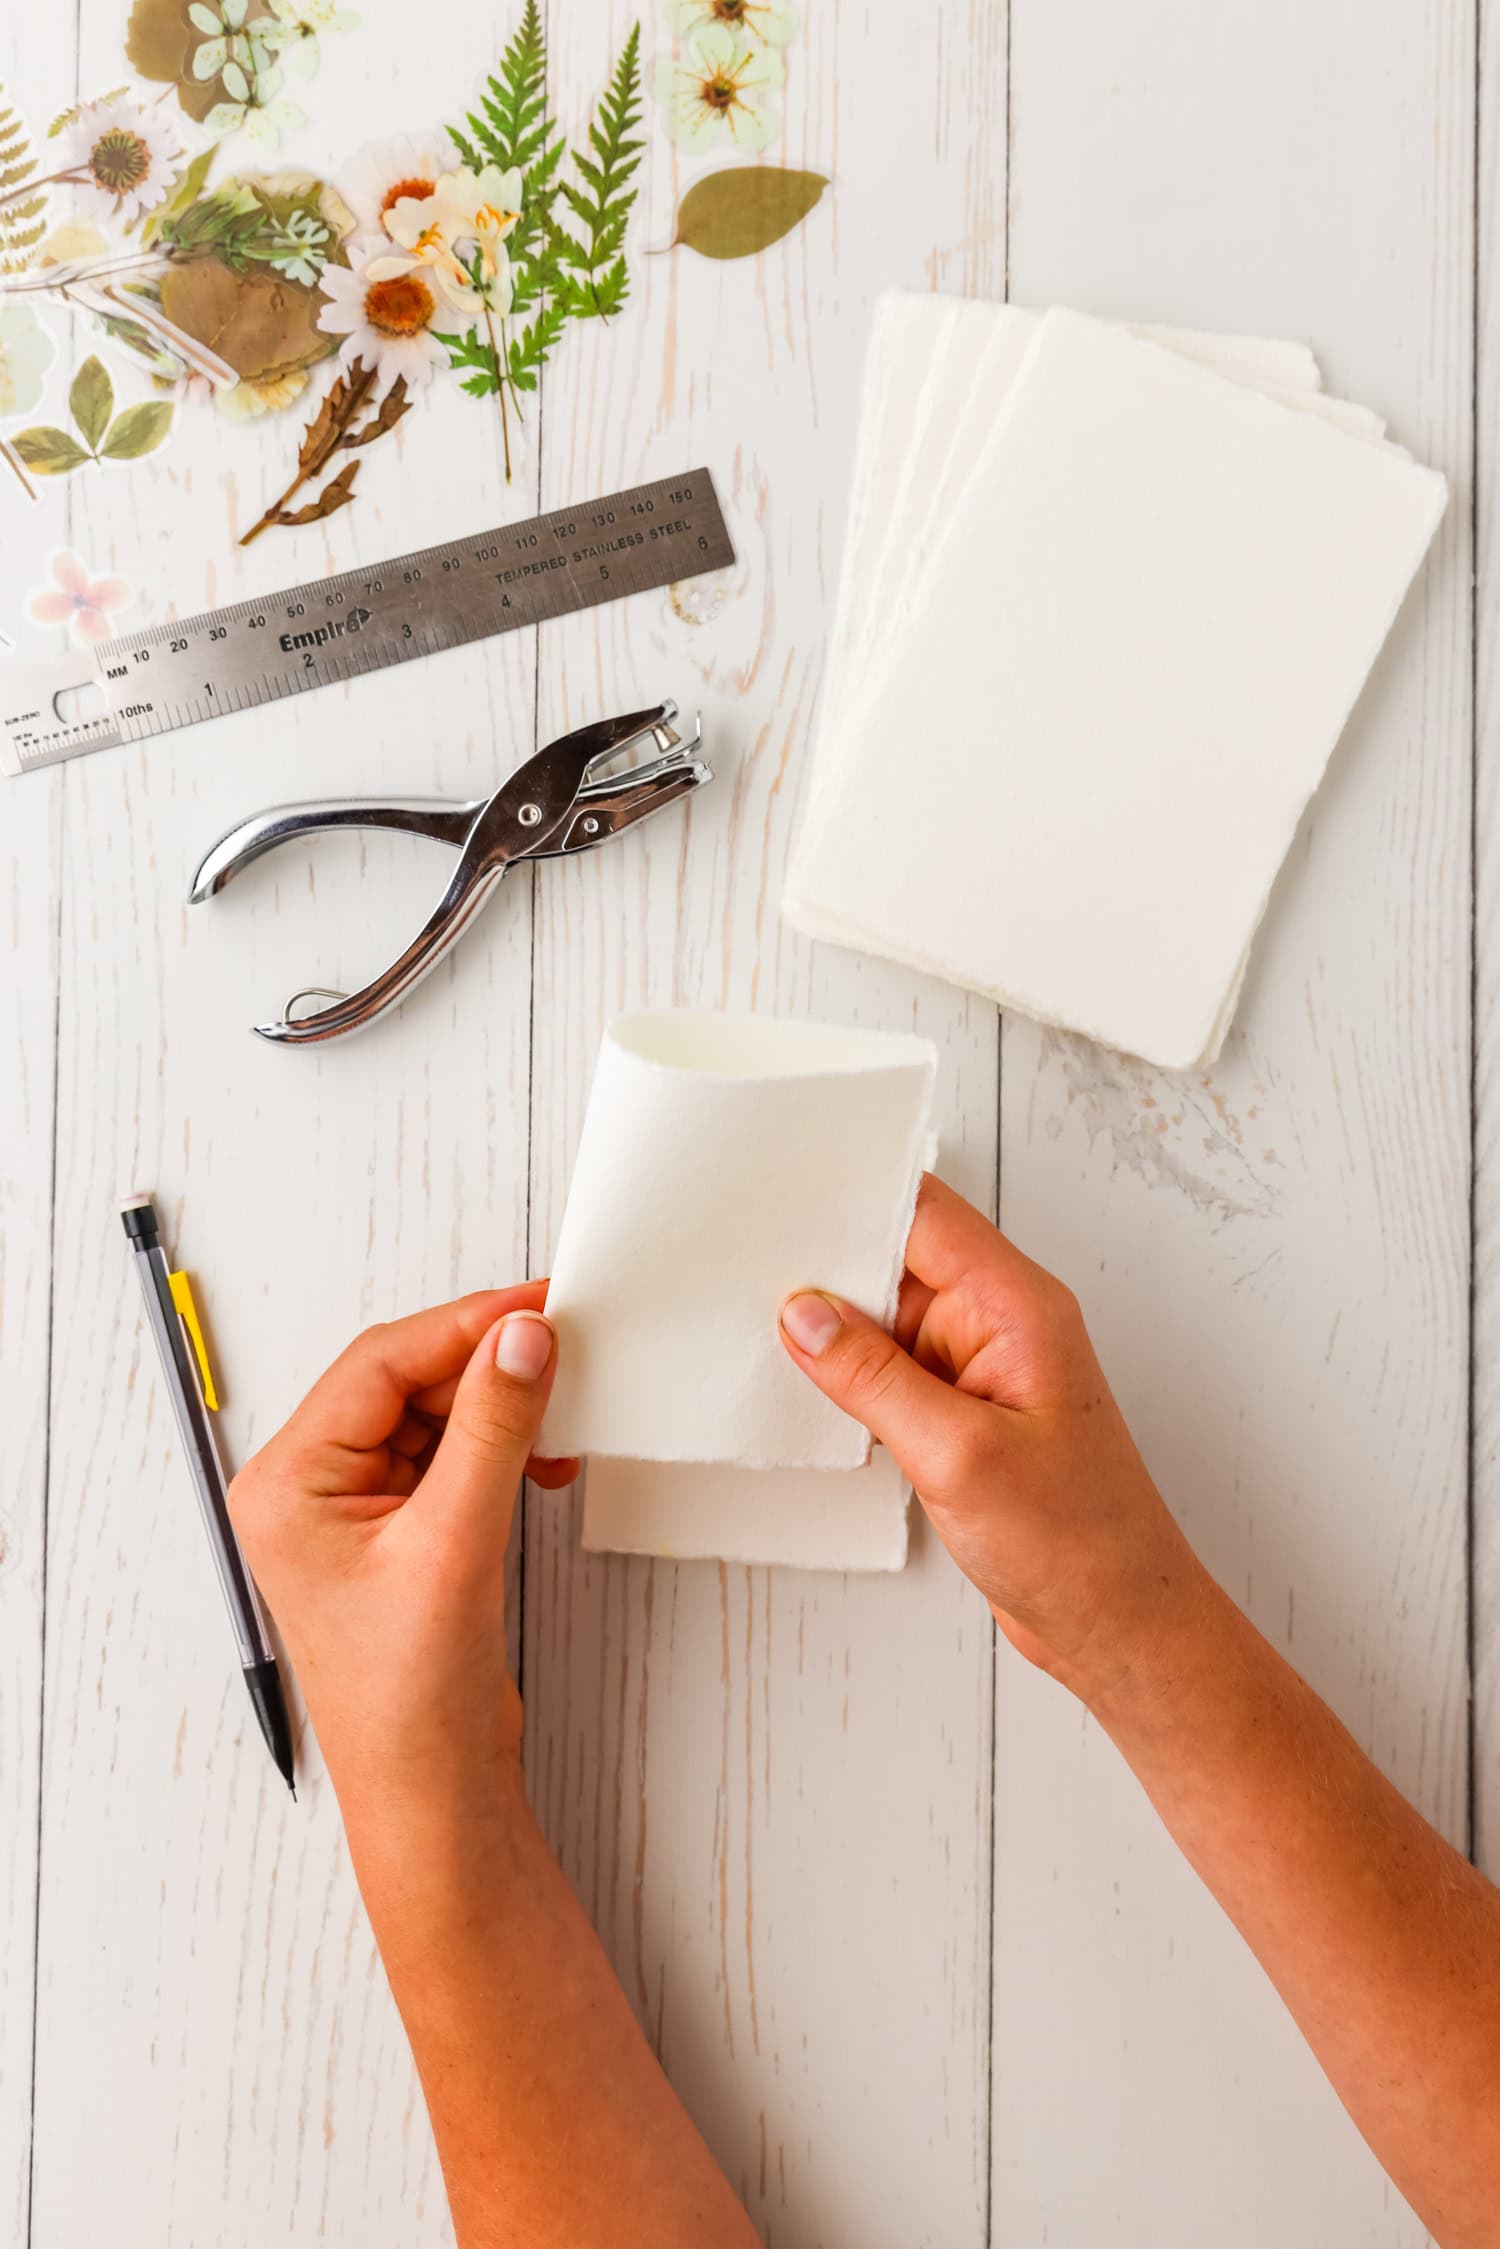
Fold a piece of the handmade paper in half, lengthwise. Then fold enough pieces of paper in half the same way to make a mini book. We used 5 pieces of paper in total.
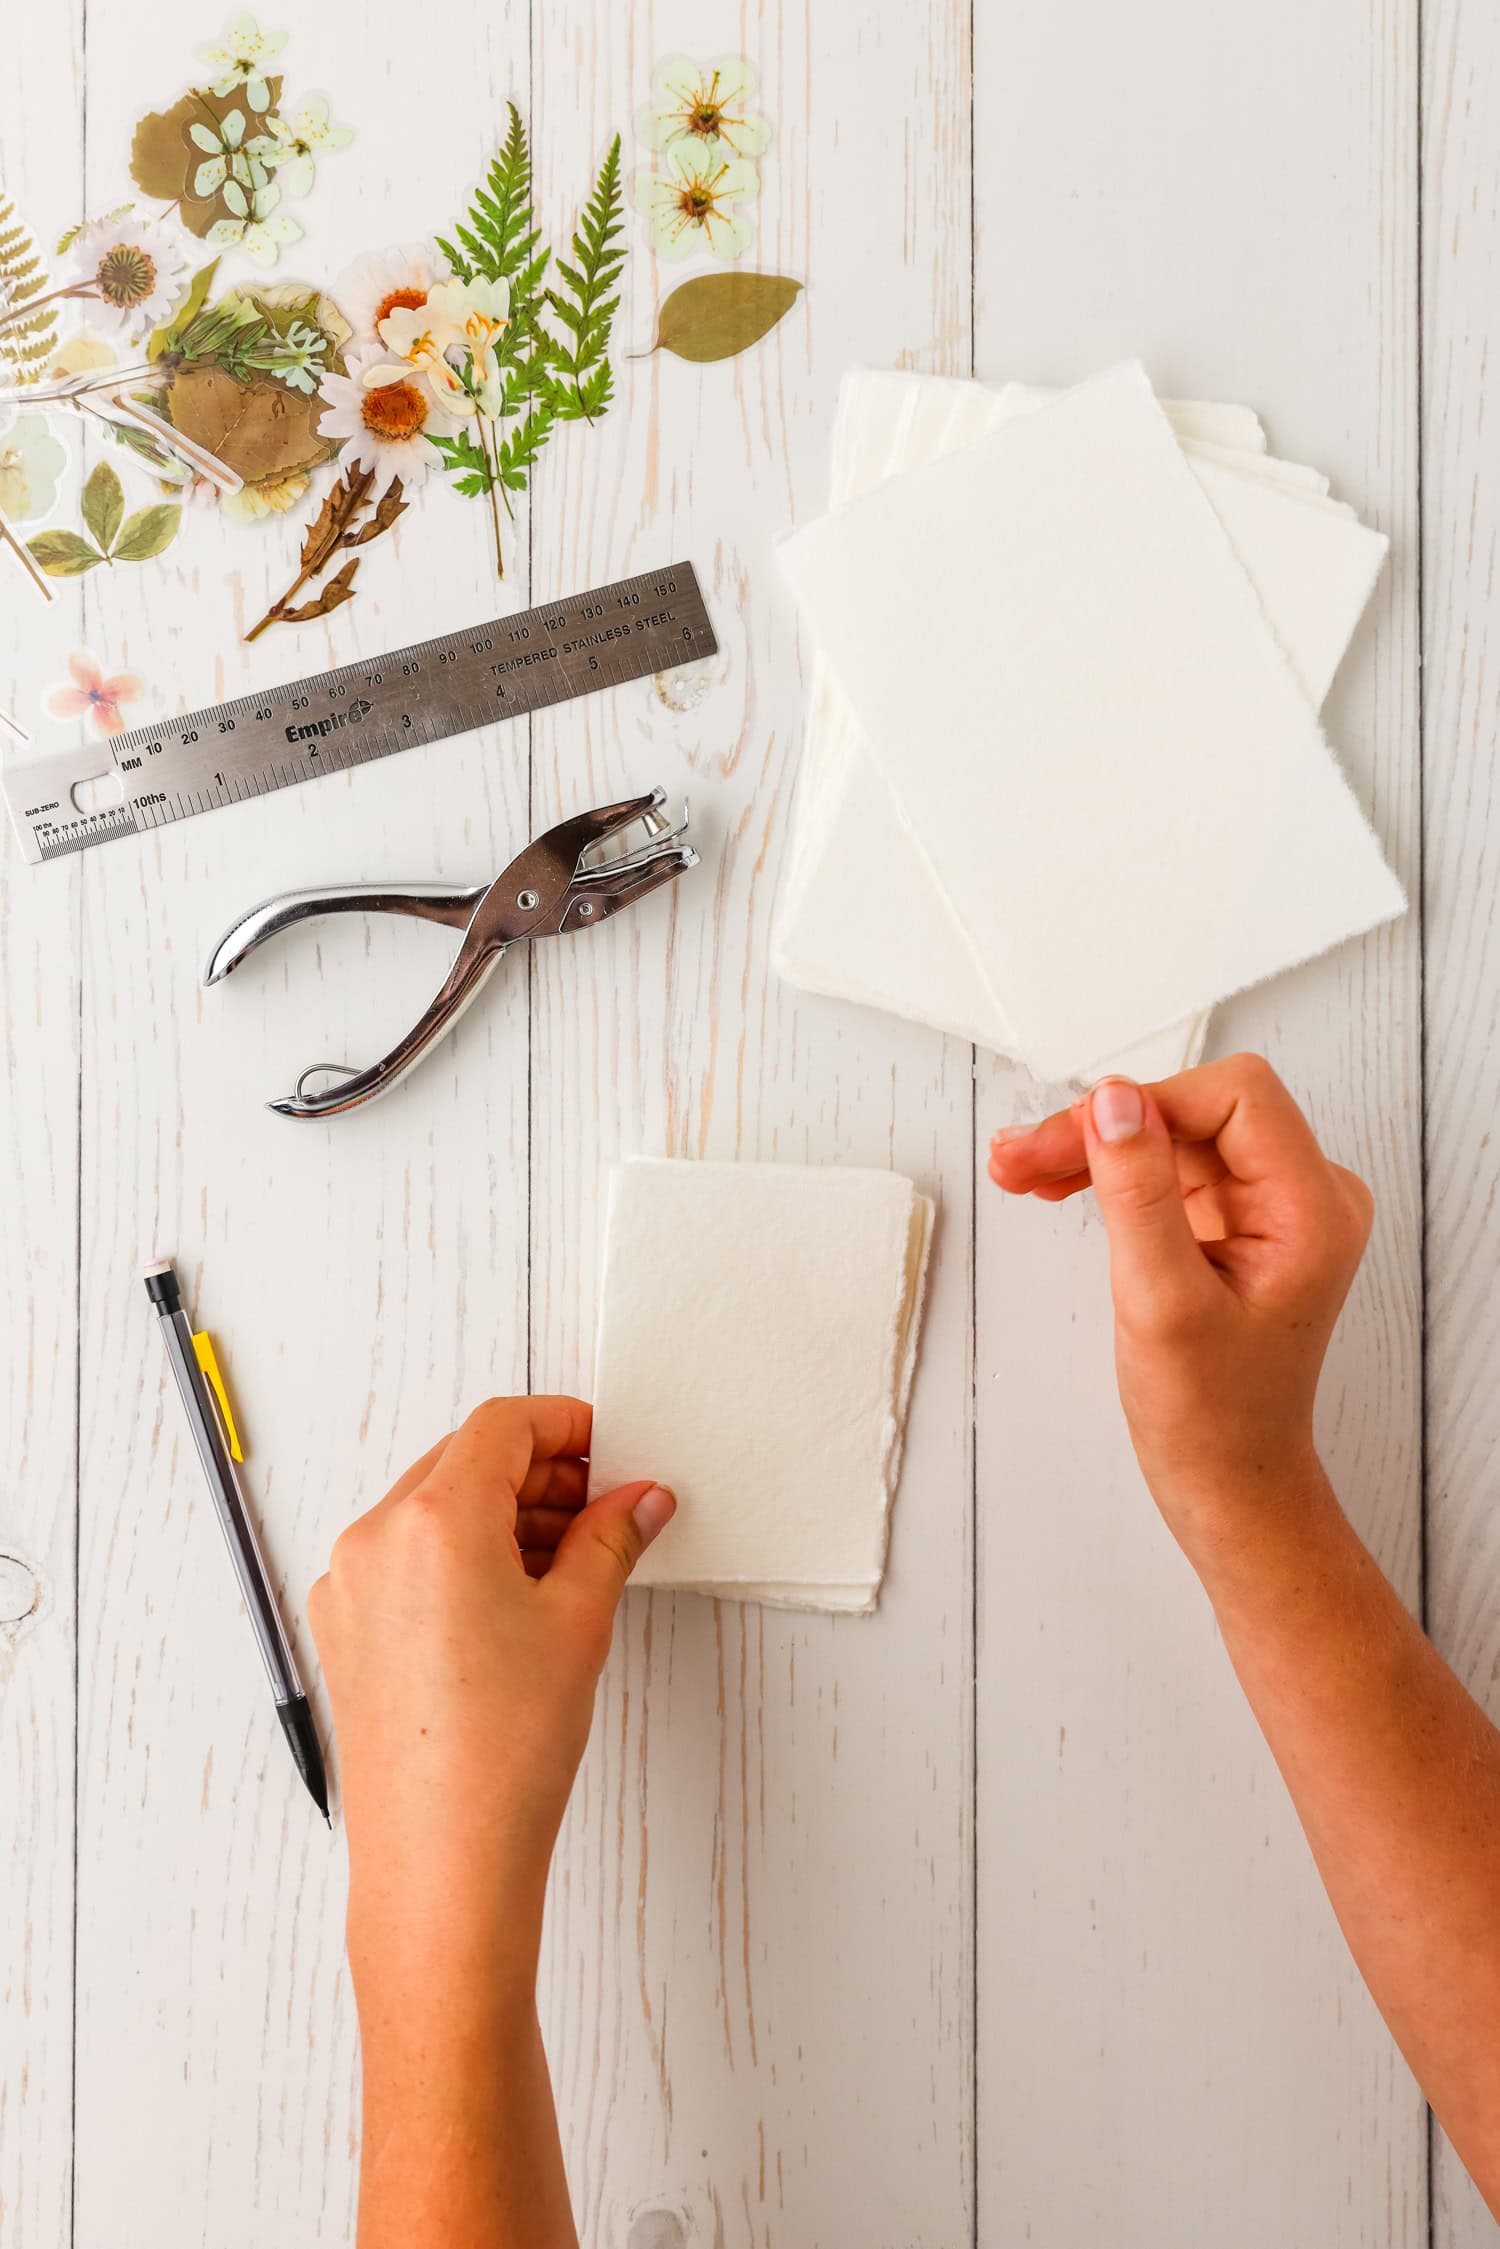
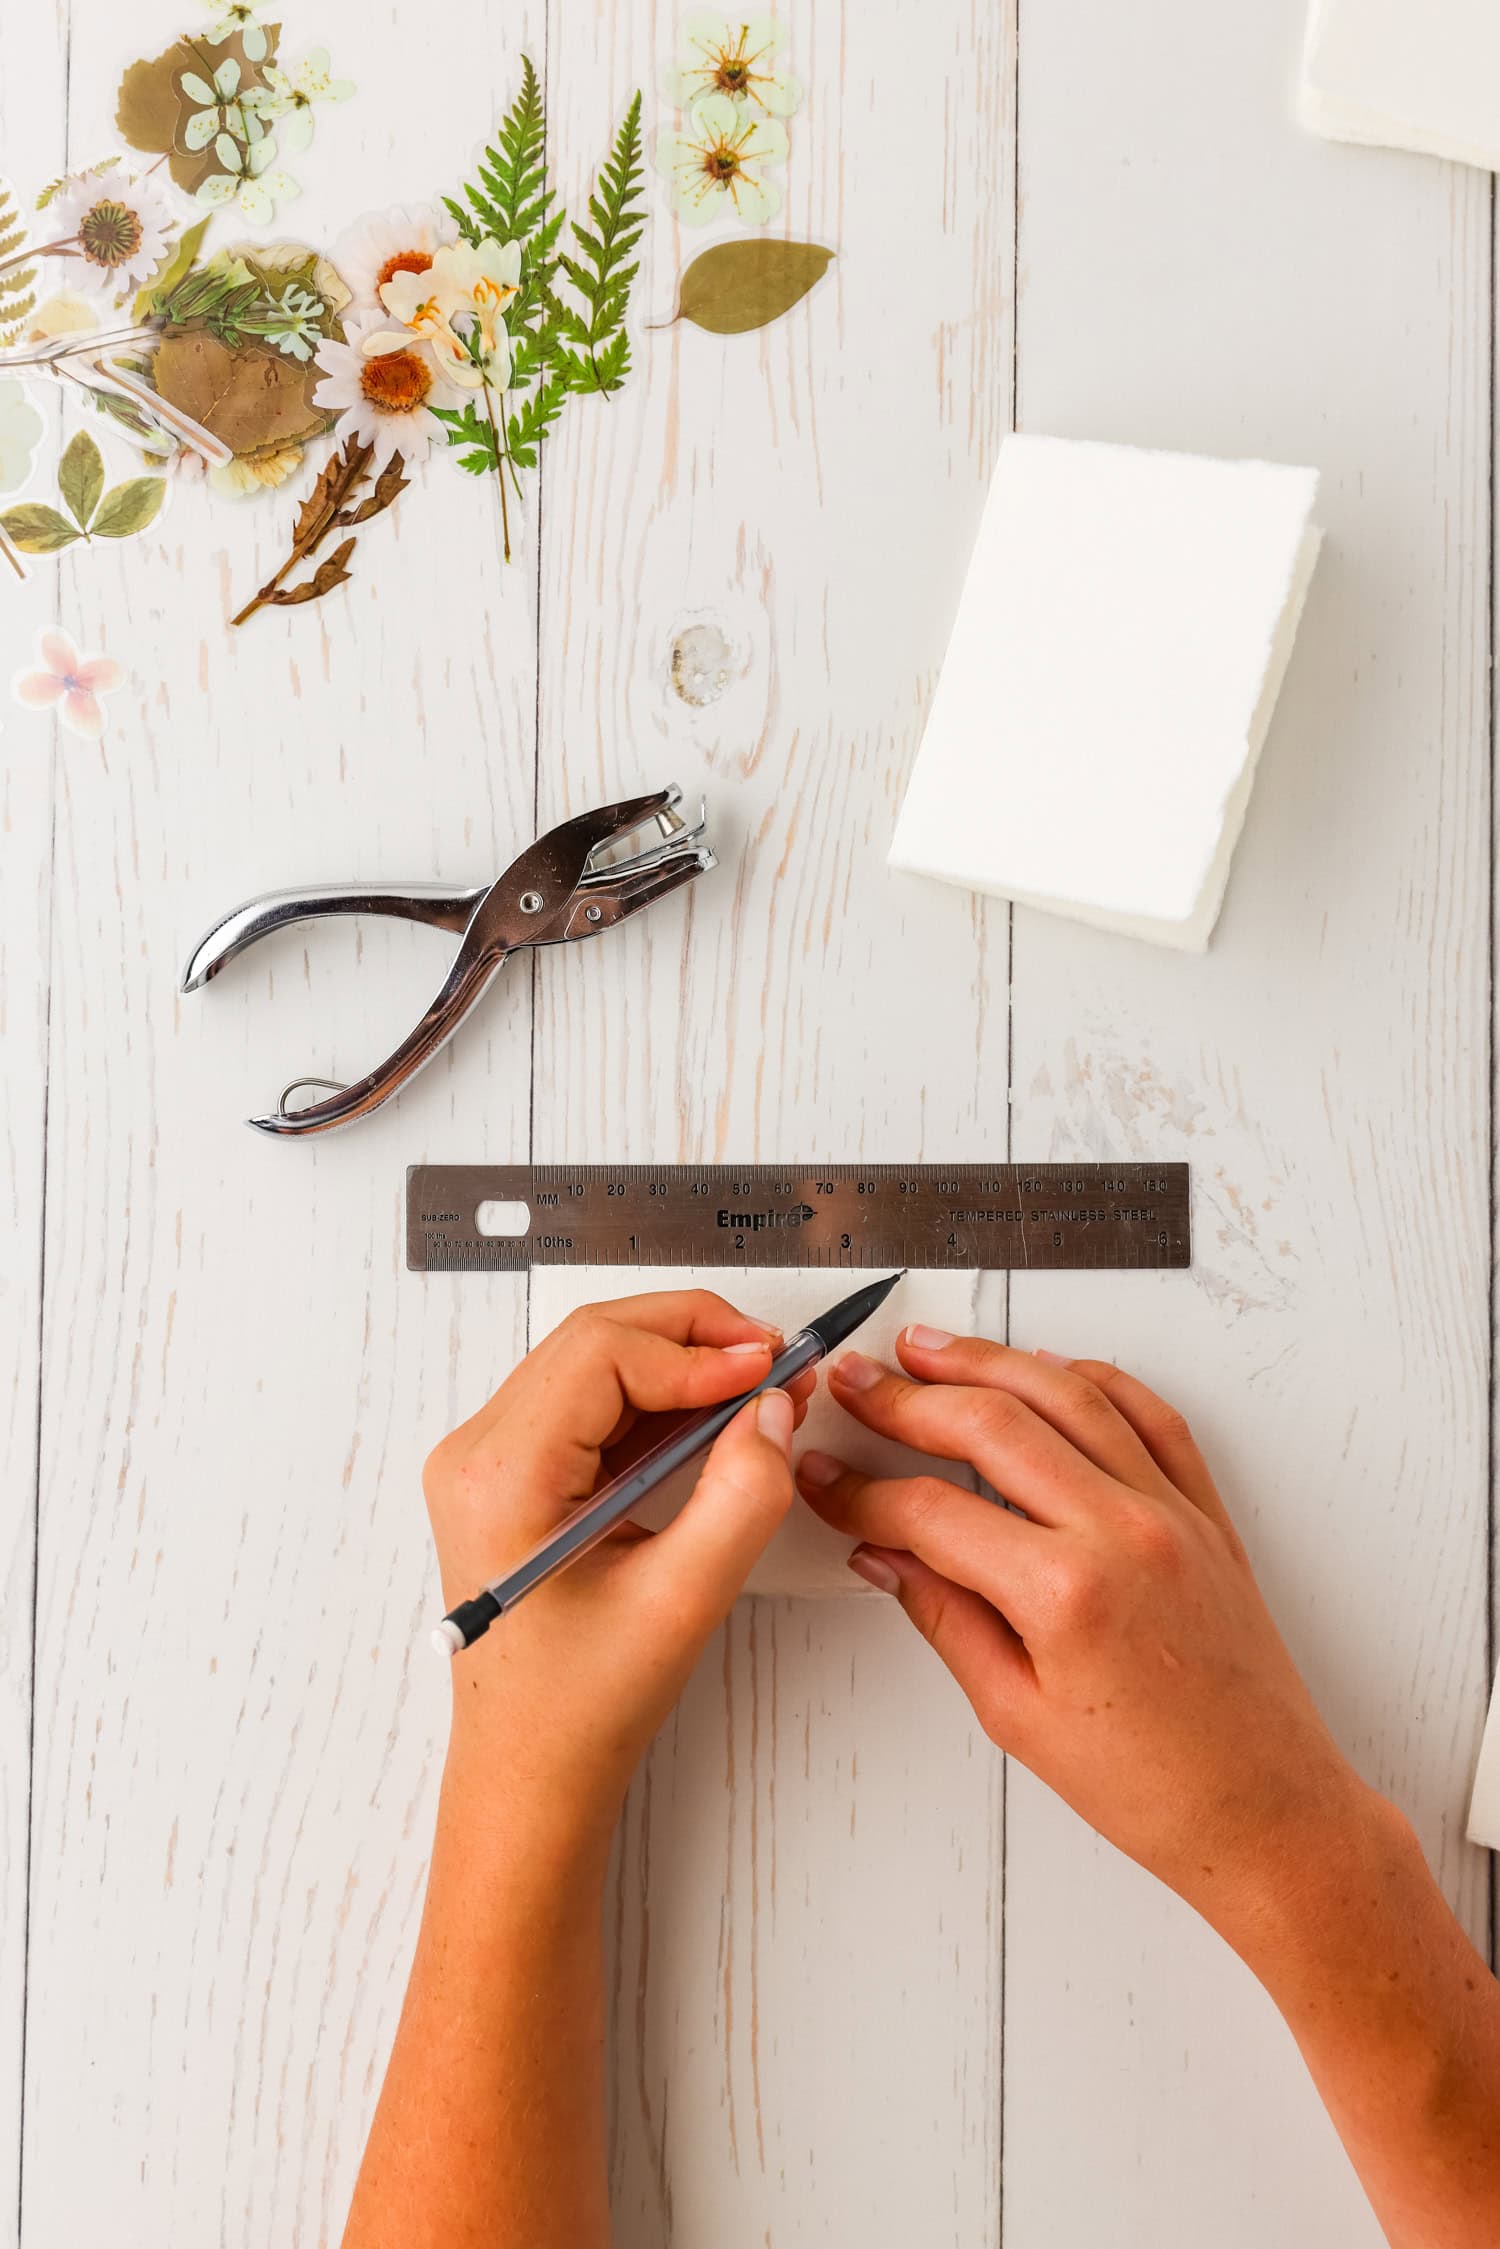
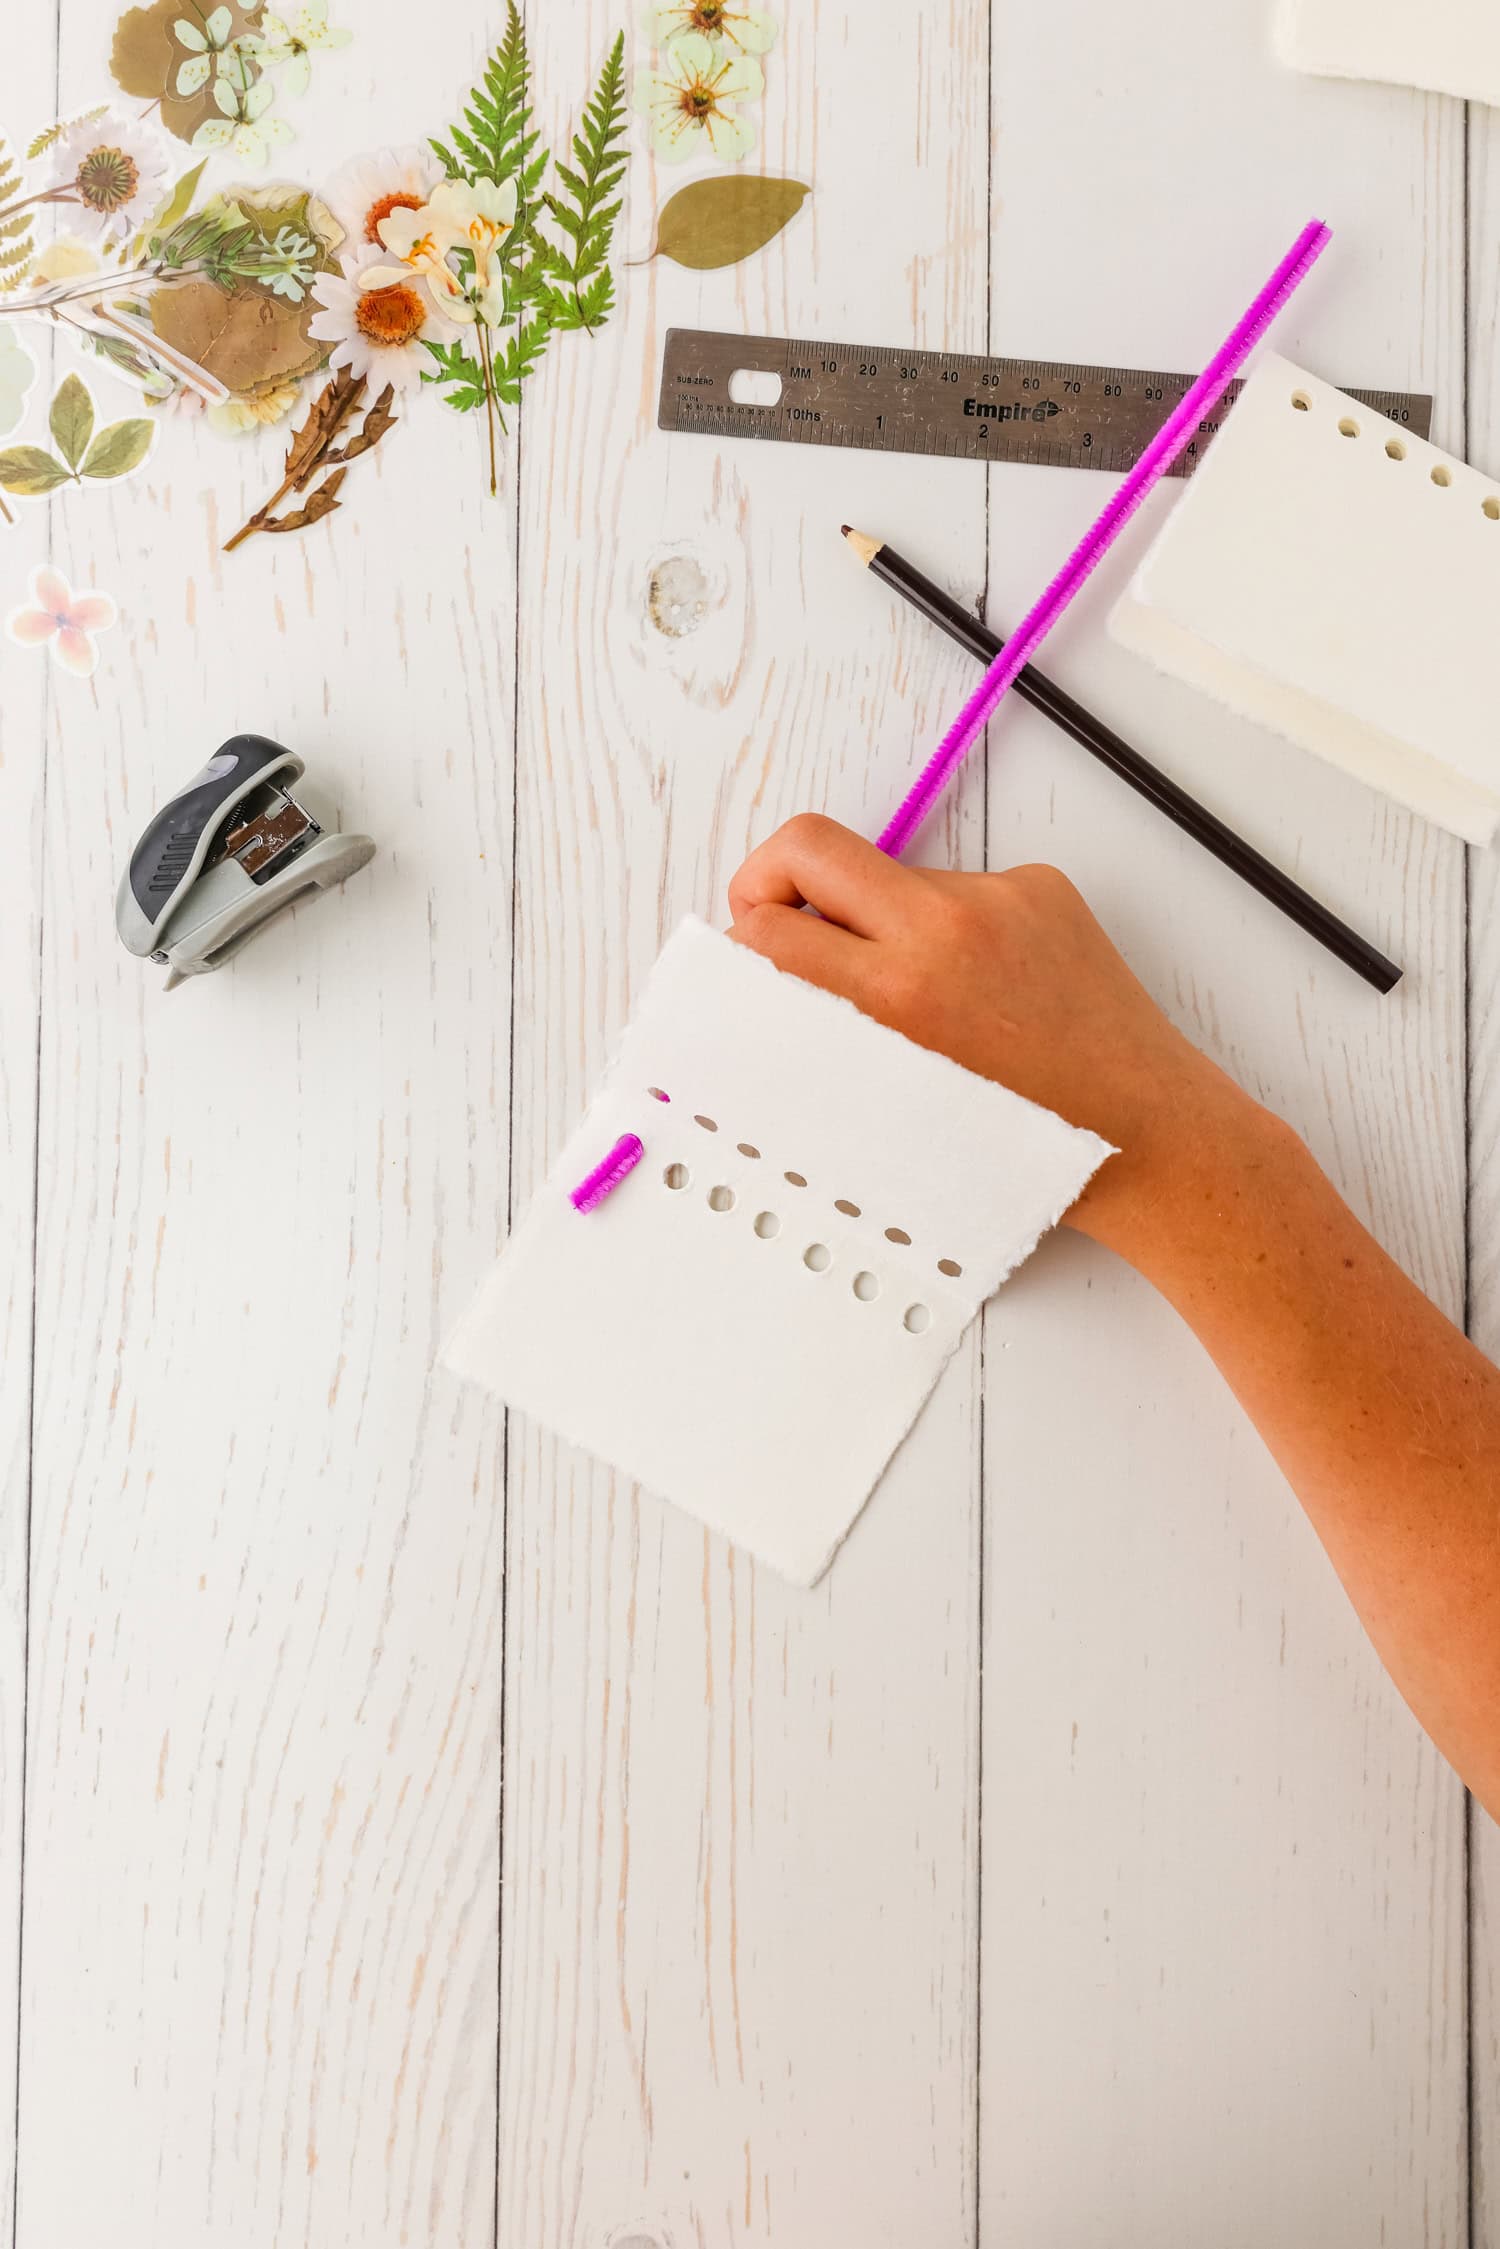
Using a ruler and a pencil, measure and mark at every half-inch line along the folded edge of one of the folded papers until you have 7 marks. This will form the outer cover of your sticker collection book.
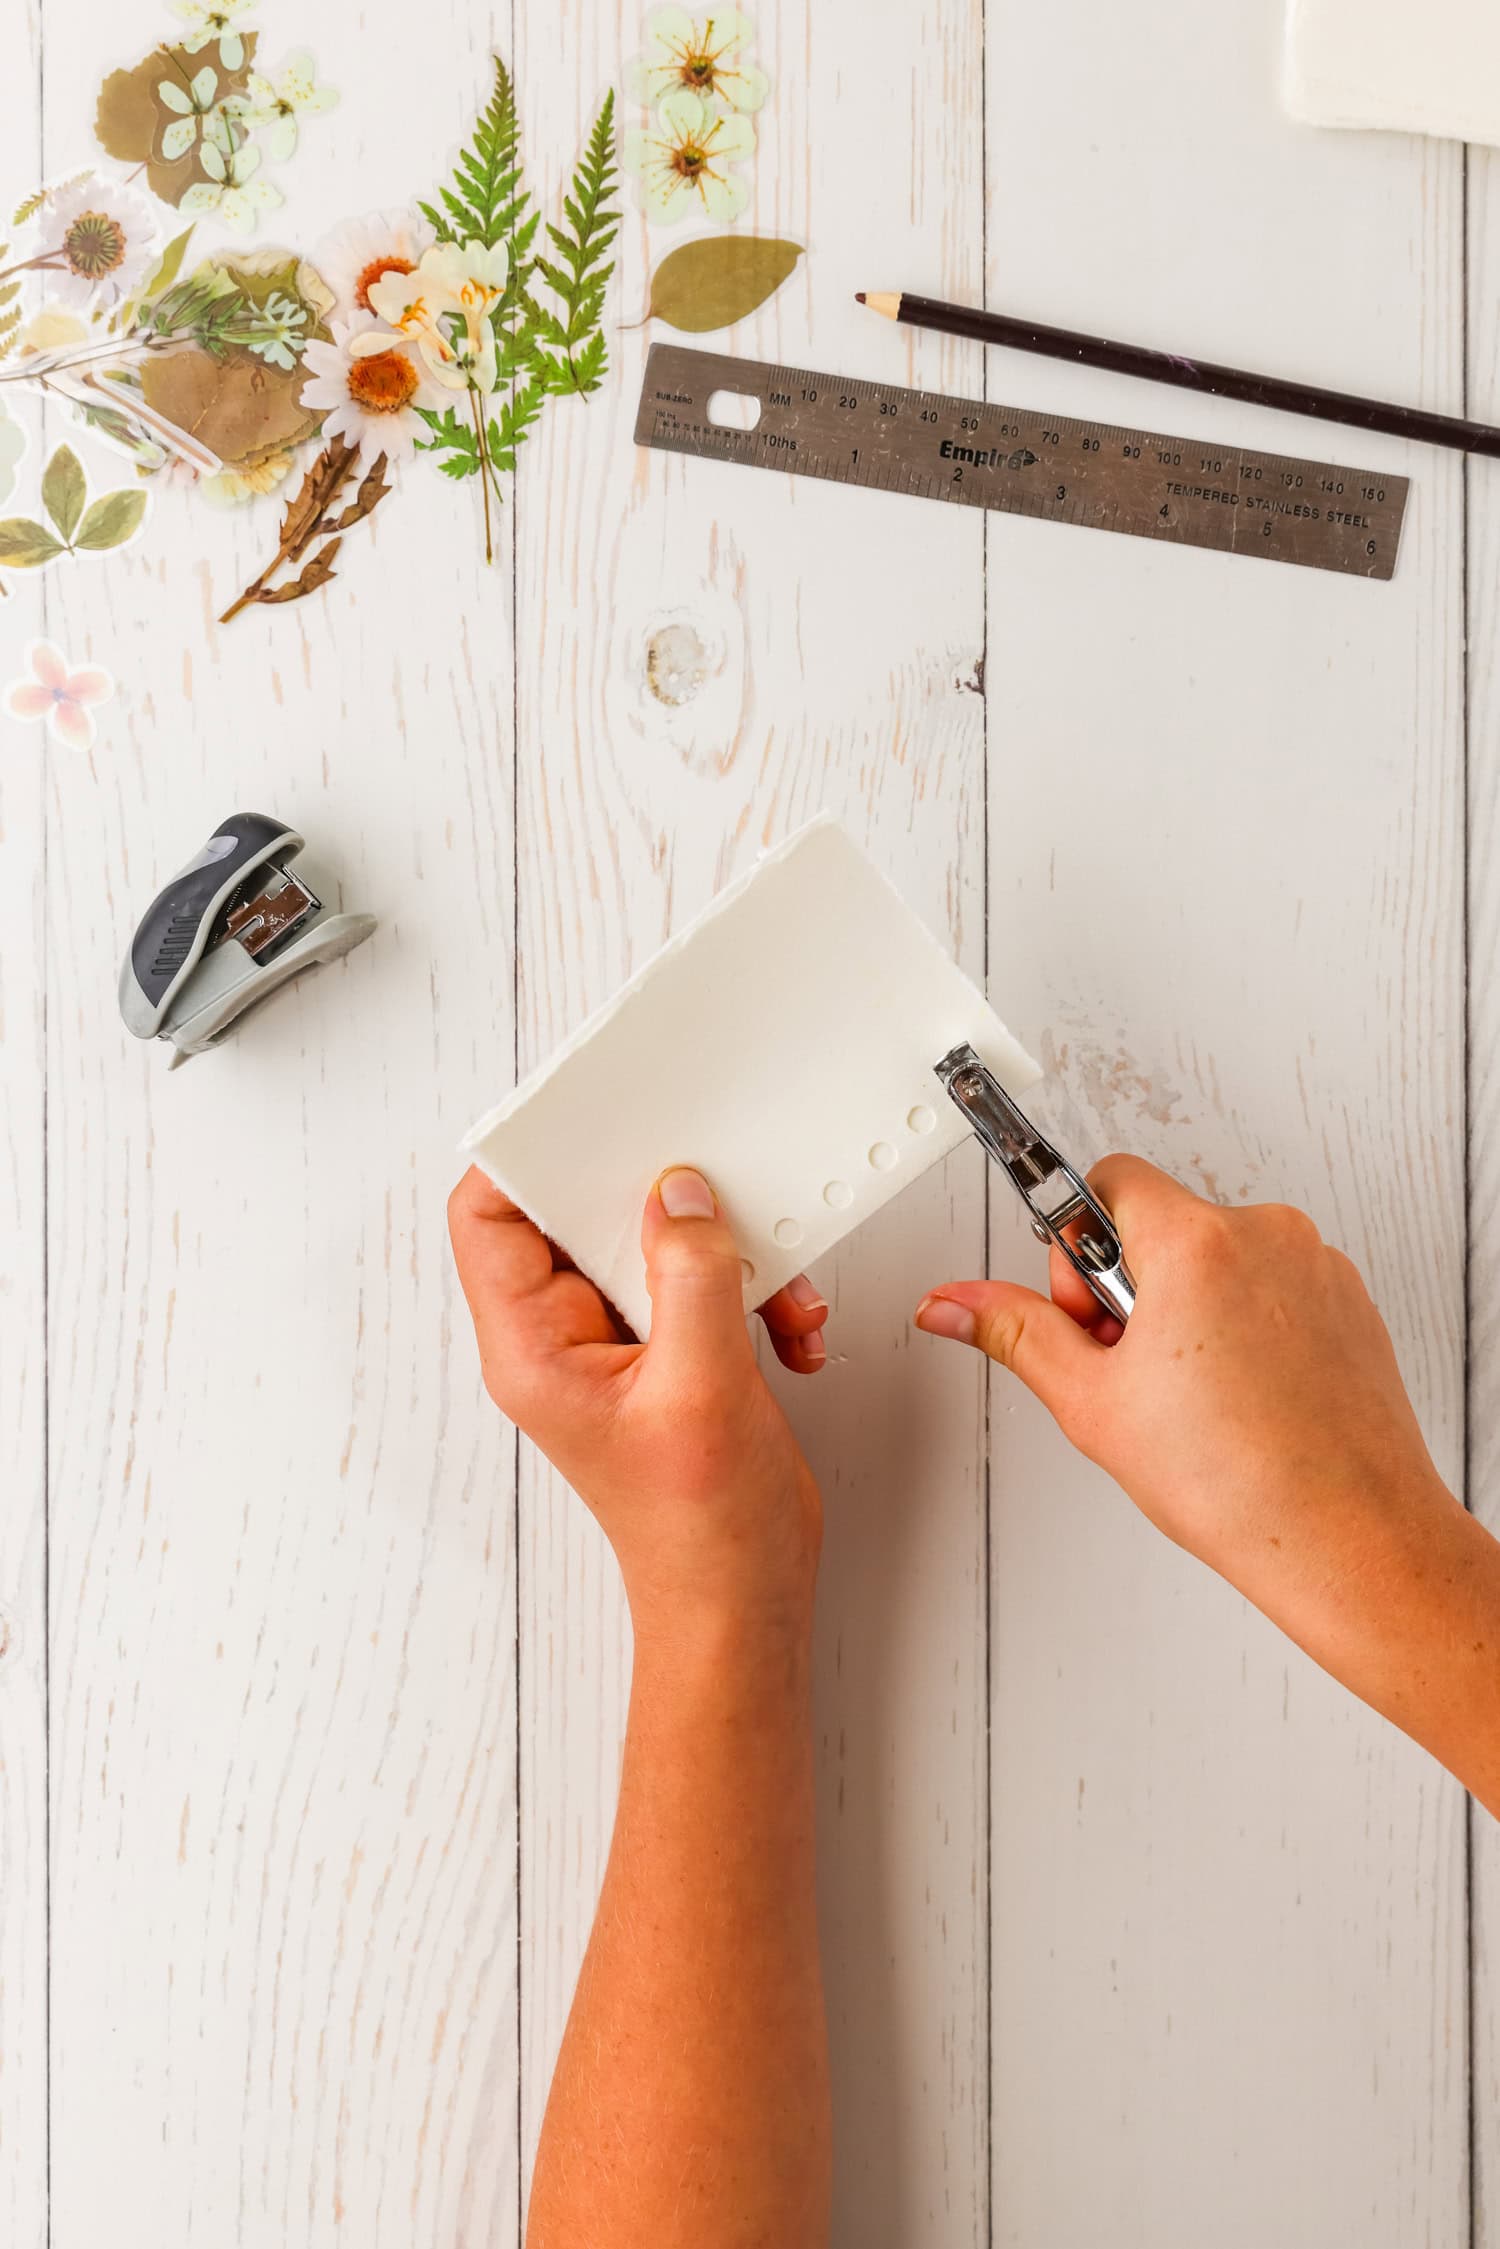
Next, use a hole punch to punch a hole at every mark, about a half-inch away from the edge of the paper. Be careful not to make your hole too close to the edge! Punch through the folded edge, forming two holes in the paper.
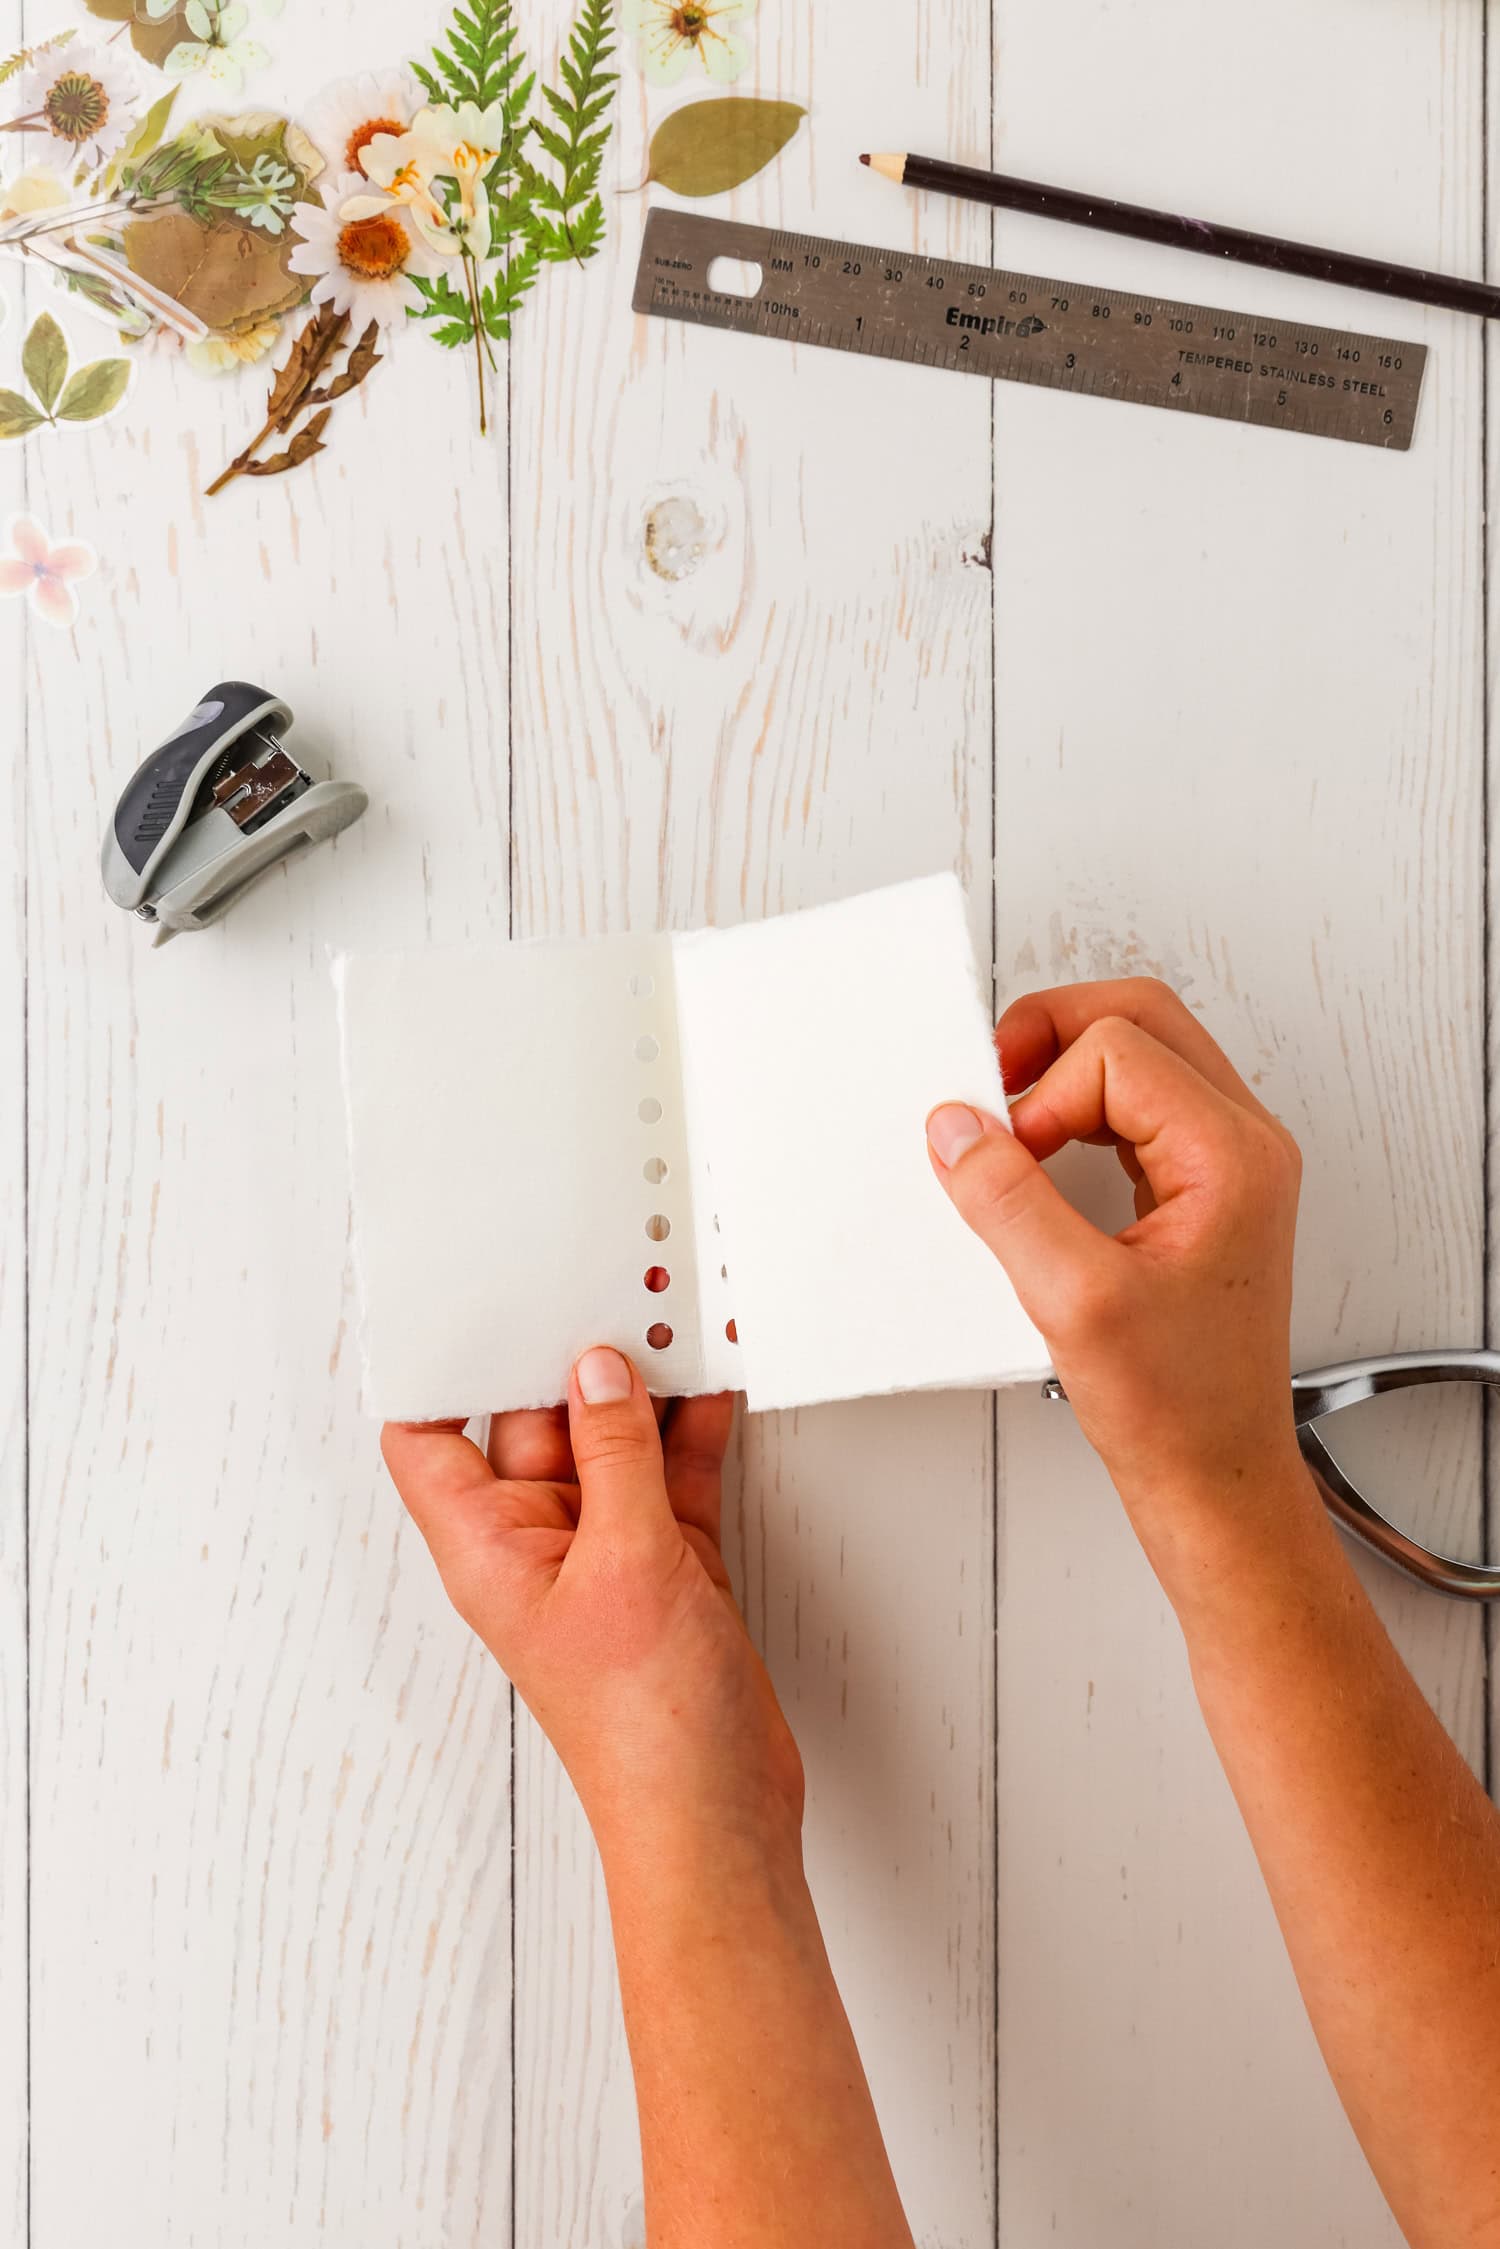
Once all of the holes are punched through, open up your folded cover. Place another folded paper INSIDE of the cover paper and line up the edges. Then close the cover over the paper that you just placed inside. The hole-punched cover should be on the outside, and your next paper should be sandwiched between the cover. This will be your guide for punching holes in the next paper.
Repeat step 4 until all of your pages are inside each other and hole-punched. Each time you add a new page to your book, open it up to the middle and insert the new page.

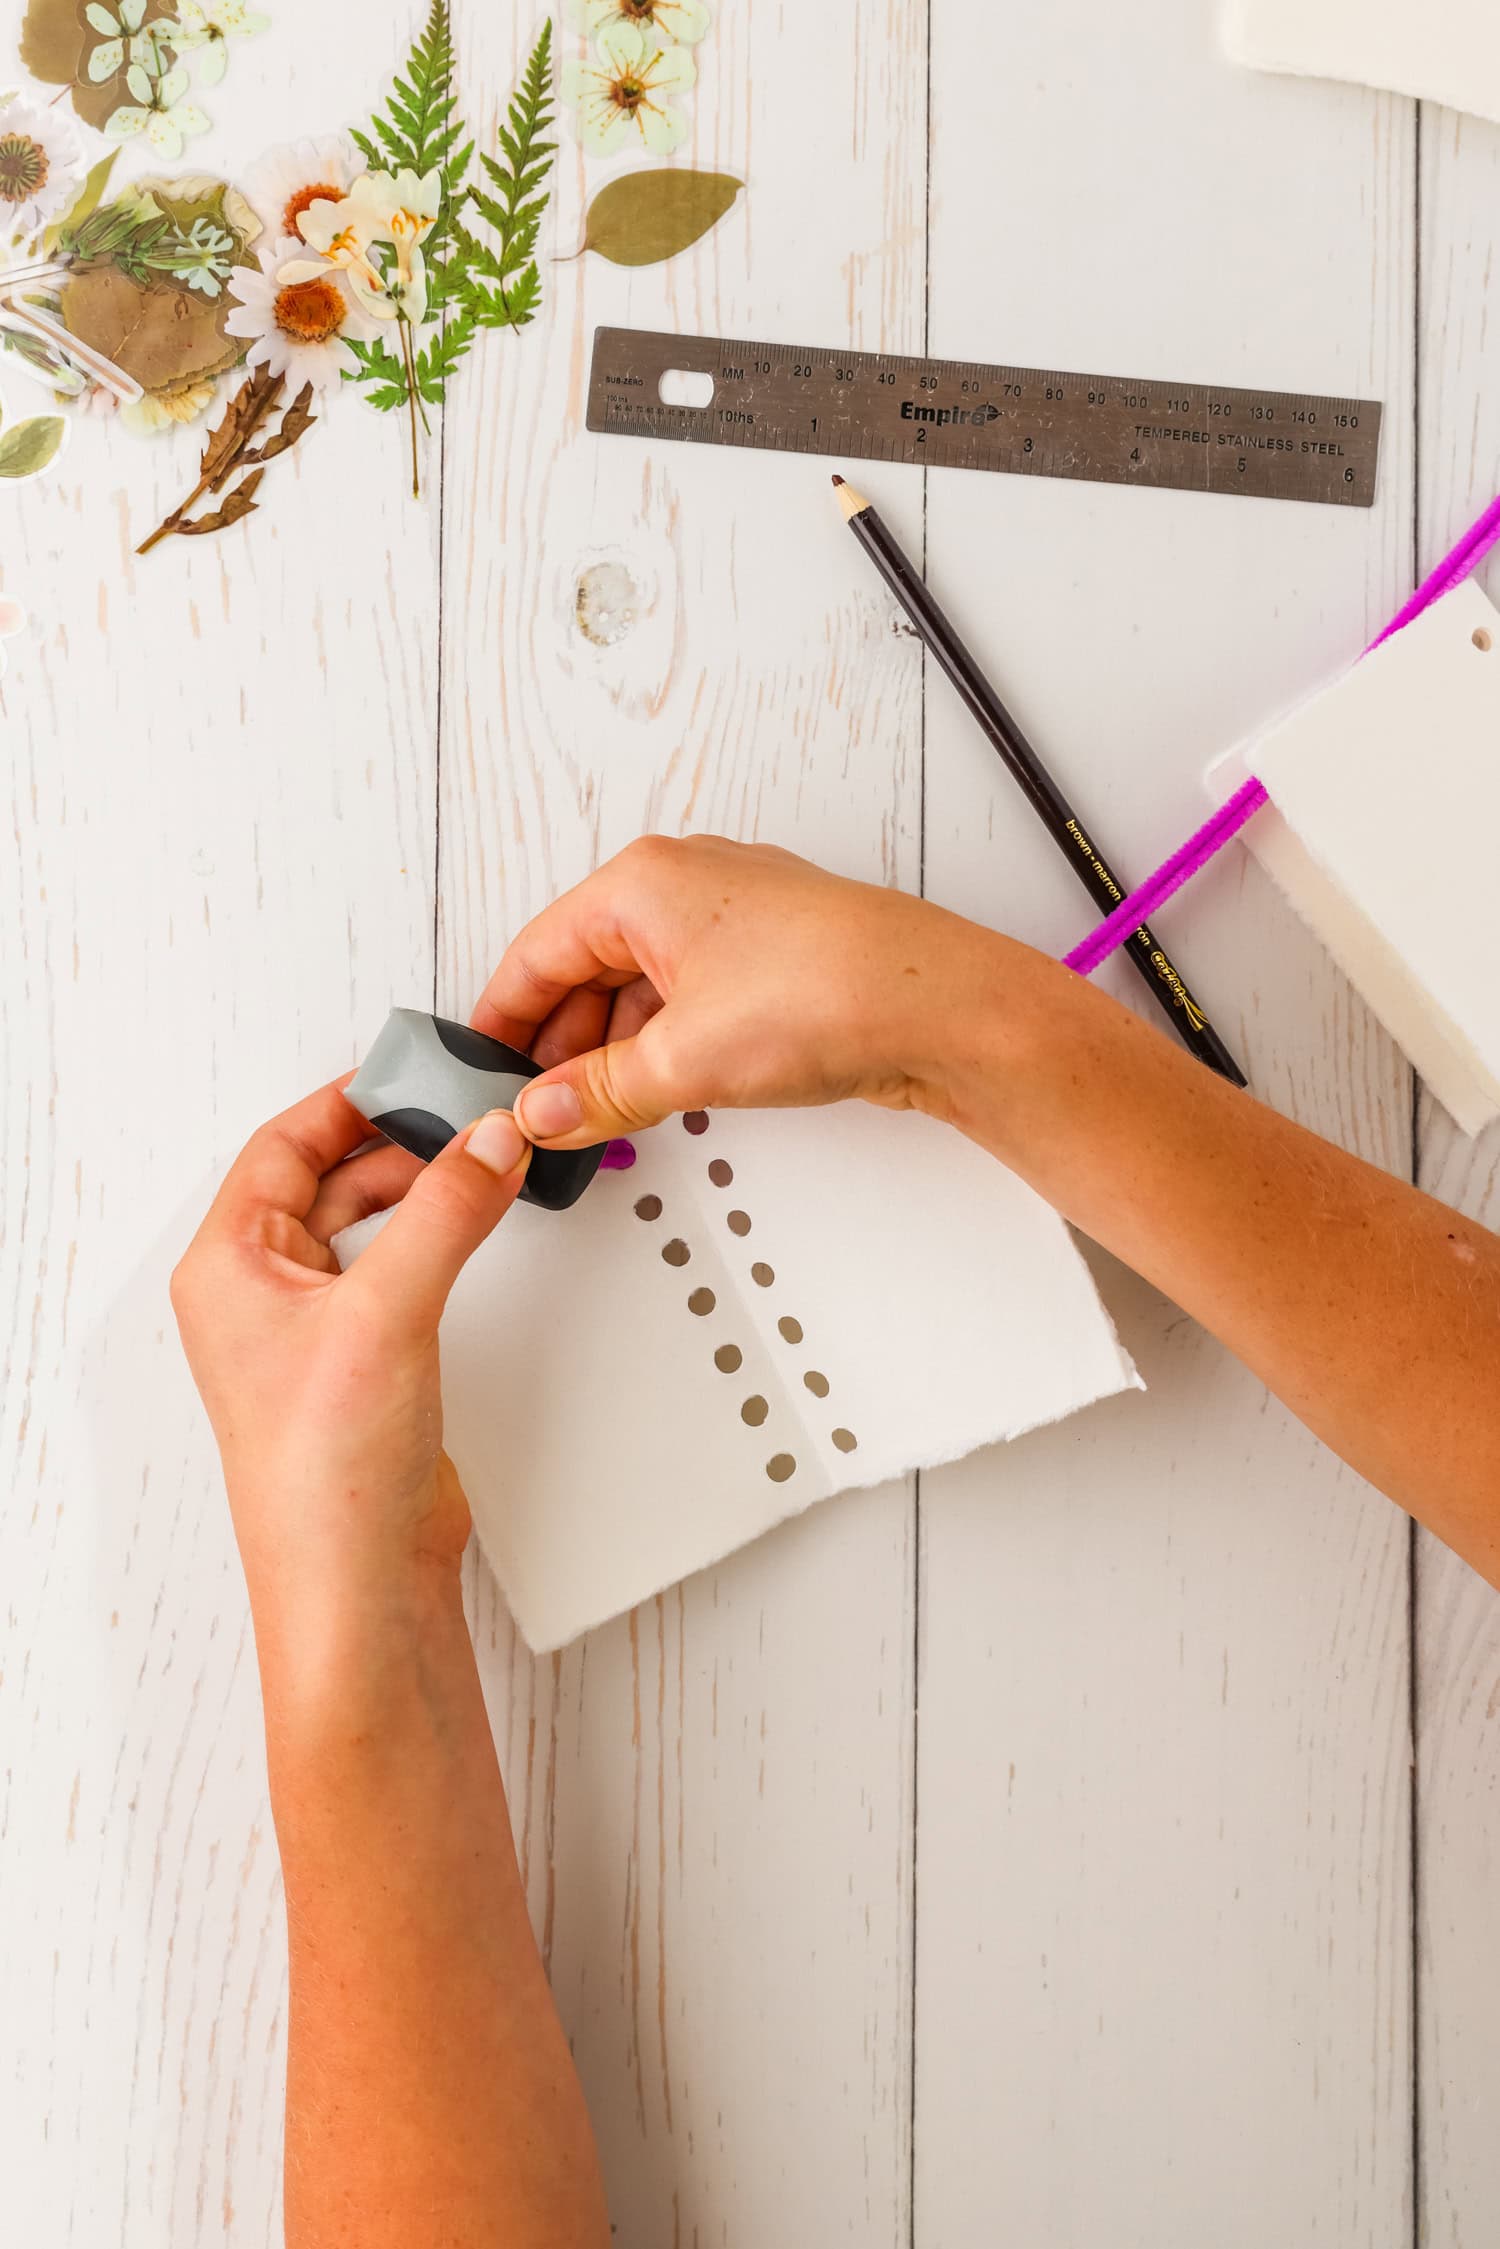
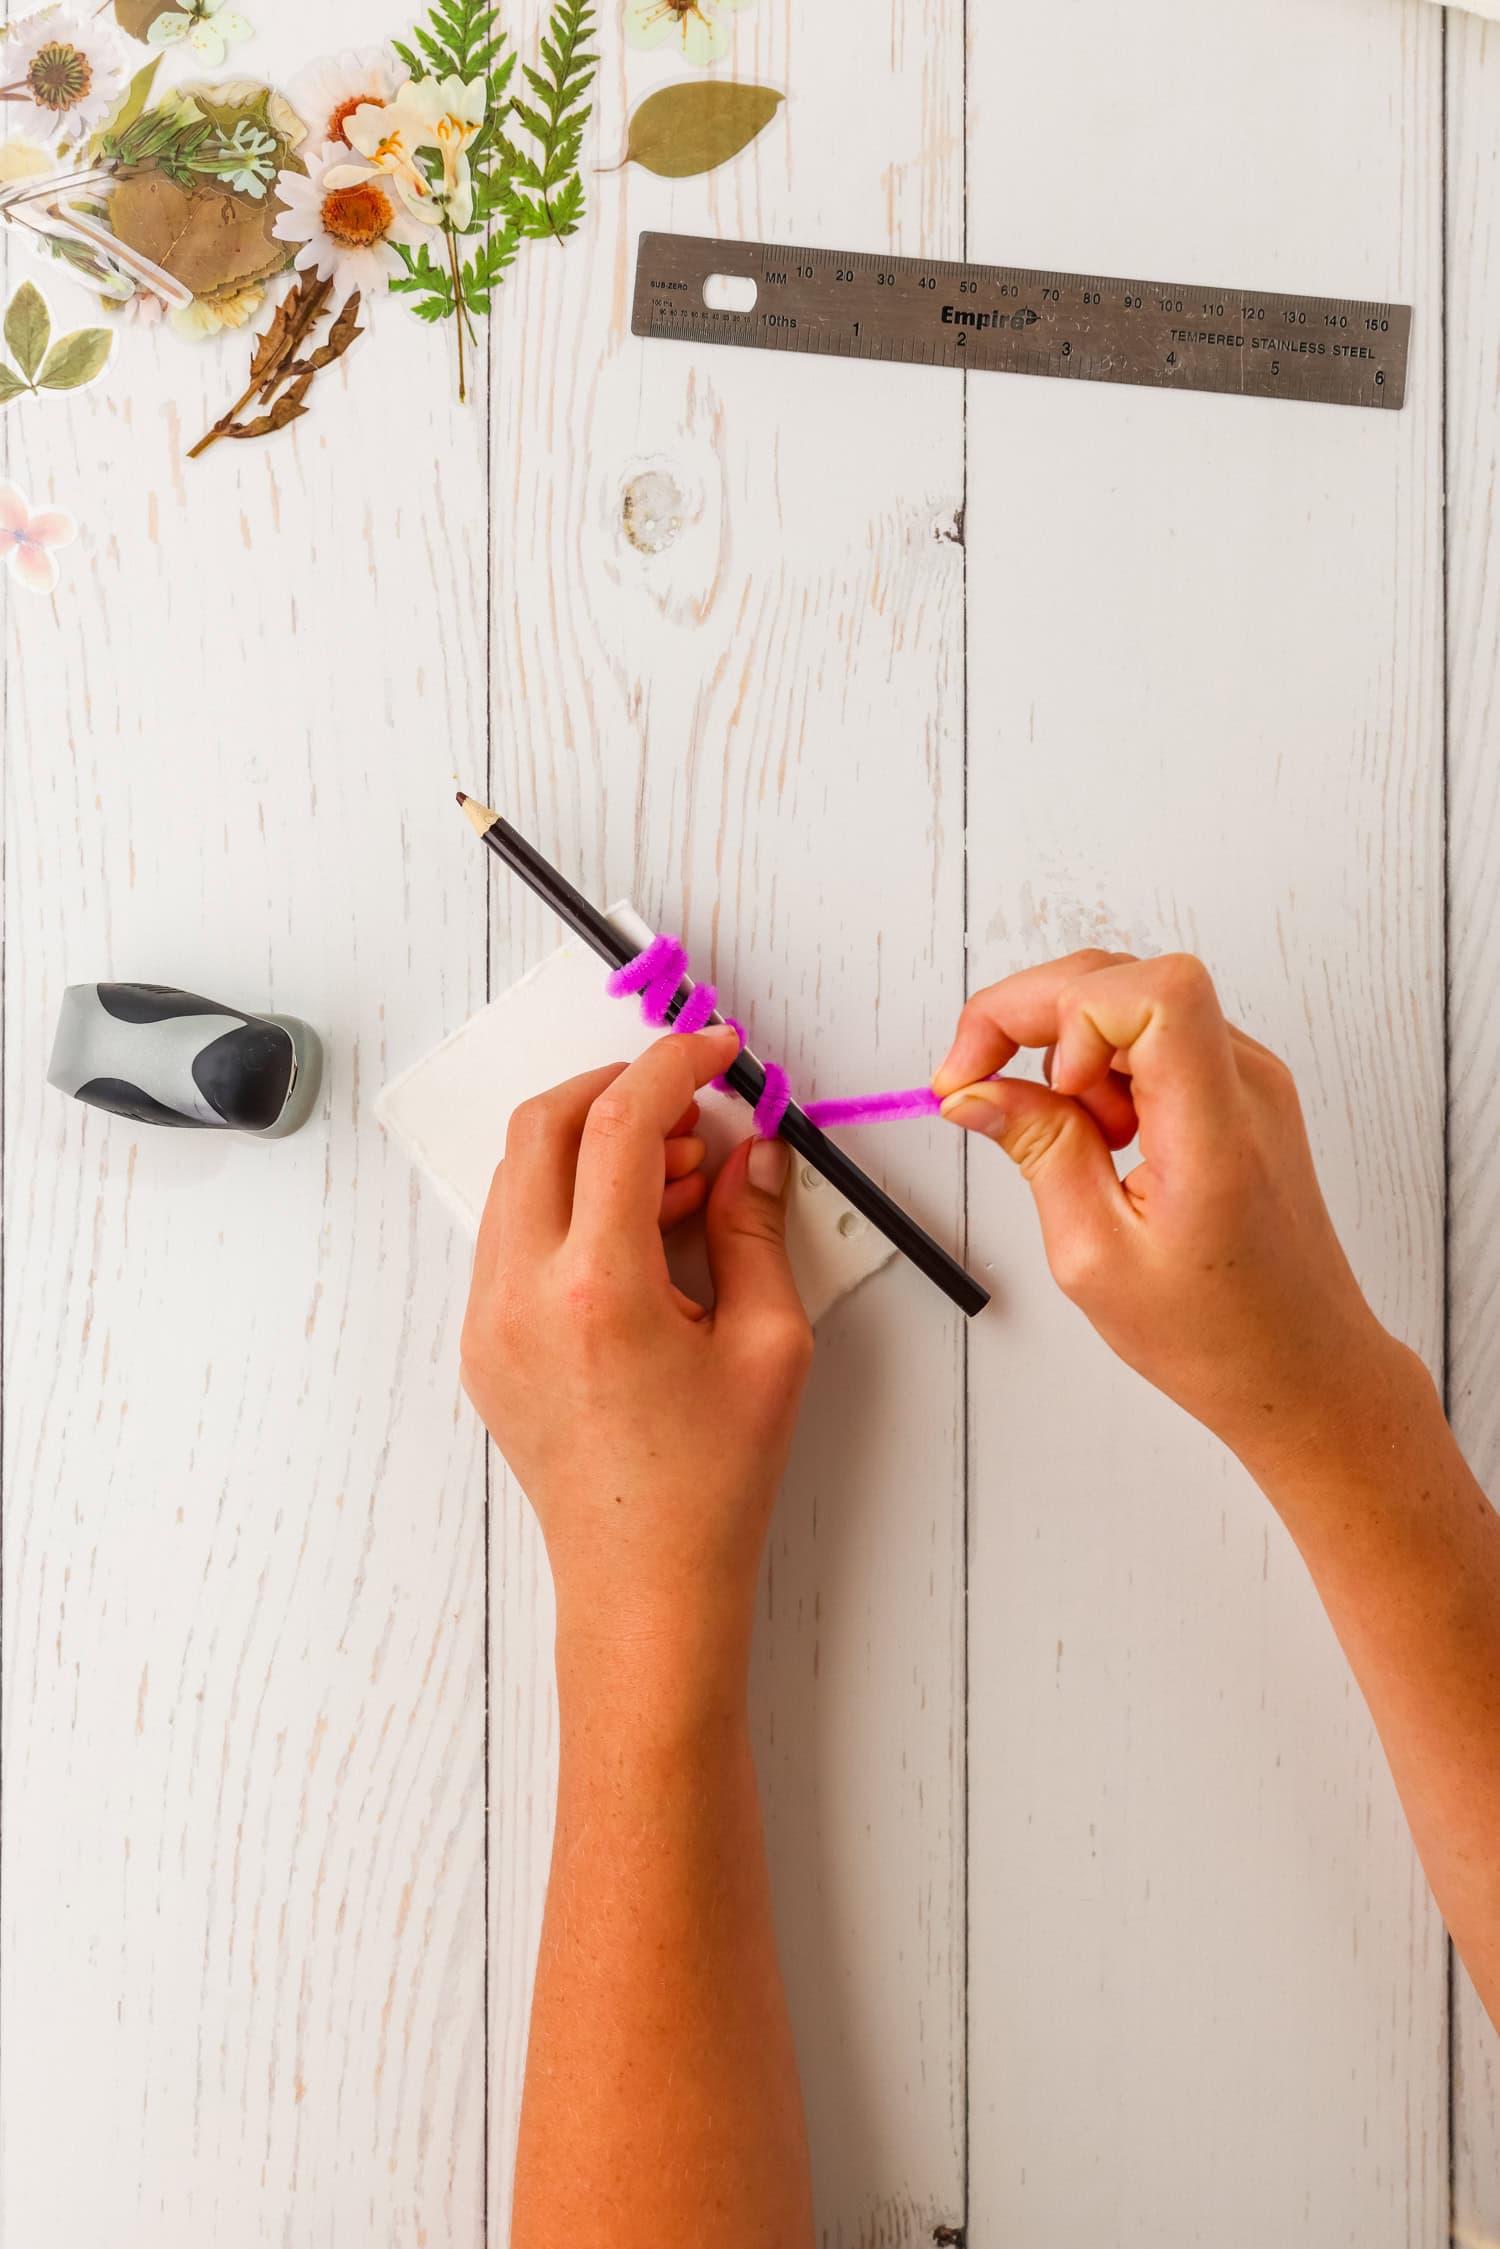
Once all of your pages are hole-punched, remove the inner pages leaving only the cover to work with. From the outside, insert a pipe cleaner through the first hole of the back cover, bringing it to the inside of the back cover. Insert about 1 inch of the pipe cleaner and staple it to the back cover.
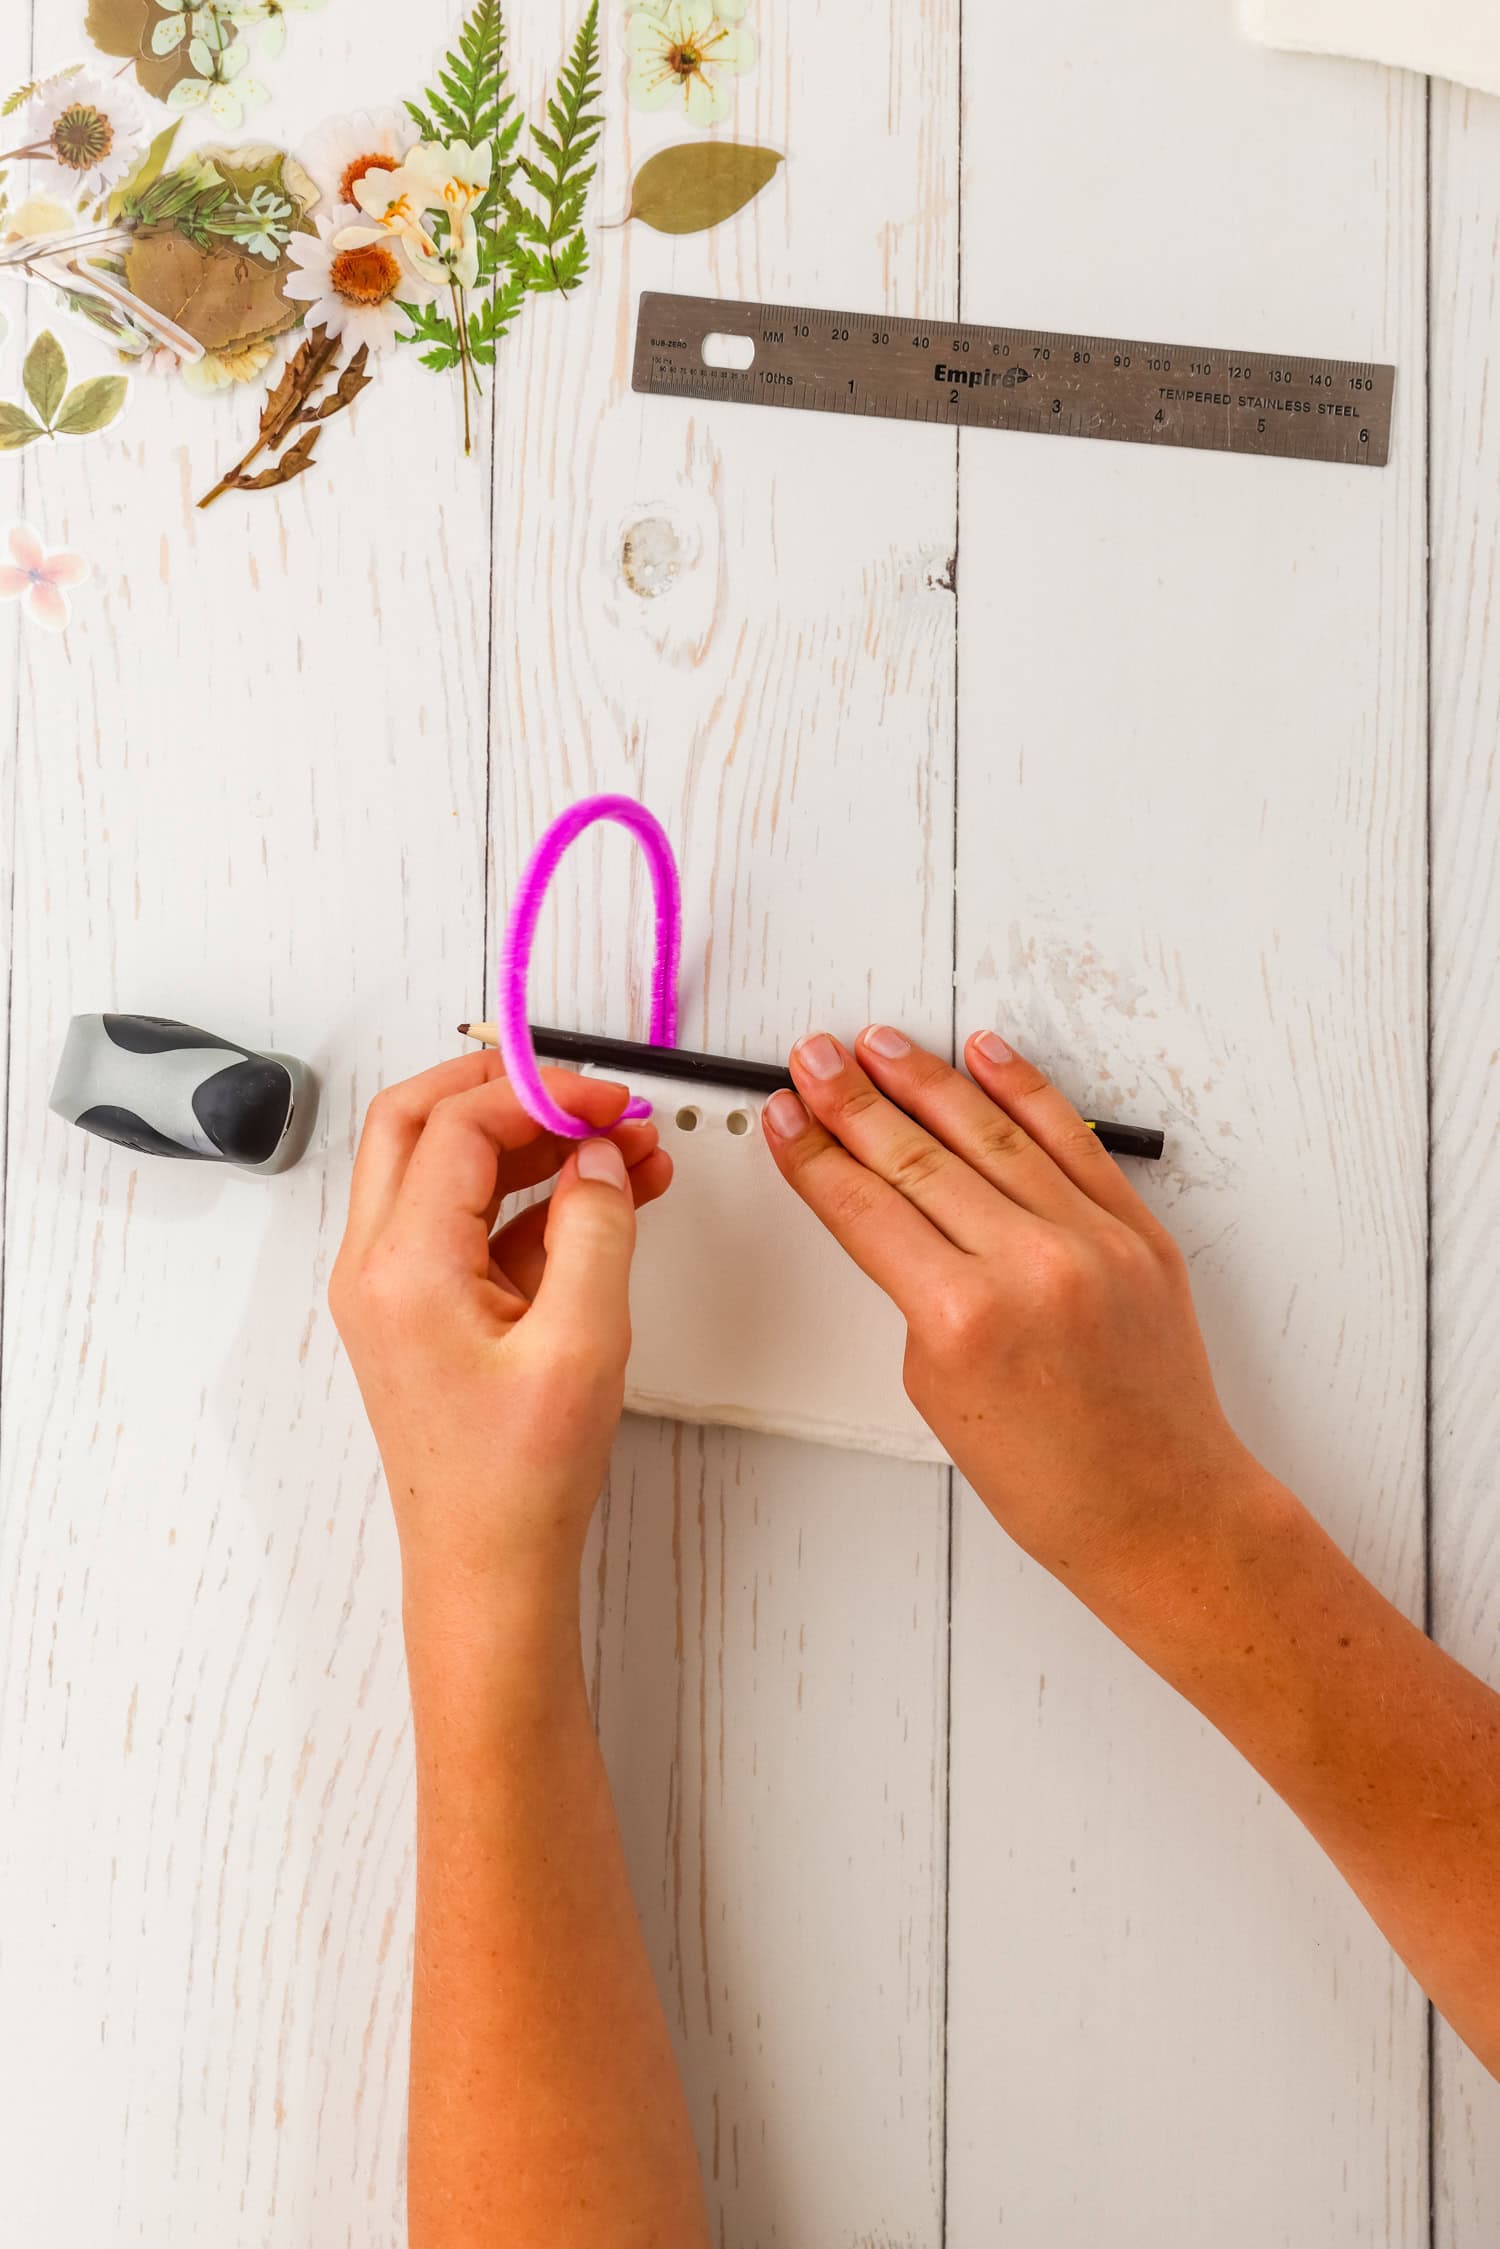
Insert all of your pages back into the outer cover, aligning the edges and holes, then close the sticker book. Place a colored pencil, or a regular pencil, along the folded edge of the closed book.
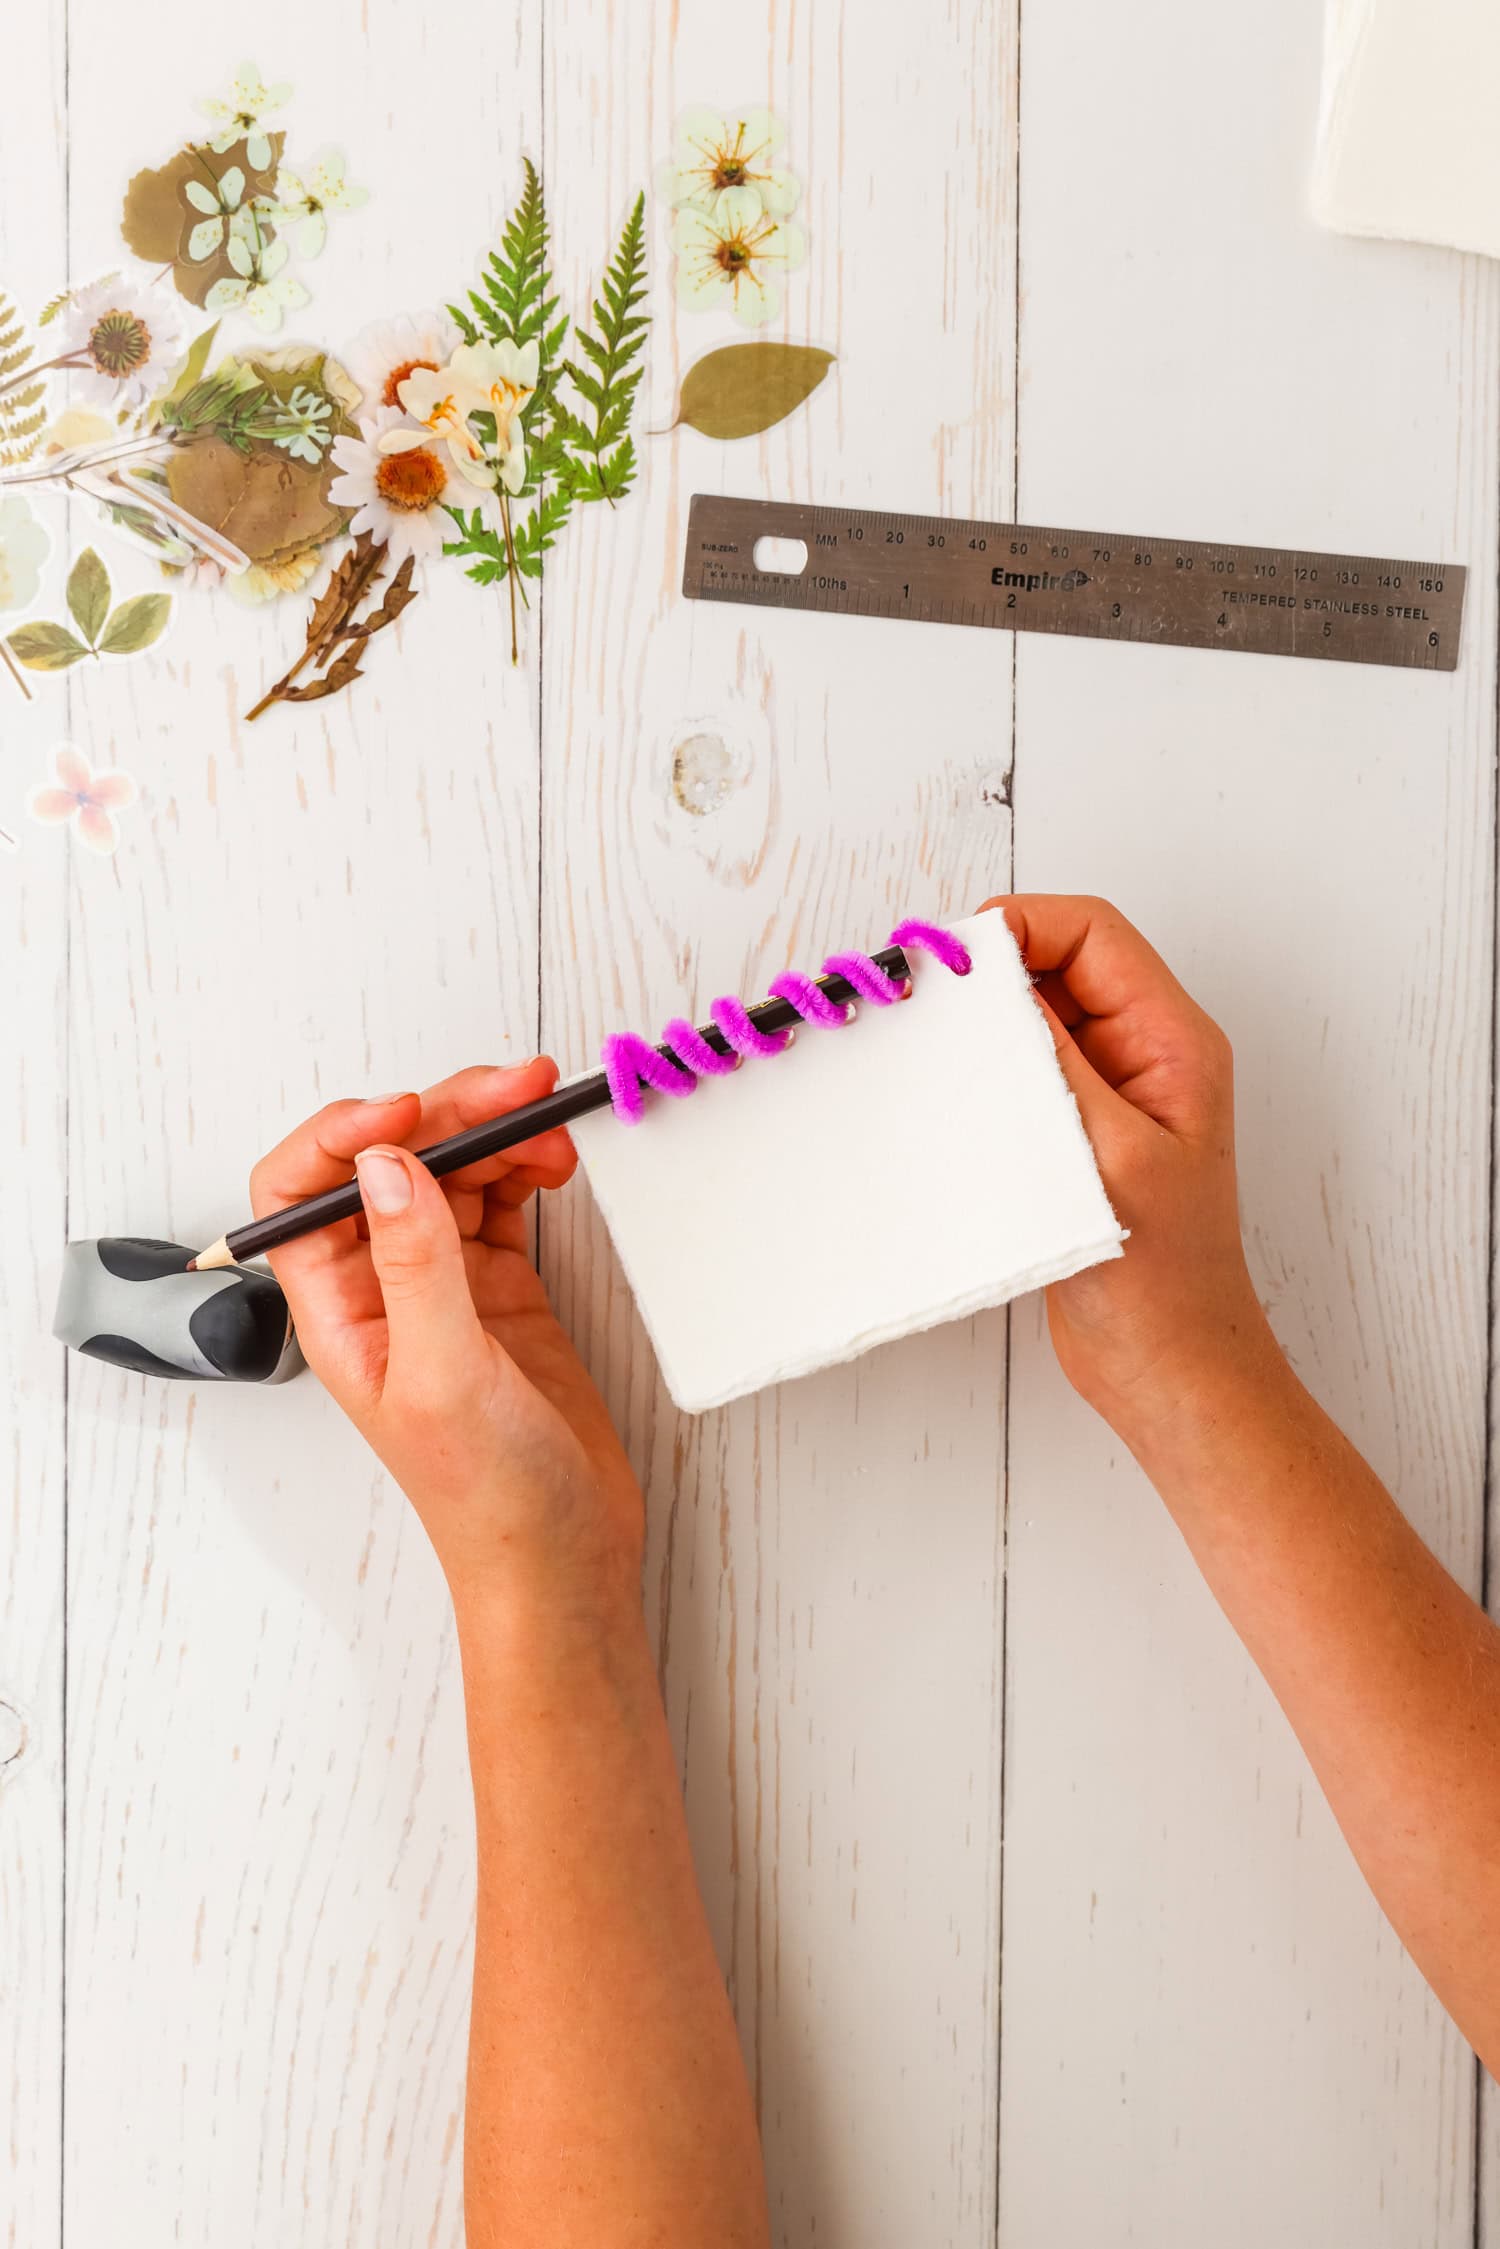
Take the free end of the pipe cleaner and loop it through the first hole of the book, starting from the top and pulling through the bottom. Work the pipe cleaner across the book by looping from the top into each hole across the folded edge, pulling the pipe cleaner down. This will form a spiral binding for your book!
Once you have reached the last hole of your book and the pipe cleaner is spiraled across the edge, carefully remove the pencil from the spiral binding.
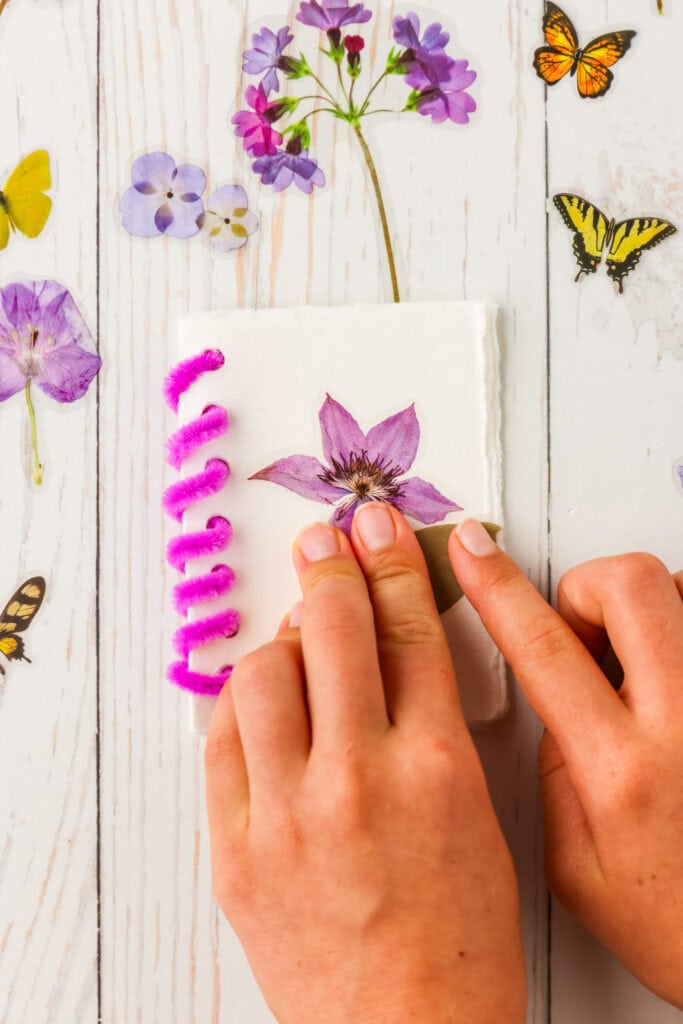
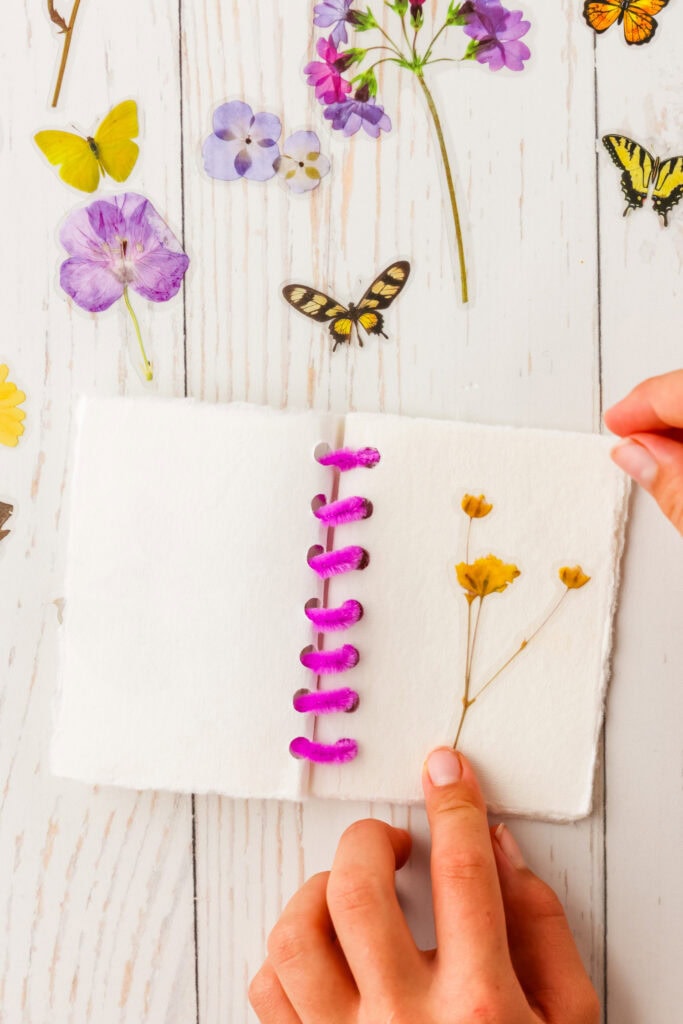
Staple the other end of the pipe cleaner in place to the back cover. Your DIY sticker book is now ready for the fun part — stickers!
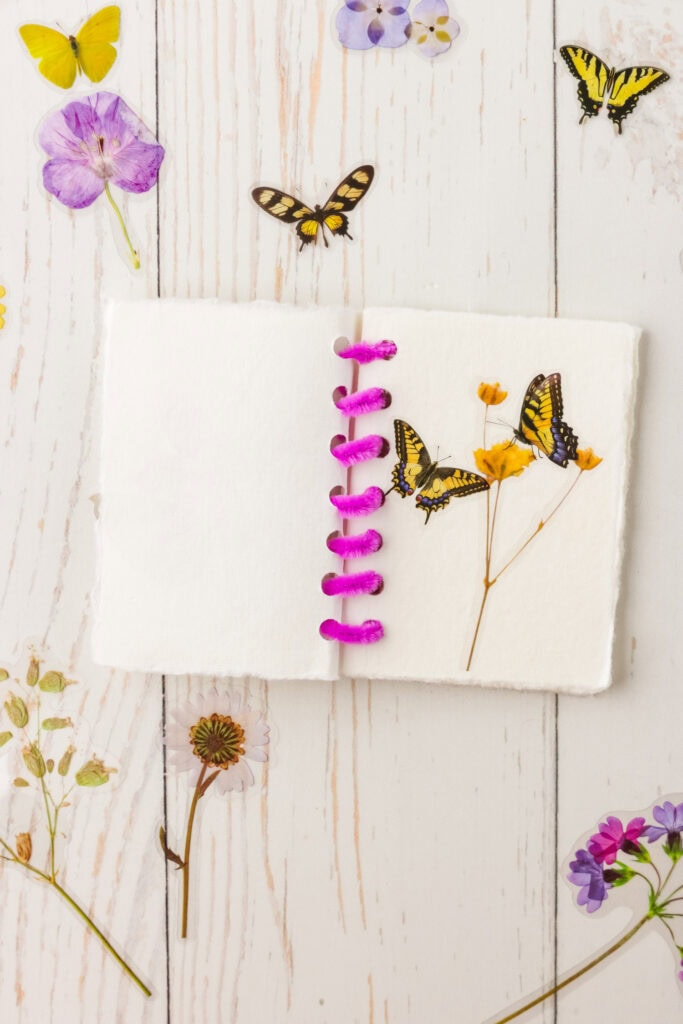
Add all of your favorite stickers to the pages to create a sticker collection that is unique and special to you!

What is the best paper for sticker books?
You need to use something that is sturdy and durable! For this activity, I used handmade/watercolor paper. It gives it a really fun, unfinished edge making it look extra special. You can also use different types of paper to make a reusable sticker book. Some cardstock covered in wax paper would work since you’d be able to peel the stickers off. Really, you can use whatever you have on hand!
Pro Tips for the Best Sticker Book!
- Don’t have a pipe cleaner on hand? You can use ribbon, yarn, or twine in its place. Anything that has plenty of flexibility but will still be strong enough to hold the book together.
- Use your creativity when filling this sticker book! You can truly use whatever stickers you want. I love ones with vibrant colors since they really stand out on the white paper.
- If you are making this with younger kids, just keep in mind that they’ll need more help. While this is a very fun craft, it’s not super easy.
Now that you know how to make a sticker book, you have endless fun right at your fingertips!
More Fun Activities You’ll Love!
- These DIY Bath Bombs will add so much fun into bath time. They’re also so easy to make!
- Skip the store-bought playdough and make this Pumpkin Playdough during the fall instead.
- Make these DIY Garden Stones during the spring time when you’re making your new garden. They’ll add a touch of fun flair!
- Fluffy Slime is a great sensory activity and science experiment all-in-one. You’re going to love it!

How to Make a Sticker Book
Ingredients
Instructions
- Fold a piece of the handmade paper in half, lengthwise. Fold enough pieces of paper in half the same way to make a mini book. We used 5 pieces of paper in total.
- Using a ruler and a pencil, measure and mark at every half-inch line along the folded edge of one of the folded papers. You should have 7 marks. This will form the outer cover of your sticker collection book.
- Next, use a hole punch to punch a hole at every mark, about a half-inch away from the edge of the paper. Be careful not to make your hole too close to the edge! You will be punching through the folded edge, forming two holes in the paper.
- Once all of the holes are punched through, open up your folded cover. Place another folded paper INSIDE of the cover paper and line up the edges. Close the cover over the paper that you just placed inside. The hole-punched cover should be on the outside, and your next paper should be sandwiched between the cover. This will be your guide for punching holes in the next paper.
- Repeat step 4 until all of your pages are inside each other and hole-punched. Each time you add a new page to your book, open it up to the middle and insert the new page there.
- Once all of your pages are hole-punched, remove the inner pages leaving only the cover to work with.
- From the outside, insert a pipe cleaner through the first hole of the back cover, bringing it to the inside of the back cover. Insert about 1 inch of the pipe cleaner and staple it to the back cover.
- Insert all of your pages back into the outer cover, aligning the edges and holes. Close the book.
- Place a colored pencil (or a regular pencil works well, too!) along the folded edge of the closed book.
- Take the free end of the pipe cleaner and loop it through the first hole of the book, starting from the top and pulling through the bottom. Work the pipe cleaner across the book by looping from the top into each hole across the folded edge, pulling the pipe cleaner down. This will form a spiral binding for your book!
- Once you have reached the last hole of your book and the pipe cleaner is spiraled across the edge, carefully remove the pencil from the spiral binding.
- Staple the other end of the pipe cleaner in place to the back cover.
- Your DIY sticker collection book is ready for the fun part… stickers!
- Add all of your favorite stickers to the pages to create a sticker collection that is unique and special to you!