Sponge Sailboat Craft
This Sponge Sailboat Craft is one of my favorite easy summer activities for kids. It uses simple supplies you probably already have at home, takes about 10 minutes to put together, and it actually FLOATS in water (which is the whole point, right?).
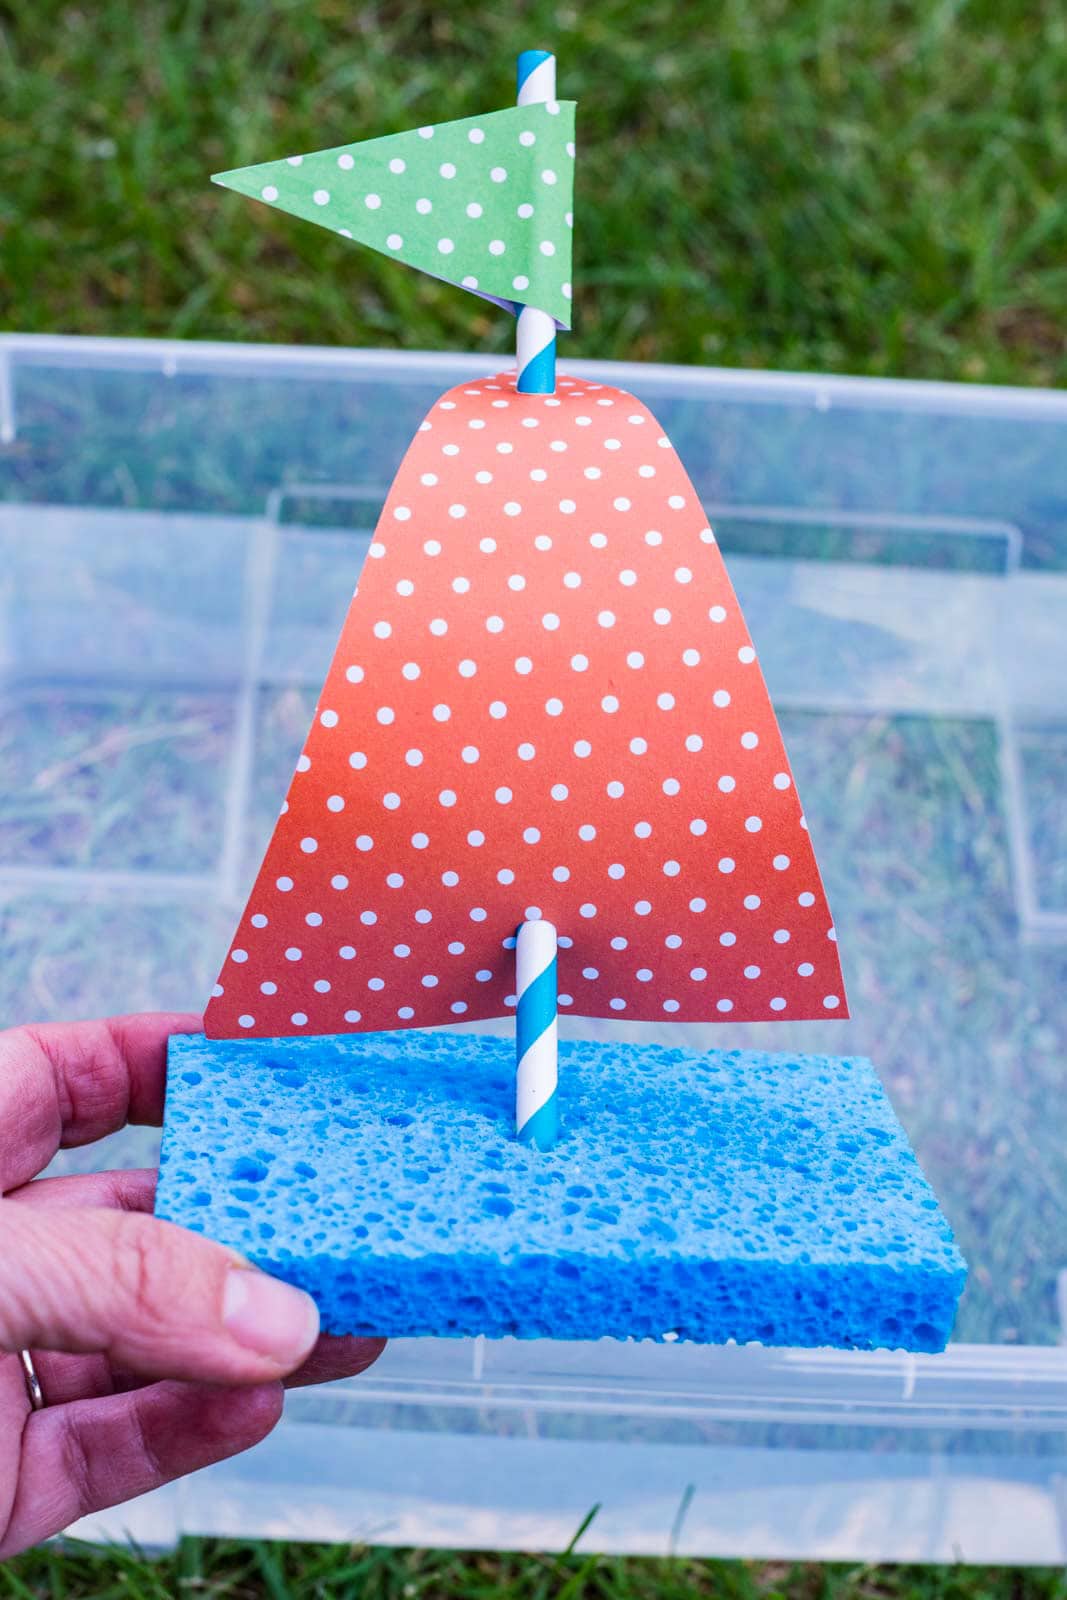
Sponge Sailboat Craft is the kind of activity that hits the sweet spot for kids: it’s hands-on, it’s creative, and the finished product becomes a toy they’ll actually play with for hours. We’re talking a kitchen sponge for the boat, a straw for the mast, a cardstock triangle for the sail, and a tiny flag at the top to add a little flair. That’s pretty much the whole supply list in a nutshell and I bet you’ve already got most of it at home already.
This activity works best for ages 4 and up, with a little adult help on the cutting steps. It’s a great option for at-home craft afternoons, summer camps, classroom activities, birthday party stations, and rainy day boredom-busters. (Yes, I have used it for all of the above.) Once the kids make one, they’ll want to make a whole fleet. Just be sure not to leave the kids unattended while they are playing with these boats in water, no matter the depth.
Why You’ll Love This Craft
- Crafts with sponges are really affordable. Plus, everything you need is most likely already in your home to make these sailboats and it’s a craft that can be played with.
- Kids can decorate the sails any way they want to flex their creative muscles. This preschool boat craft is great for practicing fine motor skills, too.
- This is a great craft to set up outside for the kids on a really warm day with a water table or a big bucket of water on the patio.

Supplies To Make Sponge Sailboats
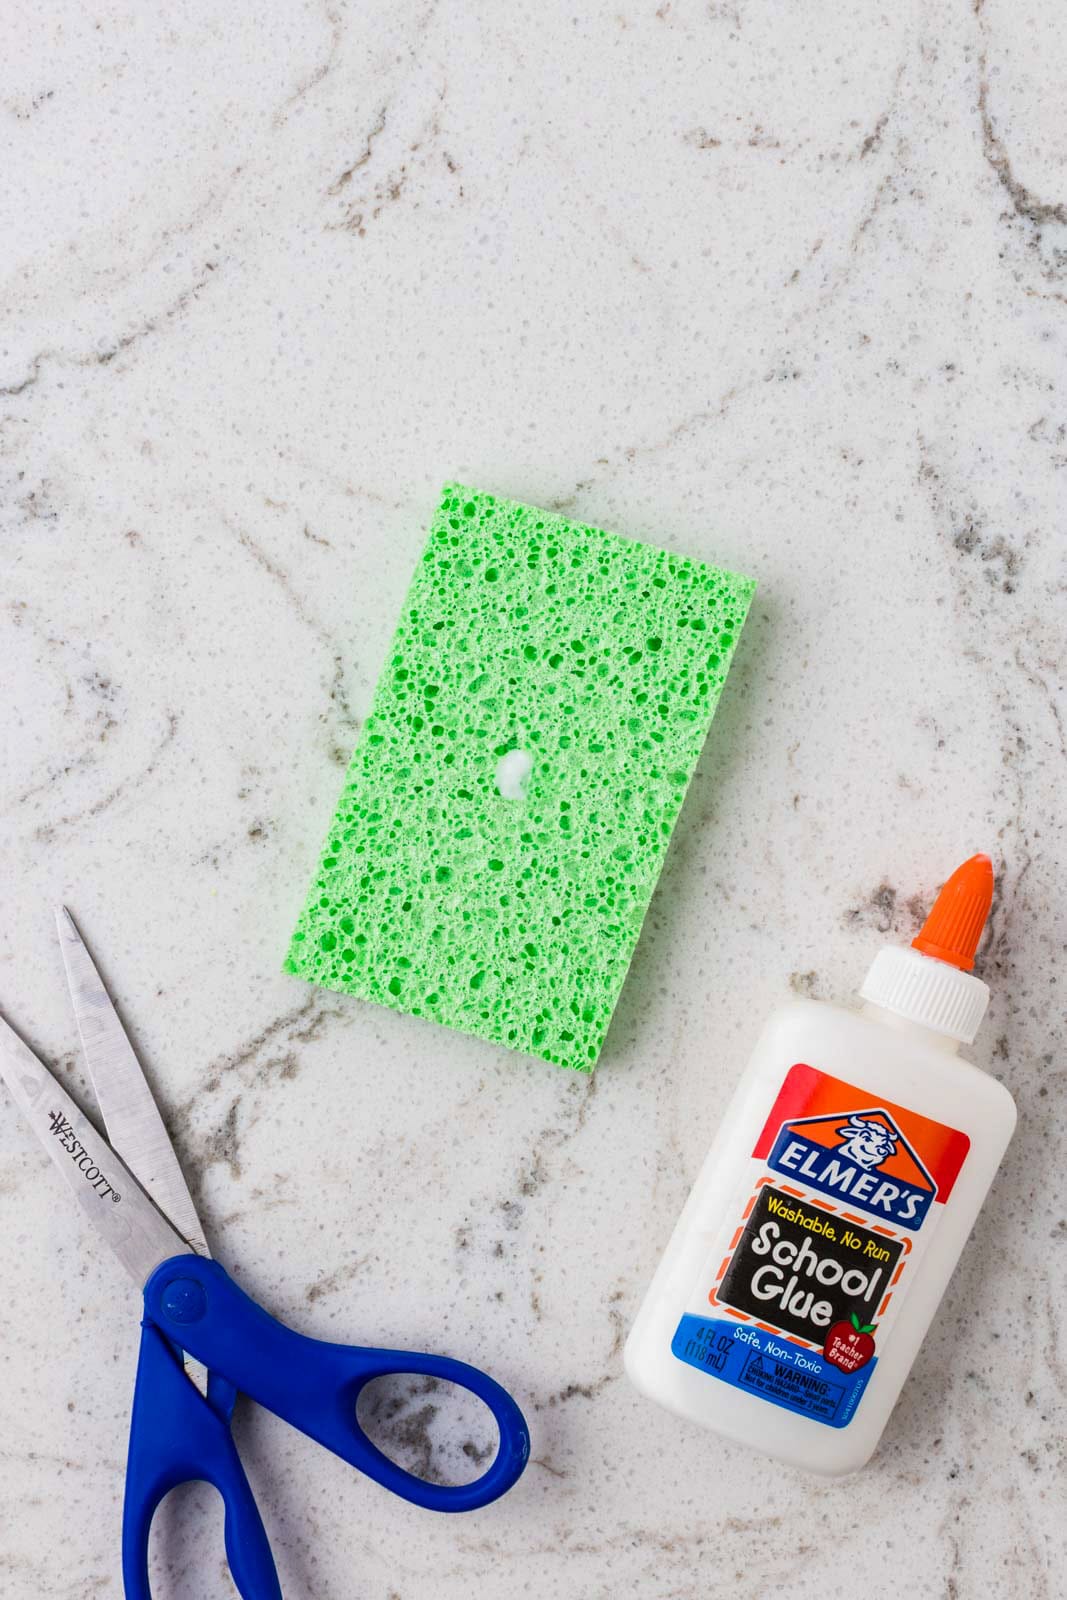
- Kitchen sponge: This becomes the base of the sailboat and helps it float in the water. A new, clean kitchen sponge works best for this craft. Avoid using an old sponge, as it may not float as well or feel clean enough for kids to handle. You can also use a craft sponge if that is what you have.
- Scissors: Used to cut the slit in the sponge, trim the sail, and cut the flag. Kids may need help from a big kid or grown up with this step.
- Craft glue: Glue helps hold the straw in place and keeps the flag attached at the top. White school glue can work, but tacky craft glue will usually hold a little better.
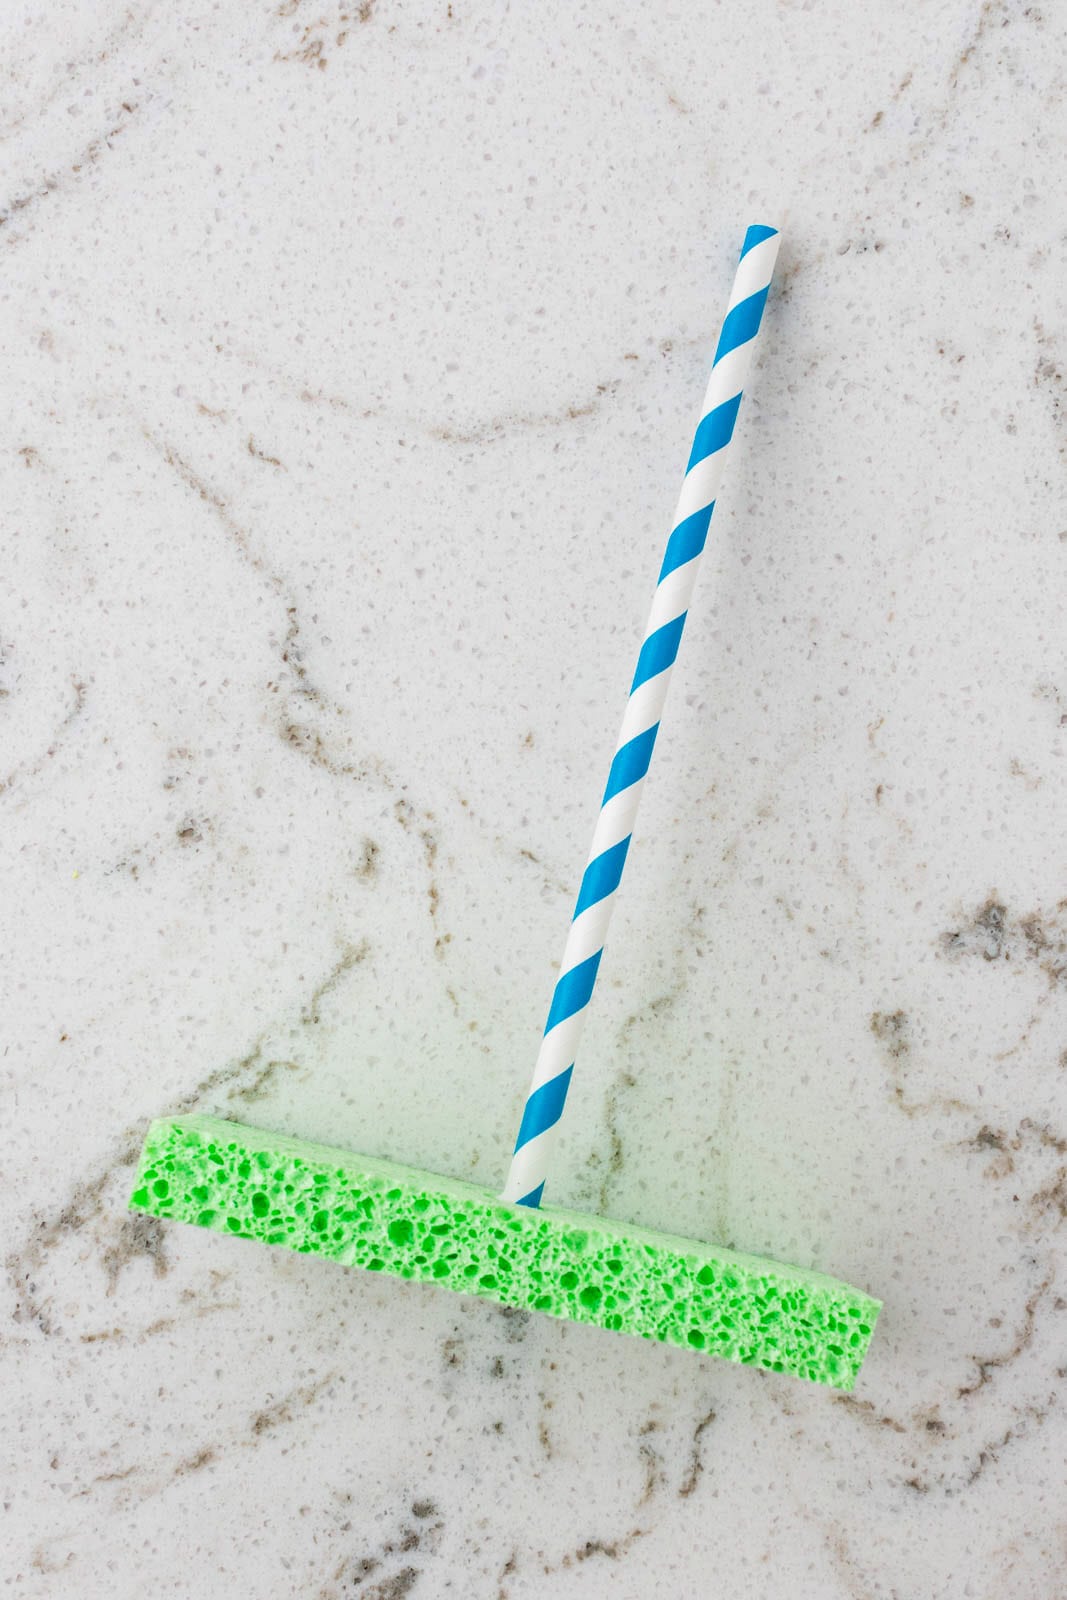
- Straw: The straw becomes the mast for the sailboat. A paper or plastic straw can work, but a plastic one will hold up better if the boat is going into water.
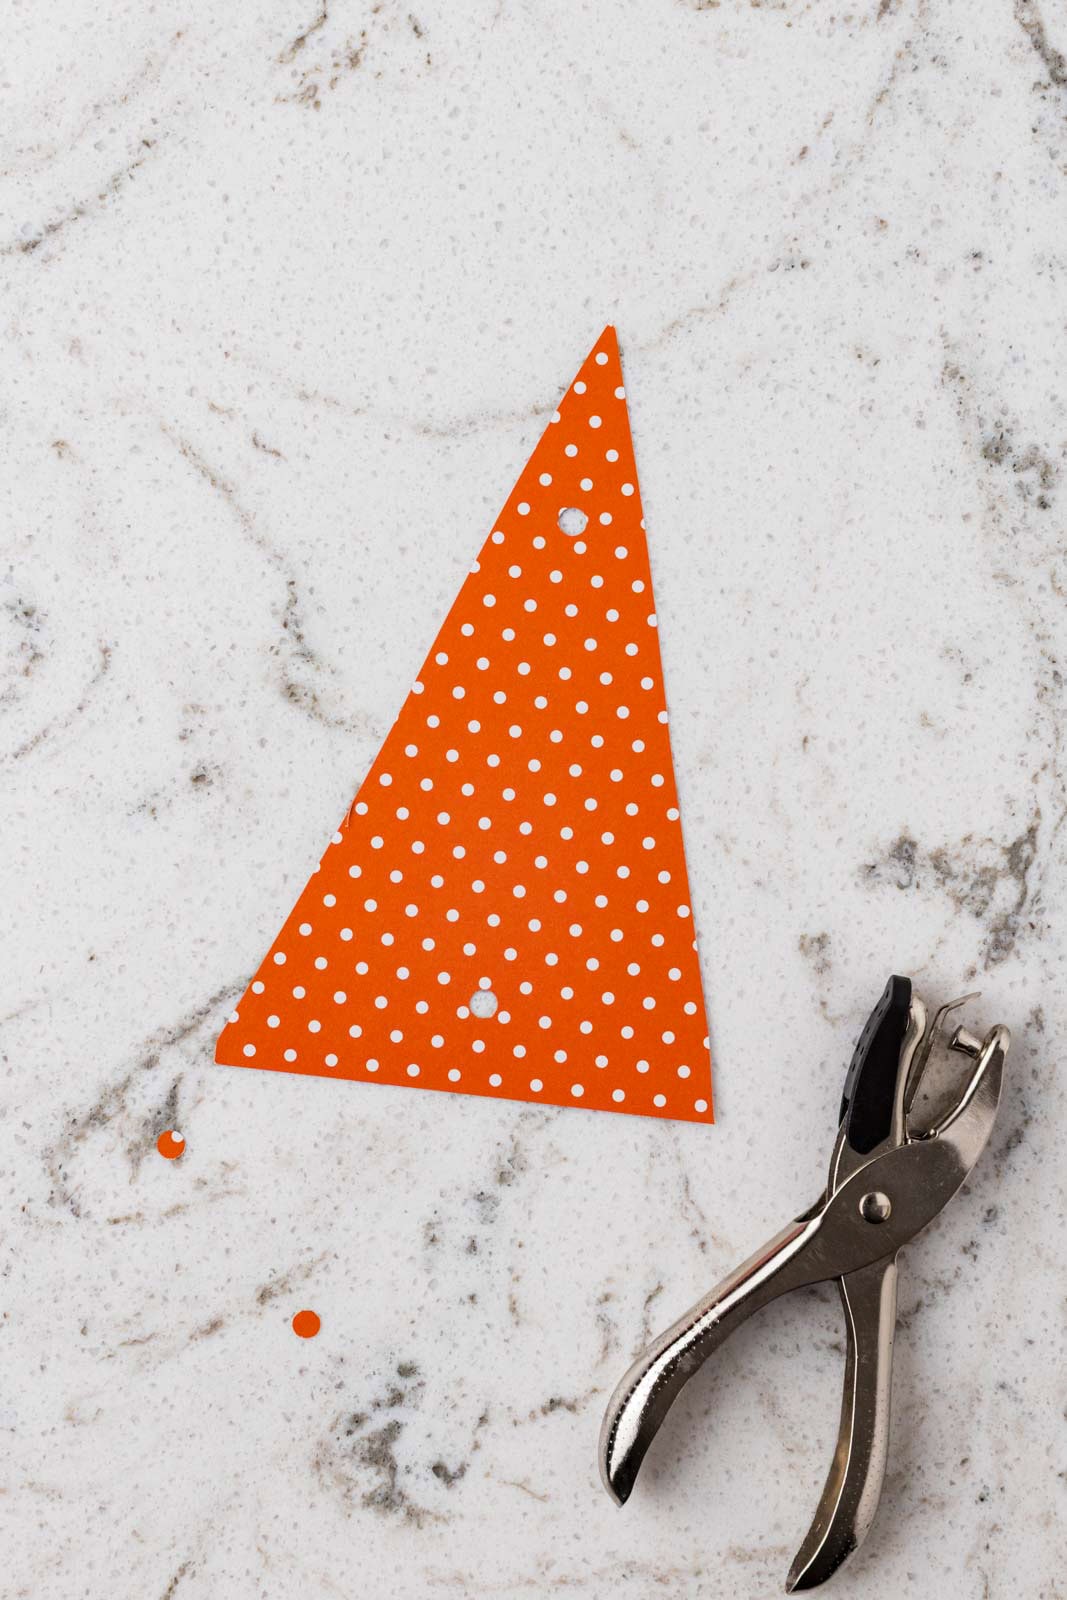
- Lightweight card stock: Card stock is used to make the sail and flag. It is sturdier than regular paper, which helps the sail stand up better. If cardstock isn’t already in your craft cupboard, but you have foam sheets, use those!
- Hole Punch: A hole punch makes clean holes in the sail so the straw can slide through easily. If you do not have a hole punch, an adult can carefully make small holes with scissors.
Ideas for Decorating the Sail
- Use markers for drawing pirate flags, rainbows, or names
- Stickers are always a great idea
- Crayons for younger kids who aren’t ready for markers
- Glitter glue for an extra-special version
- Ocean-themed paper cutouts (anchors, fish, waves) glued onto the sail
- Patriotic stripes for July 4th
- Class flags for kids to make their own “team” boats
How To Make Sponge Sailboats
- Lay the kitchen sponge flat on your work surface. Use scissors to carefully cut a small slit in the top center of the sponge. The slit should be just big enough to hold the straw upright.
- Add a small dab of craft glue inside the slit, then place the bottom of the straw into the opening. Press it gently into the sponge so it stands as straight as possible. Set the sponge aside to dry while you make the sail.
- Cut a triangle out of card stock. Make the triangle tall enough to fit on the straw, but not so large that it makes the sponge tip over.
- Use a hole punch to punch one hole near the top of the triangle and one hole near the bottom of the triangle. Thread the straw through both holes so the card stock sail sits on the straw.
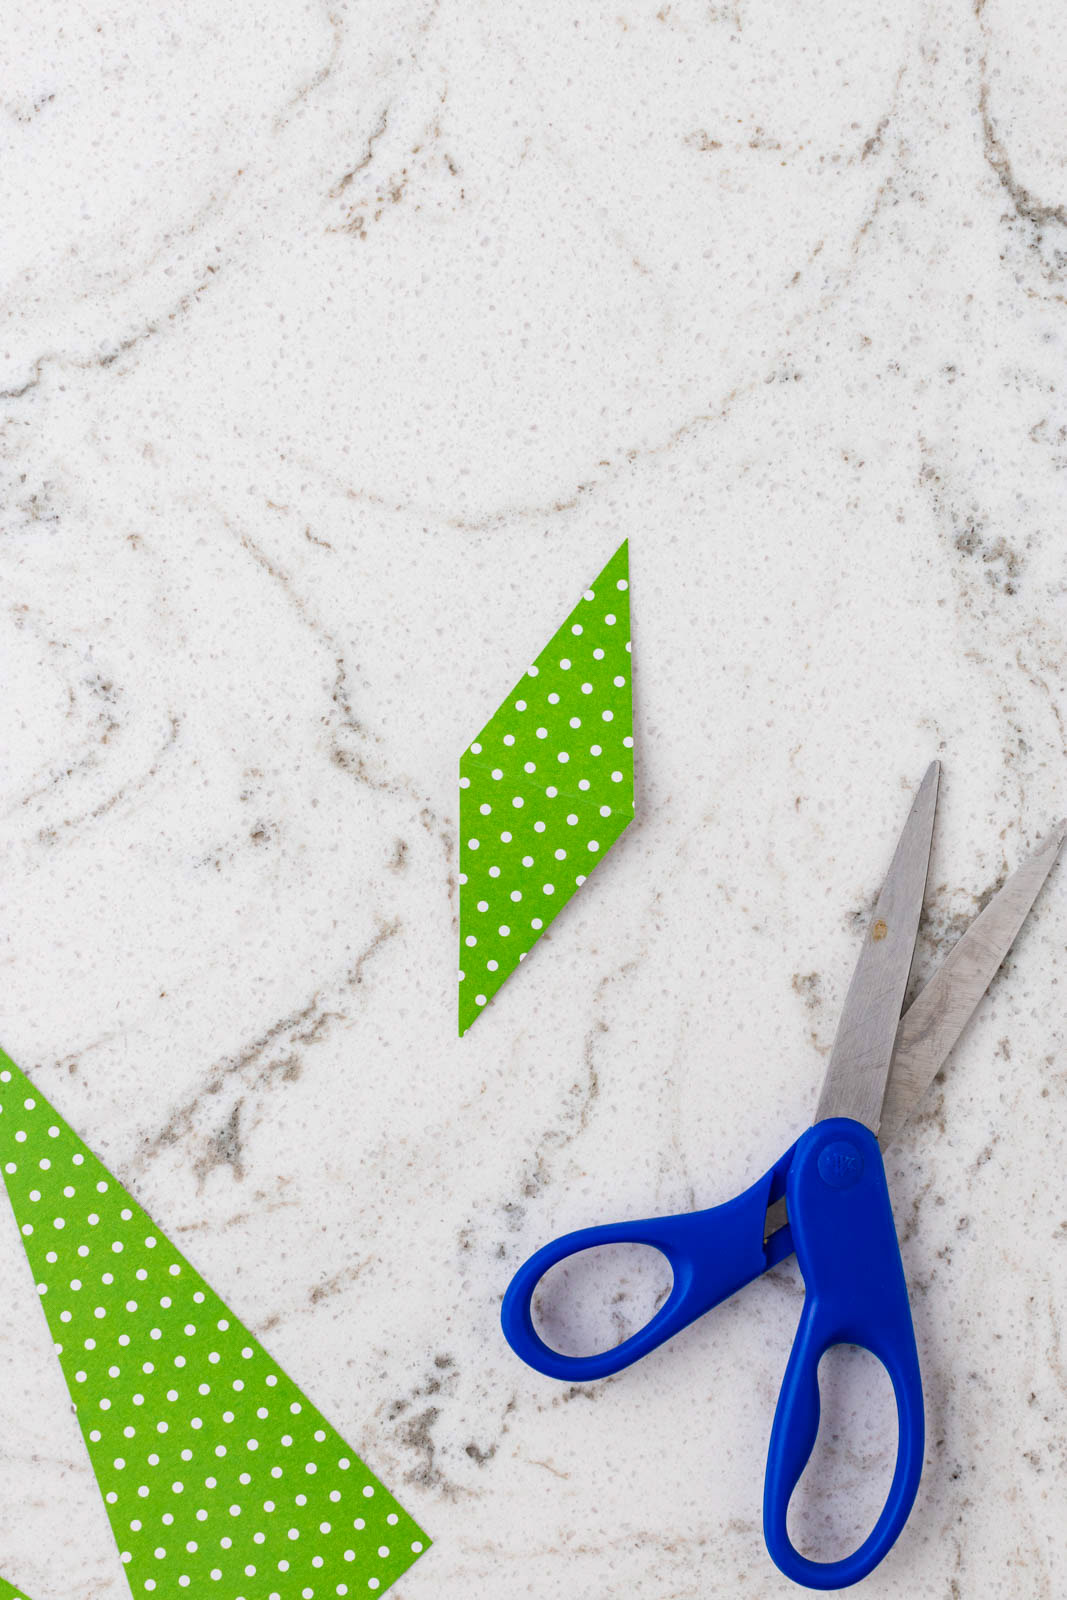
- Cut a small diamond shape out of card stock for the flag. Add a little glue to the inside center of the diamond, then fold it in half around the top of the straw. Press the flag together so it sticks to itself and stays in place.
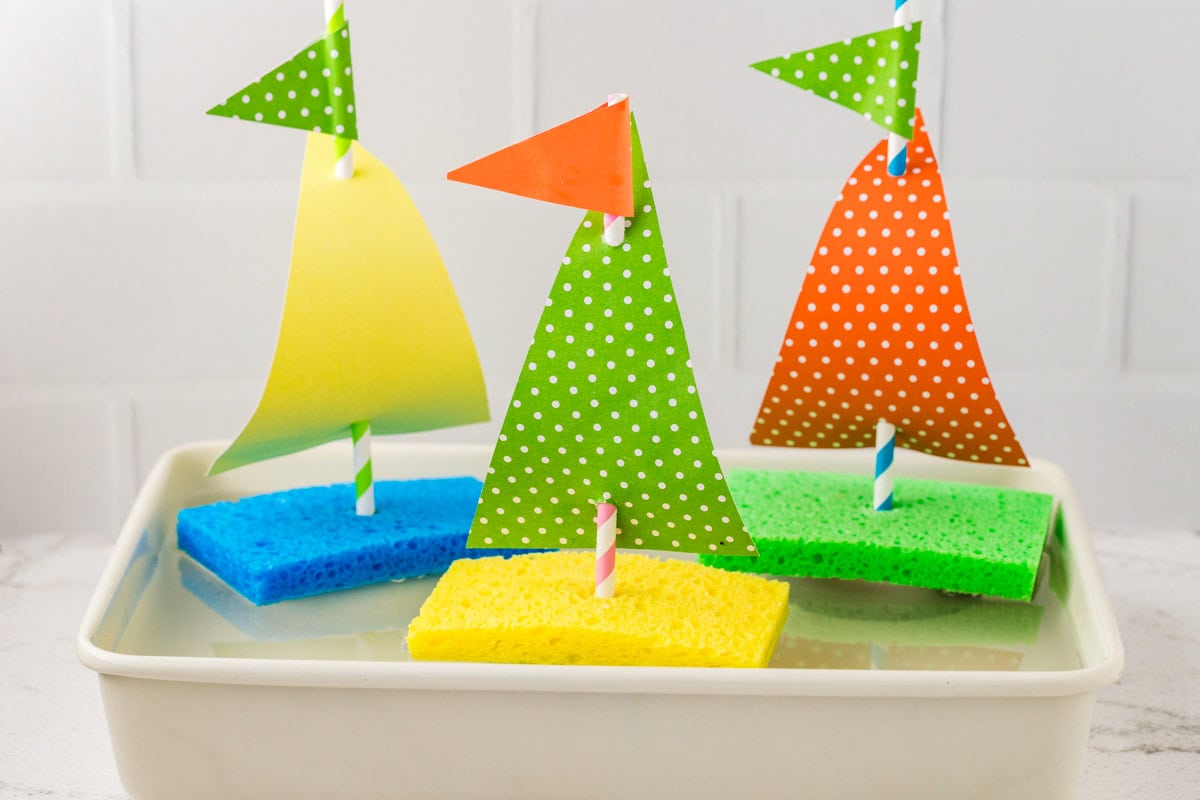
- Let the sailboat dry for about 15 to 30 minutes before placing it in water. Once it is dry, float it in a shallow pool, sink, bathtub, or small outdoor water table.
Pro Tips
- If the straw leans too much, make the slit in the sponge a little deeper and add another small dab of glue around the base.
- If you want the cardstock sail to last longer during water play, cover the cardstock with clear tape before punching the holes.
- Don’t make your sail too large! It will weigh down your boat and make it sink.
- Let kids decorate the sail before adding it to the straw. Markers, stickers, crayons, or small paper cutouts all work well.
- This craft is best for shallow water play. Do not use it in deep water, and always supervise kids around water. Never leave children unattended for this activity.

Sponge Sailboat Craft
Instructions
- Lay the kitchen sponge flat on your work surface. Use scissors to carefully cut a small slit in the top center of the sponge. The slit should be just big enough to hold the straw upright.
- Add a small dab of craft glue inside the slit, then place the bottom of the straw into the opening. Press it gently into the sponge so it stands as straight as possible. Set the sponge aside while you make the sail.
- Cut a triangle out of card stock for the sail. Make the triangle tall enough to fit on the straw, but not so large that it makes the sponge tip over.
- Use a hole punch to punch one hole near the top of the triangle and one hole near the bottom of the triangle. Thread the straw through both holes so the card stock sail sits on the straw.
- Cut a small diamond shape out of card stock for the flag. Add a little glue to the inside center of the diamond, then fold it in half around the top of the straw. Press the flag together so it sticks to itself and stays in place.
- Let the sailboat dry for about 15 to 30 minutes before placing it in water. Once it is dry, float it in a shallow pool, sink, bathtub, or small outdoor water table.
More Great Kids Crafts
- To add a fleet of planes to the collection, make up some Popsicle Stick Airplanes. All you need are some craft sticks, glue and markers to have some flying fun!
- There’s nothing better to do on a windy day than fly a homemade Kite! Kids who love crafts and science are going to have the best time creating these kites and learning about gravity.
- Kids of all ages and abilities are going to have a blast creating Melted Crayon Art. Whether the crayons are arranged like a rainbow, another pattern, or just random, the outcome is going to be amazing!
- Set up a homemade Bird Feeder in your favorite tree and see what types of birds it attracts. Get the binoculars out!