Snowglobe Craft
Snowglobe Craft made out of every day supplies is the perfect winter craft or activity for kids to make on cold winter days! It’s glittery, fun and cute to display on the refrigerator.
This simple snowglobe craft reminds me of A Charlie Brown Christmas. I always visualize the scene where Charlie and his friends take care of that tiny little tree and gather around it sing Christmas carols. It’s such a sweet little moment and I love that this craft is reminiscent of it!
There are tons of kids winter crafts out there to keep the kiddos busy during the holidays, and this is one of my favorites! It’s super simple, fun, and a great way for the kids to create something that they can give as a gift to someone if they’d like!
Why You’ll Love this Snowglobe Craft
- This easy snow globe craft can be an adorable Christmas tree ornament or addition to a Christmas card.
- Cutting and gluing objects is very beneficial for fine motor skills.
- This kids winter craft can be pretty open ended when they decorate the tree, which promotes imagination and creativity!

What You’ll Need for this Paper Snow Globe Craft
- Card Stock – This will be the base of your paper snow globe craft, so I recommend using cardstock since it’s sturdier. If you can’t find card stock, construction paper is fine, just note that it may be a little floppy!
- Glitter Cardstock – Glitter cardstock helps to make your snowglobe a bit more festive and whimsical! If you can’t find glitter cardstock, you can use colored construction paper.
- Hole Punch – A single hole punch will help you easily create ornaments for the Christmas tree in your snowglobe craft.
- Scissors – You are going to have to cut pretty precise shapes in this craft, so littler kids may have a difficult time. But if they want to have a go at it, safety scissors will work great!
- Glue – A glue stick or any craft glue will work for this easy snow globe craft.
- Pencil/Pen – You’ll just be using this to trace, so either a pen or a pencil will work fine.
- Ruler – This will help you measure each shape that you cut.
- Cup – Use a cup with a large mouth to create a decent sized round shape for the base of your snow globe craft.
- Kraft Paper – This will help protect your work space as you cut and glue.


How to make a Snow Globe Craft
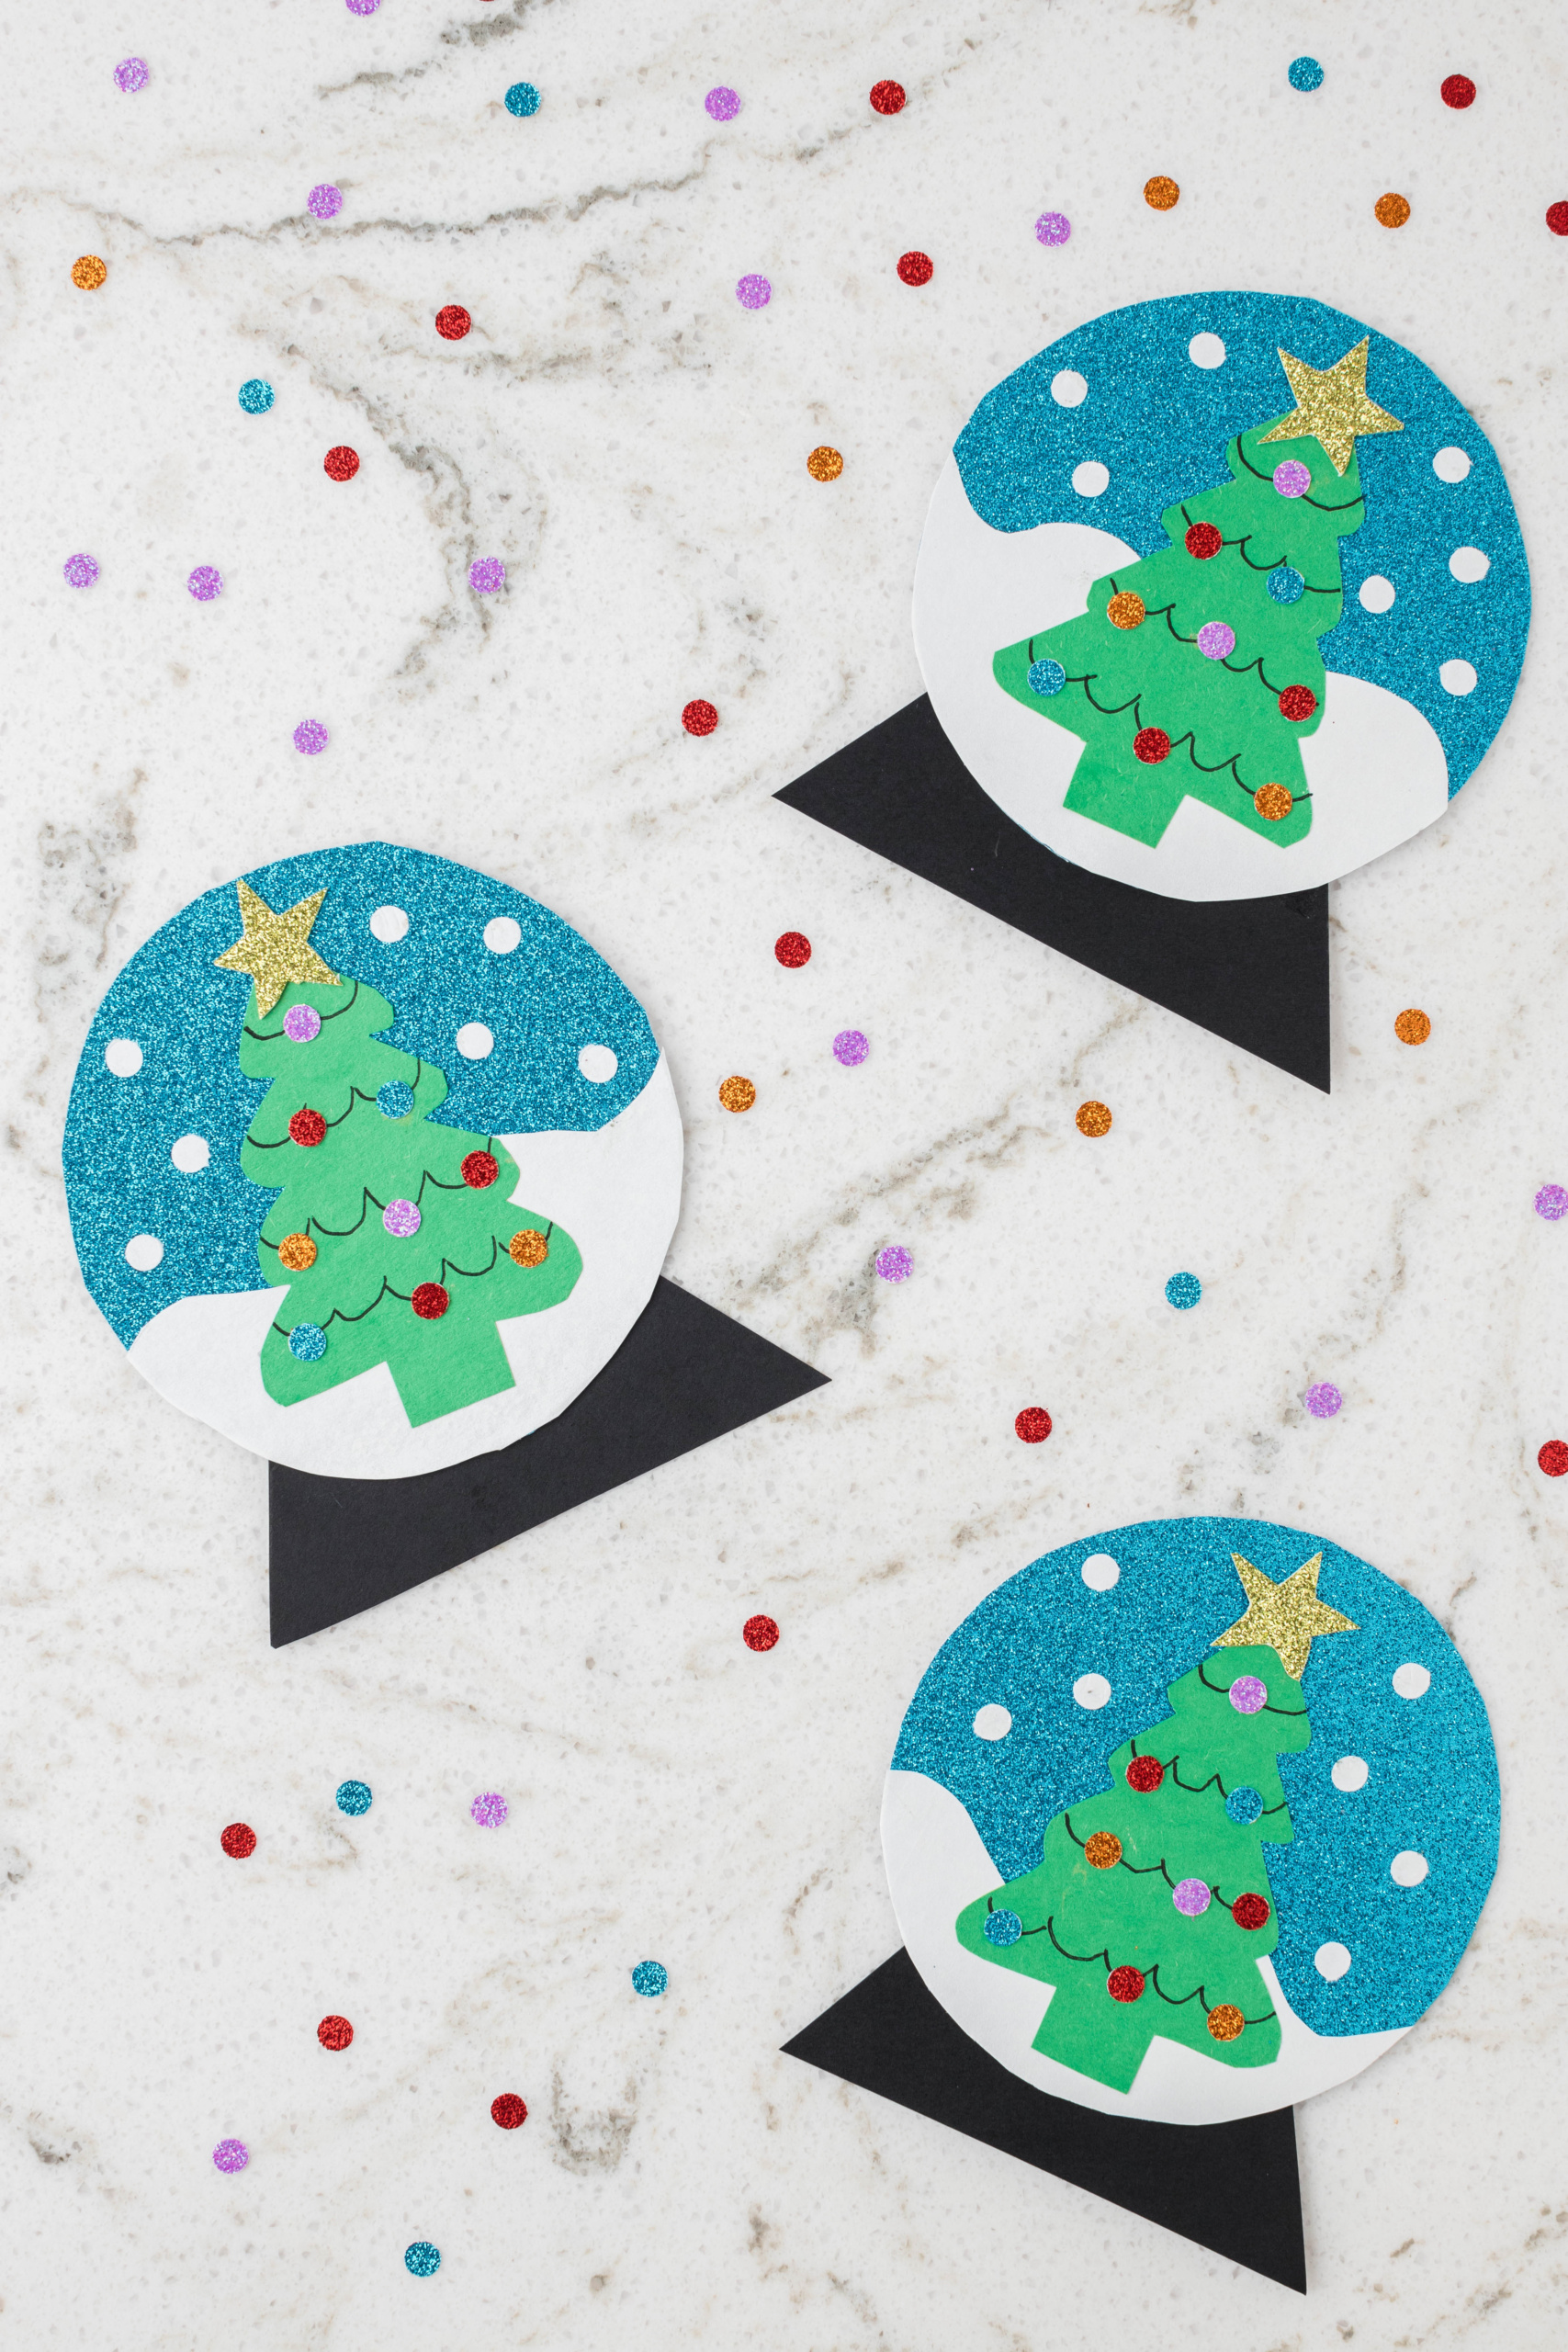
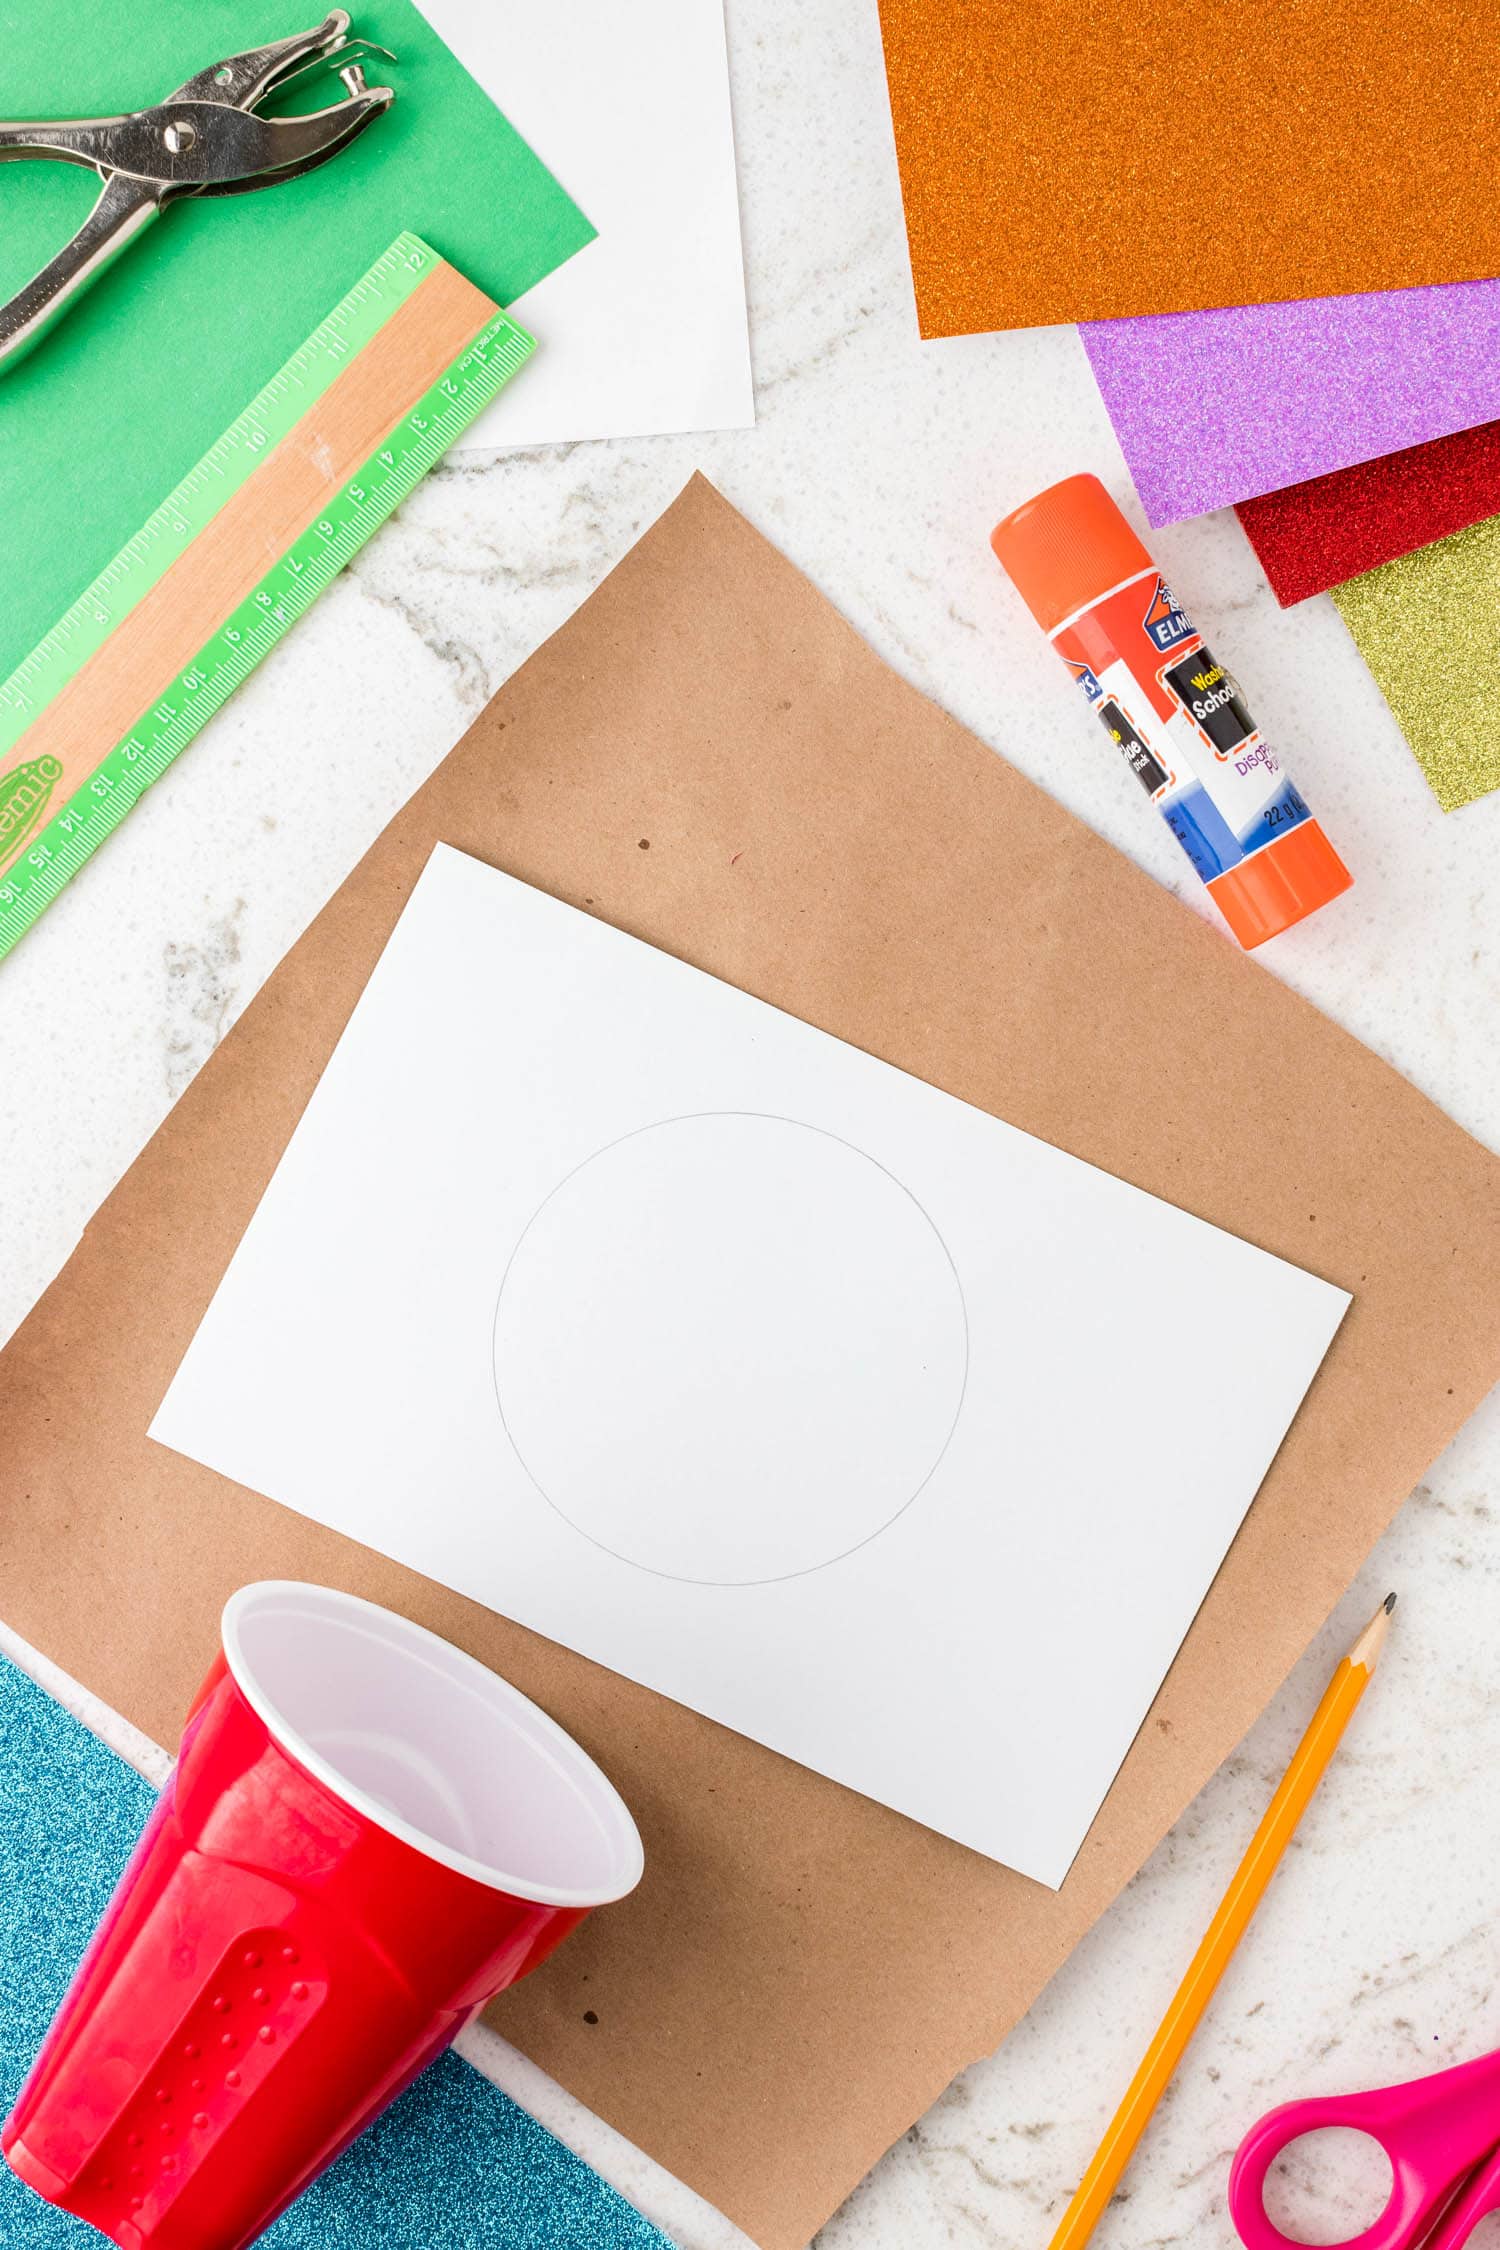
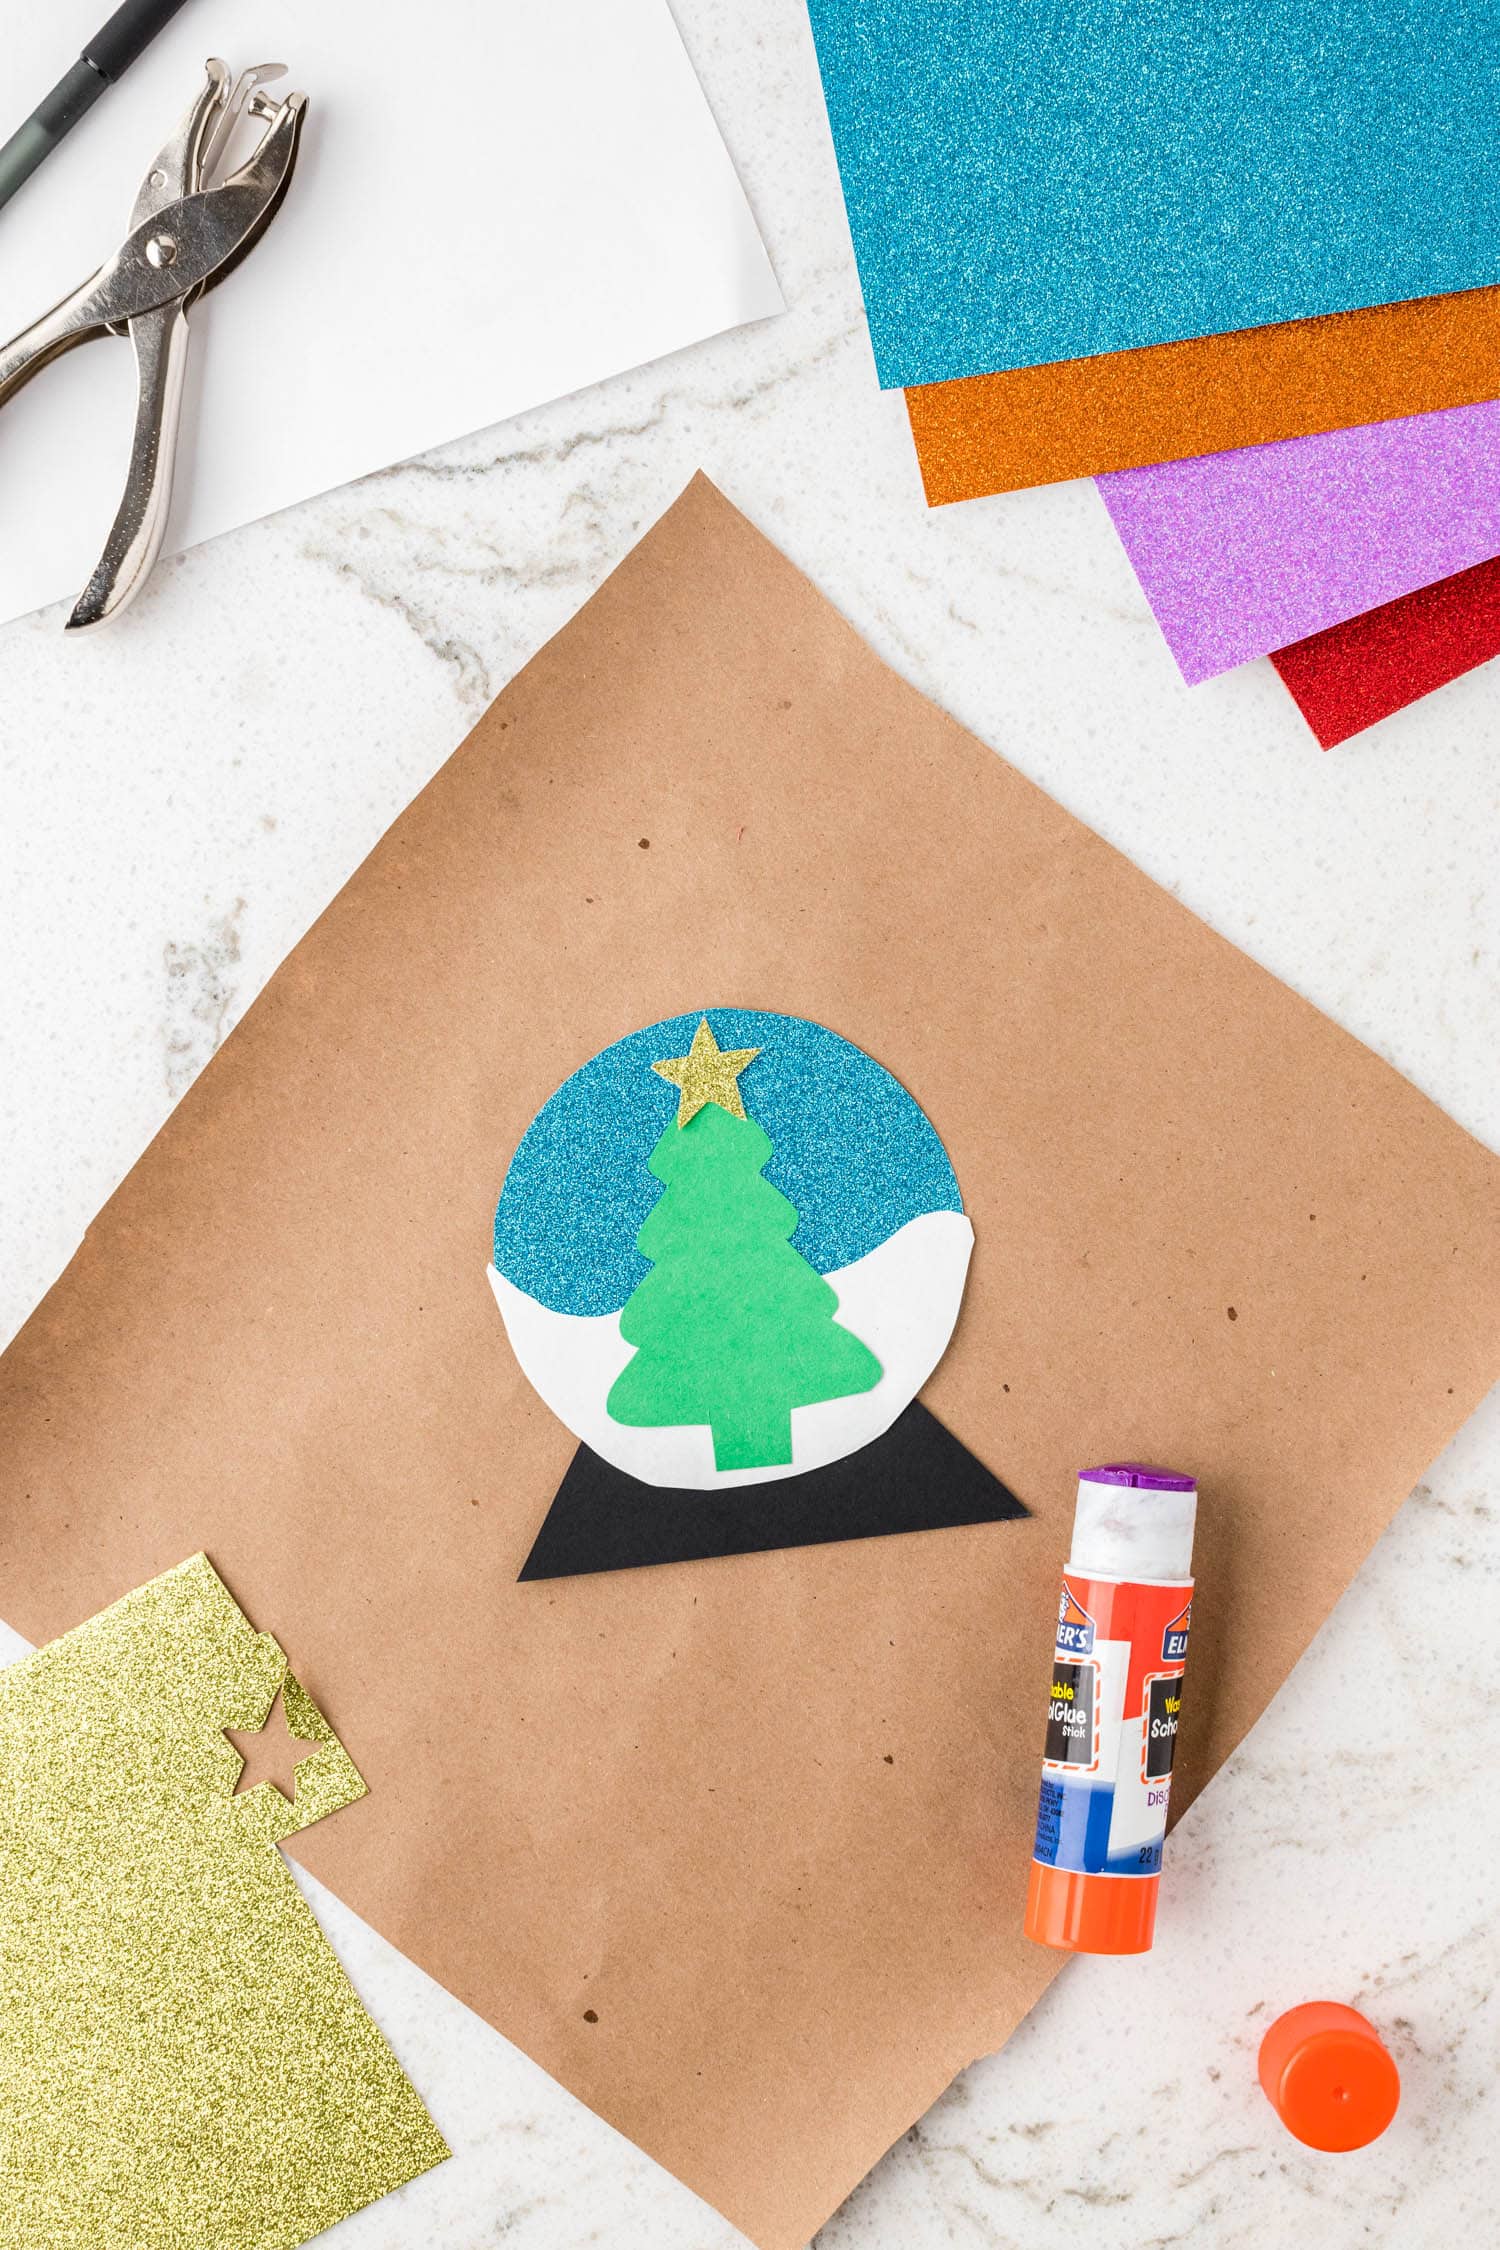
TRACE: Place a cup onto the back of a sheet of blue glitter cardstock and trace the cup opening to create a circle. Then, trace a 4 inch triangle onto the black cardstock.
CUT: Cut each of those shapes out and then glue the triangle to the back of the circle to create a base for your snowglobe.
TRACE: Then, trace a wavy shape onto the white construction paper. This will be the snow in your snowglobe, it should be about 1 1/2 inches tall. Glue the snow to the bottom of the blue circle and cut off the excess so that the bottom is rounded with the snowglobe craft.
MAKE A TREE: On your green paper, draw a 3 inch tall Christmas tree shape and carefully cut it out. Glue it onto your snowglobe with the base of the tree in the snow. Draw a small star shape on your gold glitter cardstock, cut it out, and then glue it to the top of your tree.
DECORATE: Using a black pen, draw a few scalloped lines on your Christmas tree to create “wires” for Christmas lights. Start punching out holes from different colors of glitter cardstock and white card stock to create Christmas lights and “snowflakes”.
GLUE: Glue your Christmas lights onto the tree and glue the snowflakes onto the blue space around the tree to look like falling snow.
Add any additional decorations you’d like and you’re finished!
Pro Tips for the Best Snowglobe Craft
- If you can’t find glitter cardstock, grab a sheet of regular cardstock and cut out your base circle. Apply a thin layer of glue, and then sprinkle glitter on it and allow it to dry. Shake off the excess and then keep working!
- Punch a hole in the top and add a piece of ribbon to create a Christmas ornament!
- Add a magnet to the back and display your masterpiece on the refrigerator.

This easy snow globe craft will not disappoint! It’s so much fun and turns out so cute!
More Christmas Crafts You’ll Like
- Do your kids have an active imagination? Let them express their creativity with these Christmas Drawing Ideas!
- This Christmas Tree Pom Pom Painting is a great craft for little kids.
- Put on the best Christmas puppet show after making Gingerbread Man Puppets.
- Make a precious keepsake craft with this Handprint Santa Claus.

Ingredients
- Craft paper
- Glitter card stock blue, gold, red, orange, and purple
- Pencil
- Solo cup
- Scissors
- Construction paper white and green
- Glue stick
- Card stock black
- Ruler
- Pen black
- Single hole punch
Instructions
- Cover your working surface with craft paper to protect it.
- Take a solo cup and trace the mouth of the cup on the back of the piece of blue glitter card stock. Trace and cut a 4-inch triangle out of the black cardstock for the globe's base. Glue the base to the back of the globe.
- Next, take a piece of white construction paper and trace a wavy line about 1 ½ inch from the bottom of the paper. This will be the snow on the ground inside the globe. Cut along the wavy line and glue the snow to the bottom ⅓ of the globe. Press to secure and cut off the excess white construction paper.
- Now it’s time to make the Christmas tree! With a pencil, draw a 3-inch tree on green construction paper. Cut out the tree and glue it to the middle of the globe overlapping the snow. Draw a small star on the back of the gold glitter card stock. Cut out the star and affix it to the top of the tree with glue.
- Next, let’s make some lights for the tree! With a black pen, draw a few scallops on the tree to imitate the wires for the lights. Then, with a hole punch, make several circles out of the different colors of glitter card stock for the light bulbs. Glue the “light bulbs” to the wires in a sporadic design. Be creative!
- Finally, let’s add some snowflakes to our globe! With a hole punch, make several circles and then glue them to the blue glitter card stock to make the snowglobe effect.
Notes
- If you can't find glitter cardstock, grab a sheet of regular cardstock and cut out your base circle. Apply a thin layer of glue, and then sprinkle glitter on it and allow it to dry. Shake off the excess and then keep working!
- Punch a hole in the top and add a piece of ribbon to create a Christmas ornament!
- Add a magnet to the back and display your masterpiece on the refrigerator.