Pinecone Turkey Craft
Get into the Thanksgiving spirit with this fun and easy pinecone turkey craft. Follow these simple steps to create an adorable decoration for your holiday table with your kids! It’s the perfect quick and easy craft for Thanksgiving.
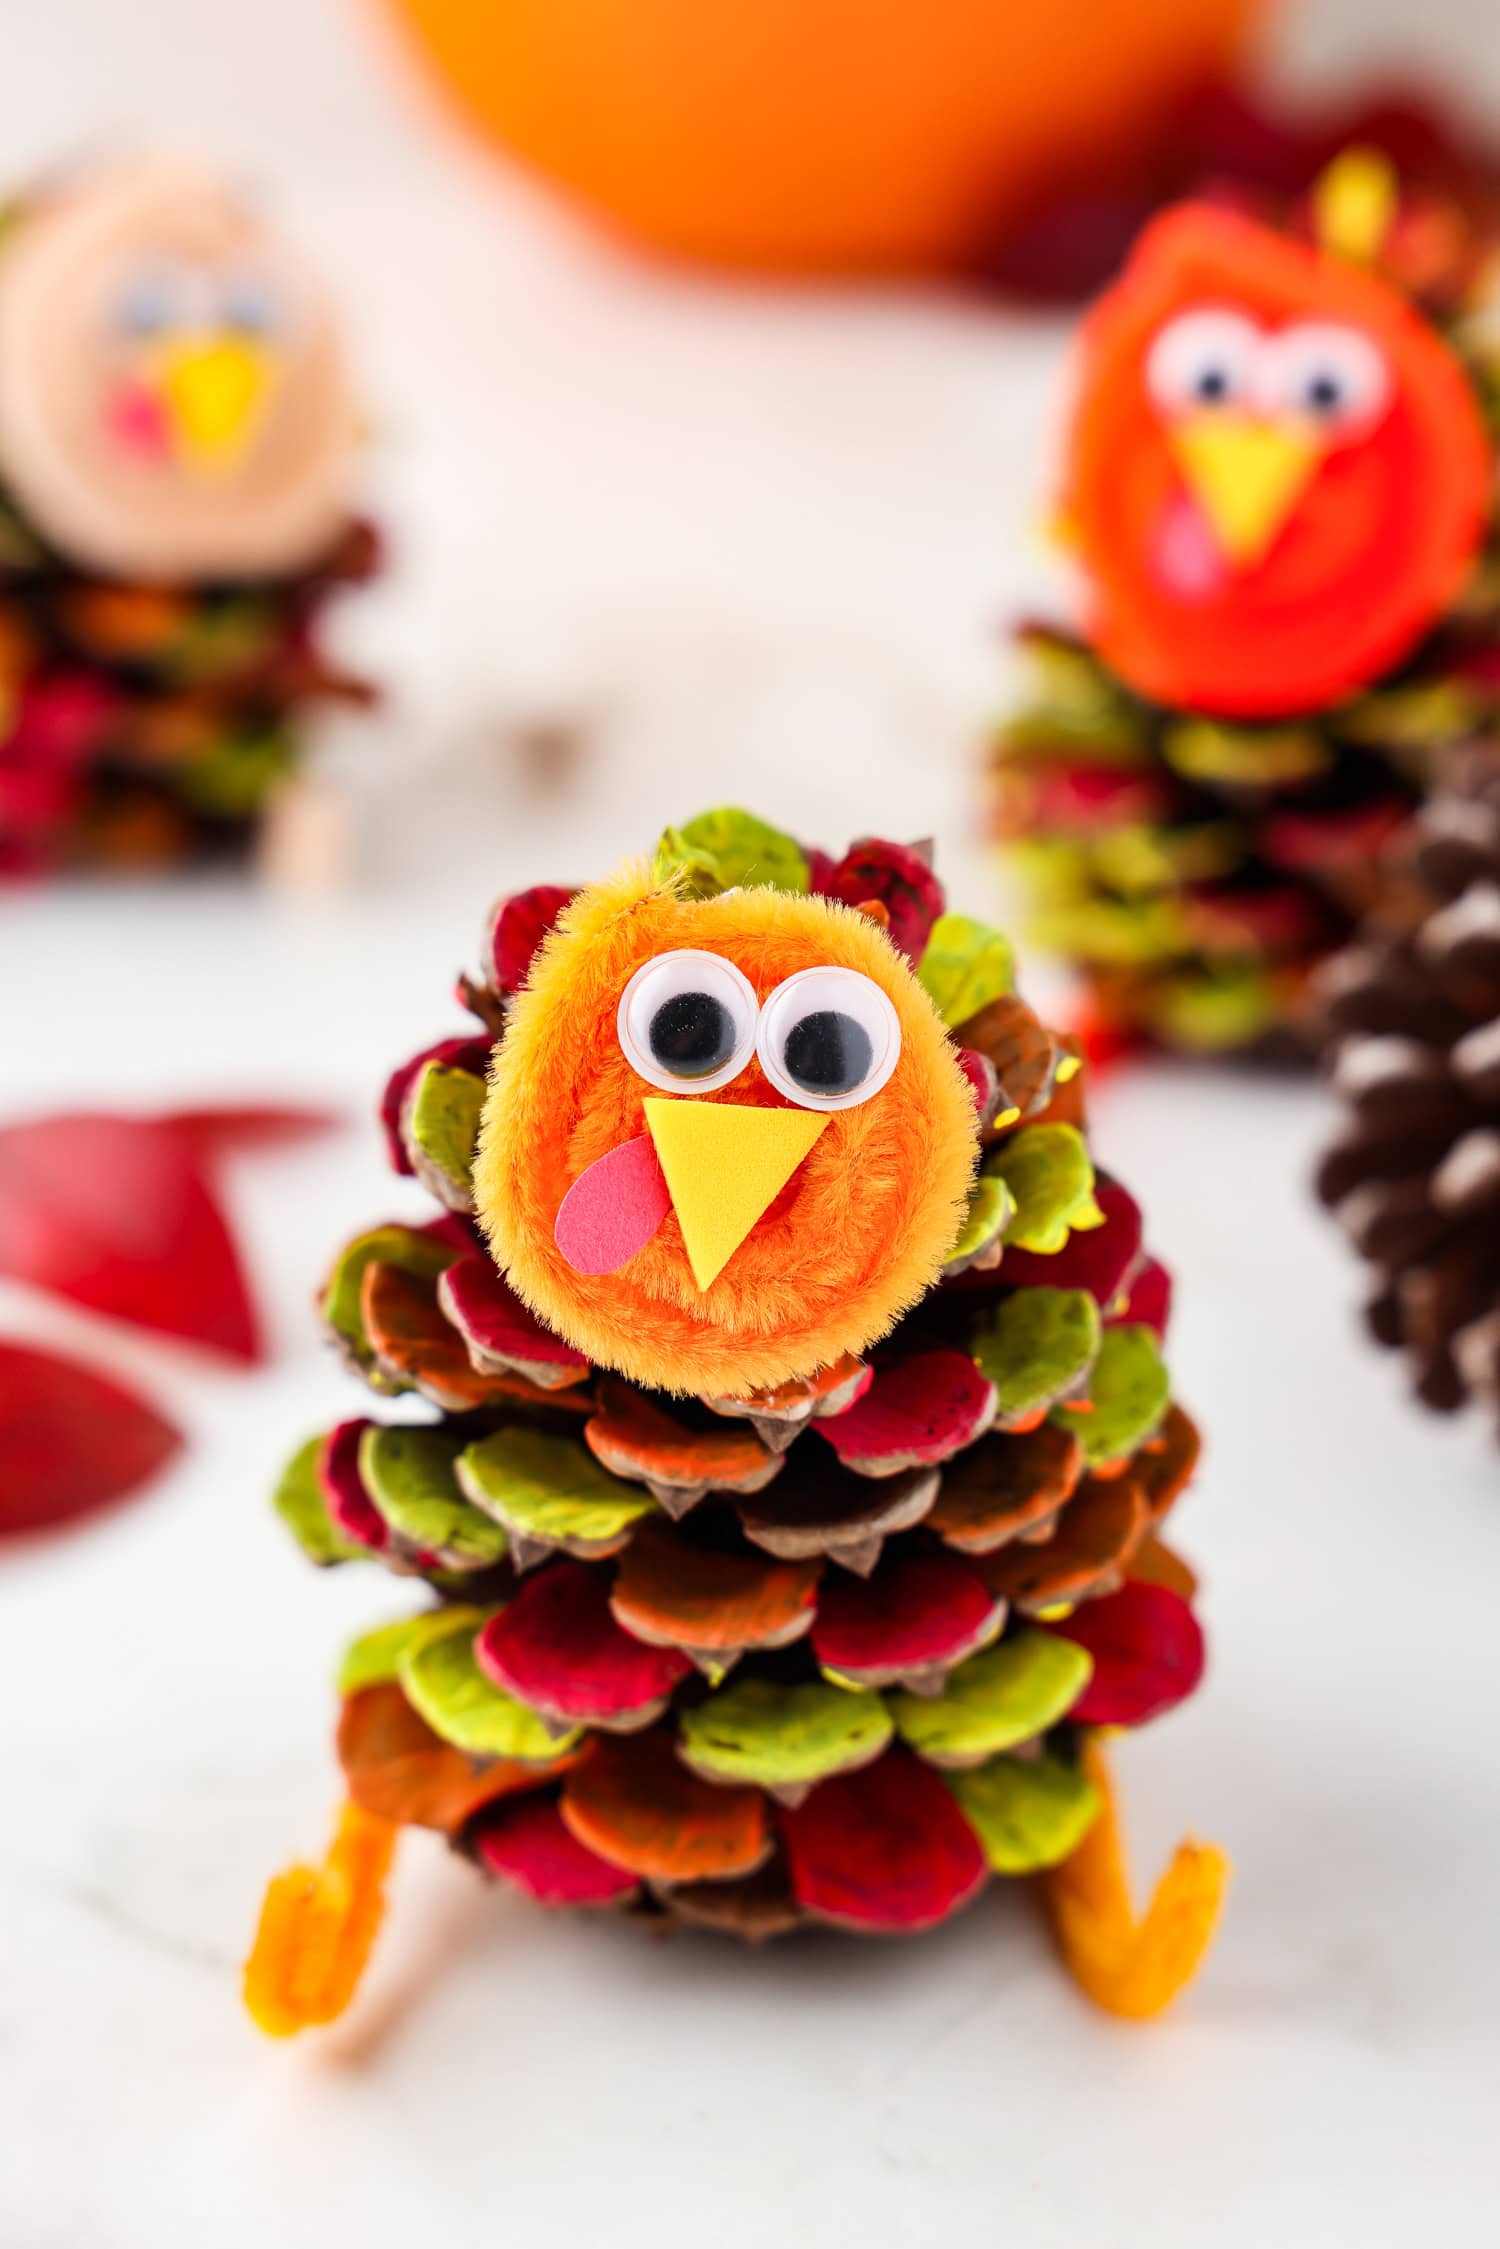
It’s turkey time! When Thanksgiving rolls around, we are always game to make the cutest fall-inspired crafts, especially if they anything to do with a turkey. This easy pinecone turkey craft is extra fun because you can use something found in nature as the base for the entire craft. It’s a great activity to keep your kiddos occupied during Thanksgiving break and can even be used as decoration for the Thanksgiving table. Because who wouldn’t want a precious little homemade turkey sitting at the center of their holiday dinner table.
While you’re at it, make some turkey suncatchers to hang in the windows and mini pumpkin turkeys to add to your table decor as well. November is full of falling leaves and pinecones, so it’s great to repurpose them into adorable crafting materials. The rounded shape of a pinecone is just perfect to make the body of a turkey too! Everything about this easy craft is just so cute. So go searching for the perfect pinecones and get started on this easy peasy turkey pinecone craft.
Why You’ll Love this Pinecone Turkey Craft
- Since the main portion of this craft can be found in nature, it’s really affordable. You may have most of the other materials on hand already too!
- Painting and glueing are all great hand-eye coordination practice and help to refine fine motor skills. Learn and grow as you create and make memories!
- Make this pinecone turkey craft in just 30 minutes. It comes together quickly and always turns out so cute!
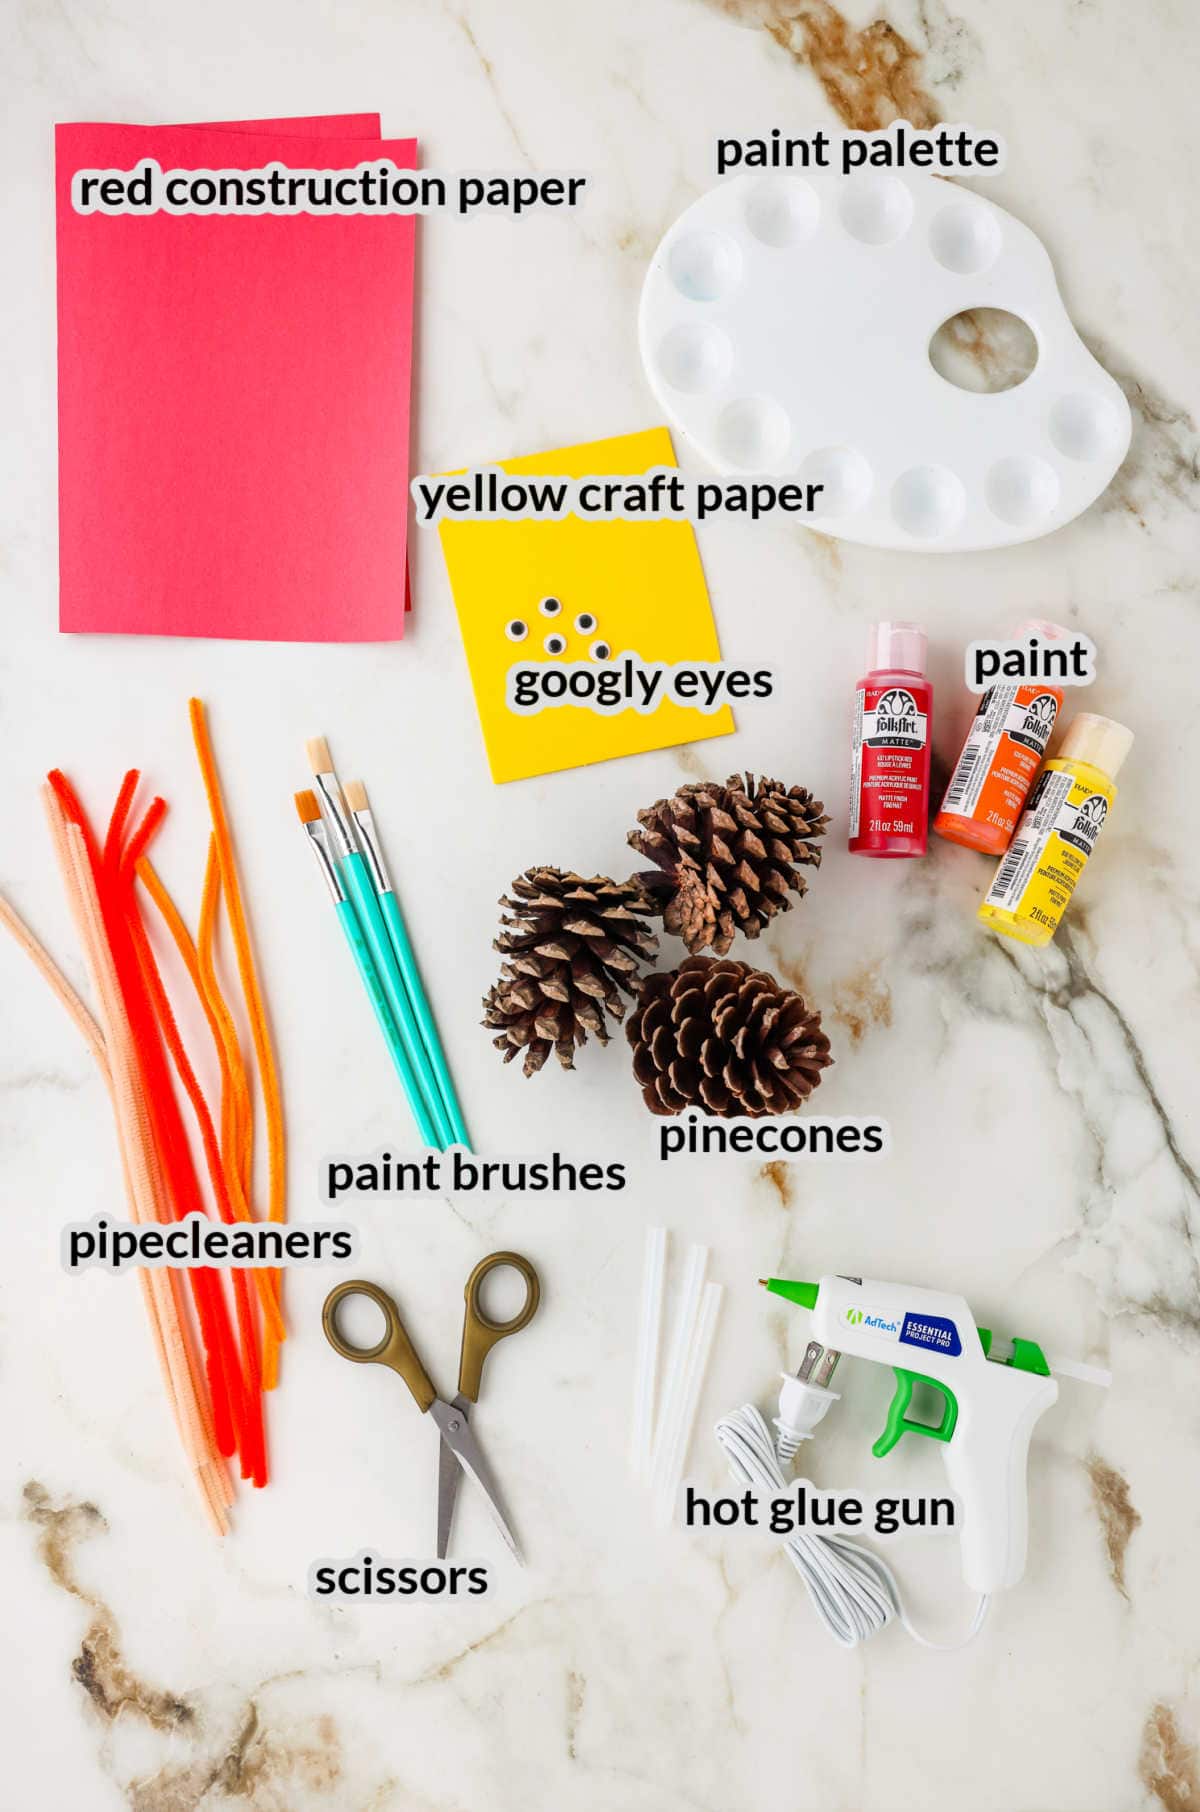
Supplies Needed
- Pinecones – If you live somewhere where there are no trees that produce pinecones, you can purchase some pinecones at your local craft store or Walmart.
- Red construction paper – You can also use red cardstock — you’ll only be using a really small scrap of the red paper so you don’t need much.
- Yellow craft foam sheet – Cut a small triangle out of the yellow foam to make the turkey’s beak. Some scrap orange paper will work for this Thanksgiving craft too.
- Googly eyes – Grab some of those mini googly eyes to put of the face of your fun turkeys.
- Acrylic paints – You can use various colors but I like to use Thanksgiving colors like red, orange, and yellow.
- Paint brushes – Small craft paint brushes are all you need to paint this pine cone turkey craft.
- Paint palette or cups – Use a reusable or disposable paint pallete to easily dip the brushes into paint. If you don’t have a paint palette then grab some plastic cups to use.
- Hot glue gun and extra glue sticks – Hot glue is the easiest way to attach all the decorations to the pinecones.
- Scissors – If you are making this craft with young children, then be sure to use safety scissor to protect those tiny fingers.
- Pipe cleaners – Grab some orange, tan, or brown colored pipe cleaners to use for the turkey’s face and for the little legs.
How to Make this Pinecone Turkey Craft
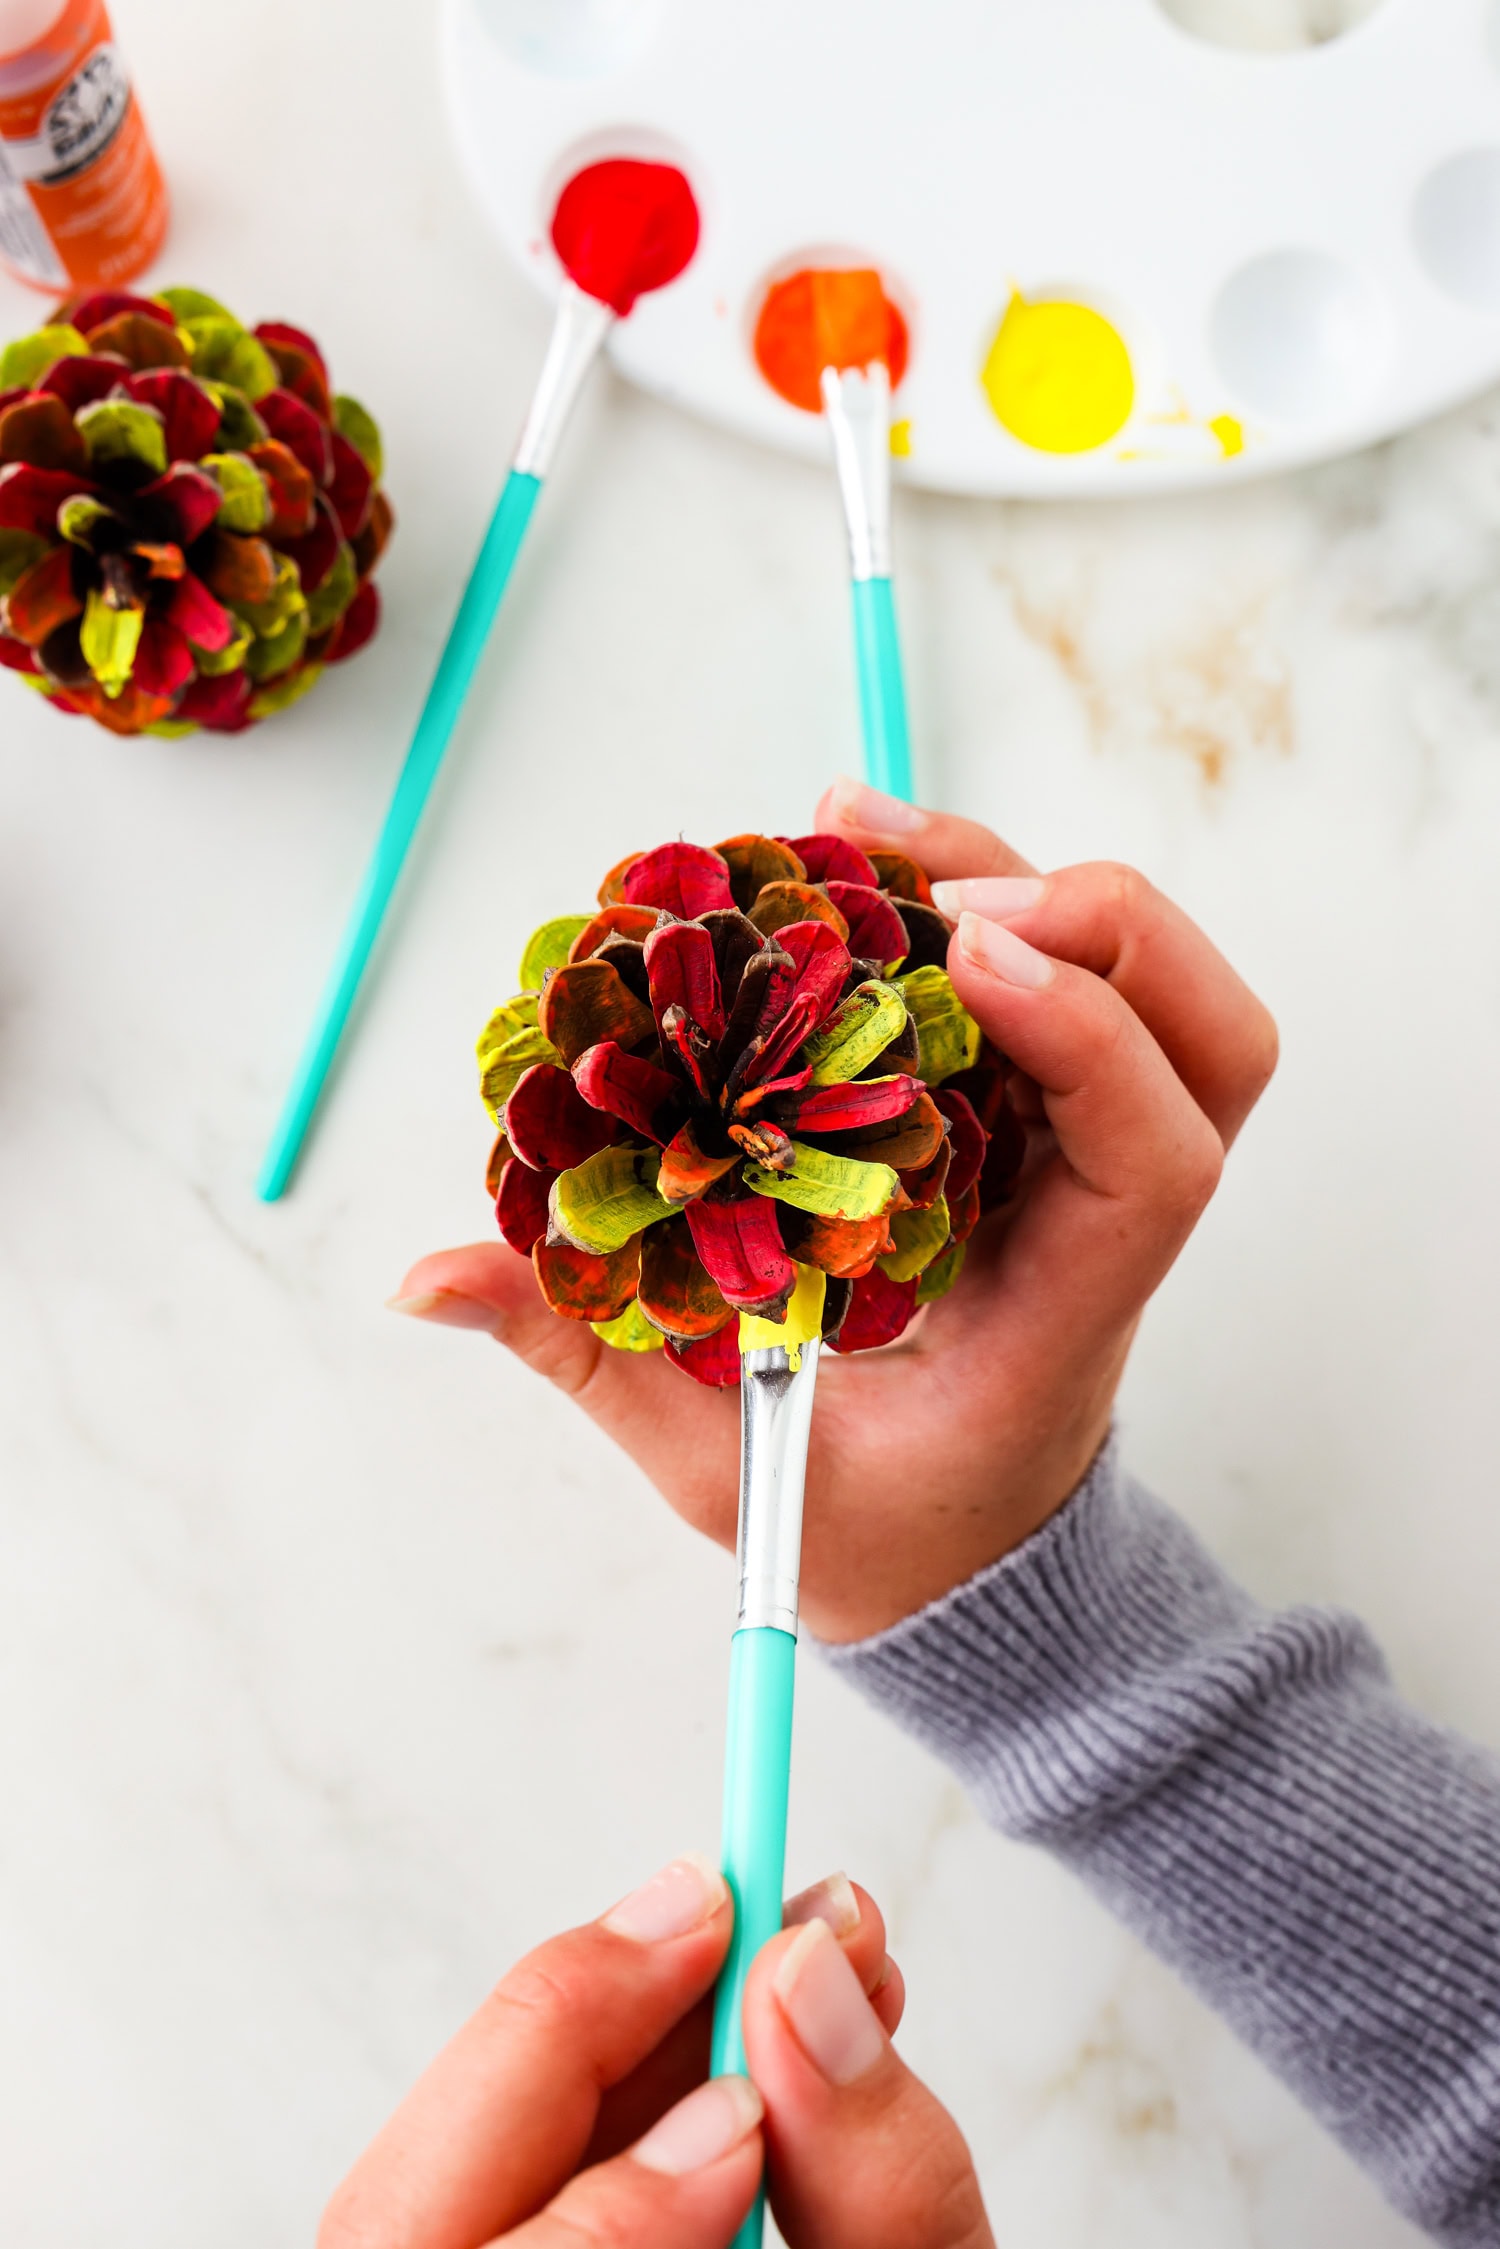
Paint a thin layer on the tops of the scales of the pinecone using red, orange, and yellow acrylic paint. Stagger the colors to get a good variety of the different colors all around the pinecone.
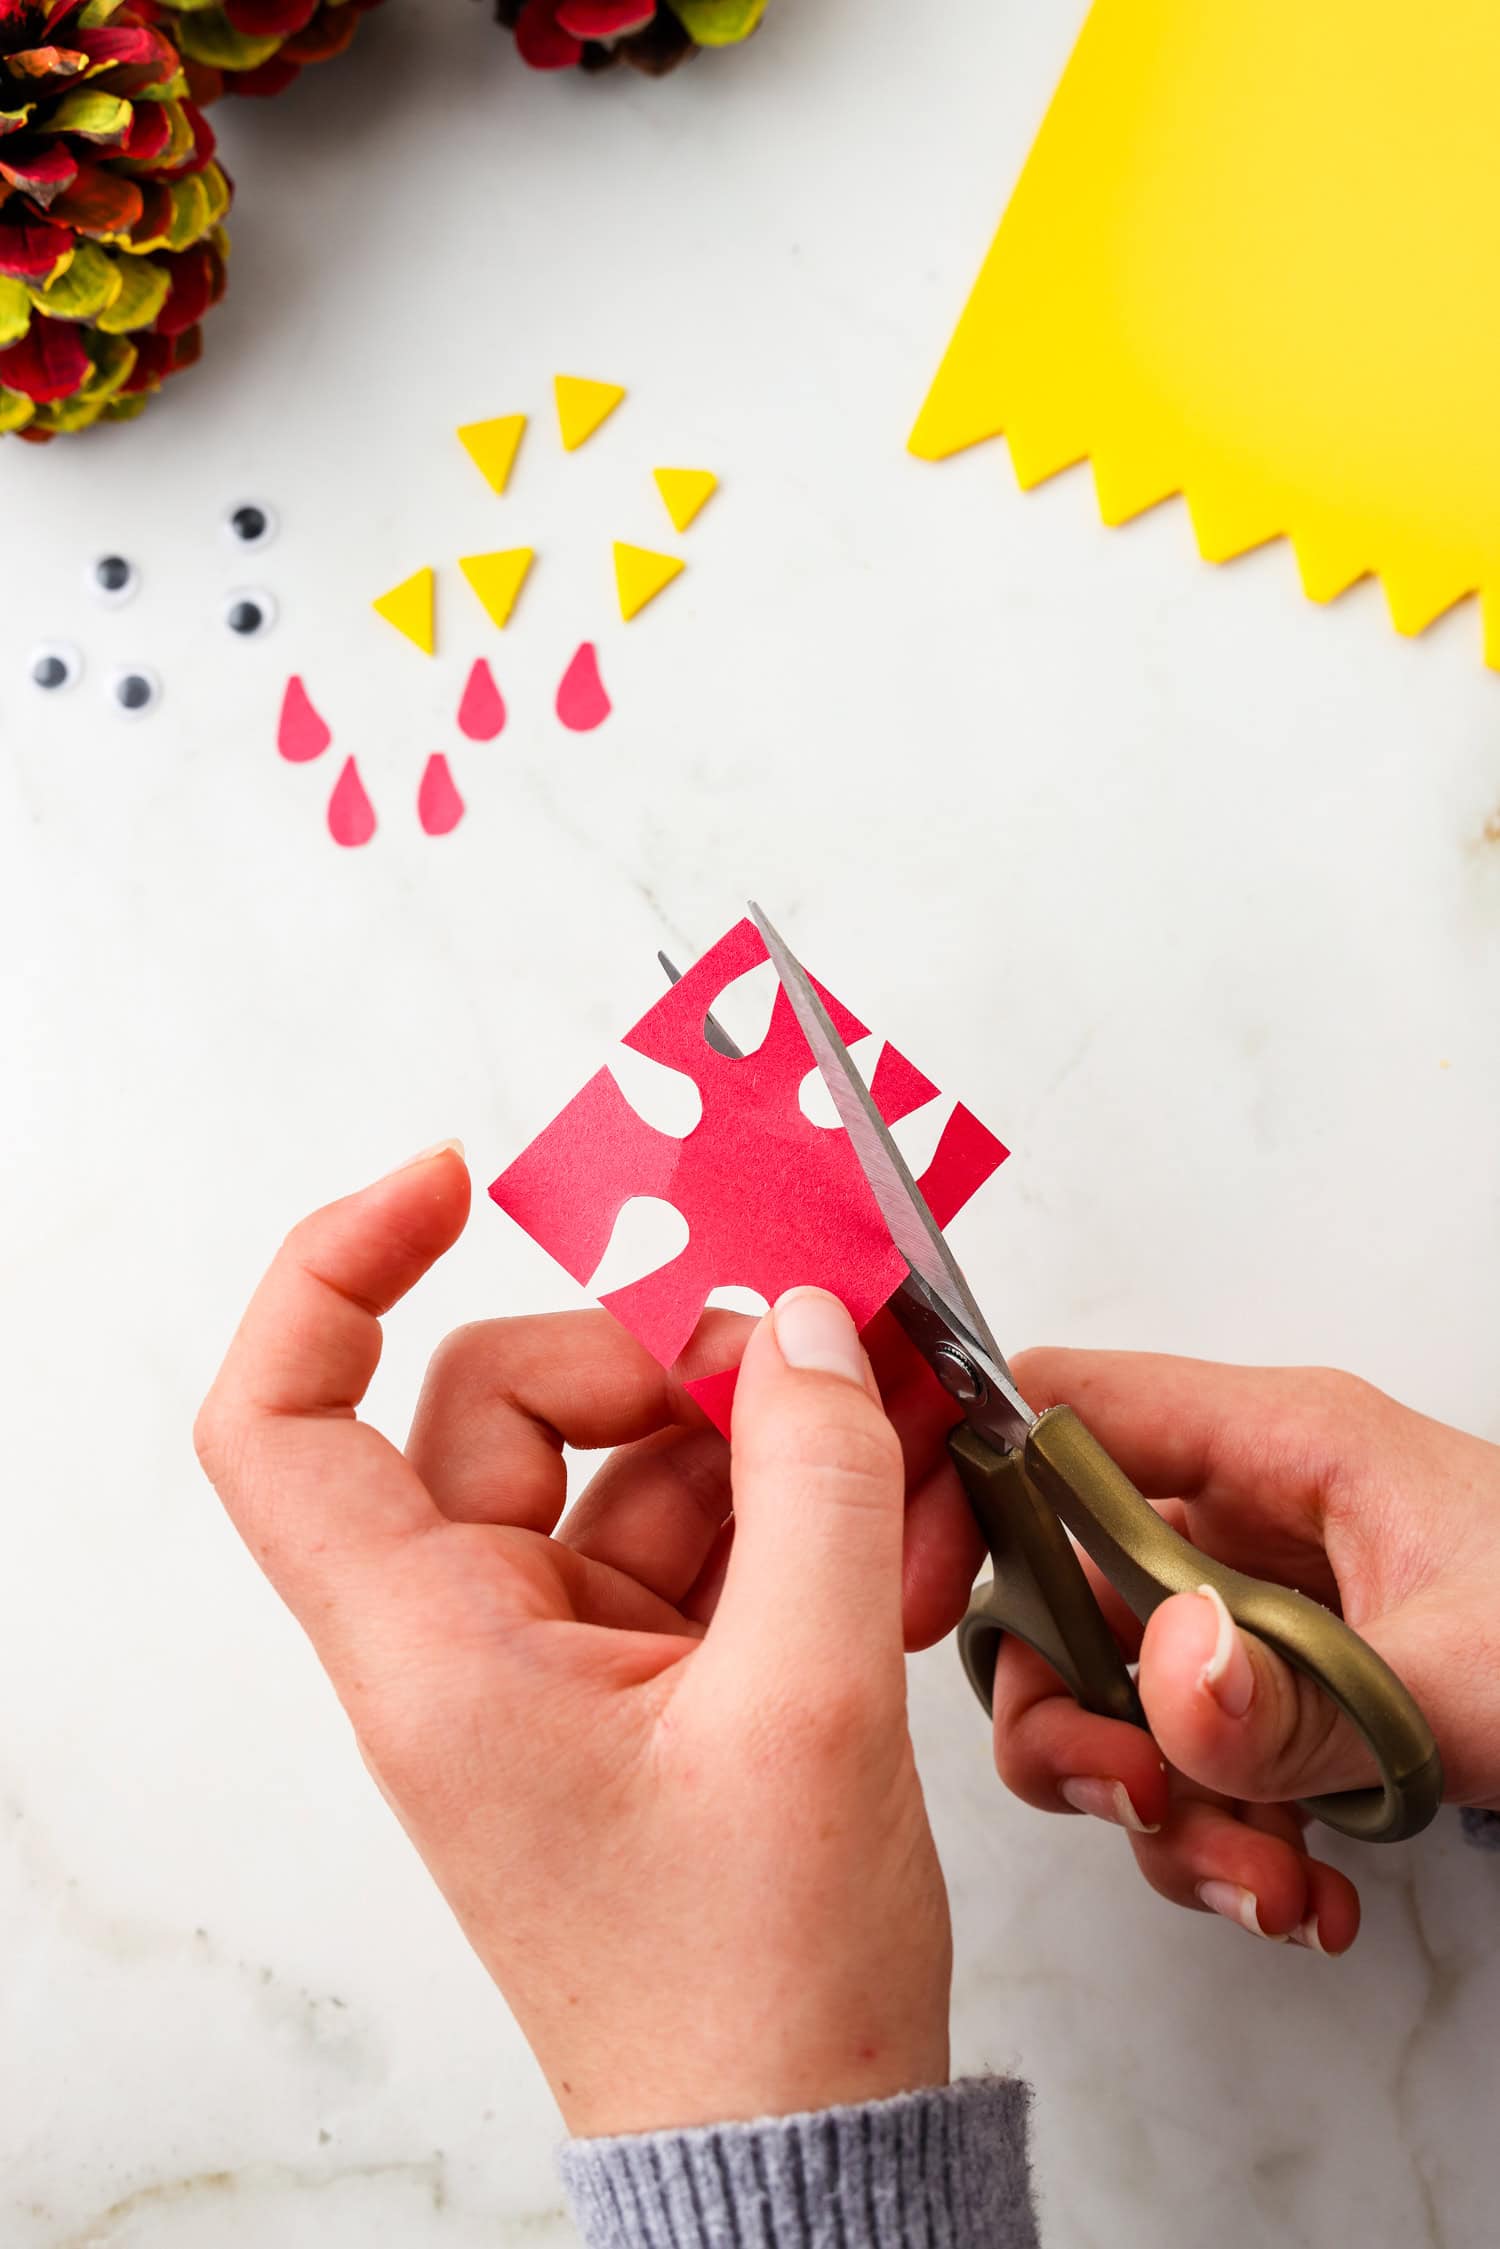
Preheat your hot glue gun. Then while you’re waiting for the paint to dry and the hot glue gun to heat up, cut a triangle shape out of the yellow craft foam sheet and a teardrop shape out of the red construction paper. Cut one beak and one snood, or waddle, for each turkey you are making. Set these pieces aside to use later.
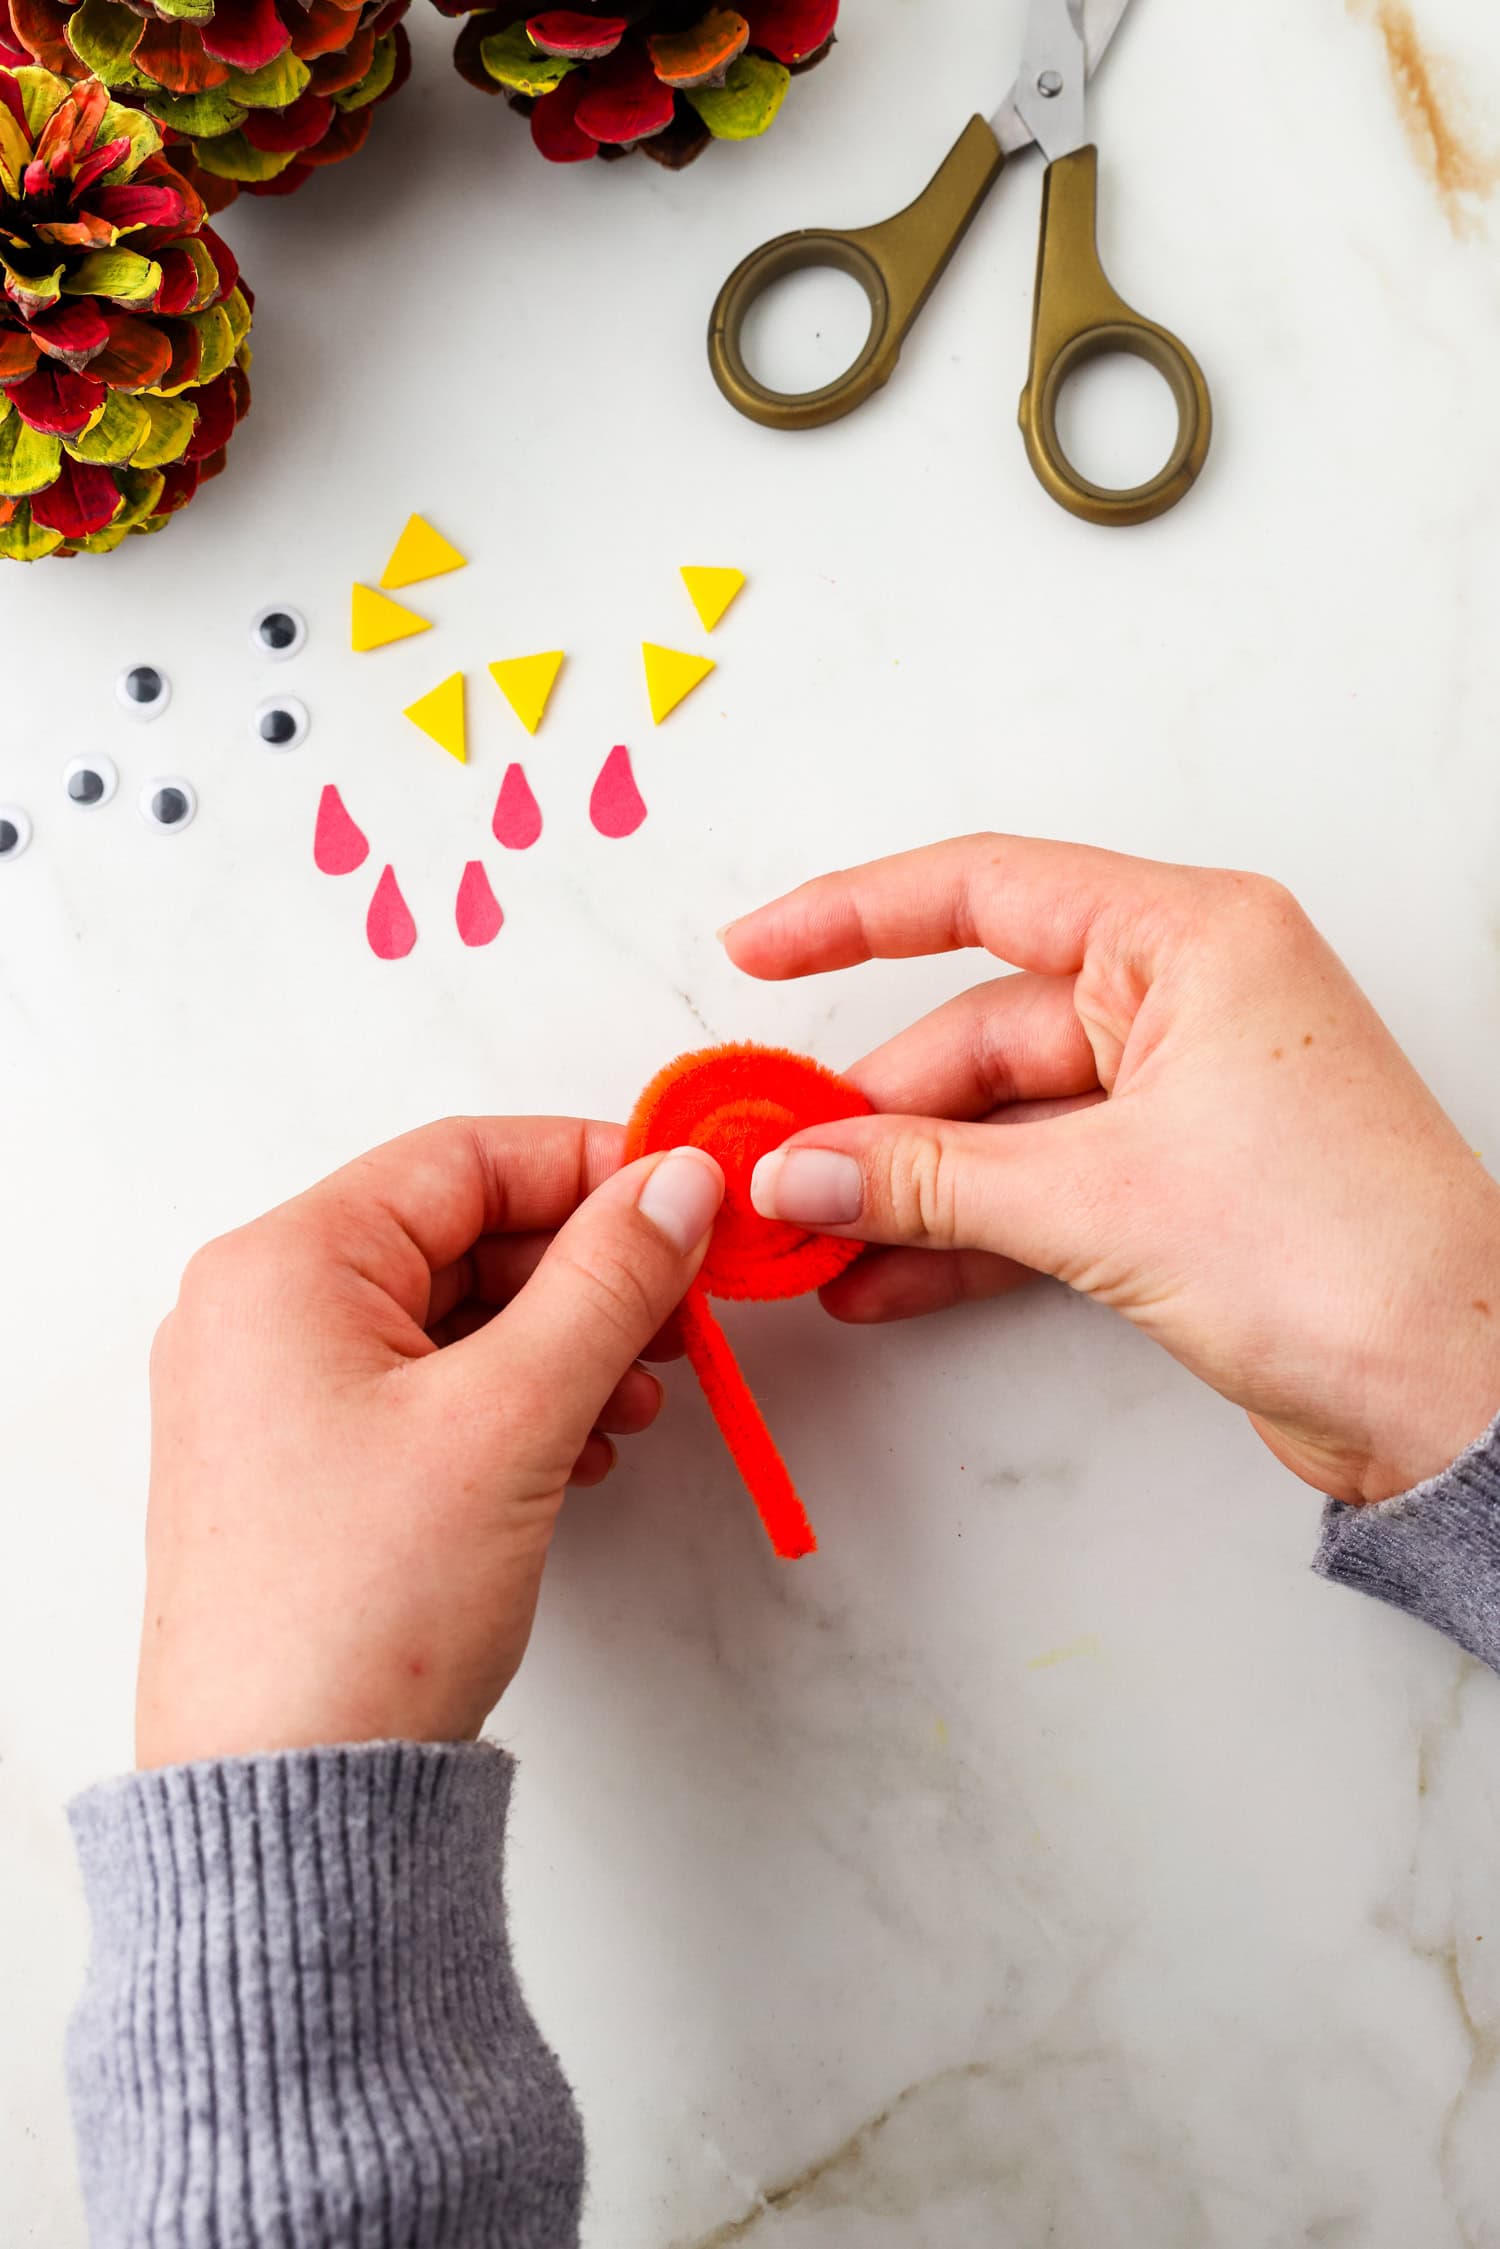
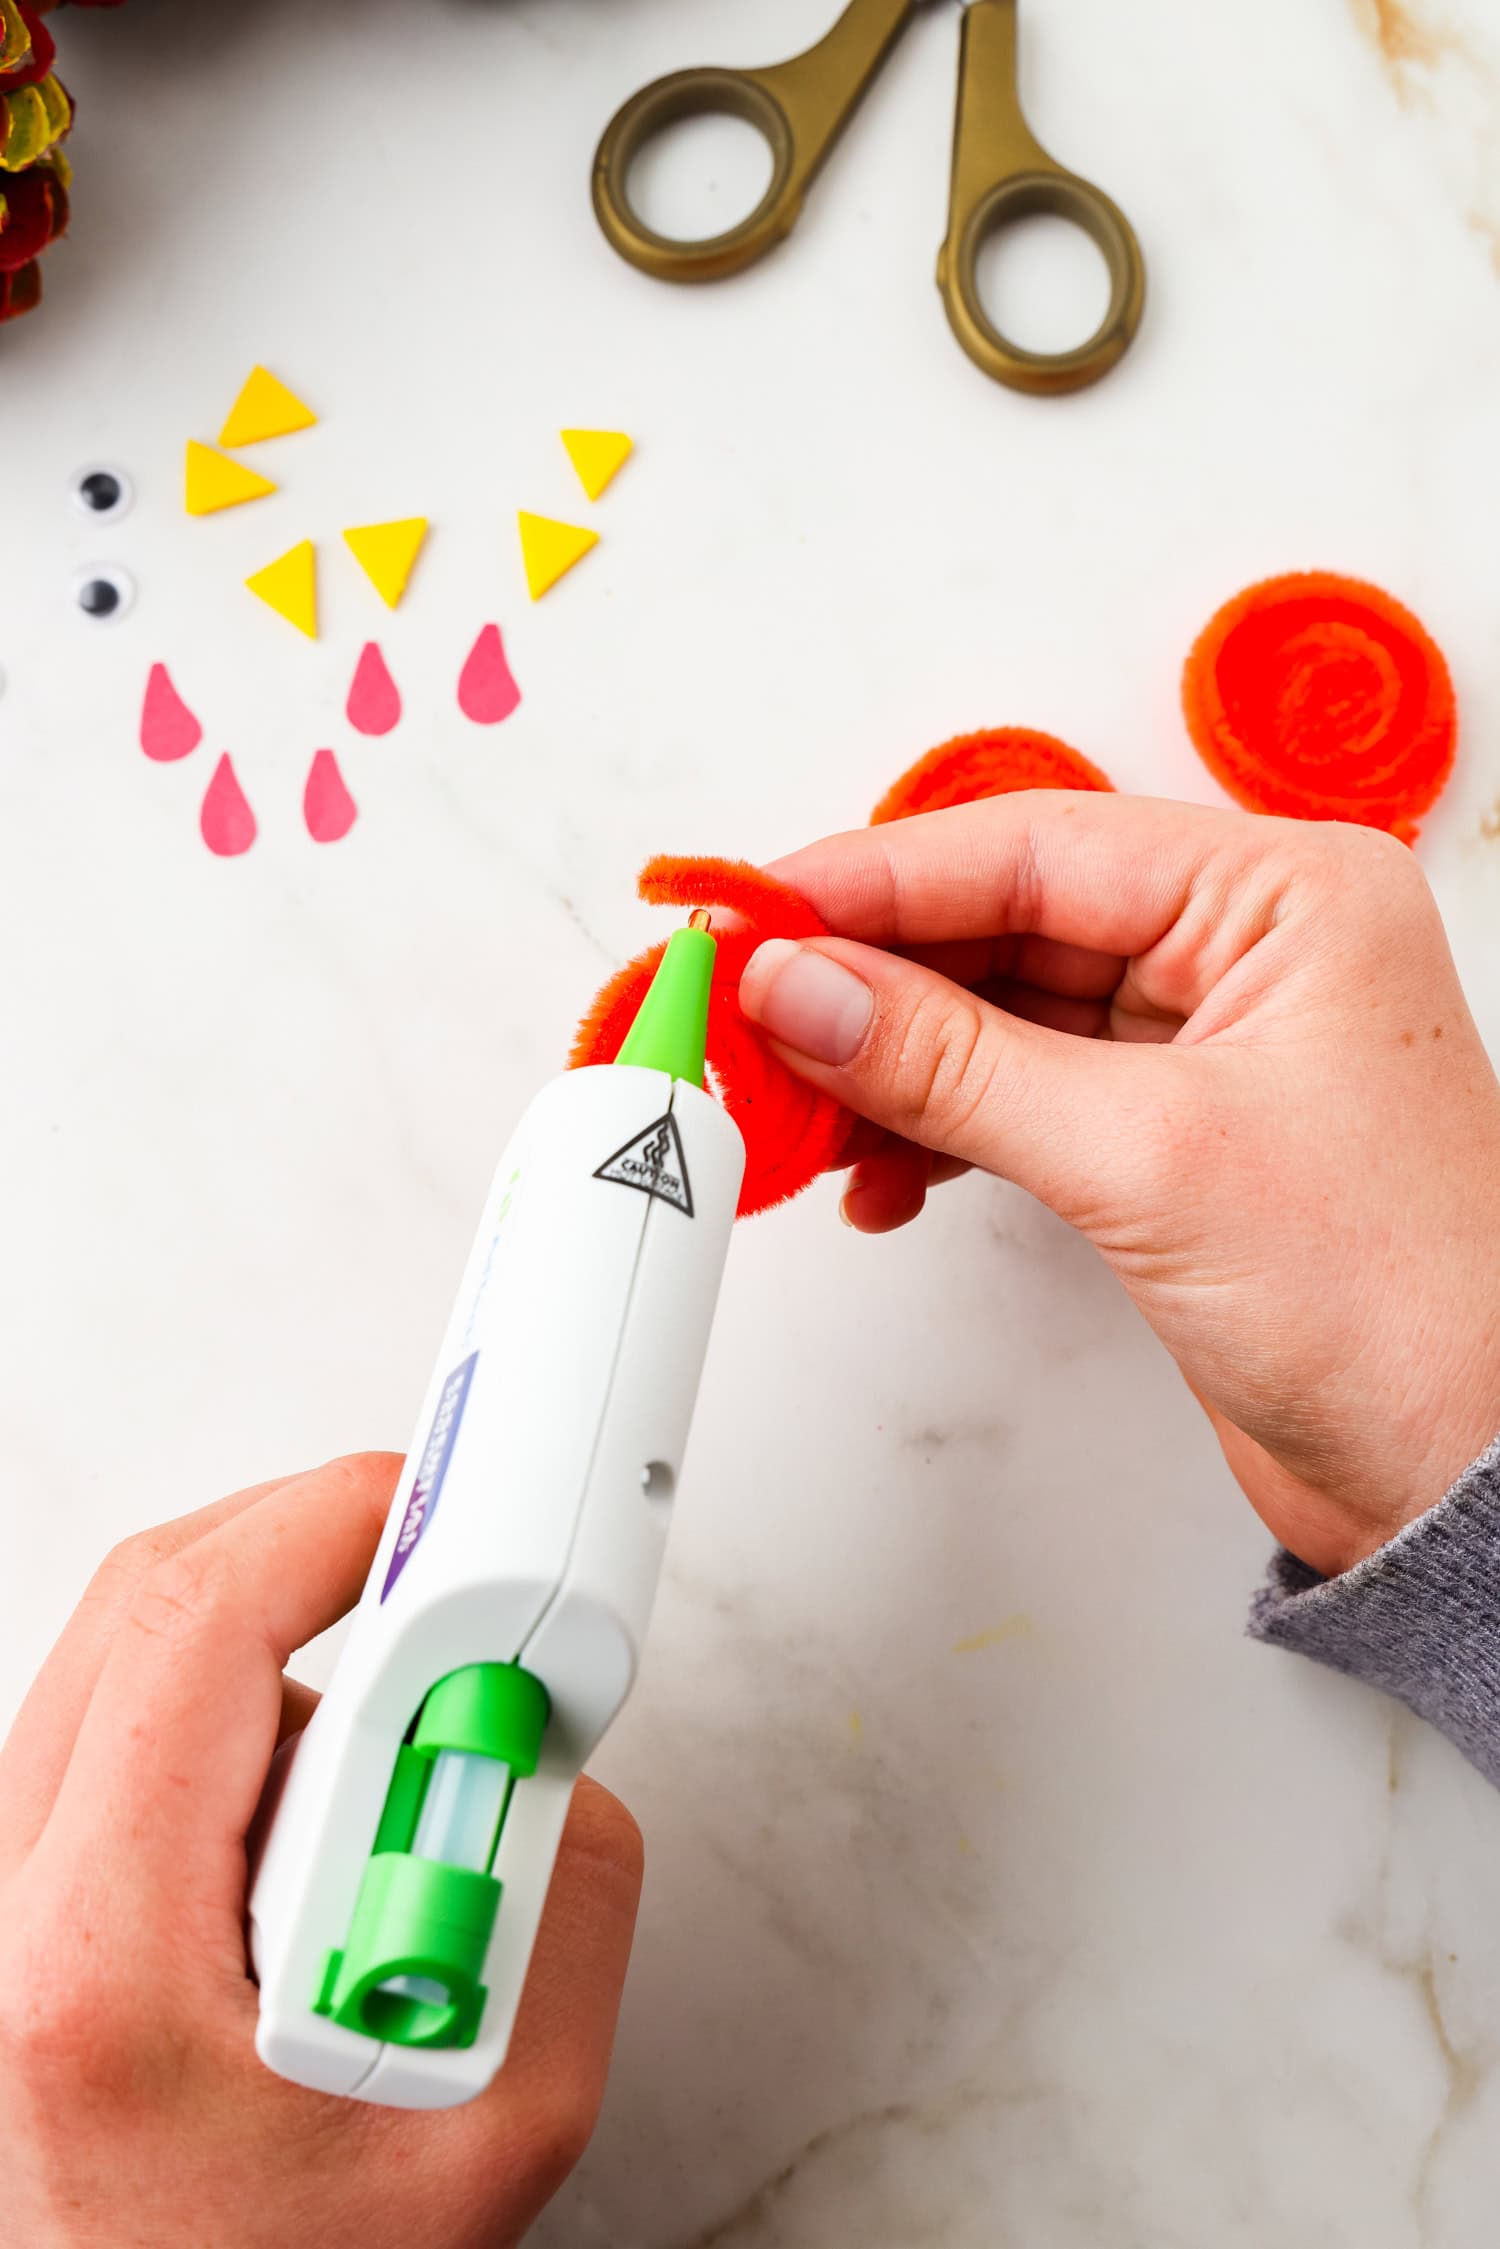
Form the turkey’s face out of a pipe cleaner by spiraling the whole length of the pipe cleaner. Once you reach the end of the pipe cleaner, secure the end with a dot of hot glue.
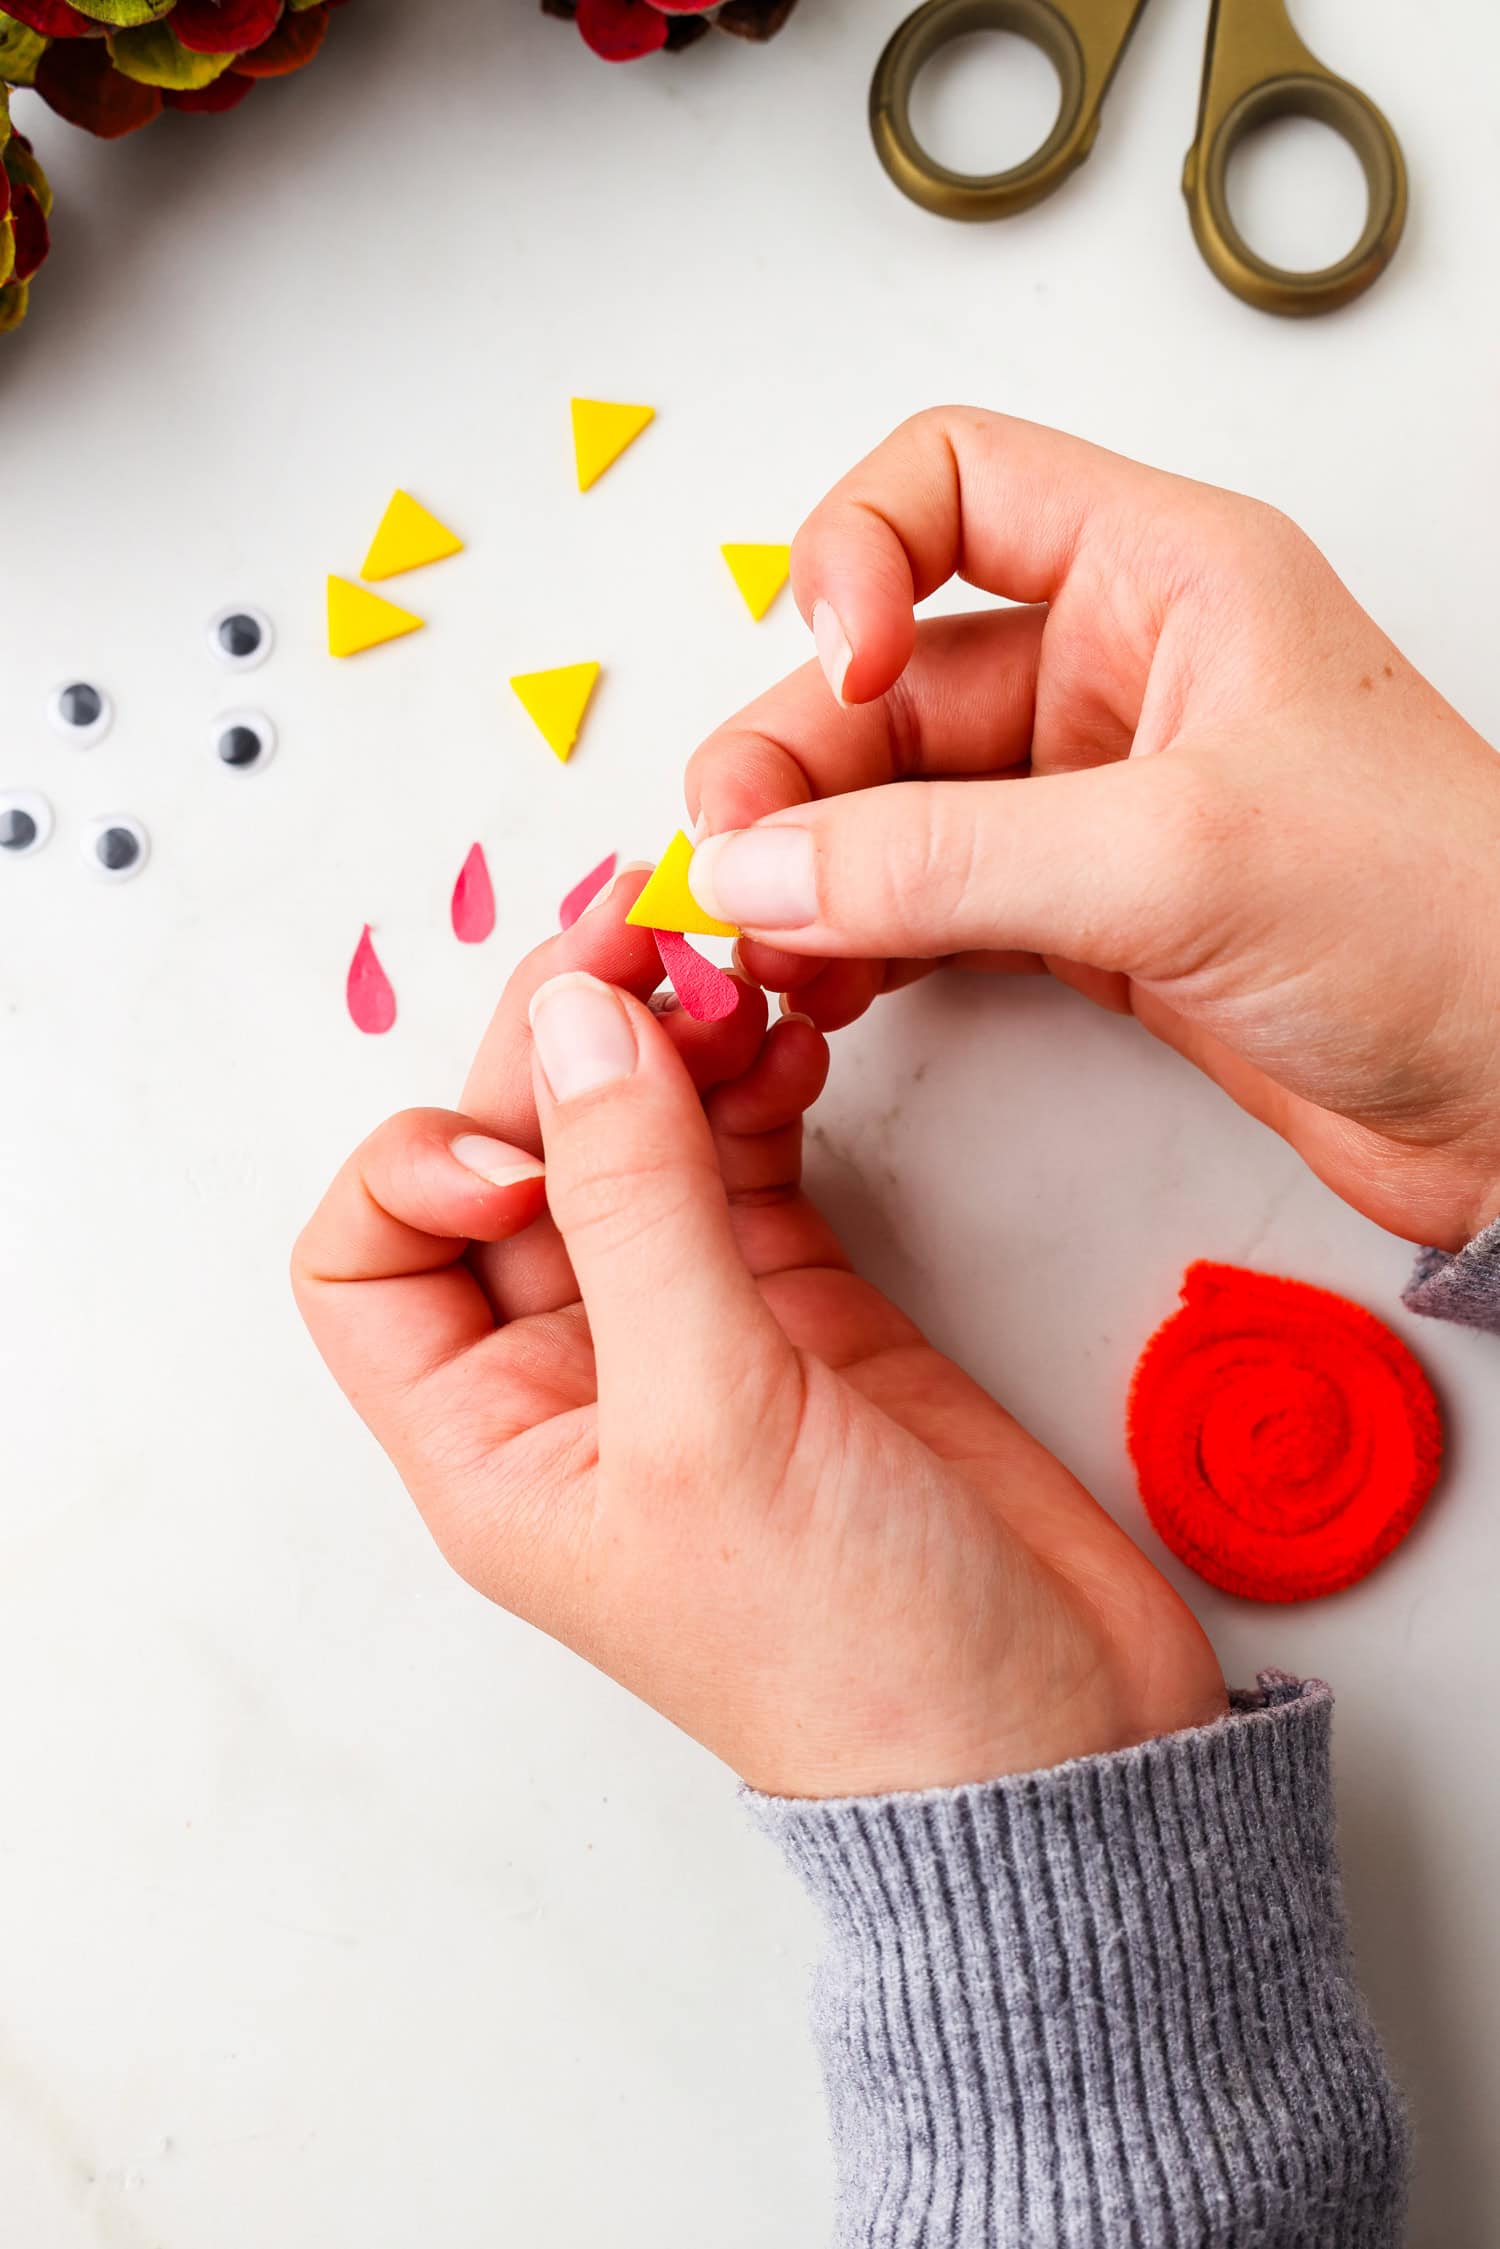
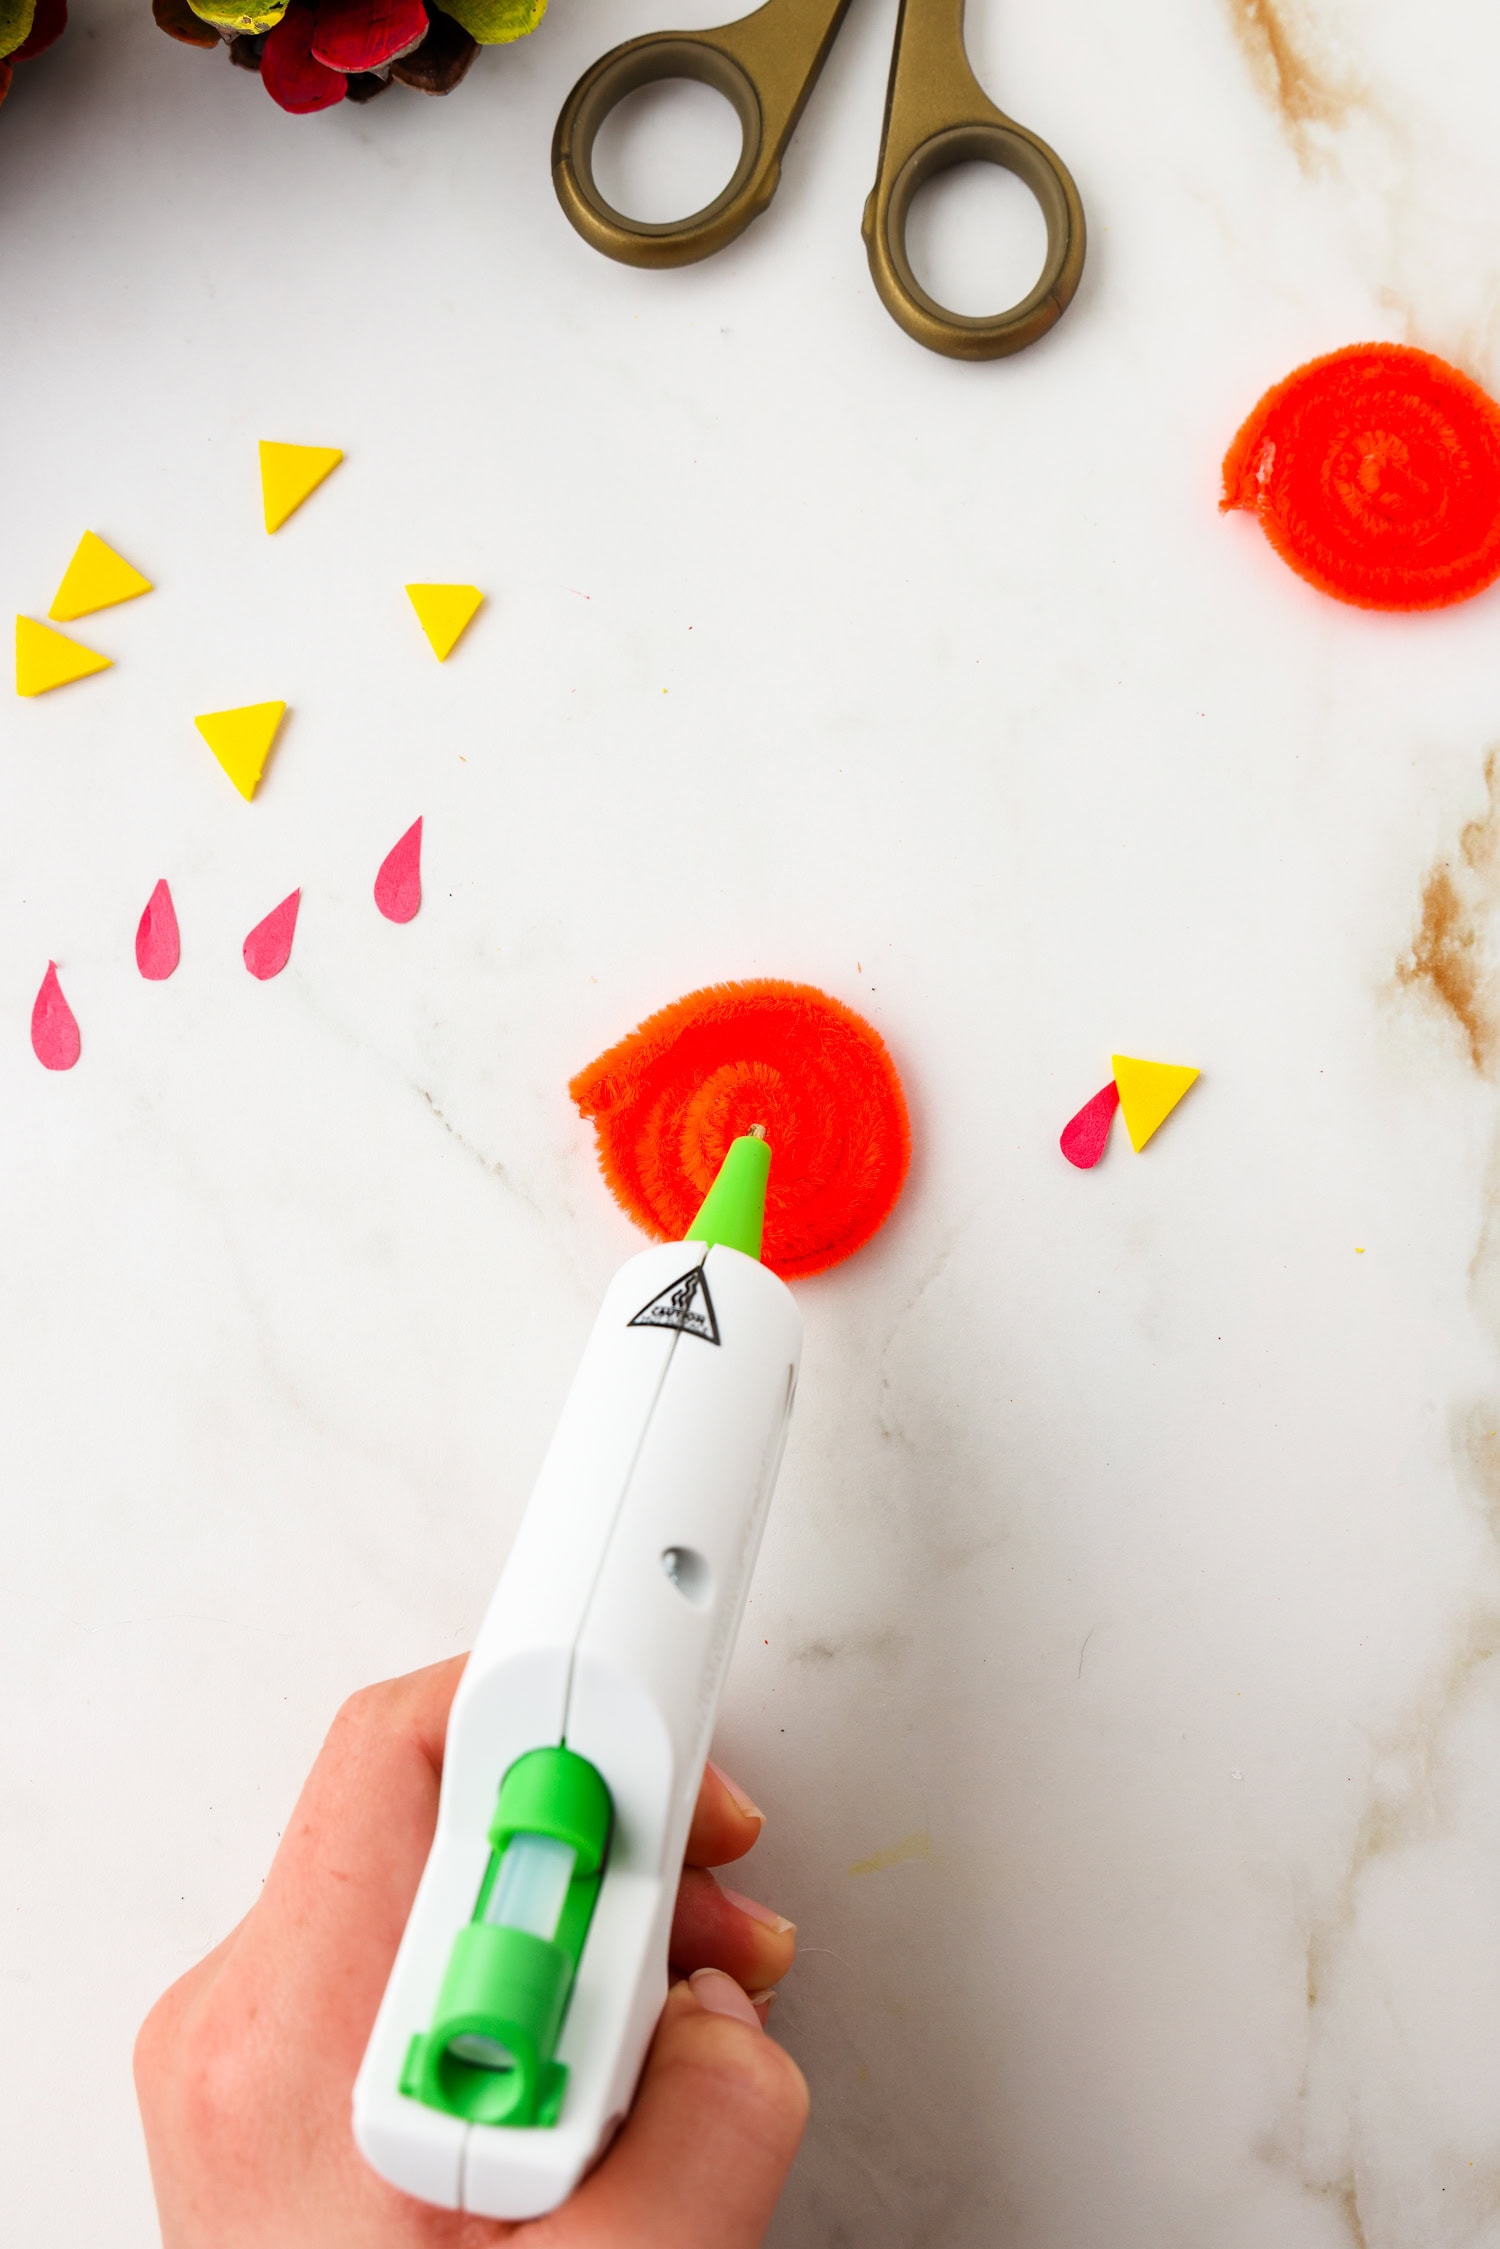
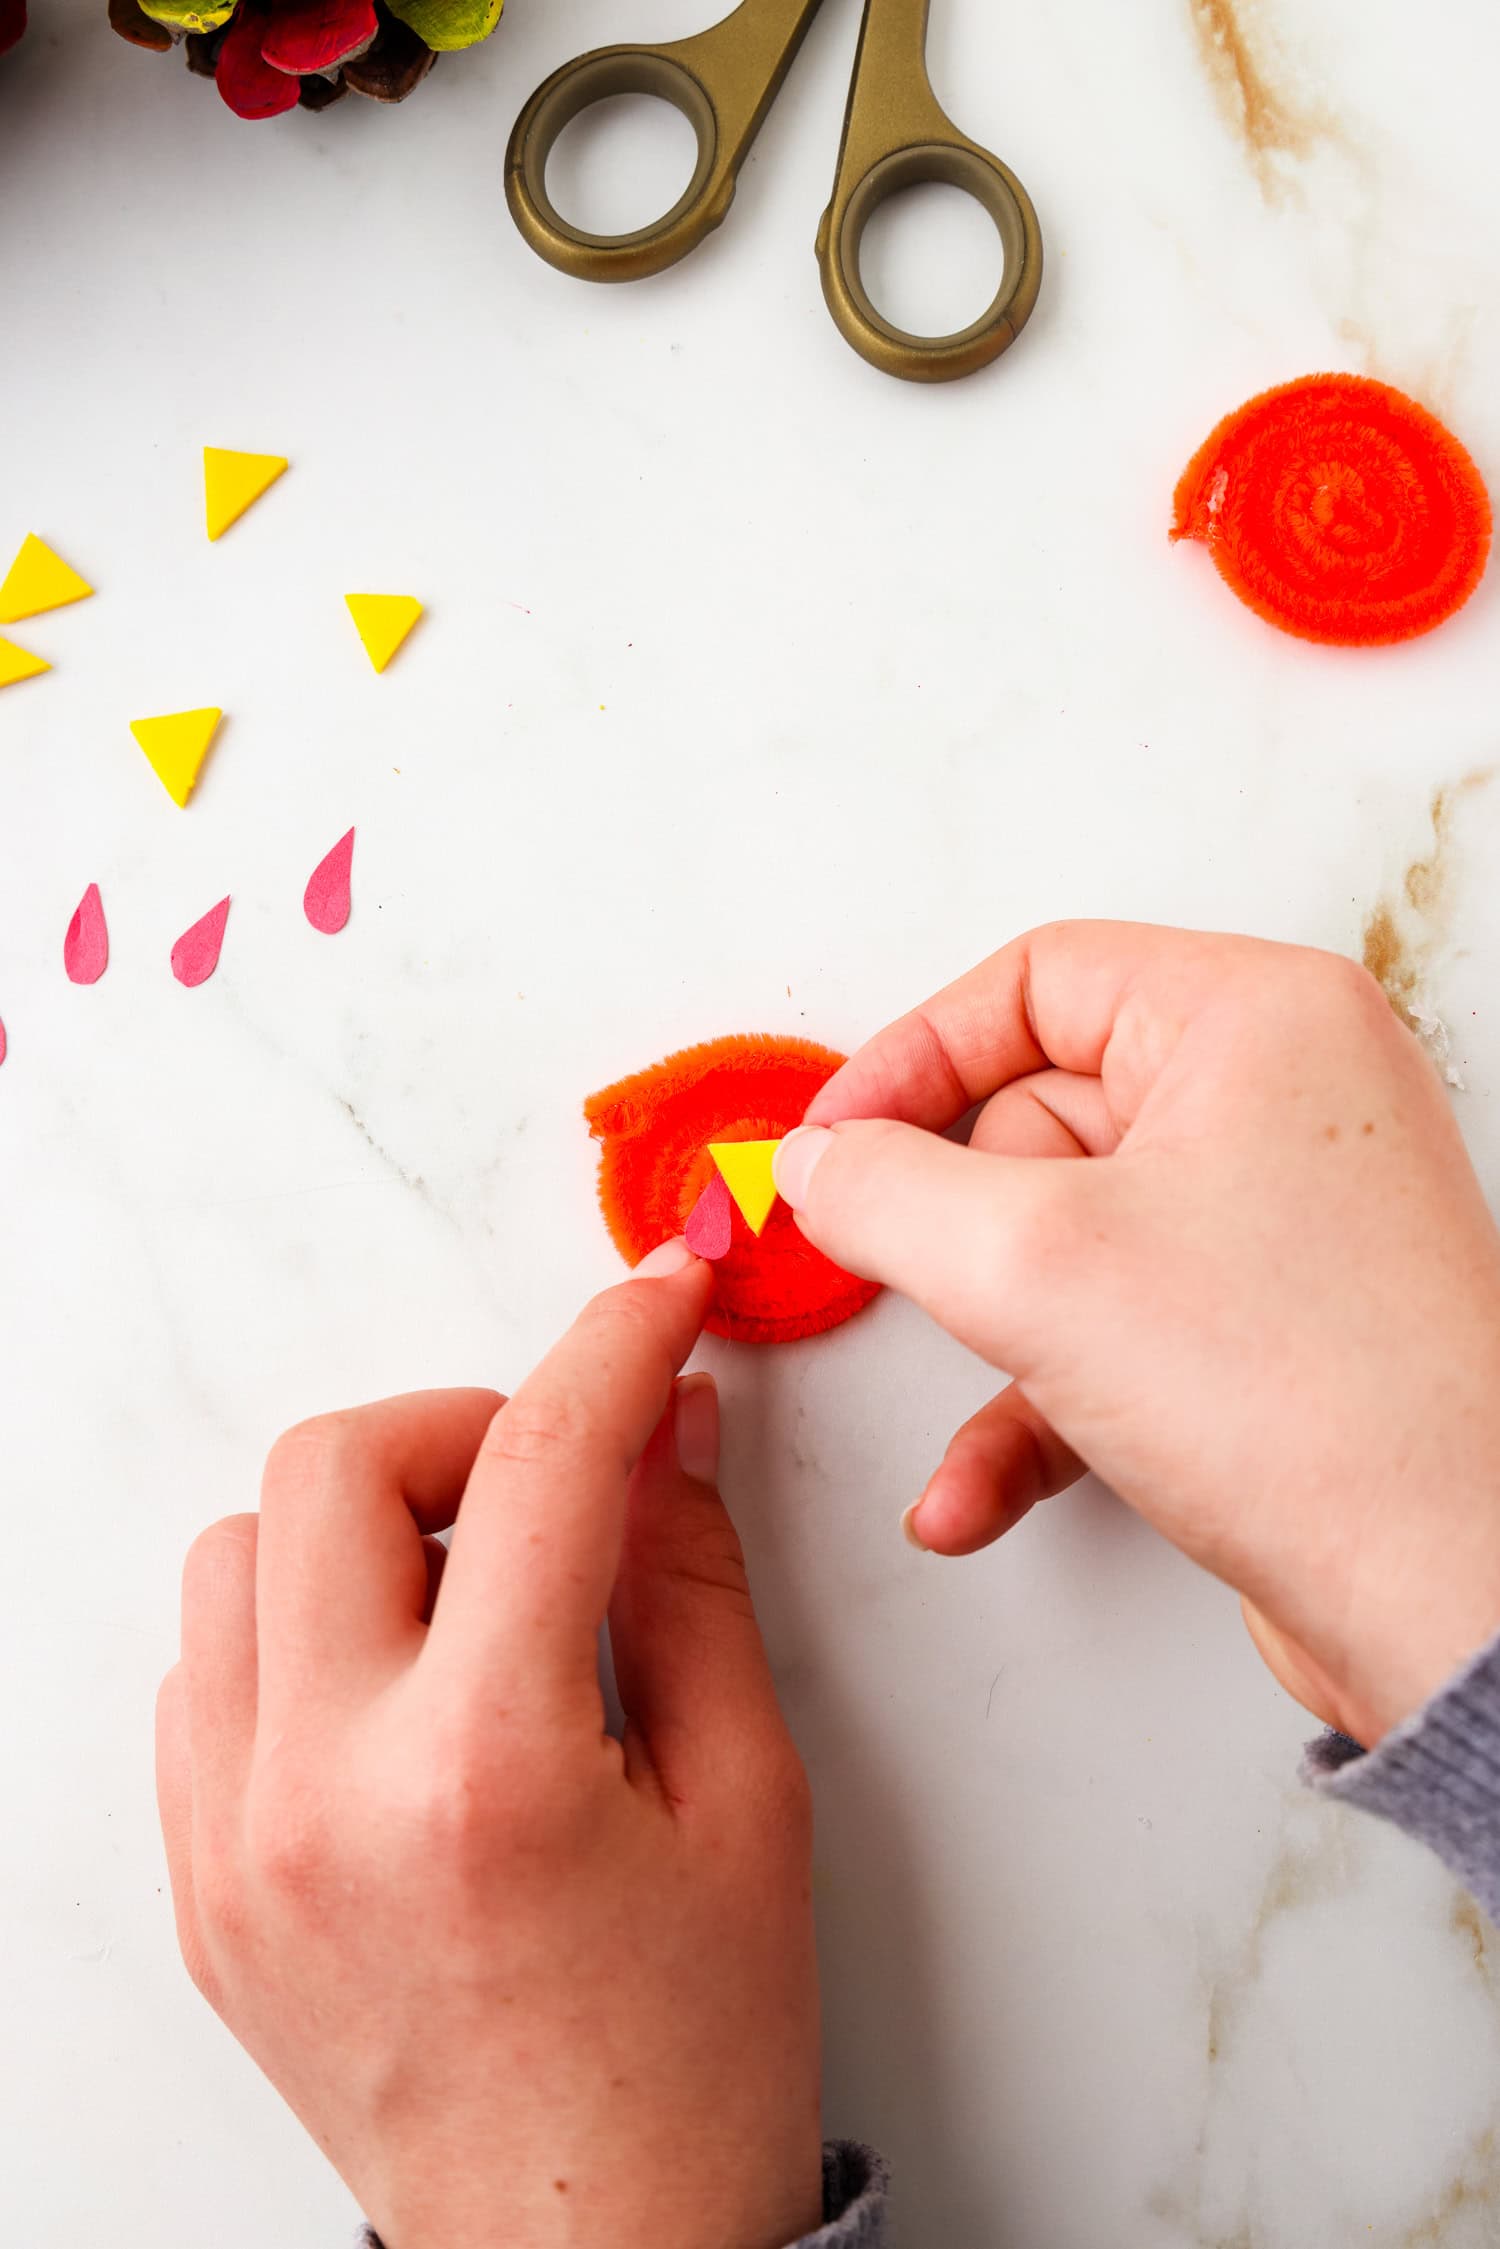
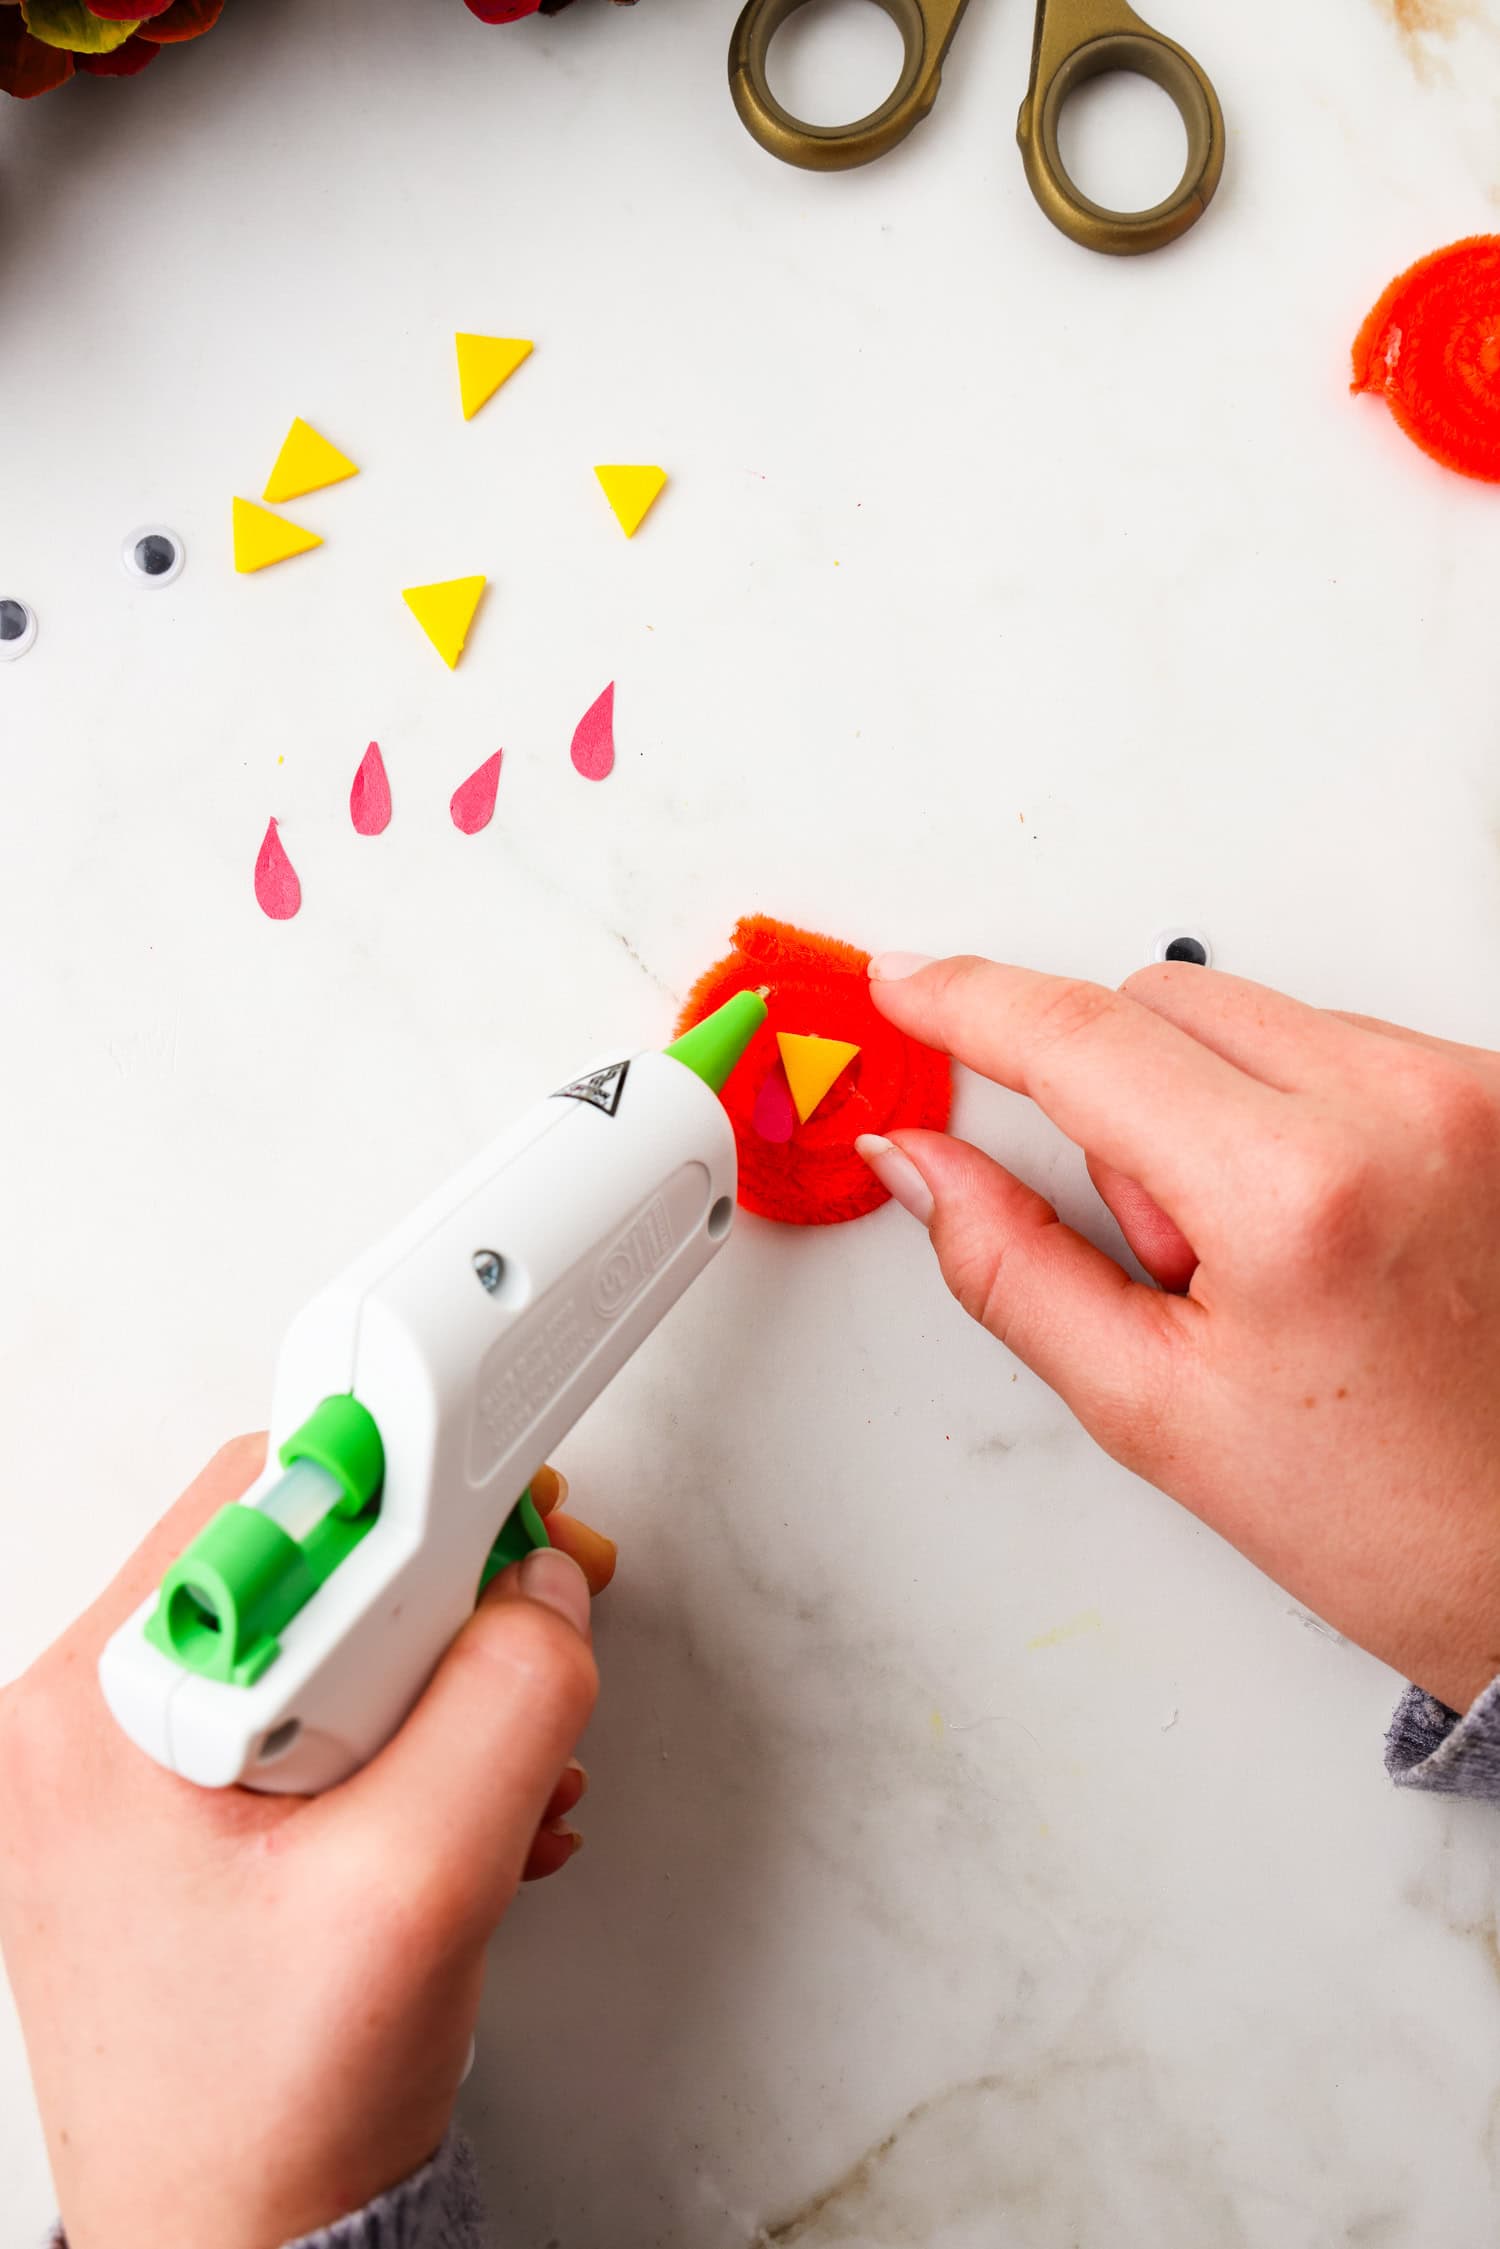
If the beak has an adhesive backing, remove the paper and stick it on. If it doesn’t have adhesive backing, then use a small dot of hot glue to stick it to the beak. Place a small dot of hot glue in the middle of the spiraled pipe cleaner and then place the beak on the dot of hot glue.
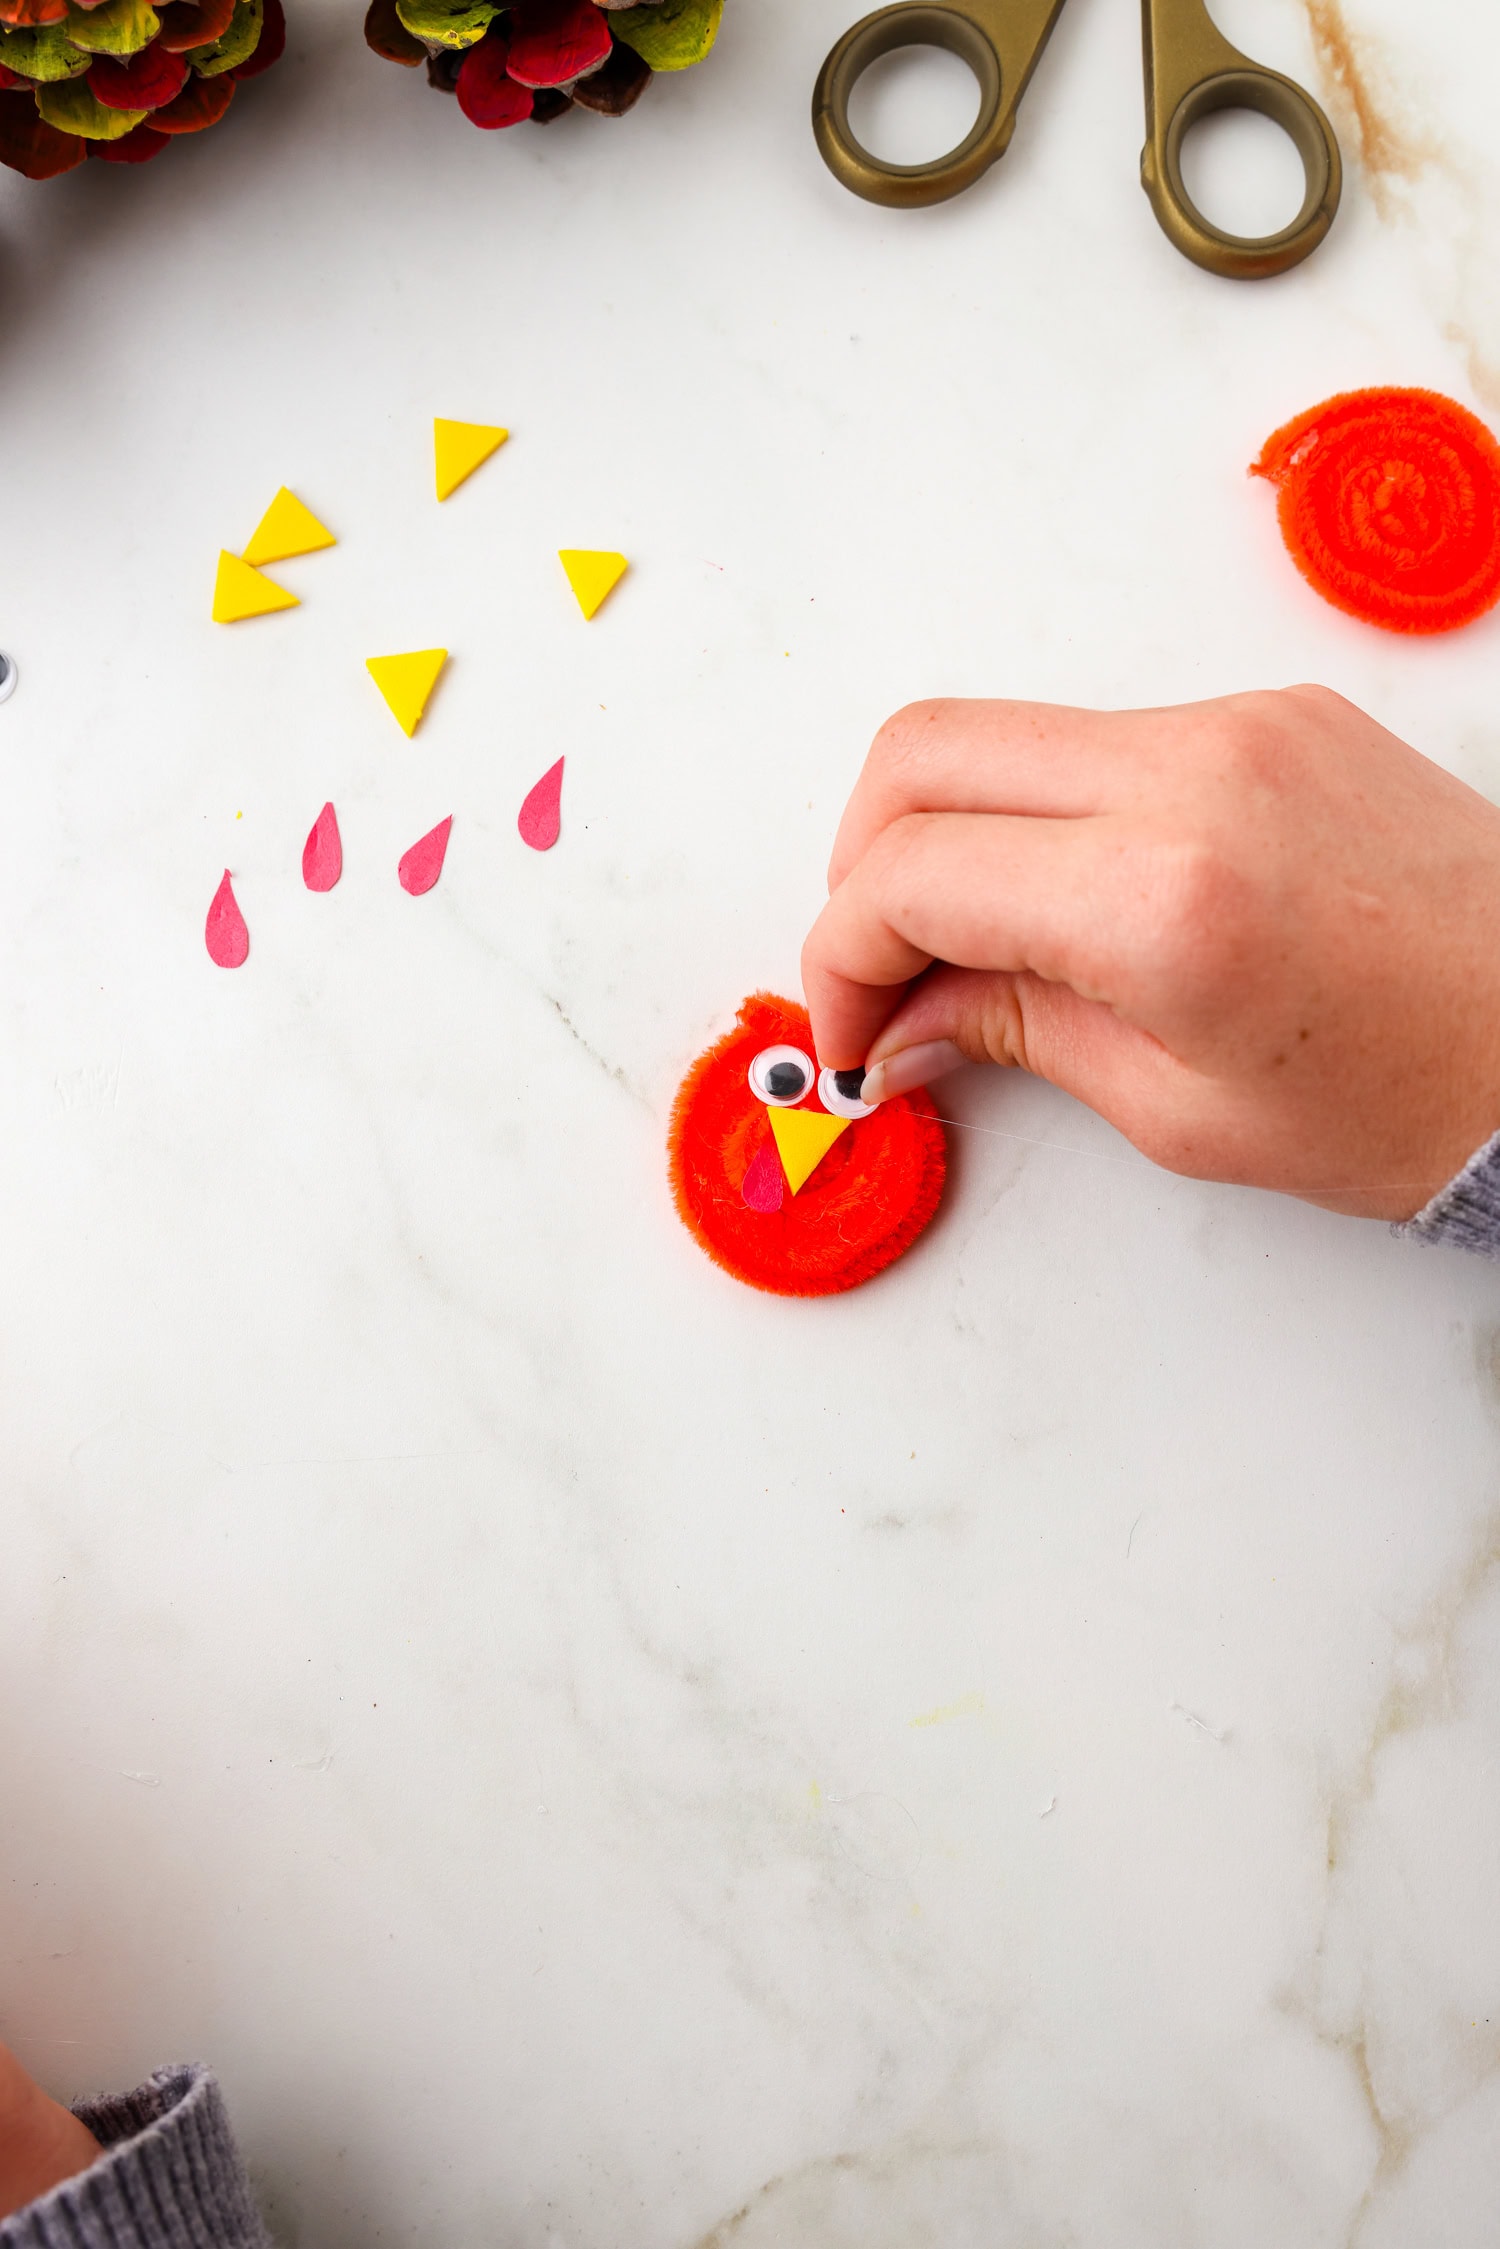
Add two small dots of hot glue on the face above the beak for the eyes, and glue the googly eyes side by side.
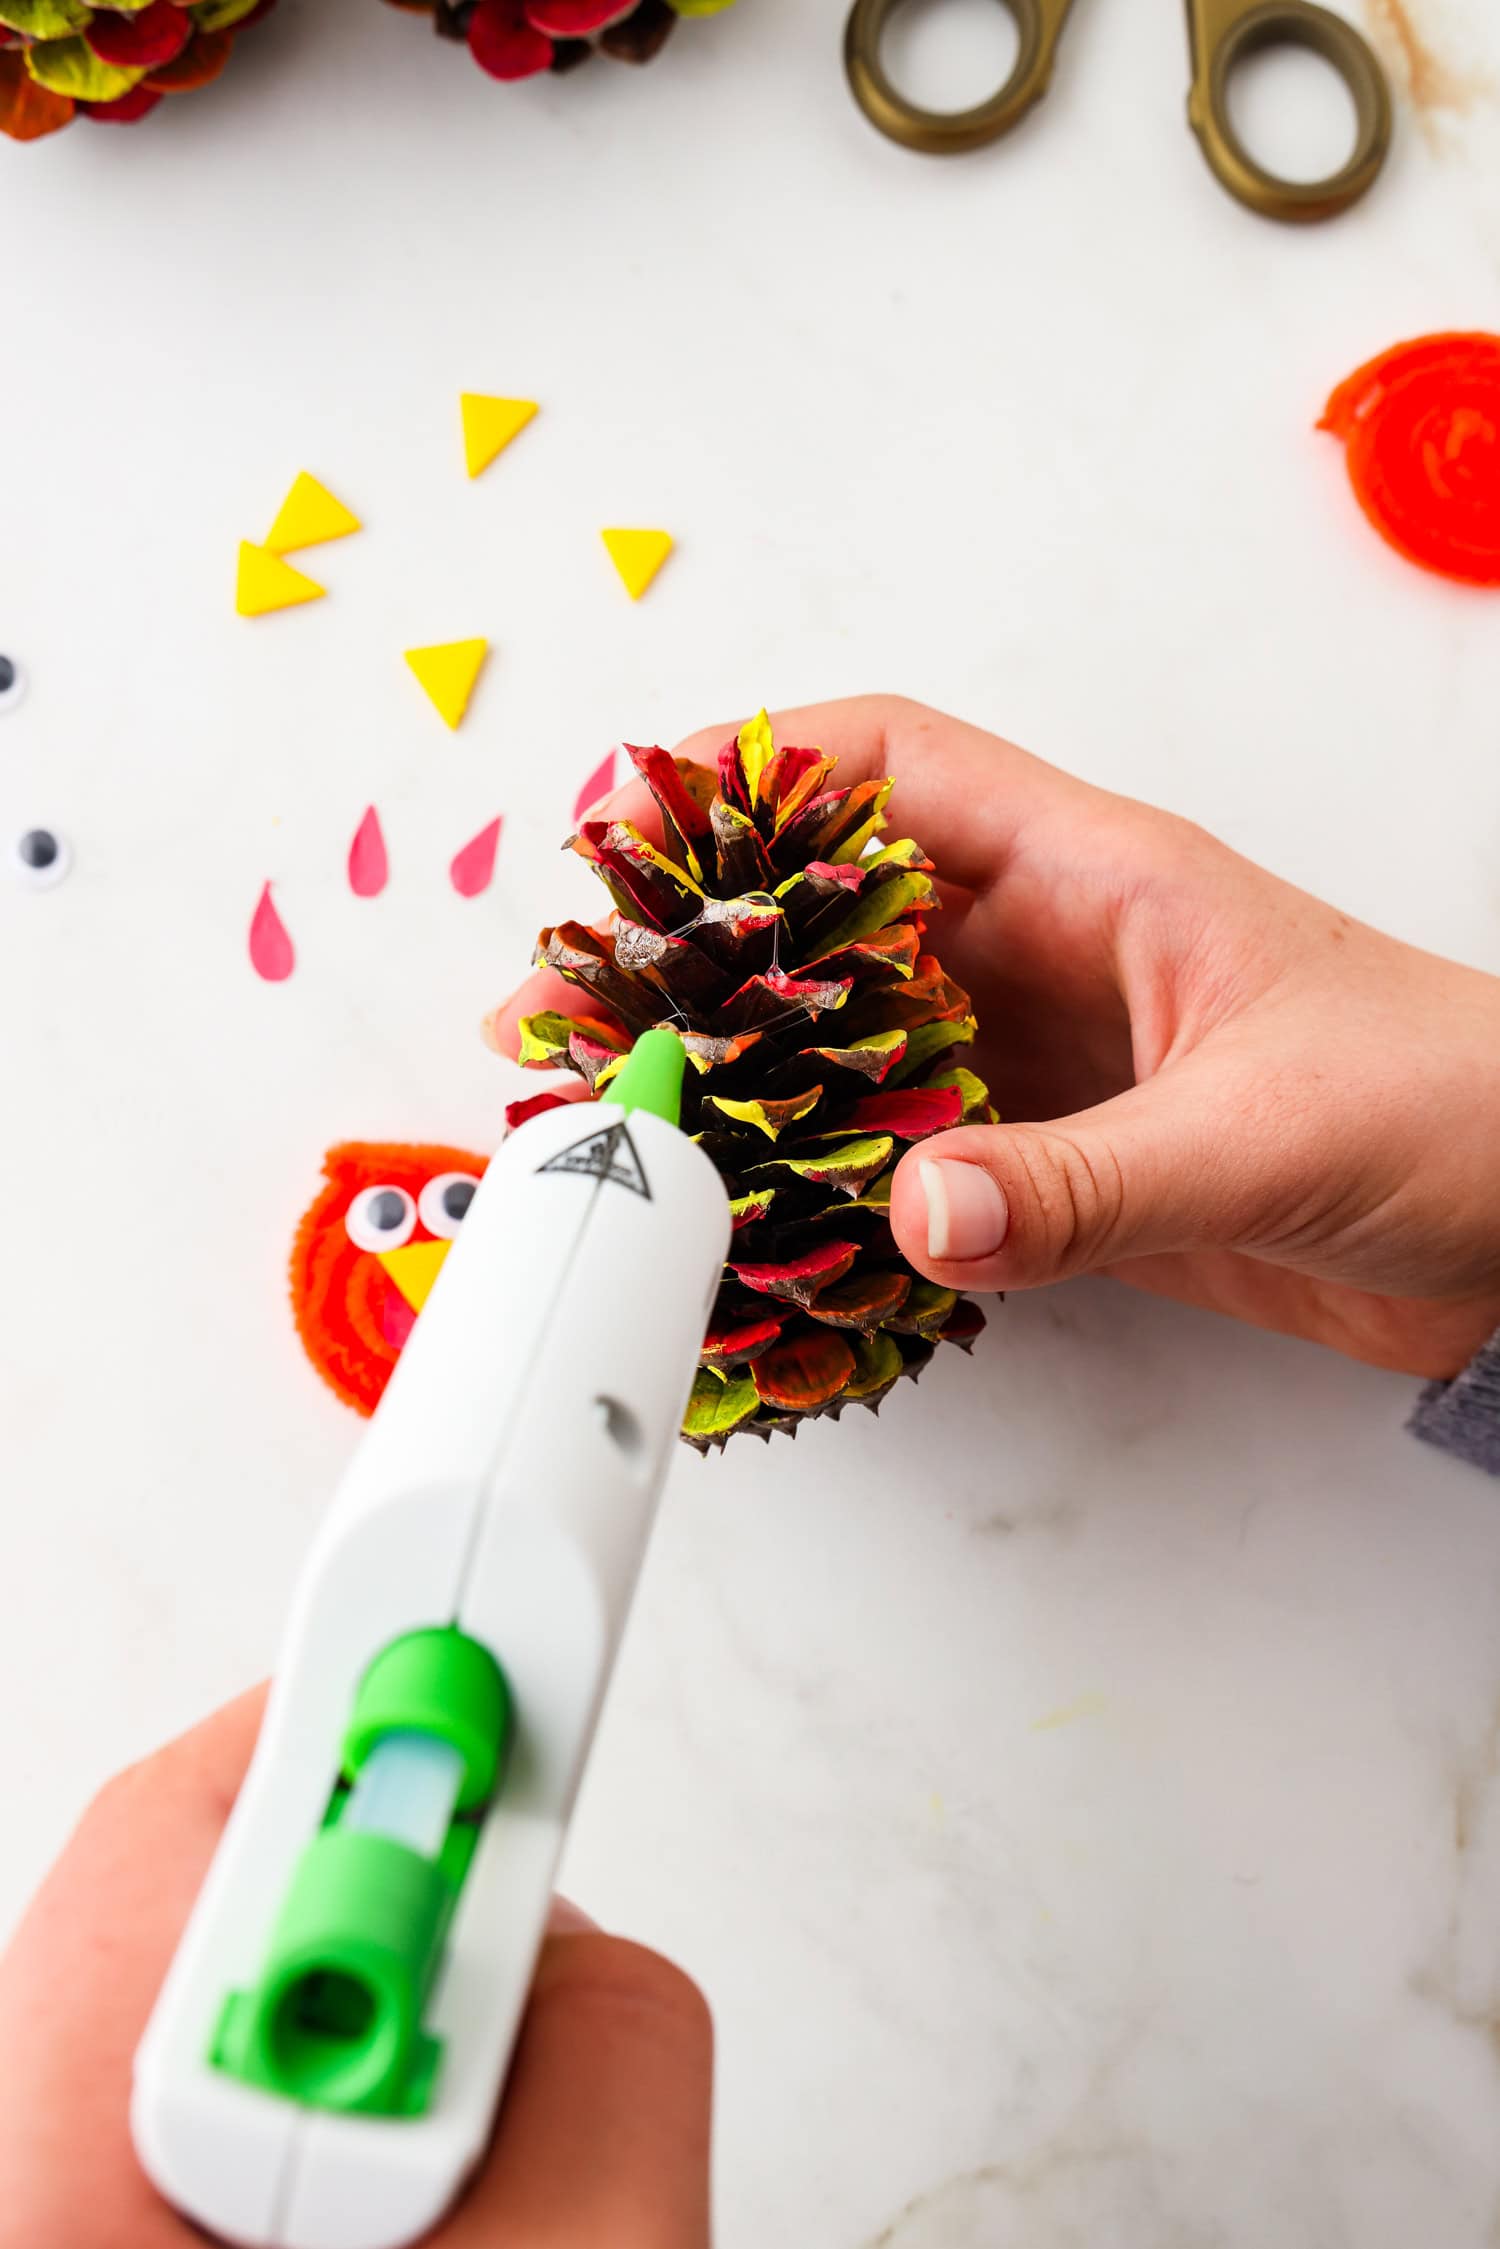
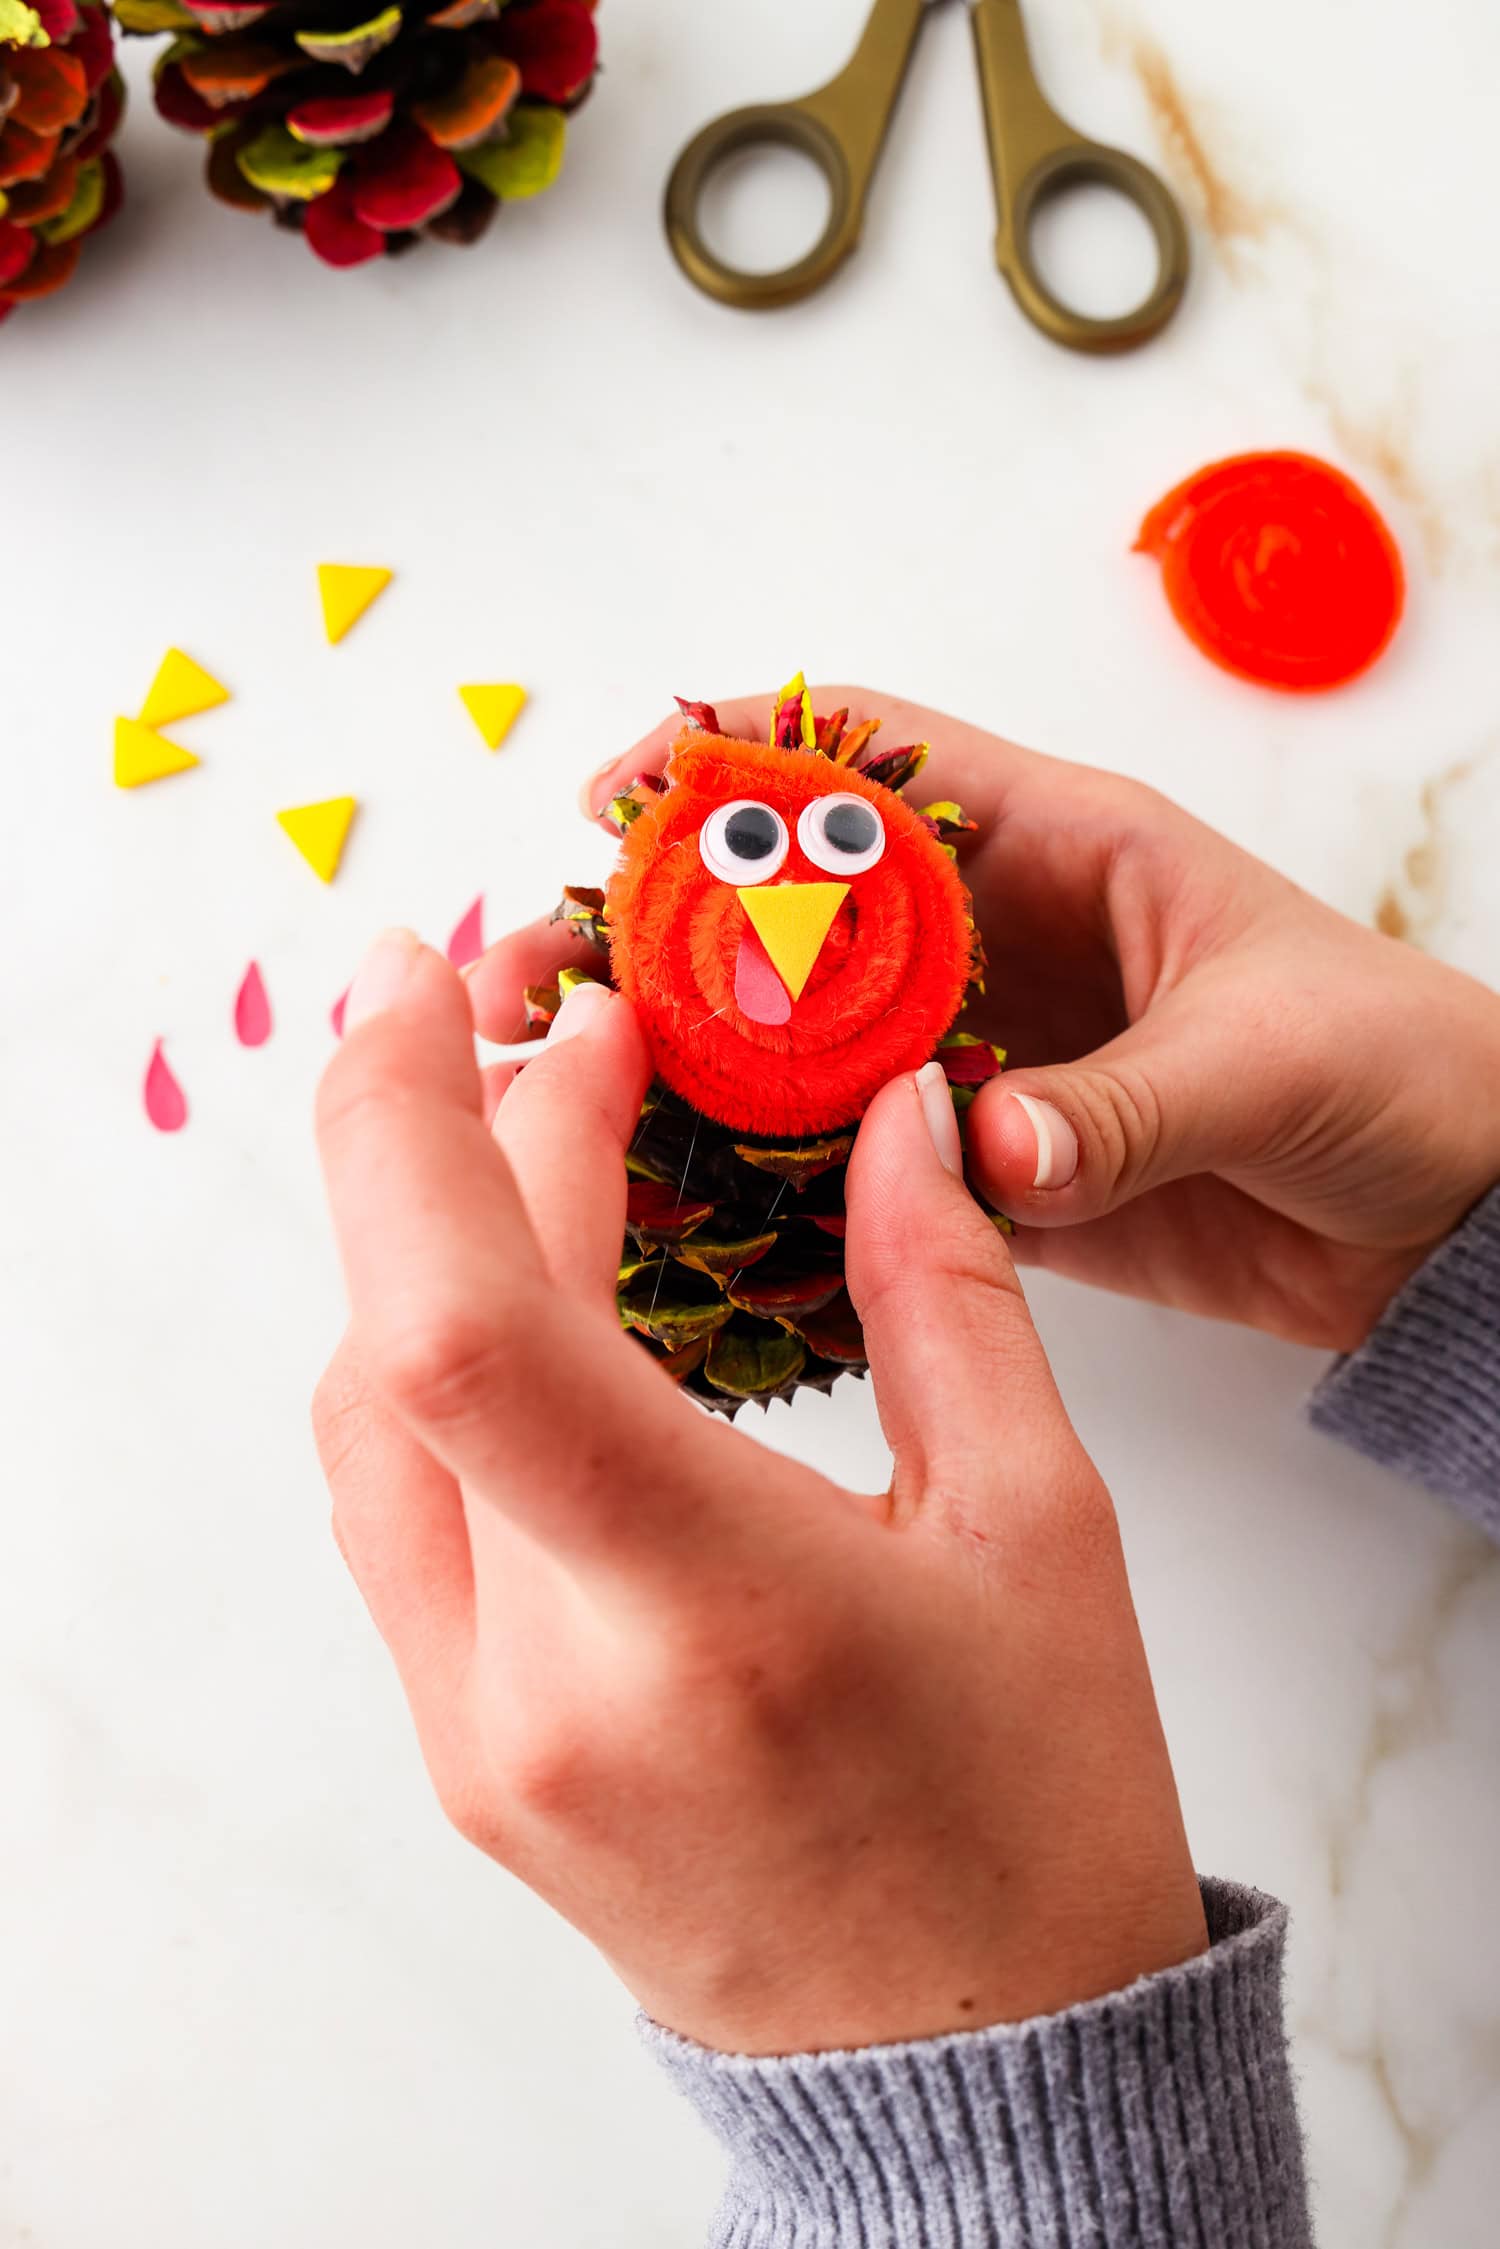
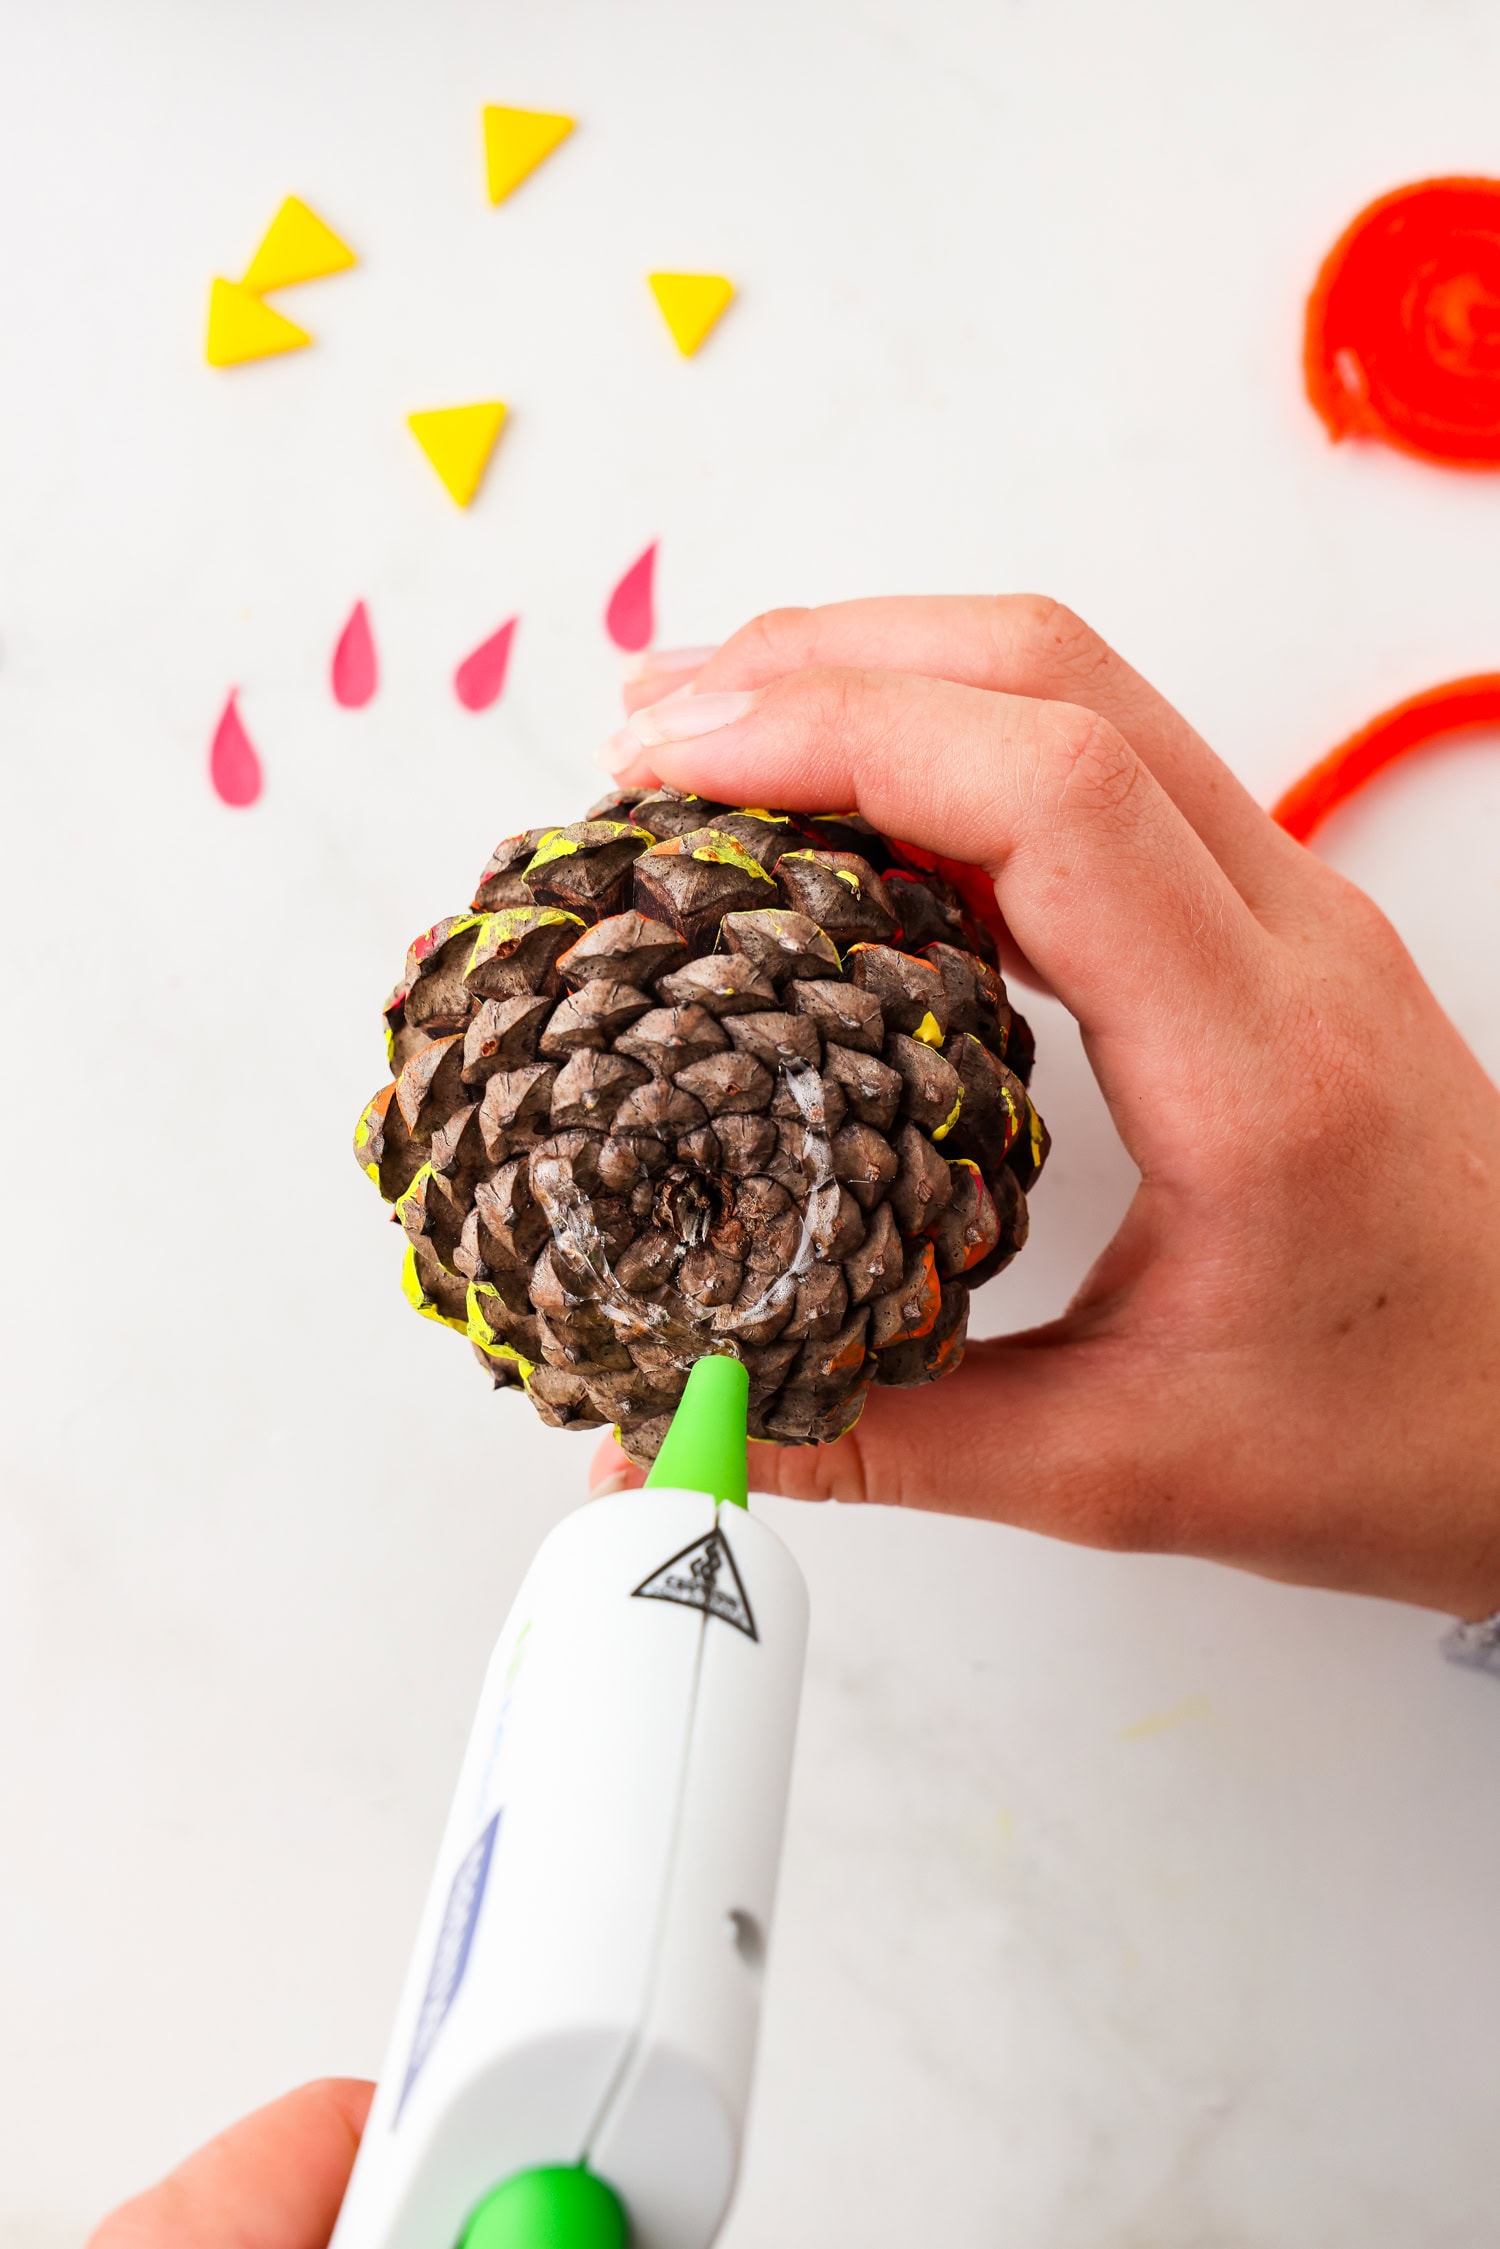
By now, the paint on the pinecone should be mostly dry. If not, you can wait a few more minutes before continuing onto the next step to allow the paint to finish drying. Once the paint is dry place the turkey’s face on the pinecone. Press and hold while the glue sets up.
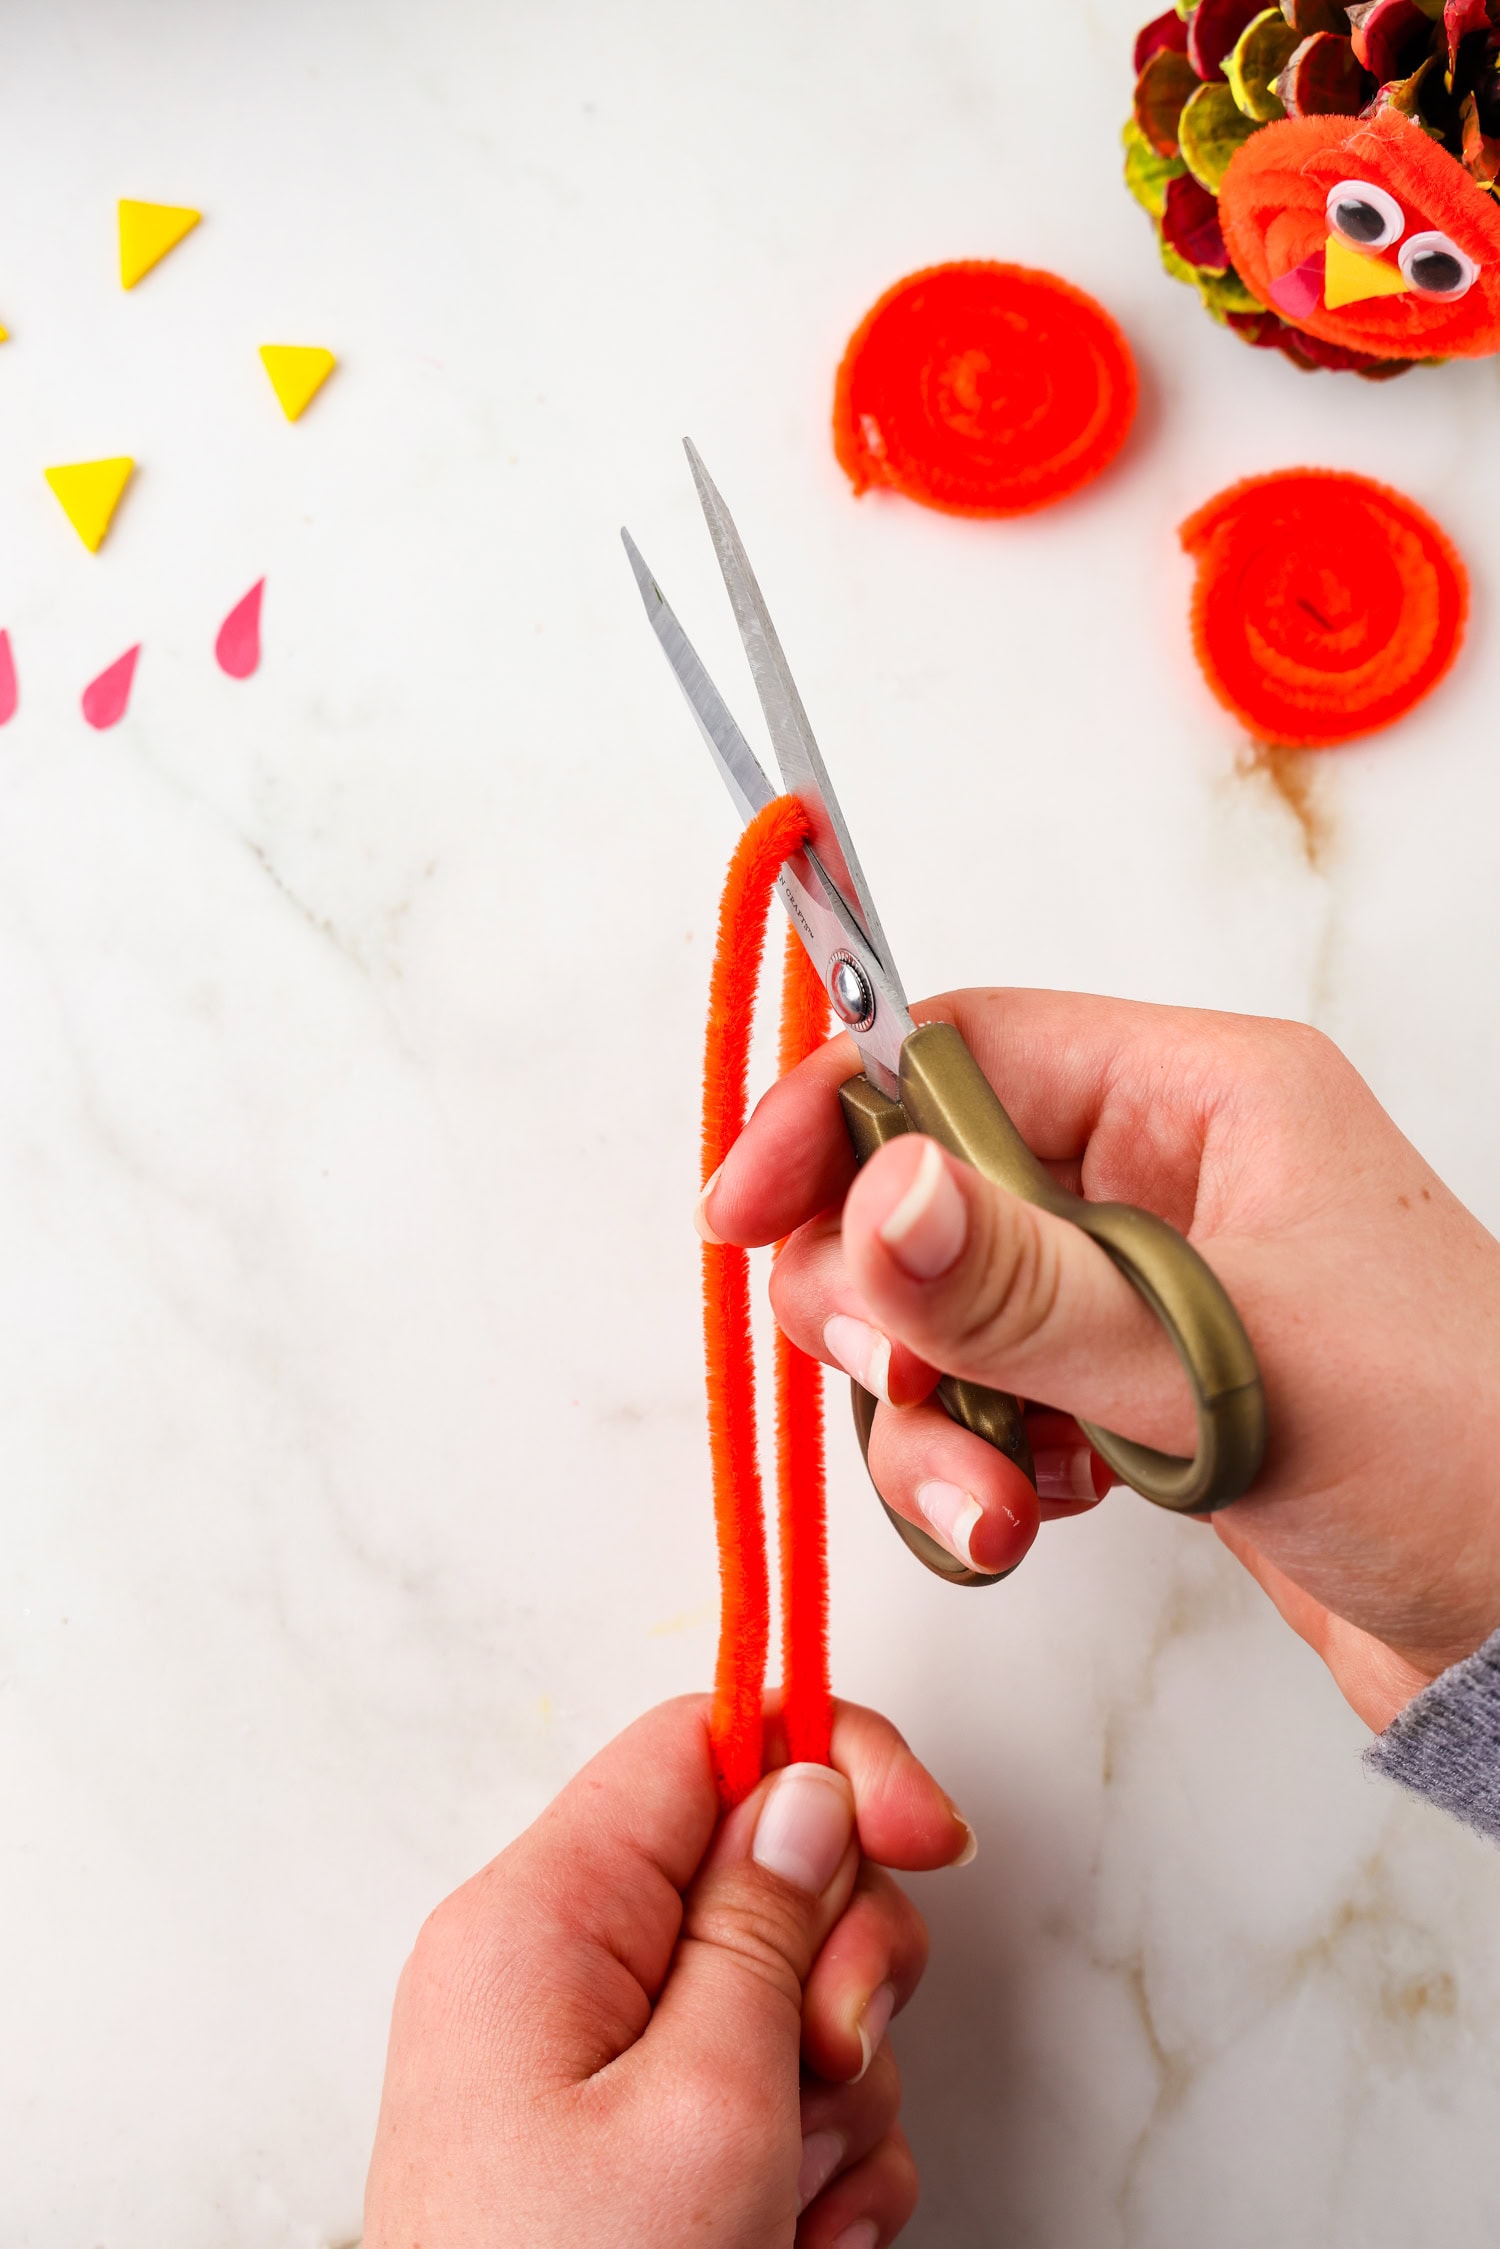
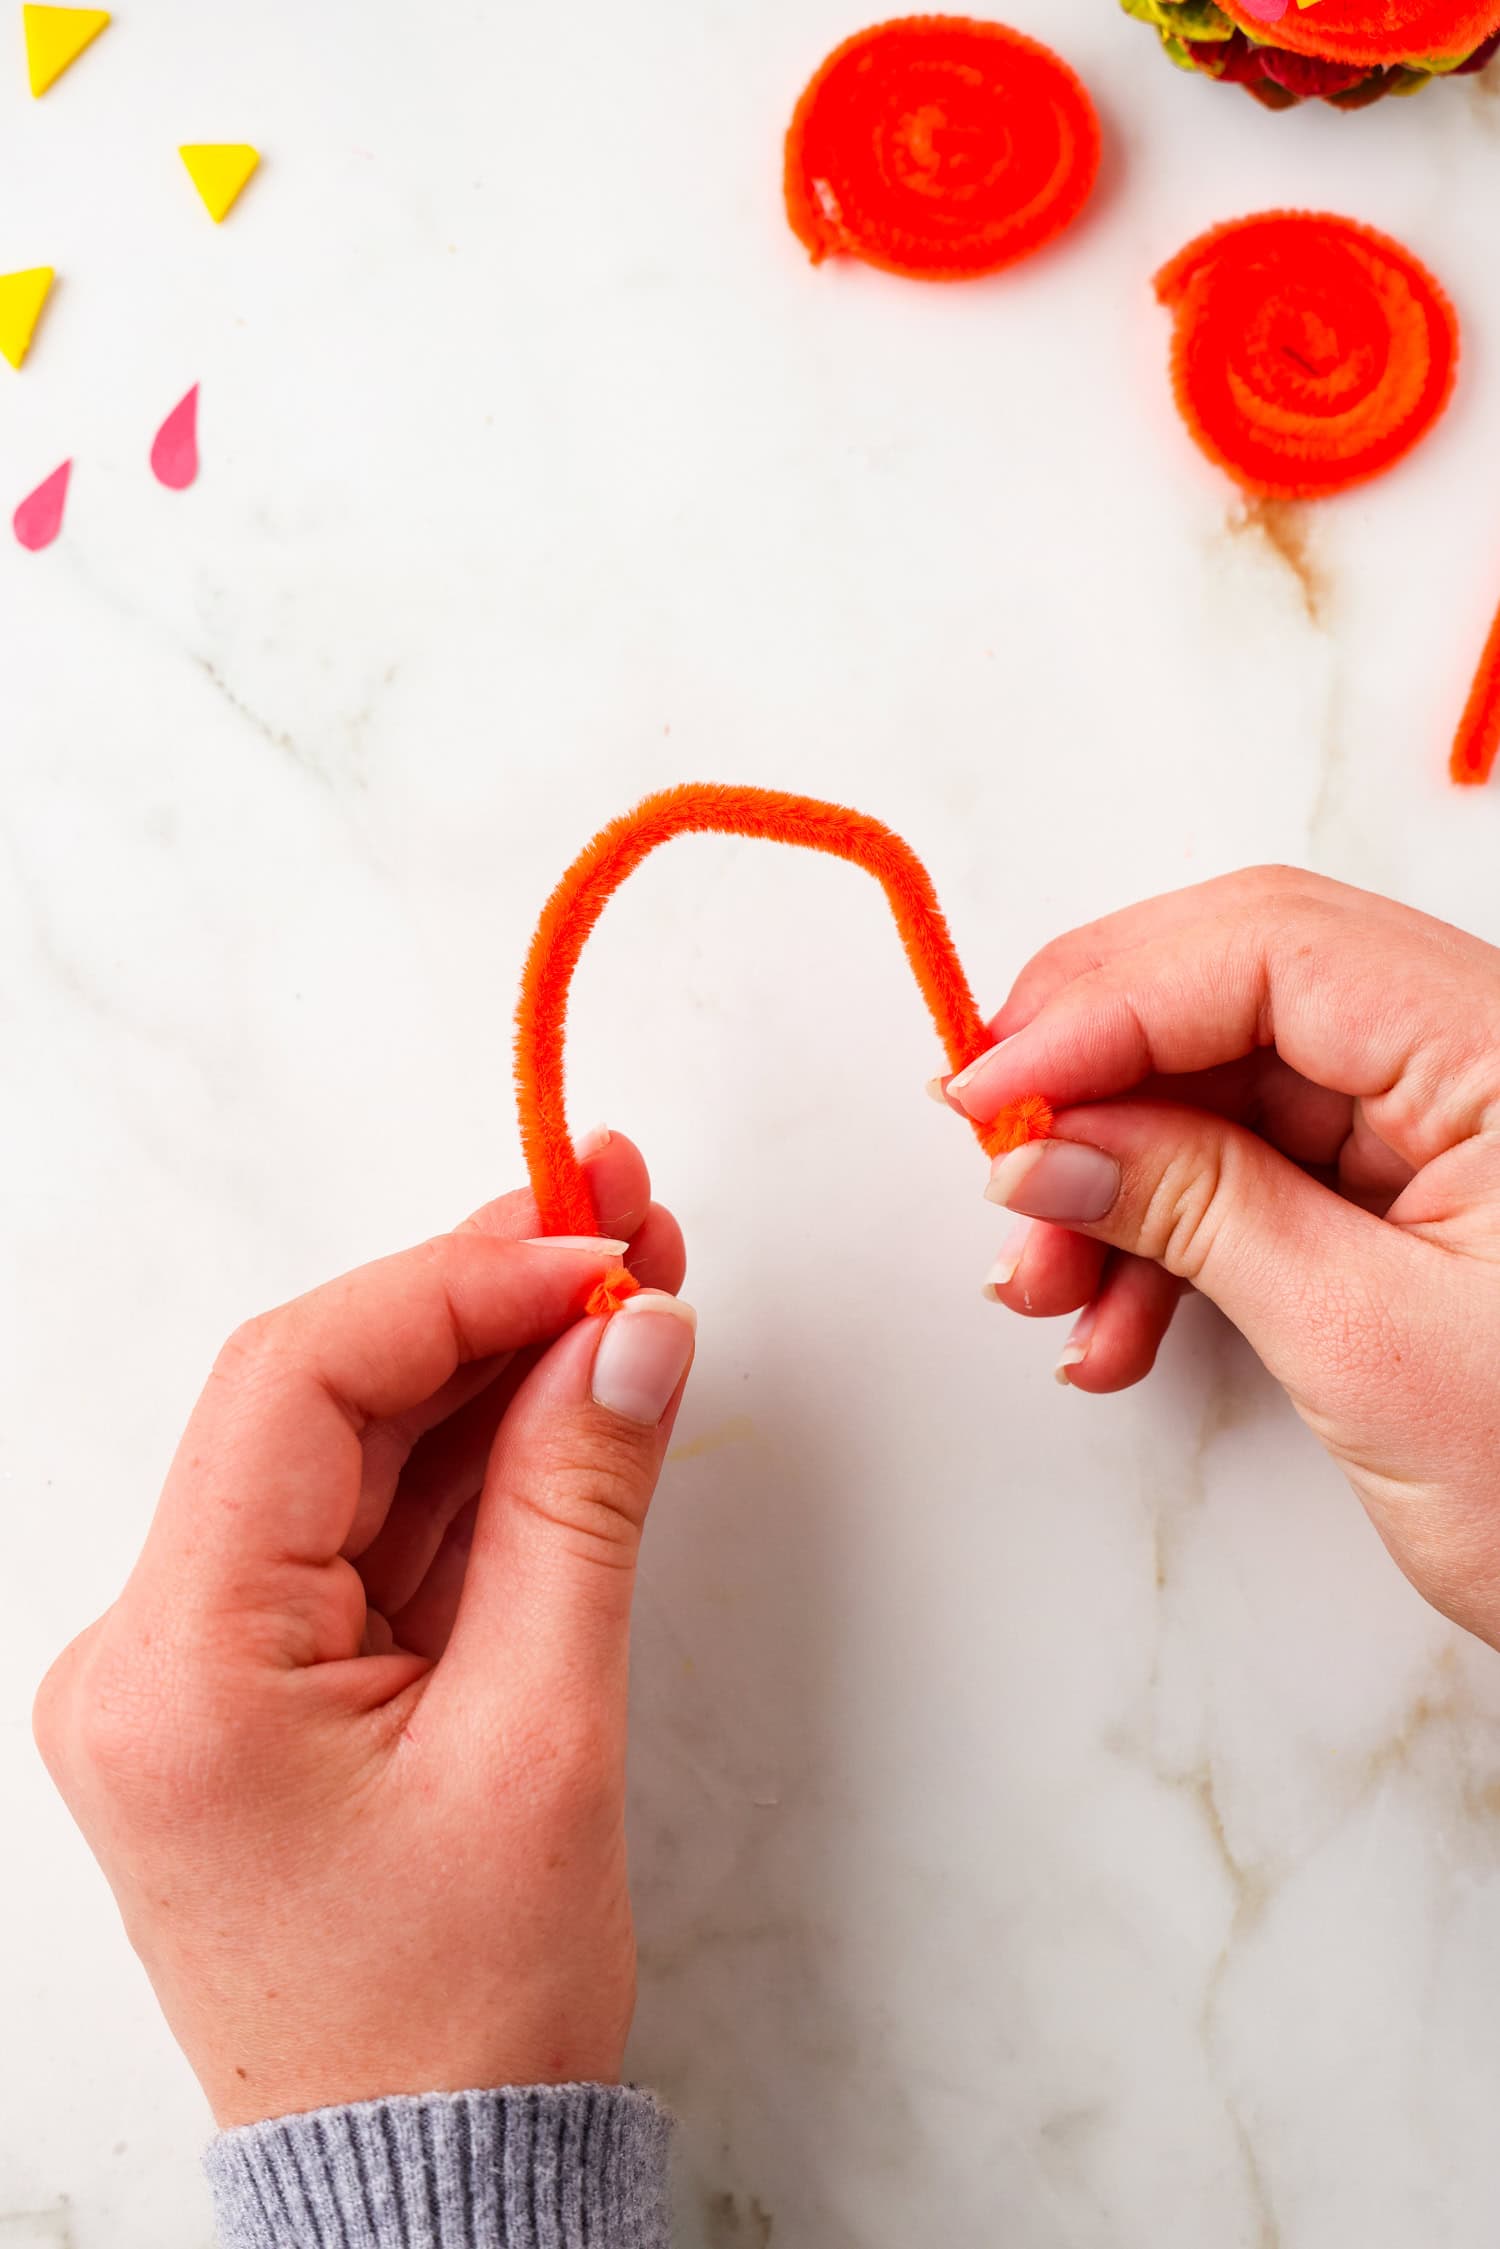
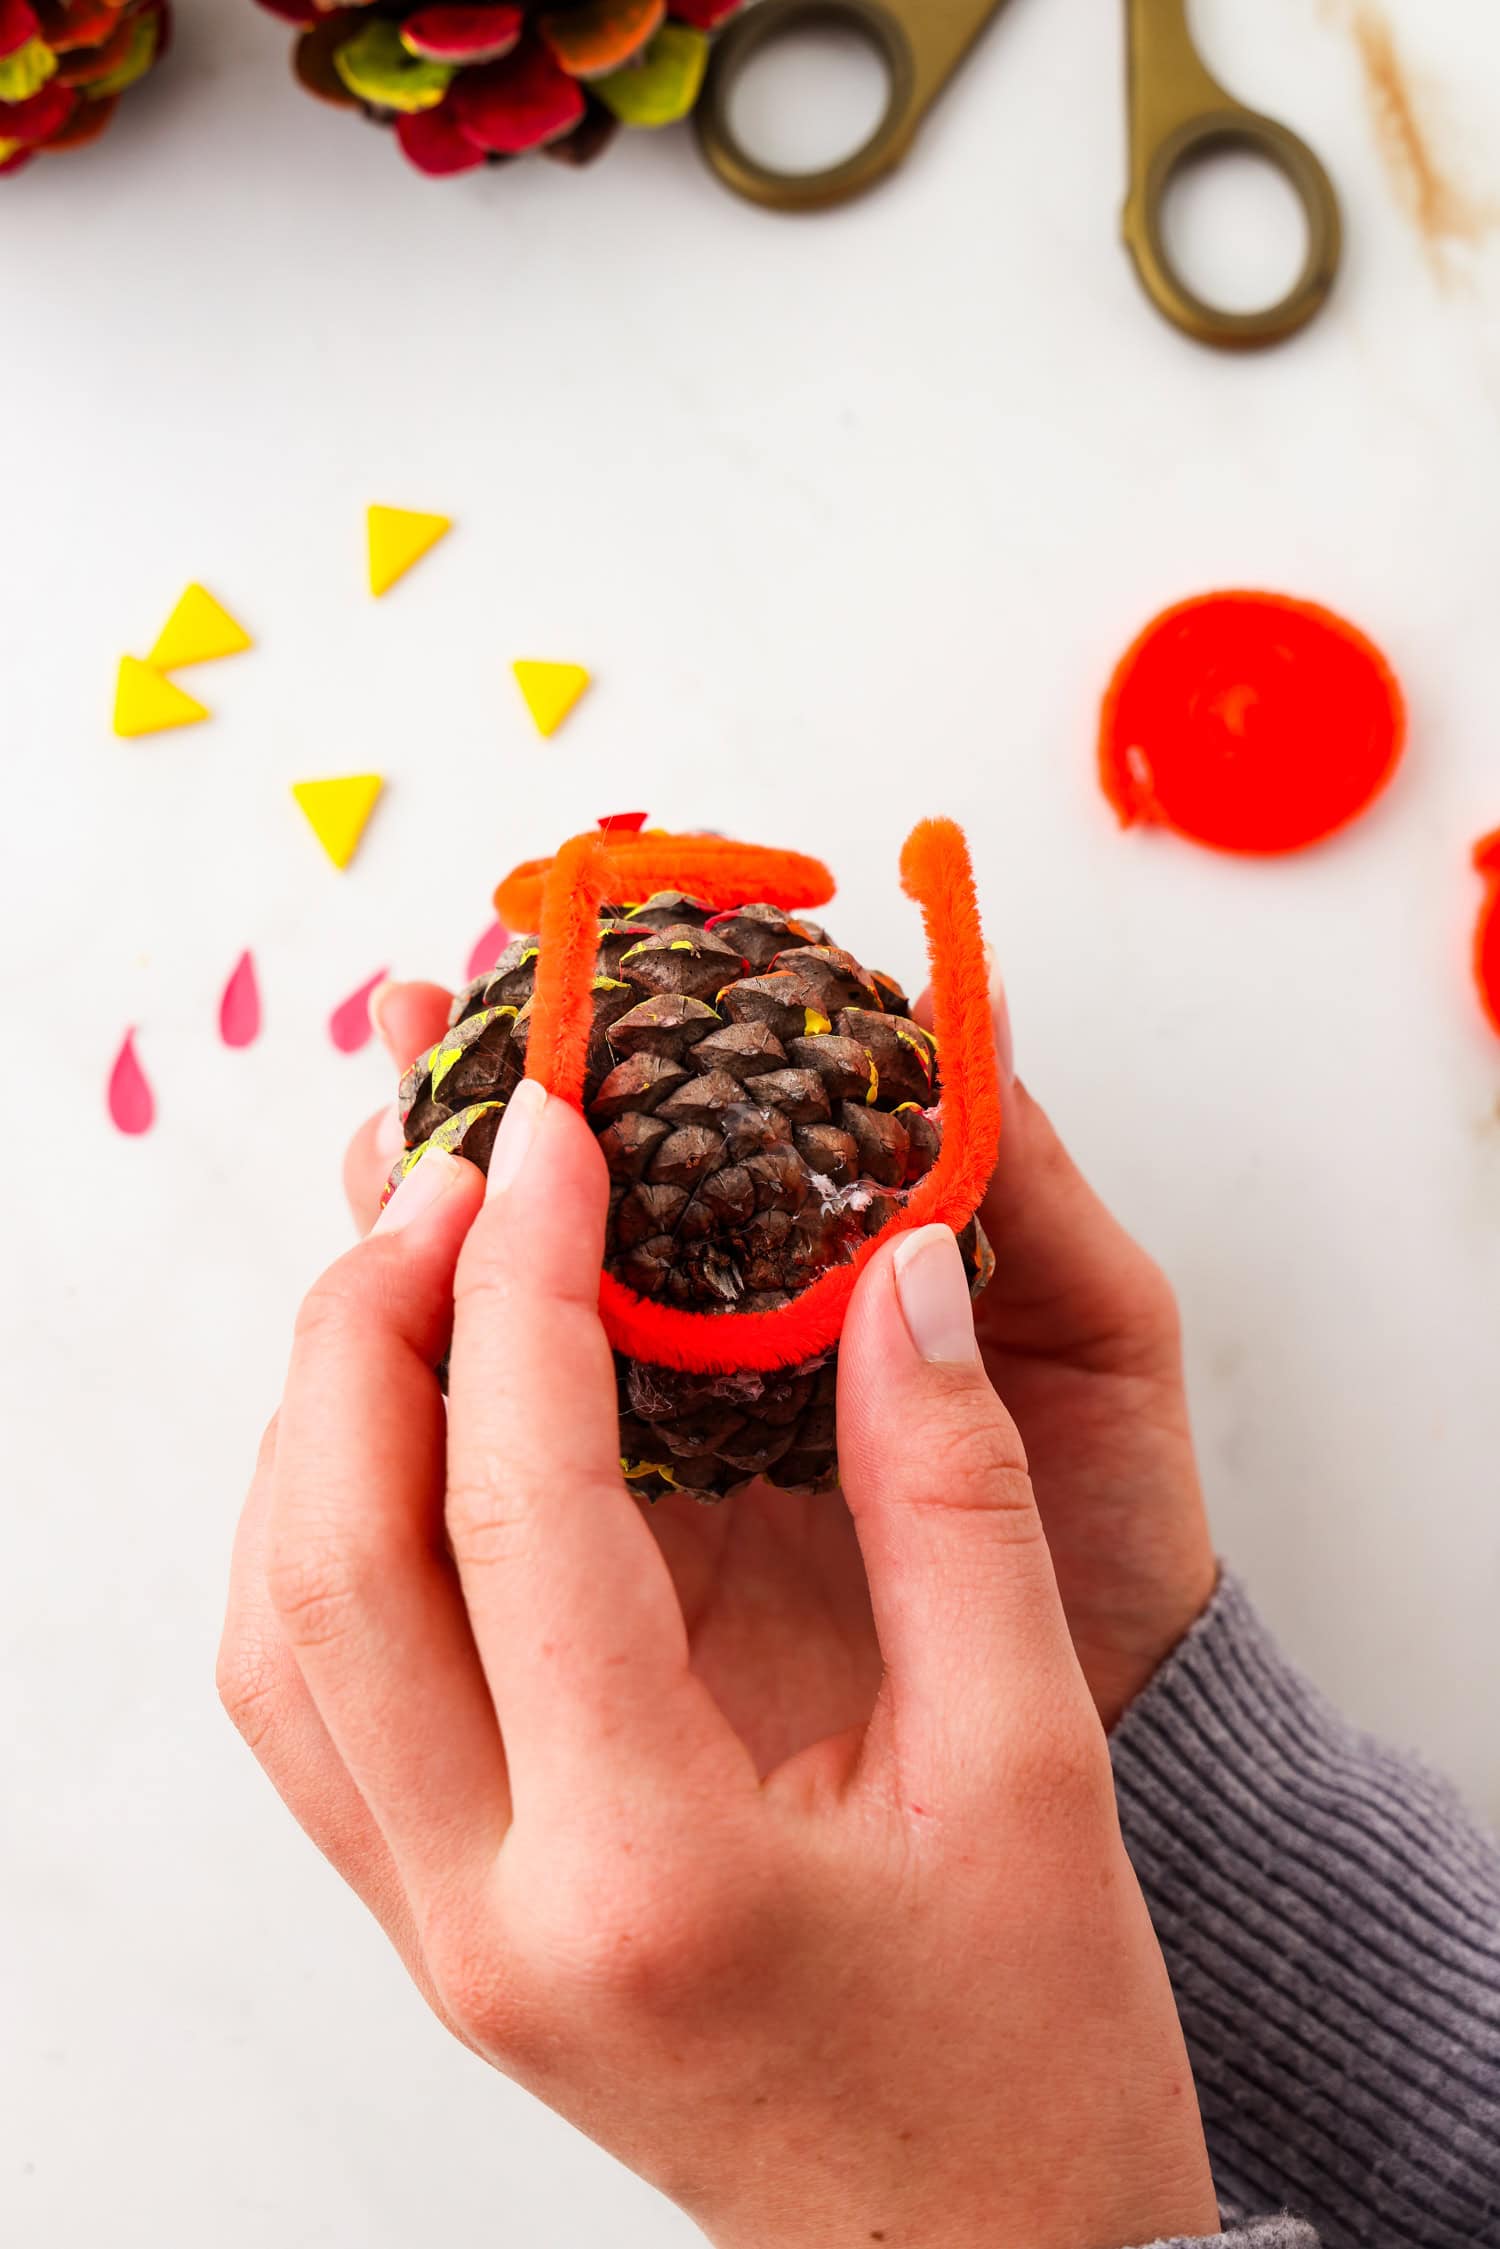
Fold a pipe cleaner in half and cut. Form a U shape with one cut half of the pipe cleaner, and bend each end upwards to form the turkey’s feet. The feet will be about ½ inch in length.
Turn the pinecone upside down and apply hot glue in a U shape for the pipe cleaner legs/feet. Attach the turkey’s legs feet to the bottom of the pinecone and hold in place while the glue dries.
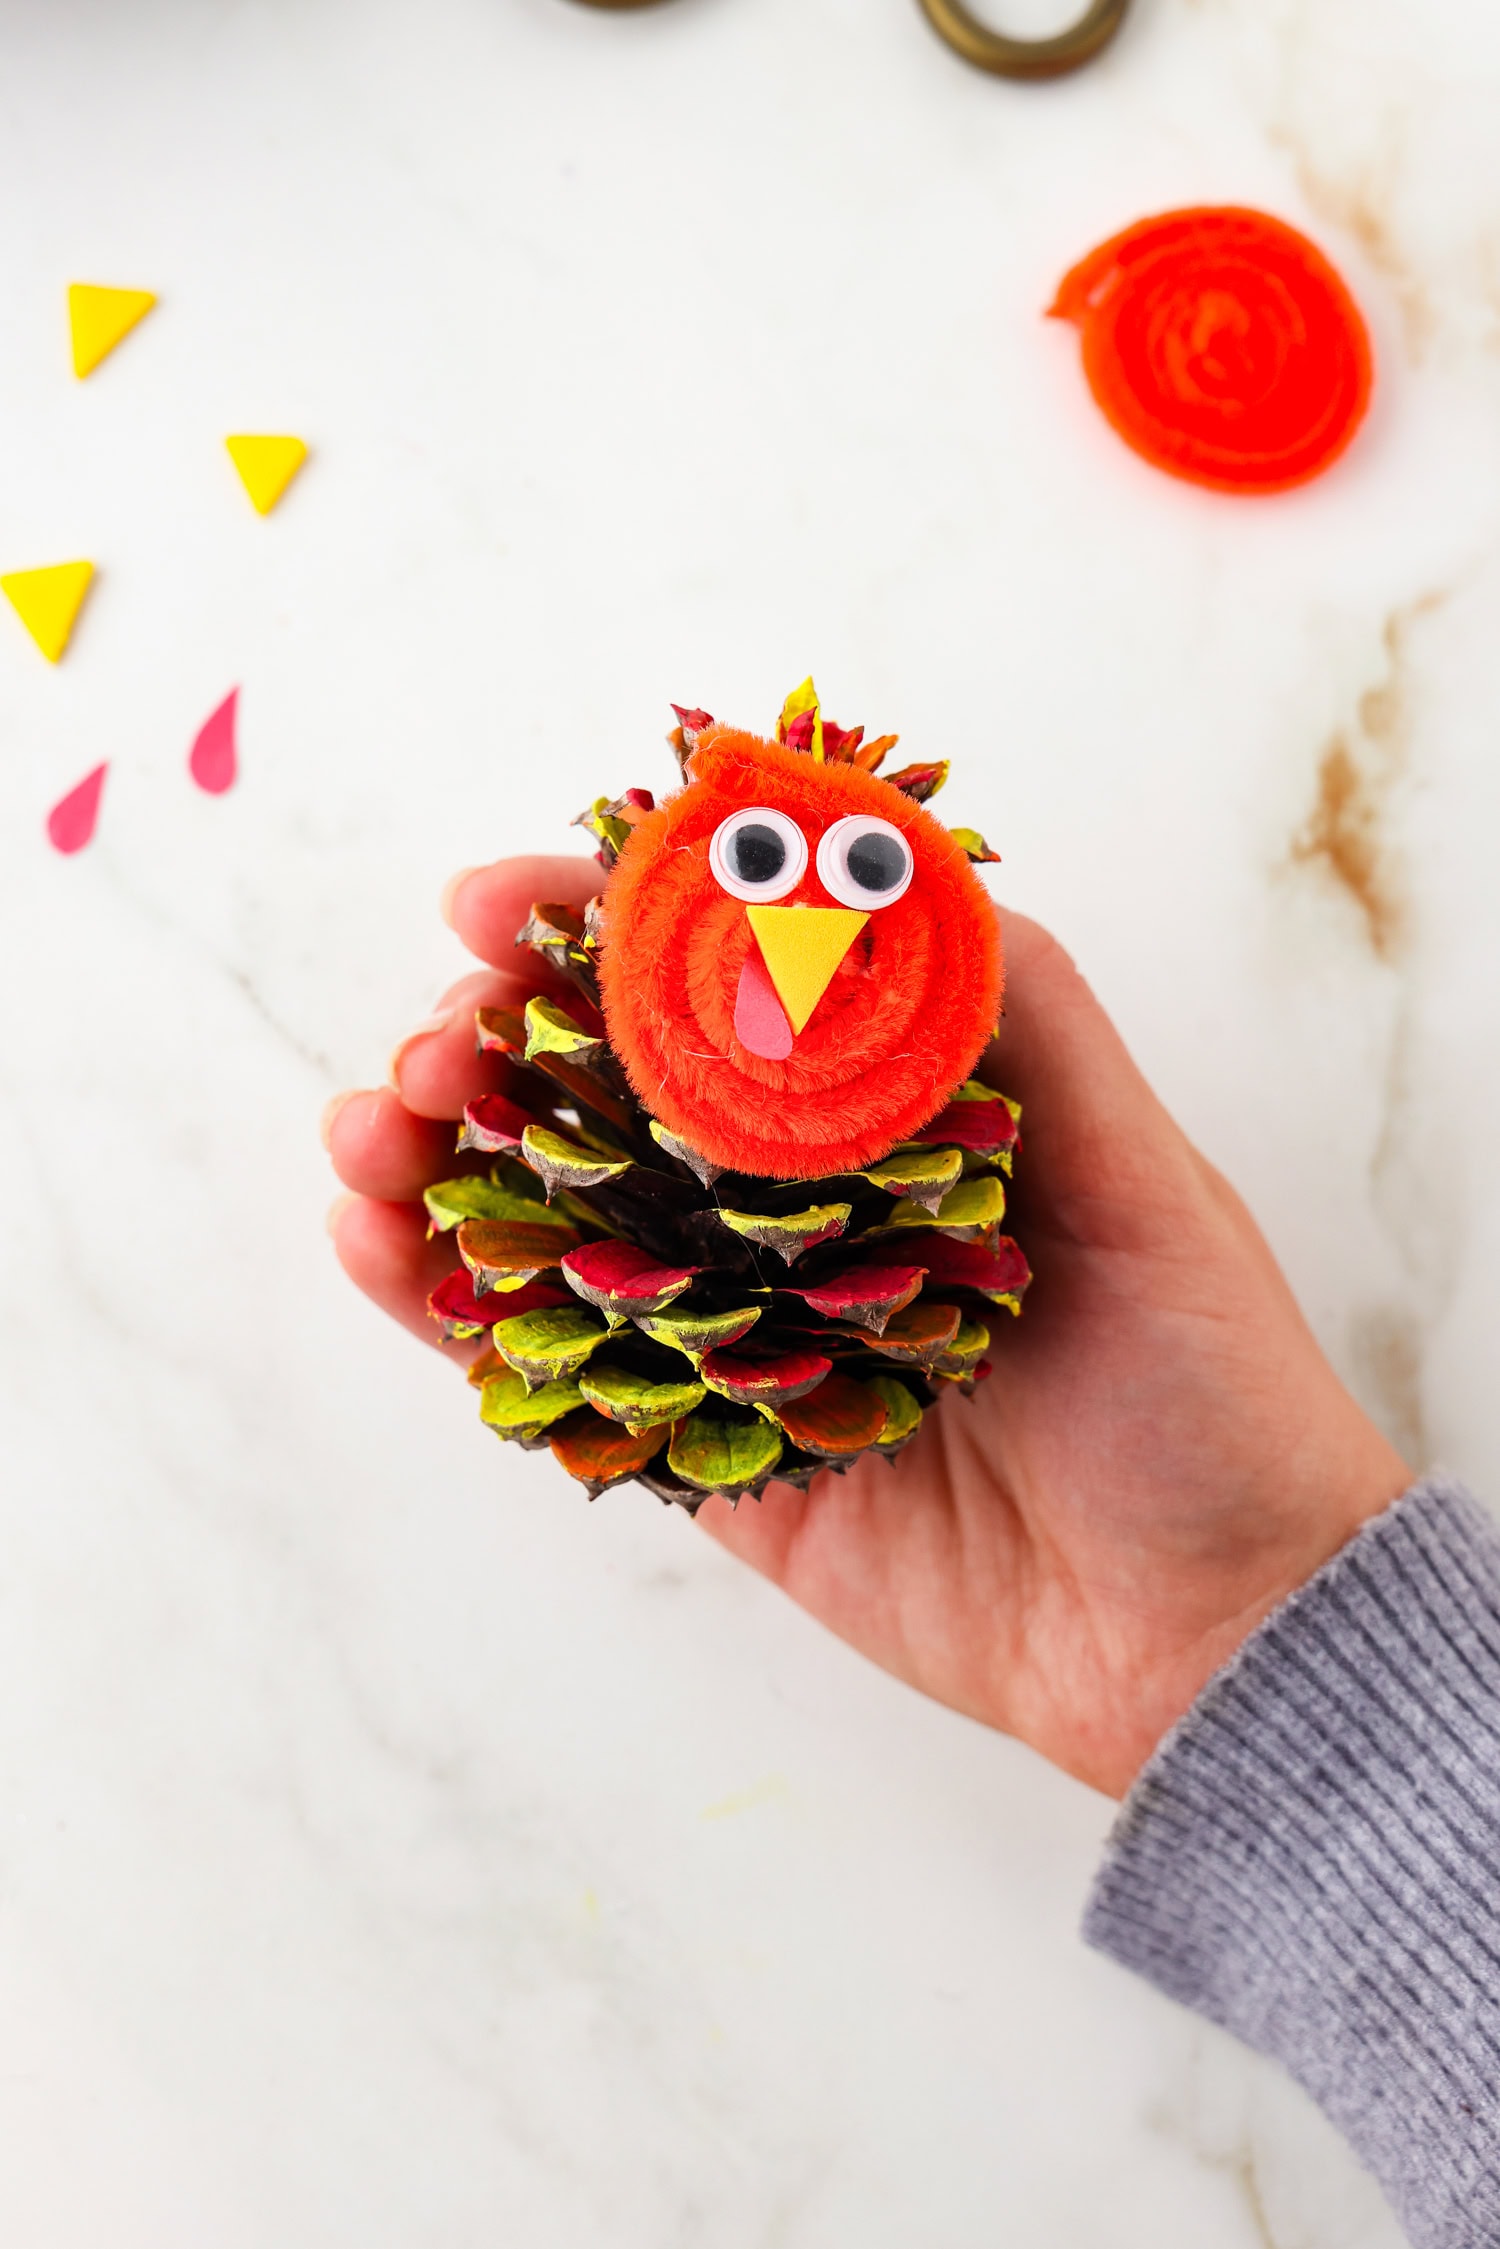
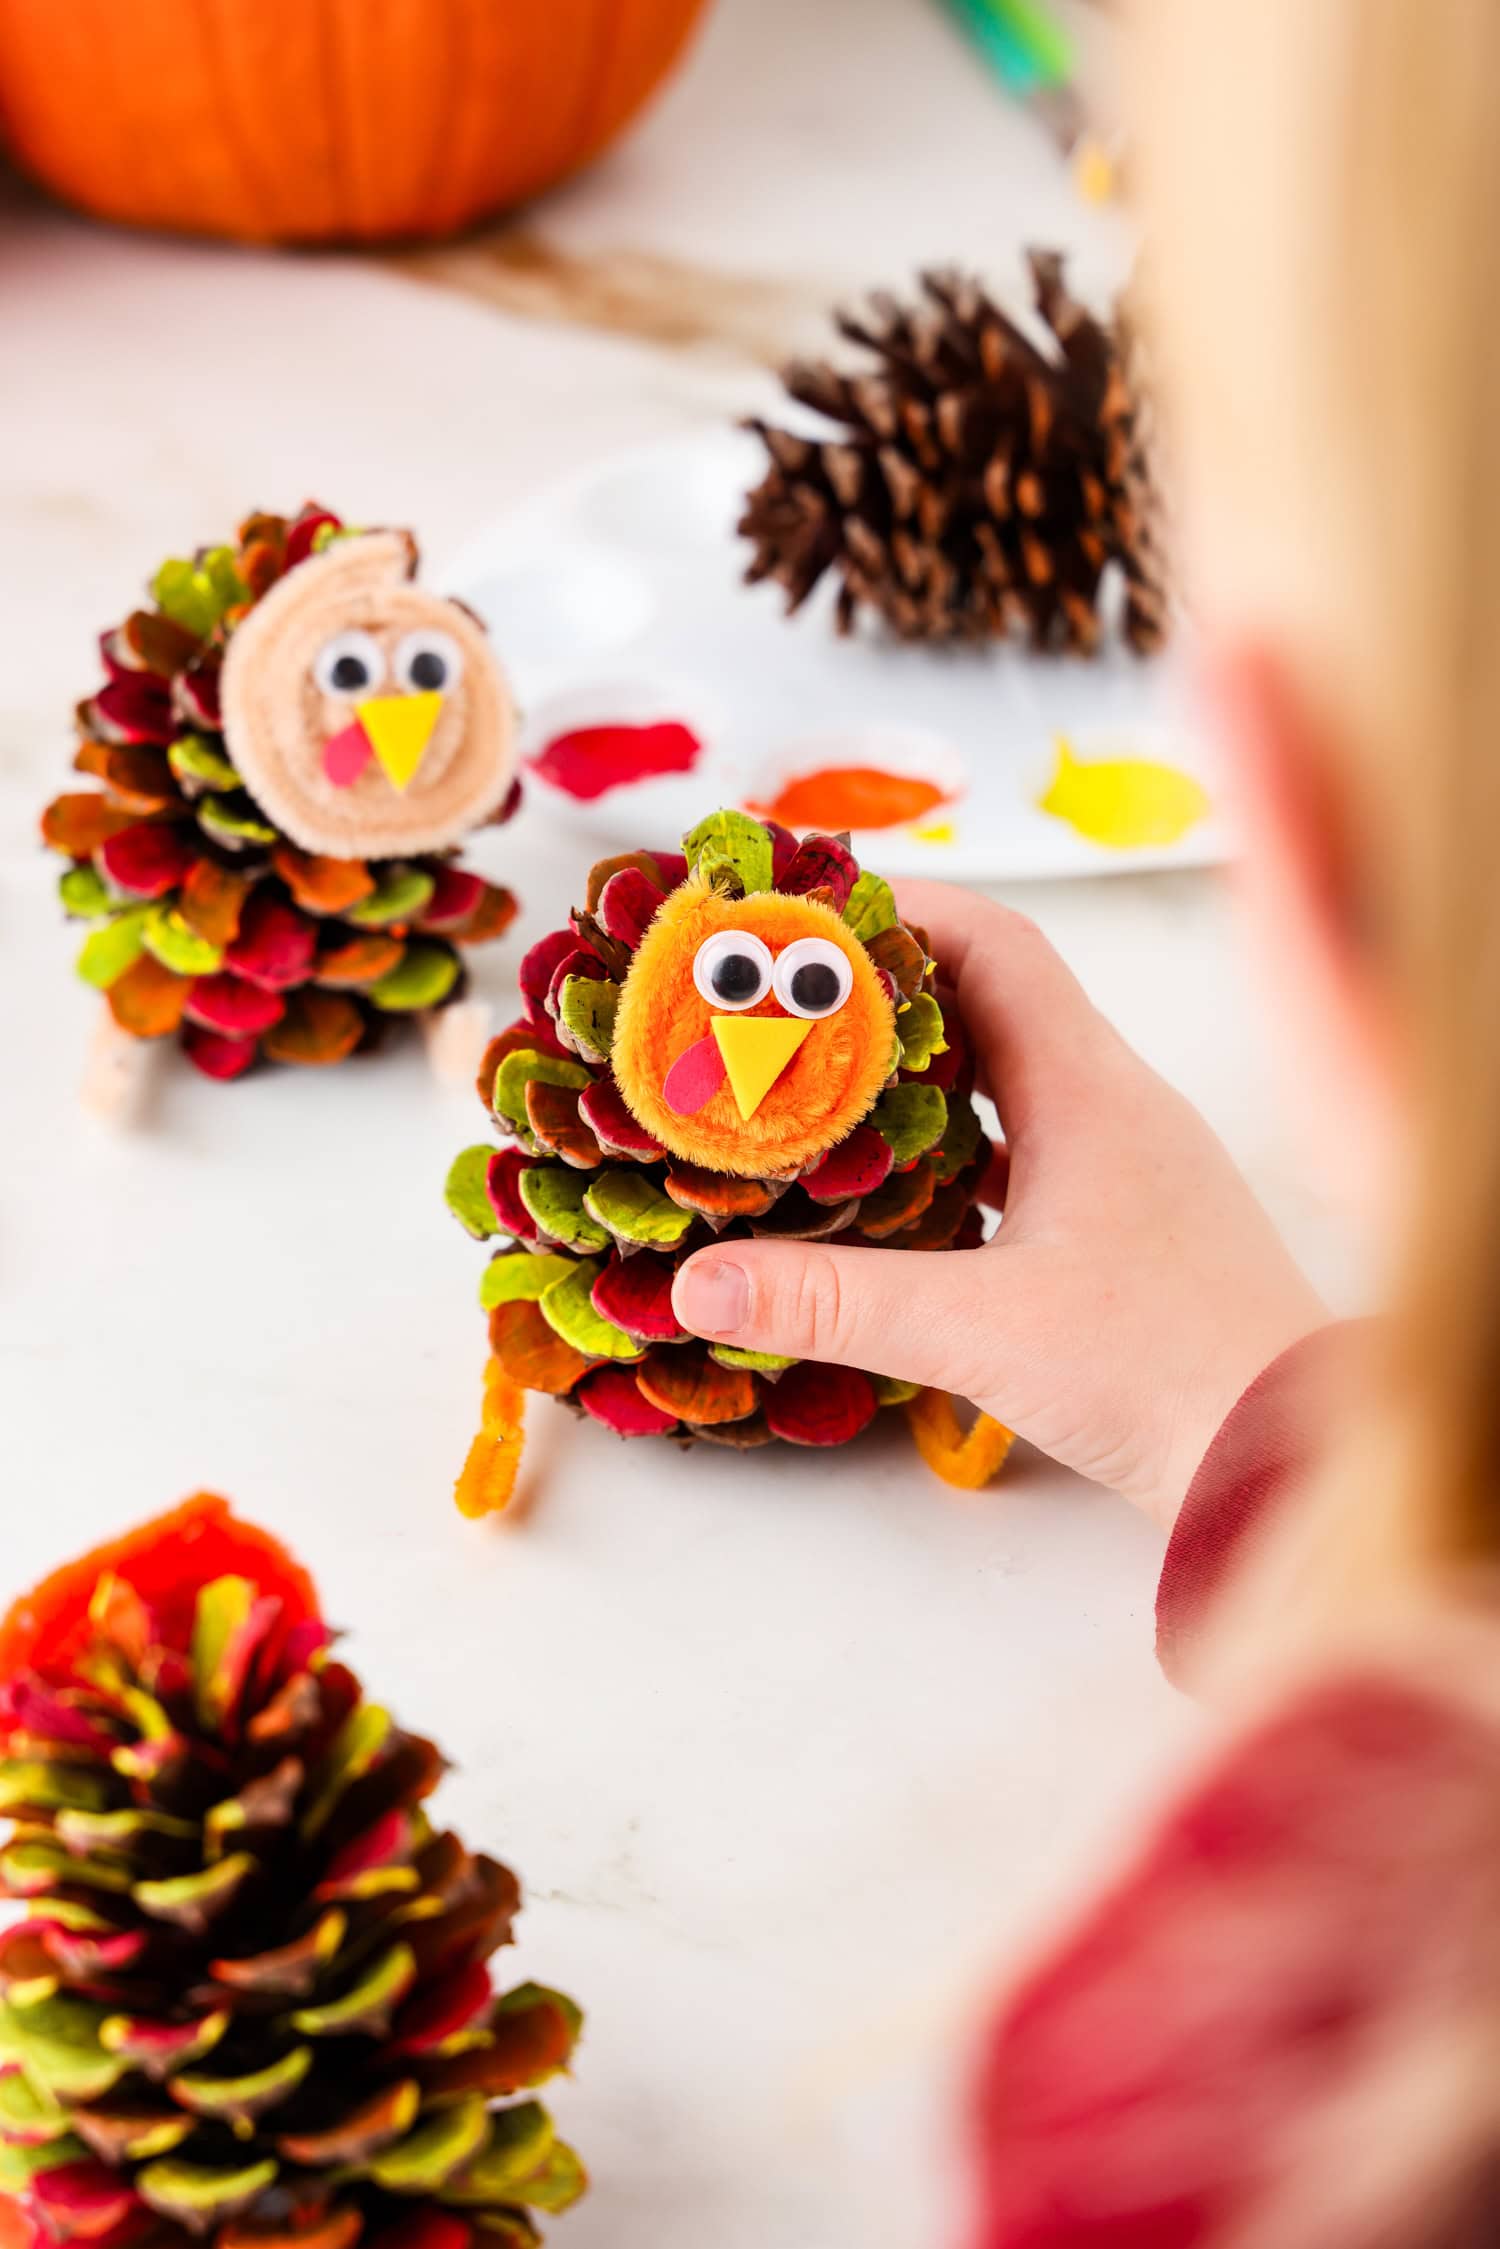
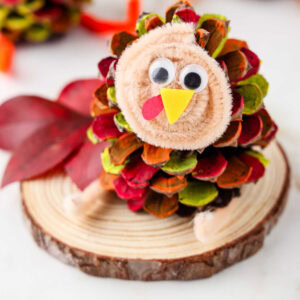
Your pinecone turkey is complete! Enjoy your new little turkey friend!
What other decorations can I use on a pinecone turkey?
While your pinecone craft will look great with all of these decorations, you can always add more! Glue some feathers on to make a fun little turkey tail, or even cut feather shapes out of construction paper. You can add some glitter to this craft, buttons, ribbon, and so much more. Make it your own and don’t be afraid to get creative!
Pro Tips for the Most Fun!
- If you’re making this pinecone turkey craft with littles, have an adult glue all of the pieces on. Hot glue can cause burns if it is not used properly!
- Choose pinecones that are a good size. If they are too small then it will be hard to attach all of the decorations and they may look too big. However, if you grab pinecones that are too large then it will take forever to paint them. Medium-sized pinecones work best.
- Don’t make the paint too thick on the pinecone scales or it’ll take forever to dry. Just a thin layer of paint to coat each section and give it plenty of color is all it takes.
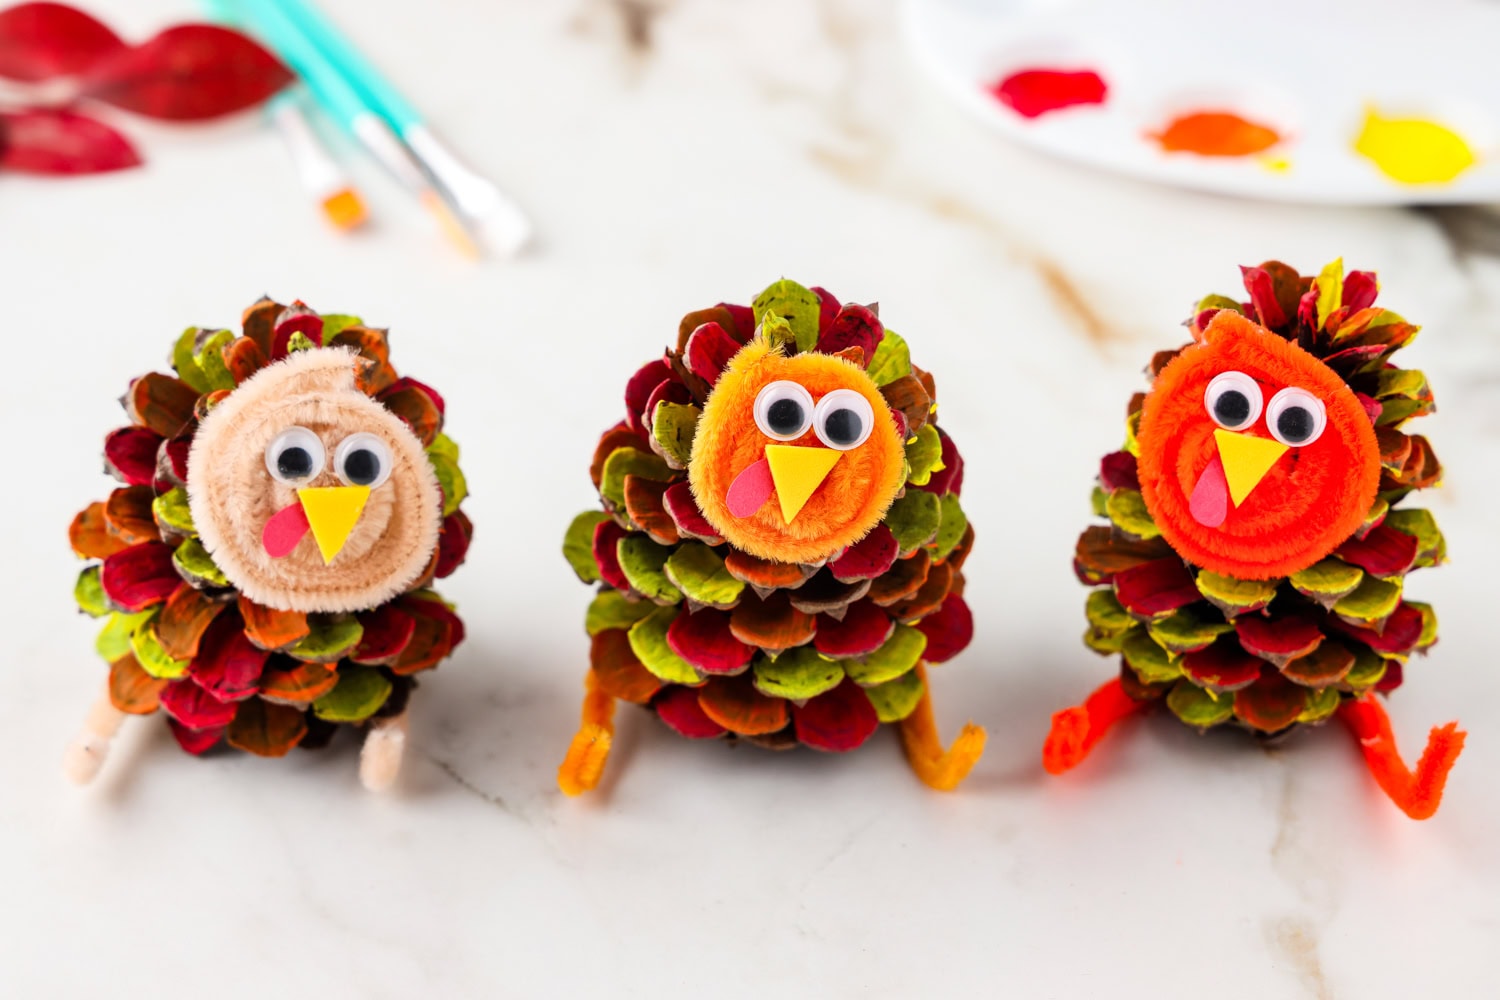
Aren’t these little turkey friends just the cutest? I hope you enjoy! Happy crafting!
More Thanksgiving Crafts You’ll Love!
- This Turkey Paper Bag Craft is super simple and makes the best use out of brown paper bags that you may already have on hand.
- Make the Thankfulness Tree and make sweet memories as you remember all that there is to be thankful for.
- Need a quick no-prep activity? These Thanksgiving Coloring Pages are perfect!
- This easy Pumpkin Pie Craft is great for those kiddos who really enjoy pretend play time.
Pinecone Turkey Craft
Ingredients
- Pinecones
- Red construction paper
- Yellow craft foam sheet
- Googly eyes
- Acrylic paints red, orange, and yellow
- Paint brushes
- Paint palette or cups
- Hot glue gun and extra glue sticks
- Scissors
- Pipe cleaners orange, tan, or brown
Instructions
- Paint a thin layer on the tops of the scales of the pinecone using red, orange, and yellow acrylic paint. Stagger the colors to get a good variety of the different colors all around the pinecone.
- Preheat your hot glue gun. While waiting for the paint to dry and the hot glue gun to heat up, cut a beak (triangle shape) out of the yellow craft foam sheet and a snood (teardrop shape) out of the red construction paper. Cut one beak and one snood for each turkey you are making. Set these pieces aside.
- Form the turkey’s face out of a pipe cleaner by spiraling the whole length of the pipe cleaner. Once you reach the end of the pipe cleaner, secure the end with a dot of hot glue.
- If beak has an adhesive backing, remove the paper and stick the snood to the adhesive (back side). If it doesn’t have adhesive backing, use a small dot of hot glue to stick the snood to the beak. Place a small dot of hot glue in the middle of the turkey’s face (spiraled pipe cleaner) and then place the beak on the dot of hot glue.
- Add two small dots of hot glue on the face above the beak for the eyes, and glue the googly eyes side by side.
- By now, the paint on the pinecone should be mostly dry. If not, you can wait a few more minutes before continuing on to the next step to allow the paint to finish drying. One the paint is dry, add a few drops of hot glue to the scales at the top (on the side) of the pinecone and place the turkey’s face in this spot. Press and hold while the glue sets up.
- Fold a pipe cleaner in half and cut.
- Form a U shape with one cut half of the pipe cleaner, and bend each end upwards to form the turkey’s feet. The feet will be about ½ inch in length.
- Turn the pinecone upside down and apply hot glue in a U shape for the pipe cleaner legs/feet. Attach the turkey’s legs/feet and hold in place while the glue dries.
- Your pinecone turkey is complete! Enjoy your new little turkey!