Mini Pumpkin Turkey Craft
Get your little ones into the holiday spirit with this simple and cute Thanksgiving craft idea. Turn a mini pumpkin into a cute turkey! Kids will love this Mini Pumpkin Turkey Craft. It also makes the perfect homemade Thanksgiving centerpiece.
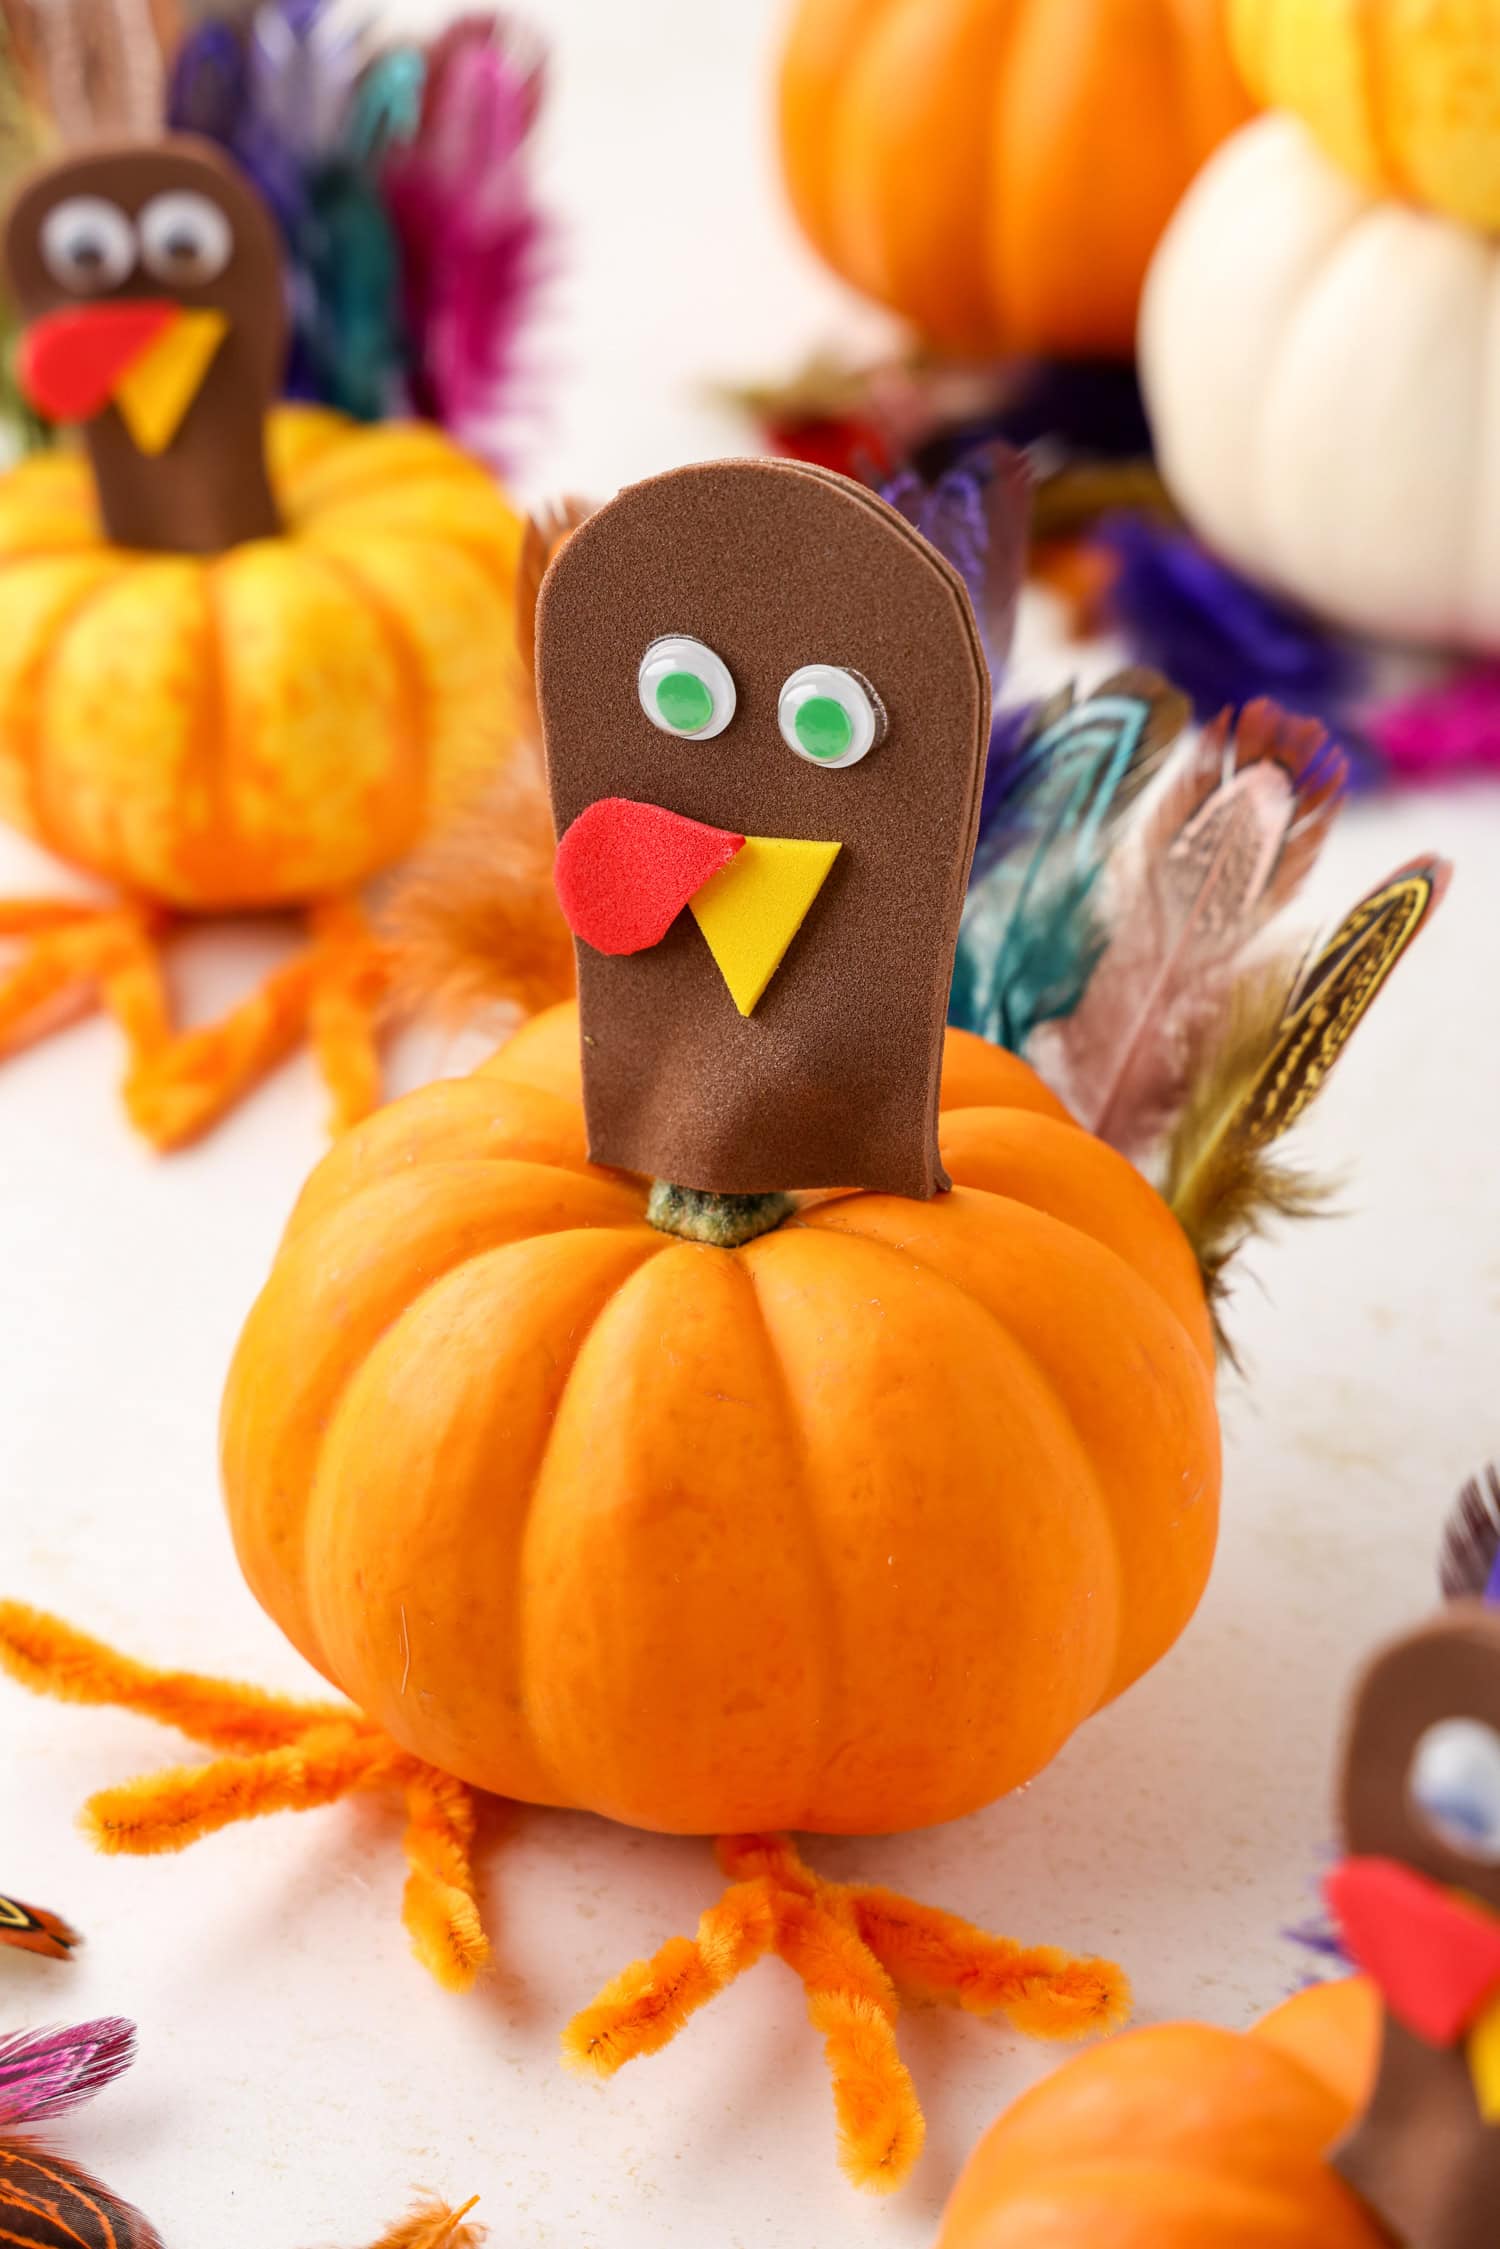
How CUTE is this min pumpkin turkey craft? Kids and grown-ups alike will love to make this adorable fall craft! It’s seriously just too fun to resist, and the result is the most adorable little pumpkin turkey. I love to give my kids a way to get involved in the decor for each holiday. During Halloween, we make yarn ghosts and during Christmas it’s always things like cinnamon ornaments. But for Thanksgiving, now we’re going to making these mini pumpkin turkeys!
They’d be perfect to decorate a table or a buffet — just the thing to make the festivities have an extra personal, and adorable, touch! Who knew you could transform a small pumpkin into something so delightfully cheery! This has become one of our favorite fall activities, and I bet you’re going to love it too.
Why You’ll Love this Mini Pumpkin Turkey
- This craft only takes 30 minutes to complete. Easy peasy and perfect for those kiddos whose attention spans are a bit short.
- You can make this with people of all ages. Older kids will love it, adults will have a blast and little will think it’s super cute!
- Mini turkey pumpkins only require a few basic craft supplies and tools. And if you have leftover supplies, you can make more pumpkins or save them for other crafts!
Supplies Needed
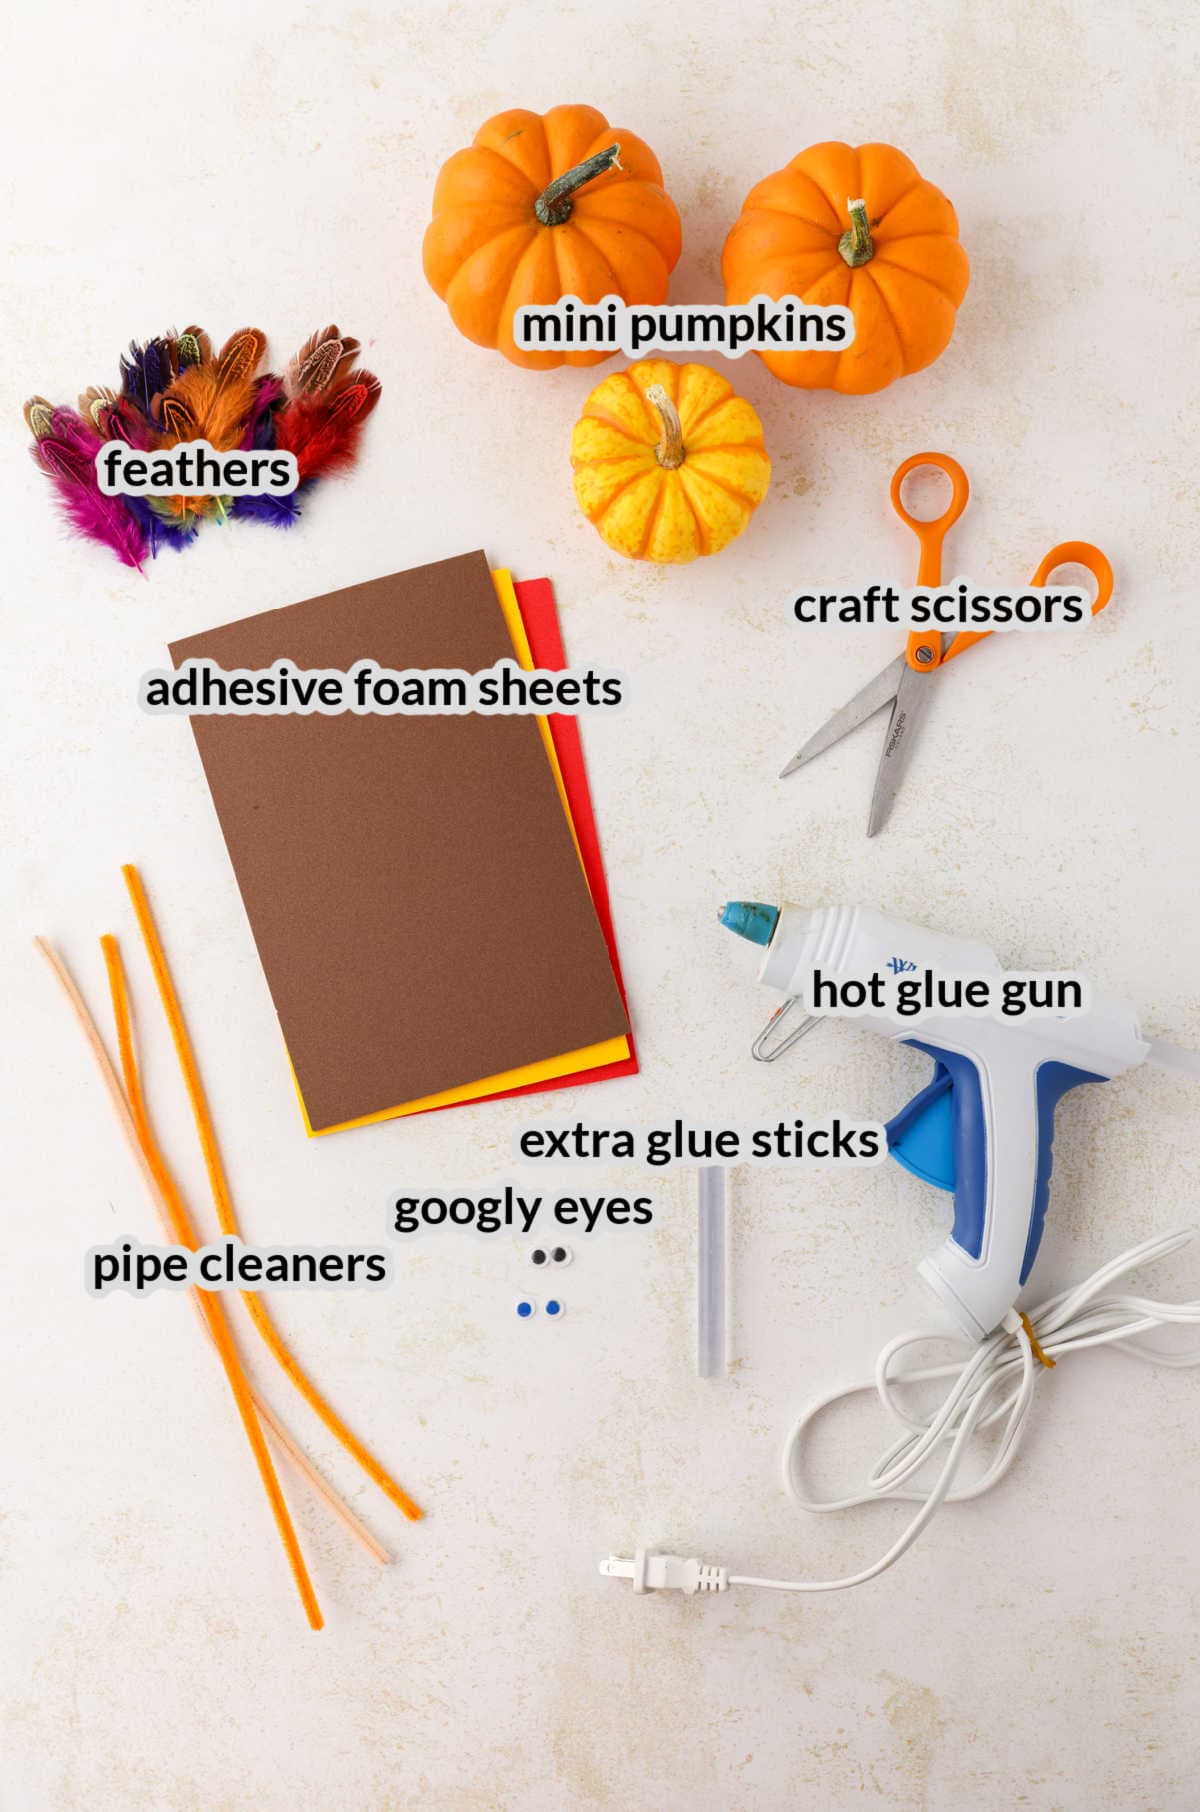
- Mini pumpkins – The tiny little pumpkin they sell at the grocery store are what you need for this craft! They should be able to sit in the palm of your hand.
- Feathers – Make a fluffy little decoration for your turkey with some craft feathers. You can use any color you want! Don’t have some craft feathers? You can make paper feathers instead!
- Adhesive foam Sheets – This is the easiest way to make decorations that can easily be adhered to your mini pumpkin.
- Pipe cleaners – You’re going to need orange, brown, or tan pipe cleaners for these fun Thanksgiving turkeys.
- Googly eyes – This is key to making a cute little turkey face! We love to grab colored googly eyes, but the regular black and white ones work too.
- Hot glue gun and extra glue sticks – Use hot glue to attach the feet onto the bottom of your mini pumpkin turkey.
- Craft scissors – If you’re working with littles who want to cut their own decorations, then I recommend grabbing some safety scissors.
How to Make a Turkey From A Pumpkin
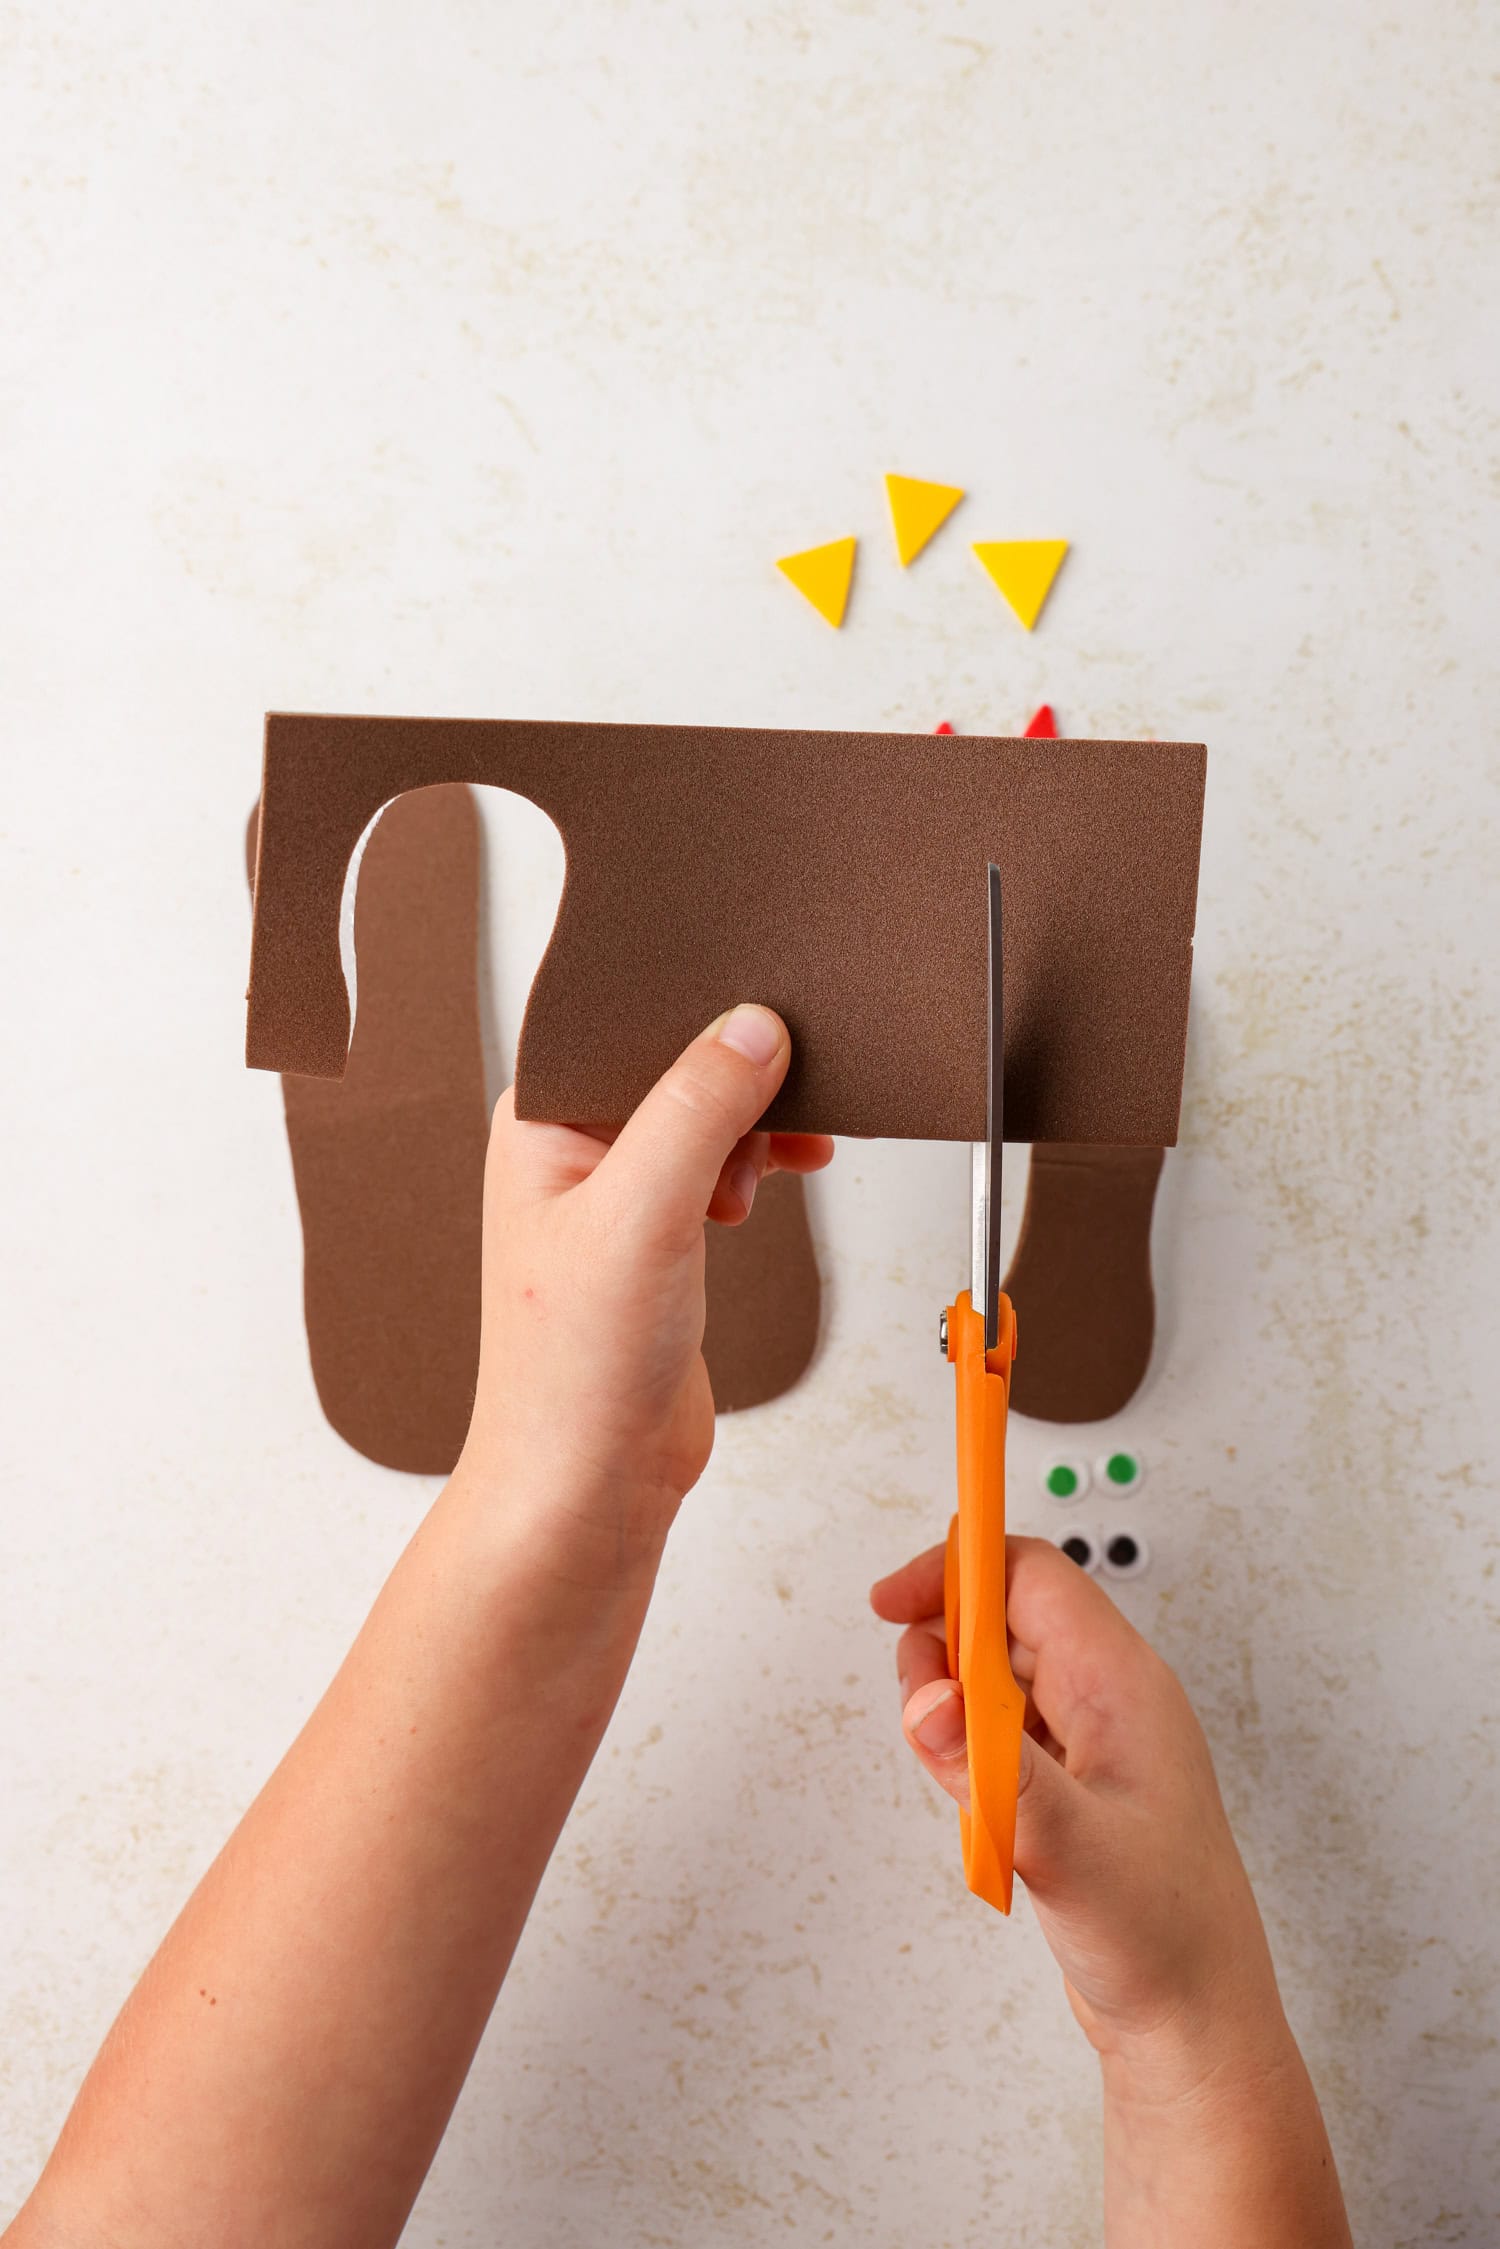
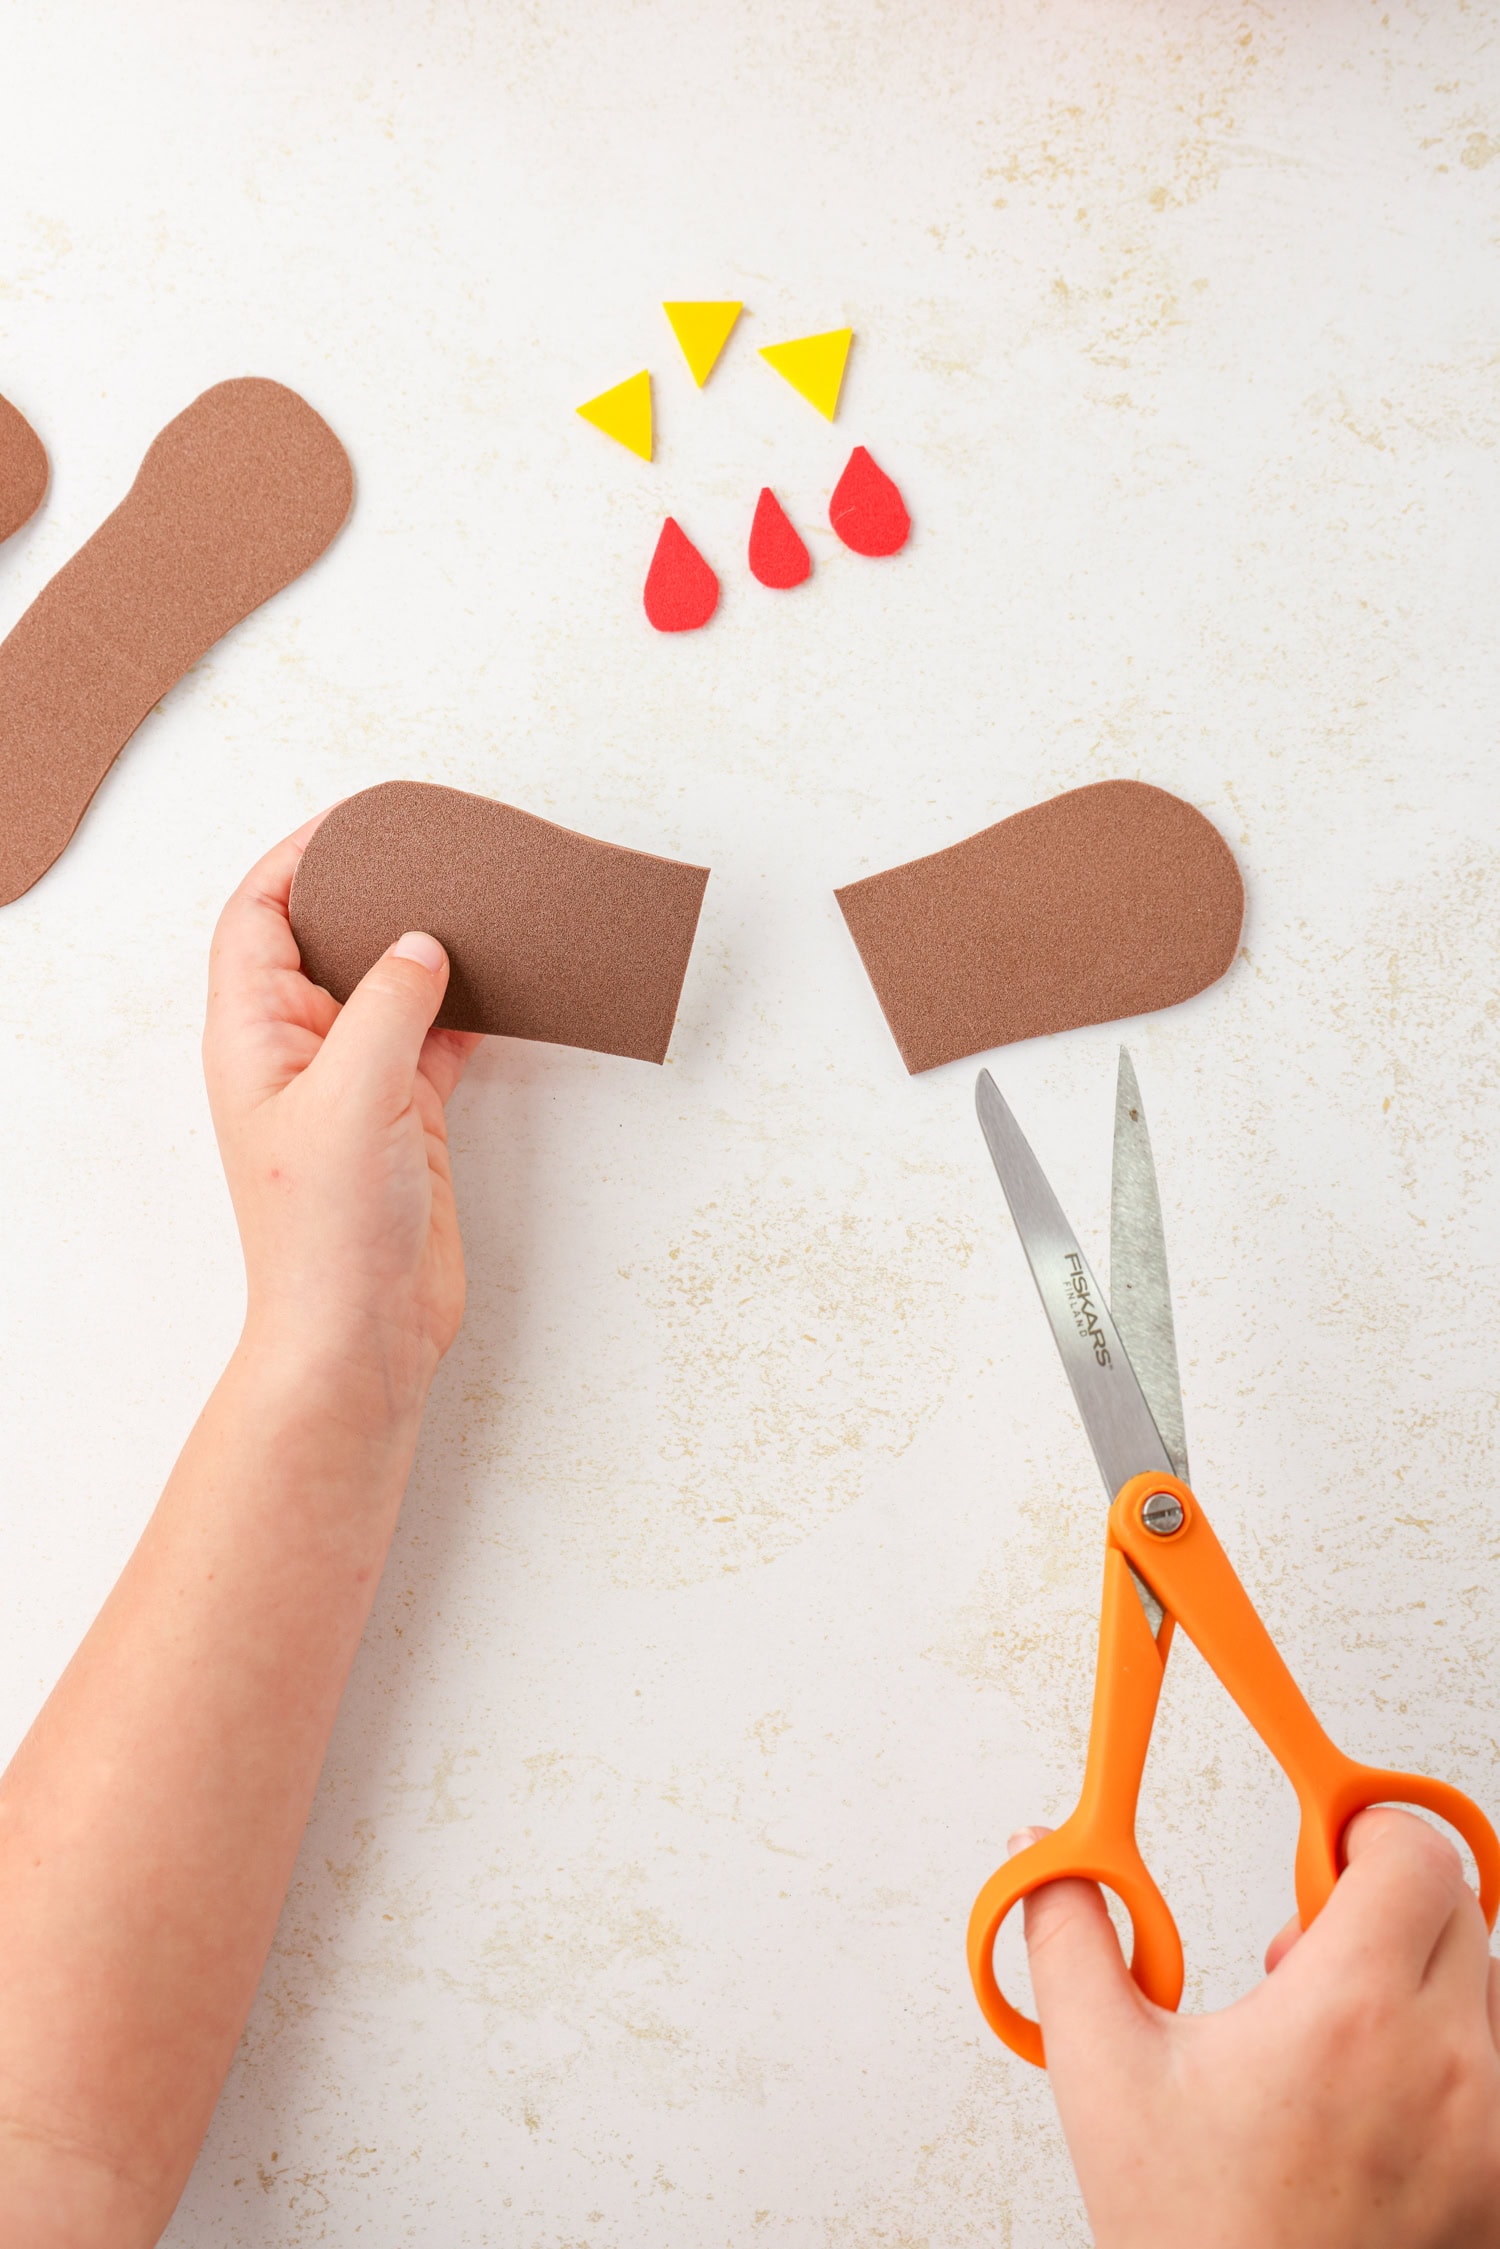
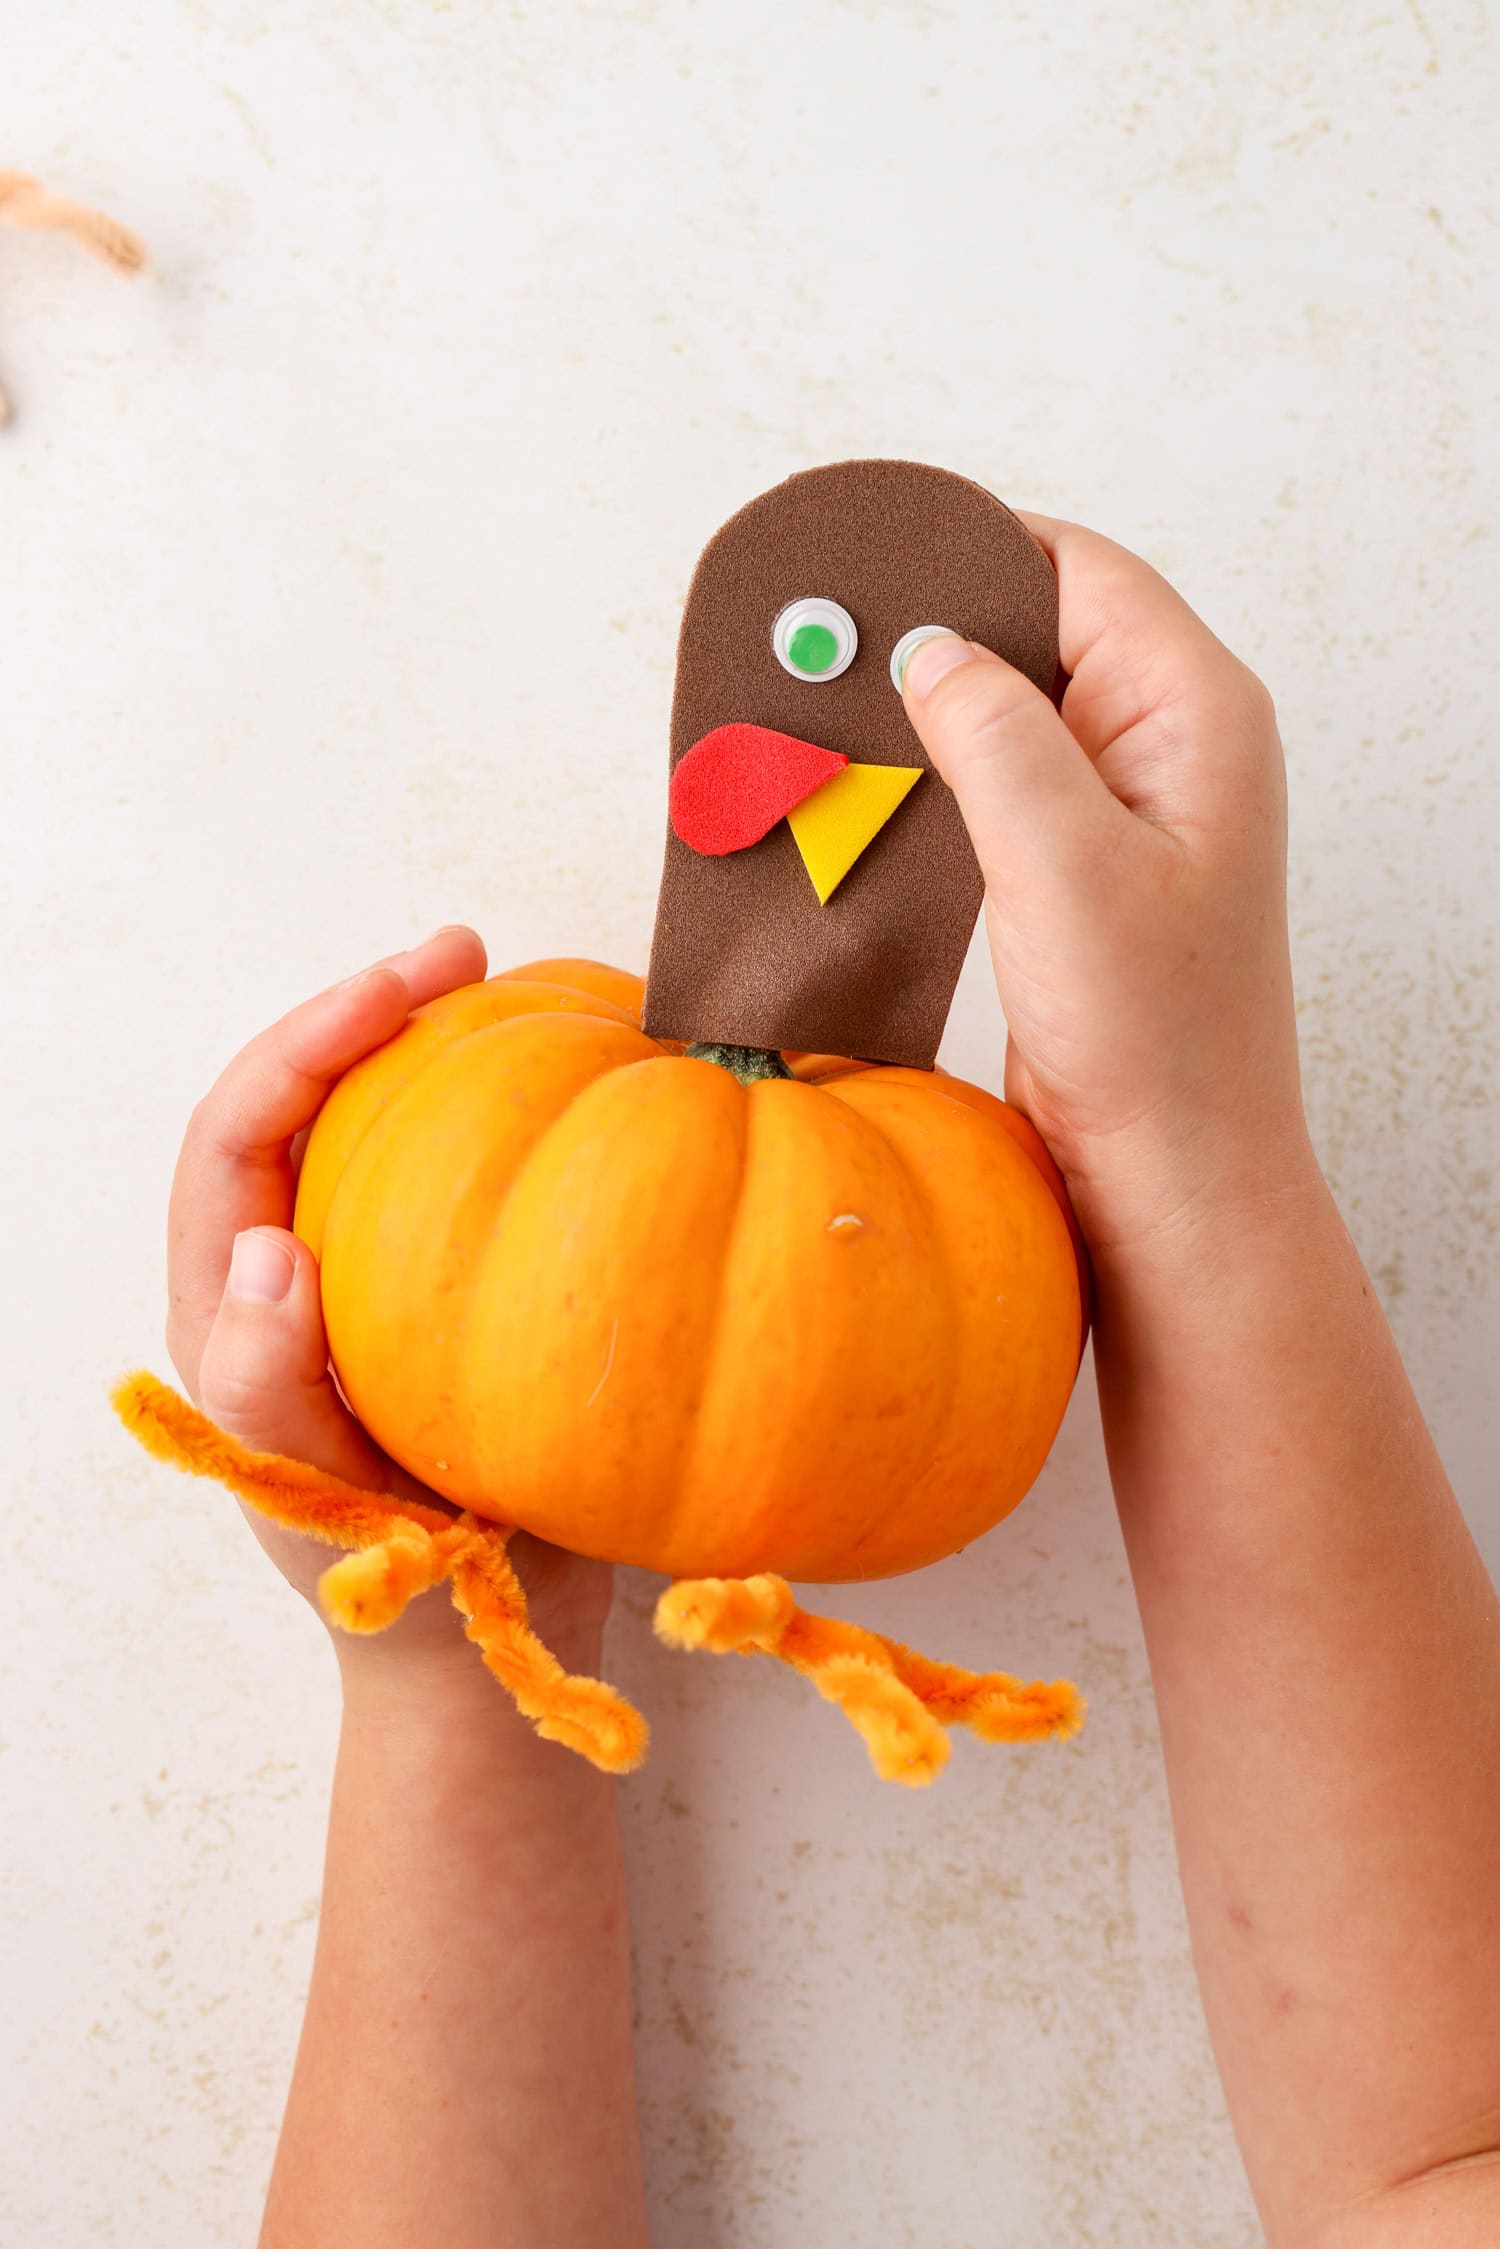
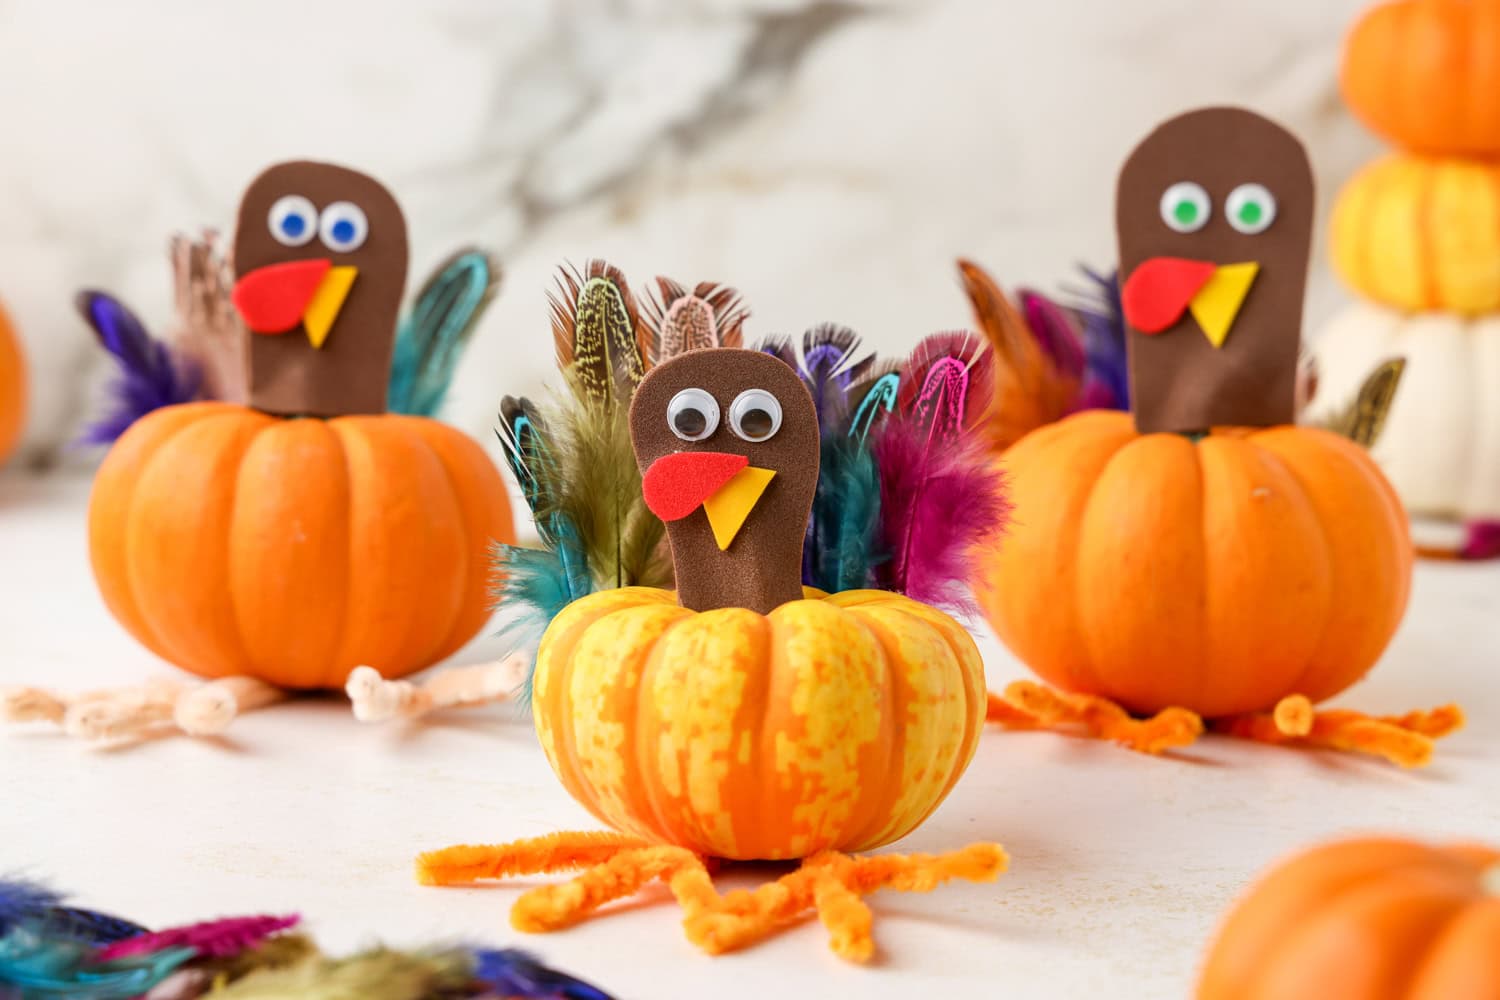
First, cut out the turkey’s head by folding a brown foam sheet in half and cutting a rounded “peanut” shape.
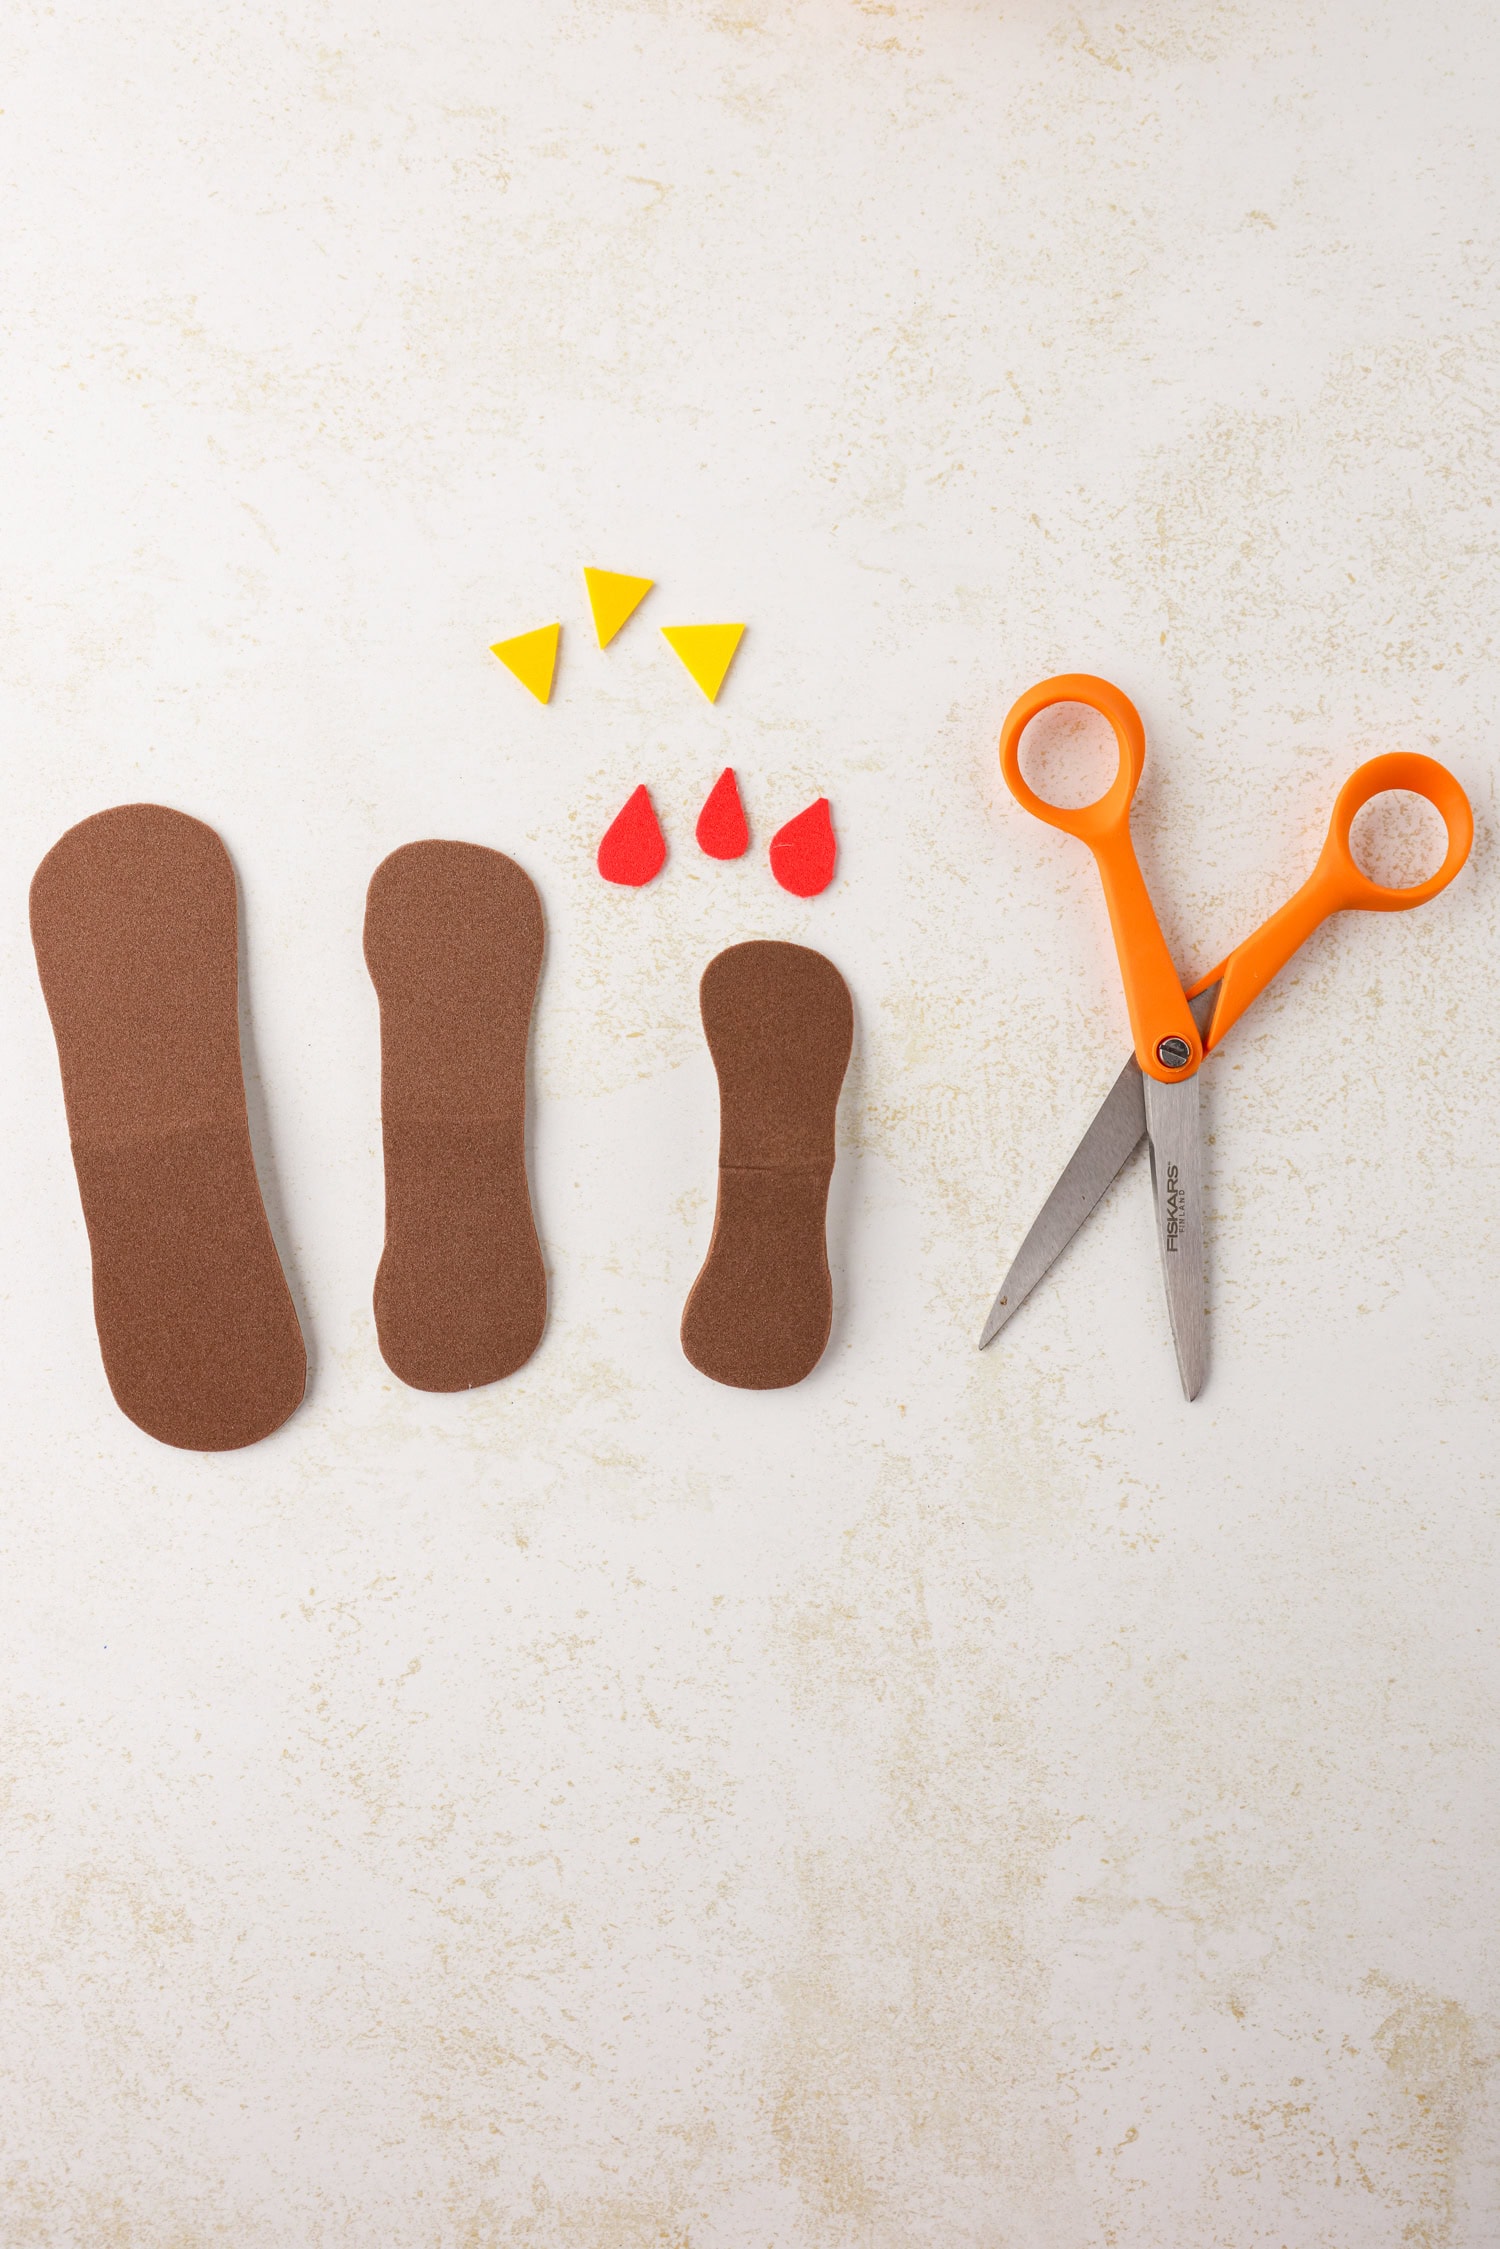
Open the peanut shape and cut it in half to make two identical shapes. These two pieces will be the front and back of the head for your turkey.
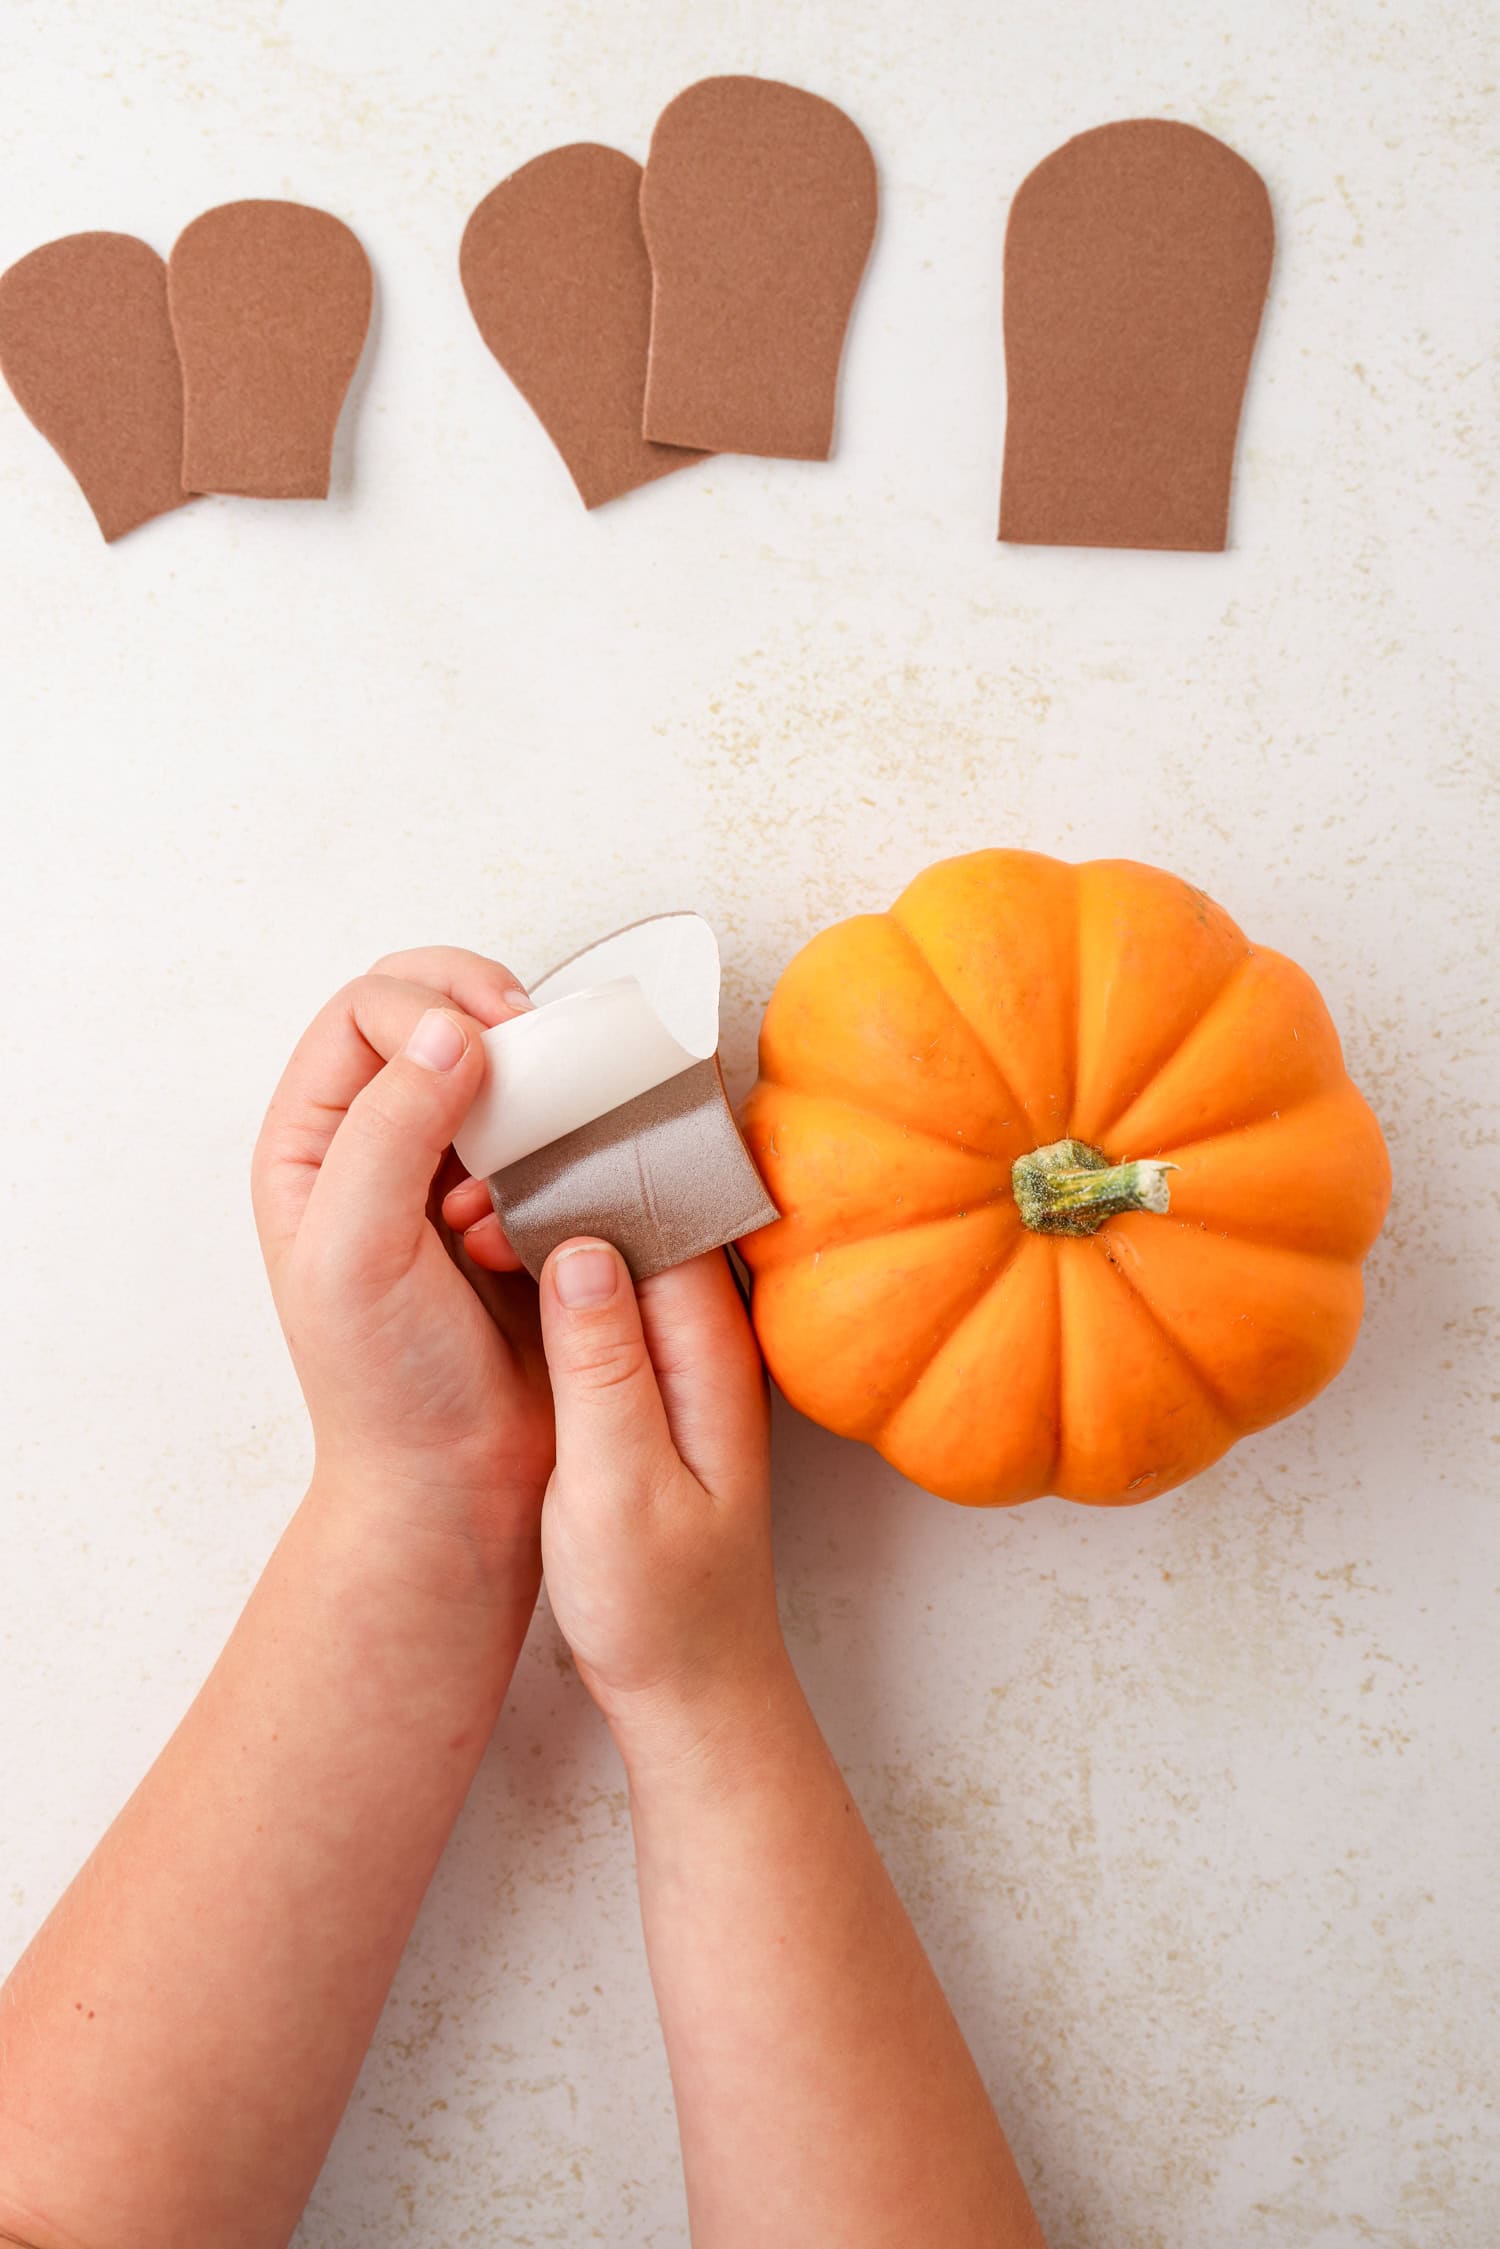
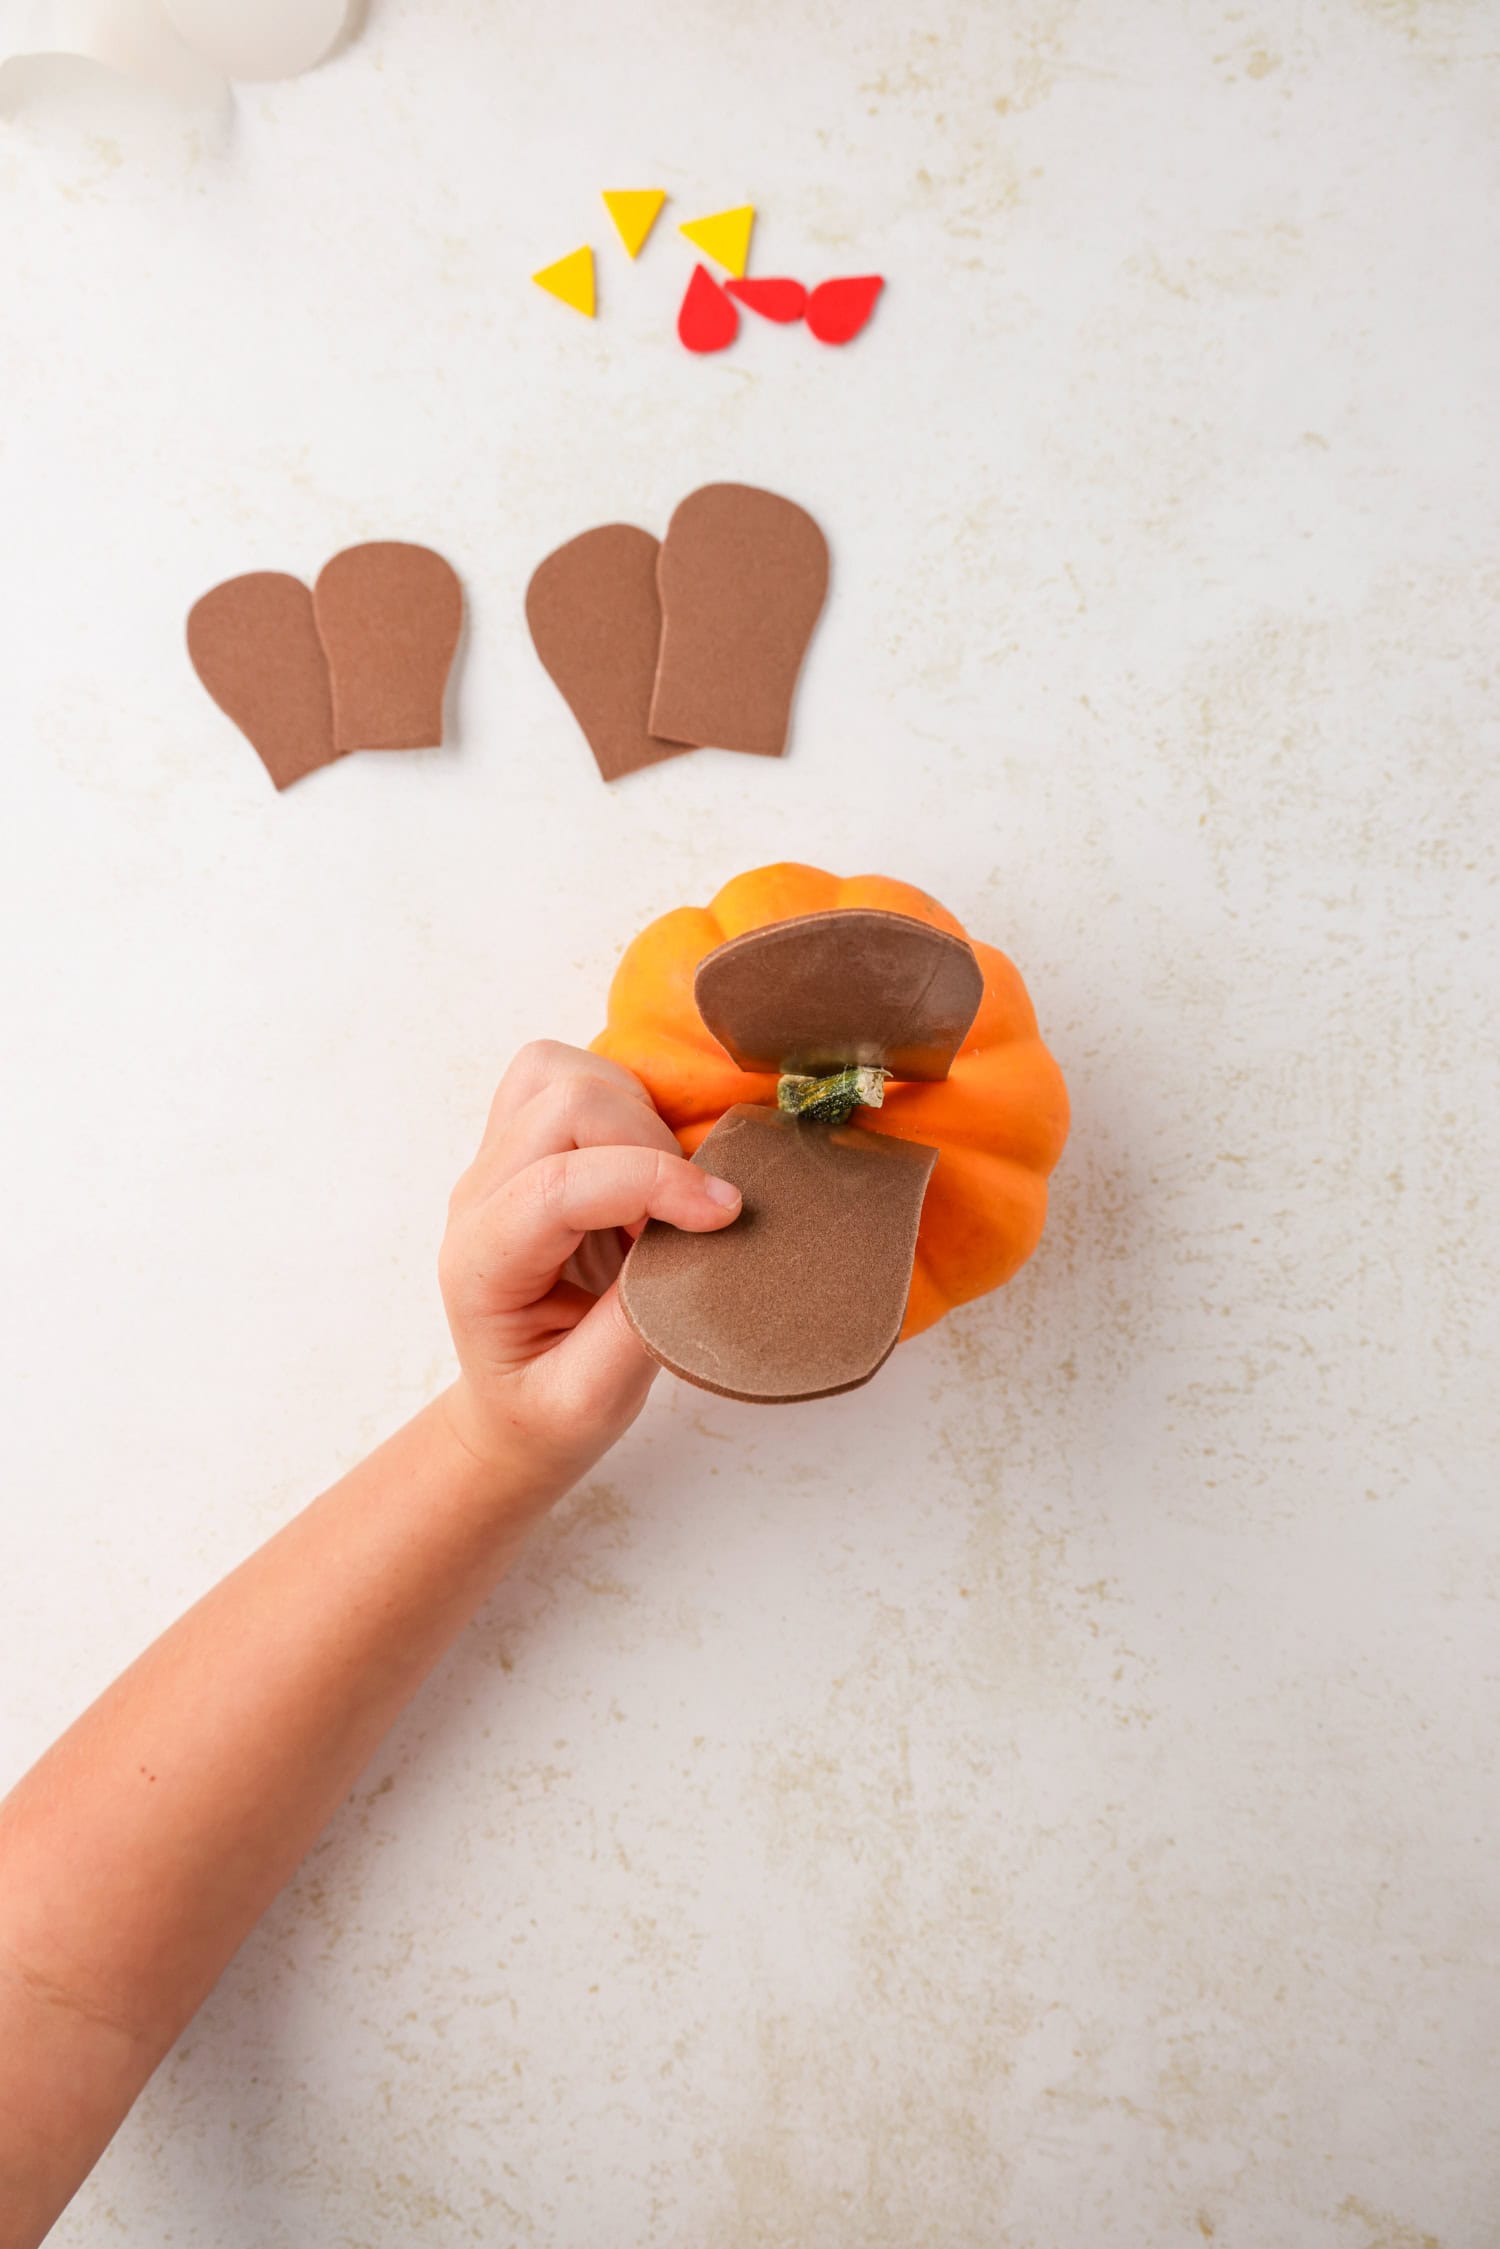
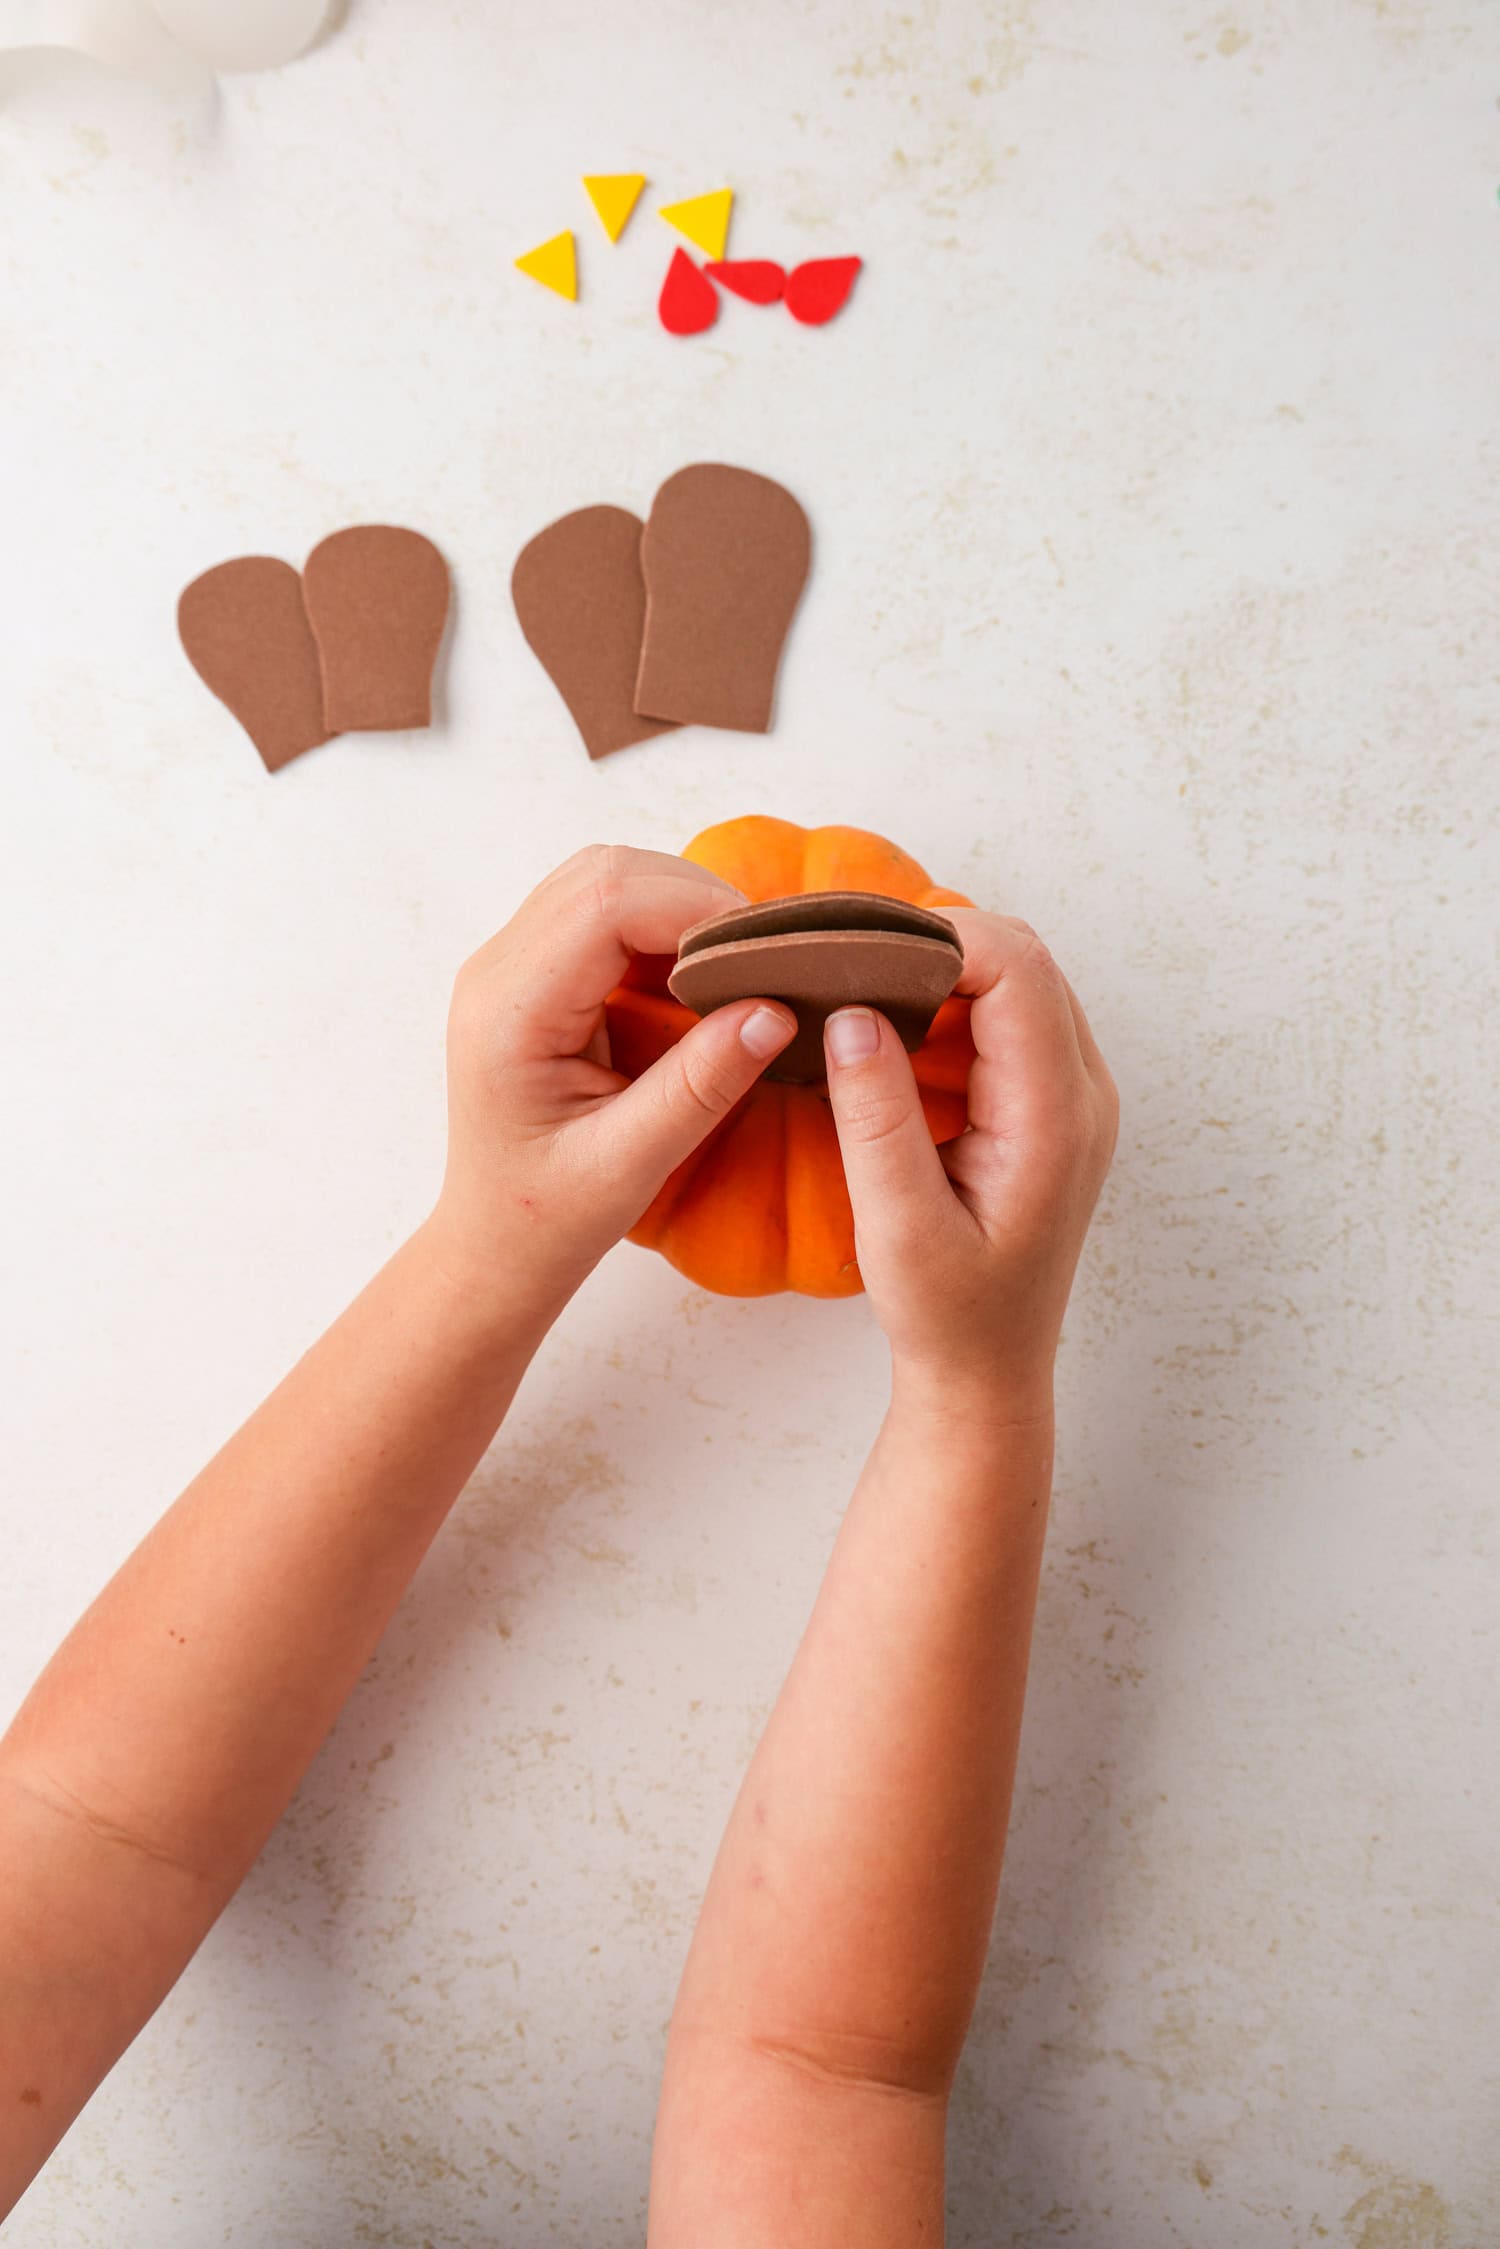
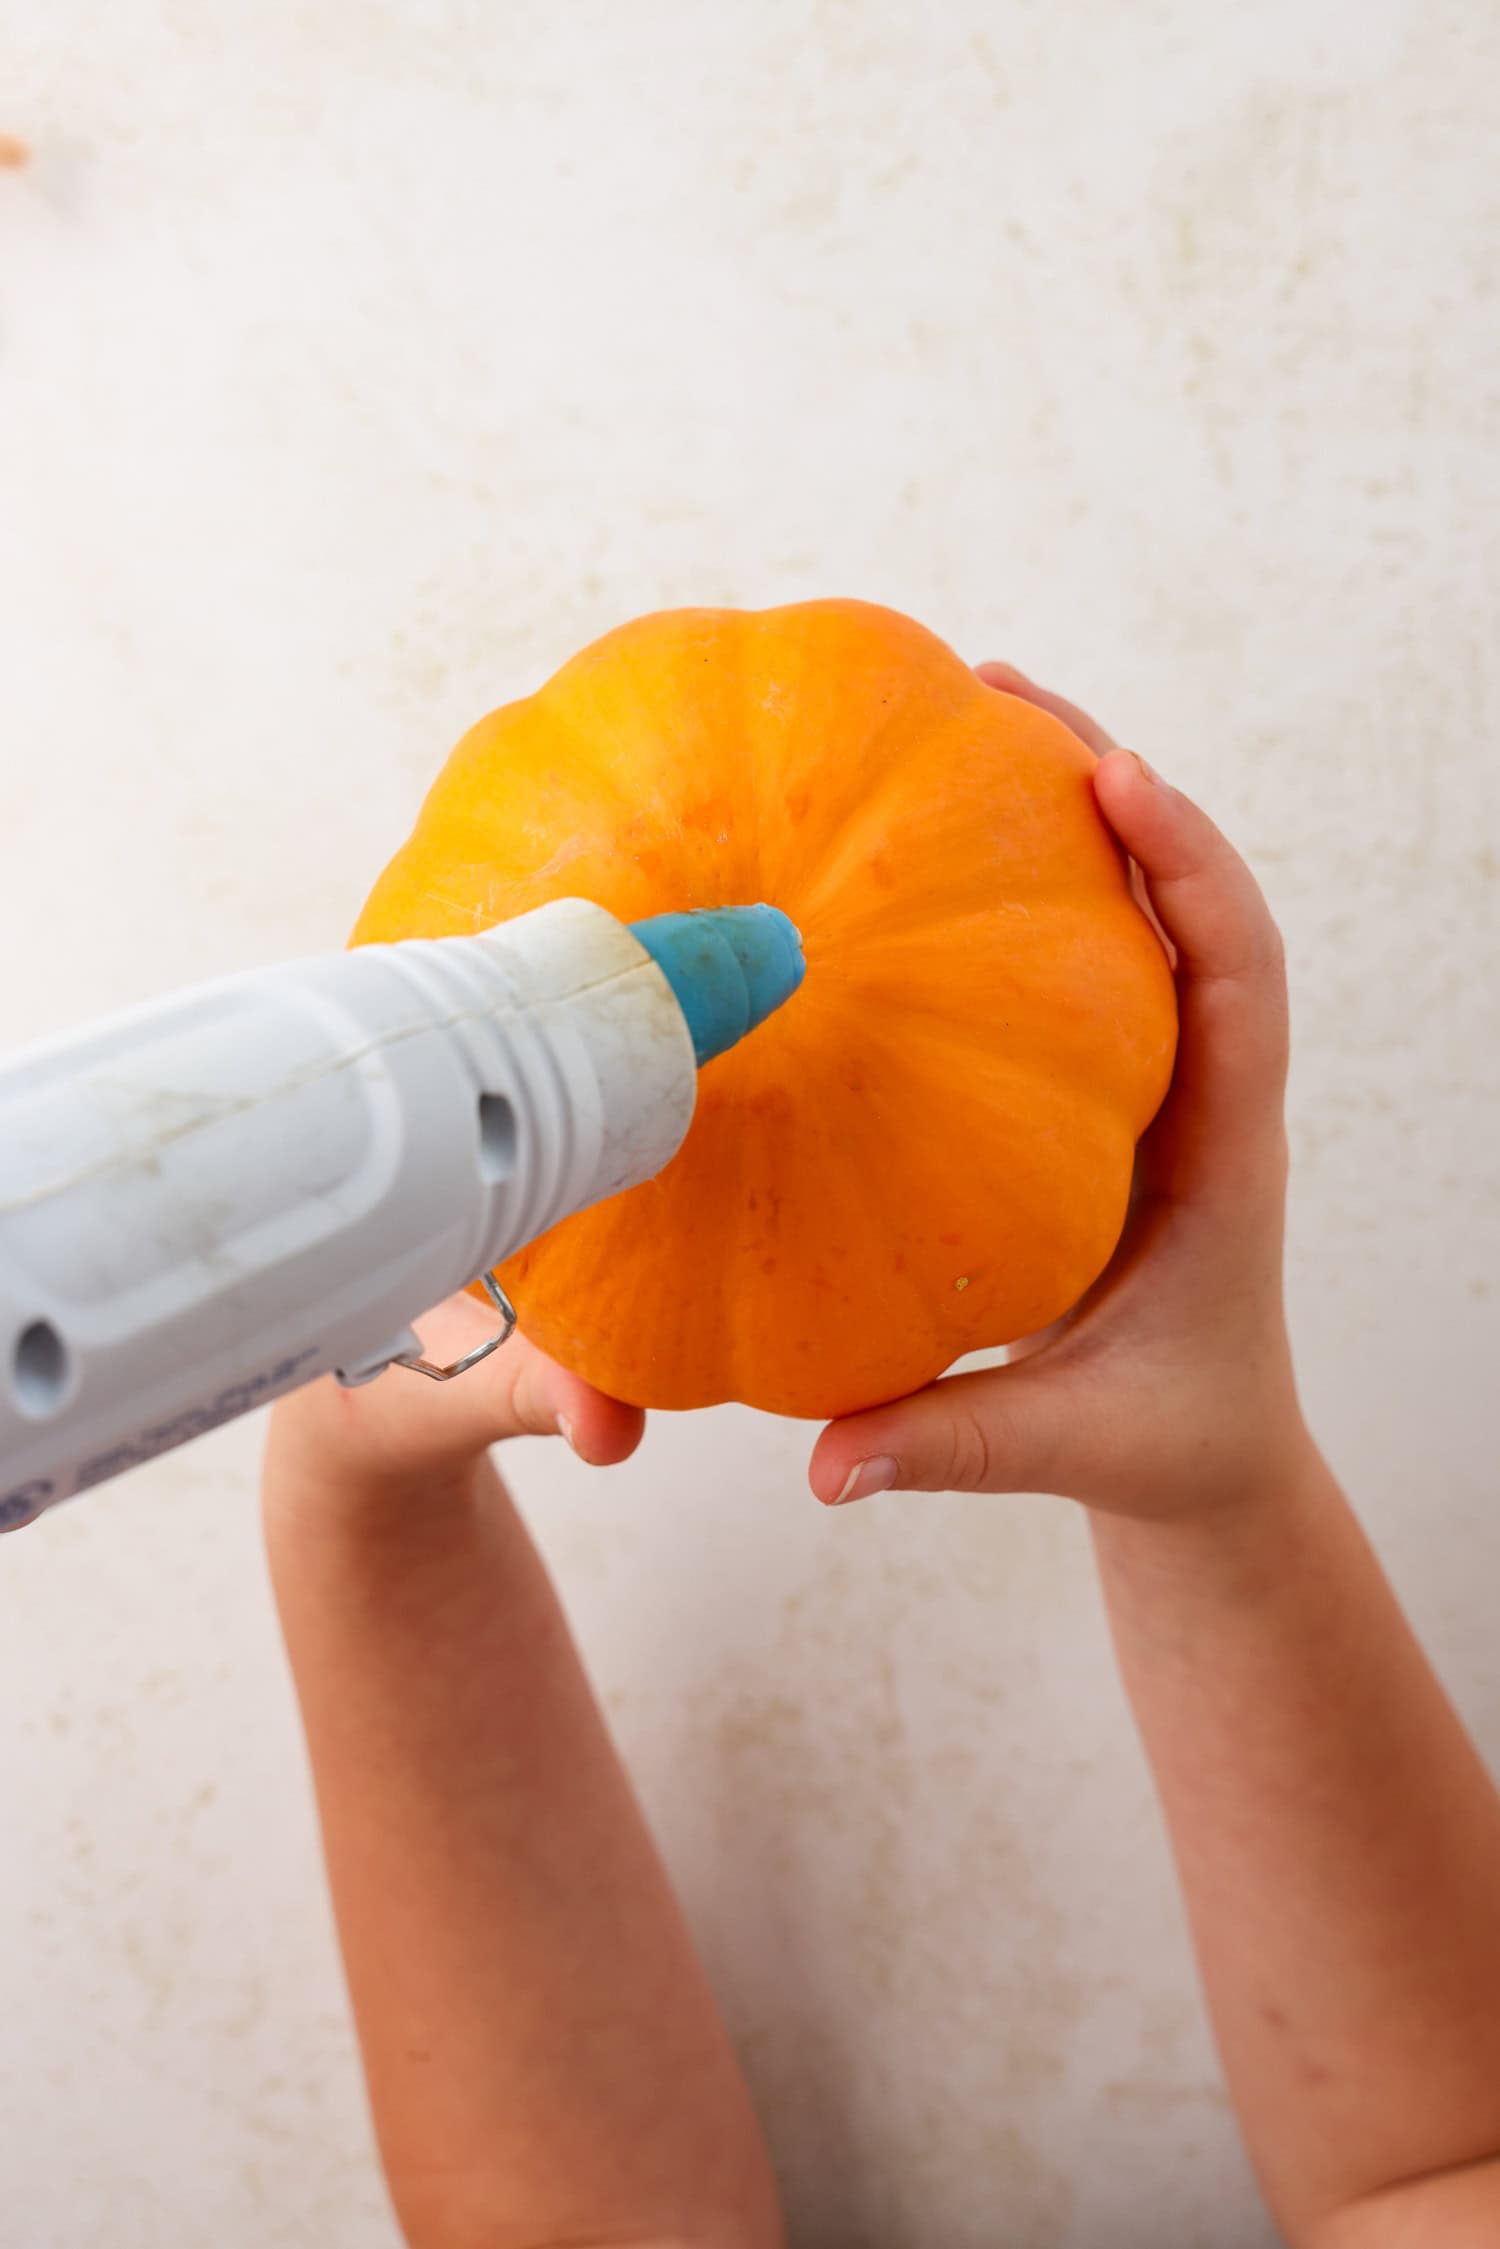
Peel off the backings and place one on each side of the stem at the top of the mini pumpkin, adhesive sides touching. Sandwich the stem between the two adhesive foam sheets and press together.
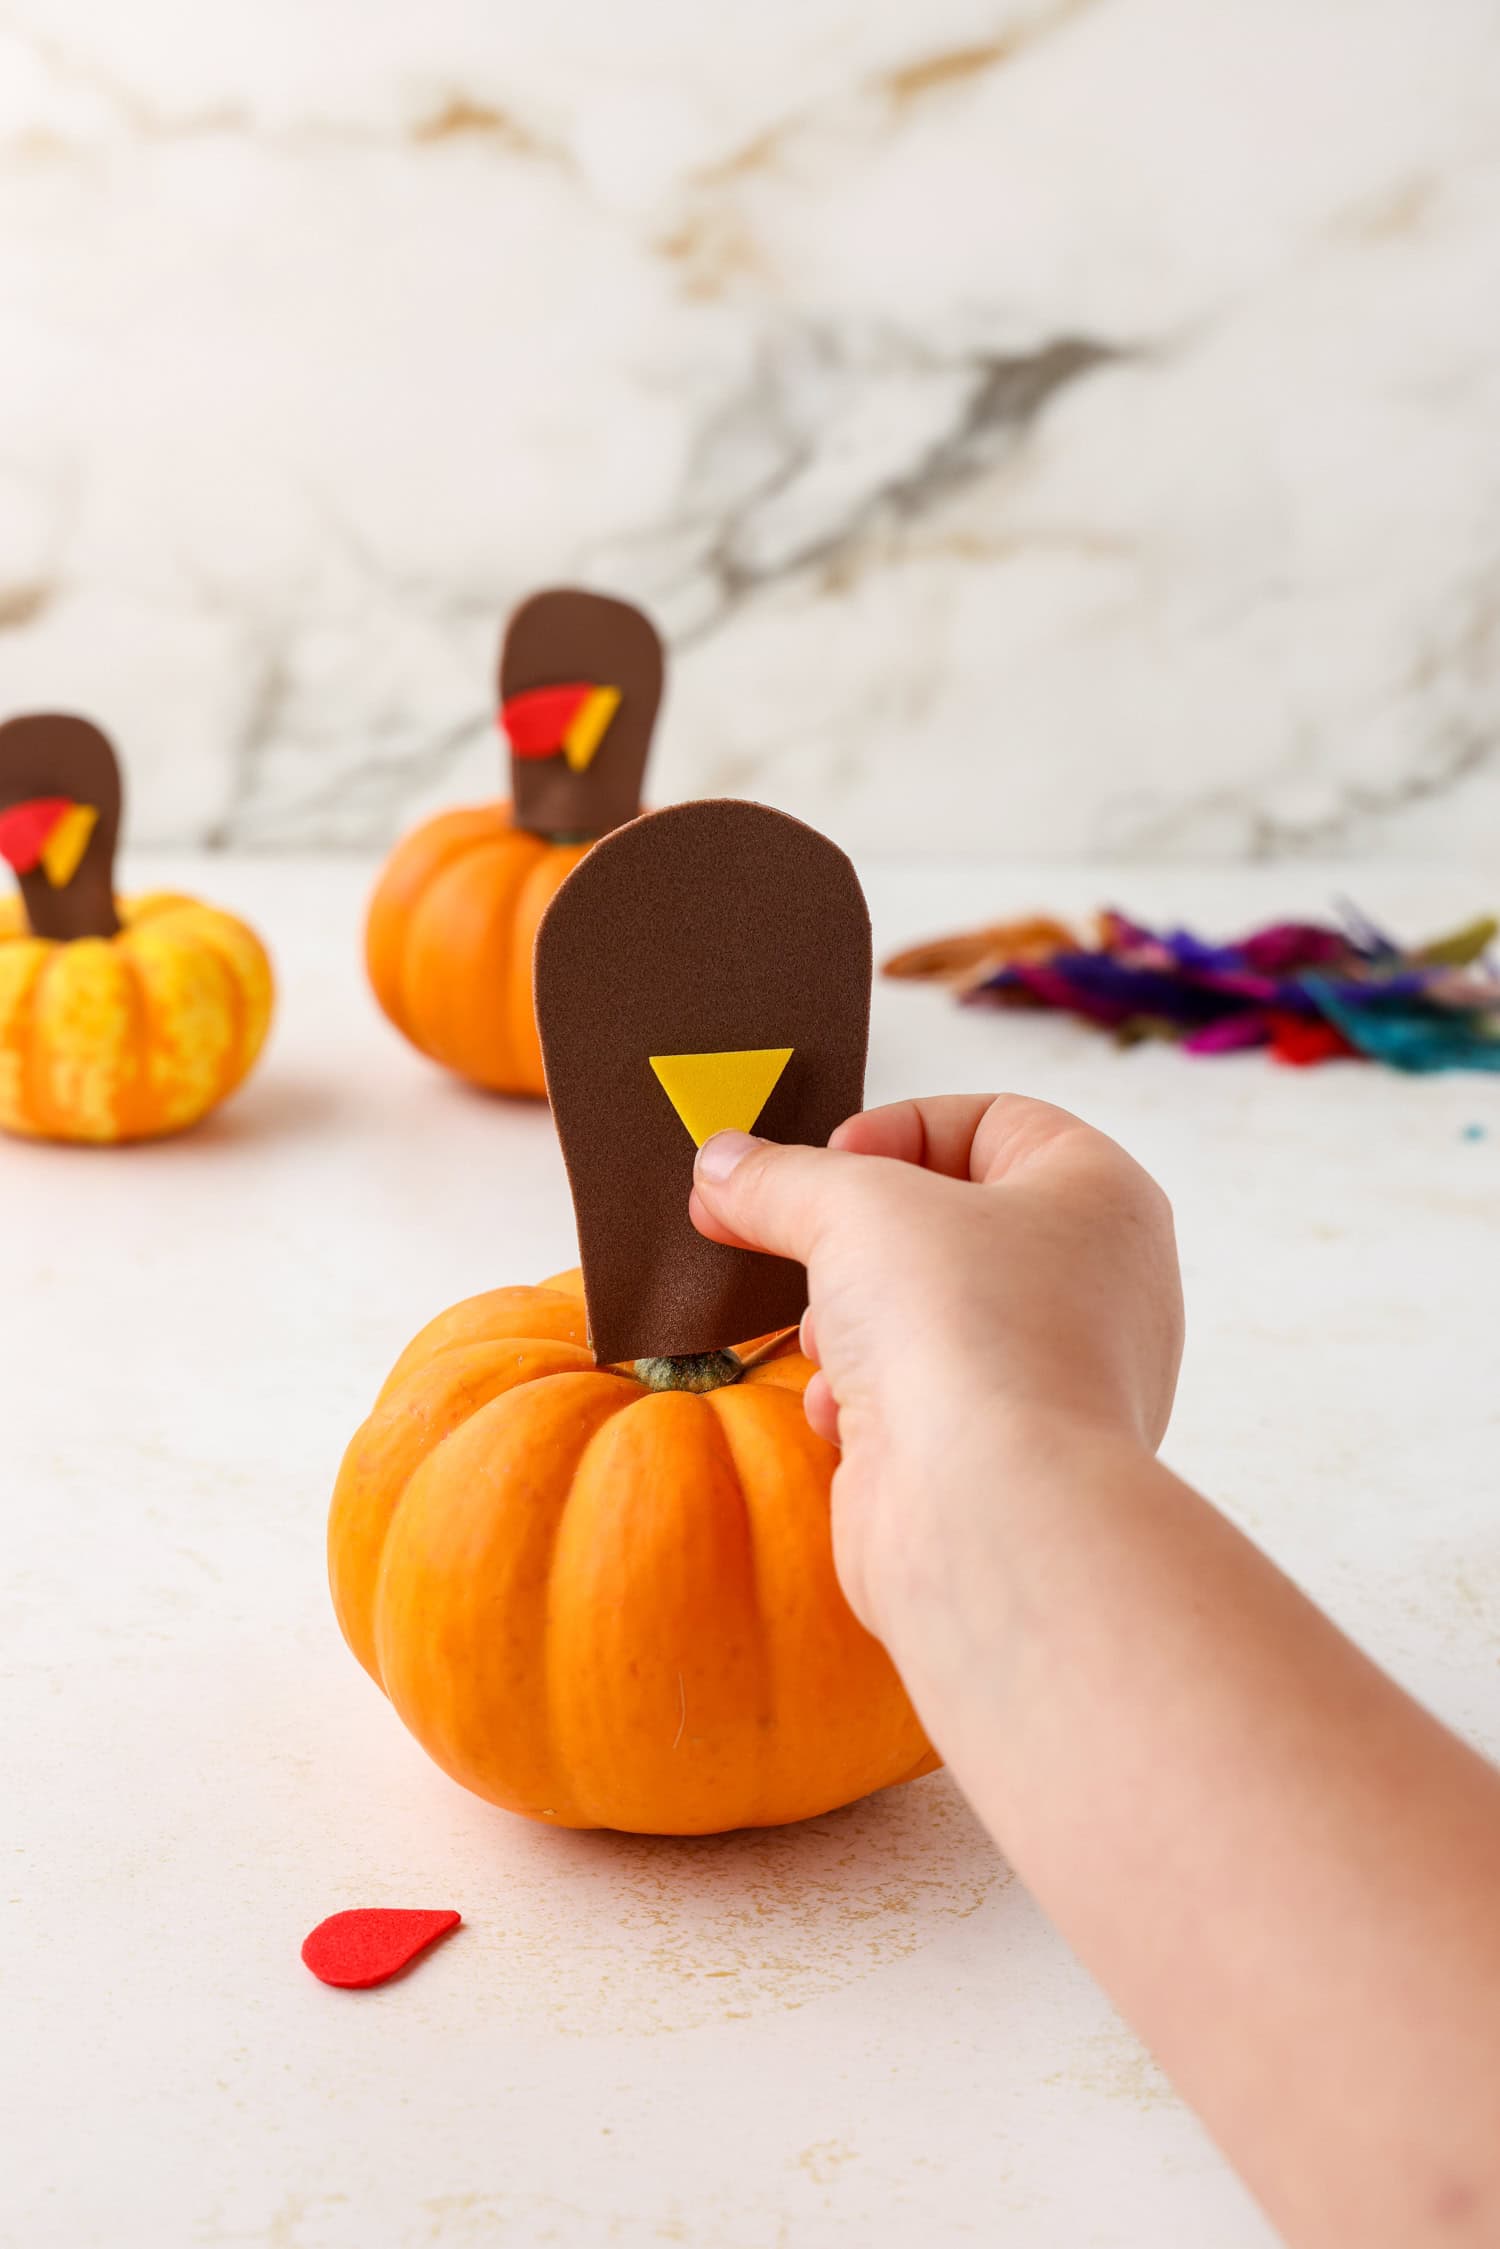
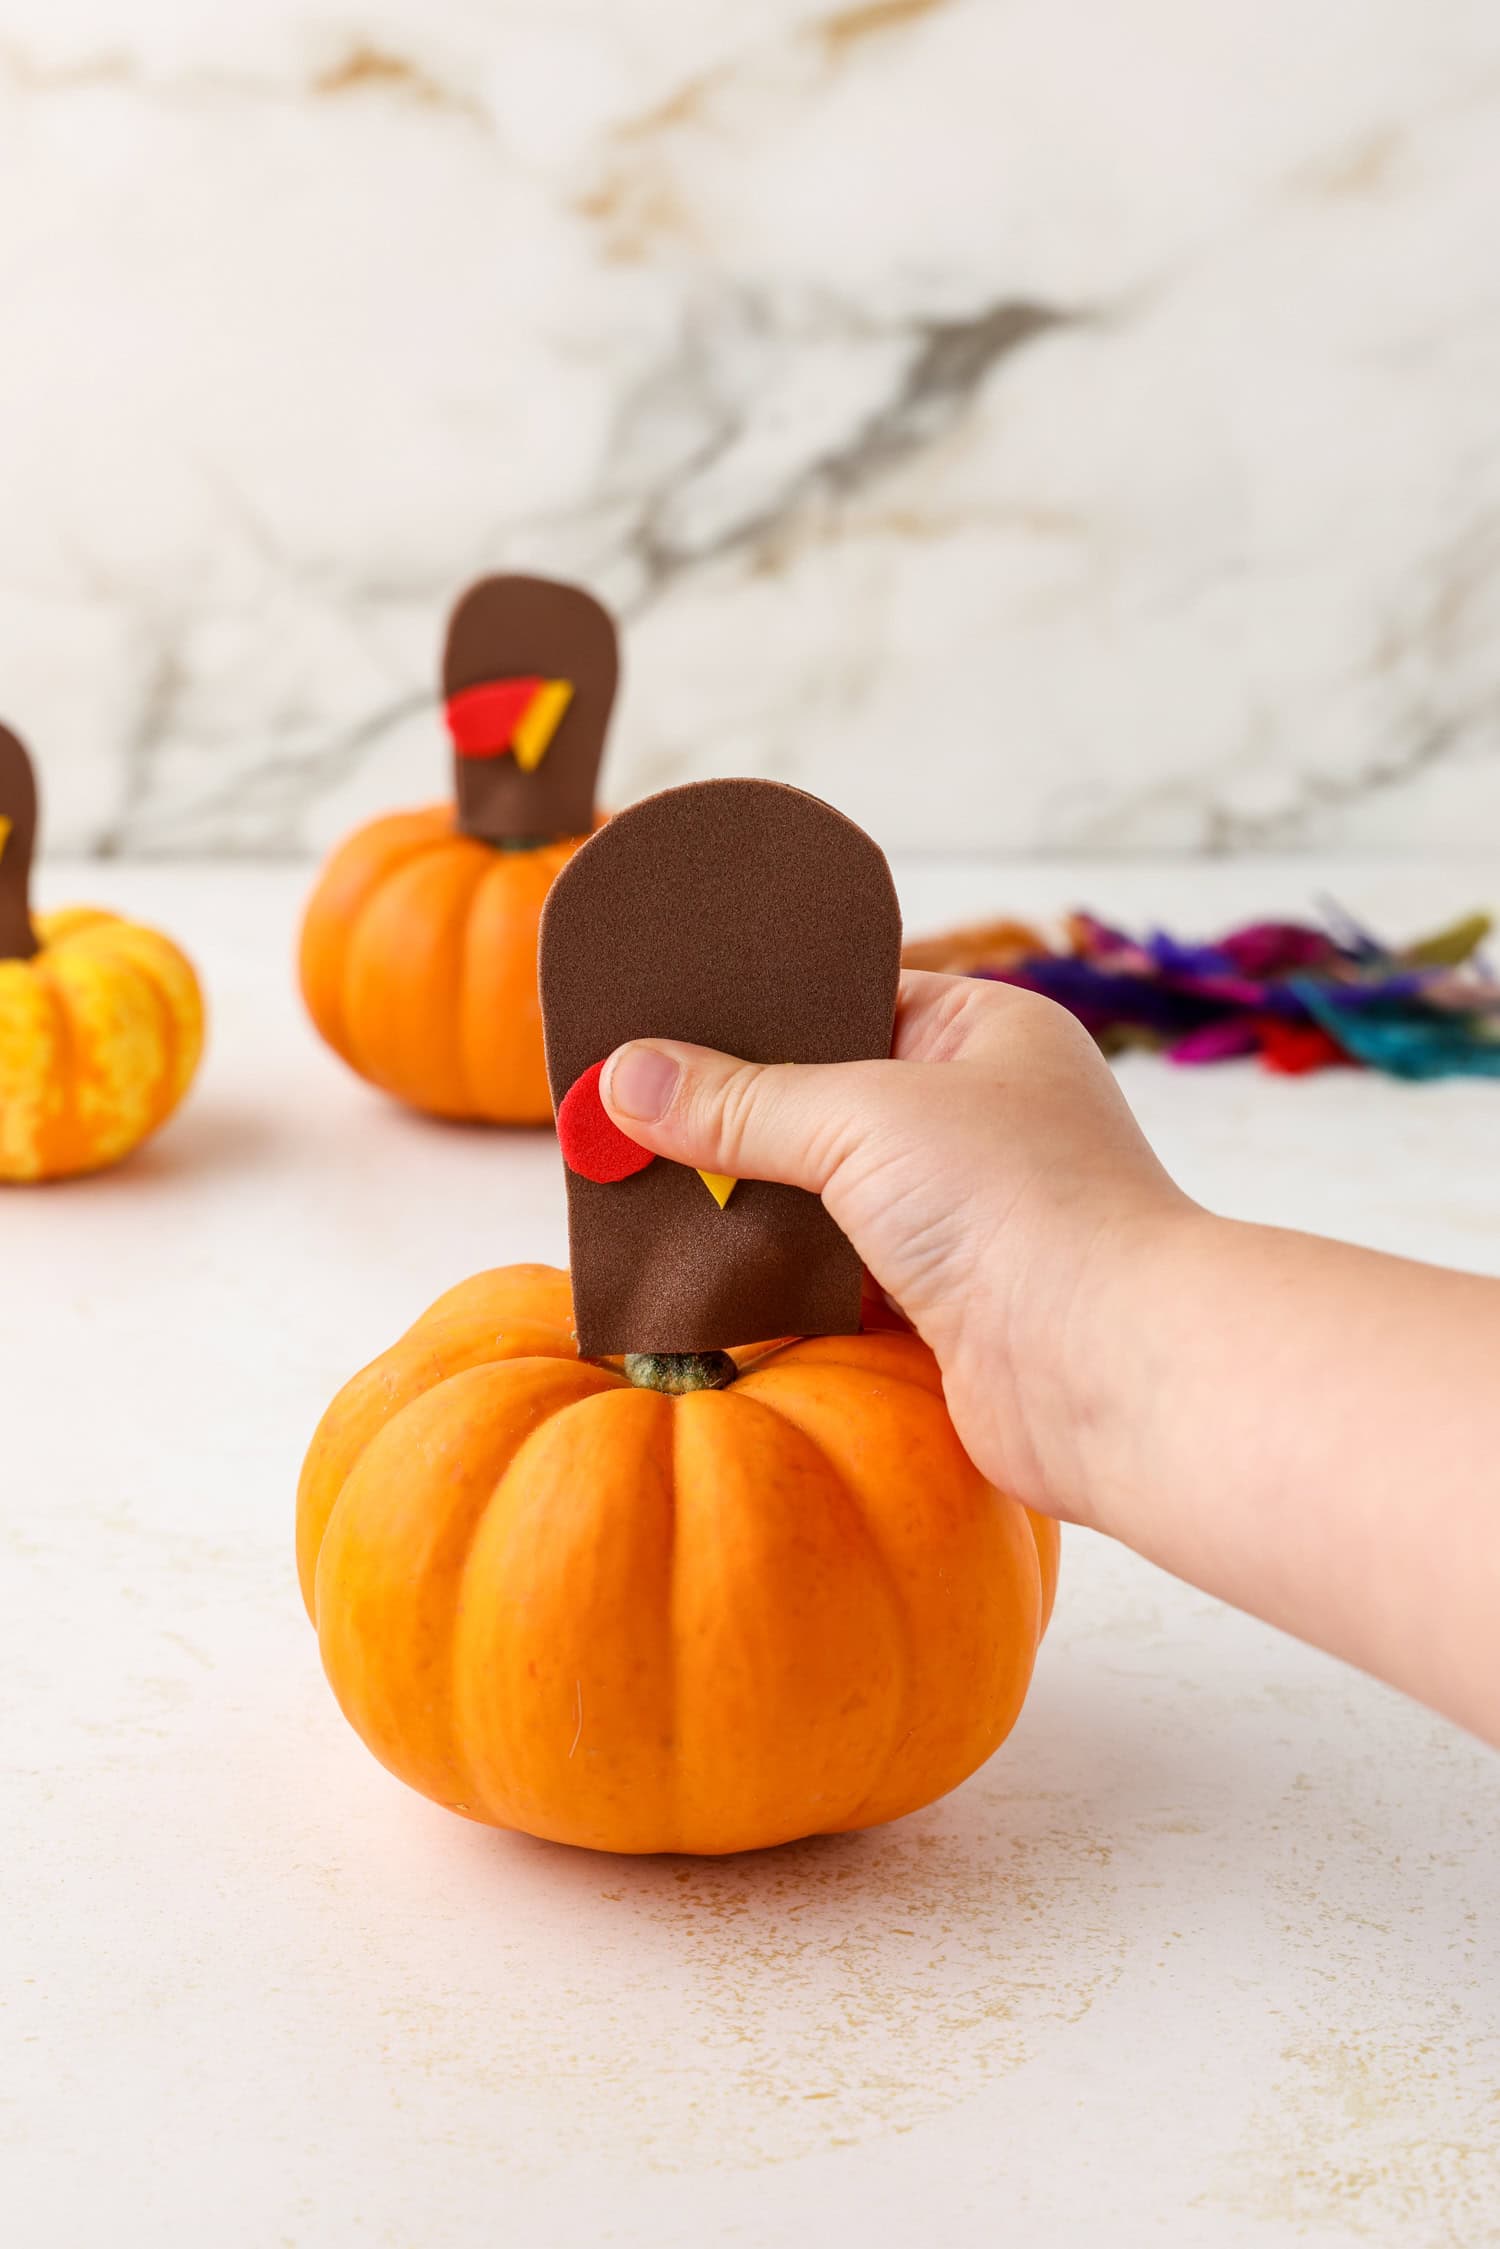
Cut a small triangle out of the yellow foam sheet for the turkey’s beak, then peel off the backing and press the sticky side on the turkey’s face.
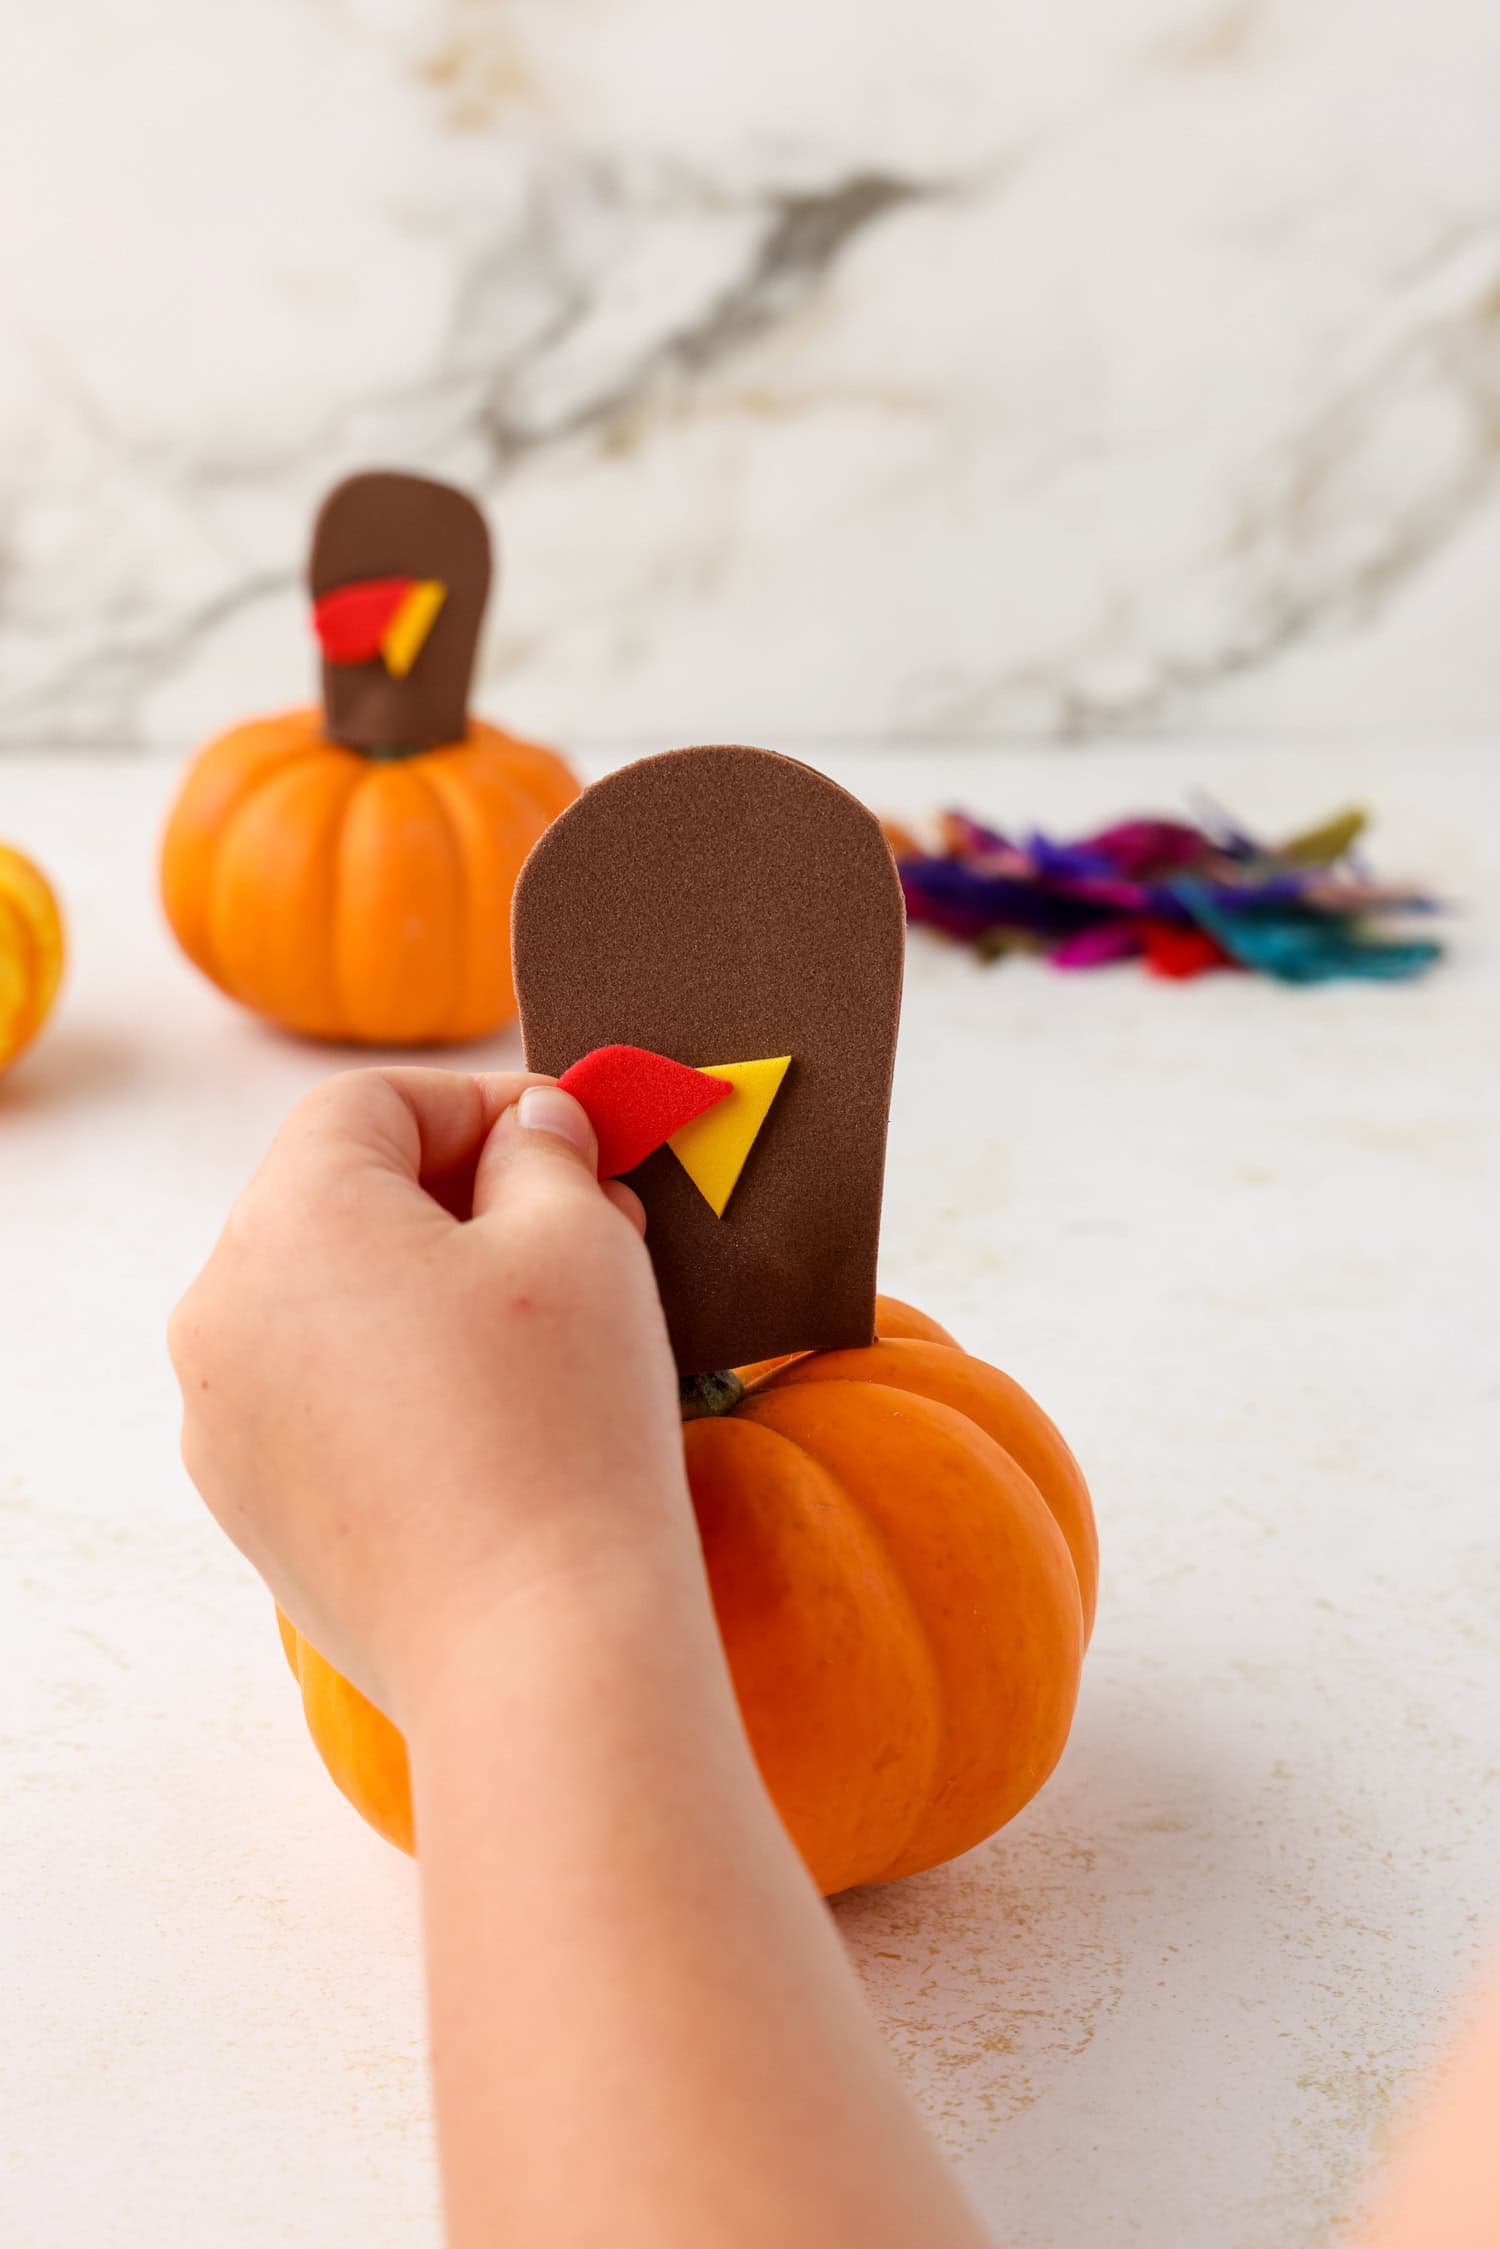
Cut simple raindrops out of the red foam sheet to form the turkey’s snood, then place it at the top of the turkey’s beak.
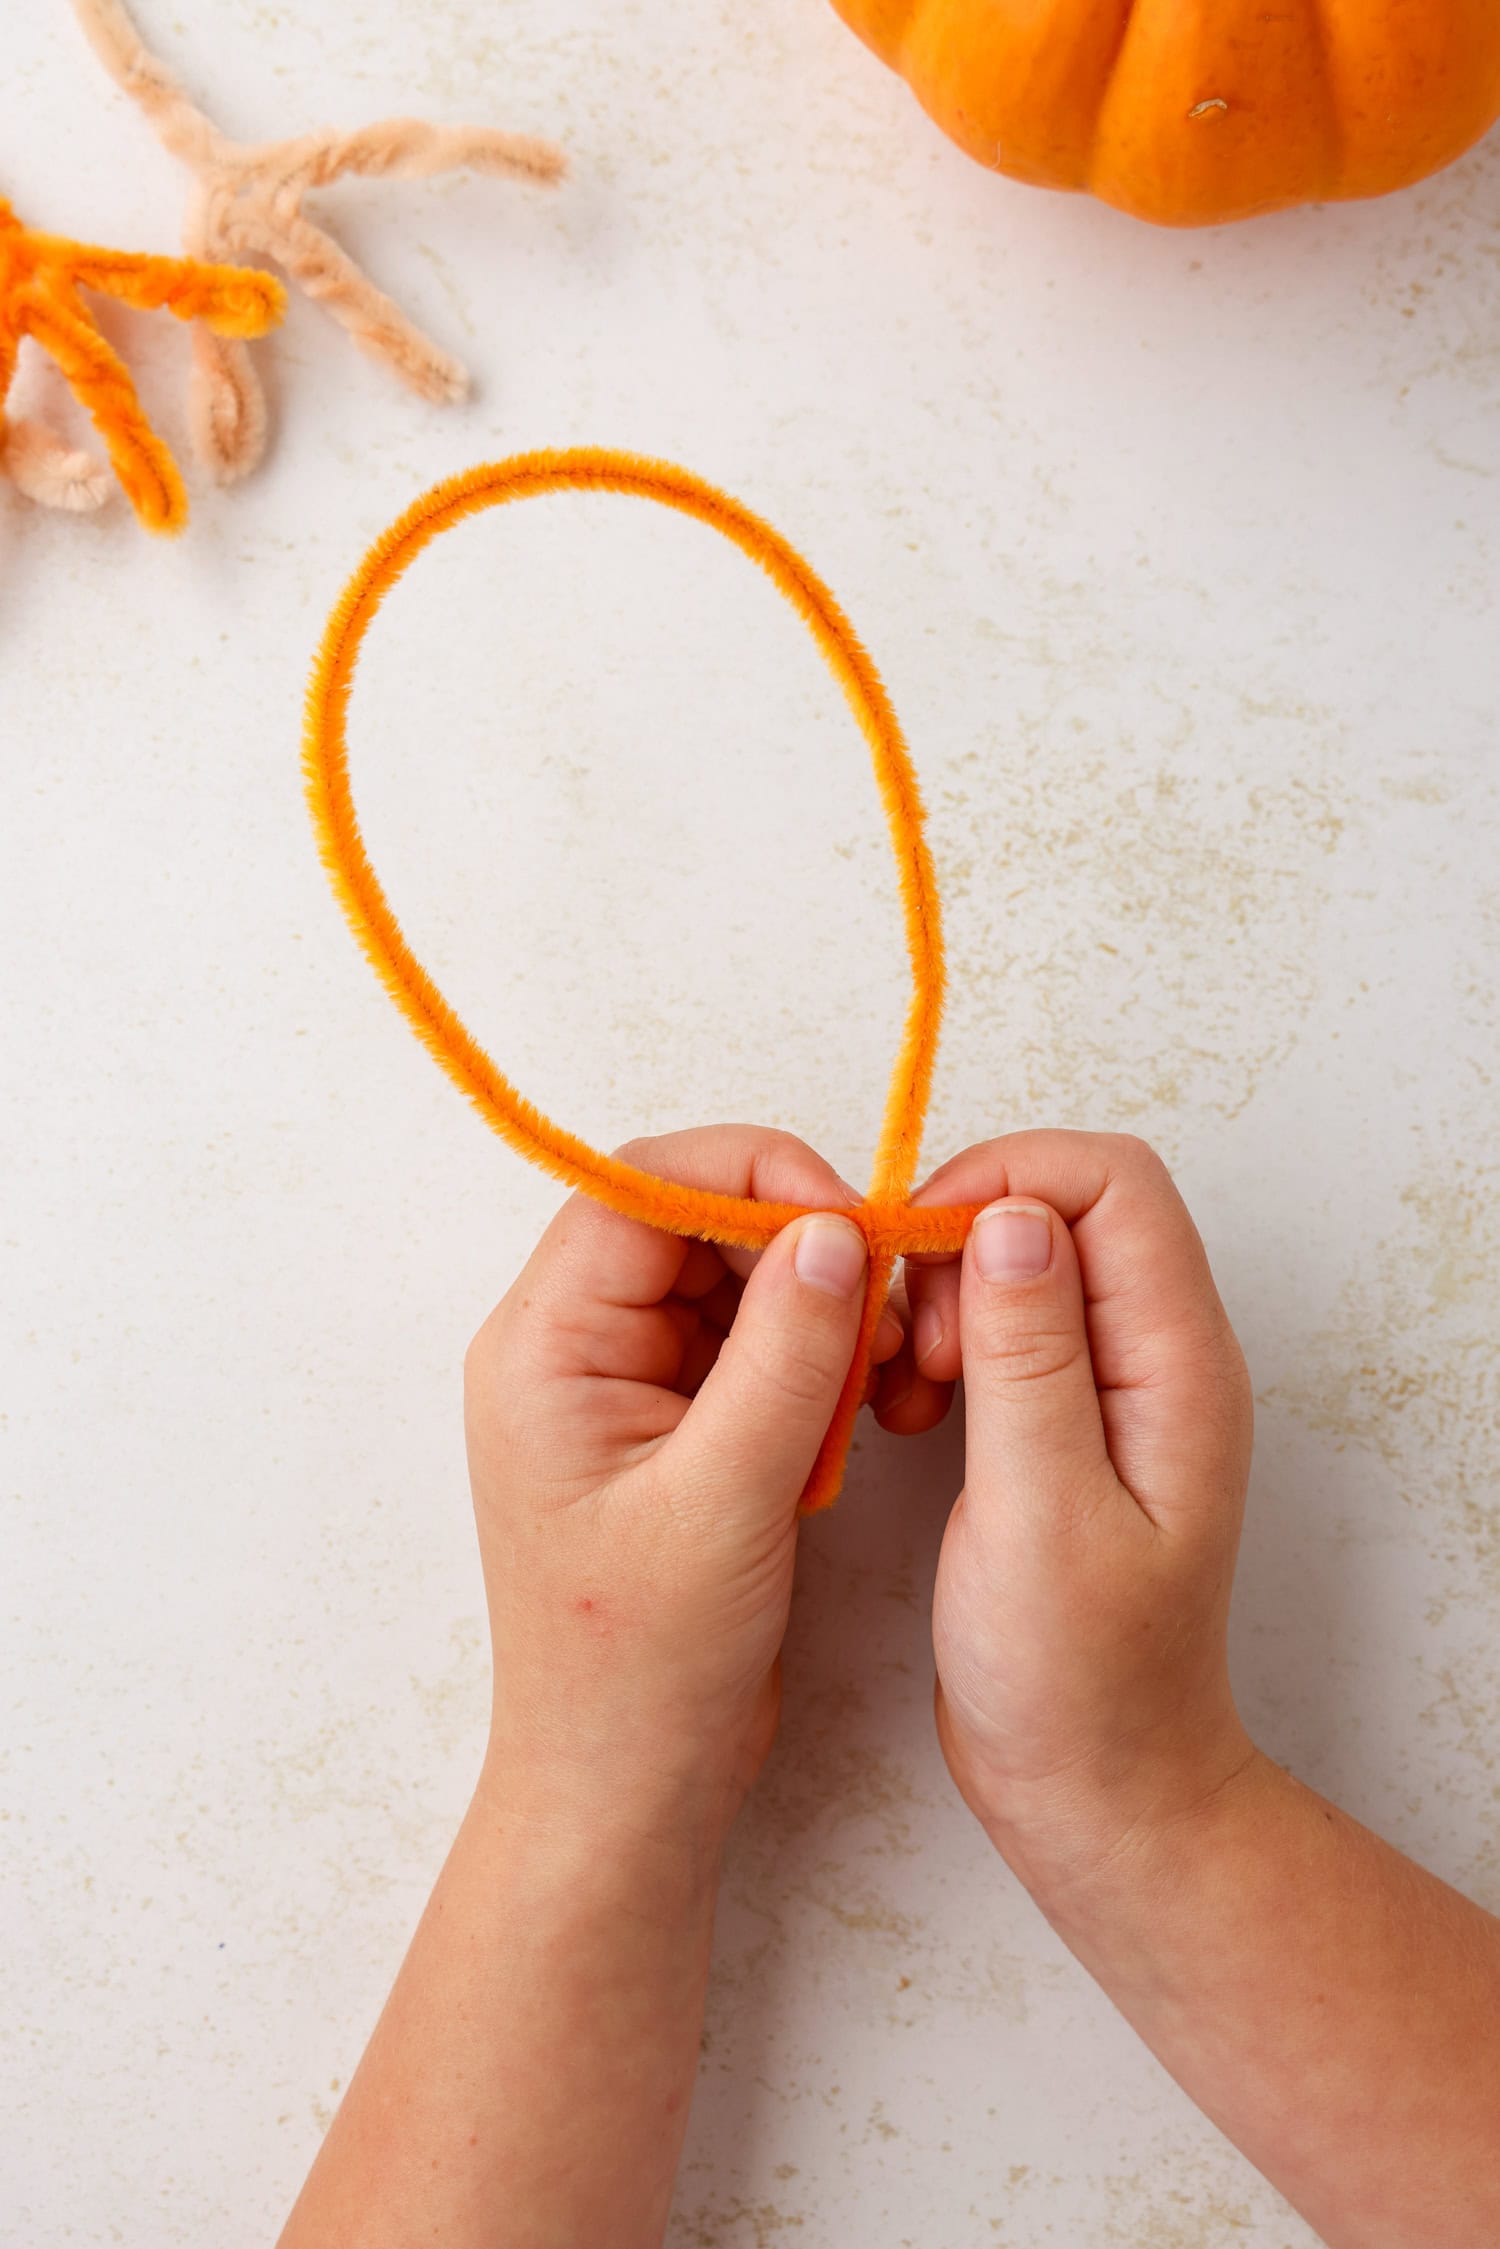
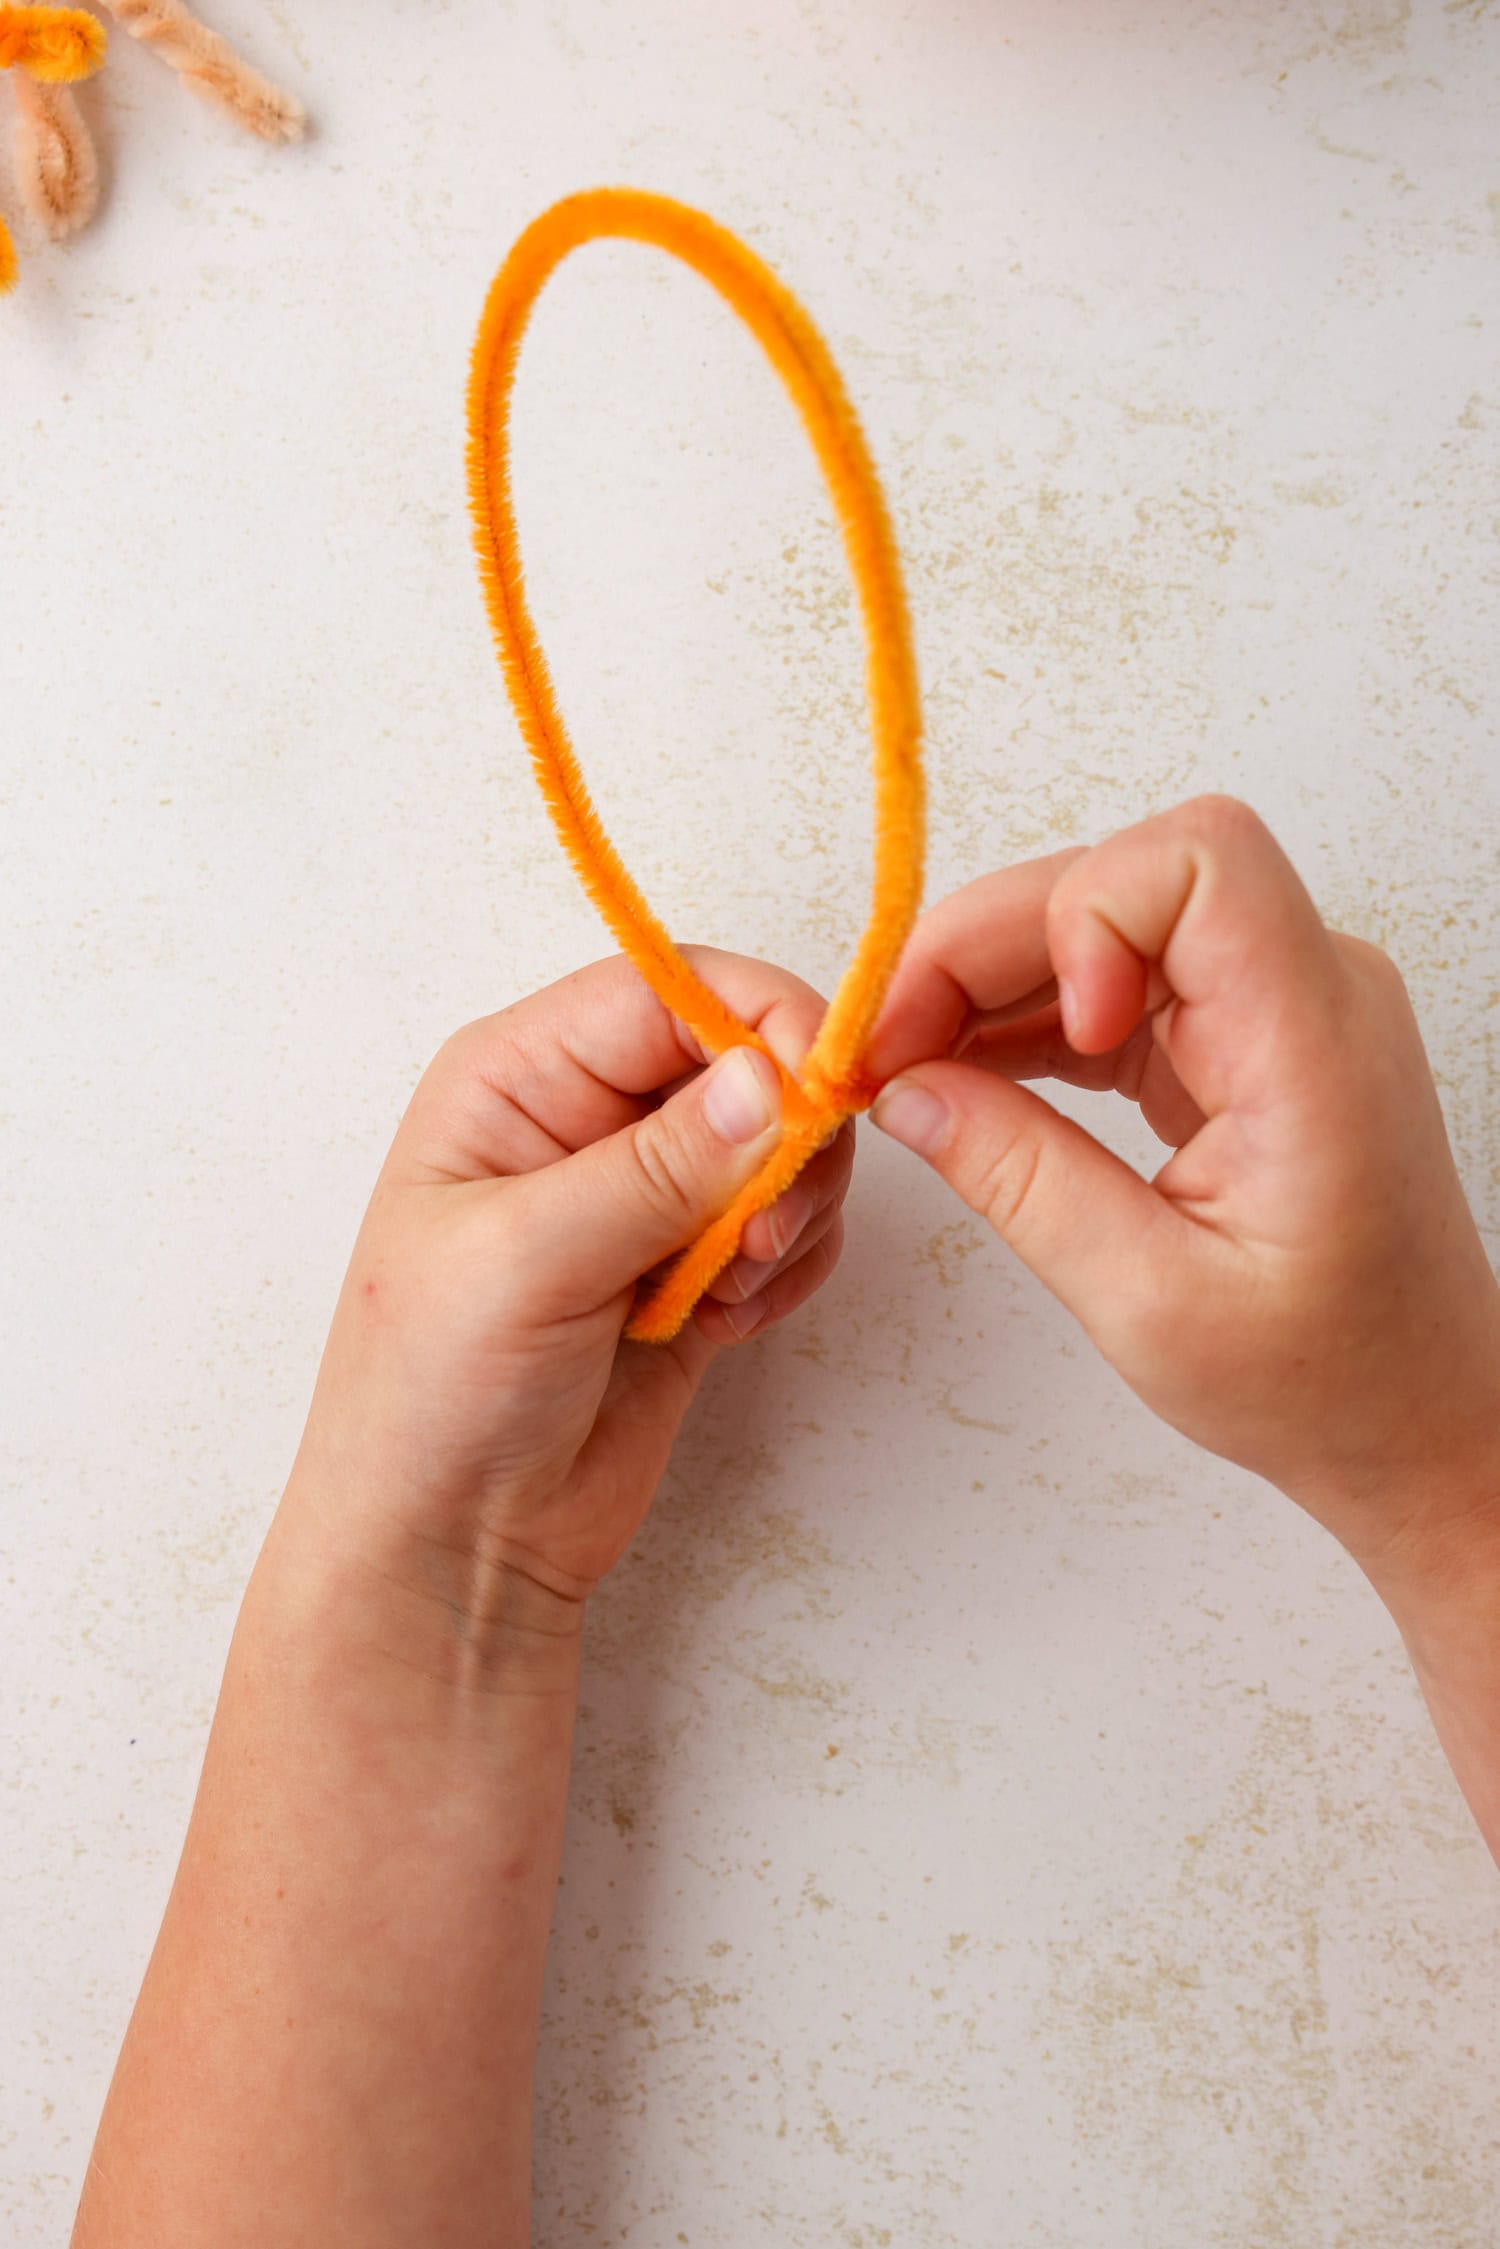
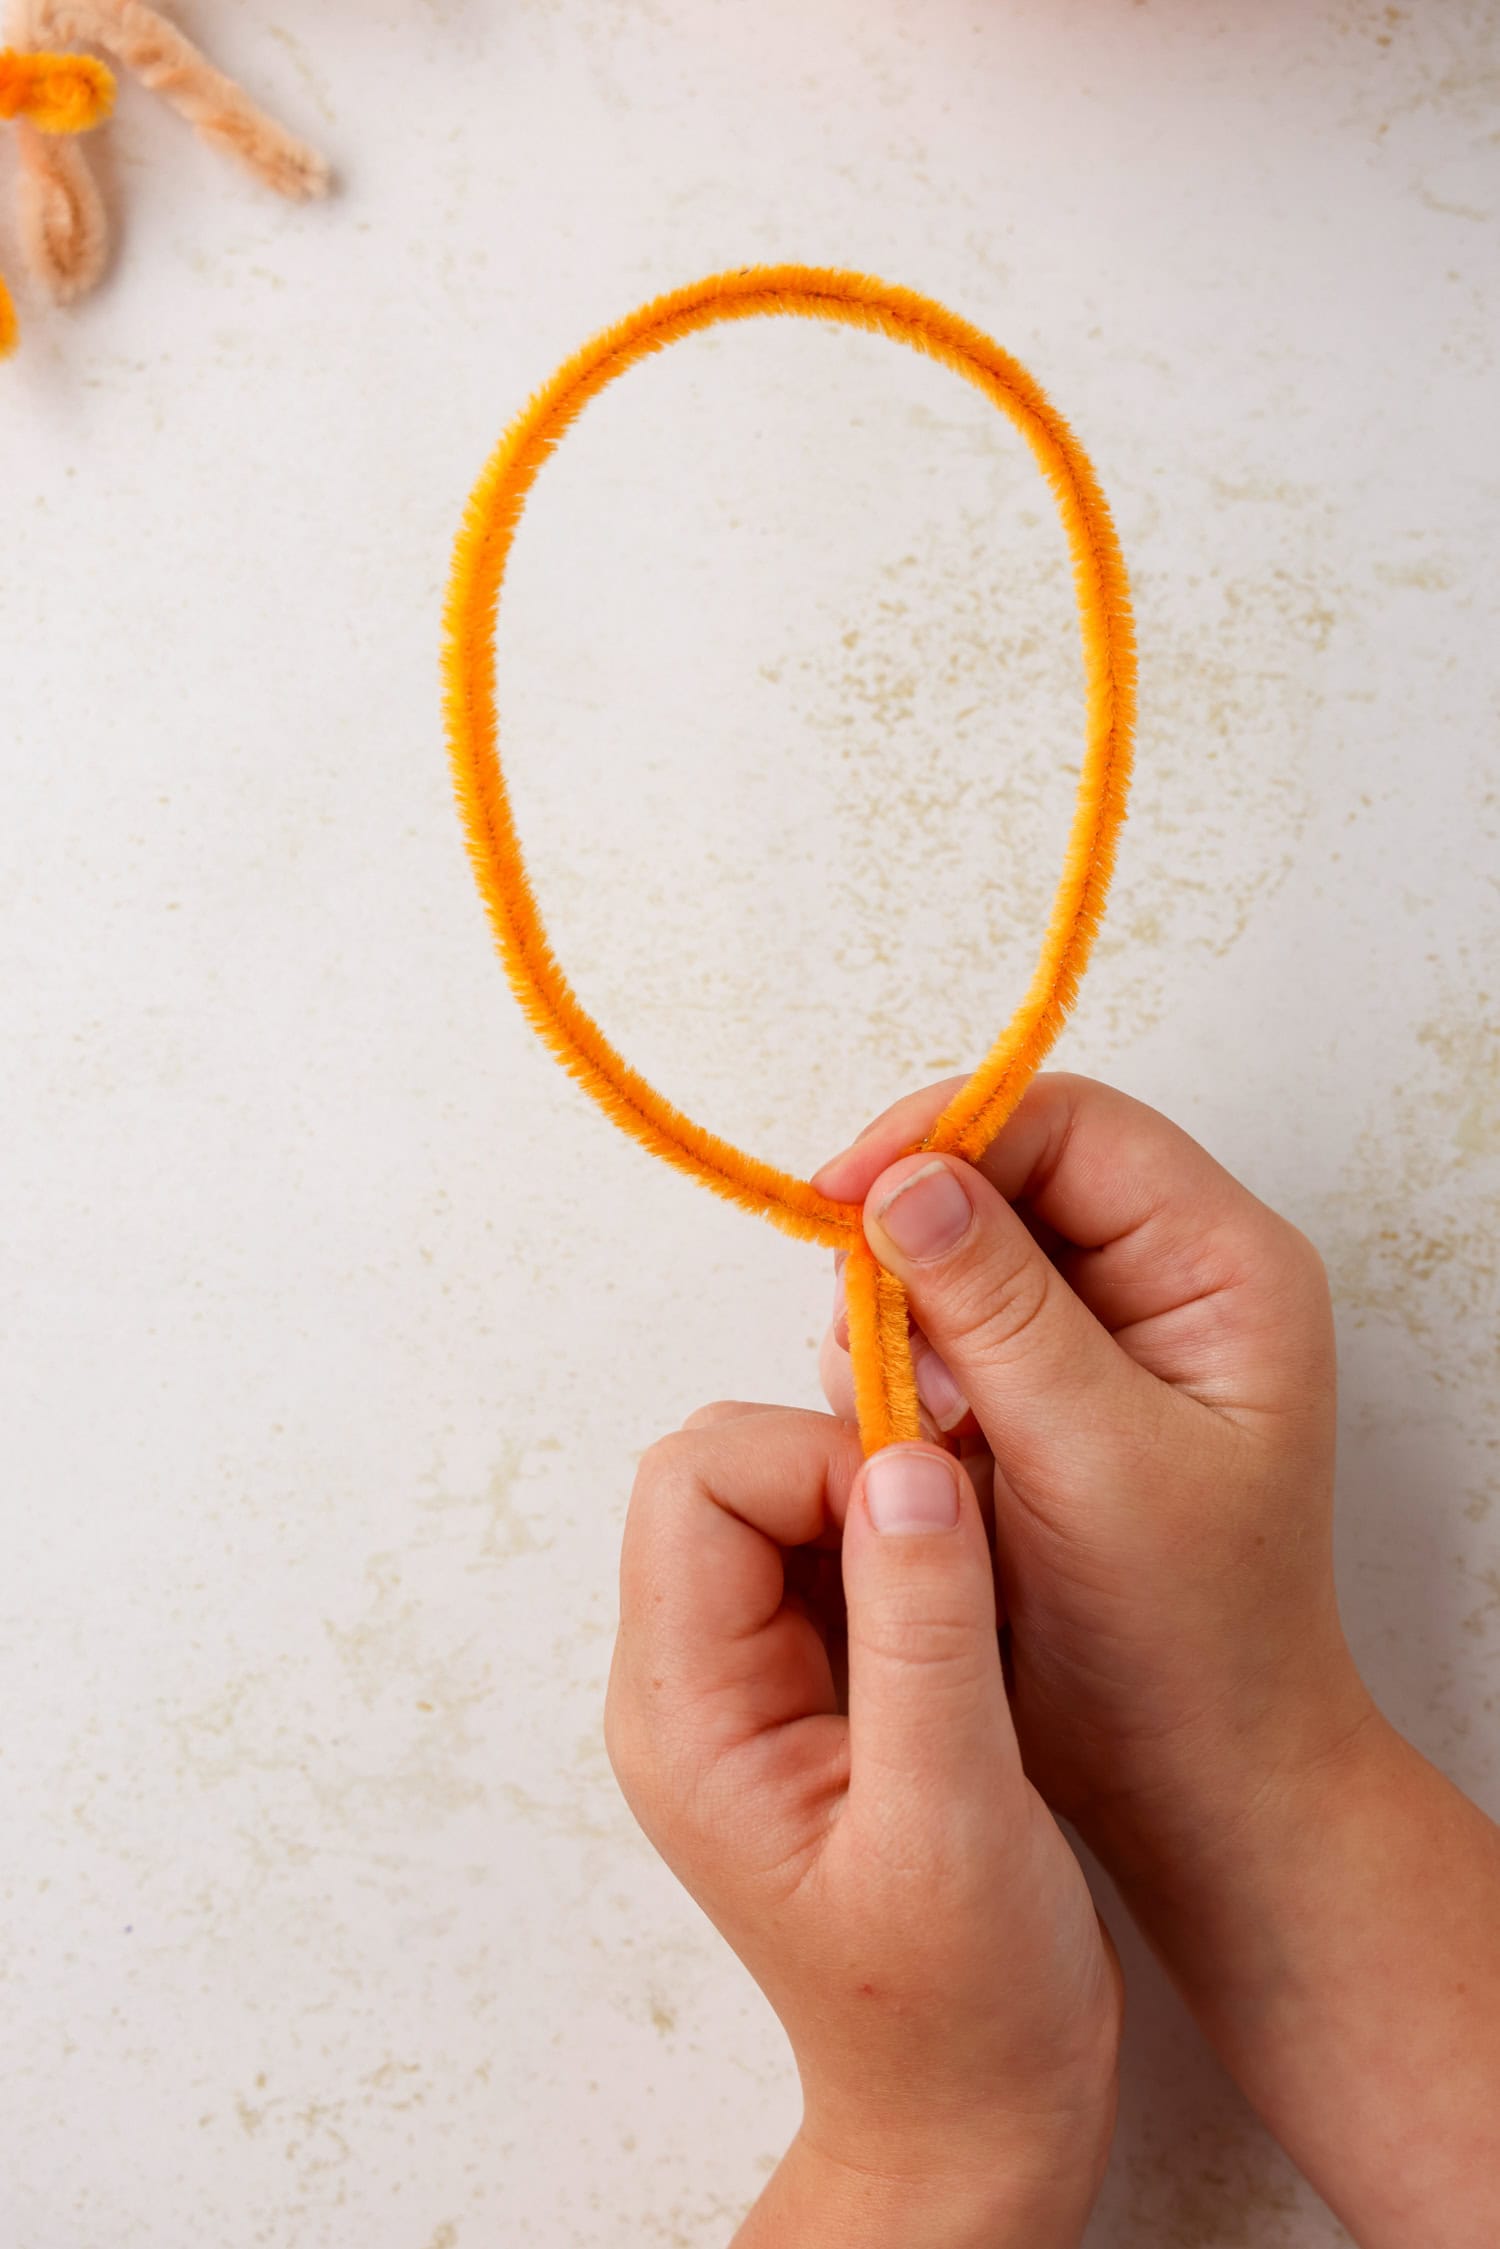
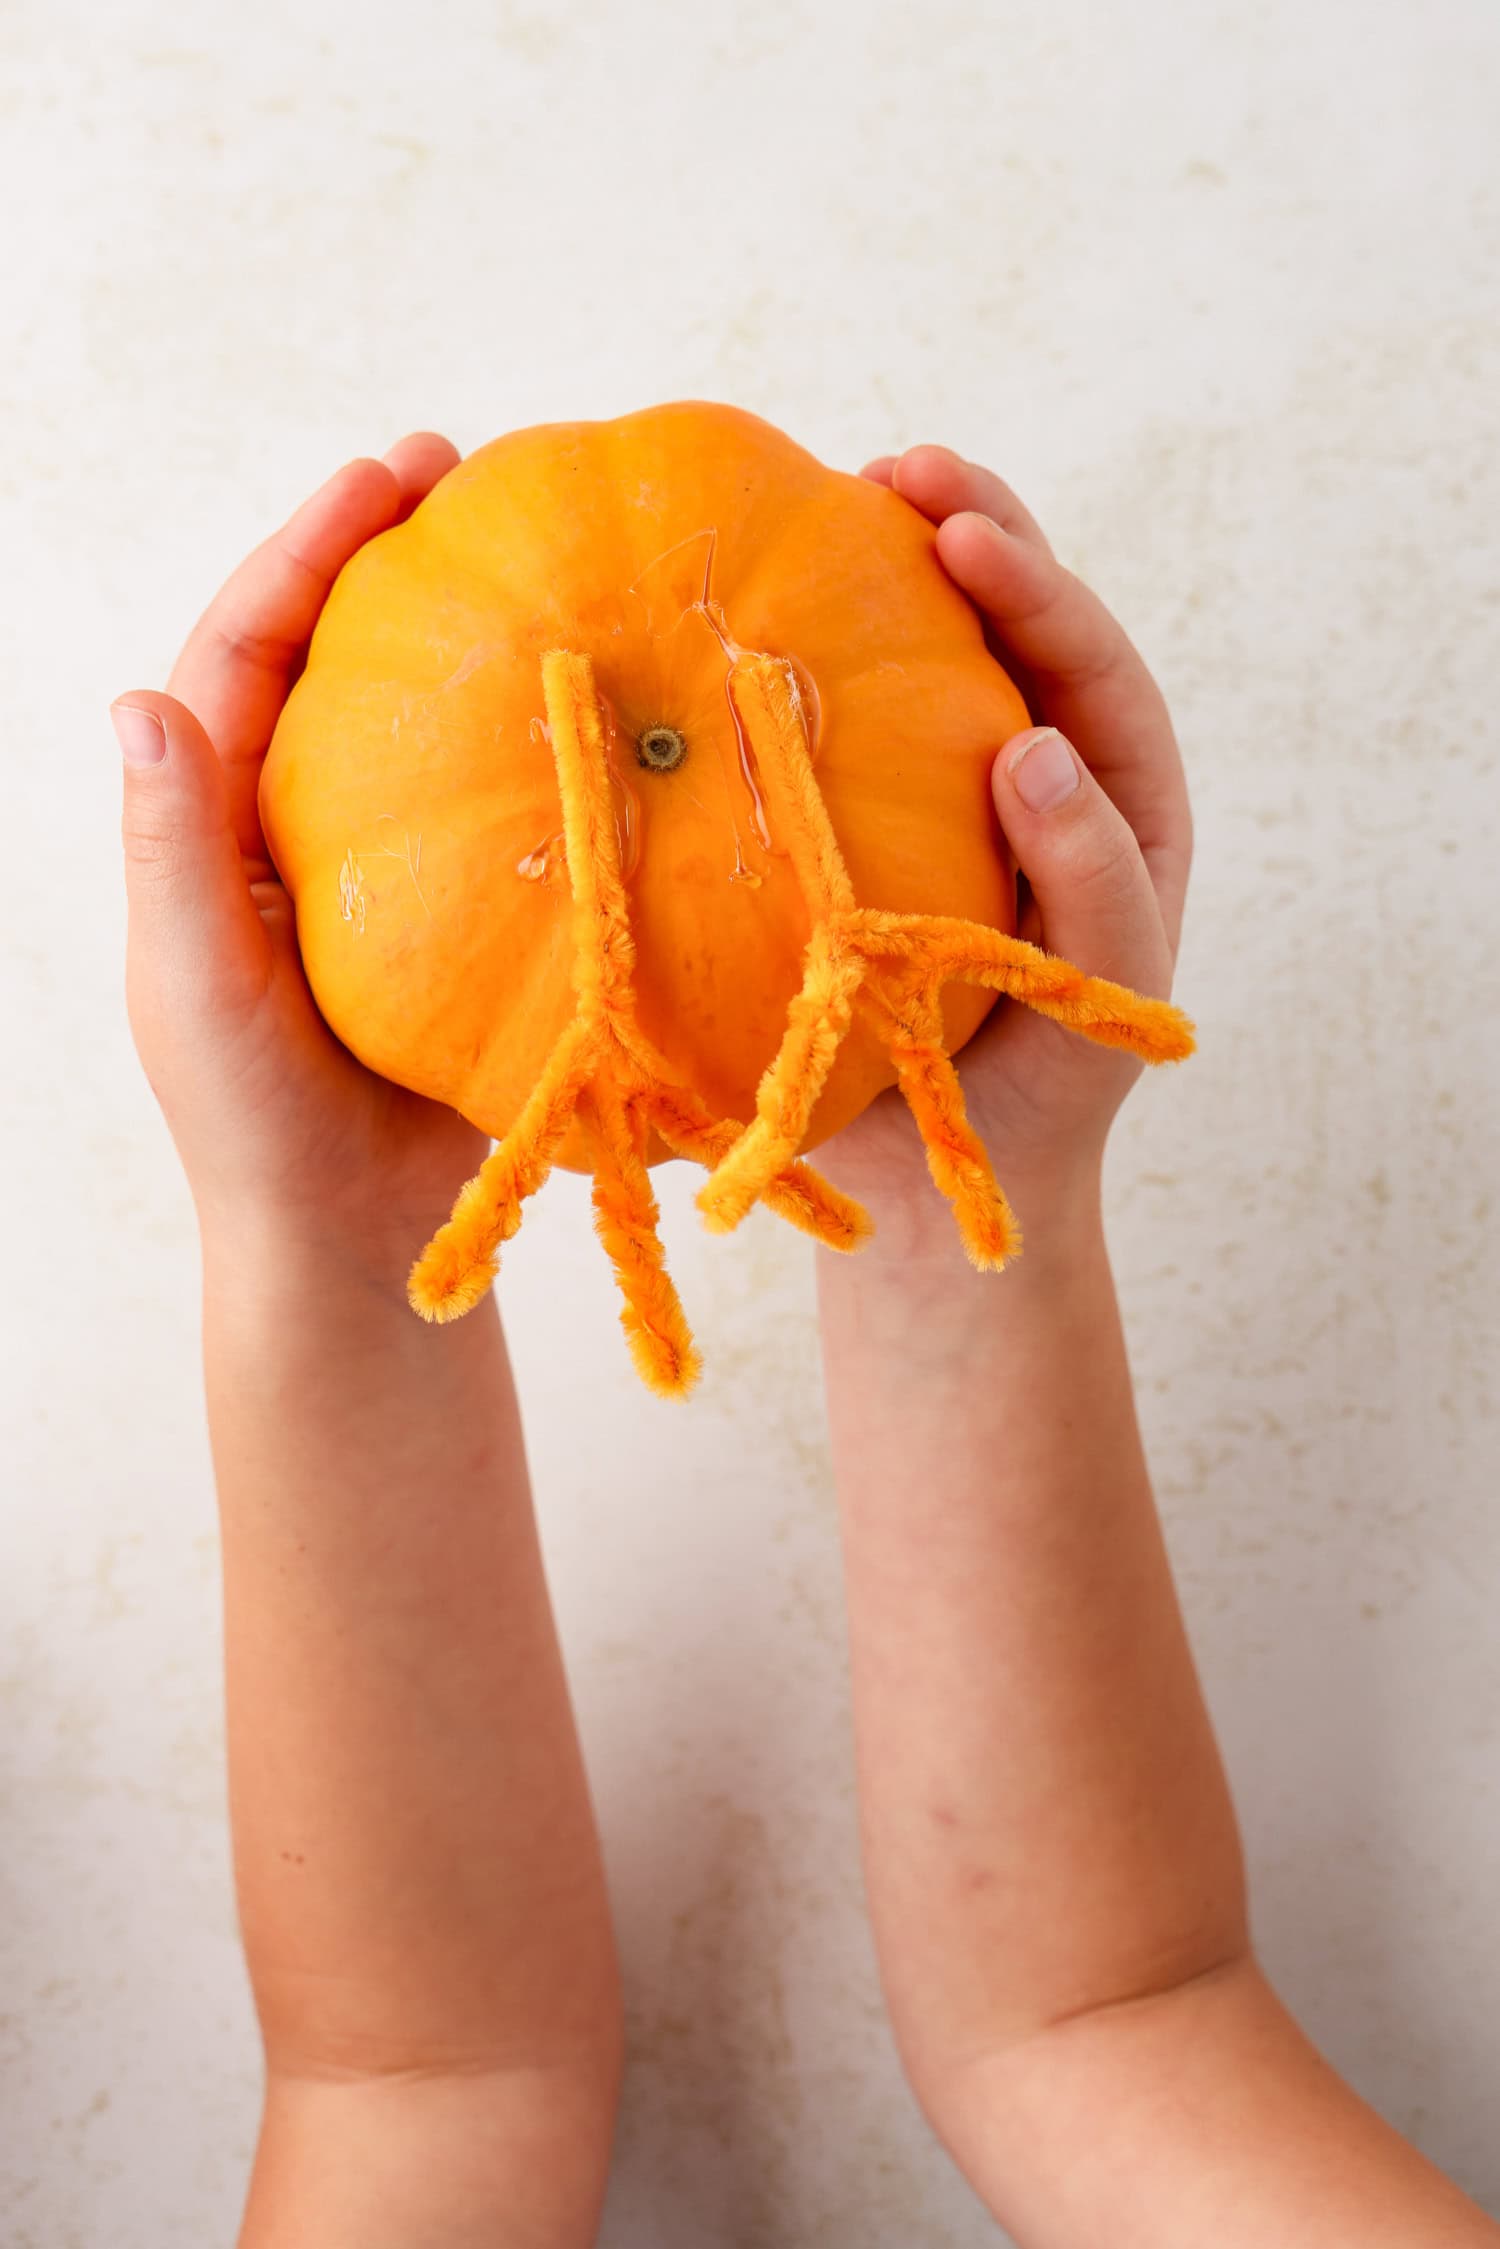
Use a pipe cleaner, and form a turkey foot by making a balloon shape, making sure to leave a short “stem” at the bottom. Once the balloon is formed, twist the pipe cleaner around itself to hold it in place.
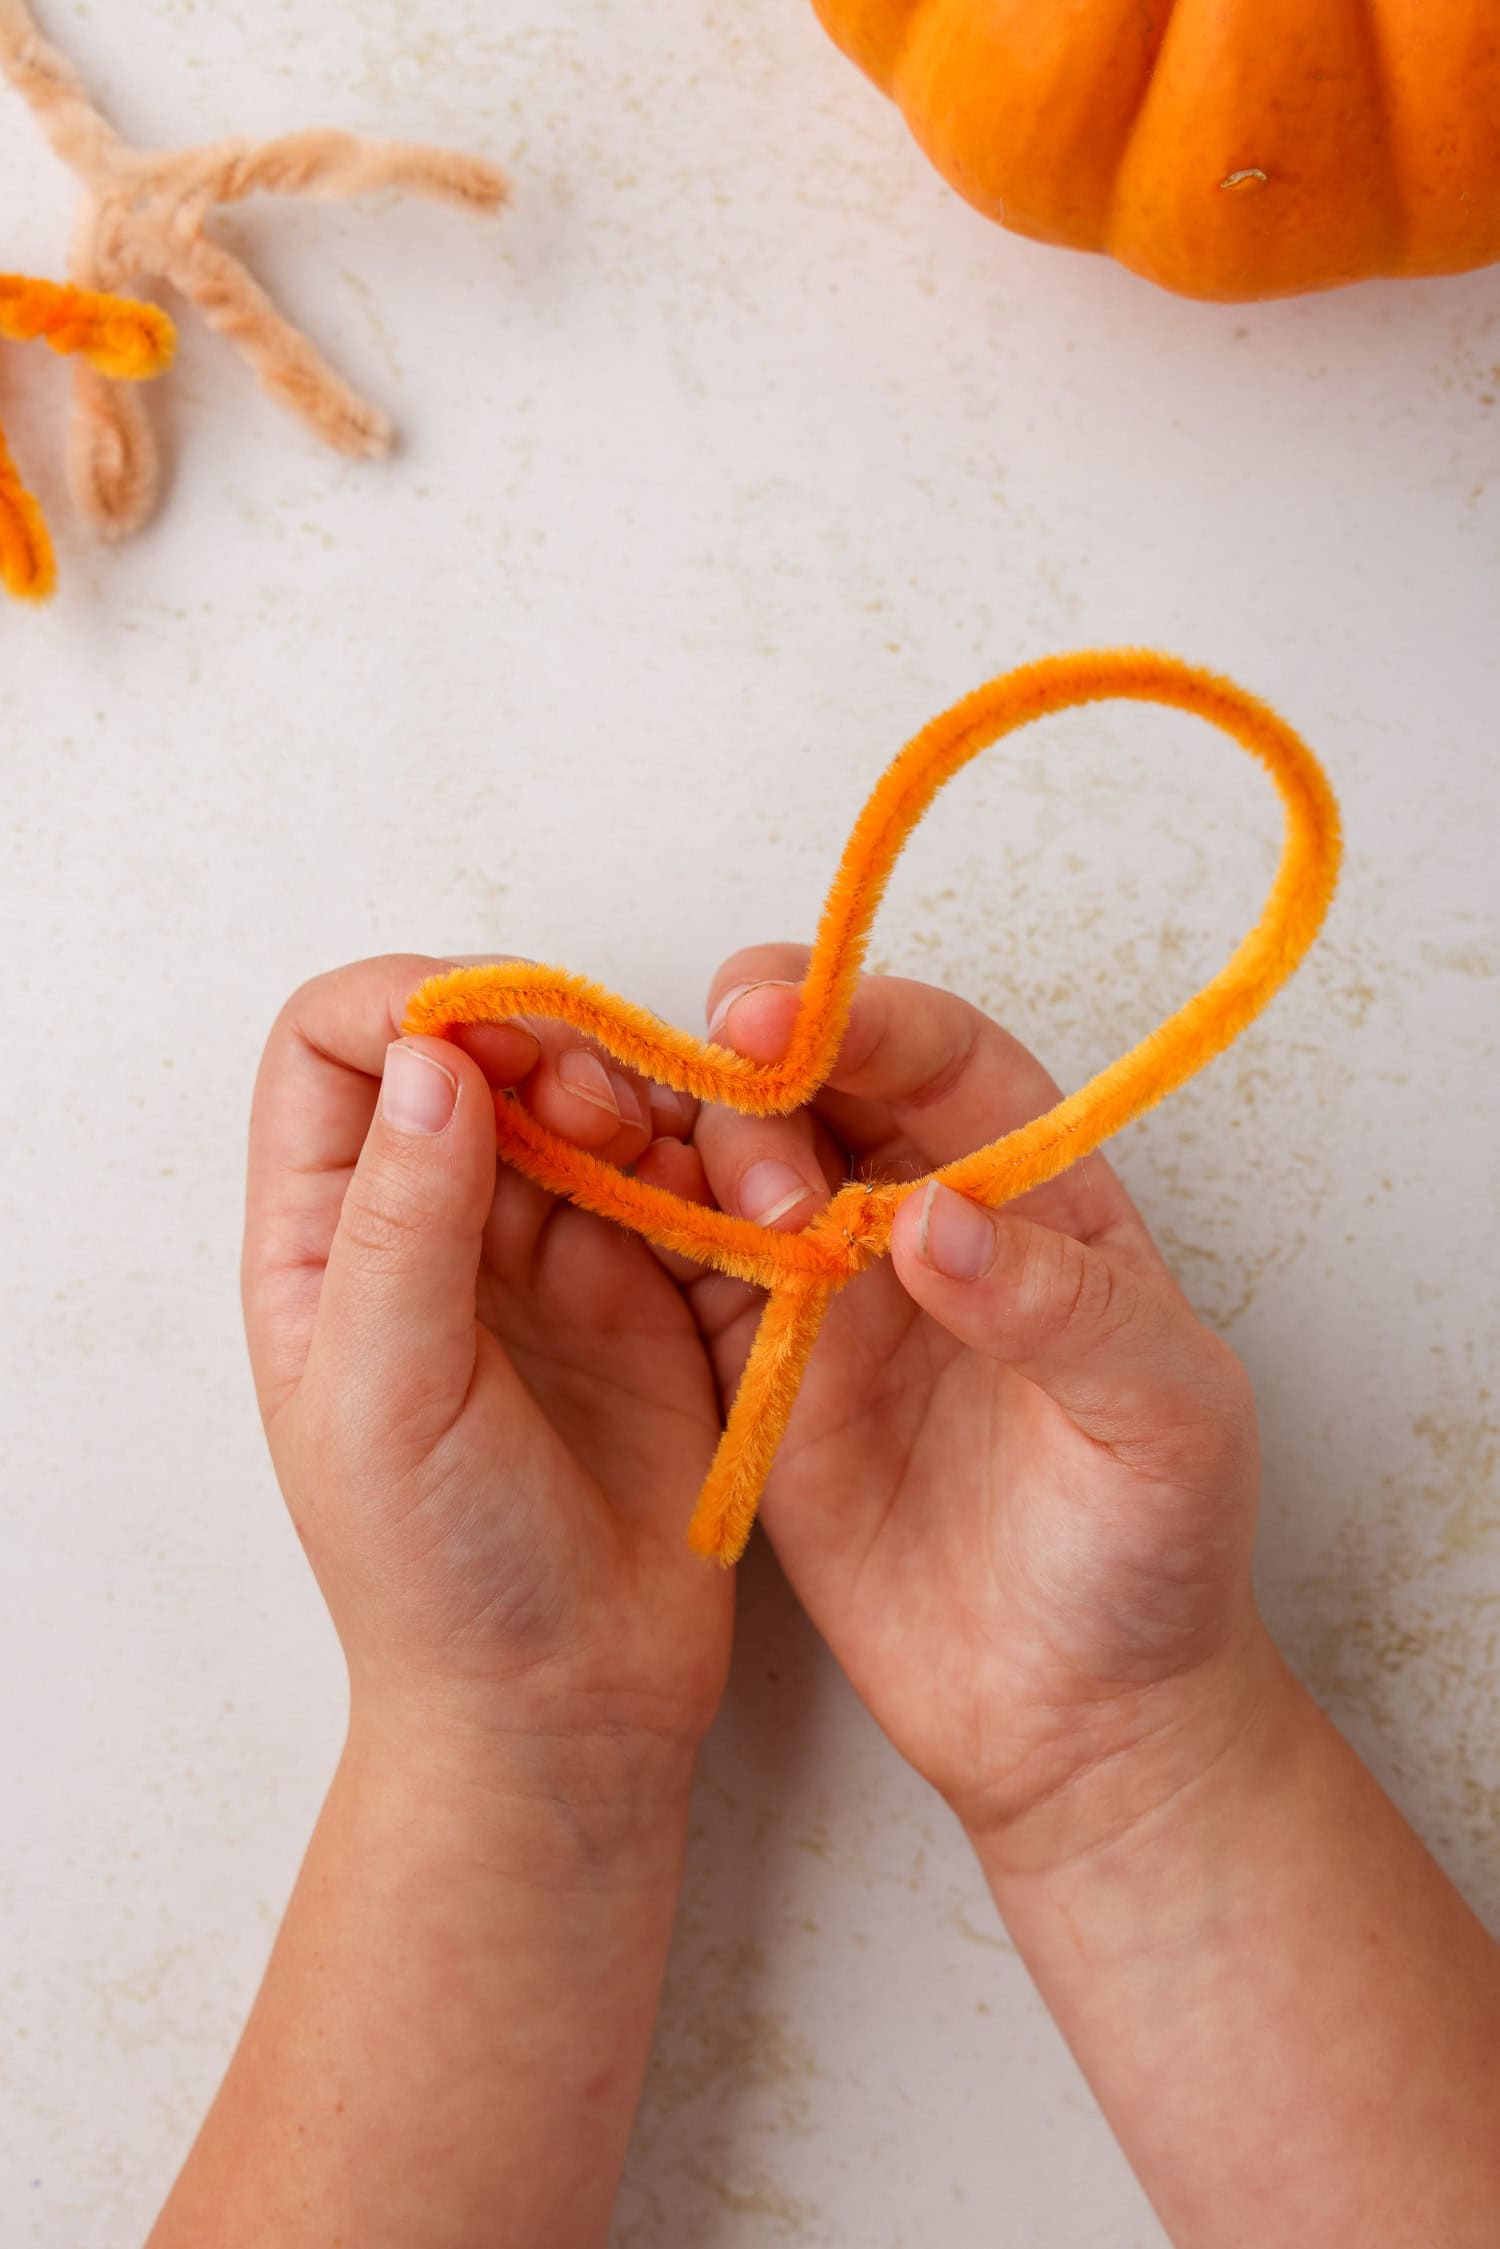
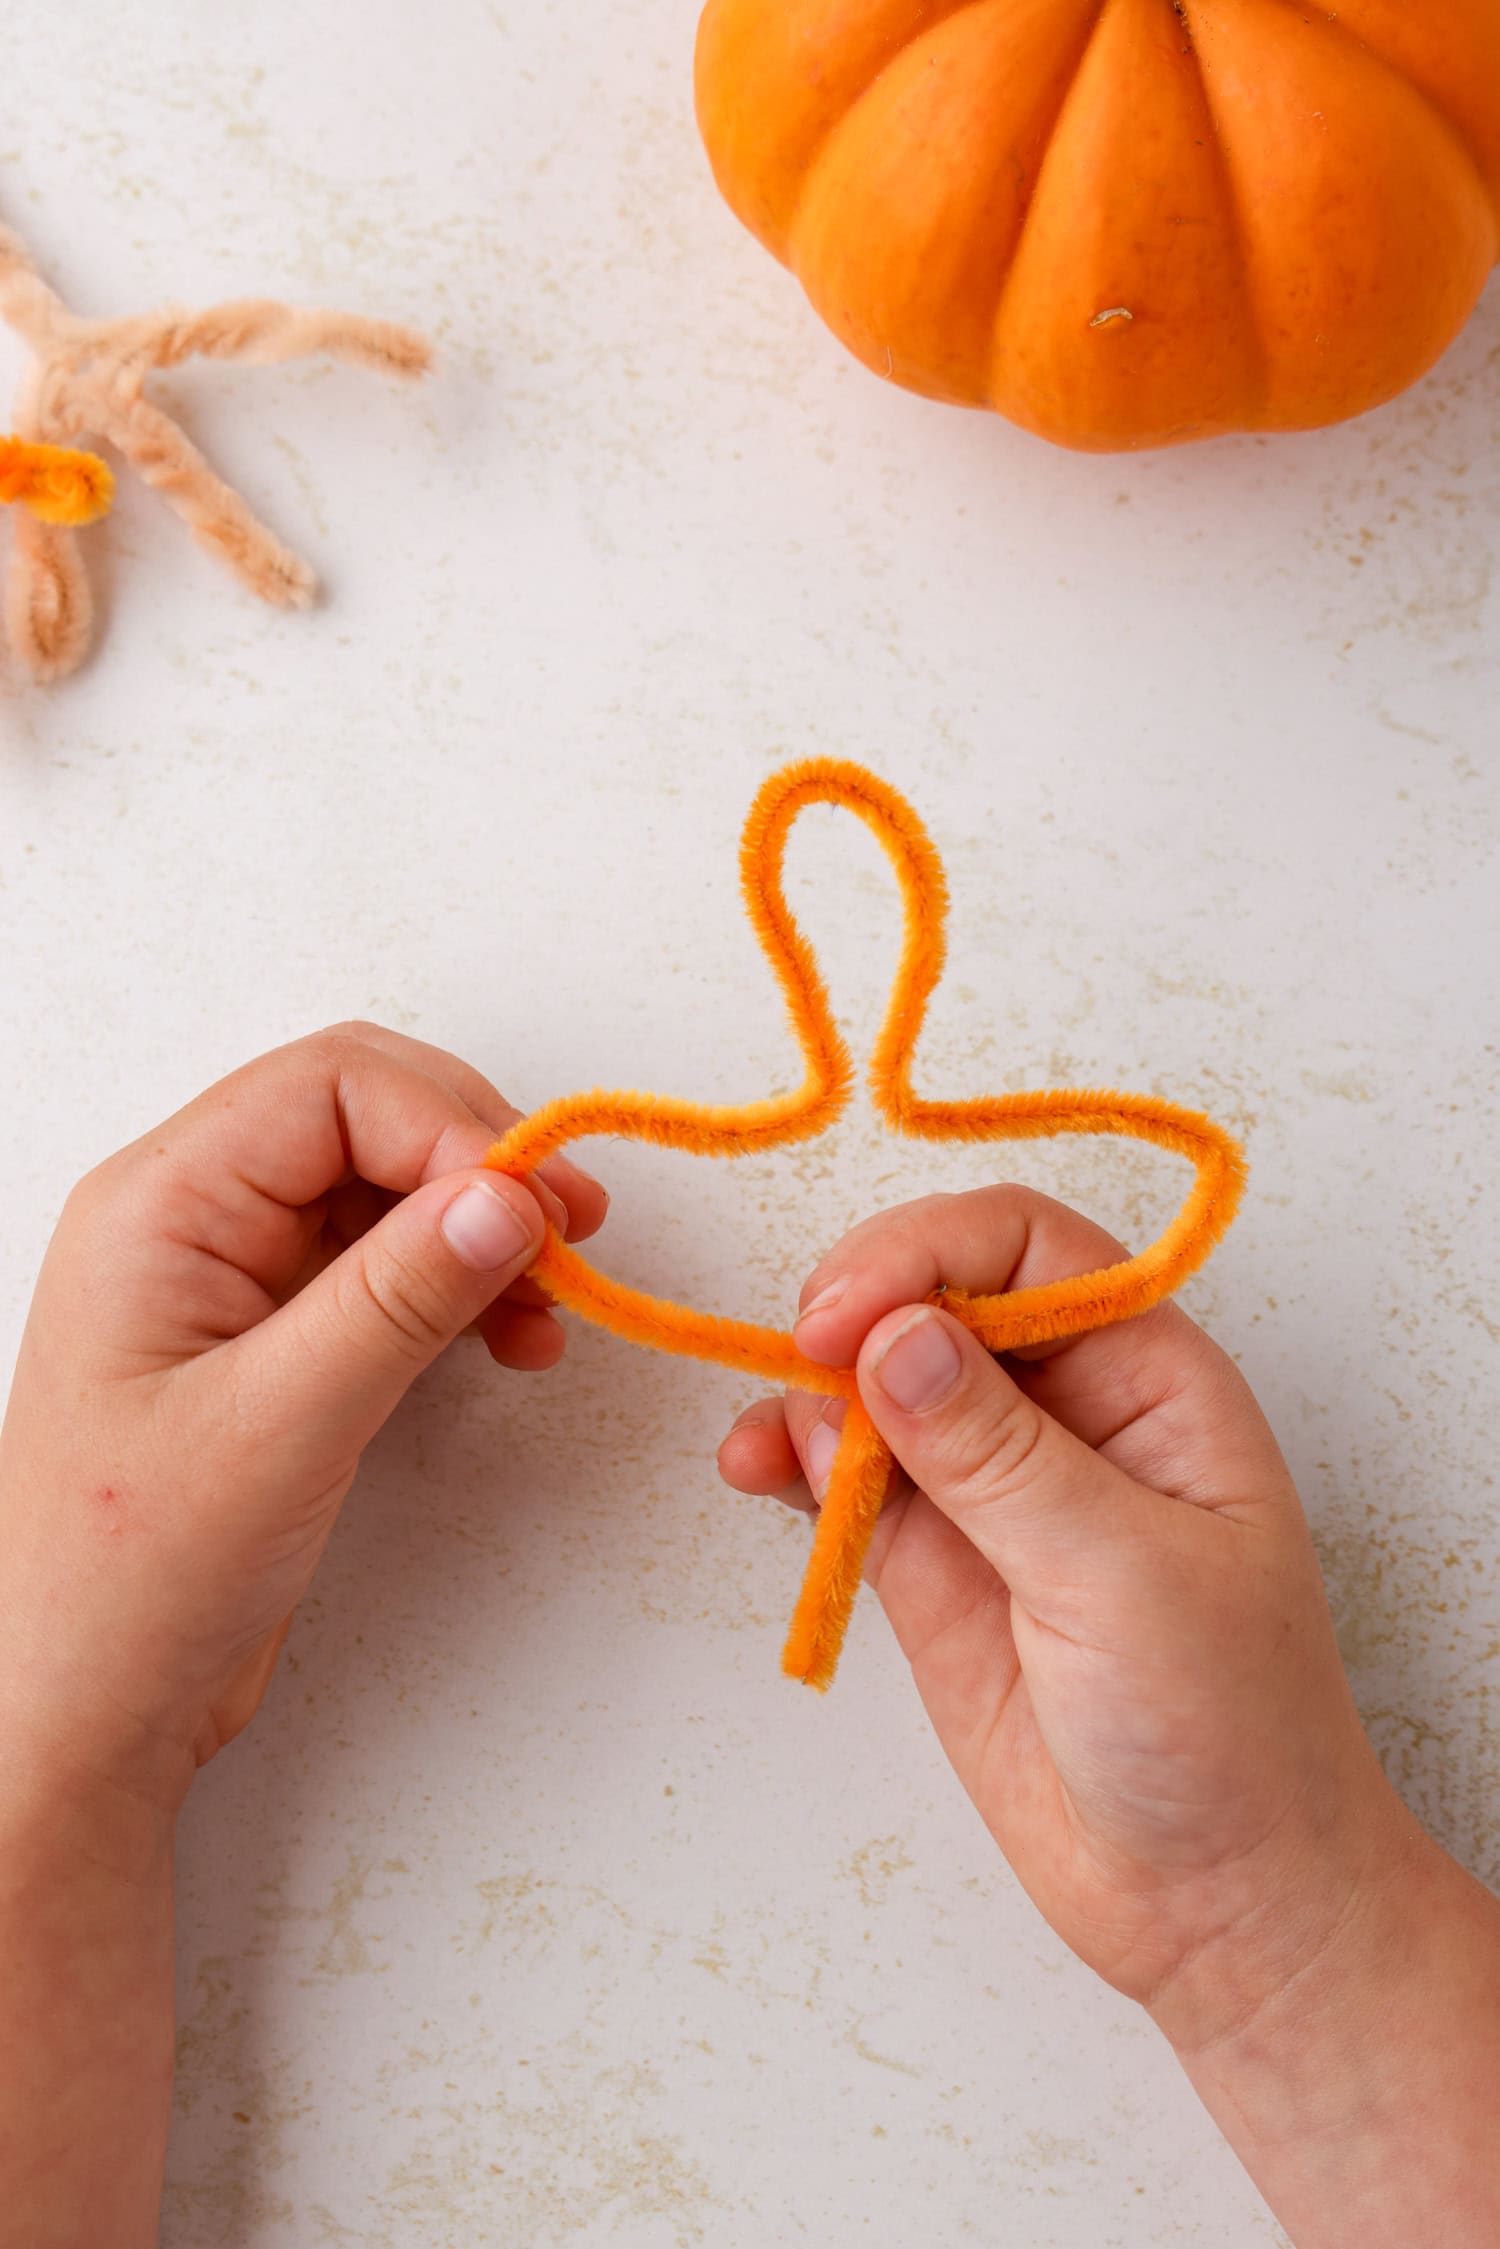
Press the left side of the pipe cleaner down towards the twisted part of the balloon to form a mitten shape. This will be the turkey’s first toe.
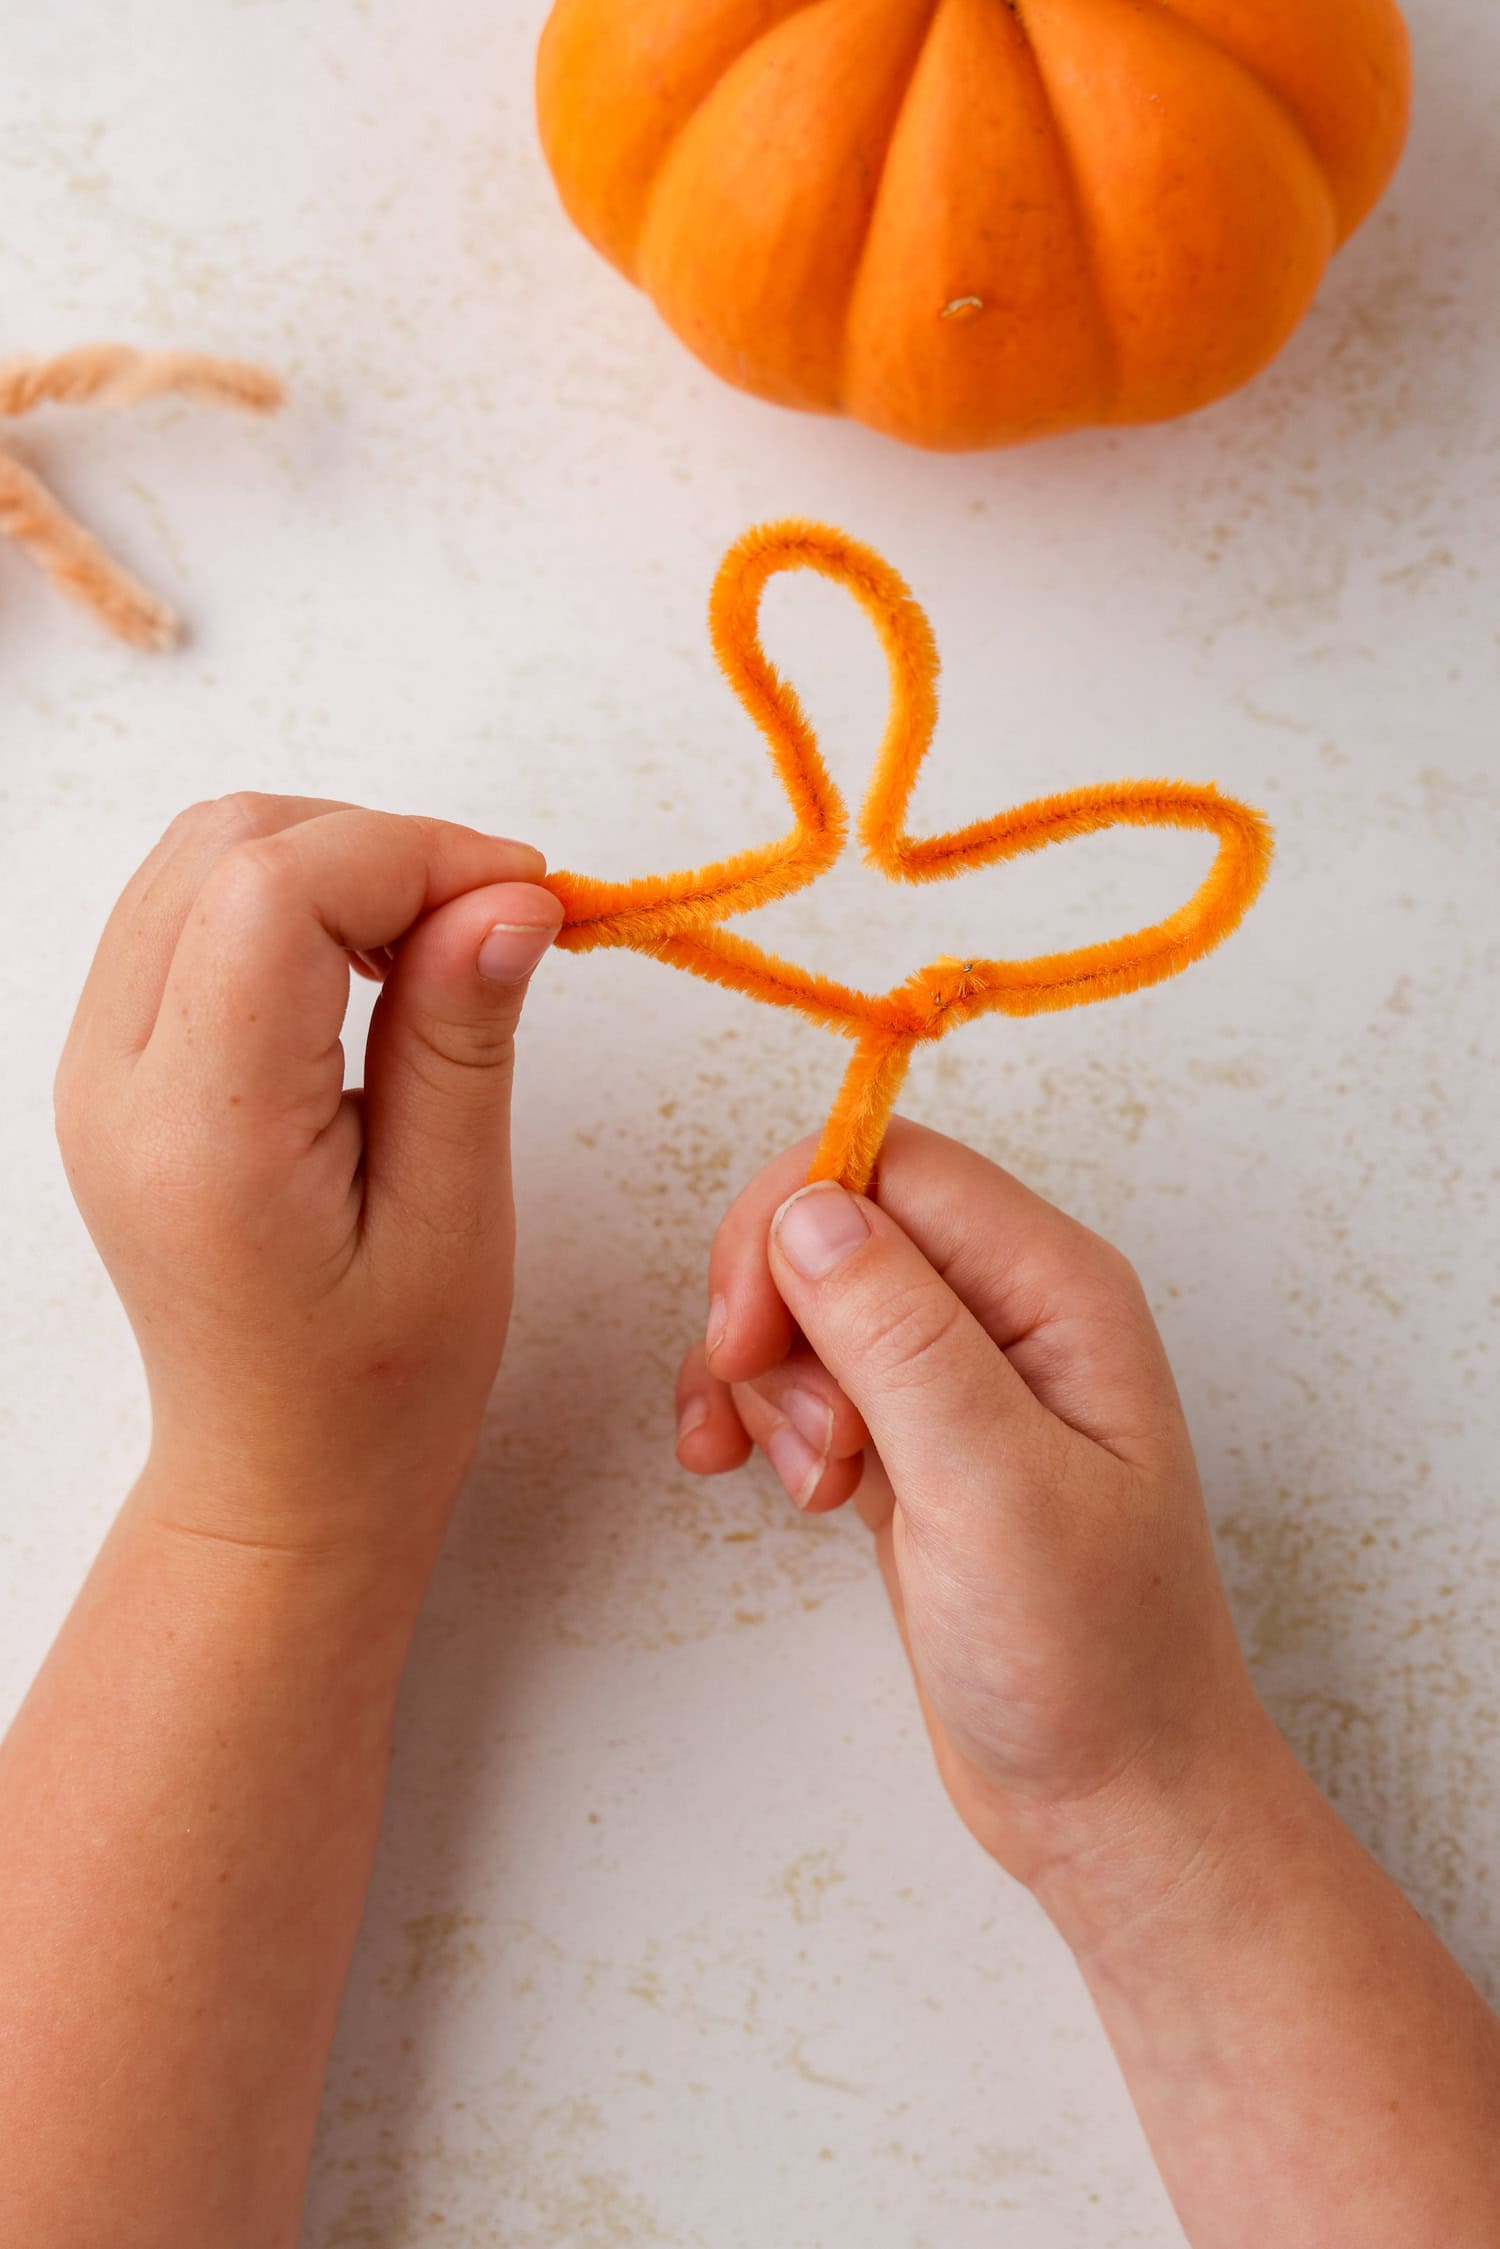
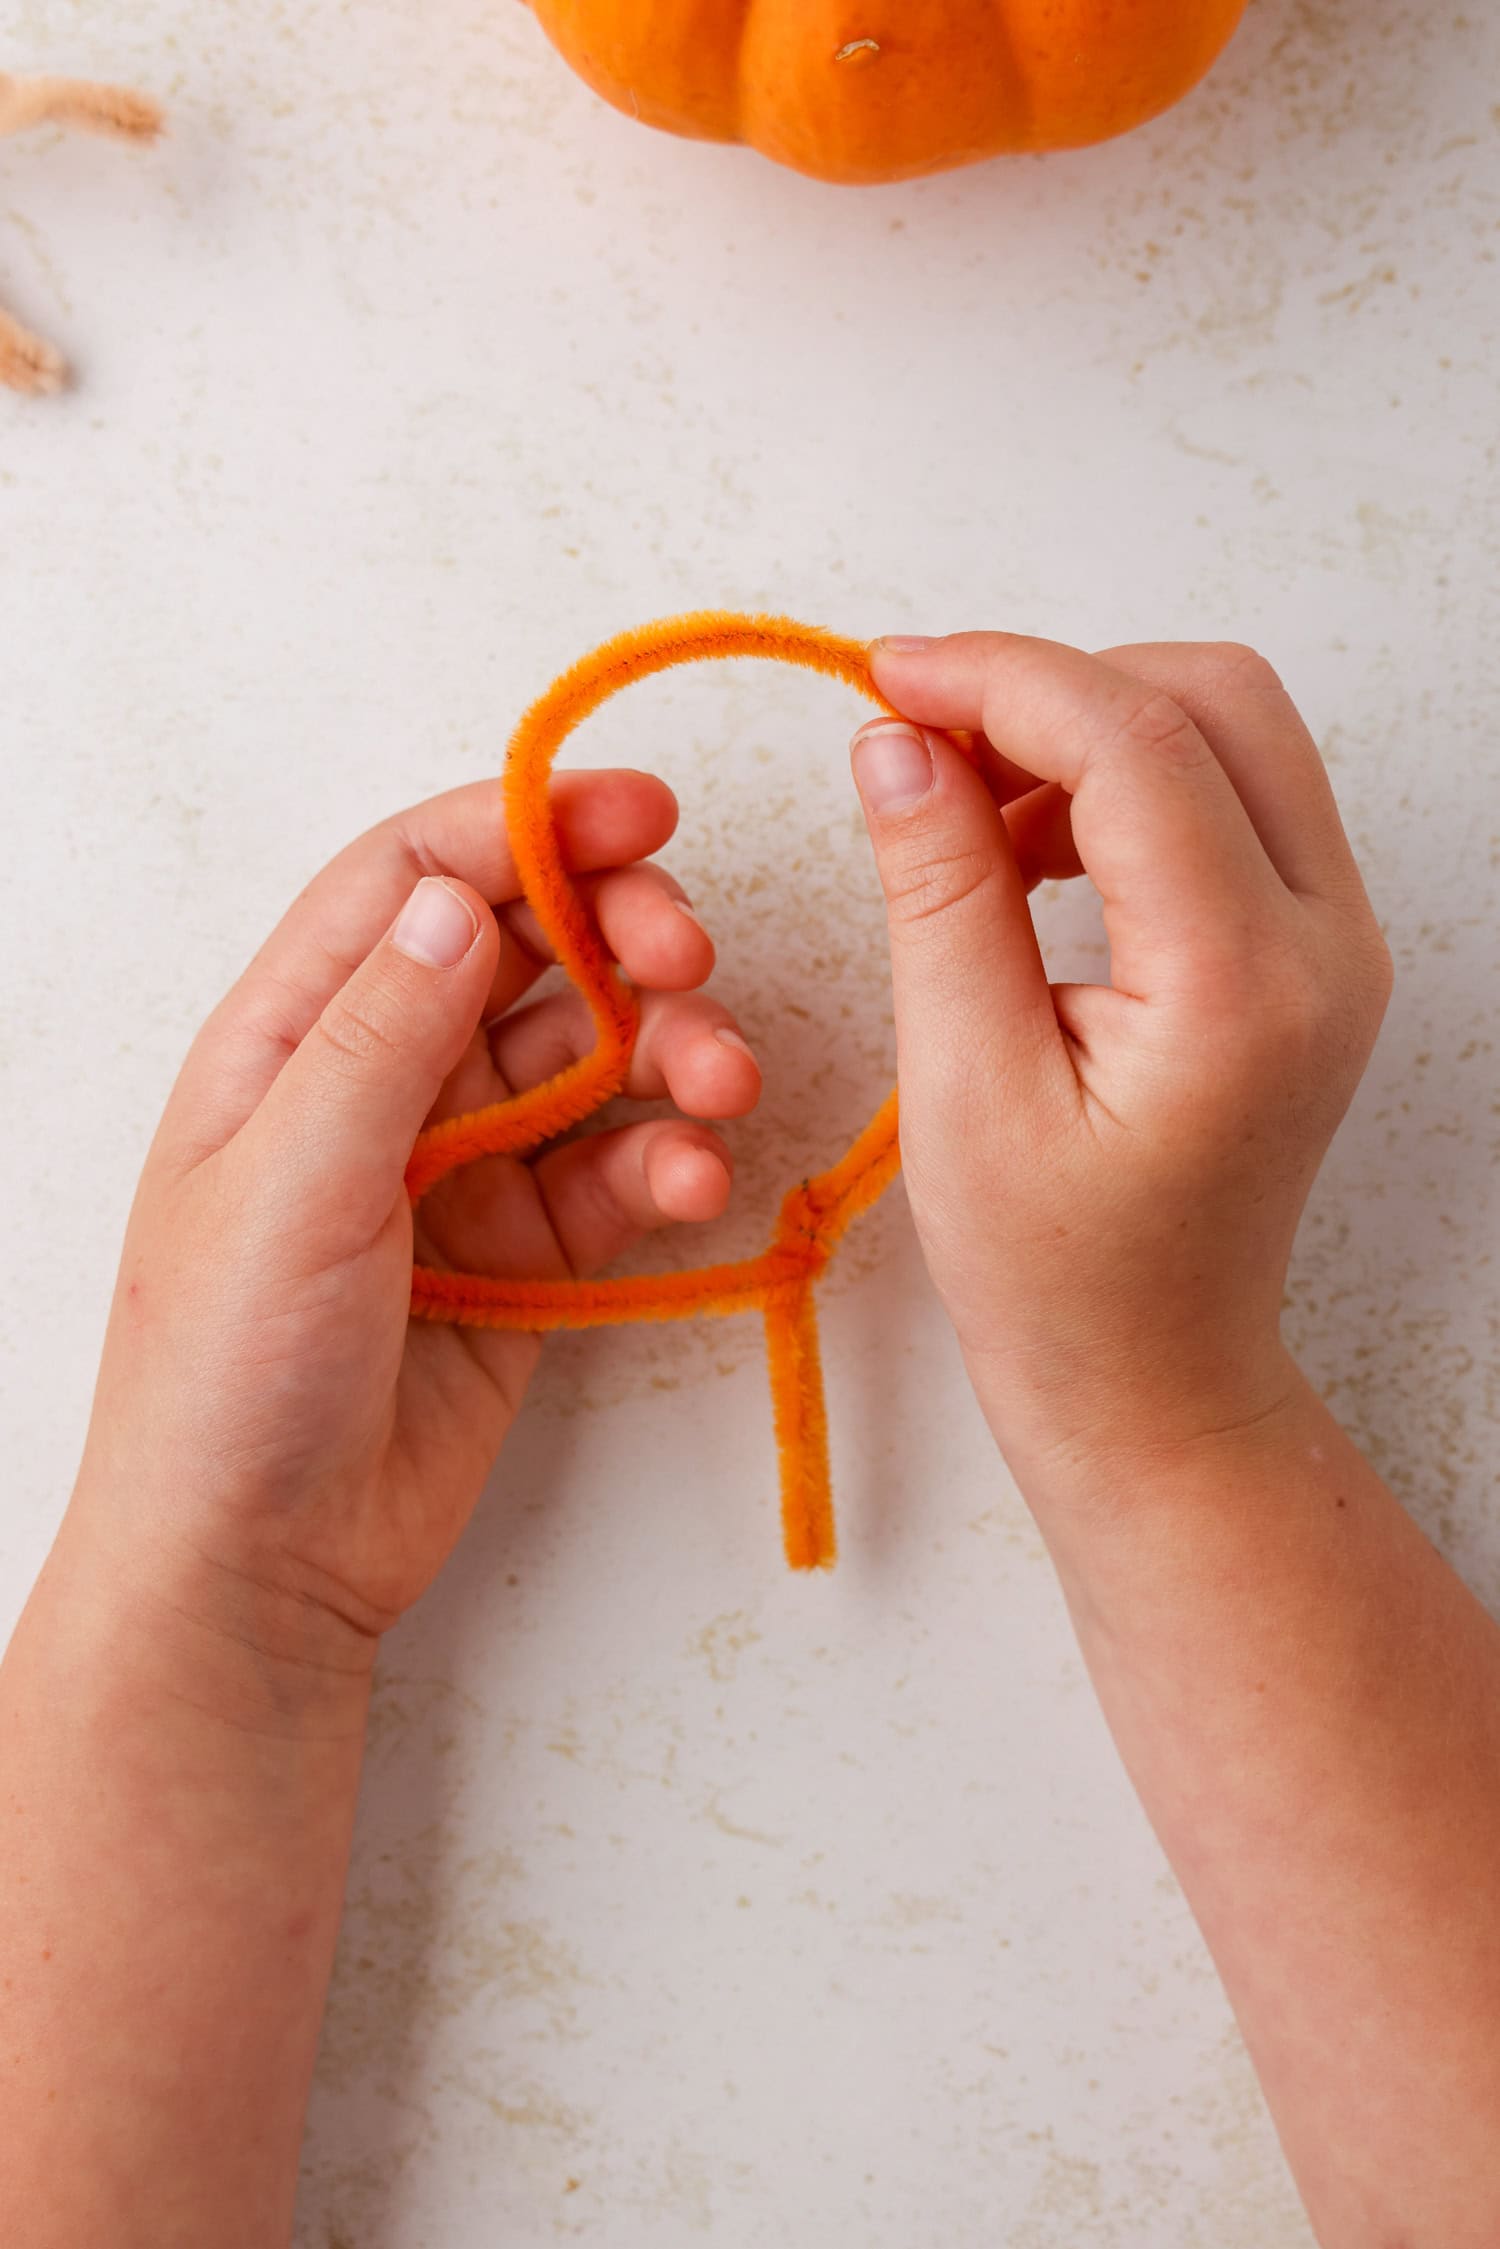
Place the right side of the mitten right in the middle towards the twisted part of the balloon. This will form the middle and right toes — the shape should look similar to a 3-leaf clover.
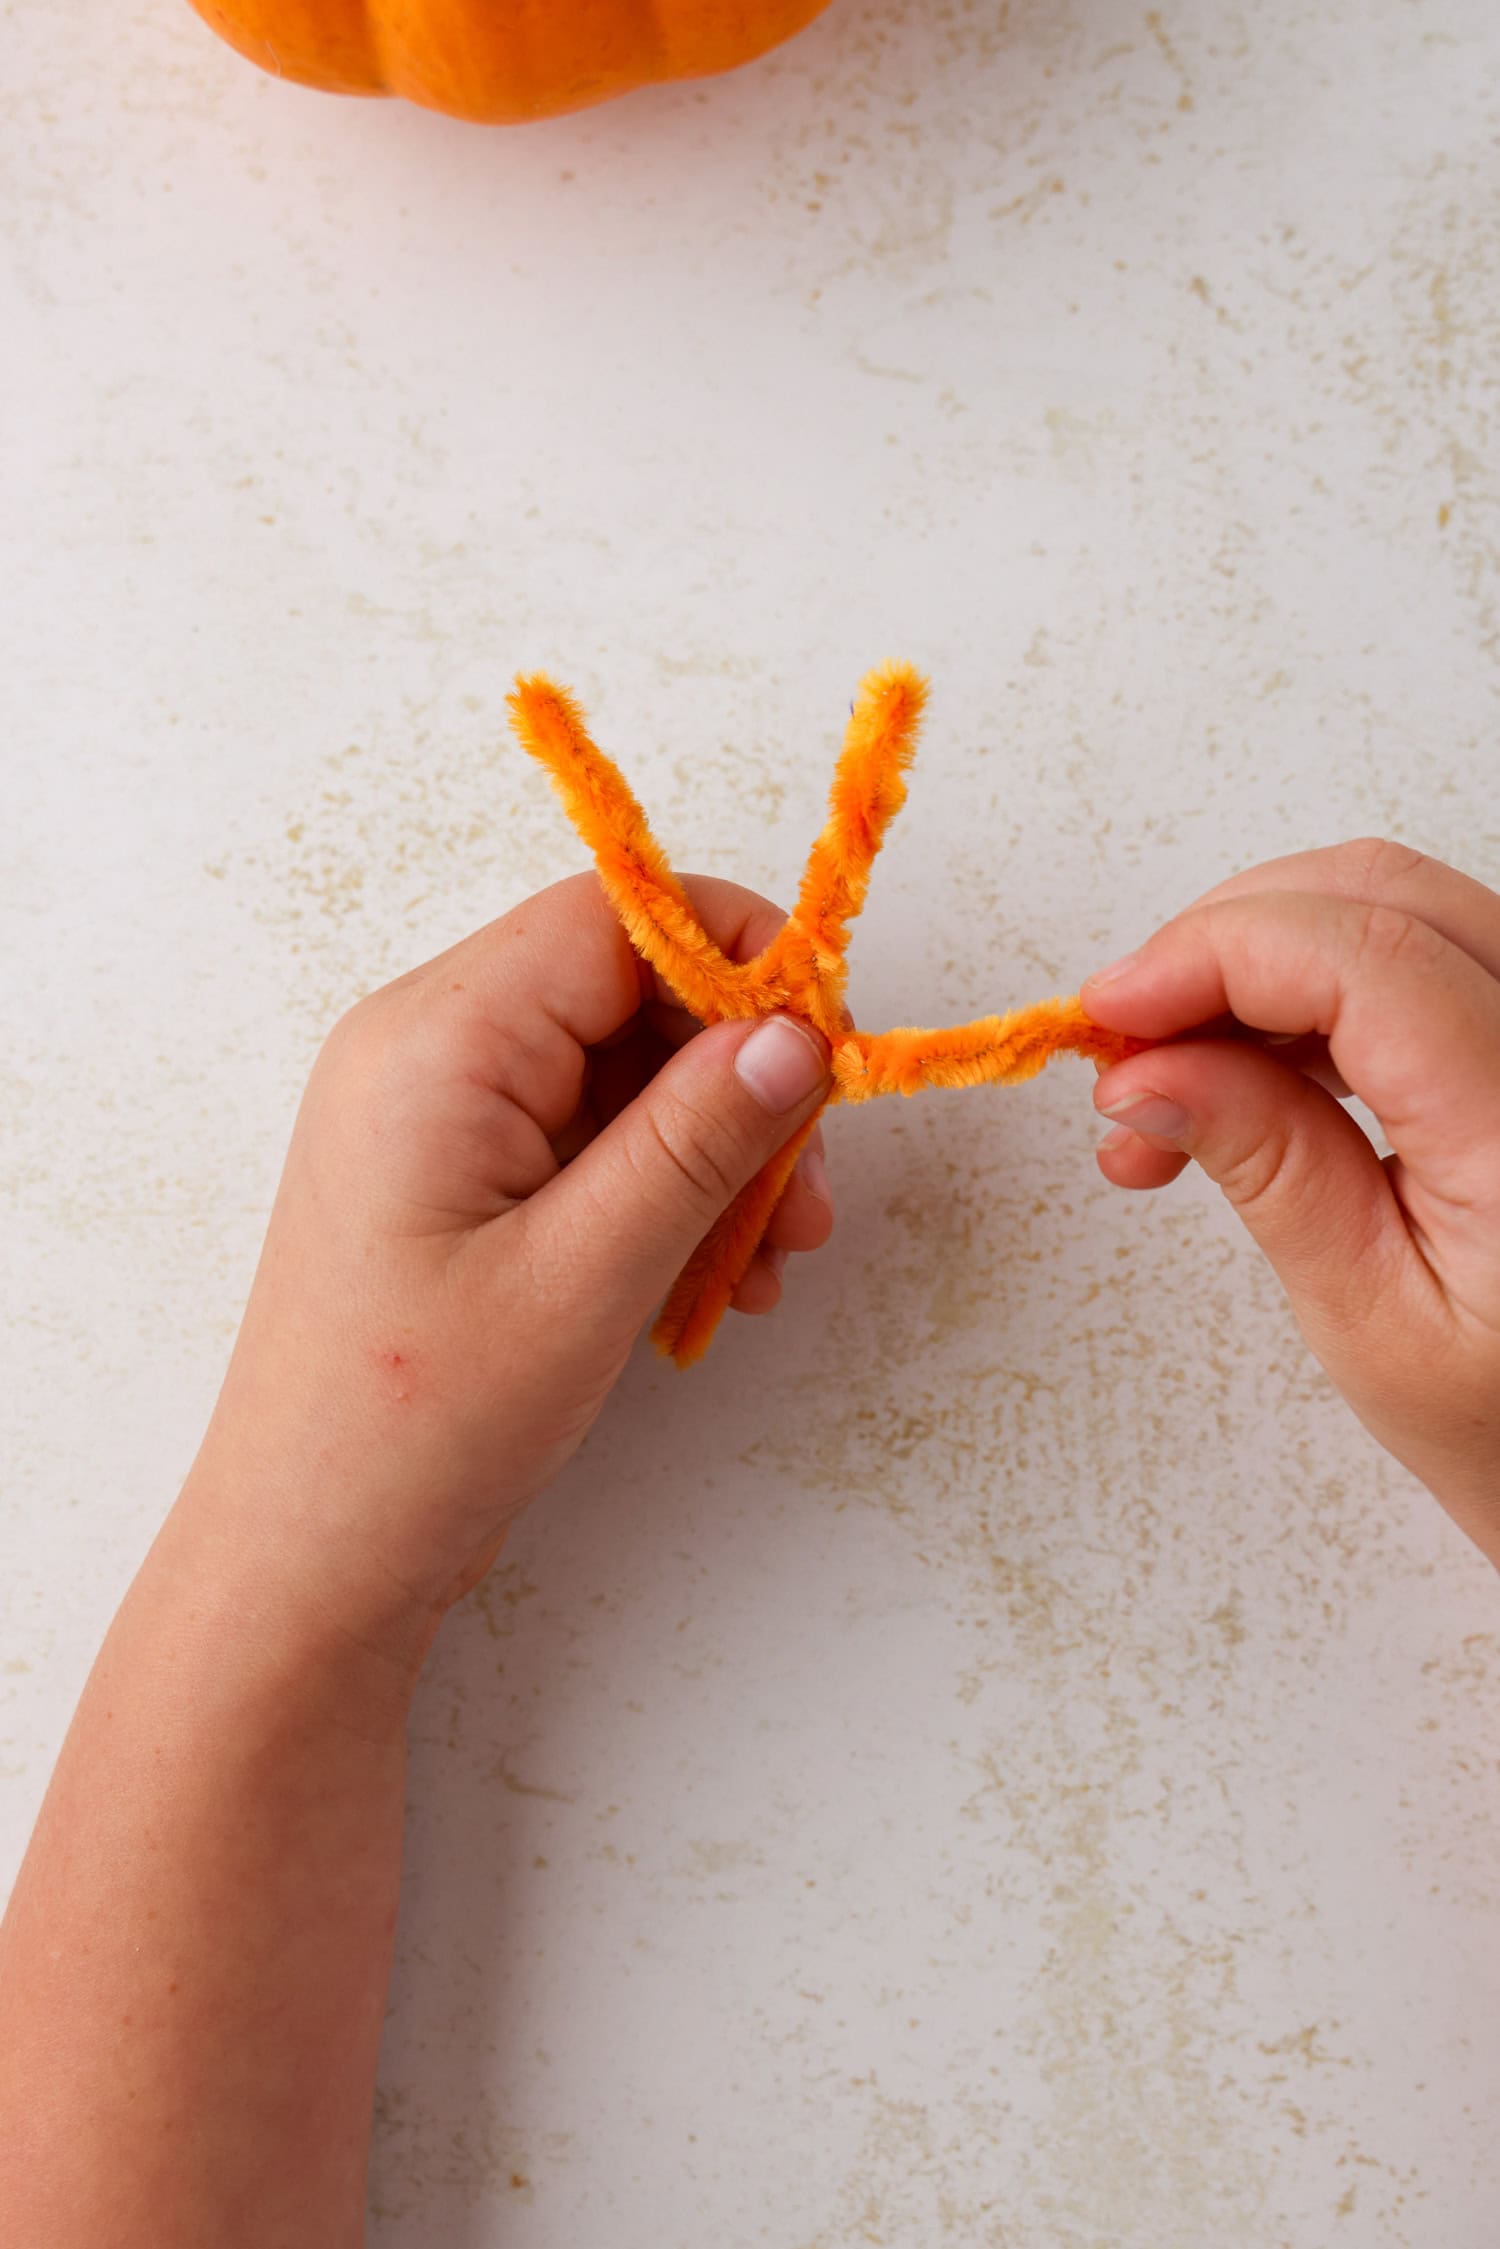
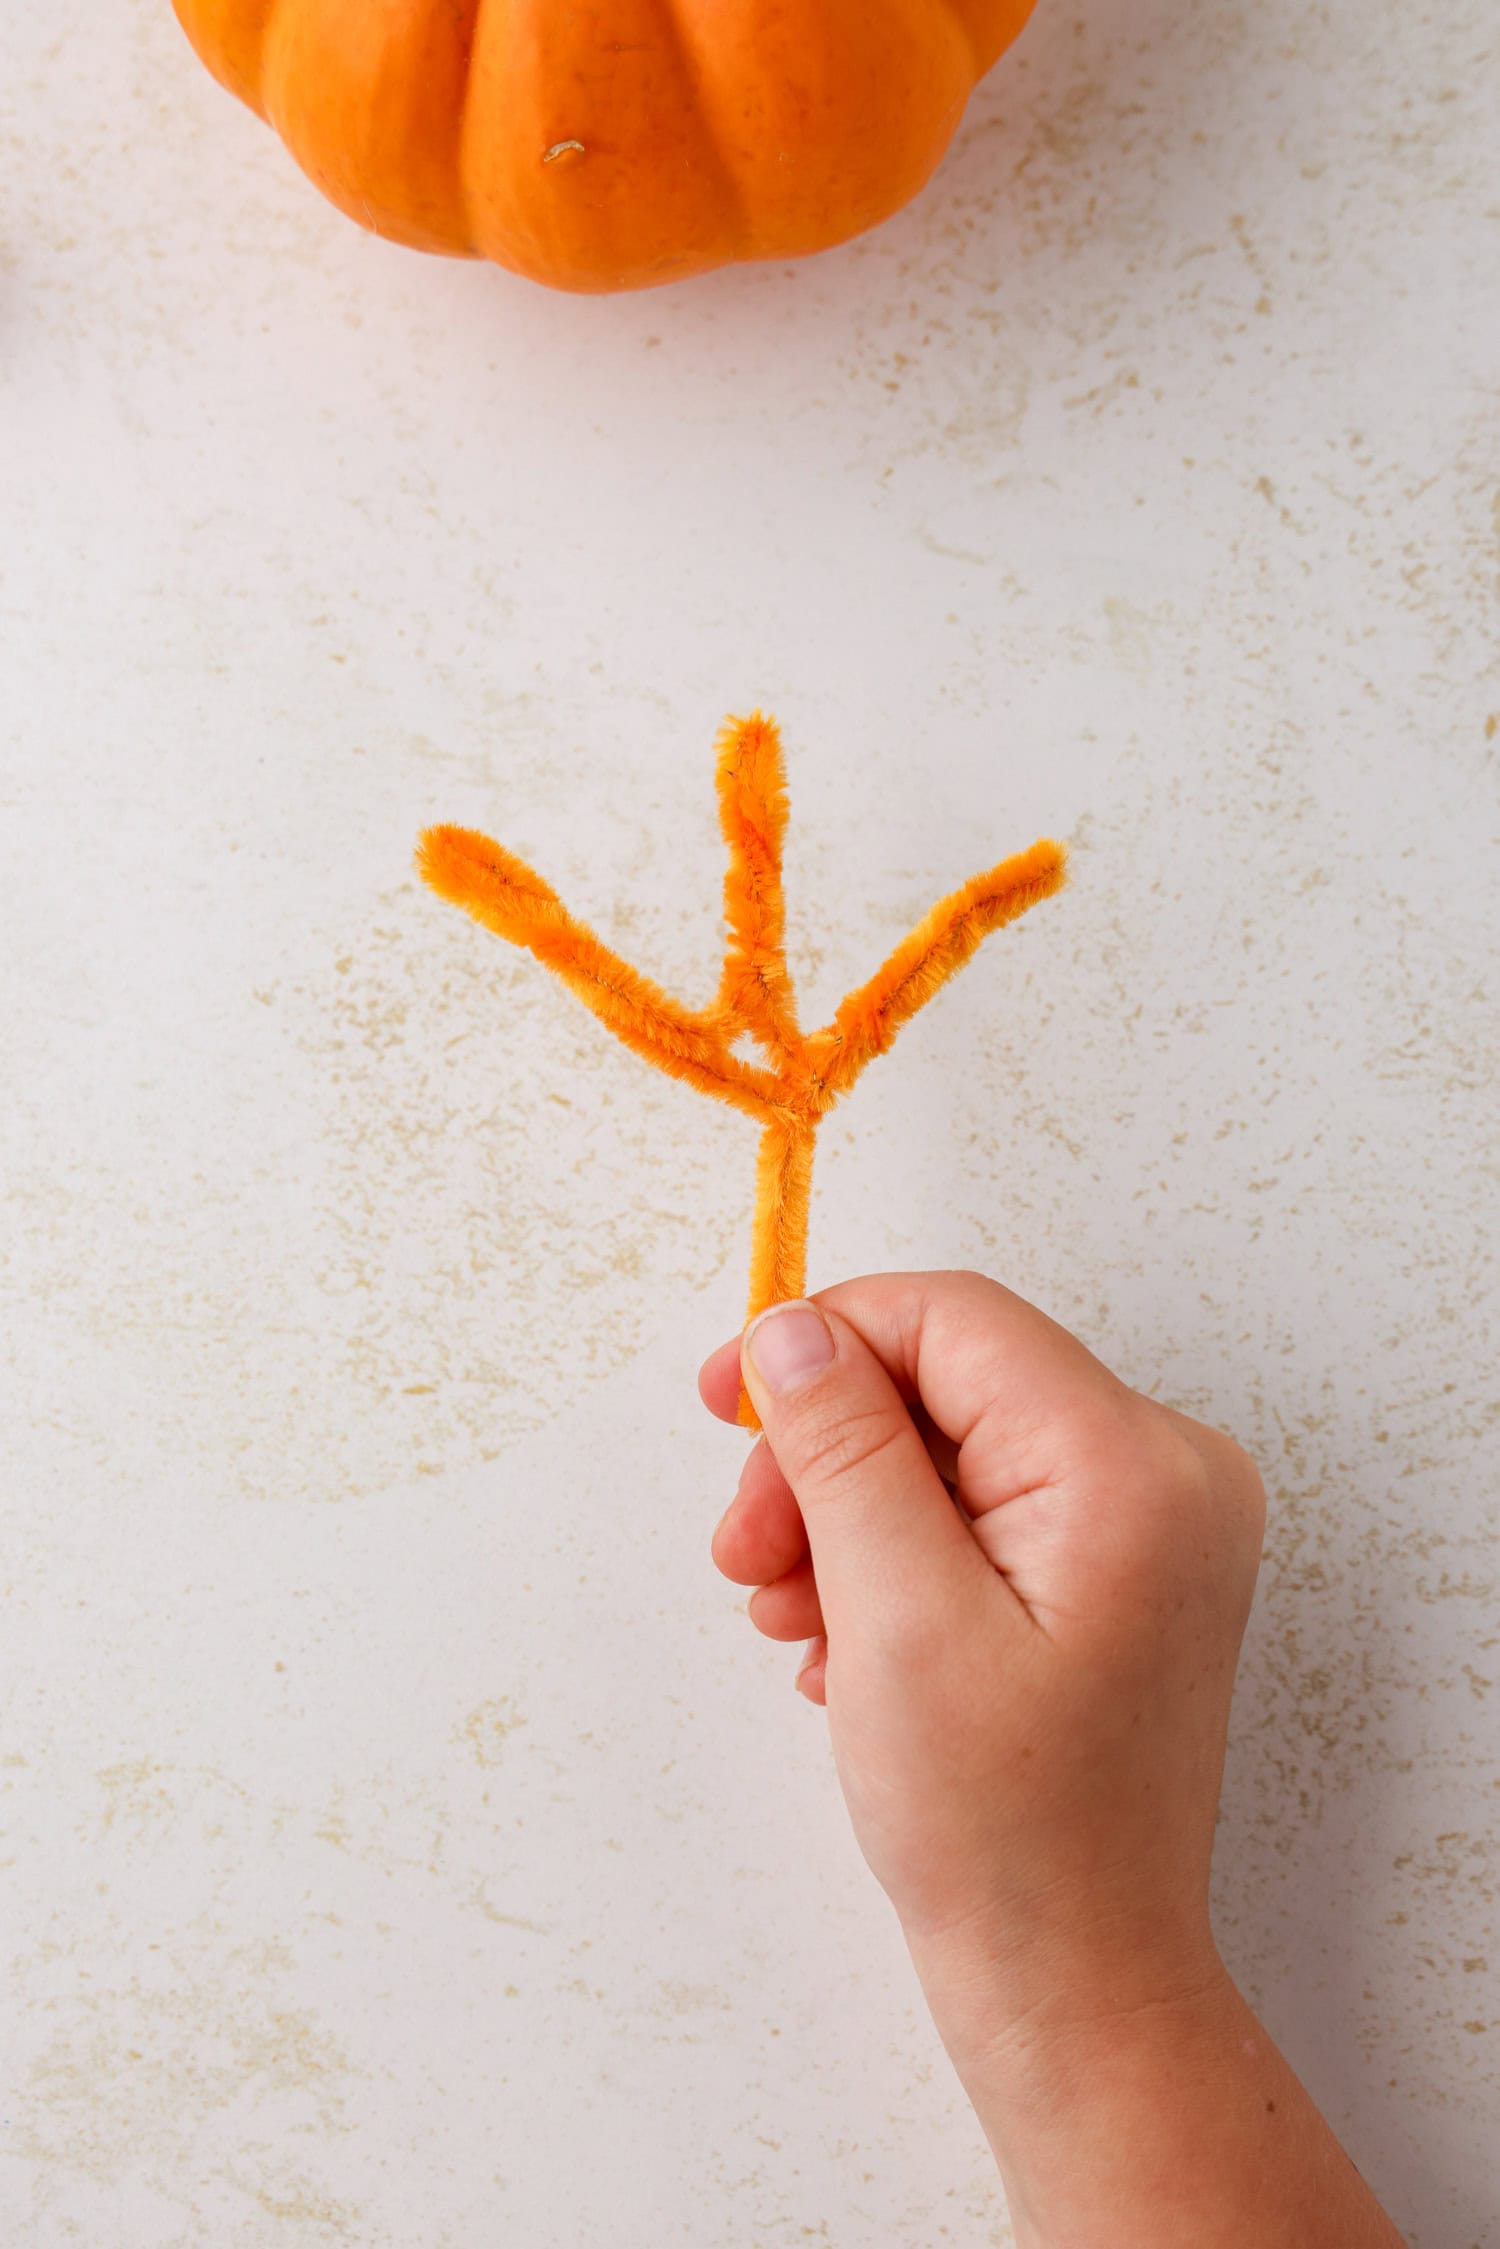
Twist each of the toes to bring them together and form the turkey’s toes! Dab a little bit of hot glue onto each foot and then attach it to the bottom of the mini pumpkin. Add a tiny drop of hot glue to attach the googly eyes if they do not have adhesive backs.
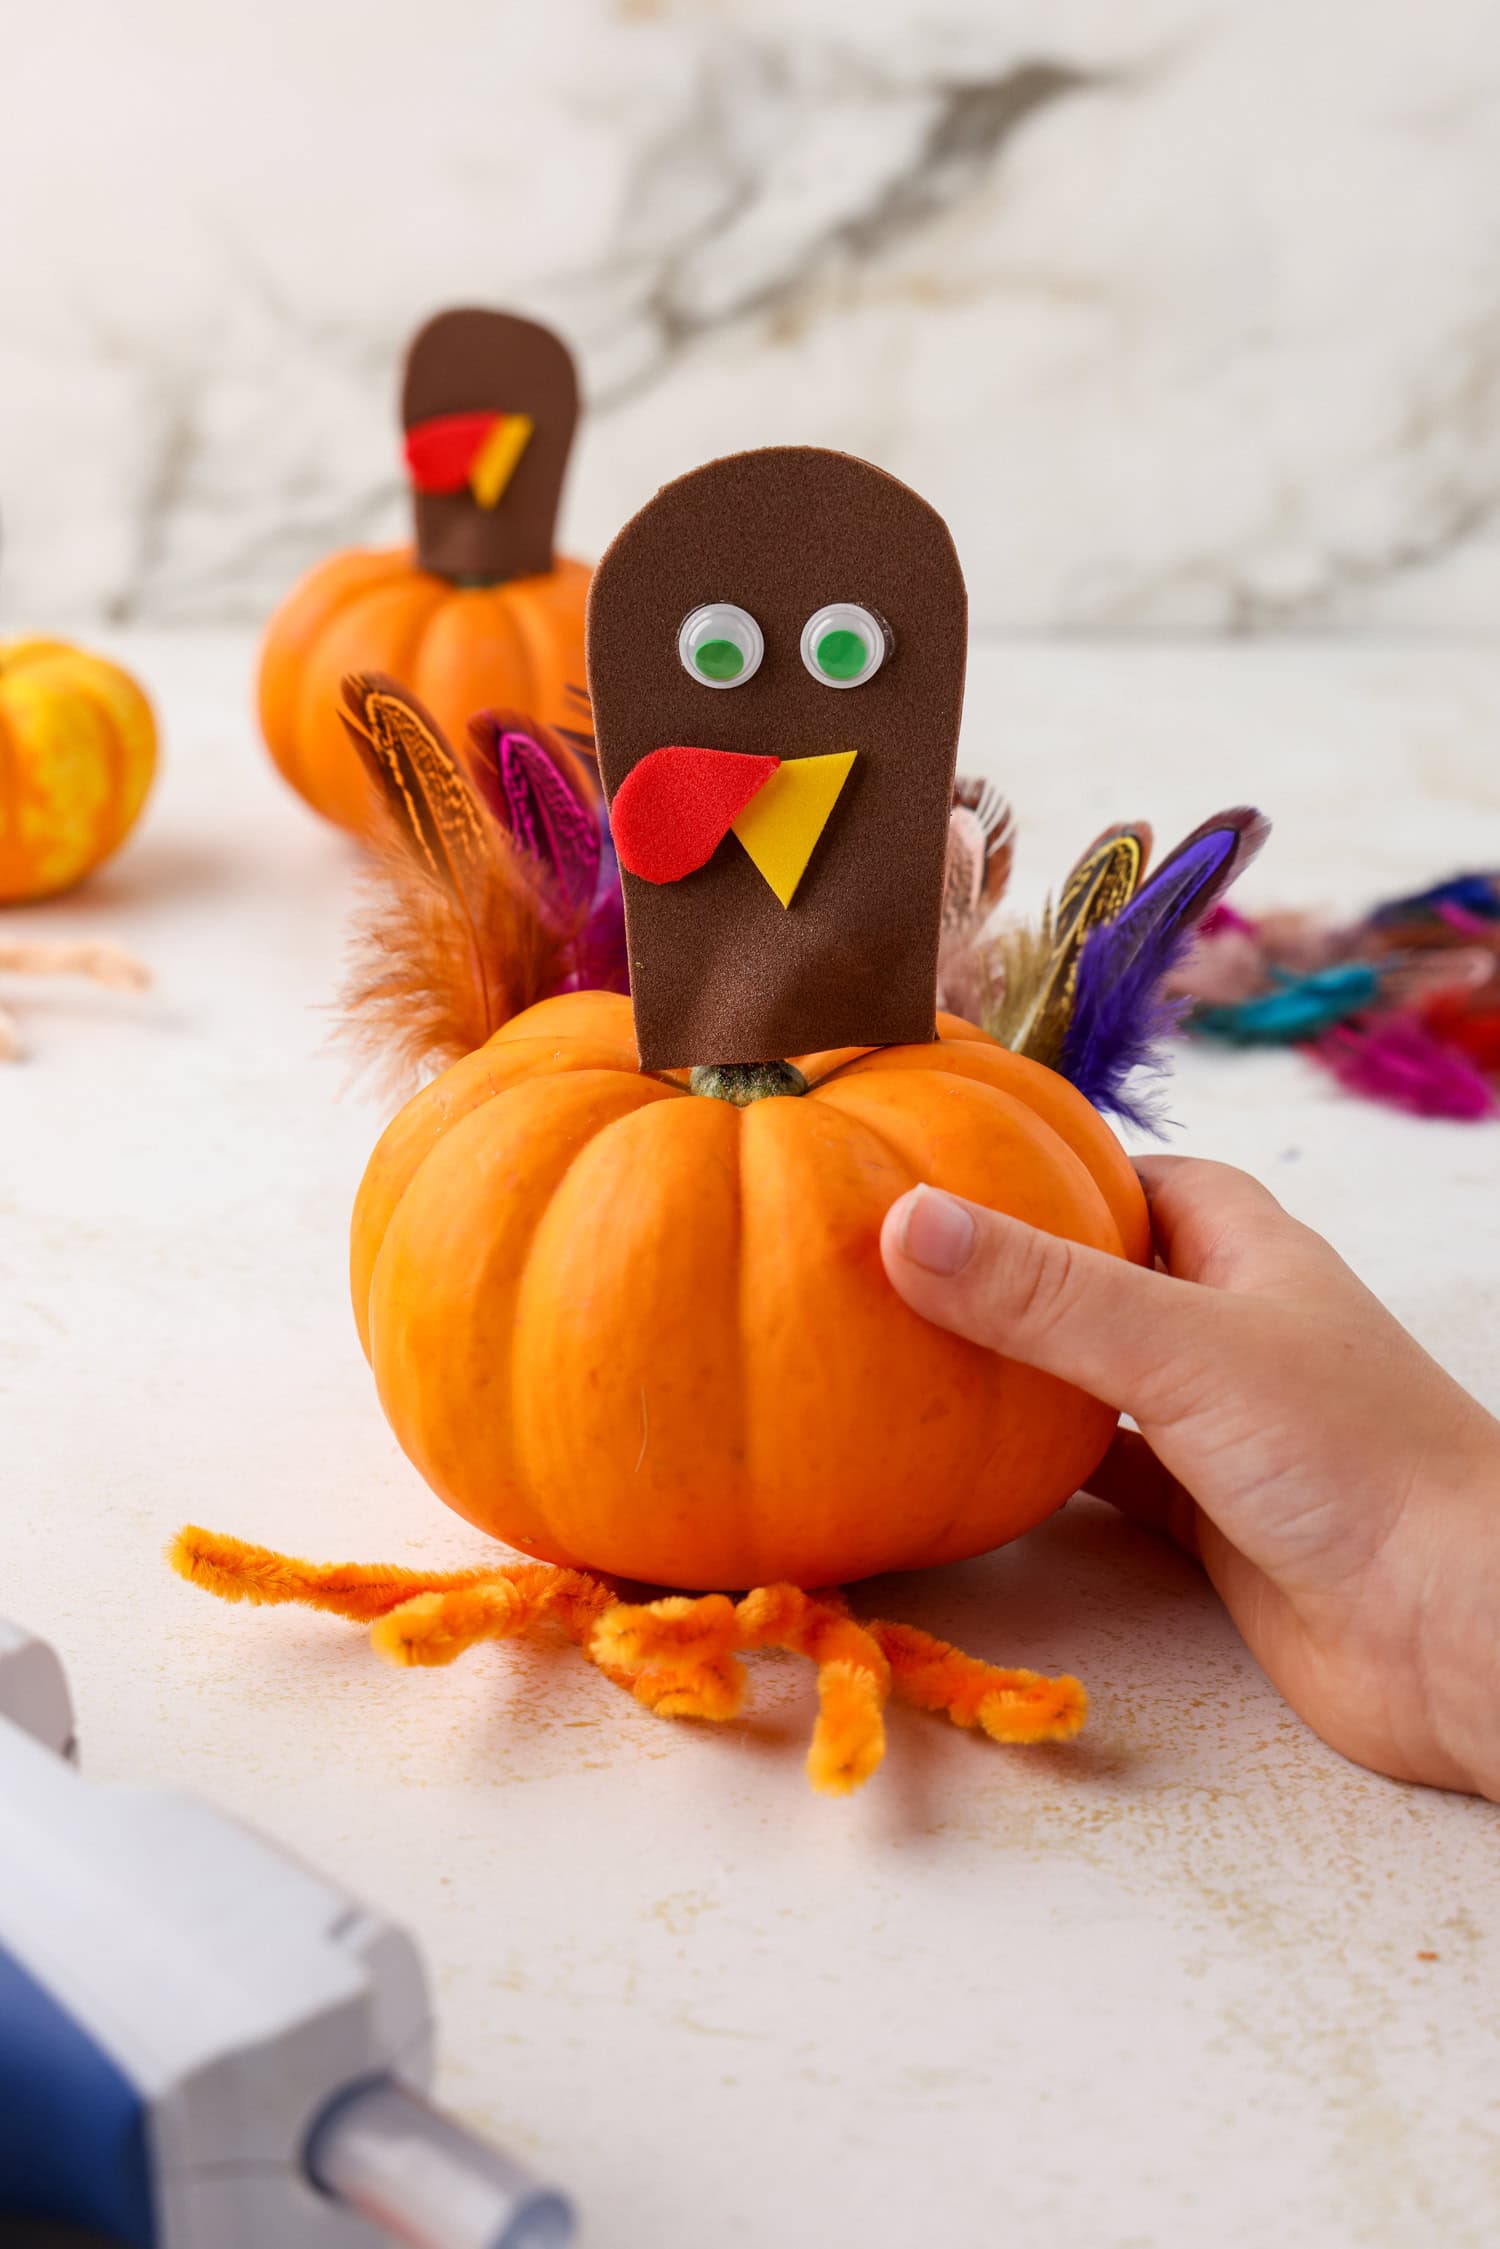
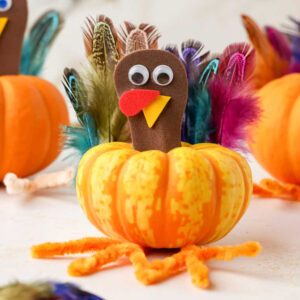
Finally, attach a row of colorful feathers to the backside of the pumpkin to create a beautiful display of turkey tail feathers!
Enjoy your cute mini-pumpkin turkeys!
Can I decorate a pumpkin without carving it?
Absolutely! These fun turkey decorations are just one of the ways that you can decorate an adorable little pumpkin. You can also paint pumpkins, glitter them, and do many other exciting activities with an un-carved pumpkin. Let that imagination soar!
Pro Tips for the Best Mini Pumpkin Turkey
- Want your mini pumpkin turkey to last forever? Then grab some fake mini pumpkins from the craft store! They’ll work just as well as a real mini pumpkin.
- Feel free to use your creativity and imagination and make this craft all your own. This easy project is really fun to make all your own. You can paint your pumpkin, add glitter, buttons, construction paper decorations, draw with markers, add fun stickers, or grab any other craft supplies that you think would be fun to create an extra special pumpkin turkey.
- Make sure you grab a pumpkin that does’t have many bumps or blemishes. The prettier the pumpkin is, the cuter your turkey will be!
I hope you love these mini pumpkin turkeys as much as we do! They’re seriously a blast to make and always put a smile on my face. Who wouldn’t smile at a turkey as cute as this one?
More Thanksgiving Crafts You’ll Love!
- This Pumpkin Playdough smells good enough to eat! A fun sensory play activity for the holidays.
- Make an Indian Corn Craft for a fun history lesson and craft all-in-one. The little rhinestone dots resemble corn kernels and it always turns out really cute.
- Want more Turkey fun? Then check out this Turkey Paper Bag Craft!
- Thanksgiving Coloring Pages are an easy printable activity for the fall.
Mini Pumpkin Turkeys
Ingredients
- Mini pumpkins
- Feathers
- Adhesive foam Sheets
- Pipe cleaners orange, brown, or tan
- Googly eyes
- Hot glue gun and extra glue sticks
- Craft scissors
Instructions
- First, cut out the turkey’s head by folding a brown foam sheet in half and cutting a rounded “peanut” shape.
- Open the peanut shape and cut it in half to make two identical shapes. These two pieces will be the front and back of the turkey’s head.
- Peel off the backings and place one on each side of the stem of the pumpkin, adhesive sides touching. Sandwich the stem between the two adhesive foam sheets and press together.
- Cut a small triangle out of the yellow foam sheet for the turkey’s beak. Peel off the backing and press the sticky side on the turkey’s face.
- Cut a teardrop shape out of the red foam sheet to form the turkey’s snood. Place it at the top of the turkey’s beak.
- Using a pipe cleaner, form a turkey foot by making a balloon shape, making sure to leave a short “stem” at the bottom. Once the balloon is formed, twist the pipe cleaner around itself to hold it in place.
- Press the left side of the pipe cleaner down towards the twisted part of the balloon to form a mitten shape. This will be the turkey’s first toe.
- Press the right side of the mitten right in the middle towards the twisted part of the balloon. This will form the middle and right toes. The shape should look similar to a 3-leaf clover.
- Twist each of the toes to bring them together and form the turkey’s toes!
- Use a little bit of hot glue to attach each foot to the bottom of the pumpkin, and a tiny drop of hot glue to attach the googly eyes if they do not have adhesive backs.
- Finally, attach a row of colorful feathers to the backside of the pumpkin to create a beautiful display of tail feathers!
- Enjoy your cute turkey!