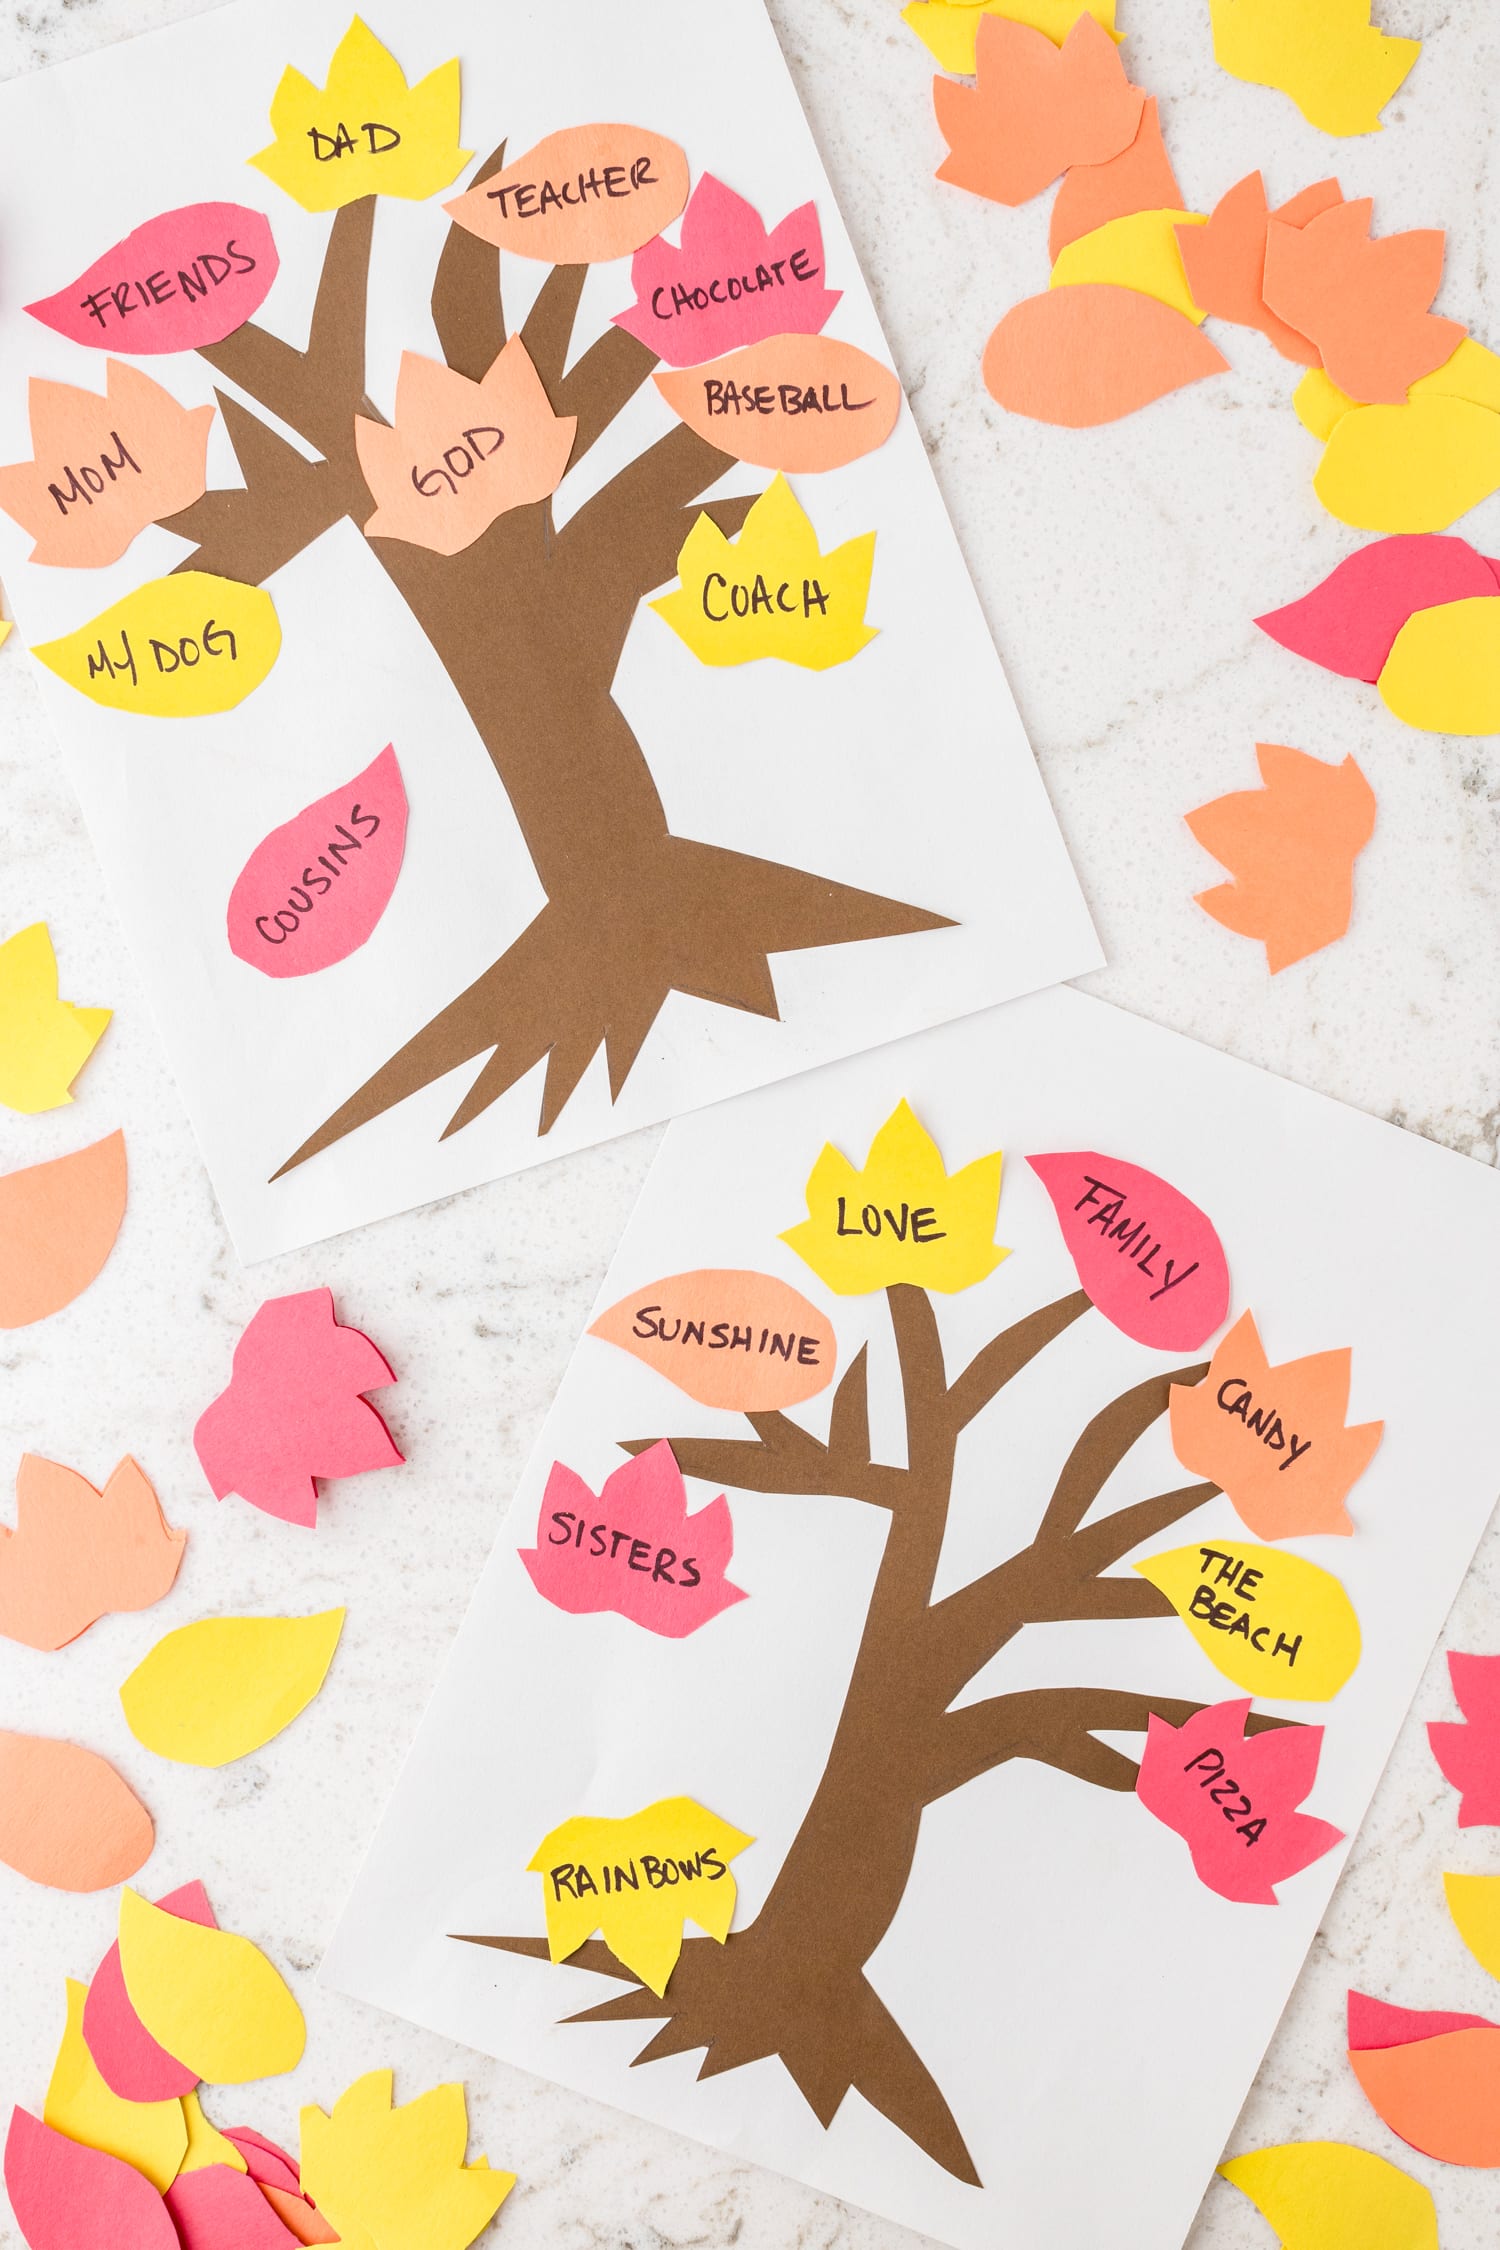
Thankful Tree Craft
The kids will have fun making this DIY Thankful Tree Craft and sharing what they are thankful for this Thanksgiving season. Templates for the Thanksgiving tree and leaves are included so just print them out and cut! It is the perfect Thanksgiving craft to do with the whole family!
Thanksgiving is great time to teach kids what it means to be thankful. There are so many things to be thankful for in life, and teaching them to acknowledge that is one of the biggest reasons we have Thanksgiving!
This easy thankful tree craft is a great idea to have a specific way for kids to mark things that they are grateful for or include the whole family in this great activity. Whether it is school, friends, family, or their favorite things, kids will love to have a fun way to express their thankfulness.
All you have to do to make this craft is open the thankful tree and leaves printable templates and grab a few simple supplies. You can make this adorable Thanksgiving craft with little to no headache! The perfect way to say Happy Thanksgiving and make a new family tradition!
This craft, pumpkin playdough, and a turkey paper bag craft are sure to keep them busy for a bit during Thanksgiving break. Make all of the fun fall crafts with kids of all ages!
Why You’ll Love this Thankful Tree Craft
- This gratitude tree craft is a fabulous keepsake. Just think, mom and dad — years from now you can look back on what your kids were thankful for at their young age. A wonderful way to reminisce!
- Not only can you make this at home for personal use, but this easy thanksgiving craft is great for classroom use too. Label them with each child’s name and display in the classroom on a bulletin board or wall for fun fall decorations.
- Cutting and glueing are great activities to help refine fine motor skills. Fun craft time with an extra goal in mind!
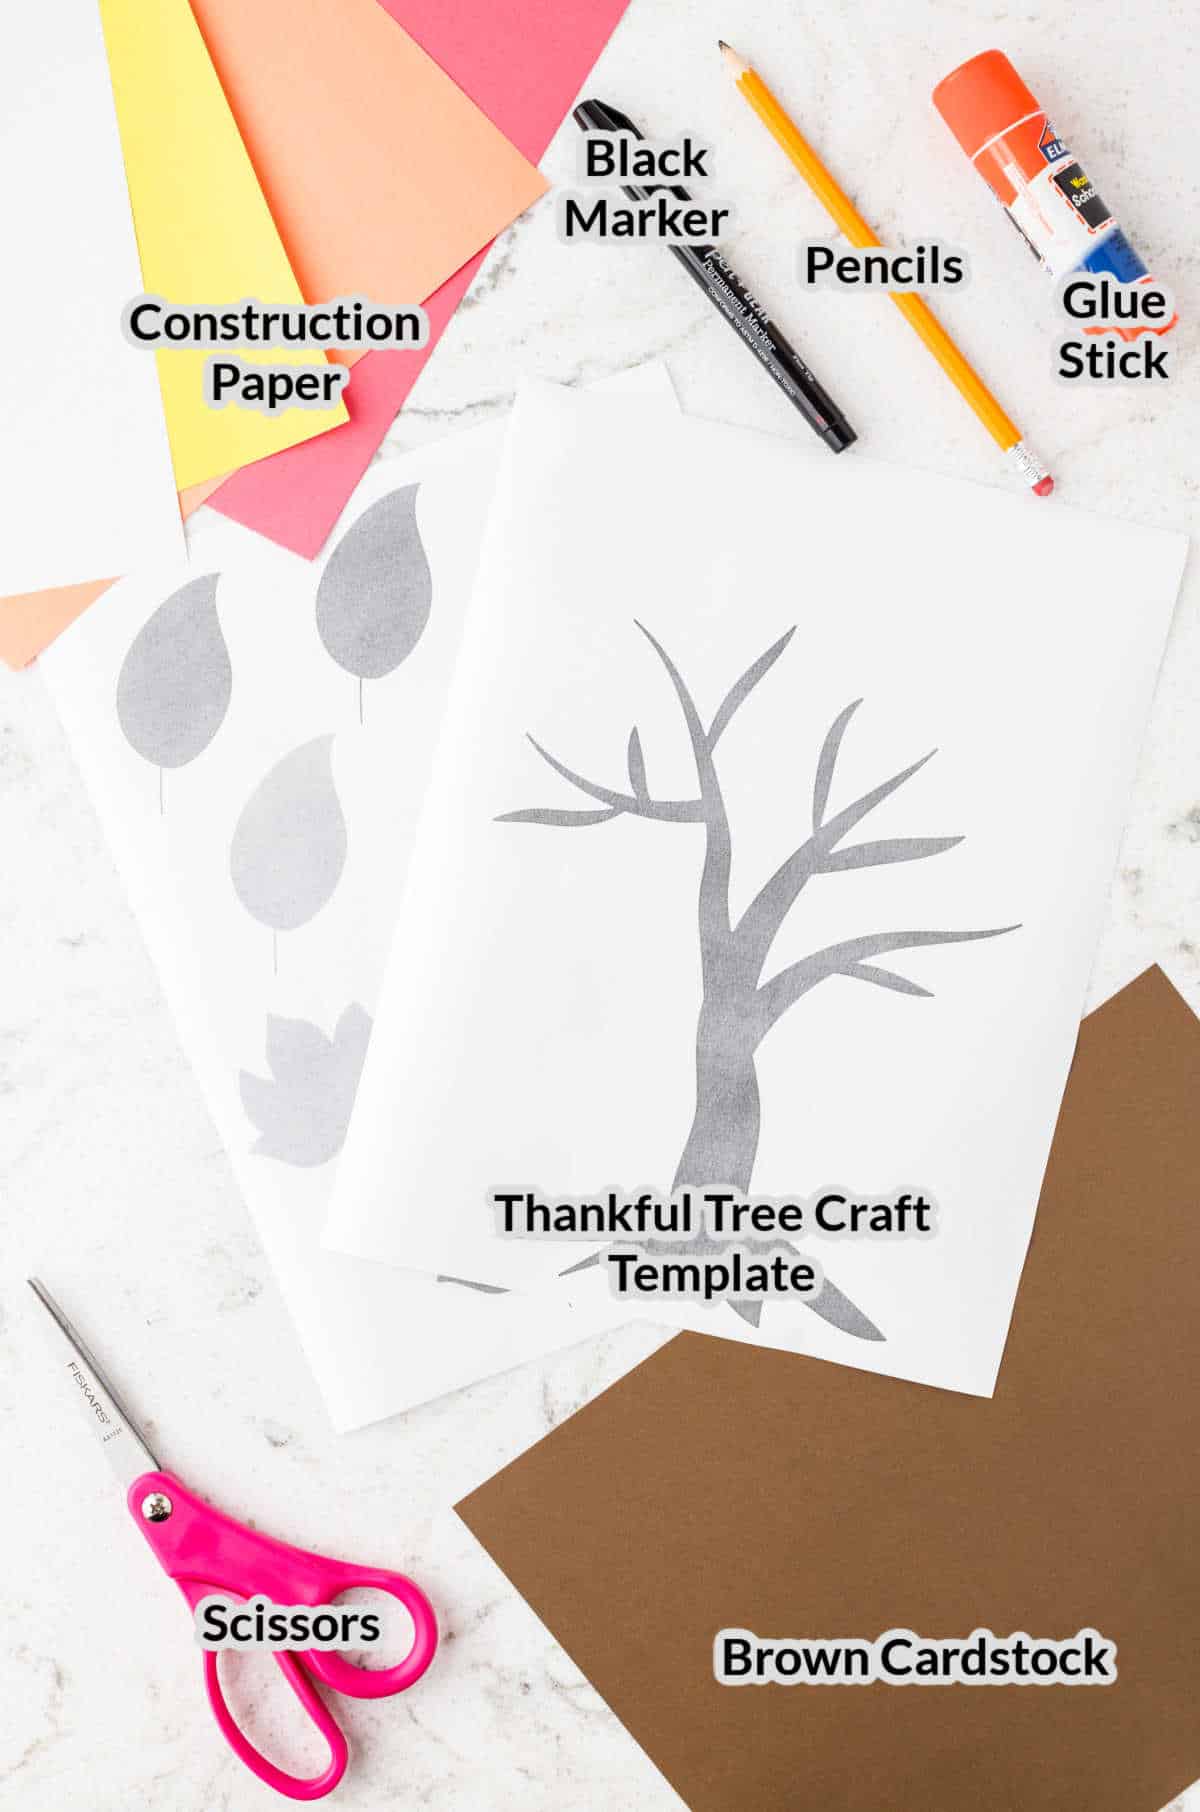
Supplies Needed to make this Gratitude Tree Craft
- Brown cardstock – If you don’t have cardstock, you can use construction paper. Just make sure it is brown because it will be used for the trunk of the tree.
- Scissors – While adults may need to help with the cutting, using safety scissors is always a good idea if the kids plan to cut anything out.
- Thankful tree craft template – Print out this template of a tree to cut out, it’s completely free! If you do not have a printer, you can try to freehand it.
- Leaf Template – This template has printable leaves, so print it out, cut the leaves out then trace them on construction paper to make your leaves. If you do not have a printer, you can freehand leaves .
- Construction paper – For the most fall-themed look, use red, orange, and yellow construction paper to make your colorful leaves. It will look like the leaves on your thankful tree craft have turned to fall colors!
- Black marker – Use a permanent or washable black marker to write what the kids are thankful for on each leaf cut-out.
- Pencils – Pencils are the best to trace the templates so that you can erase any mistakes. However, you can use any writing utensil.
- Glue stick – A simple glue stick is all you need to construct this thankful tree.
Free Templates!
The best part is there are two free printable templates included in this craft to make it easy to make.
The first one is printable leaves. Print them, cut them out and trace them on colored construction paper for your leaves.
The second is a thankful tree printable. Simply print out the template, trace the tree onto brown paper and cut it out!


How to Make this Thankful Tree Craft
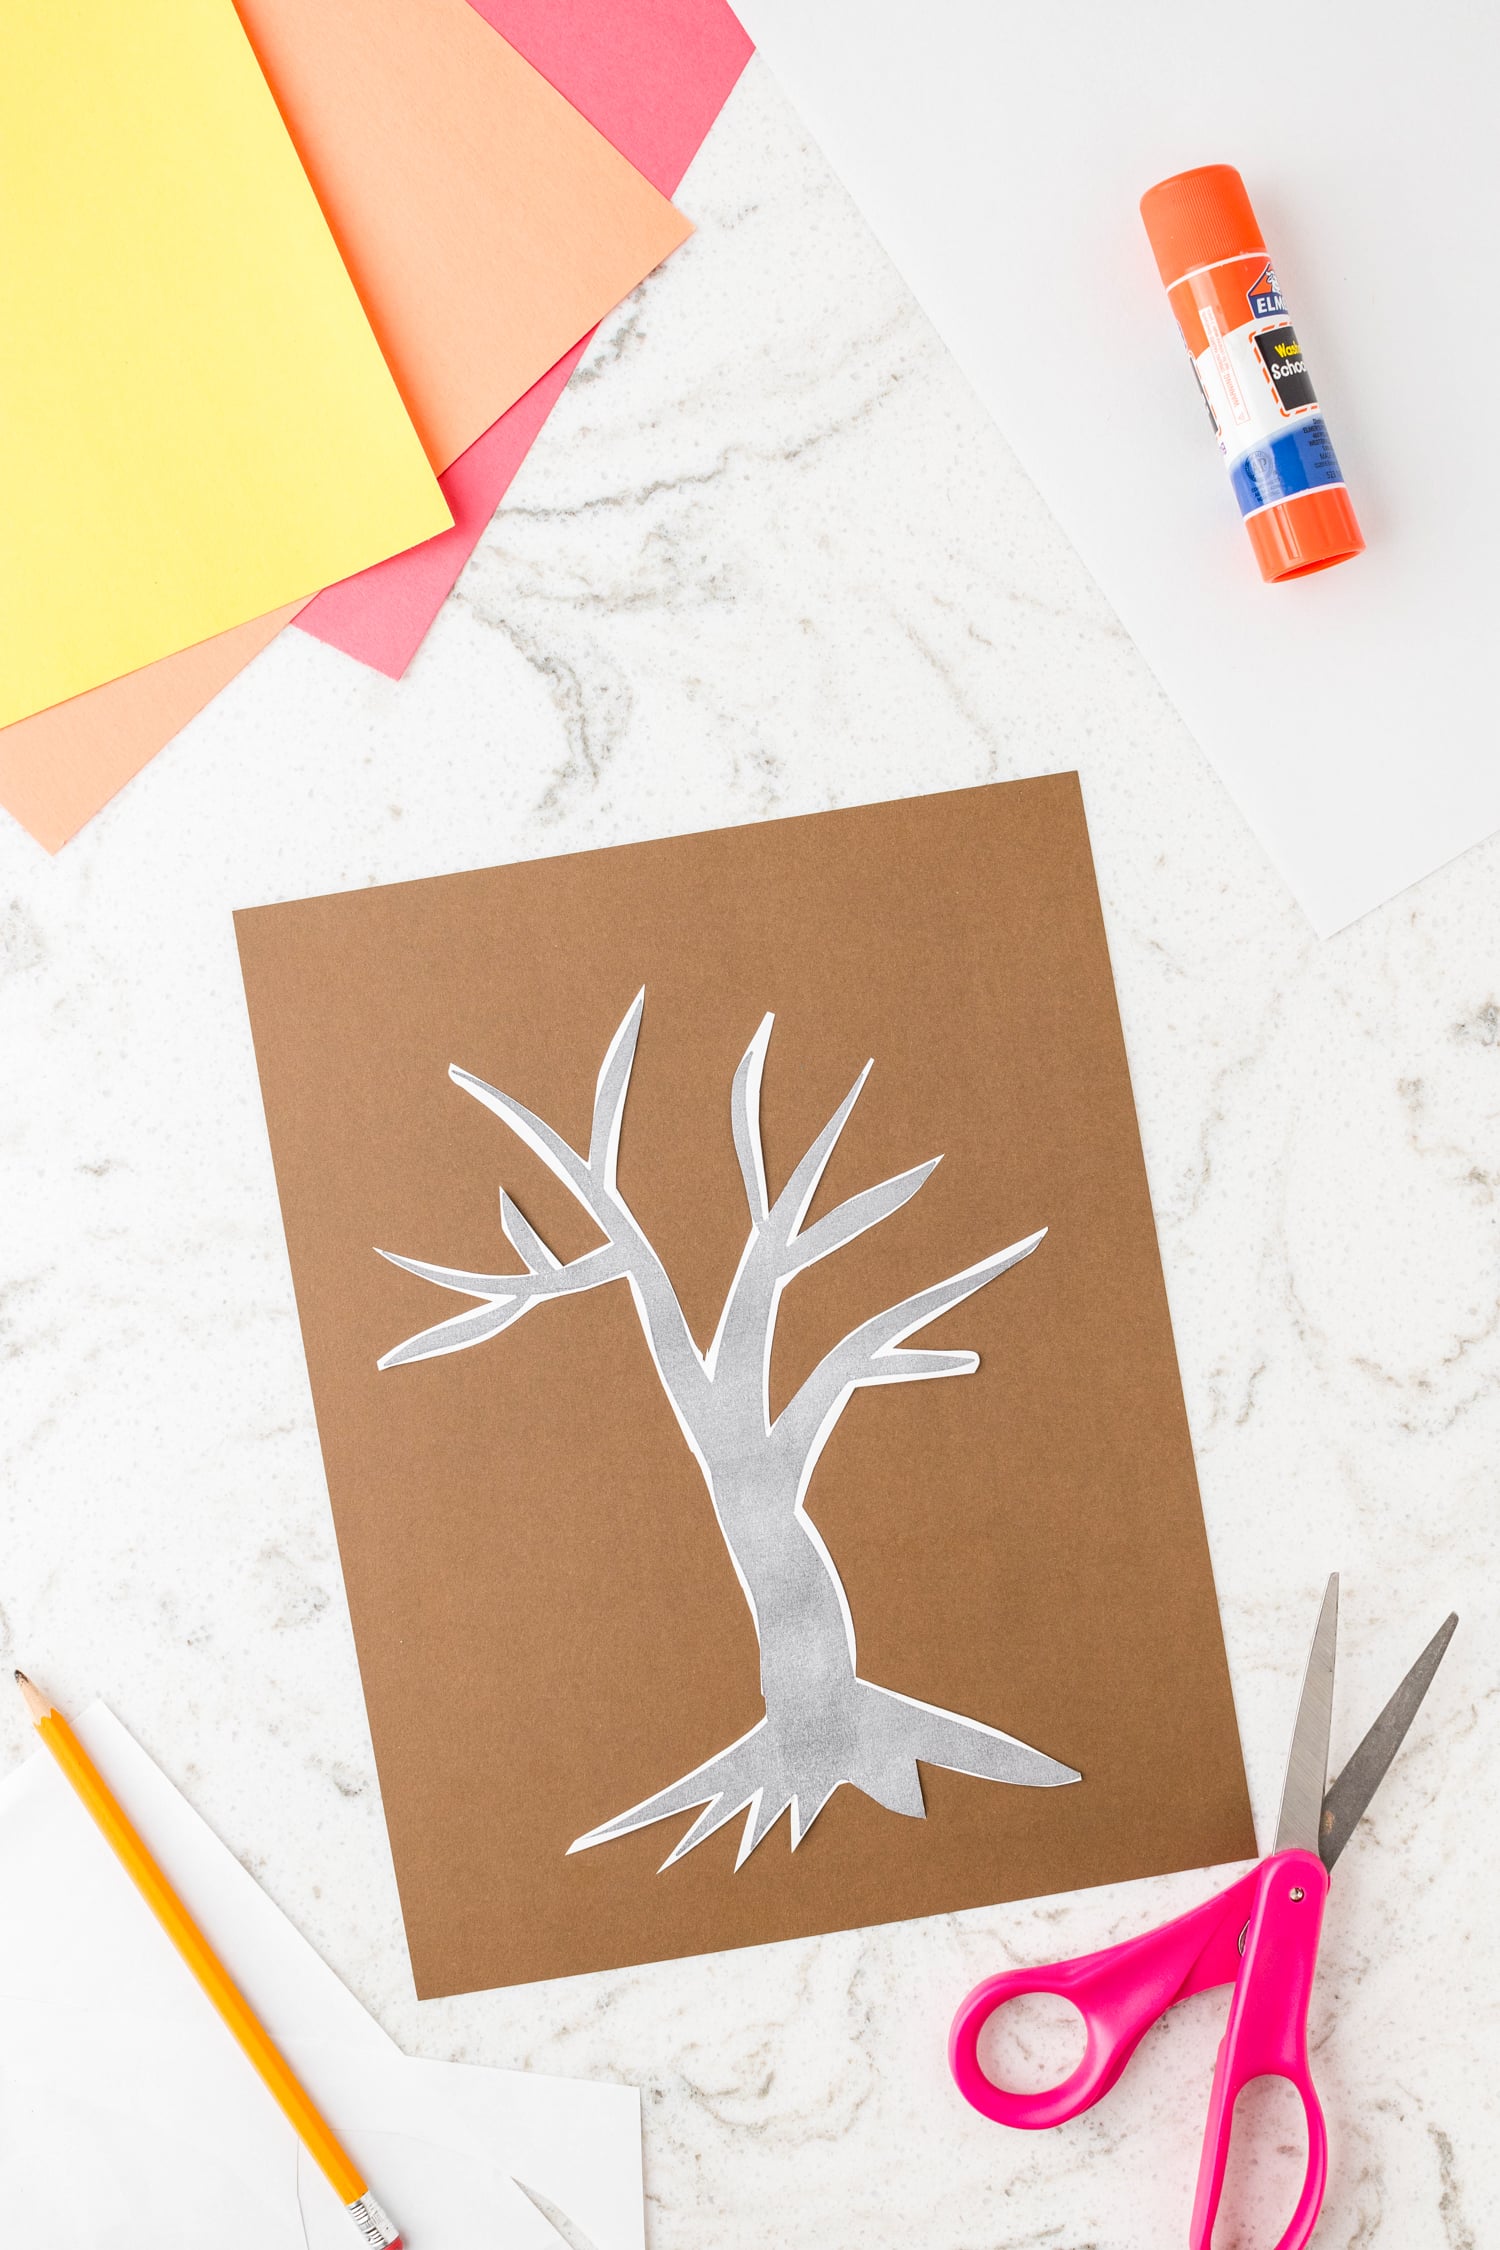
- Print out the free printable thankful tree template and then it cut out. Place the template onto the piece of brown cardstock and then trace it.
- Cut out the brown tree trunk and place a thin layer of glue onto the back of the tree. Glue it down onto white construction paper and press down to secure. Allow it to dry for a few minutes.
- While the glue on the tree dries, make the thankful leaves!
- Print out the template for the fall leaves, then cut them out. Place the cut-outs onto red, yellow and orange construction paper and trace them with a pencil.
- Cut out each of the traced leaves and then set them aside.
- Have your child write the things they are thankful for on each leaf. If your kids are young, you may need to write their words for them!
- Glue the leaves onto the tree, and even glue a few to look like they are falling! Make sure to add leaves on different branches to spread them out.
- Once dry, hang the thankful tree craft in your favorite area to display!


What to write on a grateful tree?
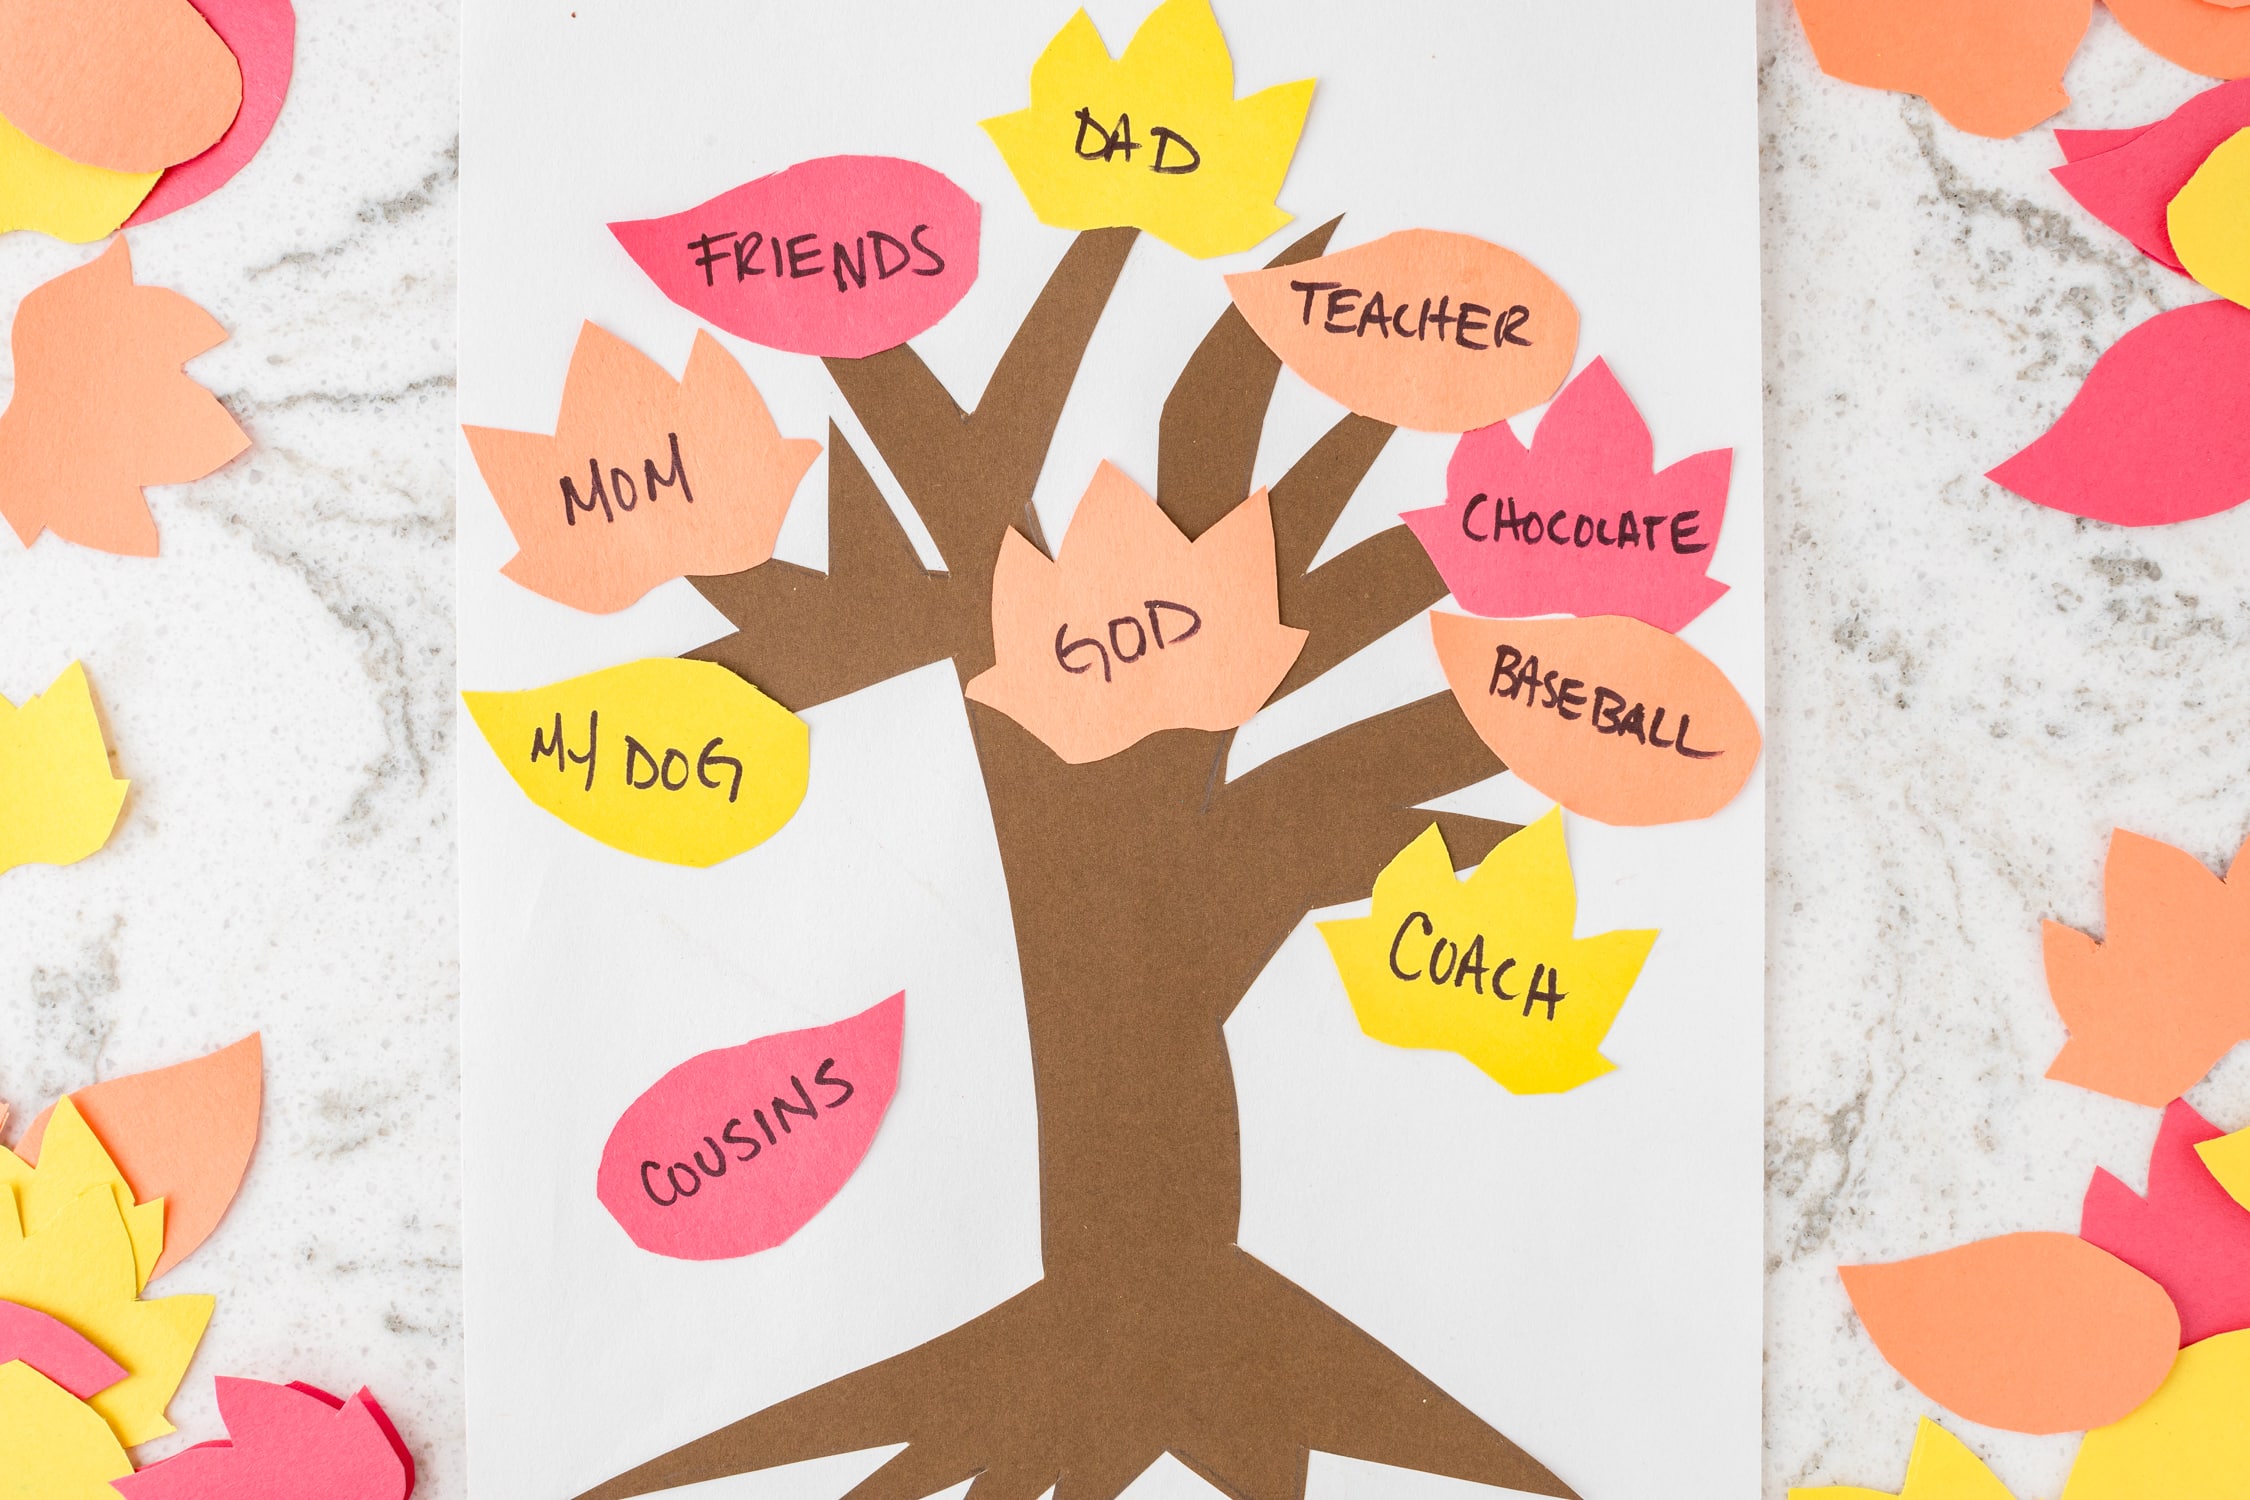
Anything and everything that the kids and family members are grateful for. Nothing is silly or off the table! Specific people, places or things are great ideas as well as weather, favorite foods and weather. Younger kids might even opt to draw the things they are grateful for on their leaves if they cannot write themselves.
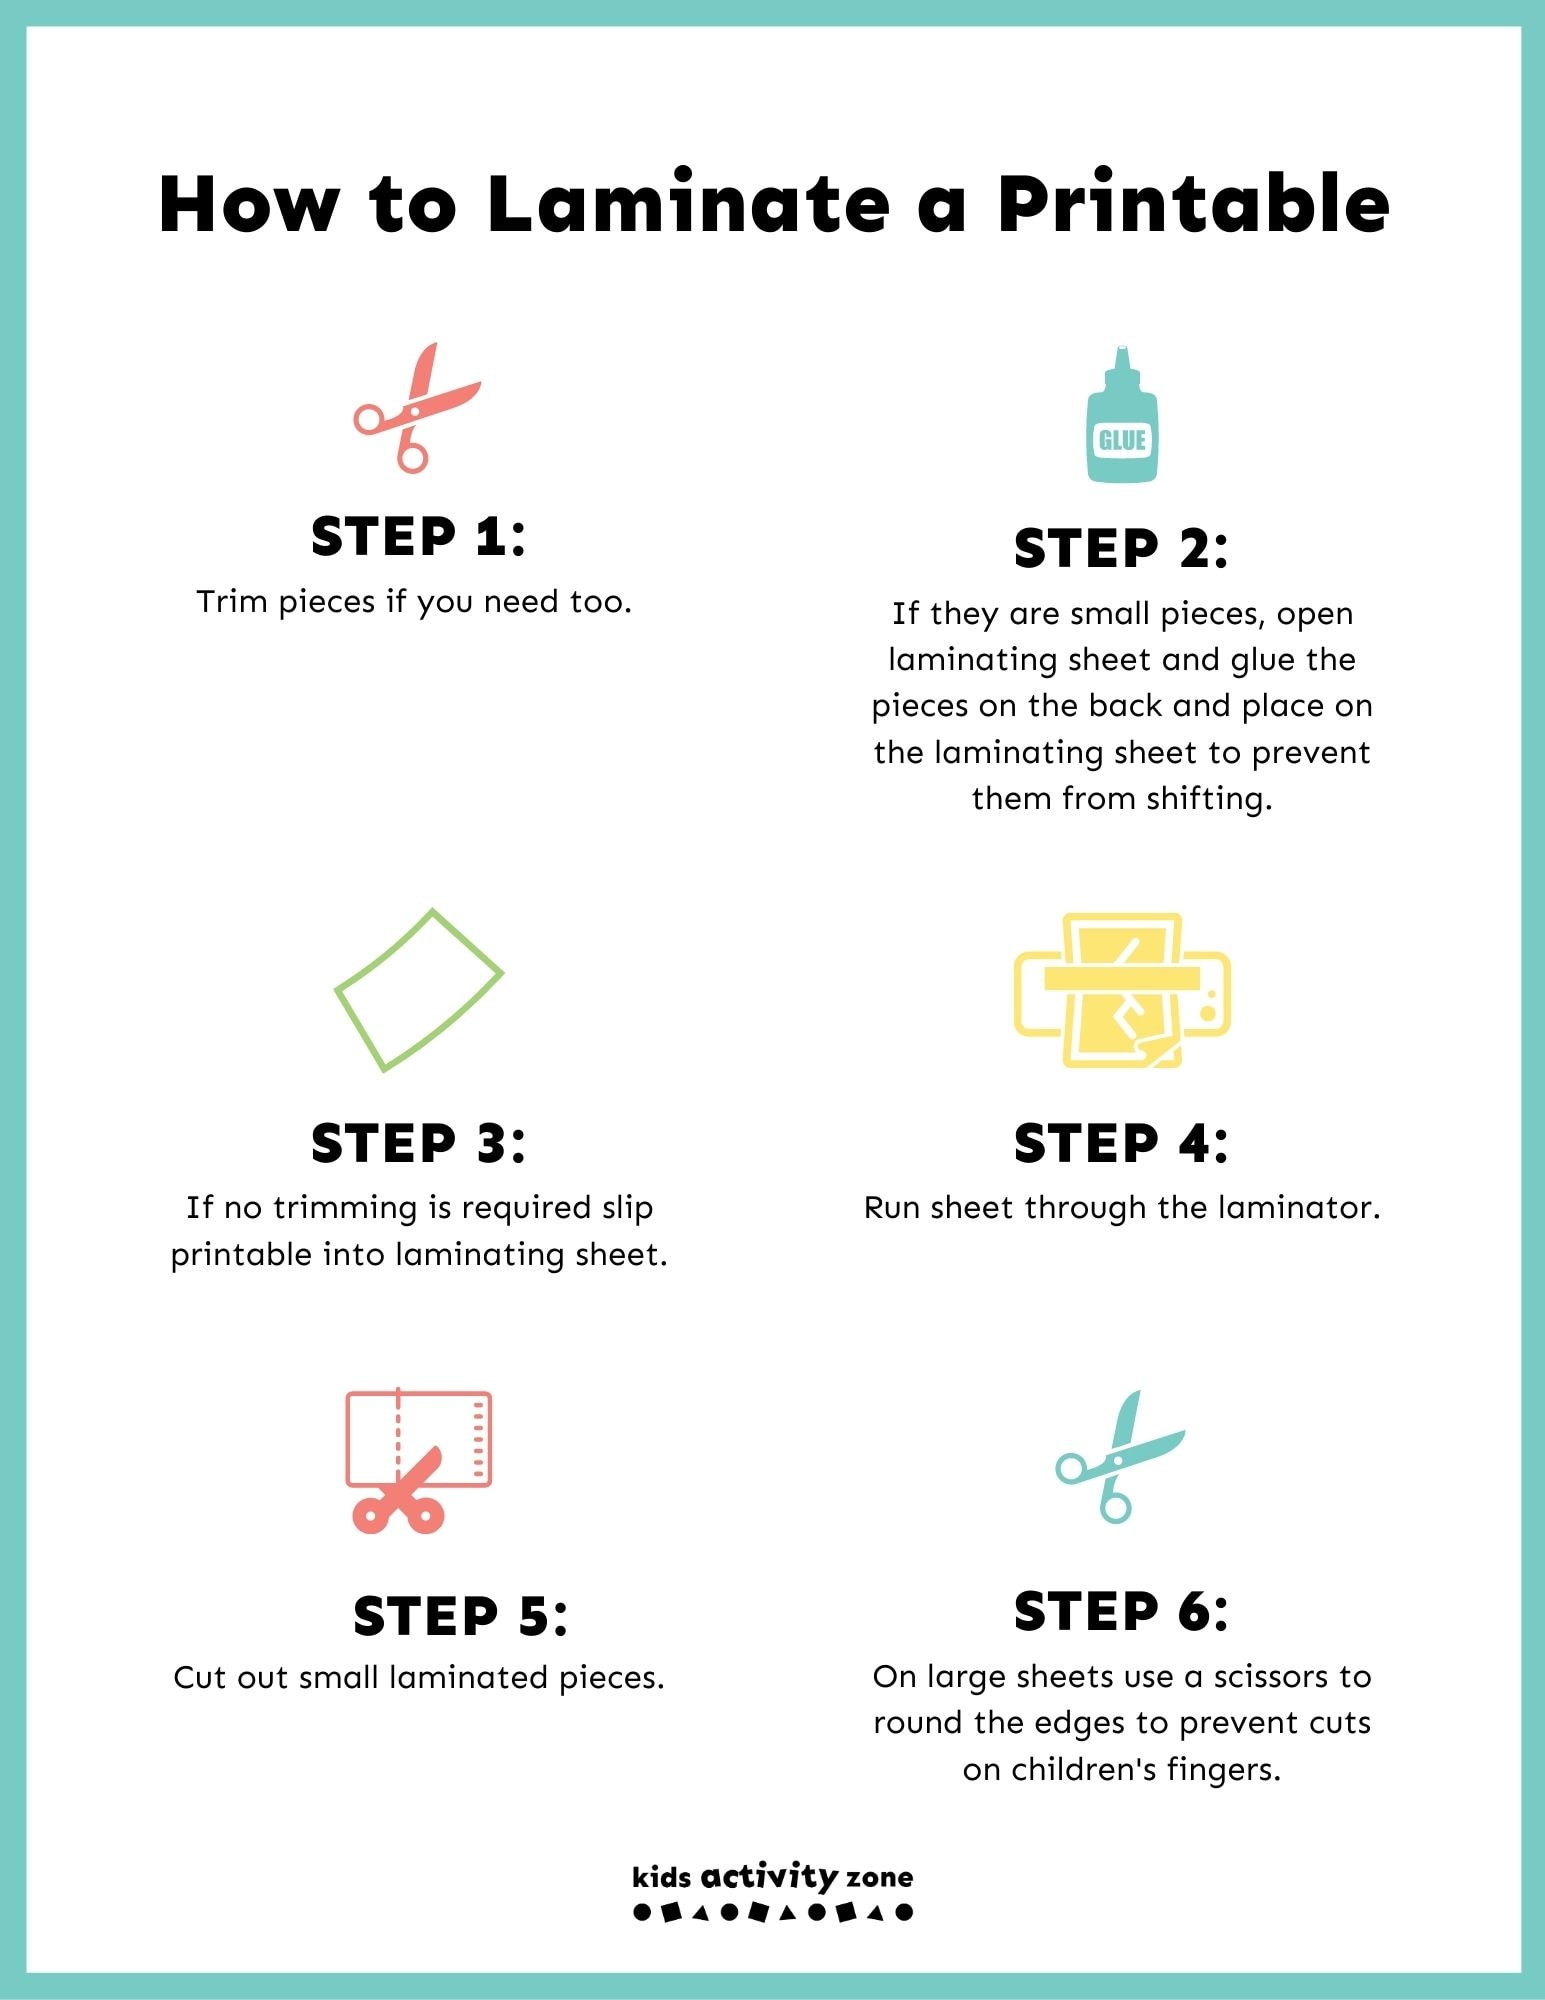
How can I make my thankful tree reusable?
After glueing the tree trunk to the white construction paper and letting it dry, laminate the page. Then, trace the leaves onto construction paper but don’t cut them out.
Laminate the page of leaves, then cut them out. Add velcro dots to the branches of the tree and the other half to the back of each leaf. Then use a dry erase marker to write on each leaf! Now your thankful tree can be used for many years to come! Stick a couple of magnets to the back so you can add it to your fridge every year!
Pro Tips!
- For extra thankfulness fun, you can add a leaf to the tree each day or week leading up to Thanksgiving holiday. Watch the tree grow in gratefulness!
- Another great way to do this is make it the perfect activity around the thanksgiving table. Every family member fills out their own paper leaves during thanksgiving dinner! This way the entire family can get in having an attitude of gratitude.
- While a variety of fall colors make the most “sense” for the thankful tree leaves, let those kiddos use their imaginations. Any color of construction paper will make a fun and unique tree with colorful paper leaves!
- Add glitter or glitter glue to the leaves and/or trunk of the tree to give your gratitude tree craft extra pizzaz.
This fun thankful tree craft is so exciting for Thanksgiving! This cute thankful tree has easy steps and a free thankfulness tree template, so you can make this craft one of the best thanksgiving decorations.
More Thanksgiving Ideas You’ll Love
- Print out some fun Thanksgiving Coloring Pages that are the best easy entertainment for children of all ages.
- This Thanksgiving Activities Packet is free! Just print it out and get to having fun. Maybe add in this I-spy, too!
- Put those empty toilet paper rolls to good use and make a Toilet Paper Roll Turkey!
- This Pumpkin Pie Craft is so fun to make and perfect for kids to use for imaginative play.

Thankful Tree Craft
Ingredients
- Leaf Template
- Thankful Craft Template print ahead of time or freehand
- Scissors
- Pencil
- Card Stock Brown
- Glue stick
- Construction paper white, red, yellow, and orange
- Marker black
Instructions
- First, let’s make our thankful tree! Print out the Thankful Tree Template and cut out the outline. Trace the template on top of a piece of brown card stock. Cut out the tree. Place a thin layer of glue on the back of the tree and then place it onto the center of the white construction paper. Press to secure the tree. Allow a few minutes to dry.
- While the tree is drying, let’s make the leaves! Print and cut out the leaf template. Place the leaf templates onto your choice of red, yellow, and orange construction paper. Cut out all of the traced leaves and set them aside.
- Write your “thankful” words on each leaf and then glue them to the branches. Allow a few minutes to dry. Another way to do this is to fill out a leaf for each day and watch your tree grow!
- Once dry, hang it on the fridge or your favorite window or door!
Notes
- If you don’t have a printer available, feel free to freehand draw the tree and the leaves.