Tin Can Planters
Recycle, reuse and reduce with these easy Tin Can Planters! They are the perfect activity for Earth Day, Mother’s Day and so much more. Recycle a tin can, decorate it and plant a succulent or flower in it. DIY tin can planters are the perfect homemade gift for so many occasions.
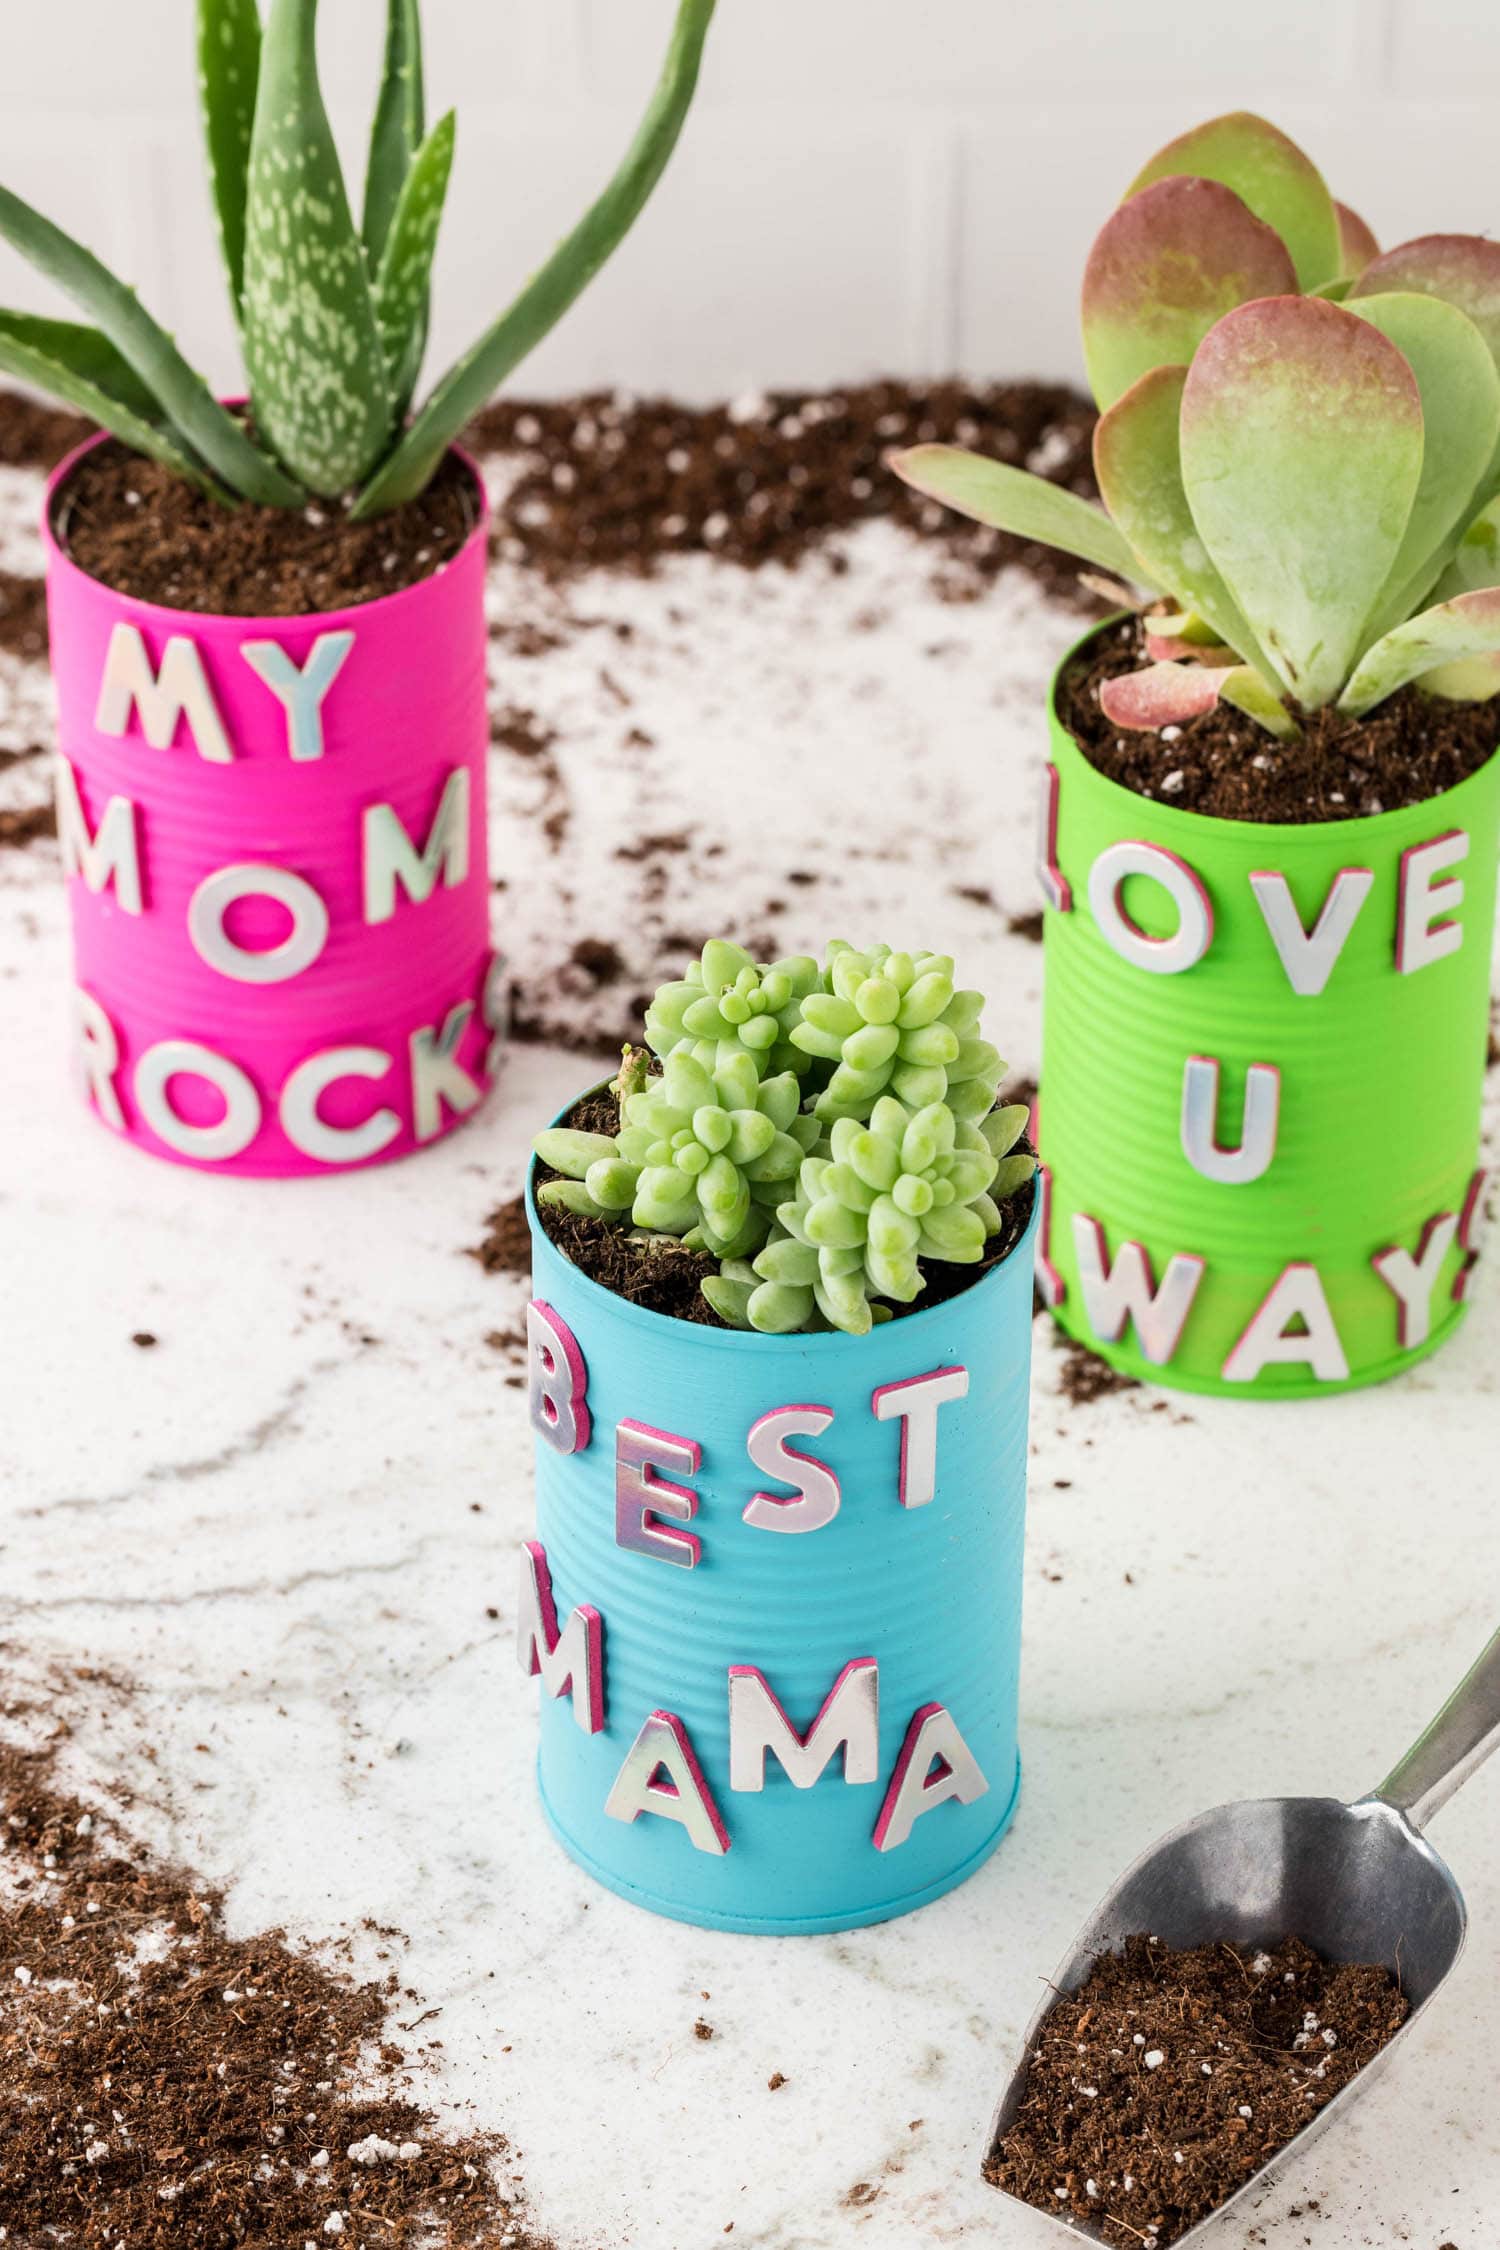
Moms love recieving flowers, but how about a plant that they can take care of and watch grow? These adorable little tin can planters are a fun way to create a homemade gift for a Mom with a green thumb. Such a sweet and genuine Mother’s Day gift!
You can gift these for so many other occasions too! Customize your aluminum can planters to make a precious homemade teacher gift, birthday gift, or as a gift for grandparents. It can also simply be a fun Spring activity because it’s never too early to teach your kiddos how to grow things! You will reuse cans to help the environment and learn something new.
I love activities that include nature. These planters are so fun to create during the Spring, and we often make this pom pom leaf painting in the Fall. These cute little tin can planters are a great way to upcycle household products and make them into something new and fun!
Why should I reuse food cans?
Reusing tin cans reduces waste going into landfills and also helps to conserve the water and energy used during manufacturing. By reusing them to make a planter, you will reduce your environmental impact.
Why You’ll Love Tin Can Planters
- Since the main part of this craft is recycled empty tin cans, making tin can plant pots is an affordable activity.
- You can easily make a lot of these tin can planters so that you have plenty of gifts to give out to friends and family for a holiday!
- Aside from an hour to dry, this easy craft only takes 40 minutes to complete.
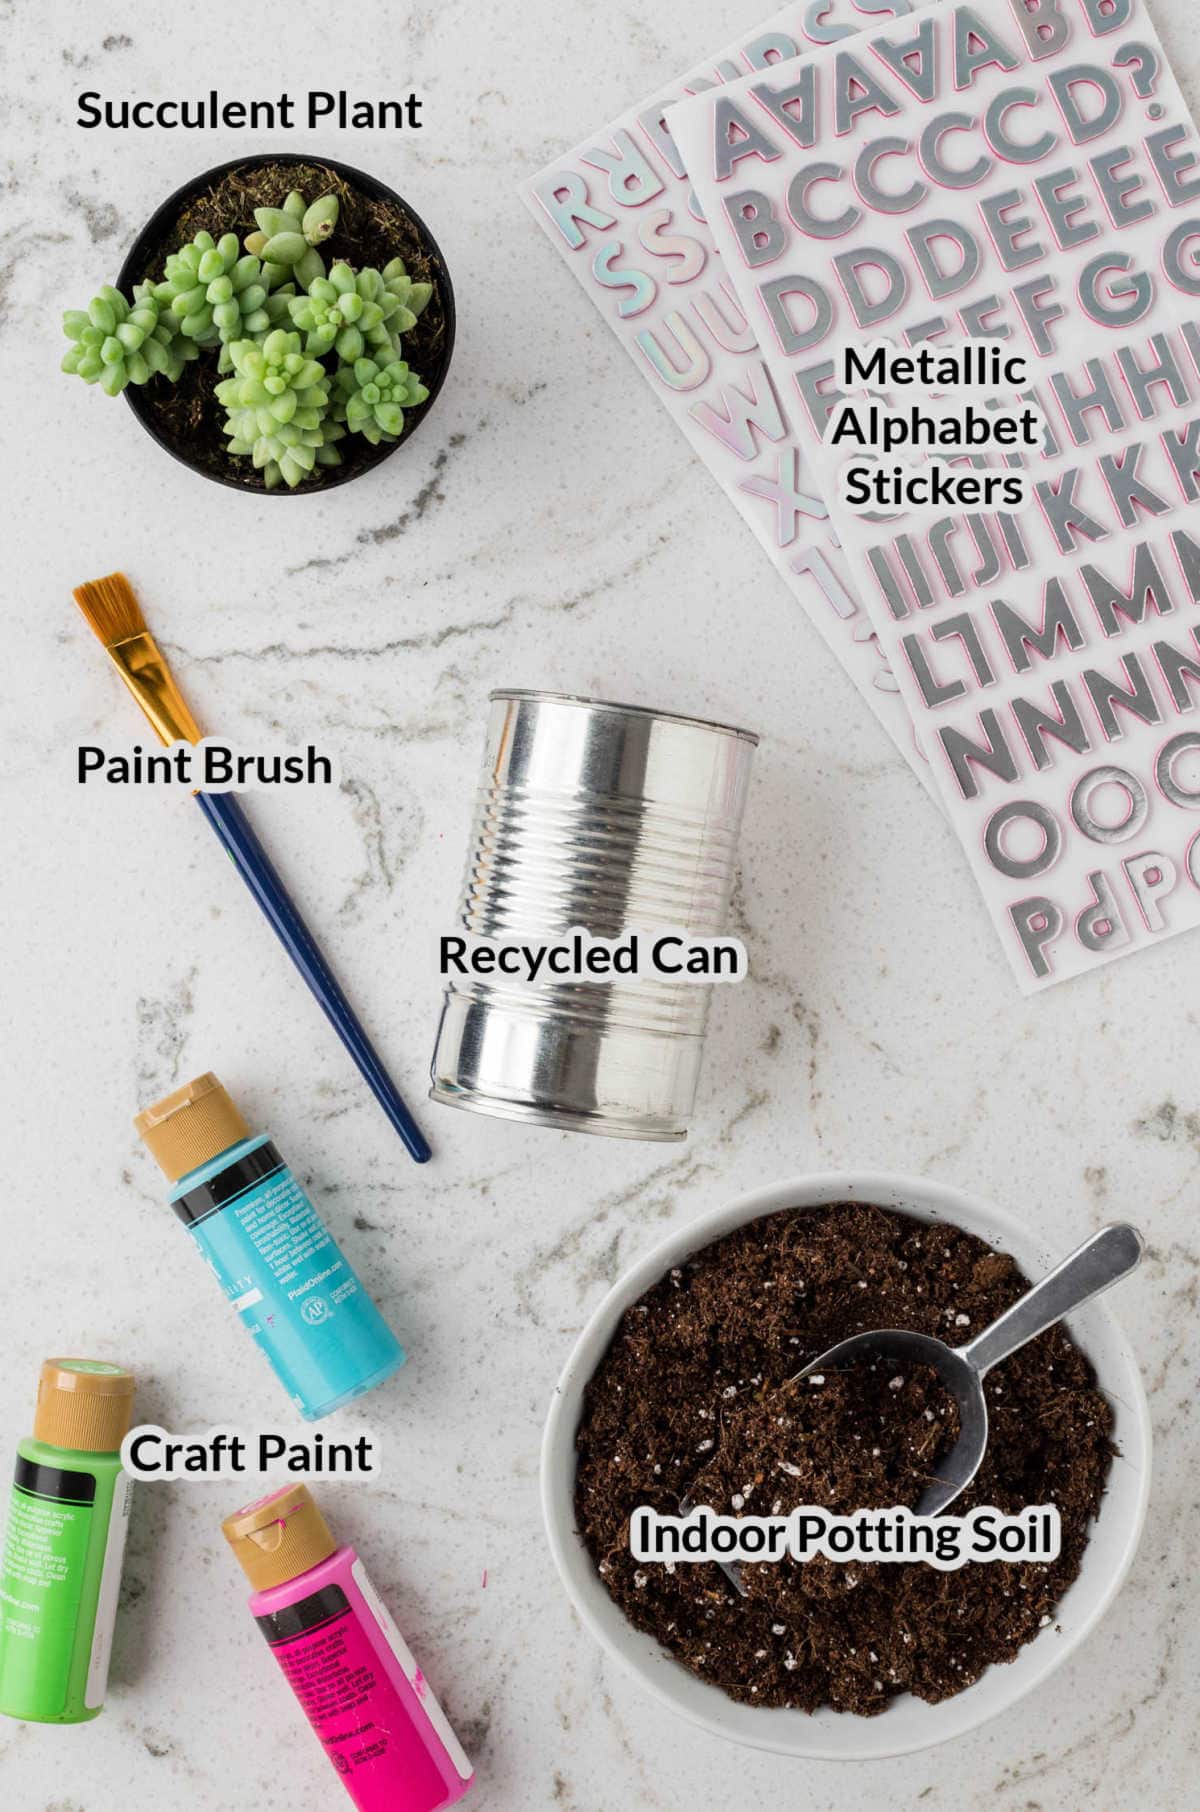
Supplies to Make Recycled Tin Can Planters
- Recycled can – You can use any empty, and clean, aluminum can from canned food.
- Hammer and nail – You will be using these to poke holes in the bottom of your can for drainage.
- Paint brush – Any simple craft paint brush will work. You can use a foam brush too! Make sure you grab one that covers a decent amount of surface area so that it won’t take you too long to finish painting the can.
- Craft paint – Use whatever color acrylic craft paint that you want.
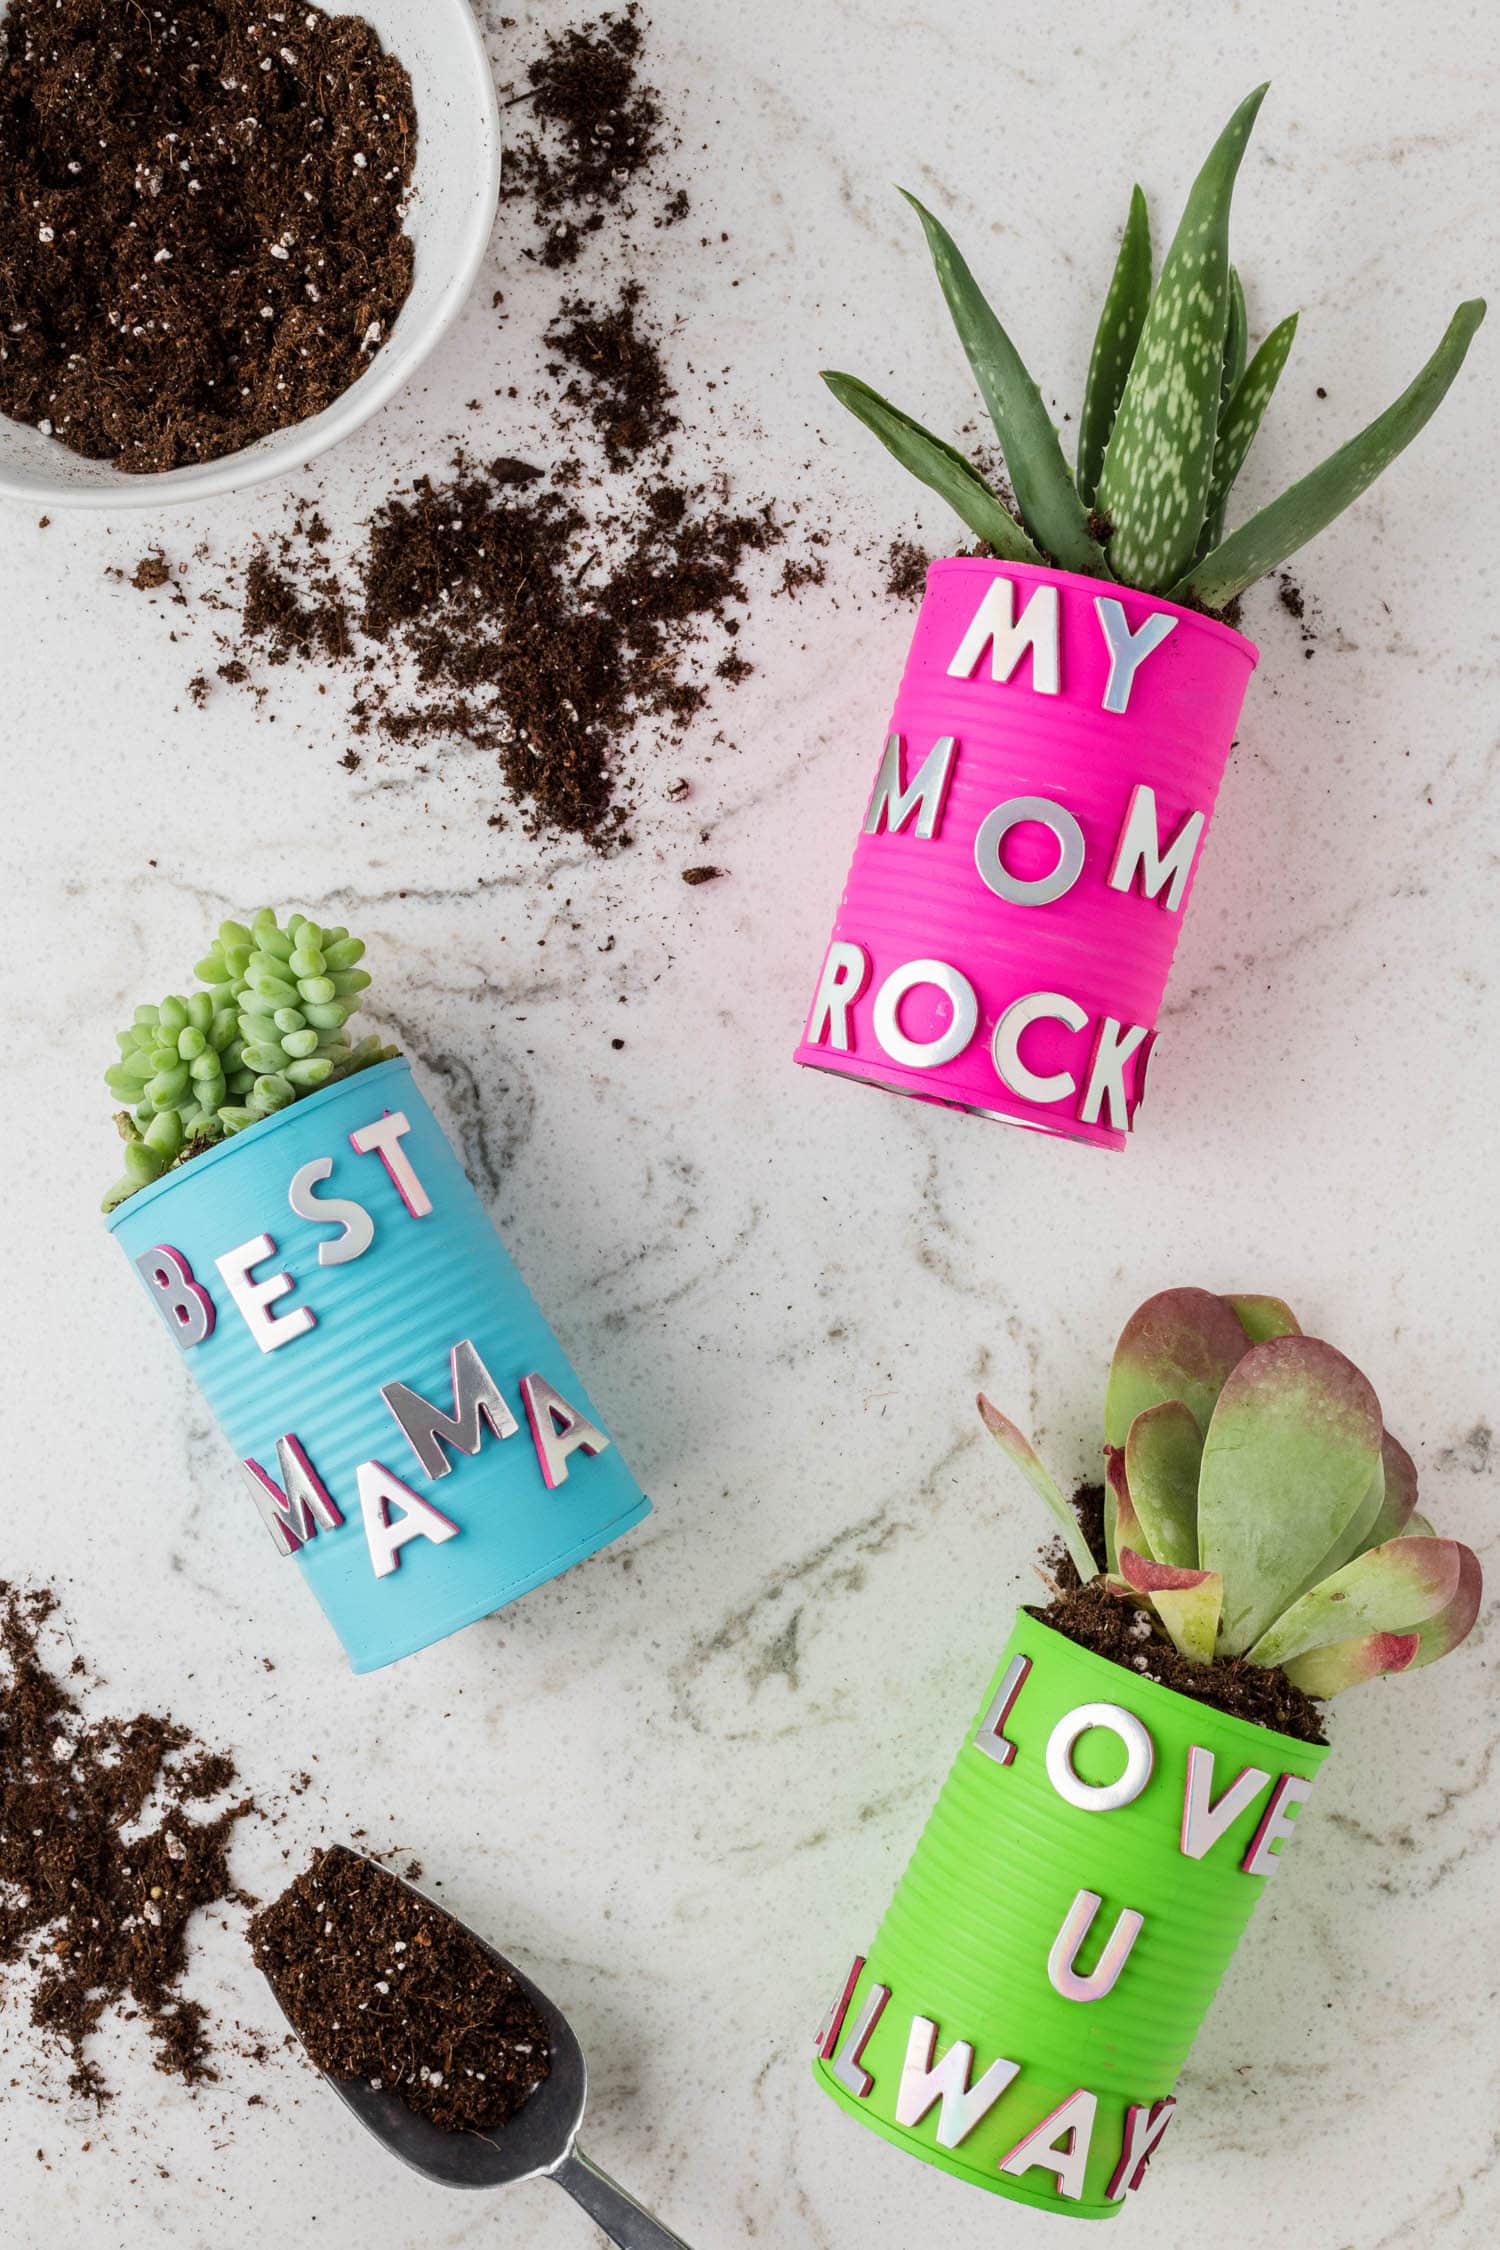
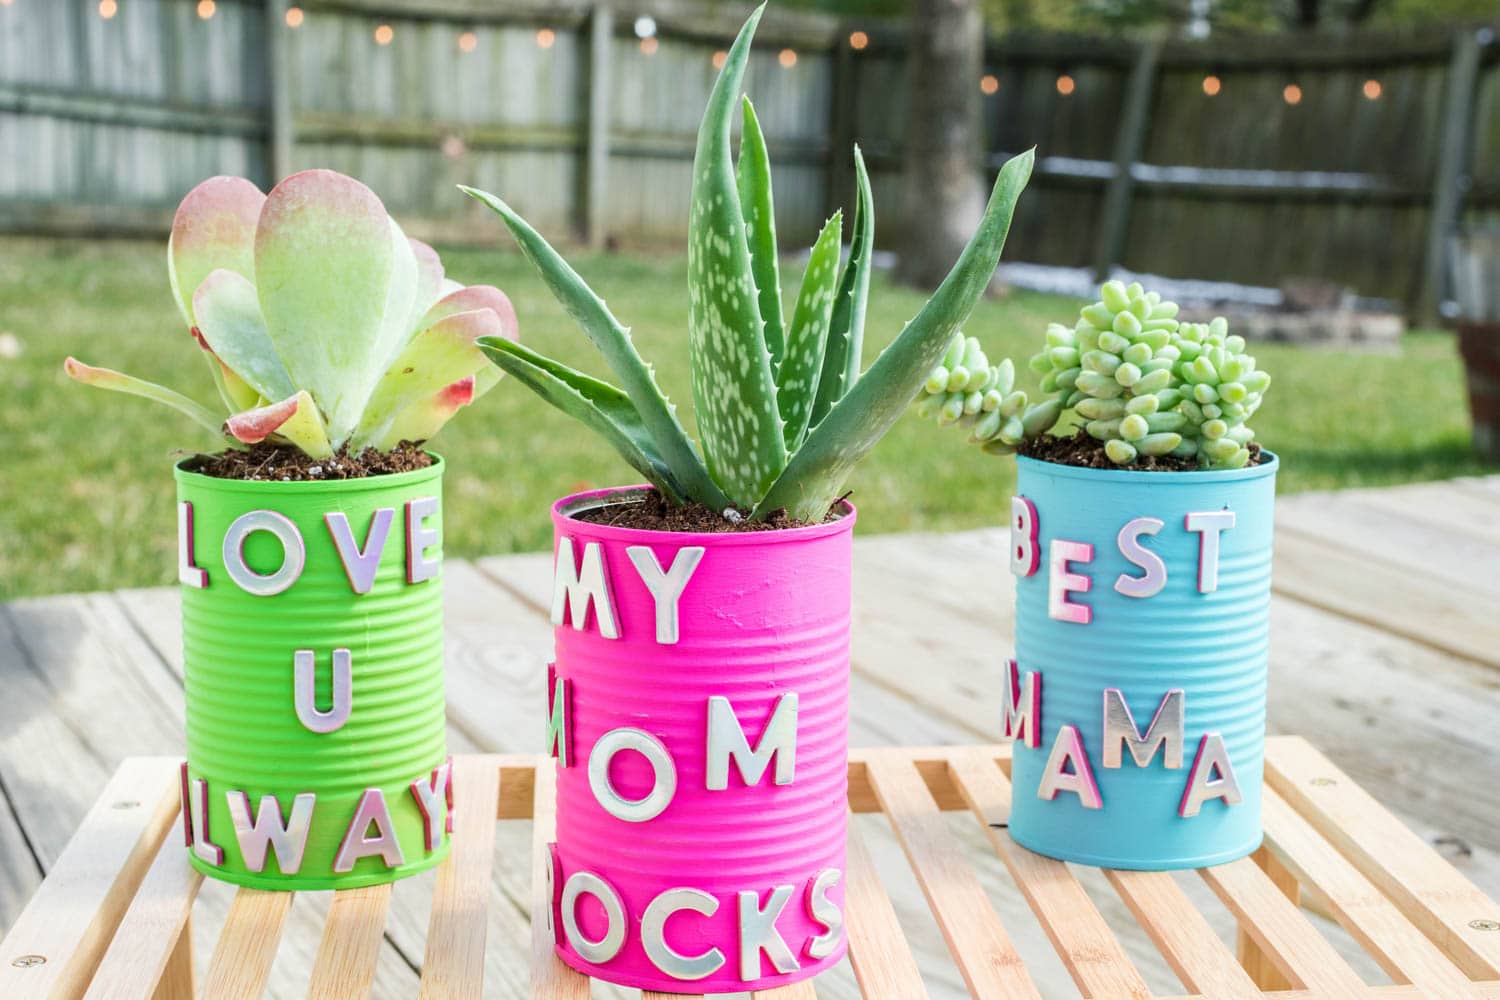
- Metallic alphabet stickers – You can typically find these in your local craft store. If you have a hard time finding them, check the scrapbooking section!
- Indoor potting soil – Any simple indoor potting soil will work.
- Succulent plant – Succulent plants can be found at your local Walmart, or hardware store that has a garden section.
- Craft paper – Use craft paper or a disposable plastic table cloth to protect your workspace as your paint your tin can plant pots.
Can I use a soda can?
Yes, you can use a soda can. Be very careful when you are removing the lid, as it will be very sharp. This is definitely a job for a grown up.
You may also want to prime the can with a white paint before painting it a color so that the logo of the soda doesn’t show through.
How to Make Tin Can Planters
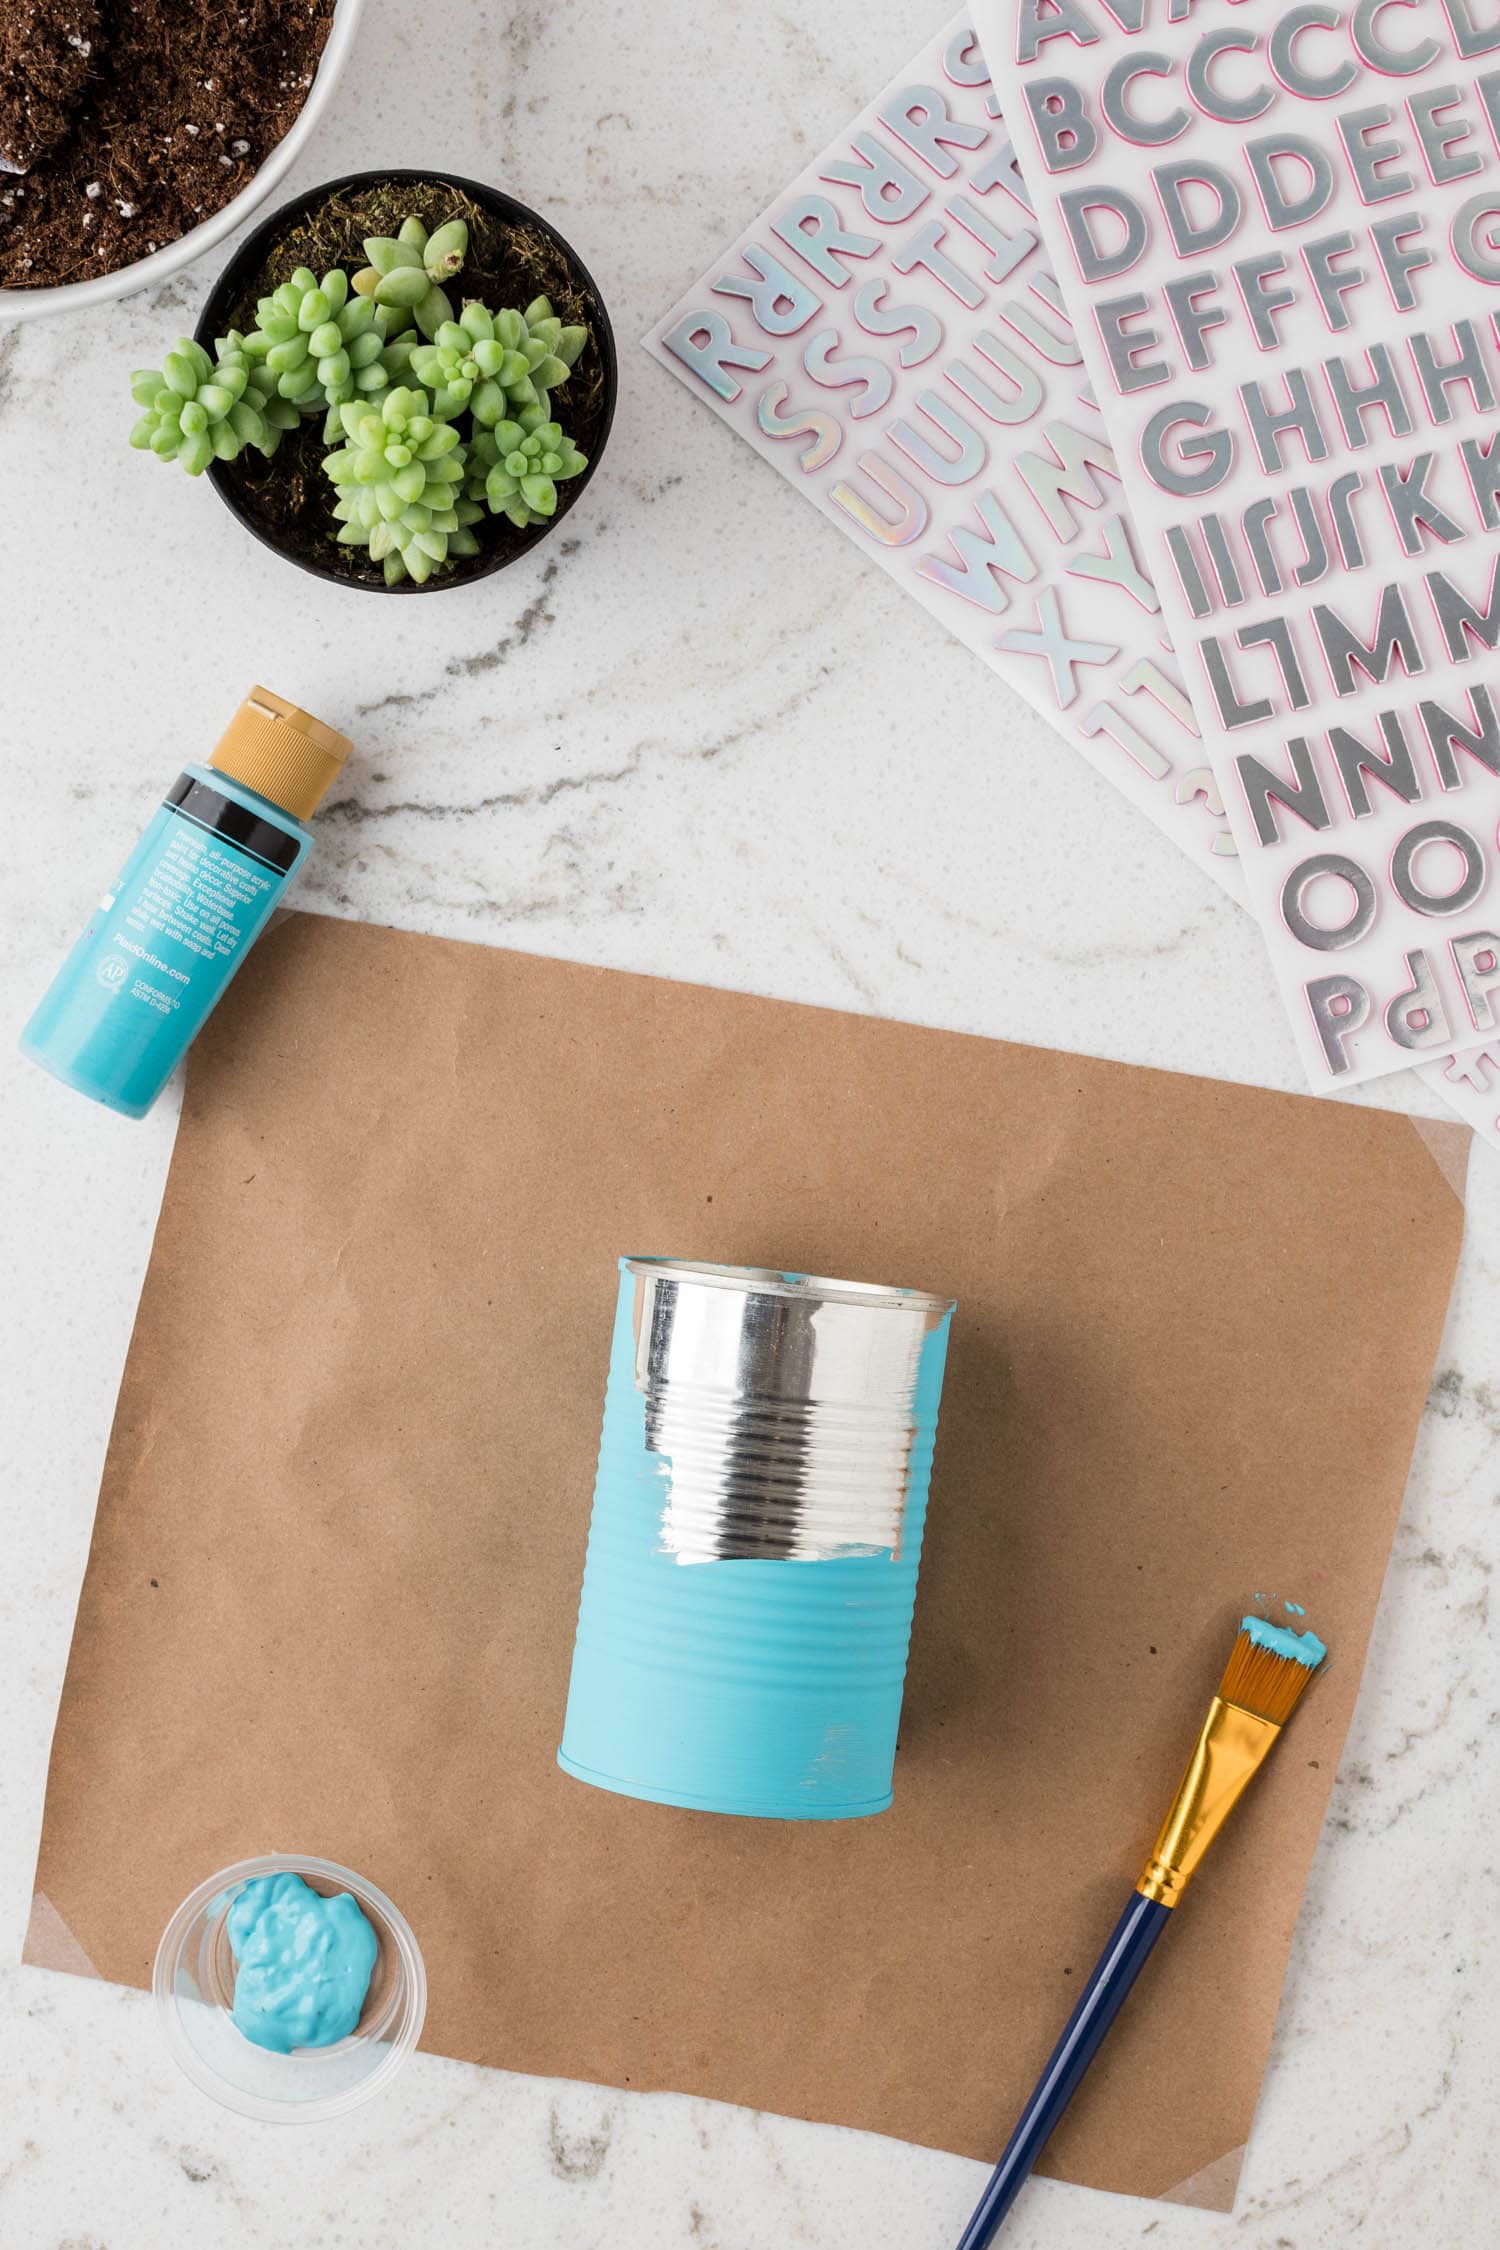
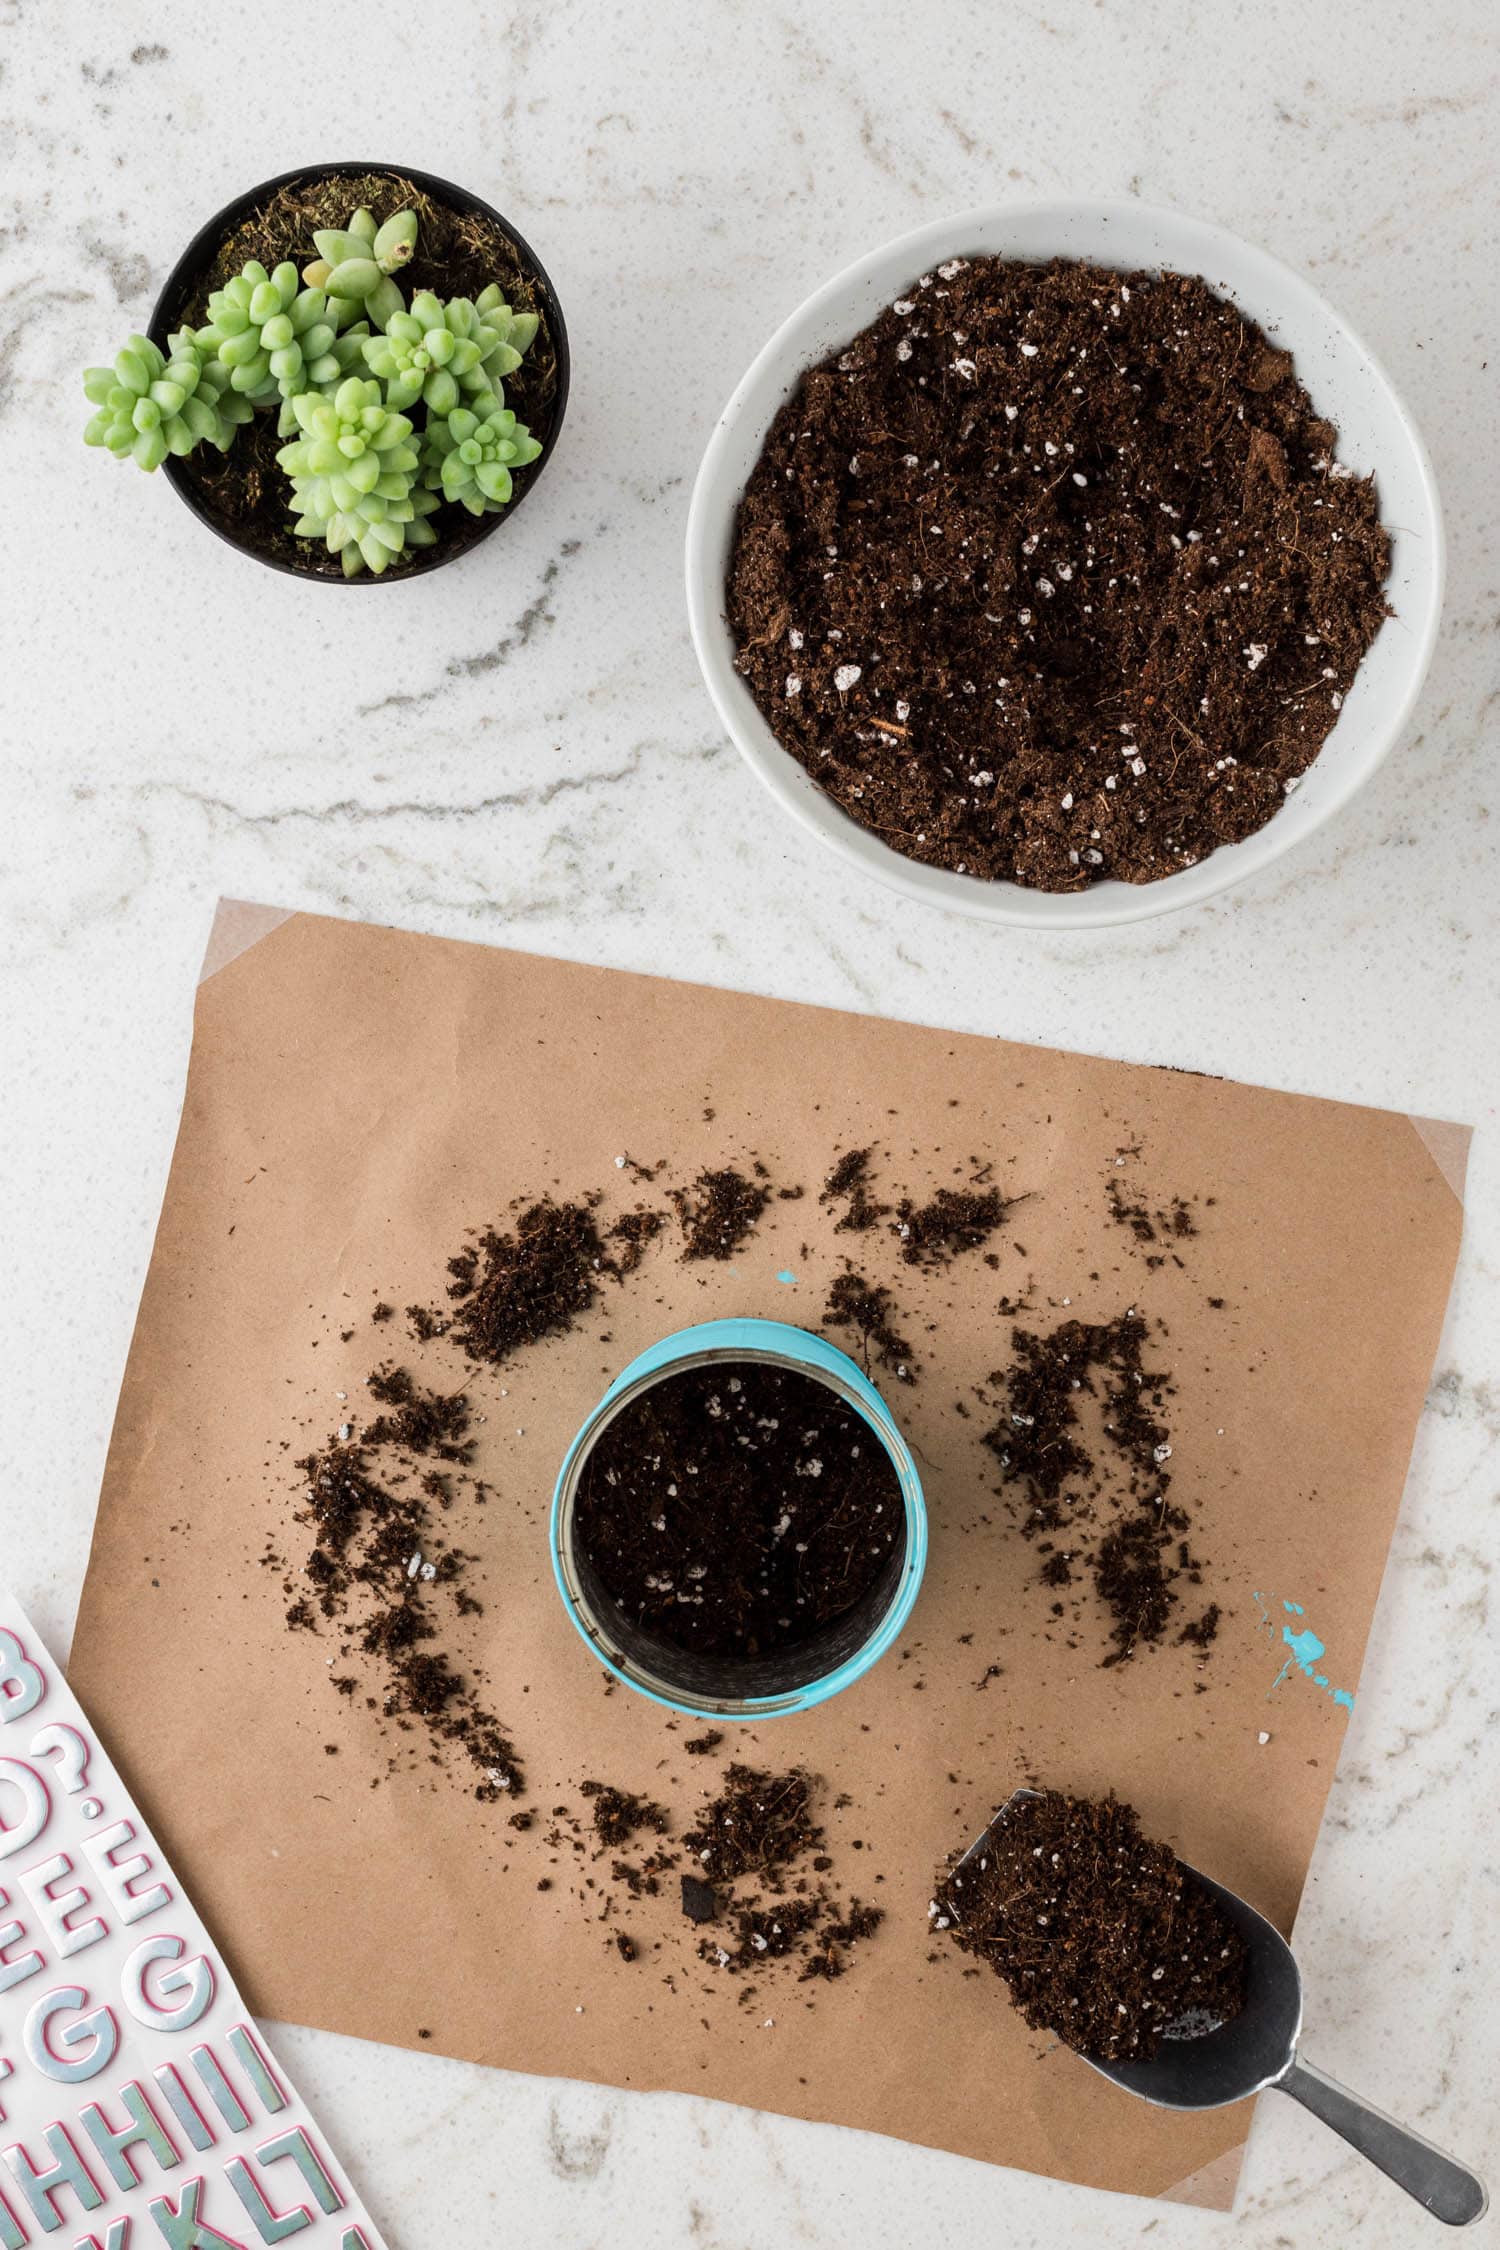
Make sure your empty tin can is completely clean and dry before you begin this craft.
Flip your can over and carefully poke a few drainage holes in the bottom of the can using the hammer and nail.
Grab your favorite color of craft paint and apply a thin layer across the entire surface of the can. Allow the paint to dry for 10 minutes and then apply a second coat.
You can apply a third coat if needed, just make sure the whole can is painted well. Let the painted tin can dry completely for an hour.
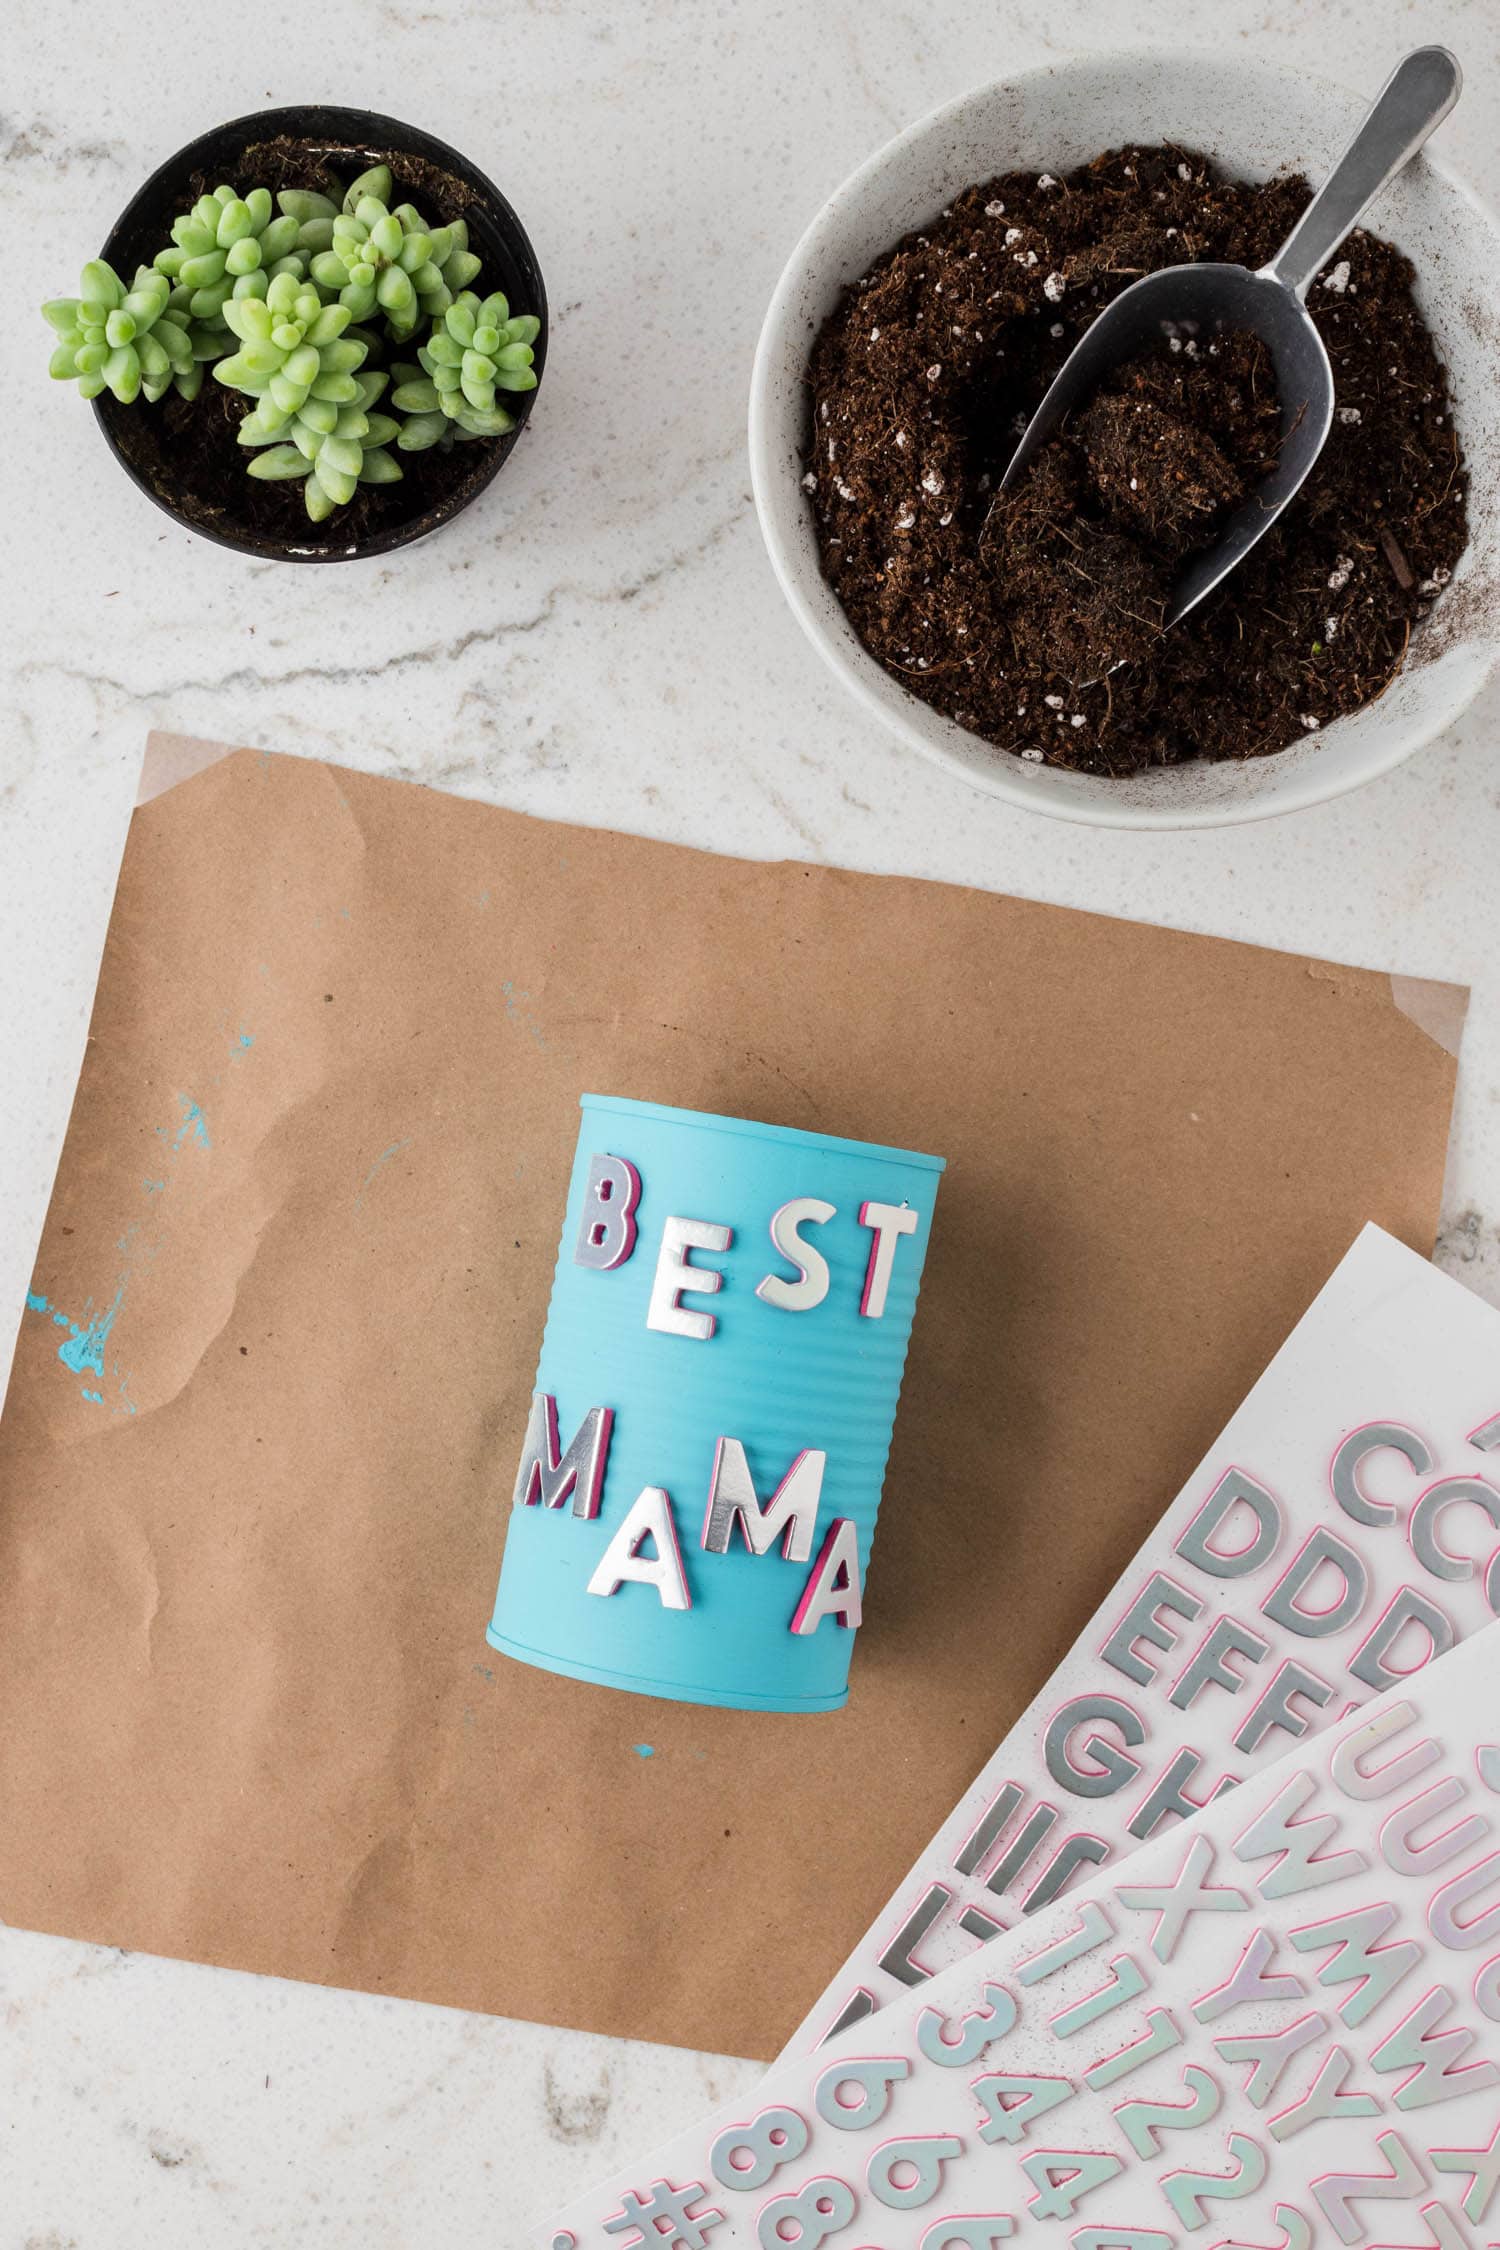
When the paint has fully dried, you can decorate the tin can! Grab the metallic alphabet stickers and spell out whatever message you want. Press the stickers onto the can to fully secure them.
Then, fill the can with potting soil and plant the succulent. Press the soil down gently around the plant, and if the soil is dry add a little water.
Your tin can planter is complete! Be sure to give your succulent some sun and water it when necessary.

Do I have to poke drainage holes in the bottom?
Yes, I highly recommend you do. This will help to prevent root rot in your plants. And yes, even with a succulent which does not require a ton of water!
How to poke holes in tin cans
This is not a tricky job to do, but probably one best done by an older kid or a grown up. Take a nail and simply hammer it through the bottom of the can to make a hole. Repeat 3 or 4 times, or more if you have a large can.
Do I have to use a real succulent?
Not at all! If you don’t excel in keeping plants alive, feel free to “plant” a fake succulent. Tons of hobby and craft stores will have plastic succulents that look very real and pretty! You can still fill the can with indoor potting soil or use fake soil or moss. These recycled tin cans will work great either way!
What plants grow well in tin can planters?
Great question! If you want something a little different than a succulent, I recommend something small that grows quickly like herbs such as mint or chives.
Pro Tips for the Best Tin Can Planters
- You can use any decorations you want for your tin can plant pots! If you can’t find metallic alphabet stickers, you can use colored ones or black ones. Feel free to add glitter, sequins, rhinestones, or any other fun decorations to your pot!
- Be sure to choose a succulent that is small enough for the tin can. Don’t purchase one that’s too large.
- You can use a sharpie to draw on your tin cans! If you don’t want to purchase extra decorations, just write whatever phrase you want and draw some fun things onto your aluminum can planters.
- Make sure your can doesn’t have any rust on it, this can affect the health of your plant.
This simple little craft has so many uses and is such a fun project! I can’t wait to see how your green thumb thrives after making these decorated tin can planters!
More Crafts and Activities You’ll Love
- Looking for new Easter activities? Try making these Glitter Easter Eggs.
- If you have littles that are still learning their letters and love to play outside, this Letter Fishing Kids Activity will be an absolute blast for them!
- Learn How to Make a Red, White, and Blue Tie Dye Shirt for your next 4th of July party!
- Want a fun activity for the Fall? Check out this really cool Pumpkin Playdough recipe!

Tin Can Planter
Ingredients
- Recycled can
- Craft paint
- Small paint brush
- Metallic alphabet stickers
- Indoor potting soil
- Small succulent plant
Instructions
- First, let’s check our recycled can and ensure it is clean and dry!
- Grab your favorite color of craft paint and apply a thin layer to the entire surface of the can. Allow it to dry for 10 minutes. Repeat with a second and third coat if necessary until fully coated. Set aside to dry for 1 hour.
- Once the paint is completely dry, let’s personalize it! Grab your metallic alphabet stickers and create your message. Press the stickers to secure them.
- Next, fill the can with potting soil and plant the succulent. Press the soil gently around the plant to secure it. If the soil is dry, give it a little water!
- Now your tin can planter is complete! These make a great Mother’s day or just because gift!