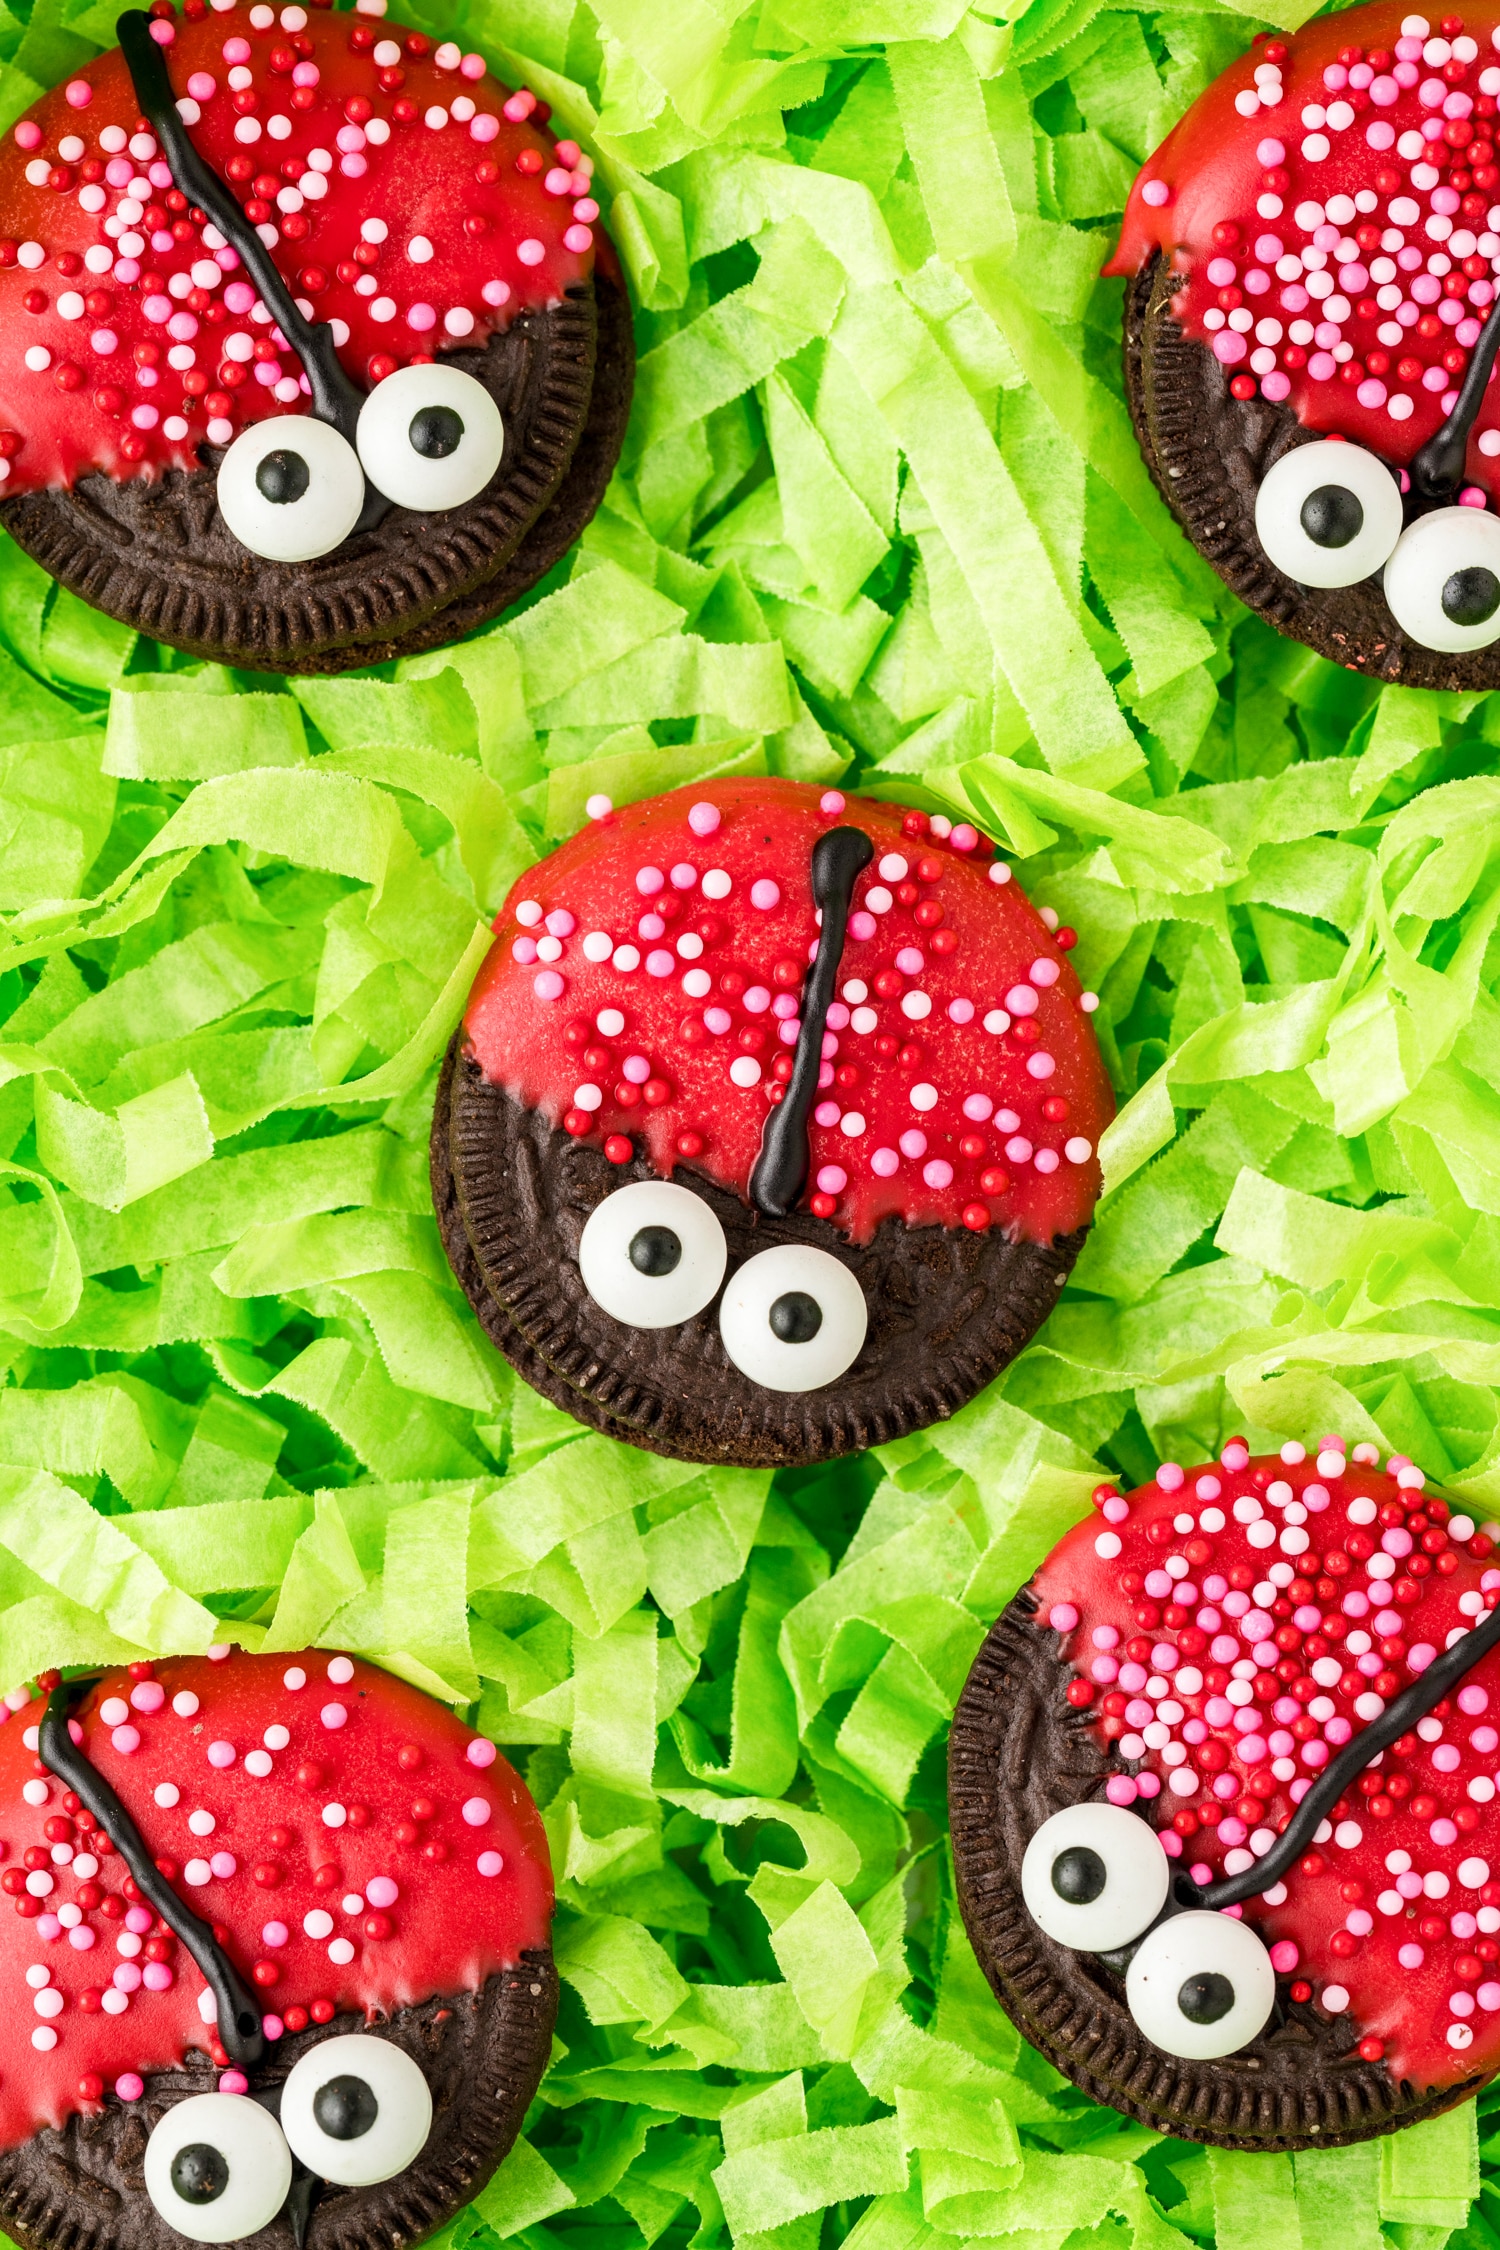
Ladybug Oreos
Turn your favorite Oreos into these adorable Ladybug Oreos for a fun and delicious Valentine’s Day treat. Using Oreos, red candy melts, cookie icing and edible eyeballs make these cute Ladybug cookies so easy to make the kids can help!
If you’re like me, you love to make homemade Valentine’s treats to give out as gifts! The kids have a blast making them and they’re just so much more personal and sweet. It’s why we make things like Valentine’s hugs, Valentine’s rice krispie treats, and these ladybug oreos. We have quality time in the kitchen and make precious memories that will last a lifetime. Plus, we end up with delicious treats in the end!
These cute love bug cookies are a simple treat that is family friendly and won’t take long to make. In fact, it’s so easy to make that your kids may be able to make them all on their own! Then they can gift them to classmates and friends and tell them they’re handmade with love. Such a thoughtful, and downright adorable, treat to give out on Valentine’s Day.
Why You’ll Love Ladybug Oreos
- Don’t have to worry about turning on that oven because this a no-bake recipe. Making even more family friendly and easy!
- Clean-up is really easy after making these treats. As long as you decorate the cookies over parchment paper, then you can roll it up and throw it away when you’re done.
- Make your ladybug cookies in about a half hour. The only time left is just to let them sit and harden.
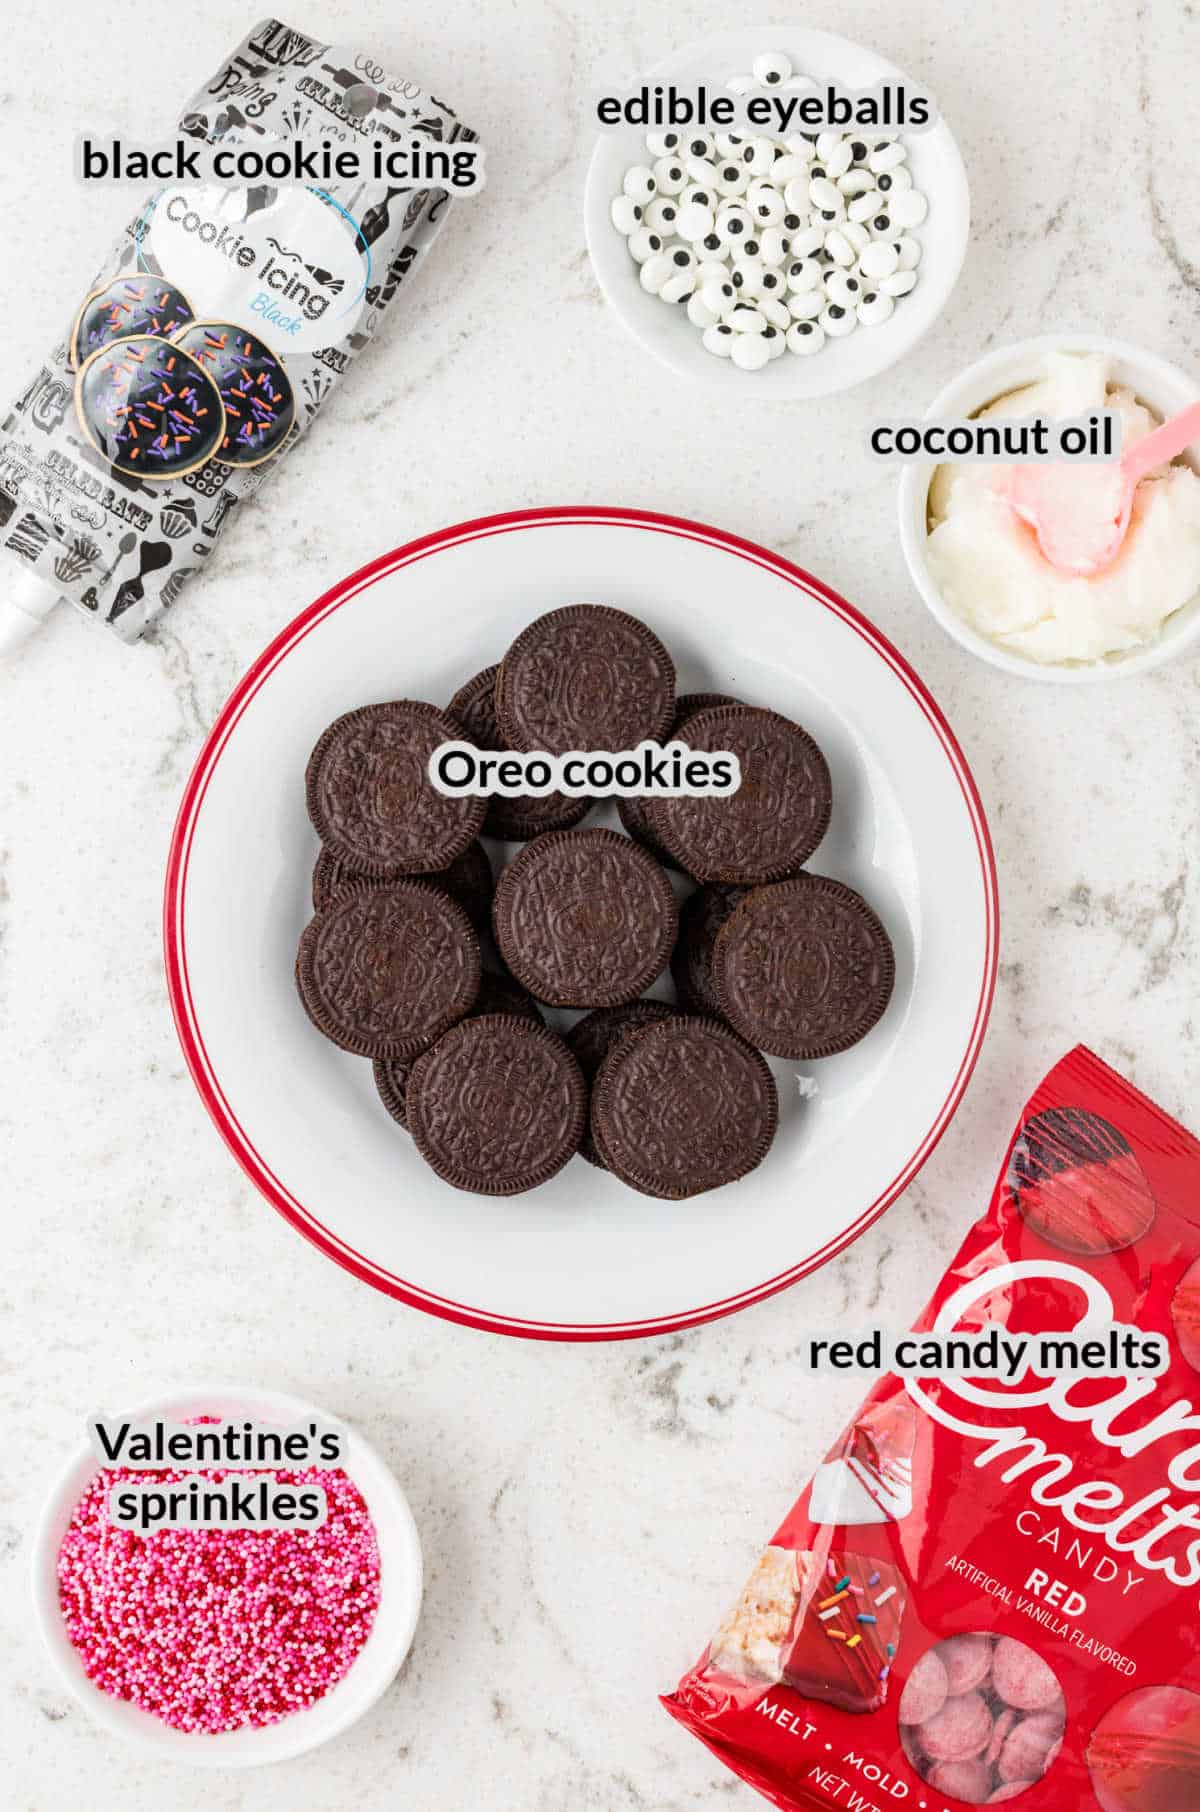
Ingredients for Lady Bug Cookies
- Black cookie icing – Use the black cookie icing to create a wing-like effect on the back of each of the cookies.
- Oreos – You can use any type Oreo that you want! They can be any of the yummy flavors and you can even use double stuf.
- Red candy melts – Can’t find red candy melts? No worries! Just get white candy melts and then mix in some red food coloring to dye it.
- Valentine’s sprinkles – I recommend using some super tiny sprinkles so that they more easily stick to the surface area of the cookies. But any Valentine’s sprinkles will do.
- Edible eyeballs – Find these on the baking aisle at your local grocery store. If you have any trouble locating them, check your local hobby store or order them online.
- Coconut oil – Coconut oil will help to thin out the red candy melts and make it easier to dip the Oreos.
Helpful Tools
How to Make Ladybug Oreos
Line a baking sheet, or a flat surface, with a sheet of parchment paper.
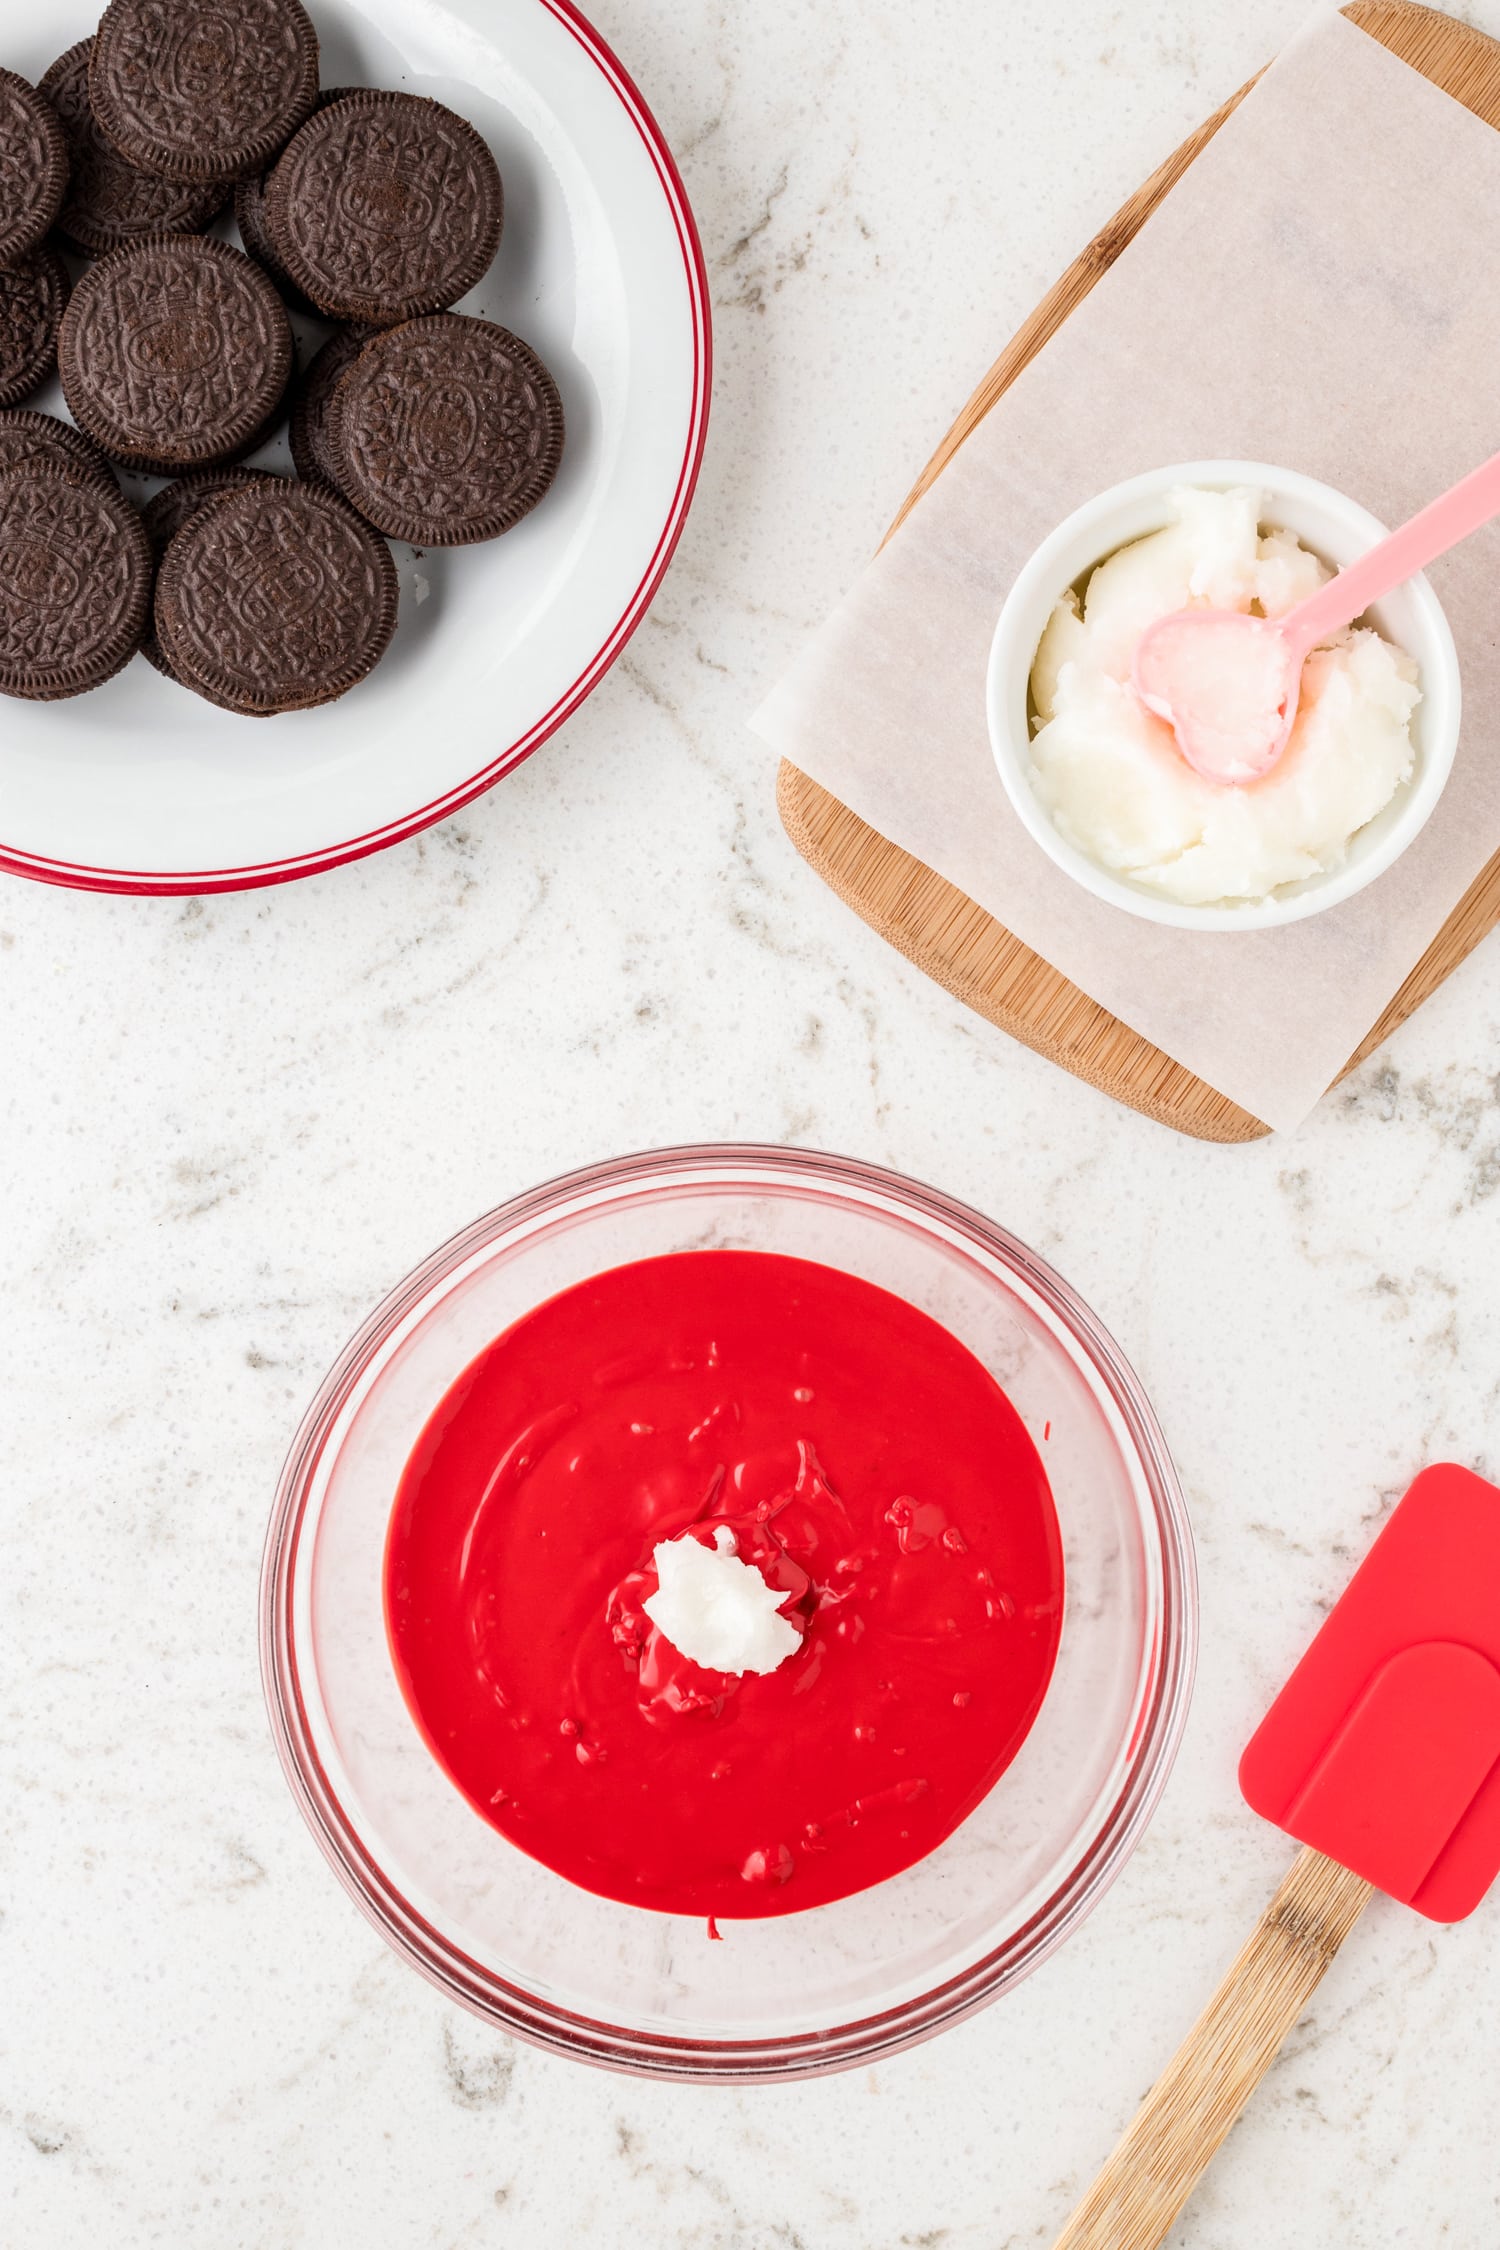
Open the red candy melts and place them into a microwave safe bowl. Using the instructions on the back of the package, melt the candy in the microwave. Add coconut oil to the microwave-safe bowl of melted candy and stir well.
Once the red candy is smooth and creamy, you can start dipping the Oreo cookies!
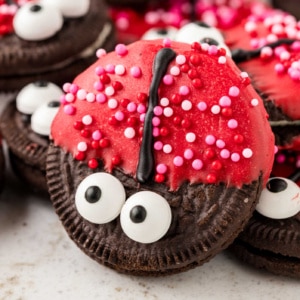
Use your thumb and forefinger, and then dip an Oreo cookie into the melted red candy. Ensure that it is well coated, but be sure to leave space at the top for the ladybug Oreos head.
Allow excess melted candy drip back into the bowl, then carefully place the Oreos onto the parchment paper or a lined cooking sheet.
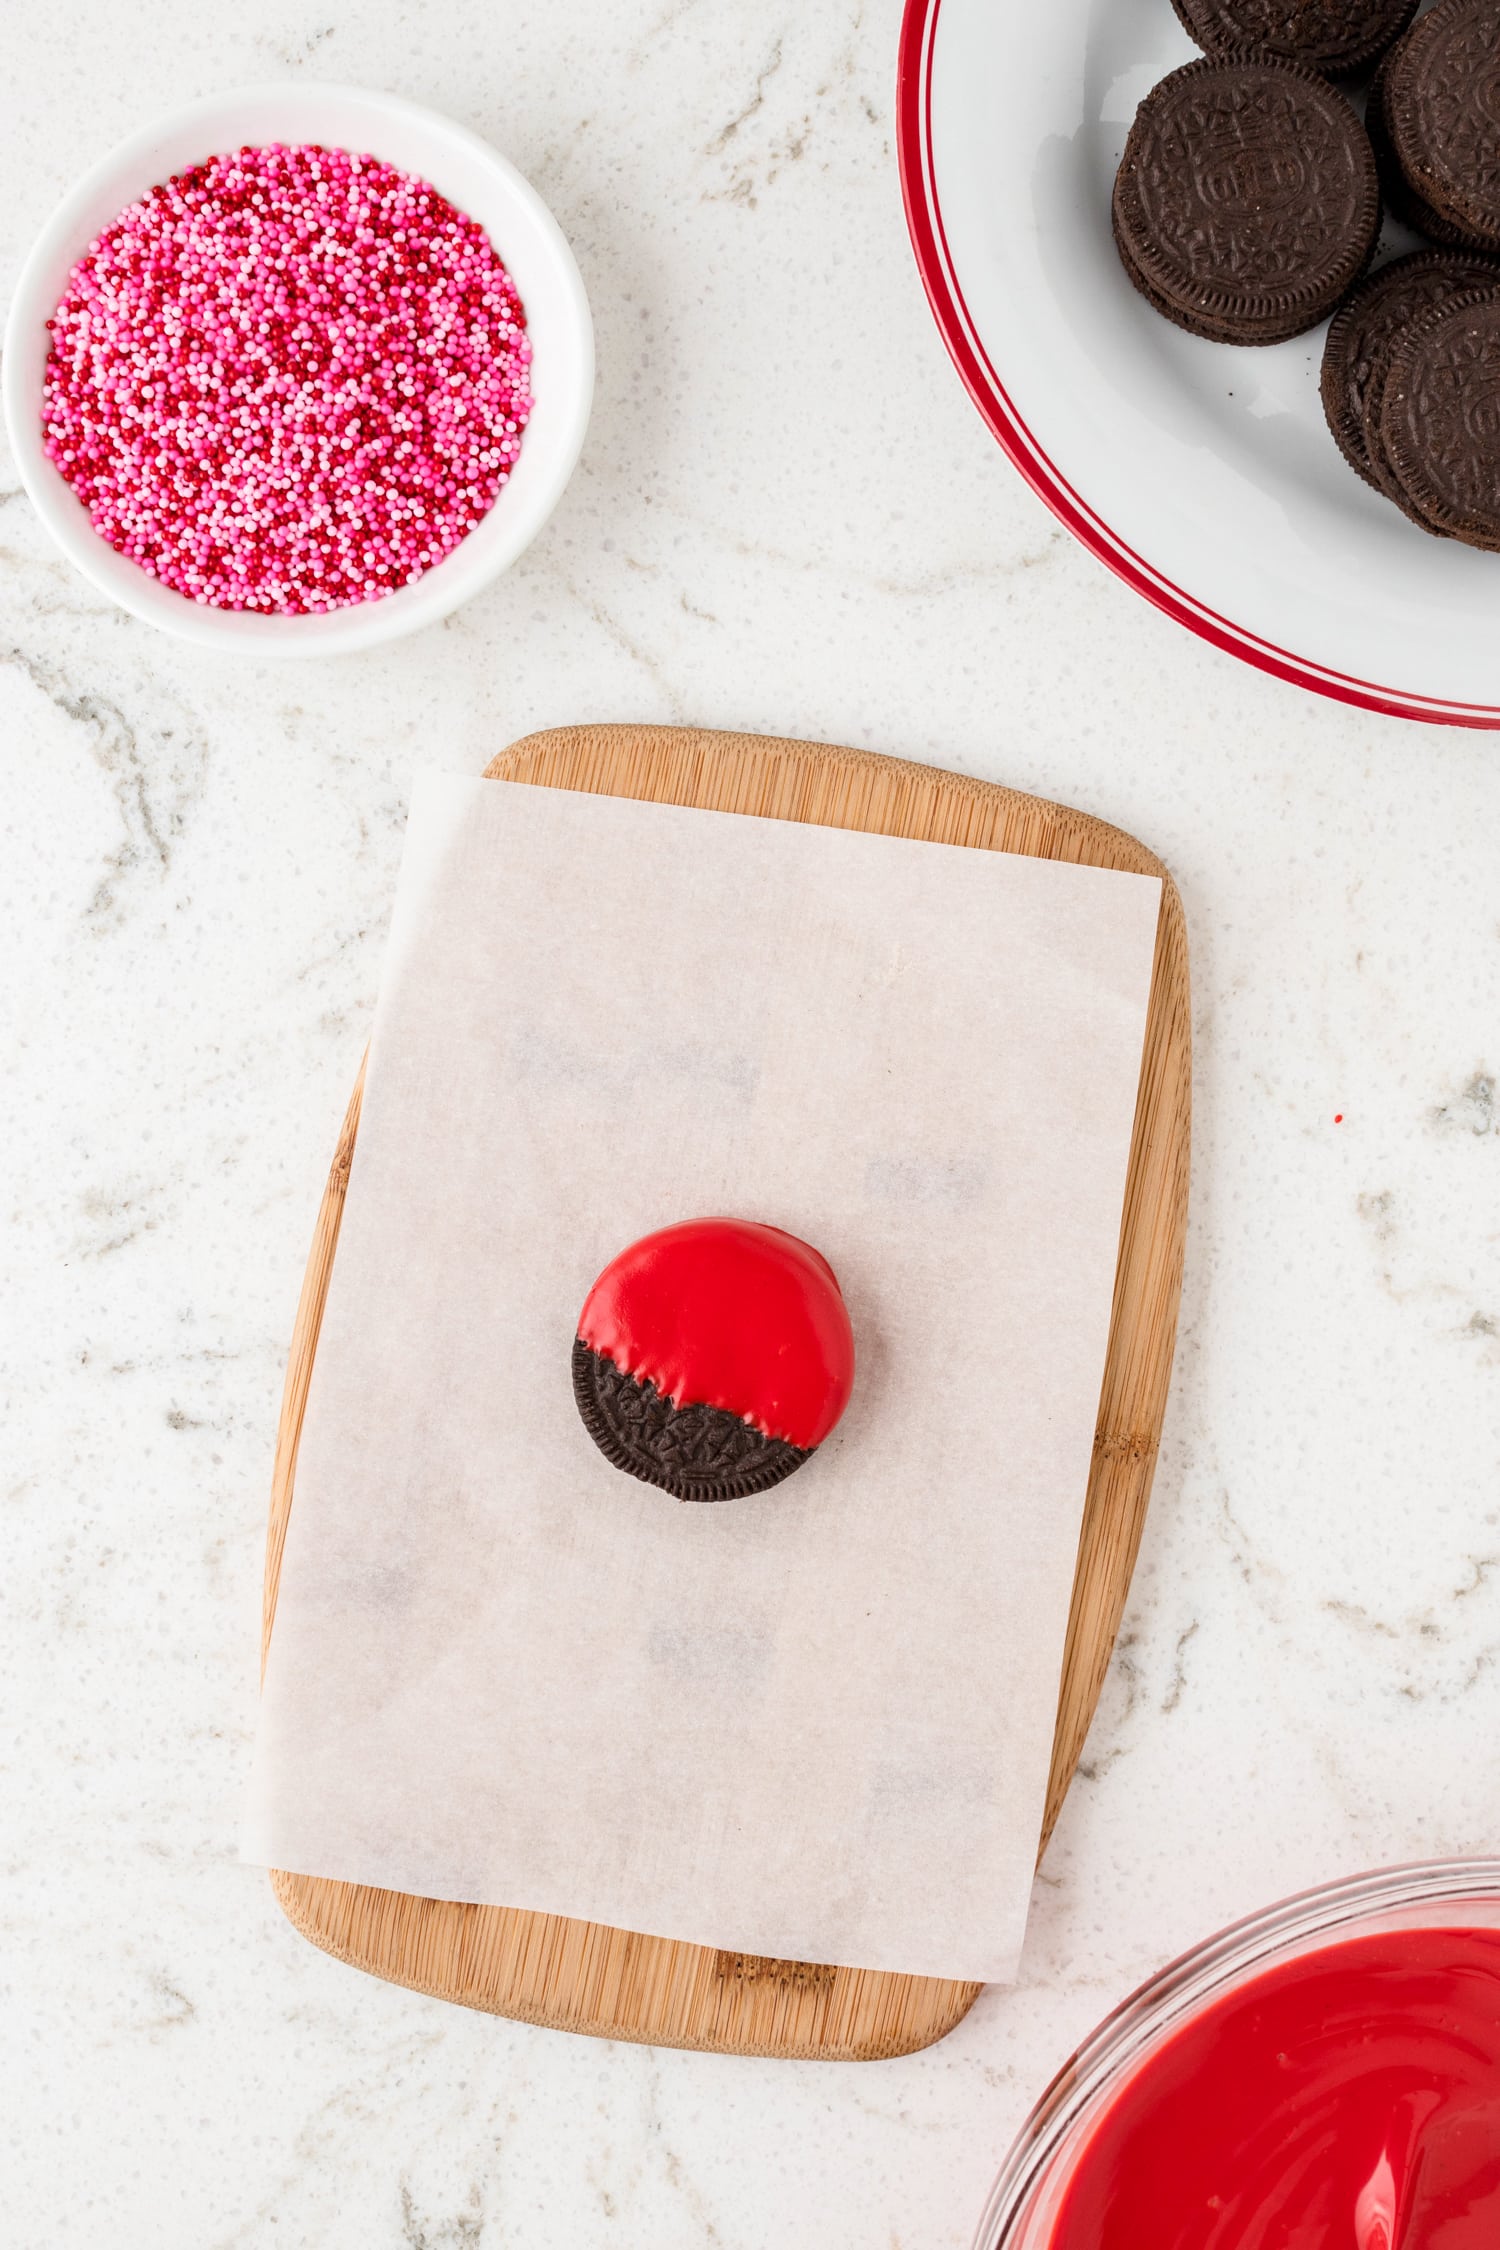
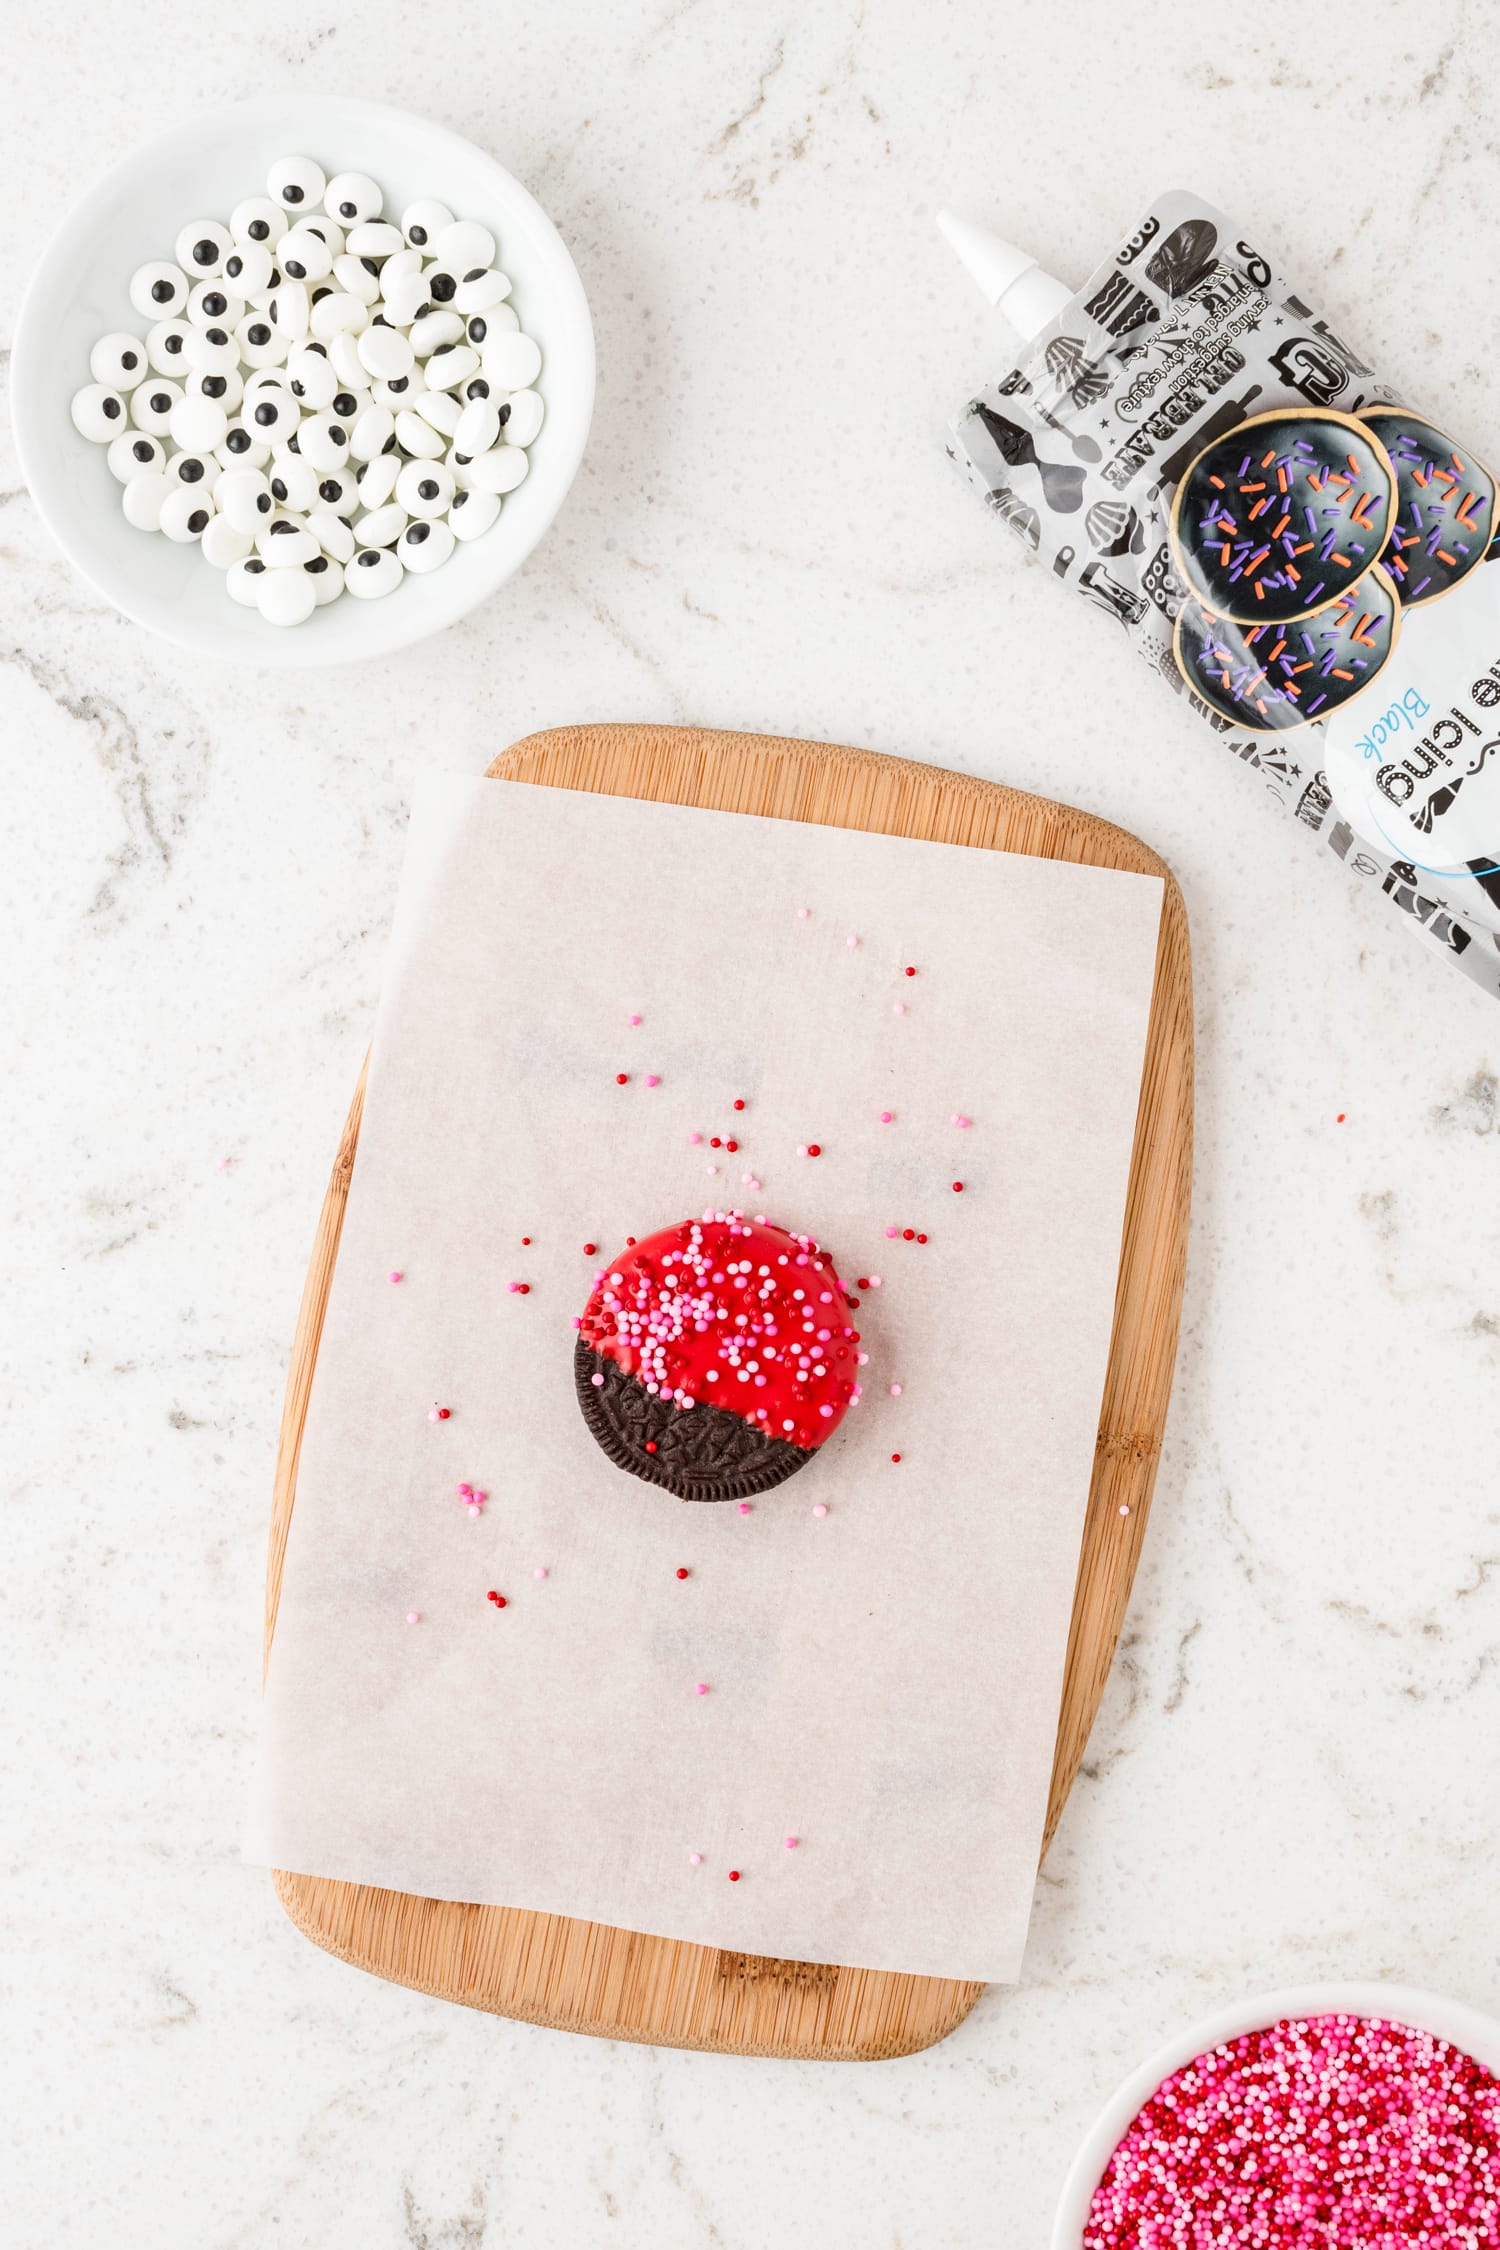

Sprinkle the Valentine’s Day sprinkles over the back of the cookies, on the melted candy.
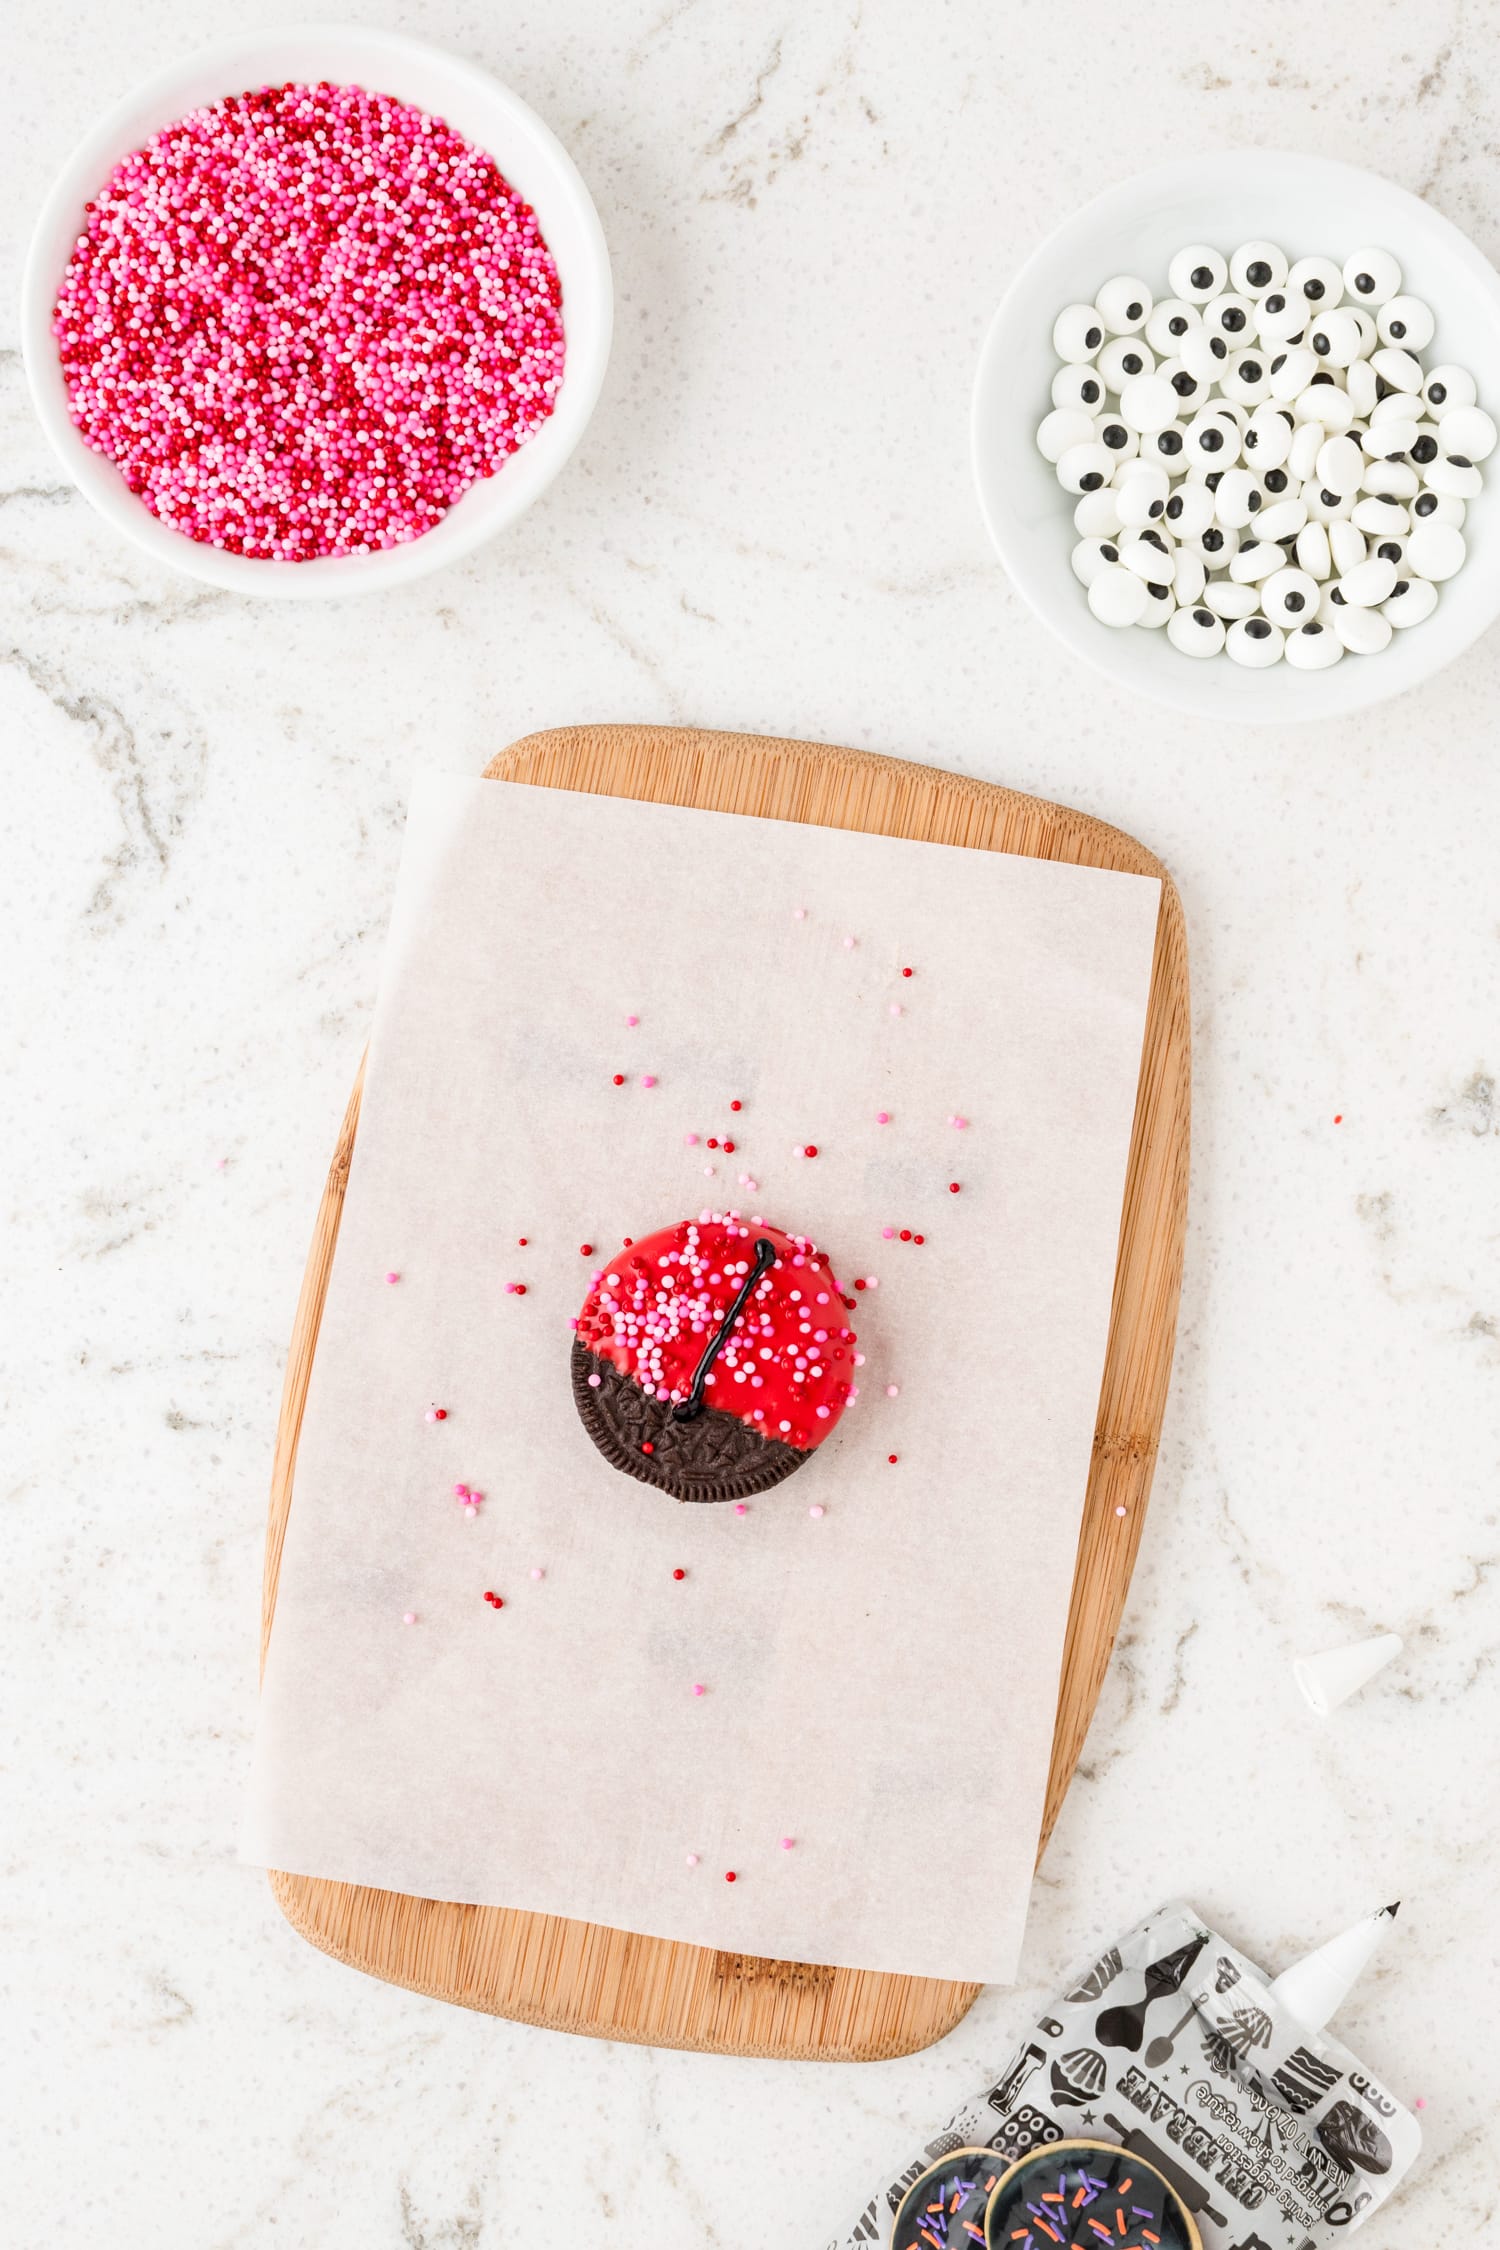
Then use the black cookie icing and make a line down the back of the cookies to create wings.
Use that same icing to securely glue the edible candy eyes onto the top of each ladybug Oreo.
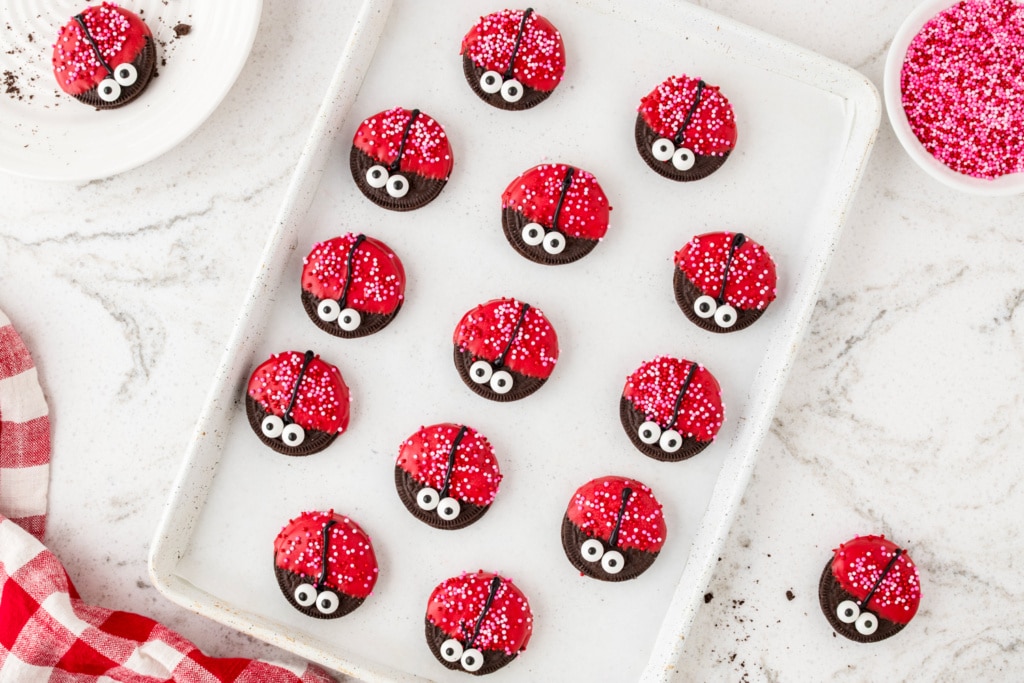
Allow the ladybug Oreos to set at room temperature, or place them in the fridge to set more quickly. Once the candy has hardened, carefully pop the cookies off of the parchment paper.
Serve immediately or store for later!
How to Store Lady Bug Cookies
Place your completed love bug cookies into an airtight container and store at room temperature for about a week. Storing in the fridge is not recommended since any change in temp could create condensation and make the Oreo cookies soggy.
However, you can freeze these cookies to extend their shelf life! Place into the freezer on a parchment paper lined baking sheet and freeze for about 2 hours. Then transfer to an airtight container or freezer bag and store in the freezer for 2-3 months.
Why aren’t my sprinkles sticking to the backs of the love bug Oreos?
If you don’t work quickly enough when adding sprinkles to these lady bug cookies, the red candy coating will set and the sprinkles won’t stick. When sprinkles are just rolling off the cookies, you likely waited too long to put them on. Have someone help you when making the cookies and let them add sprinkles as you dip the cookies!
What can I use in place of candy eyeballs?
Sometimes candy eyeballs can be hard to find. If you are unable to find them, there are a few back-up options that you can use. My favorite is flipping a white m&M to the blank side and adding a dot of black cookie icing to the center. You could also make a black dot with a food coloring pen. Another option is to use a dot of white cookie icing with black cookie icing in the center.
Pro Tips for the Best Ladybug Oreos
- You can use different colors for your cookies if you want! Dip some in pink and some in white to make tons of Valentine’s themed love bug cookies.
- To keep from having an excess of set candy on your cookies, make sure that you allow the melted candy to drip before placing the cookies onto the baking sheet.
- For extra pizzazz, sprinkle some edible glitter over the cookies before adding sprinkles. These make sure a cute party dessert!
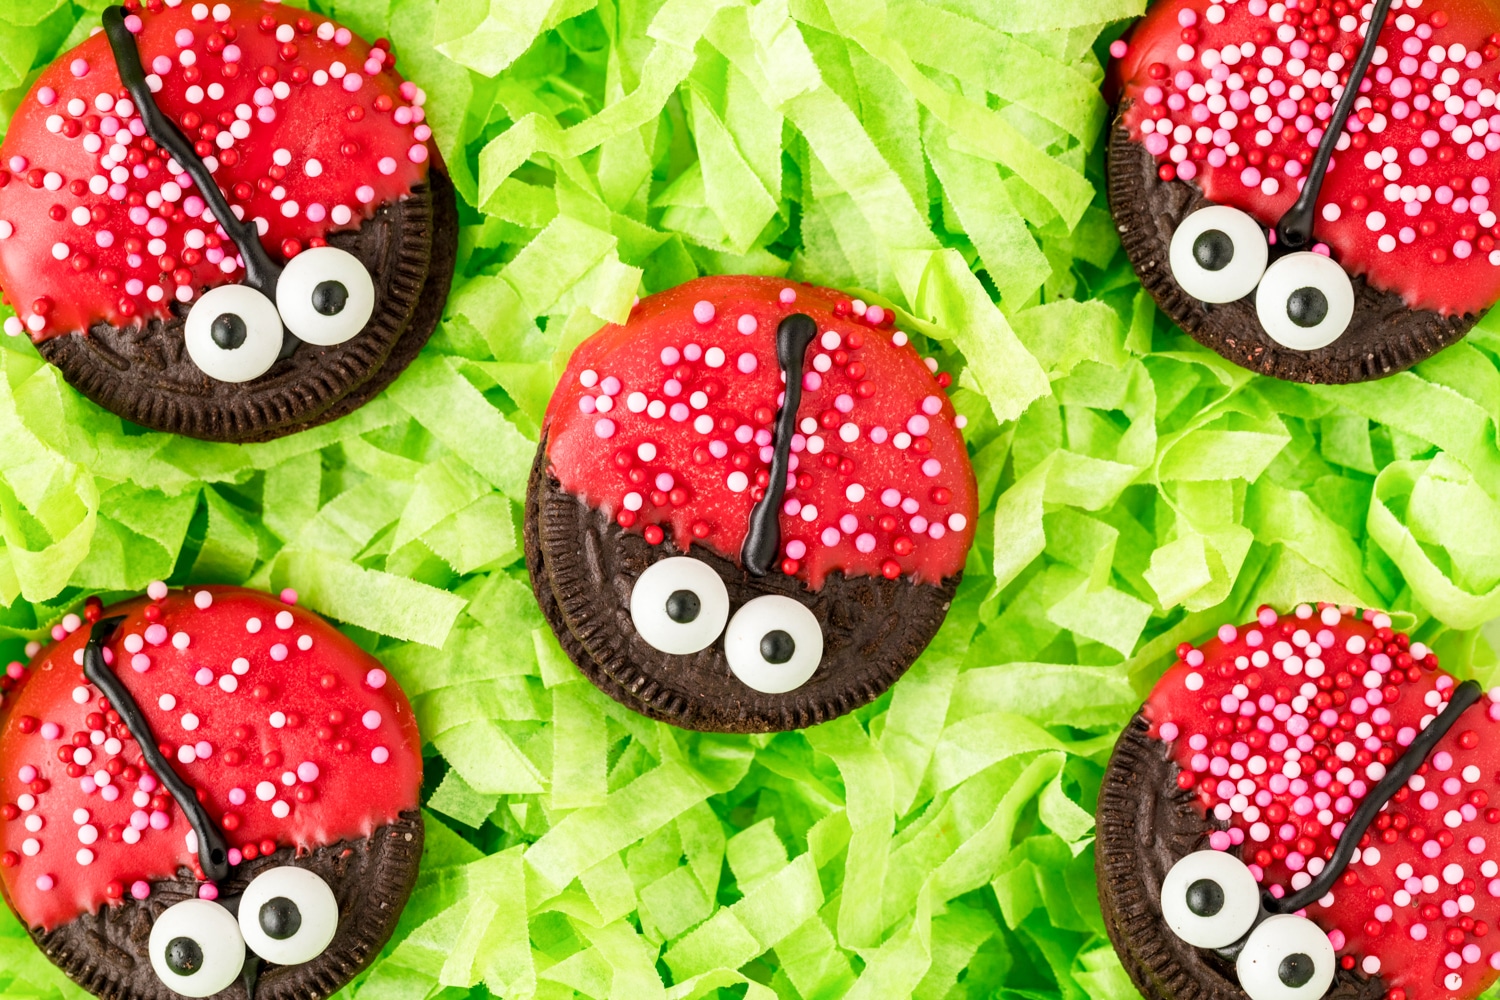
Happy Valentine’s Day!! This easy treat is sure to brighten up the holiday.
More Valentine’s Day Fun!
- Valentine’s Day Brownie Pops are super simple to make and perfectly delicious to eat.
- Need a class Valentine idea? Check out my Love Bug Class Valentine activity.
- Make your kiddos lunch extra special with these Valentine’s Day Lunch Box Jokes!
- This Heart Suncatcher Craft is great for all ages and looks so pretty hung in a window.
Ladybug Oreos
Ingredients
- 15 Oreo cookies
- 12 ounces red candy melts (1 bag)
- 2 teaspoons coconut oil
- sprinkles
- black cookie icing
- 30 edible eyeballs
Instructions
- Line a baking sheet or a flat surface with parchment paper for easy cleanup.
- Follow the instructions on the package to melt the red candy and coconut oil in a bowl.
- Using your thumb and forefinger, grab an Oreo and dip each Oreo cookie into the red candy melts, ensuring it’s coated but leaving space at the top of the ladybug’s head.
- Lift the Oreo out and let any excess candy coating drip back into the bowl.
- Place the dipped Oreos on the prepared parchment paper.
- Next, scatter the sprinkles onto the backs of the ladybugs.
- Using the store-bought black cooking icing, make a stripe down the ladybugs’ back to create the wing effect.
- Now, use the cookie icing as “glue” to add the edible candy eyes near the top center of each Oreo. These will be the ladybug’s eyes.
- Allow the Ladybug Oreos to fully set and harden at room temperature, or place them in the refrigerator for faster setting. Once the Ladybug Oreos are set, carefully remove them from the parchment paper.