Kool Aid Dyed Eggs
Learn how to make Kool Aid Dyed Eggs for Easter! This fun and easy teaches you how to dye Easter Eggs with Kool Aid and skip those colored tablets you can buy. An easy and fun activity for Easter that kids will love.
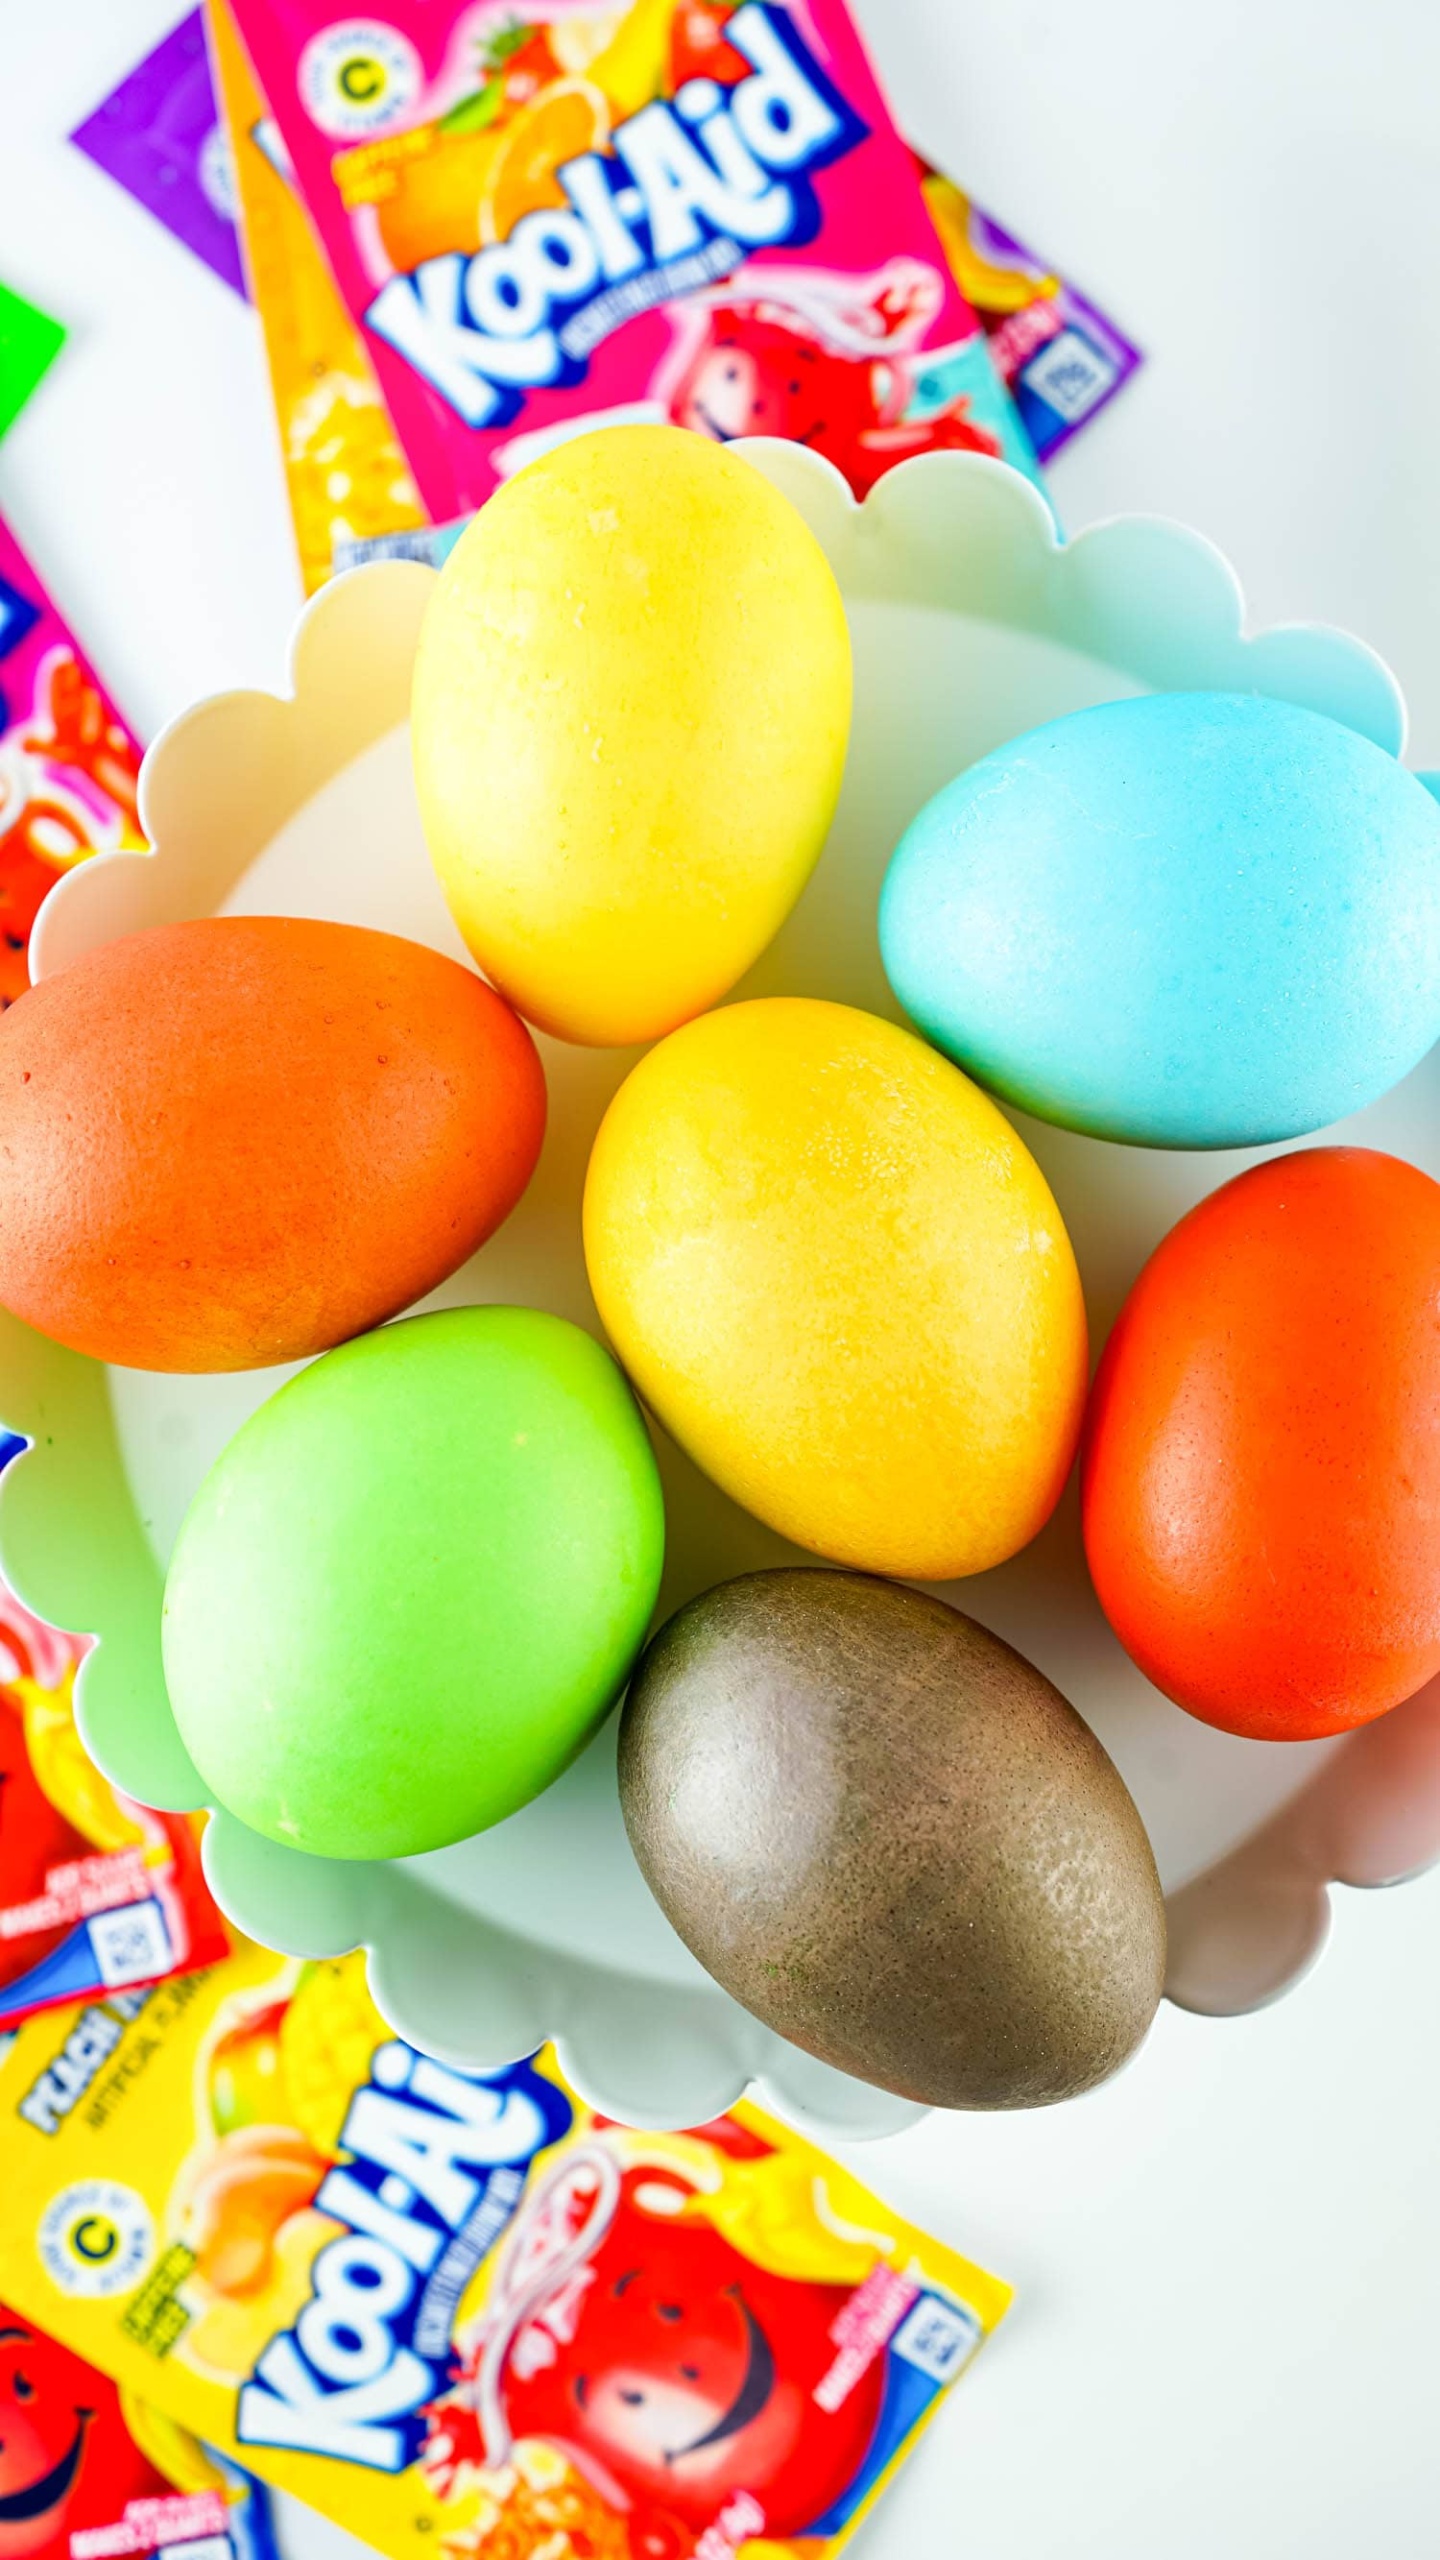
Dyeing eggs with Kool Aid gives them the most vibrant and pretty colors! It’s one of my family’s favorite ways to dye eggs because they always turn out great. So, if you’re tired of having your Easter eggs turn out weird, pale, colors with store-bought dye, then you should learn how to dye eggs with Kool Aid!
Kool Aid dyed eggs are super simple to make. Once you’ve boiled your eggs, you just mix the Kool Aid packets with some water and vinegar and get to it. Bonus points if you make a pitcher of your favorite Kool Aid to drink while you dye your eggs. Or, you can make these tasty Homemade Slushies!
Why You’ll Love Kool Aid Dyed Eggs
- Kool aid Easter eggs are an affordable way to dye a lot of eggs different colors.
- If you or your kids hate the smell of vinegar, dyeing eggs with Kool Aid helps mask some of that sour vinegar smell and will make it more bearable!
- These easy Easter eggs only take 20 minutes to make!
Supplies needed for Kool Aid Dyed Eggs
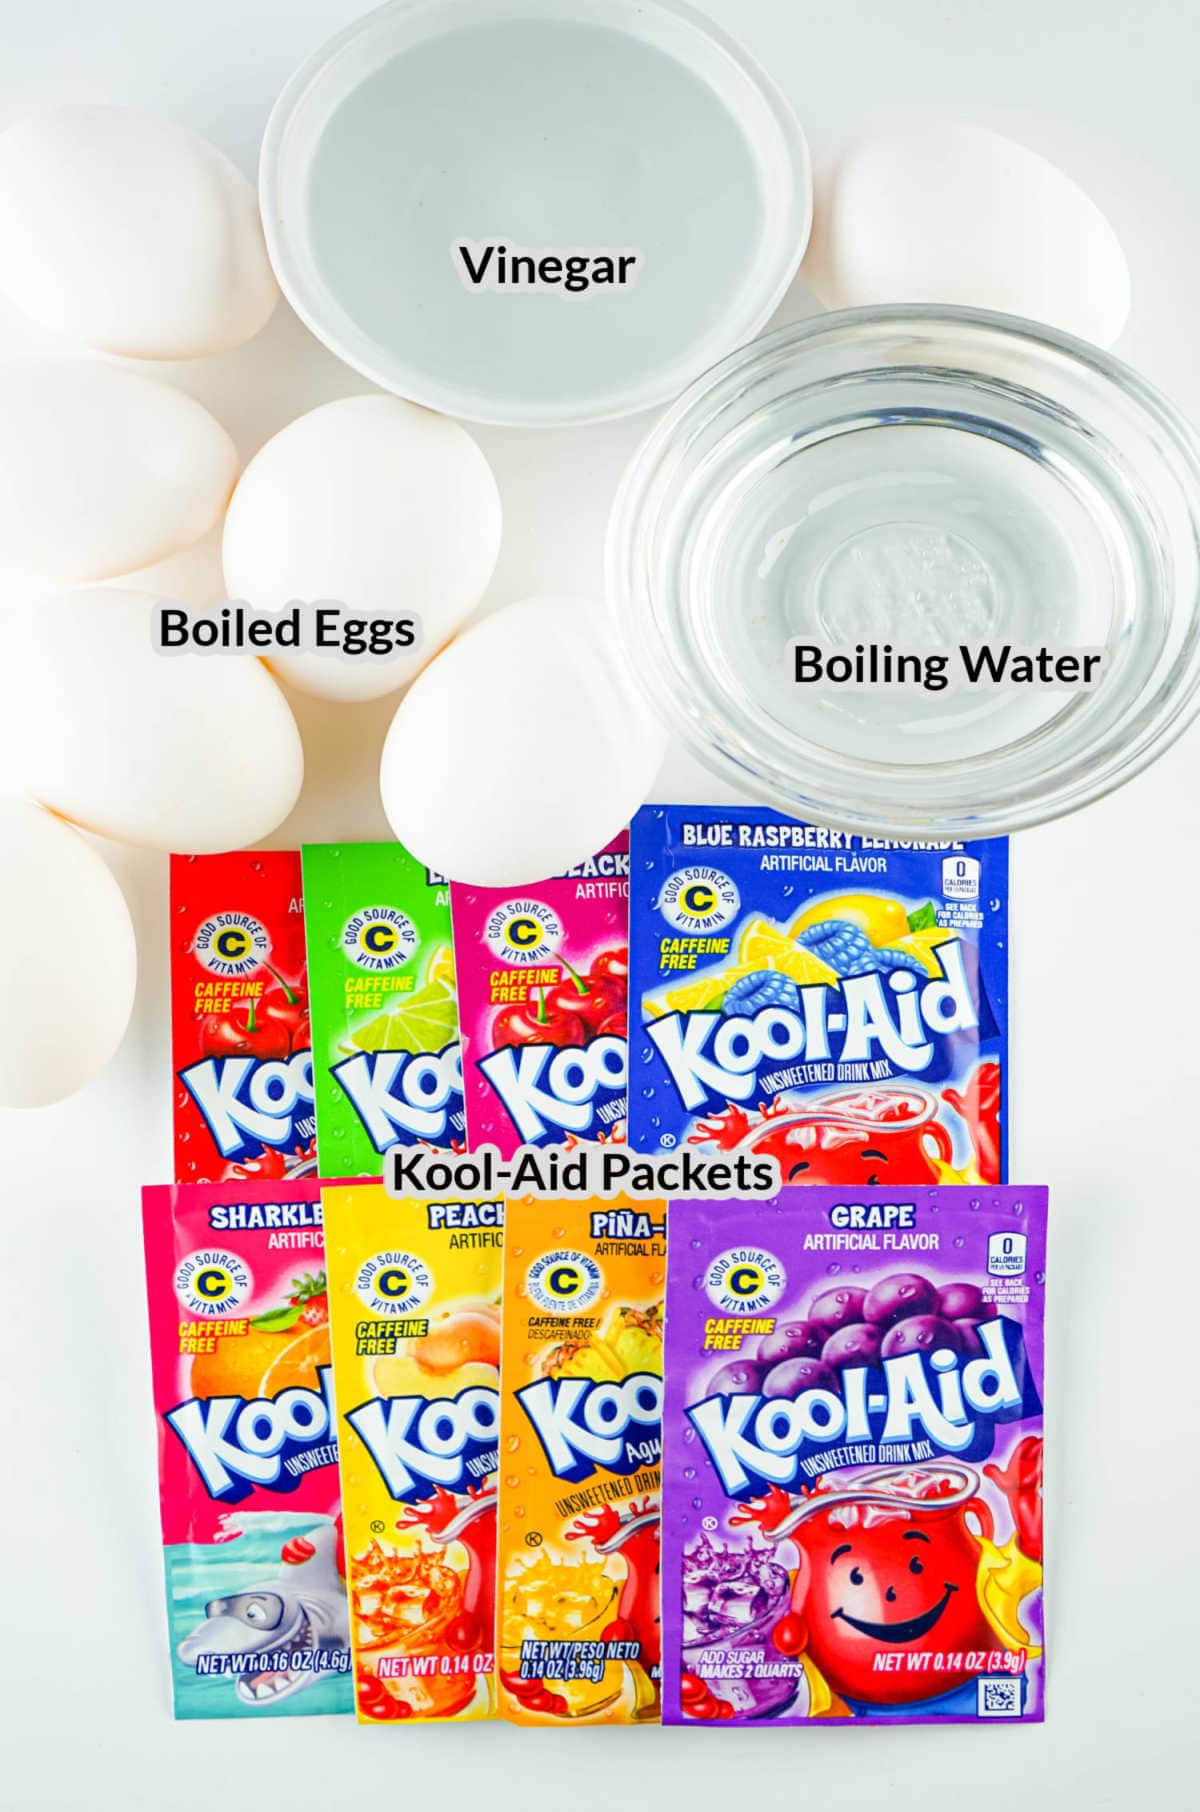
- Boiled eggs – If you have an Instant Pot, you can easily make Instant Pot Hard Boiled Eggs! If not, use this recipe to make easy hard boiled eggs.
- Boiling water – You can either boil some water on the stovetop or in an electric kettle.
- Vinegar – White vinegar helps the dye actually color the eggs.
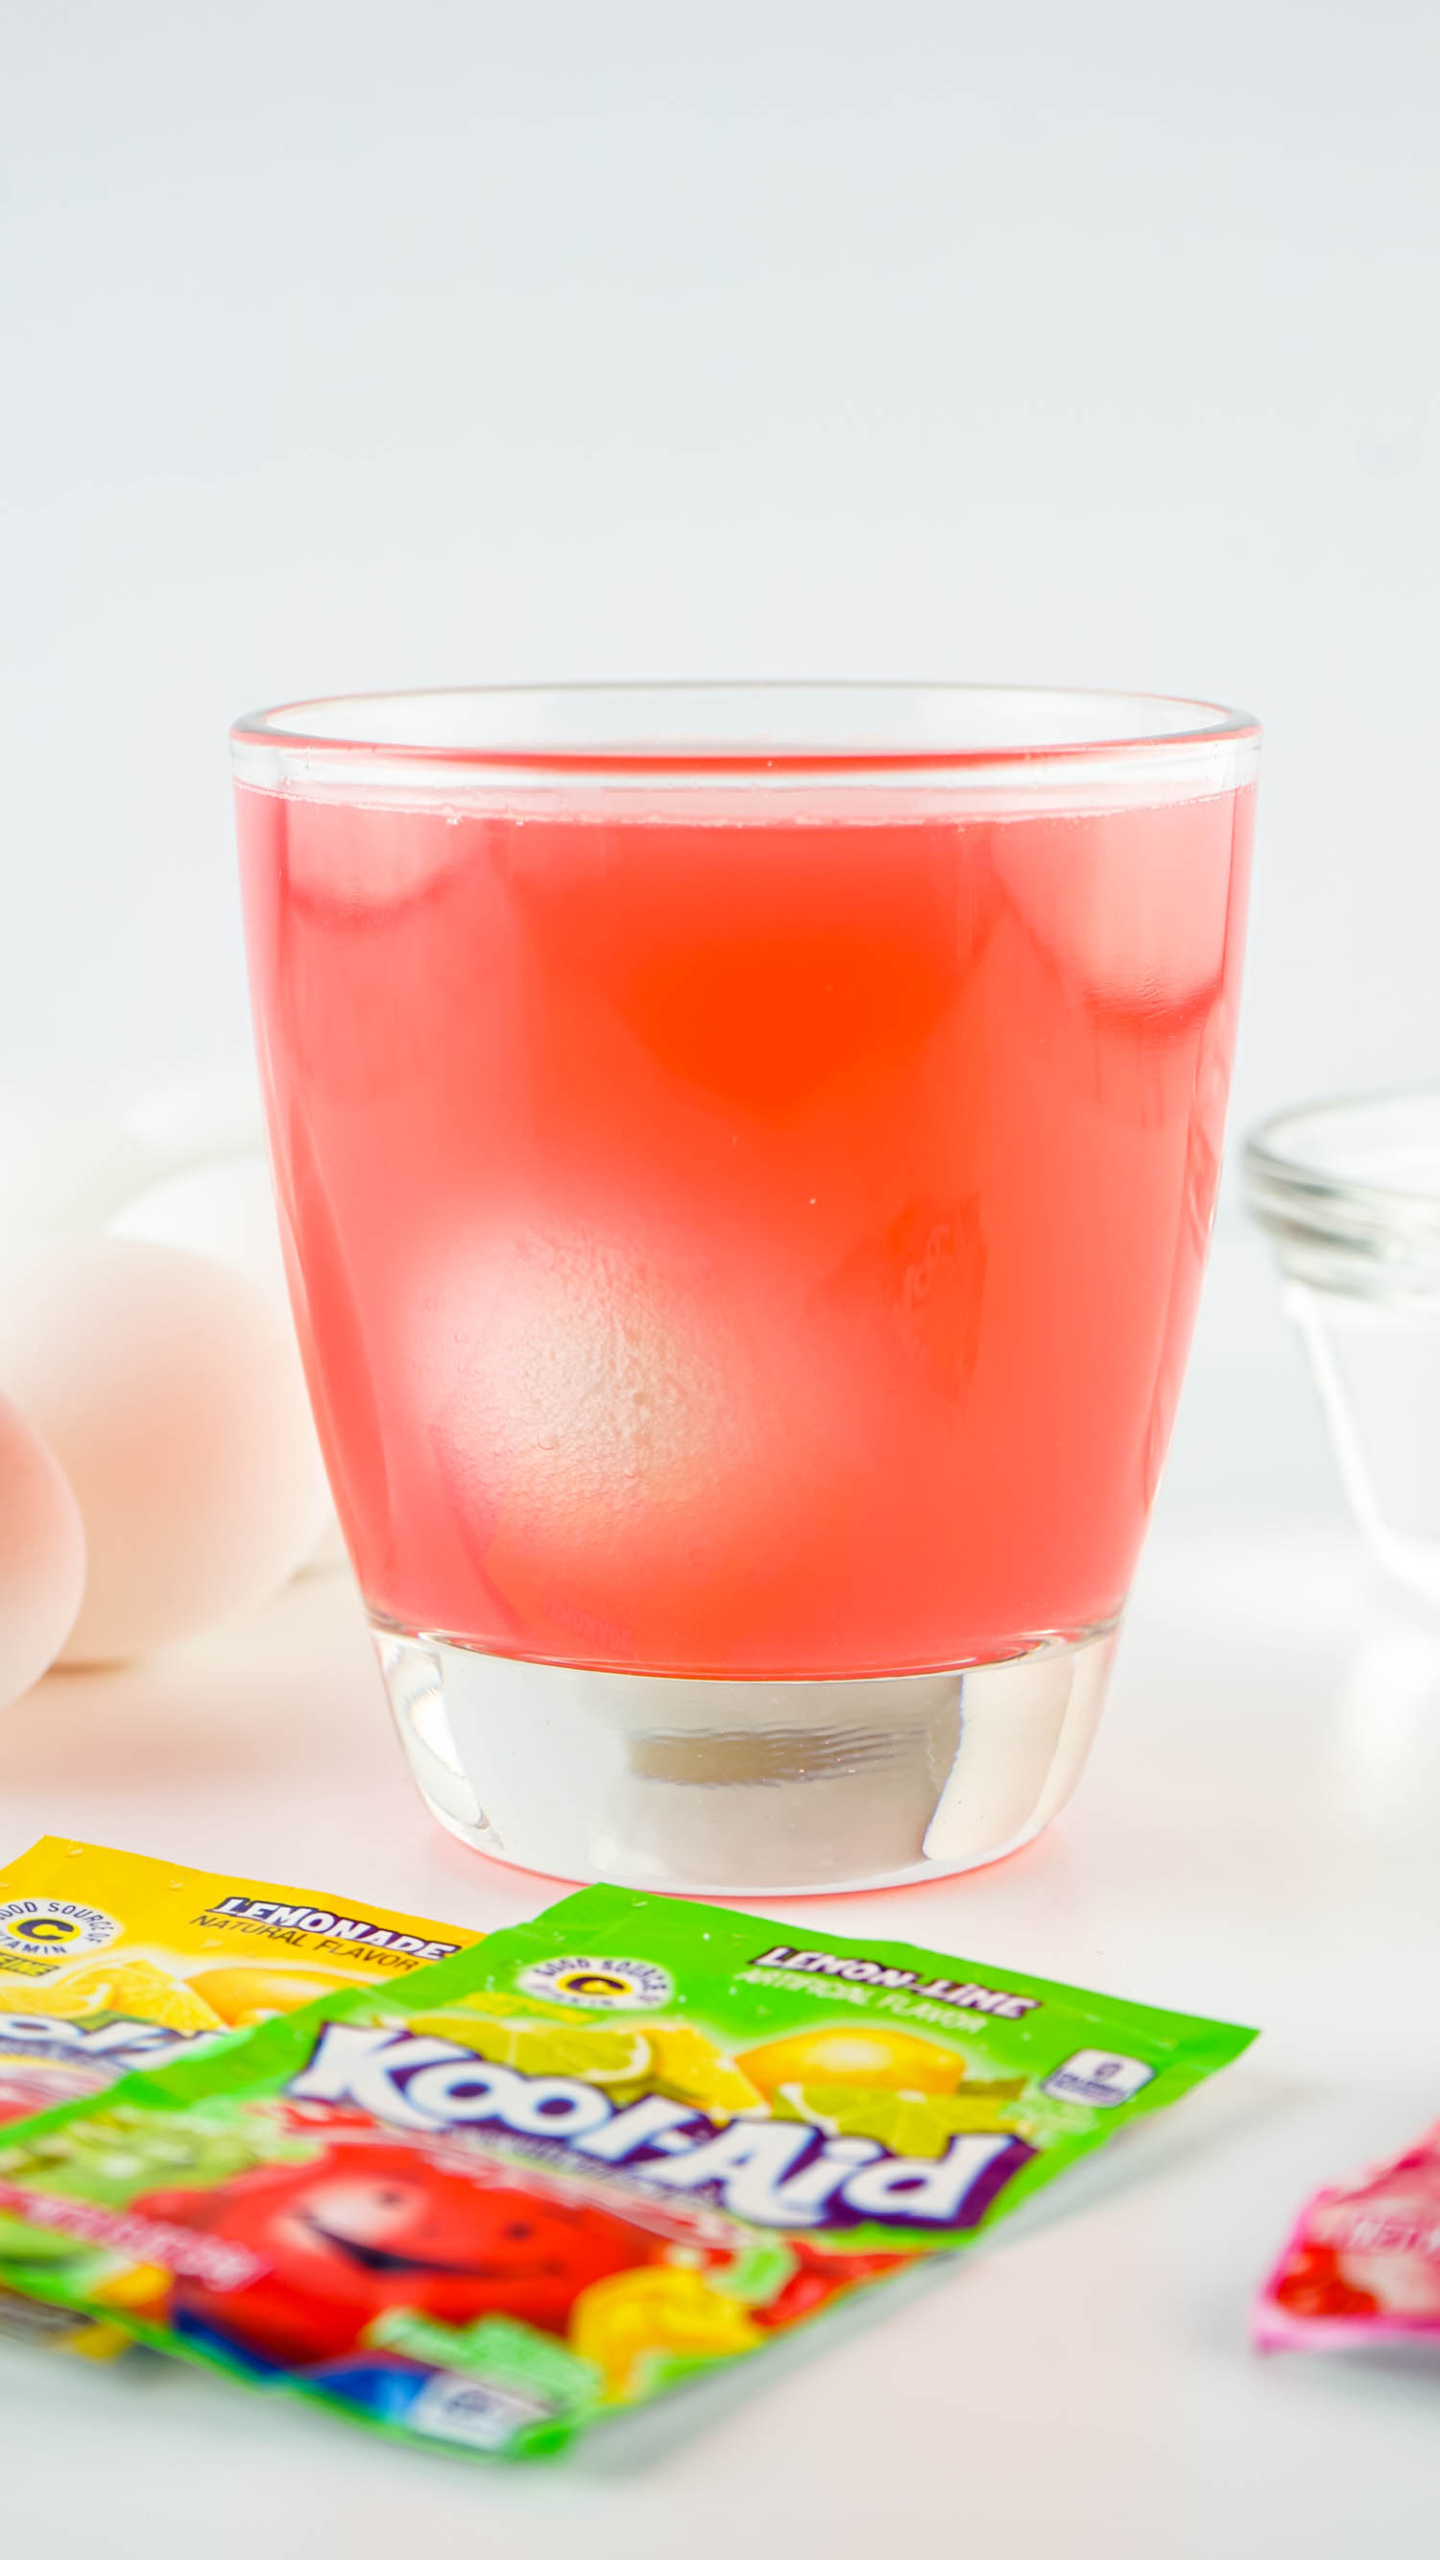
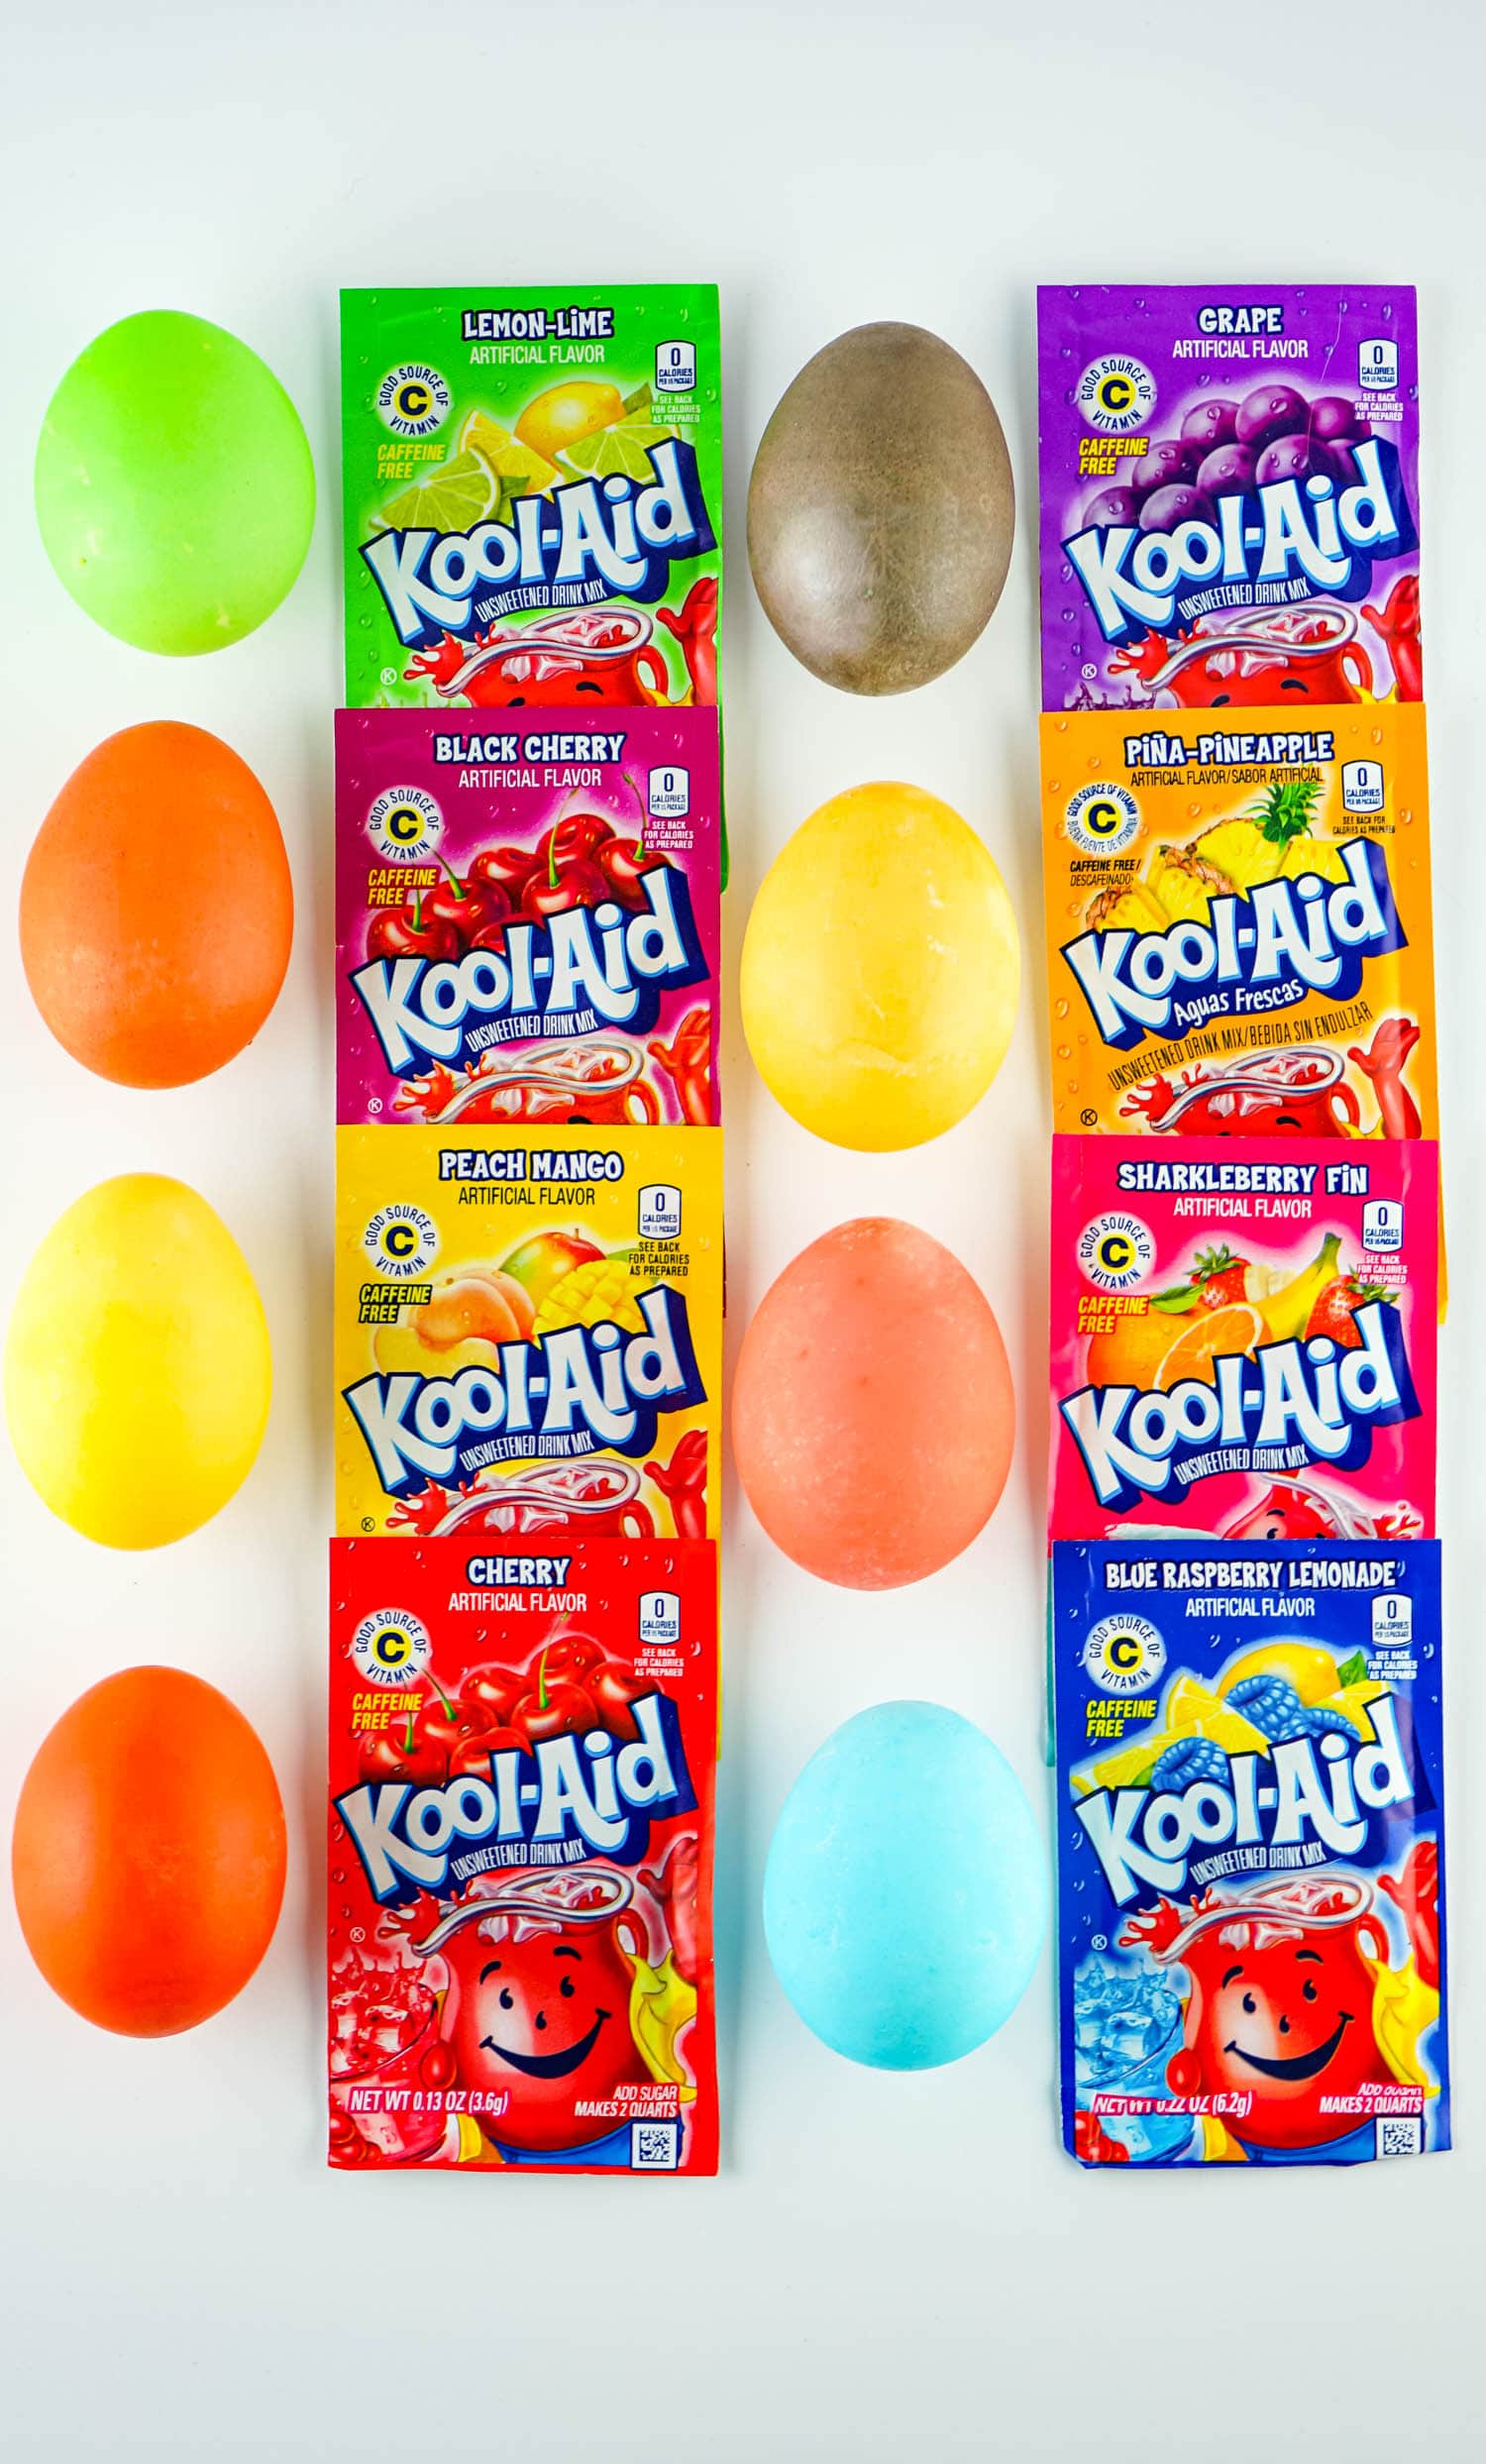
- Kool Aid packets – Choose whatever flavors/colors you’d like! Some of favorites are blue raspberry lemonade, piña-pineapple, and lemon-lime.
- Bowls – Be sure you use bowls or cups that are deep enough to completely submerge the eggs. I recommend using plastic bowls or plastic cups so that you can throw them away once you’re finished with them!
- Forks or Spoons – Use forks or spoons to carefully place the eggs into the dye and to assist in removing them from the dye.
- Paper towels – Be sure you have plenty of paper towels before beginning the process of dyeing eggs with Kool Aid. You’ll want to protect your work space from stains and spills.
How to Dye Eggs with Kool Aid
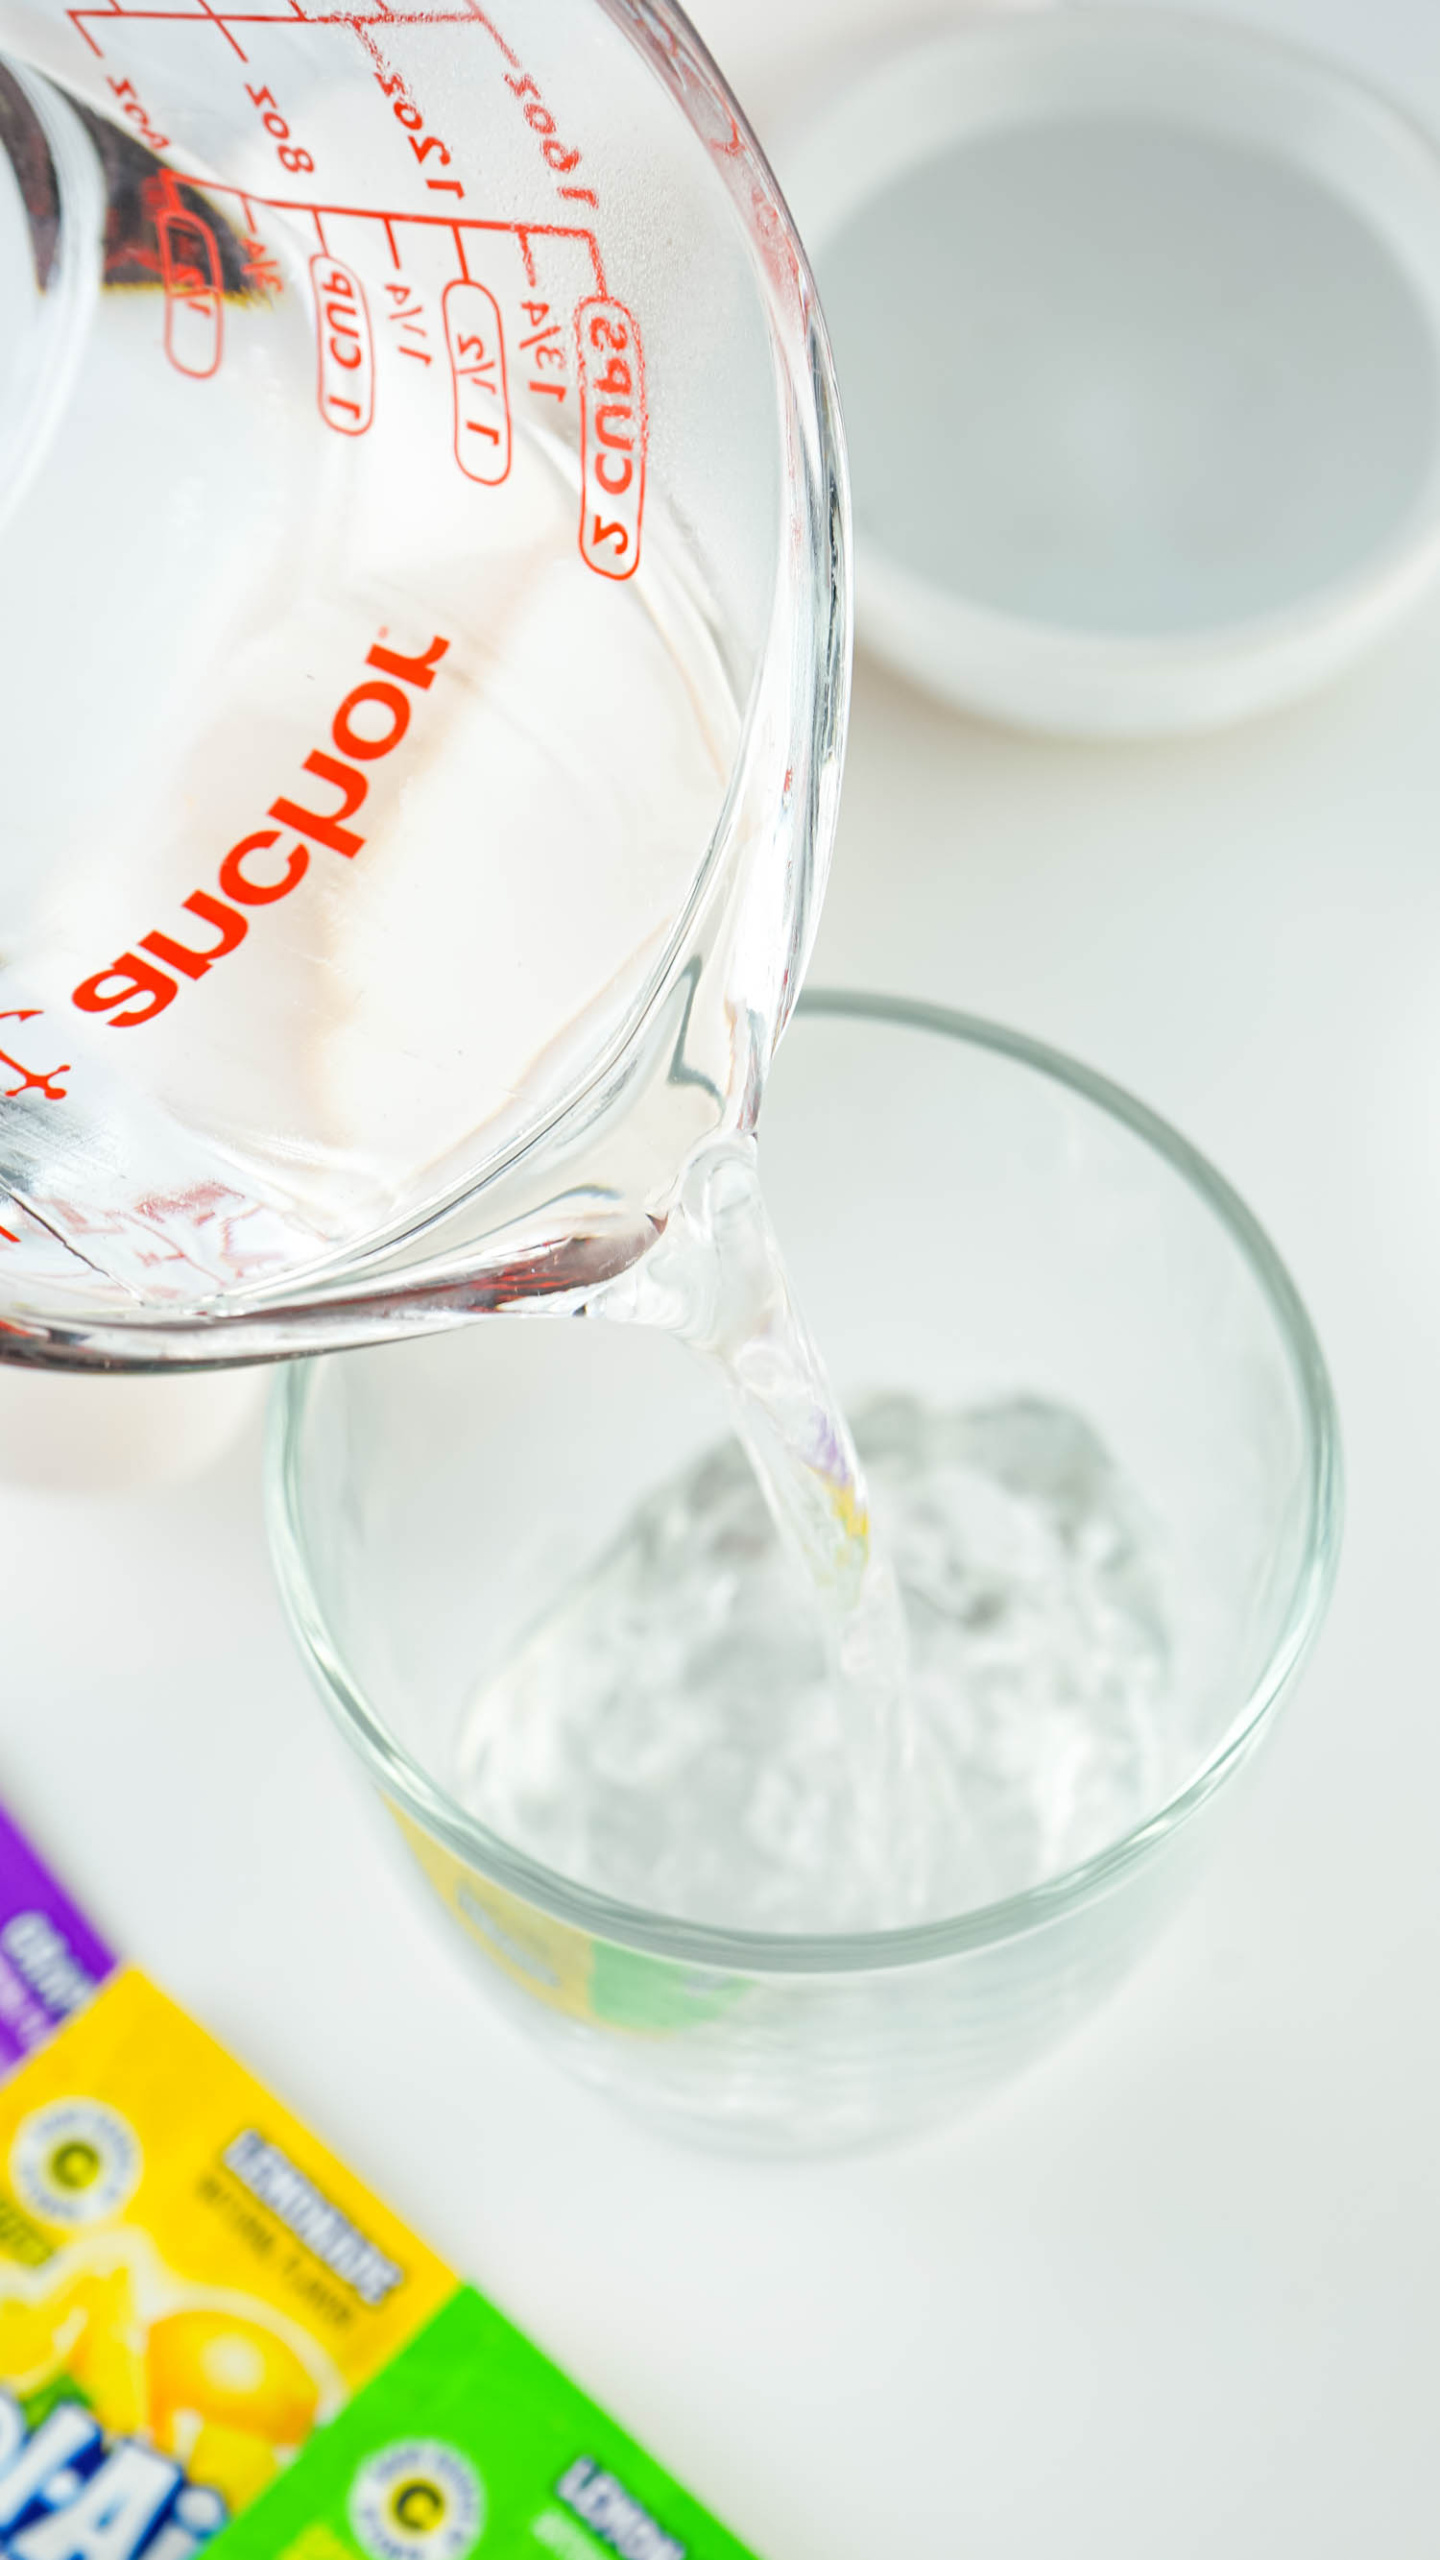
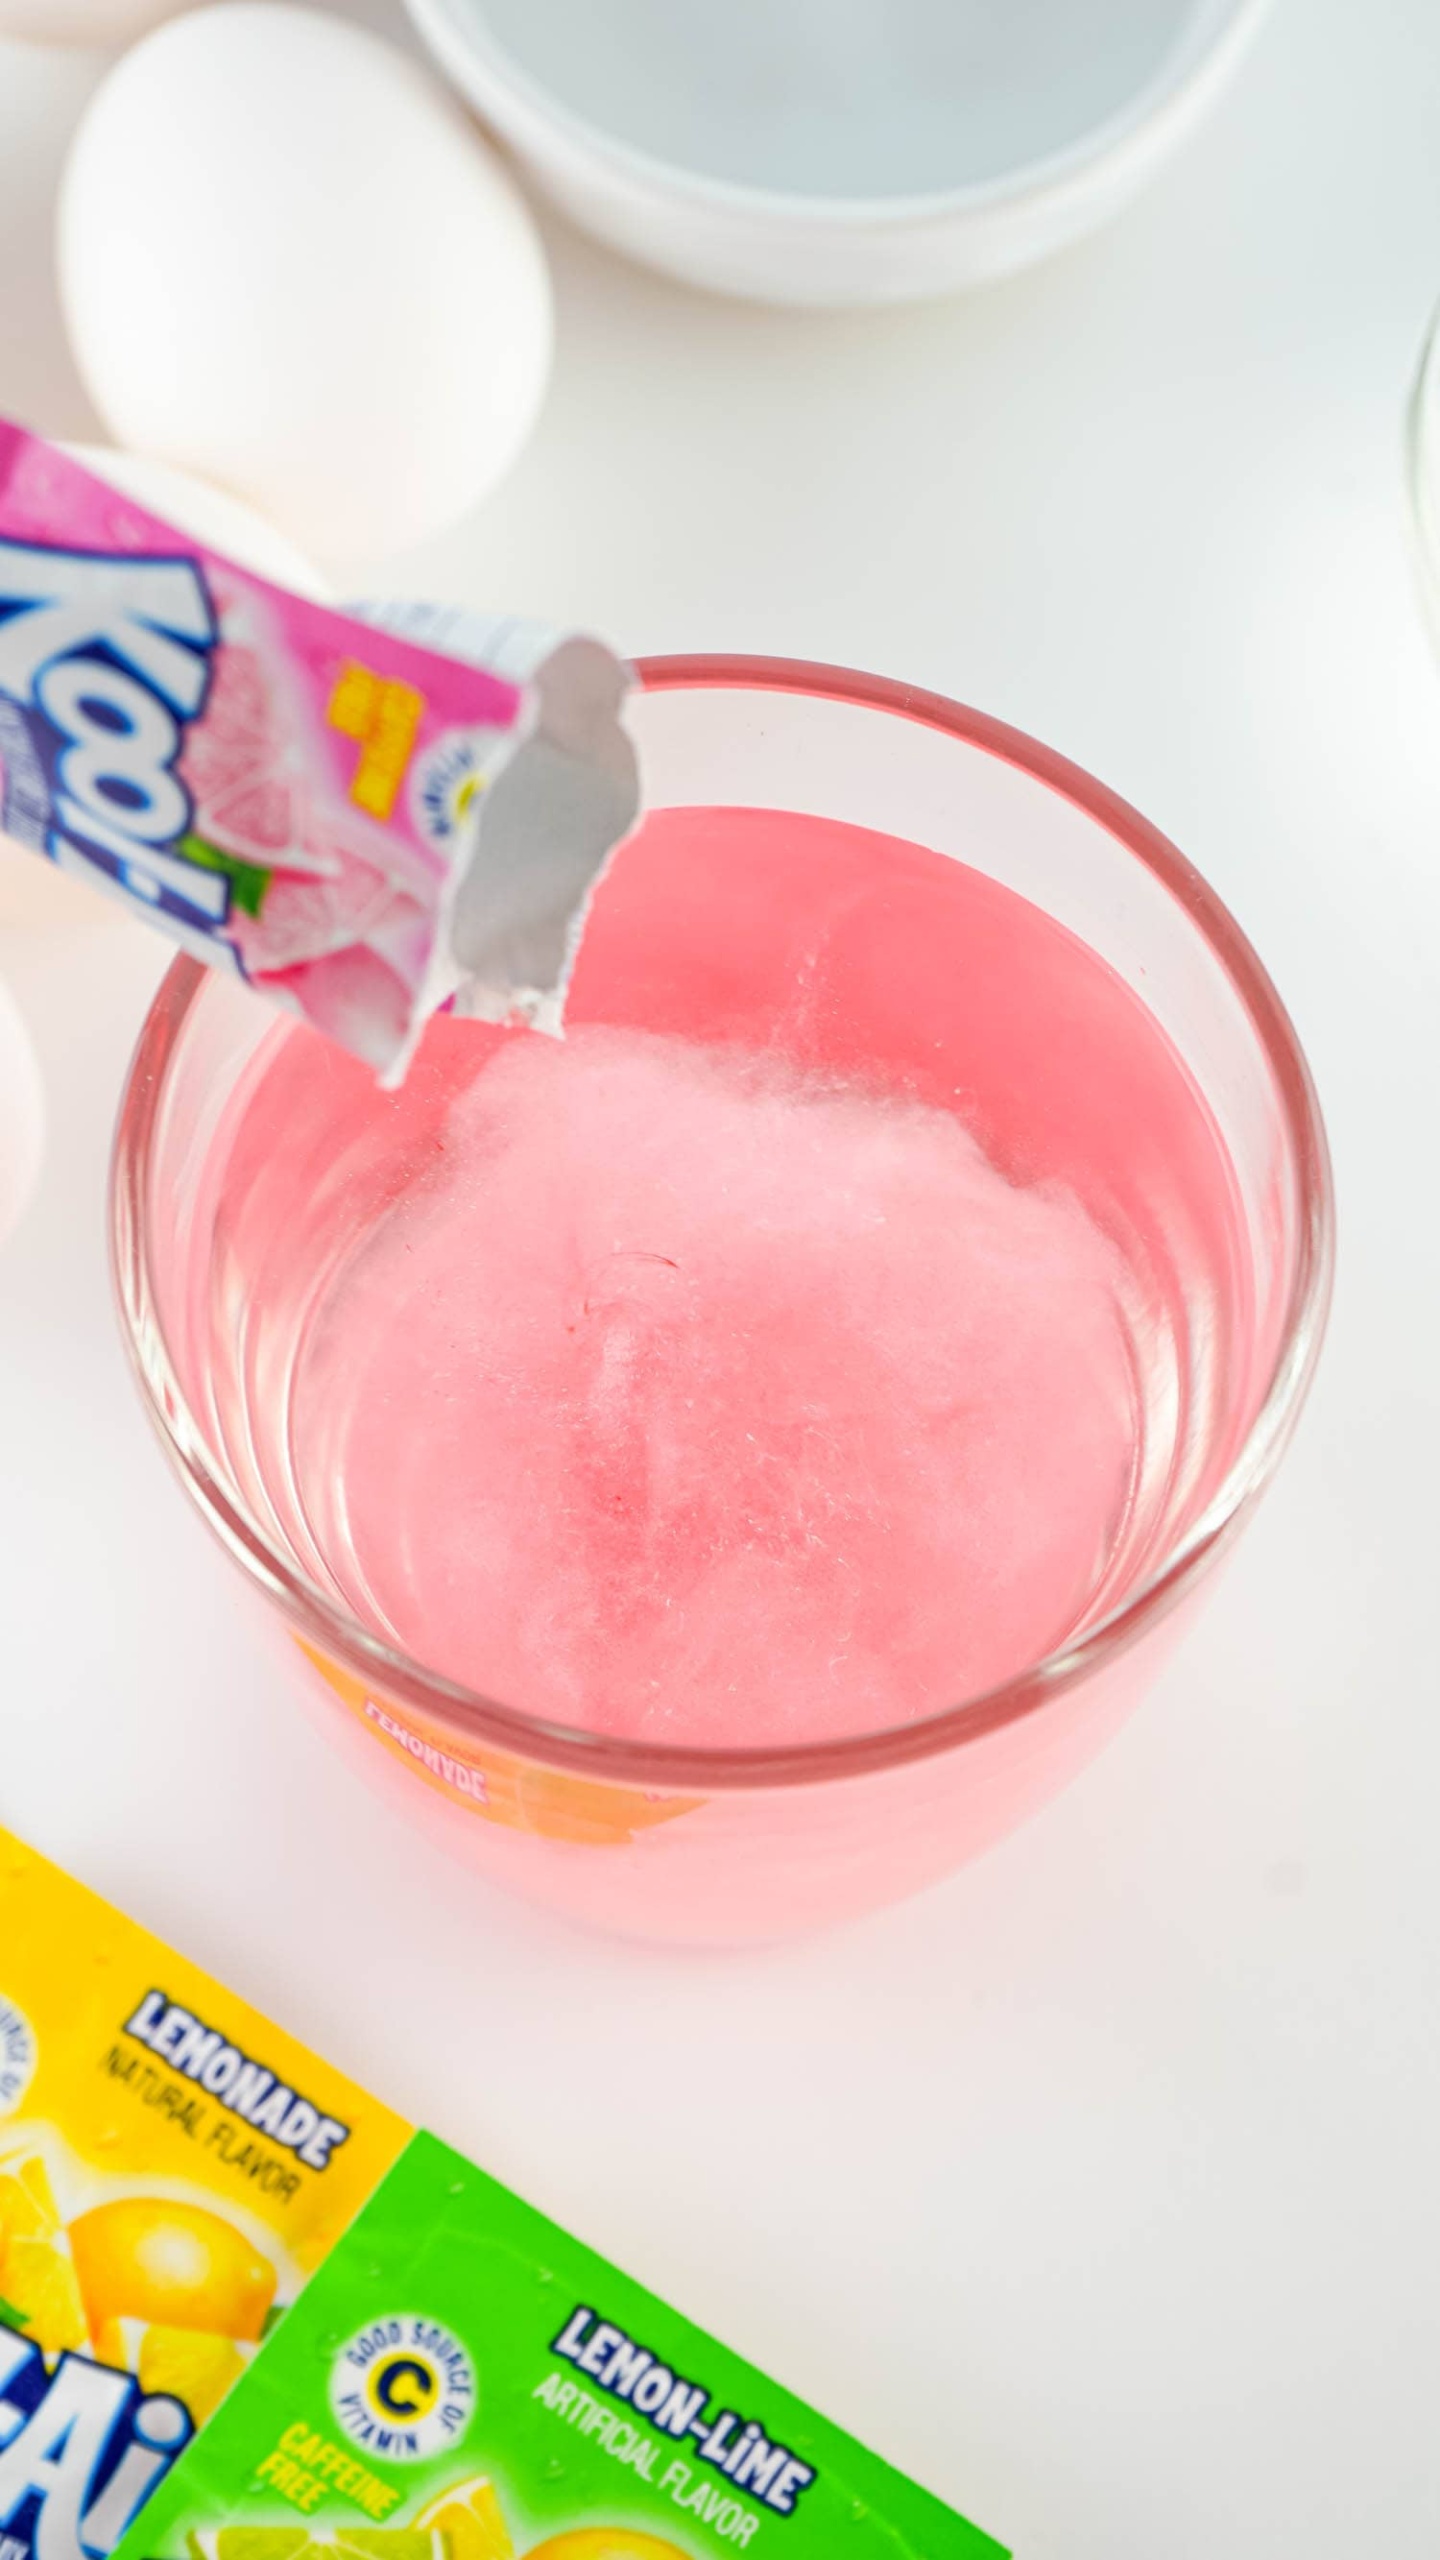
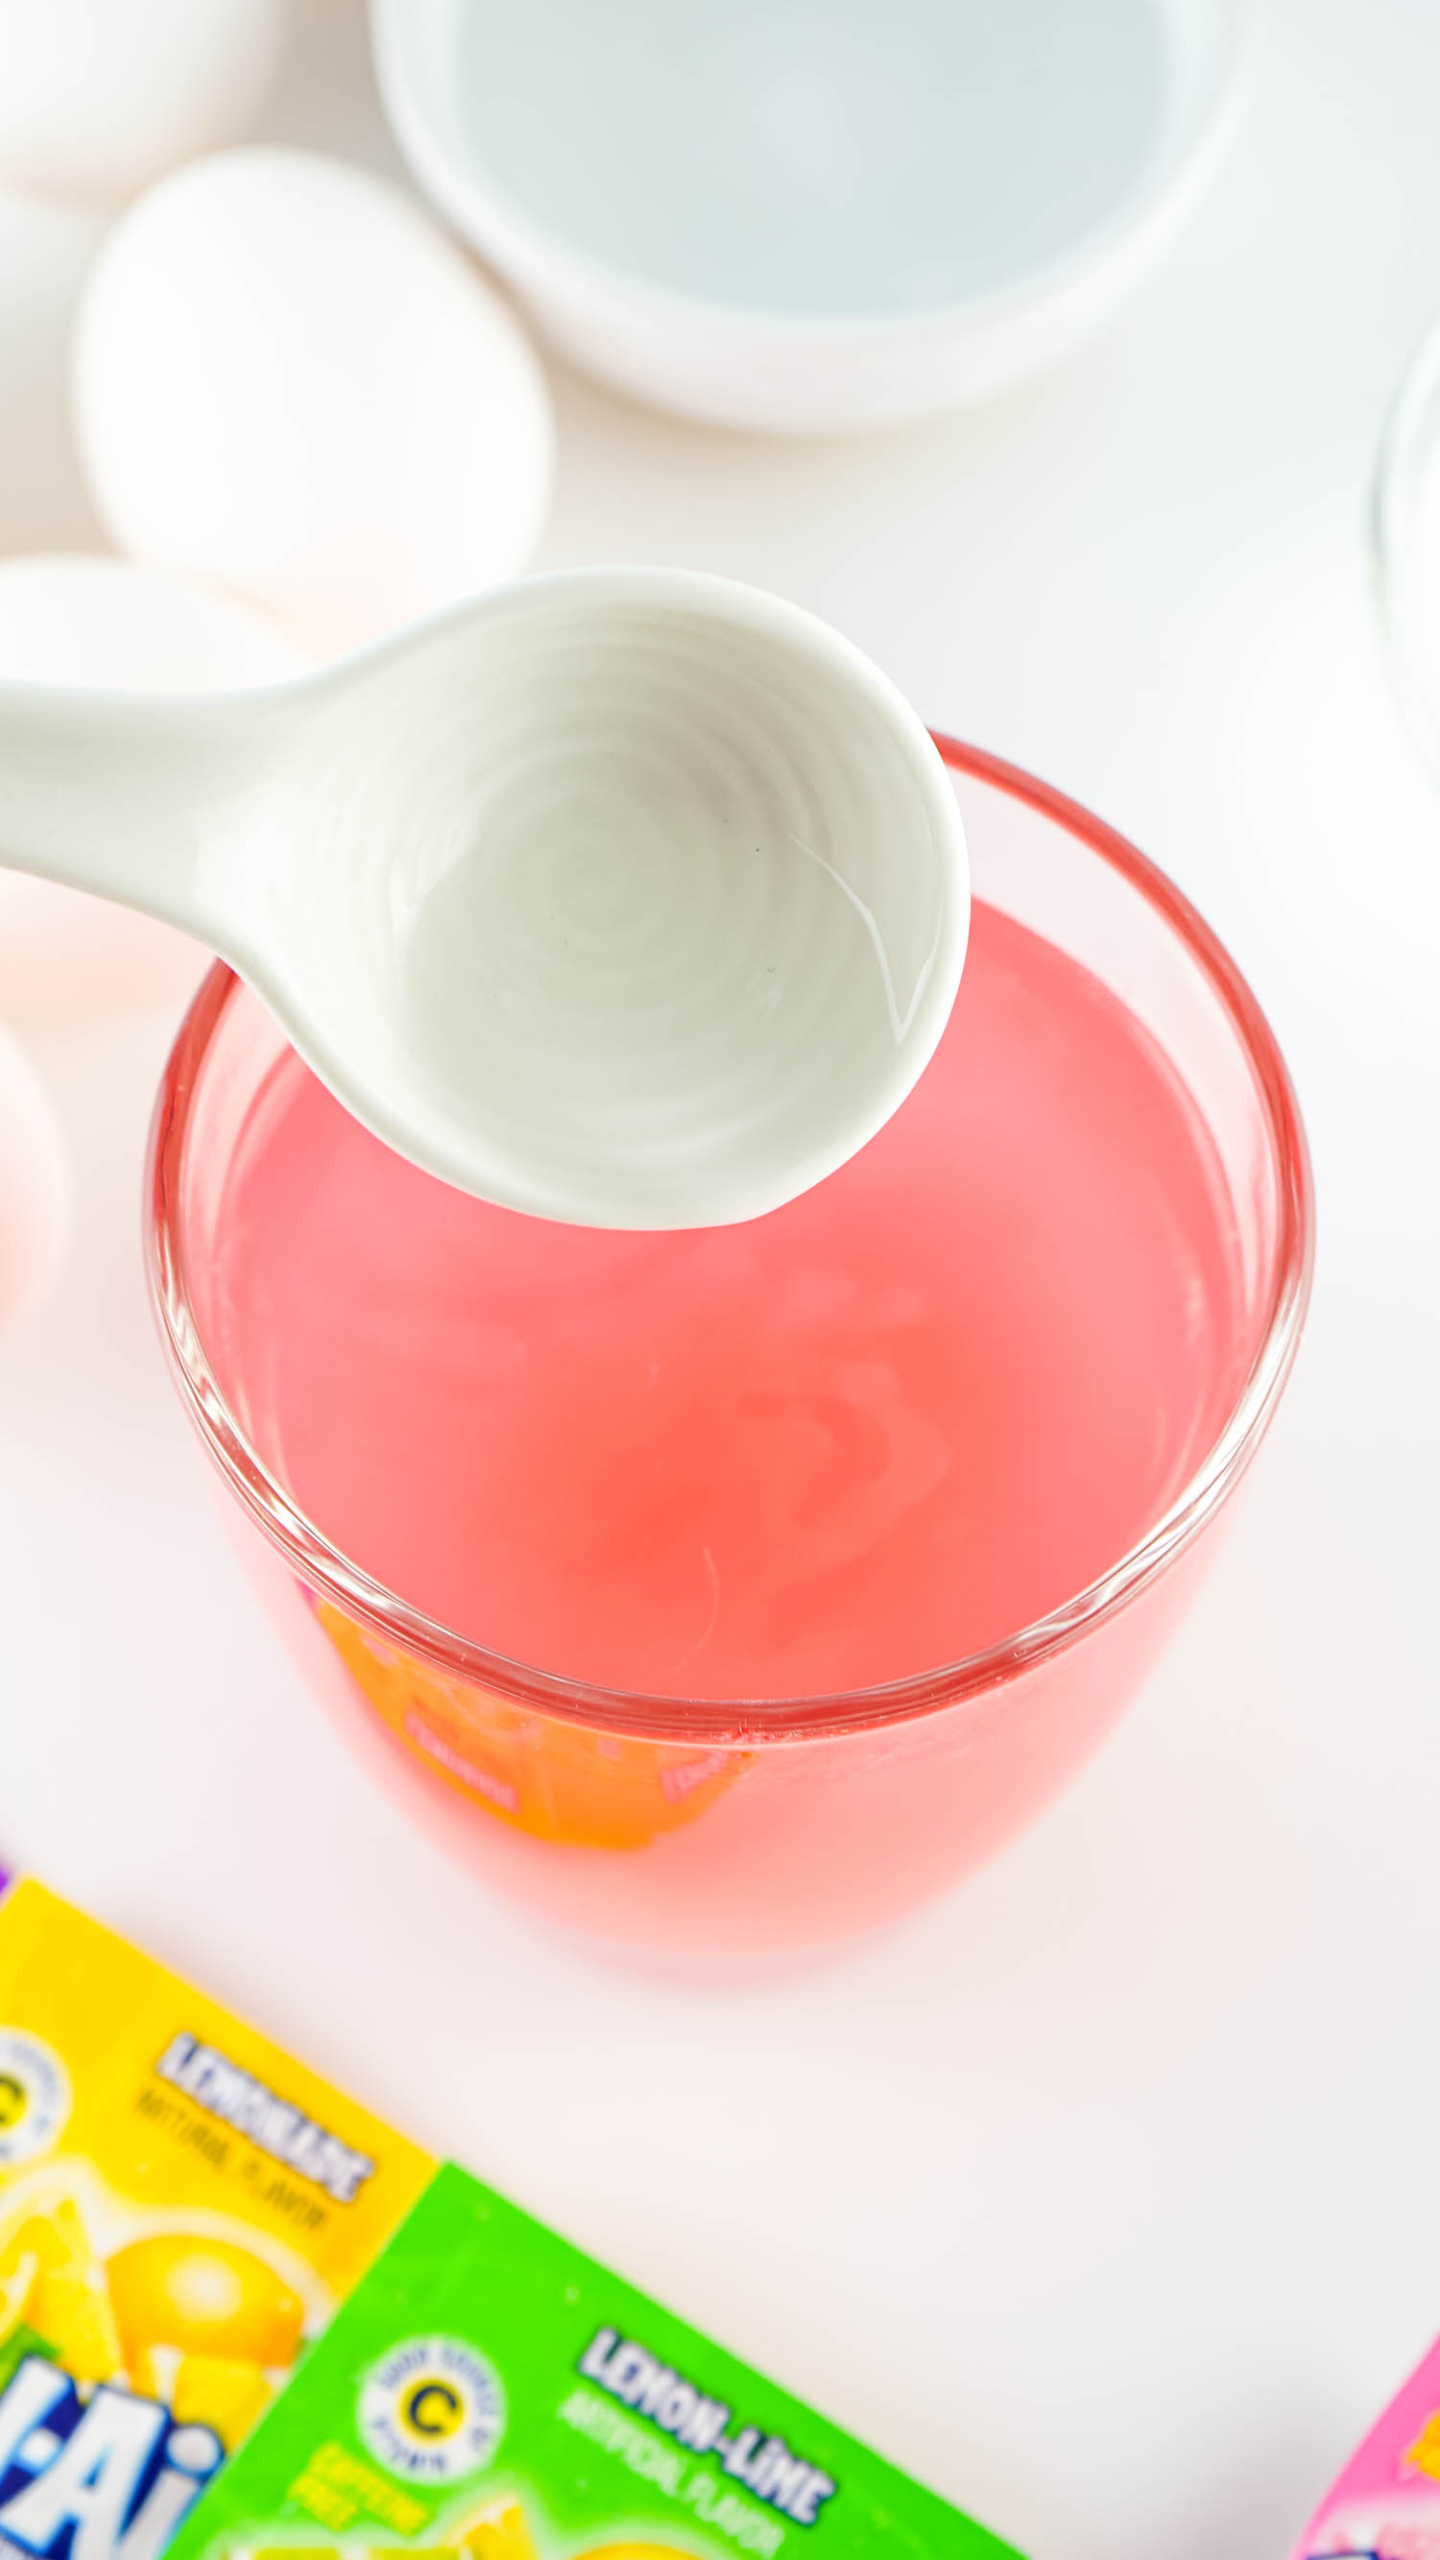
In one of the plastic bowls or cups you’ve gathered, combine ½ cup of boiling water and your chosen packet of Kool Aid with 1 teaspoon of vinegar.
Stir the mixture with a spoon or fork until the Kool Aid is completely dissolved. Make as many cups of color as you would like!
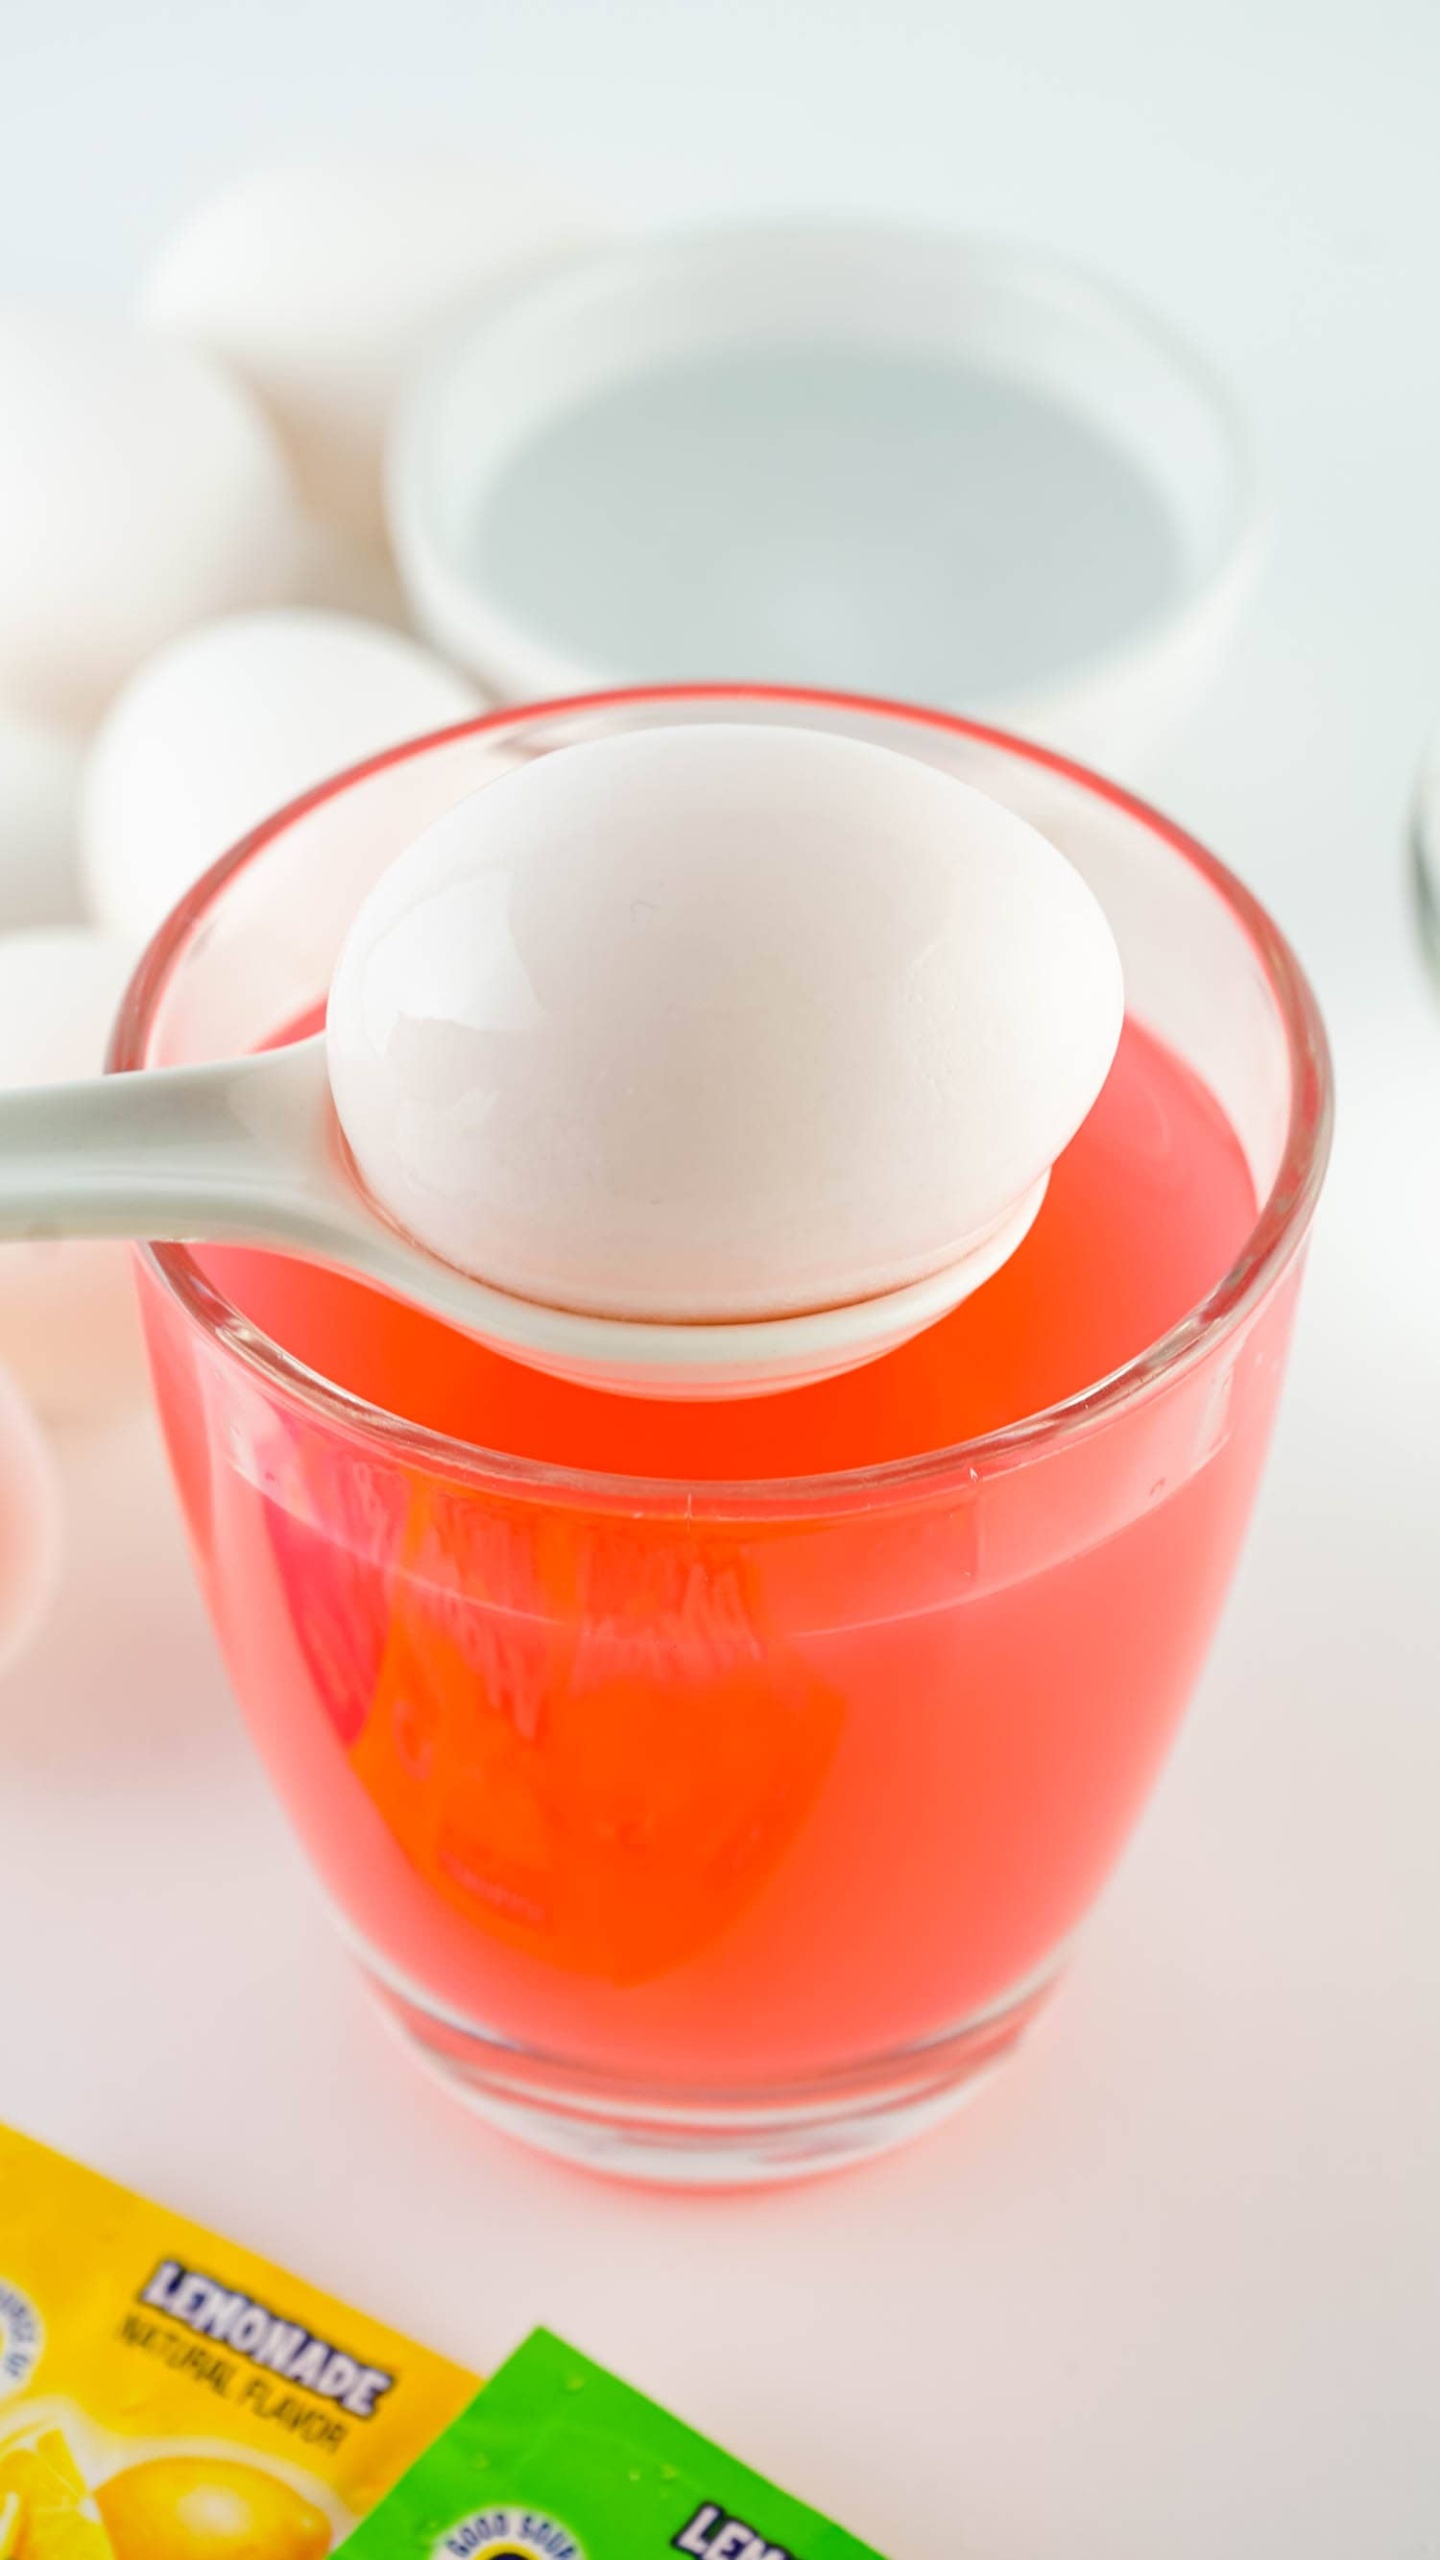
Gently place the eggs into a cup of Kool Aid dye, and let them sit for 1-2 minutes. Remove the eggs and lay them gently on a paper towel to dry. Be sure you don’t touch the eggs too much!
Allow each egg to dry for 5 minutes, or until no longer wet. Place them back in the egg carton and store in the fridge if you plan to eat them!
Pro Tips for the Best Kool Aid Dyed Eggs
- Try making tye dye Kool Aid Easter eggs! Place rubber bands around each egg to section them off and then dip each section in different colors.
- Wear gloves while you dye Easter eggs with Kool Aid to prevent your hands from becoming stained.
- Add stickers to your completed eggs to give them more character and keep the fun of dyeing eggs going a little bit longer!
More Ways to Dye Eggs
If you love these Kool aid Easter eggs, I’ve got more fun for ya! There’s so many different ways to dye eggs, and each of them are super easy.
- Dyeing Easter eggs with fabric creates the coolest textures! These are so unique and turn out really great.
- Learn how to dye Easter eggs with rice! These fun eggs end up with a cool speckled pattern and a really easy to make.
- If you like the classic dyed Easter eggs, this is an easy way to do that with no store-bought eggs dyeing kits.
- Need to make eggs while you take care of other things? Check out Crock Pot Dyed Easter Eggs.
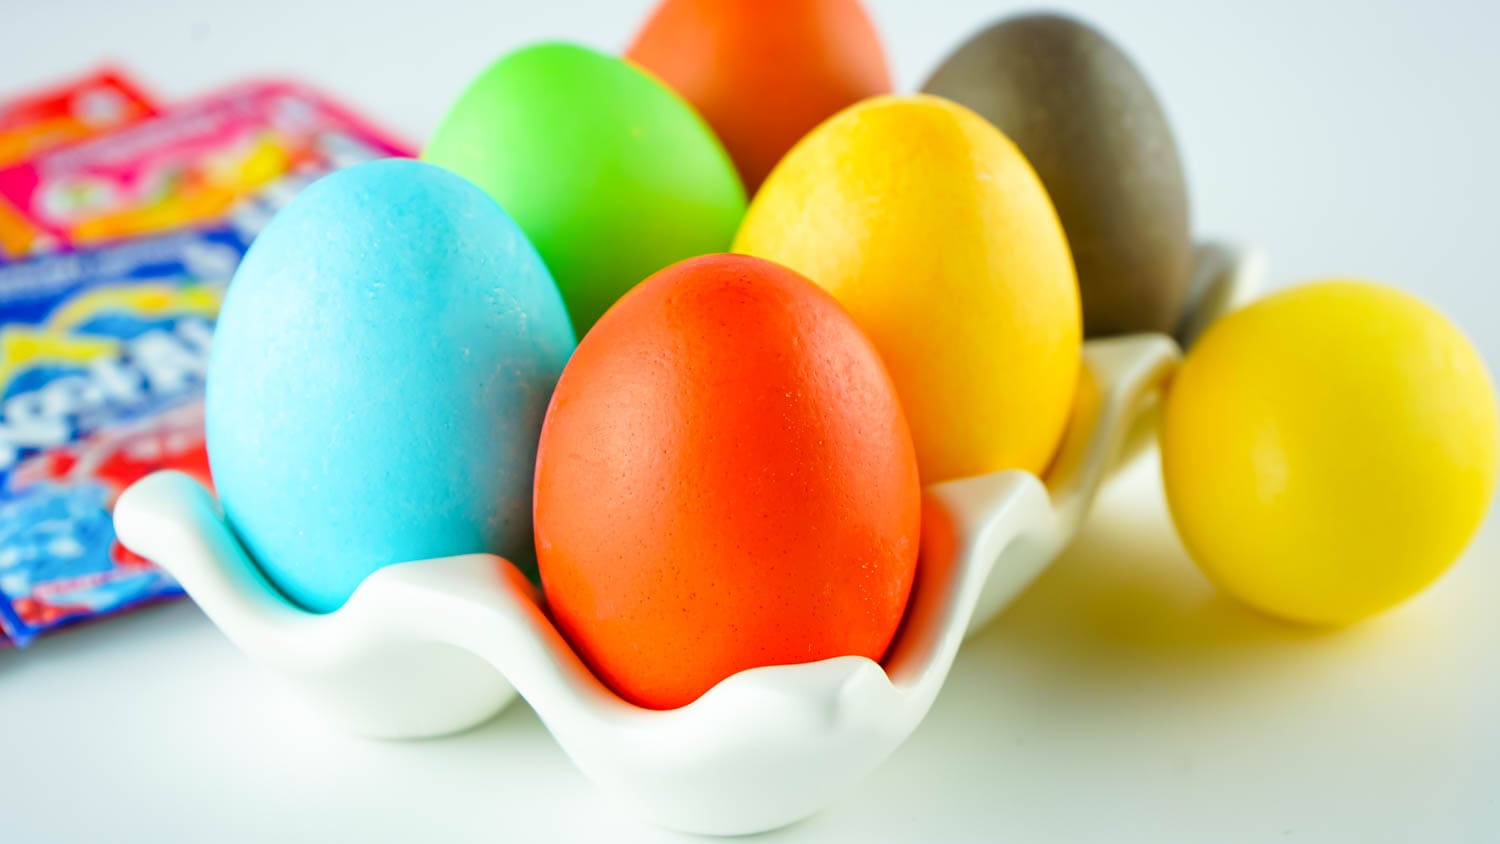
Aren’t these so pretty? I want to see how your Kool Aid dyed eggs turn out, so don’t forget to tag me in your pictures after you make those lasting memories!
More Easter Crafts and Activities You’ll Love
- Want a quick printable activity to keep the kids busy? These Easter Secret Messages are so much fun!
- Not only can potatoes do so much in the kitchen, but they can be used in crafts too! This Easter Egg Potato Stamp craft is super easy and fun.
- Have Easter egg cookies cutters? Then check out this Easter Egg Cookie Cutter Painting!
- These Salt Dough Easter Eggs are great to make as a keepsake!

Kool Aid Dyed Eggs
Ingredients
- Boiled Eggs
- 1 Packet Kool-Aid
- ½ cup Boiling Water
- 1 teaspoon Vinegar
- Paper Towels
- Spoons
Instructions
- In a cup combine ½ cup of boiling water, packet of Kool Aid and 1 teaspoon vinegar. Stir until the Kool-Aid is dissolved. Repeat for as many colors as you'd like.
- Gently add the eggs to a cup of Kool-Aid water and let sit for 1-2 minutes or until the desired color is reached.
- Remove the egg with a spoon (slotted works great!) and gently lay it on a paper towel trying not to touch the egg to much.
- Allow to dry for 5 minutes or until it is no longer wet. Place it back in egg carton for storage. Store eggs in refrigerator if planning to consume them.
Notes
- Try making tye dye Kool Aid Easter eggs! Place rubber bands around each egg to section them off and then dip each section in different colors.
- Wear gloves while you dye Easter eggs with Kool Aid to prevent your hands from becoming stained.
- Add stickers to your completed eggs to give them more character and keep the fun of dyeing eggs going a little bit longer!