How to Make Pasta Necklaces
Ready for a colorful kids’ craft? This guide on How to Make Pasta Necklaces shows you how to dye pasta with food coloring, thread it with yarn, and create bright DIY jewelry that doubles as a fine-motor activity. Minimal supplies, low mess, and perfect for preschoolers, classrooms, or rainy-day fun.

I know these pasta necklaces are going to bring back memories for you, just like they did for me! Now your kiddos can have just as much fun stringing along colorful, fun shaped noodles on a colored piece of yarn to create an exquisite piece of jewellery. A macaroni necklace might be exactly what you need to complete your outfit on your upcoming date night and your little one will be so proud to style you!
There’s just something about watching little ones focus on their hand-eye coordination. You can see the focus and the effort, but you can also see them learning and really taking it all in. Crafts like this not only help them to learn, they also give them confidence in their own abilities and allow them to practice their own creativity.
Why You’ll Love This Craft
- Kids will practice their fine motor skills and hand-eye coordination when participating in this activity.
- This is a budget-friendly activity that your kids are going to love. I’m sure you already have most of the supplies needed for this at home and what you might need to pick up is inexpensive.
- This is also a great way for kids to practice color recognition and patterning.
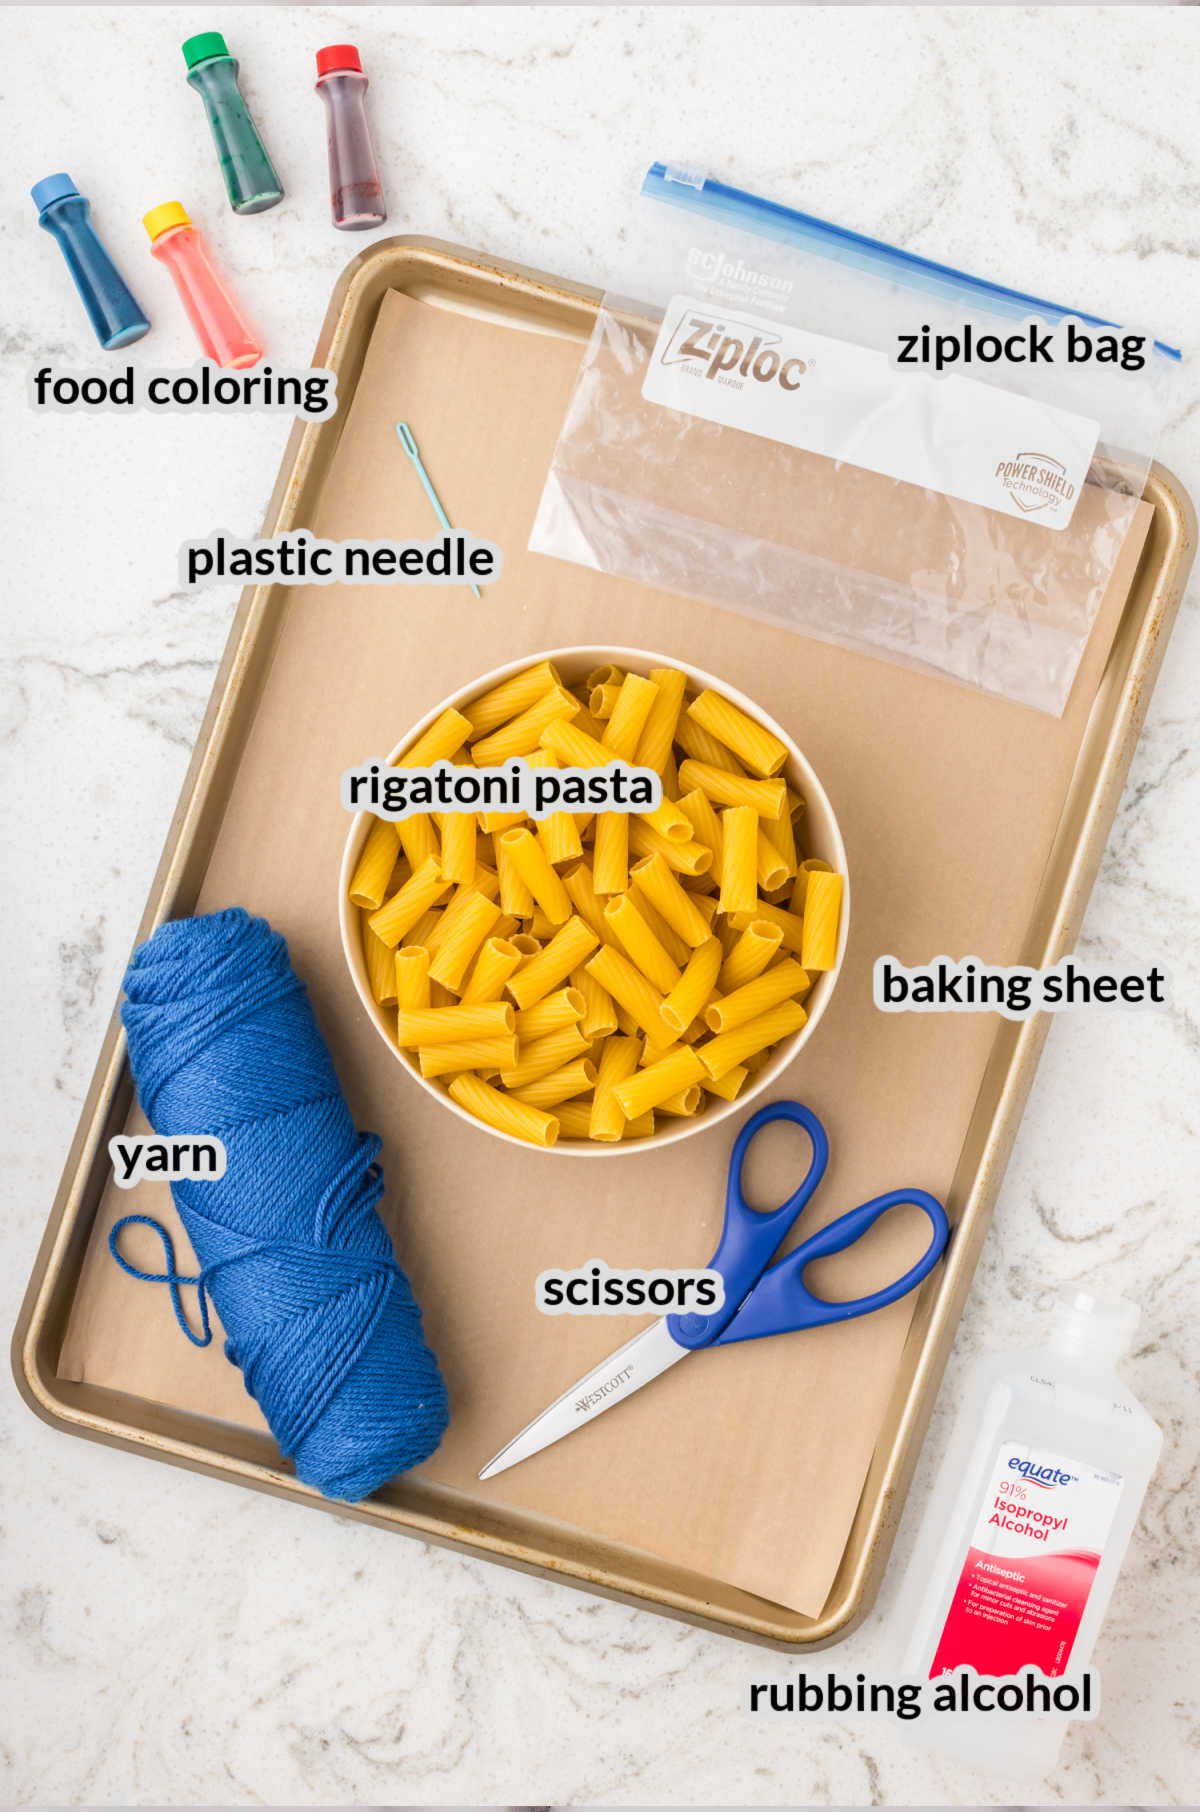
Supplies Needed For Pasta Necklaces
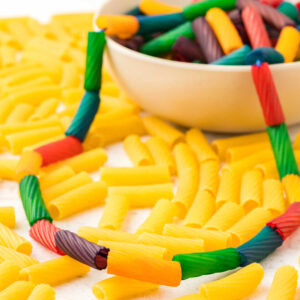
- Pasta – This is the base of the necklace and works well because the holes are large enough for yarn. Other tube-shaped pasta, like penne or ziti, can also be used.
- Food coloring – This adds bright color to the pasta, making the necklaces look great and more fun. Gel or liquid food coloring both work.
- Rubbing alcohol – This helps the food coloring spread evenly and dry faster on the pasta.
- Zip-lock bags – You will need one per color when dyeing the noodles.
- Yarn – This is the best material to use for these pasta necklaces because it is nice and soft. Of course you can use regular string or twine, too.
- Scissors – Used to cut the yarn.
- Plastic needle – A plastic needle will make threading the pasta onto the yarn so much easier.
- Cookie sheet – This will give the dyed noodles lots of time to dry completely.
- Parchment paper – Keeps the mess down.
How To Make Pasta Necklaces
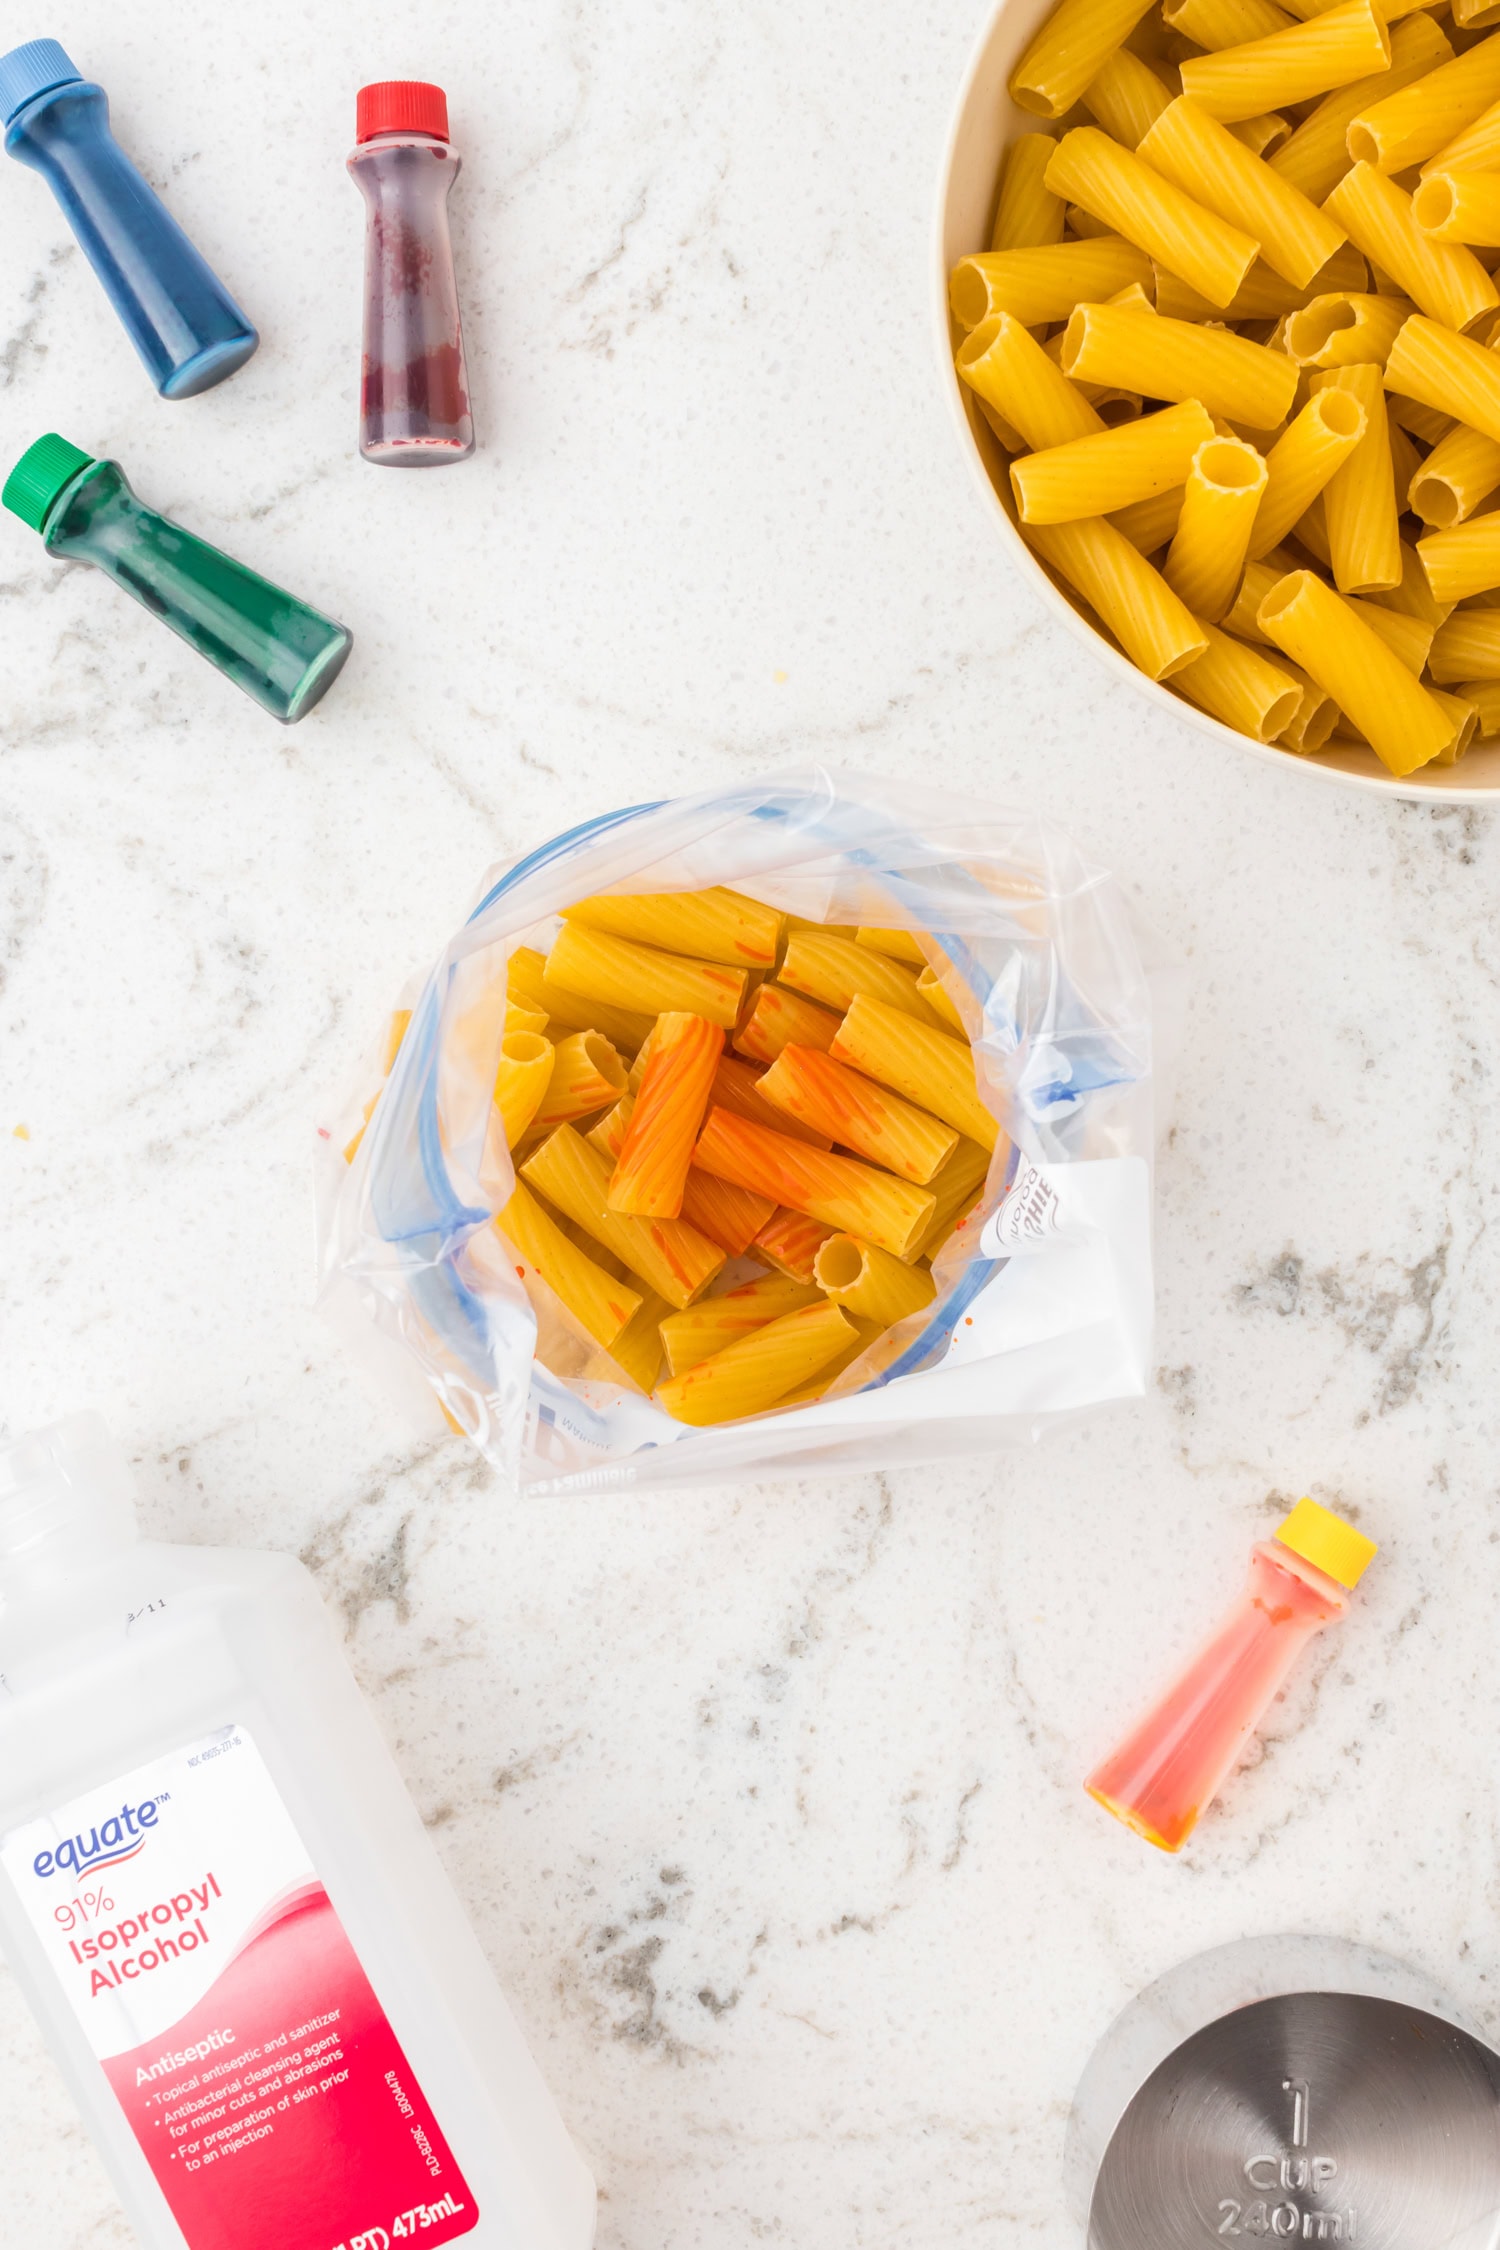
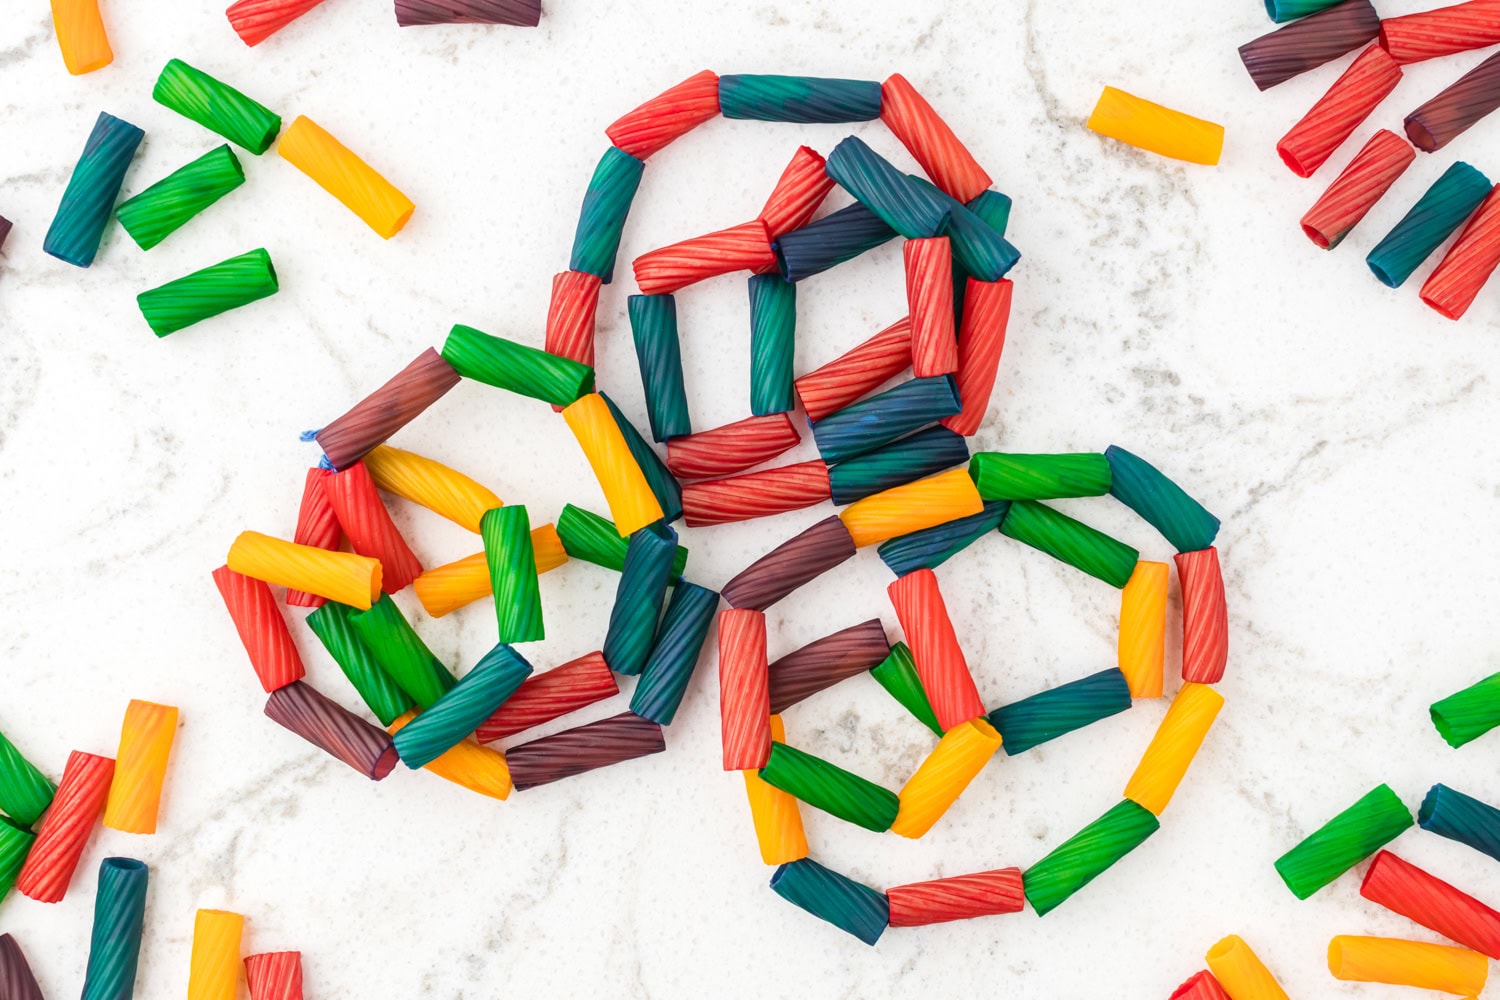
- Add about 1 cup of dry rigatoni pasta to a zip-lock bag with 1 teaspoon of rubbing alcohol and about 20 drops of food coloring. Zip the bag closed and gently shake it around, using your hands to move the pasta so the color coats all sides of the noodles.
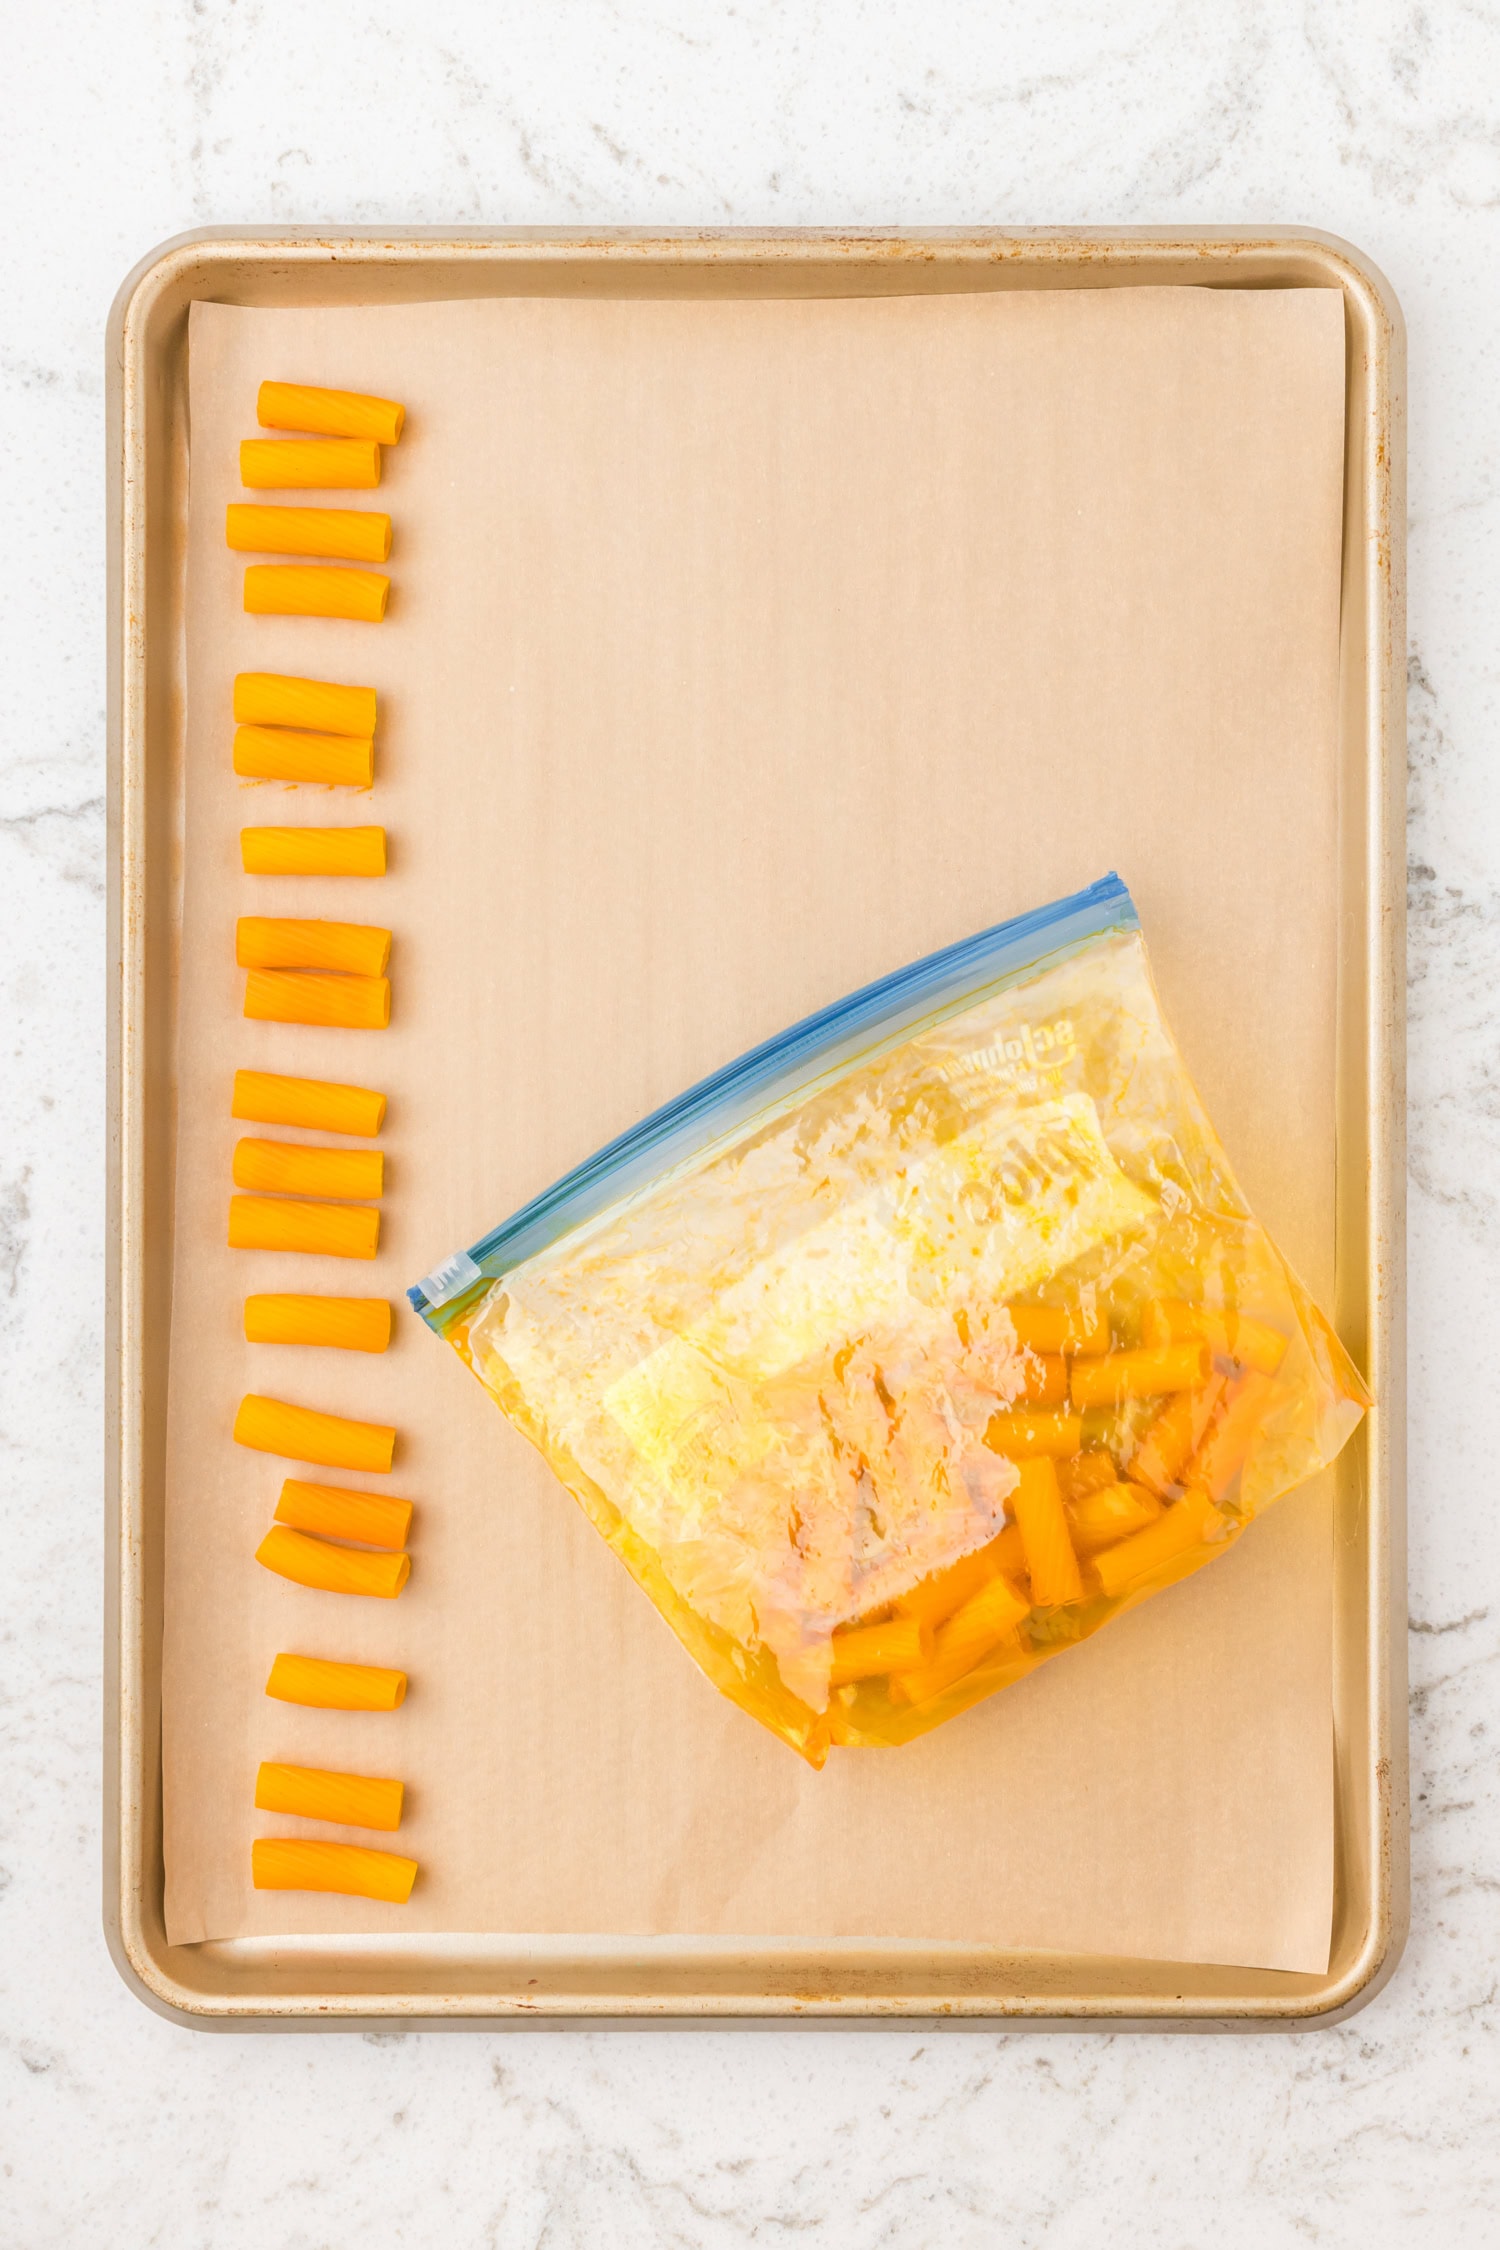
- Open the bag and dump the colored noodles onto prepared baking sheet, spreading the pieces out so they are not touching. Let the pasta sit and dry for about 30 minutes.
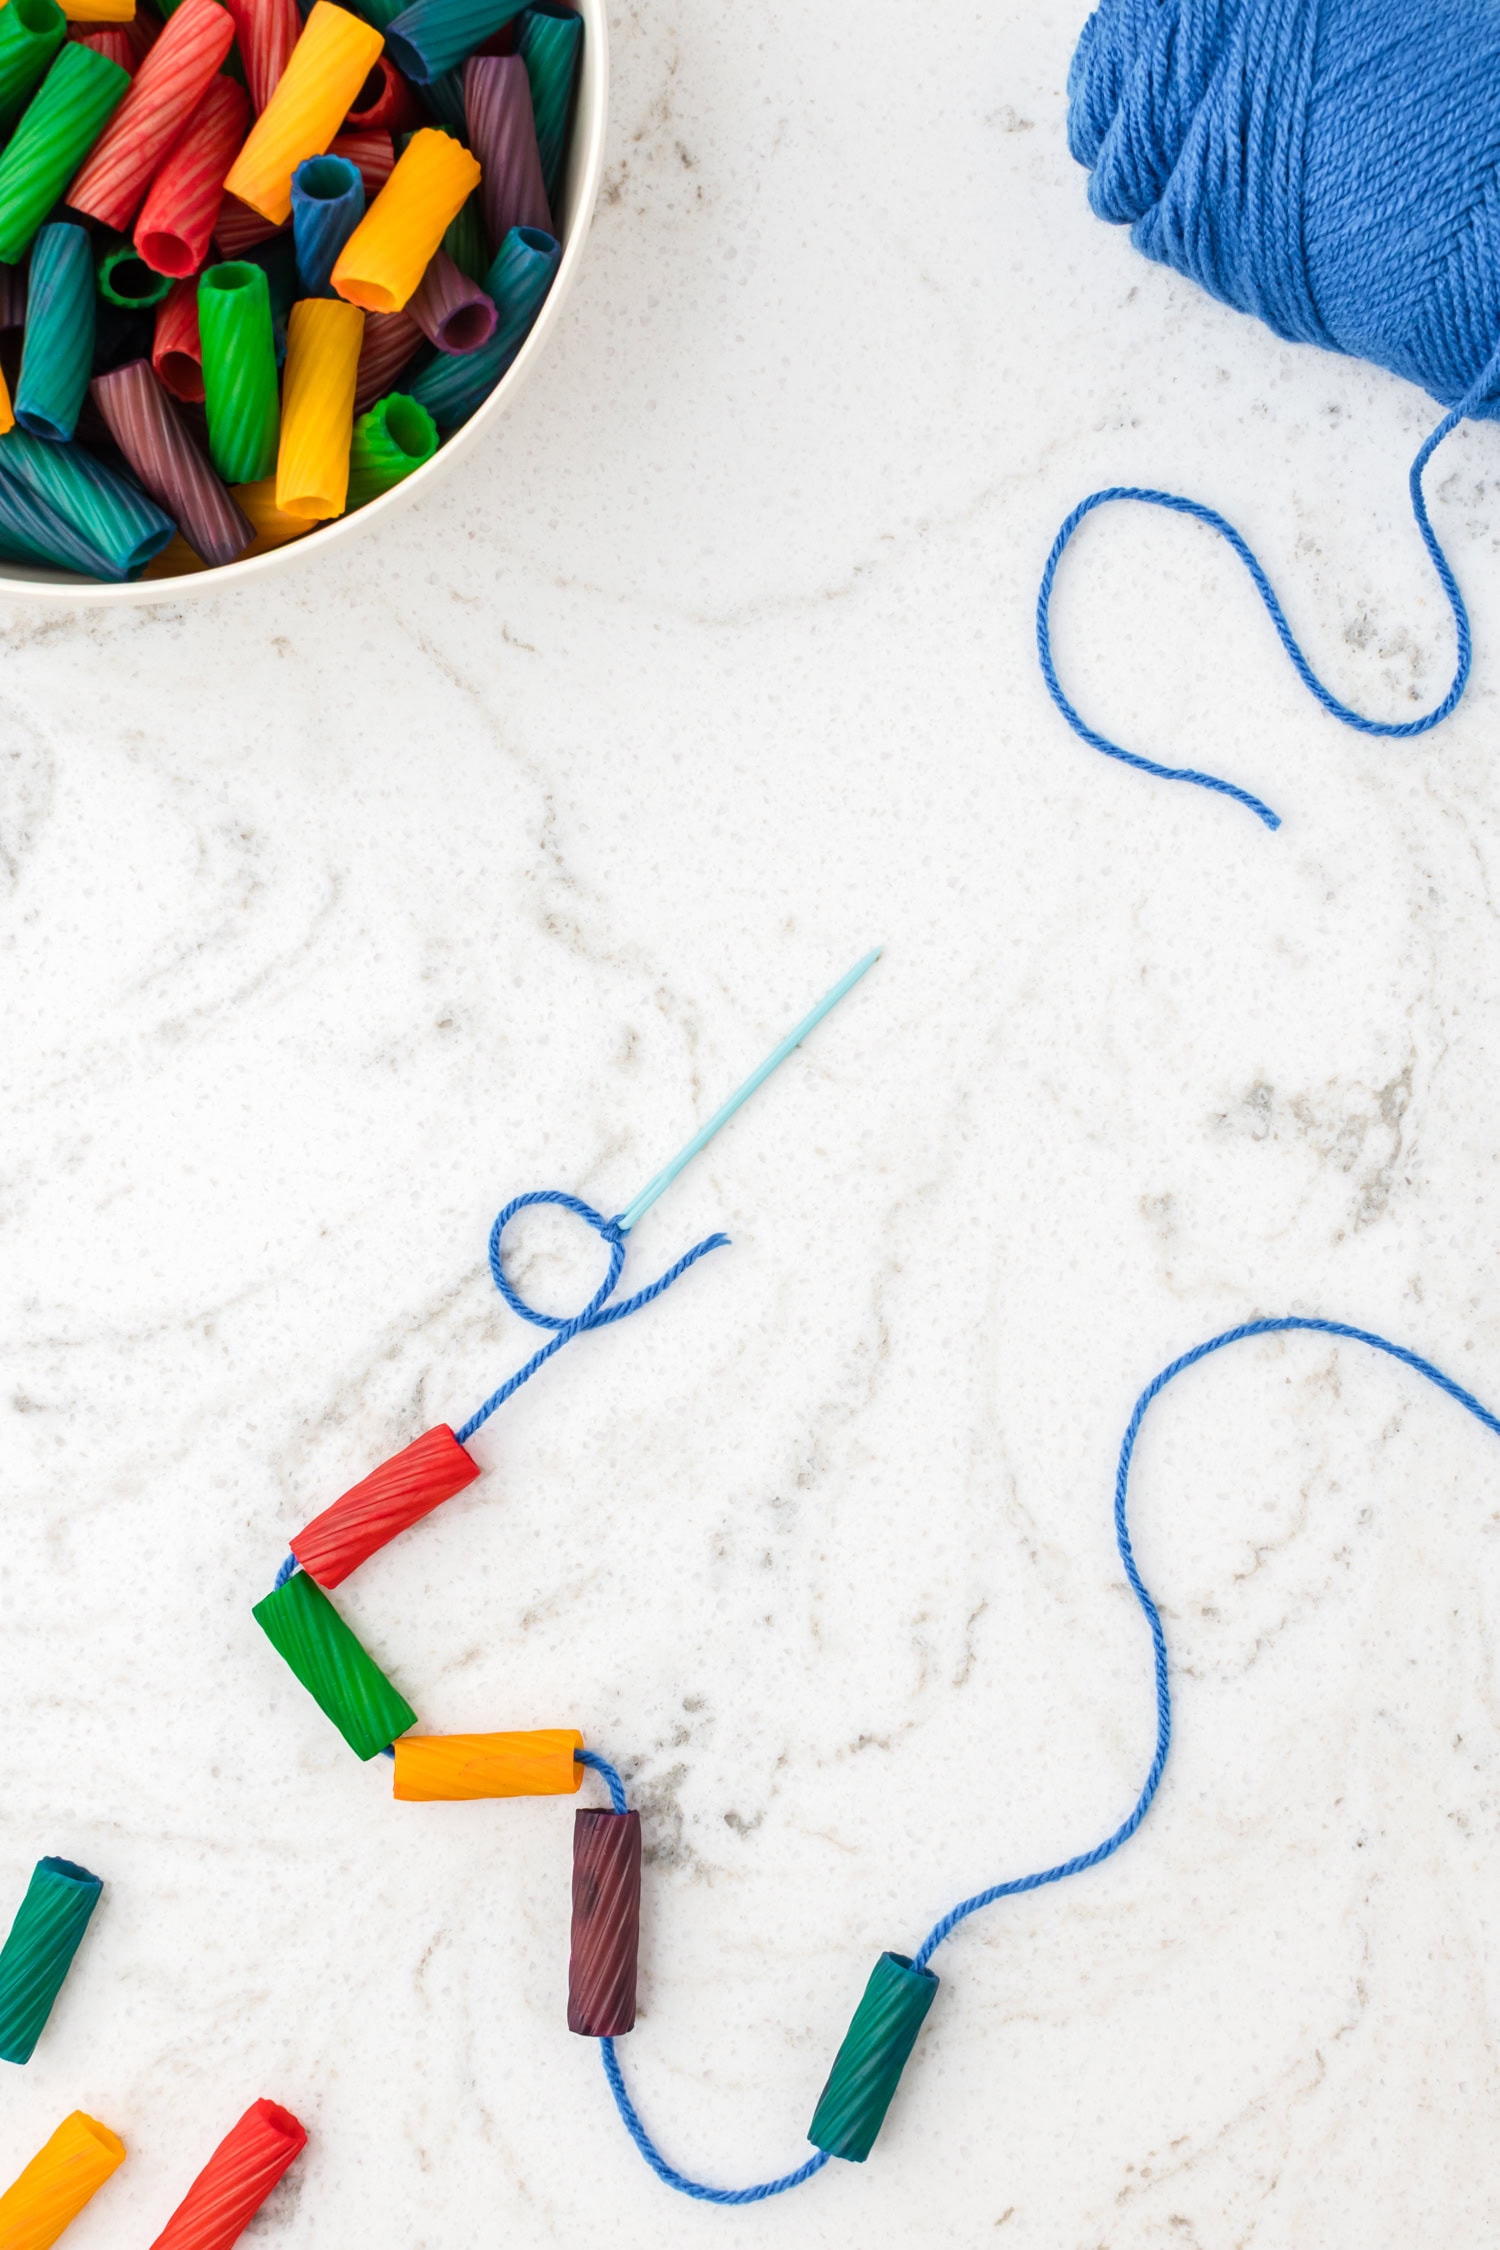
- After the pasta is fully dry, you are ready to turn it into a necklace. Cut a piece of yarn to the length you want. Slide a plastic needle onto one end of the yarn to make threading easier.
- Start stringing the pasta onto the yarn, leaving some extra space at each end for tying. Alternate colors as you string the pasta. When you are done adding noodles, tie the ends of the yarn together.

Pro Tips
- If you are using multiple colors, you may want more than one baking sheet so everything has space to dry.
- If you see any leftover dye collecting underneath, transfer the pasta to a paper towel and let it air dry for a few more minutes.
- If you are setting up this activity for a party, I recommend dyeing the pasta ahead of time.
- You don’t have to color the pasta. You can skip the dye step and use plain pasta if you prefer a more natural look.
- You may need to add more drops of food coloring, depending on the type you use and the vibrance of the color you want to achieve.
Making colorful pasta necklaces is such a fun activity to get creative and pass the time. The kids are going to love creating beautiful jewelry.
How to Make Pasta Necklaces
Ingredients
- 16 ounces Rigatoni pasta (1 box)
- Food coloring any color
- Rubbing alcohol
- Zip-lock bags one bag per color
- Yarn
- Scissors
- Plastic needle
- Cookie sheet
- Parchment paper
Instructions
- Line a large cookie sheet with parchment paper and set it aside.
- Add about 1 cup of dry rigatoni pasta to a zip-lock bag. Pour in 1 teaspoon of rubbing alcohol and add about 20 drops of food coloring. Zip the bag closed and gently shake it around, using your hands to move the pasta so the color coats all sides of the noodles. Repeat this step for each color you want to make.
- Open the bag and dump the colored pasta onto your parchment-lined baking sheet, spreading the pieces out so they are not touching. Let the pasta sit and dry for about 30 minutes.
- After the pasta is fully dry, you are ready to turn it into a necklace. Cut a piece of yarn to the length you want. Slide a plastic needle onto one end of the yarn to make threading easier.
- Start stringing the pasta onto the yarn, leaving some extra space at each end for tying. Alternate colors as you string the pasta. When you are done adding noodles, tie the ends of the yarn together. Your pasta necklace is ready to wear or share.
More Great Crafty Activities
- Whether at home or in the classroom, Salt Dough Recipe will always come in handy. It’s simple to make and so much fun to decorate.
- Looking for a new sensory activity? Moon Sand is soft, moldable and so easy to make!
- There are so many creative ways to make slime, but my favorite is Pudding Slime. You only need 4 simple ingredients and it always smells so good.
- For the bird and animal loving kids, a homemade Bird Feeder is a great project any time. The best part is picking out a shape that the birds will love!
I can’t wait to color the pasta for my great grandkids and take it over to them so they can make necklaces. I love take craft projects over to them and teaching them new skills.
I can’t wait to see what else you send my way.
These are so fun to make, and my kids are still running around wearing them! Thanks!