Crayon Craft
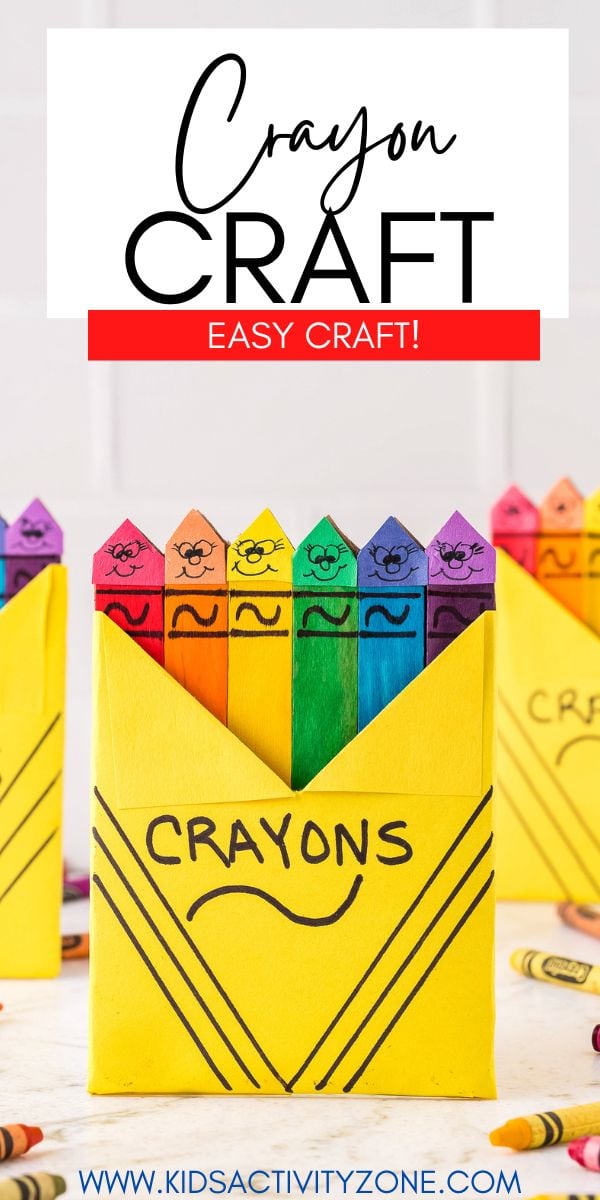
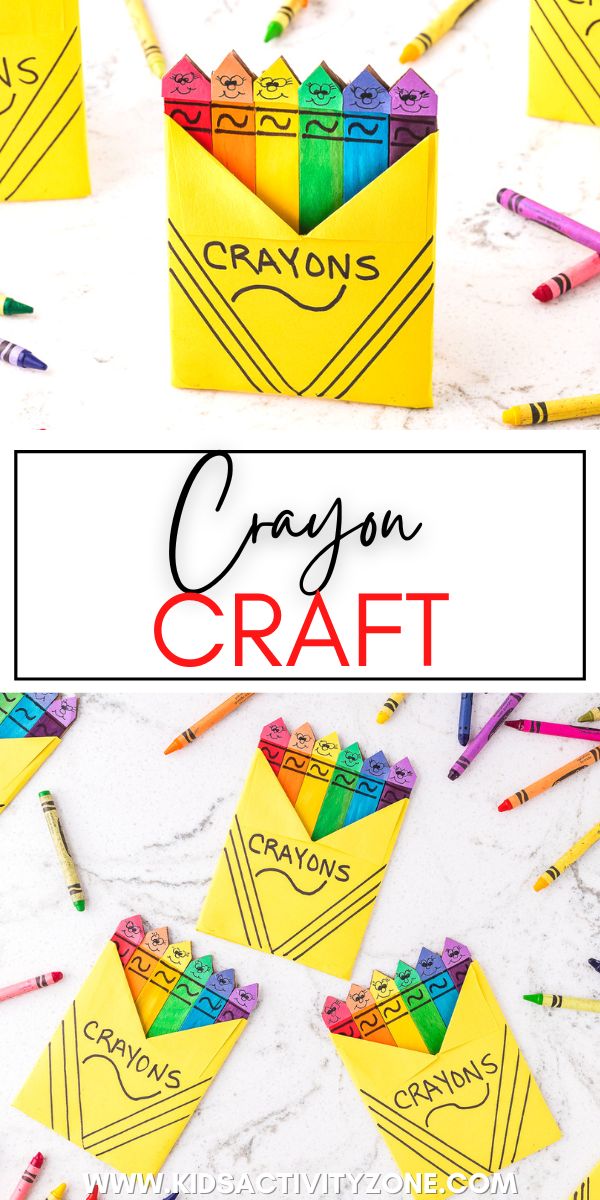
Celebrate back to school with this fun Crayon Craft! Gather your supplies, most of which you already have on hand, and decorate them to crate a box of crayons. It’s a great first day of school gift for your teachers, classroom project for your students or perfect for decorating the classroom.
Bright, fun and cute Crayon Box Craft is perfect for back to school season! The best part is impressive, but takes minimal supplies and you might even have them on hand already!
Old kids will have fun making this on their own, or little kids help assemble it. It’s also perfect for decorating your classroom. Instead of writing crayons on the box write each of your student’s names to welcome them to school this year!
Supplies Needed for Crayon Box Craft
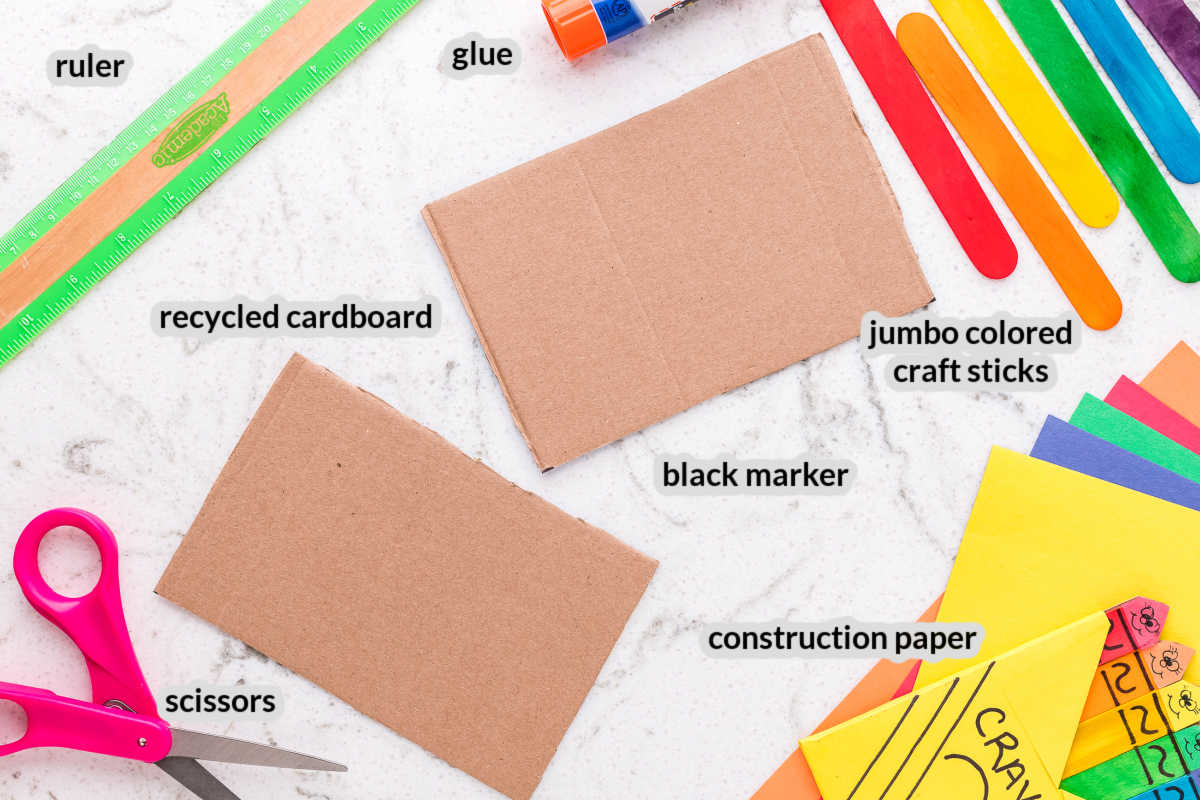
- Recycled cardboard
- Ruler
- Scissors
- Glue stick
- Jumbo-colored craft sticks, red, orange, yellow, green, blue, and purple
- Construction paper, red, orange, yellow, green, blue, and purple
- Black marker
Create the Colors!
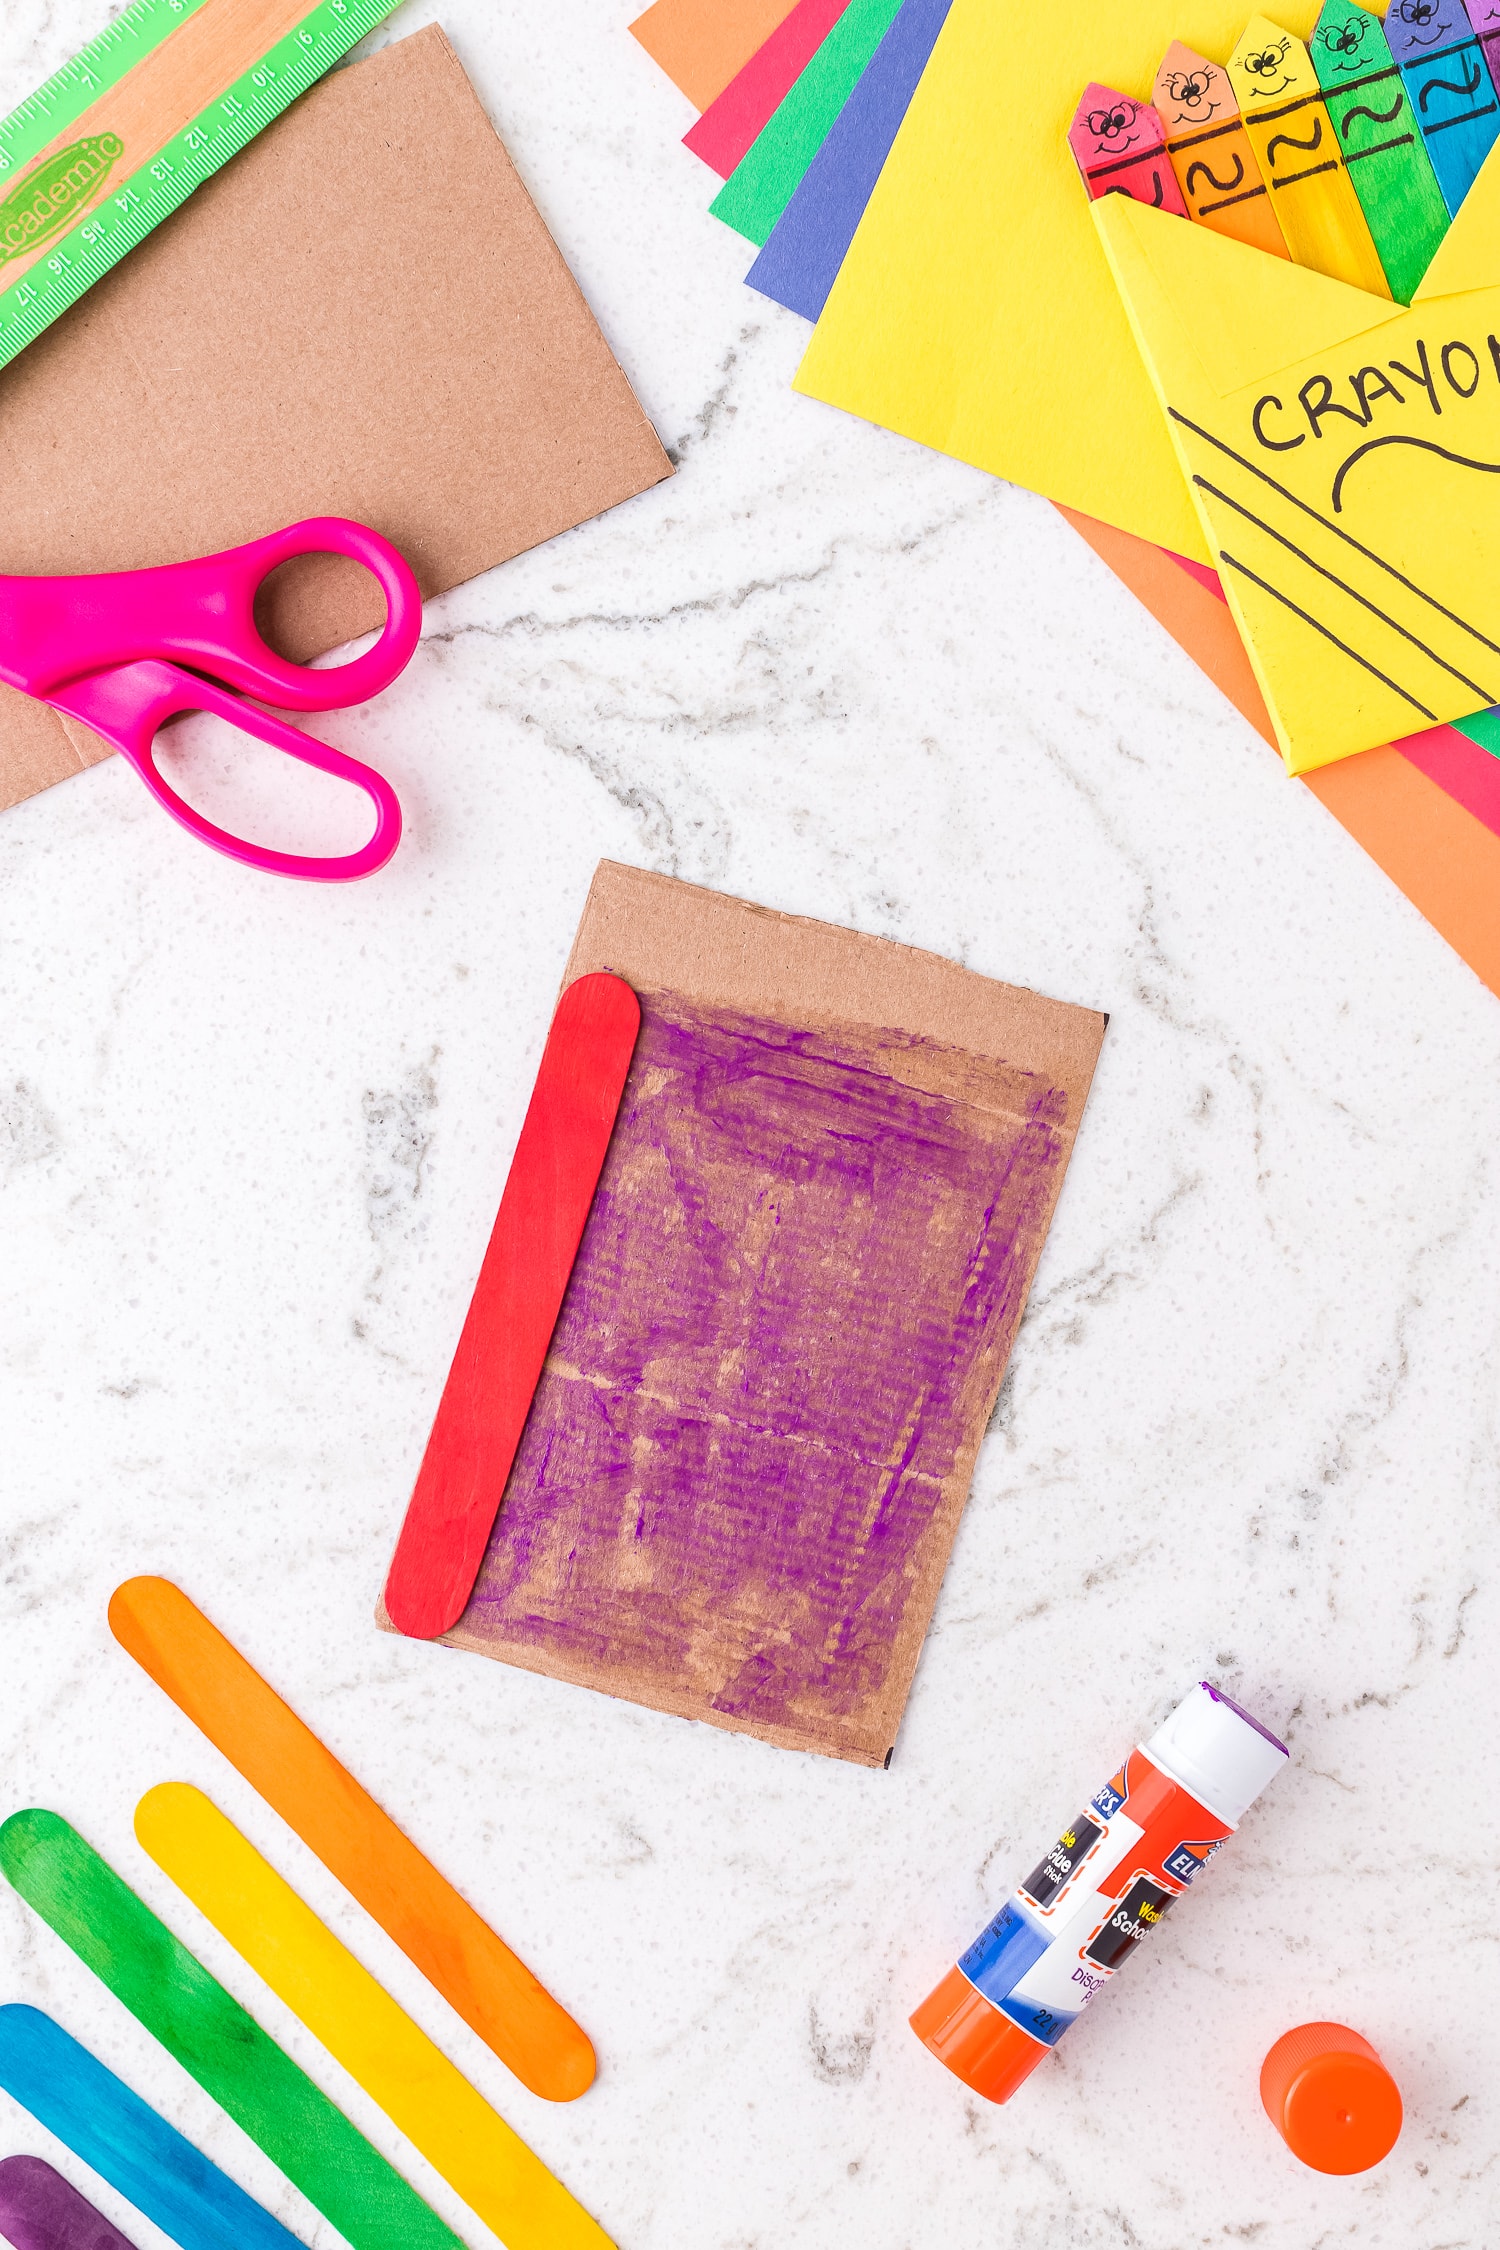
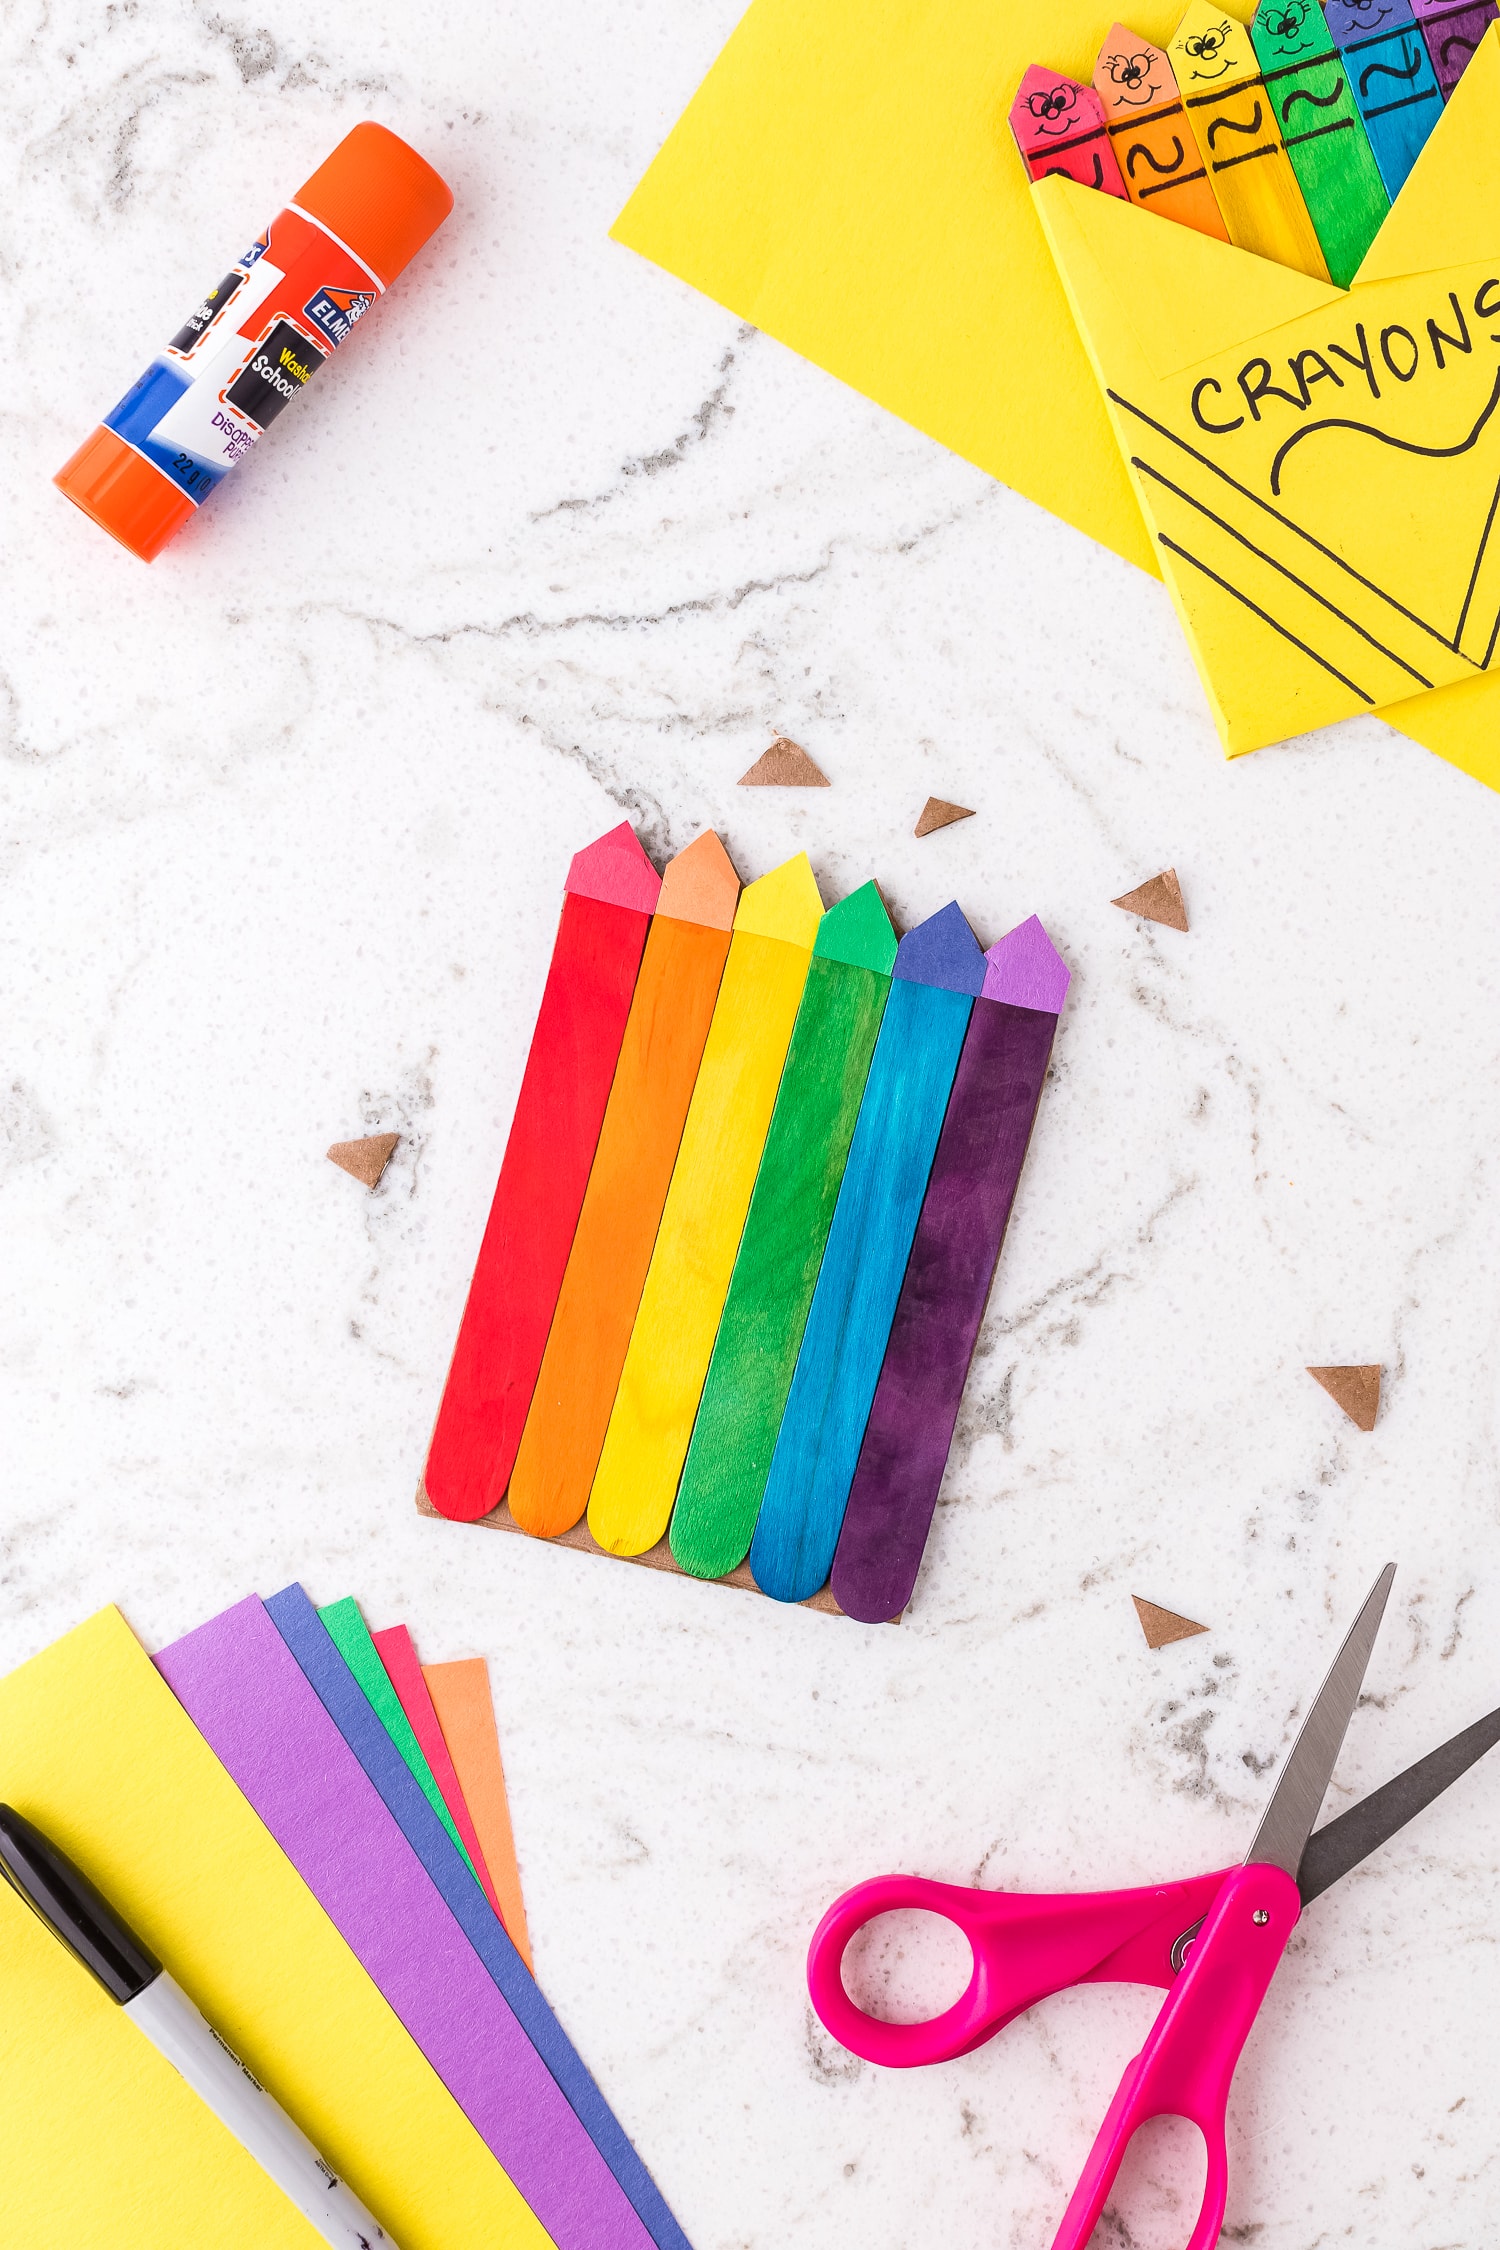
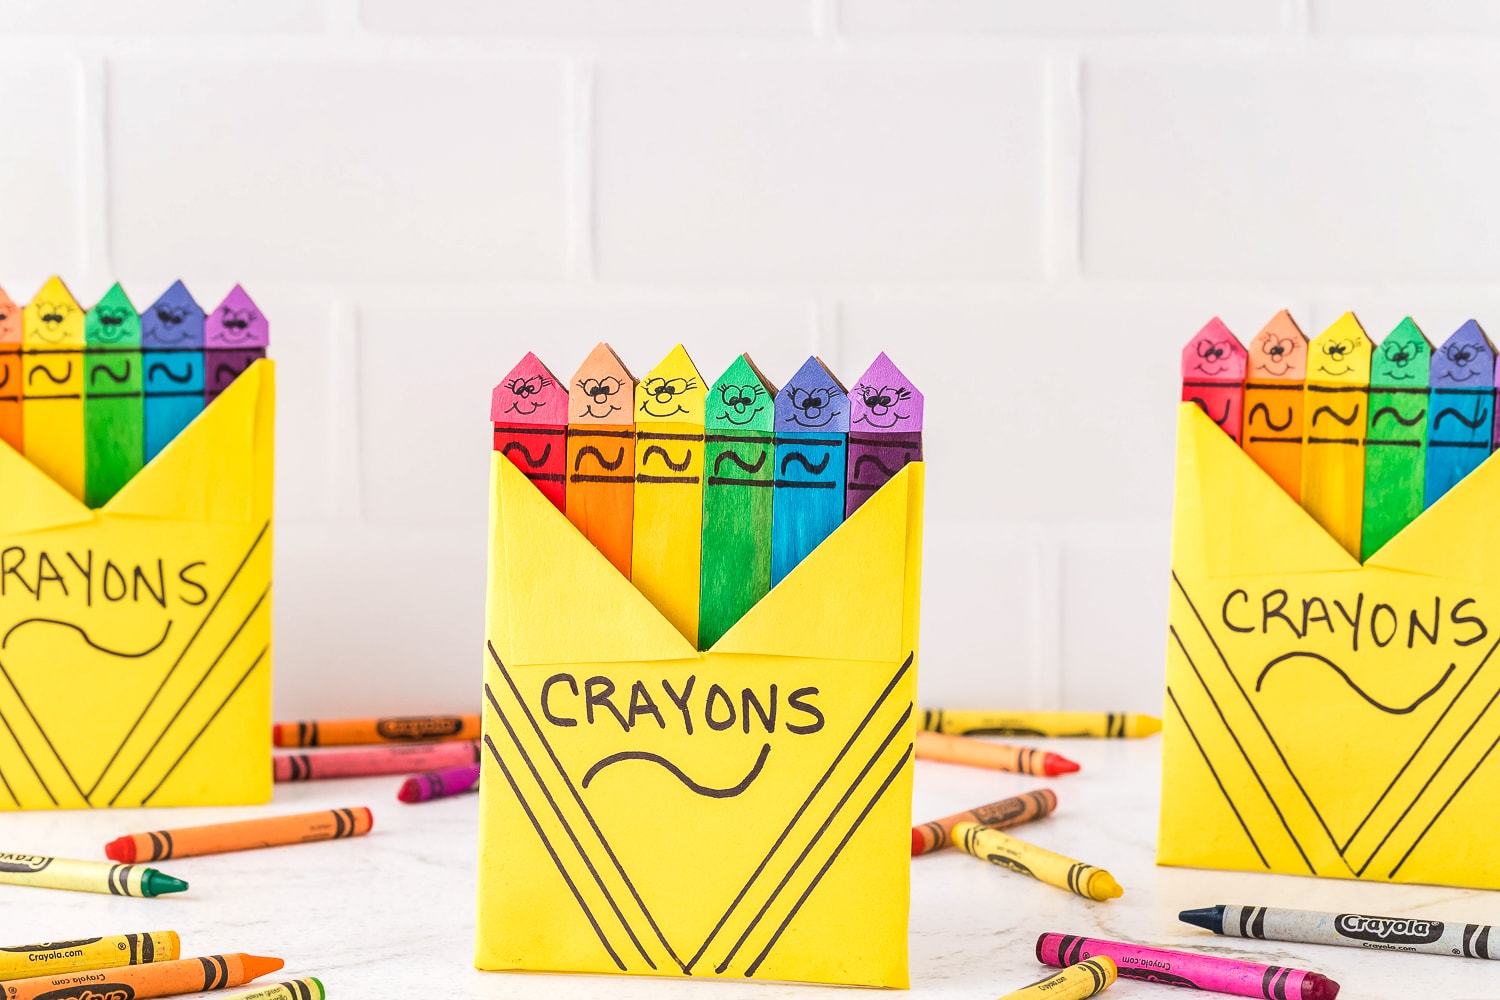
First, cut the recycled cardboard into a 6 ½ inch x 4 ½ inch rectangle.
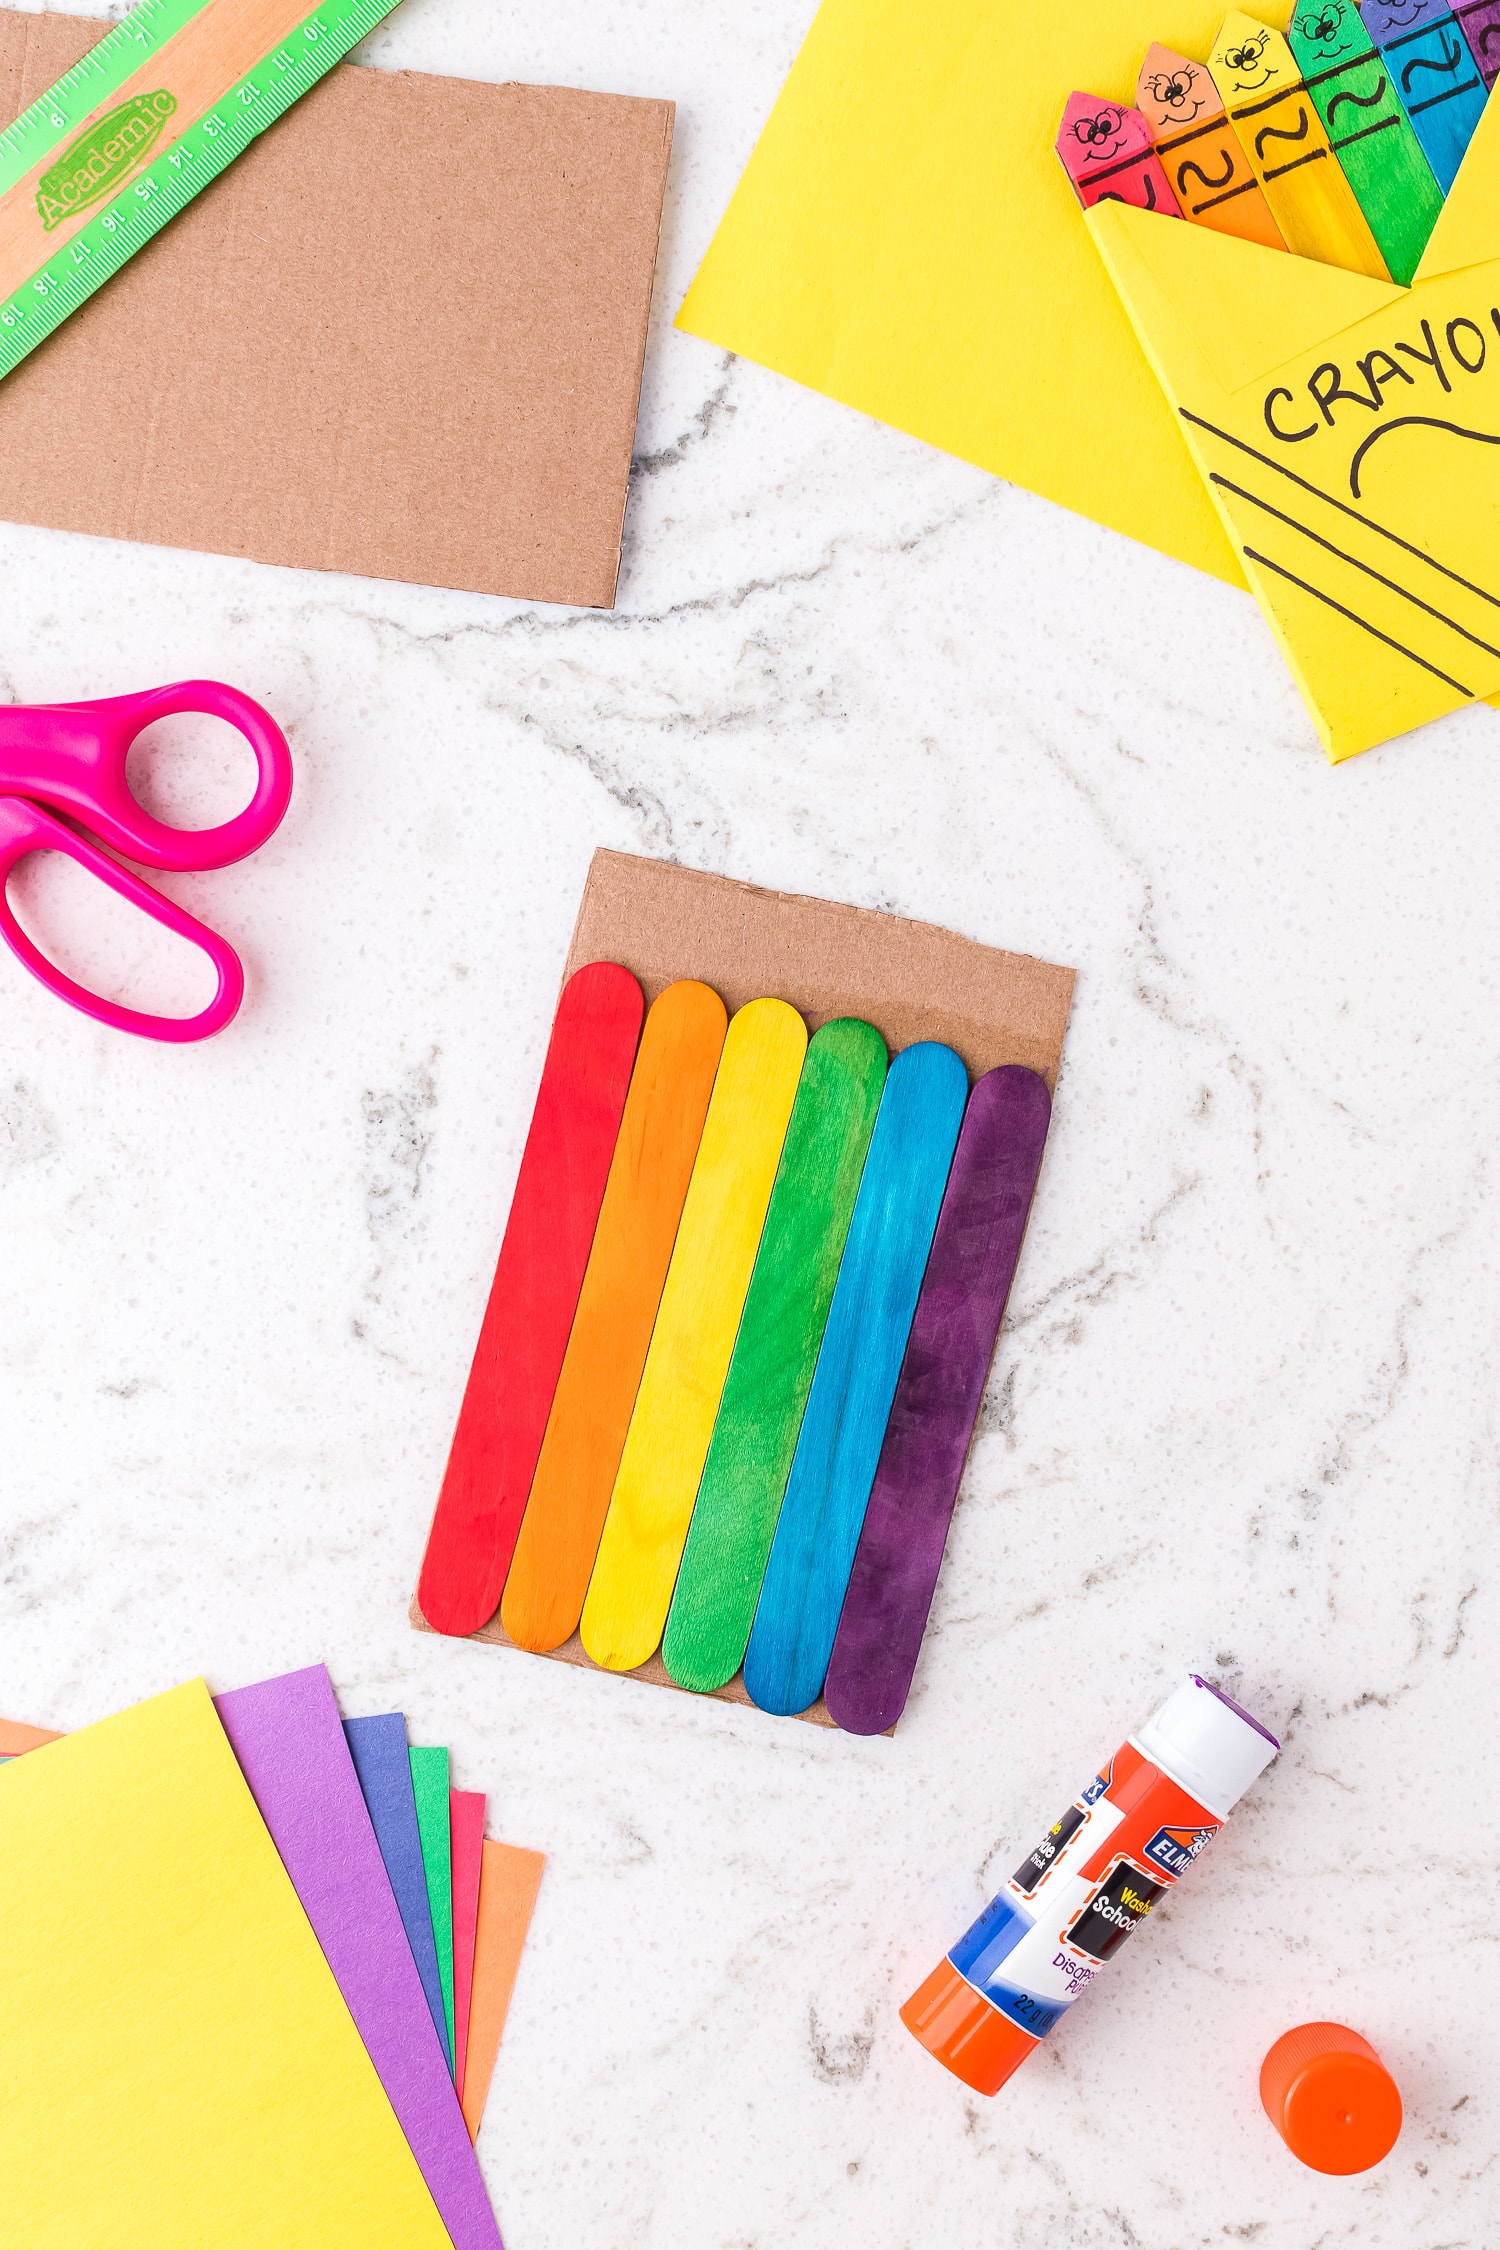
Now let’s attach our crayons! Using the colored jumbo craft sticks, affix each color to the cardboard with a glue stick and press to secure.
Once all the sticks are secure and lined up evenly, take a book or other heavy item and place it on top. Allow the crayons to dry for at least 5 minutes.
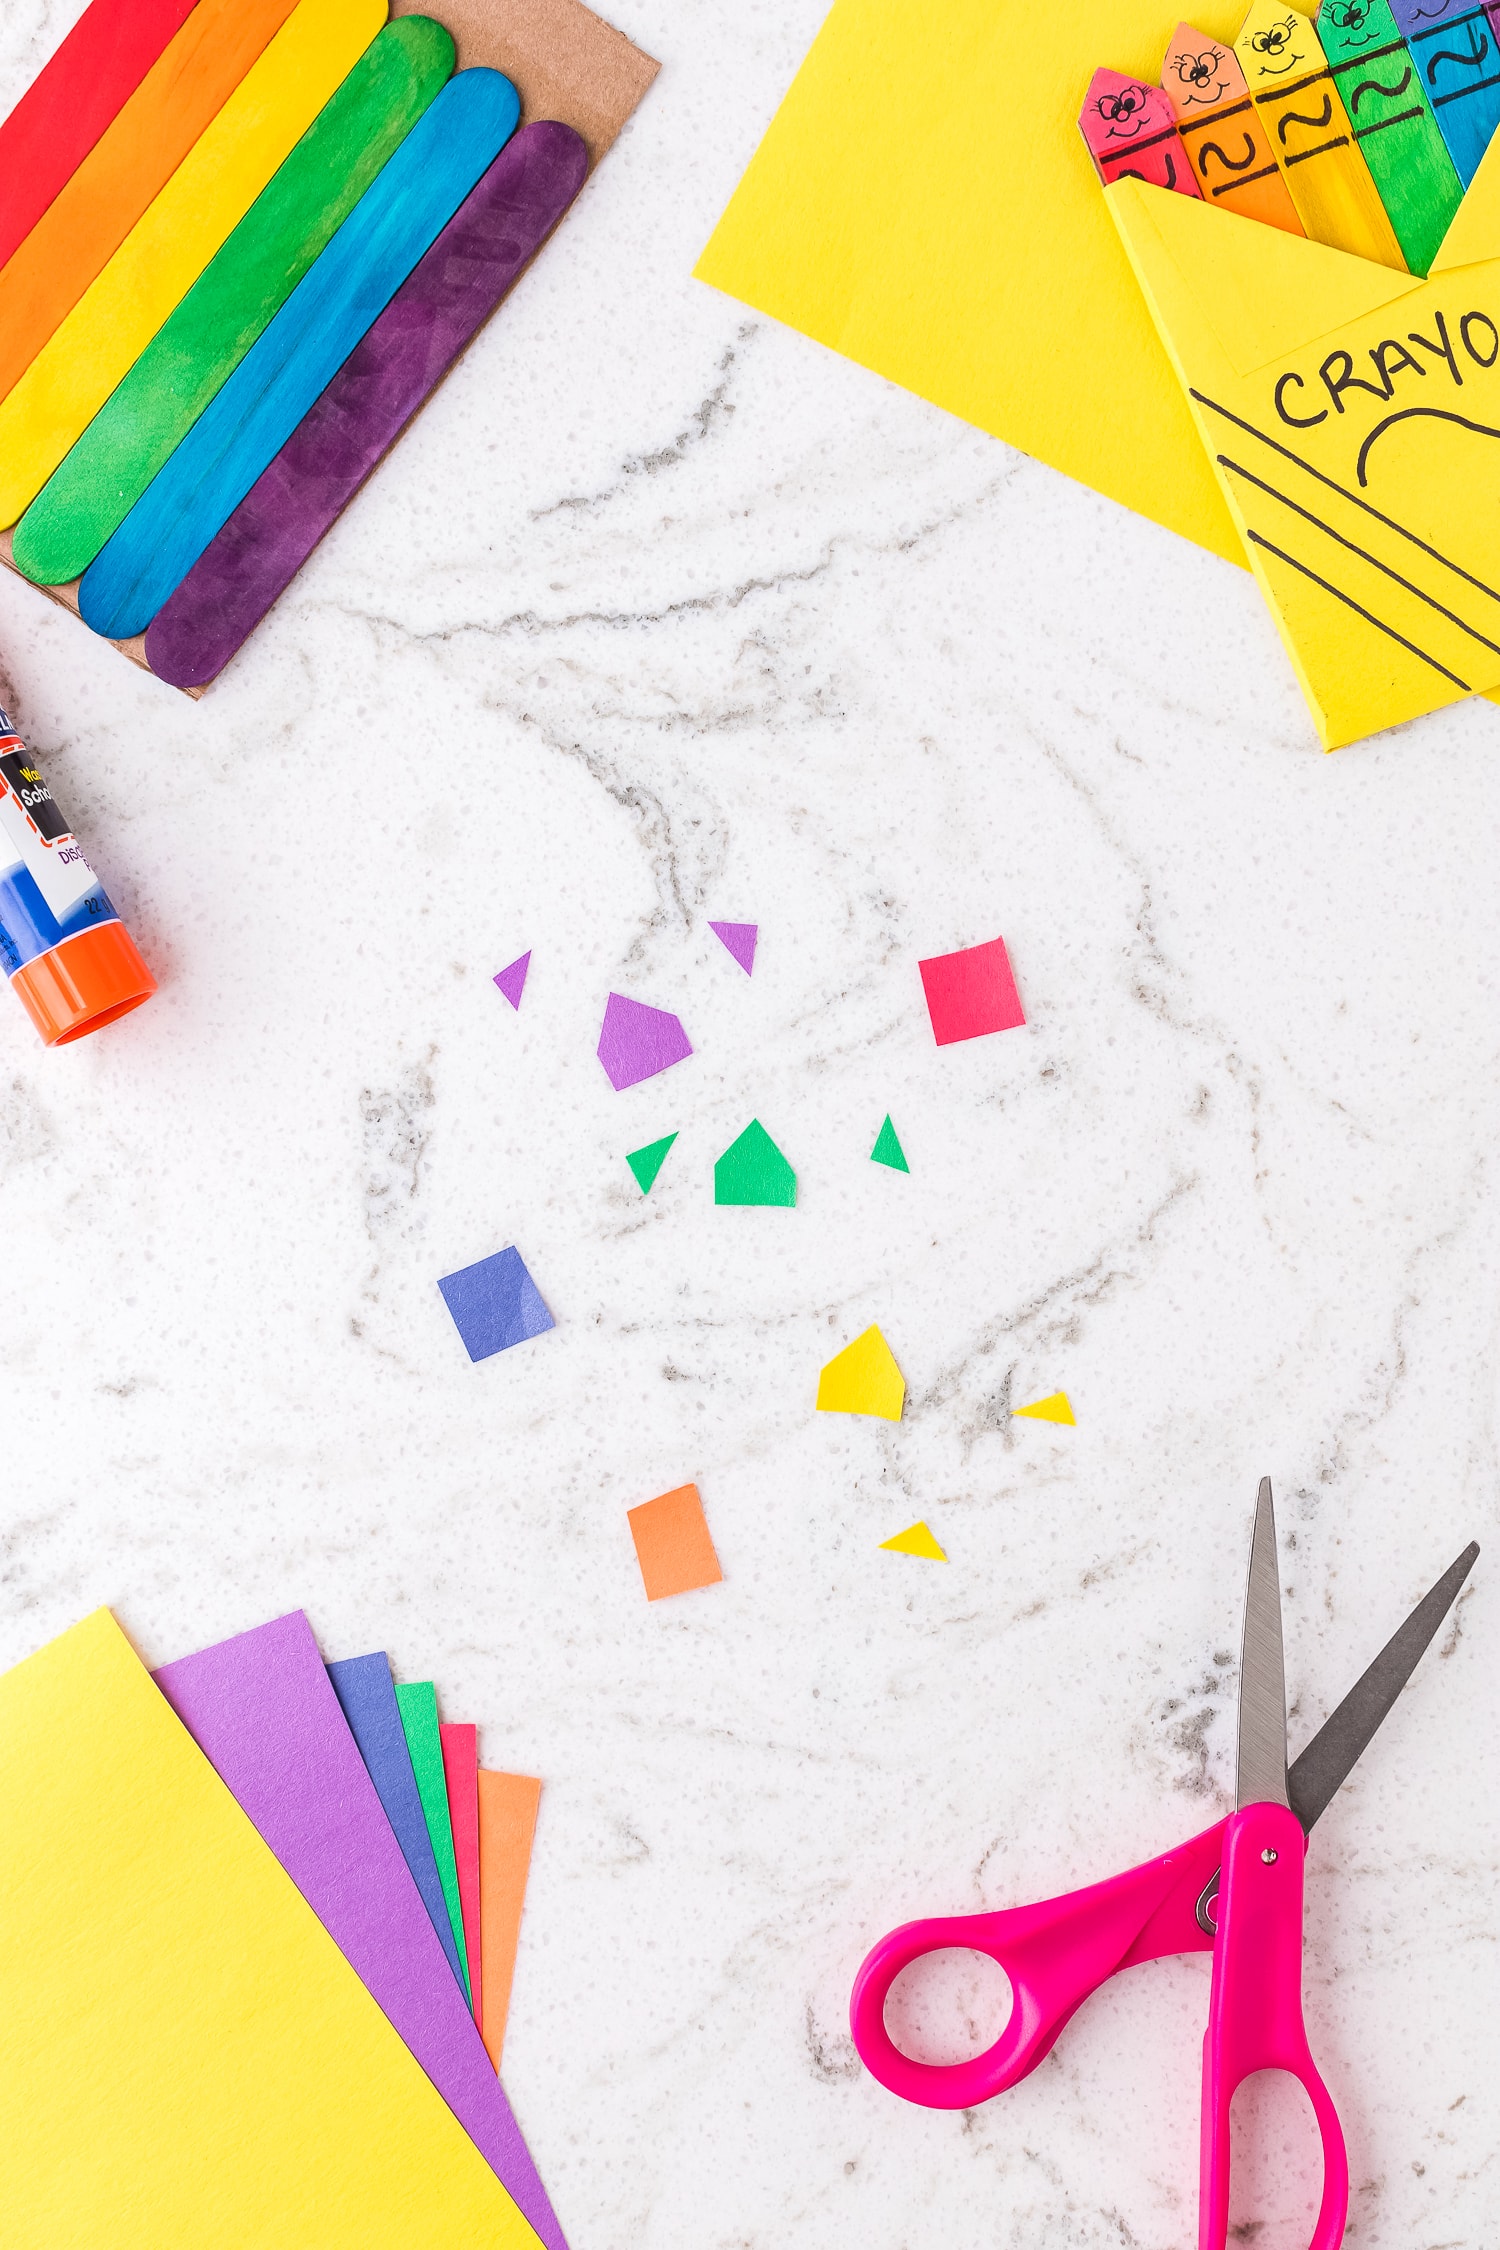
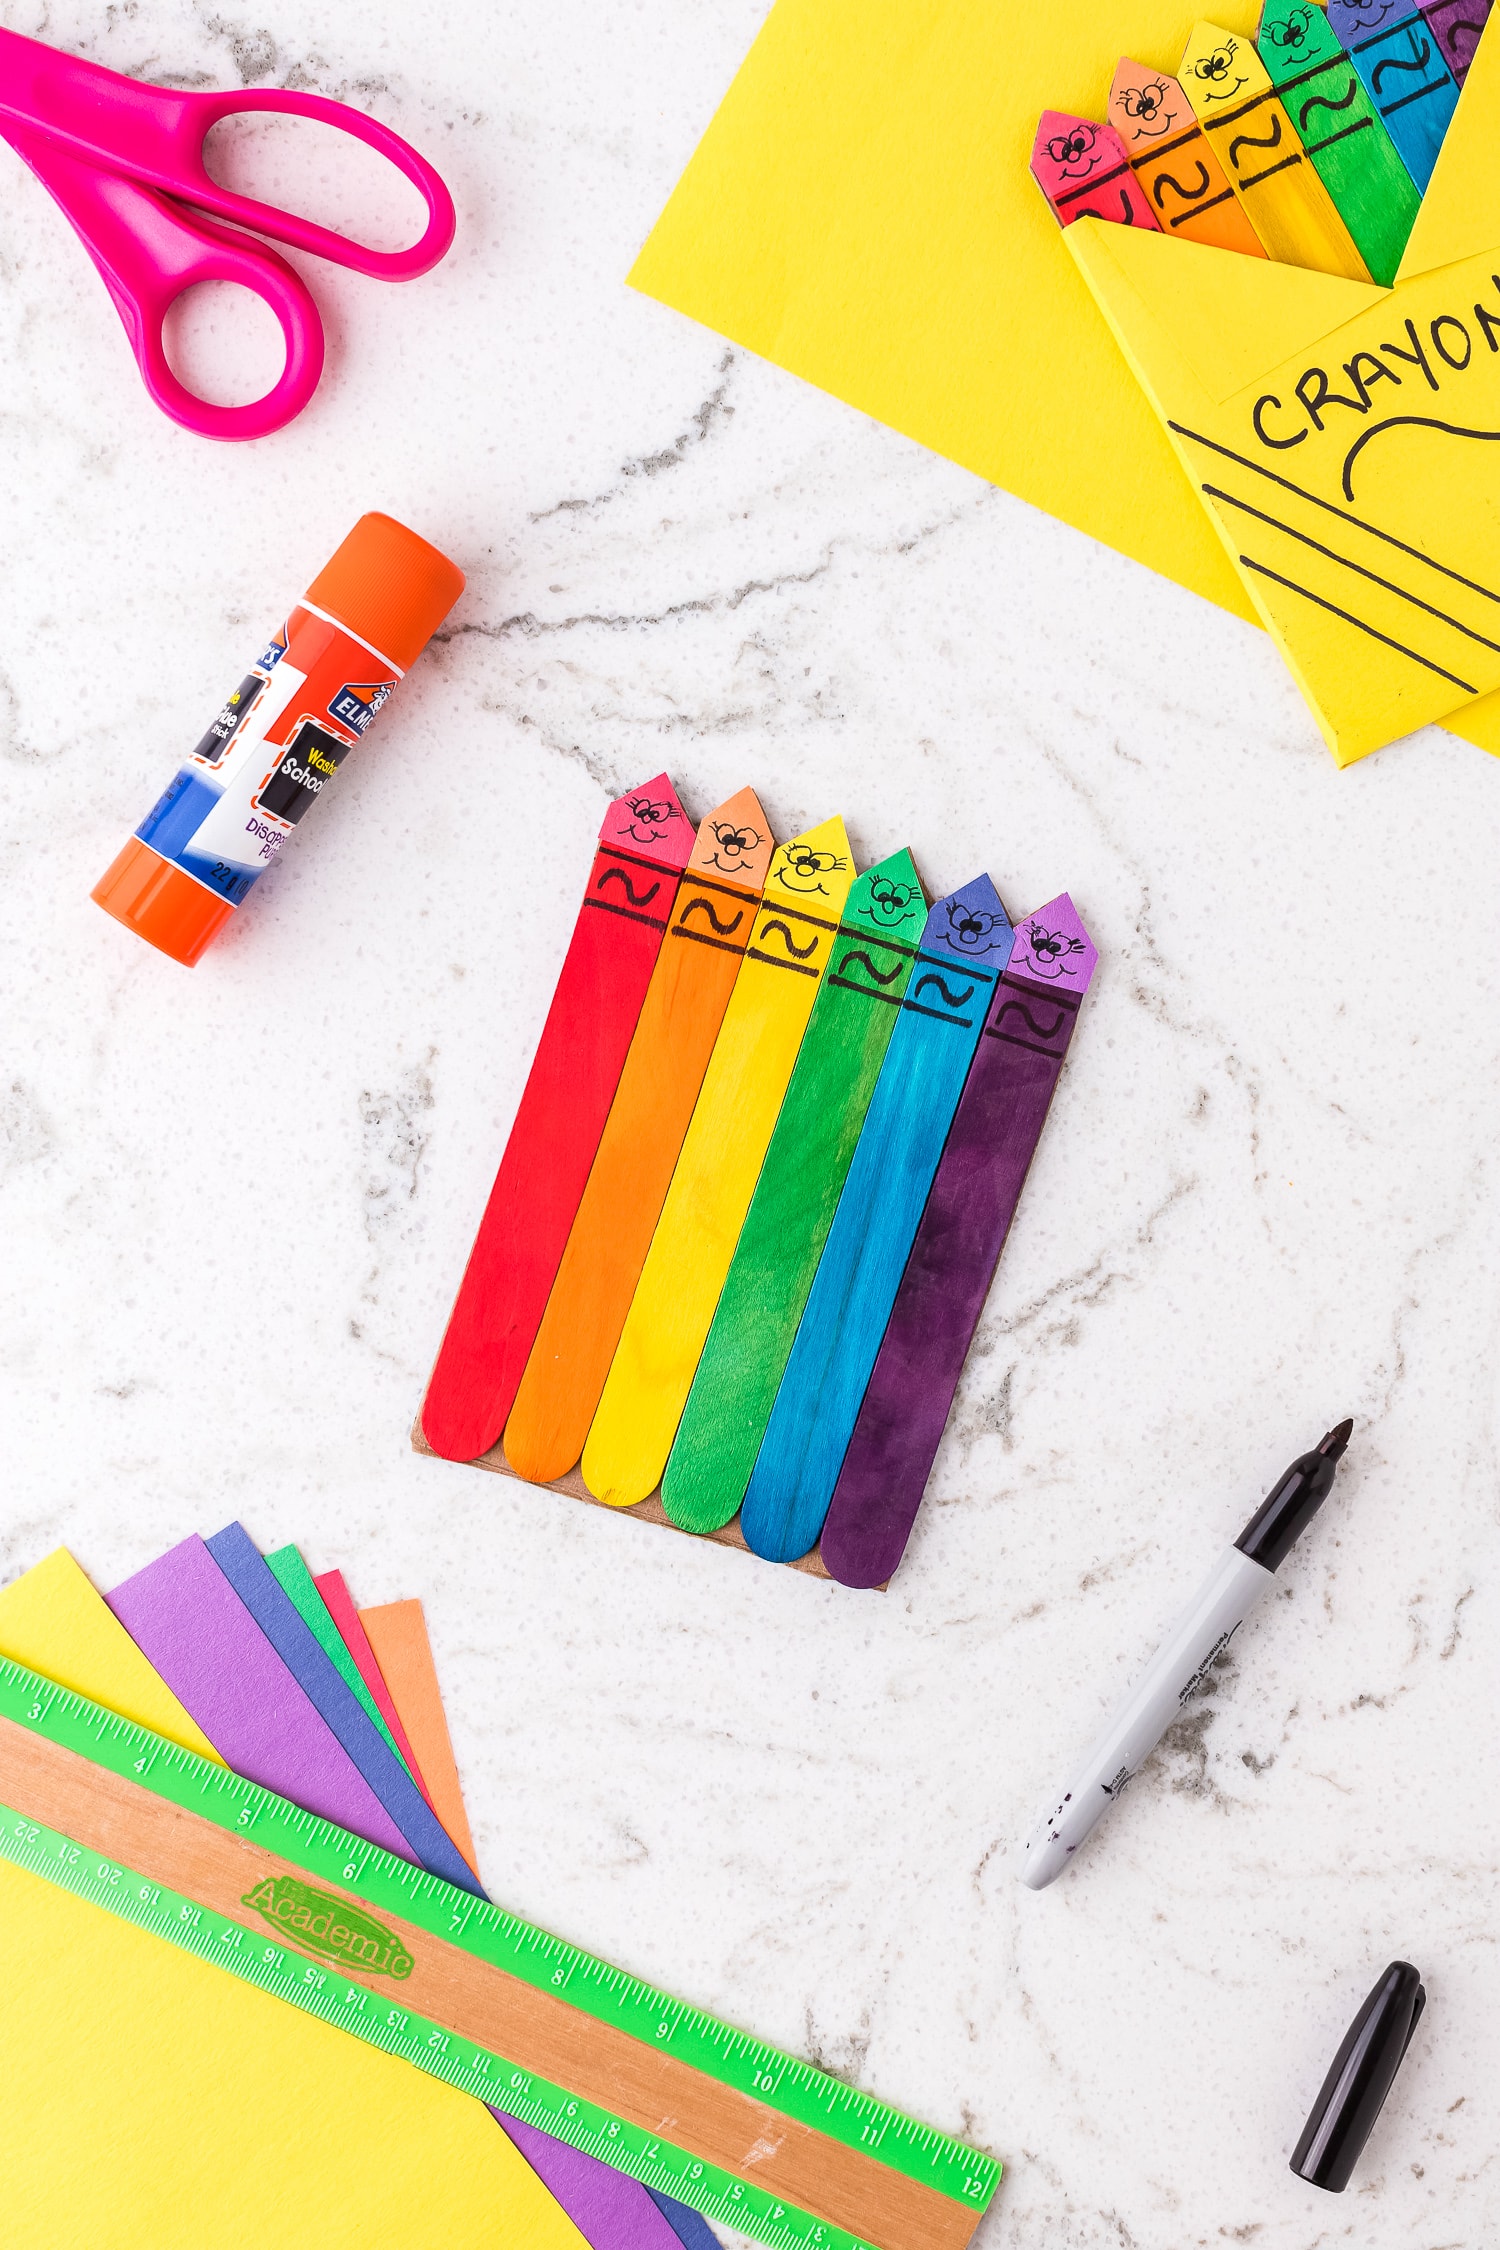
While the crayons are drying, let’s make the “crayon tips.” Cut a small square of each color of construction paper. Cut the top of each square to a point by cutting each corner to create the crayon tip.
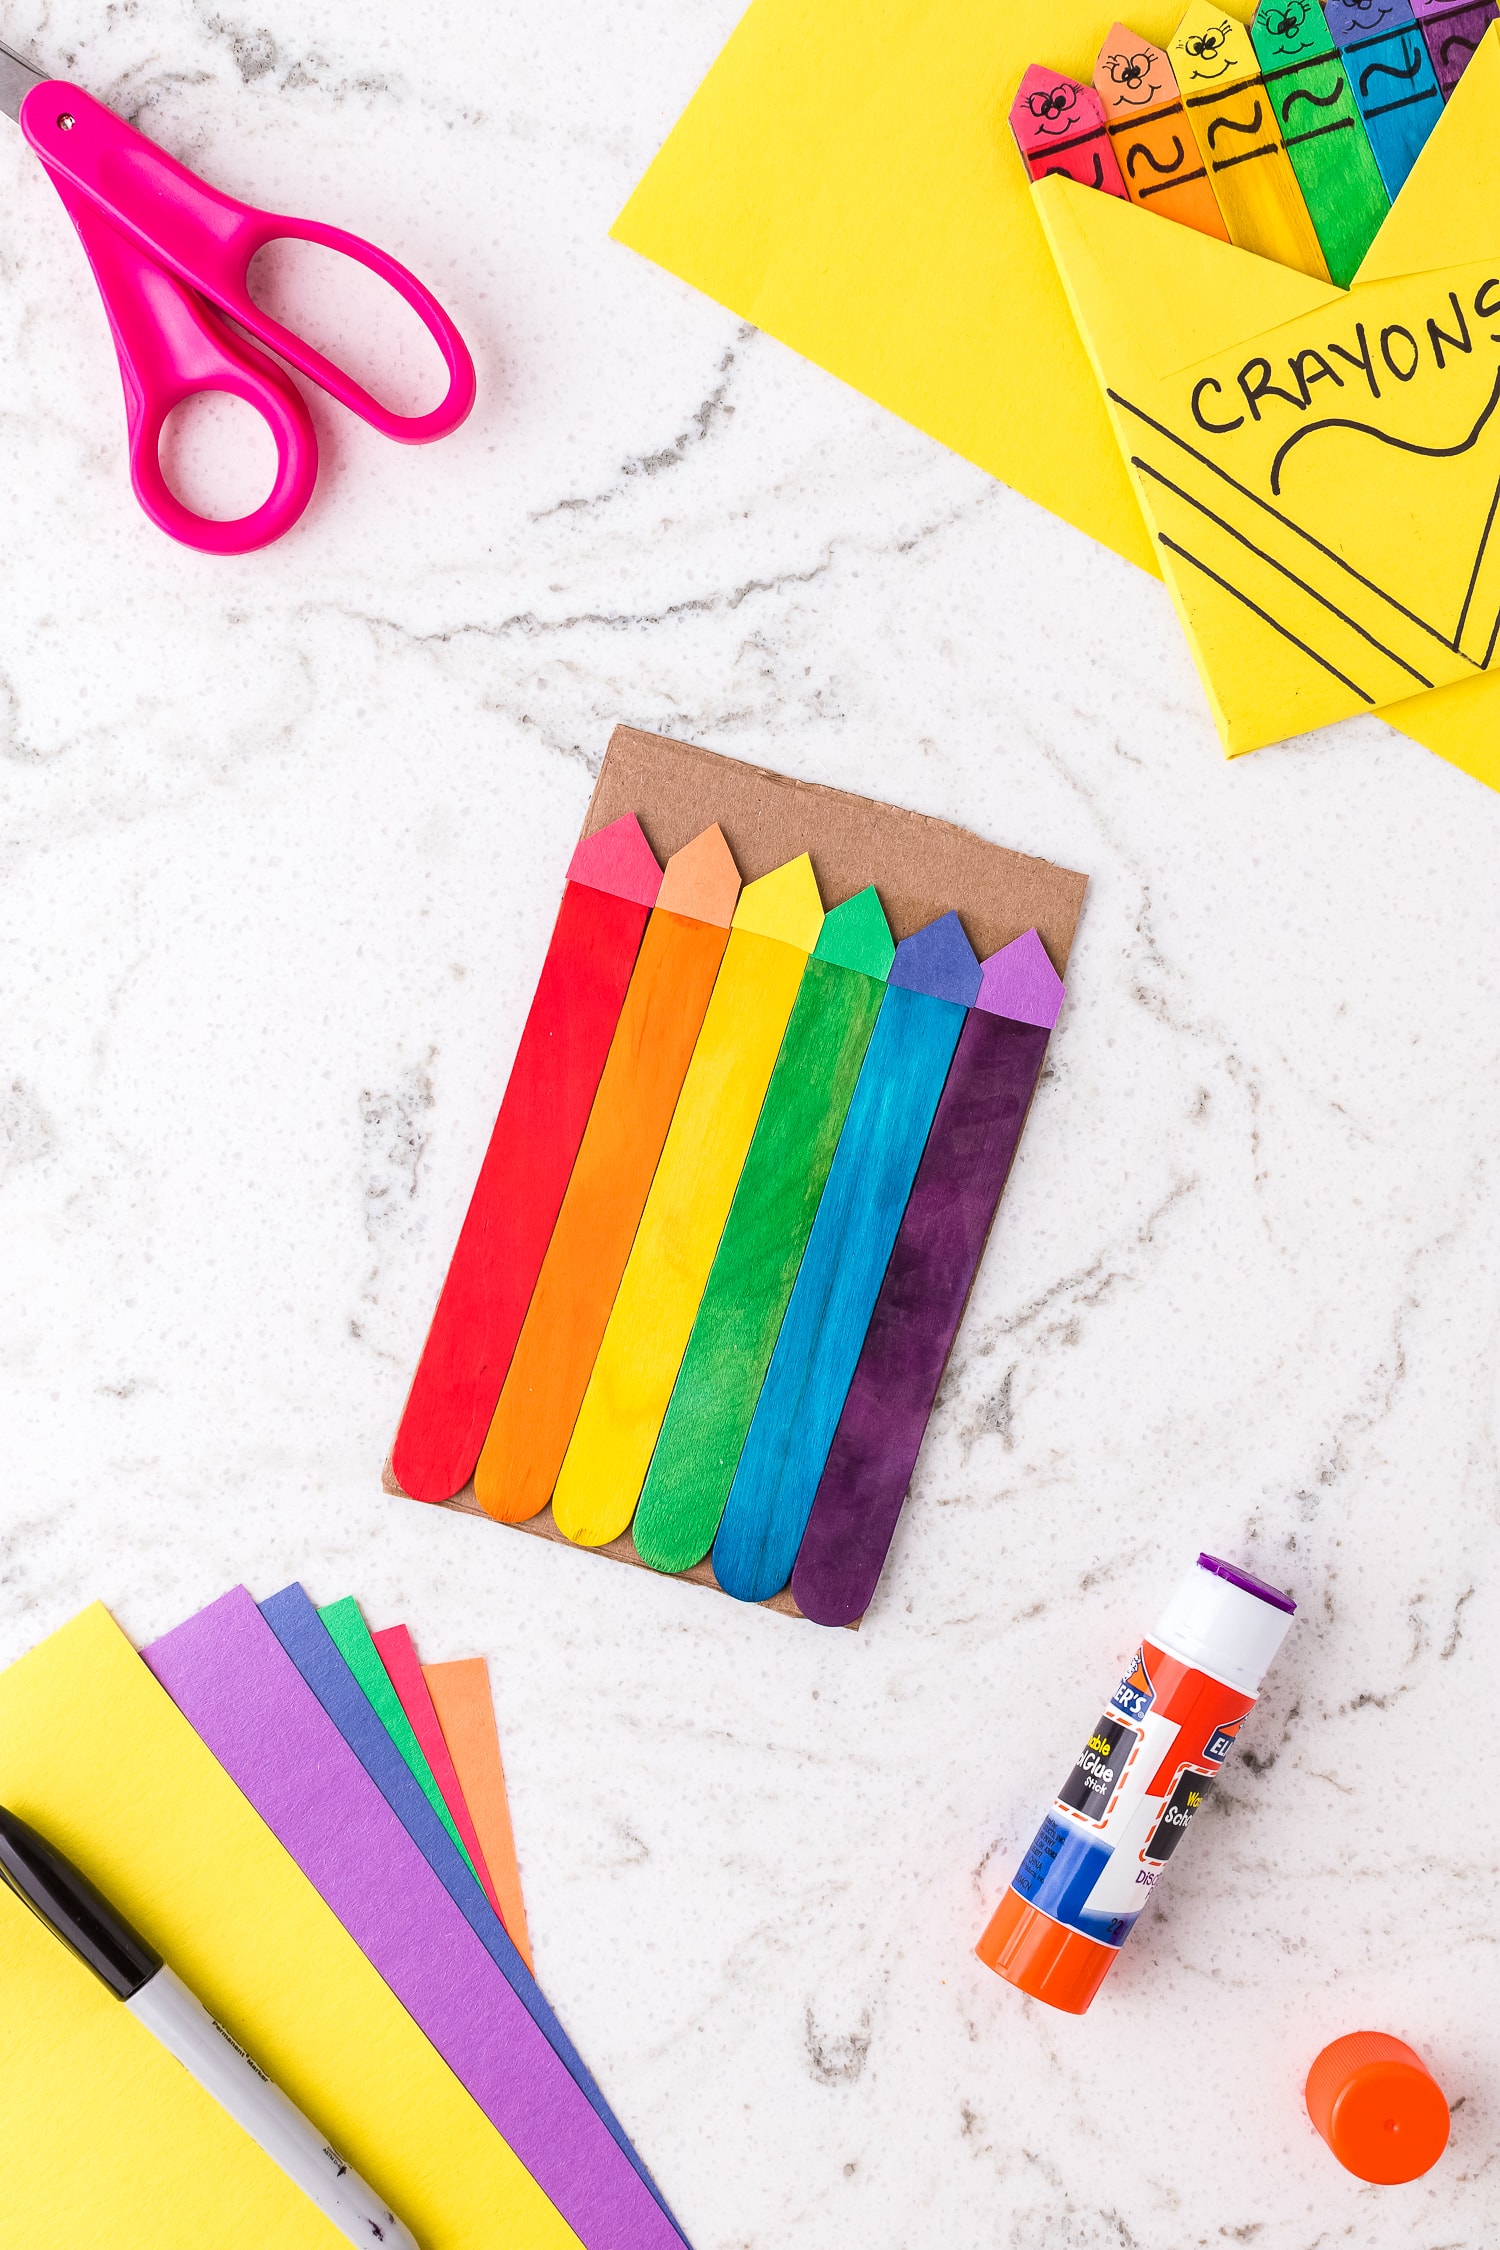
Glue the “crayon tips” on each crayon according to color and allow to dry for a few minutes. Cut the excess cardboard around the tips of the crayons.
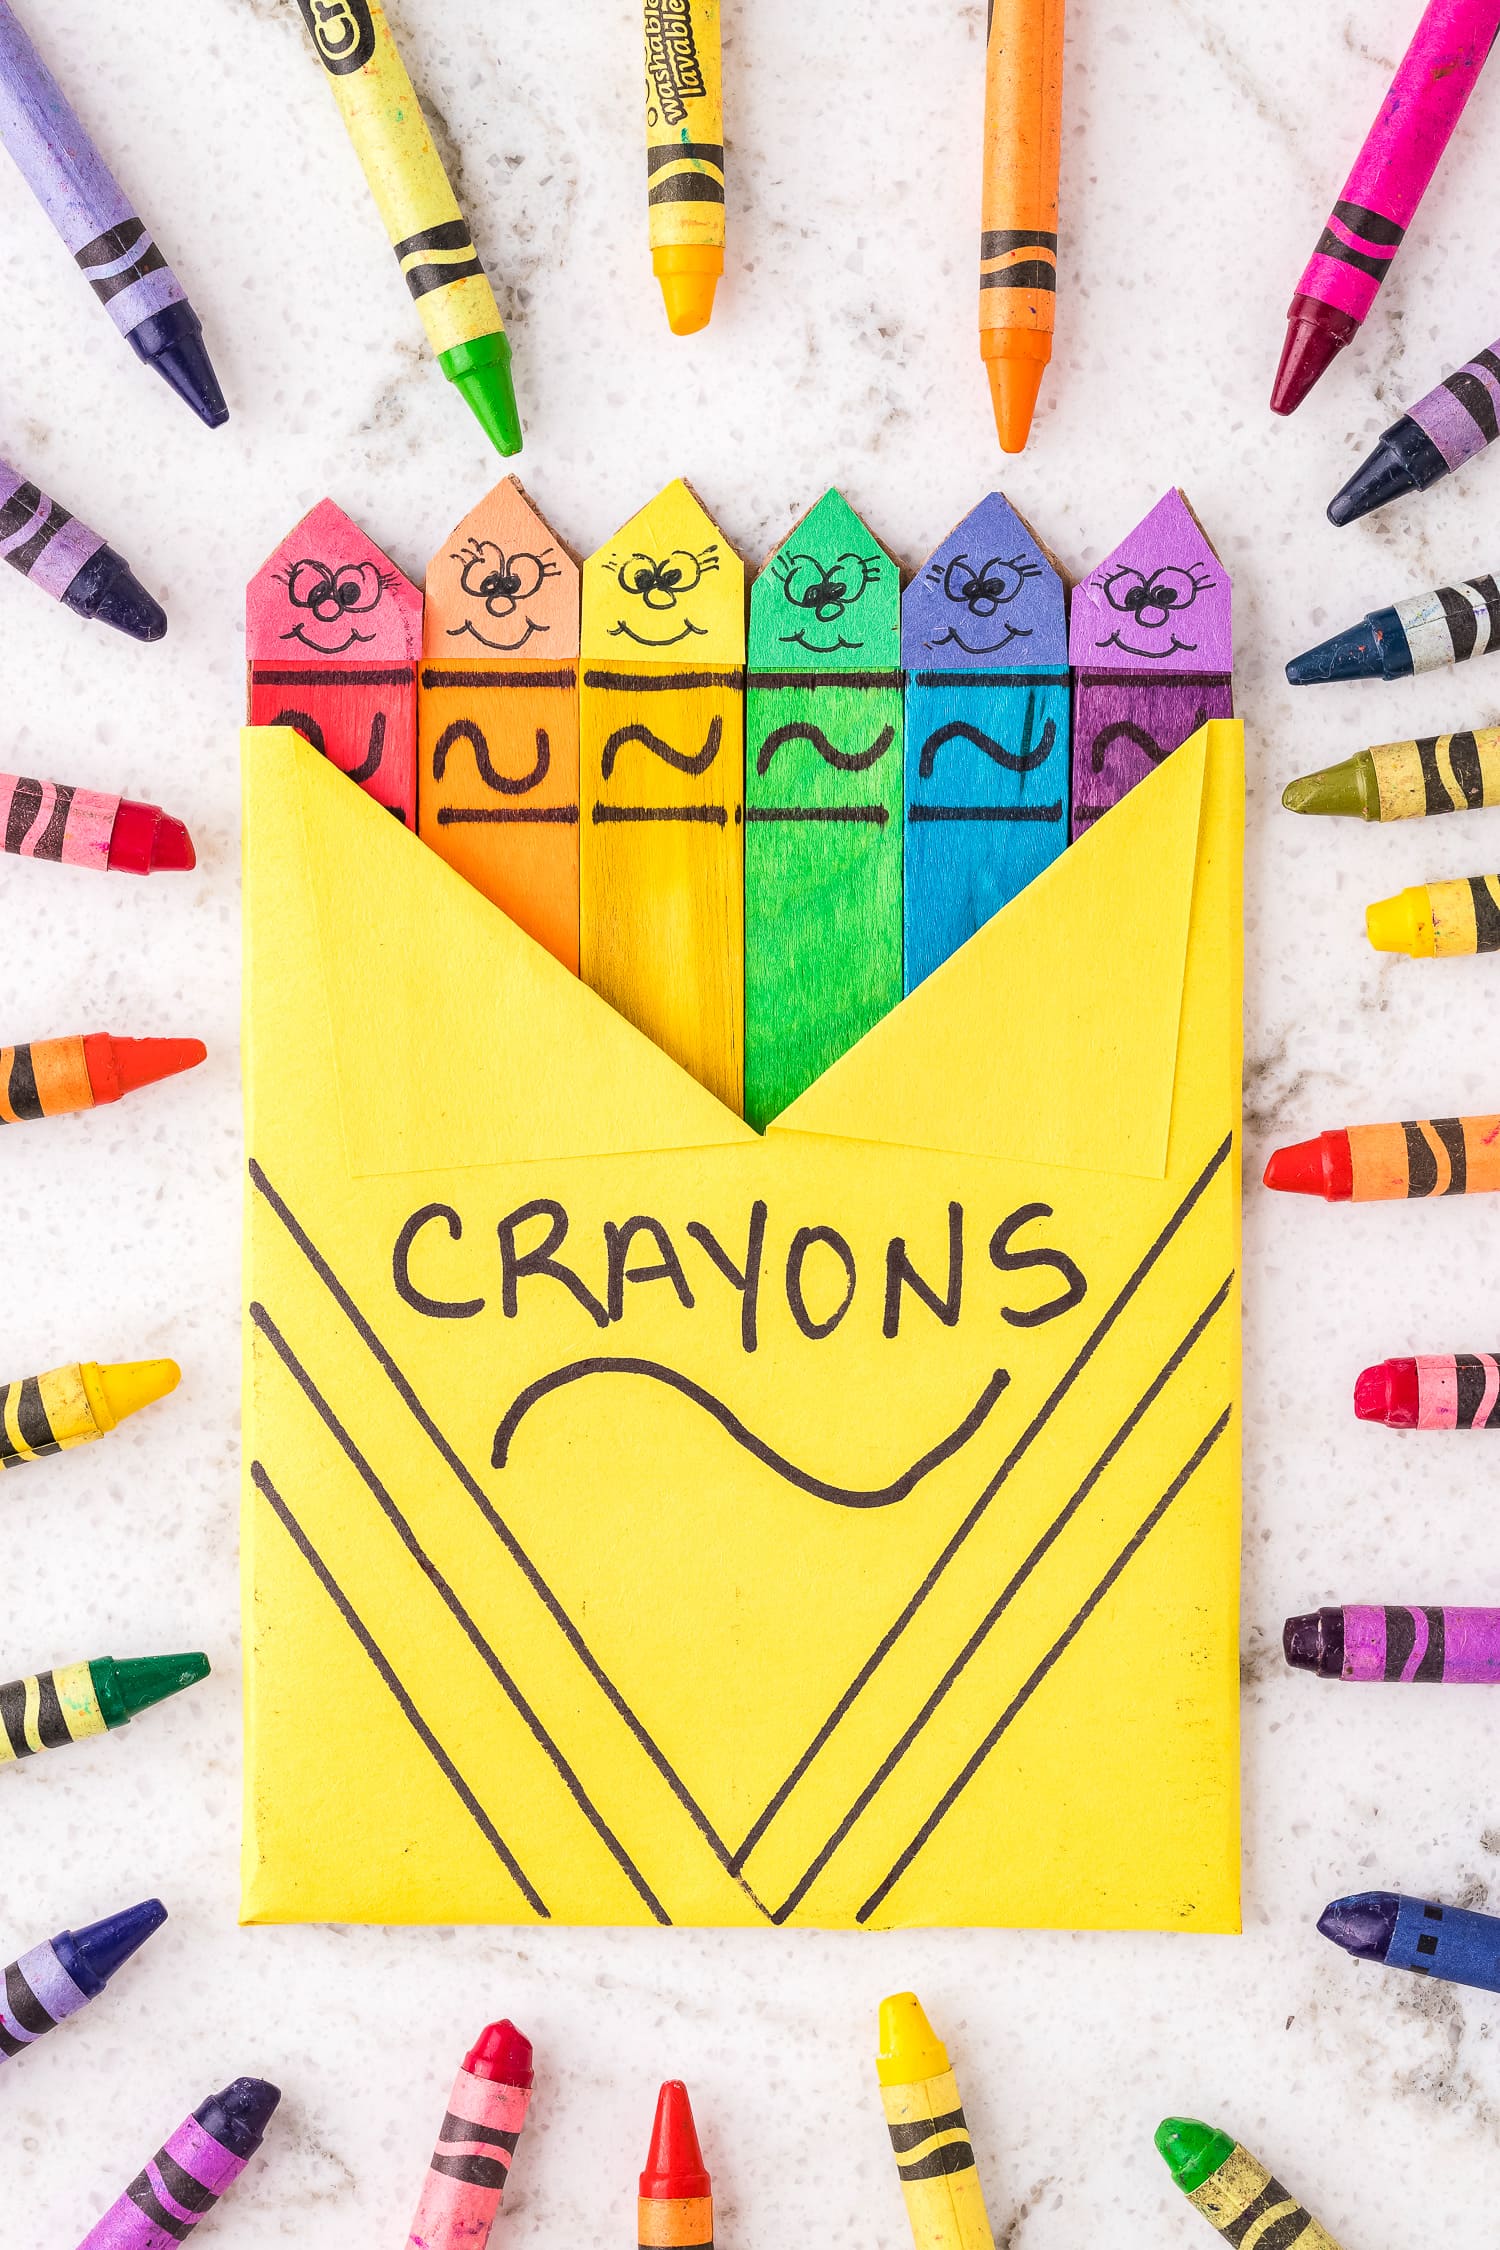
Once the crayon tips are dry, it’s time to decorate the crayons! Draw a design and a smile to give these crayons some life!
Create the Crayon Box
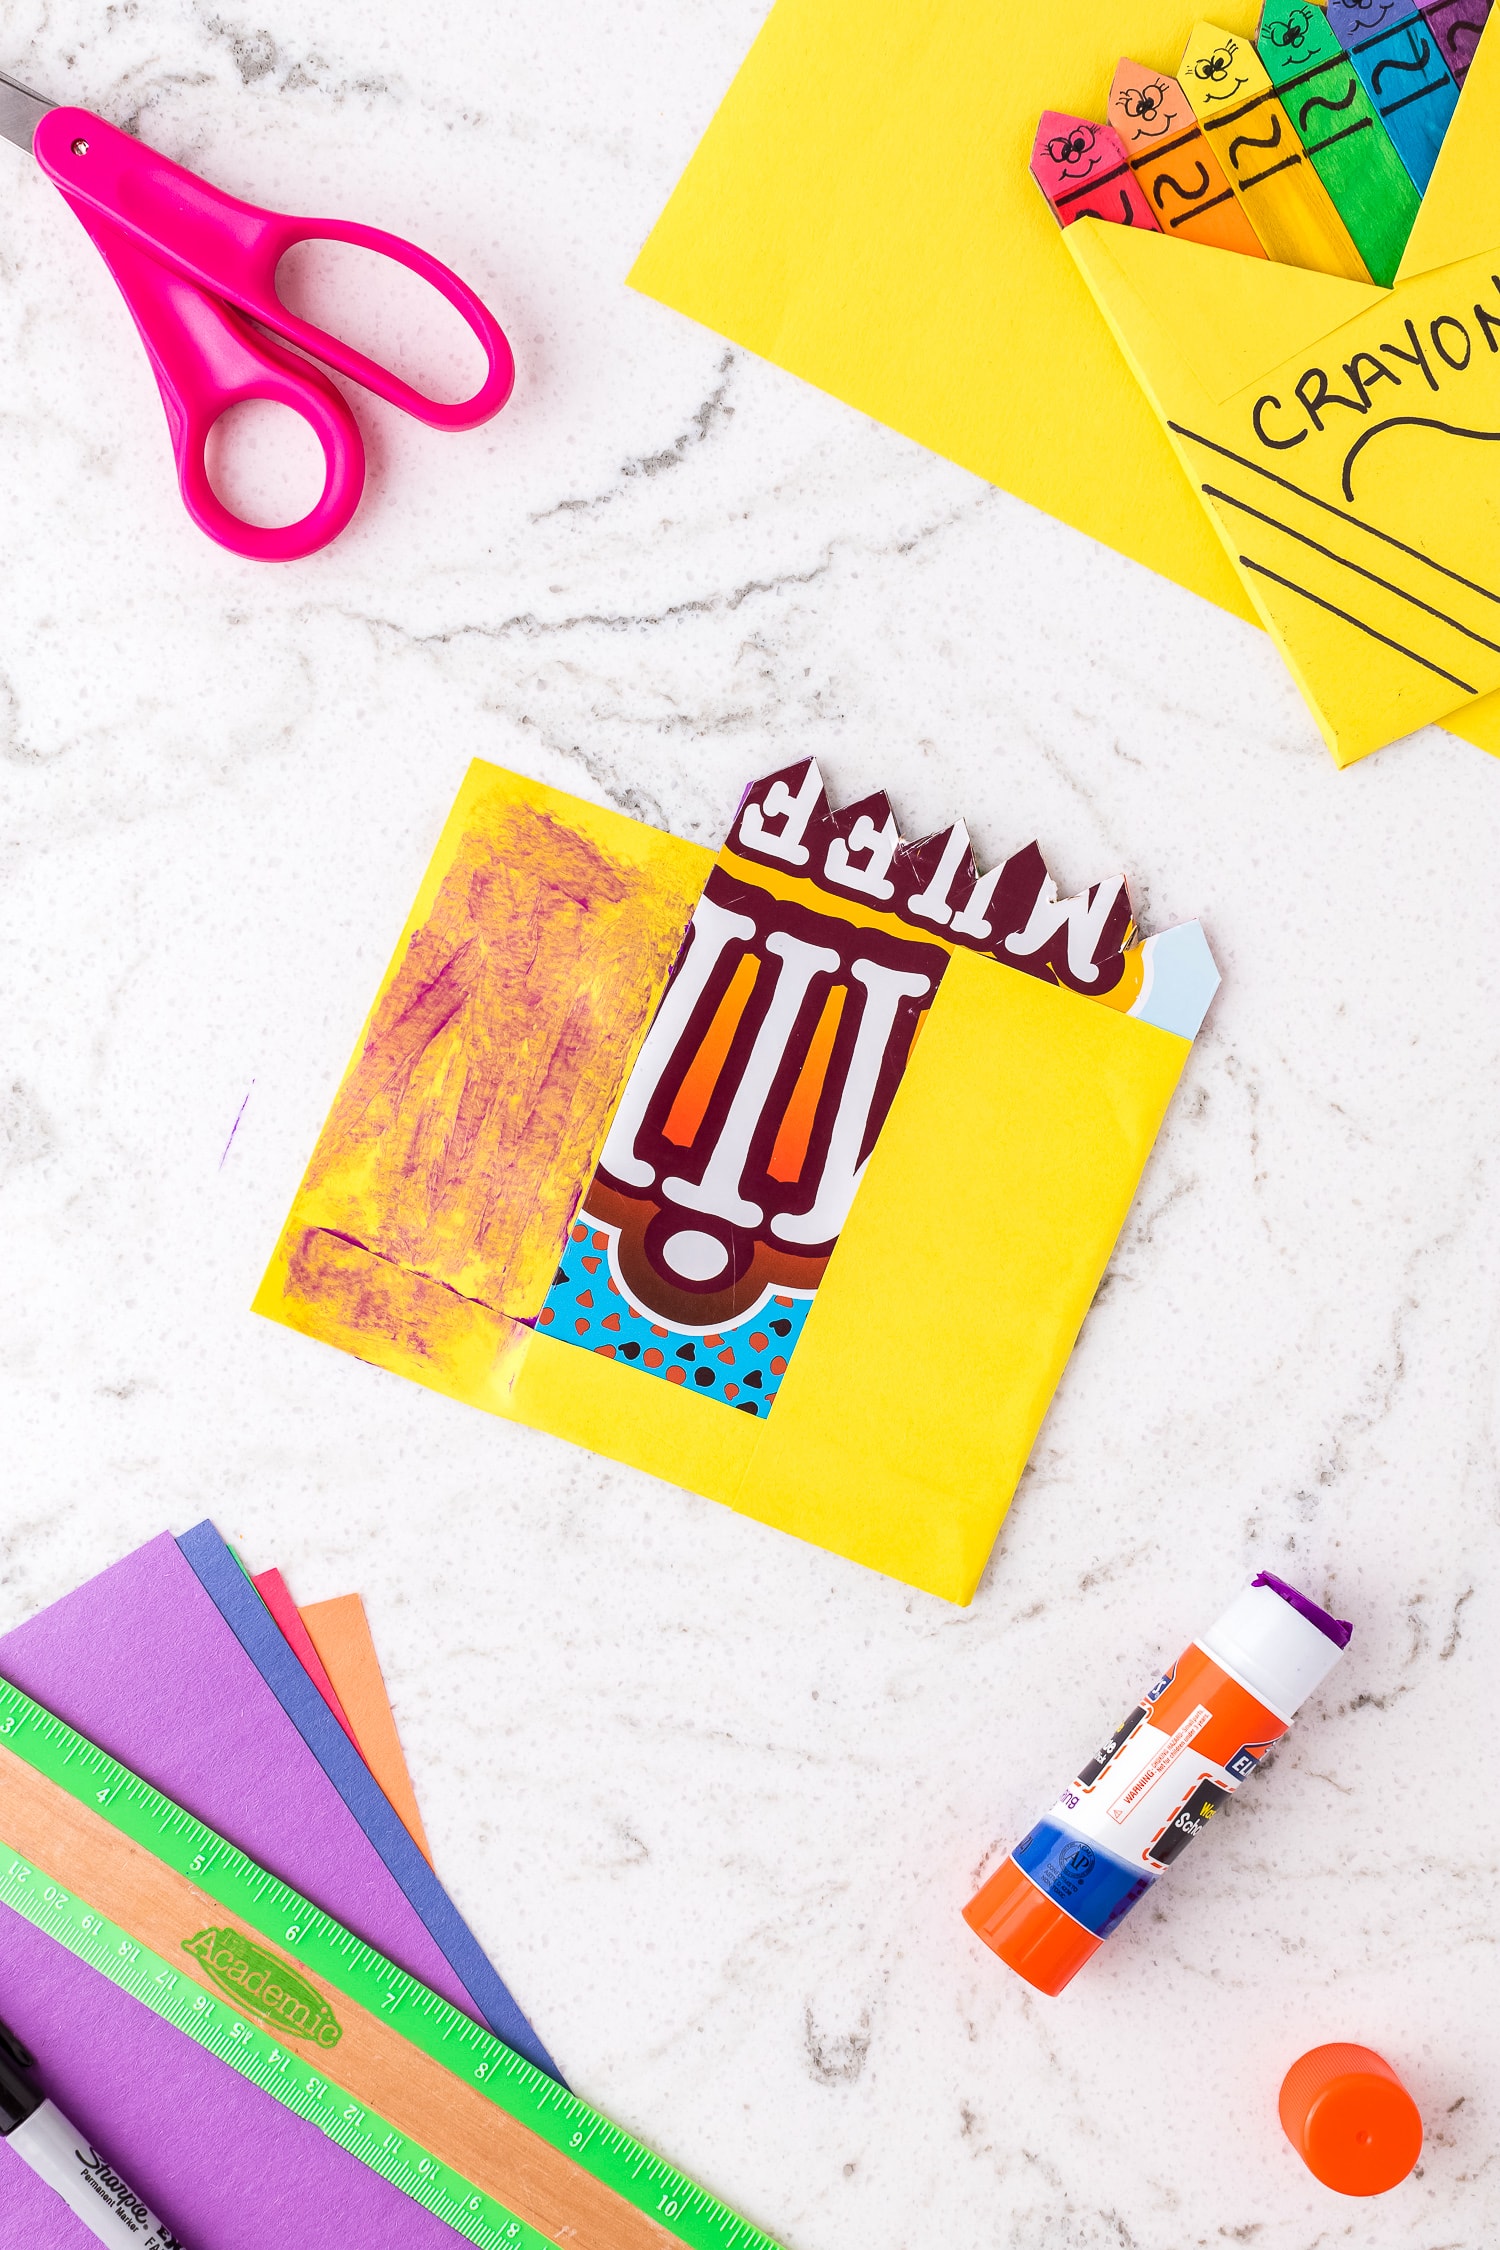
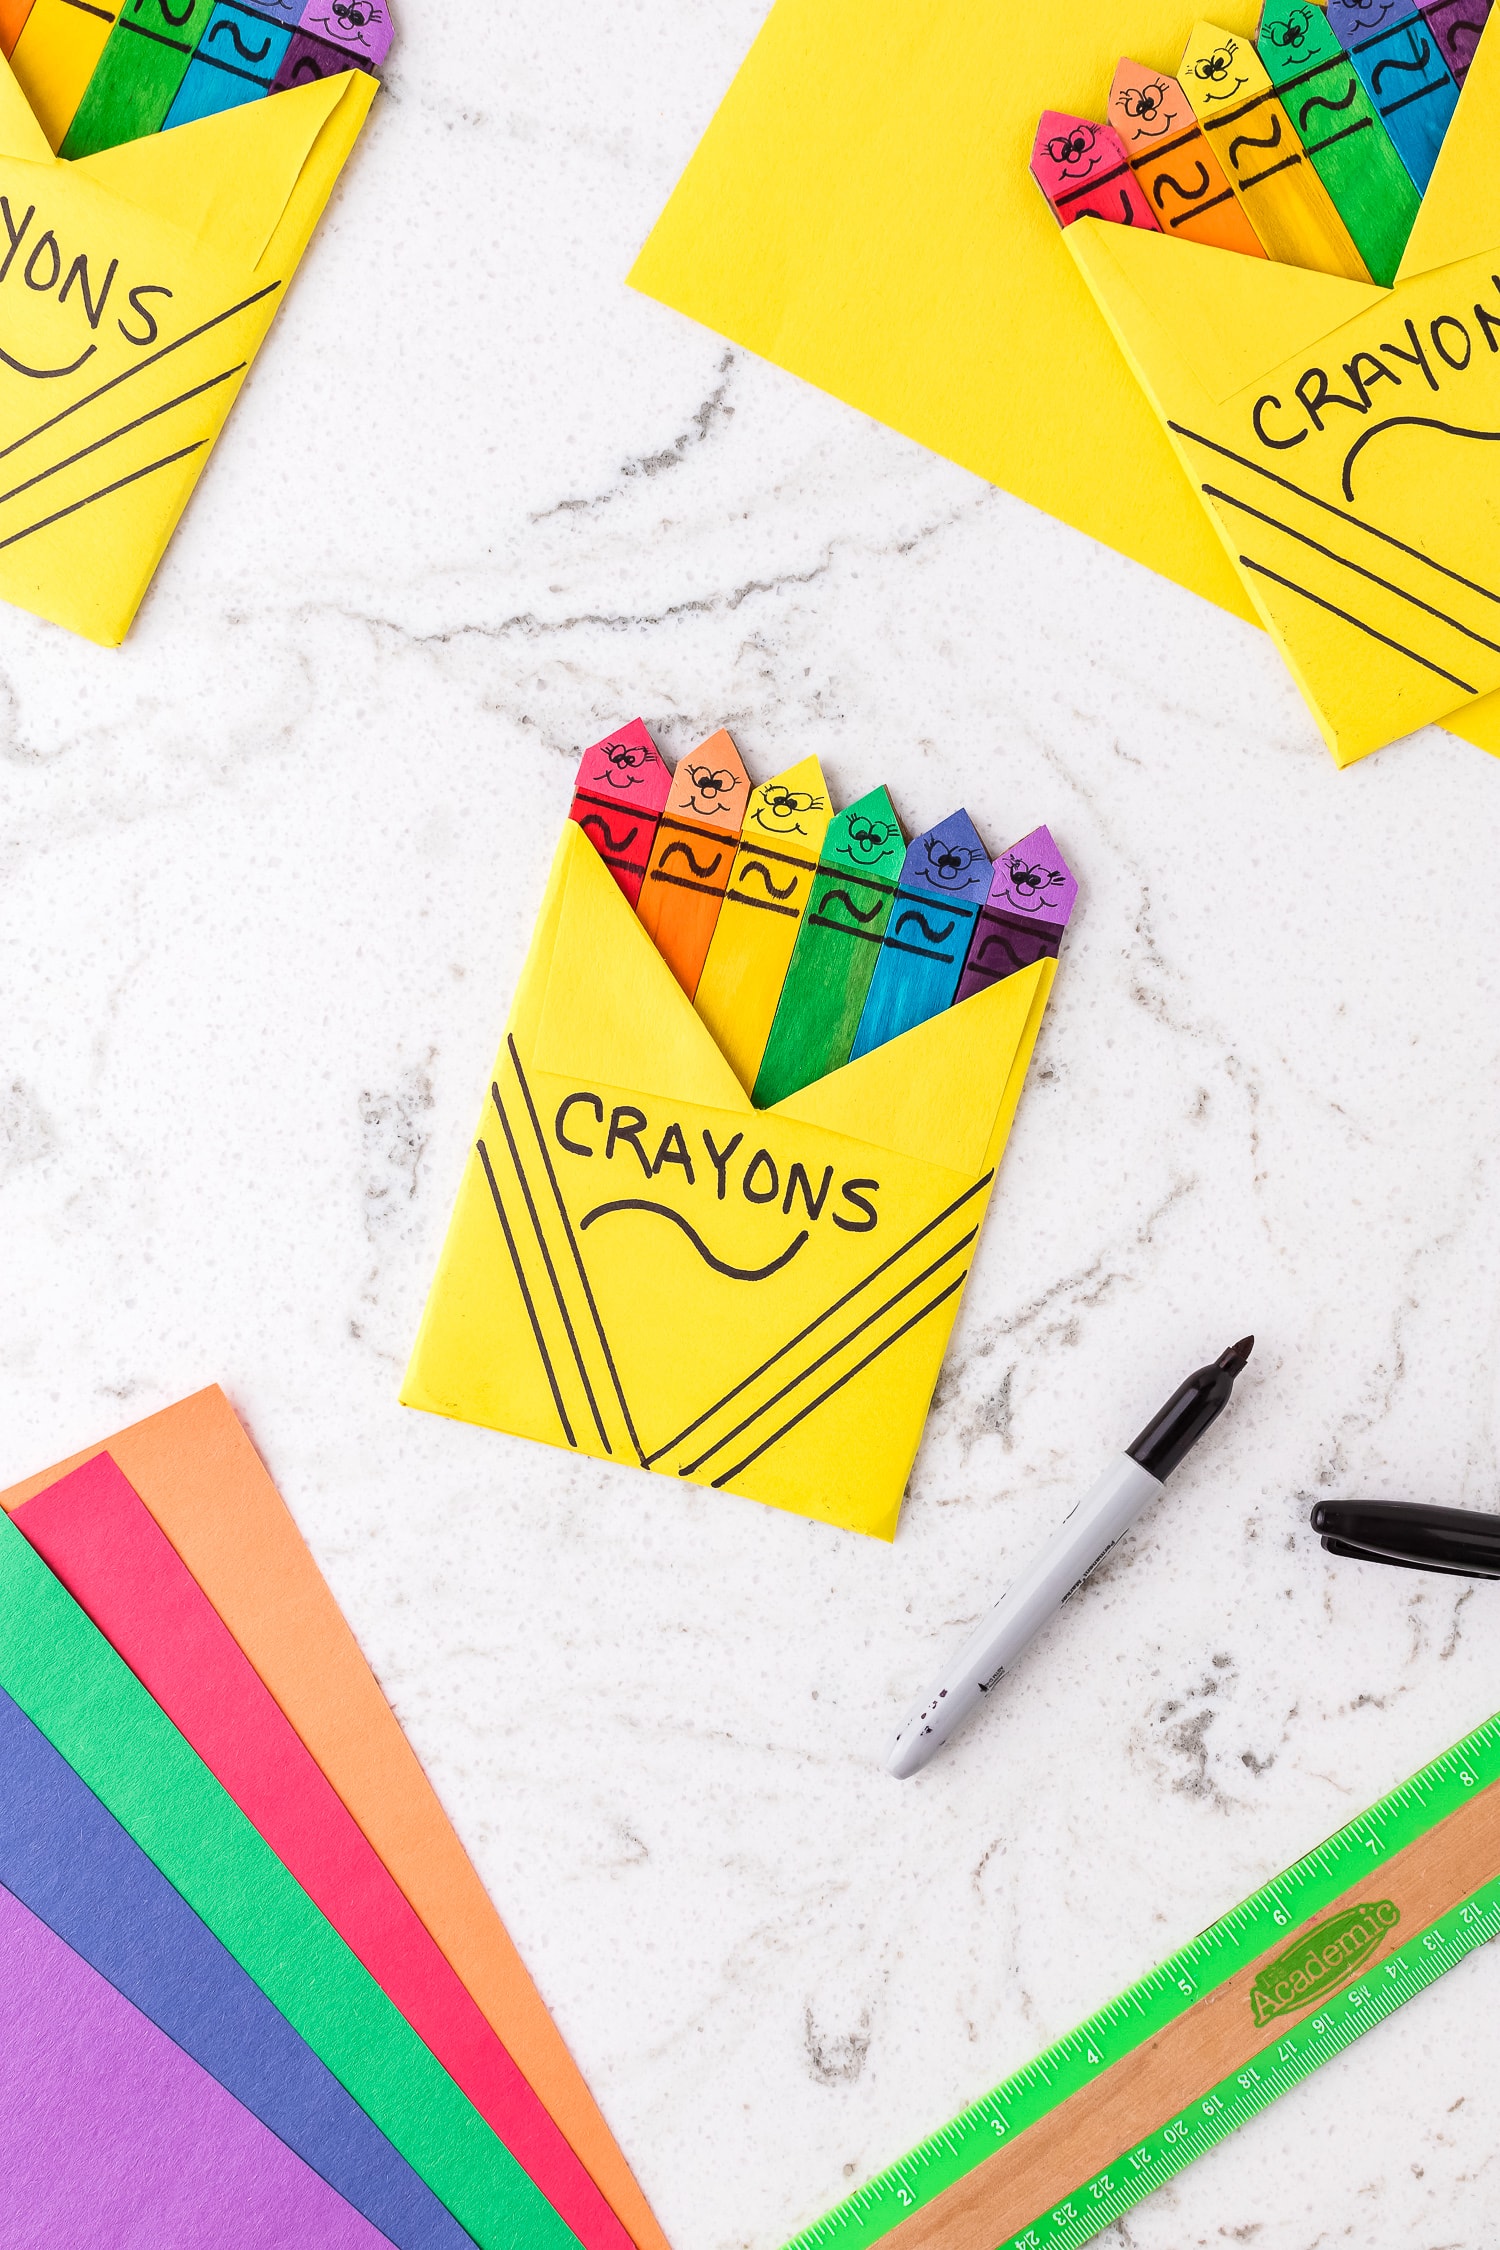
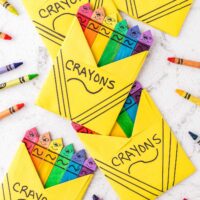
Now it’s time to make the “crayon box.” Cut a piece of yellow construction paper in half. Wrap and fold the paper around the “ crayons,” securing it in the back with glue. Allow drying time.
Cut a slit midway from the top of the paper to create some flaps for your box. Fold-down and glue the corners of the flaps to secure them.
Finally, decorate the front of the crayon box to make it more realistic!

Pro Tips
- Precutting items for this craft may help when working with small children or if you need to reduce the time of the craft.
- Painting natural craft sticks with craft paint is also an option if the colored sticks aren’t available.
More easy kids craft projects!
- Another back to school craft idea! This easy Pencil Craft is the perfect activity for kids to make. It’s also great for gifting to teachers or decorating your classroom.
- Bright, cute Jellyfish craft created out of a paper plate are an easy kids craft that they will love making.
- Vibrant, adorable Tissue Paper Flower Rainbow Craft is so much fun for the kids to make and brighten ups every room you display it in!
- Fun and cute Tissue Paper Turtle Craft! These turtles are so fun to make and cute for the kids.
If you take a picture and share it Instagram make sure to #kidsactivityzone or tag us @kidsactivityzoneblog so we can see them!
Crayon Craft
Ingredients
- Recycled cardboard
- Ruler
- Scissors
- Glue stick
- Jumbo-colored craft sticks red, orange, yellow, green, blue, and purple
- Construction paper red, orange, yellow, green, blue, and purple
- Black marker
Instructions
- First, cut the recycled cardboard into a 6 ½ inch x 4 ½ inch rectangle.
- Now let’s attach our crayons! Using the colored jumbo craft sticks, affix each color to the cardboard with a glue stick and press to secure. Once all the sticks are secure and lined up evenly, take a book or other heavy item and place it on top. Allow the crayons to dry for at least 5 minutes.
- While the crayons are drying, let’s make the “crayon tips.” Cut a small square of each color of construction paper. Cut the top of each square to a point by cutting each corner to create the crayon tip.
- Glue the “crayon tips” on each crayon according to color and allow to dry for a few minutes. Cut the excess cardboard around the tips of the crayons.
- Once the crayon tips are dry, it's time to decorate the crayons! Draw a design and a smile to give these crayons some life!
- Now it’s time to make the “crayon box.” Cut a piece of yellow construction paper in half. Wrap and fold the paper around the “ crayons,” securing it in the back with glue. Allow drying time.
- Cut a slit midway from the top of the paper to create some flaps for your box. Fold-down and glue the corners of the flaps to secure them.
- Finally, decorate the front of the crayon box to make it more realistic!
Notes
- Precutting items for this craft may help when working with small children or if you need to reduce the time of the craft.
- Painting natural craft sticks with craft paint is also an option if the colored sticks aren’t available.