Tissue Paper Flower Rainbow Craft
Vibrant, adorable Tissue Paper Flower Rainbow Craft is so much fun for the kids to make and brighten ups every room you display it in! Learn how to make easy Tissue Paper Flowers to decorate this kids Rainbow Craft activity. It will keep them busy and they will have so much fun creating it.

This Rainbow Craft with Tissue Paper flowers decorating it might look a little bit complicated, but it’s not! Plus, it’s so cute and pretty to display it’s worth making.
If you have younger kids they will need help with the cutting and stapling, but will have so much fun assembling and gluing this easy rainbow craft.
Every kid can make this their own by choosing the colors they want to make their rainbow so it has their unique stamp on it.
Gather you craft supplies and make this fun rainbow activity craft today!

Supplies Needed for Rainbow Craft
- 10-inch paper plate
- Tissue paper, red, orange, yellow, green, blue, and purple
- Ruler
- Scissors
- Crepe paper streamers, red, orange, yellow, green, blue, and purple
- Stapler
- Cotton balls
- Glue stick
- Green pipe cleaners
How to Make Rainbow Craft with Tissue Papers Flowers!
This craft may look a little complicated, but we will break it down step by step with easy to follow pictures. It’s really not difficult to make and so pretty to display.
If you have younger children they will need help with the cutting, but will love to glue and assemble this easy rainbow craft!


Cut Paper Plate
Take a 10-inch paper plate and cut off about 3 ½ inches across the bottom, creating a half-moon shape.
Next, poke a hole in the paper plate with scissors about 1 inch from the bottom and cut a half-moon shape. Careful not to cut through your borders.
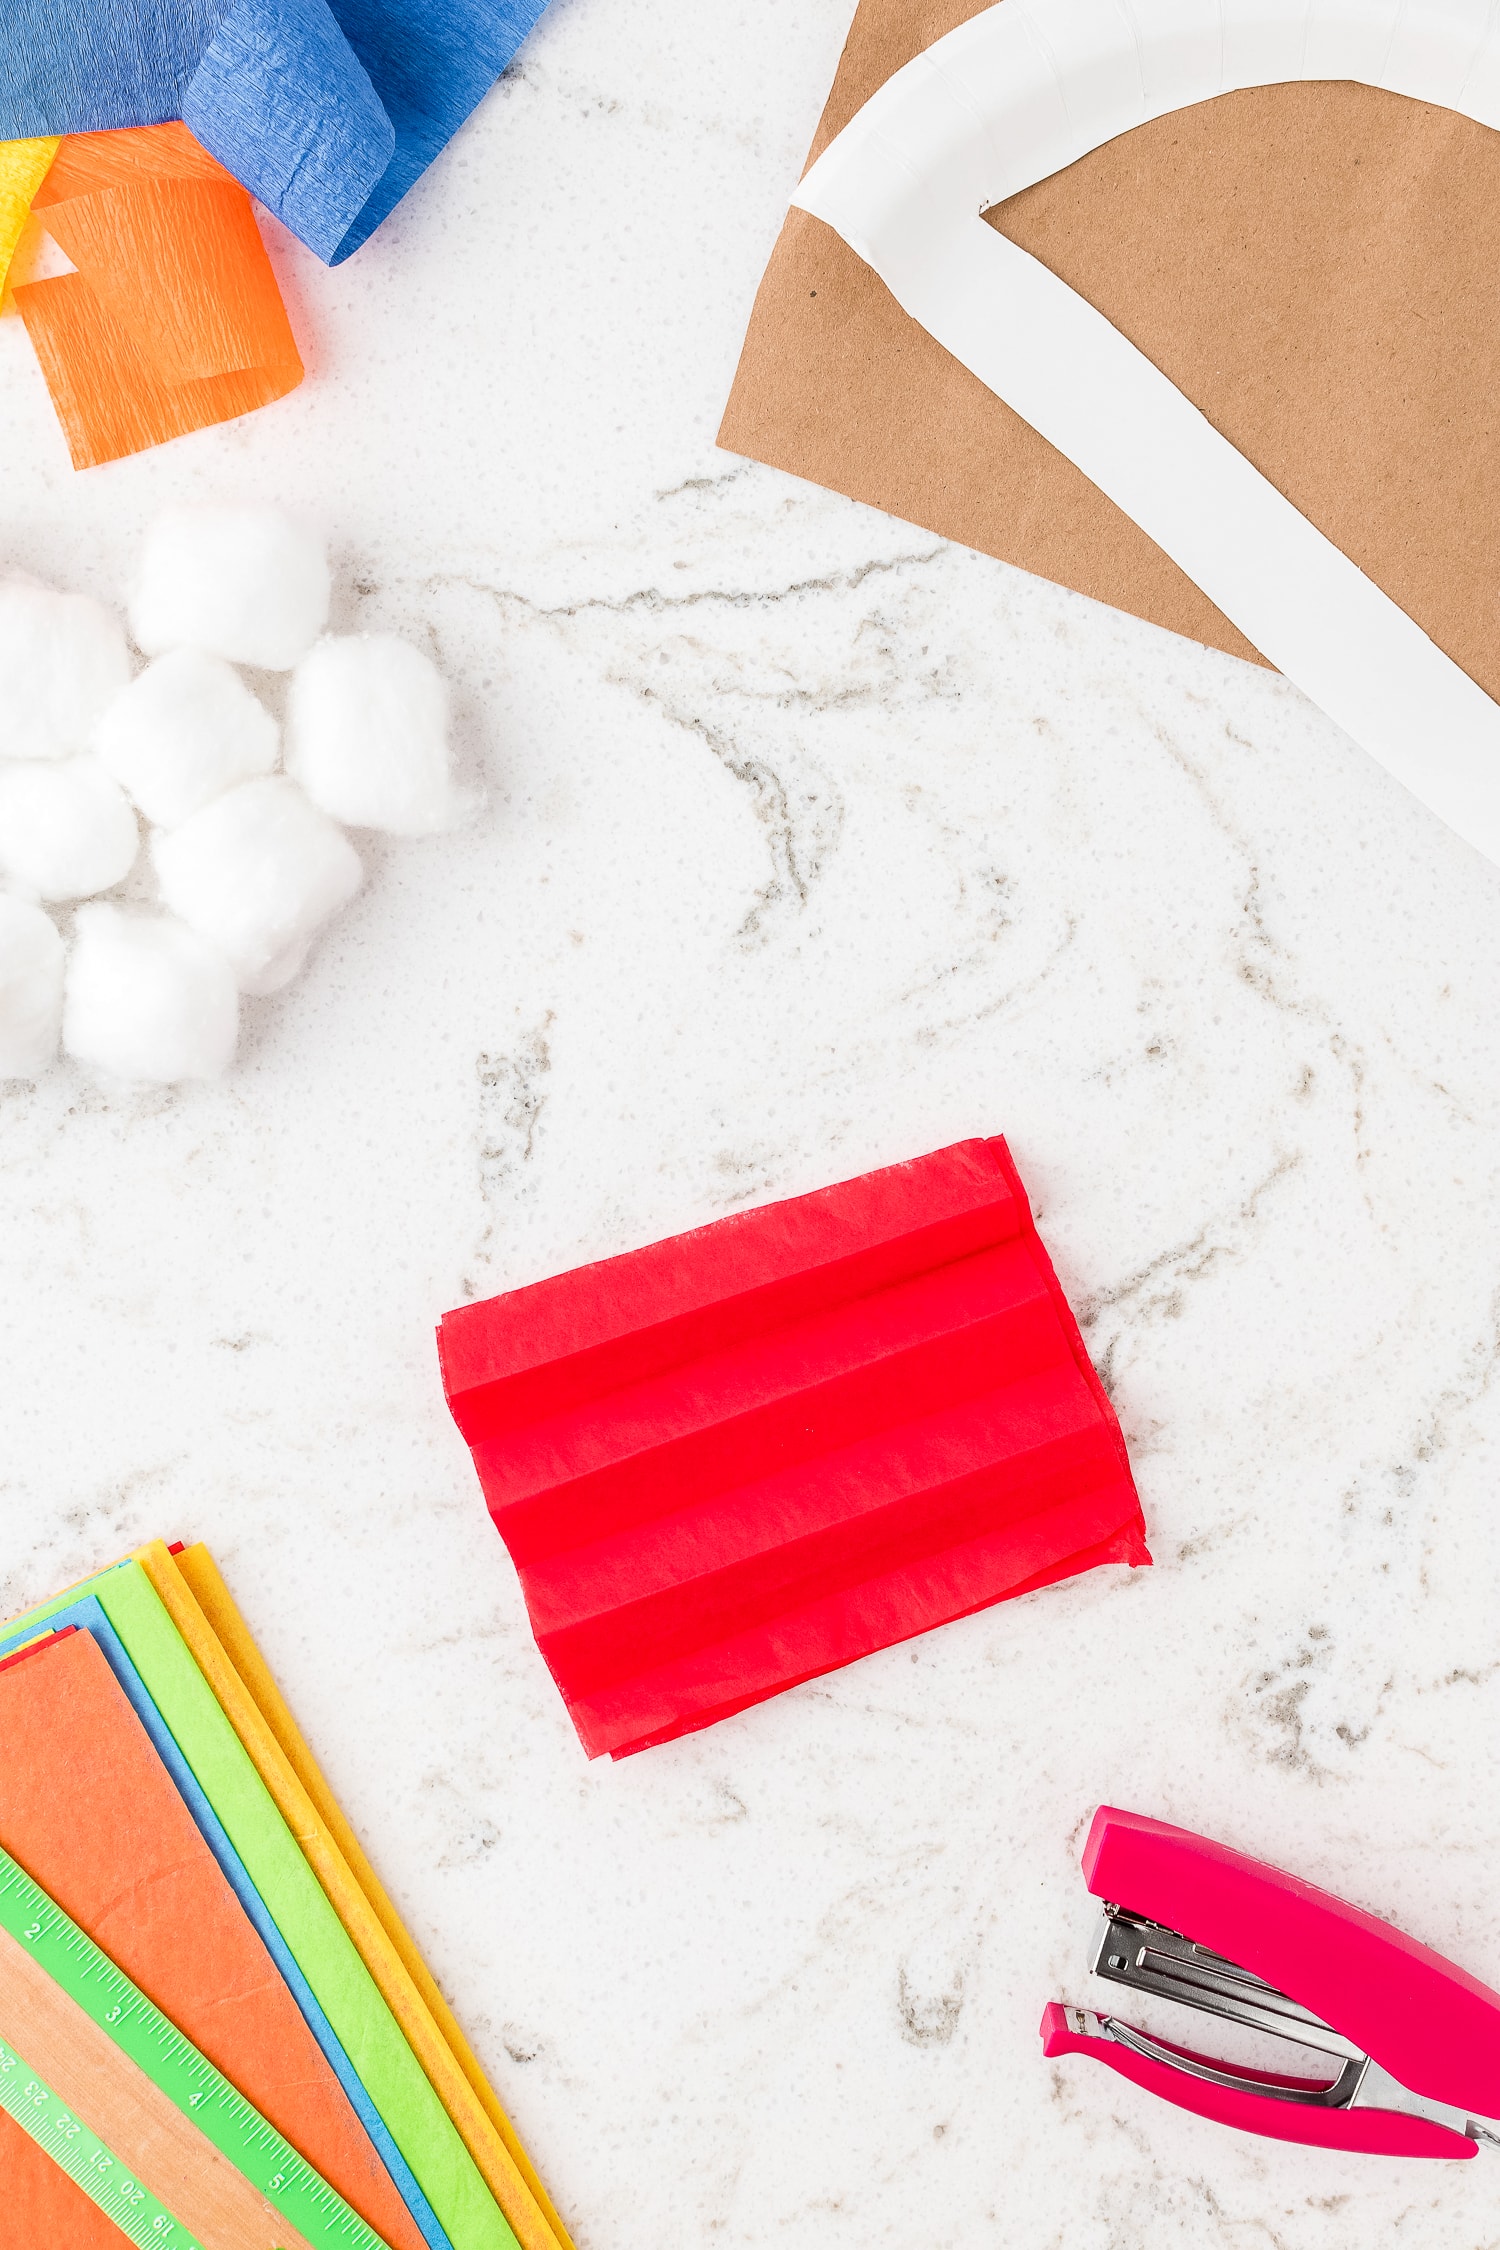


Cut Tissue Paper For Tissue Paper Flowers
Stack the pieces of the paper in groups of 6. Take a group of 6 pieces of tissue paper and make sure they are stacked and straightened equally.
Using an accordion pattern, fold back and forth until you reach the end. Now staple the center of the folded stack.
Next, trim and round the edge of your paper to give your flower the rounded petal look!
Start by pulling the first layer of tissue paper towards the center of the flower. Repeat this step on each side, alternating until your flower is fluffed completely. Set your completed flowers aside.
Pro Tip!
As a variation, layer multiple different colors of tissue paper to create a multi-color flower rainbow!


Staple Tissue Papers Flowers to Plate
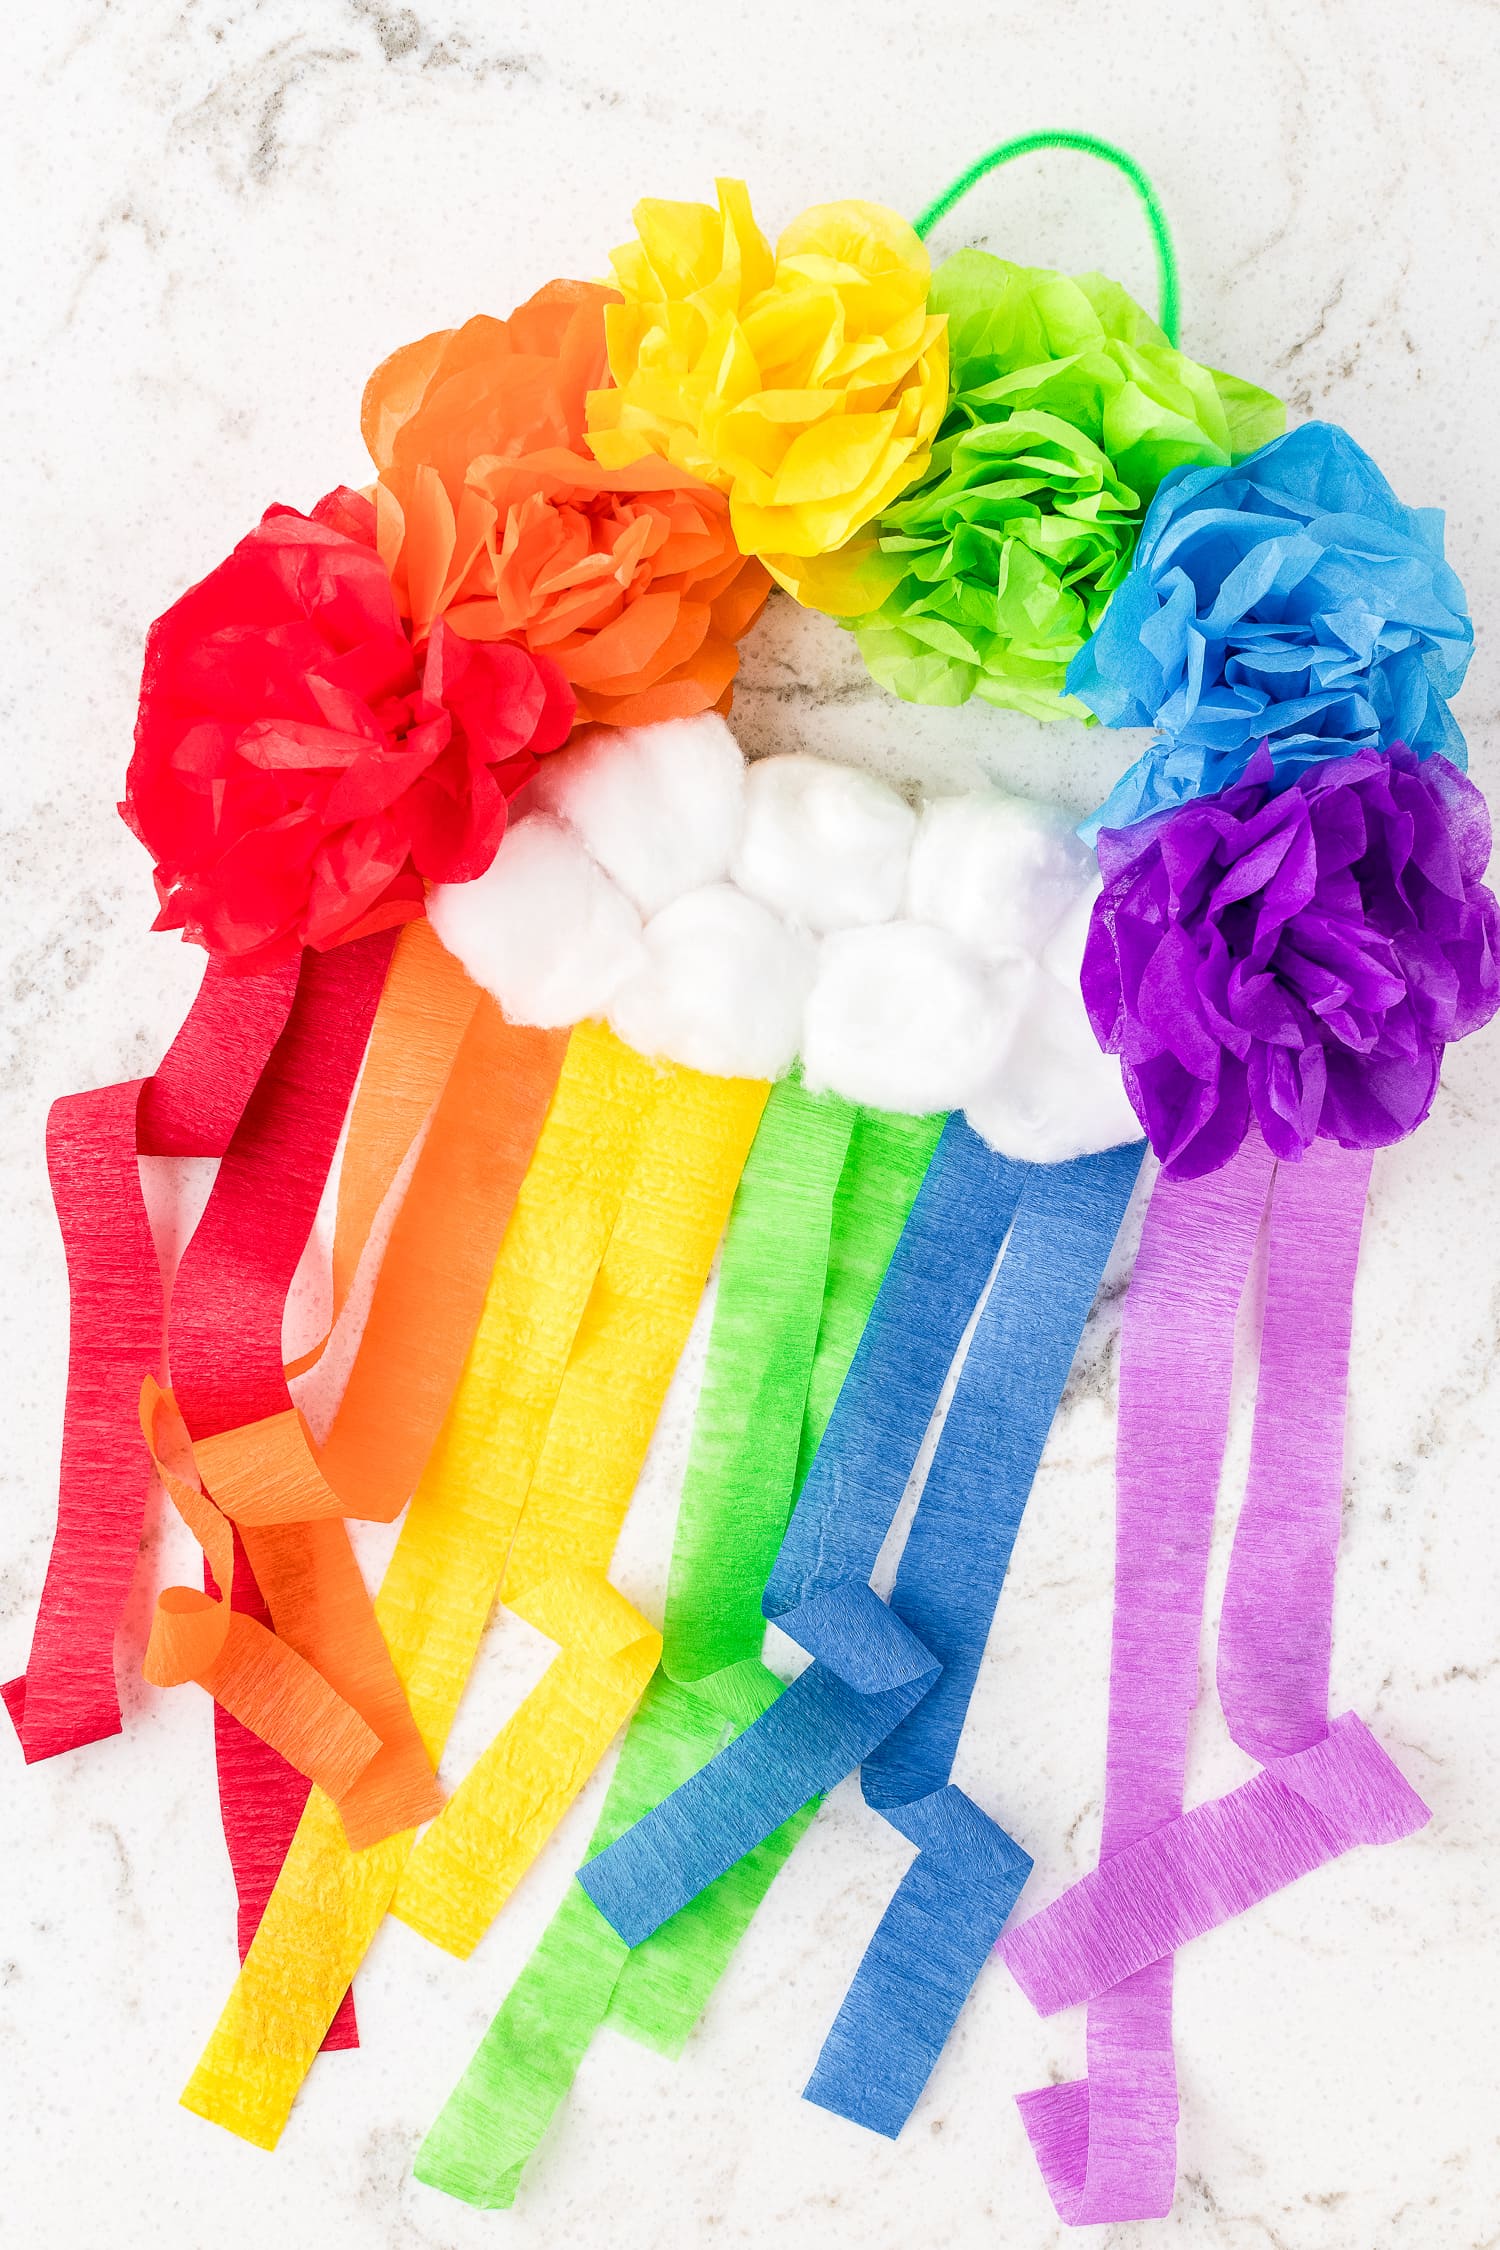
Grab your base (previously cut paper plate) and staple your first flower to the lower-left corner. Staple the back few layers of the flower’s petal to the edge of the paper plate. Repeat this step with the remaining colors of flowers, creating an arch.


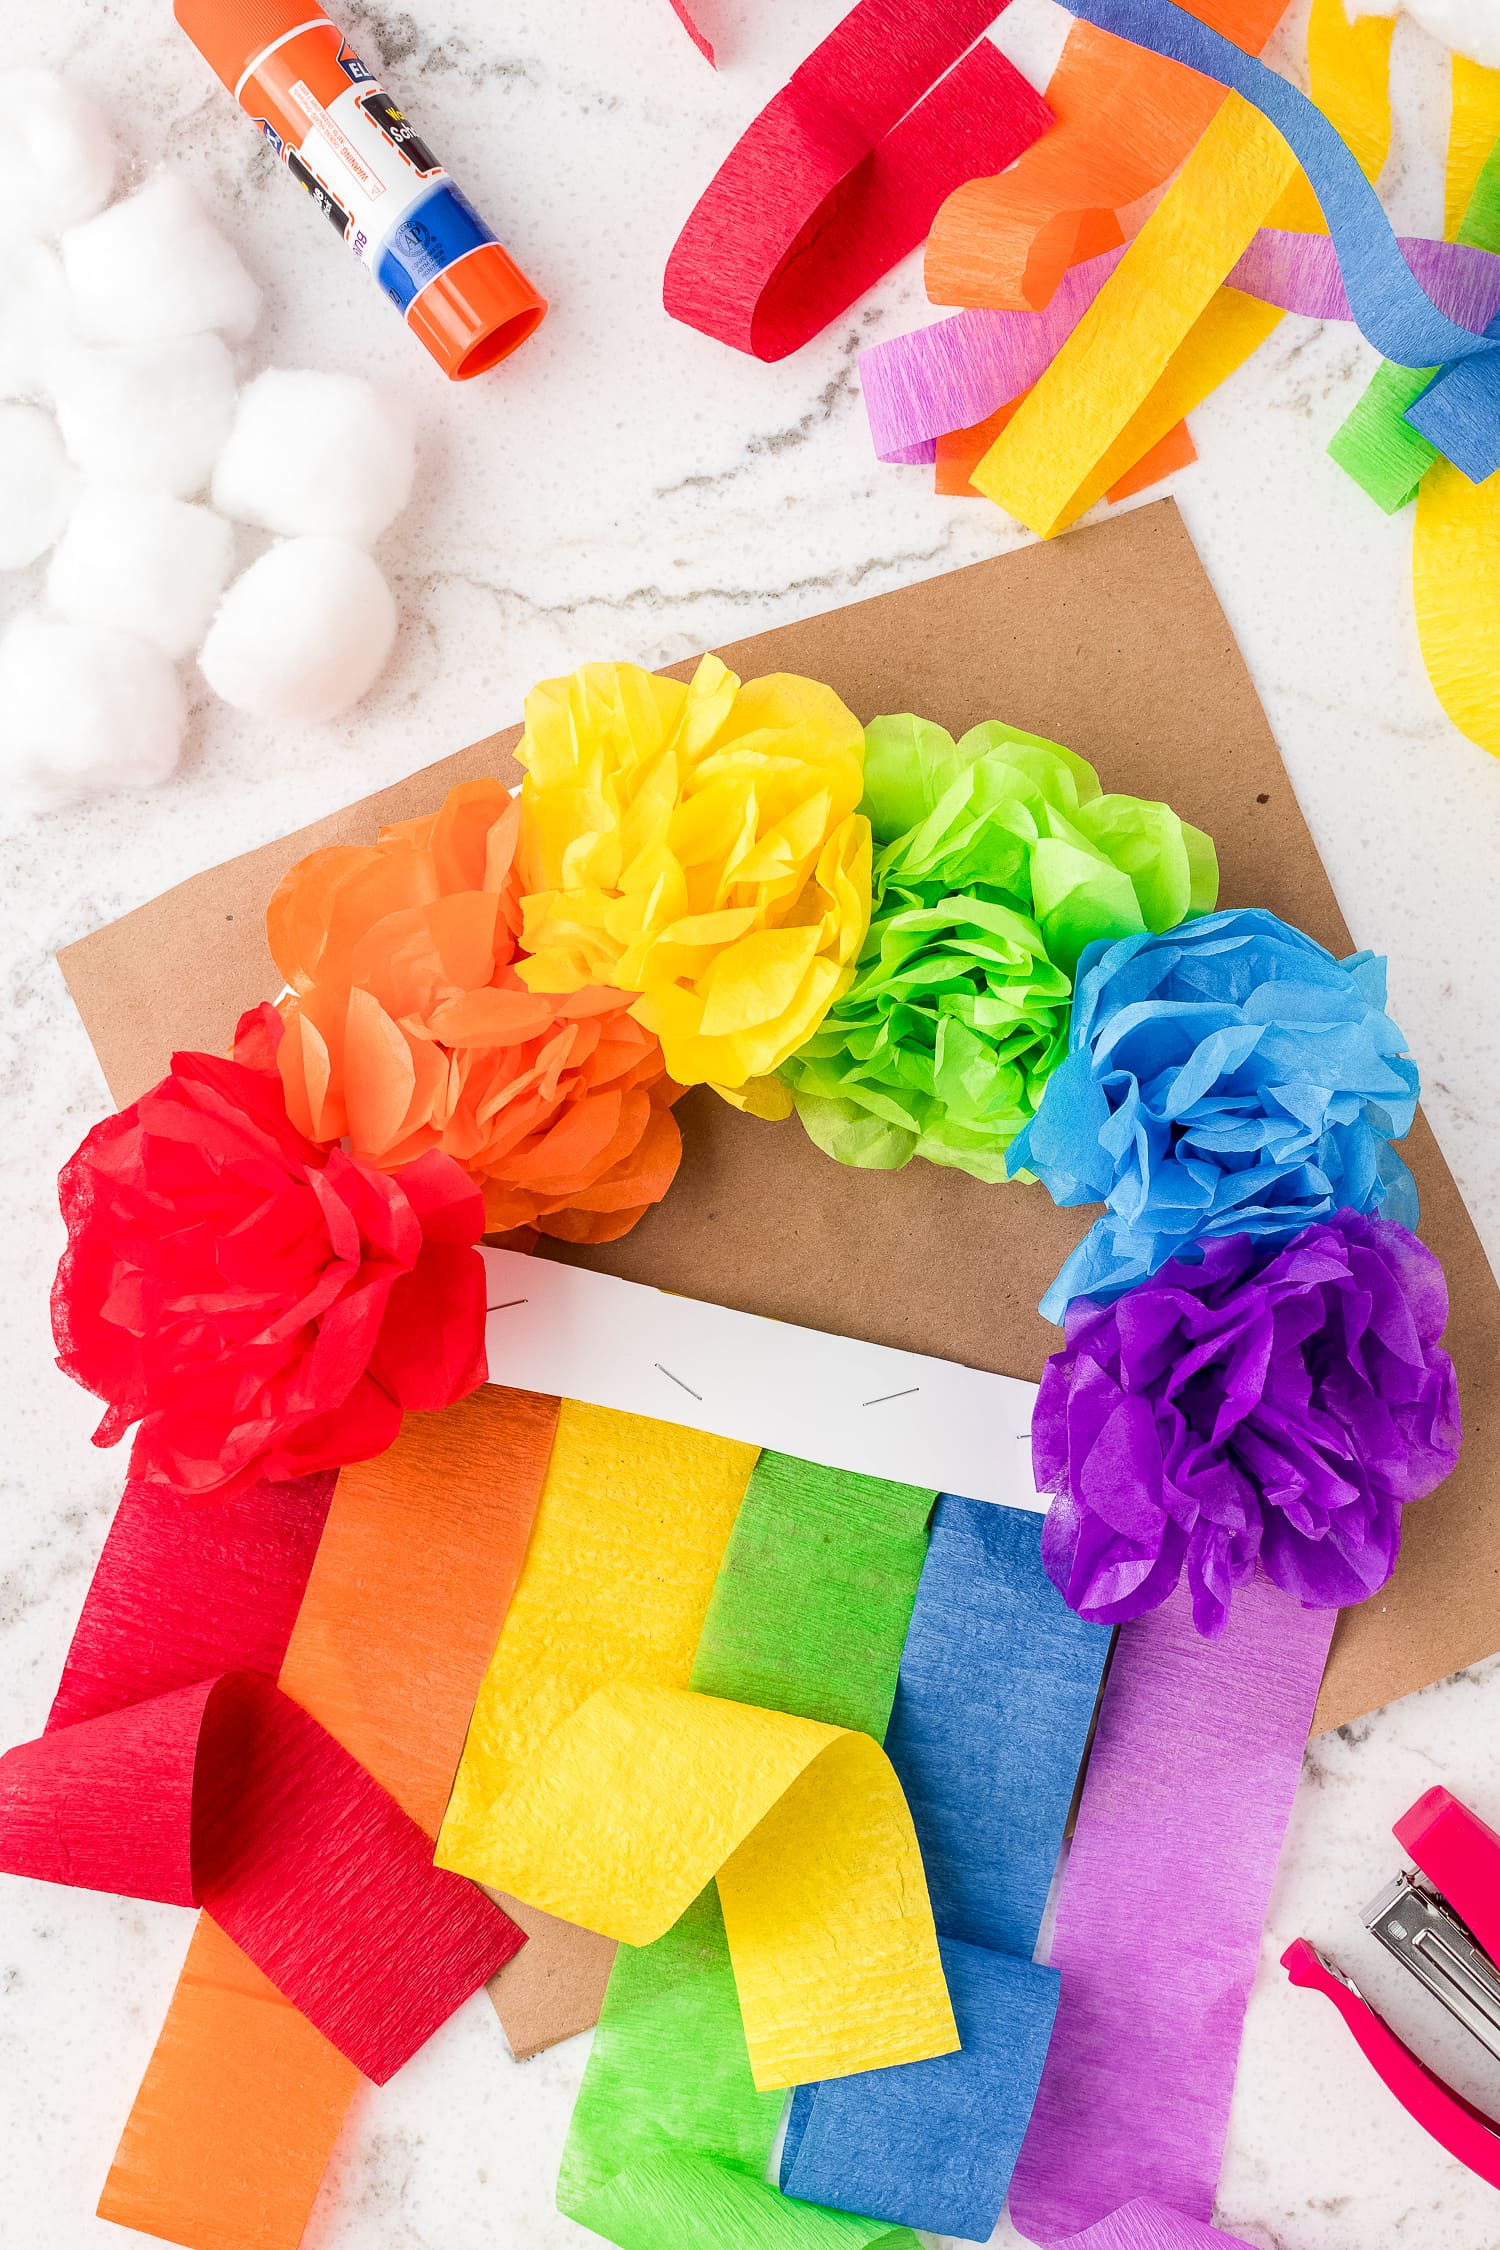
Staple Tissue Paper Streamers to Plate
Take your red crepe paper streamer, measure, and cut a 12-inch strip. Repeat this process with all of the rest of your colors. Set the streamers aside.
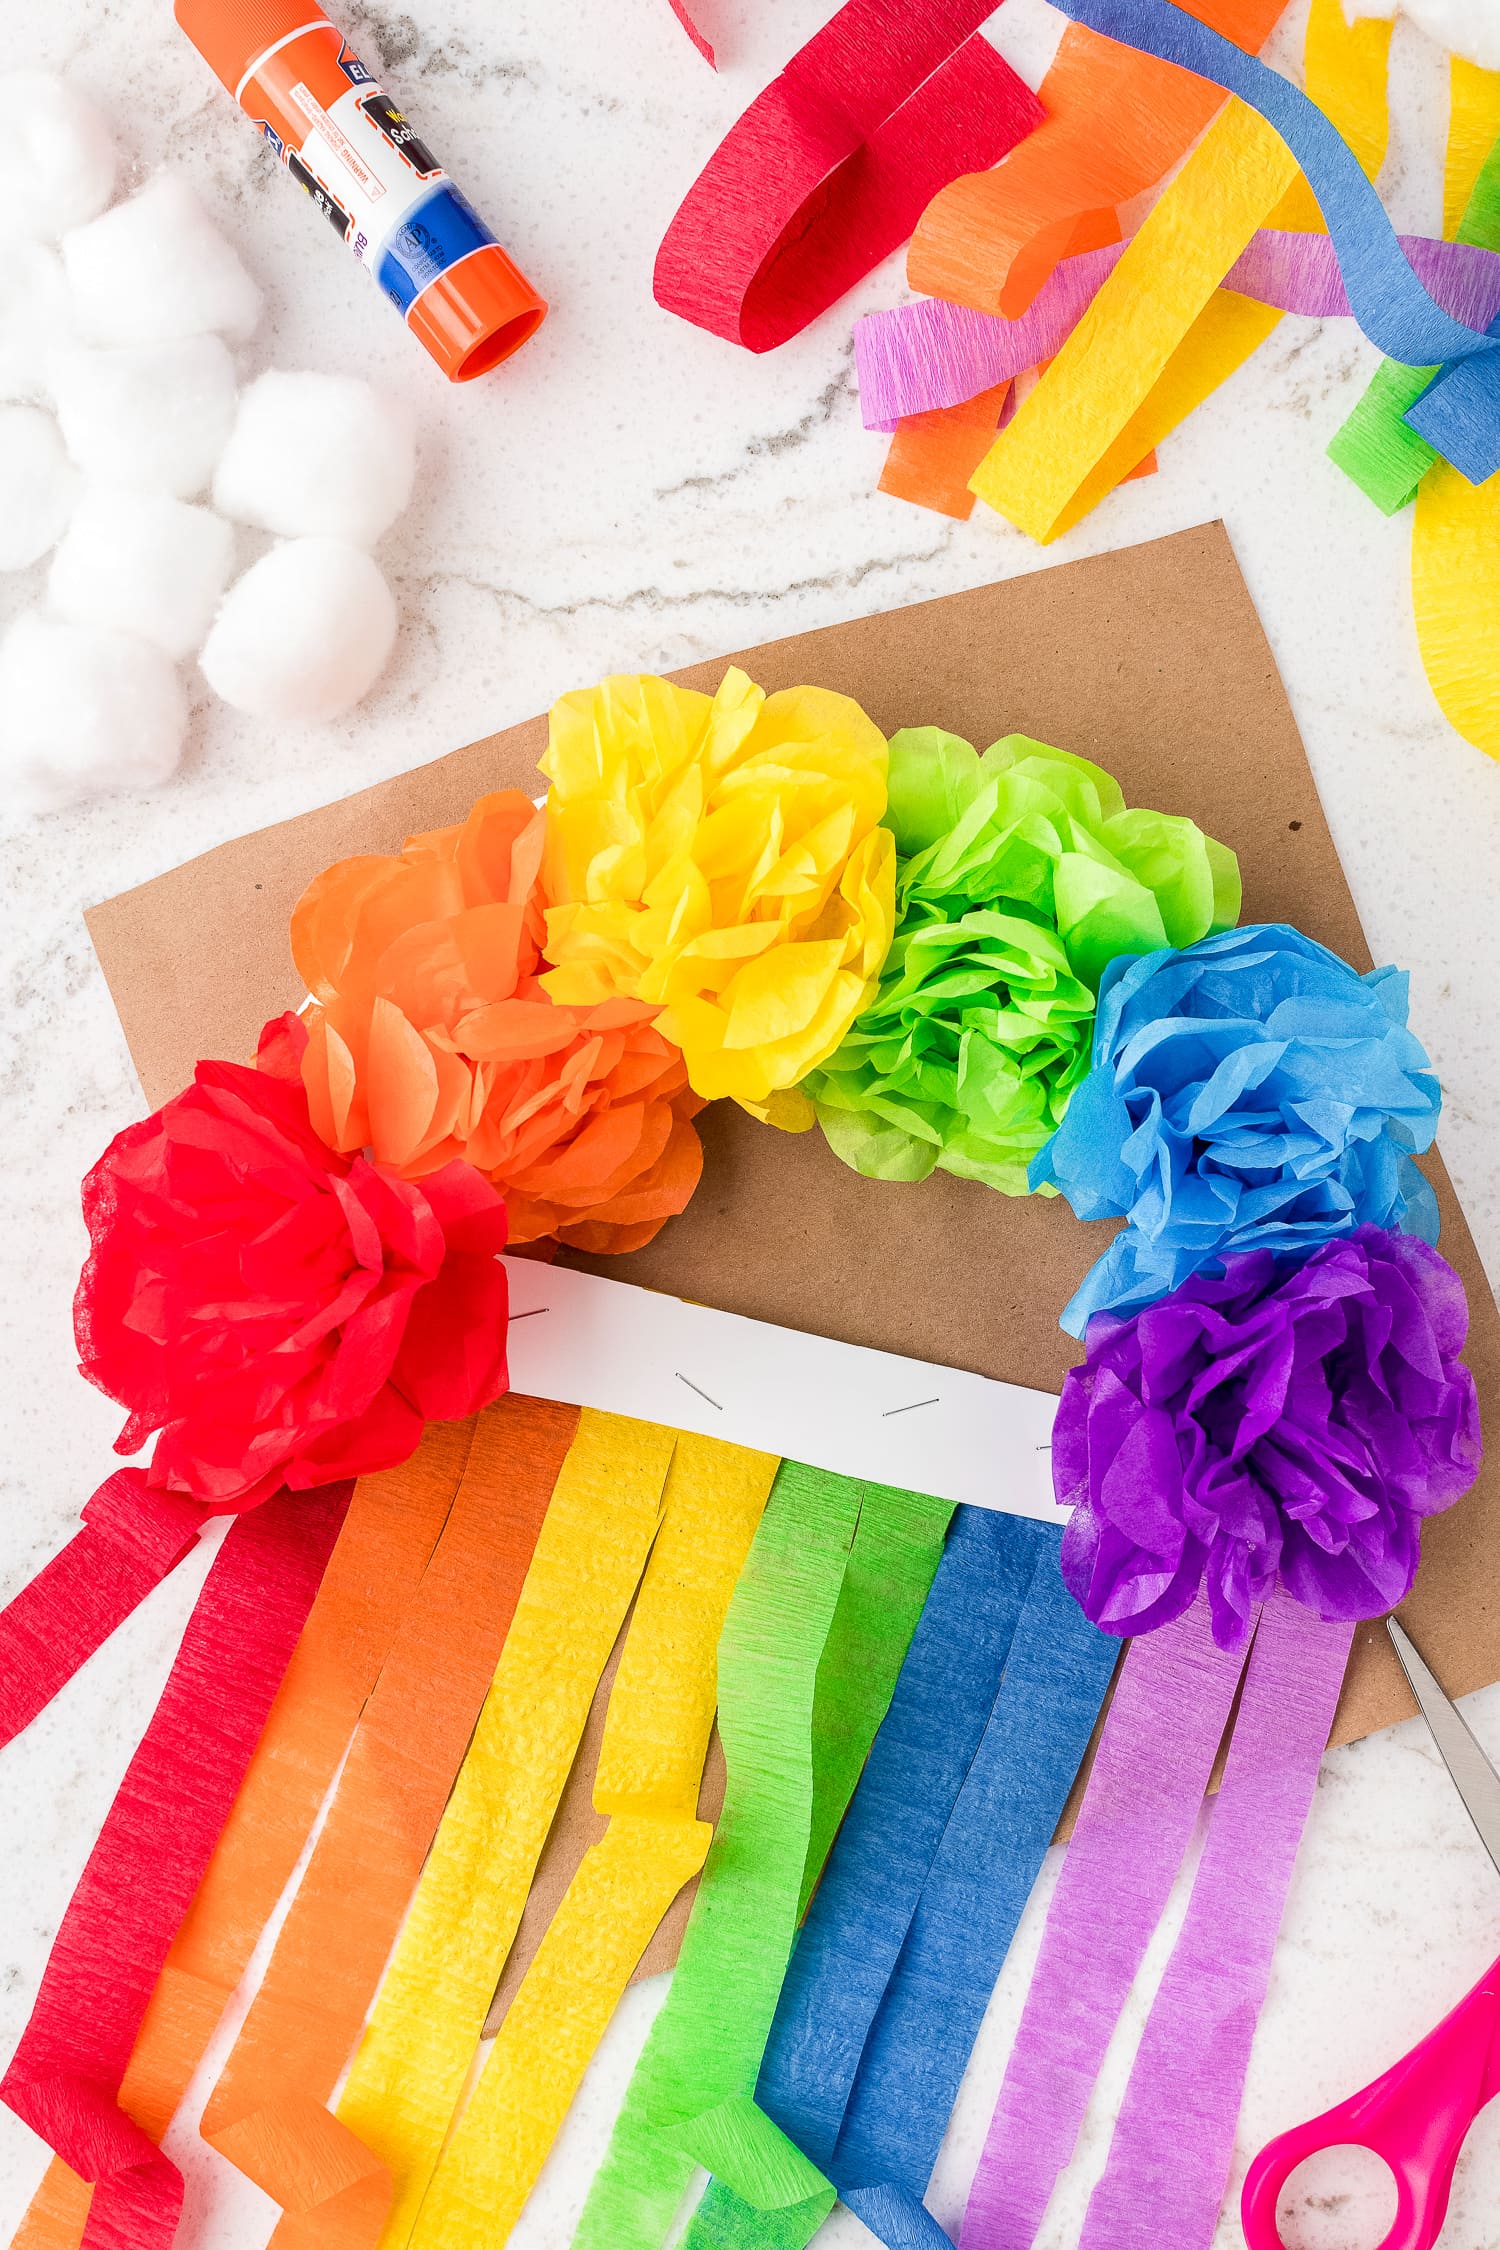
Staple the red streamer just under the red flower and fastening it to the base of the paper plate. Cut the red streamer up the middle to create more movement. Repeat this step across the bottom with the remaining colors of streamers.
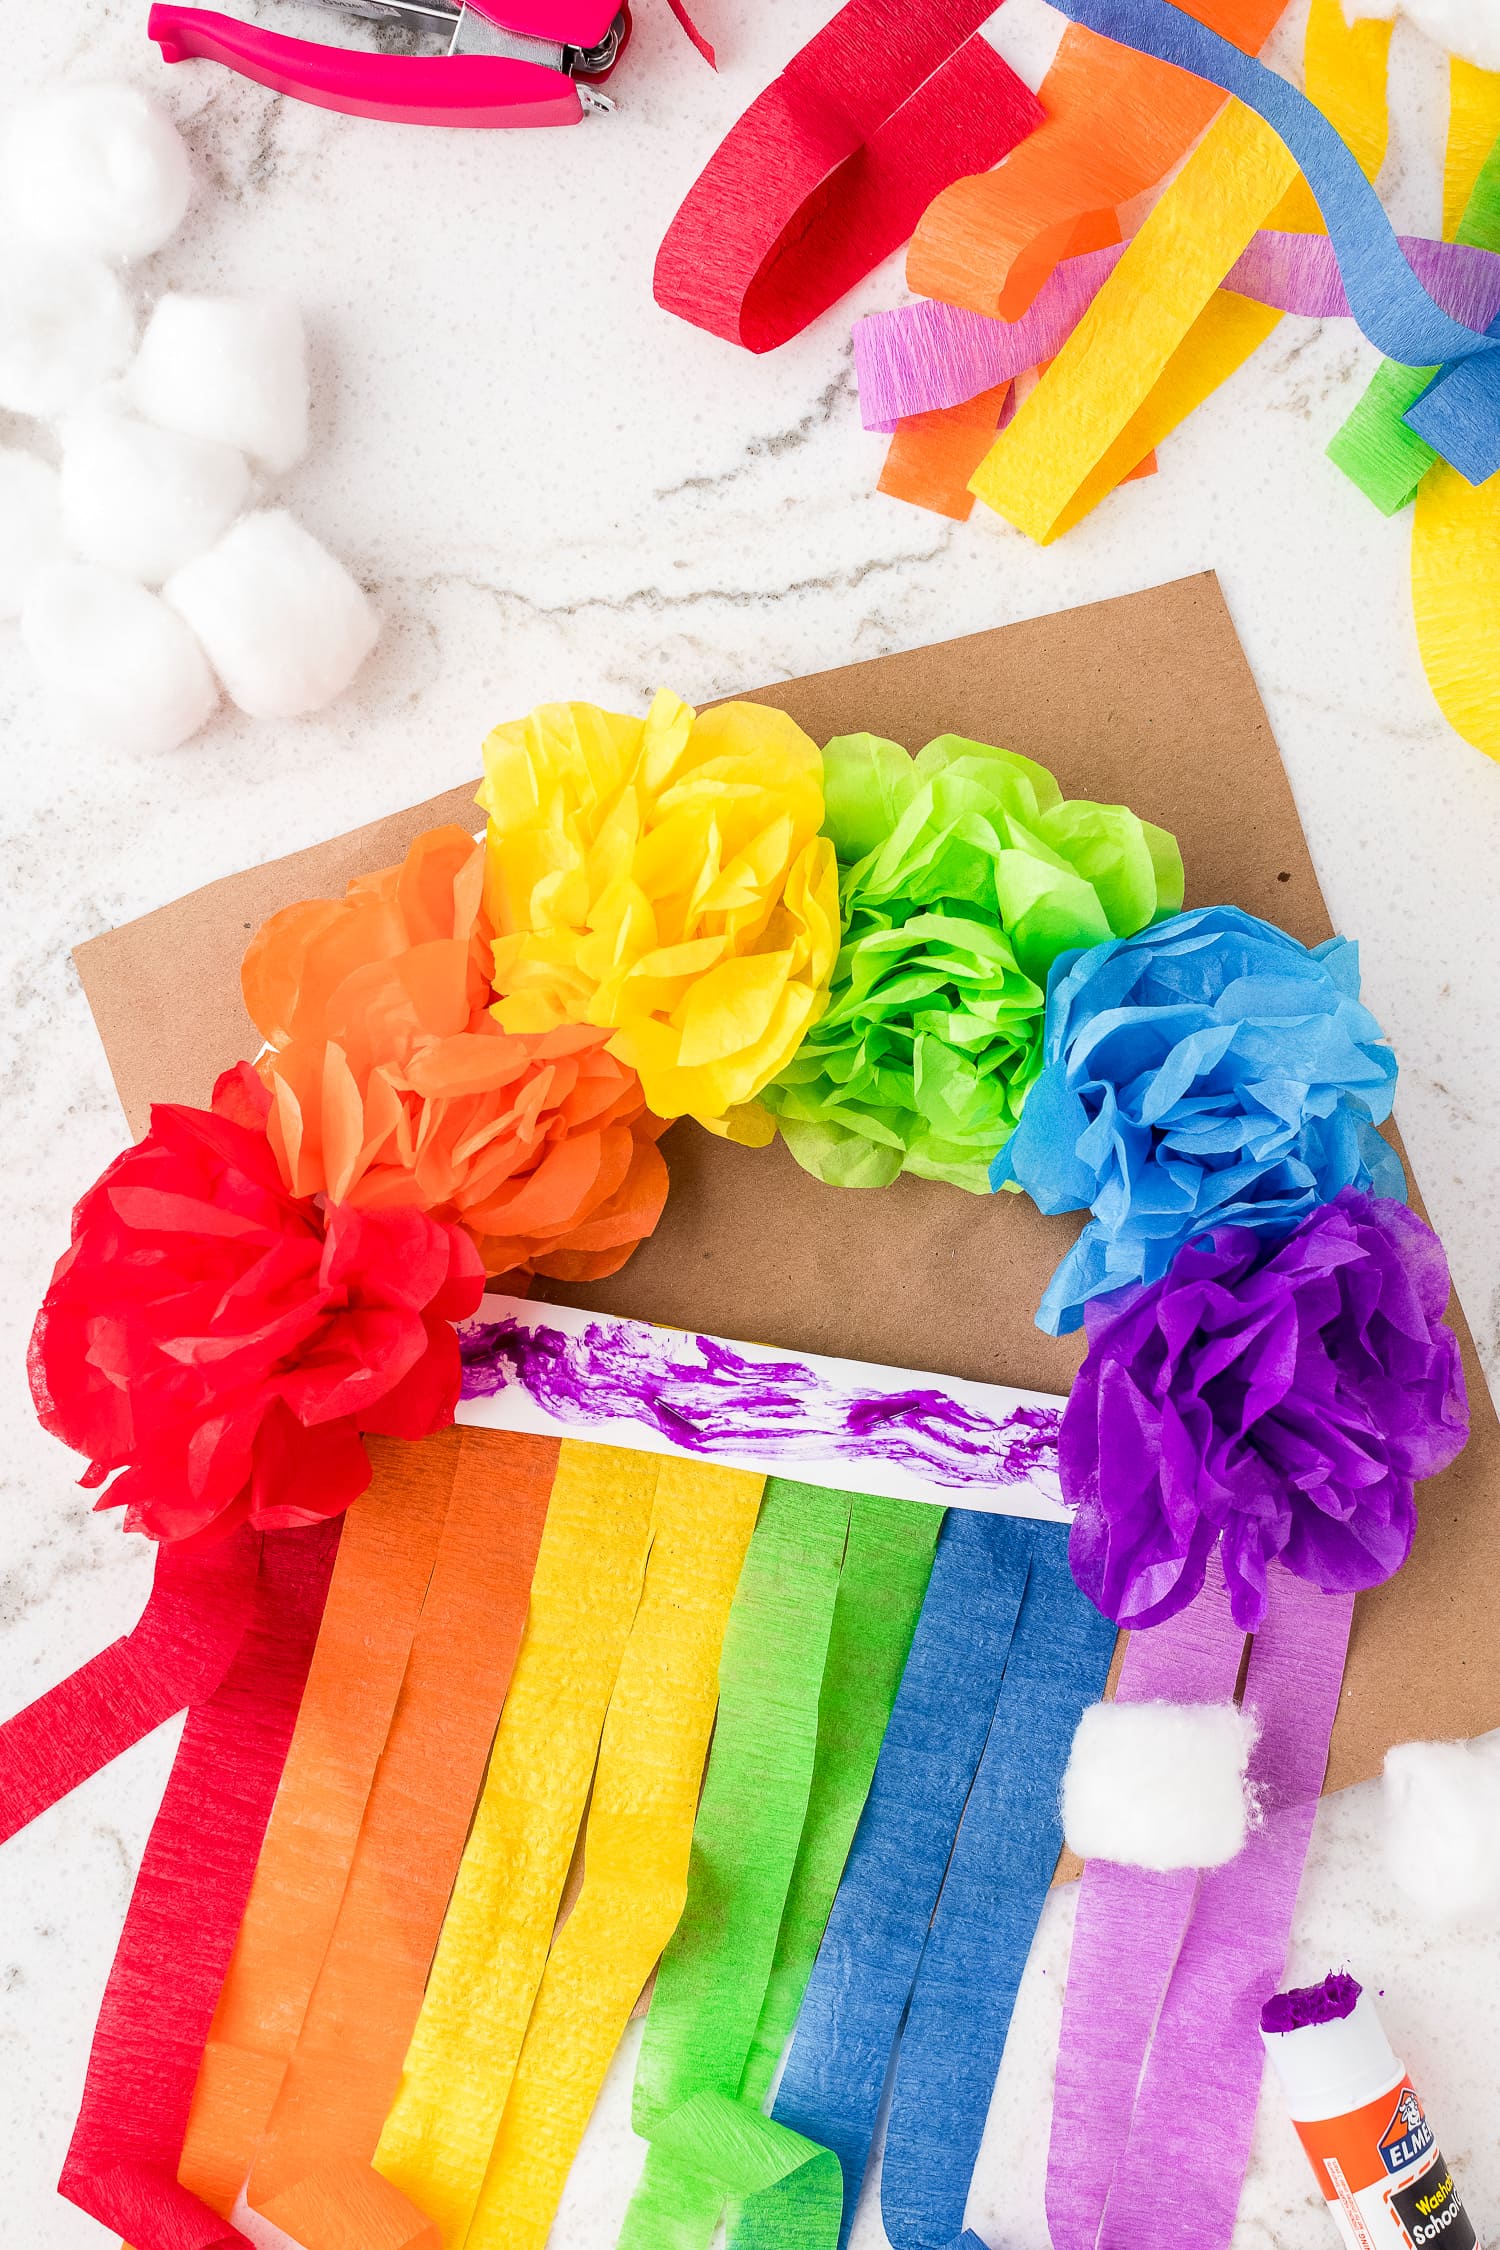


Add Cotton Ball Clouds
Let’s add some cotton balls to our creation for a cloud effect. Use a glue stick to affix the cotton balls to the base. Make sure to press down each cotton ball for about 10 seconds to ensure it is secure to the base. Once dry and secure, you can gently stretch the cotton to make your clouds more fluffy!
Attach Pipe Cleaner Hanger
Lastly, cut a green pipe cleaner in half. Attach it to the top of the paper plate with a stapler, and then create an arch and staple the other side to create your hanger.

Tissue paper crafts are so much fun! Once you try this one, make this tissue paper Christmas wreath during the holidays.
More Rainbow Themed Fun!
- Delicious homemade vanilla cupcakes topped with a homemade buttercream frosting made to look like clouds. The final touch is Rainbow Berry Candy and sugar pearls to make these Rainbow Cupcakes festive and fun.
- Cute, easy and fun craft for kids to welcome spring or summer! This Rainbow Sun Craft is a super simple craft that can be made with construction paper, glue, scissors and a black marker.
If you take a picture and share it Instagram make sure to #kidsactivityzone or tag us @kidsactivityzoneblog so we can see them!
Tissue Paper Rainbow Craft
Equipment
Ingredients
- 10- inch paper plate
- Tissue paper red, orange, yellow, green, blue, and purple
- Ruler
- Scissors
- Crepe paper streamers red, orange, yellow, green, blue, and purple
- Stapler
- Cotton balls
- Glue stick
- Green pipe cleaners
Instructions
- Take a 10-inch paper plate and cut off about 3 ½ inches across the bottom, creating a half-moon shape.
- Next, poke a hole in the paper plate with scissors about 1 inch from the bottom and cut a half-moon shape. Careful not to cut through your borders.
- Gather your tissue paper and cut it into 5-inch sections. You will want to make one flower of each color.
- Stack the pieces of the paper in groups of 6. Take a group of 6 pieces of tissue paper and make sure they are stacked and straightened equally.
- Using an accordion pattern, fold back and forth until you reach the end. Now staple the center of the folded stack.
- Next, trim and round the edge of your paper to give your flower the rounded petal look!
- Start by pulling the first layer of tissue paper towards the center of the flower. Repeat this step on each side, alternating until your flower is fluffed completely. Set your completed flowers aside.
- Take your red crepe paper streamer, measure, and cut a 12-inch strip. Repeat this process with all of the rest of your colors. Set the streamers aside.
- Grab your base (previously cut paper plate) and staple your first flower to the lower-left corner. Staple the back few layers of the flower's petal to the edge of the paper plate. Repeat this step with the remaining colors of flowers, creating an arch.
- Now that the flowers are secured, let’s add the crepe paper streamers. Start by stapling the red streamer just under the red flower and fastening it to the base of the paper plate. Cut the red streamer up the middle to create more movement. Repeat this step across the bottom with the remaining colors of streamers.
- Let’s add some cotton balls to our creation for a cloud effect. Use a glue stick to affix the cotton balls to the base. Make sure to press down each cotton ball for about 10 seconds to ensure it is secure to the base. Once dry and secure, you can gently stretch the cotton to make your clouds more fluffy!
- Lastly, cut a green pipe cleaner in half. Attach it to the top of the paper plate with a stapler, and then create an arch and staple the other side to create your hanger.