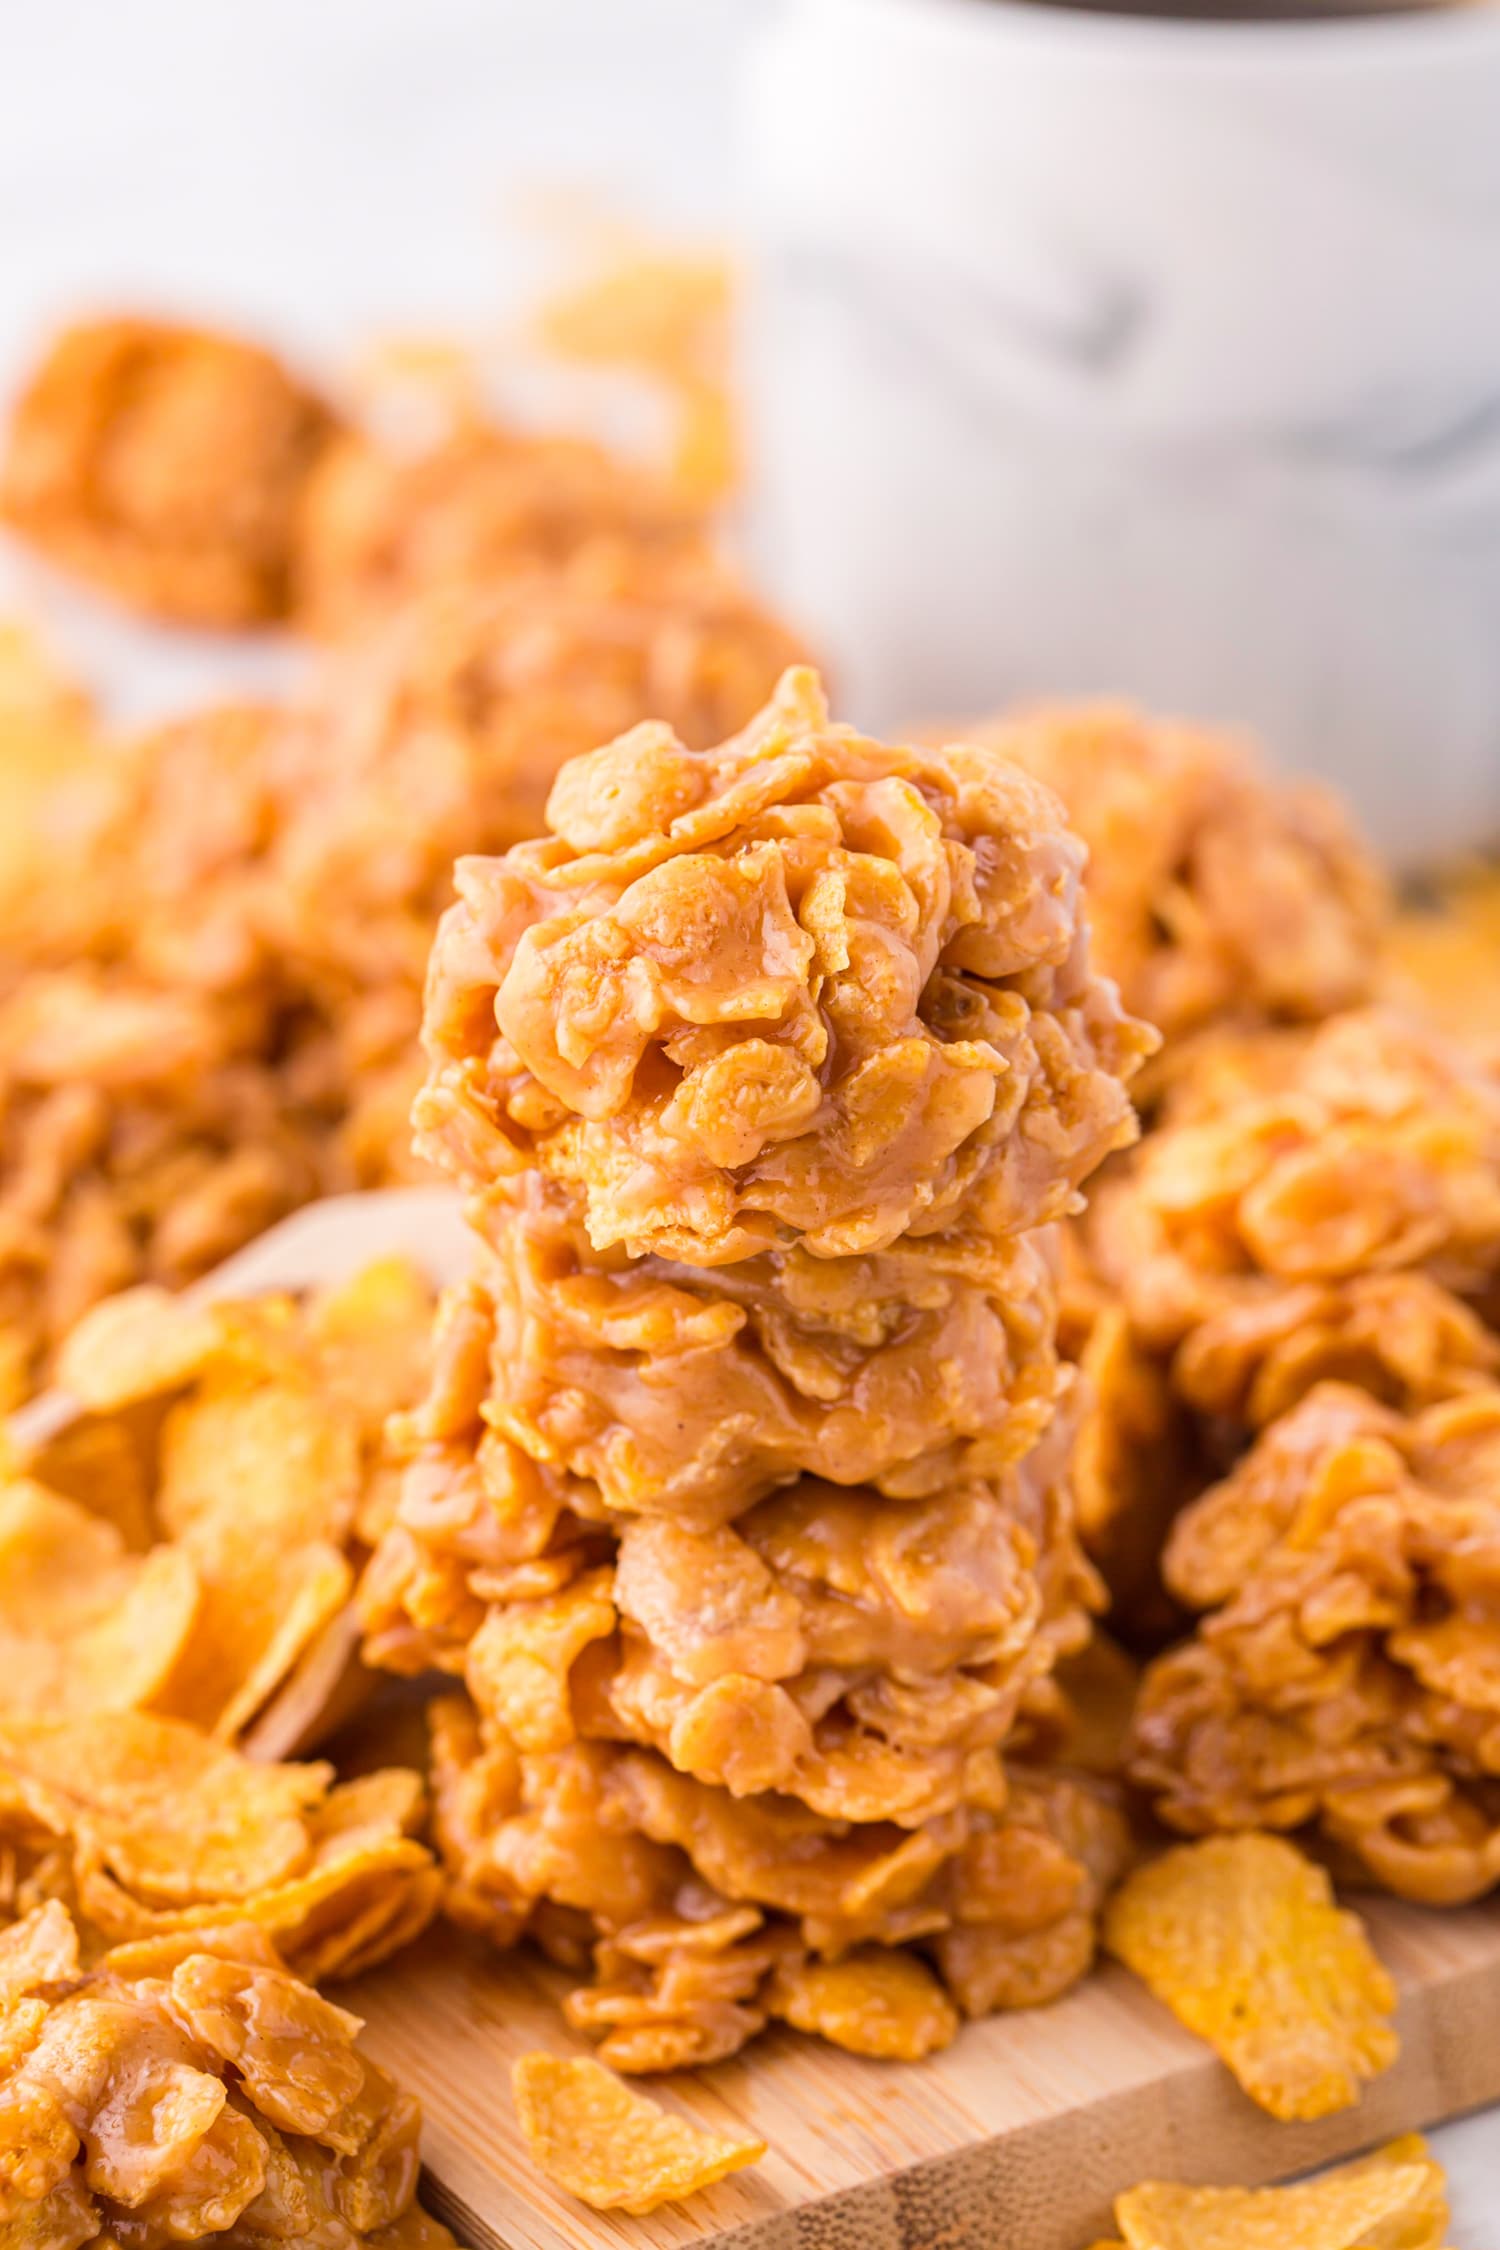
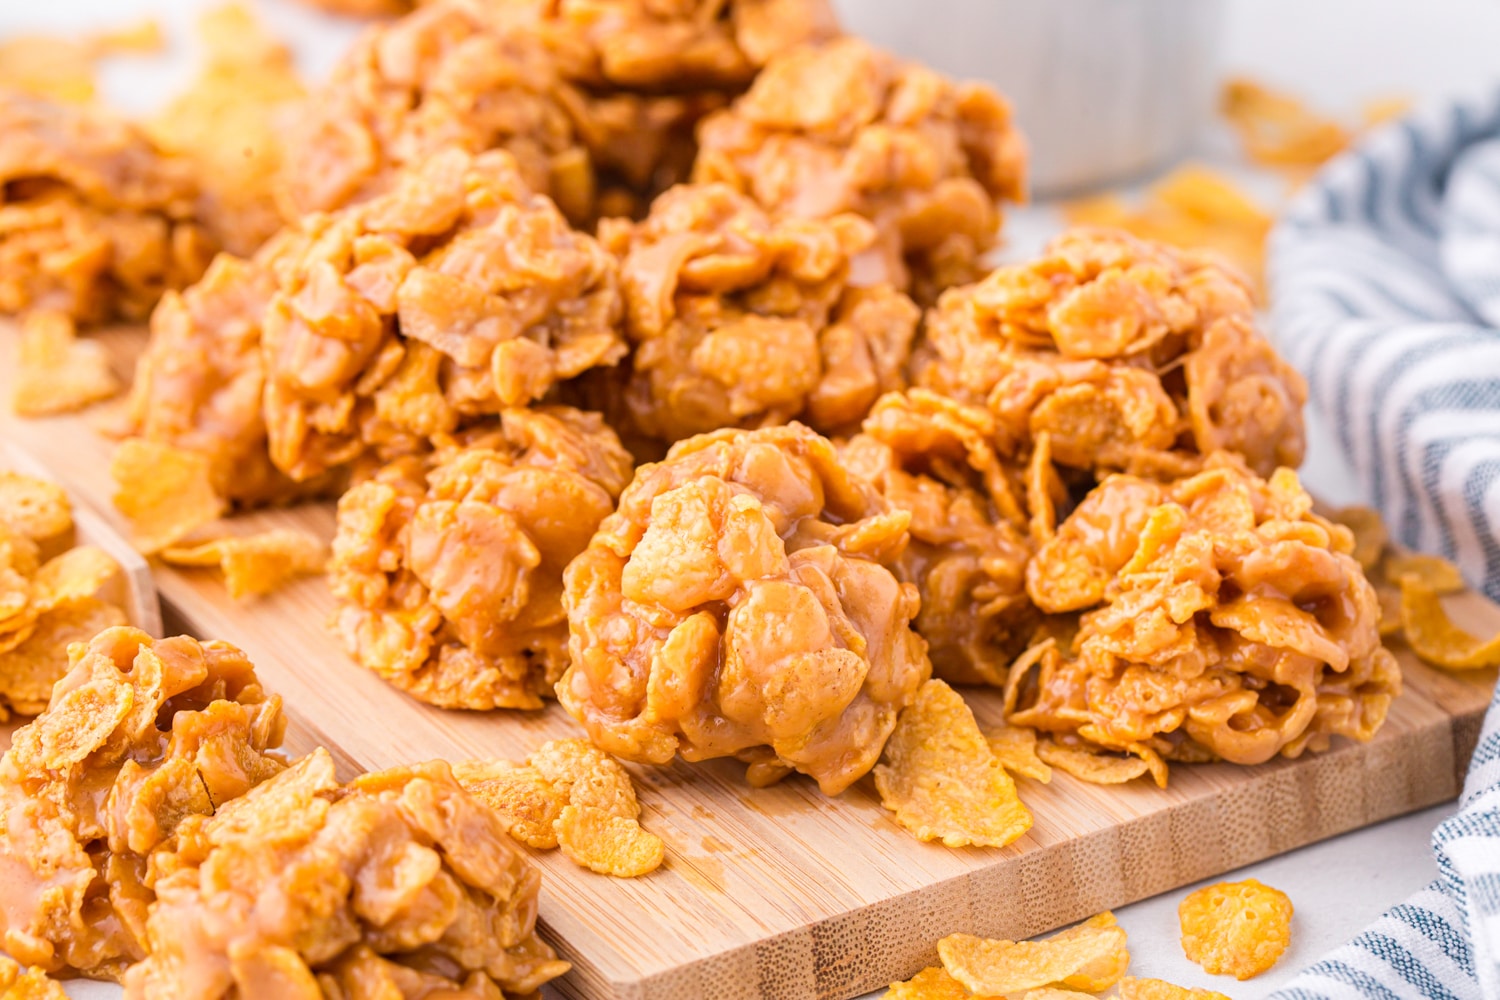
Peanut Butter Cornflake Cookies
Quick and easy No Bake Peanut Butter Cornflake Cookies are treats kids love to make and eat! These are so easy to make with minimal ingredients that it’s the perfect way to get kids in the kitchen. They are sweet, crunchy and irresistible.
No bake recipes are by far some of the most kid-friendly recipes out there! I don’t have to worry about little hands touching a hot oven or a hot pan, and they typically are so easy that older kiddos can make them all on their own. And that is, in fact, exactly the case with these delicious no bake peanut butter cornflake cookies! This yummy recipe is drool worthy for peanut butter lovers, but is so easy that kids can make it all on their own.
We love to make no bake oatmeal cookies, so adding more incredible no bake recipes to our list of tasty desserts is always a win. These chewy cookies have a slight crunch from the cornflakes and the most delicious flavor from a sugary peanut butter coating. If you love peanut butter treats, then these will sky-rocket to the top of your favorite’s list in no time!
Why You’ll Love Peanut Butter Cornflake Cookies
- No baking required! Keep that oven off and use the stove top instead. No bake recipes like this one are great for hot summer days when the last thing you want in the house is more heat.
- This is a wonderful recipe for beginners. Since there are minimal steps and very basic ingredients, you can rest assured that novice bakers will be working like pros in the kitchen.
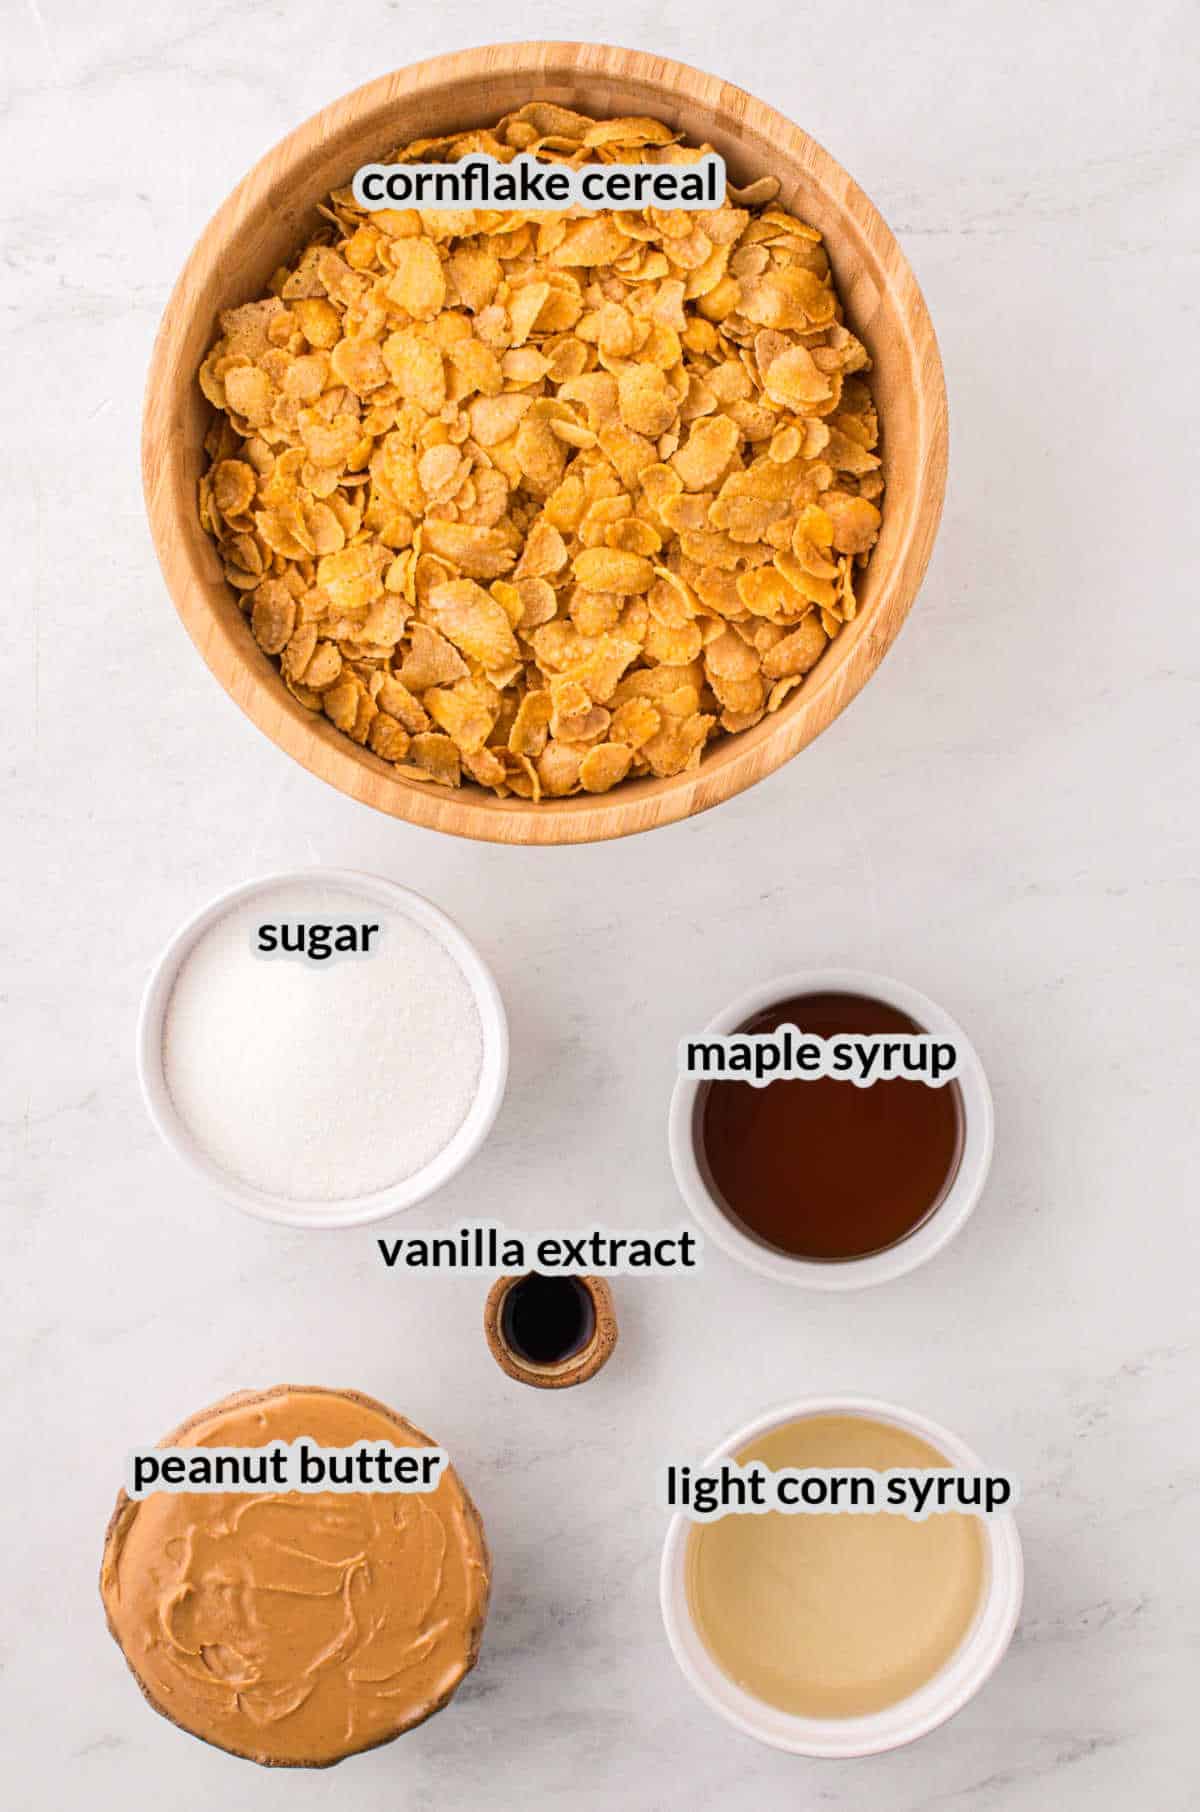
- You only need six simple ingredients to make cornflake and peanut butter cookies. You may even have most, or all, of them on hand already!
Ingredients for this Peanut Butter Cornflake Cookies Recipe
- Peanut butter – You’ll need one cup of peanut butter for this cookie recipe, so make sure you have plenty of your favorite smooth peanut butter on hand. Crunchy peanut butter is fine too!
- Light corn syrup – Corn syrup will add structure to the cookies and actually helps create that chewy texture you know and love.
- Vanilla extract – A splash of vanilla extract takes these cookies from good to great. So tasty!
- Maple syrup – For a bit more sweetness and some more structure, use maple syrup in the cookie mixture.
- Cornflake cereal – Grab a big box of cornflakes so that you have more than enough cereal on hand.
- Granulated white sugar – Sweeten your peanut butter cornflake cookies to perfection with some granulated white sugar.
Helpful Tools

How to Make Peanut Butter Cornflake Cookies
- Begin by lining a baking sheet with parchment paper and then set it aside to use later. Then pour corn flakes into a large bowl and set them to the side.
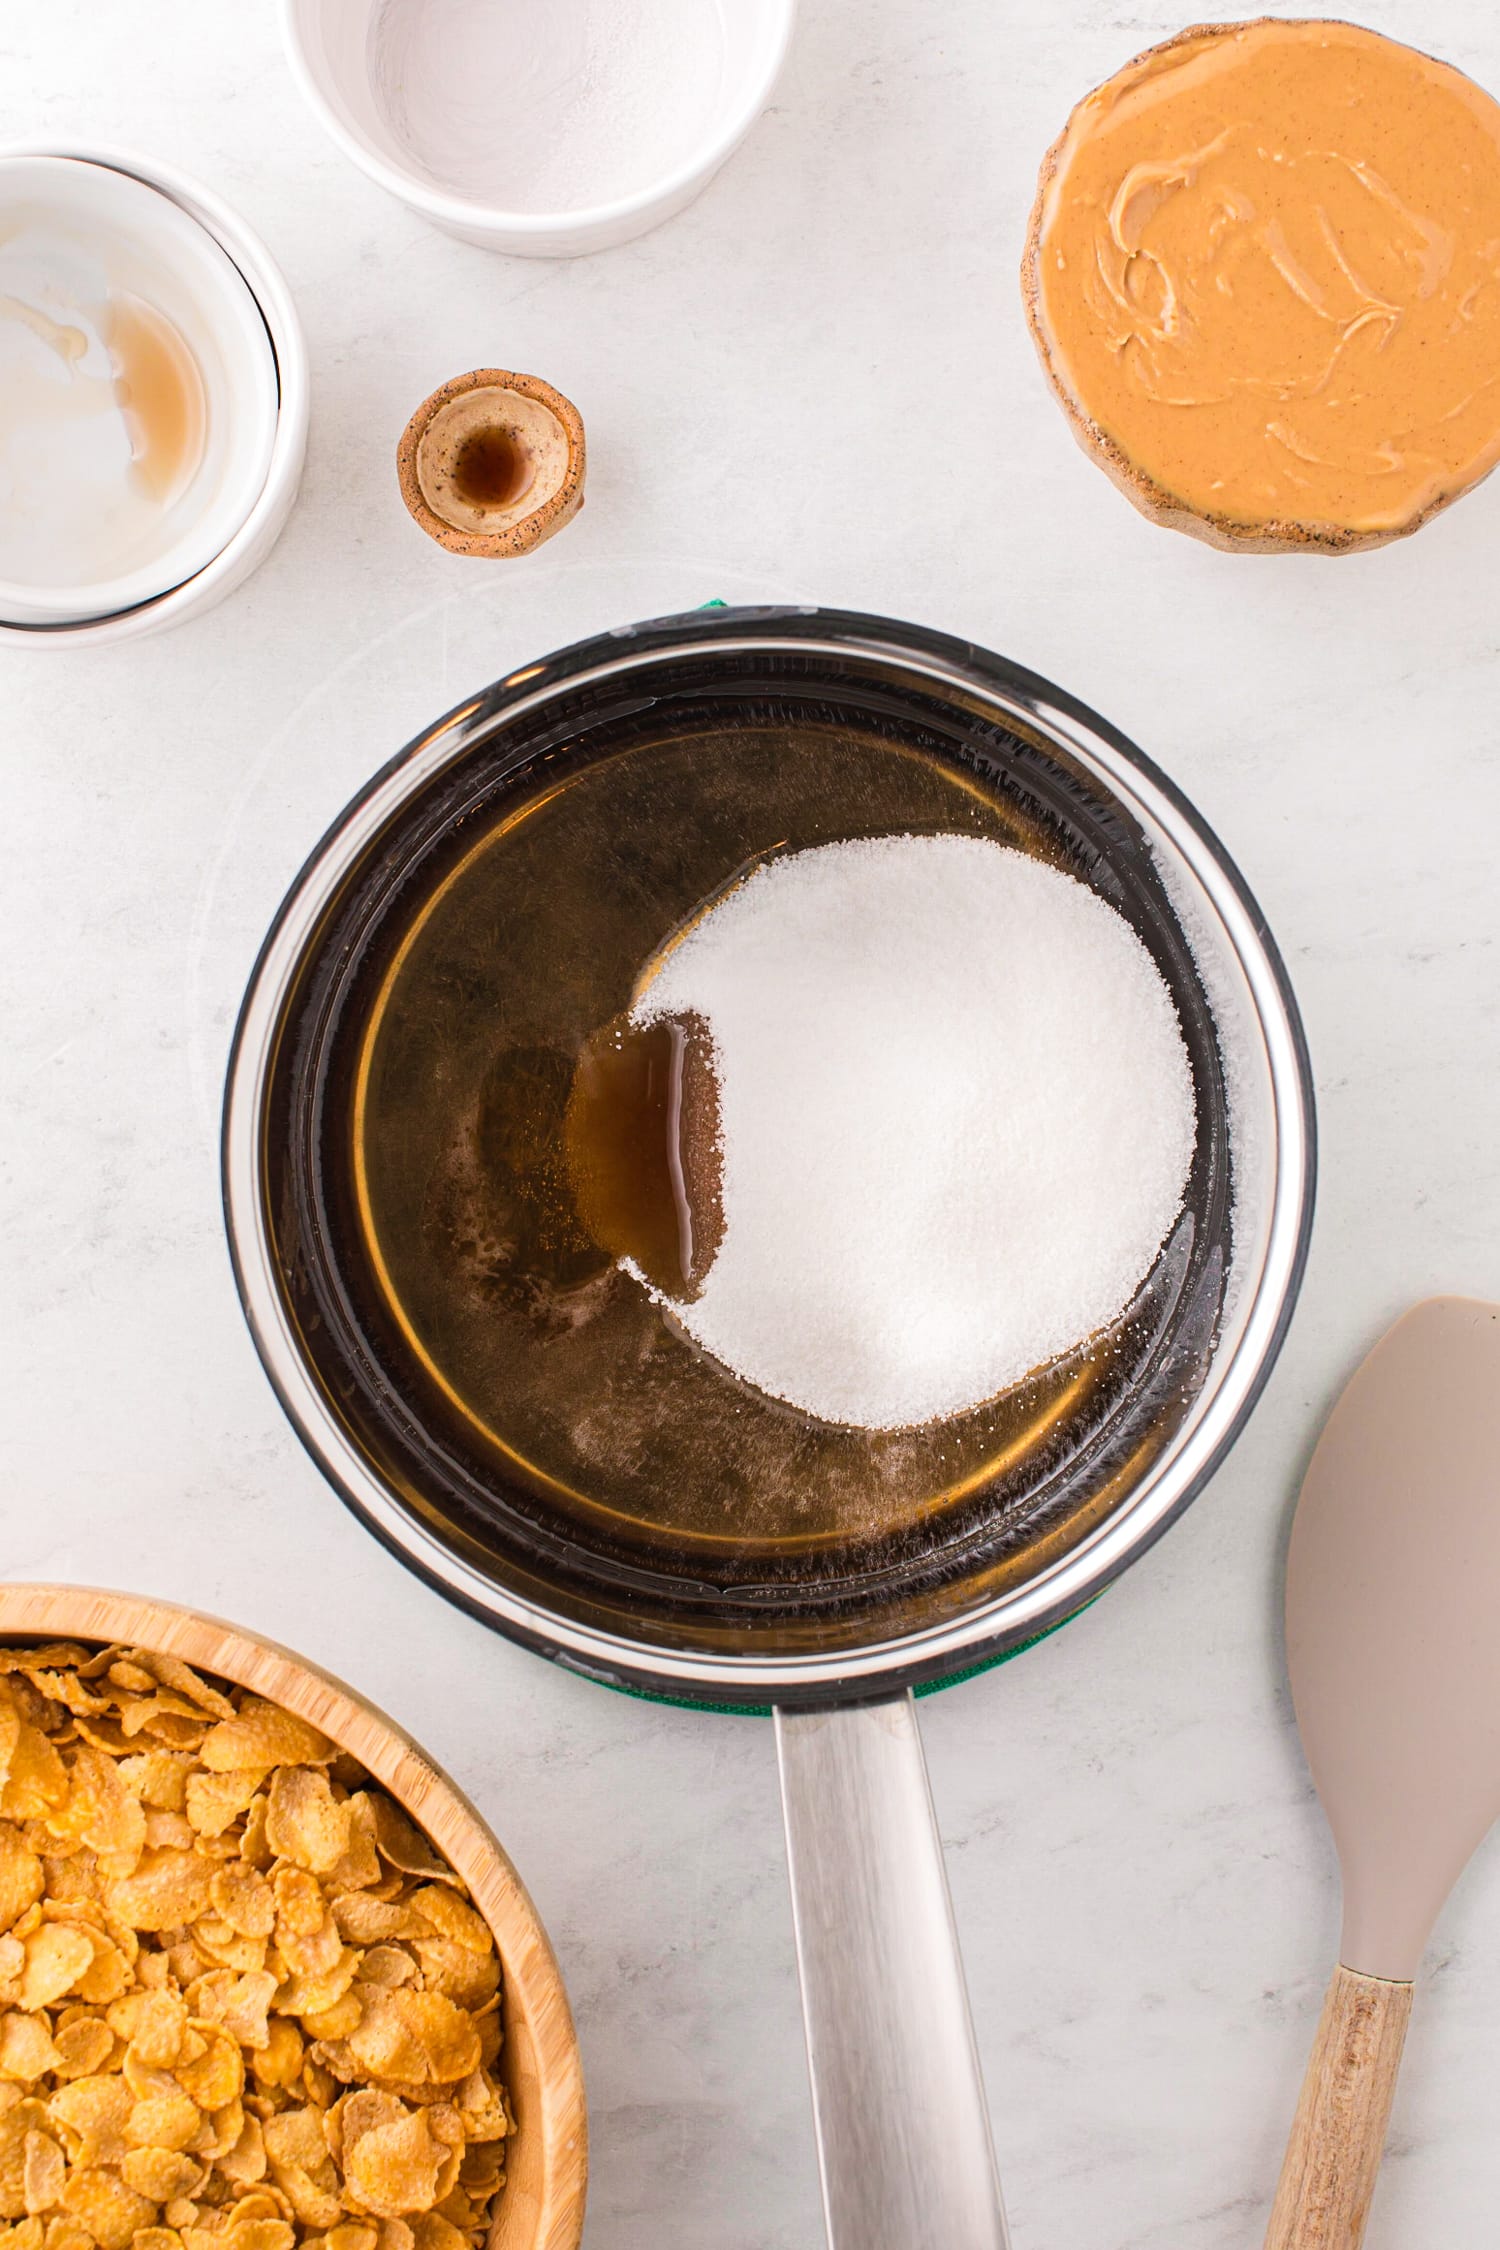
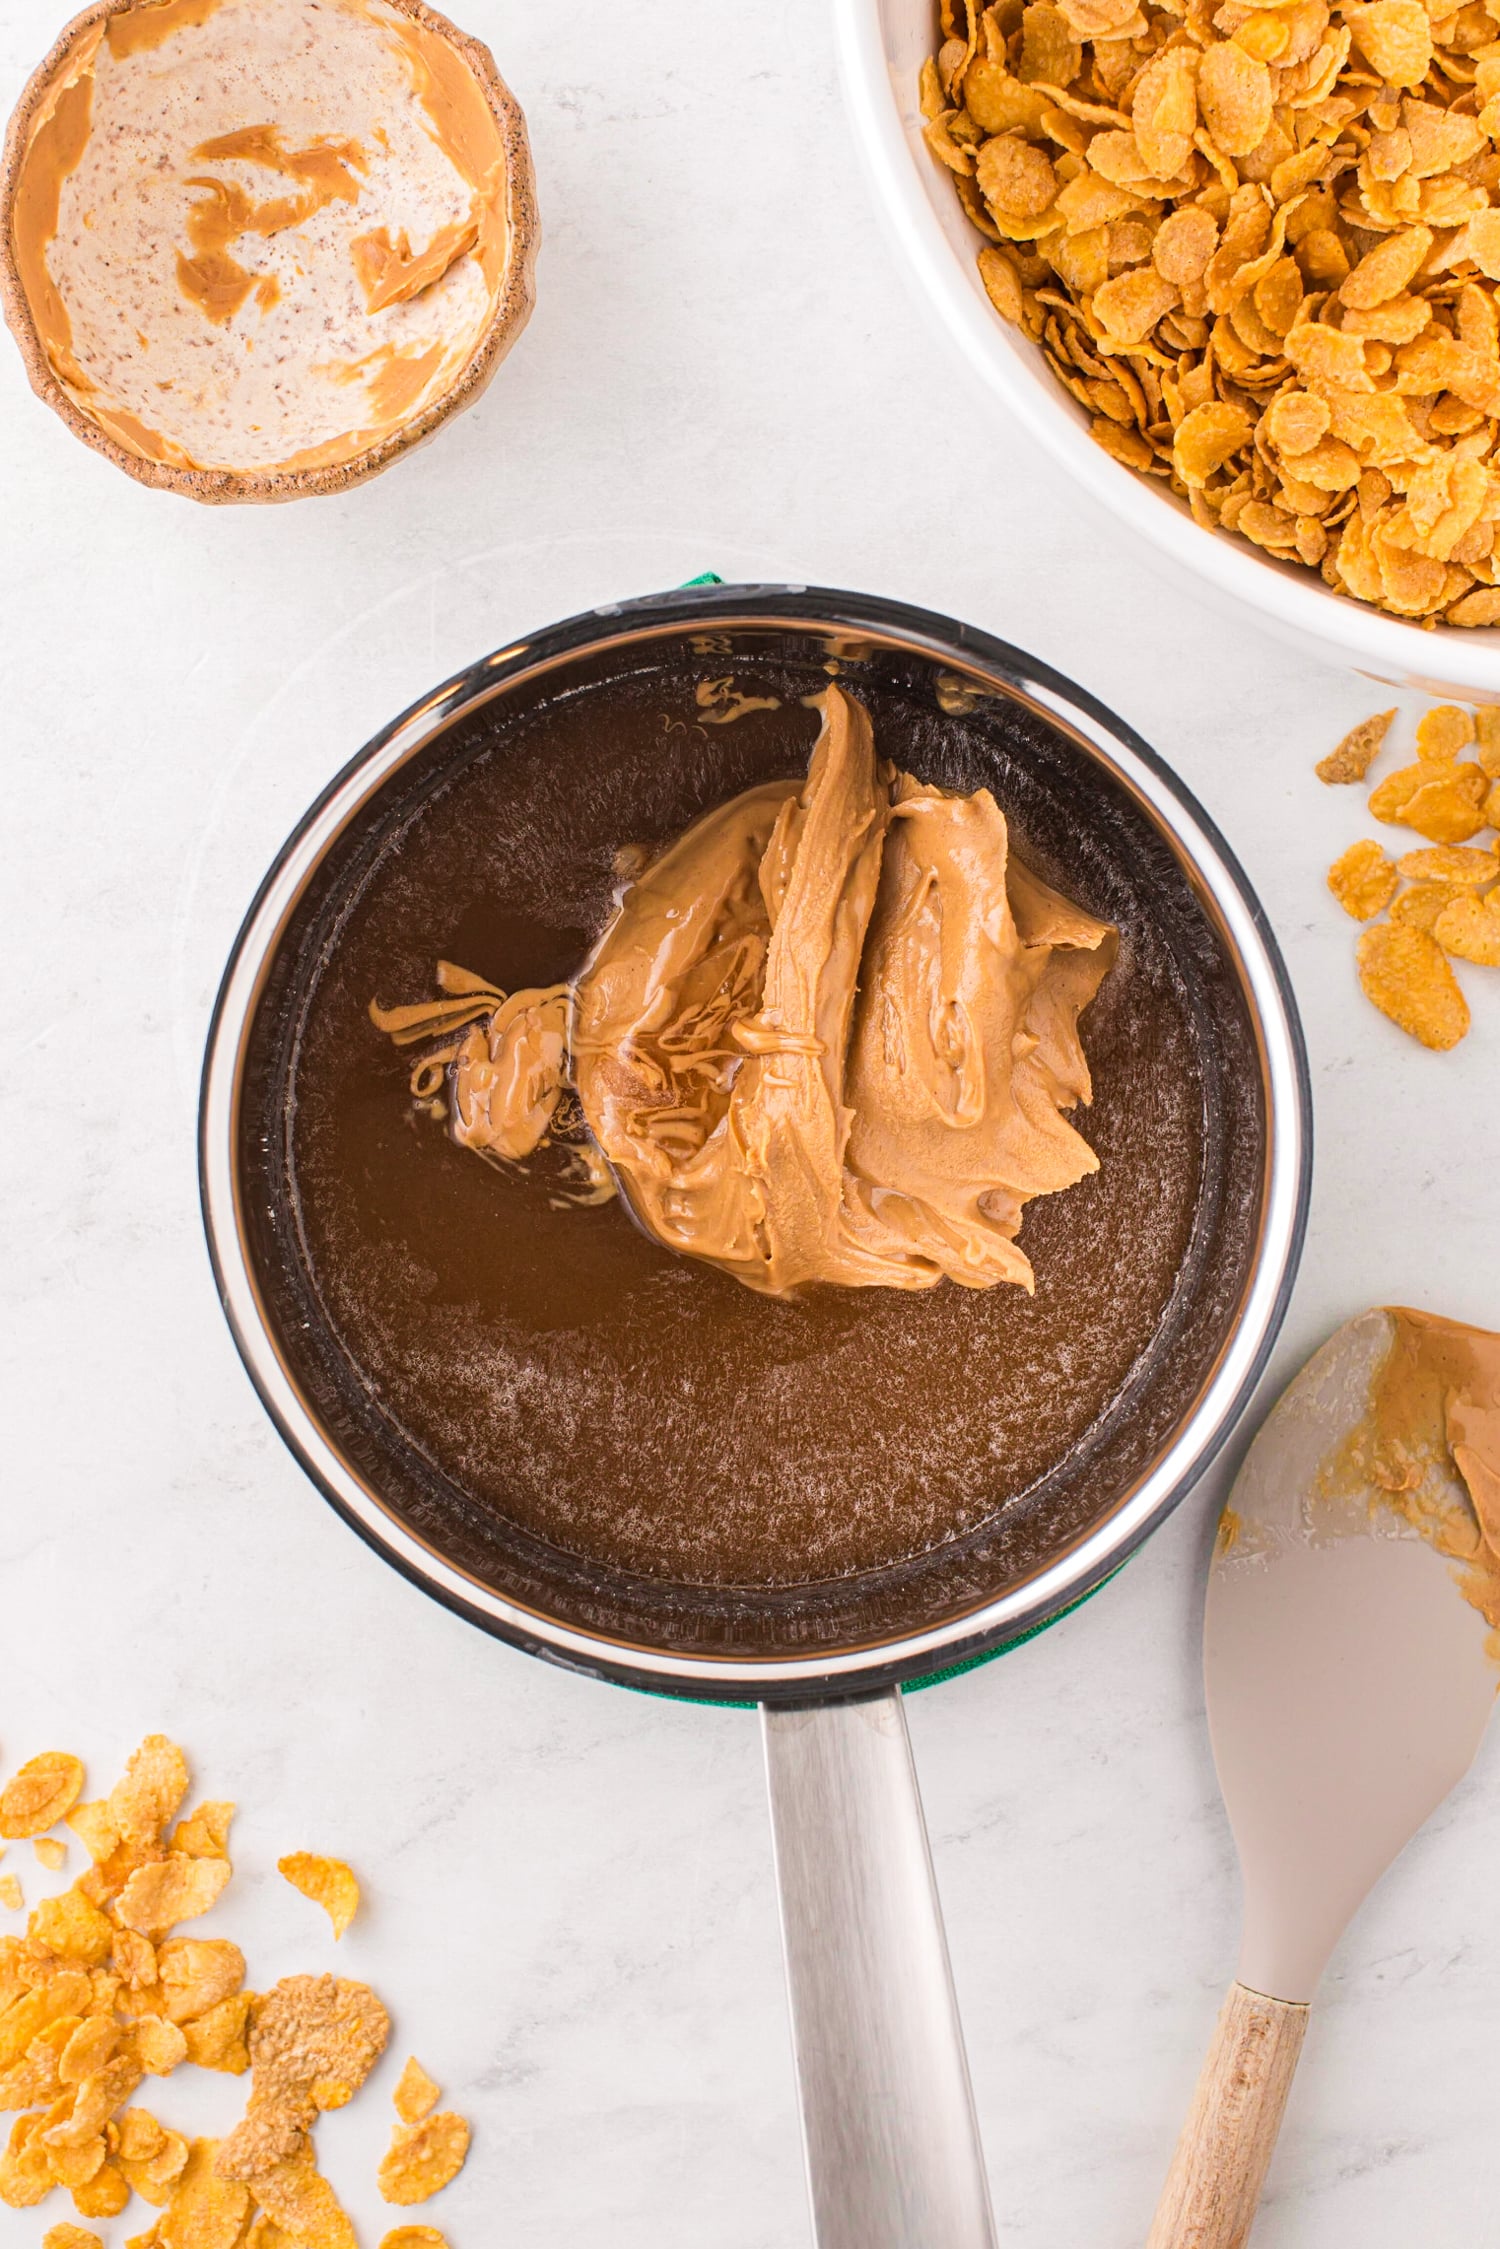
- Pour the corn syrup and maple syrup into a medium saucepan and warm on medium-low heat for 3-4 minutes. Stir occasionally and heat the mixture until slightly bubbly, do not boil it.
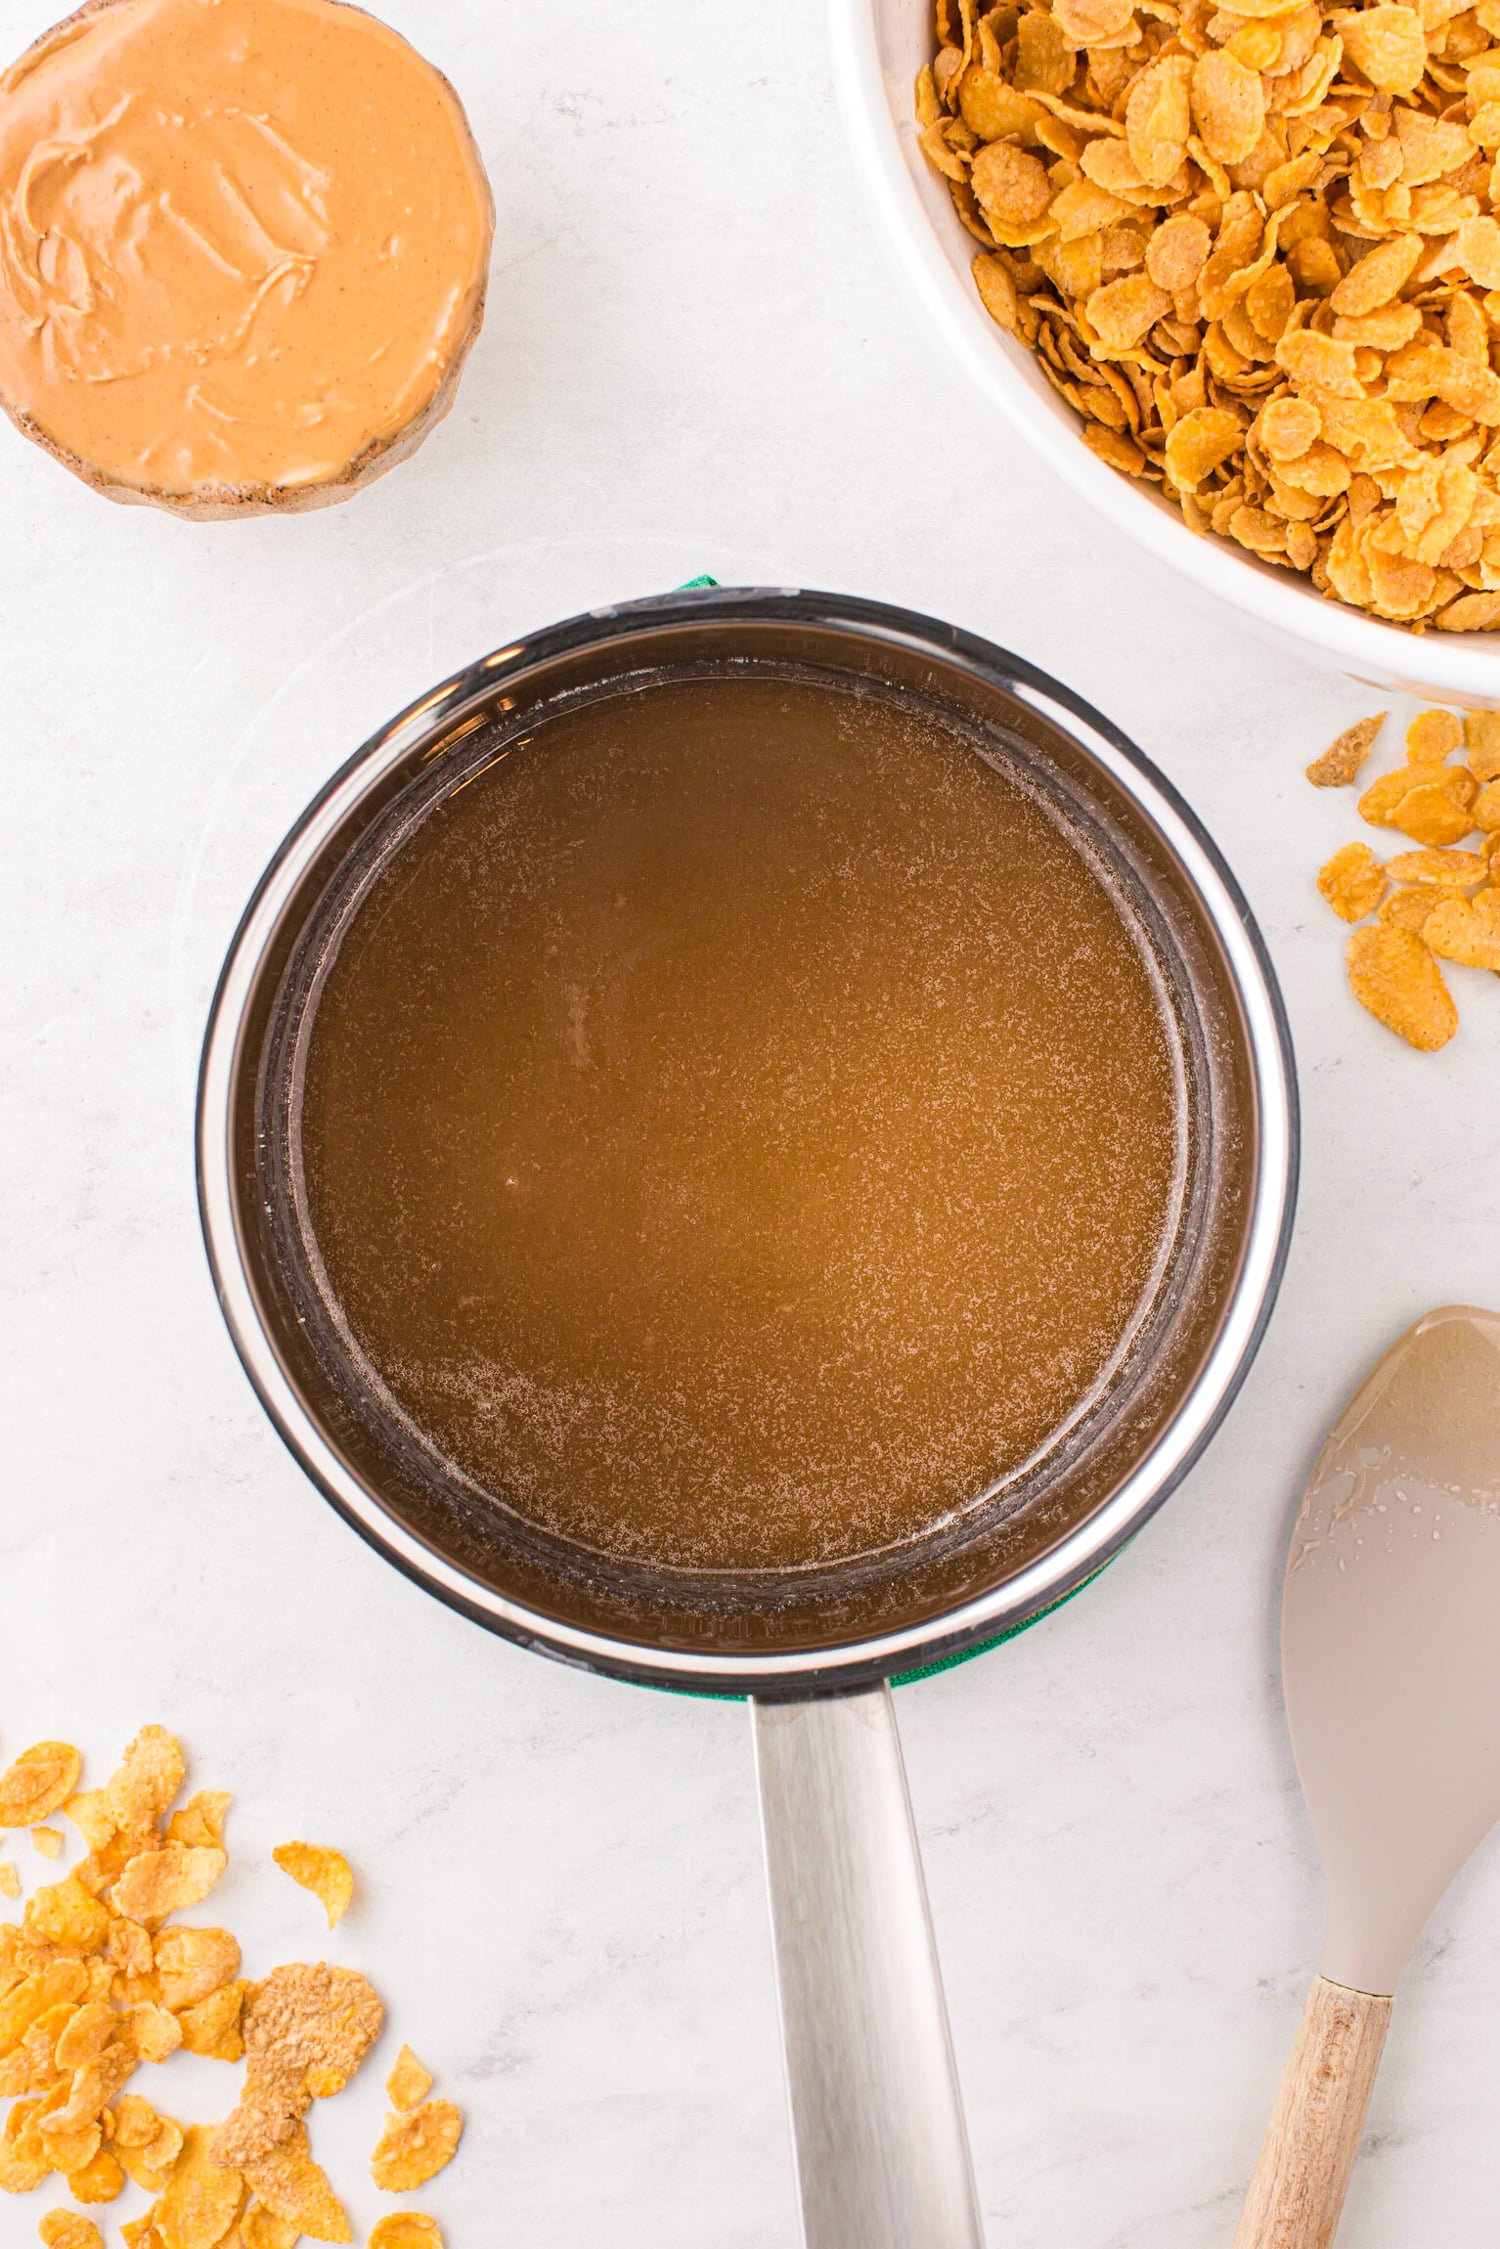
- Turn the heat off and mix in the white sugar and vanilla extract. Once combined, mix in the creamy peanut butter using a silicone spatula.
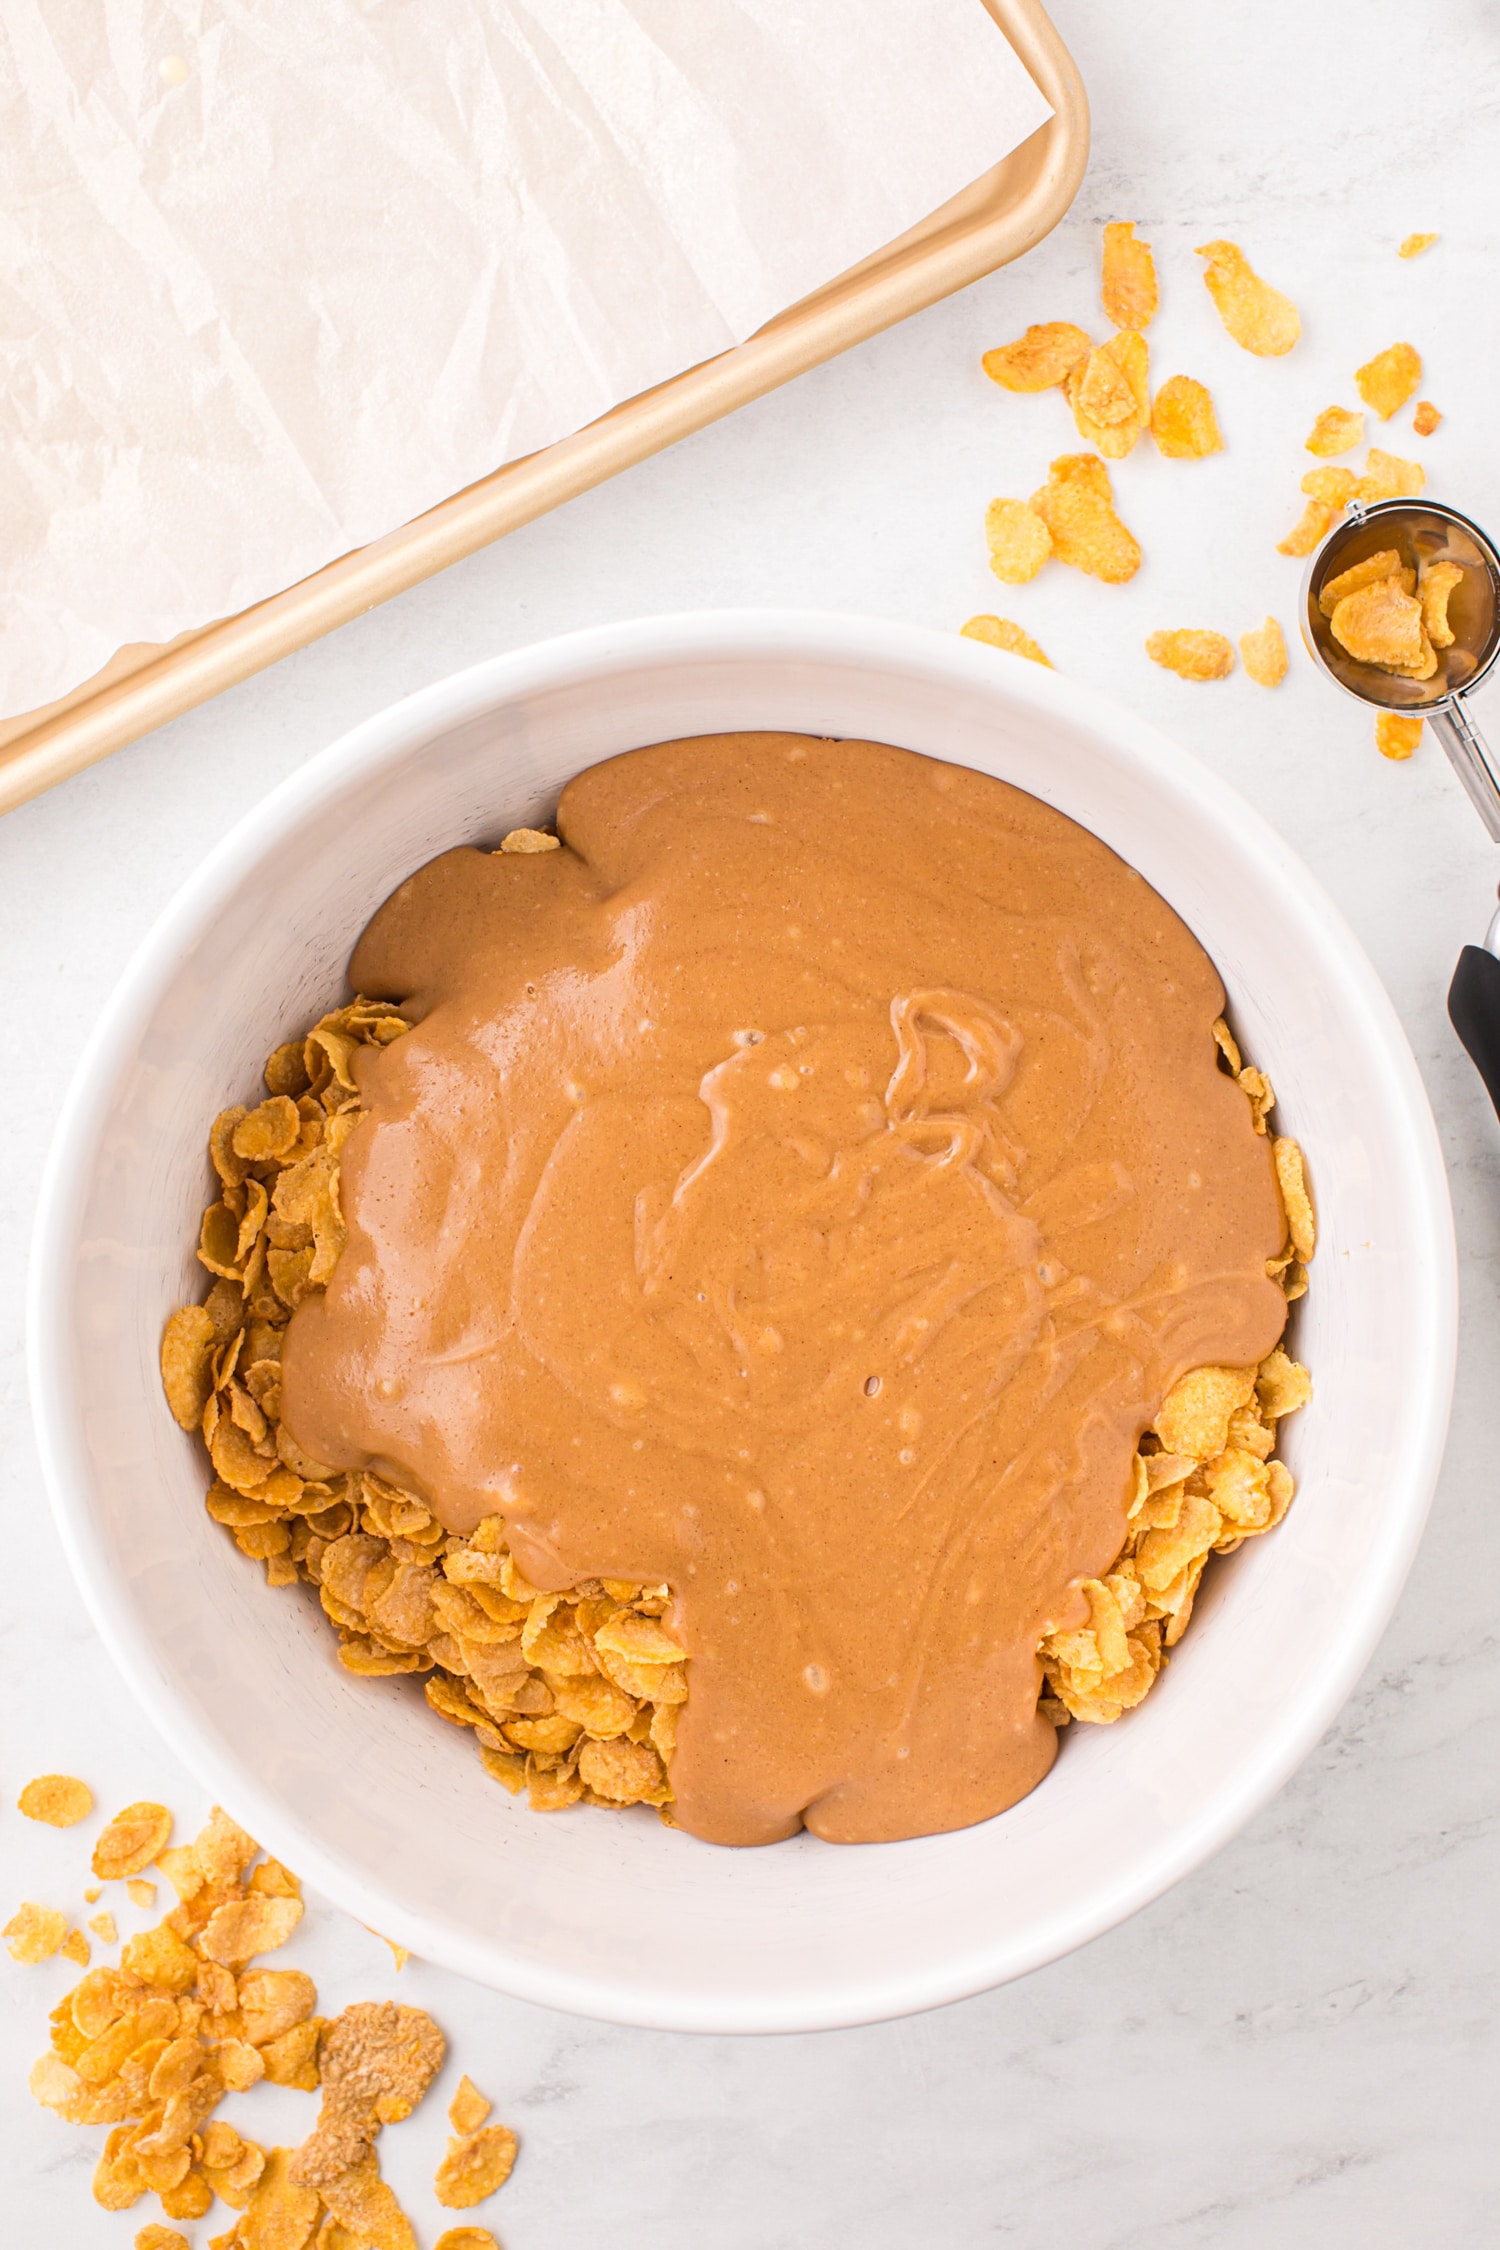
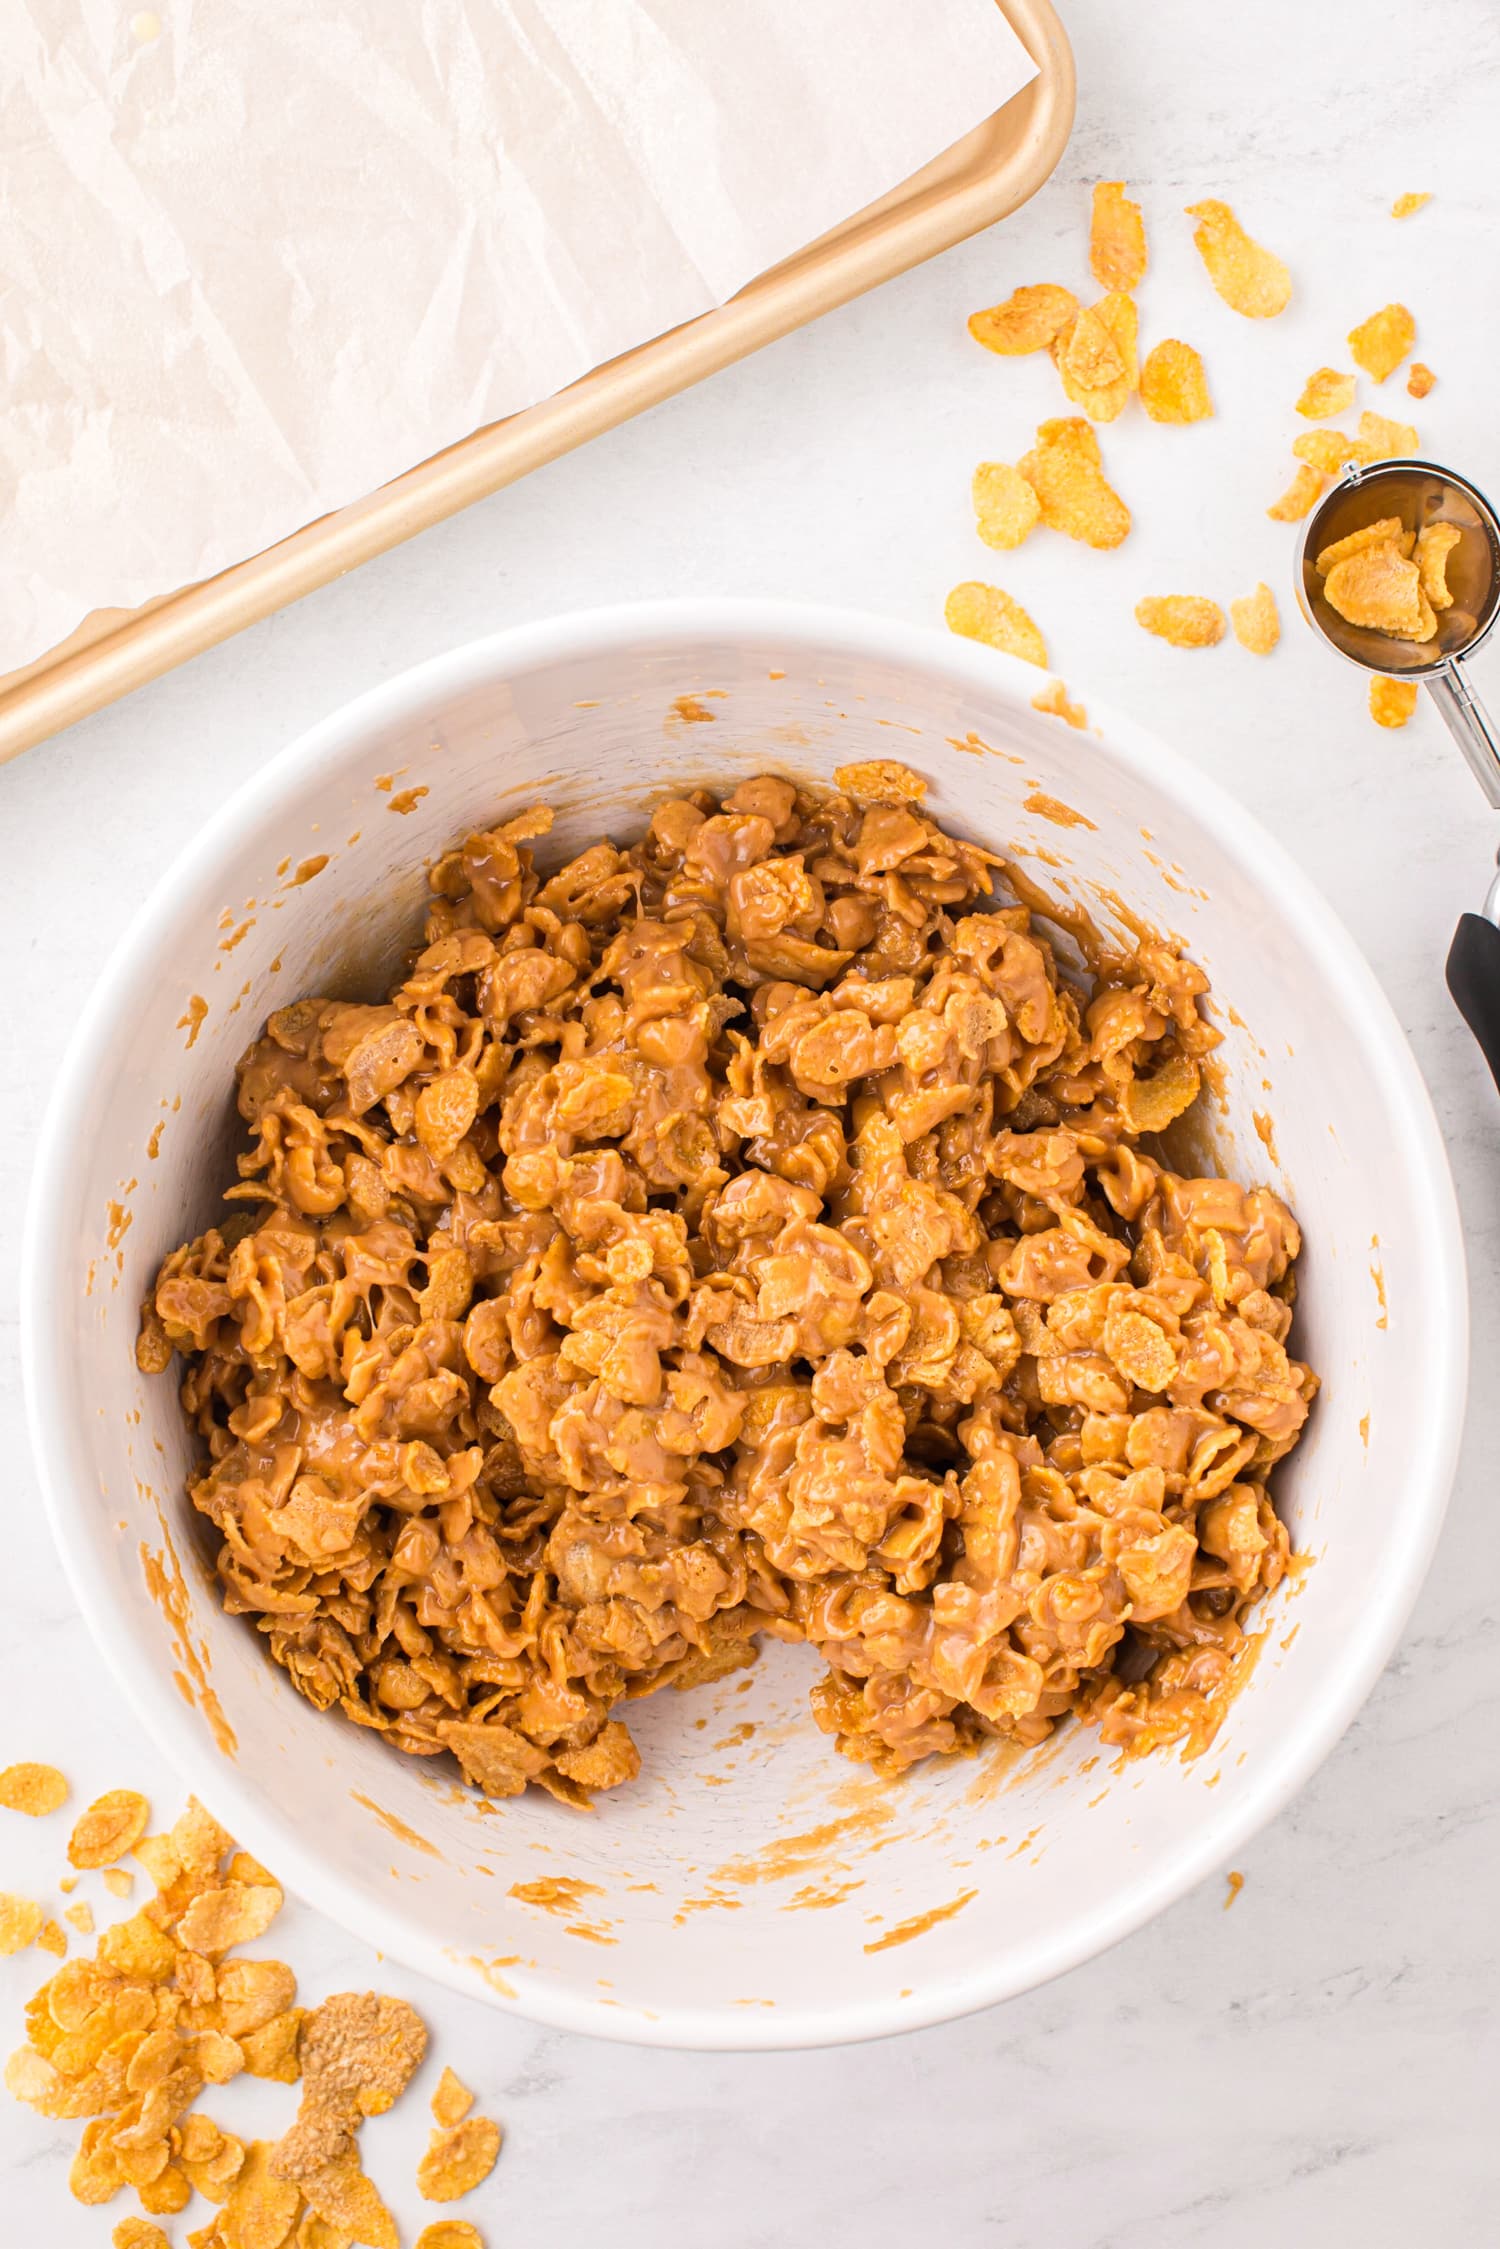
- Pour the peanut butter mixture over the cornflakes and slowly mix it into the spatula, careful not to crush the cereal.
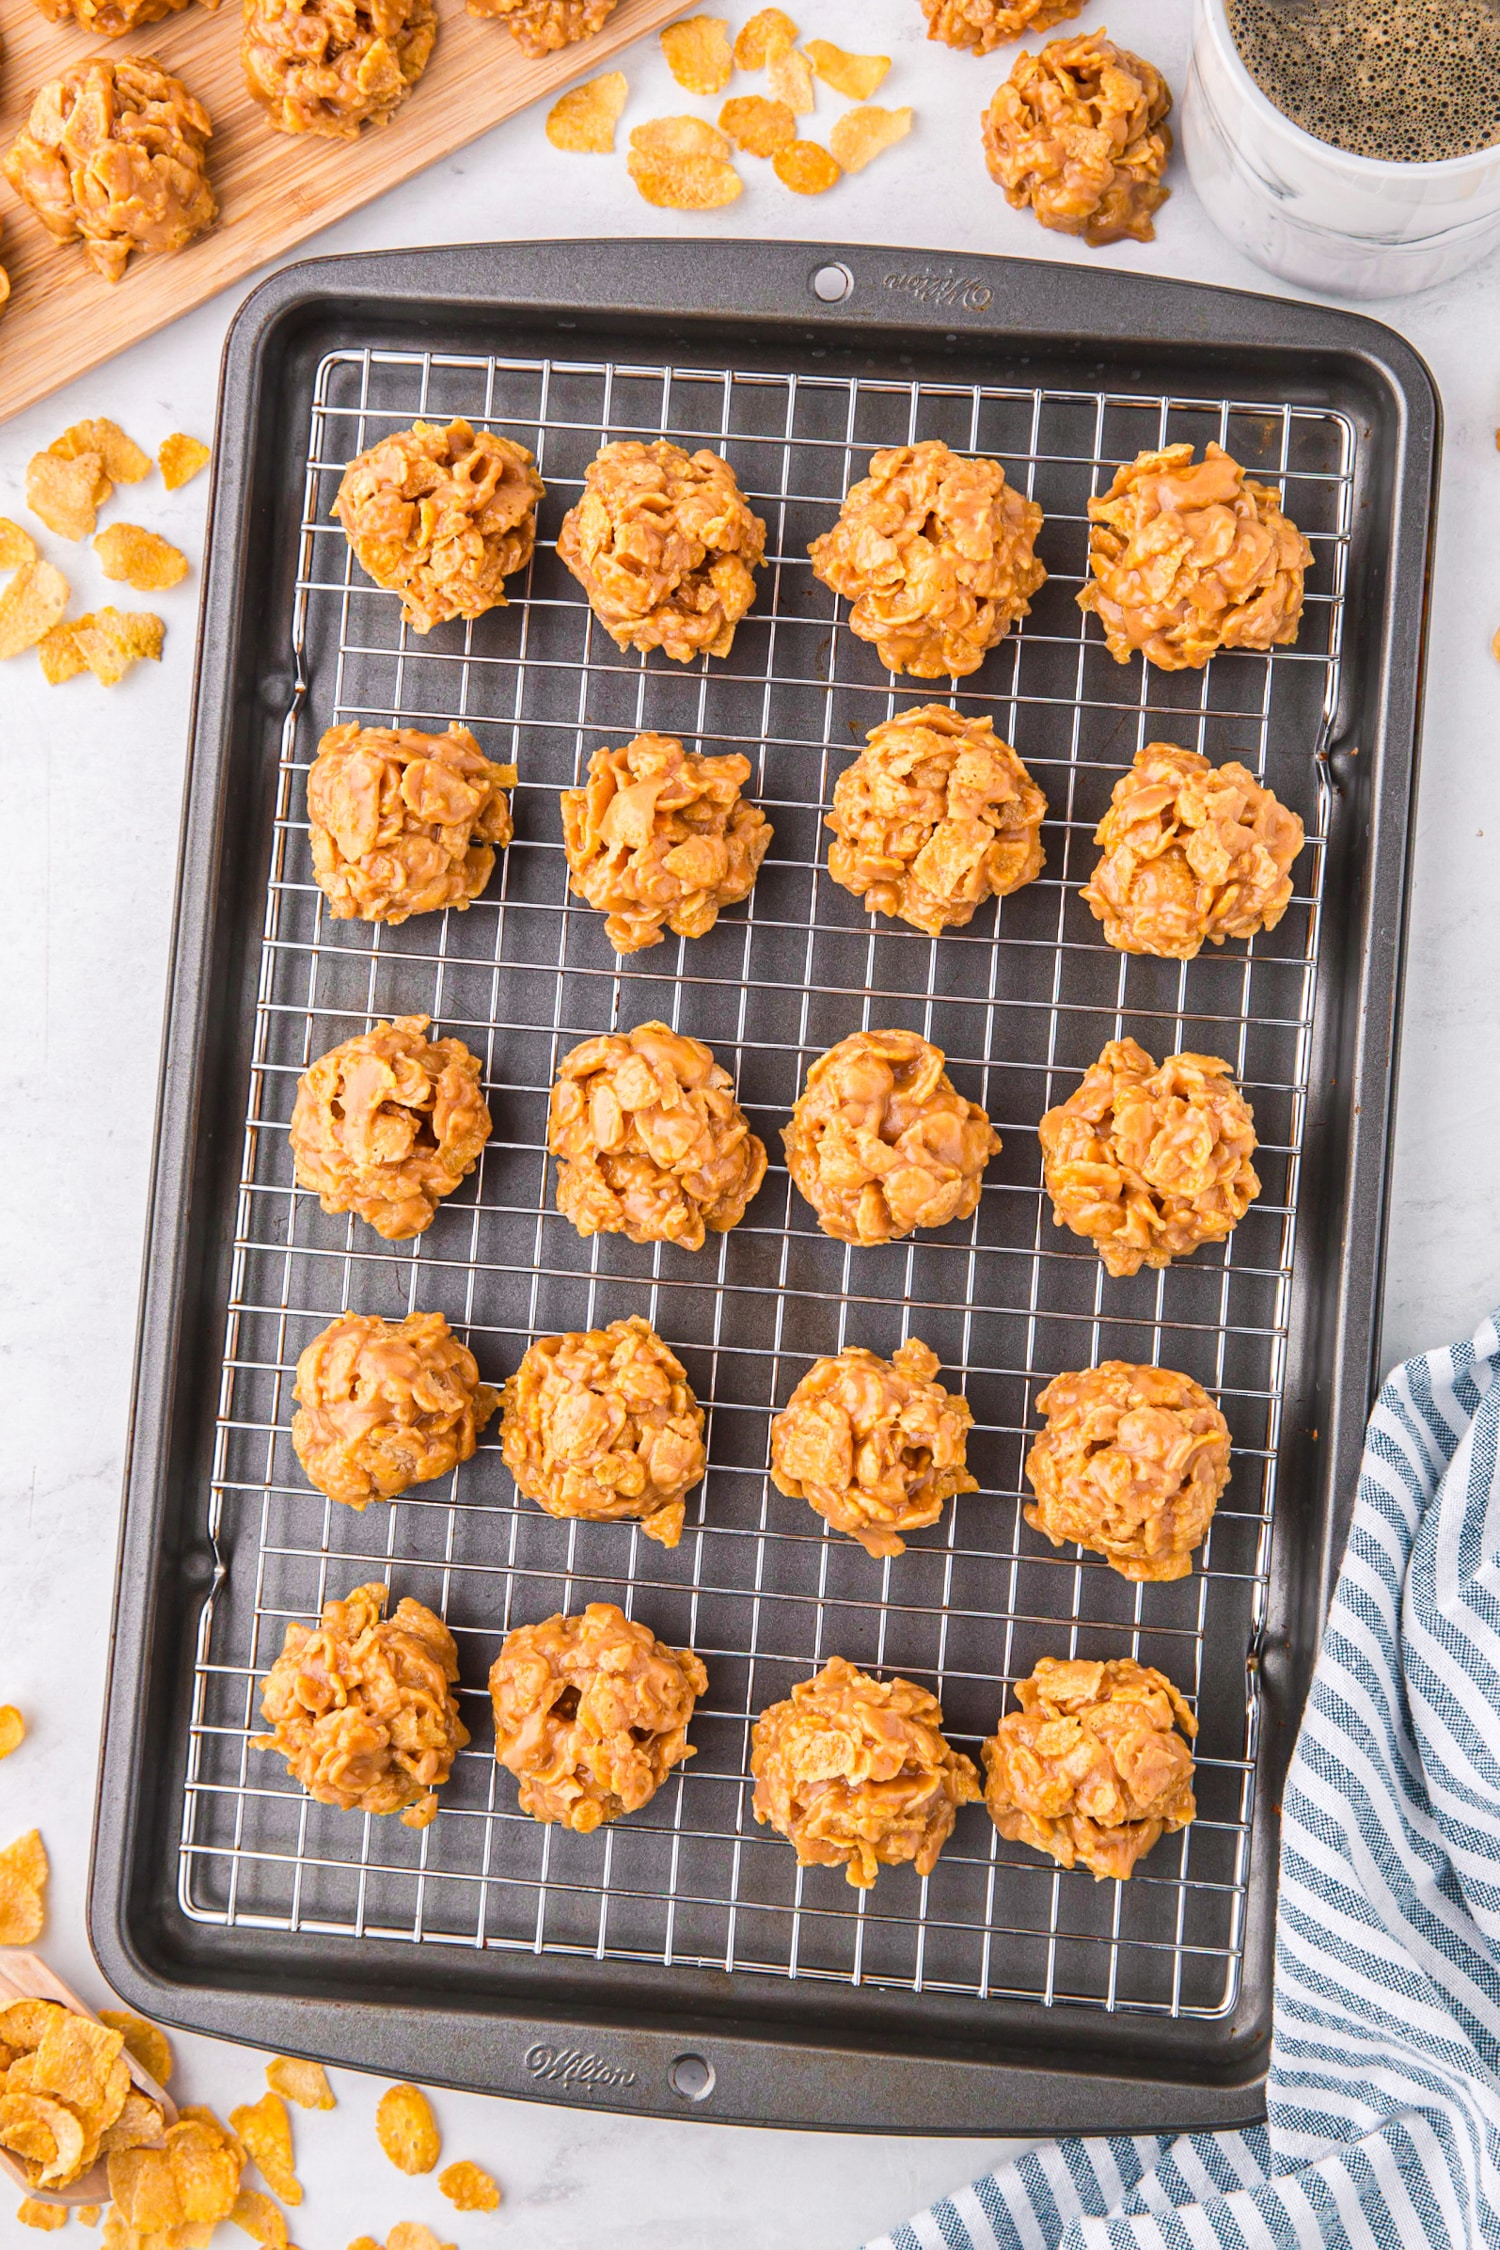
- Work quickly and drop 1 ½ tablespoon cookie mounds onto the prepared baking sheet using a cookie scoop or spoon.
- Allow the no bake peanut butter cornflake cookies to set for 10-15 minutes, then serve!
How to Store No Bake Peanut Butter Cornflake Cookies
Leftovers of this peanut butter cornflake cookies recipe store very well. Transfer the cookies to an airtight storage container. Store them in a single layer, or with a sheet of wax paper in between layers if you need to stack them. Then store at room temp for 2-3 days.
FRIDGE: You can also place leftovers into an airtight container and store in the fridge for up to a week. Before eating a cookie from the fridge, you may need to let it sit out for a few minutes. Otherwise, the texture could be tough from the cold temperature.
Can I freeze Peanut Butter Cornflake Cookies?
These sweet treats do freeze well! You may notice a slight change in texture once they have thawed, but they’re still quite tasty. I recommend freezing them in a single layer so that they do not stick together as they thaw. Freeze for up to 2-3 months. Allow to thaw before eating.
What can I add to peanut butter cornflake cookies?
You can add a variety of different things to make variations of these cookies. However, keep in mind not to overload the mixture or the cookies may not stick together well.
Add fun ingredients like a melted chocolate drizzle, chocolate chips, mini marshmallows, sprinkles, nuts and so much more. Don’t be afraid to be adventurous! Add anything that sounds tasty to you.
Are cornflakes made with real corn?
Yes, cornflakes are made with real corn. Their yummy crunch and mild flavor make the perfect base ingredient for this peanut butter cornflake cookies recipe. However, if you wanted another fun swap idea you can you frosted corn flakes!
Pro Tips for the Best Cookies
- If you are allergic to peanuts, feel free to try this recipe with other nut butters. Cashew butter, sunflower butter and almond butter would all be very tasty.
- Try to make all of the cookies the same size and be sure you do not make them too large. A big mound of the peanut butter coated cereal may not set well.
- If you have littles making this recipe, make sure they have help when you are forming the cookie balls. You need to work quickly before the mixture sets.
Enjoy these sweet and nutty delights! Make an extra extra big batch because I can guarantee that they somehow just magically disappear…wink wink!
More No Bake Dessert Delights!
- No Bake Christmas Tree Pretzels are one of our most favorite things to make for the holidays. They’re adorable and tasty!
- Pumpkin Rice Krispie Treats are just as delicious as they are cute. Such a fun fall treat!
- Cool off on a warm day with these yummy Root Beer Popsicles. Way better than store bought frozen treats.
- I think Sand Dessert Cups may just be the cutest summer time dessert ever!

Peanut Butter and Cornflake Cookies
Ingredients
- 5 cups cornflake cereal
- ⅔ cup light corn syrup
- ¼ cup maple syrup
- ¾ cup white granulated sugar
- 1 teaspoon vanilla extract
- 1 cup creamy peanut butter
Instructions
- Line a large baking sheet with parchment paper and set to the side.
- Pour the cornflake cereal in a large bowl and set to the side.
- In a medium saucepan pour in the corn syrup and the maple syrup. Warm on medium low heat, stirring occasionally until slightly bubbly, about 3-4 minutes.
- Turn off the heat and mix in the sugar and vanilla extract and stir well.
- Using a rubber spatula, mix in the peanut butter. The mixture will be very sticky.
- Pour the mixture over the reserved cornflakes and mix well.
- Working quickly, using a 1 ½ Tablespoon cookie scoop or a Tablespoon, drop cookies onto your prepared baking sheet.
- Let cookies set for 10-15 minutes and serve.