Paper Plate Dinosaur Craft
Paper plate crafts are so easy to make. With a few craft supplies you create this Paper Plate Dinosaur with the kids. It’s a fun kids activity that’s inexpensive and cute.
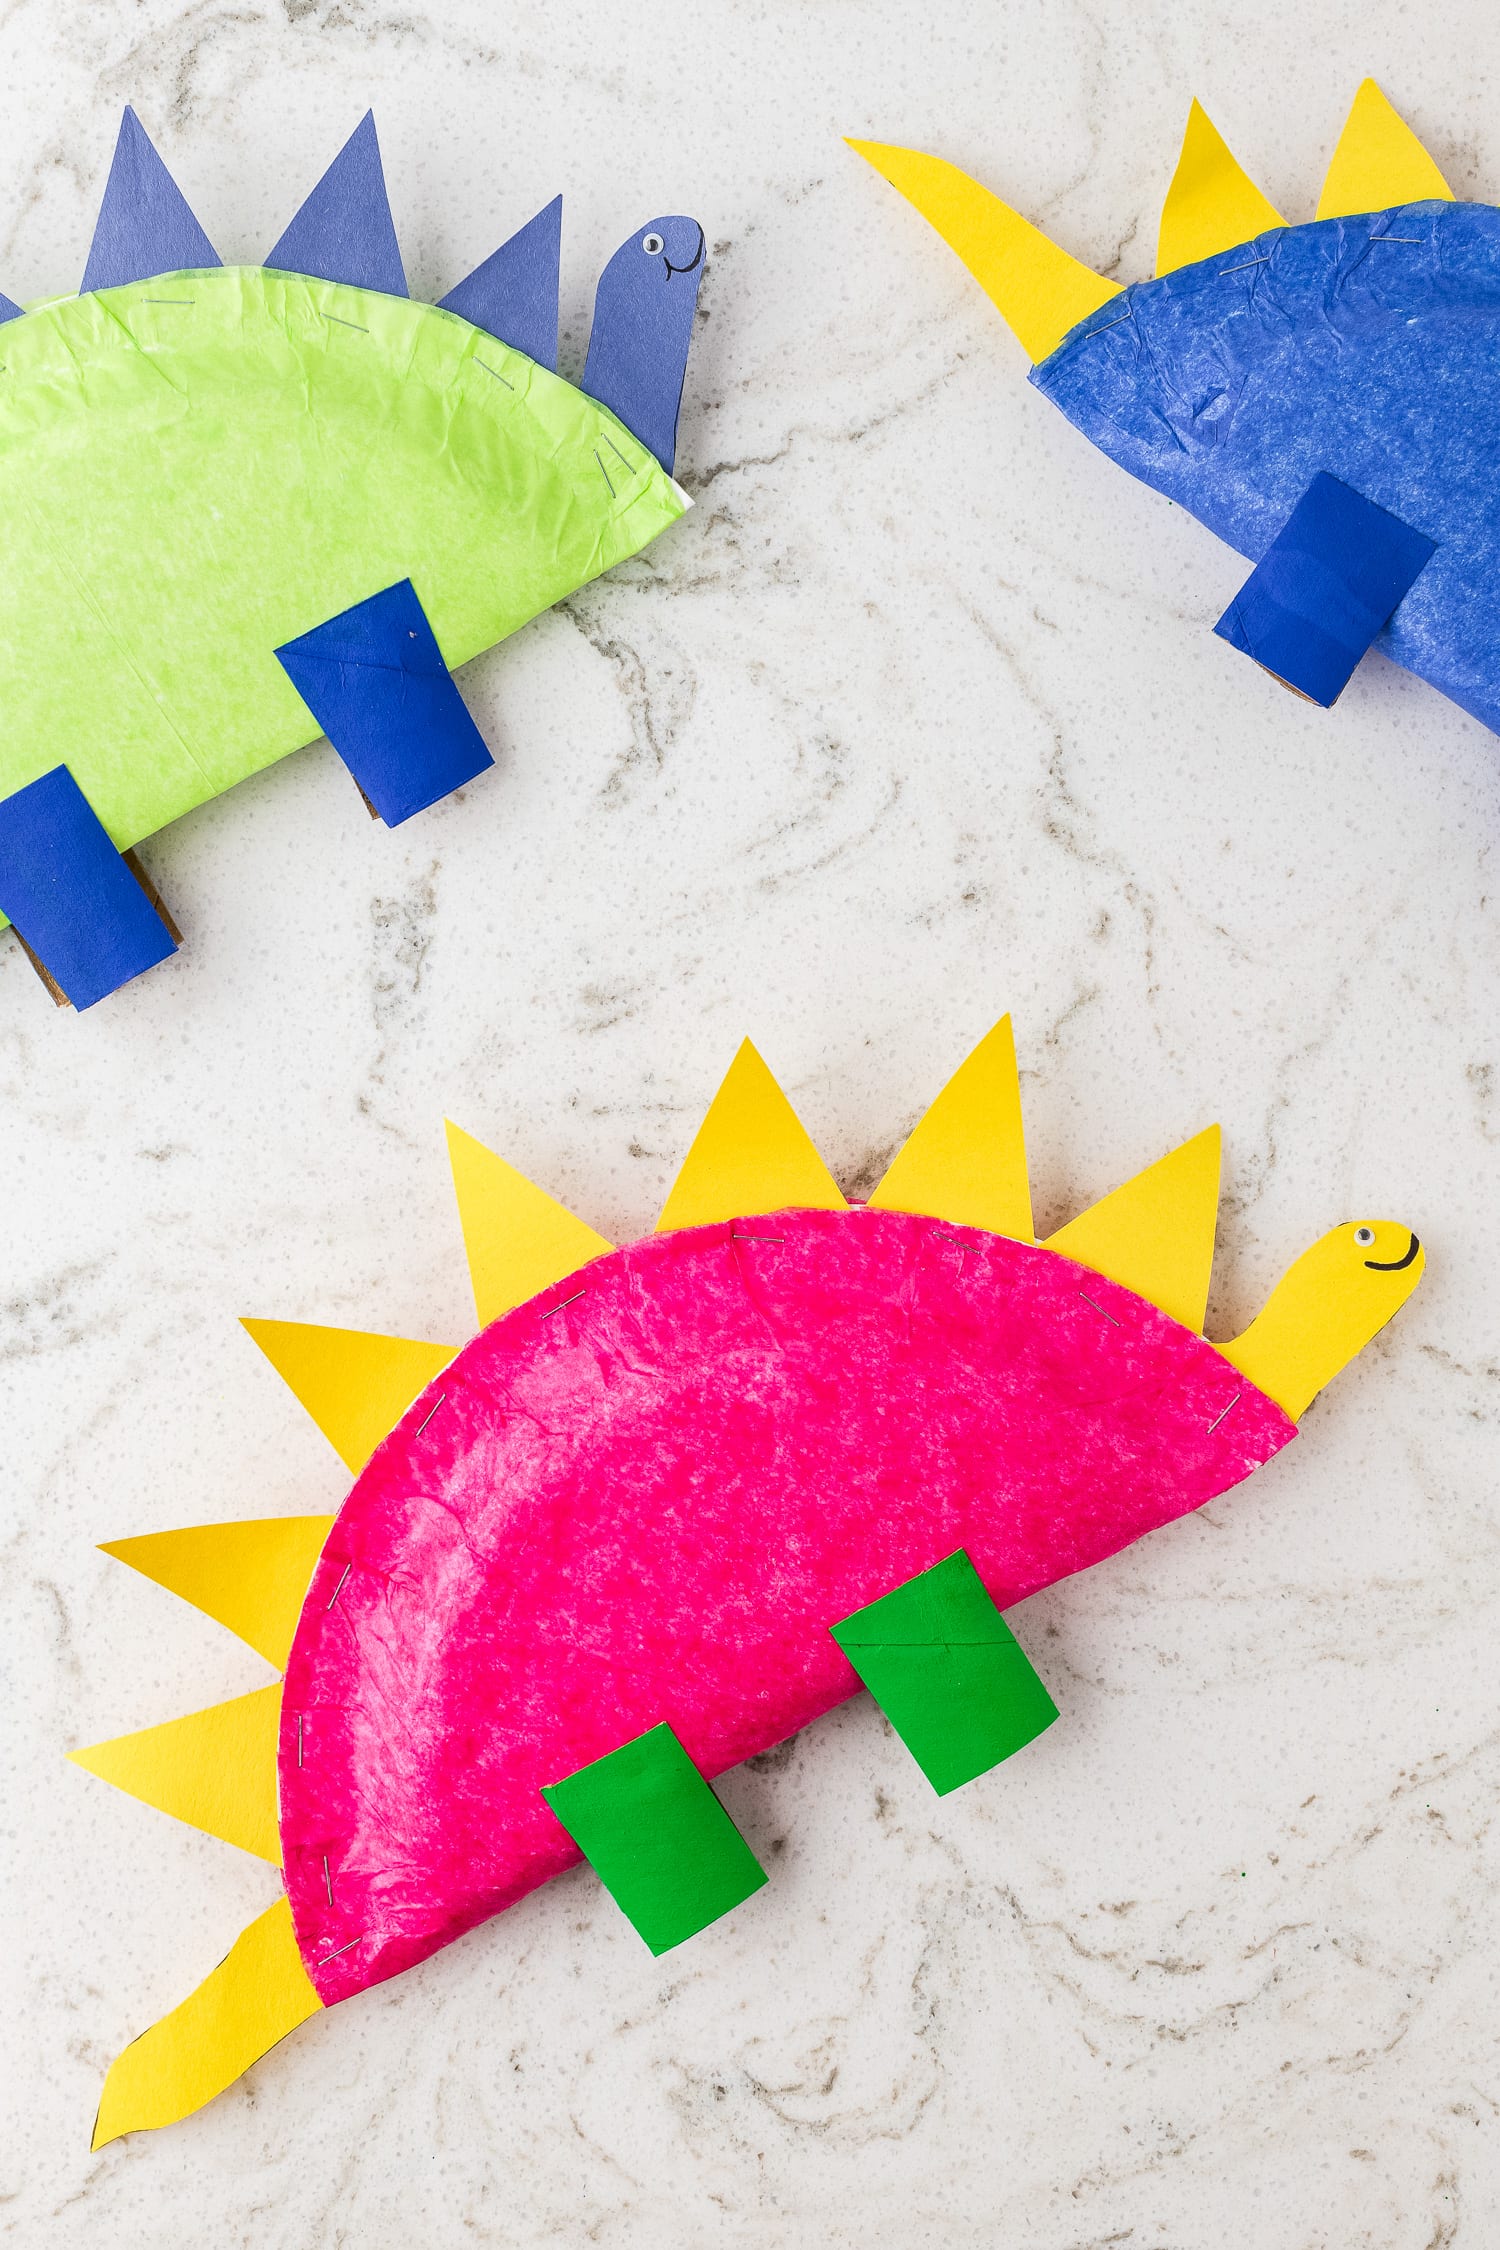
Looking for an easy activity or craft that kids will love making? Try out these Paper Plate Dinosaurs.
This quick and easy paper plate craft is made with craft supplies you probably already have at home making it the perfect activity for the kids when they are bored during the summer or on the weekends.
The result is a bright colored dinosaur craft that’s cute! Try them out today!
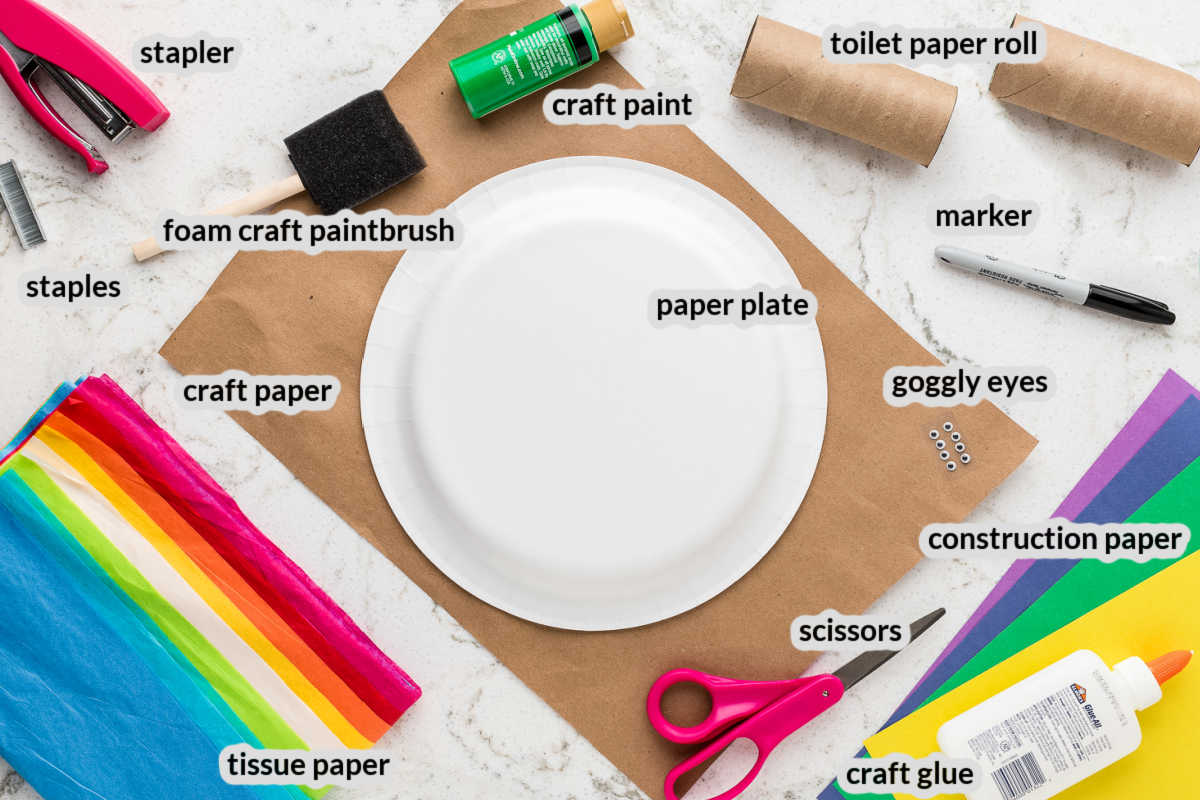
What will I need to complete this Dinosaur Paper Plate Craft?
- Paper plate – we used a 10-inch paper plate for this project.
- Tissue paper – we used 20-inch x 26-inch sheets of tissue paper, but any size can be cut to fit the size of your dinosaur.
- Craft glue – we used Elmer’s multi-purpose glue, but you can use any craft glue or glue stick.
- Scissors – make sure your scissors are clean and sharp!
- Googly eyes – use googly eyes to give your dinosaur some personality!
- Stapler – we used a small stapler for this craft.
- Staples – standard staples were used for this project.
- Construction paper – you can also use card stock for this project.
- Craft paper – make life easier by covering your surface before painting!
- Toilet paper roll – reduce, reuse, and recycle! We used an empty toilet paper roll as legs for the dinosaurs.
- Craft paint – we used craft paint, but you can use any non-toxic paint.
- Foam craft paintbrush – foam brushes are easy for kids to use, but you can use a regular small paintbrush or sponge if unavailable.
- Marker – feel free to use any marker you have on hand.
How to Make a Paper Plate Dinosaur!
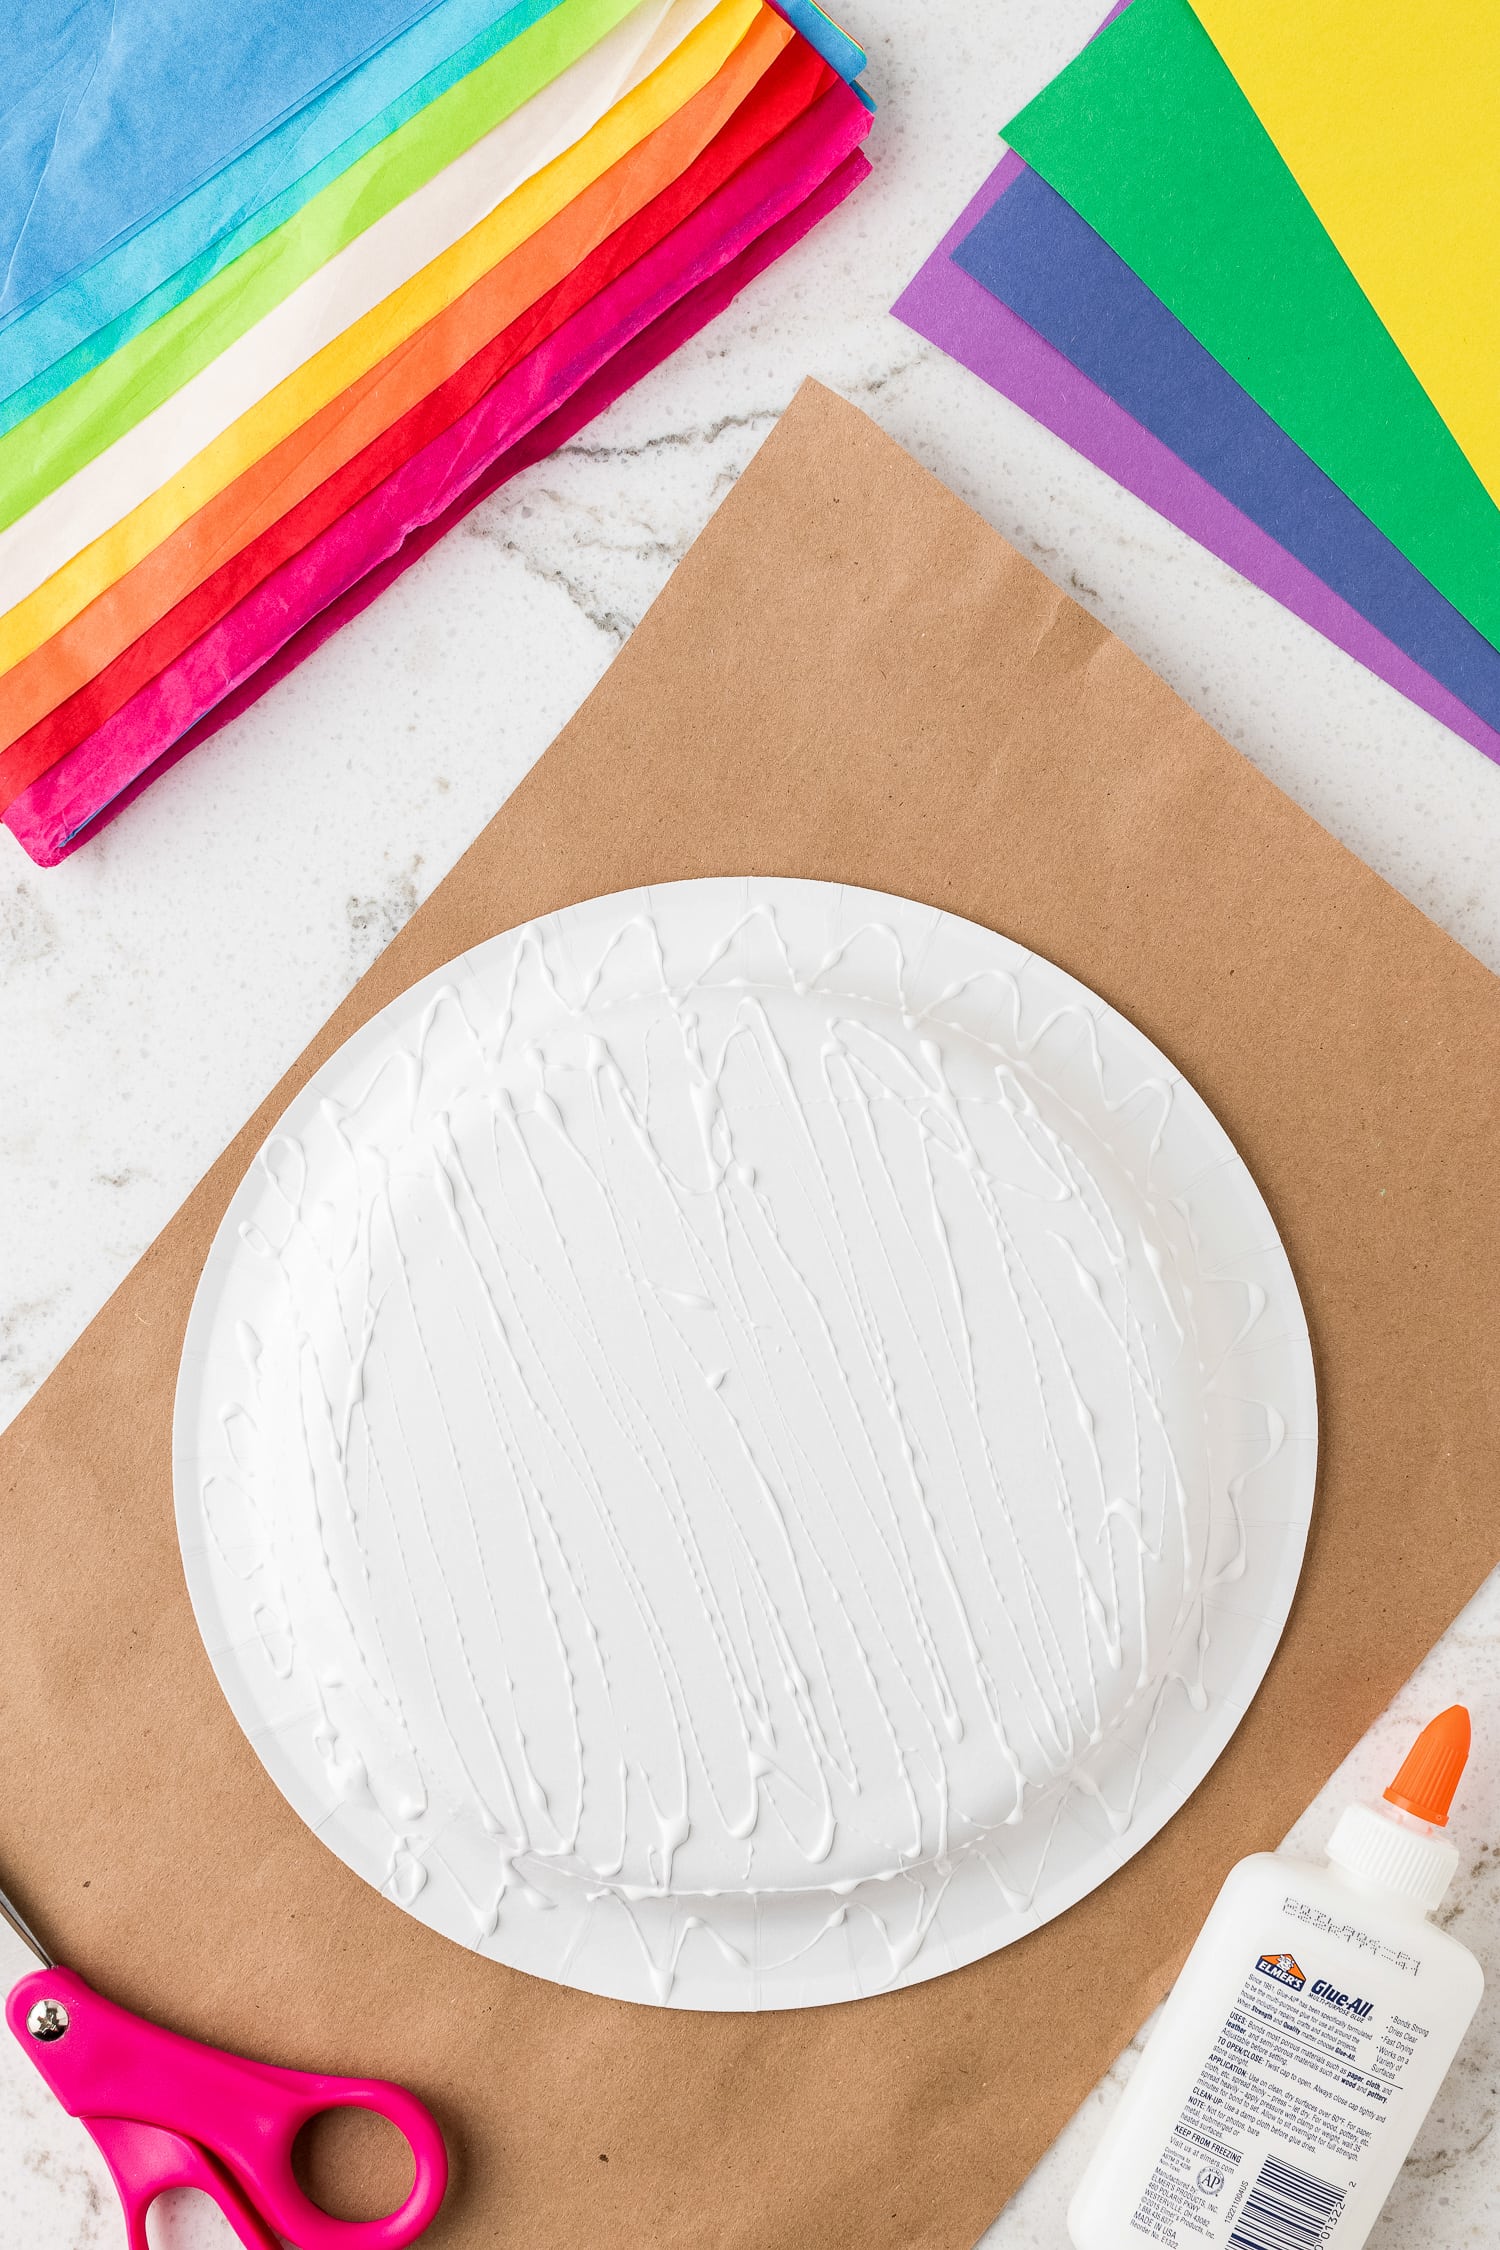
The first thing you want to do is gather all of your supplies. Lay out the craft paper where you are going to do this craft for easy clean up.
Decorate the Plate!
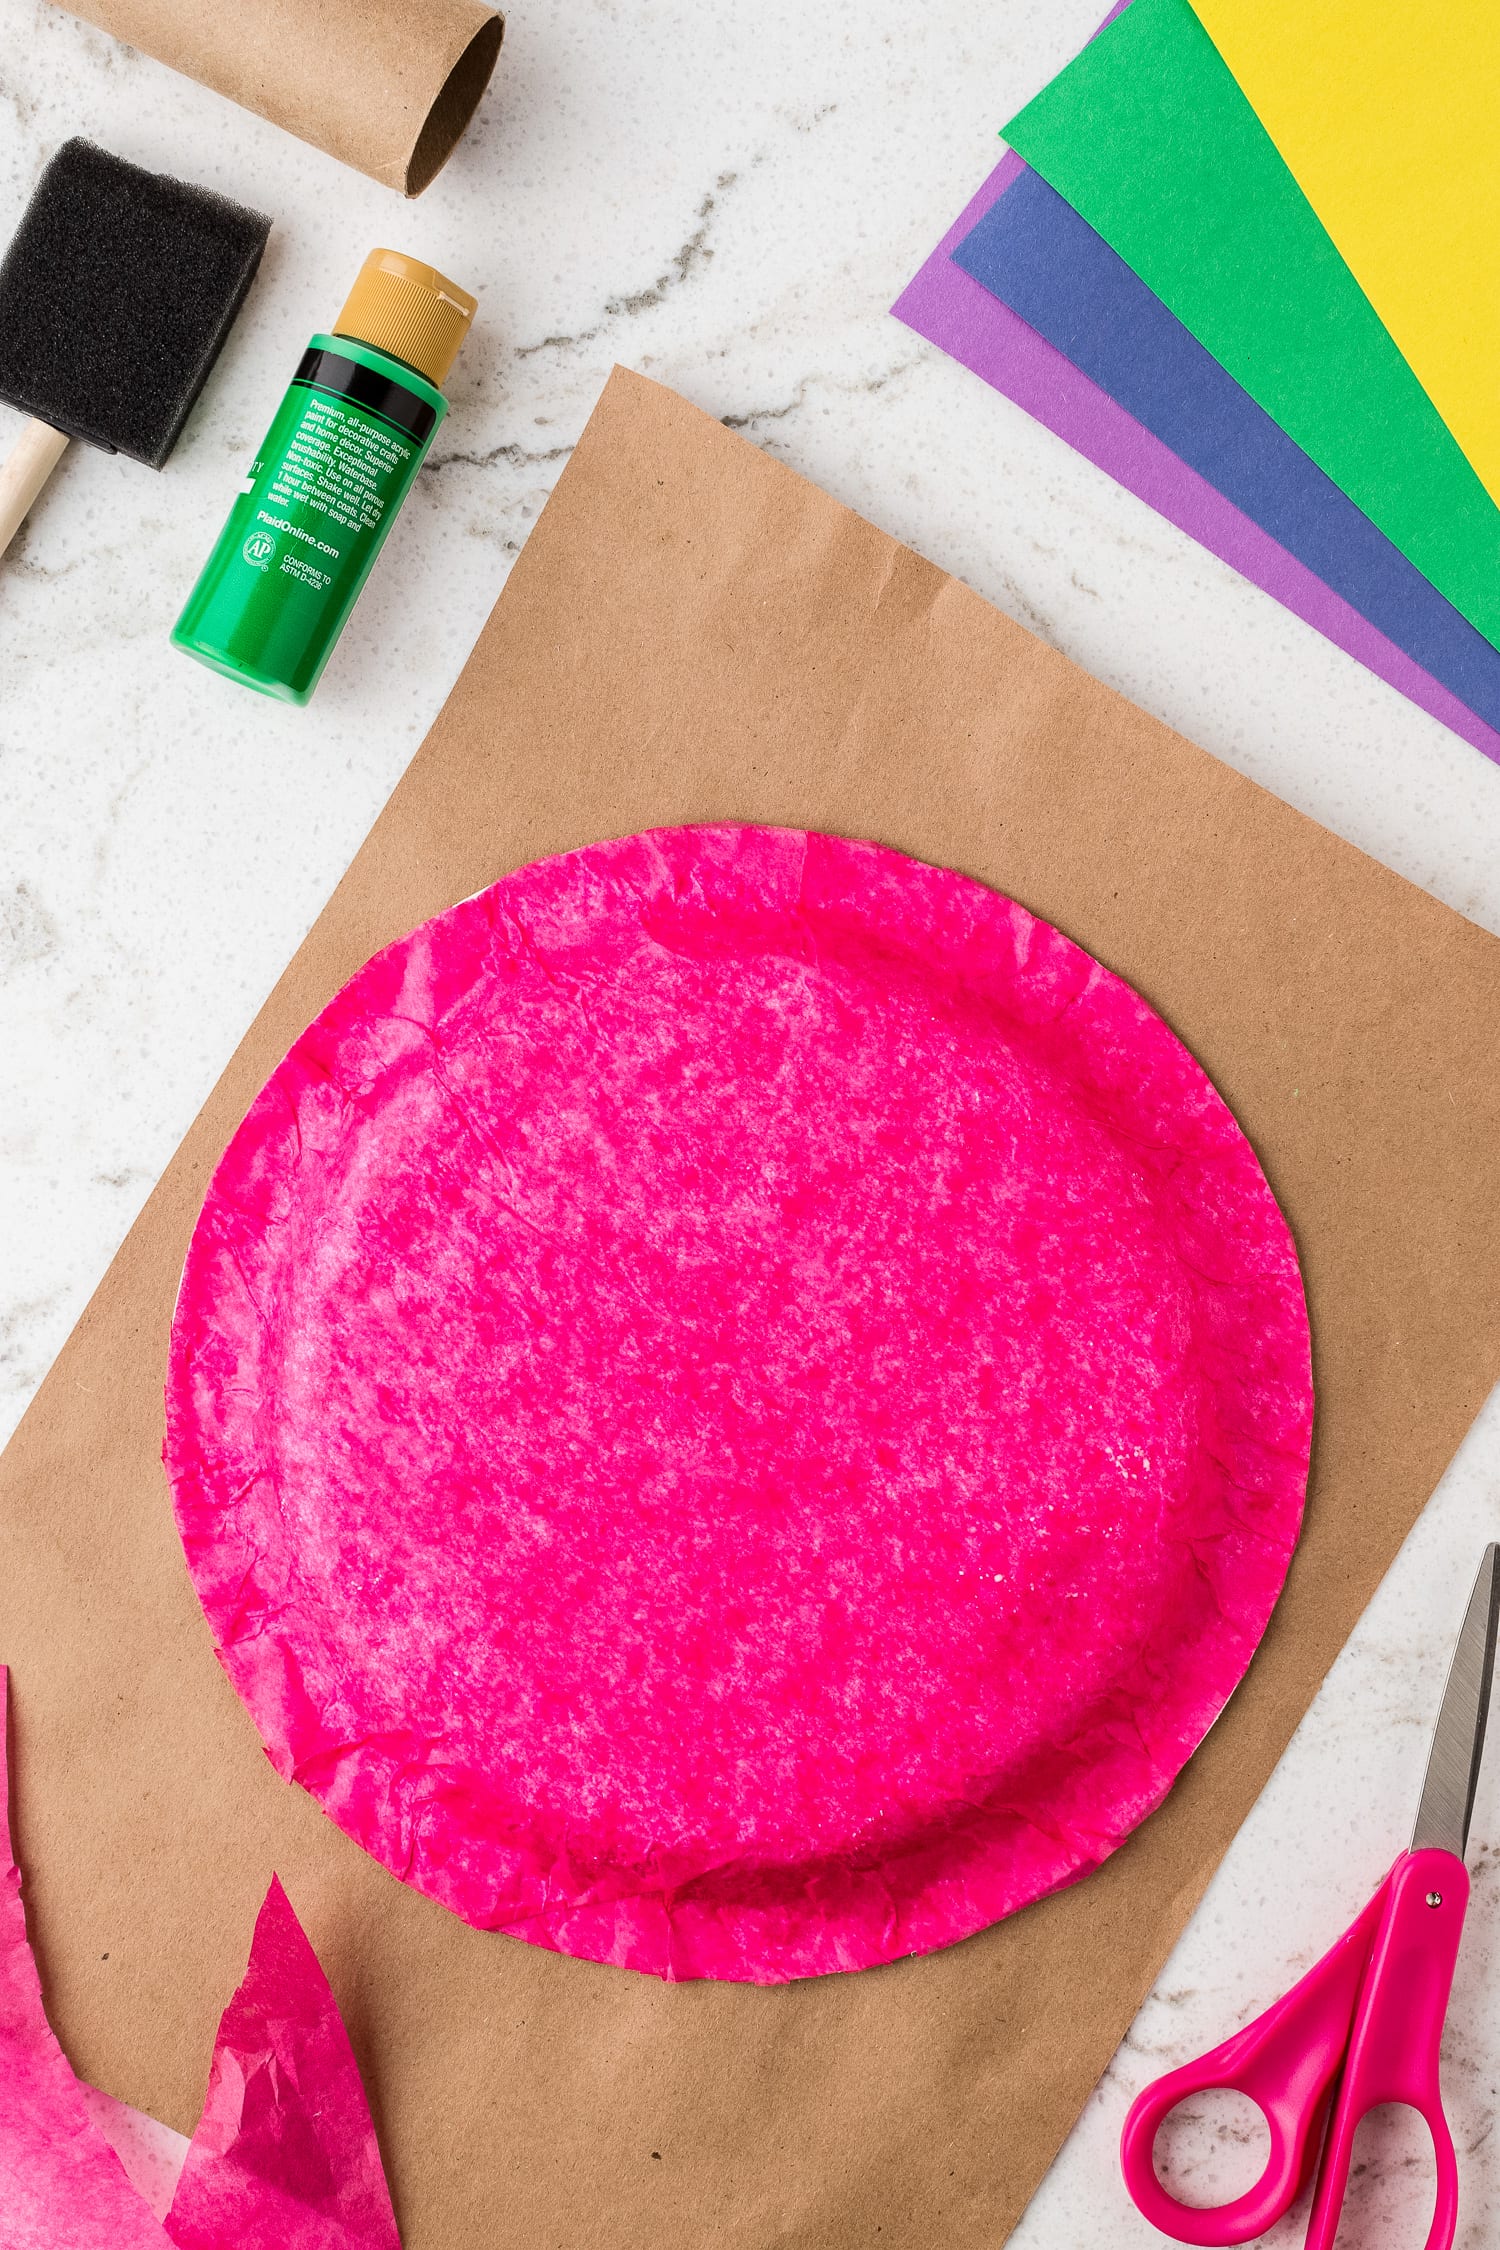
The first step is to cover the back of your paper plate in glue then place the tissue paper on top of it.
Press until secure. Cut the excess tissue paper from the edges. Set aside to dry for about 5 minutes.
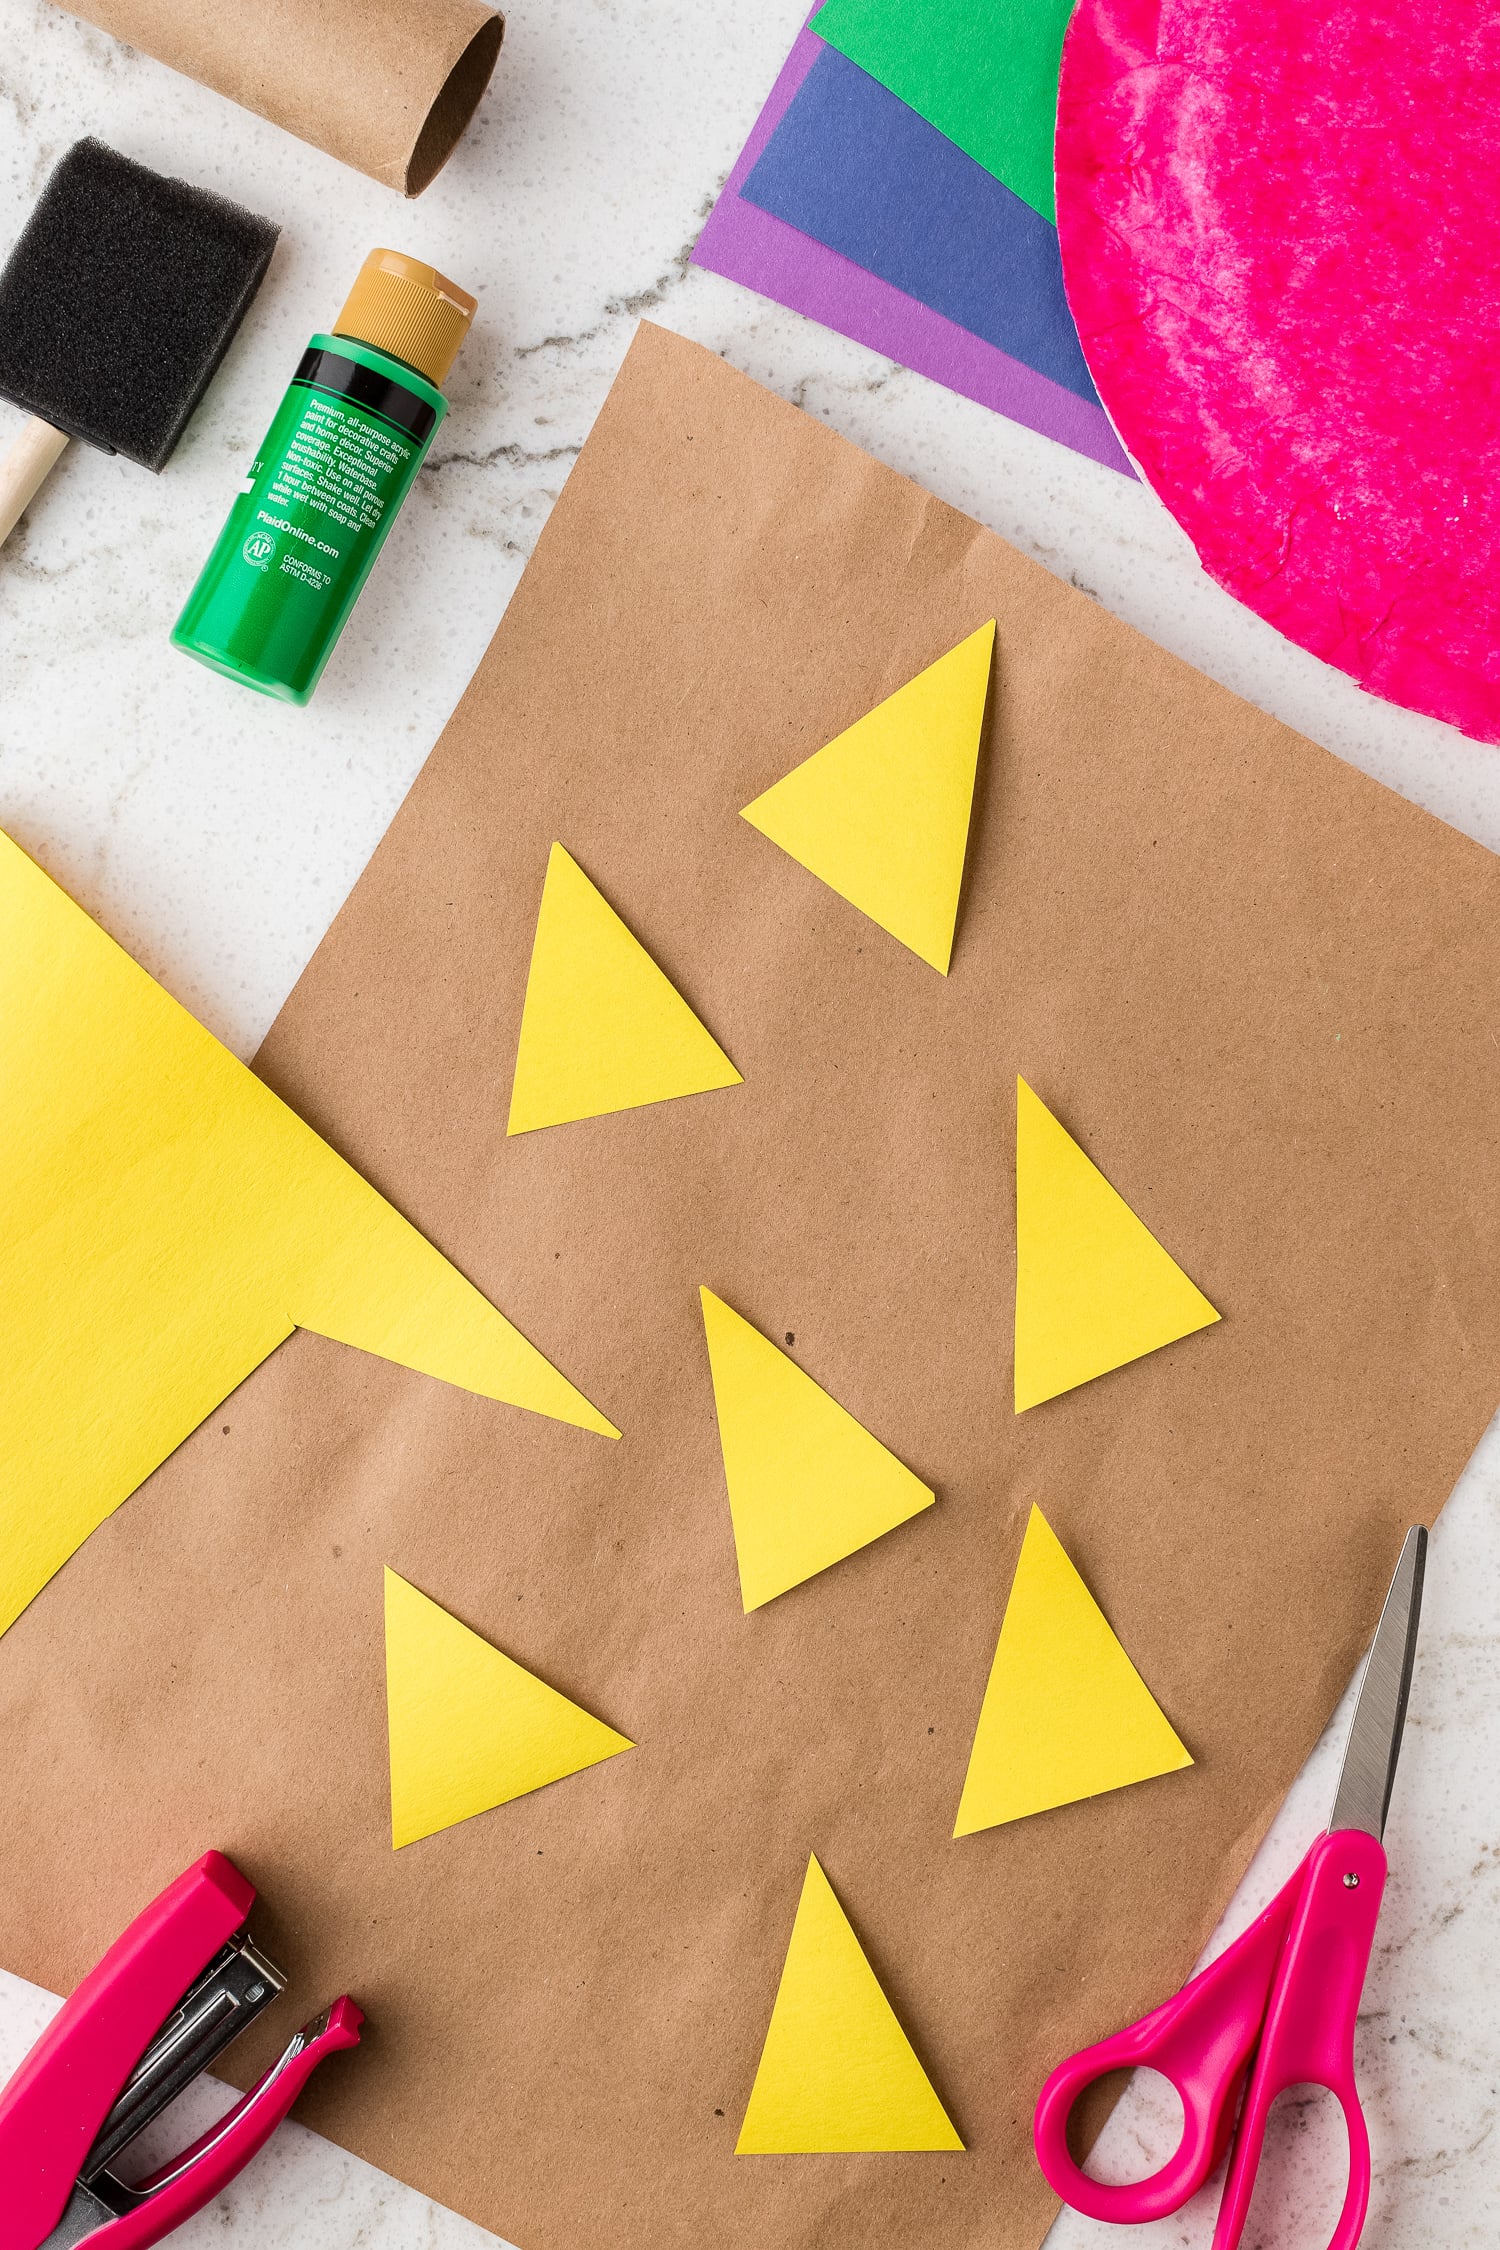
Take a piece of construction paper and cut about 6 triangles for the spikes.
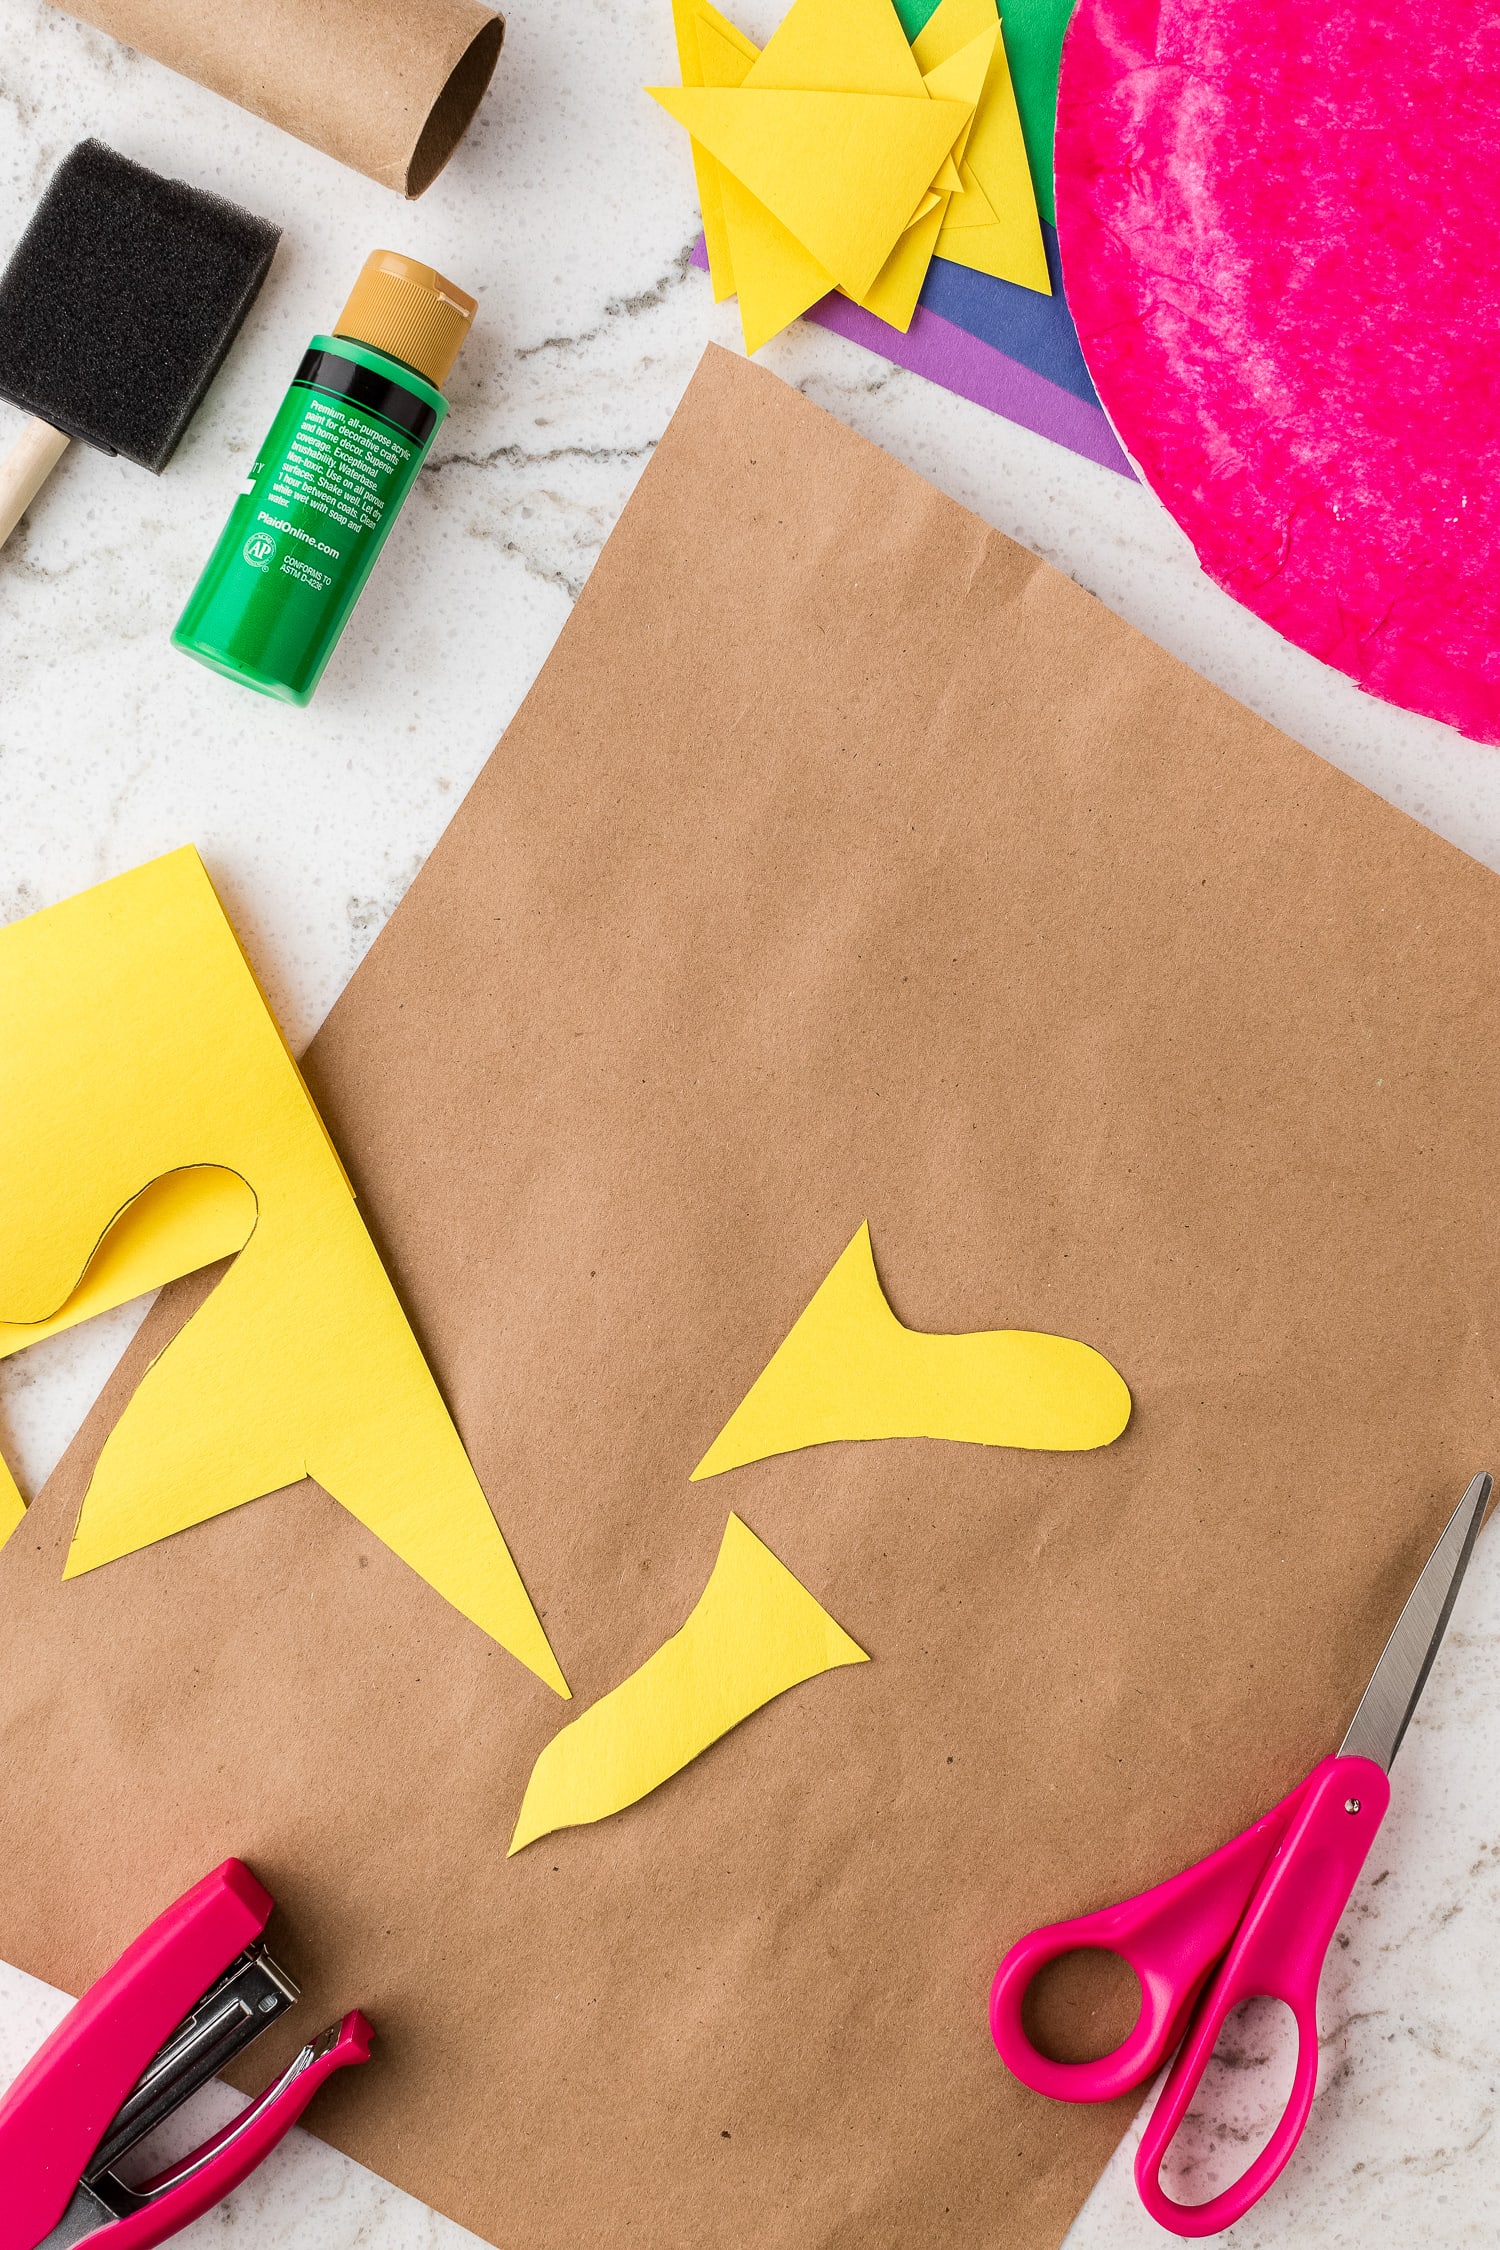
Next, draw the head and tail and cut them out. You can trace your fingers for the head and tail!
Set aside.
Cut Out the Dinosaur Spikes and Head
While the paper plate dinosaur body is drying start cutting out the dinosaur spikes, head and tail.
Cut out 6 triangles
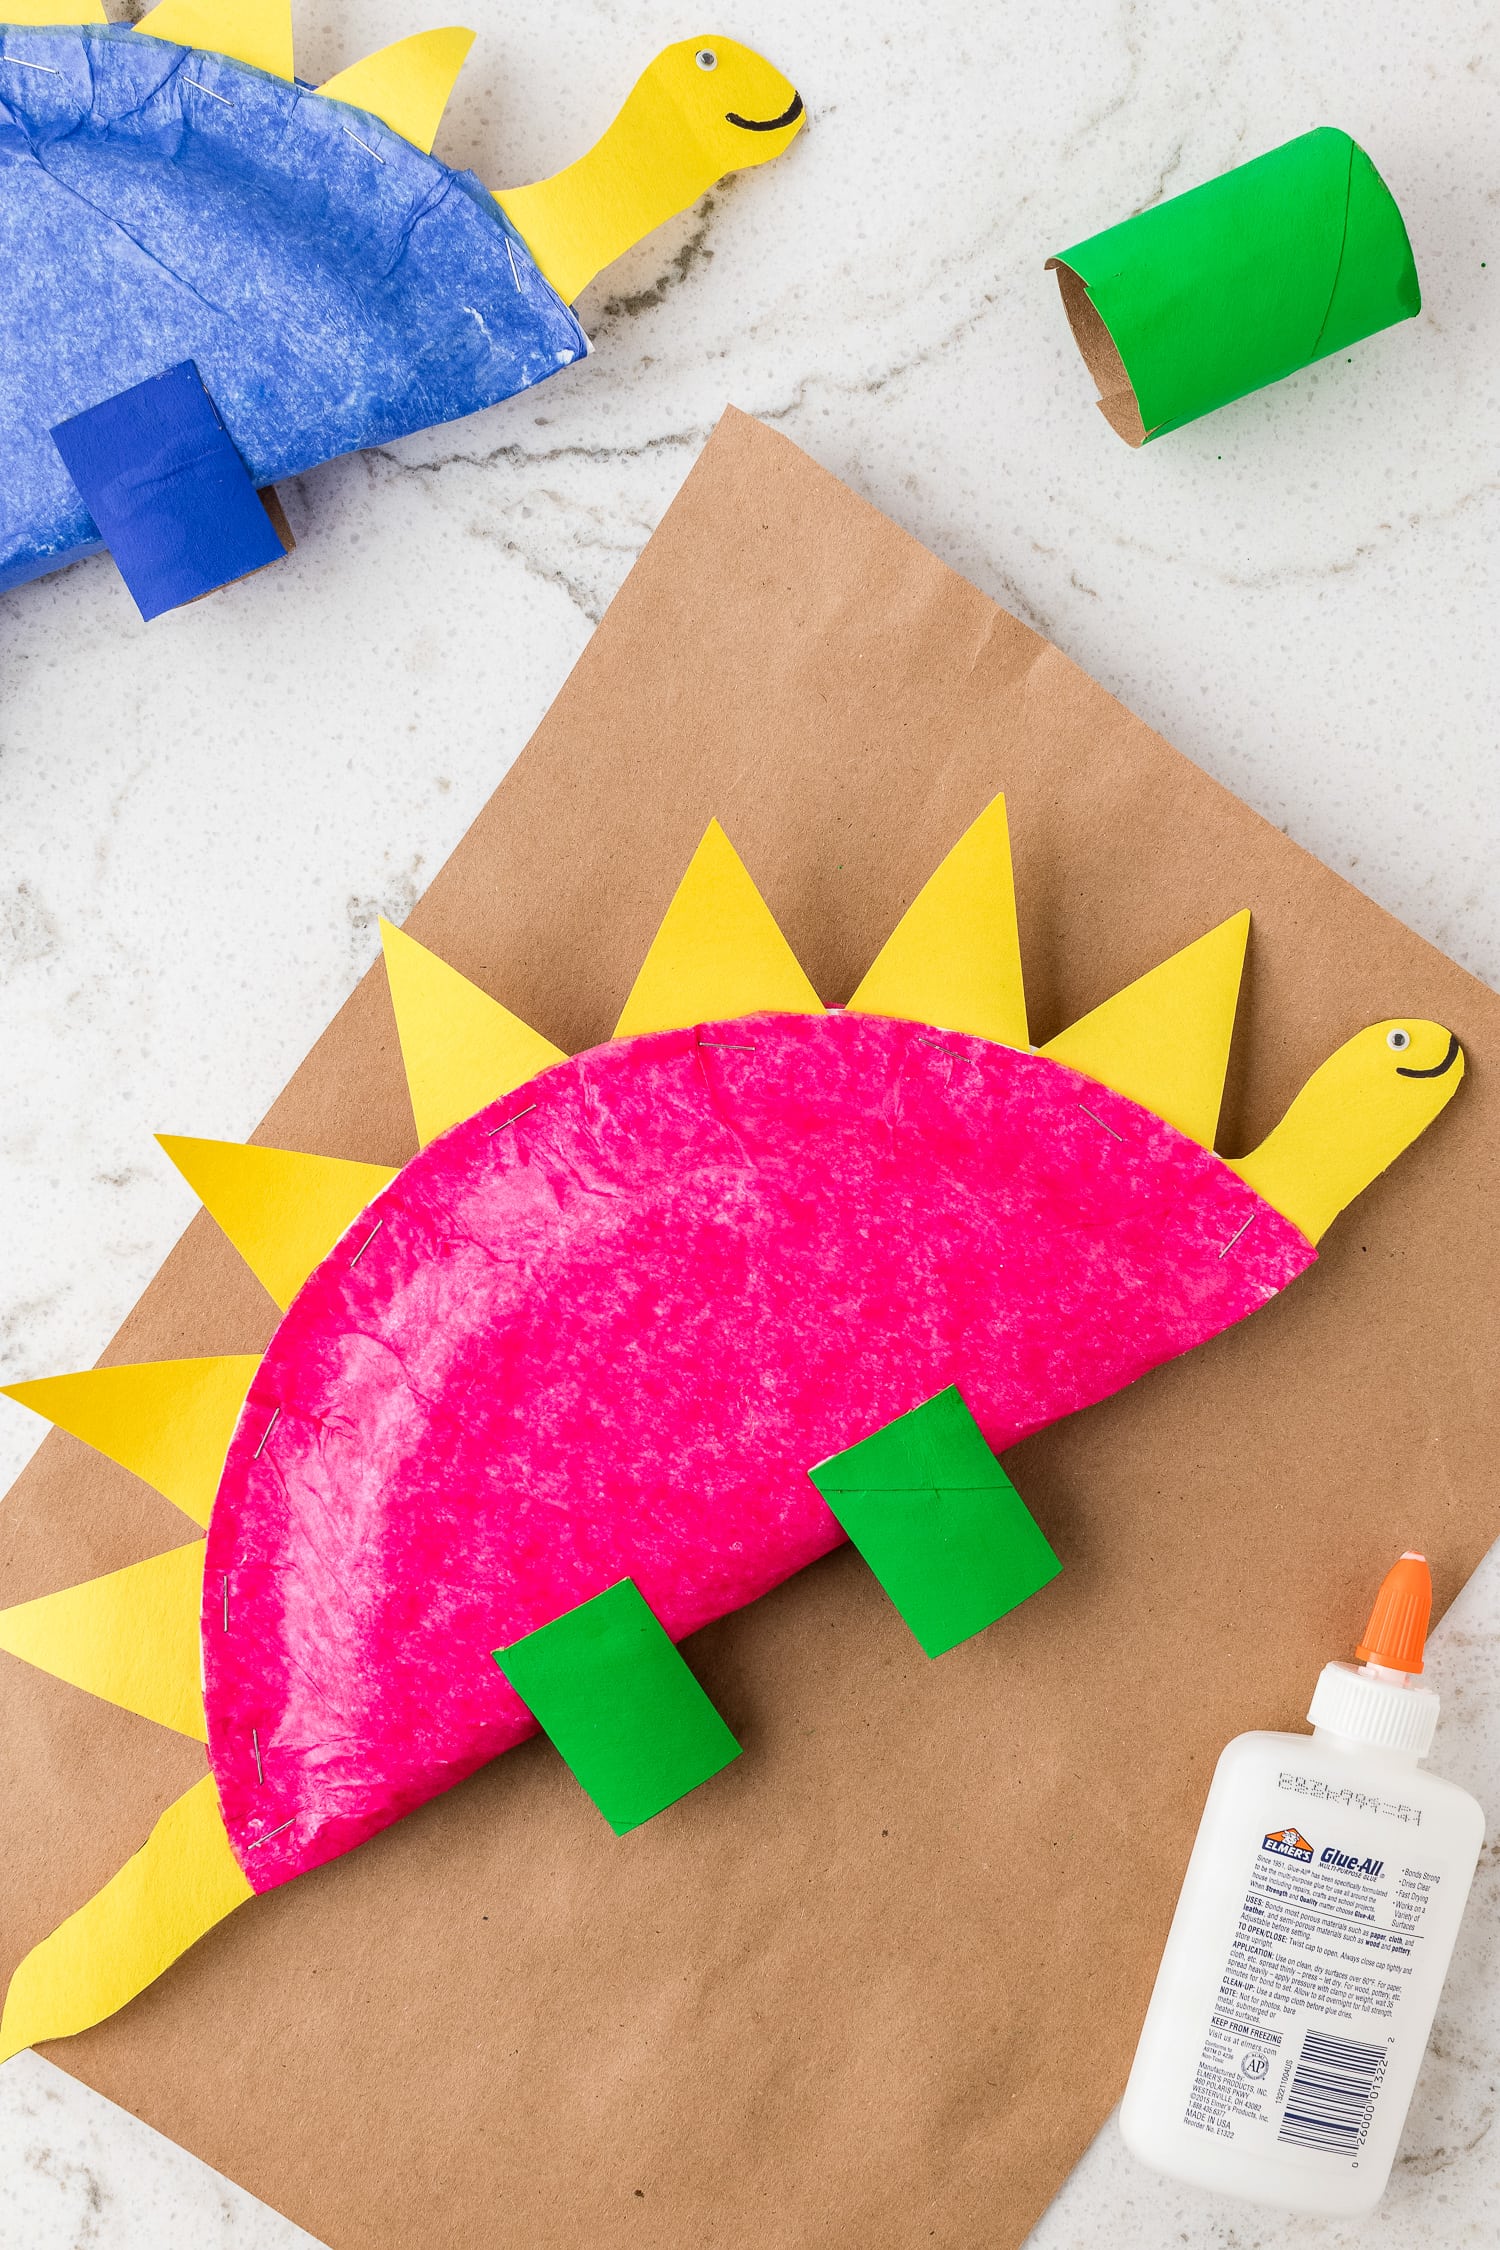
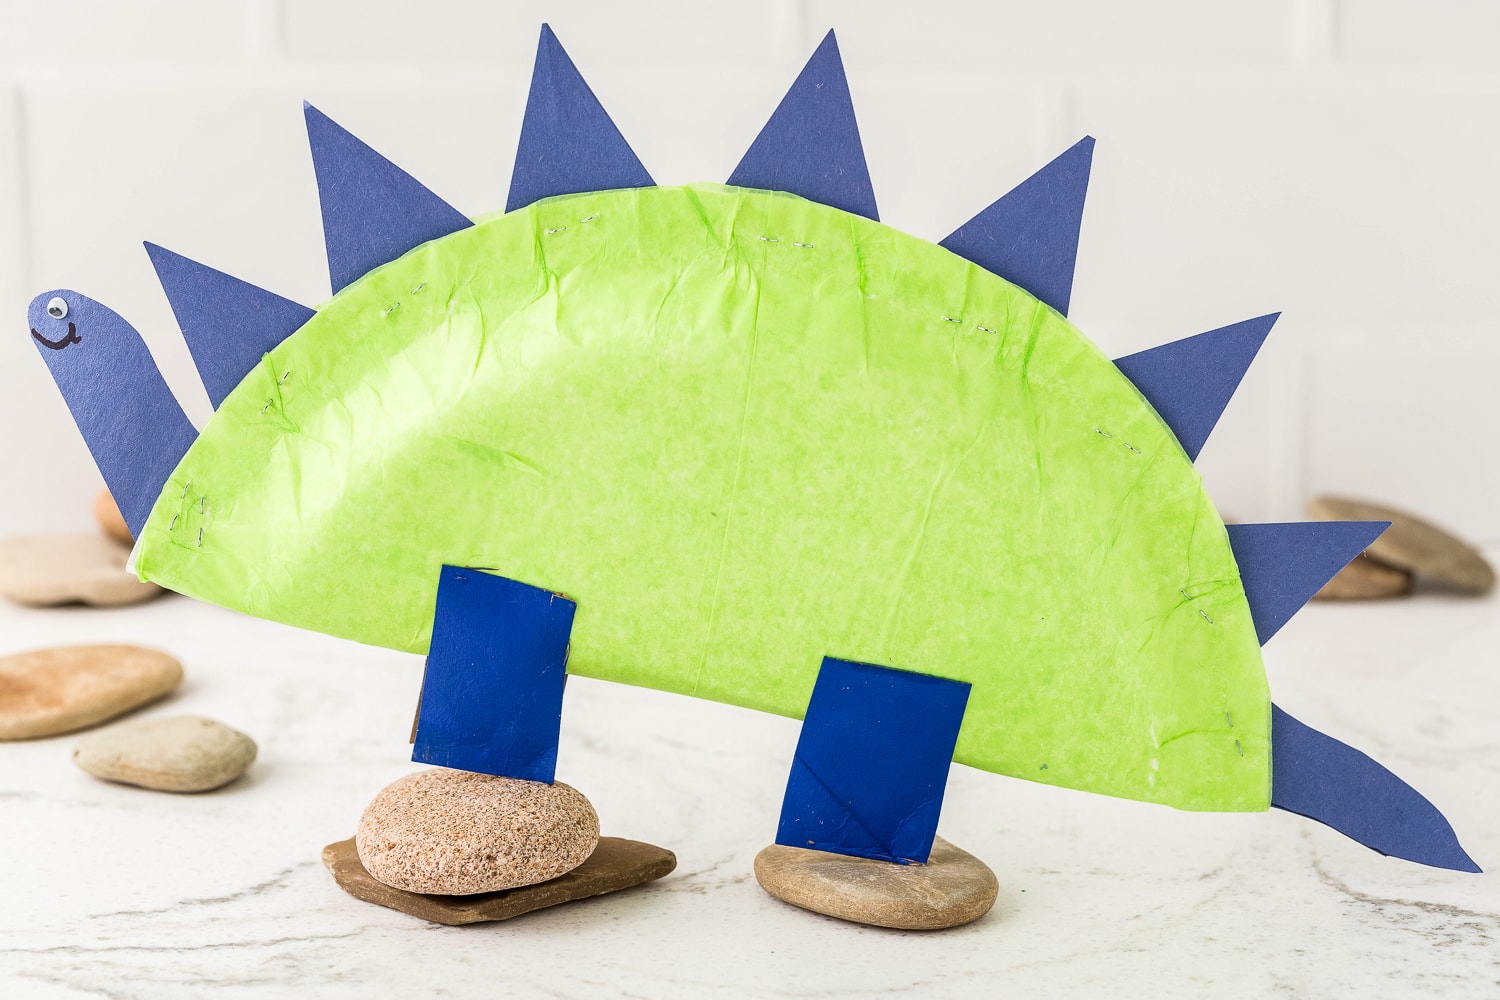
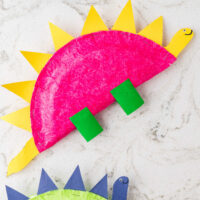
Assemble the Dinosaur!
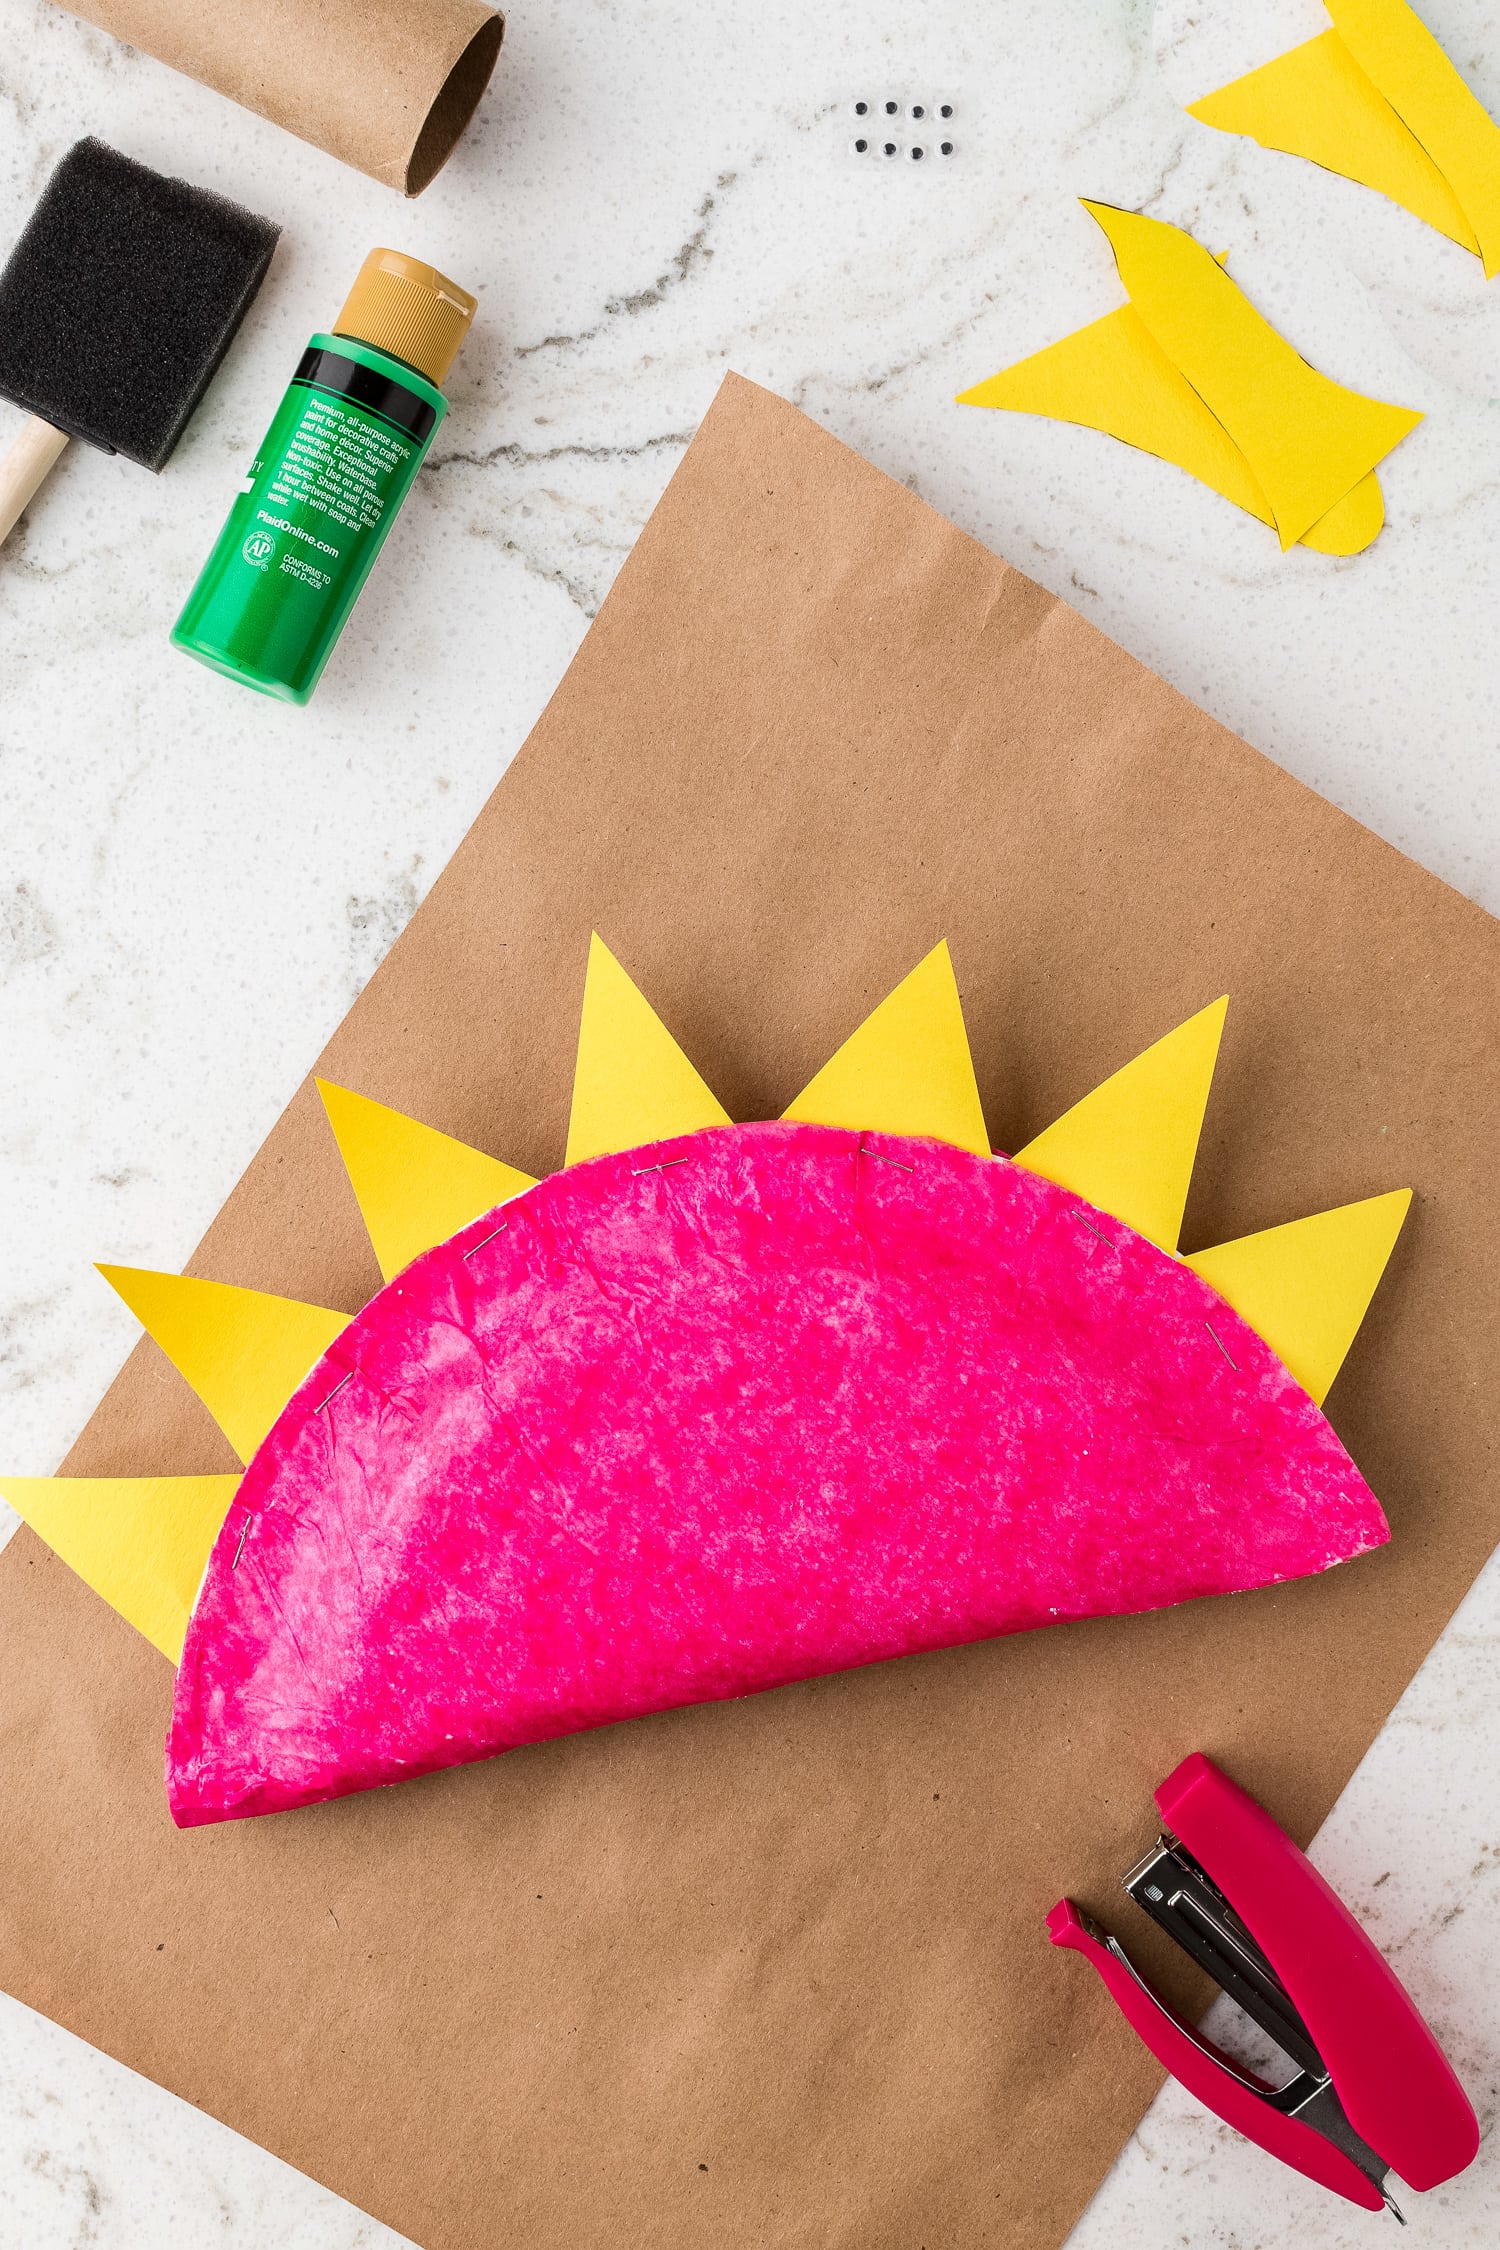
Take your tissue paper-covered paper plate and fold it in half. Take one of the previously cut triangles and staple it to the top center, securing the spike and the folded paper plate. Repeat this step attaching the remaining spikes.
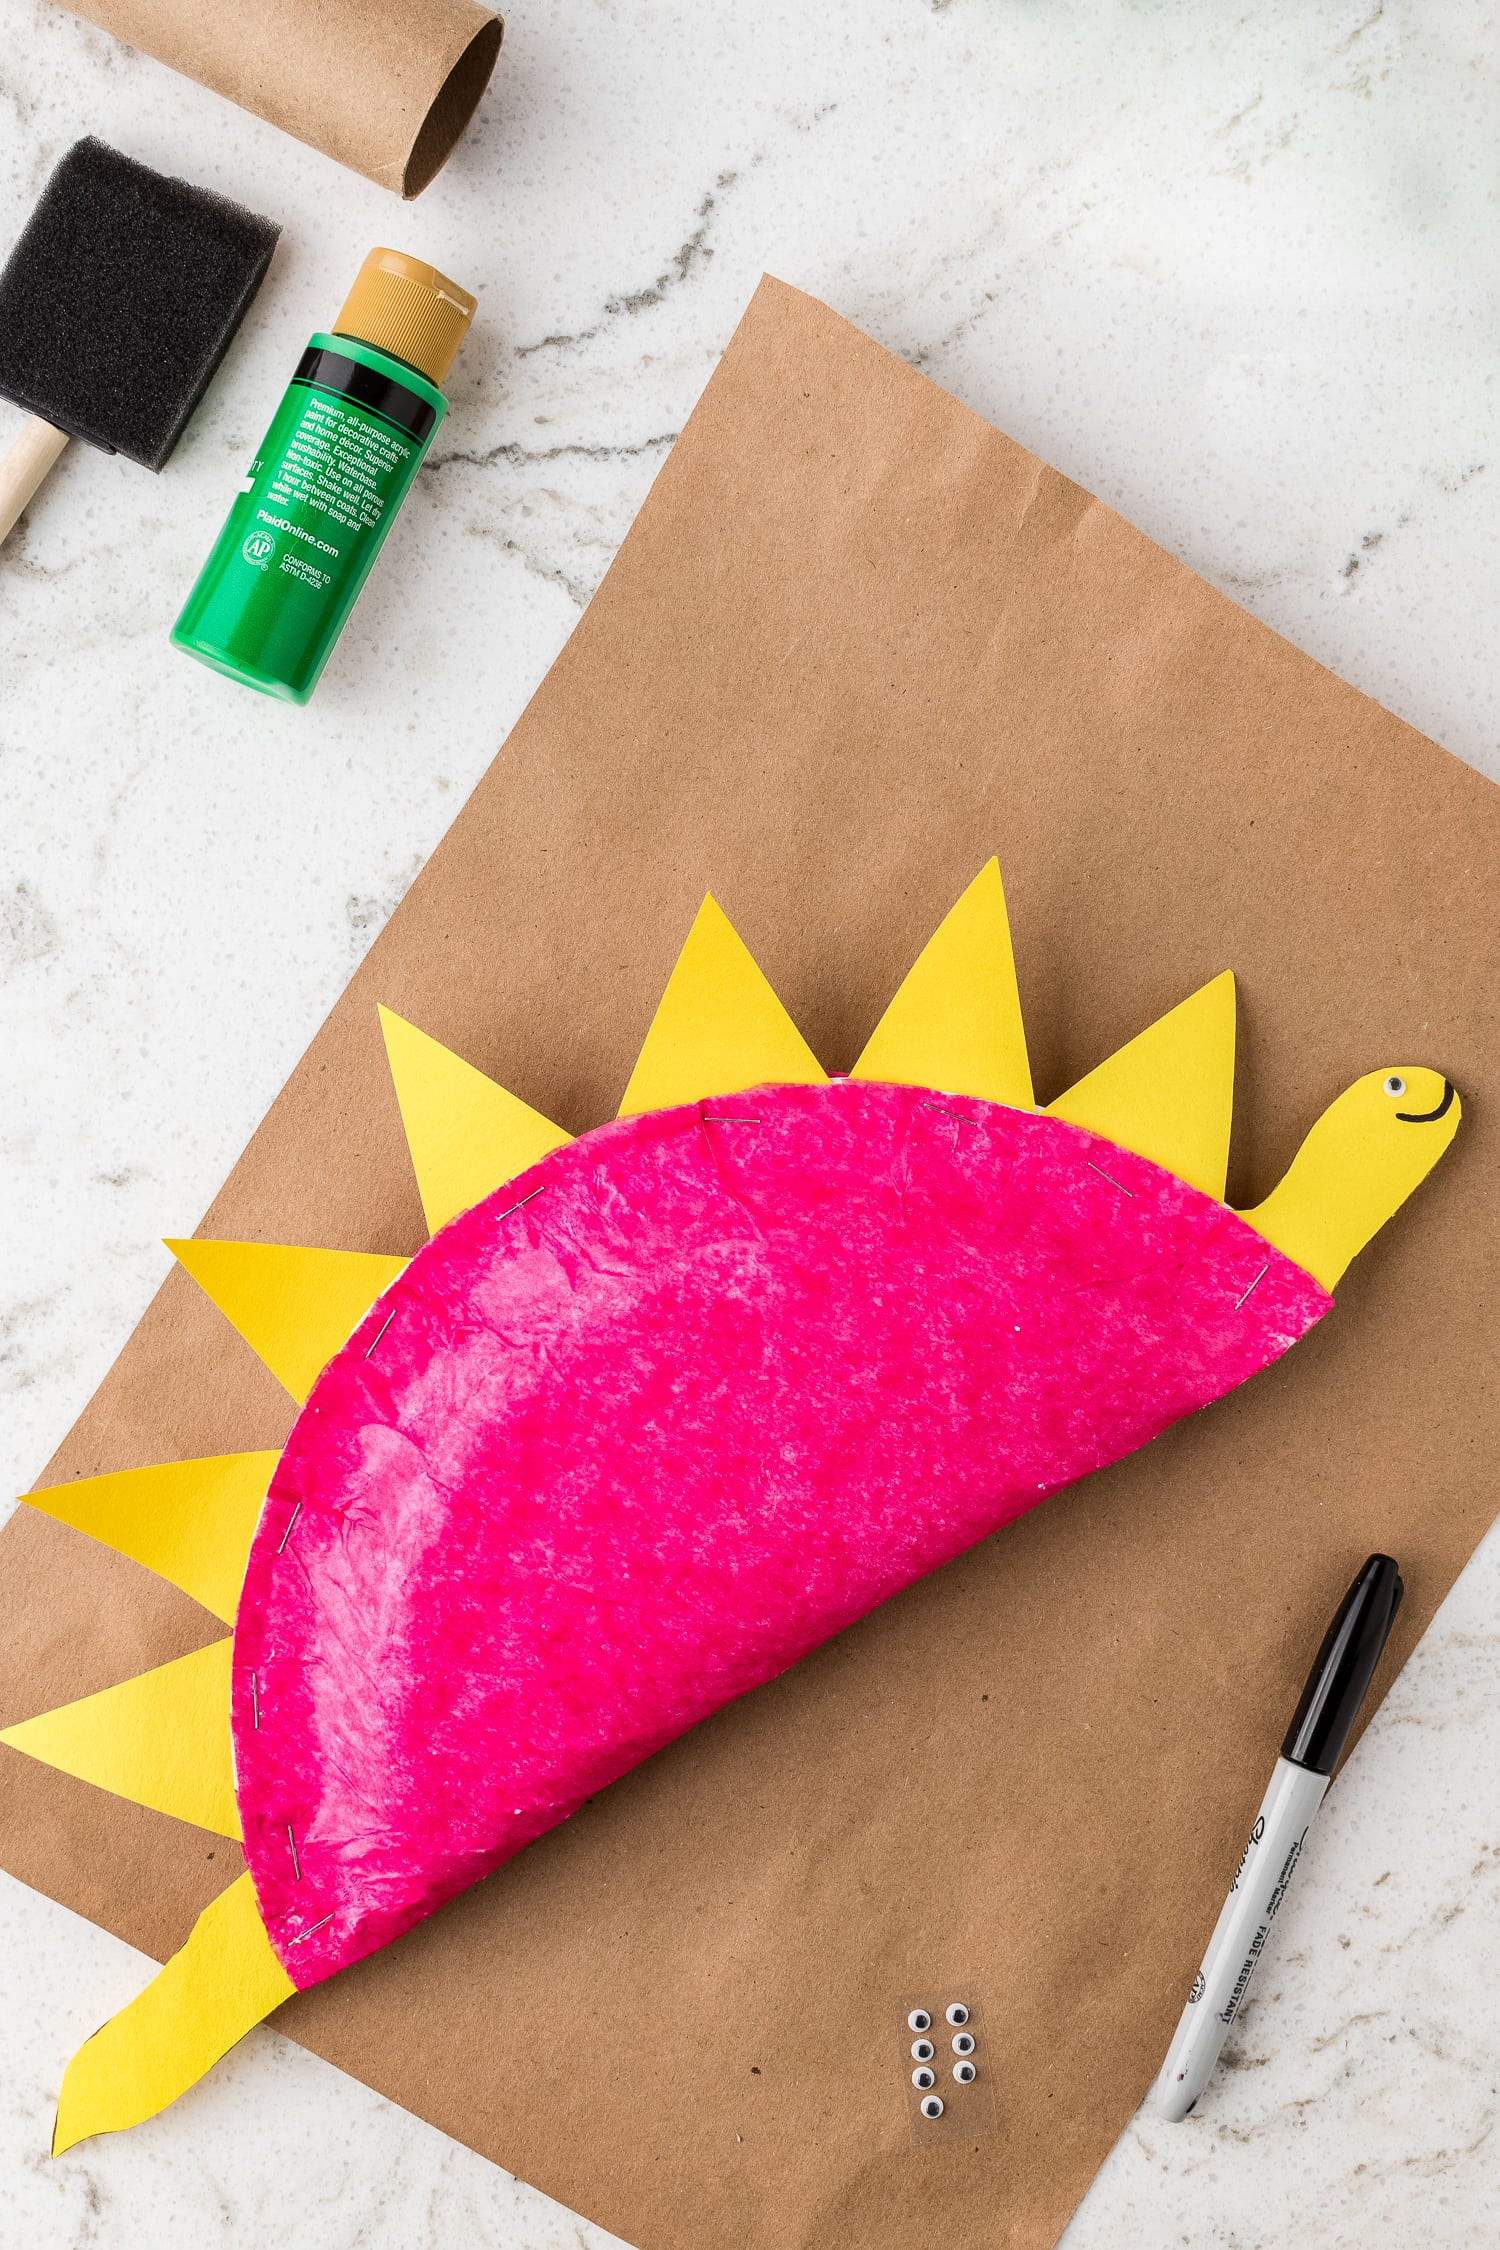
Lastly, fasten the head and the tail to the paper plate. Using a marker add an eye and smile to personalize this dinosaur.
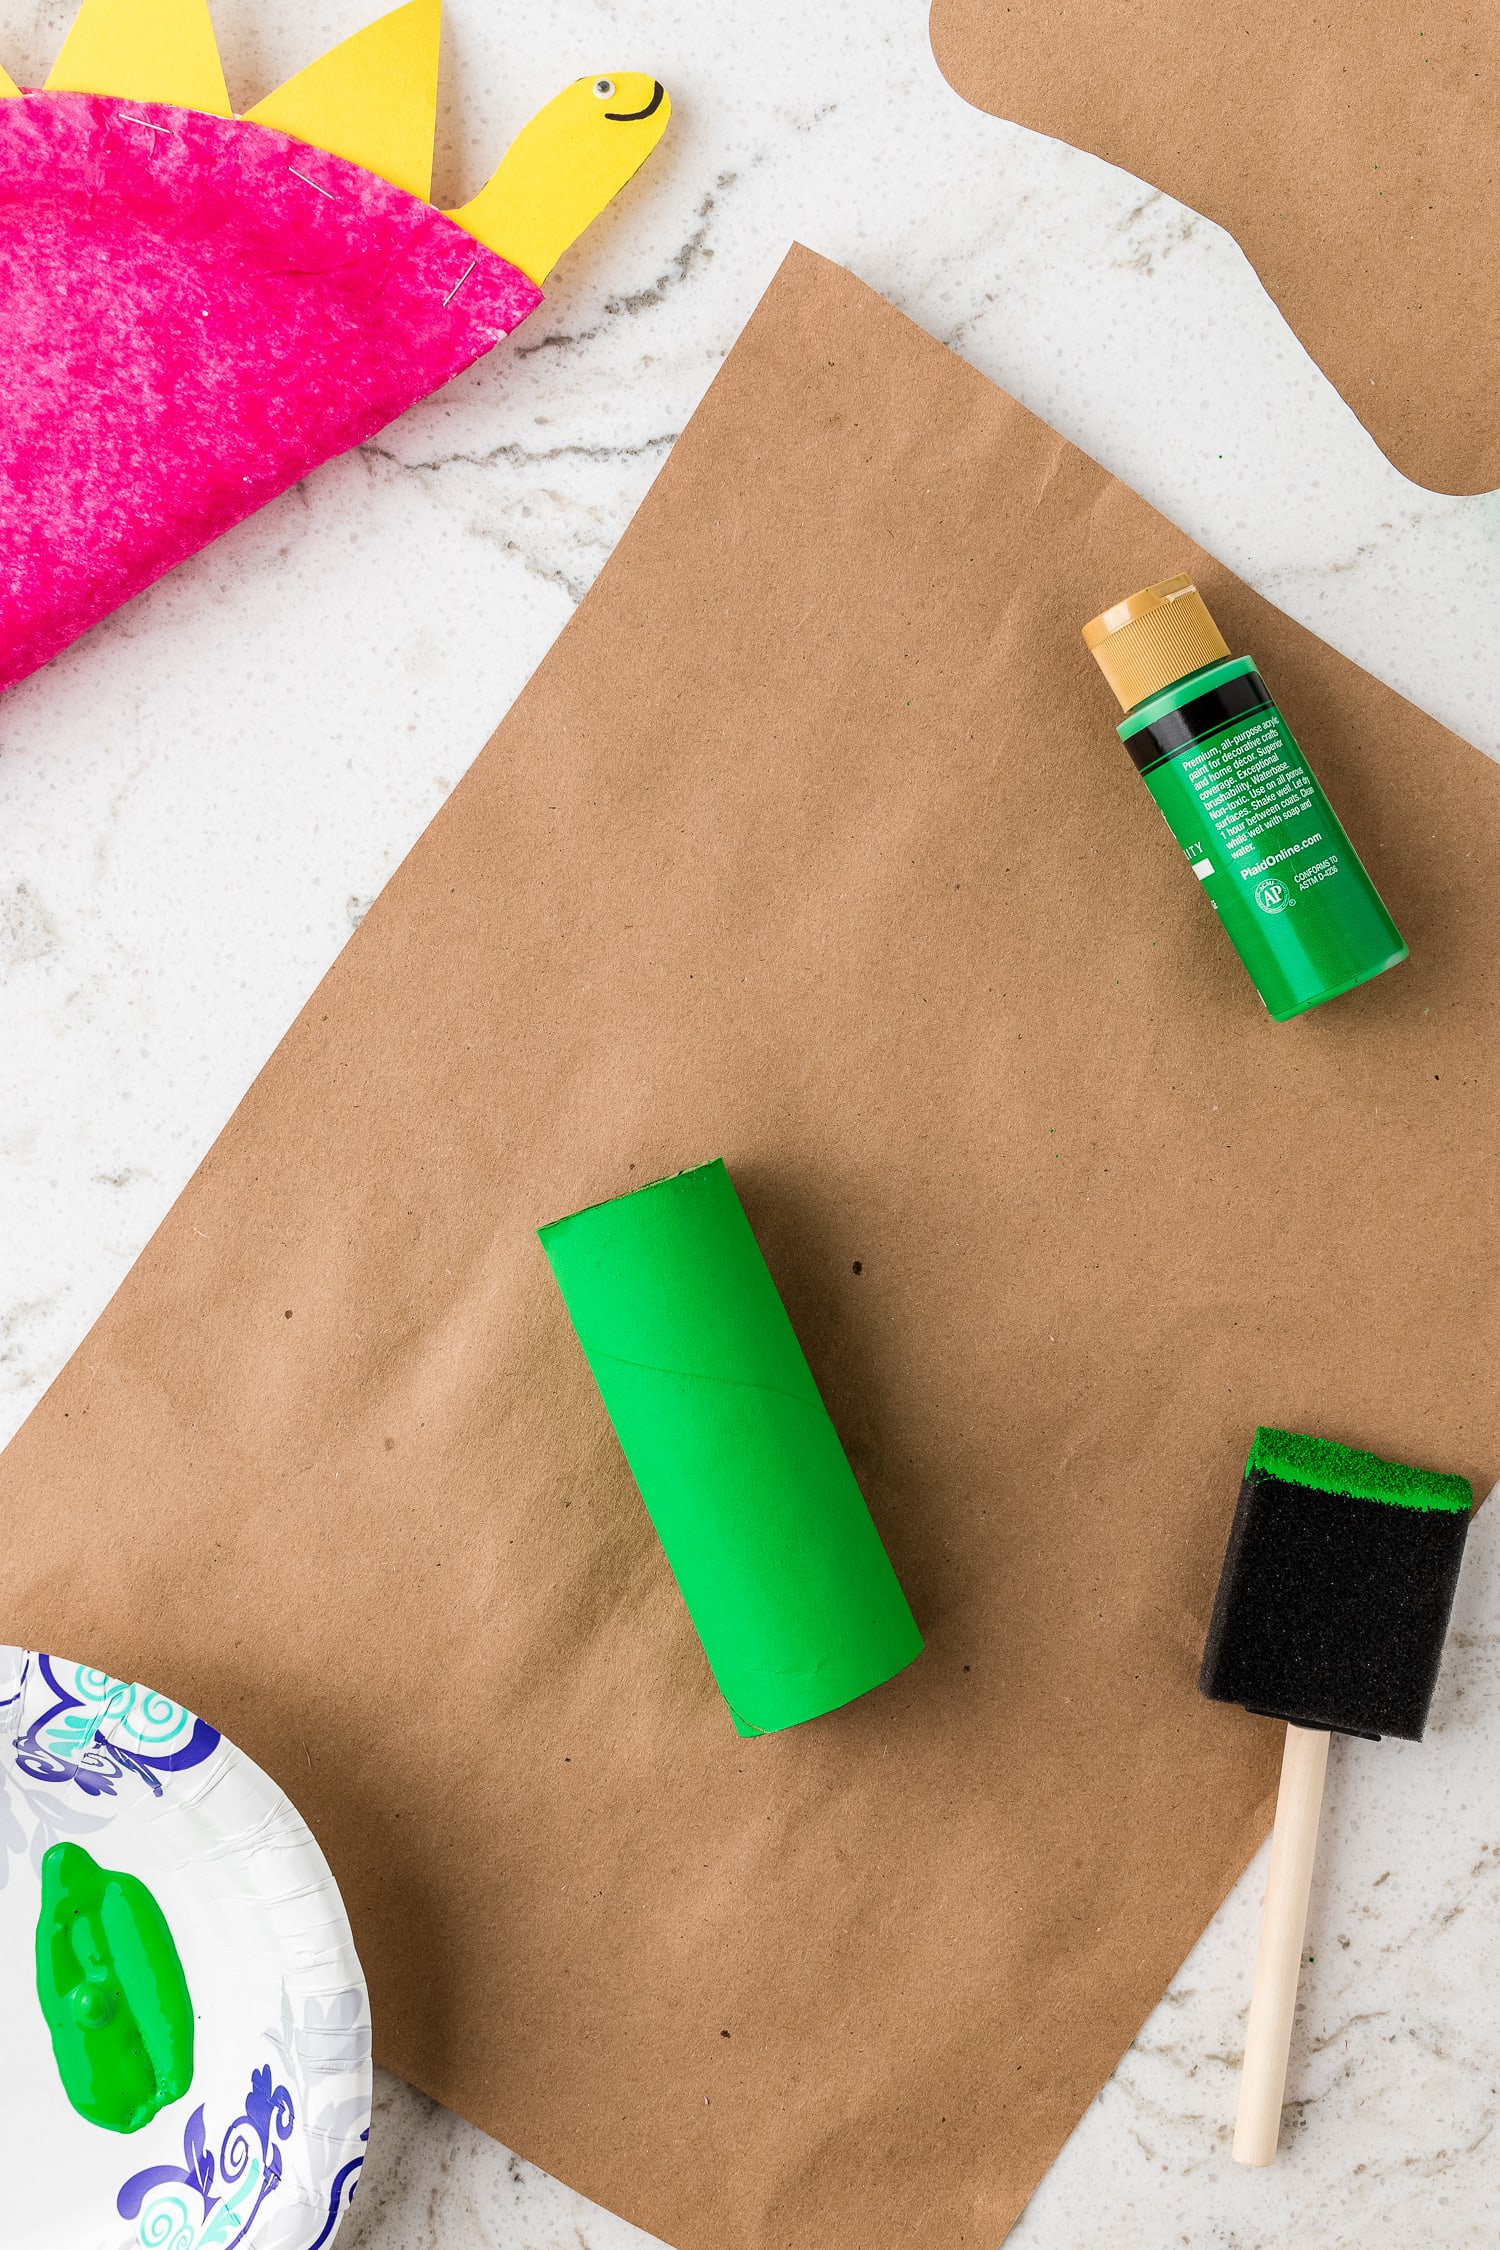
Make the Dinosaur Legs
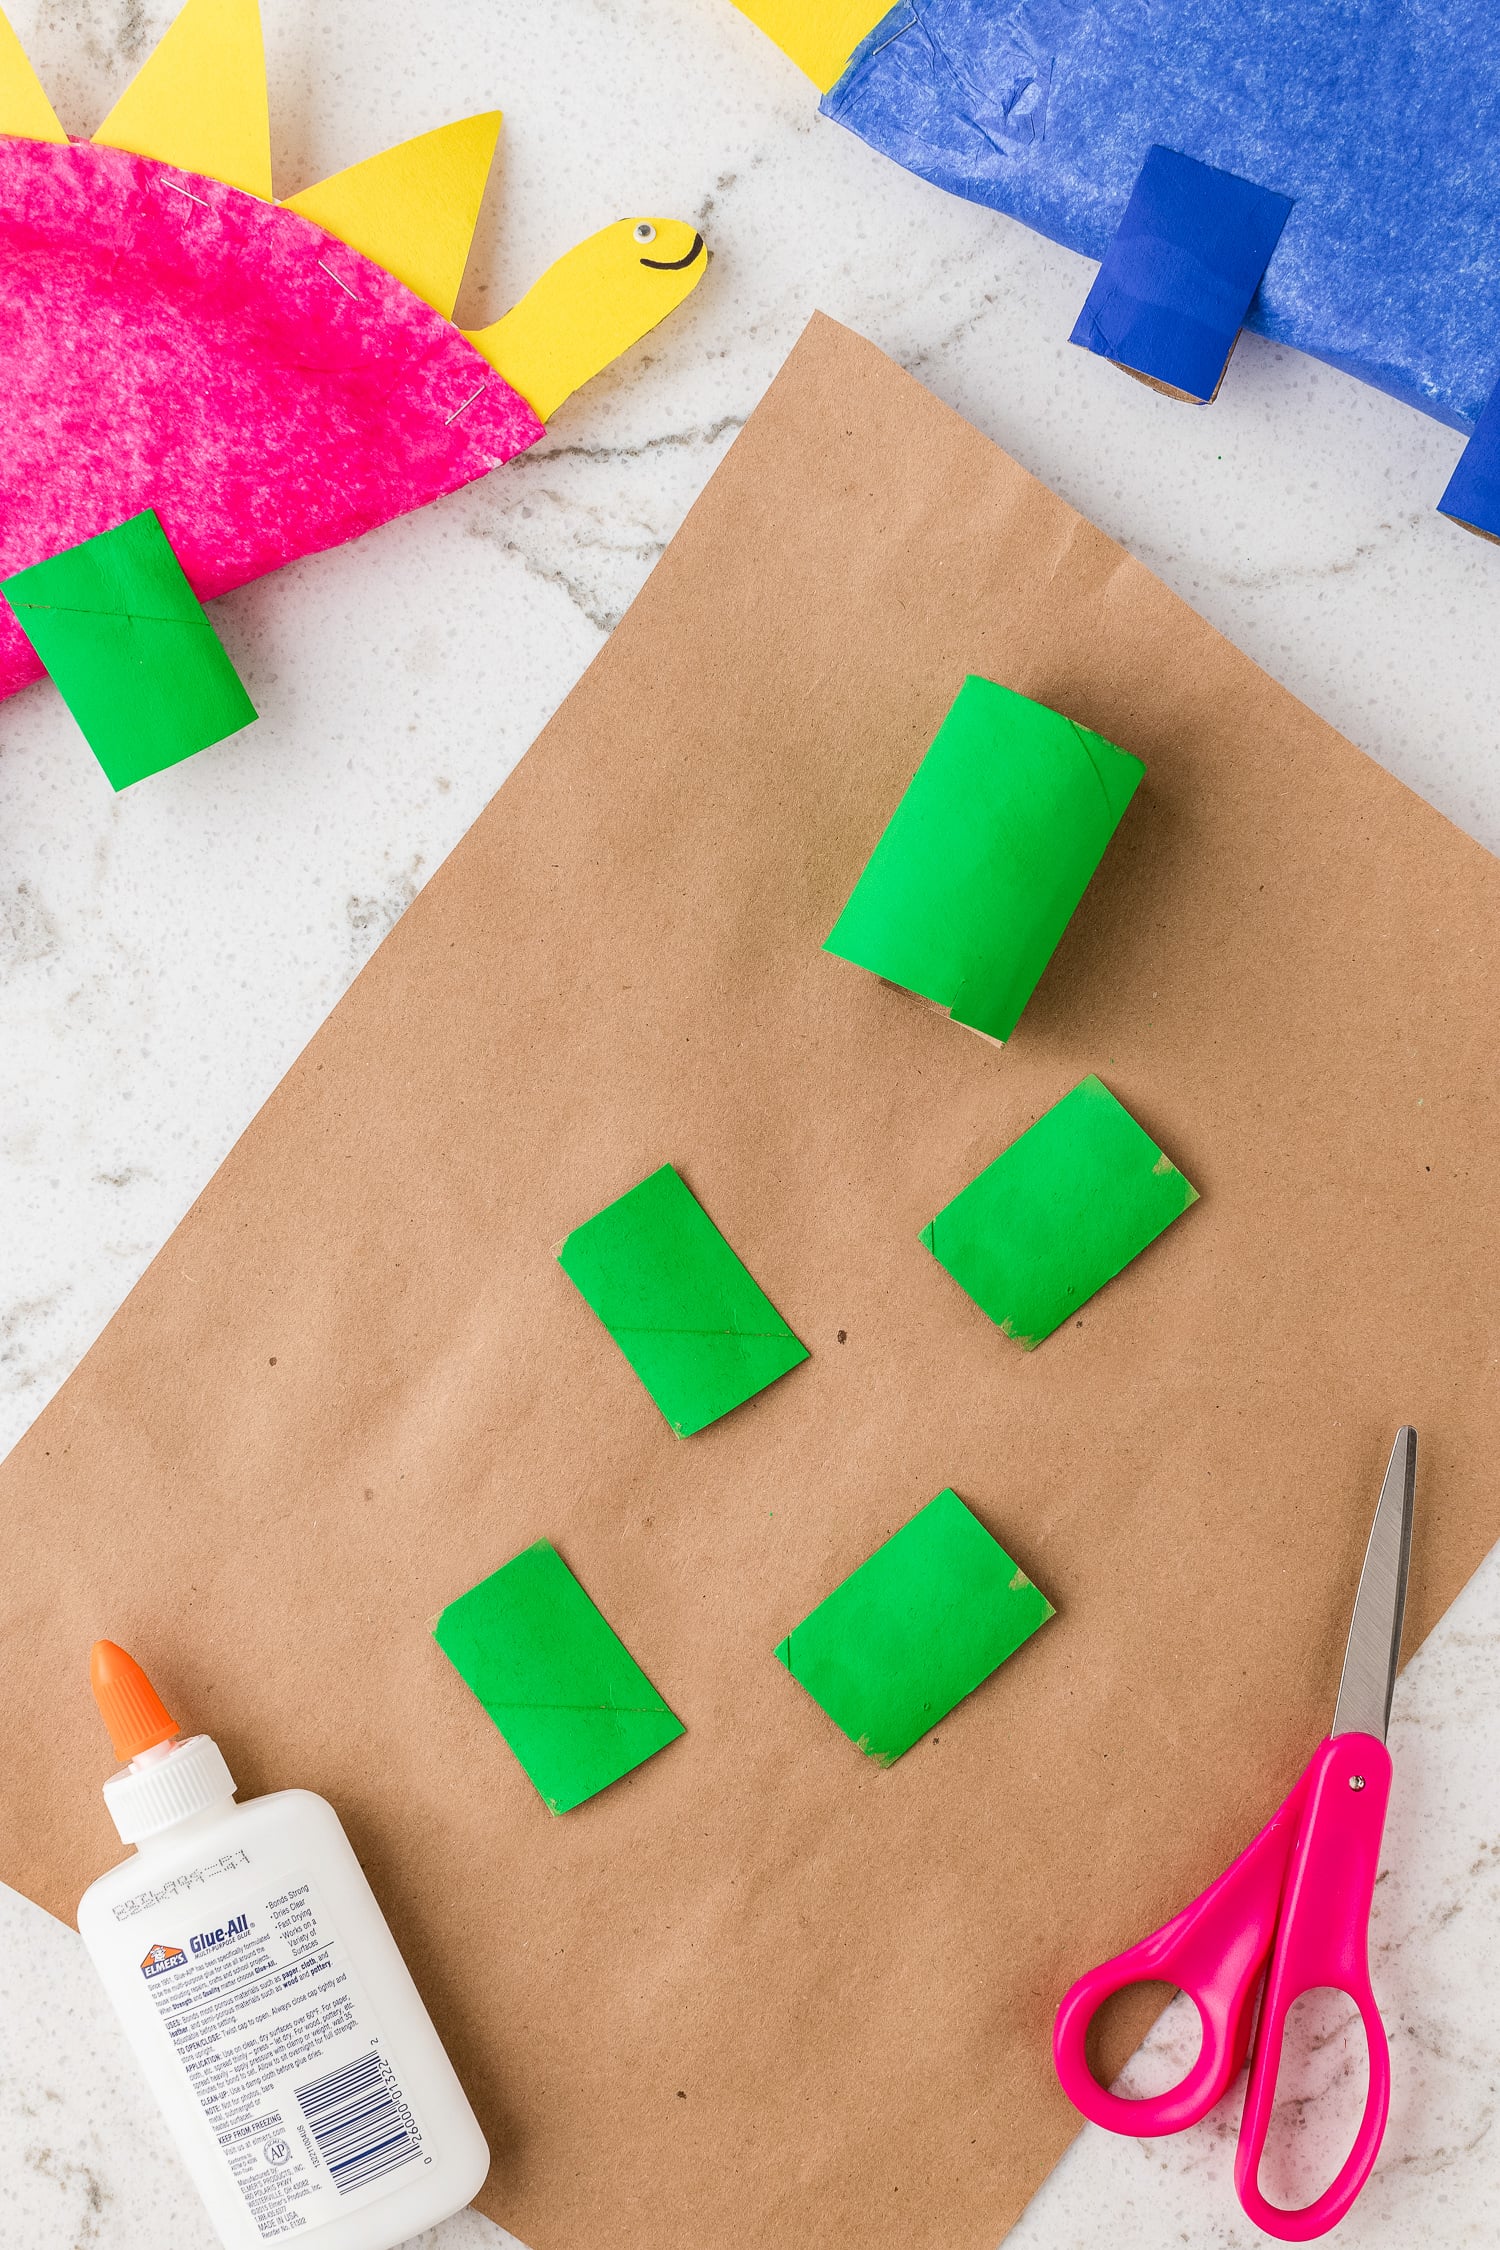
Lastly, let’s make the legs for the dinosaur. Take a recycled toilet paper roll and paint it with craft paint. Allow it to dry for 10 minutes.
Once dry, cut it into 4 rectangles. Affix the with craft glue to create the legs.
Quick Tip!
If you create this craft with younger children, you might consider precutting the items to reduce time.
More Easy Paper Plate Crafts!
- Grab your paper plates and make this cute summer craft! You won’t be able to resist smiling after the kids create this adorable Paper Plate Sunflower.
- This quick and easy Apple Paper Plate Craft is the perfect activity for preschoolers. It uses supplies that are typically found in your house and turns them into a fun and easy apple craft perfect for fall!
- Make this super fun Paper Plate Chick Craft around Easter time!
- This Paper Plate Octopus is adorable and so simple to make.
If you take a picture and share this Dinosaur Paper Plate Craft on Instagram make sure to #kidsactivityzone or tag us @kidsactivityzoneblog so we can see them!
Paper Plate Dinosaur Craft
Ingredients
- Paper plate
- Tissue paper
- Craft glue
- Scissors
- Stapler
- Staples
- Construction paper
- Googly eyes
- Marker
- Craft paper
- Toilet paper roll
- Craft paint
- Foam craft paintbrush
Instructions
- Spread a thin layer of glue over the entire surface of the paper plate. Lay a sheet of tissue paper over the glue and press until secure. Cut the excess tissue paper from the edges. Set aside to dry for about 5 minutes.
- While the body is drying, let’s make the spikes, head, and tail for our dinosaur. Take a piece of construction paper and cut about 6 triangles for the spikes. Next, draw the head and tail and cut them out. Set aside.
- Now it’s time to assemble the dinosaur! Take your tissue paper-covered paper plate and fold it in half. Take one of the previously cut triangles and staple it to the top center, securing the spike and the folded paper plate. Repeat this step attaching the remaining spikes.
- Lastly, fasten the head and the tail to the paper plate. Using a marker add an eye and smile to personalize this dinosaur.
- Lastly, let’s make the legs for the dinosaur. Take a recycled toilet paper roll and paint it with craft paint. Allow it to dry for 10 minutes.
- Once dry, cut it into 4 rectangles. Affix the with craft glue to create the legs.
Notes
- Tracing your hand is an easy way to make the head and tail for your dinosaur.
- If you create this craft with younger children, you might consider precutting the items to reduce time.