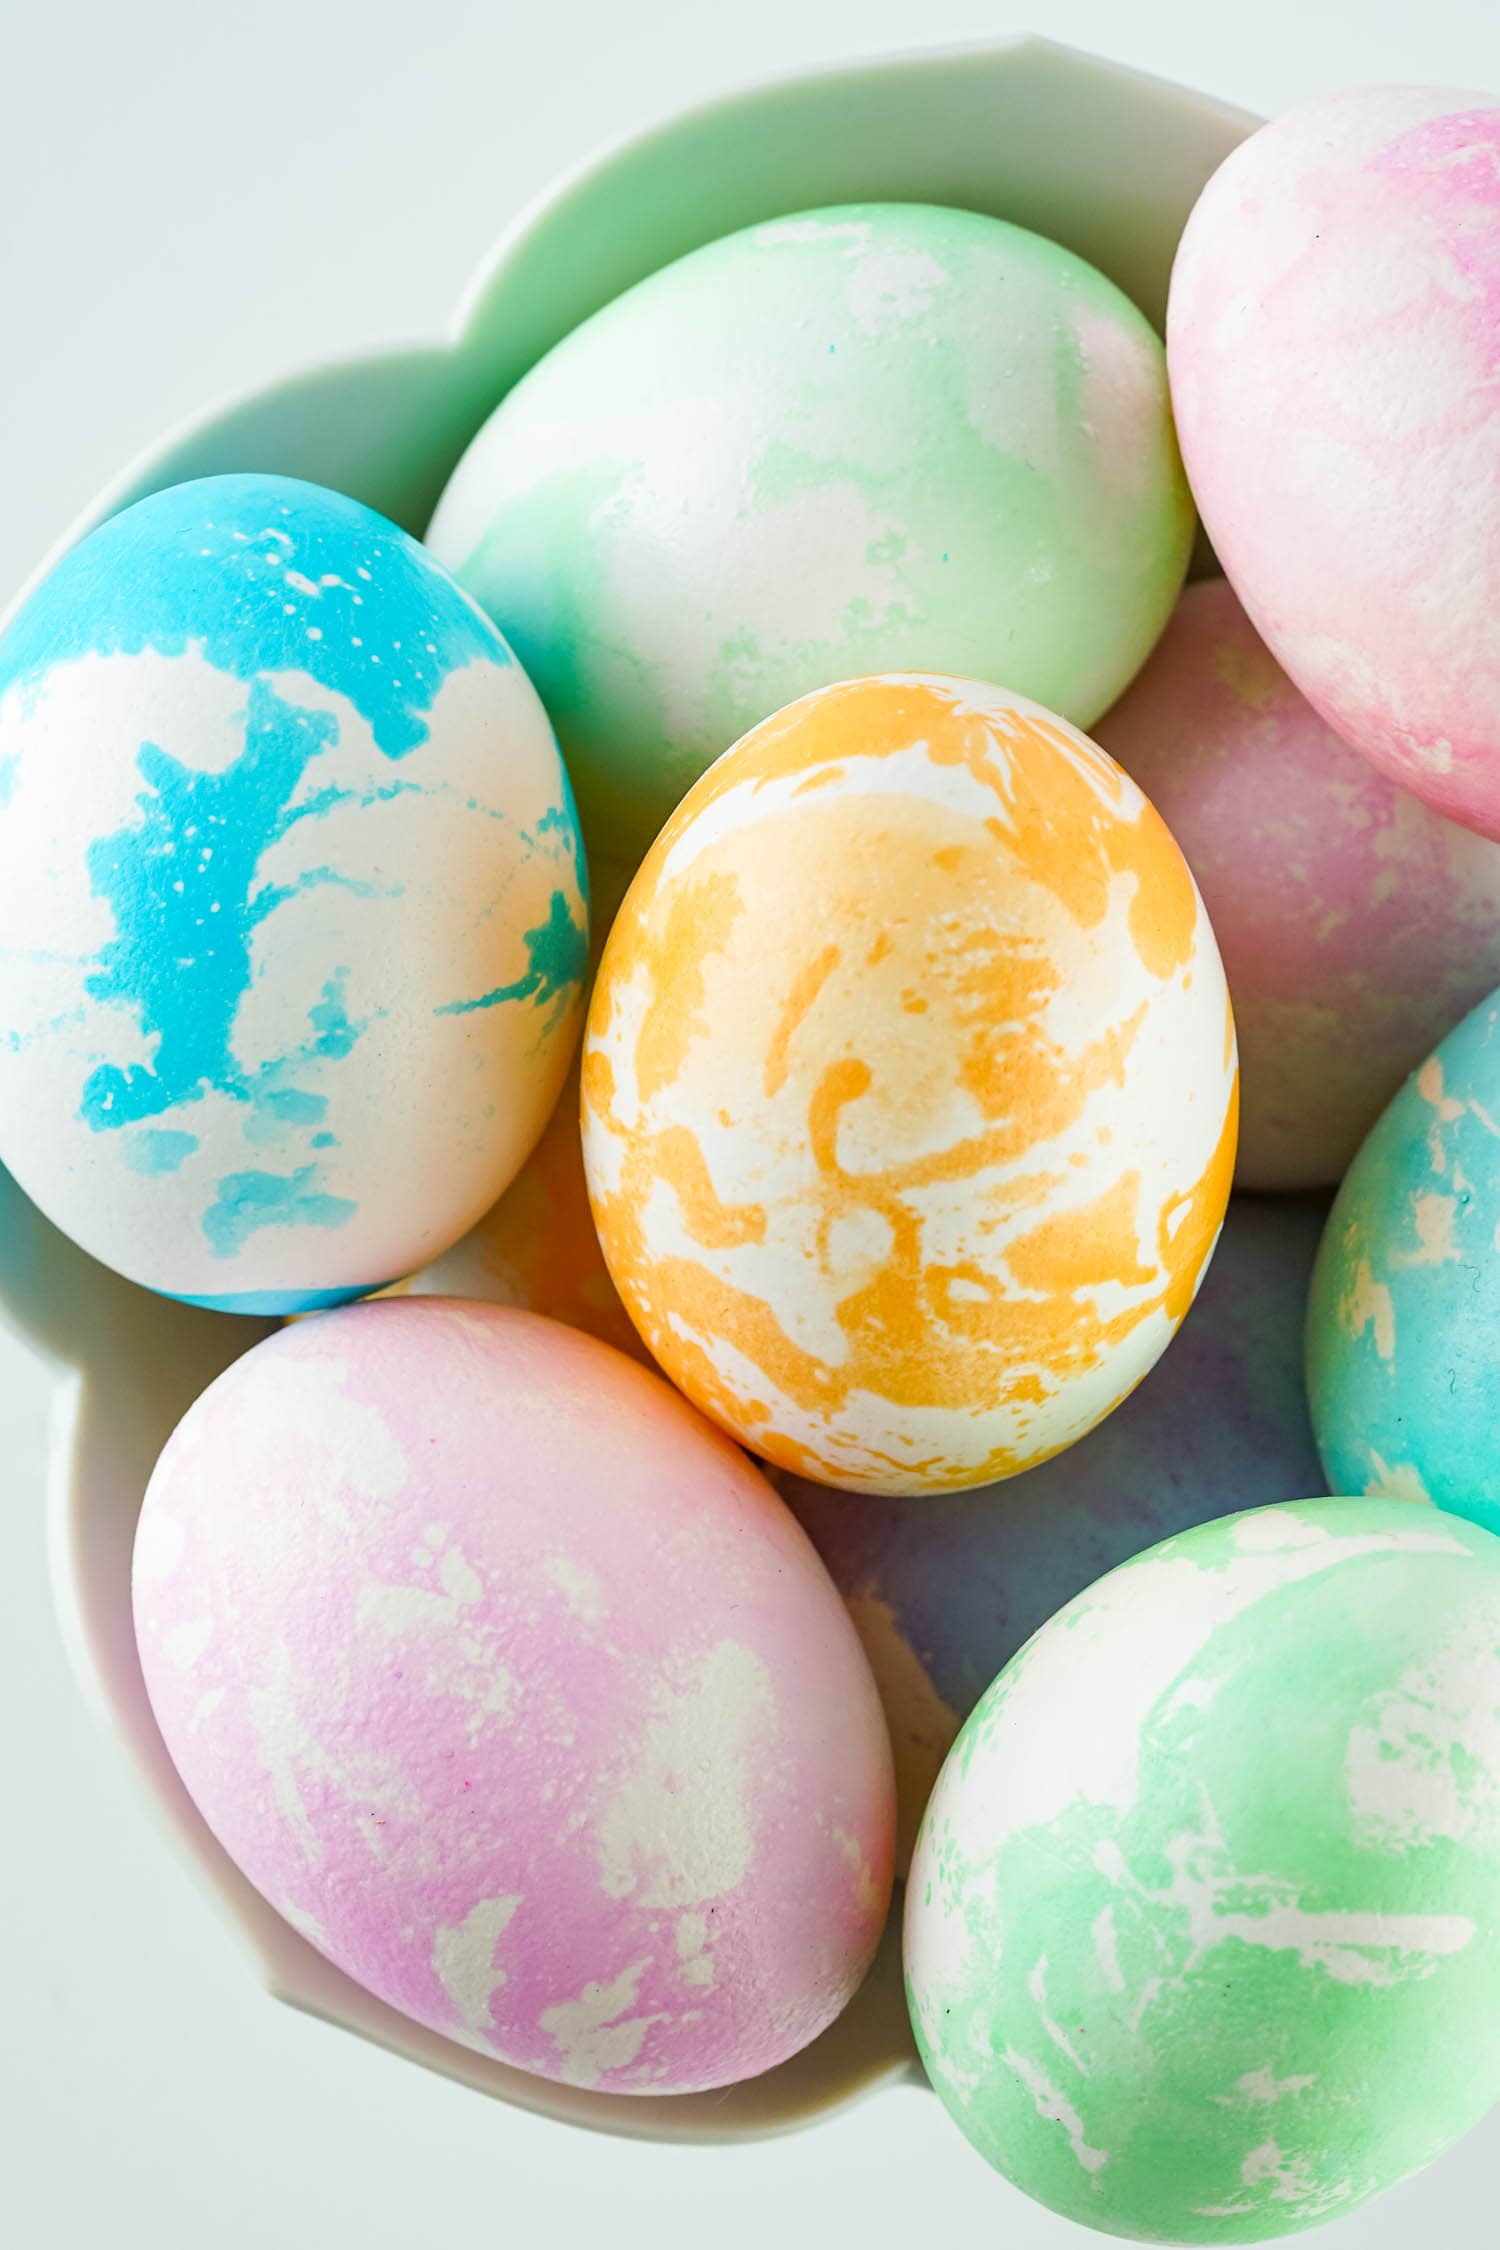
Marble Dyed Eggs
Marble Dyed Eggs are Easter Eggs that are dyed using oil and food dye! The kids will have so much fun doing this Easter activity. The oil will repel the dye to create a cool marbling effect on the eggs. It’s a craft and science activity all in one.
The marble dyed eggs are so cool! I love finding activities like this one because my kids can learn some science while they make a really cool product. This is a great way to teach your kids about the density of liquids and why substances like oil and water don’t mix. If you homeschool, this would be a great activity to do during science around Easter time.
But you don’t even have to talk about science when you create marbled eggs either! These are so fun, and it’s great to sit back and listen to the kids go “woooah!” when we pull each egg out of the dye. I’ll never get over the way kids are so easily entertained and fascinated!
Why You’ll Love Marble Dyed Eggs
- It only takes 20 minutes to make marble dyed eggs from start to finish!
- Kids of any age can make marble Easter eggs. As long as they’ve got gloves on and follow the instructions, they’ll make some really cool eggs!
- Marbled eggs are a great science experiment and fun activity all-in-one.
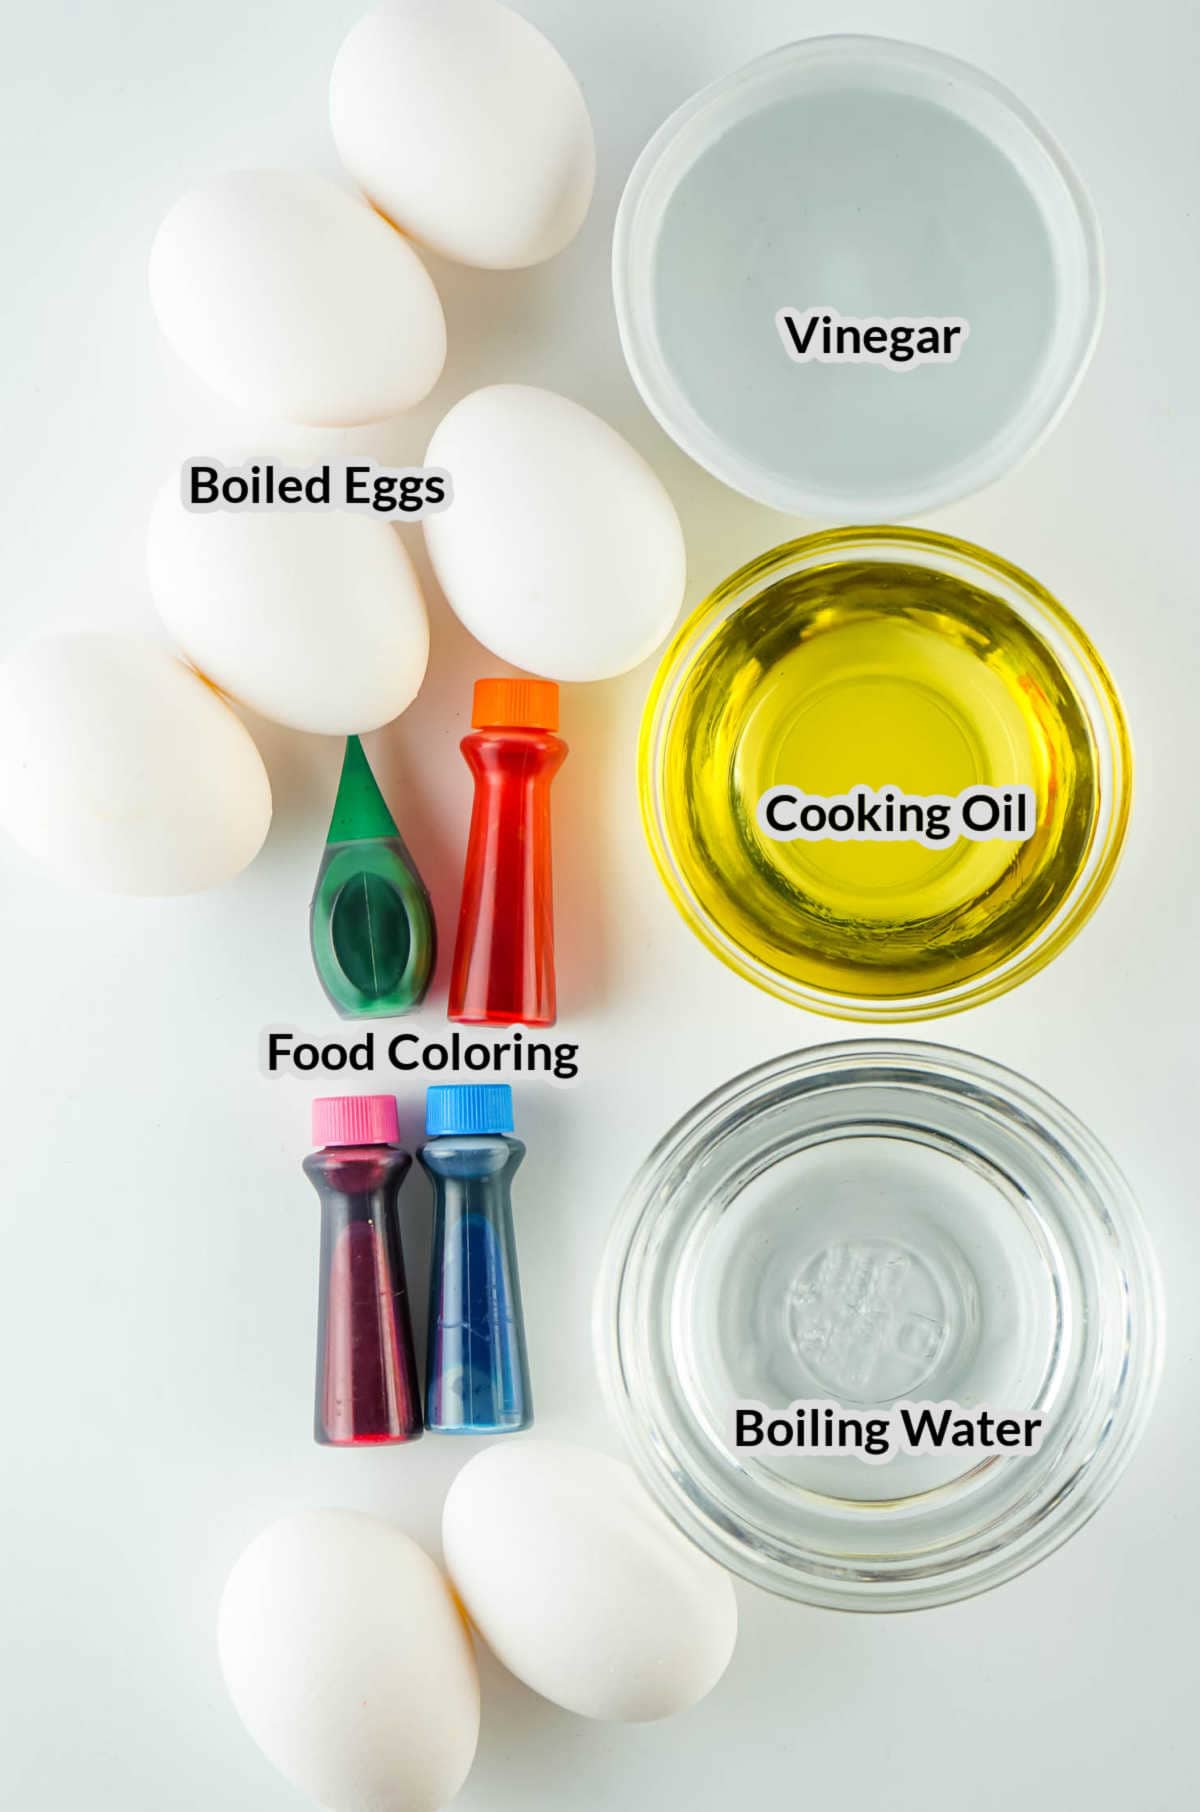
Supplies needed to make Marble Dyed Eggs
- Boiling Water – Make boiling water on the stovetop or even more quickly in an electric kettle.
- Cooking Oil – You can use vegetable oil, canola oil, olive oil, avocado oil, or any other oil you prefer!
- Vinegar – This is what helps the food coloring actually dye the eggs.
- Food Coloring – Choose whatever colors you’d like! Don’t forget that you can mix colors to create more variety in colors.
- Boiled Eggs – If you own an Instant Pot, you can easily make eggs in it! If not, this recipe will help you easily make the perfect hard boiled eggs.
- Paper Towels – Be sure you’ve got plenty of paper towels on hand! You’ll need them to protect your workspace and clean up any spills.
- Plastic Cereal Bowls – I recommend using plastic cereal bowls so that you can just throw them away once you’re done.
- Rubber Gloves – You have to touch these eggs more than you do when you dye eggs the classic way. Wear rubber gloves to protect your fingers from getting stained!
- Forks or Spoons – Grab plastic forks or spoons as well! It’s way easier to just throw them away after making marble Easter eggs.
How to Make Marbleized Easter Eggs
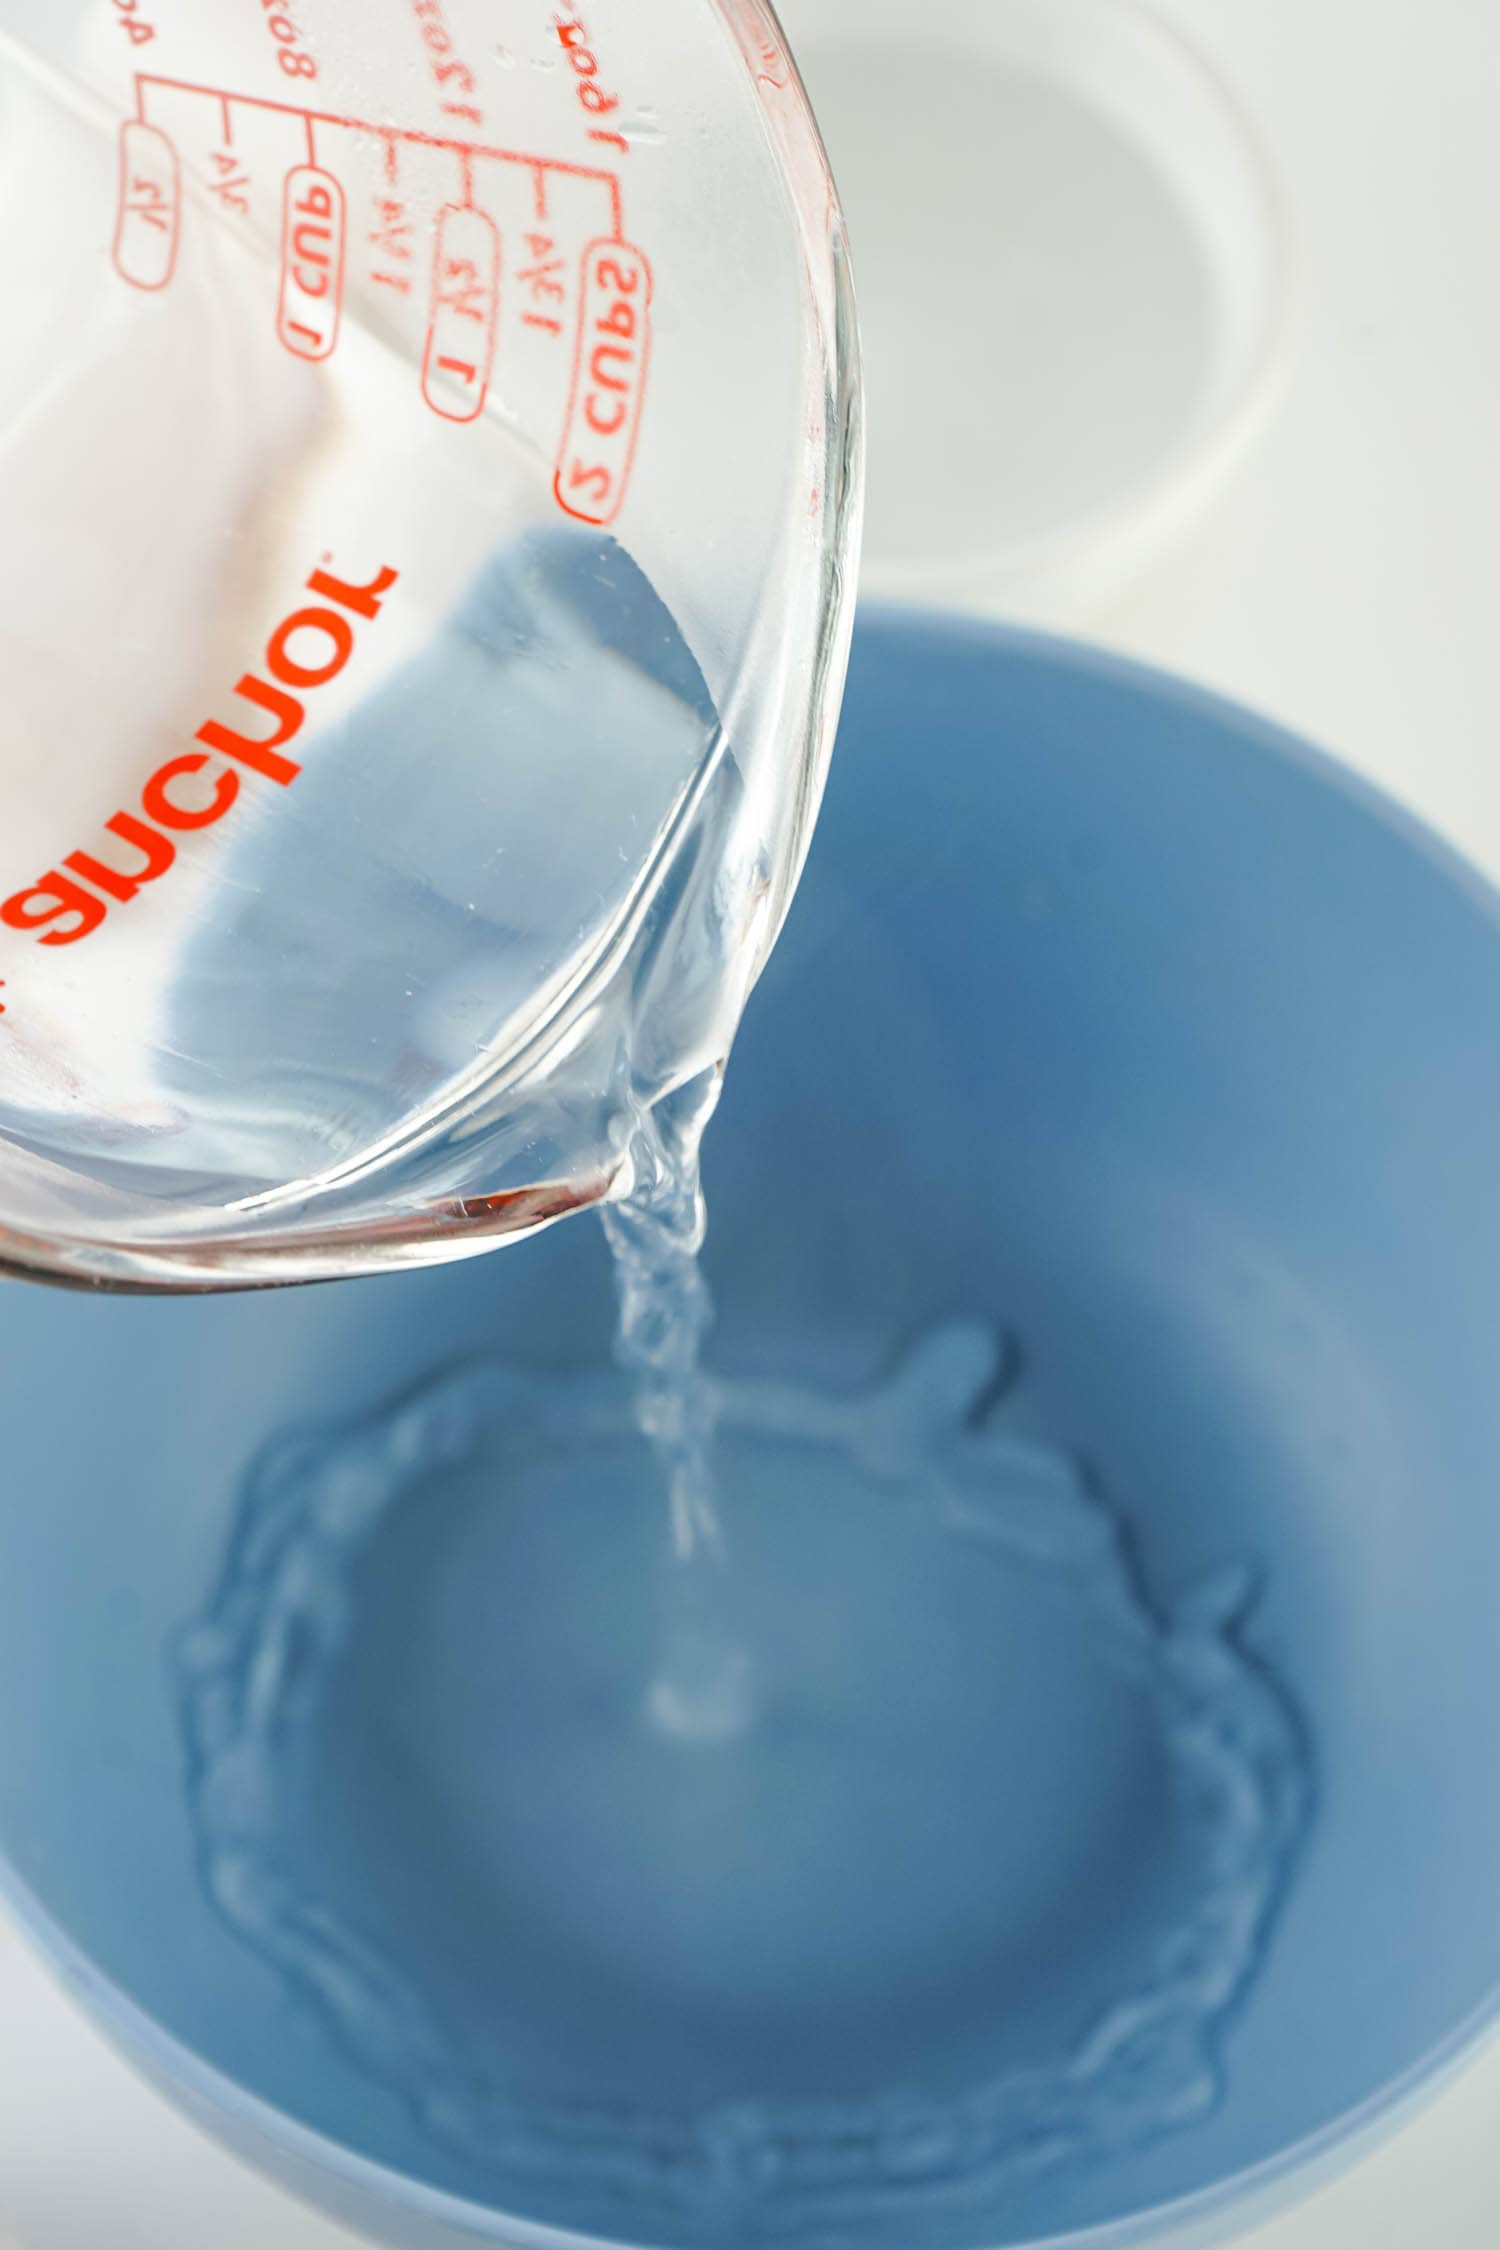
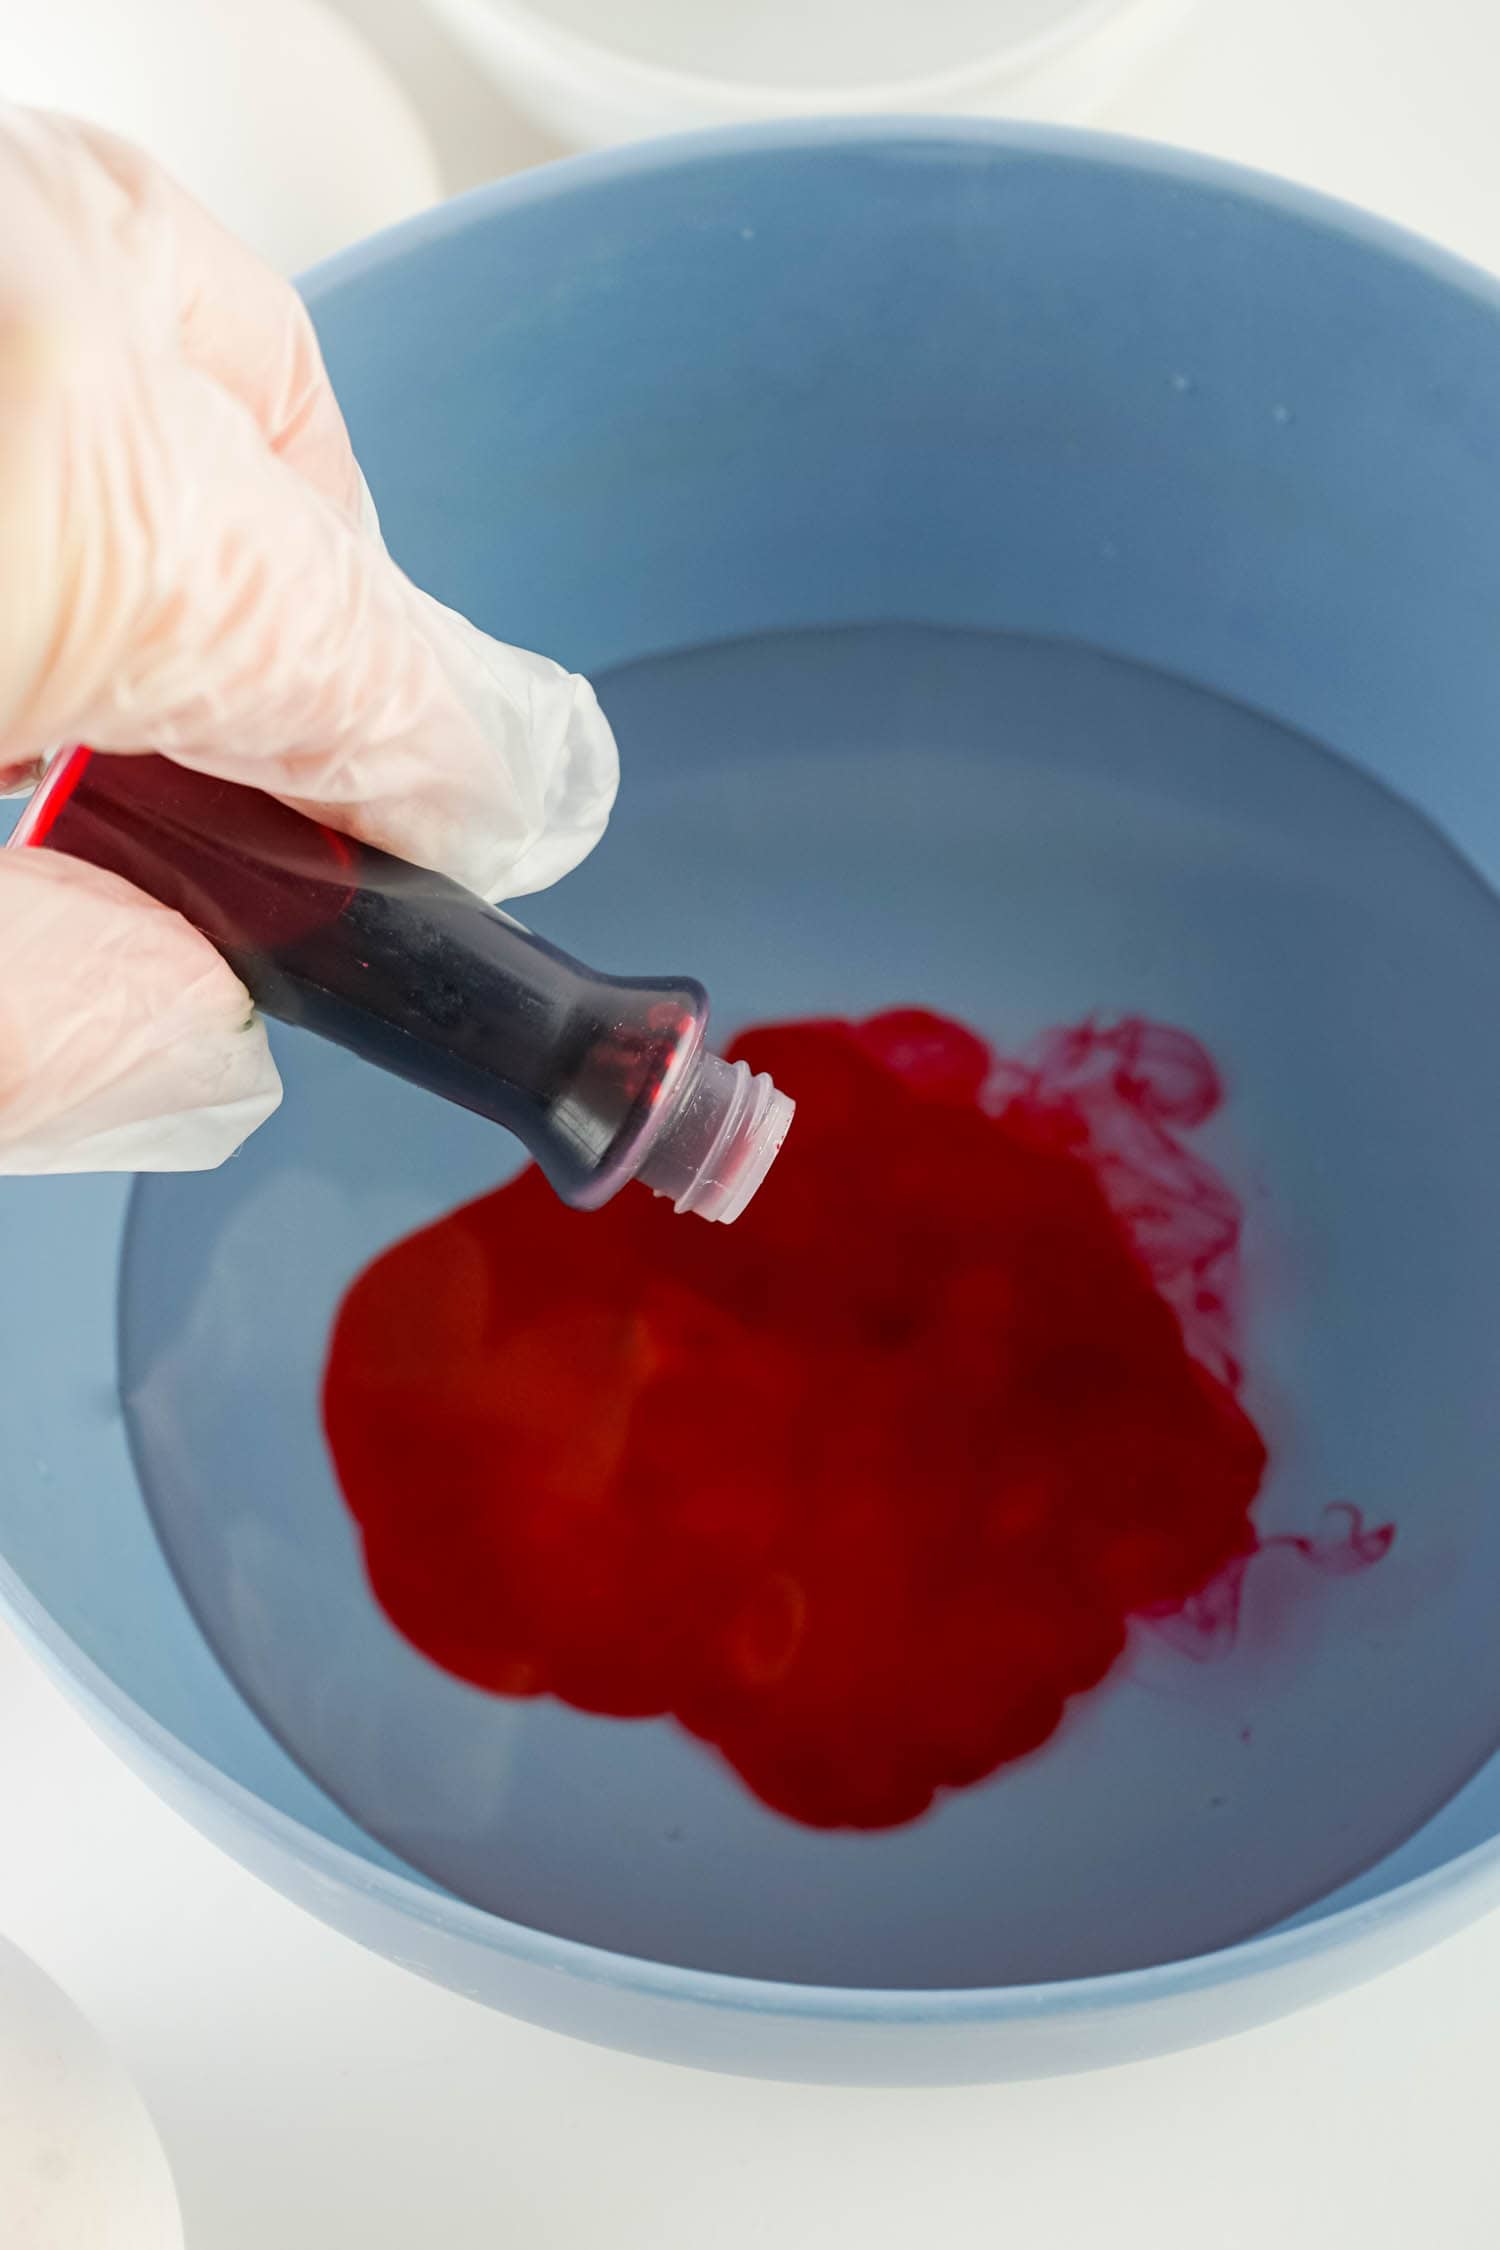
Pour ½ cup of boiling water into each disposable bowl. Don’t let the water be higher than about a half inch. Add ½ Tablespoon of vinegar to each bowl.
Choose your color and add 10-20 drops of food coloring into each bowl. Only do one color per bowl.
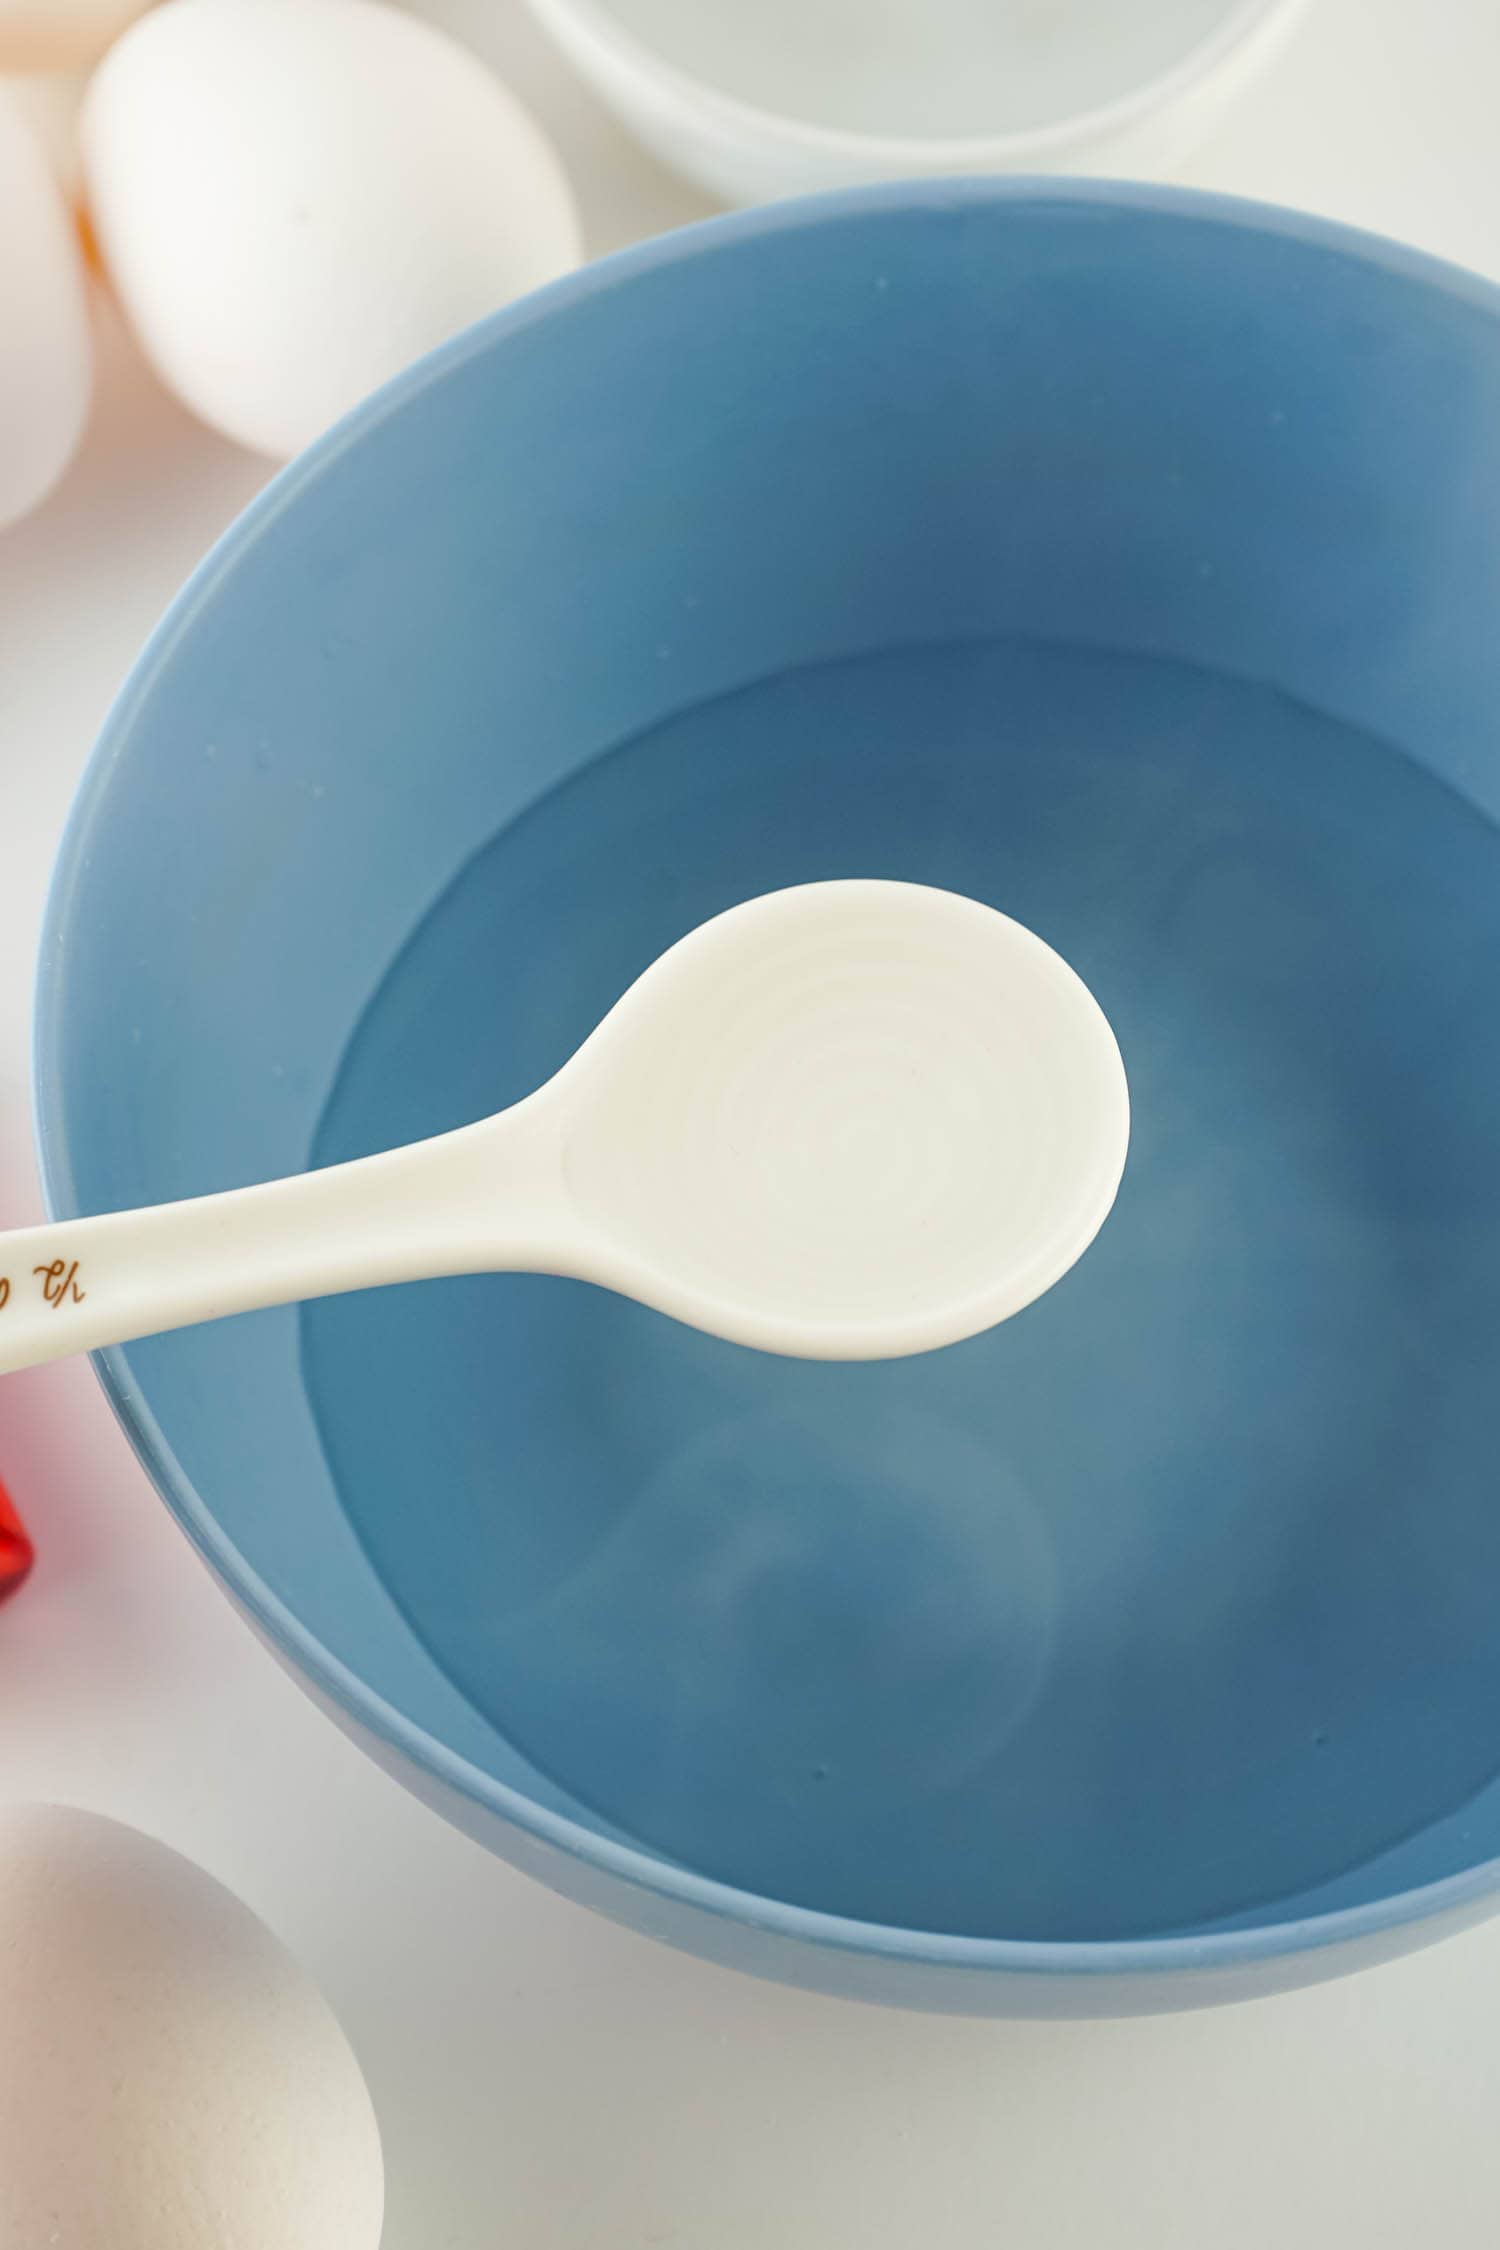
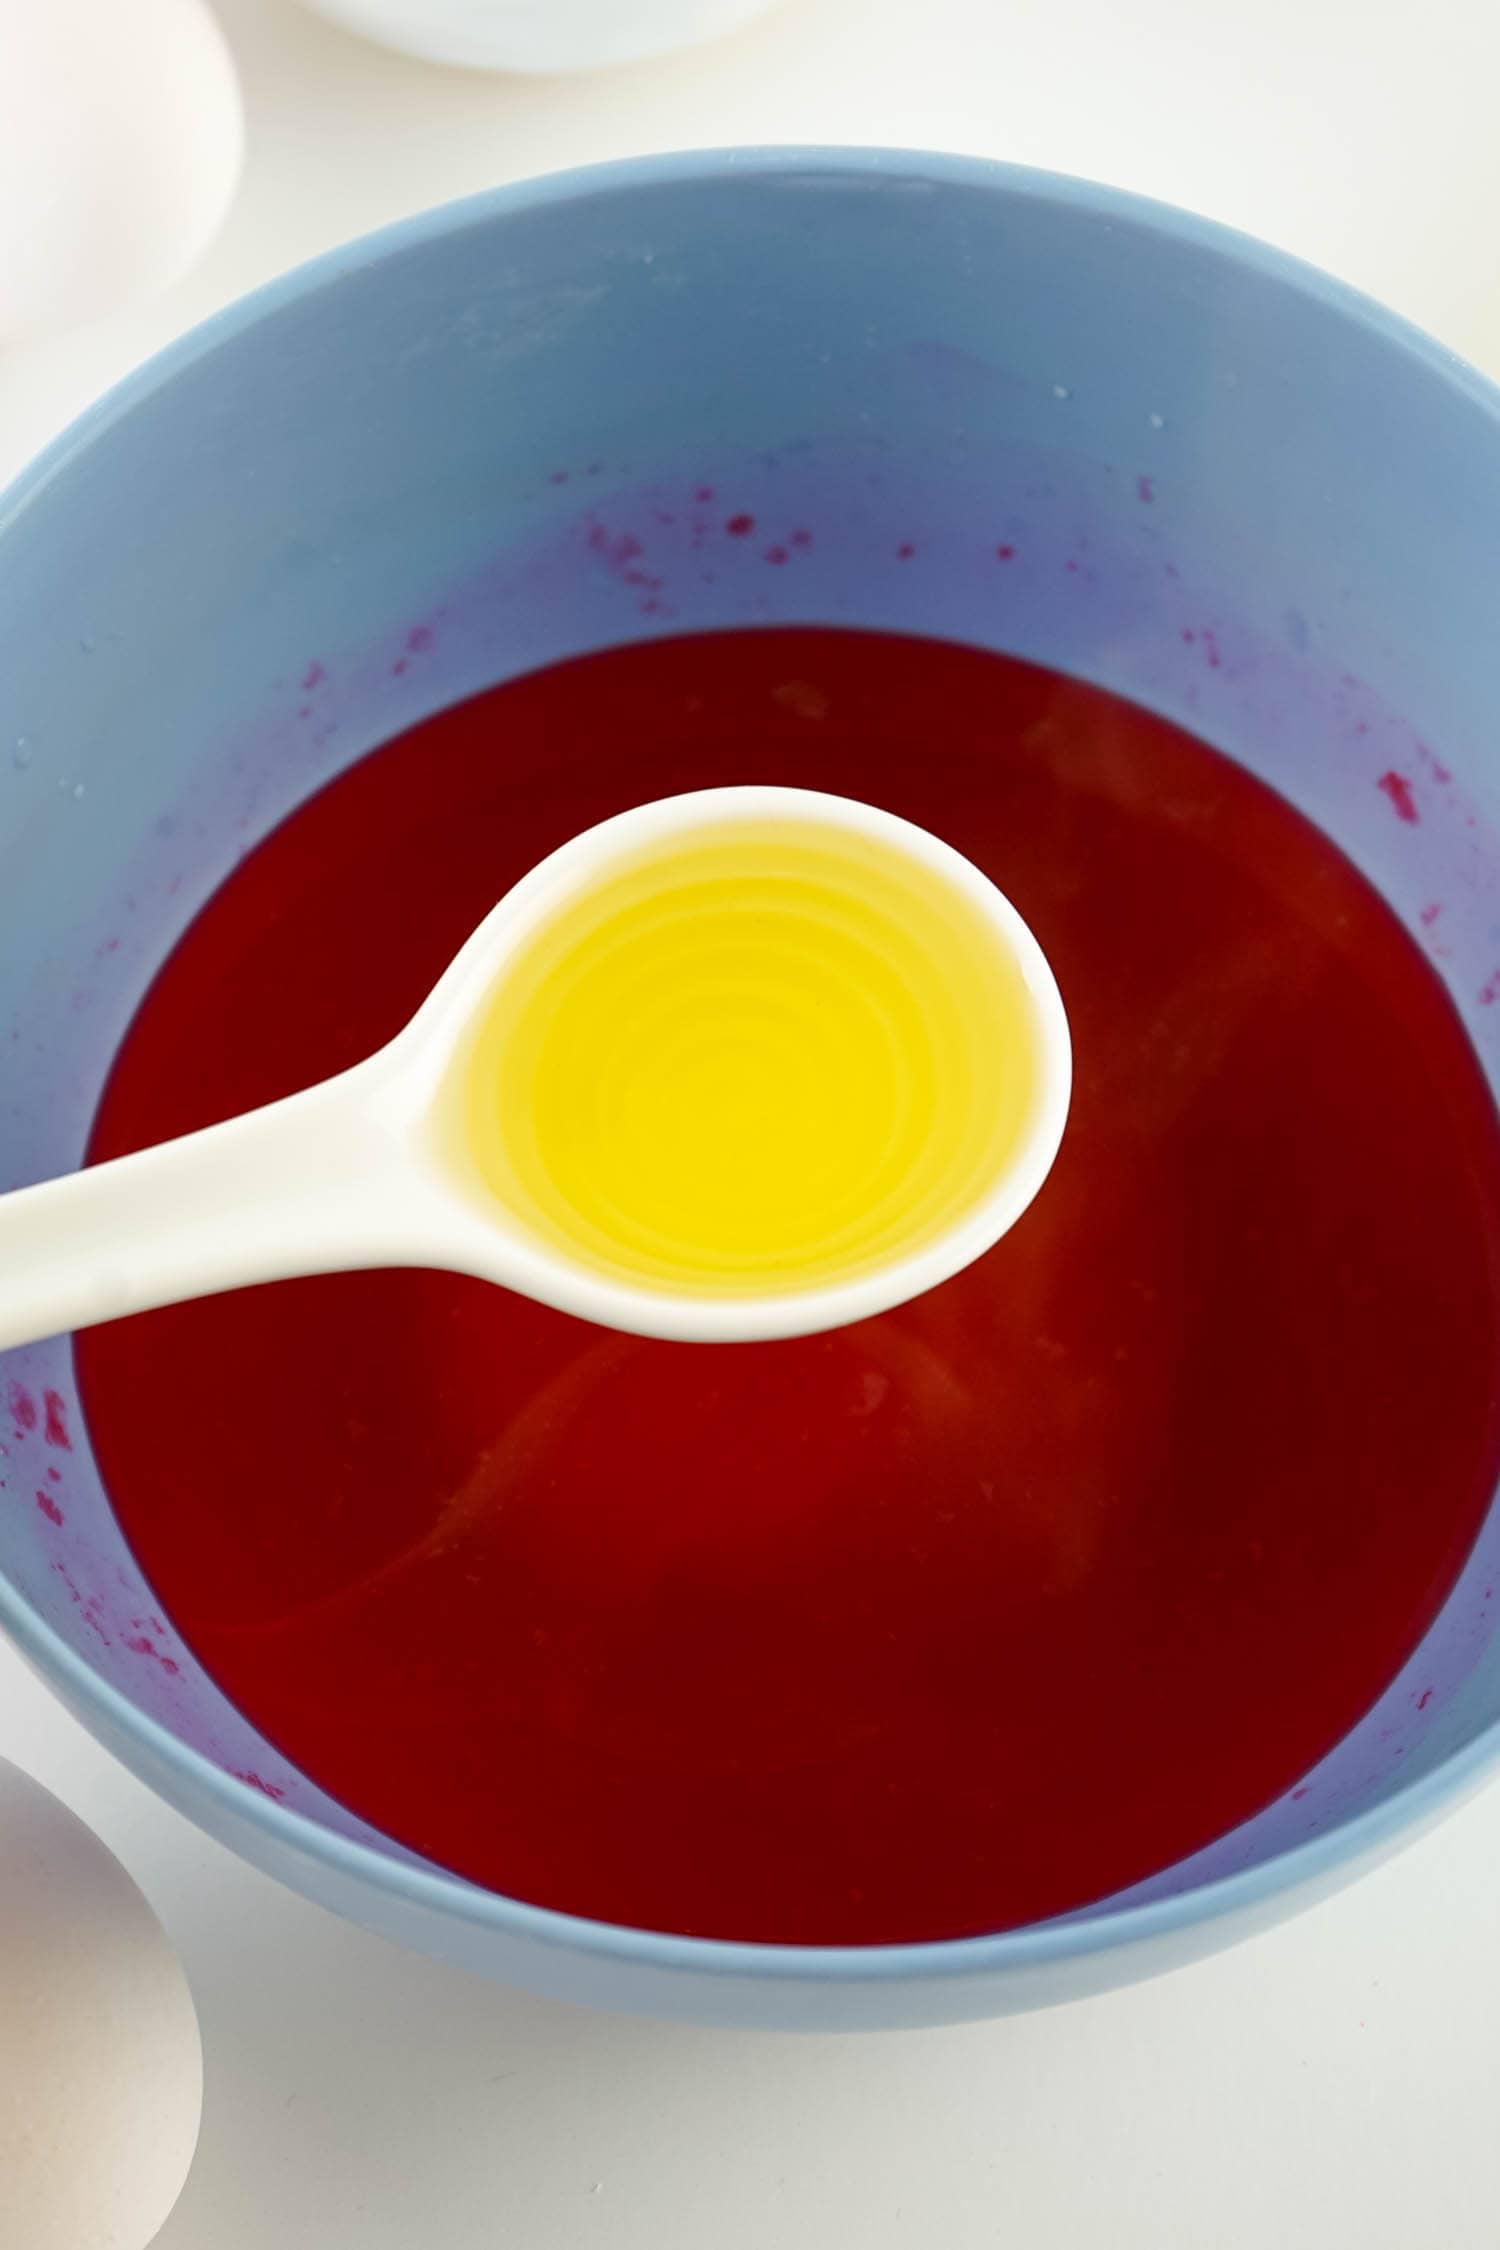
Stir to combine and then add a tablespoon of oil to each bowl. Grab an empty bowl and pour little oil in it, this will be used later.
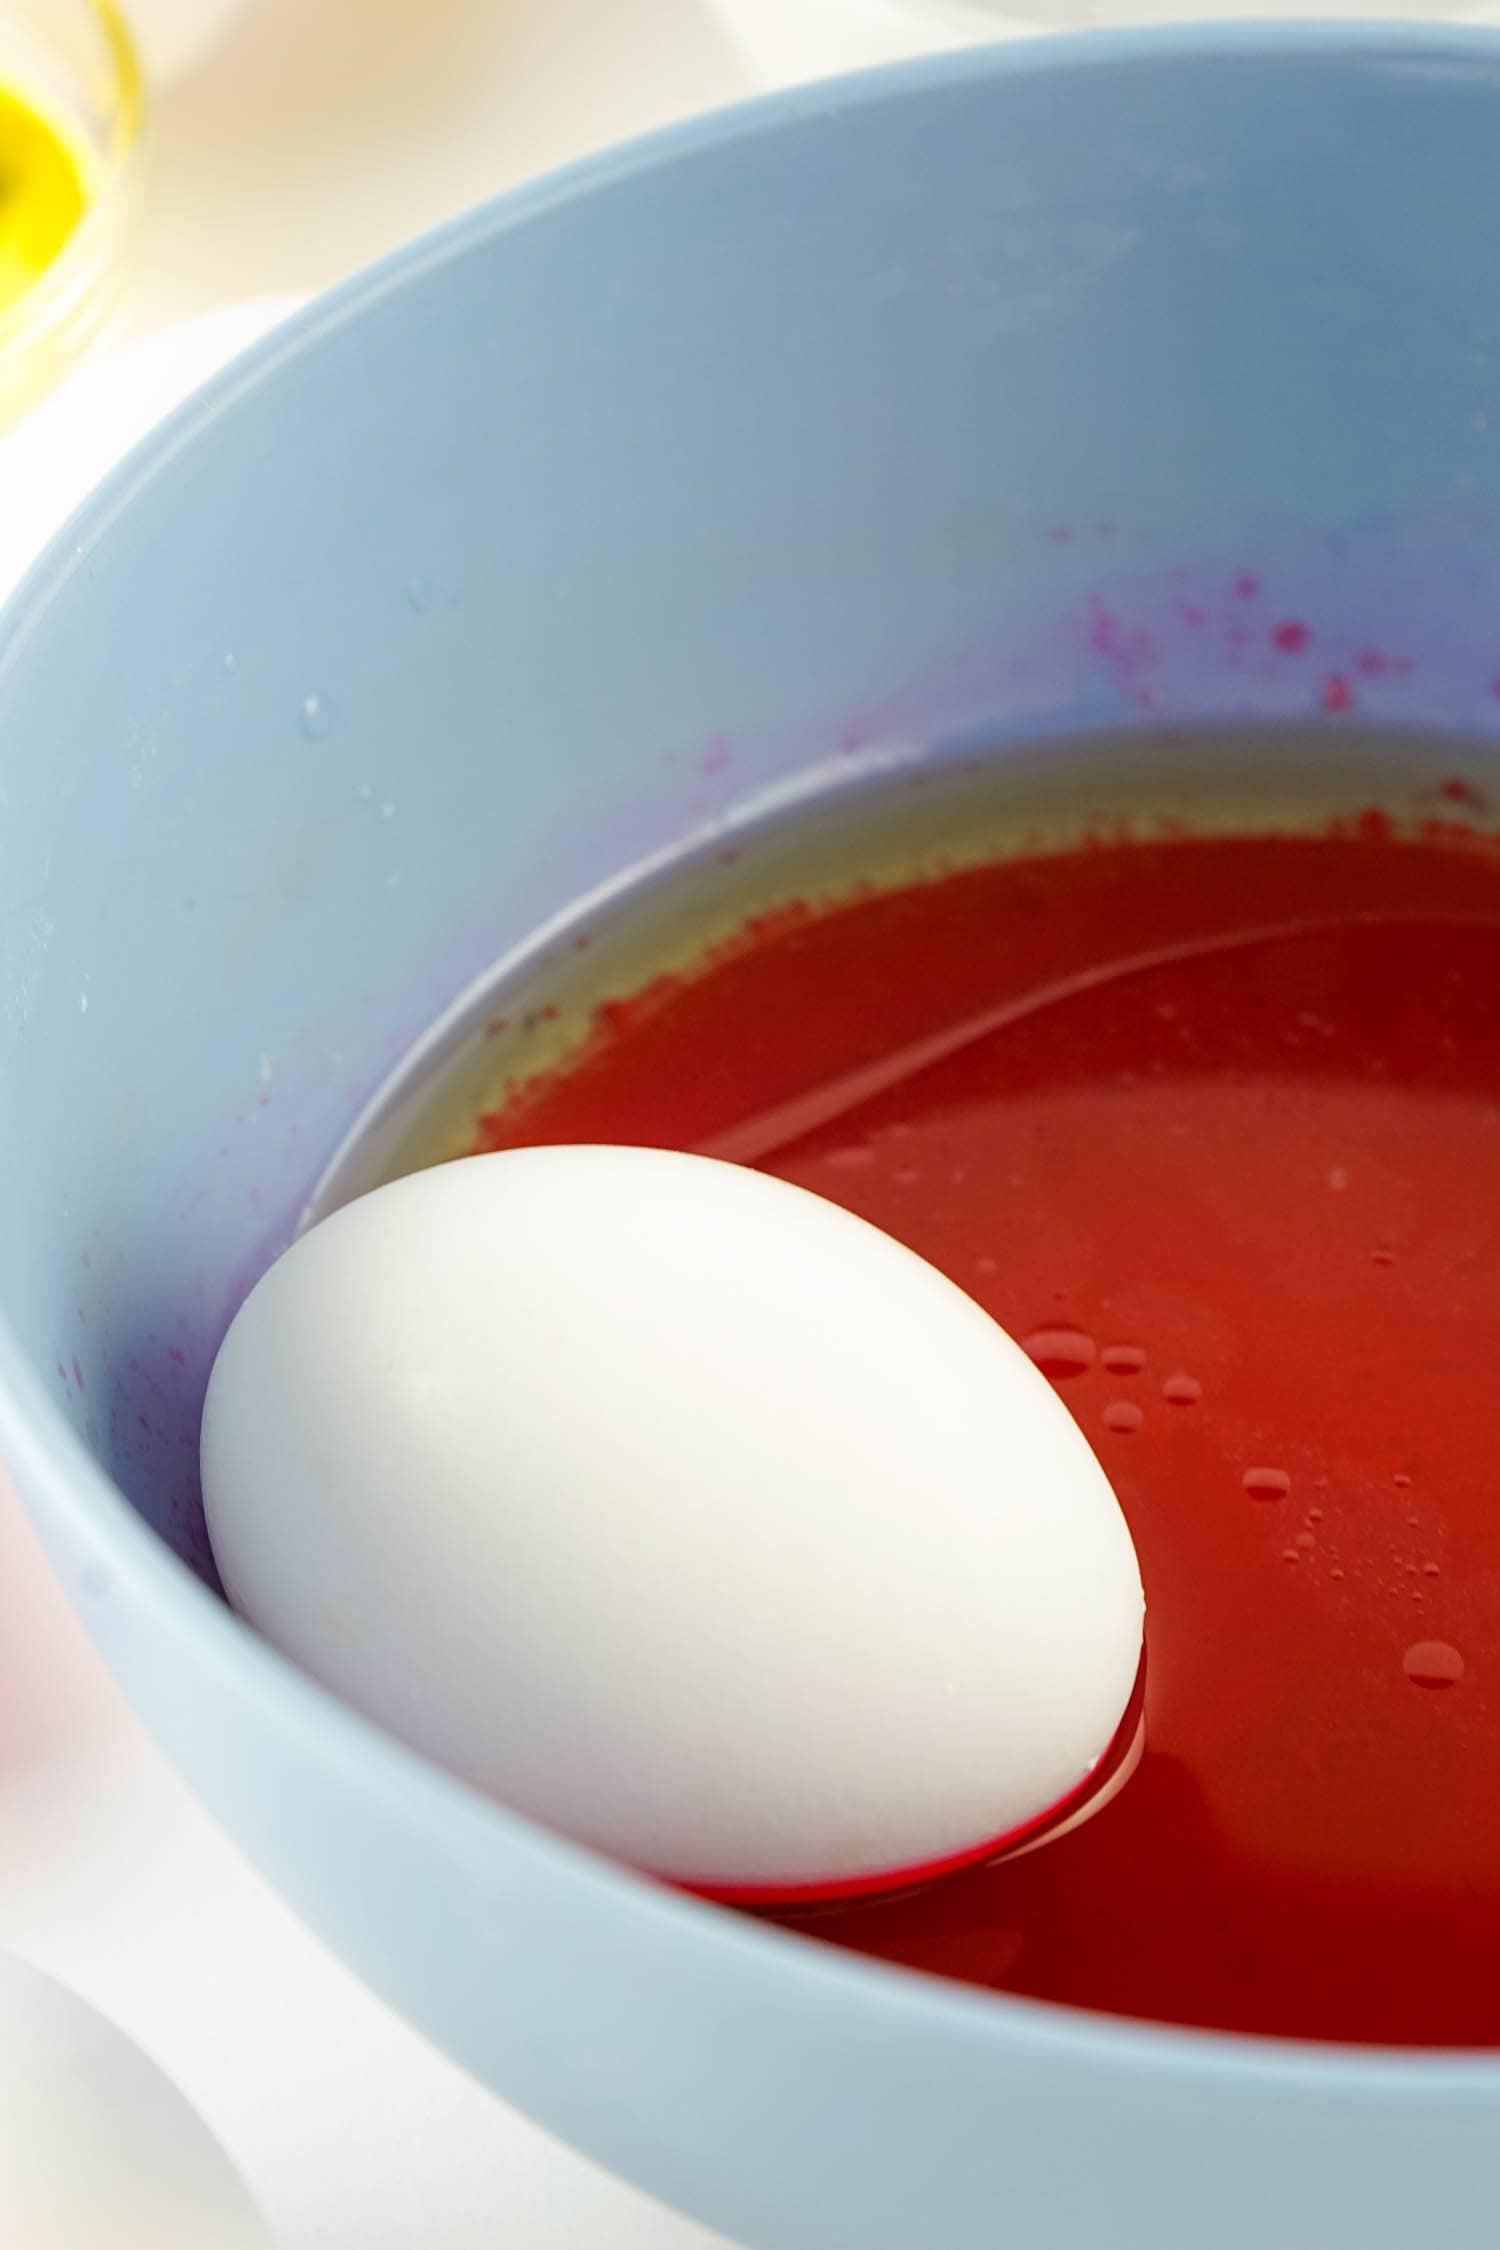
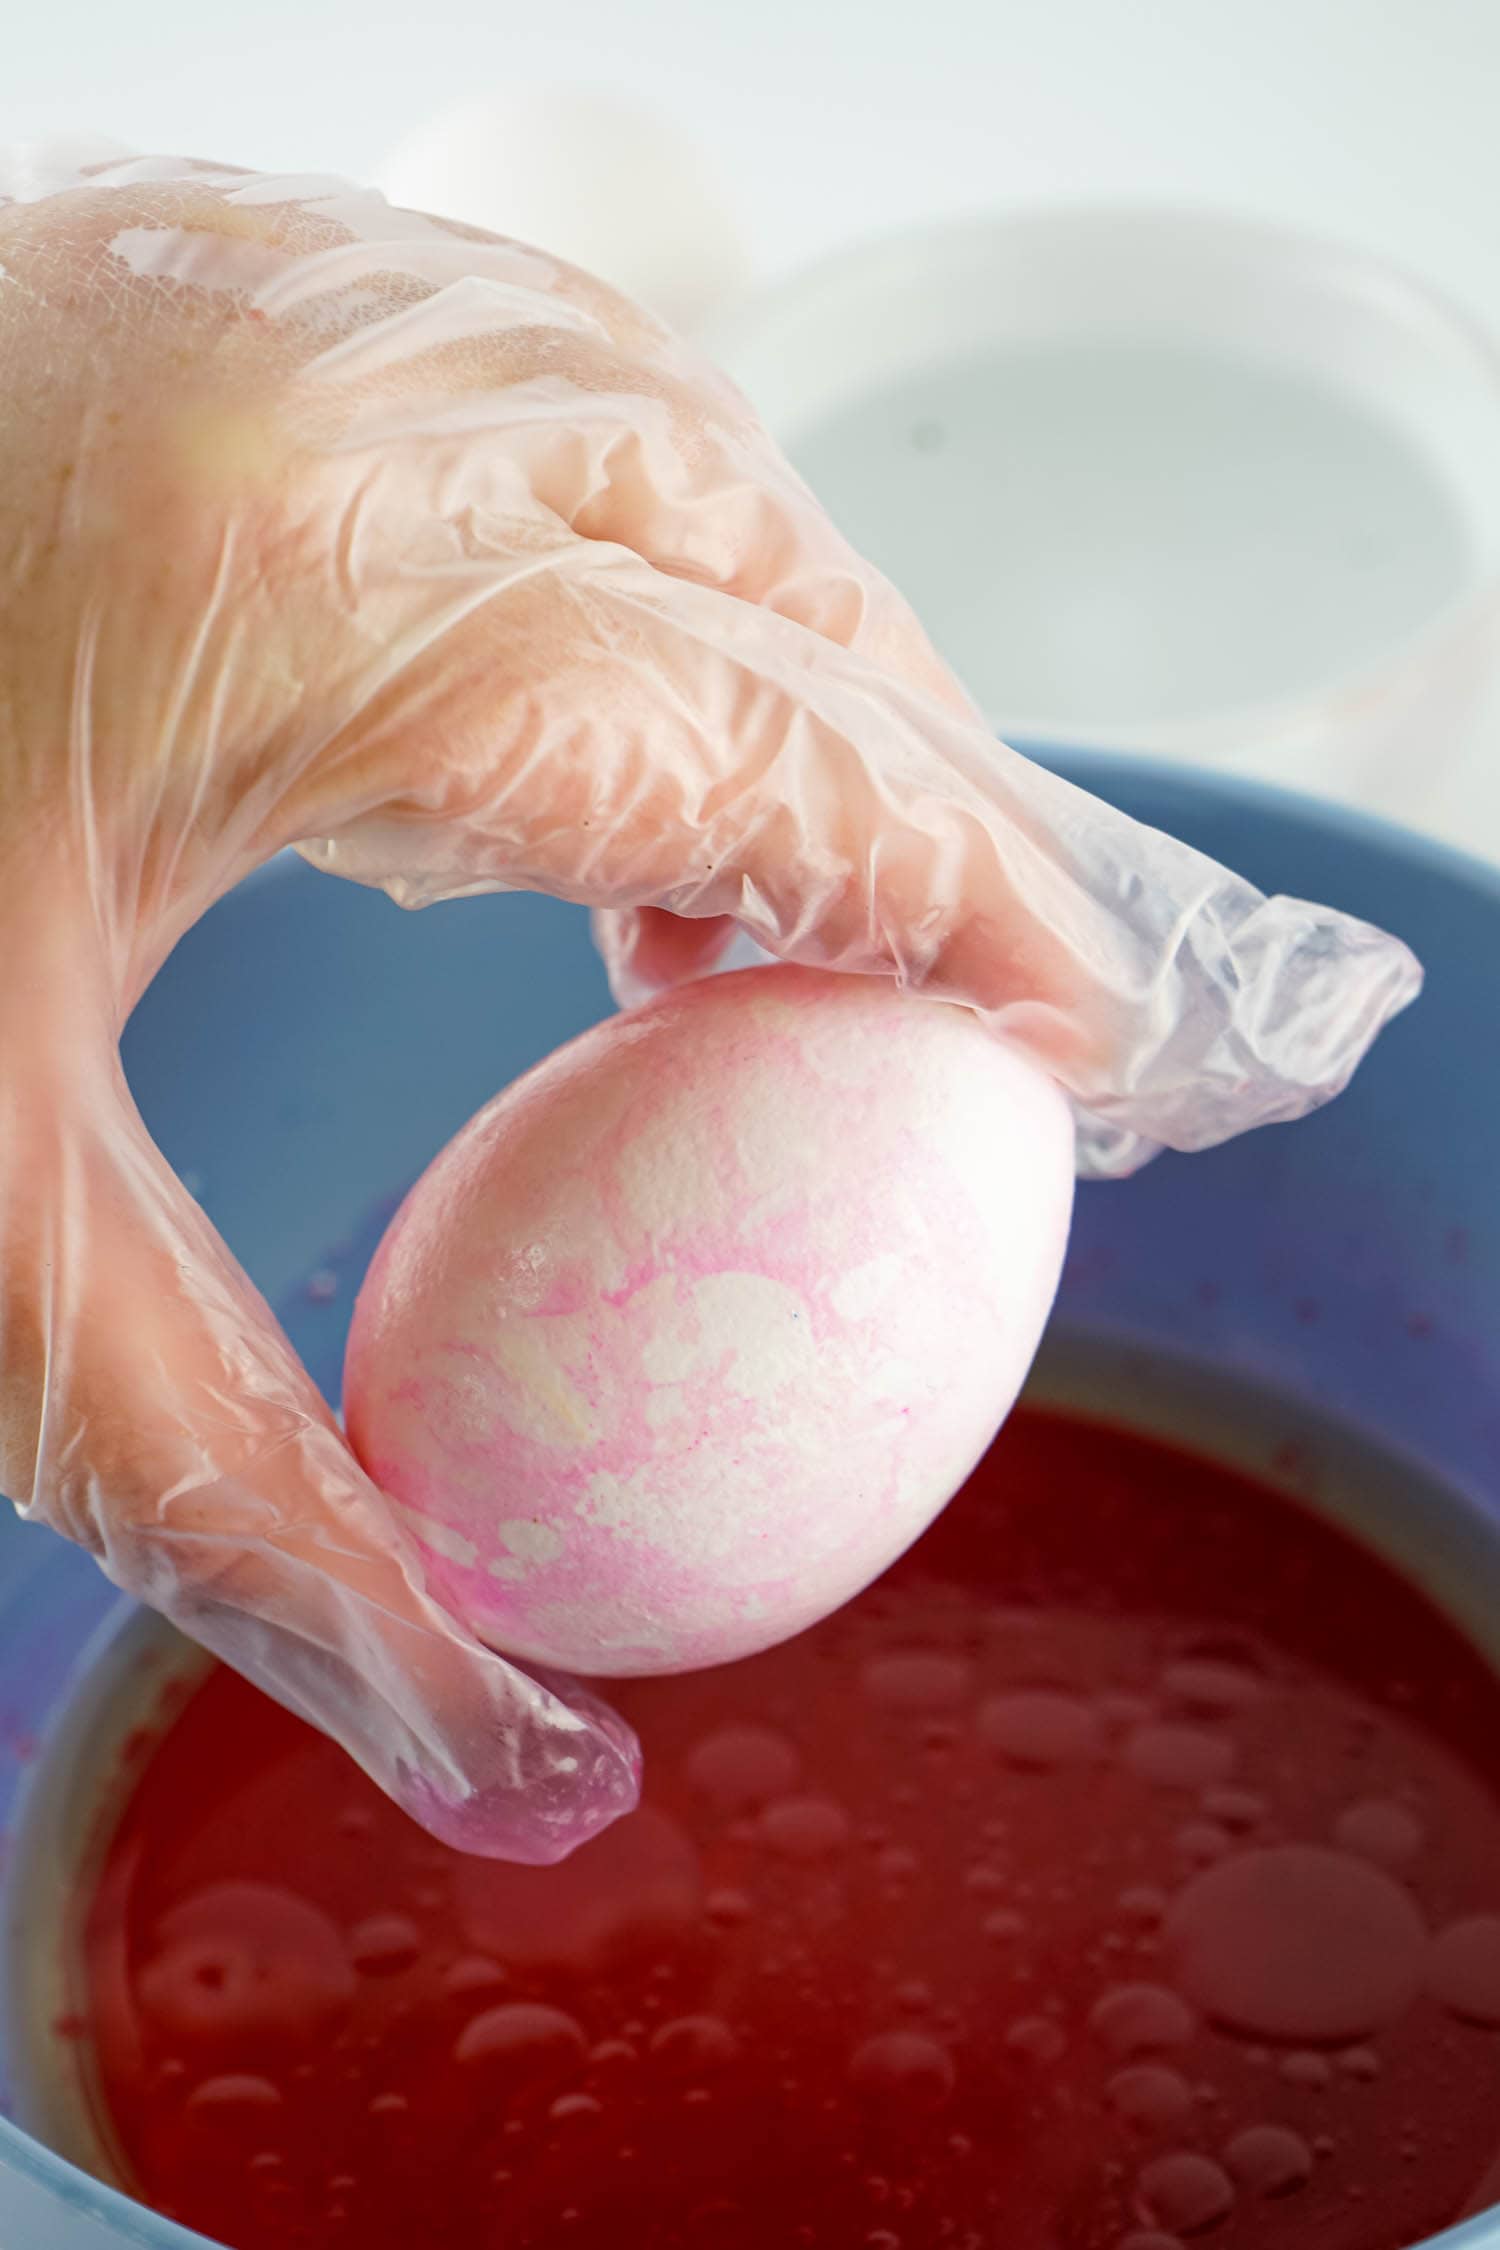
Let your hard boiled eggs completely cool and dry fully. Using your finger, or a paint brush, make streaks of oil all over the egg but don’t completely cover it in oil.
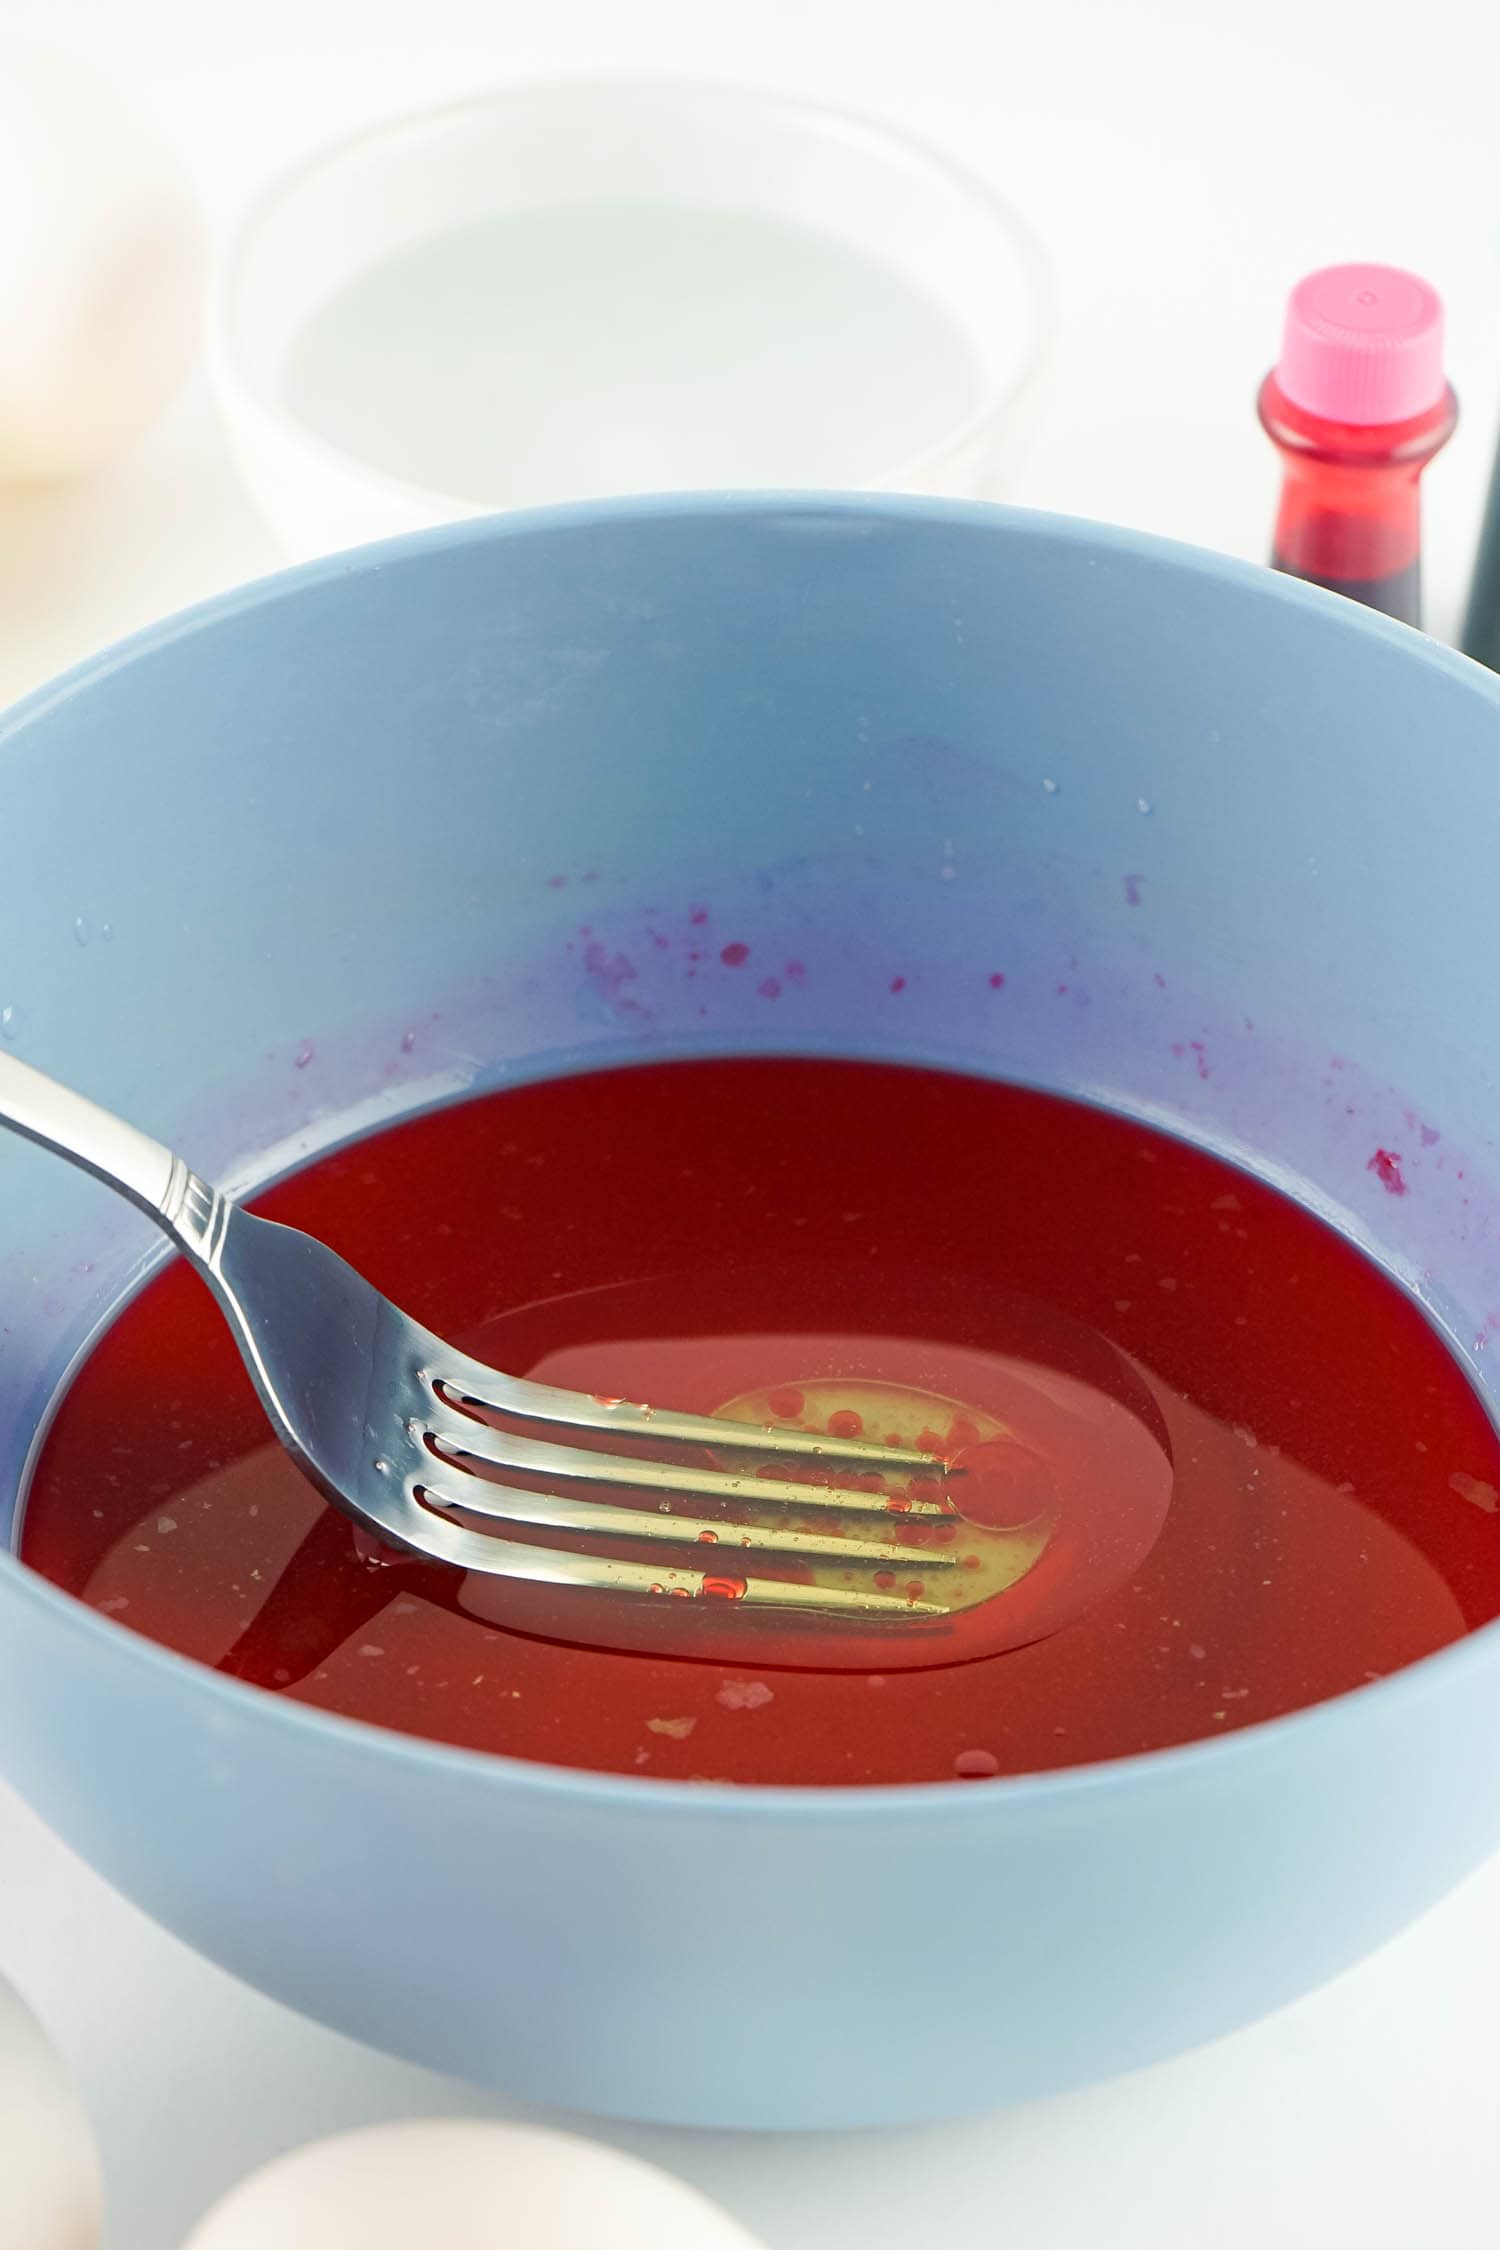
Mix the oil in the bowl of dye with a fork or spoon and then immediately roll the oily egg in it so that the whole egg has touched the dye mixture. Quickly pull the egg out and wipe it dry with a paper towel.
Place the egg back in the egg carton and let it dry for 5 minutes.
Does vinegar help food coloring stick to eggs?
The acidic content of vinegar does help food coloring dye eggs! So don’t leave this ingredient out when you’re dyeing Easter eggs.
Pro Tips for the best Marbleized Easter Eggs
- Use lots of different colors! You can even buy neon food coloring to make really bright eggs. I find that the brighter colors do really well on marble dyed eggs.
- If you’re using a dark color, you won’t need as many drops of food coloring. So just eyeball it and when it looks like the bowl of dye has reached the right color, then stop adding dye.
- Don’t roll the egg around in the dye too much. If it’s touched the dye, it’s good to go!

These eggs really turn out looking so fancy! They’d even make a great table centerpiece around Easter.
More Ways to Dye Easter Eggs
- Want some more snazzy eggs? Check out these gorgeous Glitter Easter Eggs!
- Kool Aid Dyed Eggs are super fun and are great for kids who really hate the smell of vinegar.
- Learn How to Dye Easter Eggs with Fabric and make some eggs with really cool and unique textures!
- I love dyeing Easter eggs with rice because they come out speckled and really fun.

Marble Dyed Easter Eggs
Ingredients
- Boiled Eggs
- ½ Cup Boiling Water
- 1 Tablespoon Cooking Oil plus just a dab extra
- ½ Tablespoon Vinegar
- 10-20 Drops Food Dye
- Plastic Cereal Bowls
- Paper Towels
- Rubber Gloves
- Forks or Spoons
Instructions
- Add ½ cup boiling water to disposable paper bowls (you don't want the water to be higher than a half inch) along with ½ Tablespoon vinegar.
- Then add 10-20 drops of food coloring to each bowl. Once color per bowl. The darker the color the less dye it will need in the water.
- Stir to combine. Then add 1 Table spoon oil to each bowl.
- Add a little oil to a different bowl for use later.
- Make sure your eggs are dry and at room temperature.
- Put disposable gloves on to protect from the dye.
- Using your finger or a paint brush make streaks and spots of oil all over the egg, do not completely cover.
- Mix the oil and dye in the bowl with a spoon or fork. Immediately roll the egg in it so that the entire egg has touched the dye mixture at least once. Do this step quickly then pull the egg out immediately and wipe dry with a paper towel.
- Place egg back in egg carton and let it sit for 5 minutes to dry.
Notes
- Use lots of different colors! You can even buy neon food coloring to make really bright eggs. I find that the brighter colors do really well on marble dyed eggs.
- If you’re using a dark color, you won’t need as many drops of food coloring. So just eyeball it and when it looks like the bowl of dye has reached the right color, then stop adding dye.
- Don’t roll the egg around in the dye too much. If it’s touched the dye, it’s good to go!