Halloween Dirt Cups
These Halloween Dirt Cups are a quick and easy no-bake treat made with chocolate pudding, crushed Oreos, and spooky candy toppings—perfect for Halloween parties and kid-friendly fun!

If you love dirt pie, you will love these individual dirt pudding cups! They’re so easy to make and the perfect Halloween replication of a classic dirt and worms recipe. This Halloween dessert is super fun to make with the kids – they’ll love adding all the creepy-fun decorations on top.
I love this recipe because it’s a no-bake dessert that’s perfect for sharing at parties, enjoying after trick-or-treating, or just as a fun and spooky treat as Halloween gets closer. Halloween dirt pudding cups are also a great dessert to serve that is individually portioned and the kids can top their own however they like.
Why You’ll Love This Recipe
- Halloween dirt cups are a great make ahead treat to make party prep even easier.
- This is a no-bake dessert which makes it even easier for the kids to enjoy preparing when there aren’t any hot ovens or stovetops to worry about.
- Let your children’s creative sides come out while they decorate the dirt cups with different candies and toppings.

Ingredients For Halloween Dirt Cups
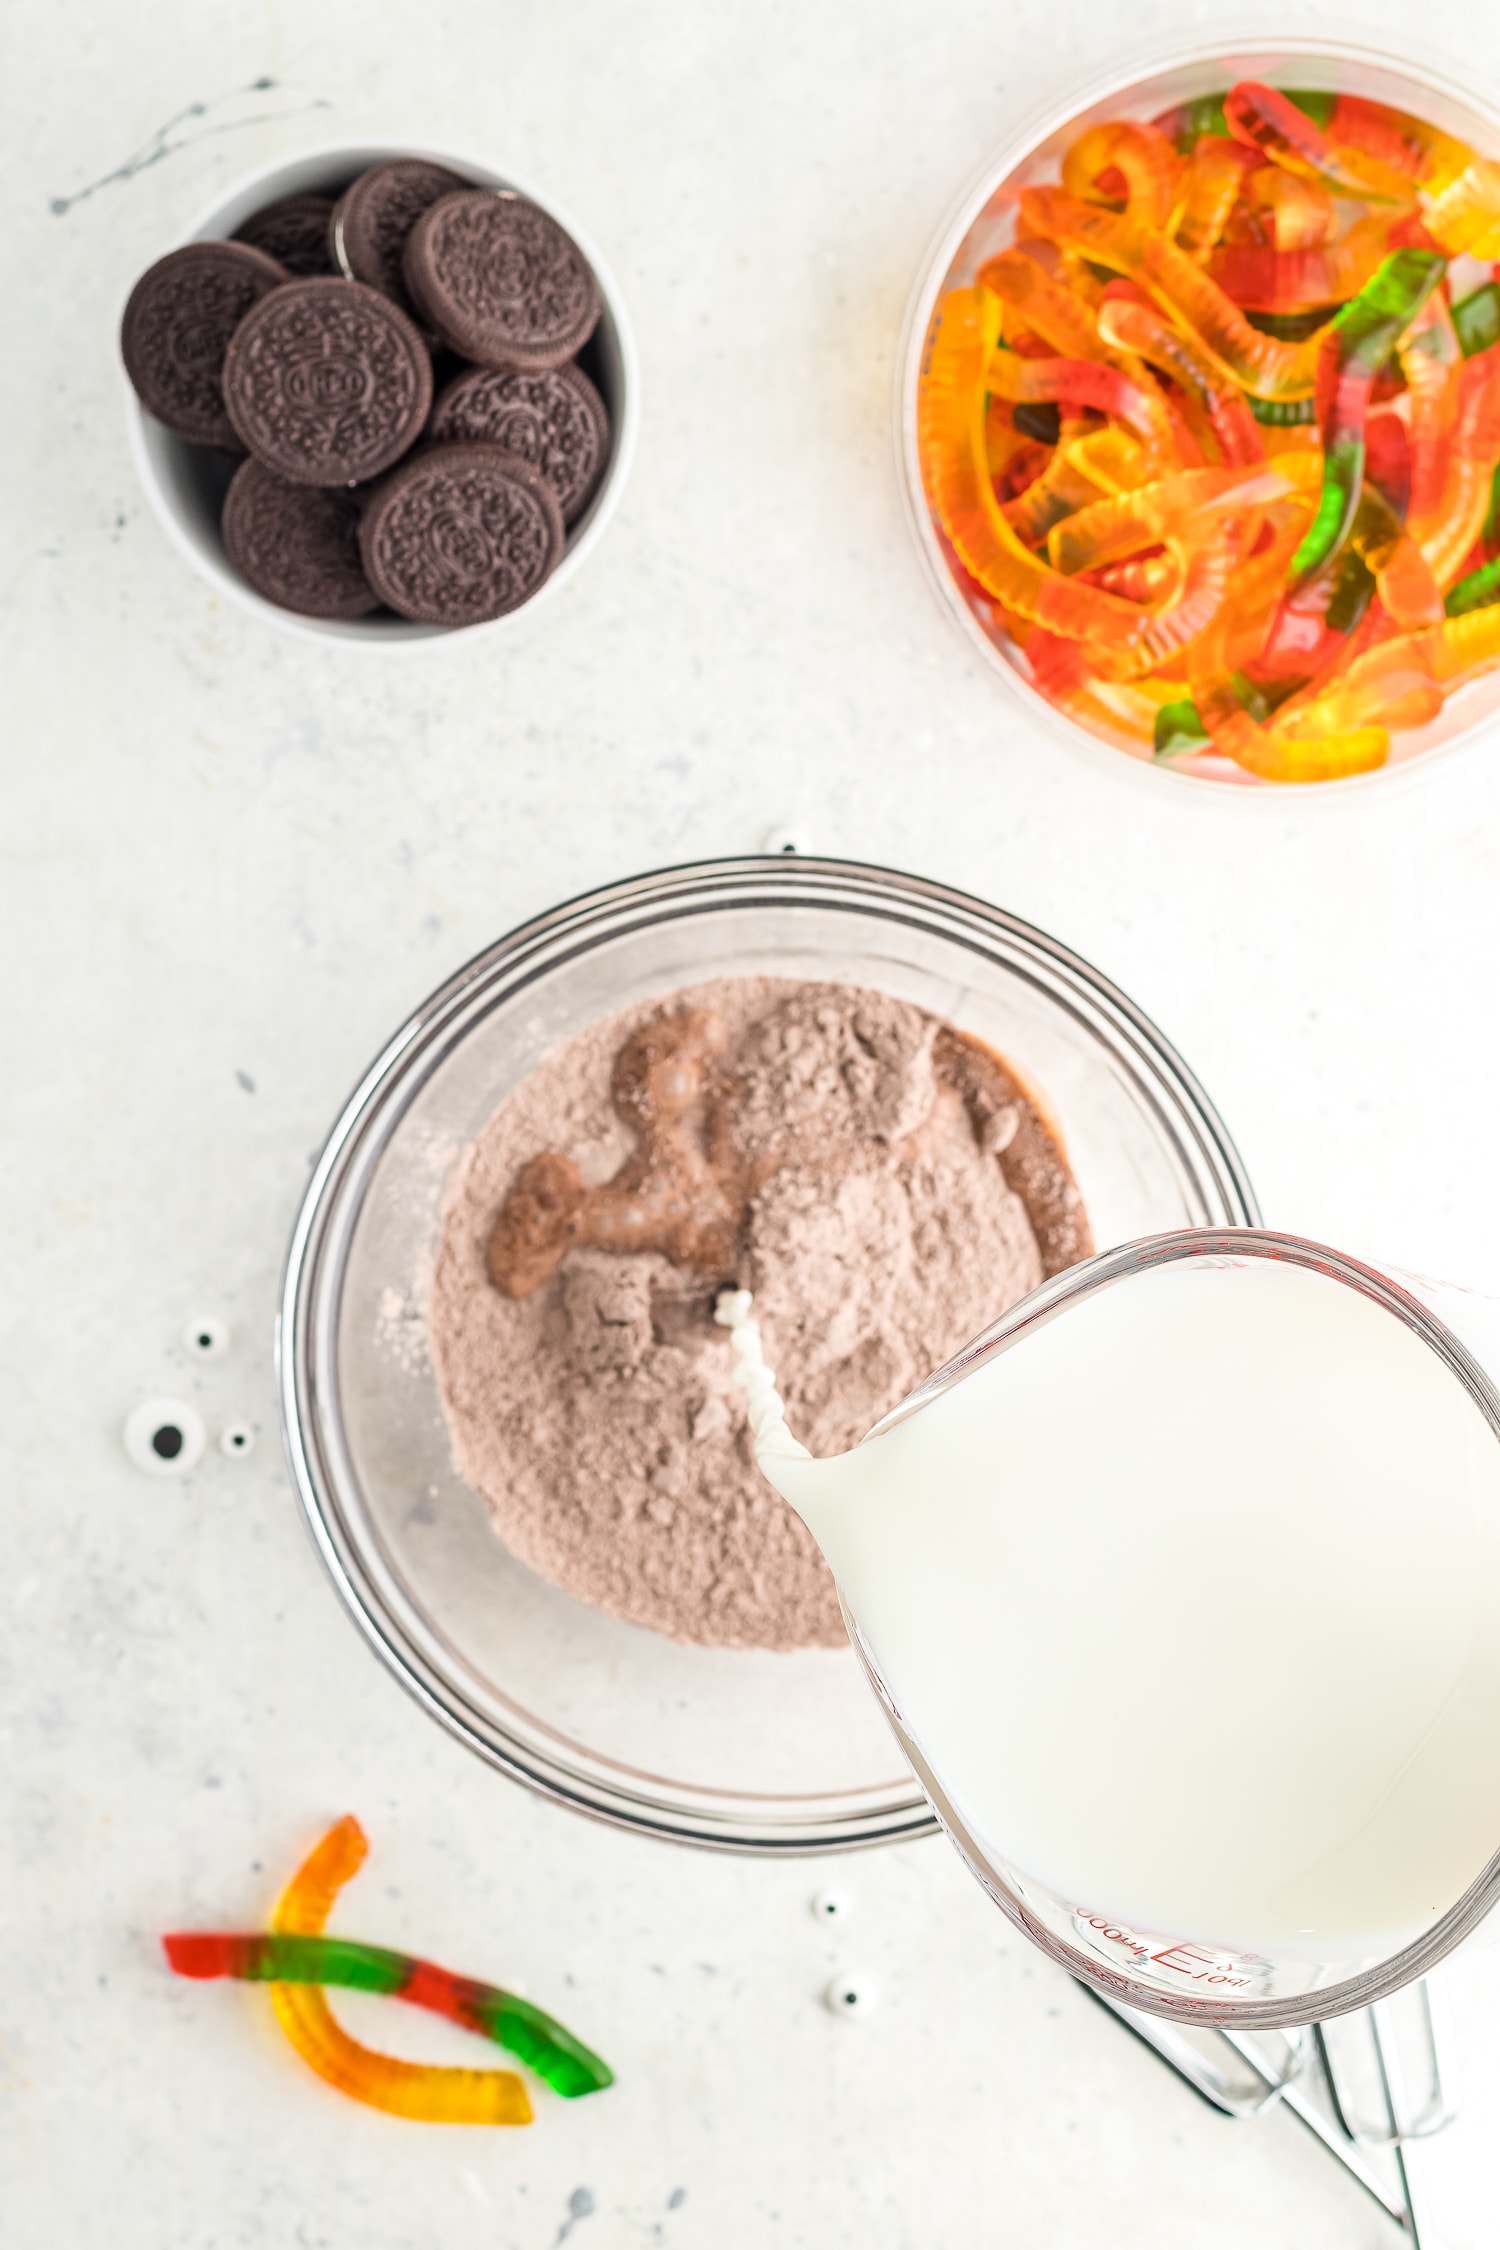
- Instant chocolate pudding mix – Make sure it’s the instant no-cook kind of pudding mix. Switch it up and use vanilla with orange food coloring for a fun layer.
- Milk – We like to use 2% milk or whole milk.
- Cool Whip – You can use homemade whipped cream instead of Cool Whip. I prefer whipped topping because it’s more stable than homemade and keeps better in the fridge once the dirt cups are made. You can also skip this ingredient and layer the pudding with the Oreos only.
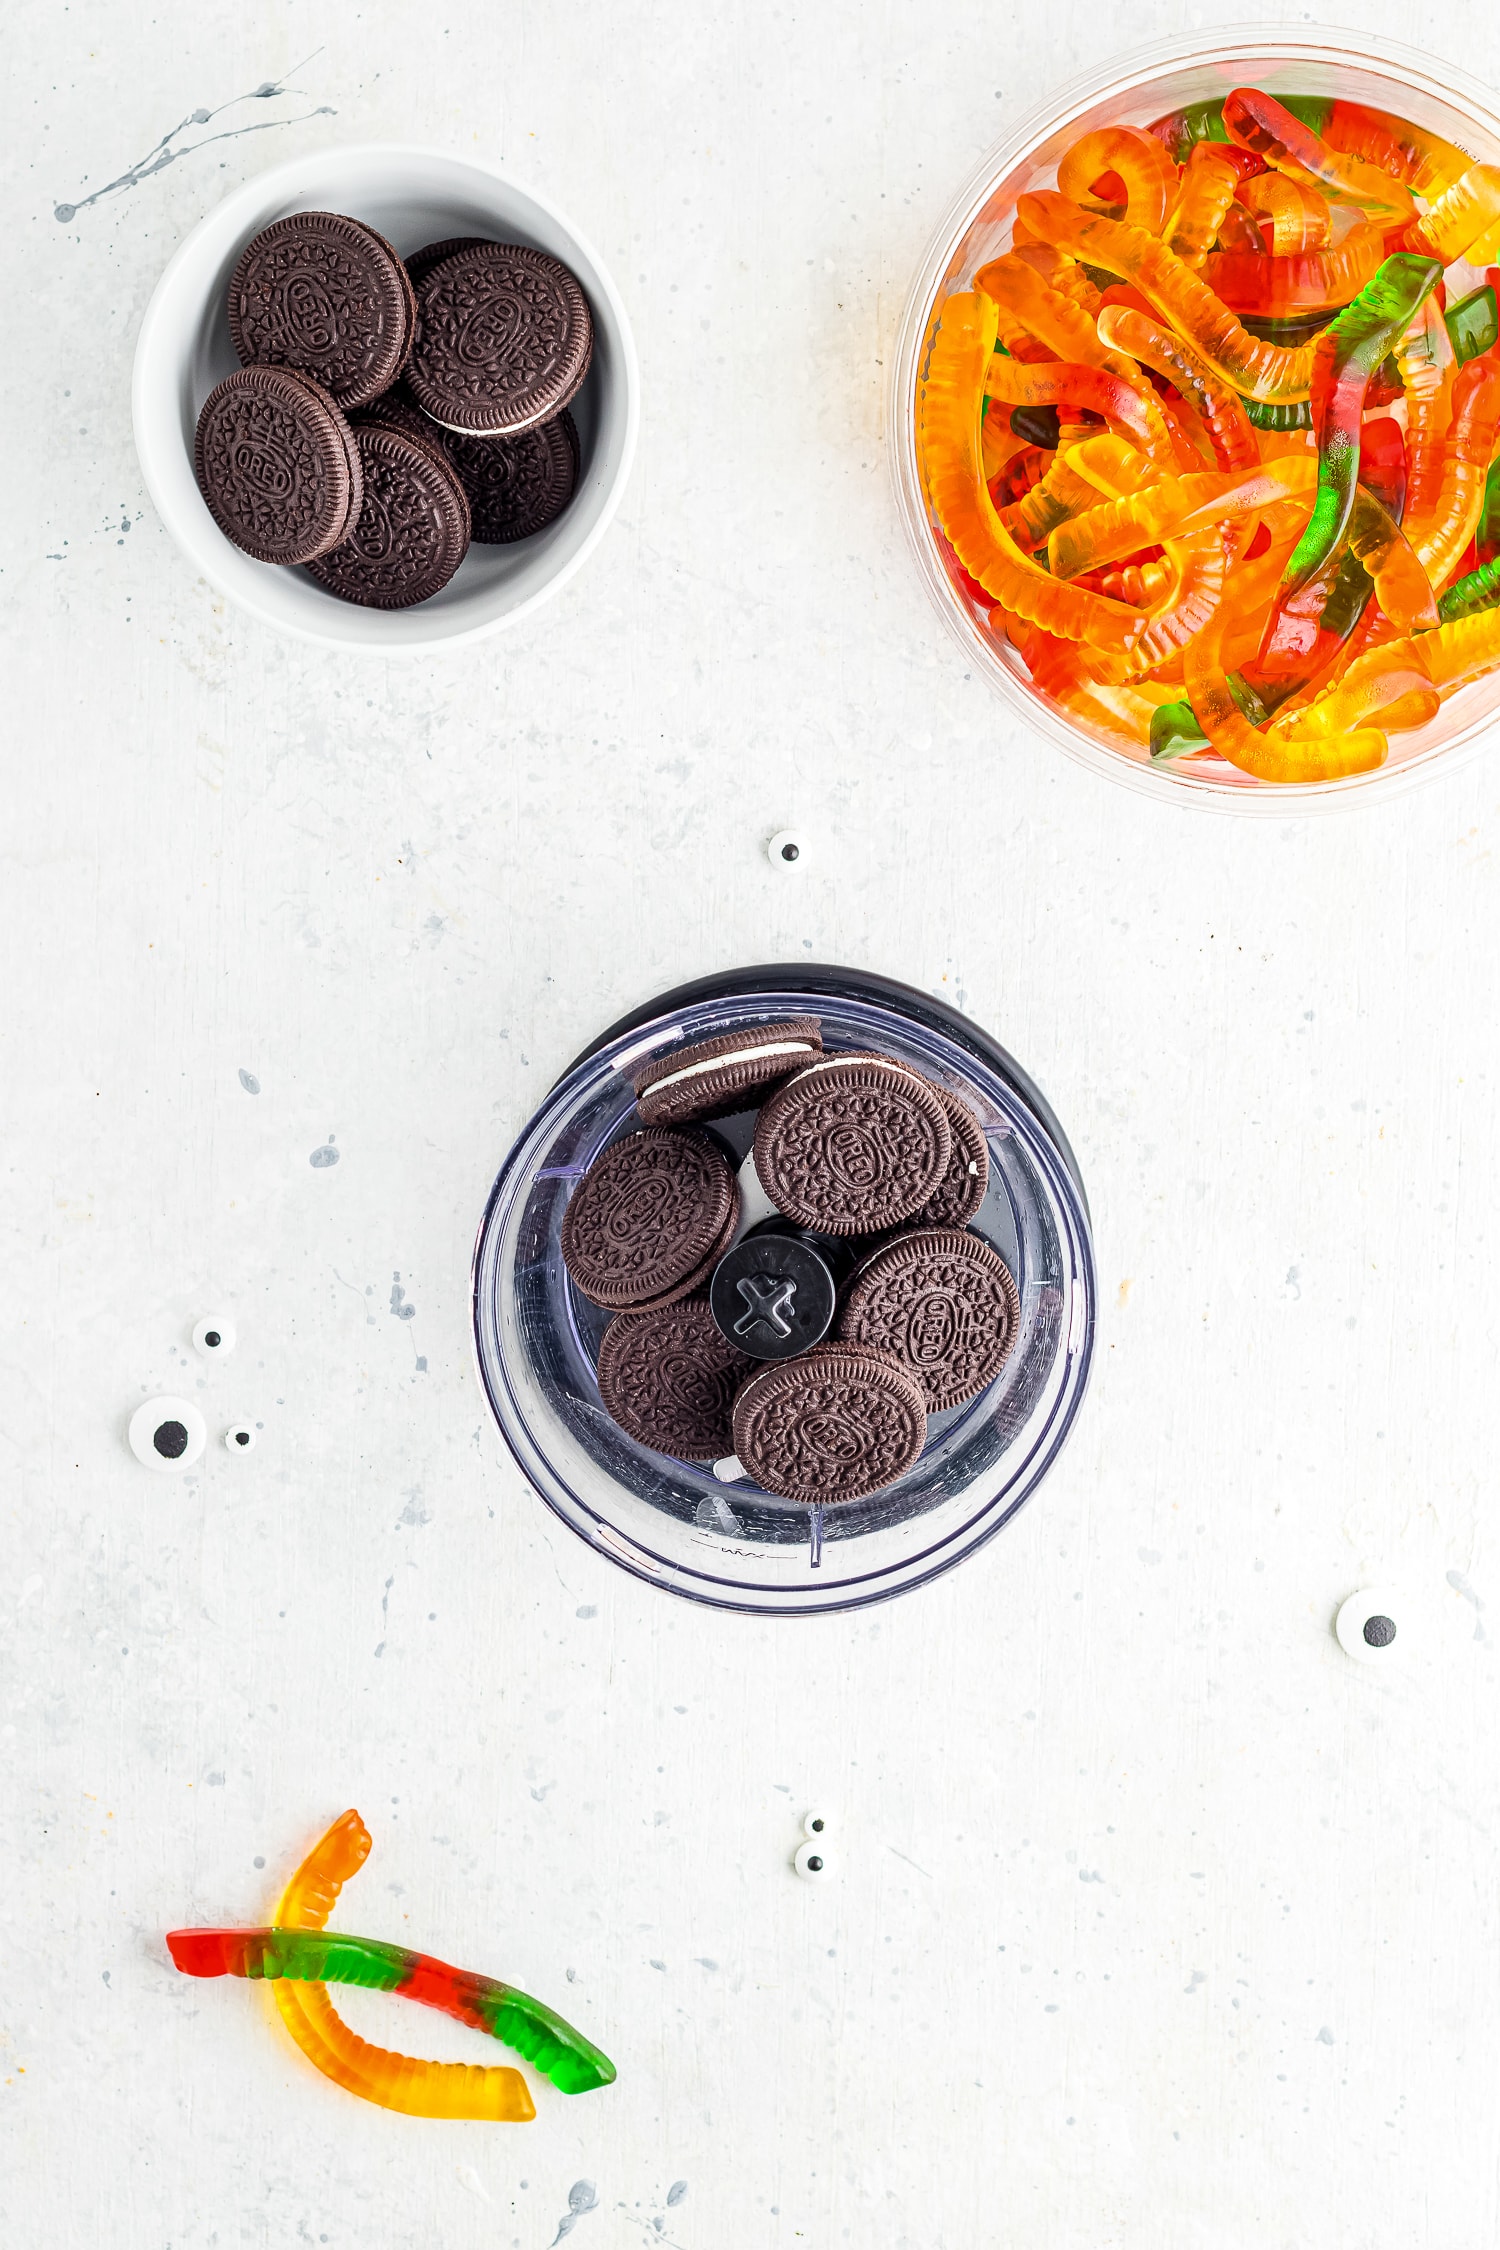
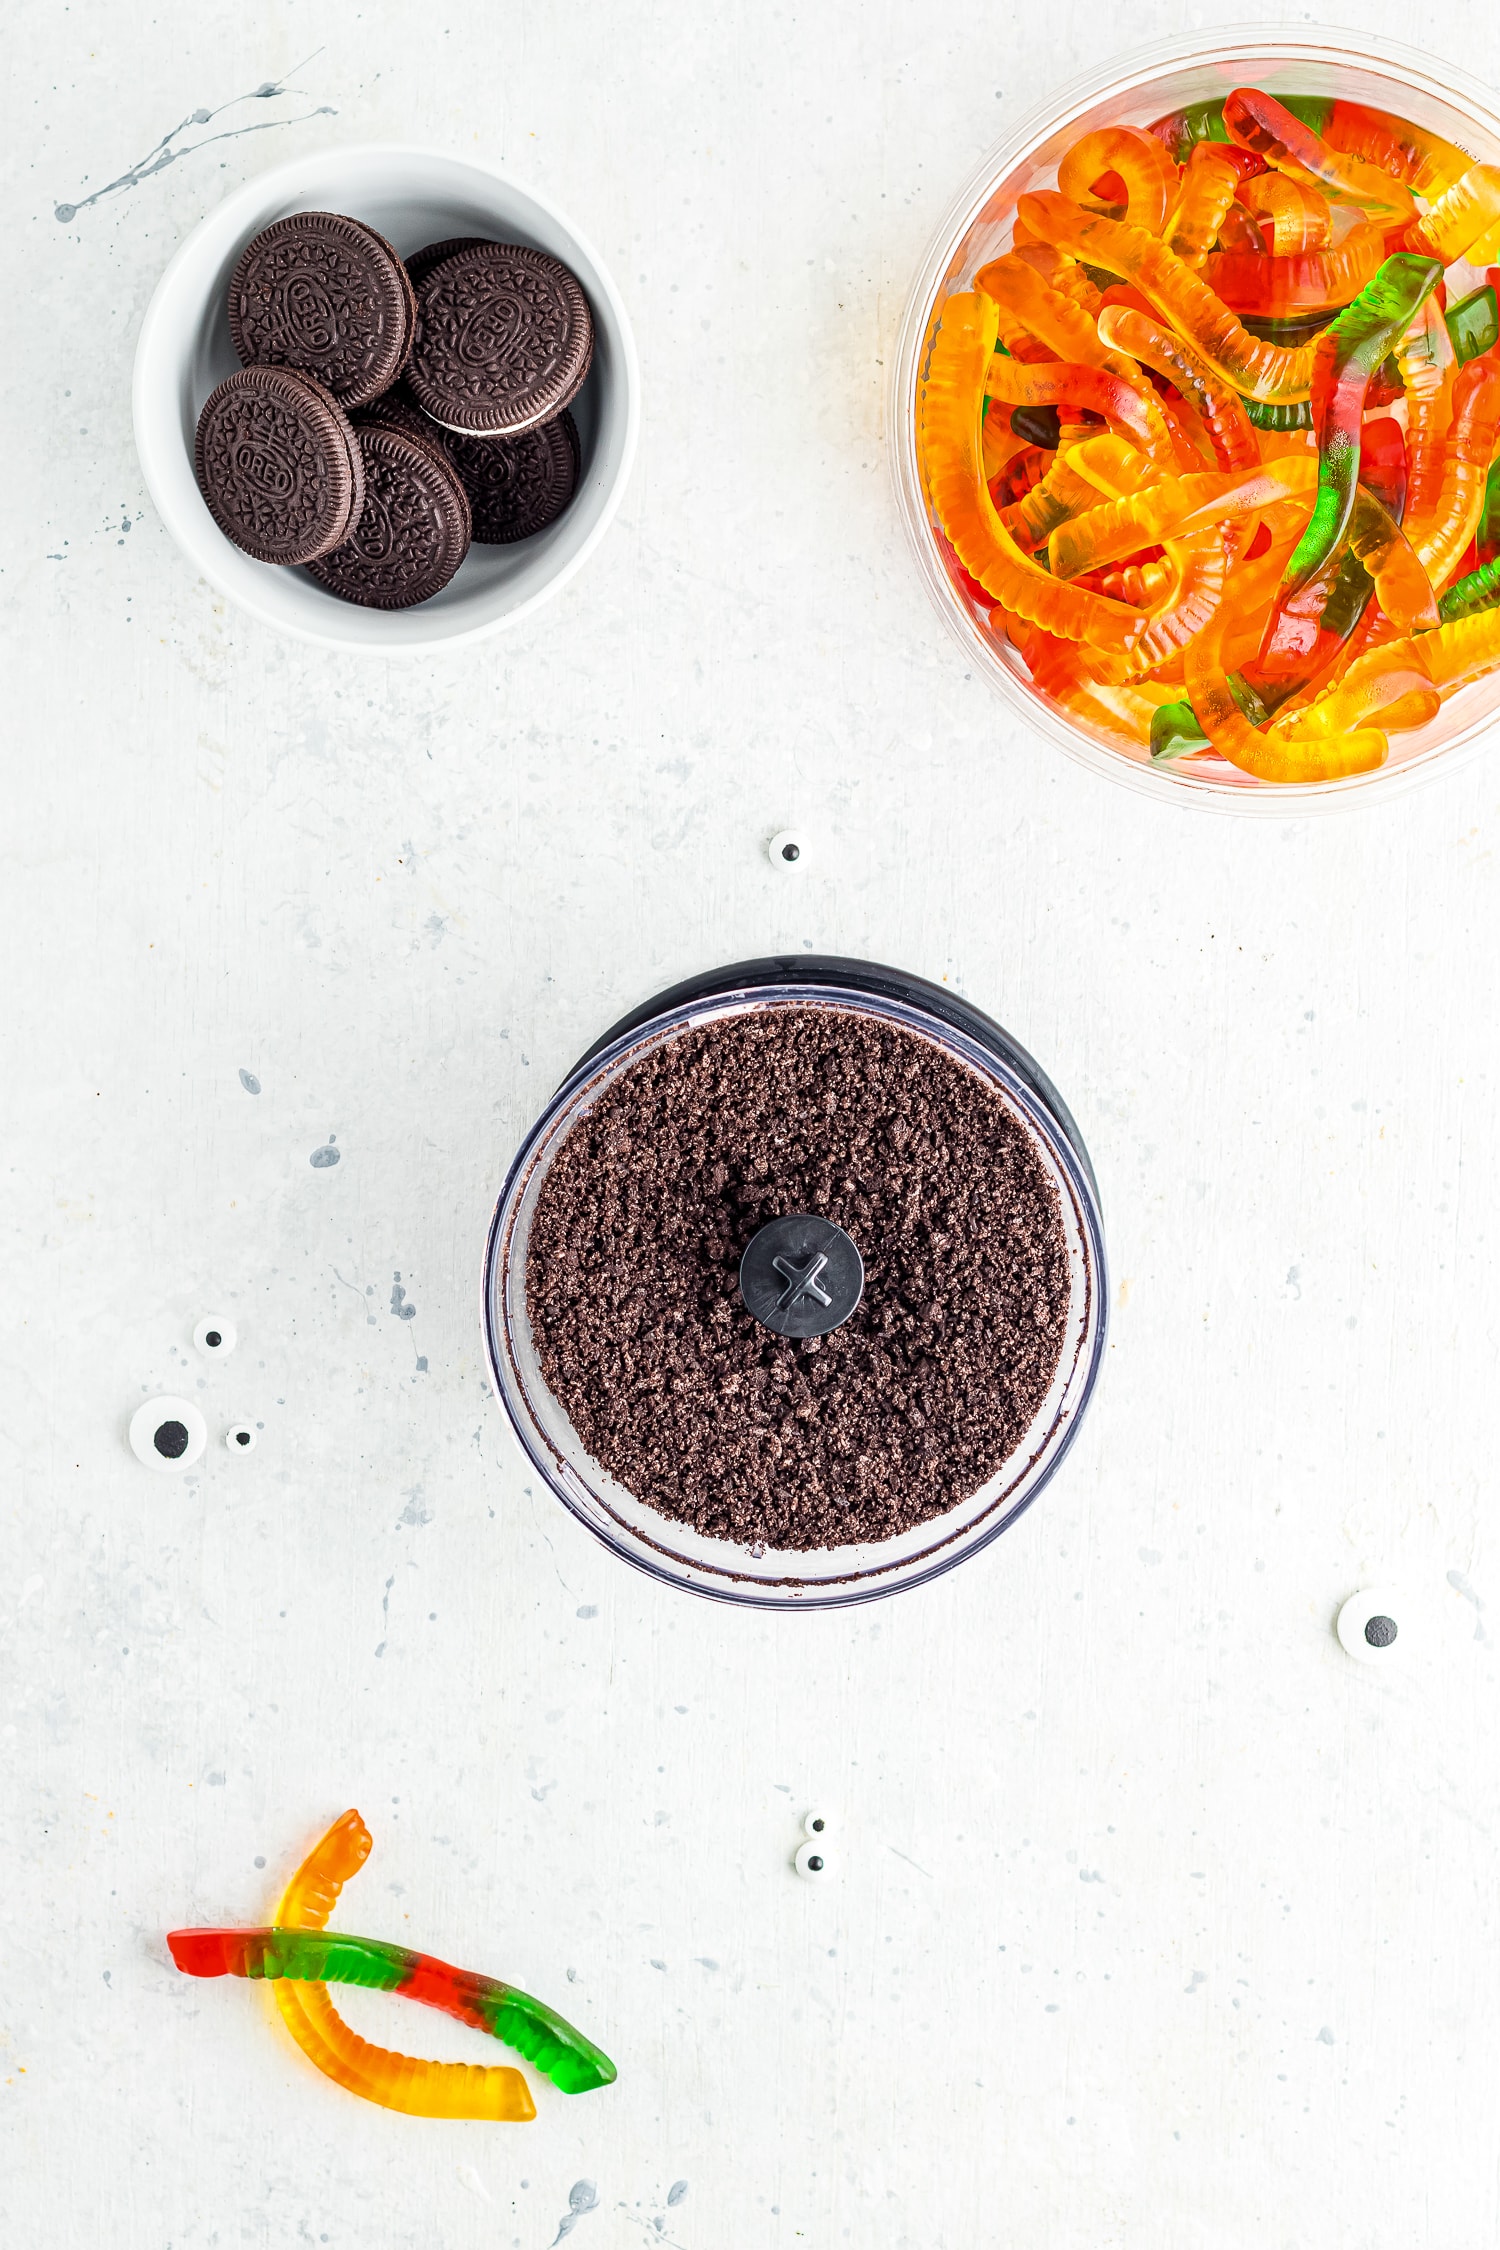
- Crushed Oreos – Use a food processor or crush them in a bag with a rolling pin so they look like crumbly dirt. You can also buy Oreo crumbs.
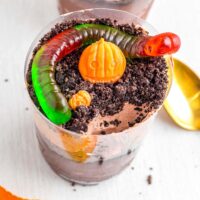
- Halloween candy – Assorted candy eyes, gummy worms, candy corn, candy bones and chocolate Halloween candy for decorating
Dirt Cup Variations
- Gummy worm dirt cups: Just use a few gummy worms.
- Pumpkin patch dirt cups: Look for small candy pumpkins and use them to make a cute pumpkin patch on top. You can even use green frosting or melted green chocolate to make vines and leaves.
- Graveyard dirt cups: Use cookies for the tombstones and add candy ghosts with Halloween sprinkles for a spooky dirt cup.
Helpful Tools
How To Make Dirt Cups For Halloween
Combine the pudding mix and milk in a large mixing bowl. Mix at low speed until combined then increase speed to medium. Mix until the pudding is thickened.
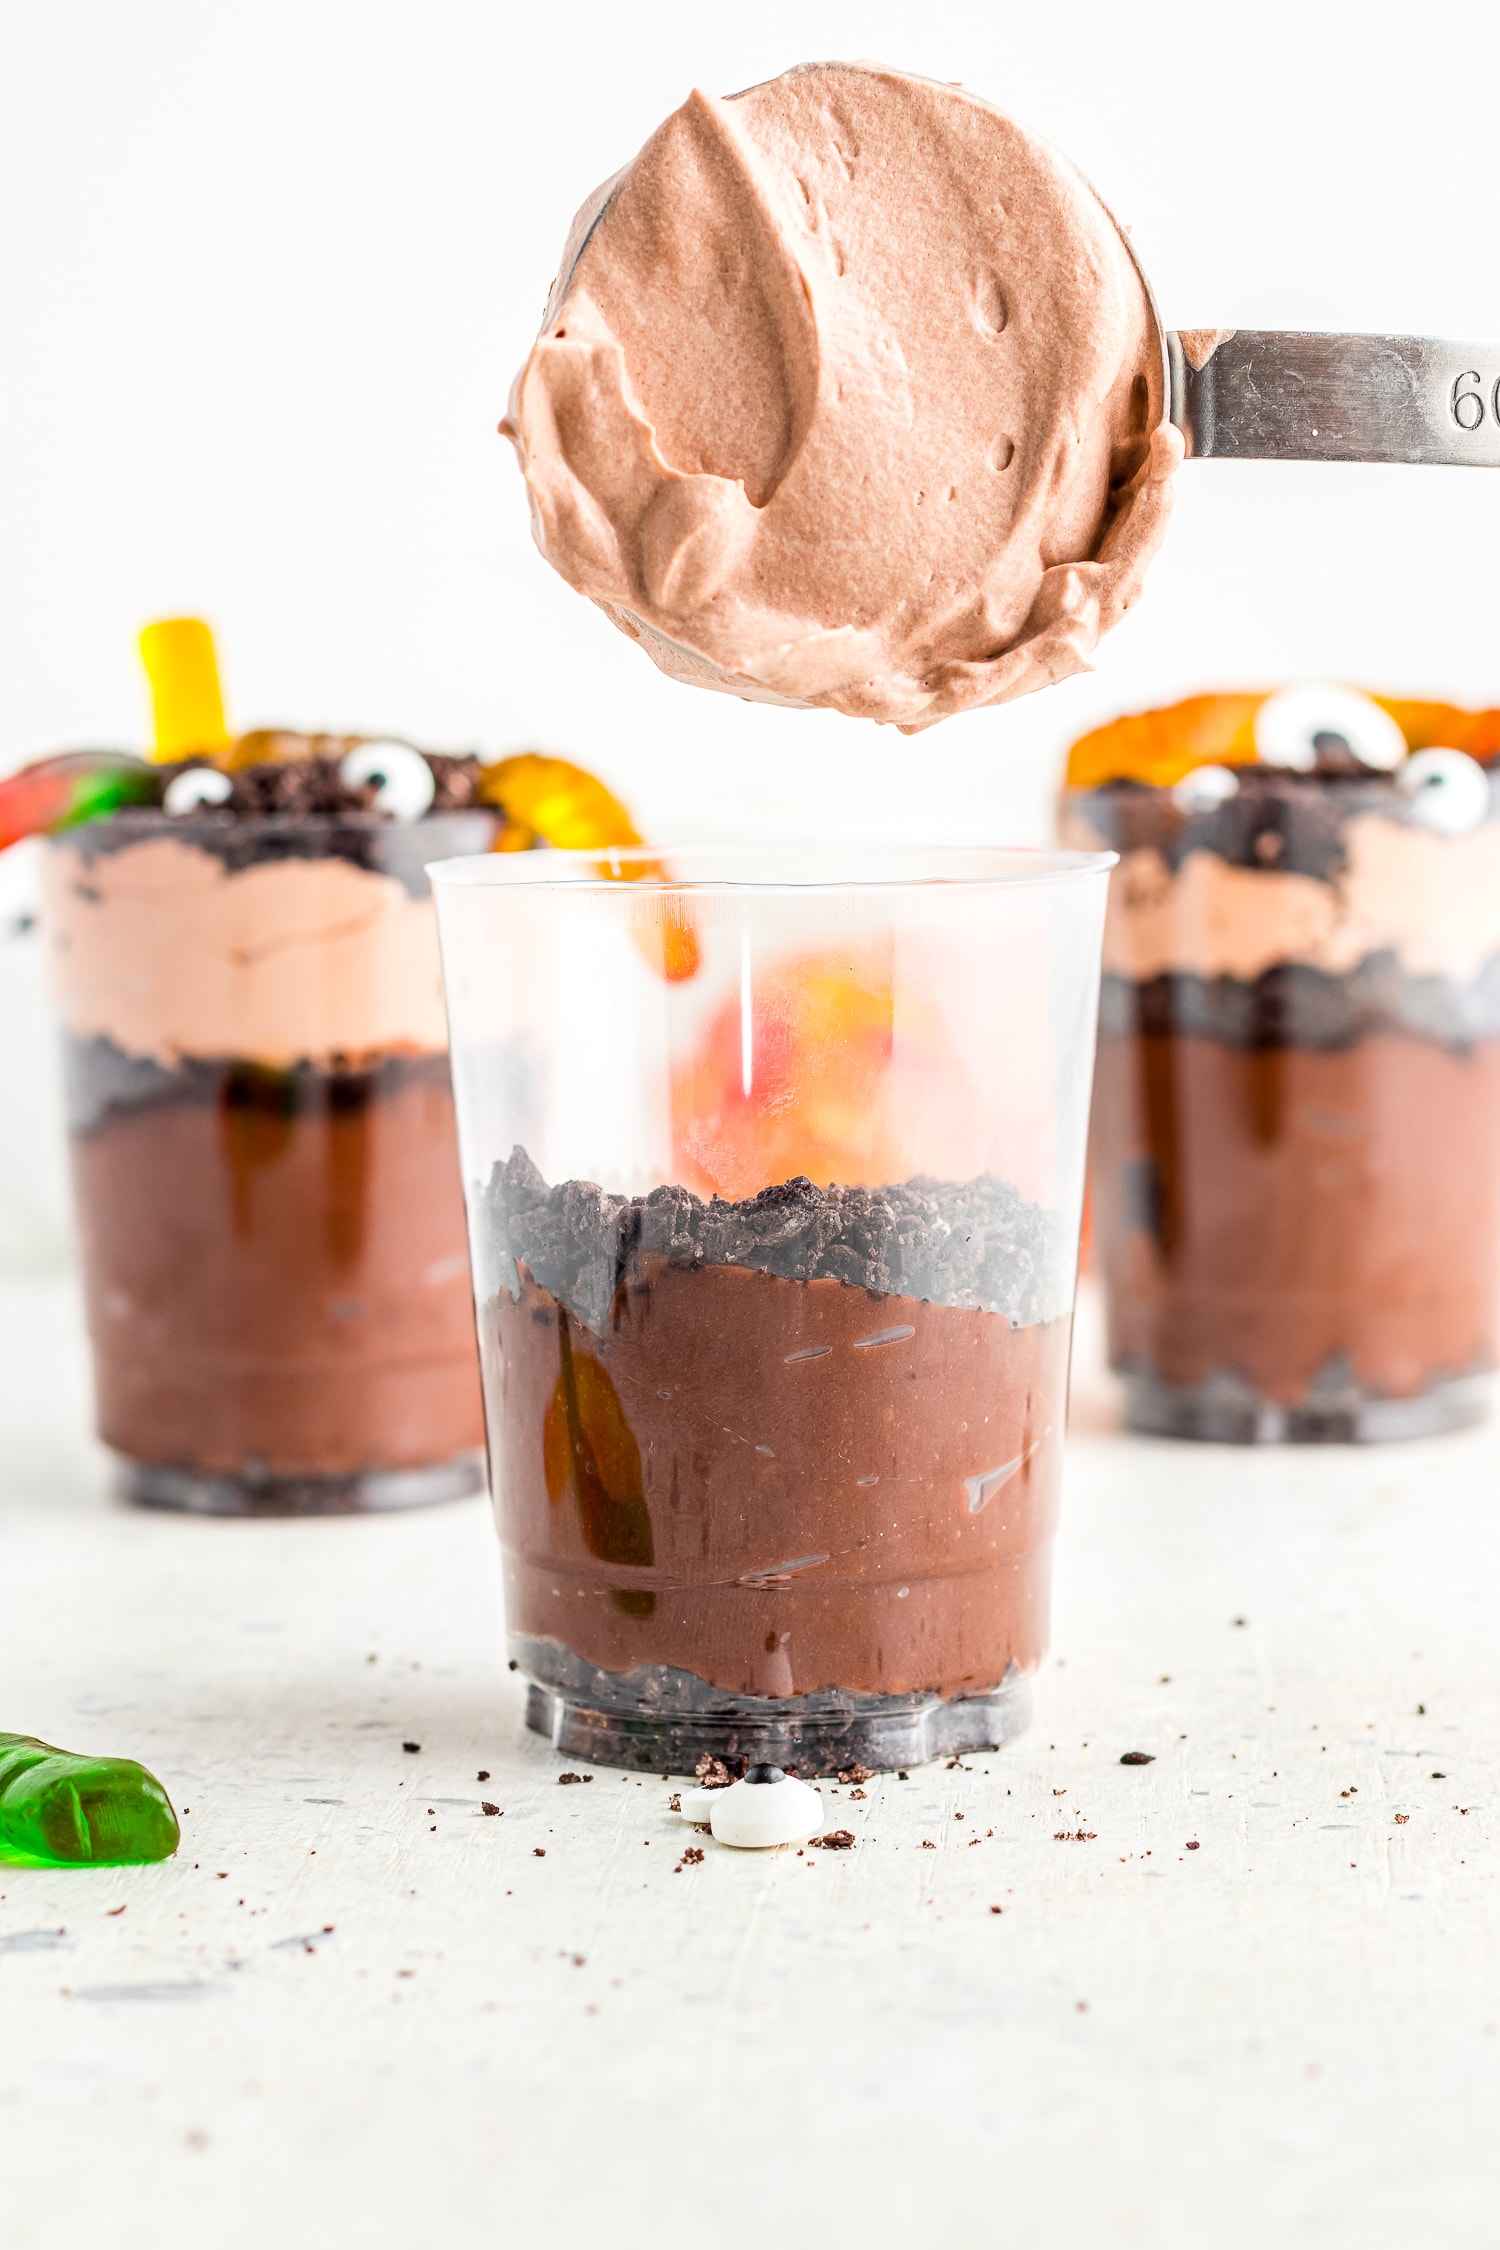
Combine one cup of prepared chocolate pudding with one cup of Cool Whip. Mix until well combined.


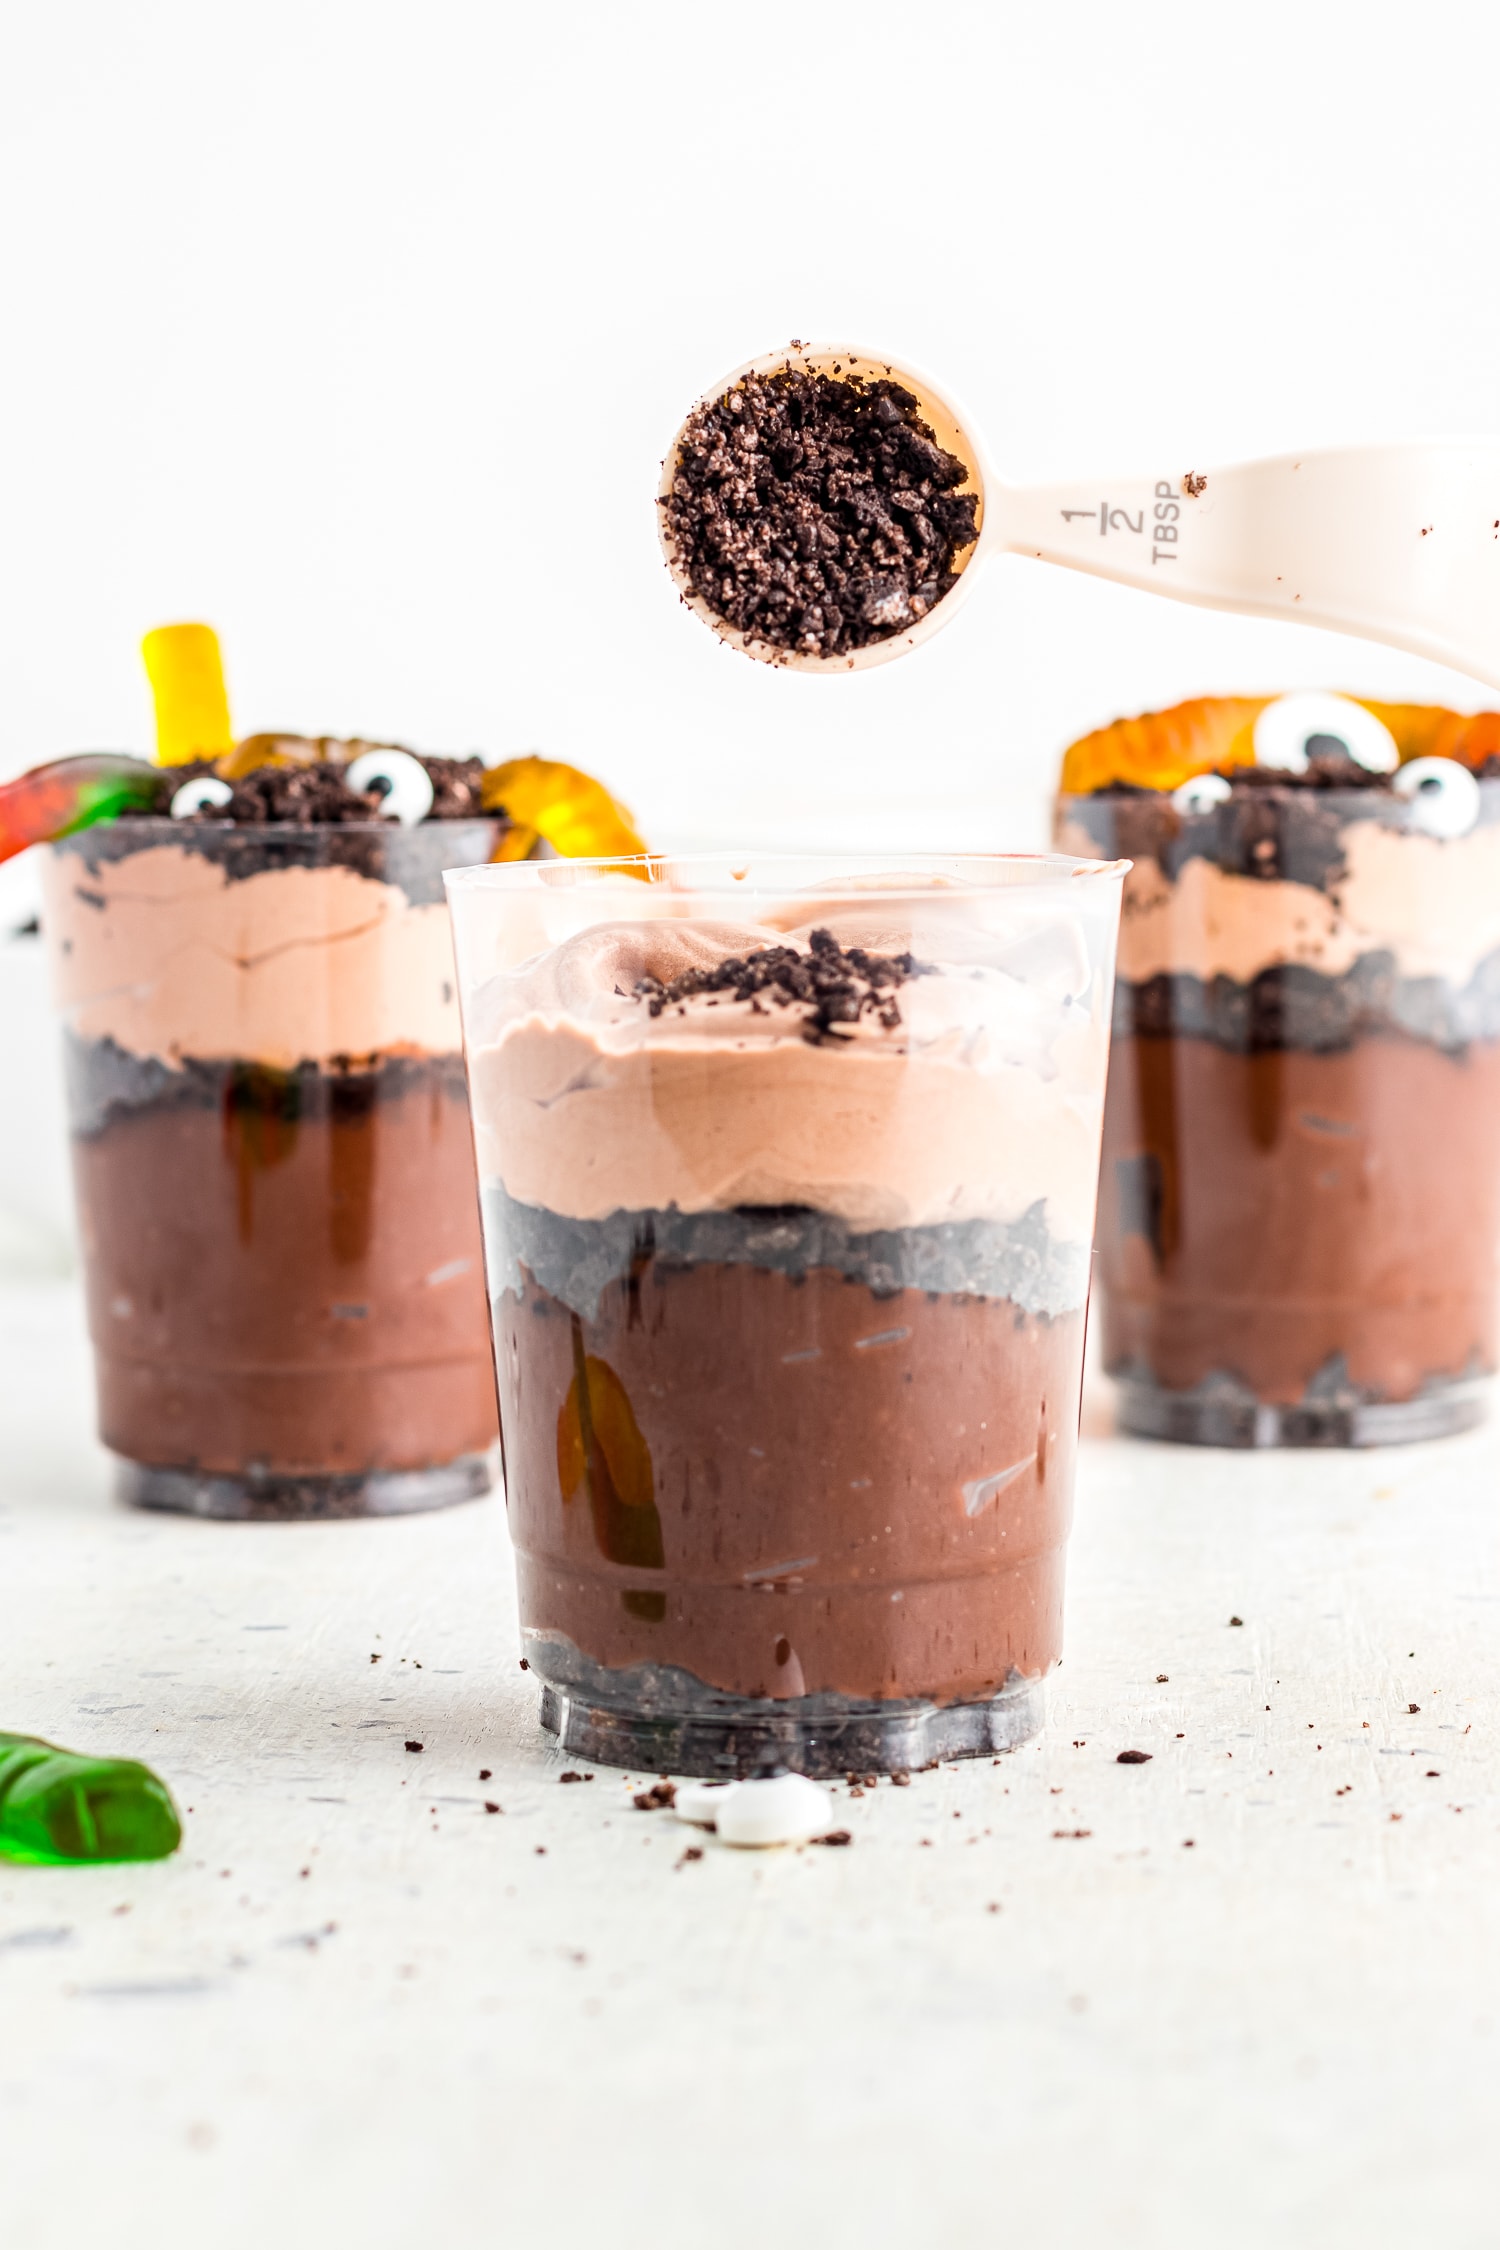
Add Oreo cookies to the food processor and pulse until the crushed cookies are fine and have the texture of dirt.
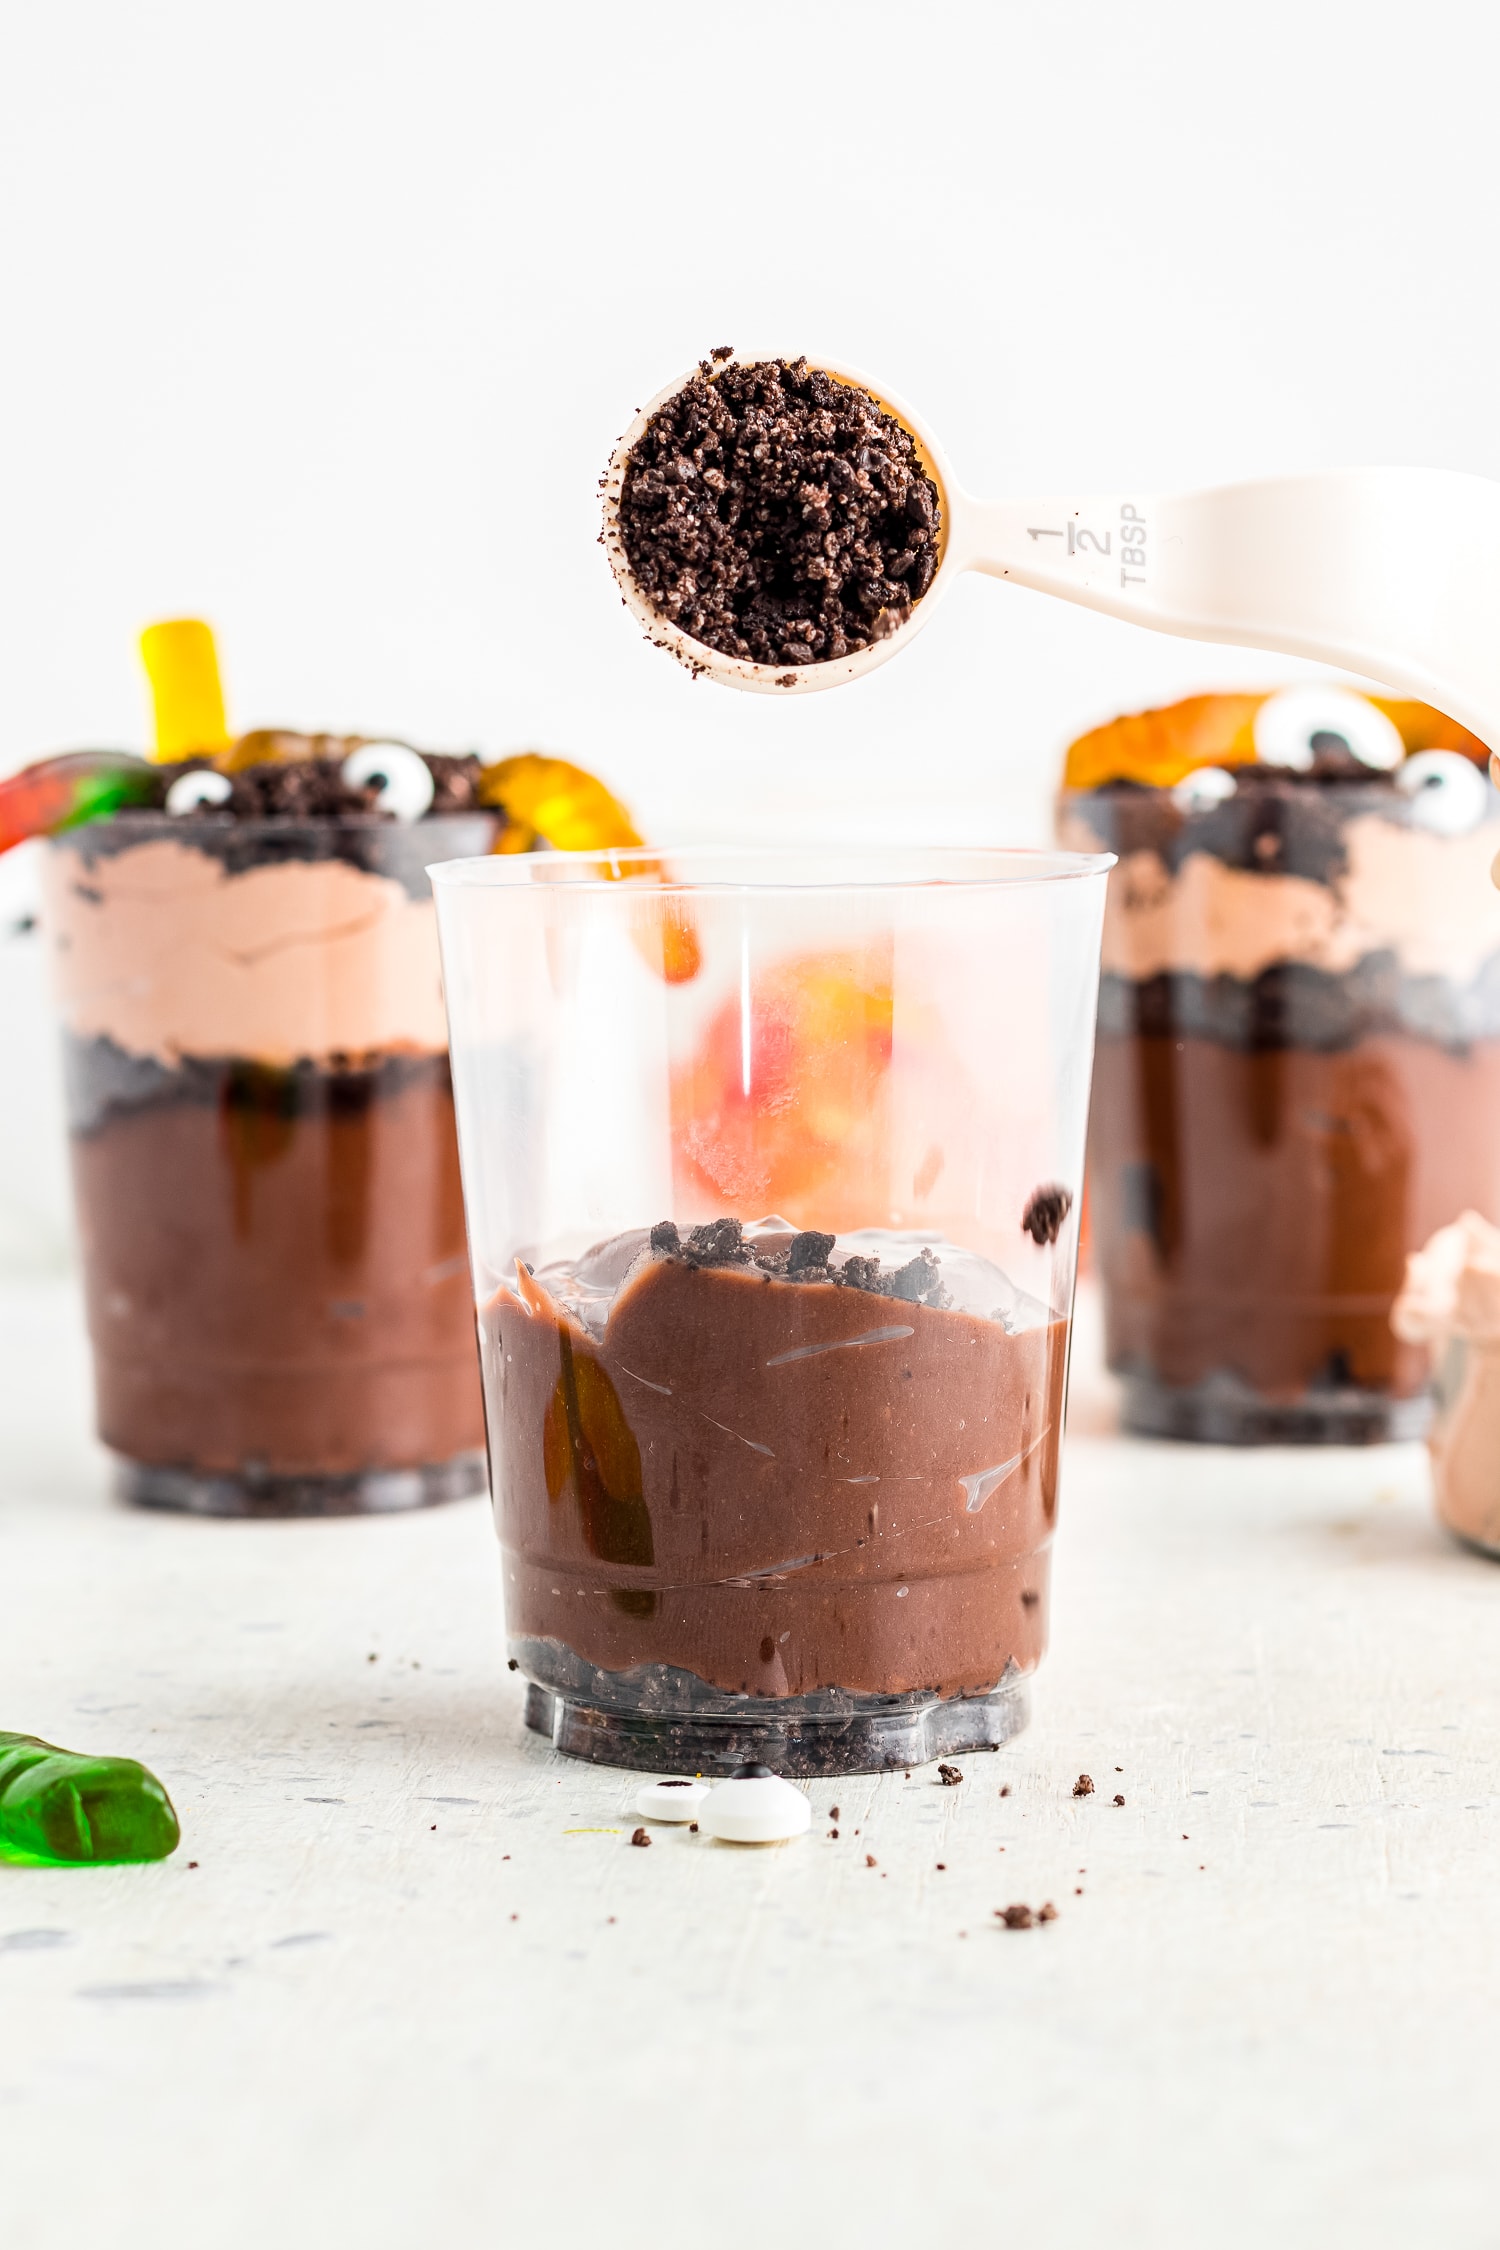
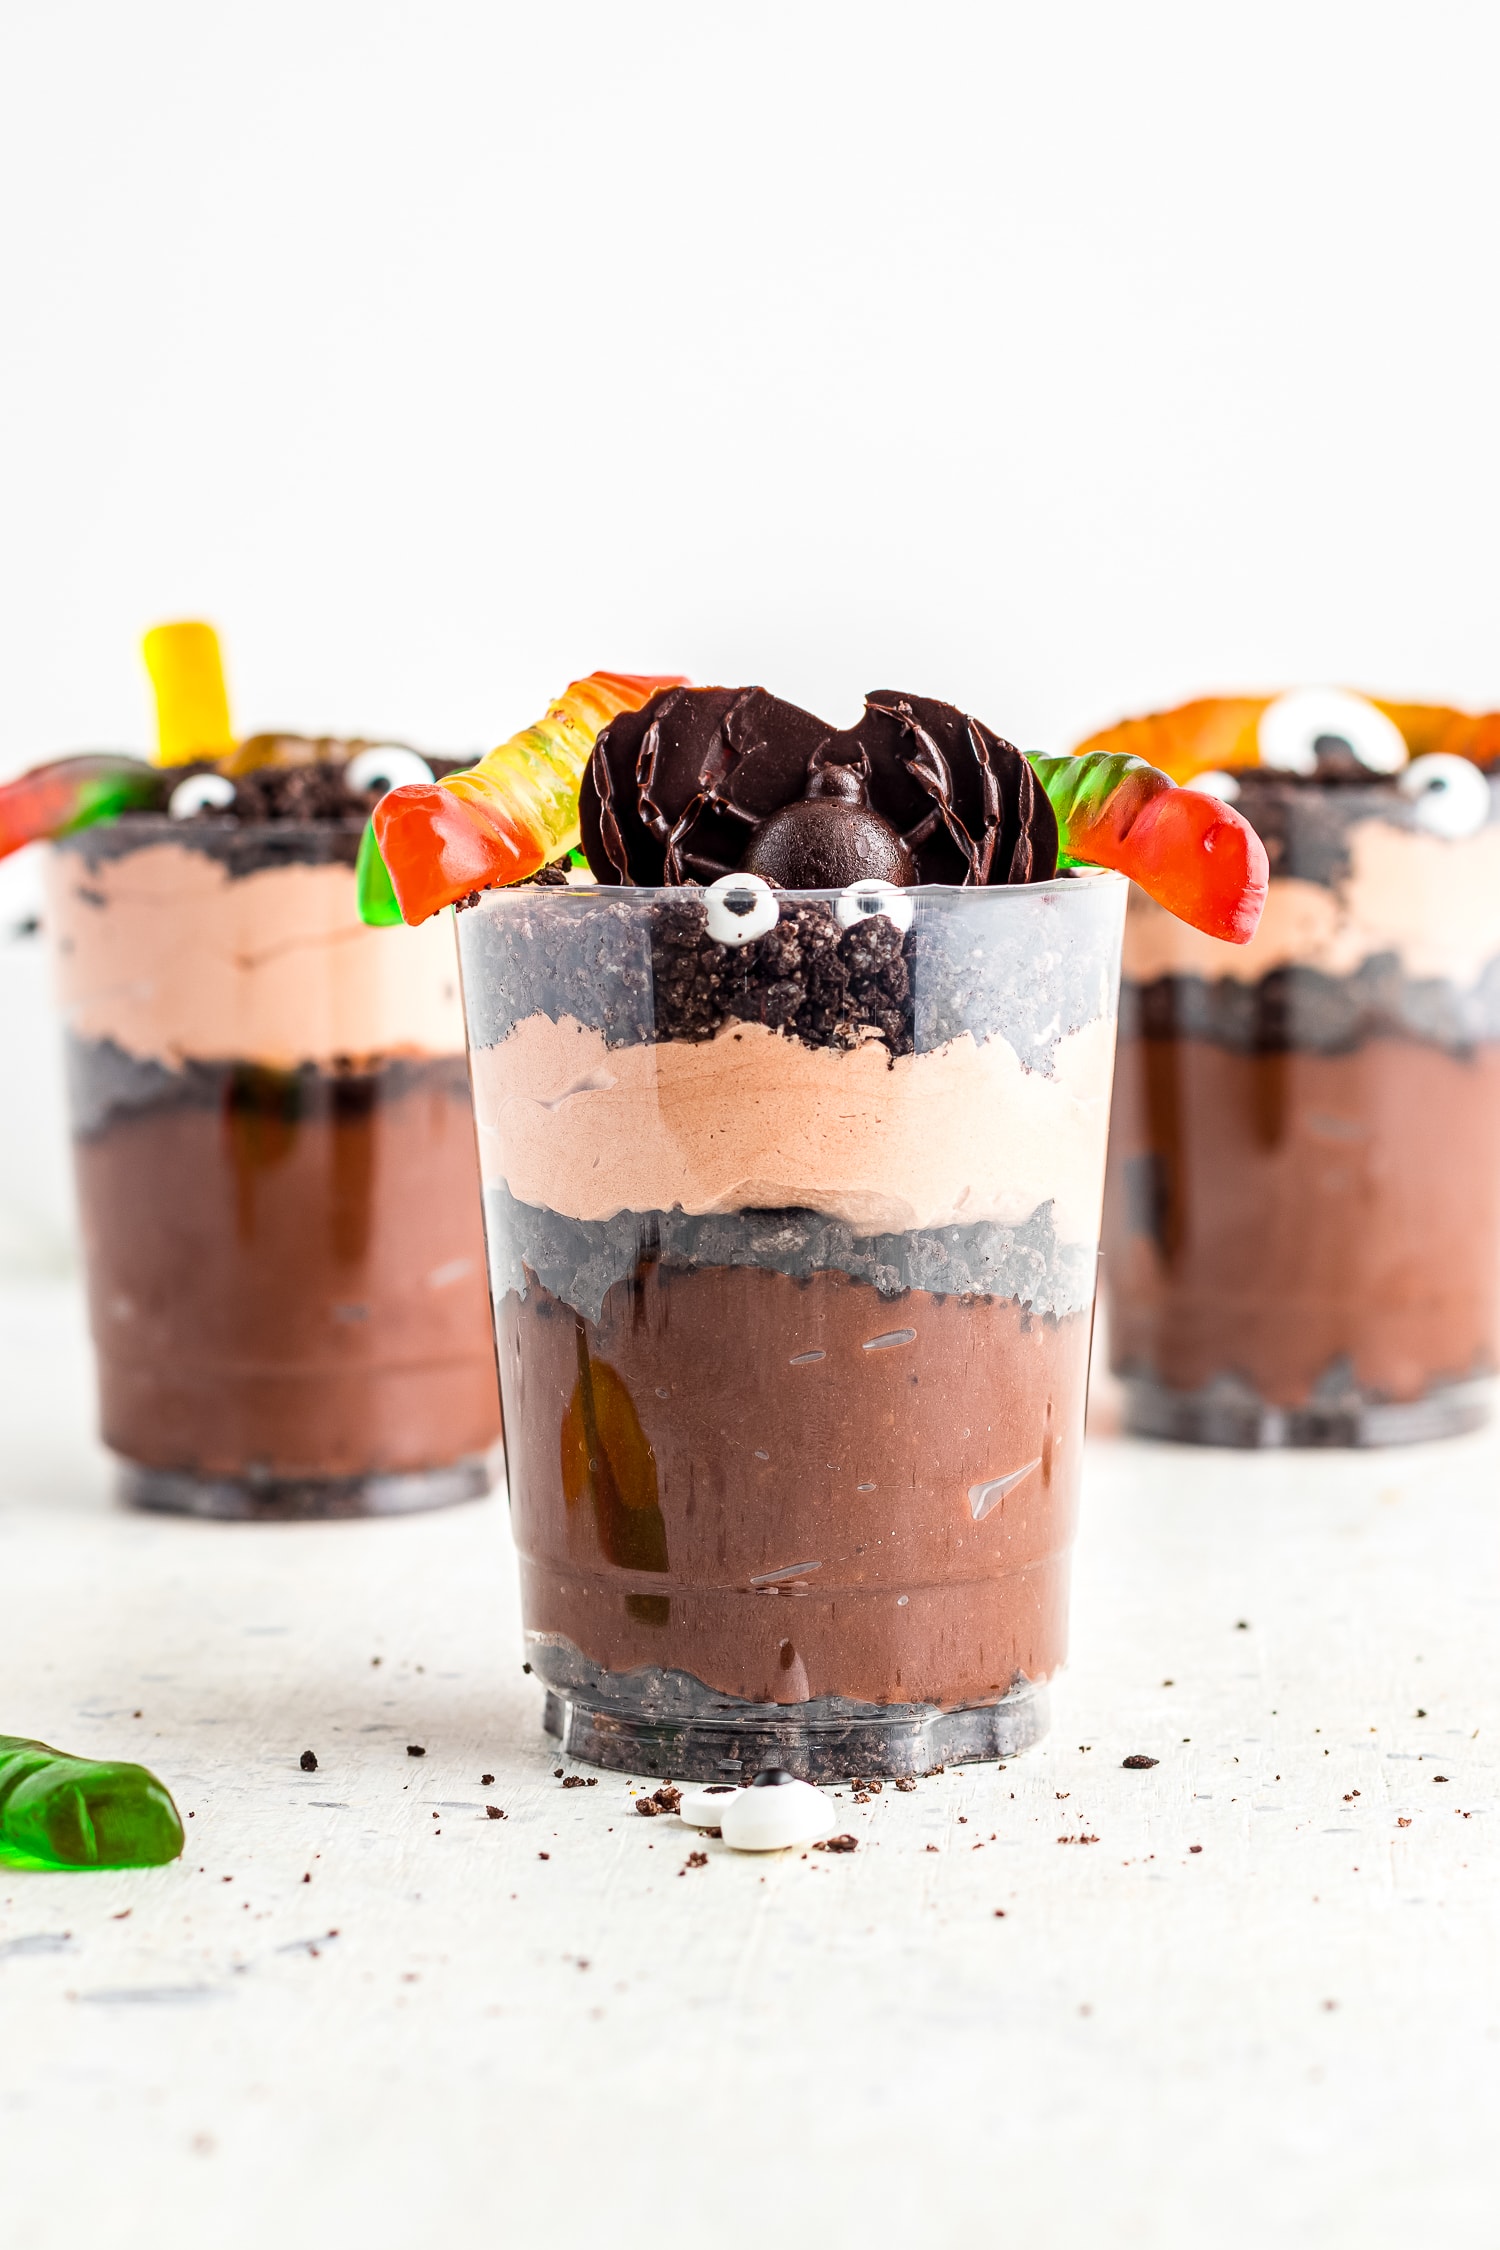
Fill each cup with one tablespoon of crushed Oreos. Top with the chocolate pudding and then add another layer of cookie dirt. Add the whipped topping, and sprinkle more crushed Oreos over the top.
Top each pudding cup with your Halloween candy decorations.
Place the dirt cups, covered in plastic wrap, in the refrigerator for at least 30 minutes before serving.
Storage
Halloween dirt cups are best the day they’re made because the crushed Oreos and gummy worms will get soggy if they sit too long in the refrigerator.
Fridge: If you have leftovers, they will keep for up to three days but the candy and cookies will be softer. If you can keep the toppings separate, that will work best.
Pro Tips
- You can make the pudding a day ahead and crush the cookies and keep them in an airtight container. The next day, just assemble the cups!
- Be sure to finely crush the Oreos. It will be easier to spoon into the cups if there aren’t a lot of uneven chunks. Also, it will look more like dirt!
- To make distinctive layers, carefully add each layer to the cups. Keep the sides of the cups clean so you can see the different layers once they’re assembled.
- If you make a mistake and smear pudding on the side, use a paper towel to wipe it away before adding the next layer.
- Tap the bottom of the cup on the counter to even out each layer before adding the next layer.
- Want to up-level the decorations? Look for silicone chocolate molds in fun Halloween shapes and fill them with melted candy melts. Let them set, pop them out, and use them to decorate the tops of the dirt cups.
- This recipe makes 8 large servings. You use smaller cups and divide the ingredients to make smaller servings or cut the recipe in half to just make 4.

The combination of cool and creamy pudding, whipped topping, and crunchy cookie dirt are so good in these Halloween pudding dirt cups! If you’re looking for a fun no-bake dessert for this spooky season, this recipe needs to be on your list.
If you take a picture and share these Instagram make sure to #kidsactivityzone or tag us @kidsactivityzoneblog so we can see them!
Halloween Dirt Cups
Ingredients
- 2 packages of instant chocolate pudding mix 3.9 oz or 113g packages
- 4 cups milk
- 1 cup Cool Whip thawed
- 15 Oreos
- Assorted Halloween candy for topping
Instructions
- In a mixing bowl add the 2 packages of chocolate instant pudding and 4 cups of milk. Mix with an electric mixer starting on low speed and switching to medium speed until it becomes a thick pudding consistency and thoroughly combined (about 2-3 minutes).
- In a separate medium bowl, add 1 cup of thawed Cool Whip and 1 cup of the chocolate pudding from step 1. Mix on medium speed until combined, about 2 minutes.
- Place pudding and whipped topping mixture in the refrigerator while you prepare the “dirt”.
- Place Oreos in the base of a food processor and pulse until medium-fine crumbs are created. If you do not have a food processor, you can crush the Oreos by placing them in a zip top bag and rolling over them with a rolling pin until completely crushed into crumbs.
- Remove the pudding and whipped topping mixture from the refrigerator and lay out the plastic cups.
- Start filling the cups by layering 1 tablespoon of the Oreo dirt in the bottom of the cup.
- Layer with ½ cup of chocolate pudding and a Tablespoon of crushed Oreos overtop.
- Add a heaping ¼ cup of the whipped topping mixture over the dirt. Tap the cup on the counter to level out the layer.
- Finish with Tablespoon of crushed Oreo dirt and garnish with gummy worms and Halloween candy of your choice. Allow the dirt cups to chill for at least 30 minutes before serving and enjoy.
Nutrition
More Easy Halloween Desserts
- My kids can never get enough chewy, crispy Monster Rice Krispie Treats! Add green, or your favorite color, to this sweet treat and load it with eyeballs for a fun and spooky treat.
- Monster Halloween Cookies are another easy recipe that will get everyone into the spooky spirit! Chocolate cookies loaded with M&Ms, chocolate chips and a few googly eyes make for a great sweet treat.
- As the weather cools down, keep the family warm with a cup of Witches Brew Hot Chocolate. It is a white hot chocolate that is easy to color so it looks like something out of a witches cauldron!
- Serve up some adorable Ghost Cupcakes at your Halloween party this year. A classic chocolate cupcake is topped with a frosting ghost. You’ll never guess what keeps the ghost from falling down.