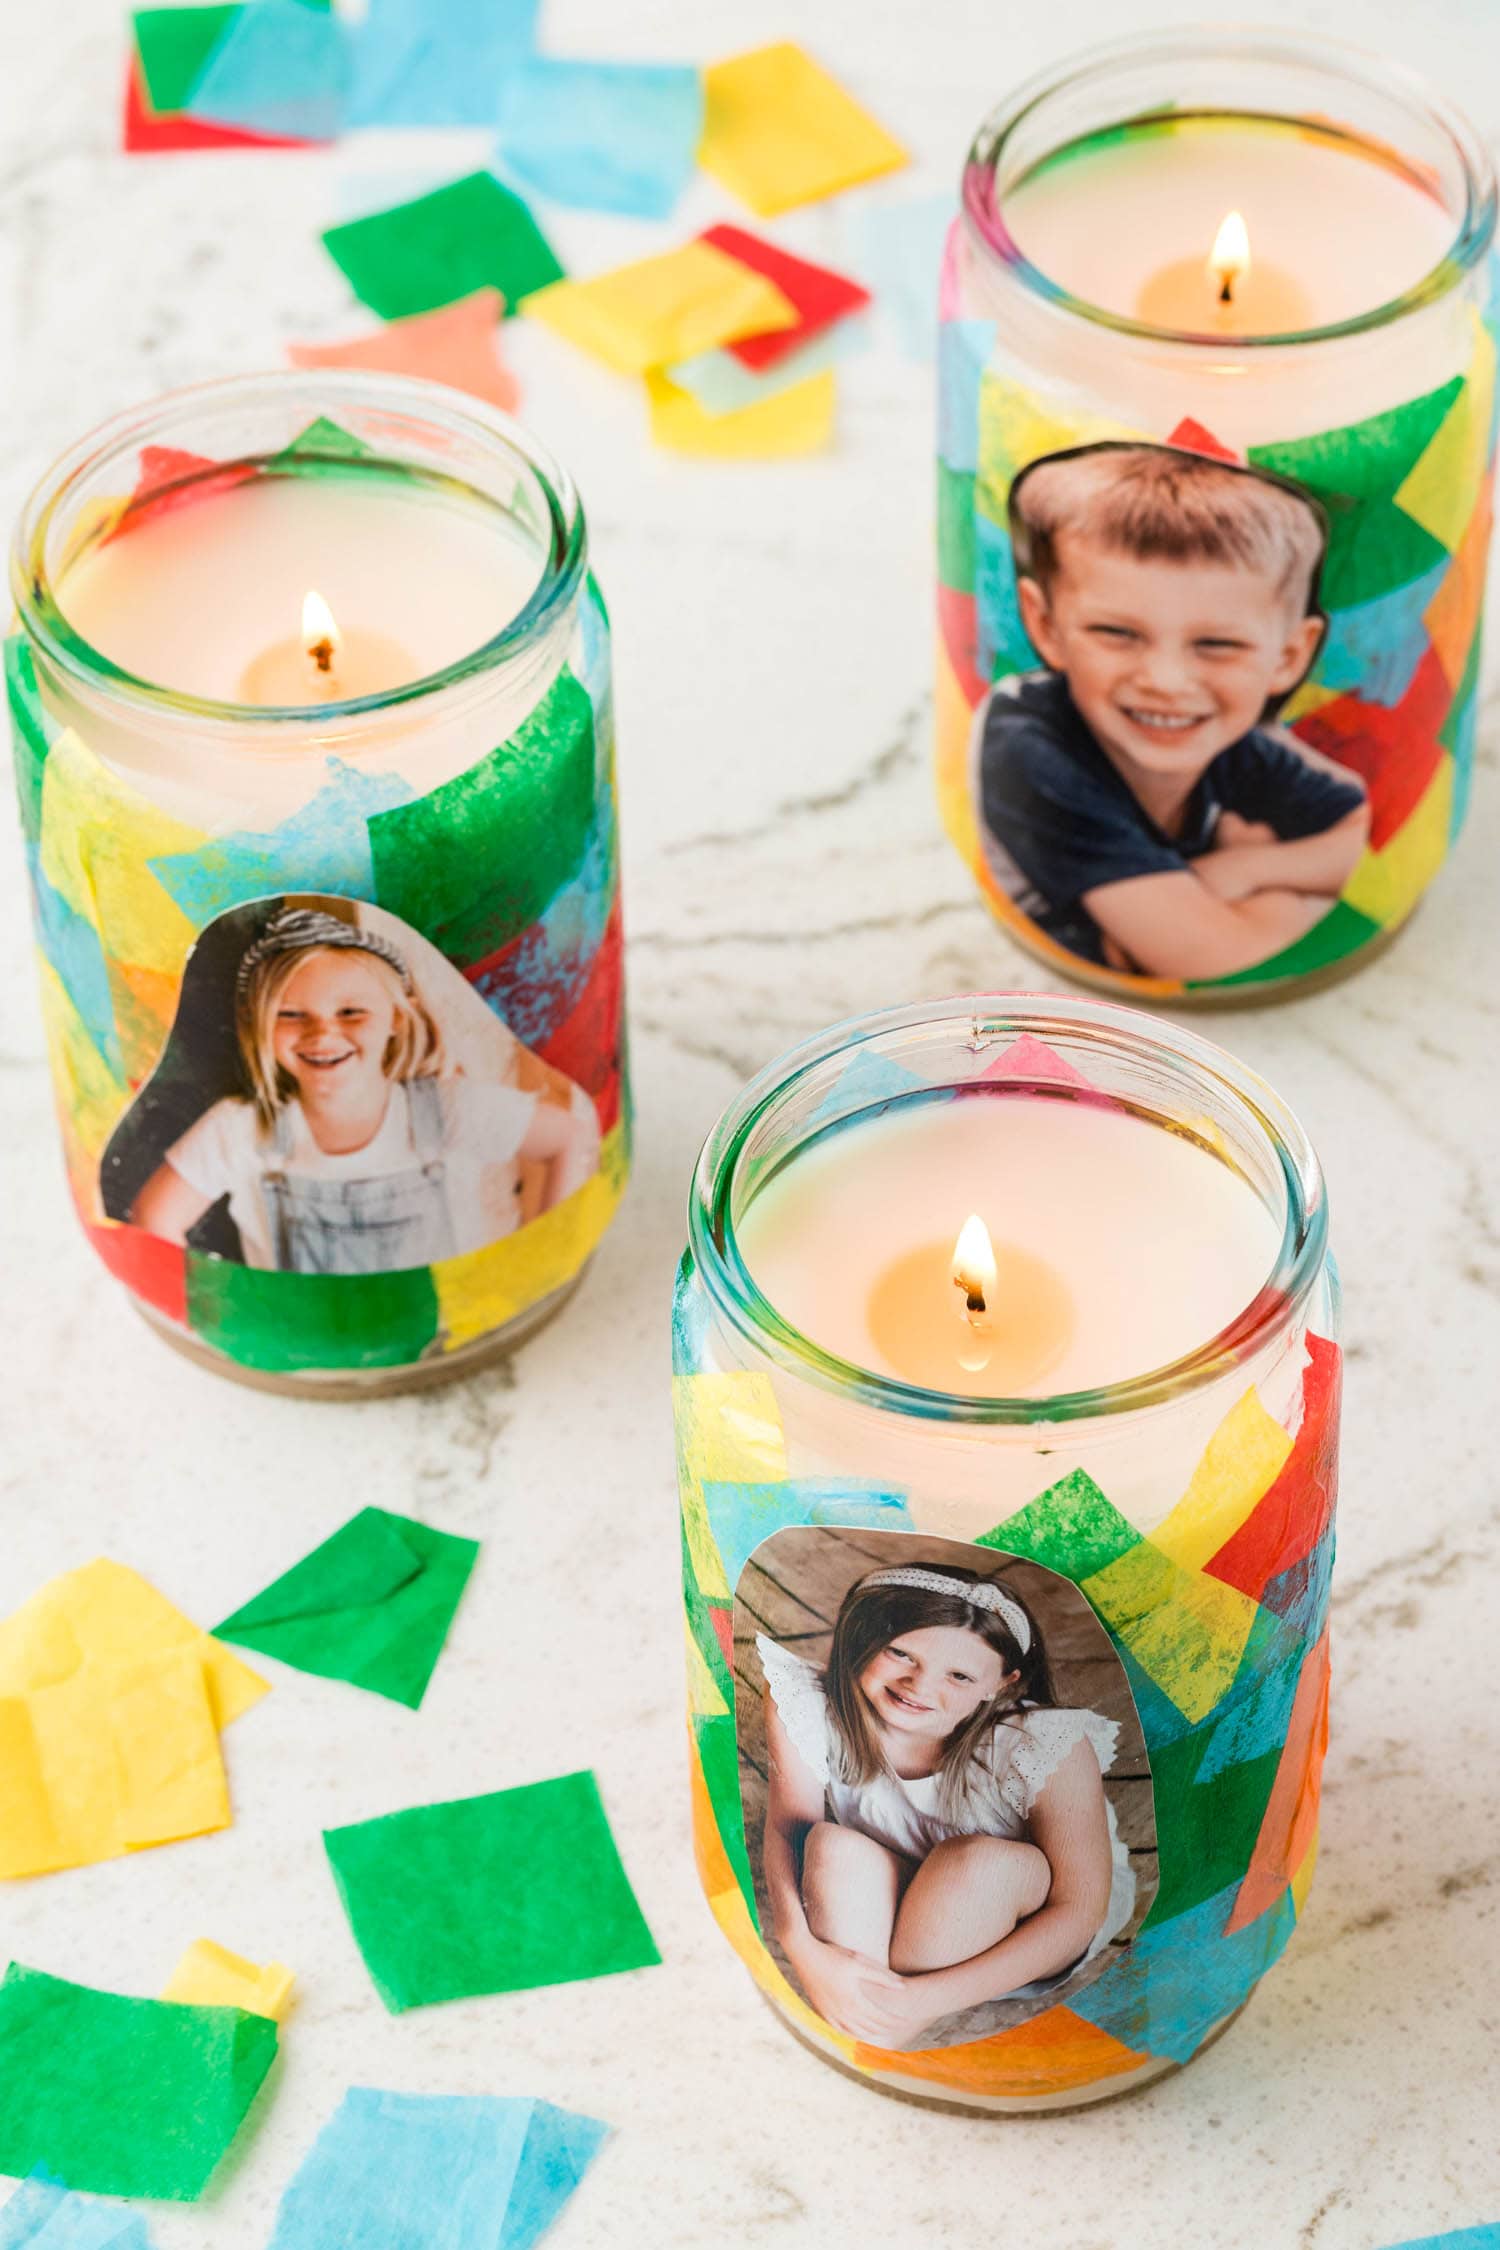
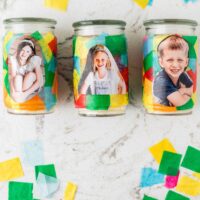
DIY Photo Candle
This easy DIY Photo Candle Craft is so easy to make and the best gift for Mother’s Day, Grandparents Day, Christmas, and more! All you need is an inexpensive candle from the dollar store, tissue paper, Mod Podge and a picture of your child. Make this easy homemade gift for all occasions.
Looking for a special Mother’s Day gift? This DIY photo candle will make any mom smile from ear to ear! It’s really easy to make this simple craft and it’s so fun too. There are tons of different cute homemade gift ideas out there for Mother’s Day. But, if you mom is someone who really loves gifts that have a practical use, then this is perfect!
You simply just mod podge photos on candles, and that’s it! You can choose the perfect scented candle that your mom will like, her favorite photo, and her favorite colors. It’s such a great personalized gift.
Make this cute DIY photo candle along with some sweet treats like flower pretzels or chocolate chip cookies. Such a sweet and special way to tell mom thank you!
Why You’ll Love DIY Photo Candles
- It’s really easy to personalize these DIY picture candles to fit whatever holiday or need you have!
- You only need six supplies to make this super easy DIY Mother’s Day gift.
- It only takes 20 minutes to make this mod podge craft. Then you just have to let it dry for a day!
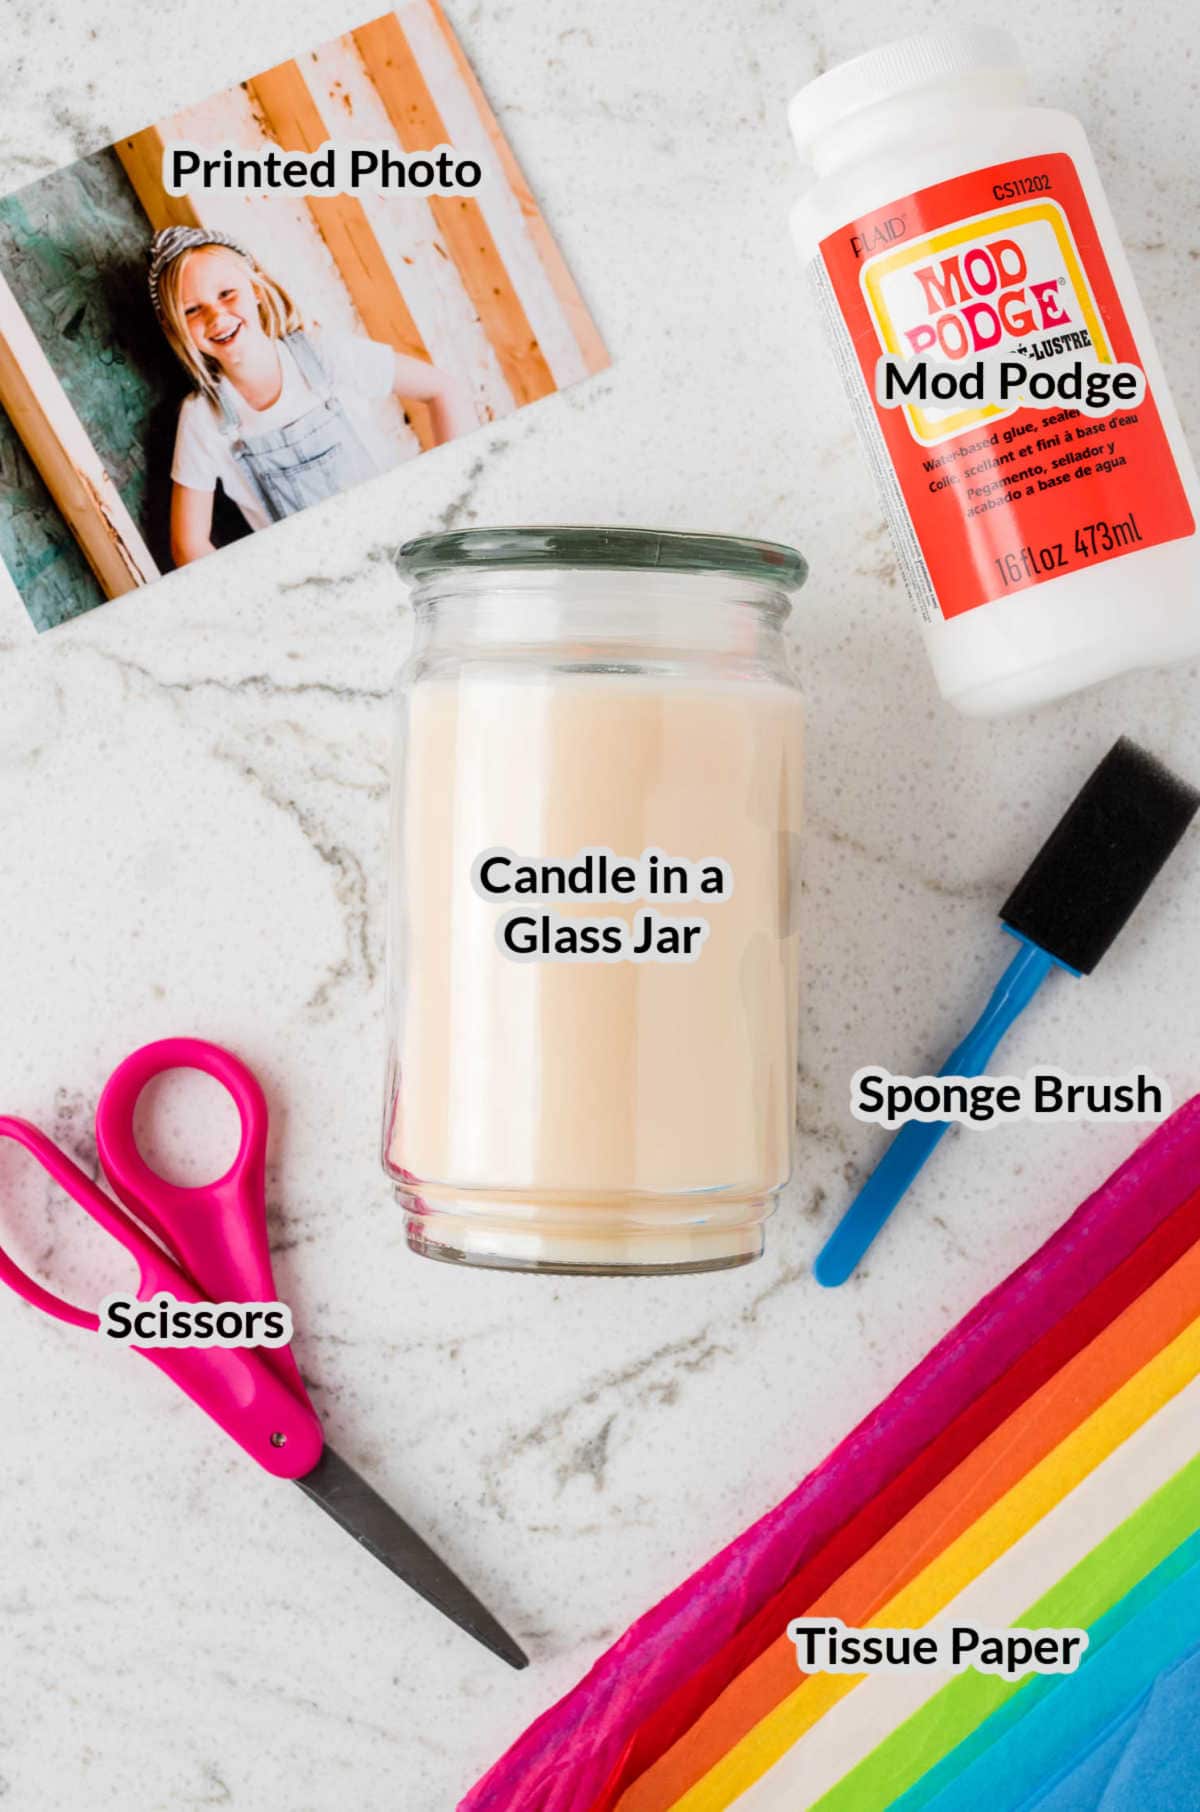
Supplies needed to make a DIY Photo Candle
- Printed photo – If you don’t have the ability to print photos at home, you can print them in store at your local Walgreens, CVS, or Walmart. You can also print them online at Shutterfly and have them delivered to your home.
- Candle in a glass jar – Be sure to purchase a candle in a glass jar that has smooth sides. Any pumps in the jar can make the picture look weird!
- Mod podge – There are a lot of different kinds of mod podge, but you just need the classic stuff!
- Scissors – If you have younger kids working on this craft, consider using safety scissors.
- Sponge brush – Just a simple sponge brush will work for this craft.
- Tissue paper – Use whatever colors of tissue paper that you want.
How to Make Personalized Photo Candles
- Begin by cleaning the glass jar of the candle. Remove any stickers ensuring that all the gooey stuff is gone. Use goo gone if you need to! Cleaning the jar with alcohol wipes can help to remove other residue as well.
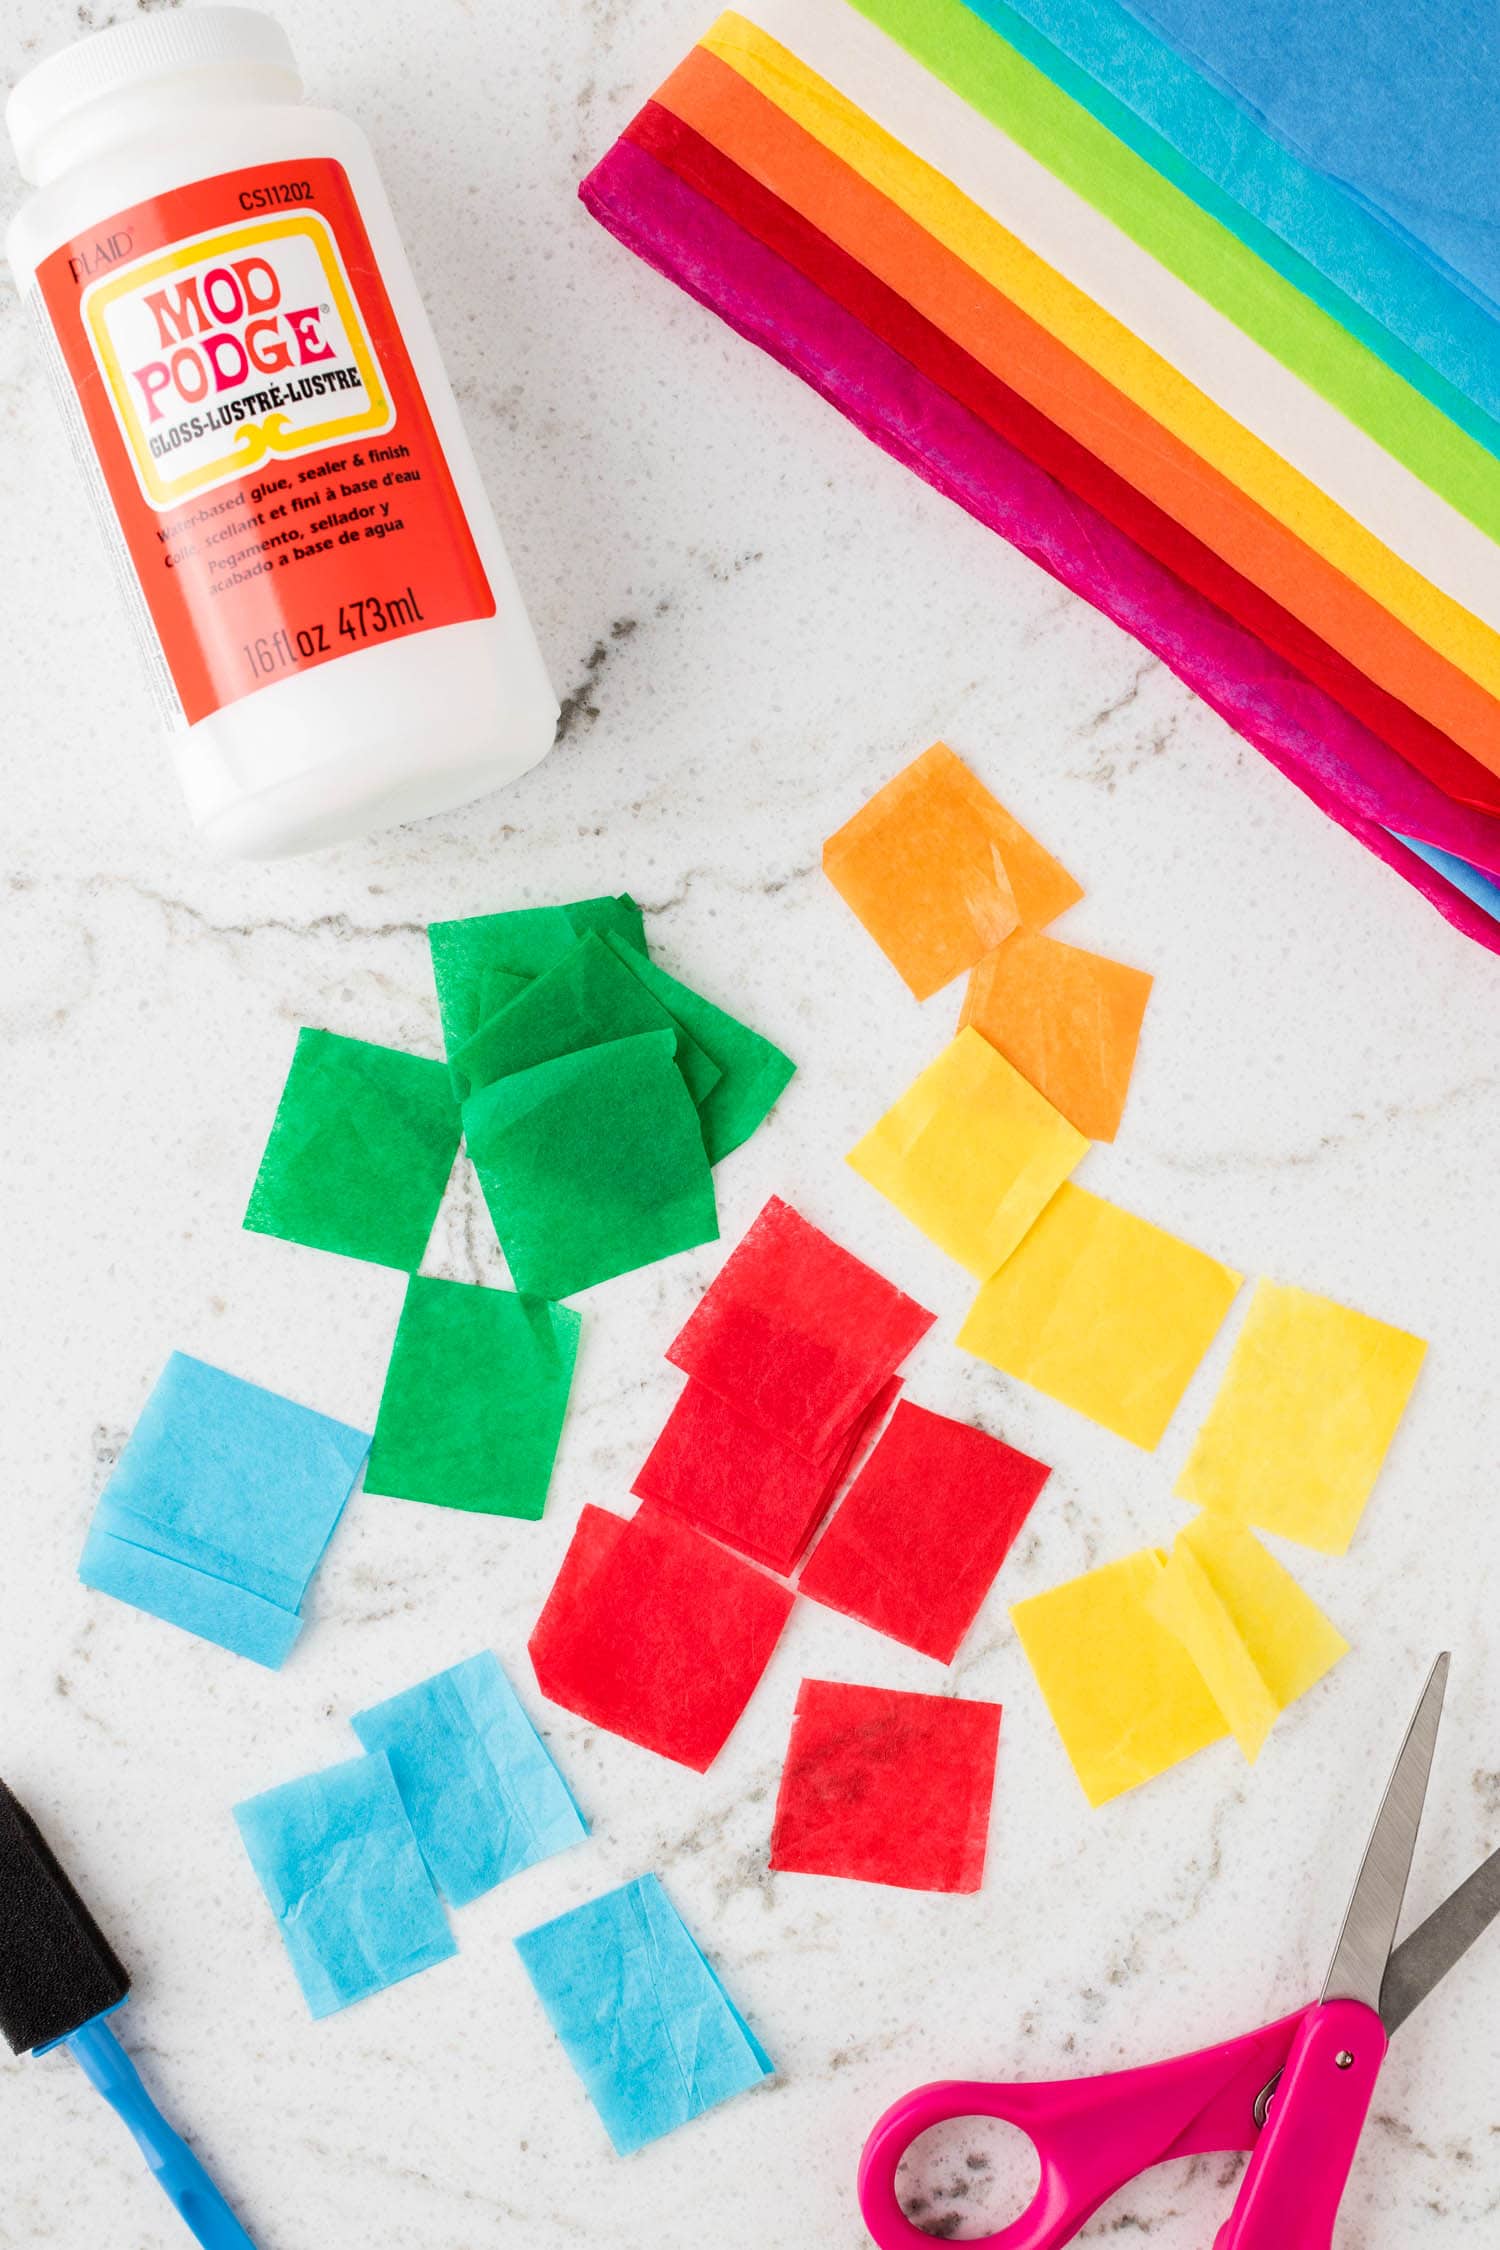
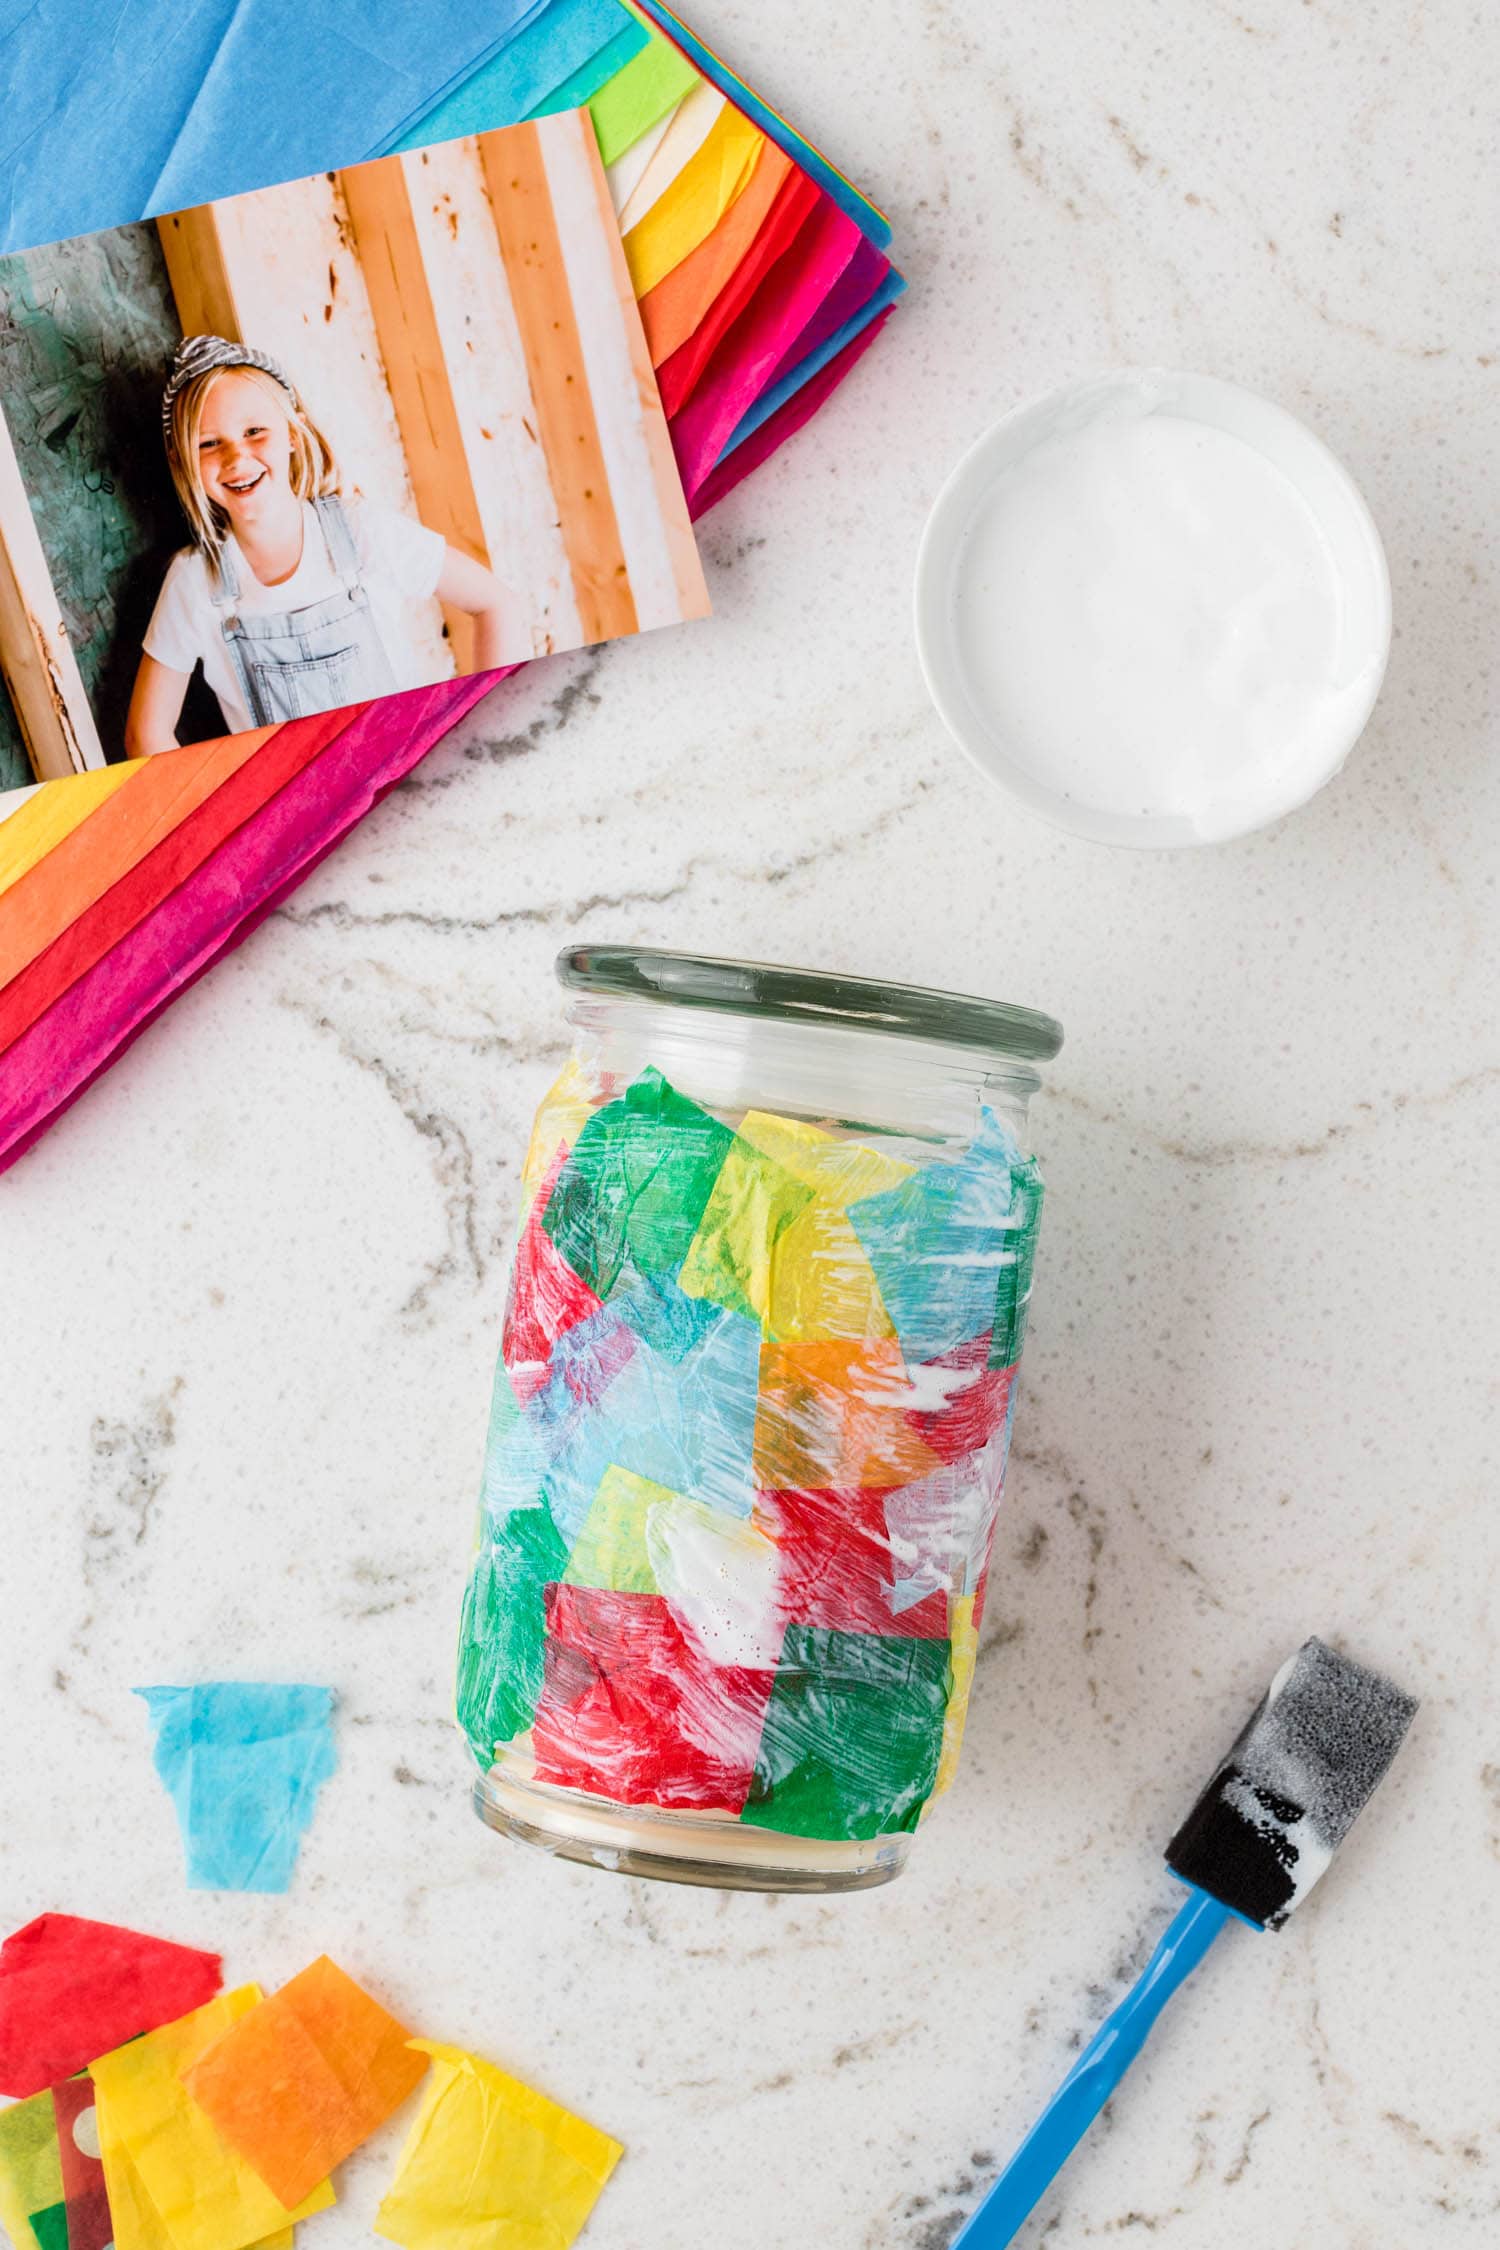
- Take the tissue paper and cut it into 1-inch squares and then set them aside.
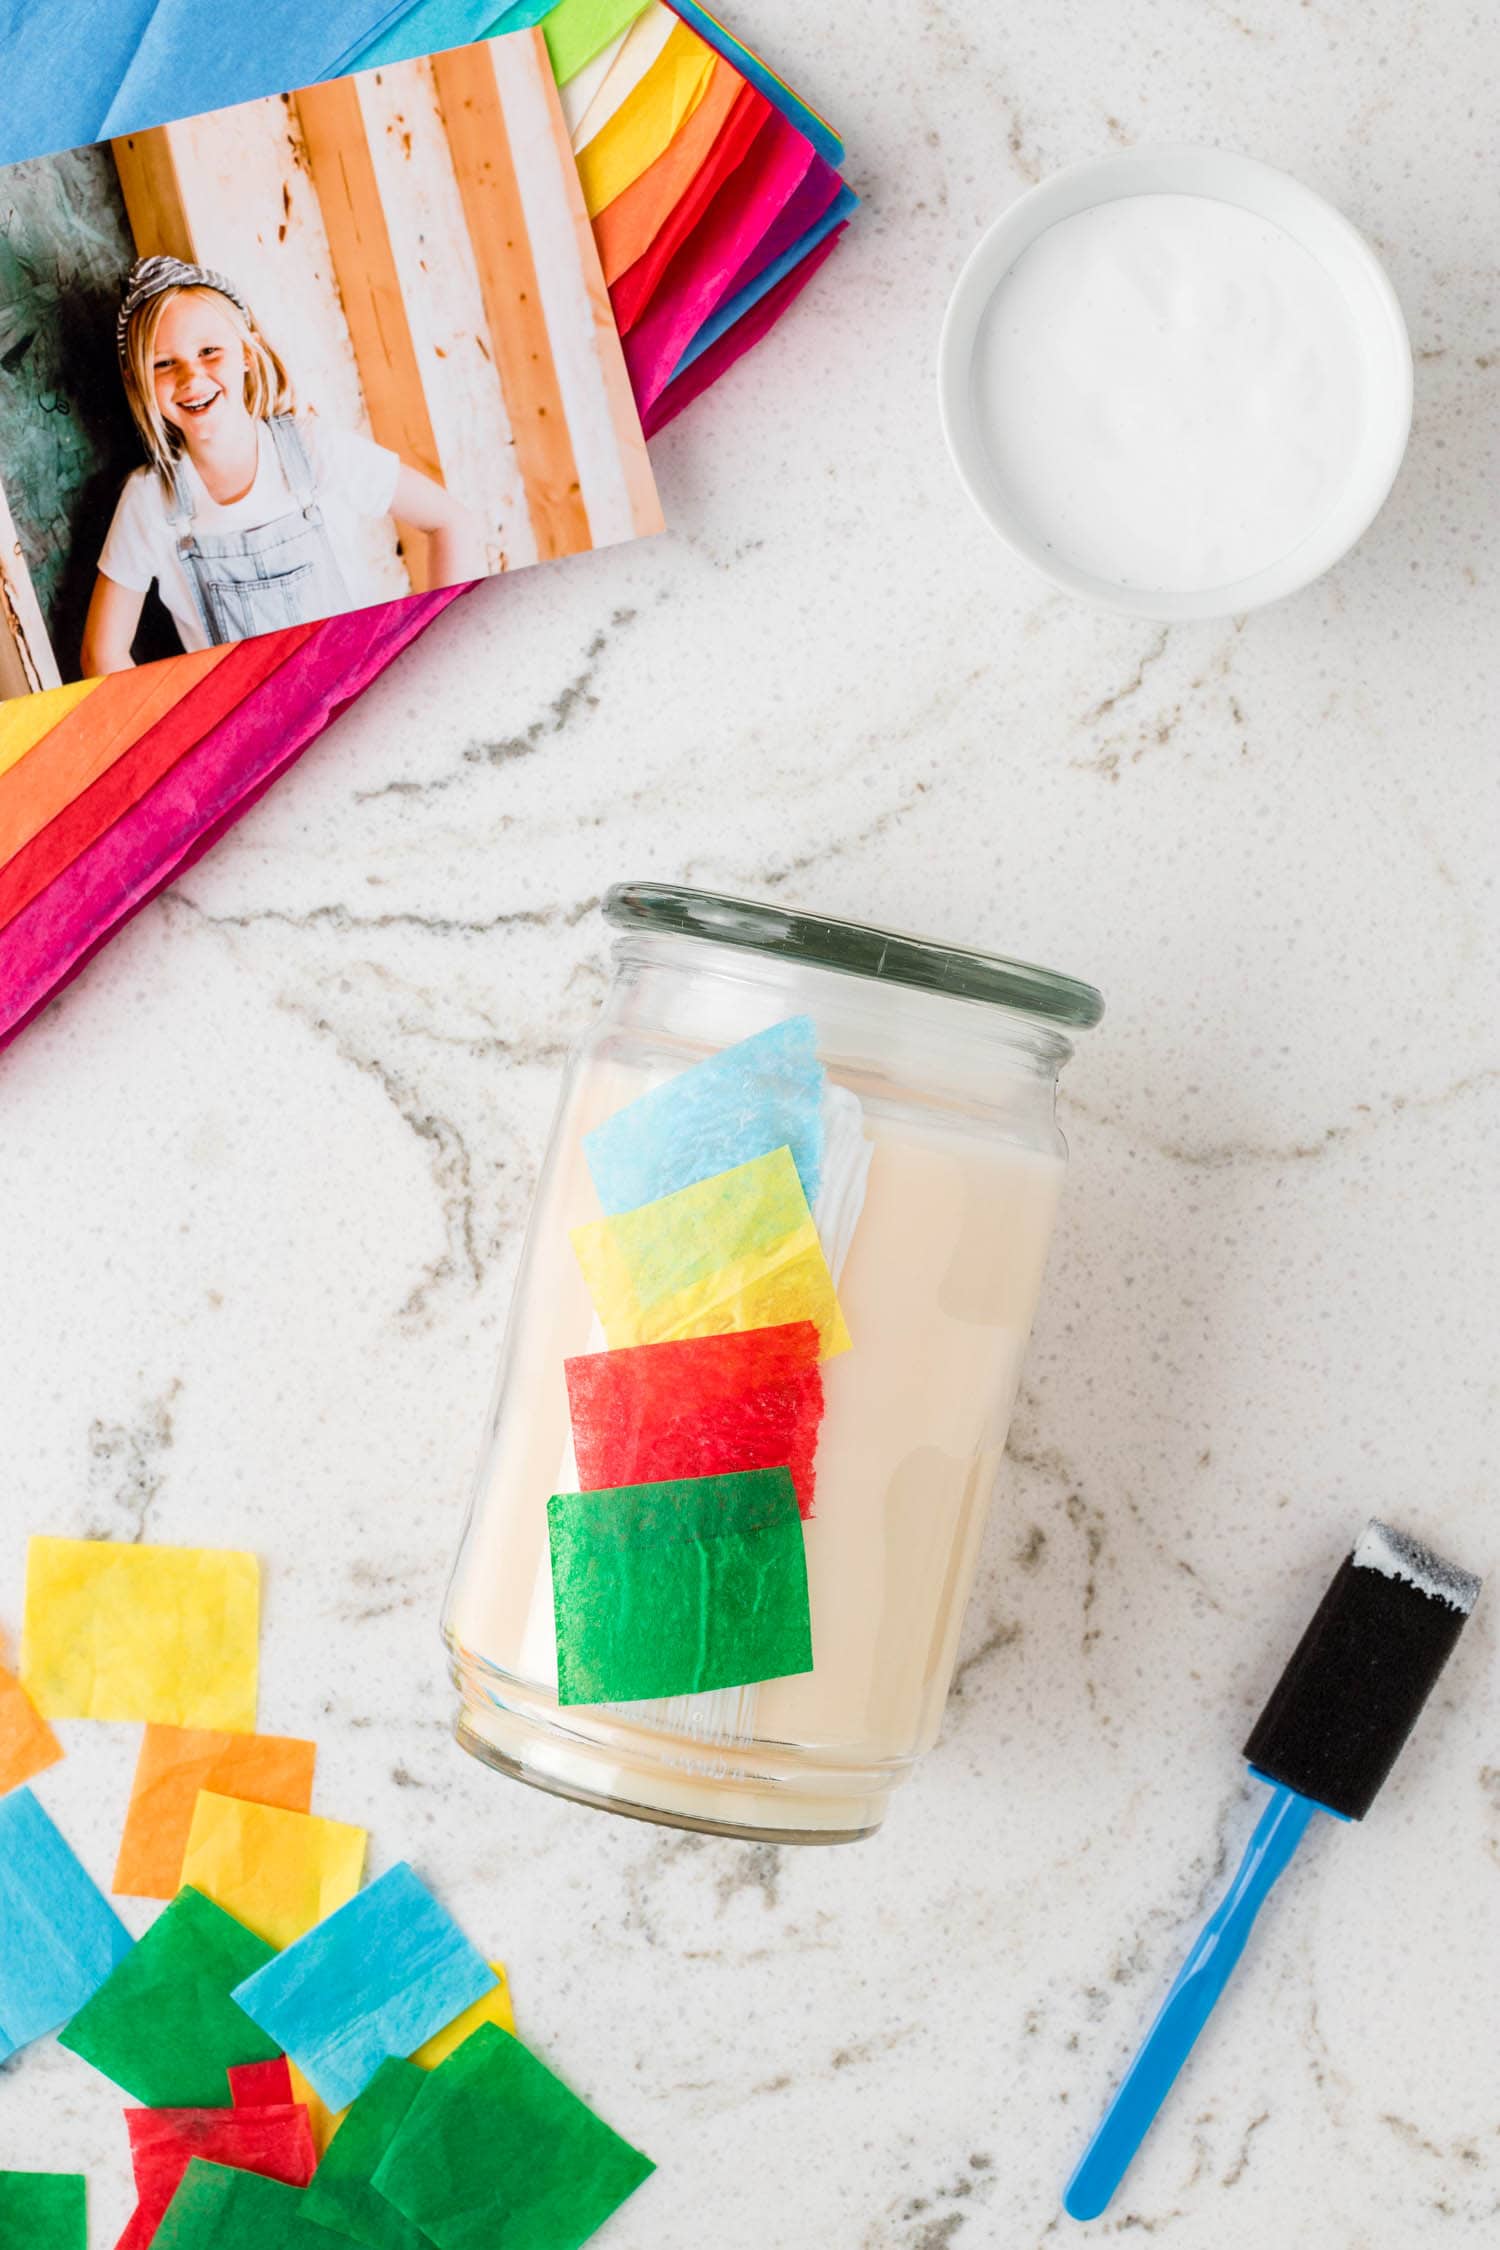
- Using the foam sponge brush, apply a thin layer of mod podge to the clean and dry glass candle jar. Place a piece of tissue paper onto the mod podge and overlap the square until the whole jar is covered.
- Seal the tissue paper by adding another layer of mod podge over the entire jar. Allow it to dry, it’ll take a few minutes!
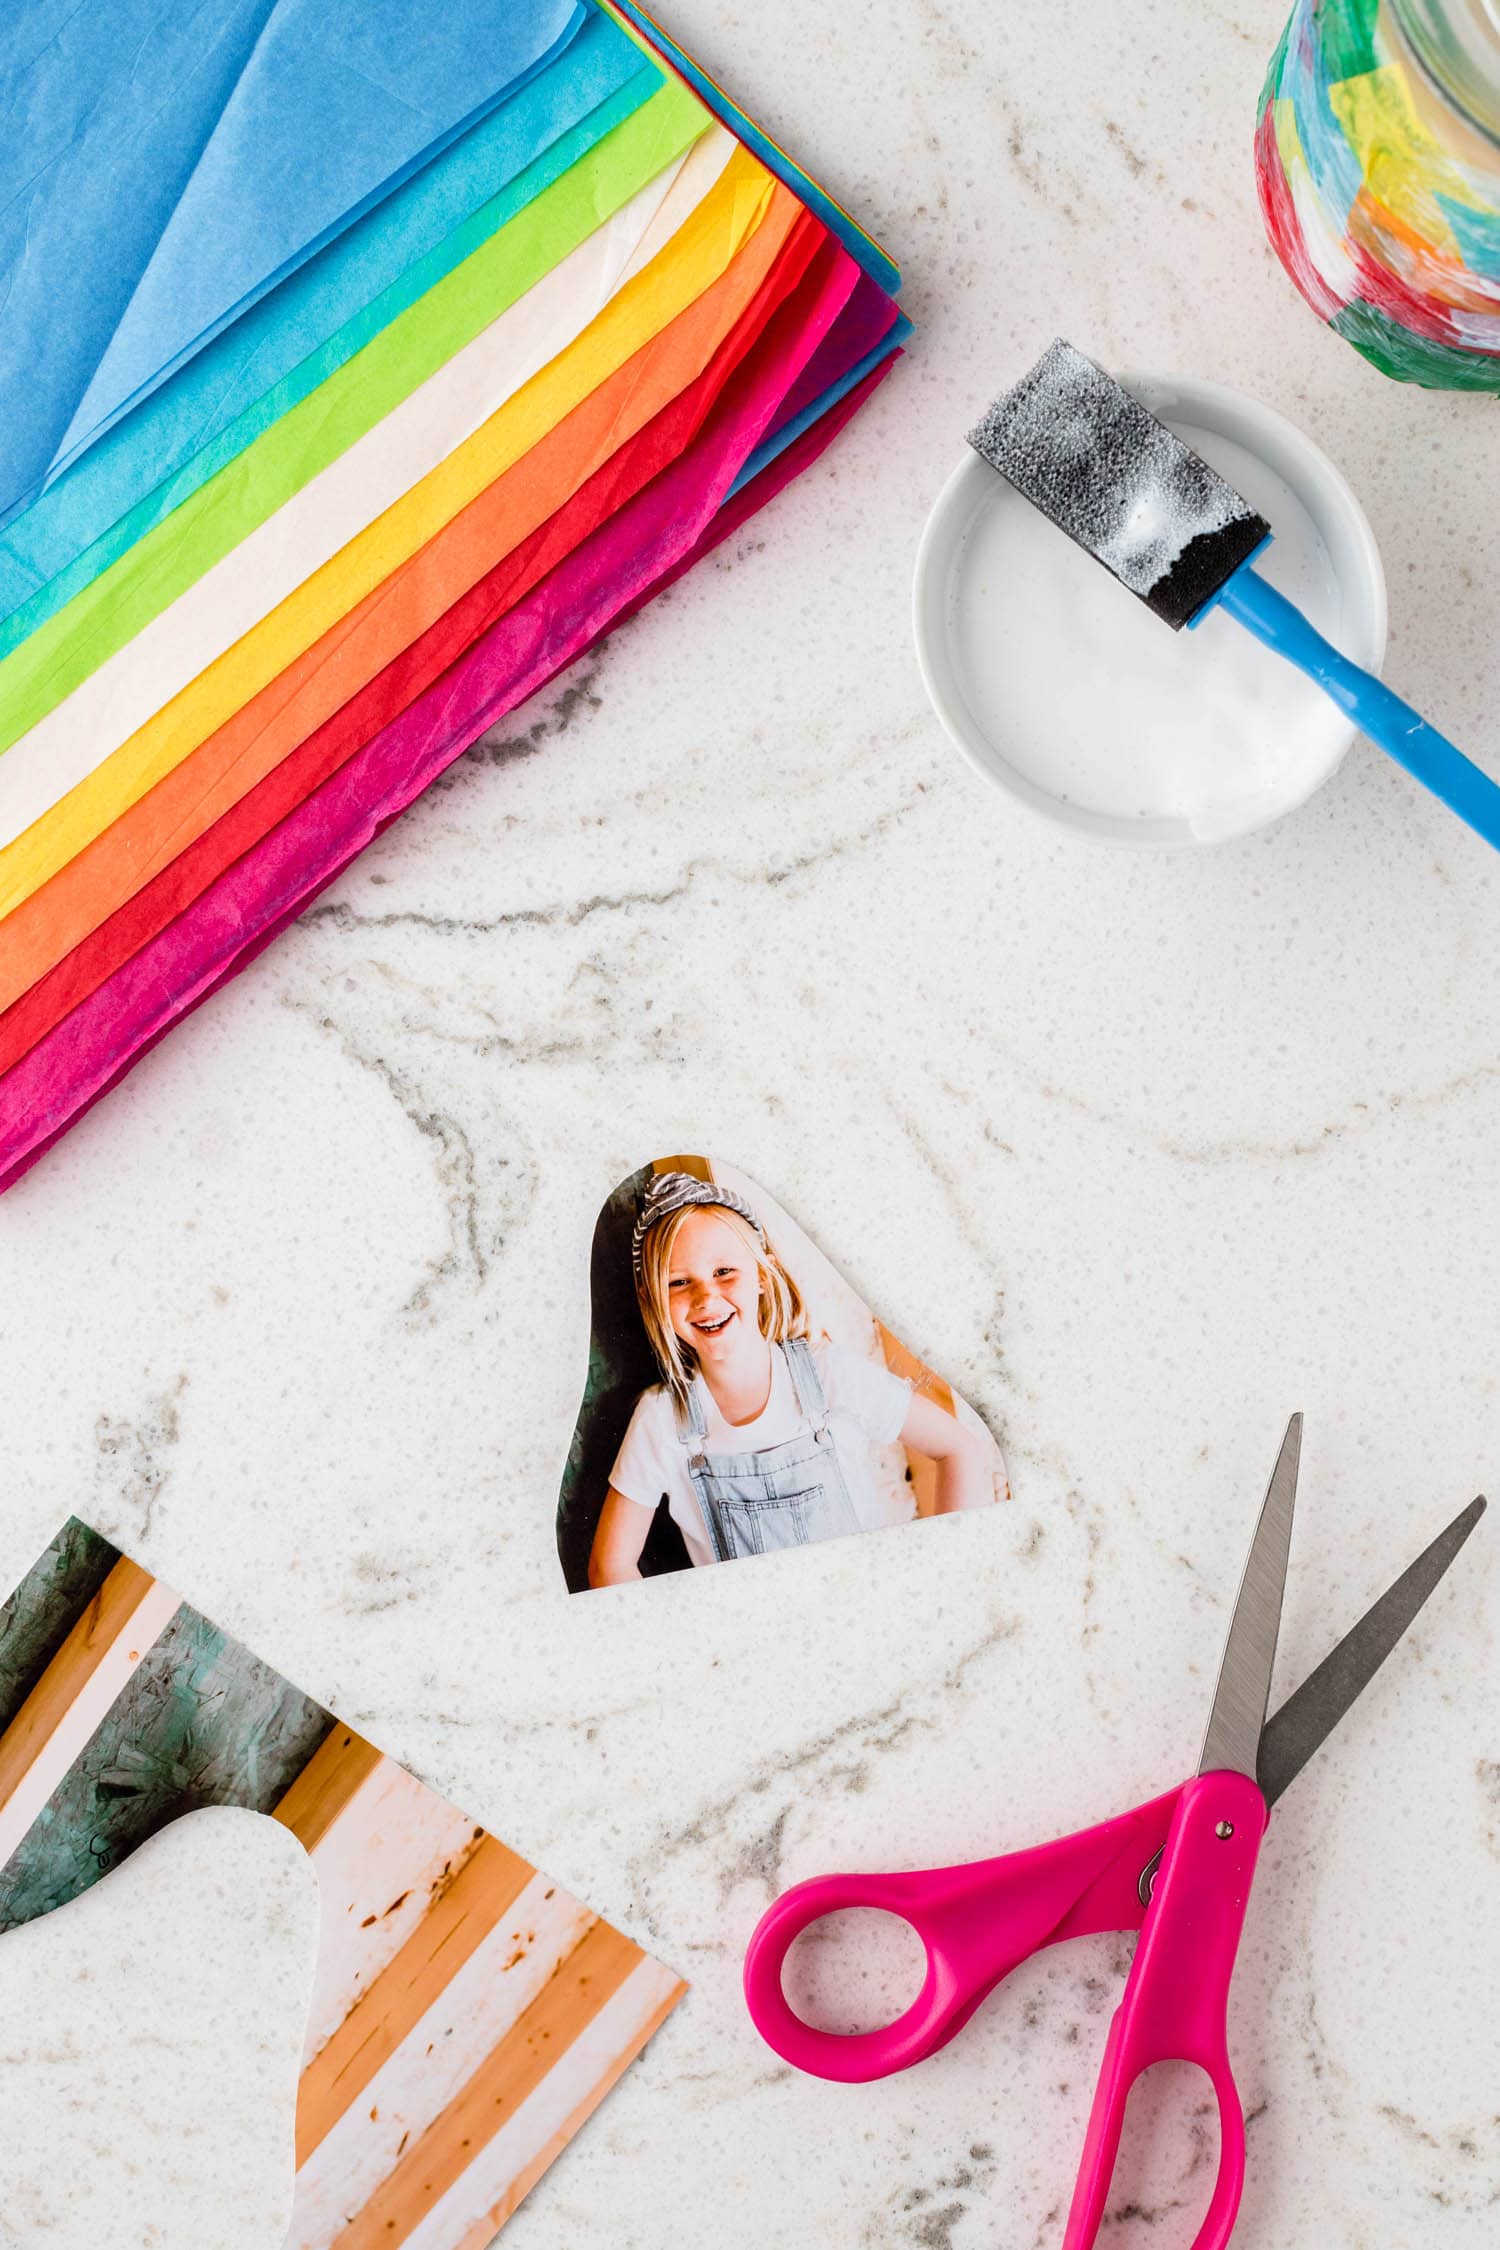
- Cut the printed photo to fit the size of the jar. Then, place a thin layer of mod podge on the back of the picture and place it in the center of the jar.
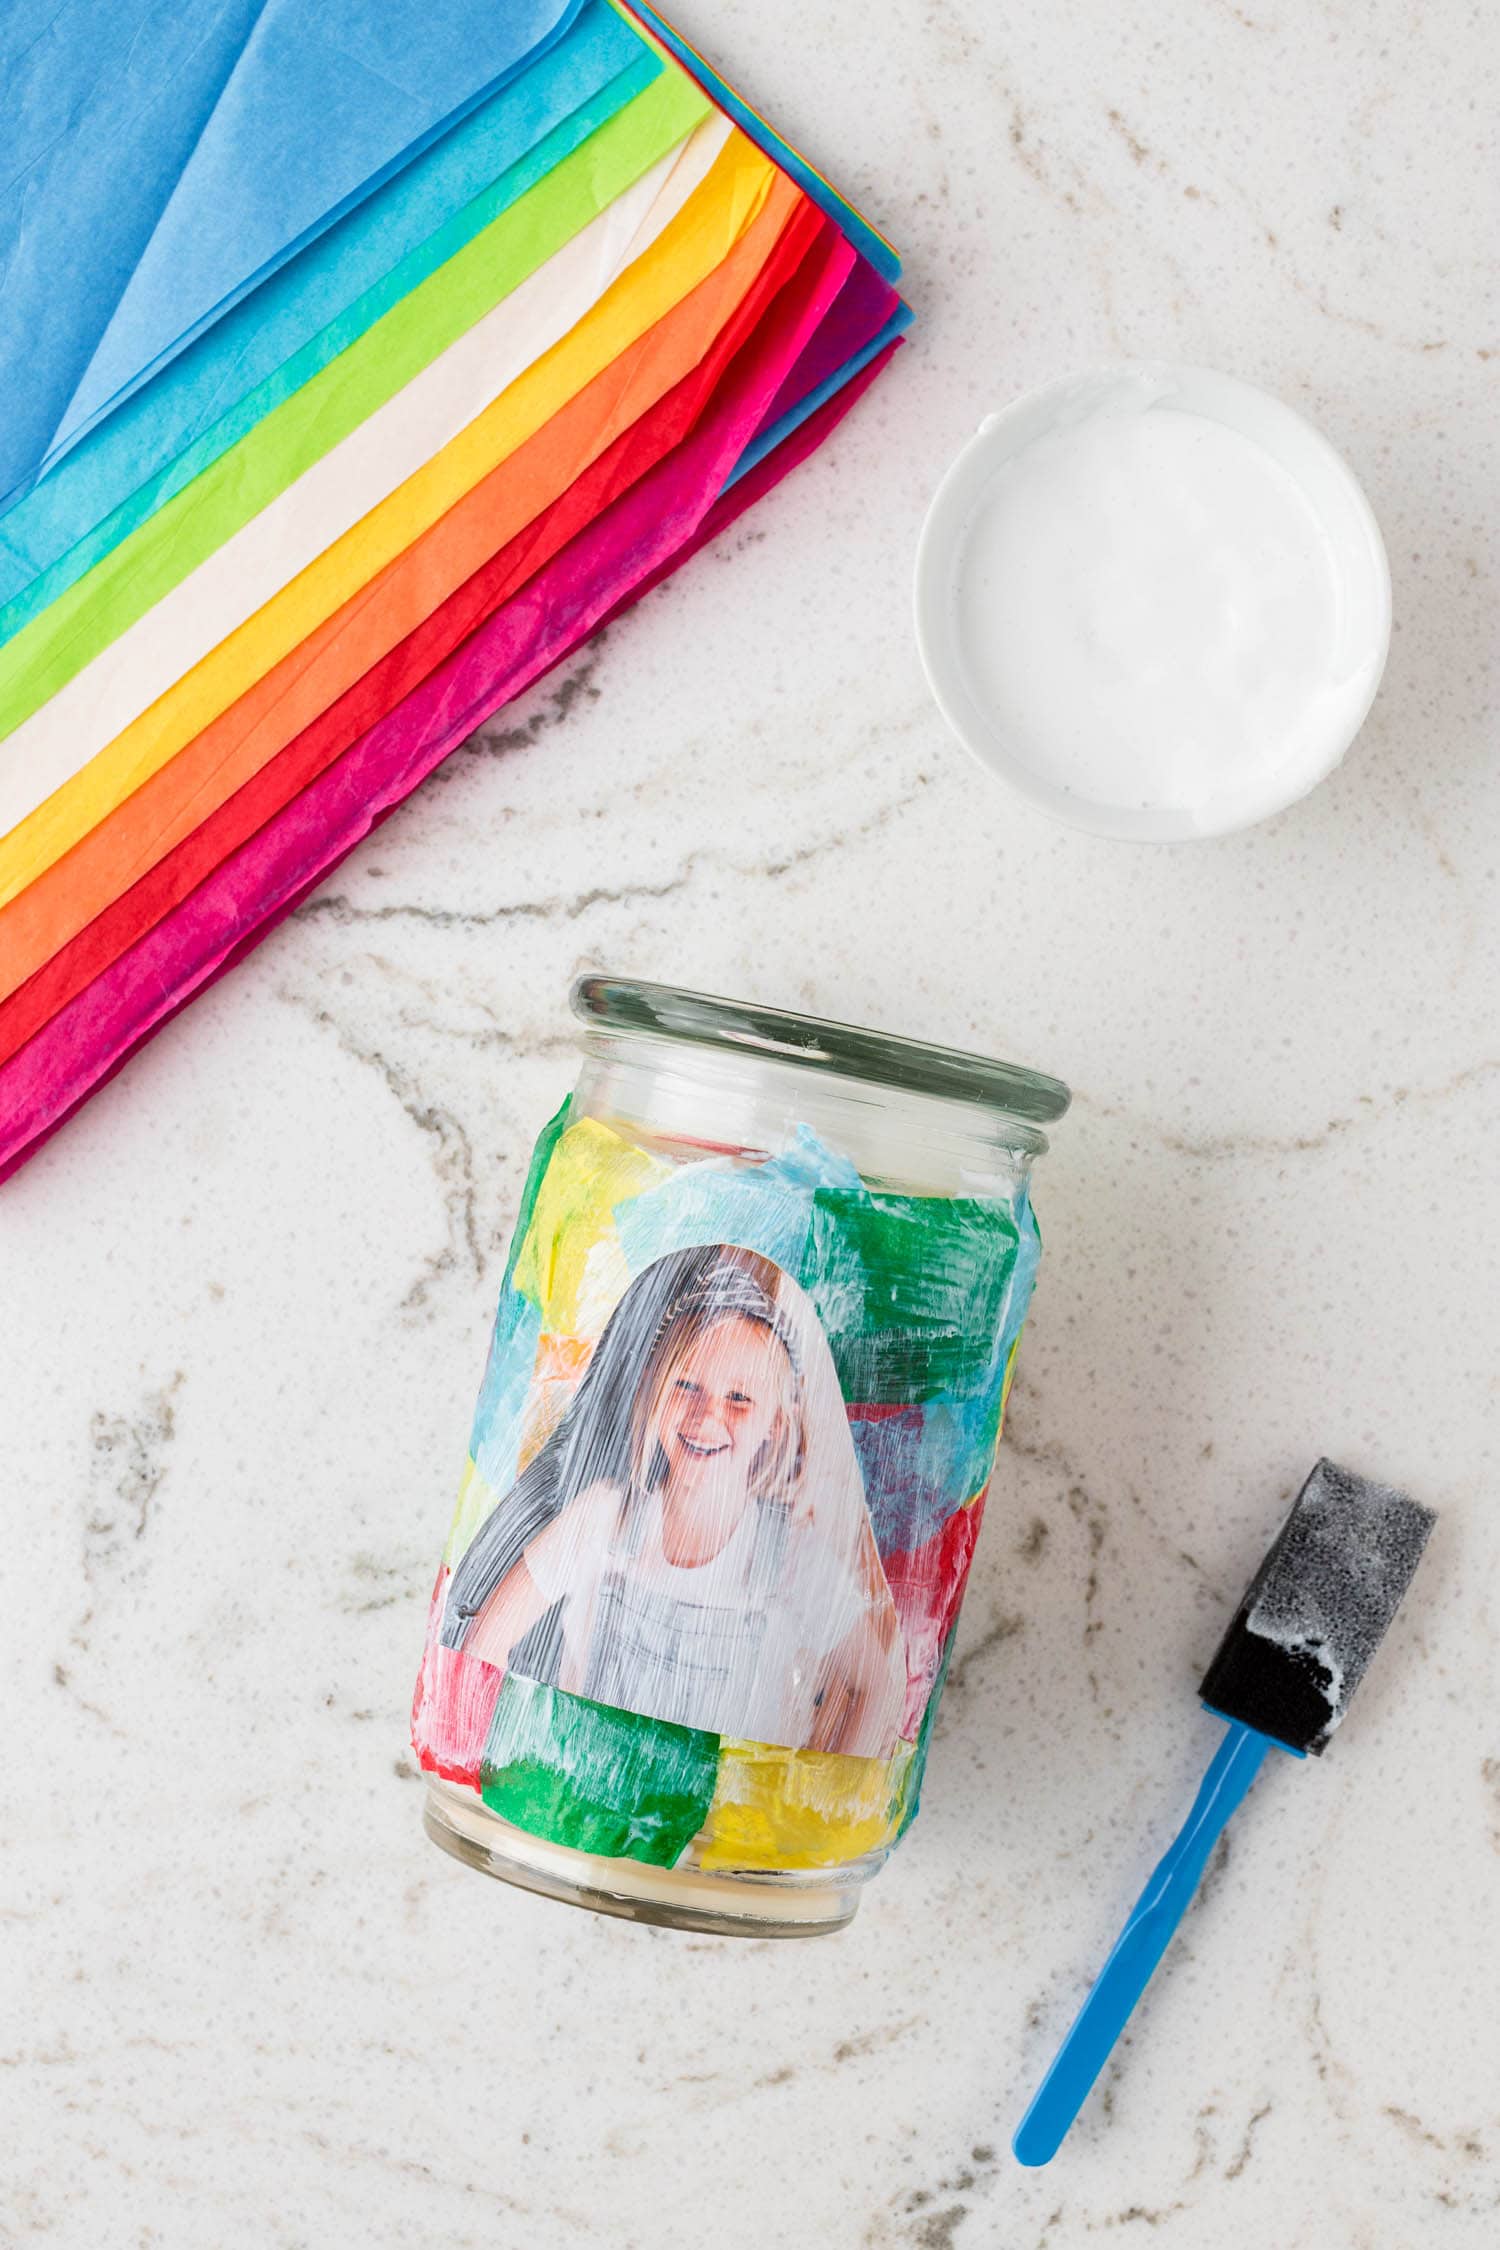
- Press the picture on to the jar to make sure it adheres well. Then layer mod podge on top of it to seal it in.
- Allow the jar to completely dry for 24 hours and it’s ready to go!
More Uses for this DIY Photo Candle
These adorable DIY picture candles can be used for so much more than just a Mother’s Day gift! You can give these to grandparents or aunts and uncles as a sweet gift too.
Or, make themed decorations for a party by printing out logos or cartoon character on photo paper and using that in place of the pictures!
Pro Tips for the Best DIY Photo Candle
- To add a little extra pizzazz, put some glitter on your candles. You can sprinkle some on after you put the tissue paper on and before you seal it with another layer of mod podge.
- Write a message on the back of the candle in Sharpie to personalize it even more!
- For extra homemade goodness, make your own homemade candles.
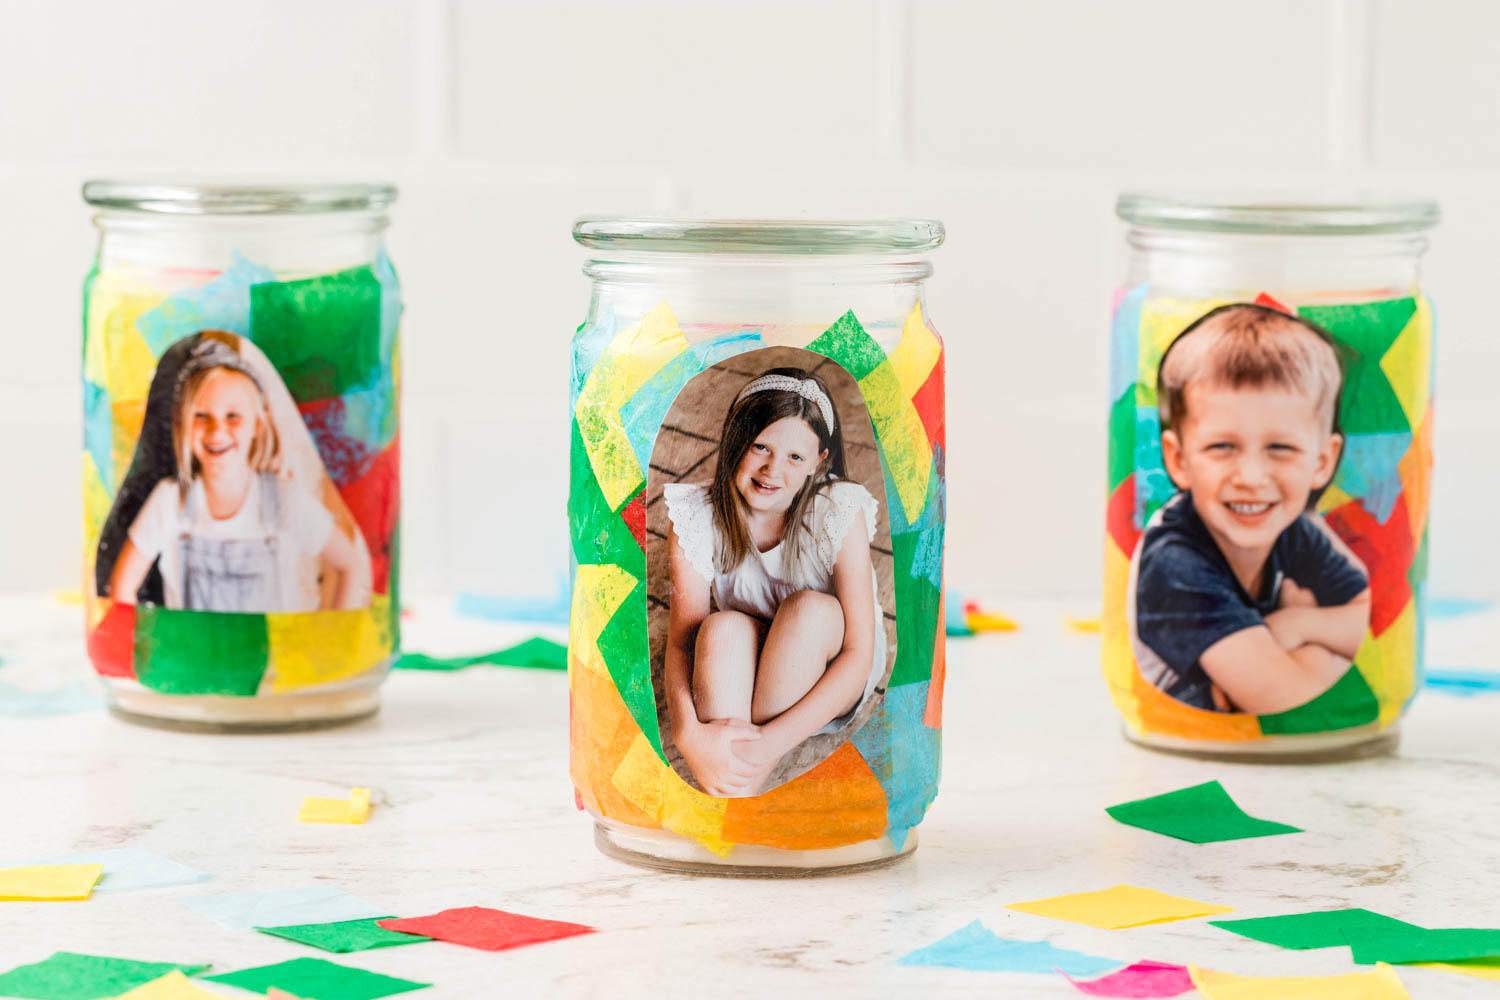
These precious DIY photo candles are such a great gift idea for many different occasions!
More DIY Projects You’ll Love
- Do you love making sun catchers? Check out this super fun Shamrock Suncatcher that you can make around St. Patrick’s Day.
- Snowglobes are already so much fun, but what if you made one yourself? This Homemade Snow Globe is such a cool DIY project.
- If your kids love playdough, you can make your own with this yummy smelling Pumpkin Playdough recipe.
- Make your own Christmas ornaments with this awesome Cinnamon Ornaments recipe.
- These DIY Felt Envelopes are super easy to make and just the cutest thing!
Tissue Paper DIY Photo Candle Craft
Equipment
Ingredients
- Candle in a glass jar
- Tissue paper
- Scissors
- Mod podge
- Foam sponge brush
- Printed photo
Instructions
- Start by choosing a candle in a glass jar. Remove any stickers or labels and ensure the glass is clean and dry.
- Next, take the tissue paper and cut it into 1-inch squares. Use as many colors as you would like! Set them aside.
- Grab the foam sponge brush and apply a thin layer of mod podge to the glass jar. Place a cut tissue paper square onto the mod podge. Overlap the squares repeating until the entire jar is covered.
- Place an additional layer of mod podge over the whole surface to seal the tissue paper. Allow a few minutes to set.
- Let’s cut the printed photo to fit the size of the jar. Place a thin layer of mod podge on the back of the picture and place it in the center of the jar.
- Press the picture to be sure it sticks. Place another thin layer of mod podge over the top of the photo to seal it.
- Allow the completed candle to dry for 24 hours.