Snowman Pancakes
Looking for a fun and delicious breakfast recipe to make with your kids? Try out these easy snowman pancakes! With simple ingredients and step-by-step instructions, your children will love making and eating these adorable winter-themed treats.
Looking for a kid-friendly Christmas breakfast? These snowman pancakes are just the thing you need! It’s a festive breakfast that any kid would love, especially if they get to decorate one themself. Christmas pancakes are a must during the holidays. And if we’re not making these adorable snowman pancakes, then we’re at least making chocolate chip pancakes! There’s no shortage of delicious breakfast recipes in our house.
These snowman shaped pancakes always put a smile on my kid’s faces. If you’ve got some kiddos that are morning grumps, this is a sure-fire way to make them grin and turn their morning into something extra fun! And for a complete breakfast idea, serve up some crispy bacon with your fluffy pancakes. It’s a yummy breakfast that is actually super simple to make. Whip up a batch for your next Christmas morning, or even a happy breakfast during the holiday season!
Why You’ll Love these Snowman Pancakes
- It will only take a half hour to make this easy pancake recipe! You can make these on busy mornings and still not be late for your day.
- These pancakes are really simple to make. Homemade pancakes don’t have to be a crazy recipe — it’s just pantry staples mixed together into a delicious batter!
- Snowman pancakes are kid-friendly but great for all ages. Adults will love them too! Who wouldn’t love a cutie little snowman shaped pancake?
Ingredients for Snowman Pancakes
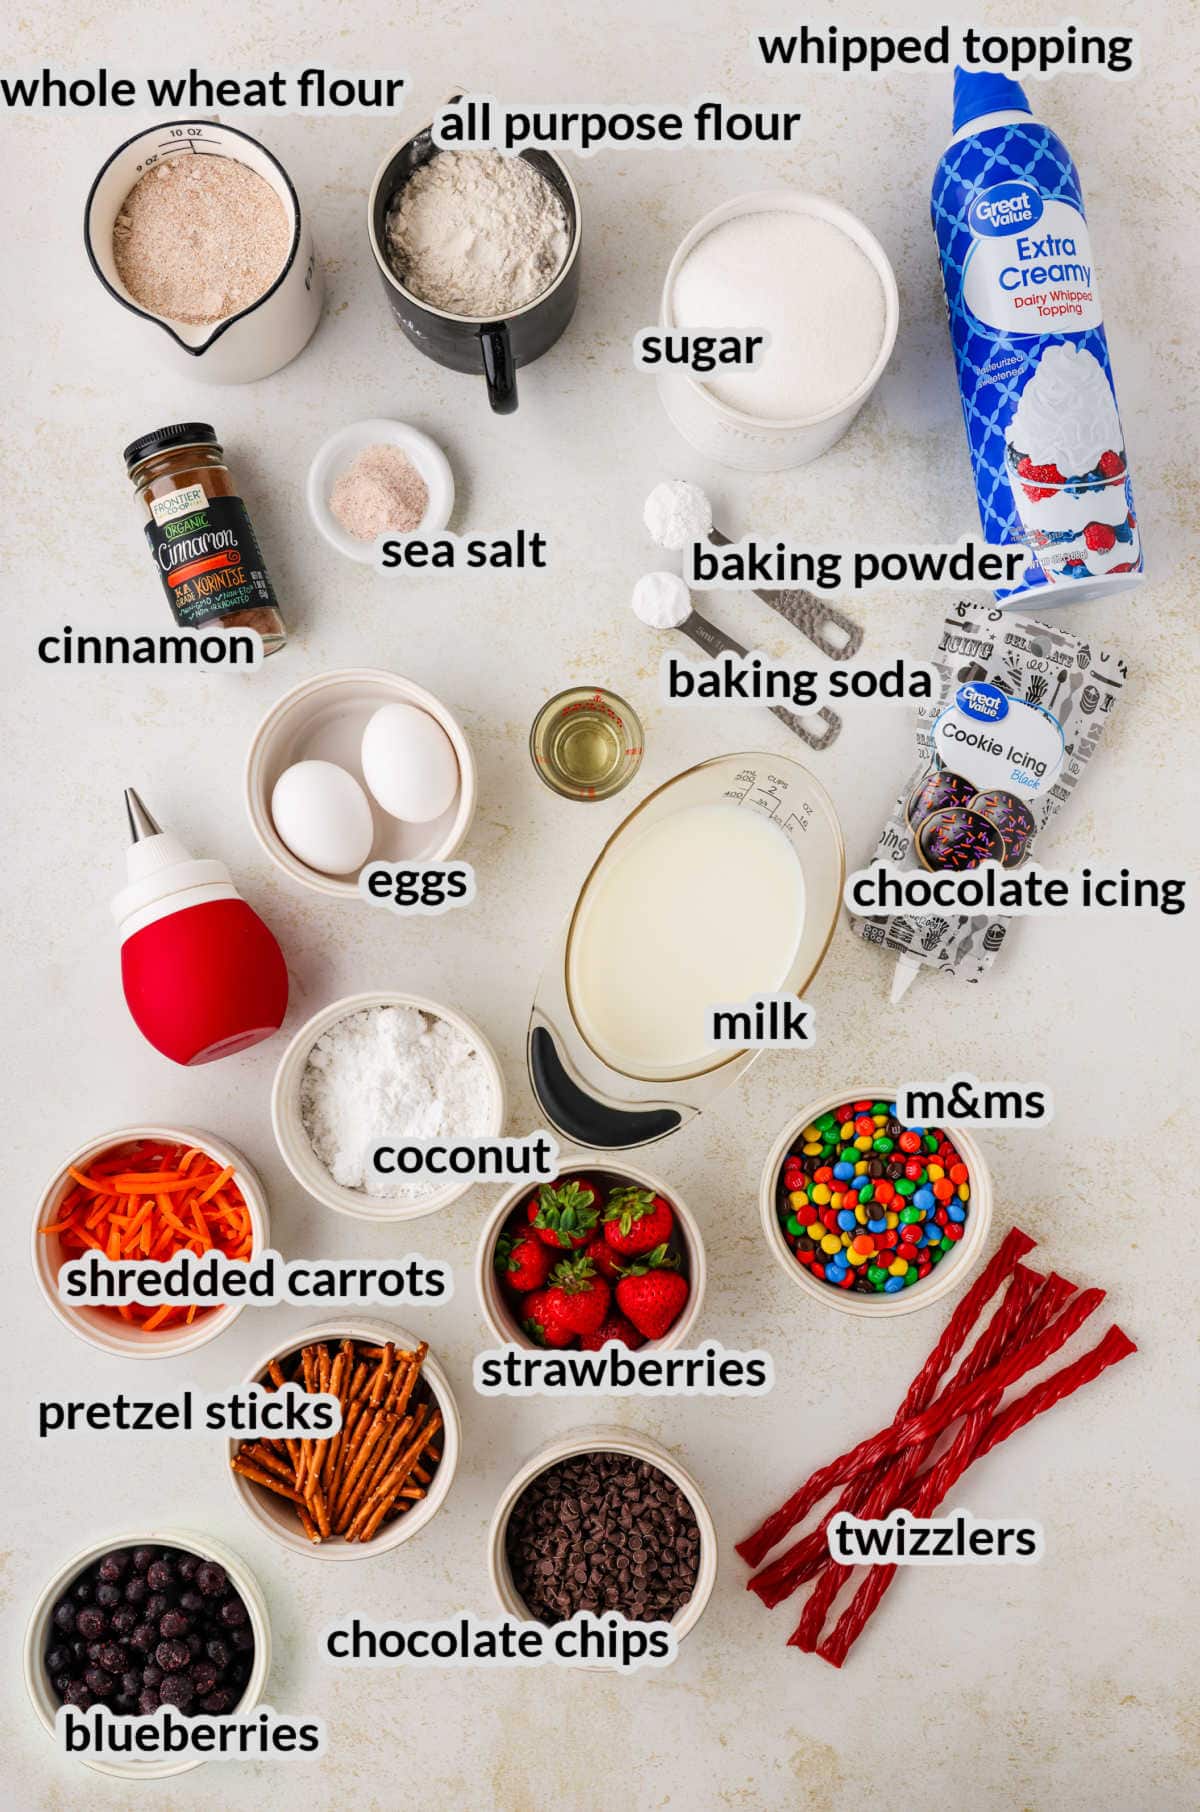
- Whole wheat flour – I like to use both whole wheat flour and all purpose flour for a more hearty texture in my snowman pancakes.
- All purpose flour – Did you know that you can make a homemade pancake mixture with the all purpose flour in your pantry? Now you do!
- Sugar – Sweeten the batter with a little bit of sugar! Don’t use too much though, gotta leave some space for that warm maple syrup.
- Ground cinnamon – Add a little bit of cinnamon to the pancake batter for a cozy, warming flavor.
- Baking powder – Baking powder is a rising agent, so use it to make your pancakes wonderfully light and fluffy.
- Baking soda – I like to use two rising agents so that my snowman pancakes are guaranteed to be as light and fluffy as possible!
- Sea salt – Use a little pinch of salt to help balance out the sweetness of your snowman pancake recipe.
- Whole milk – Bring together those dry ingredients with a bit of whole milk. You can also use a dairy free milk alternative if you’d like!
- Large eggs – Eggs act as a binder to combine all of the ingredients and help those snowman pancakes hold up to all the toppings.
- Vegetable oil – If you don’t have vegetable oil, you can use canola oil, olive oil, coconut oil or another cooking oil that you enjoy.
- Decorations – Use whatever decorations you want, but we like all of these to make the cutest snowman pancakes ever! Here’s what I keep on hand for decorating:
- powdered sugar
- mini chocolate chips
- fresh shredded carrots
- black cookie icing
- Twizzlers
- mini M&M’s
- pretzel sticks
- strawberries
- blueberries
- whipped cream
Supplies Needed
- Blender
- Mixing bowls
- Measuring cups and spoons
- Silicone spatula
- Whisk
- Skillet or griddle
- Frosting bulb


How to Make Snowman Pancakes
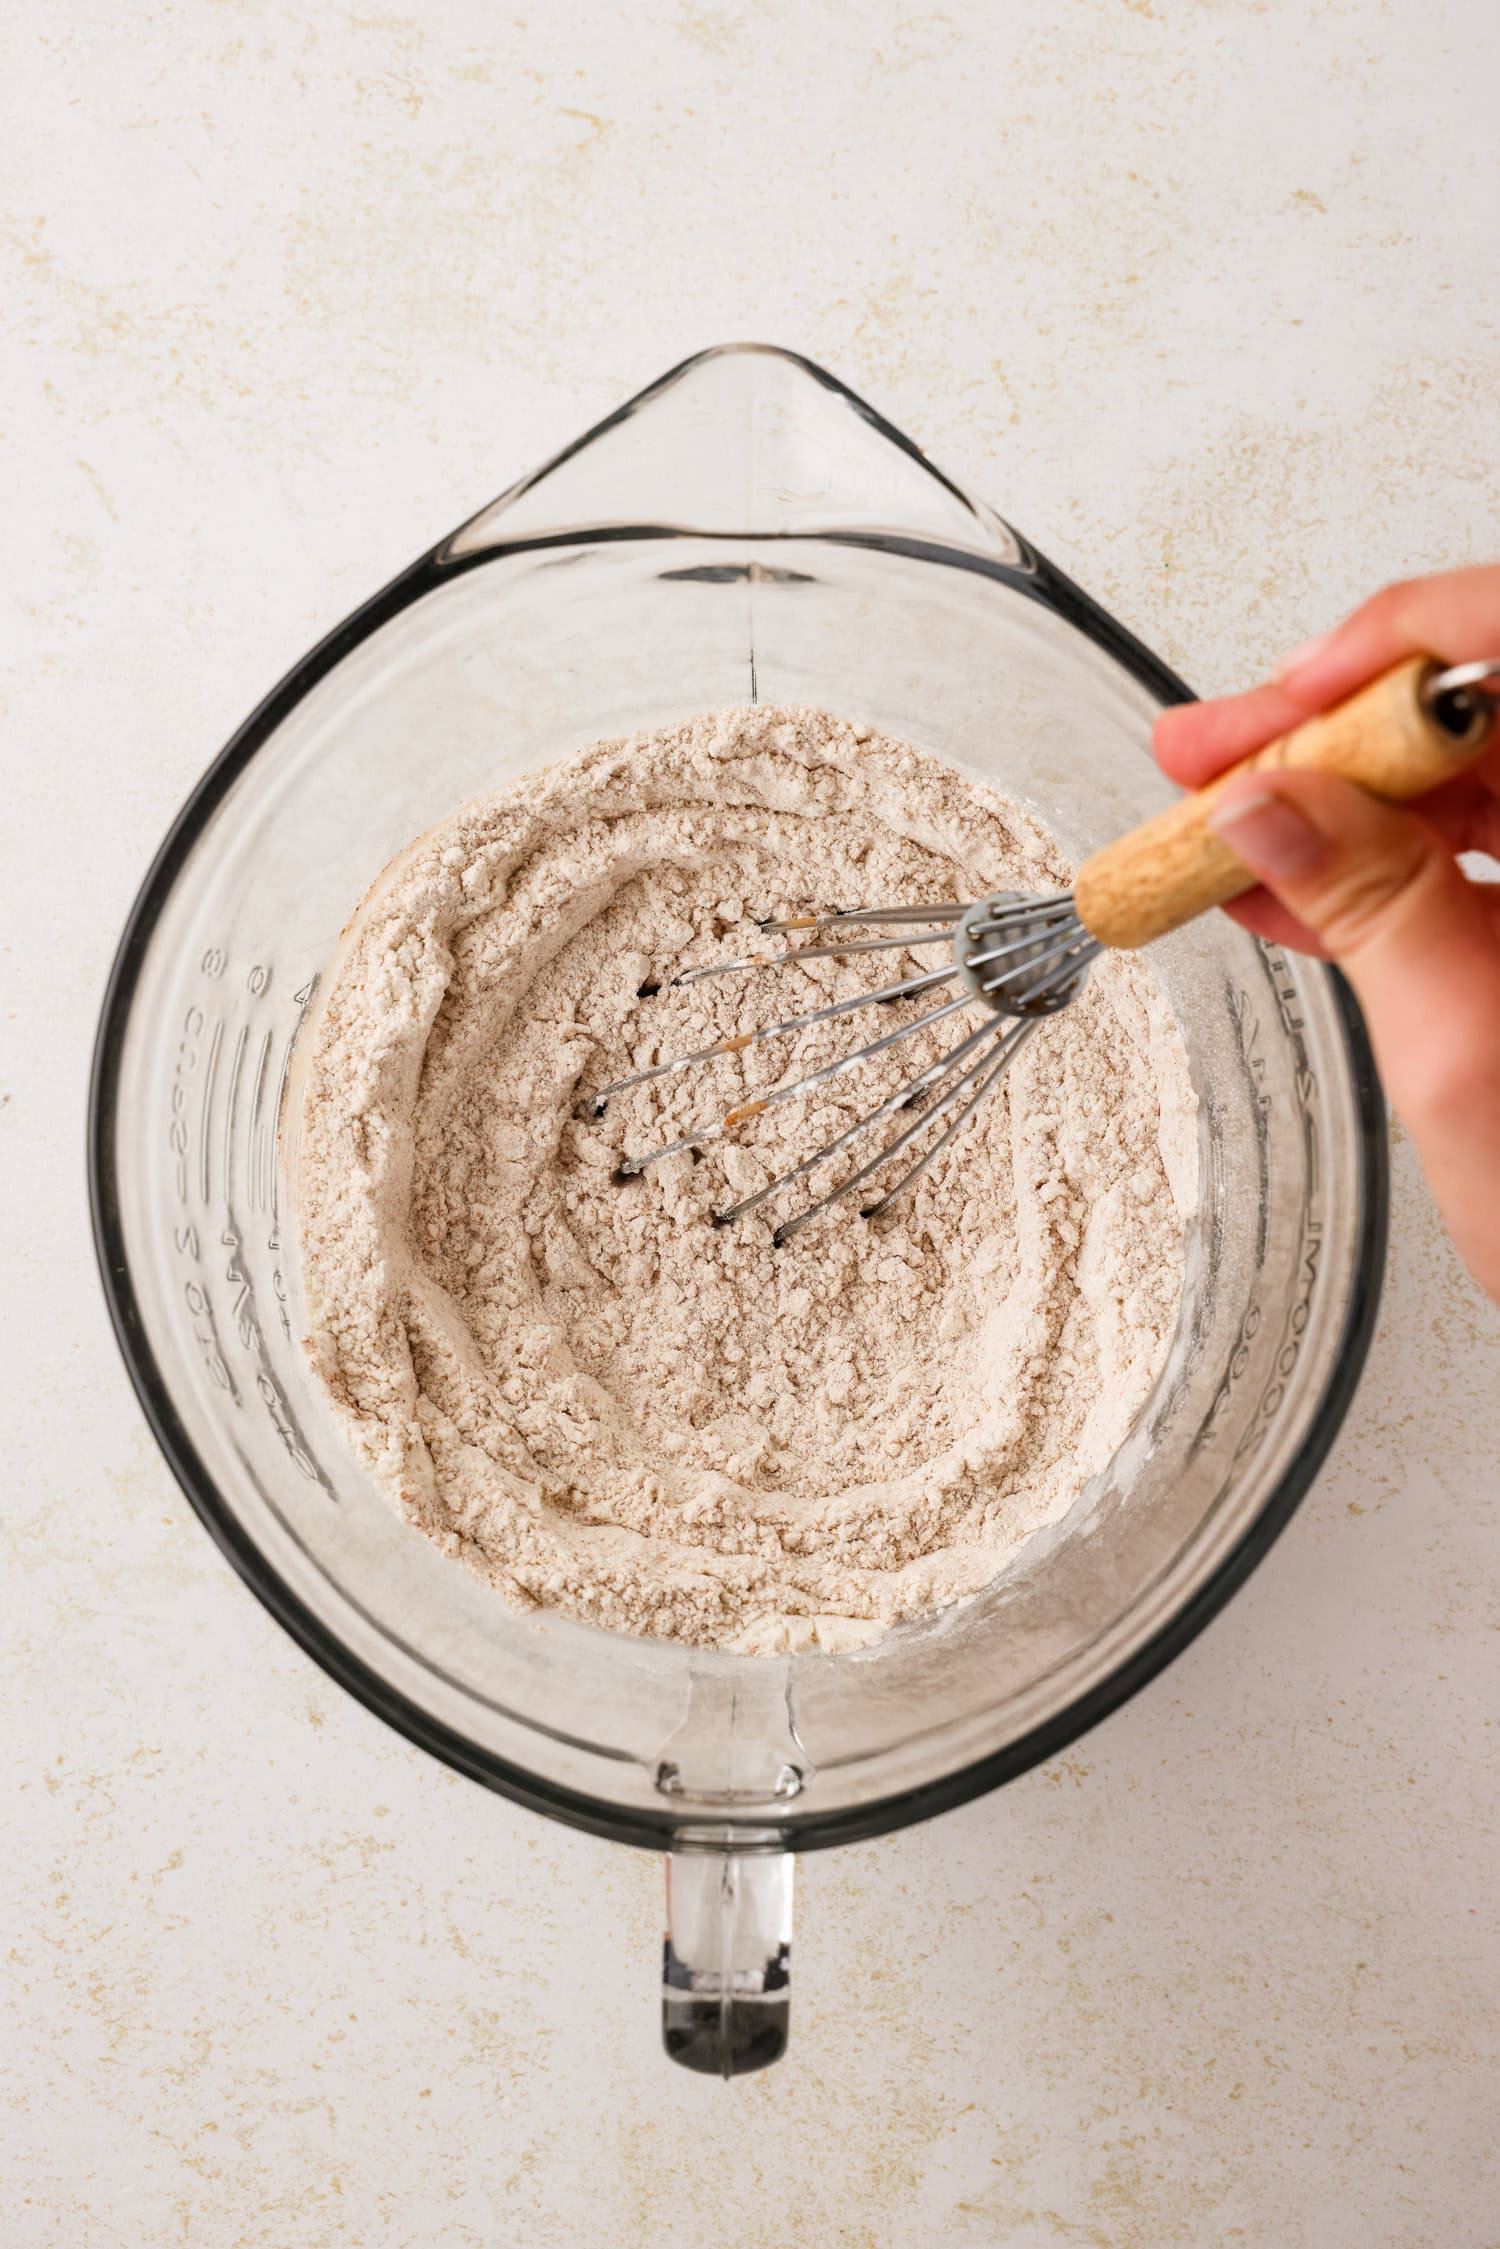
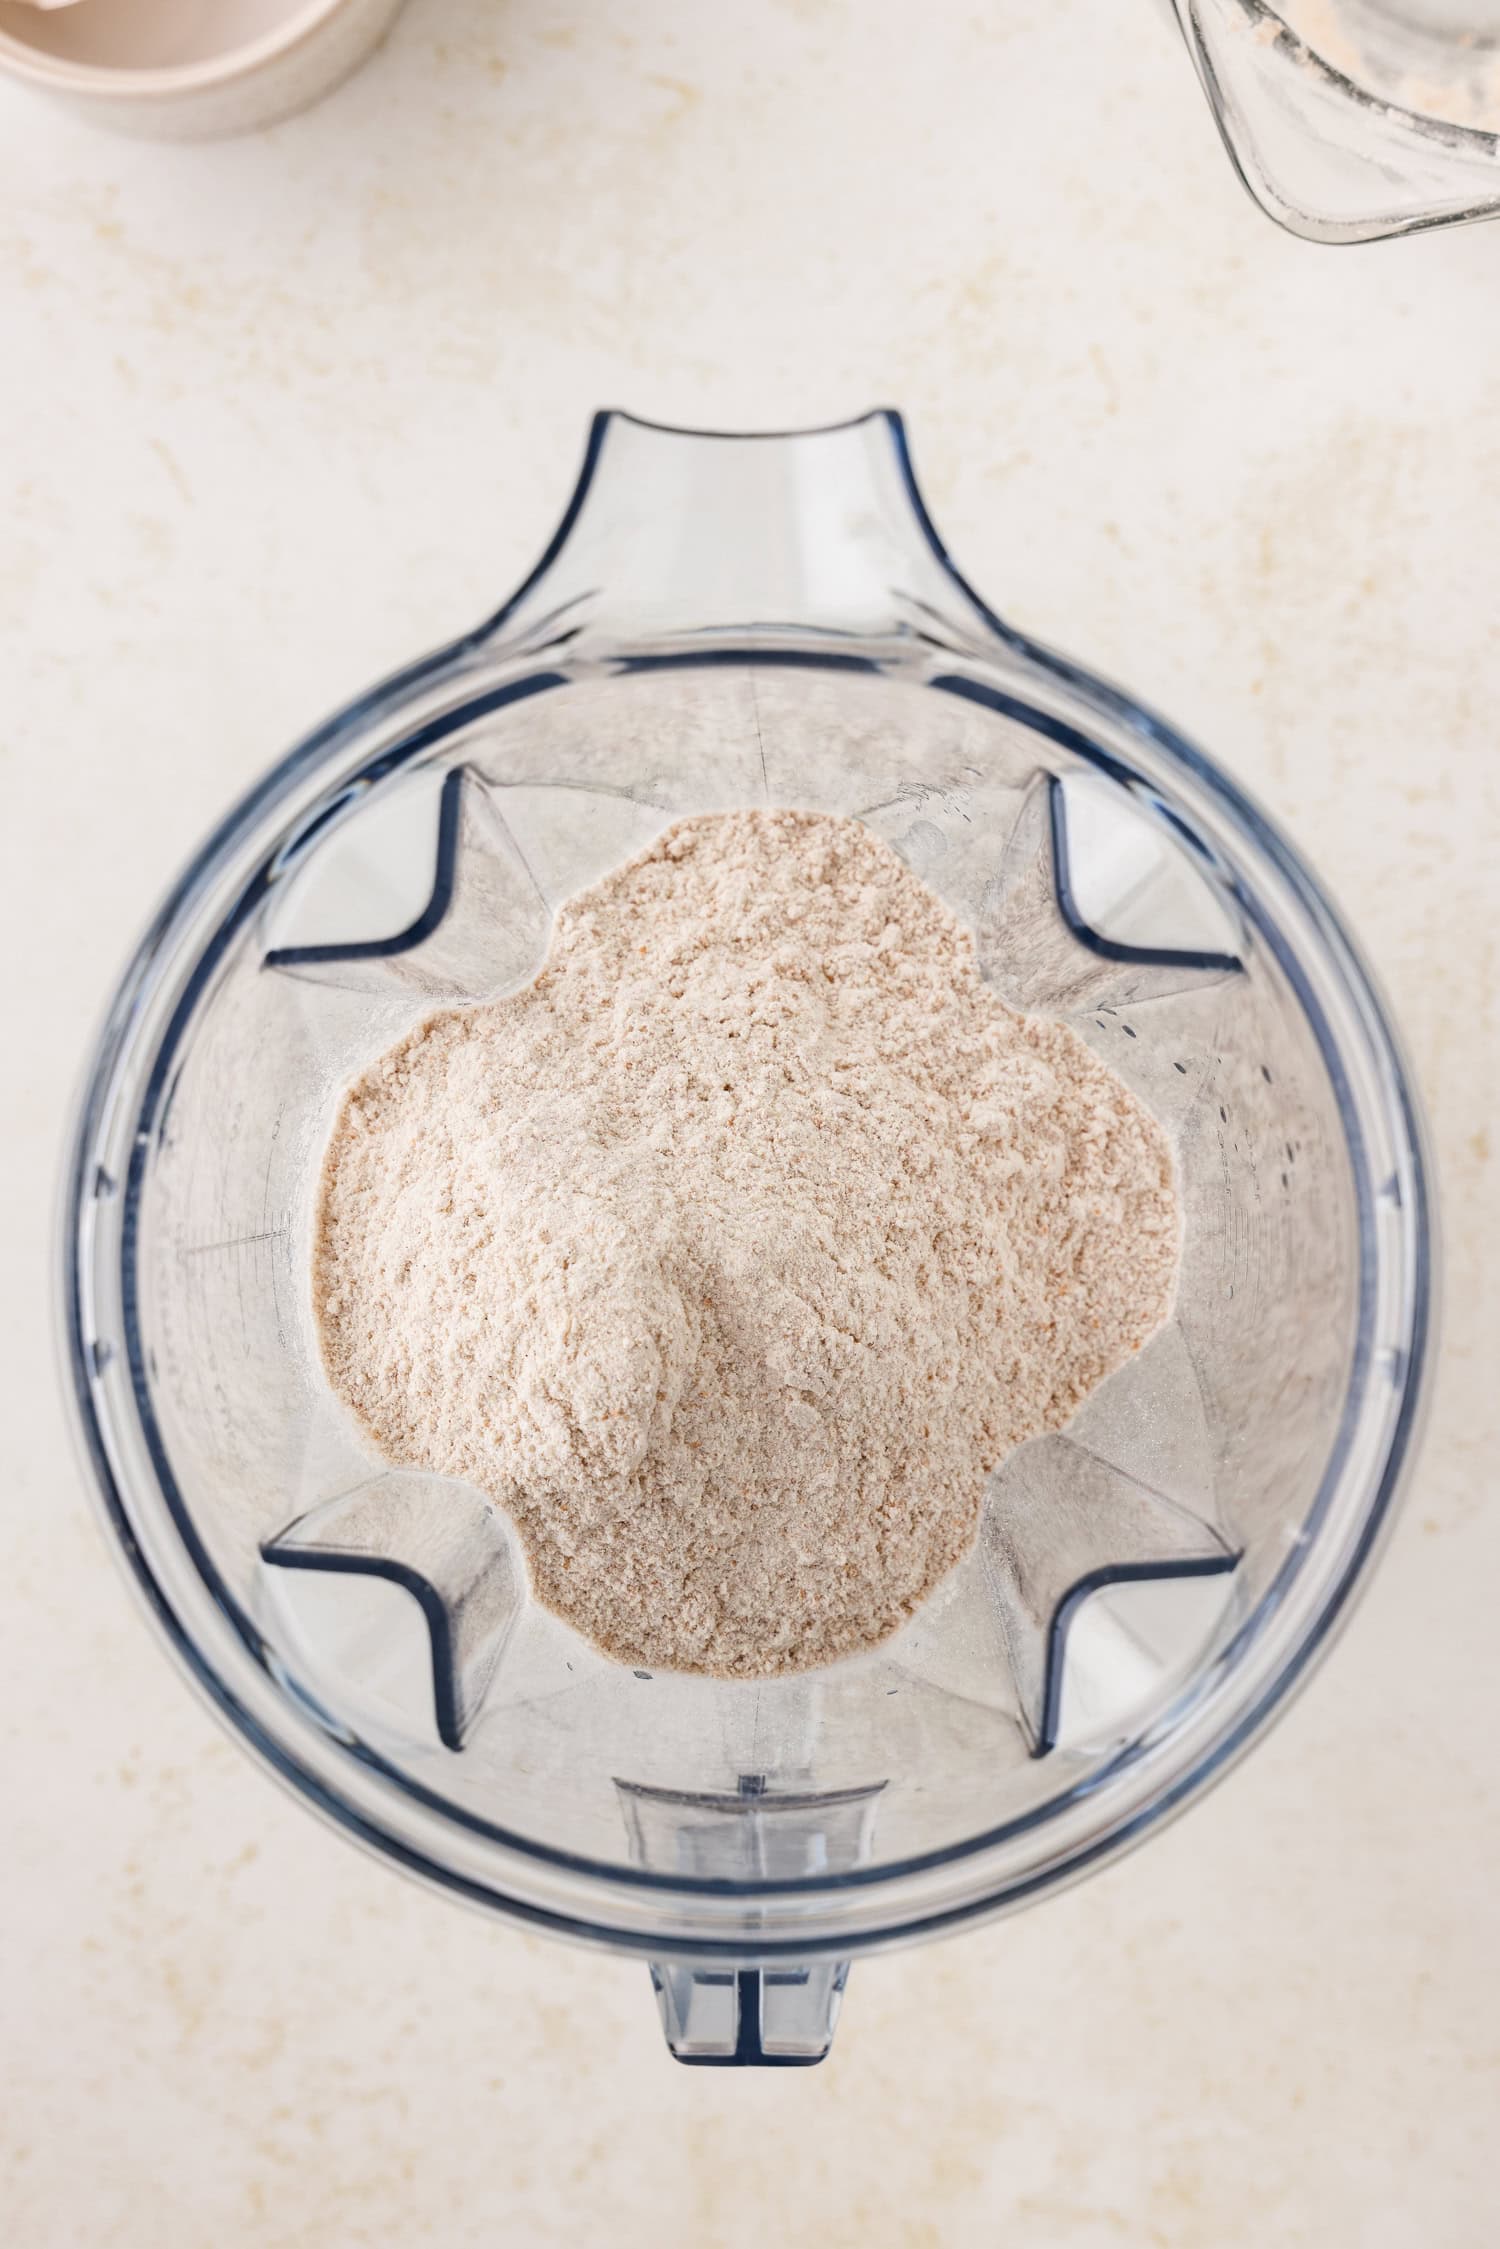
To start making these snowman pancakes, carefully measure out all of the dry pancake ingredients and pour them into a medium size bowl. Whisk well to combine, and then set aside.
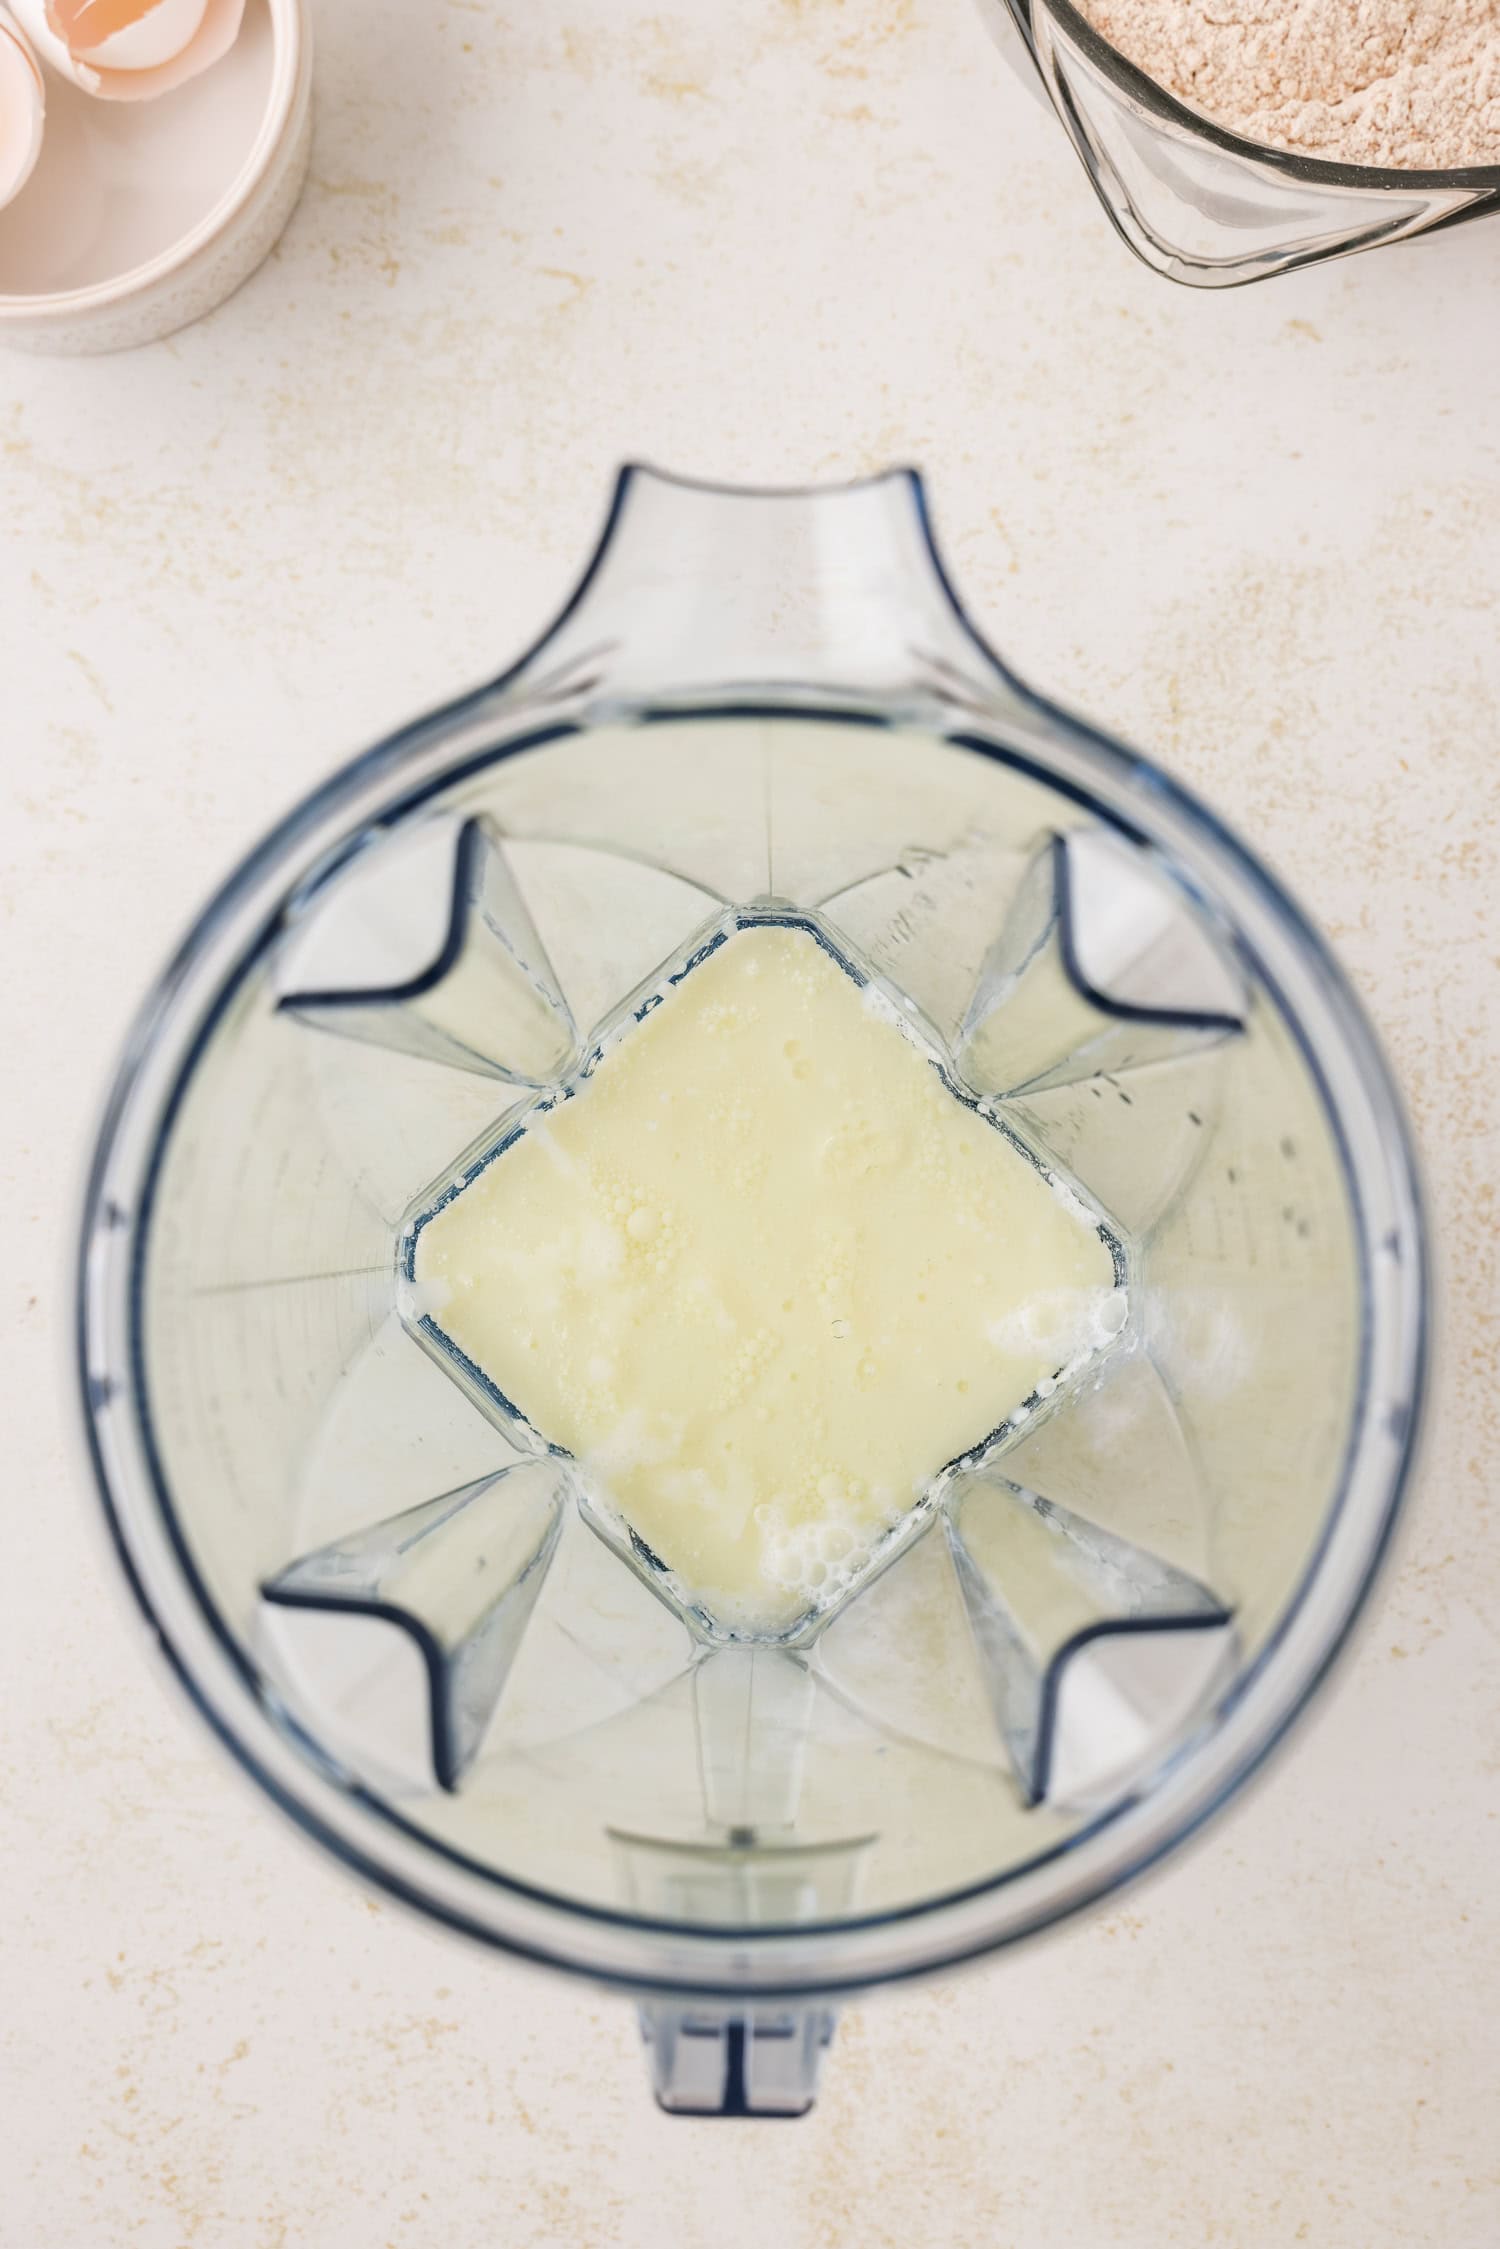
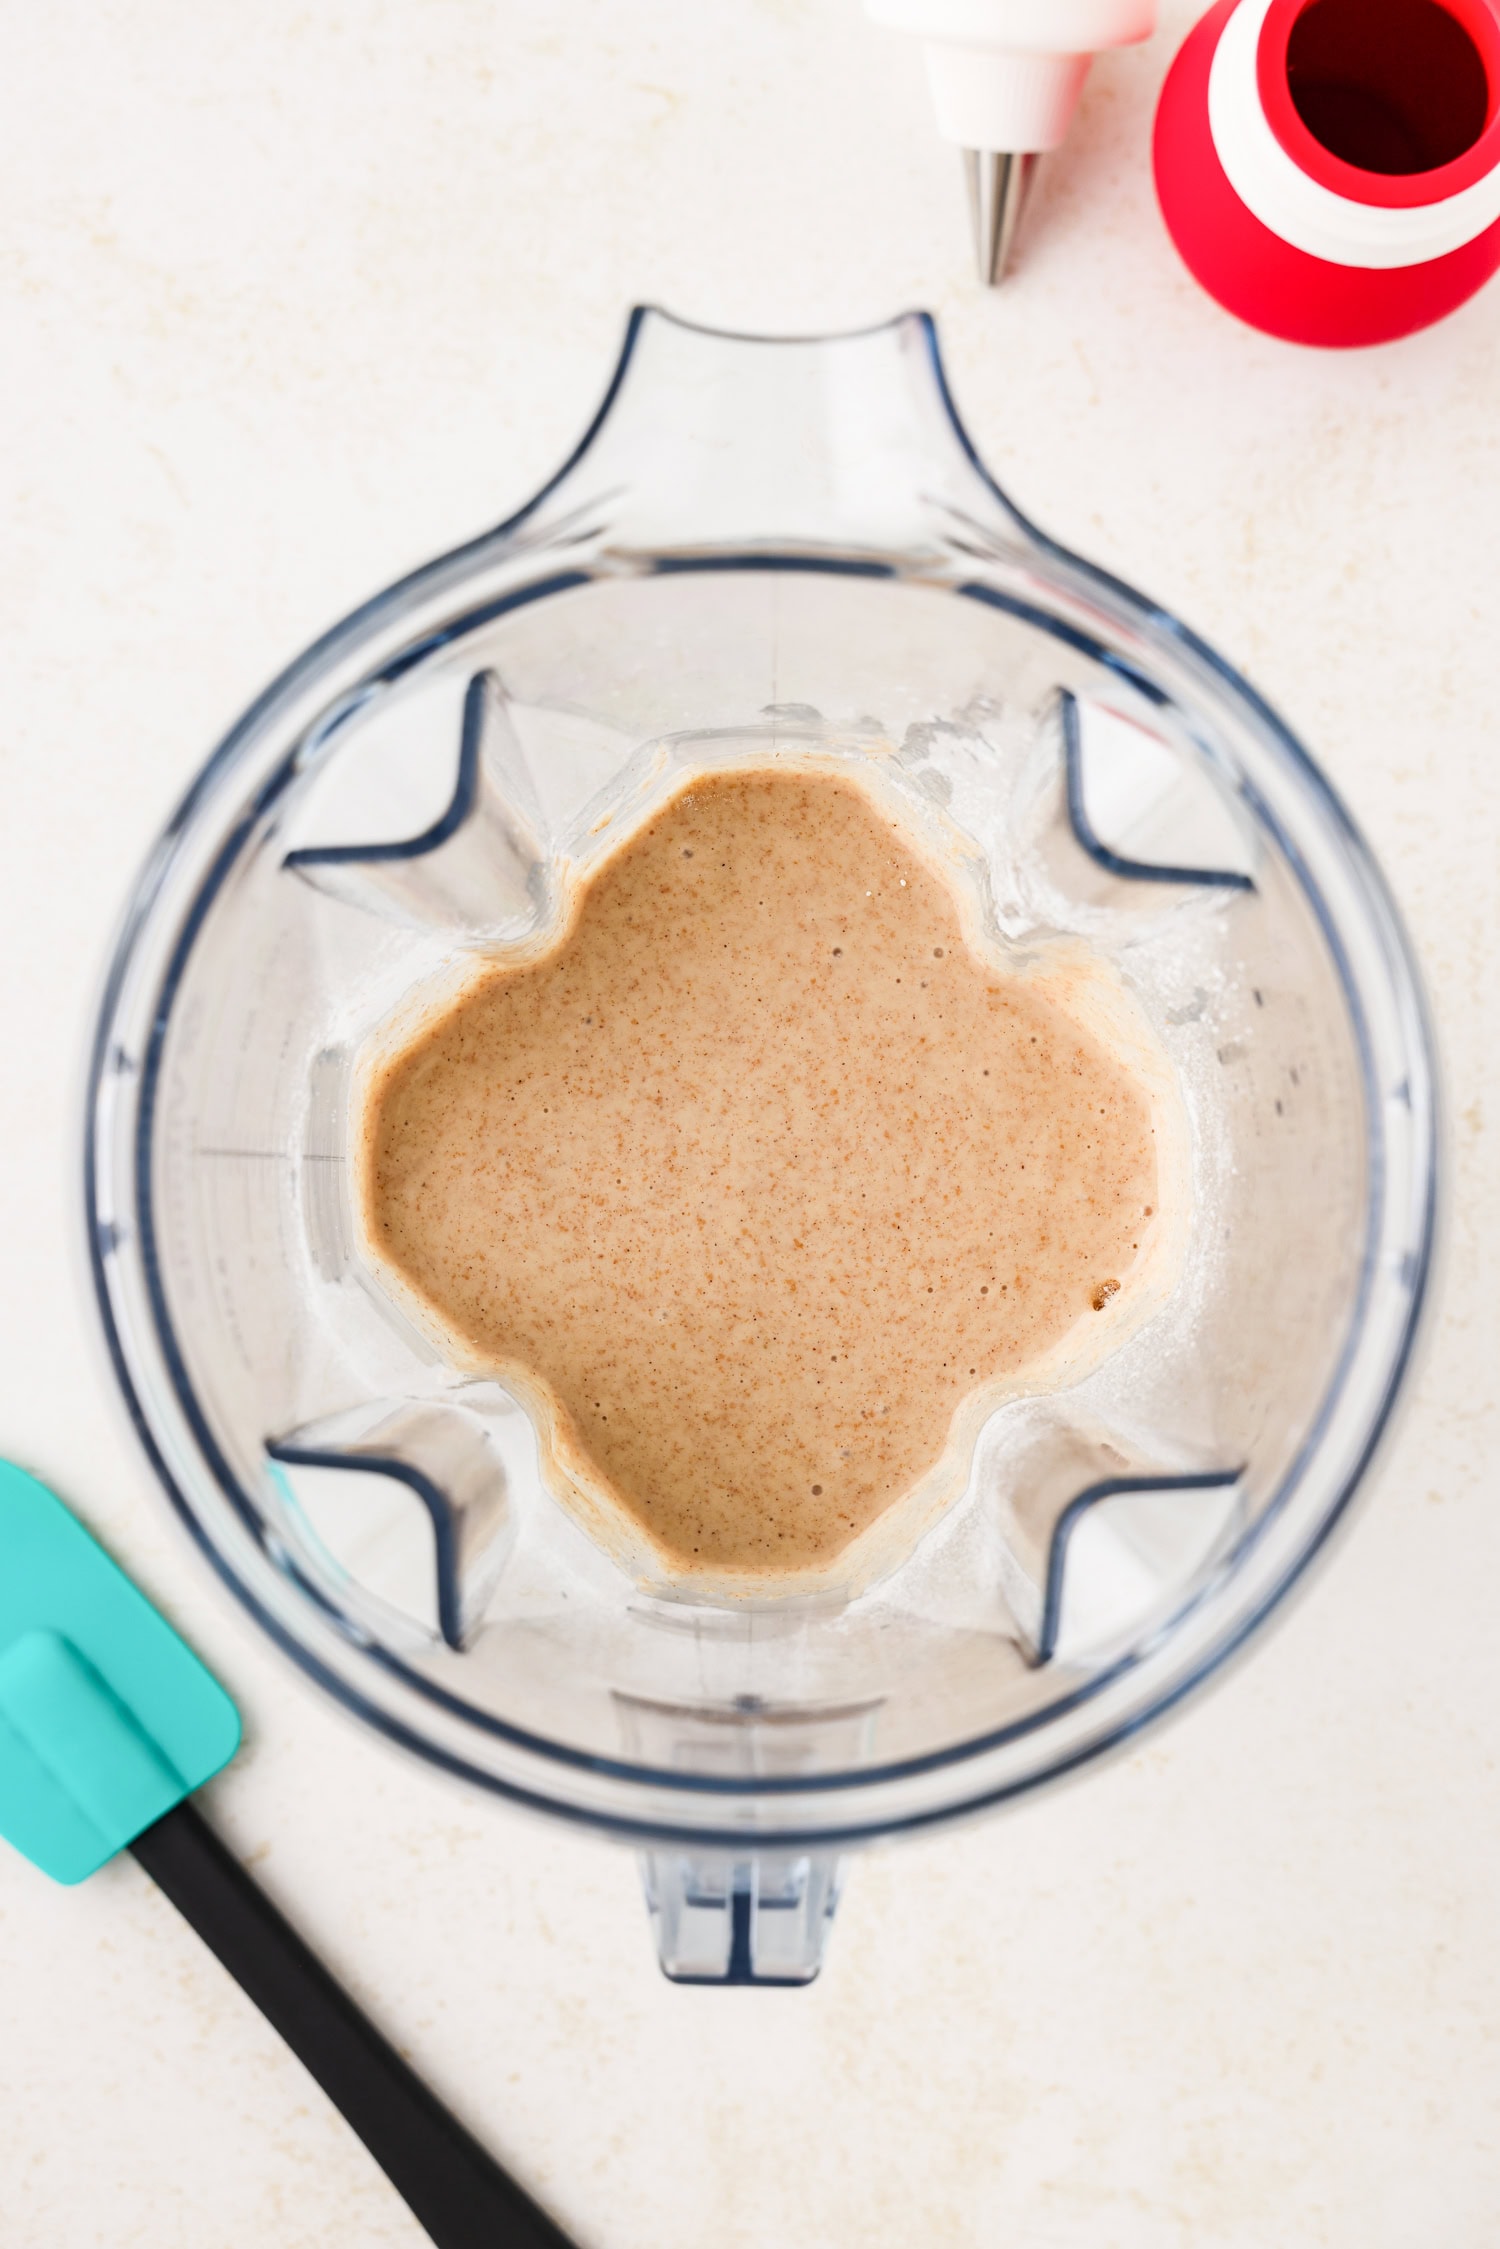
Measure all of the wet ingredients and pour them into a blender. Blend on medium speed until they are completely combined, about 20-30 seconds.
Slowly pour the dry ingredients into the blender, working in batches if needed. Blend starting on low and work your way up to high power. Blend for 20-30 seconds.
If needed, scrape down the sides of the blender with a silicone spatula and then blend again. Blend well, making sure all ingredients are fully incorporated and there are no lumps.
Place a medium size skillet on the stovetop and pour about ½ tablespoon of vegetable oil in it. Turn the burner on medium heat. On an electric stove, I recommend using setting 3. Let the skillet get nice and hot while you prep the batter in the next step.
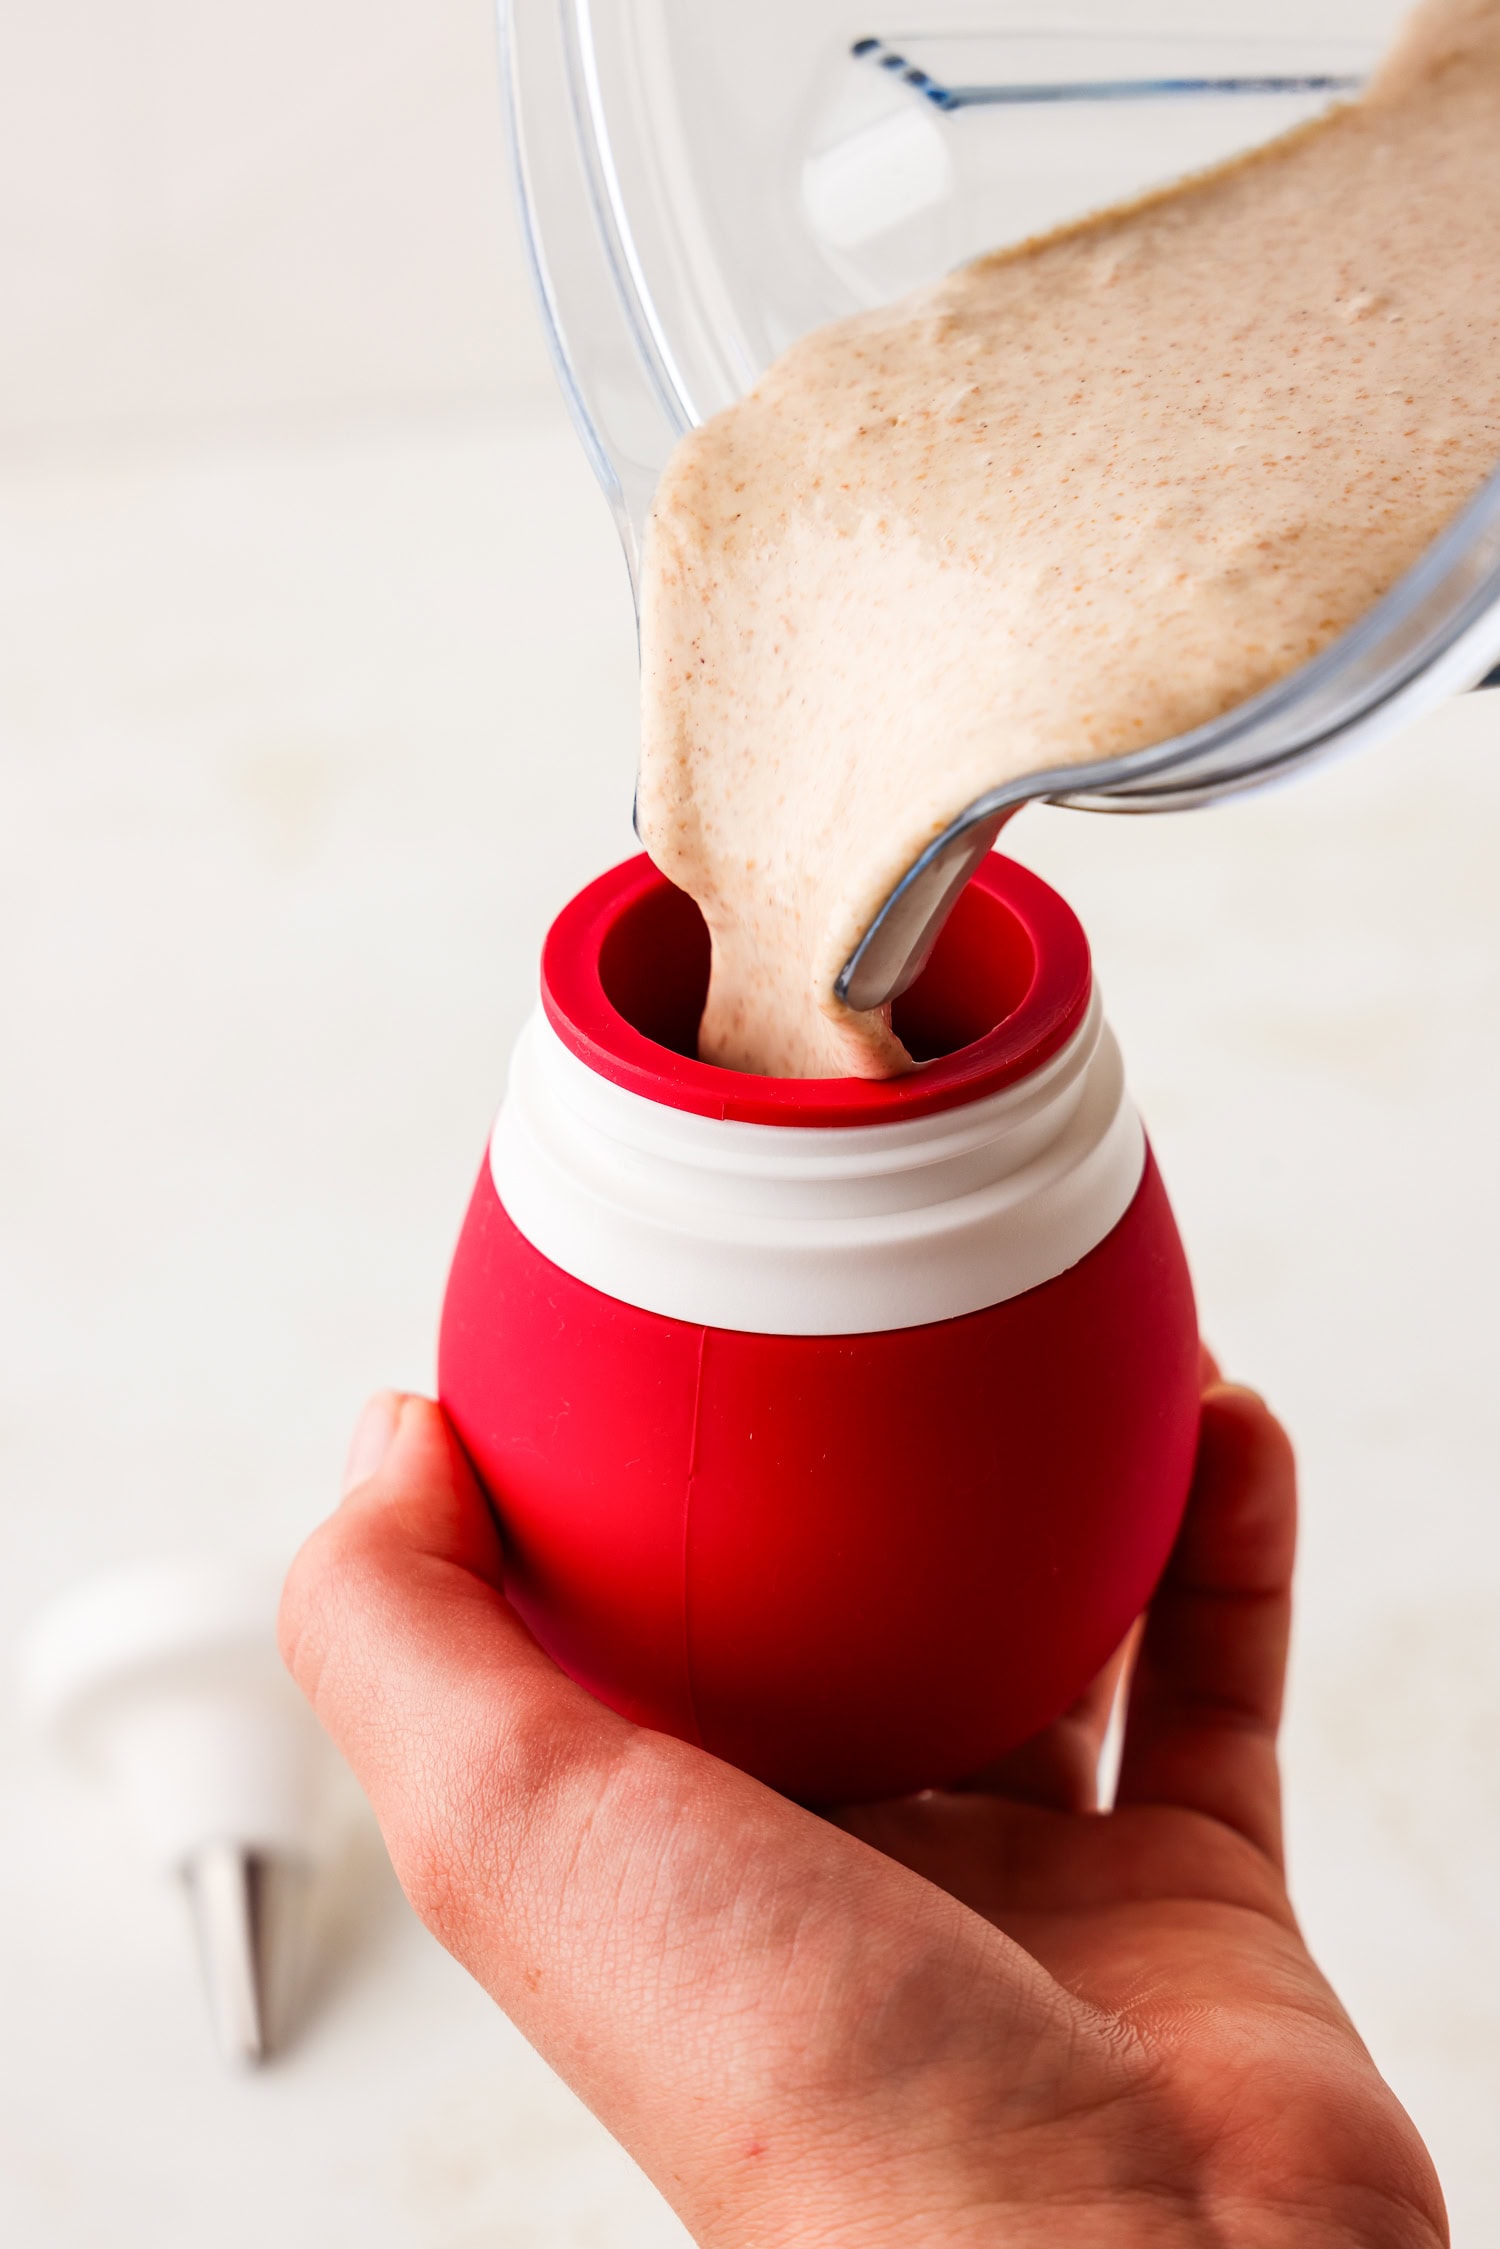
Fill your frosting bulb with the pancake batter and place the round frosting tip on the bulb. This frosting bulb makes forming the snowmen so easy, and I can’t recommend this set enough! They are very convenient, and they work so much better than a traditional piping bag…especially when little hands are helping!
Once the skillet is nice and hot, use a spatula to spread the oil around to make a nice, even layer. Use the frosting bulb to squeeze in some pancake batter. The first step is to form the head of the snowman.
Starting near the top of the skillet, squeeze out enough batter to form a circle that is about 2 inches in diameter. No need to make a circle, the batter will spread out nicely!

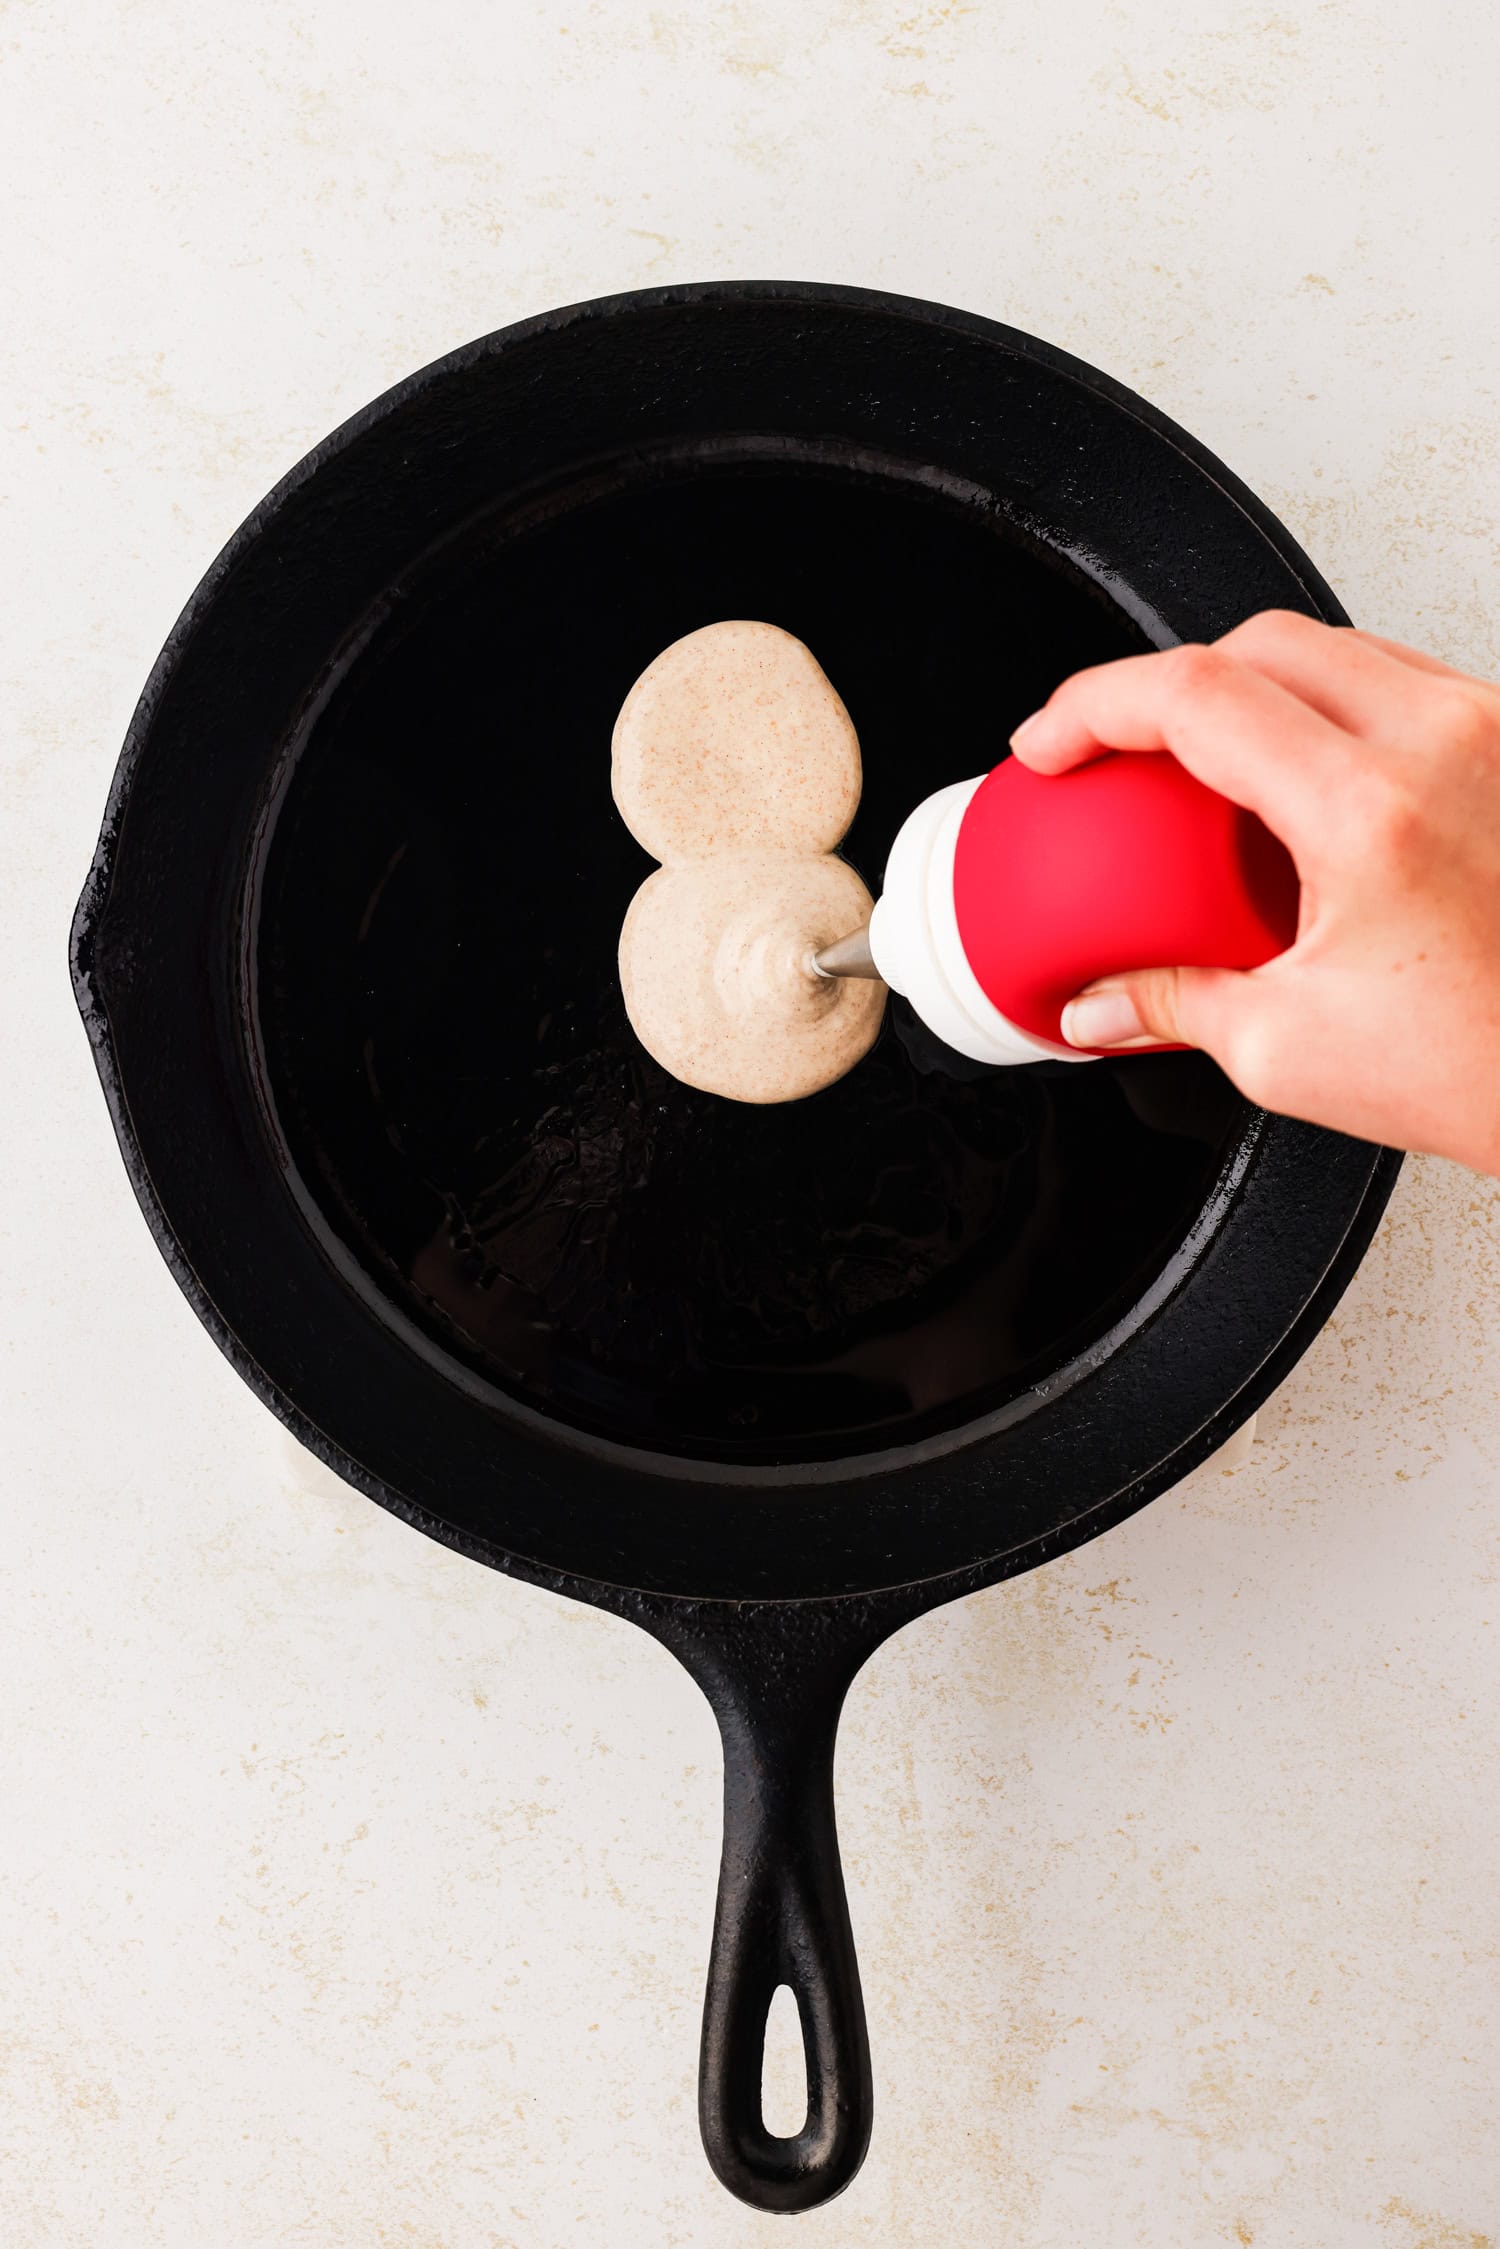
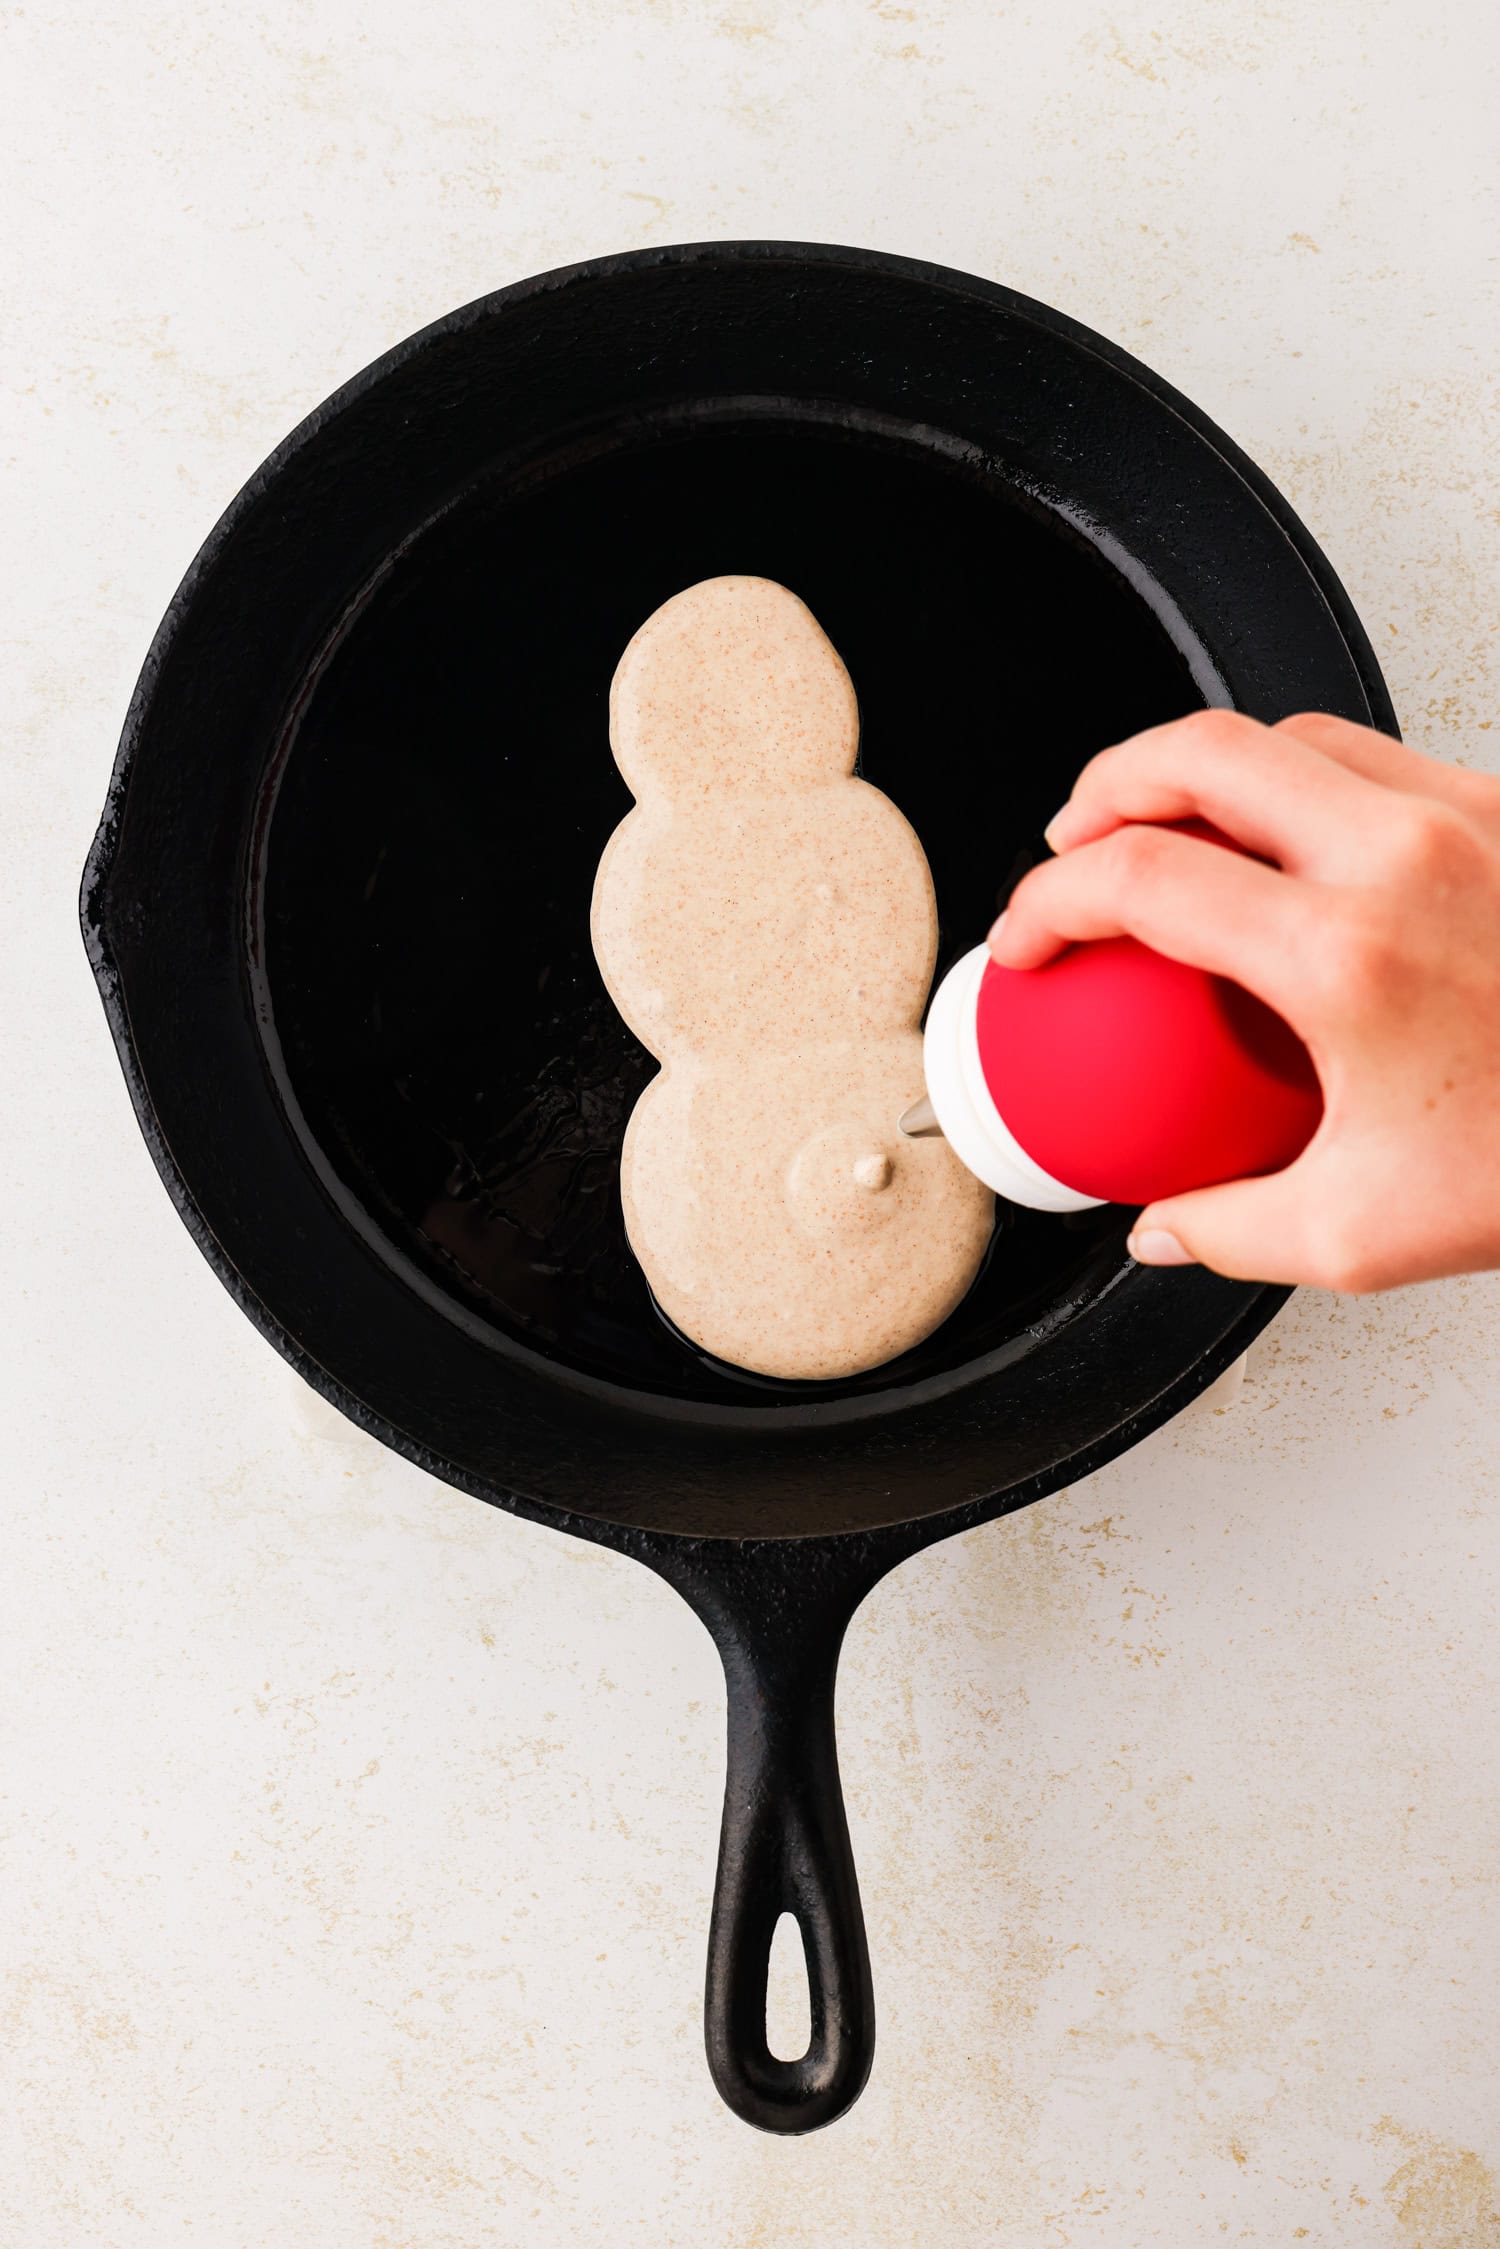

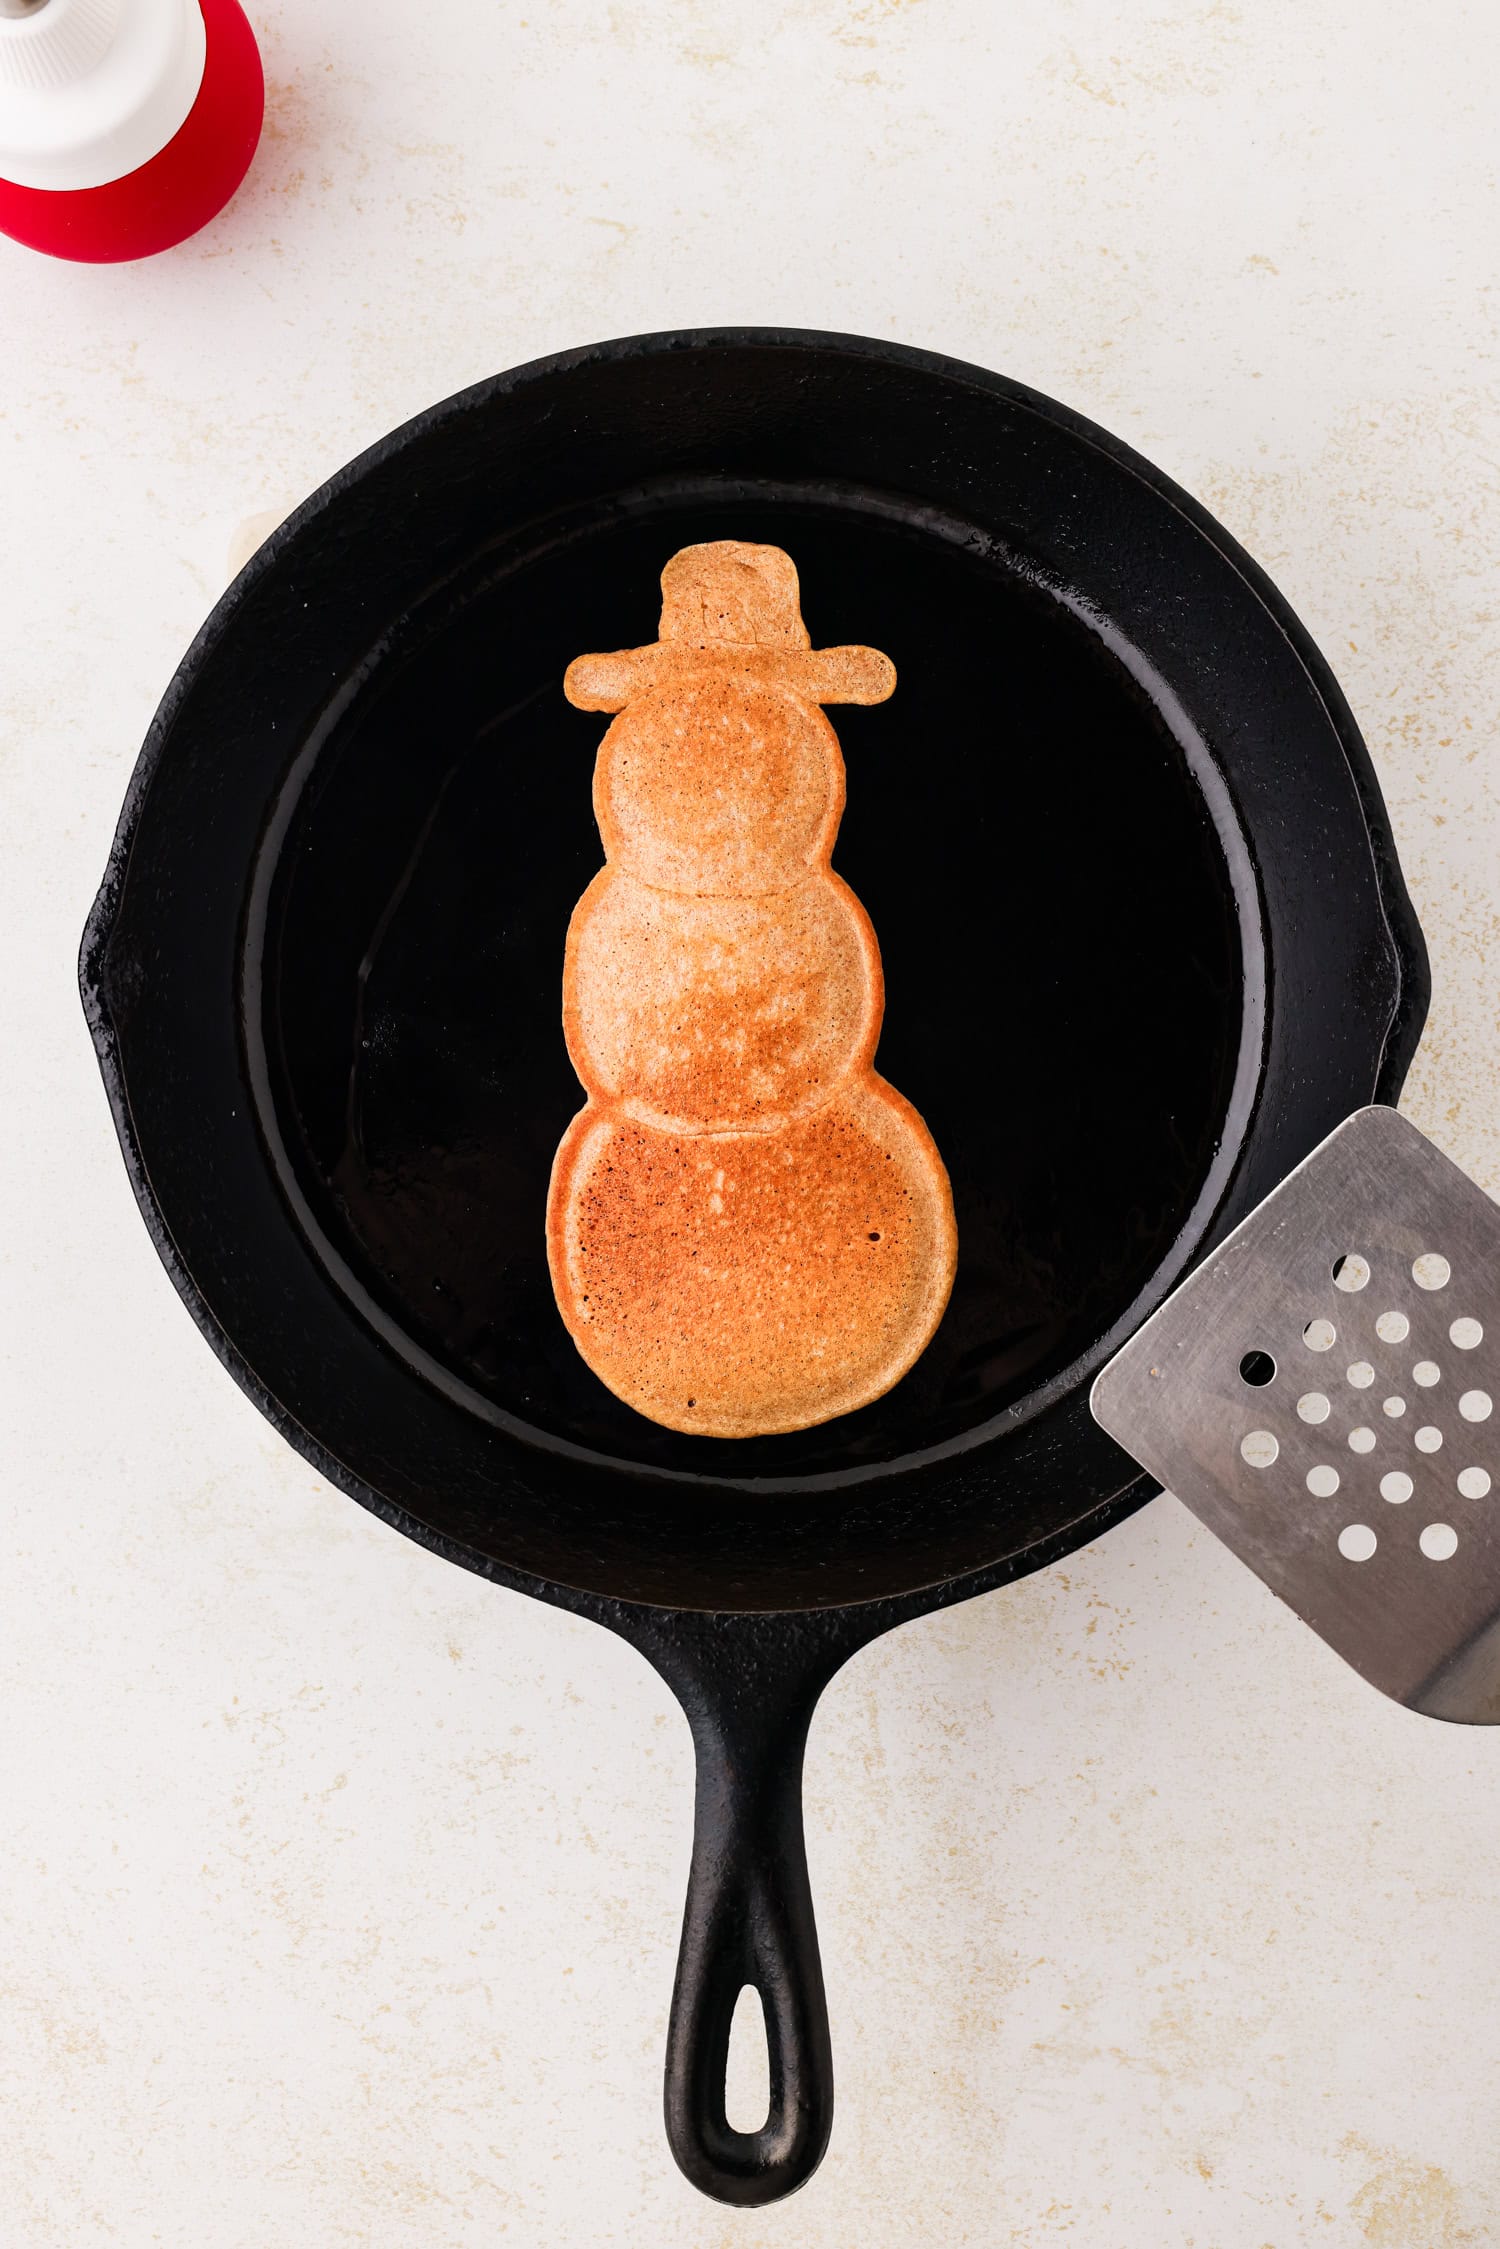
Once you form the head, move down to form the snowman’s body. Make another circle that connects to the head. Make it just slightly bigger than the head.
Right after forming the body, move down to form the third circle in the same way you formed the head and the body, making sure it is connected. Make it just a little bit bigger than the other 2 circles.
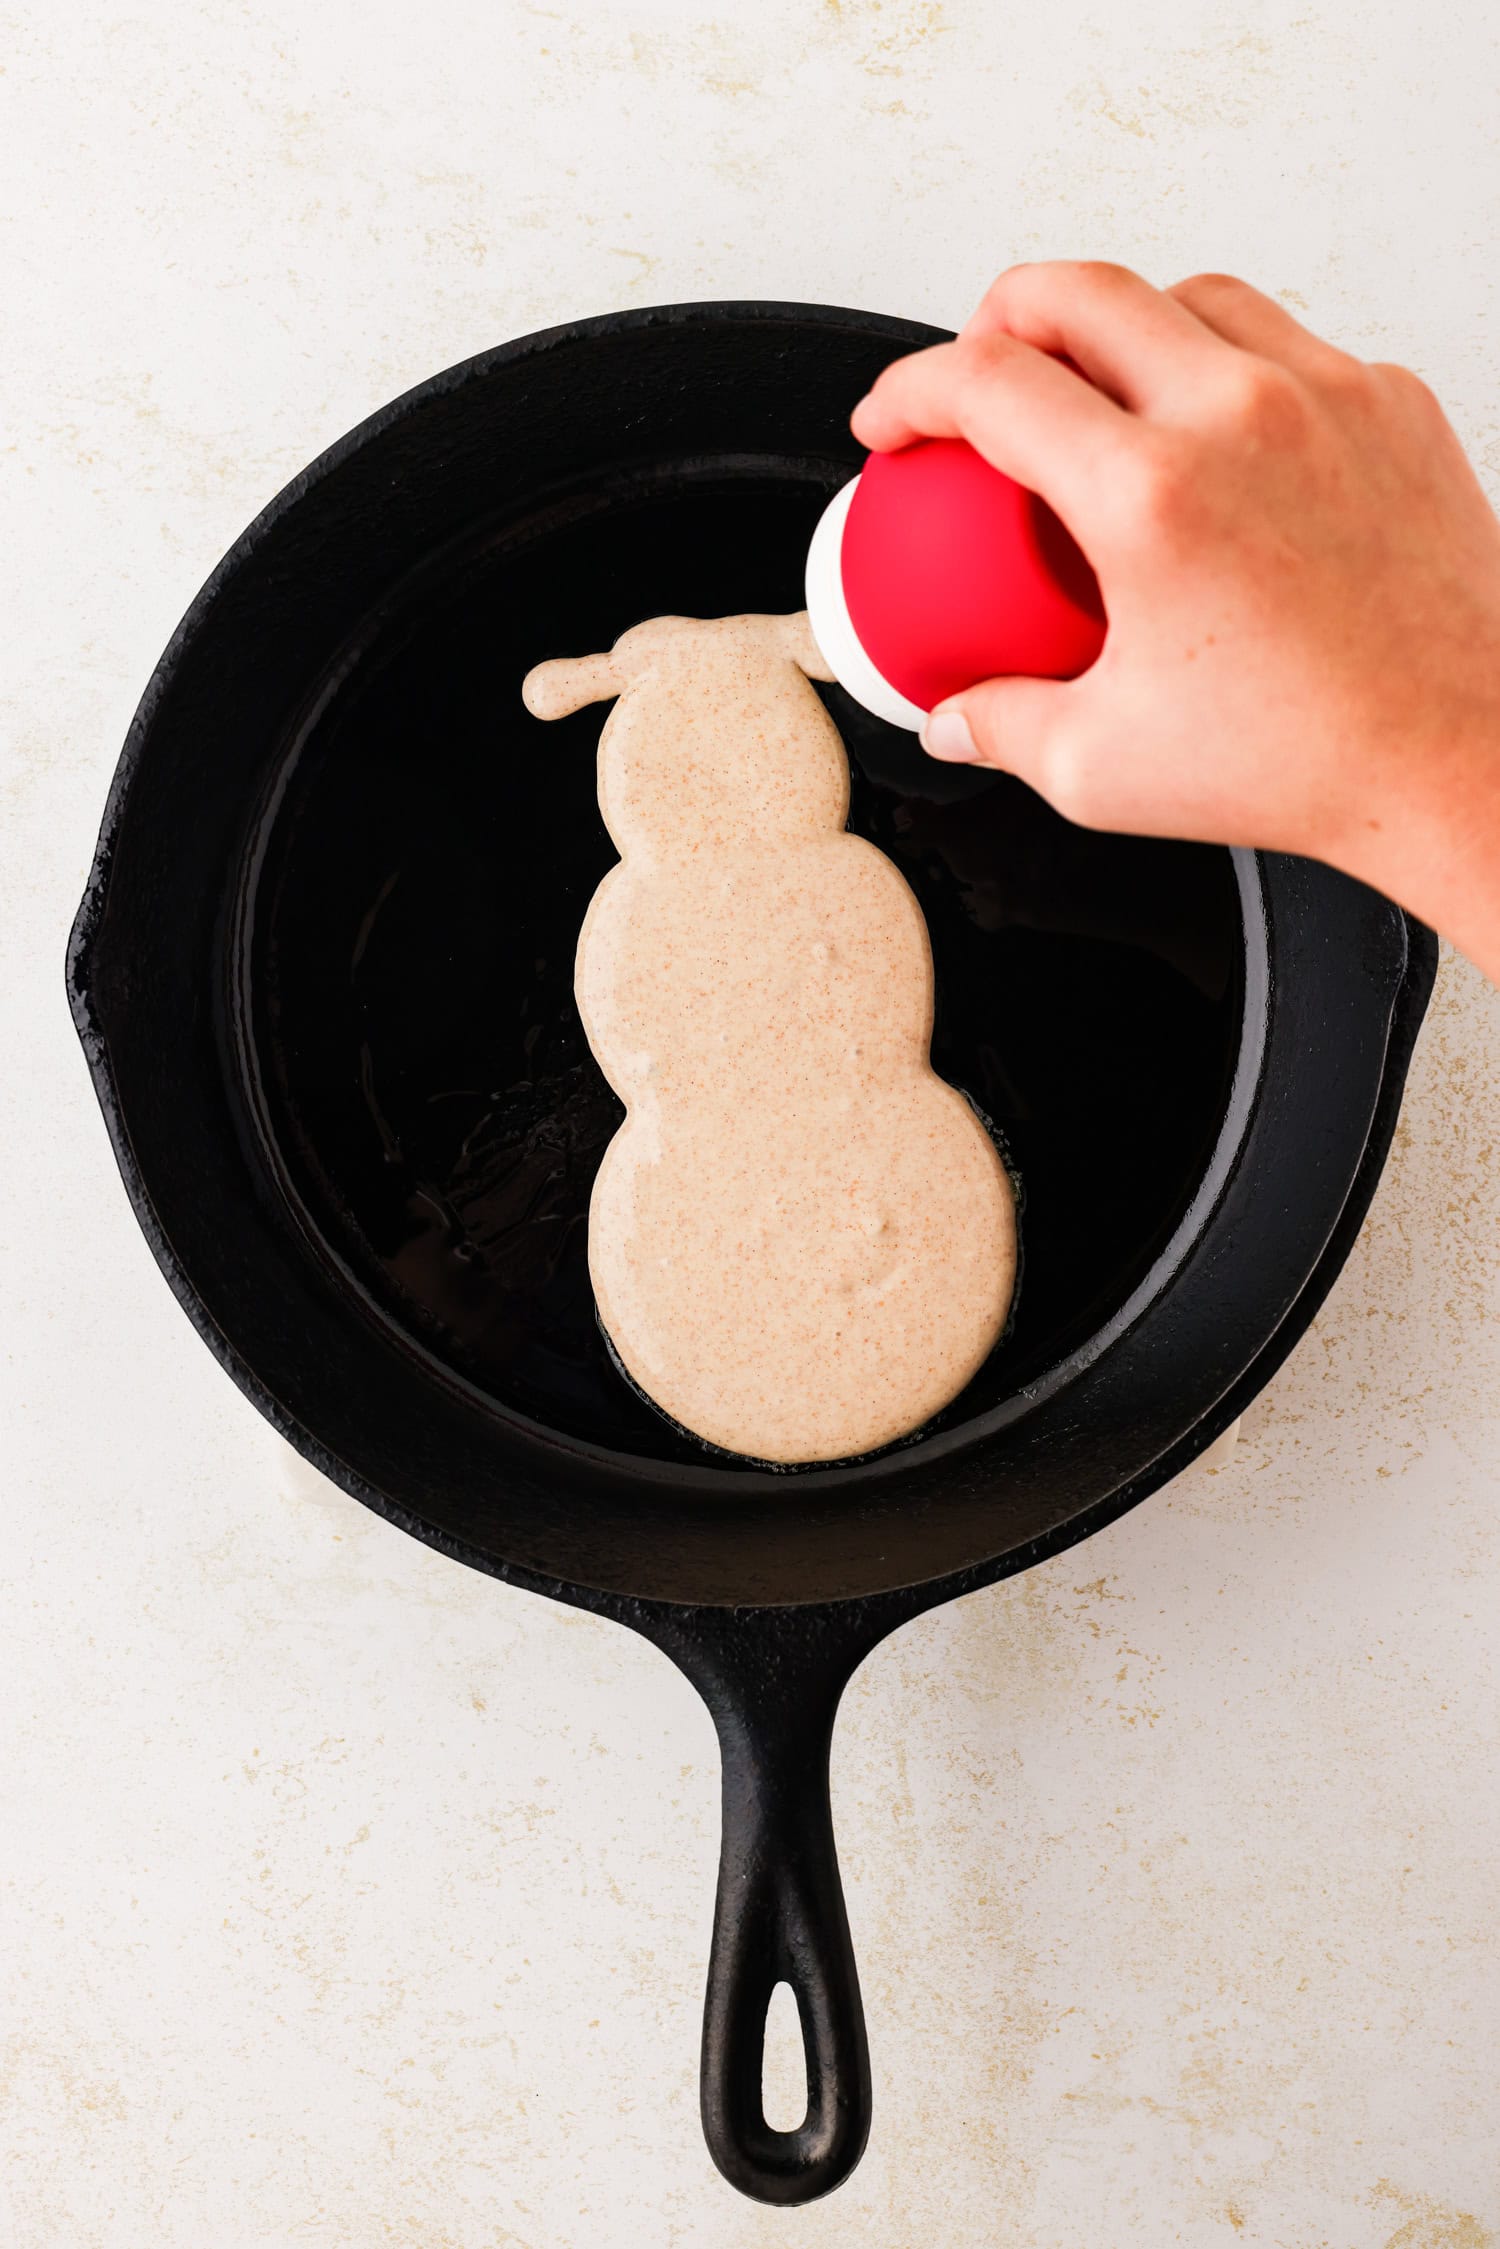
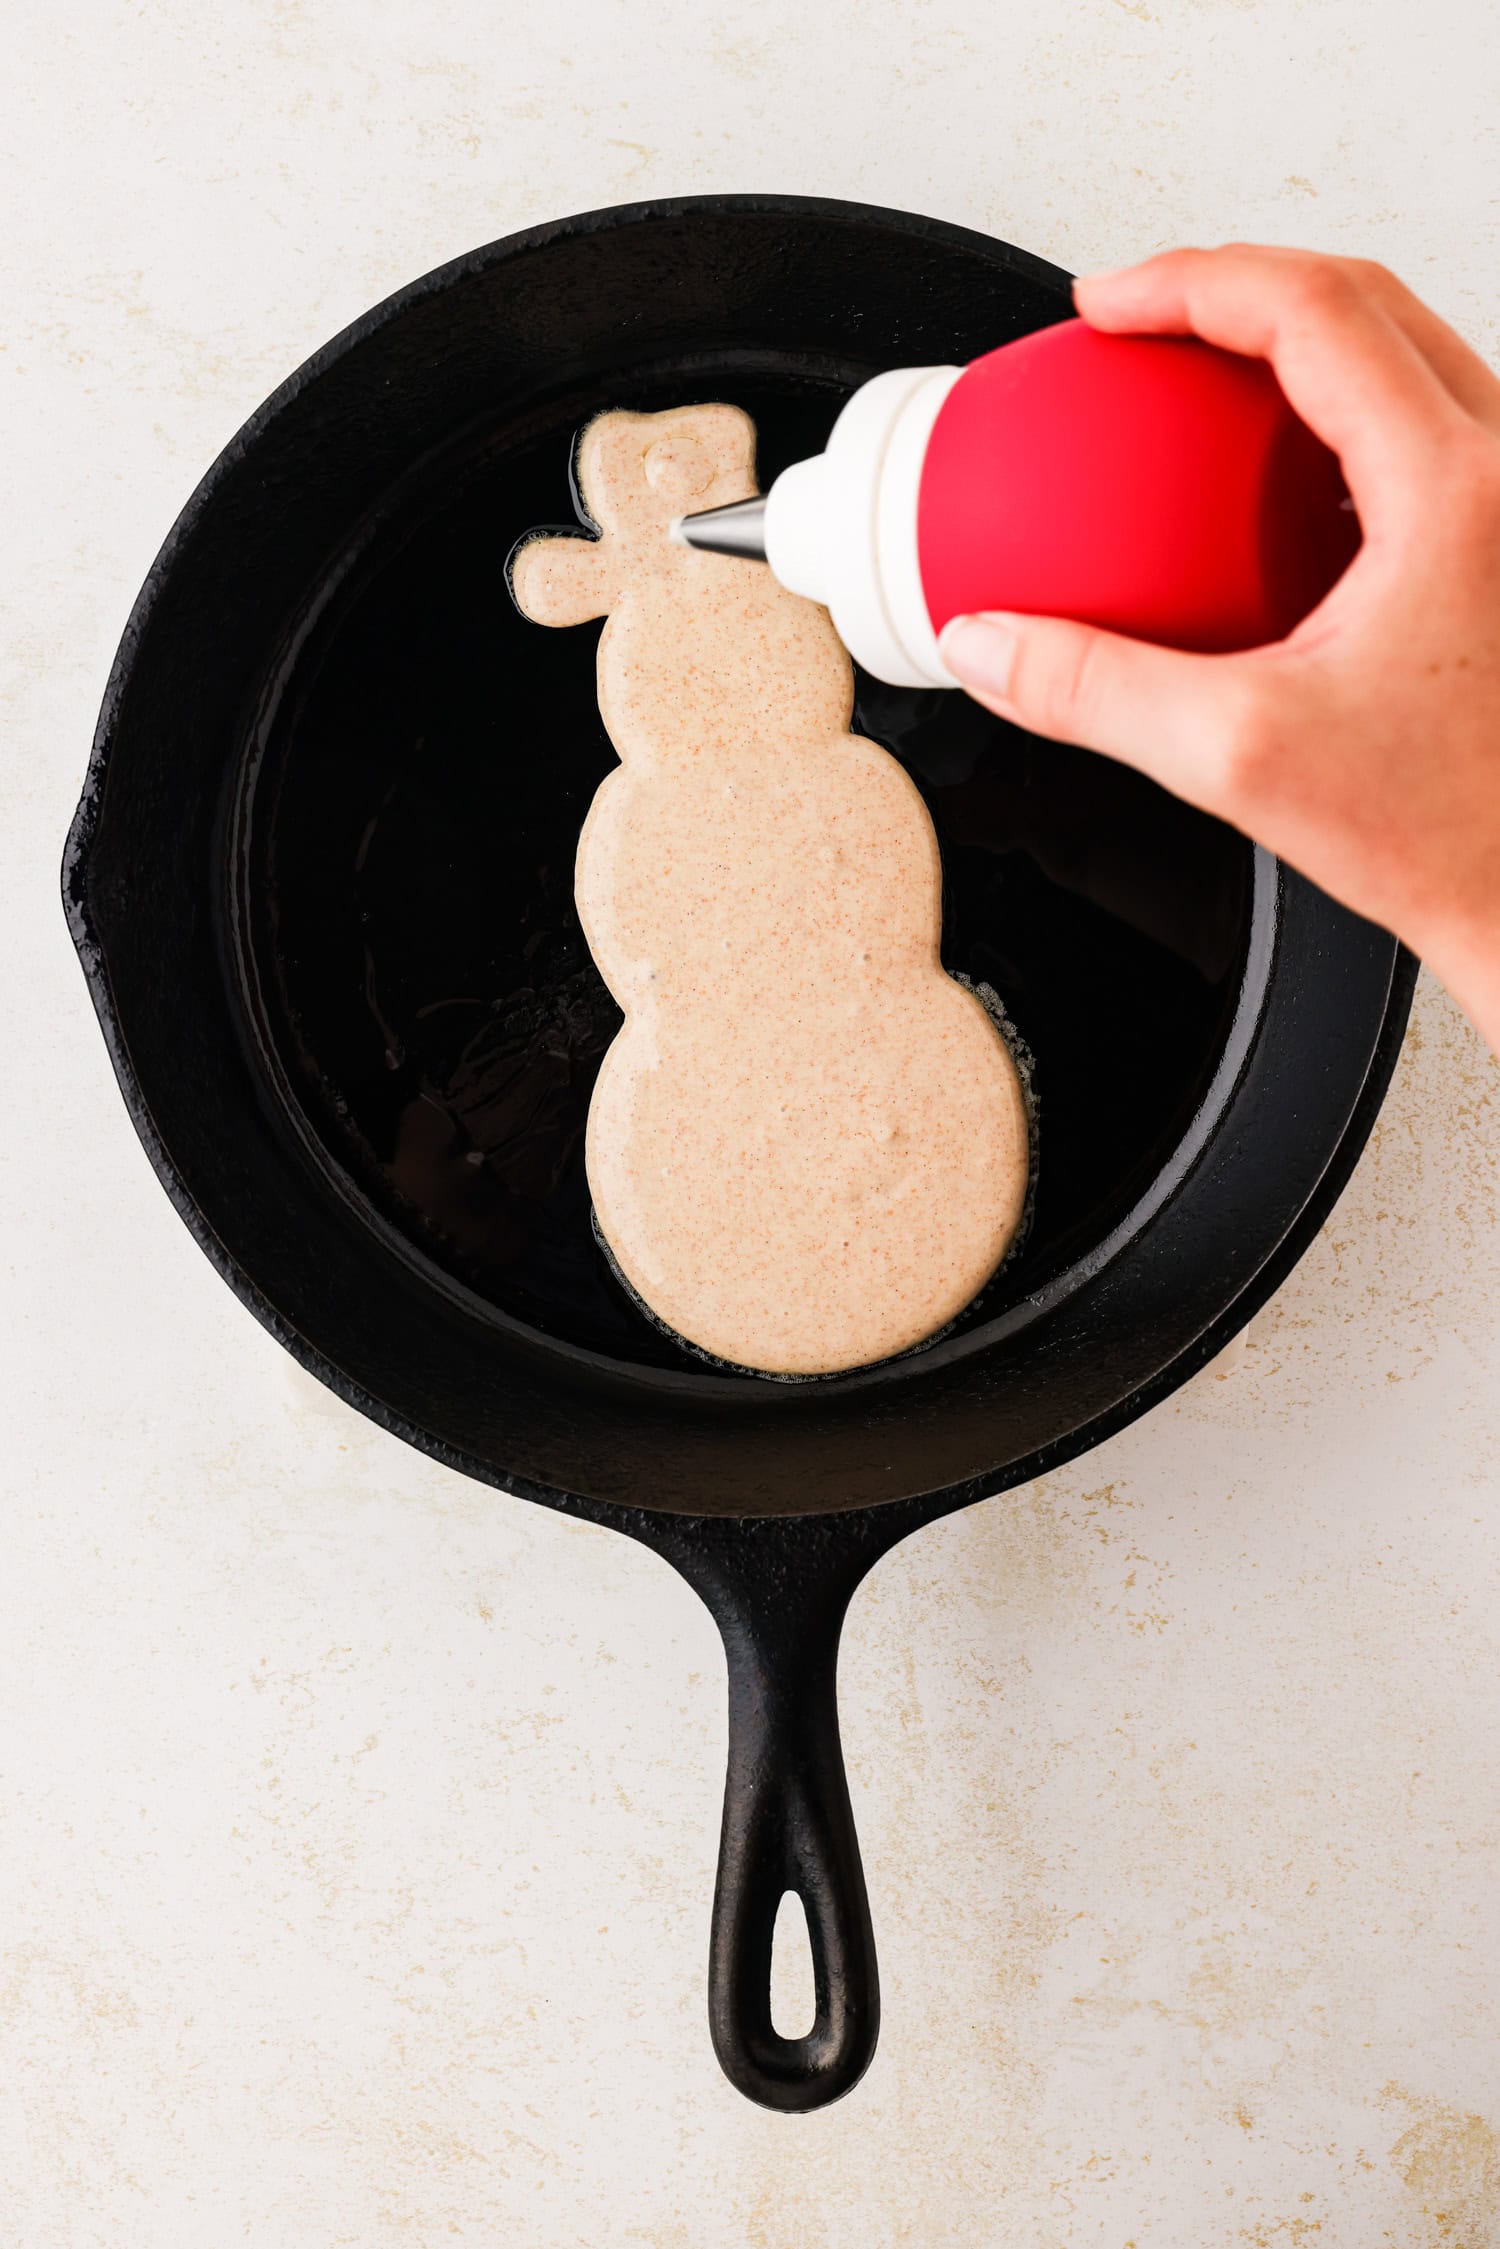
Finally, move to the top of the head to form the snowman’s top hat. First make a line right over the snowman’s head, making sure it connects to the head. This is the brim of the snowman’s hat. Then draw a small outline of a square right over the line and fill it in to complete the snowman’s hat.
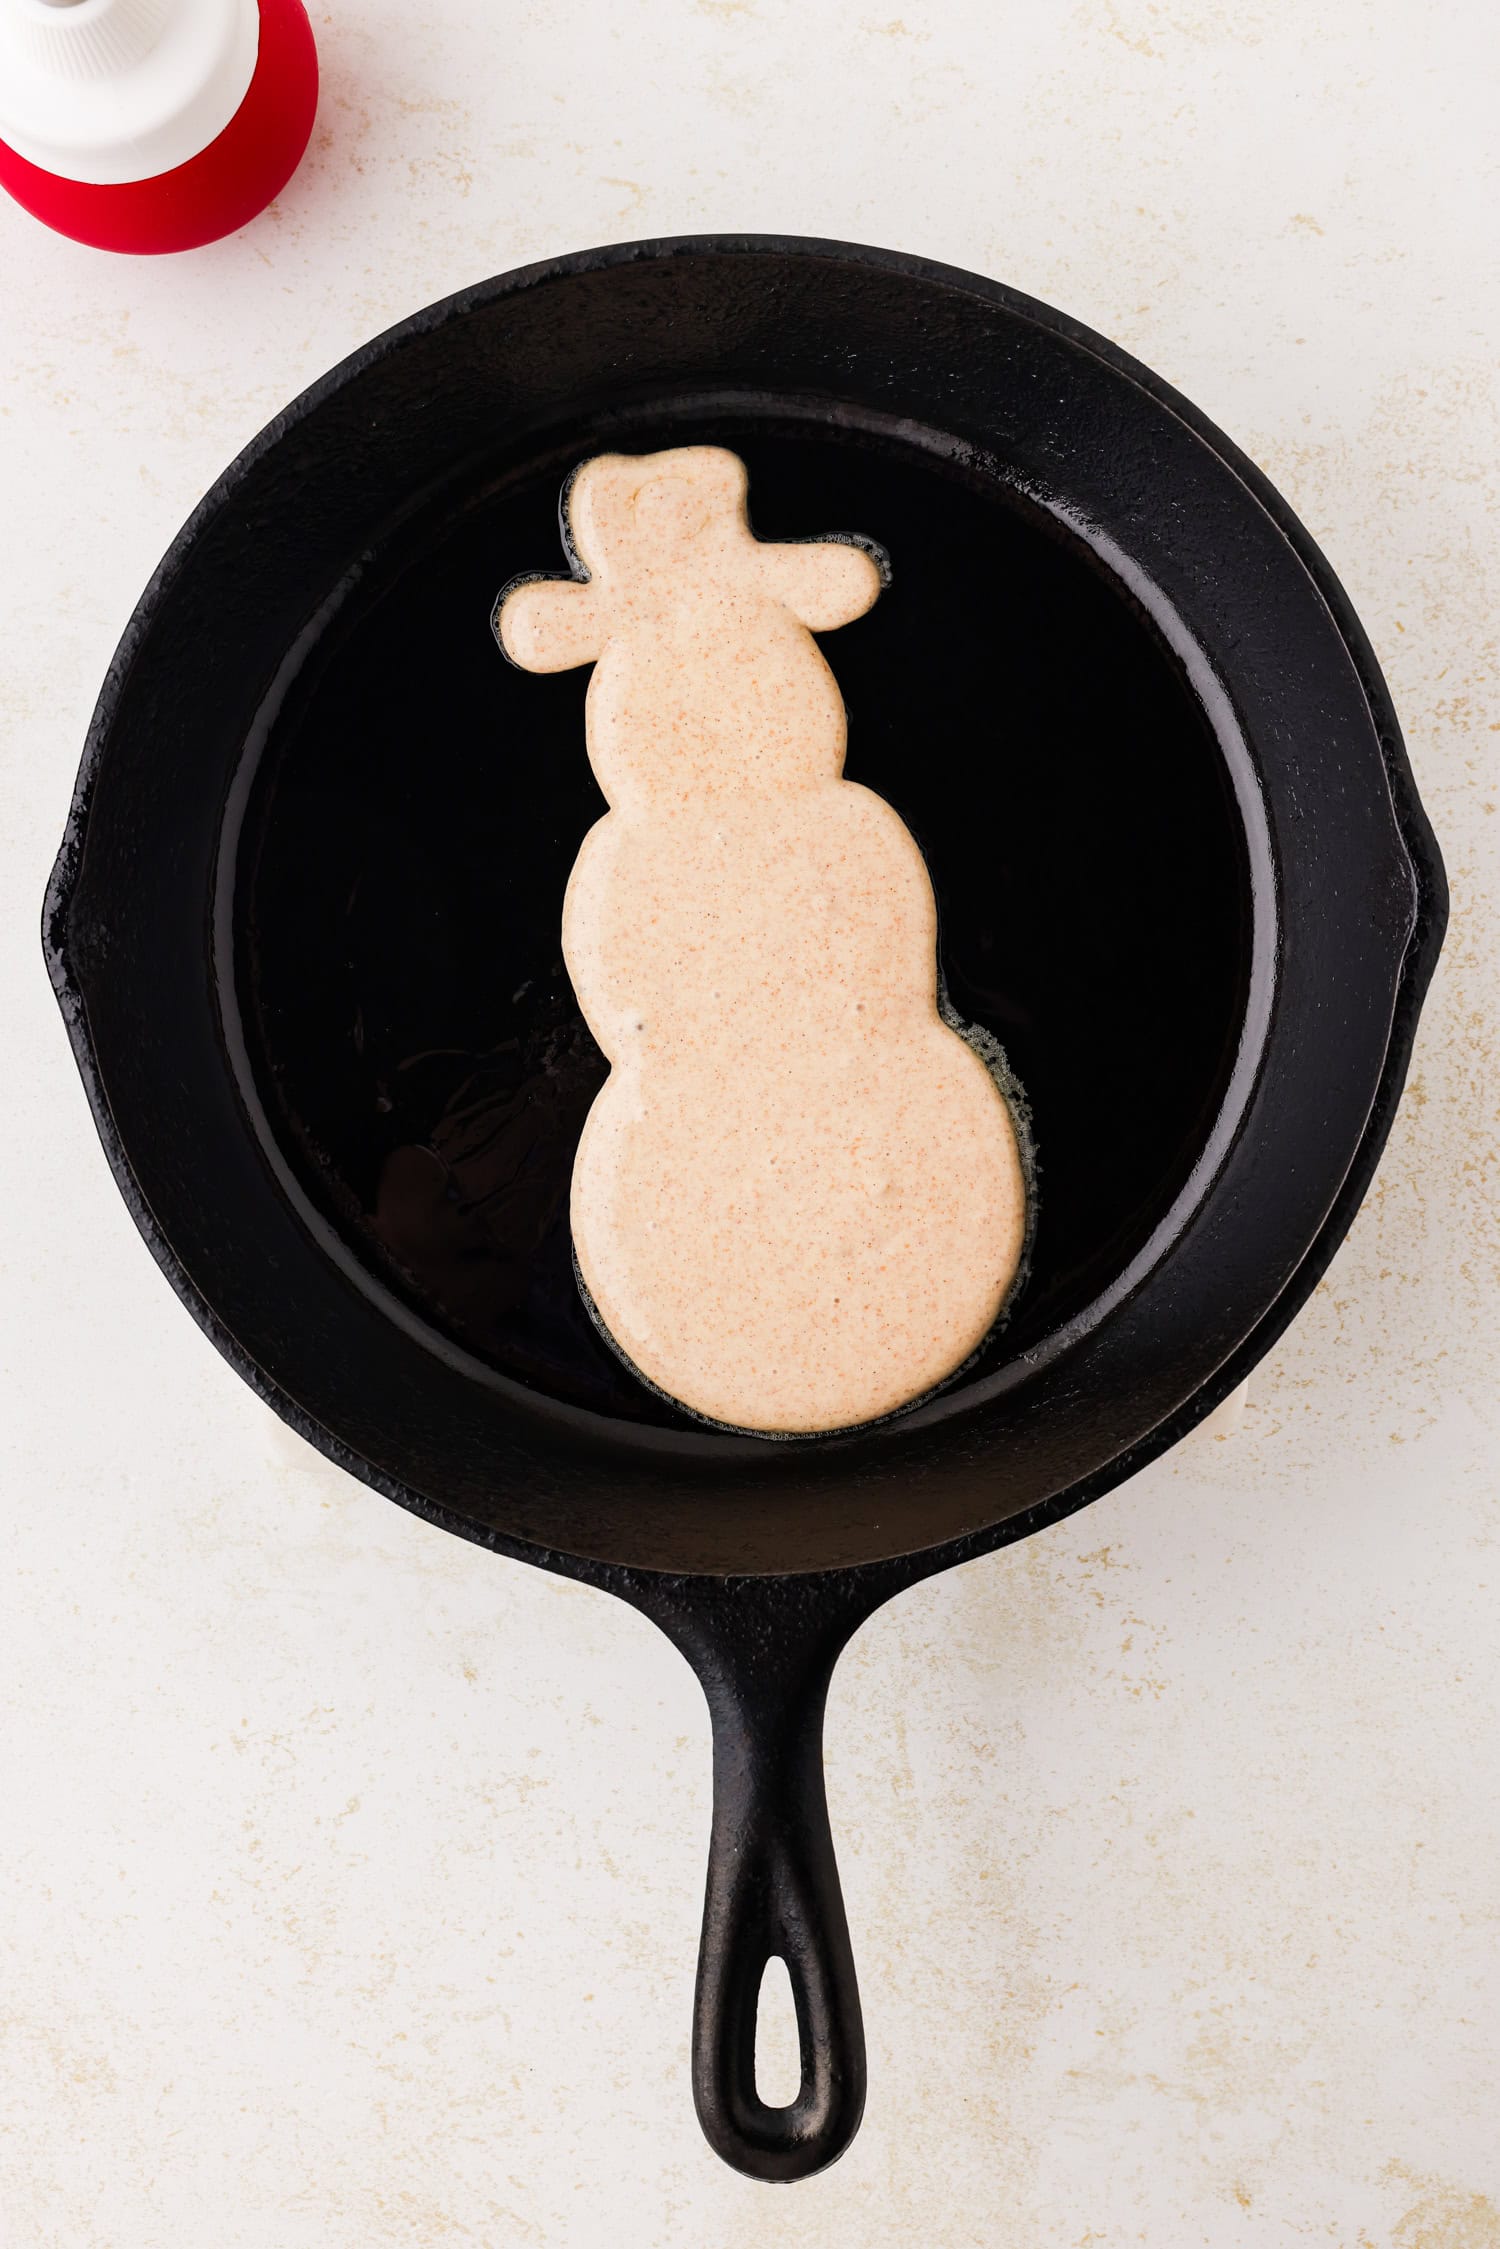
Cook until bubbles begin to form and pop on the body of the snowman. About 2-3 minutes. Flip the pancake and cook for 1-2 minutes on the opposite side. The pancakes should be a light, golden brown color when finished cooking.
Remove the snowman pancake from the skillet and place in a single layer on a large plate or platter while you cook the rest! Parchment paper on a cooling rack works nicely, too. The pancakes will need to cool slightly before you add your decorations and toppings.
Before adding more batter to the skillet each time, make sure you have a thin, even layer of oil spread around the skillet. You may need to wipe out excess pancake batter too. This will help the snowmen cook well and prevent sticking, making them super easy to flip!
Repeat all of these steps until you have used up all the batter, refilling the frosting bulb as needed. We could make about 3 snowman pancakes between fillings.
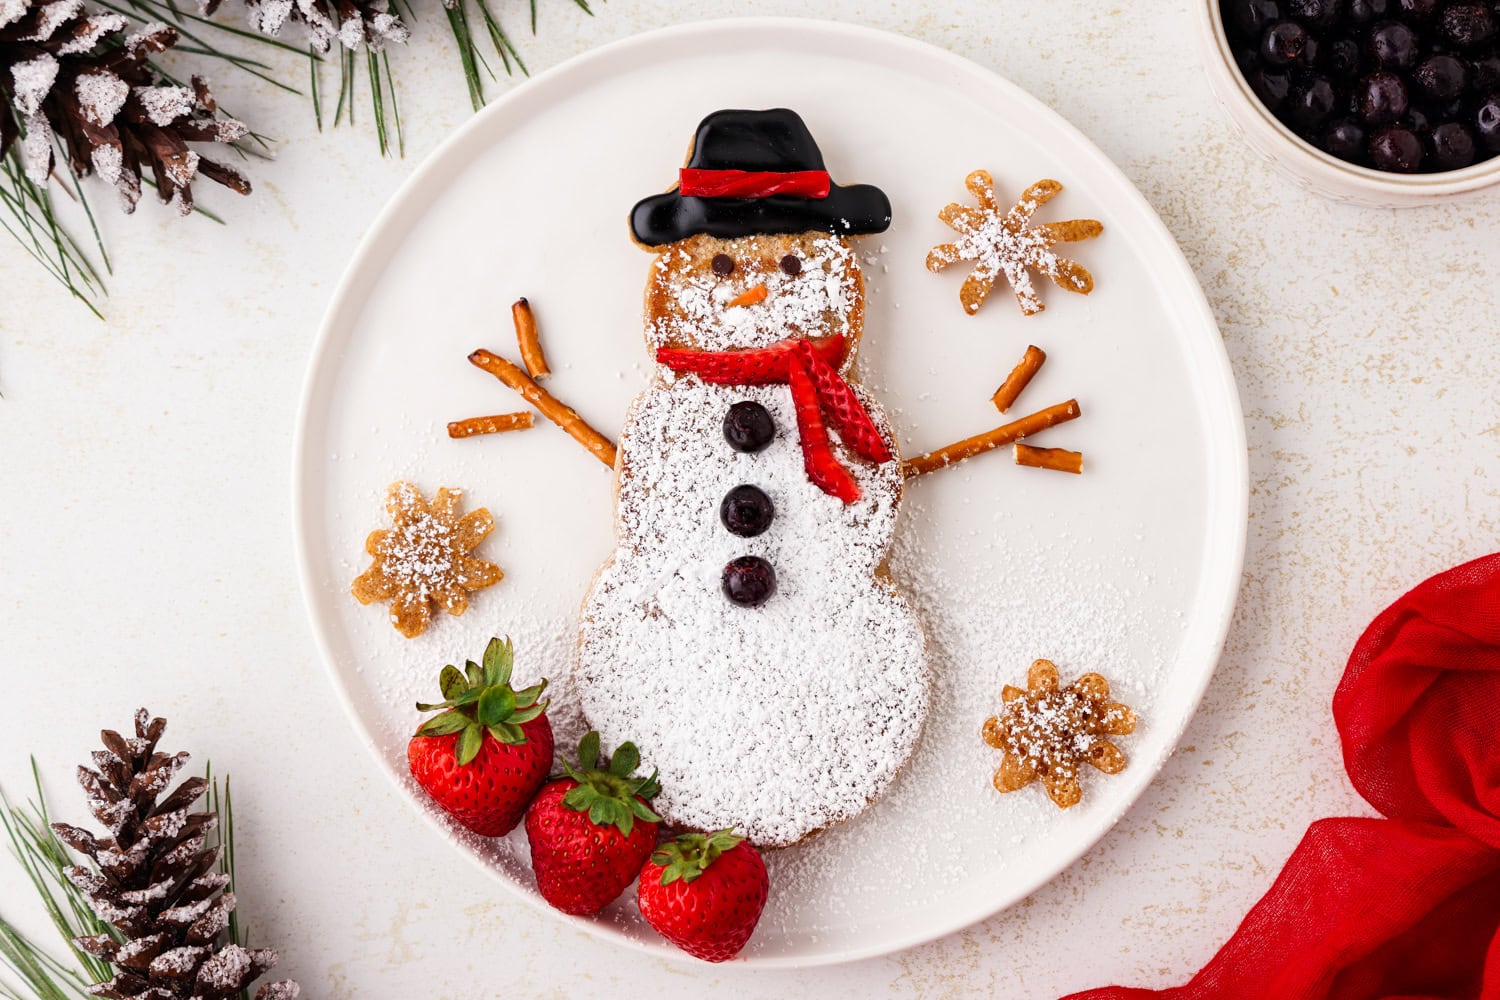
If you have any extra batter at the end, you could try making snowflakes by making the shape of an asterisk *. These are such a fun way to use up the extra batter and decorate around the snowman!
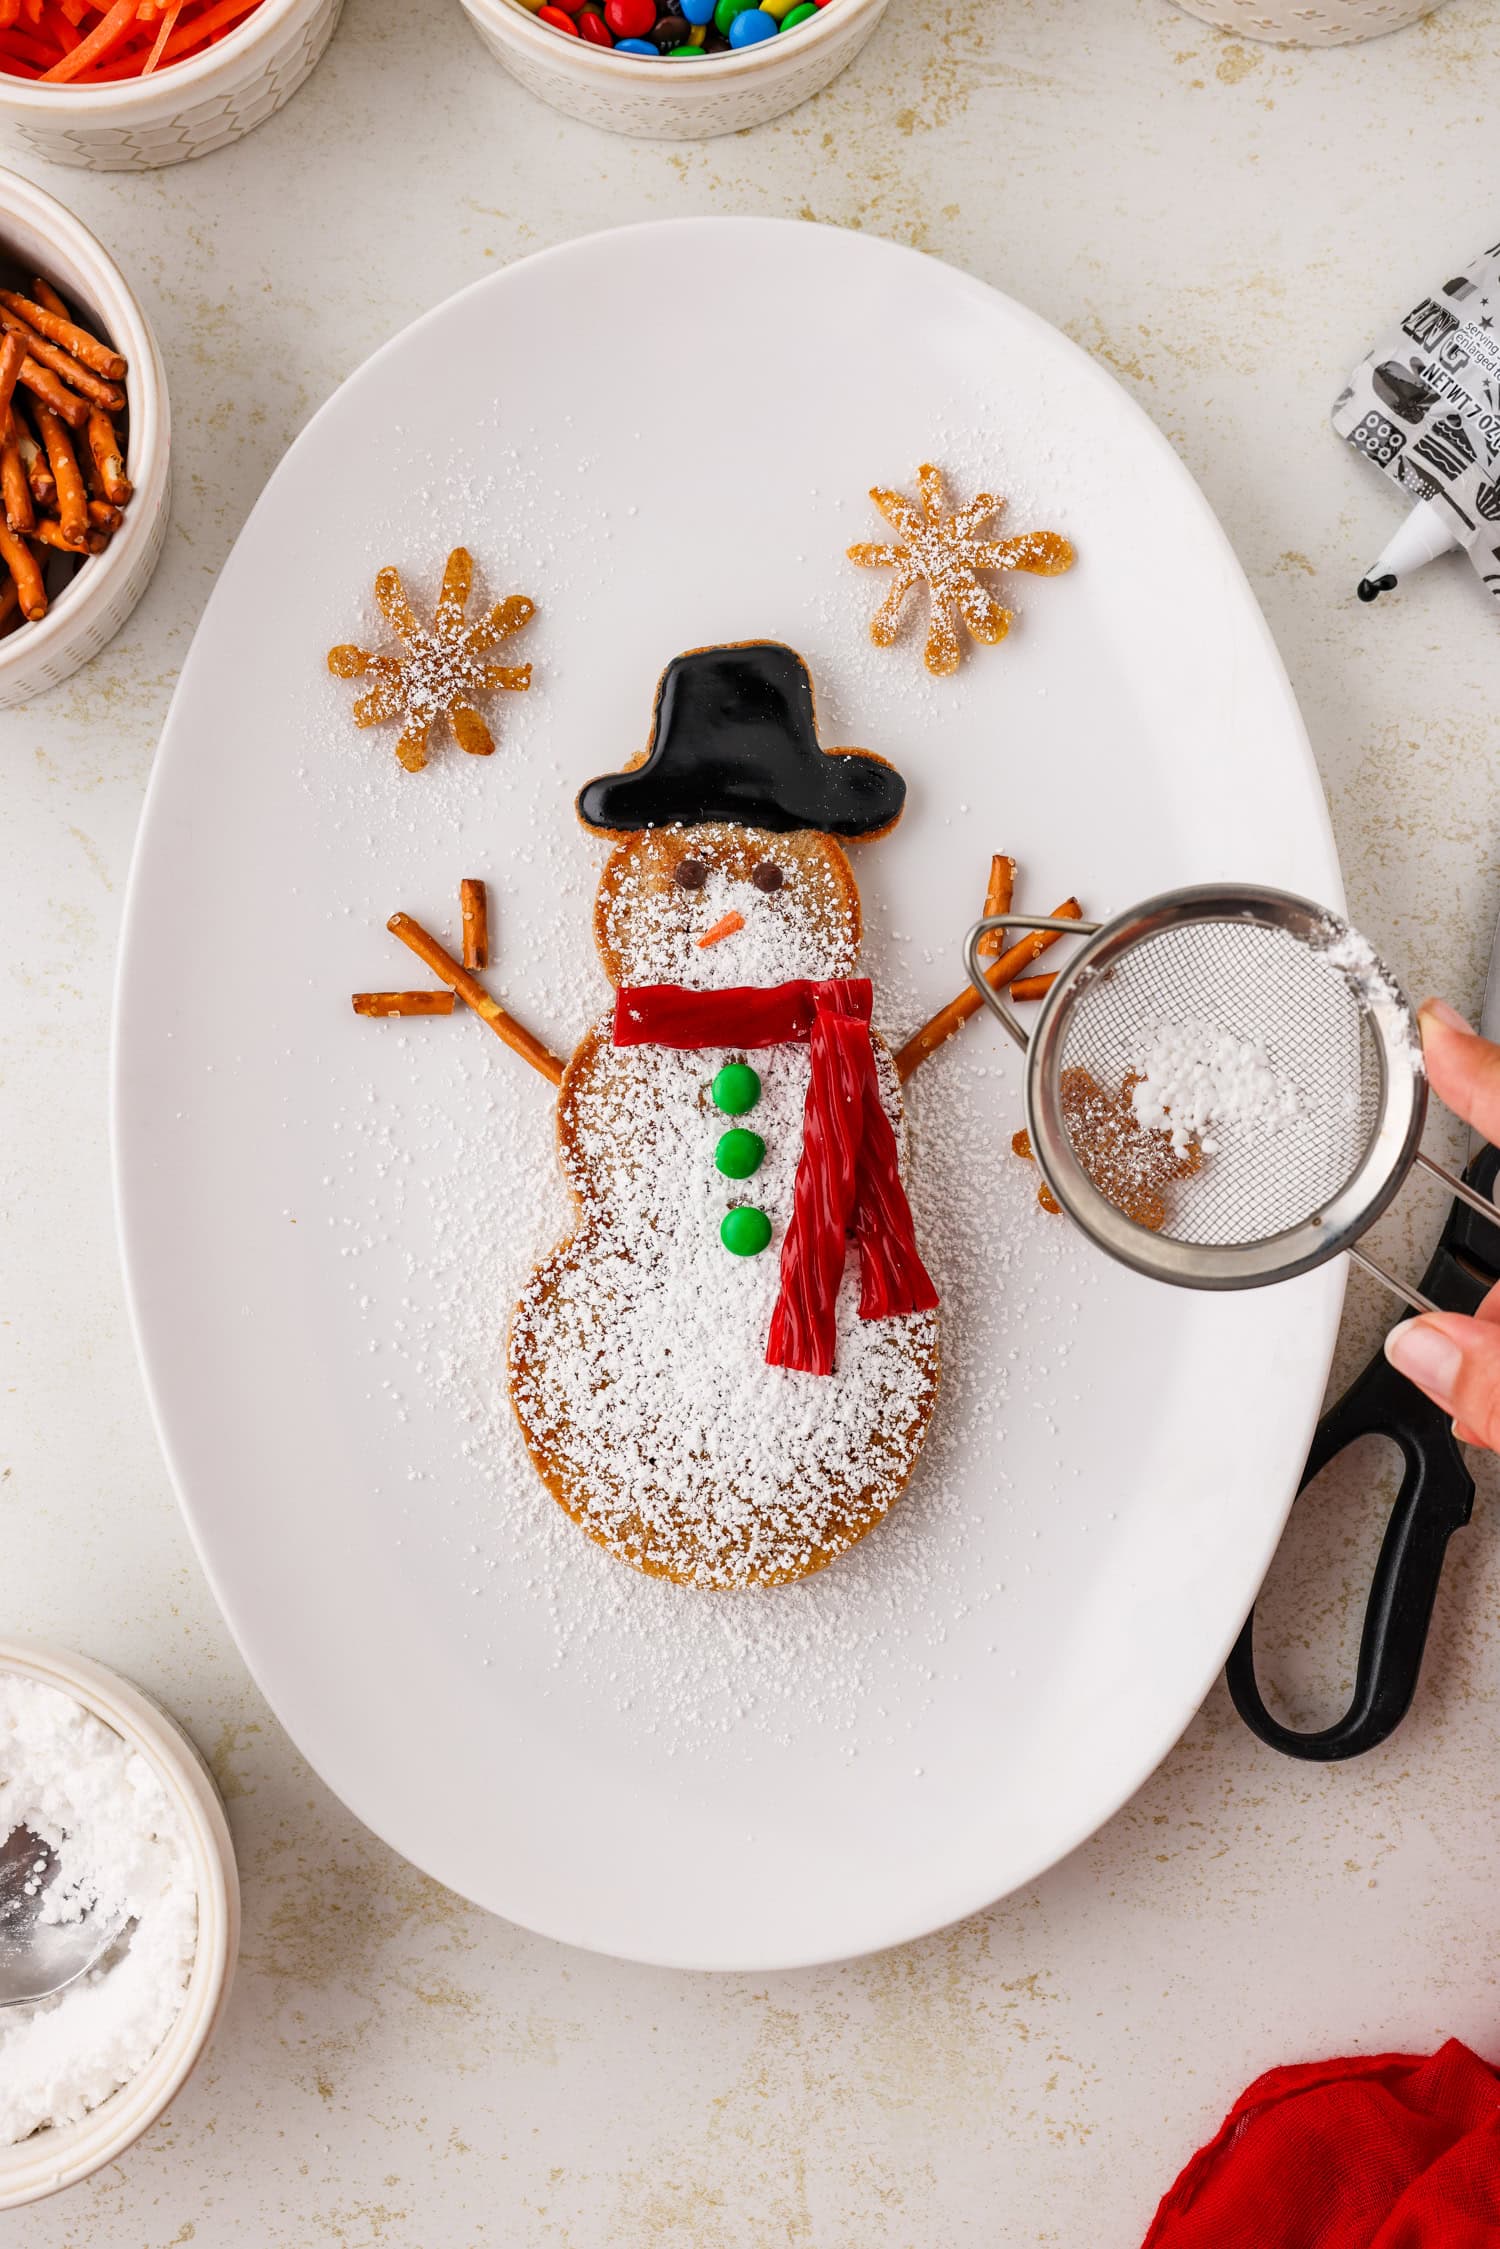
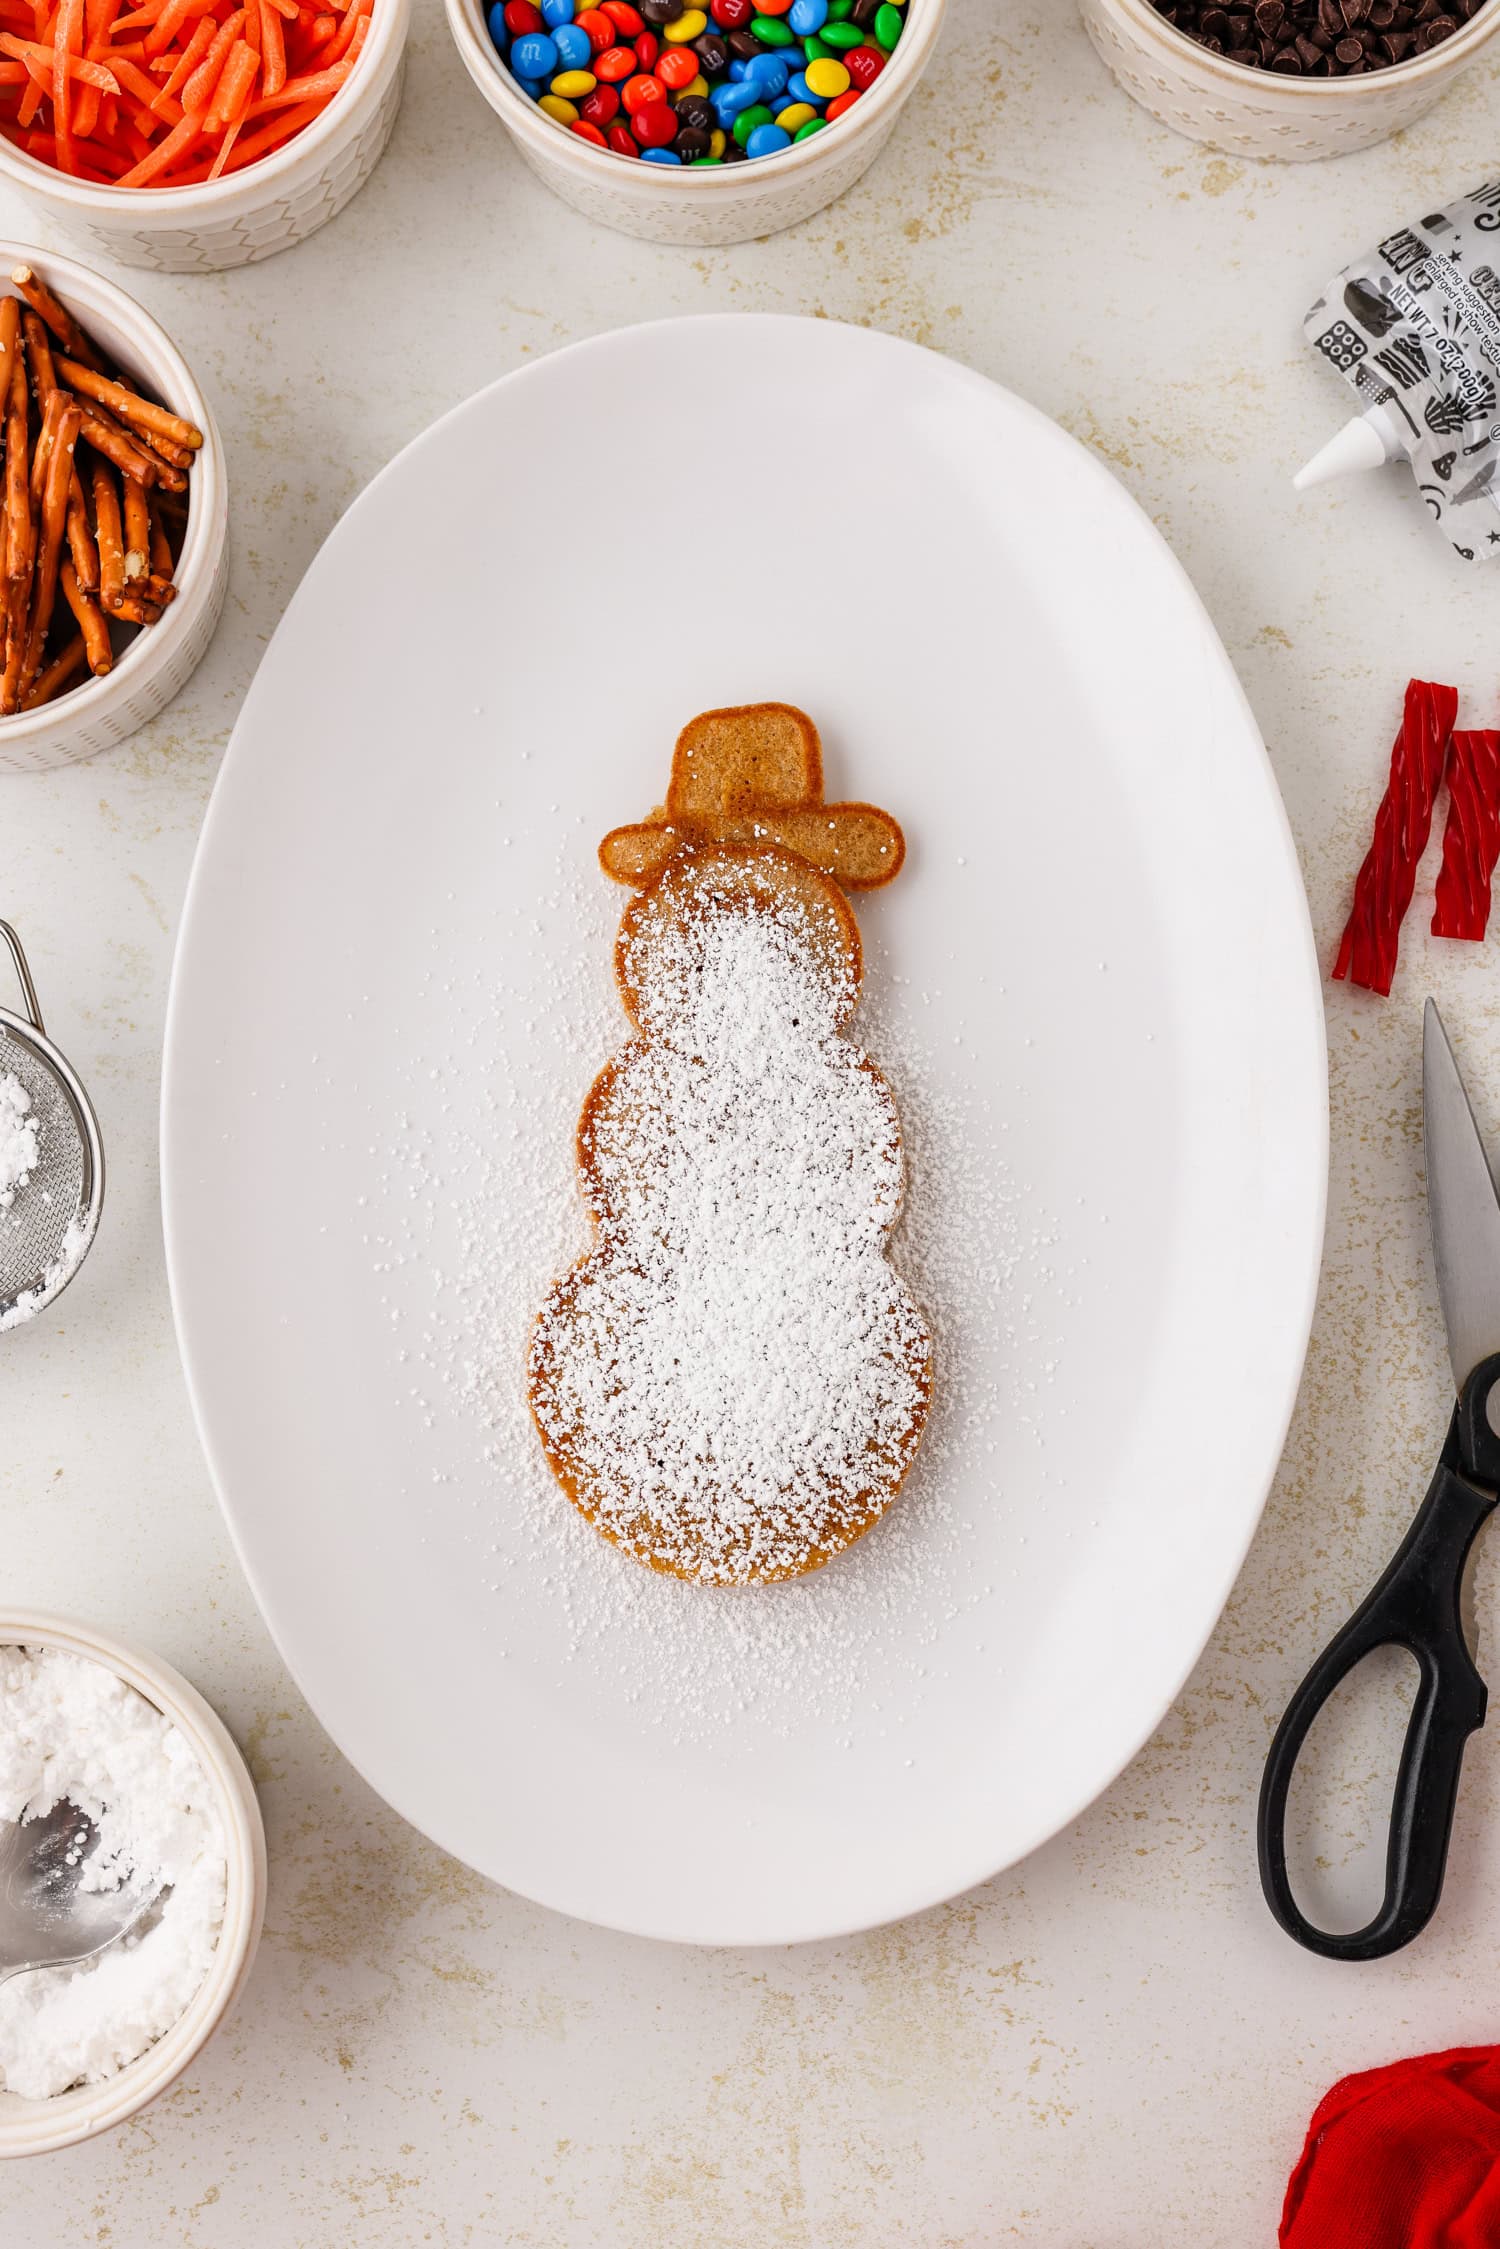
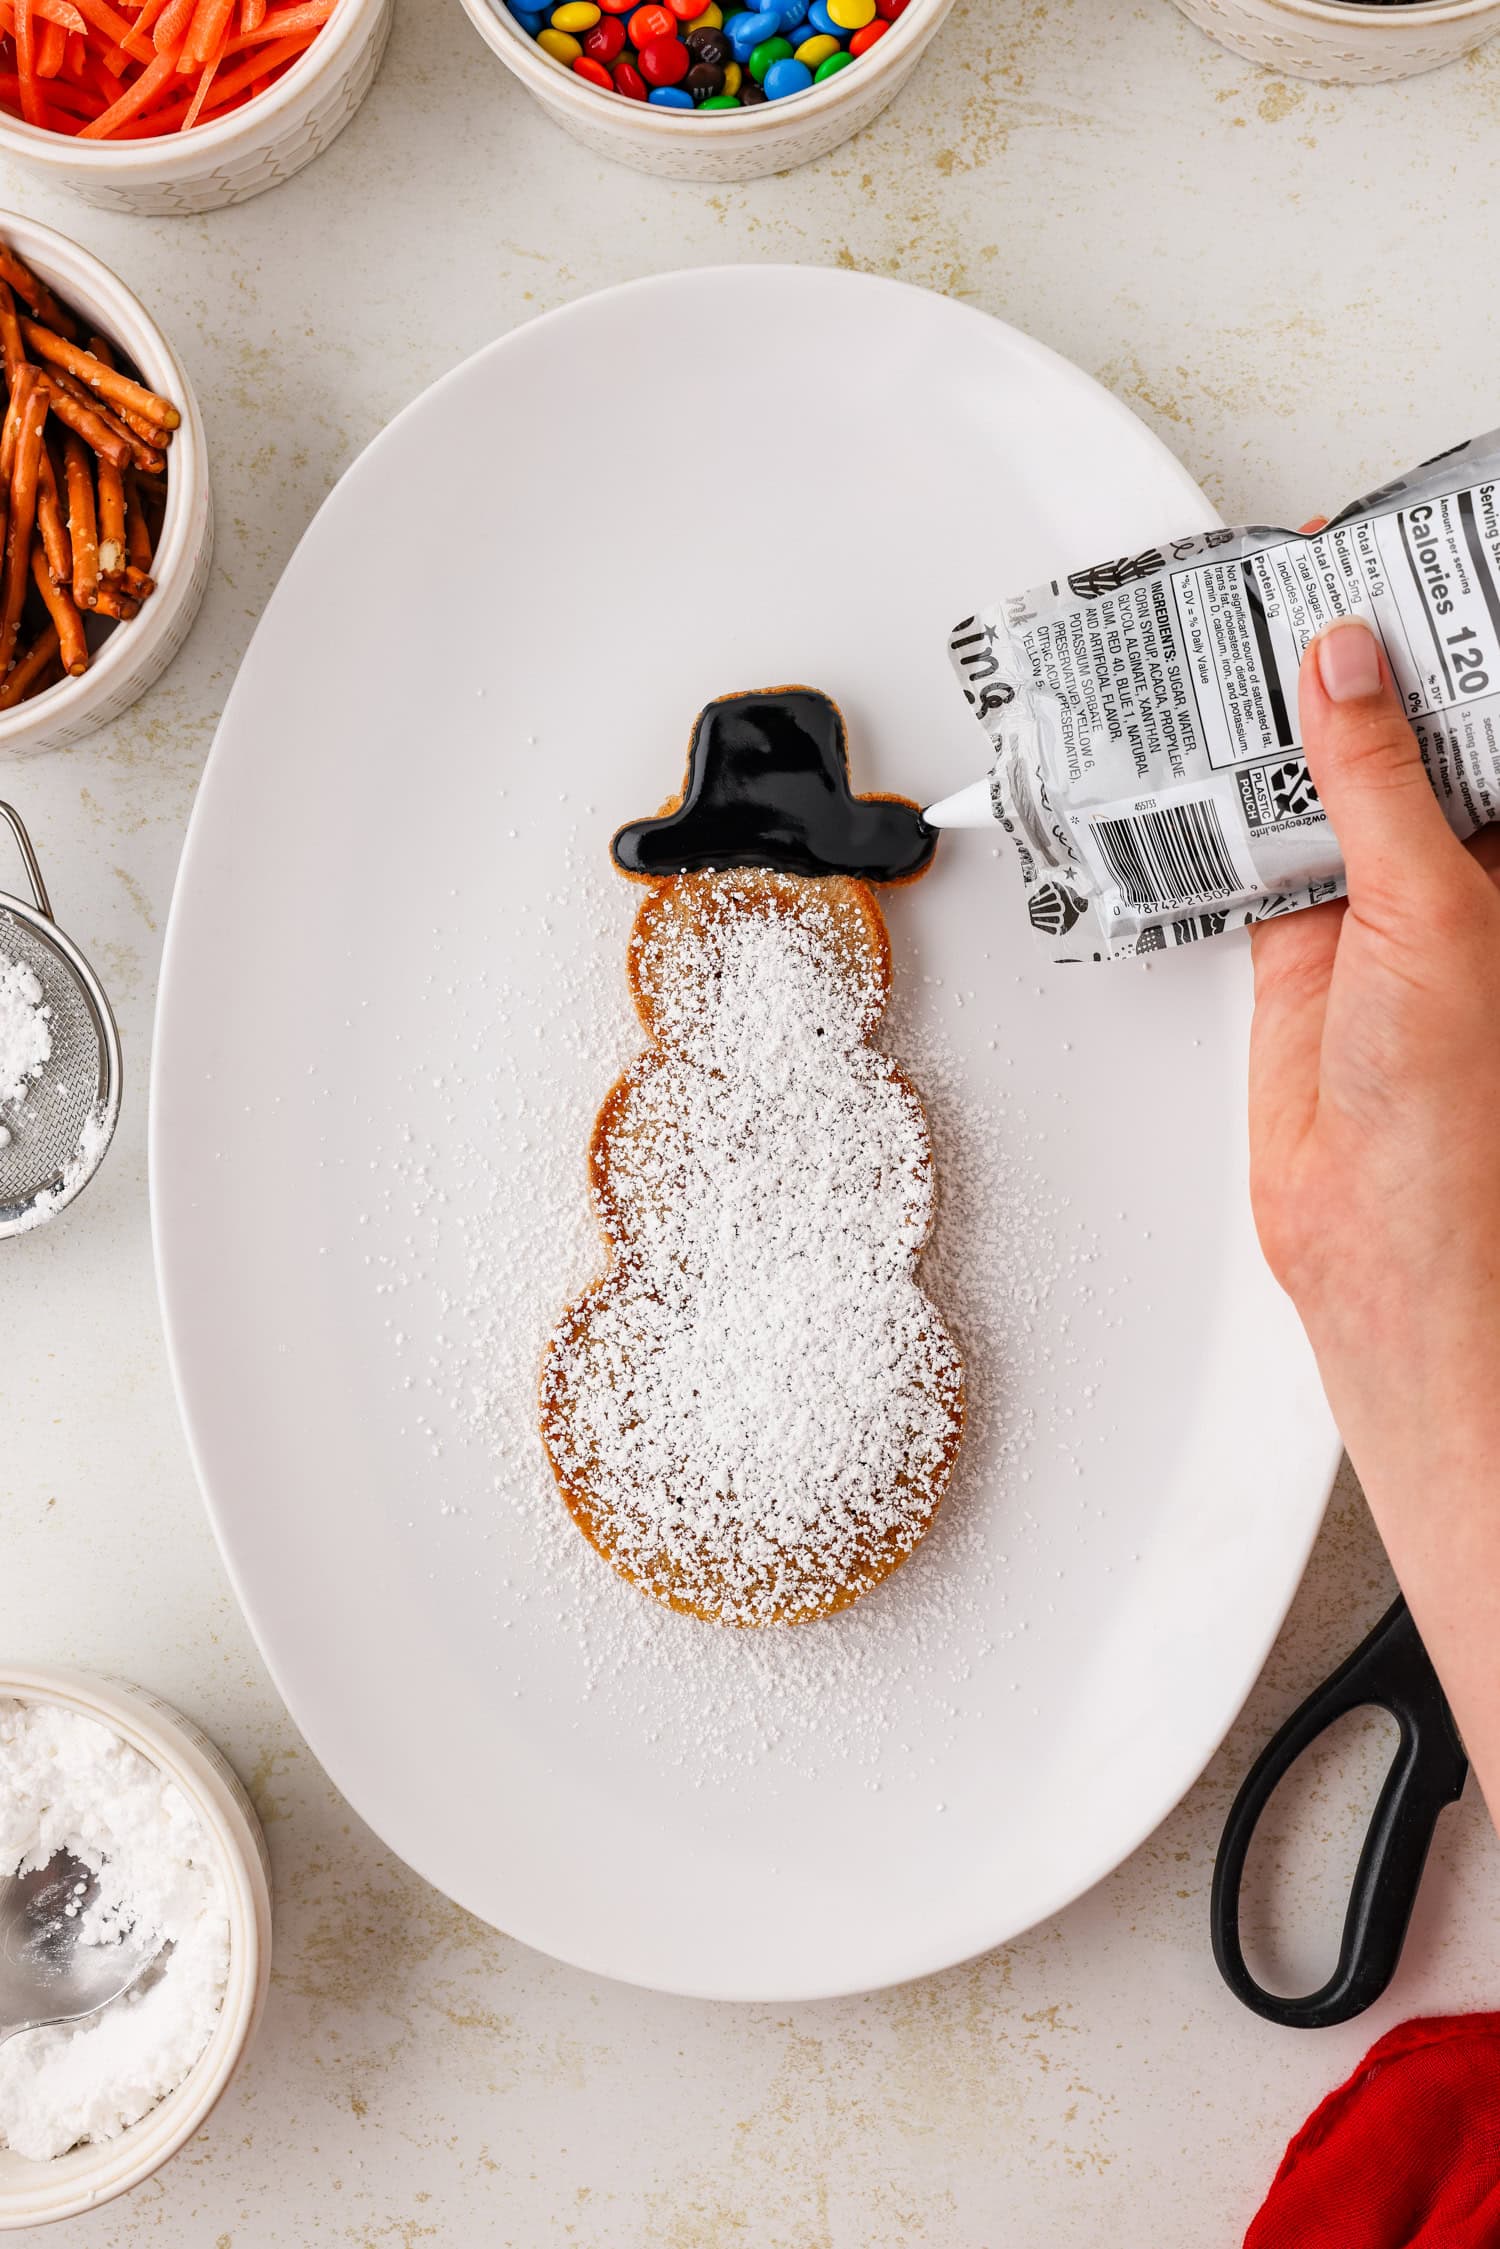
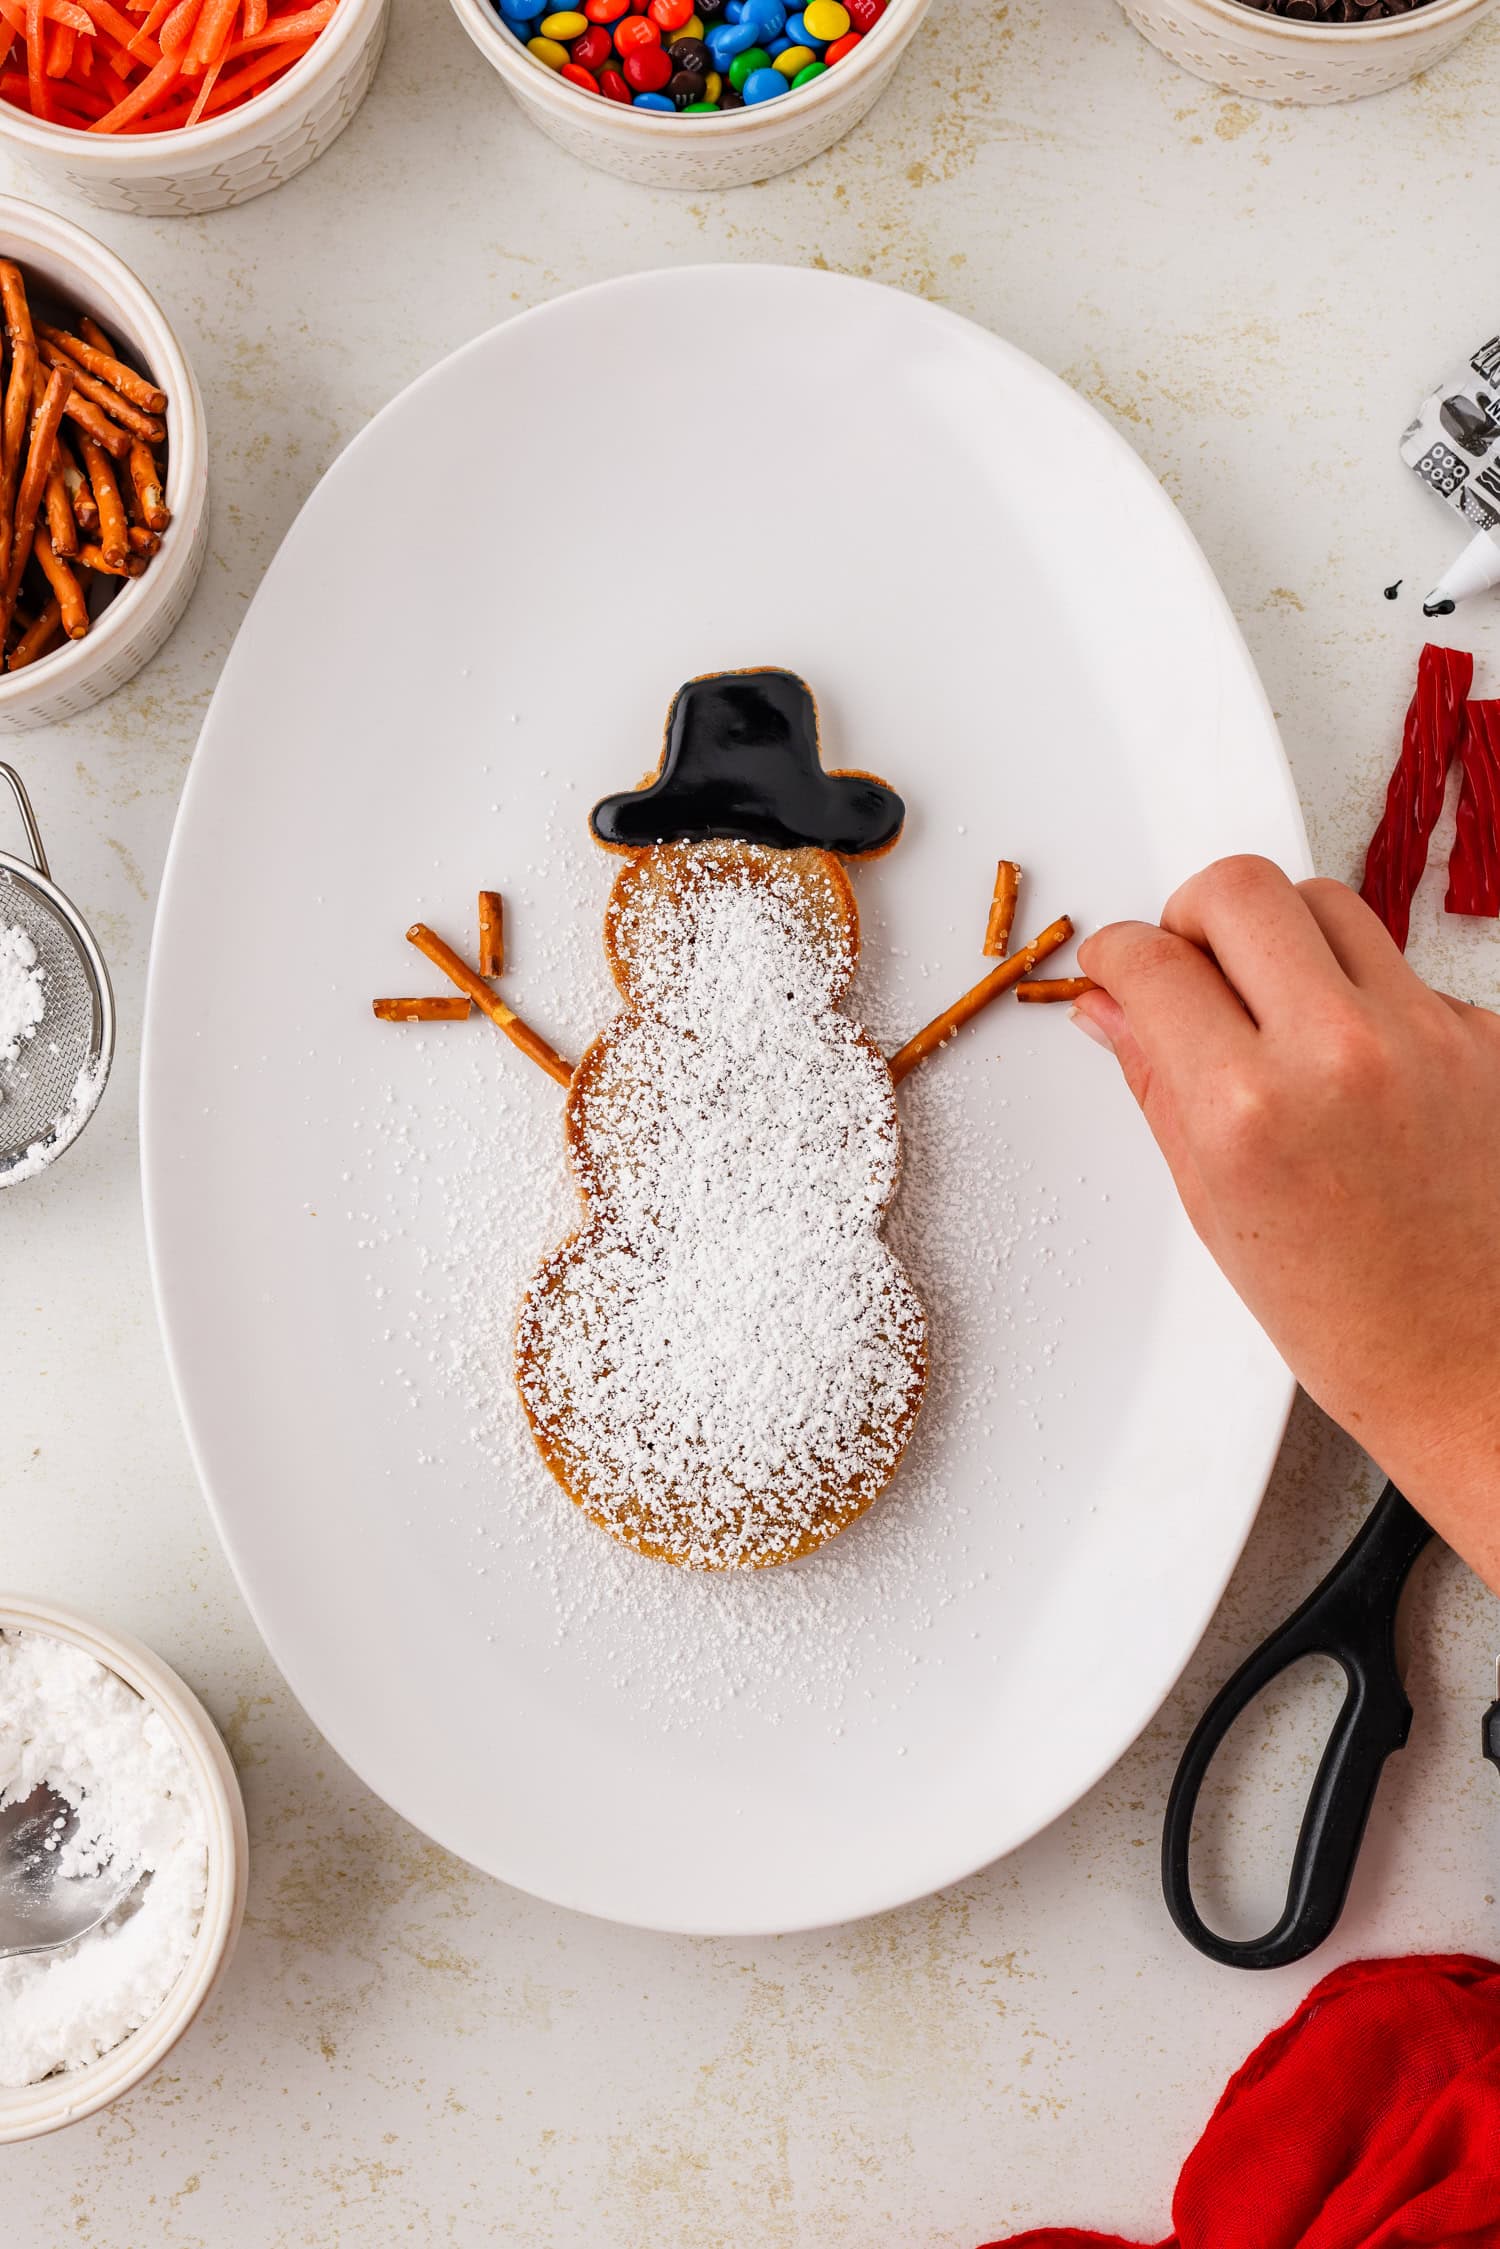
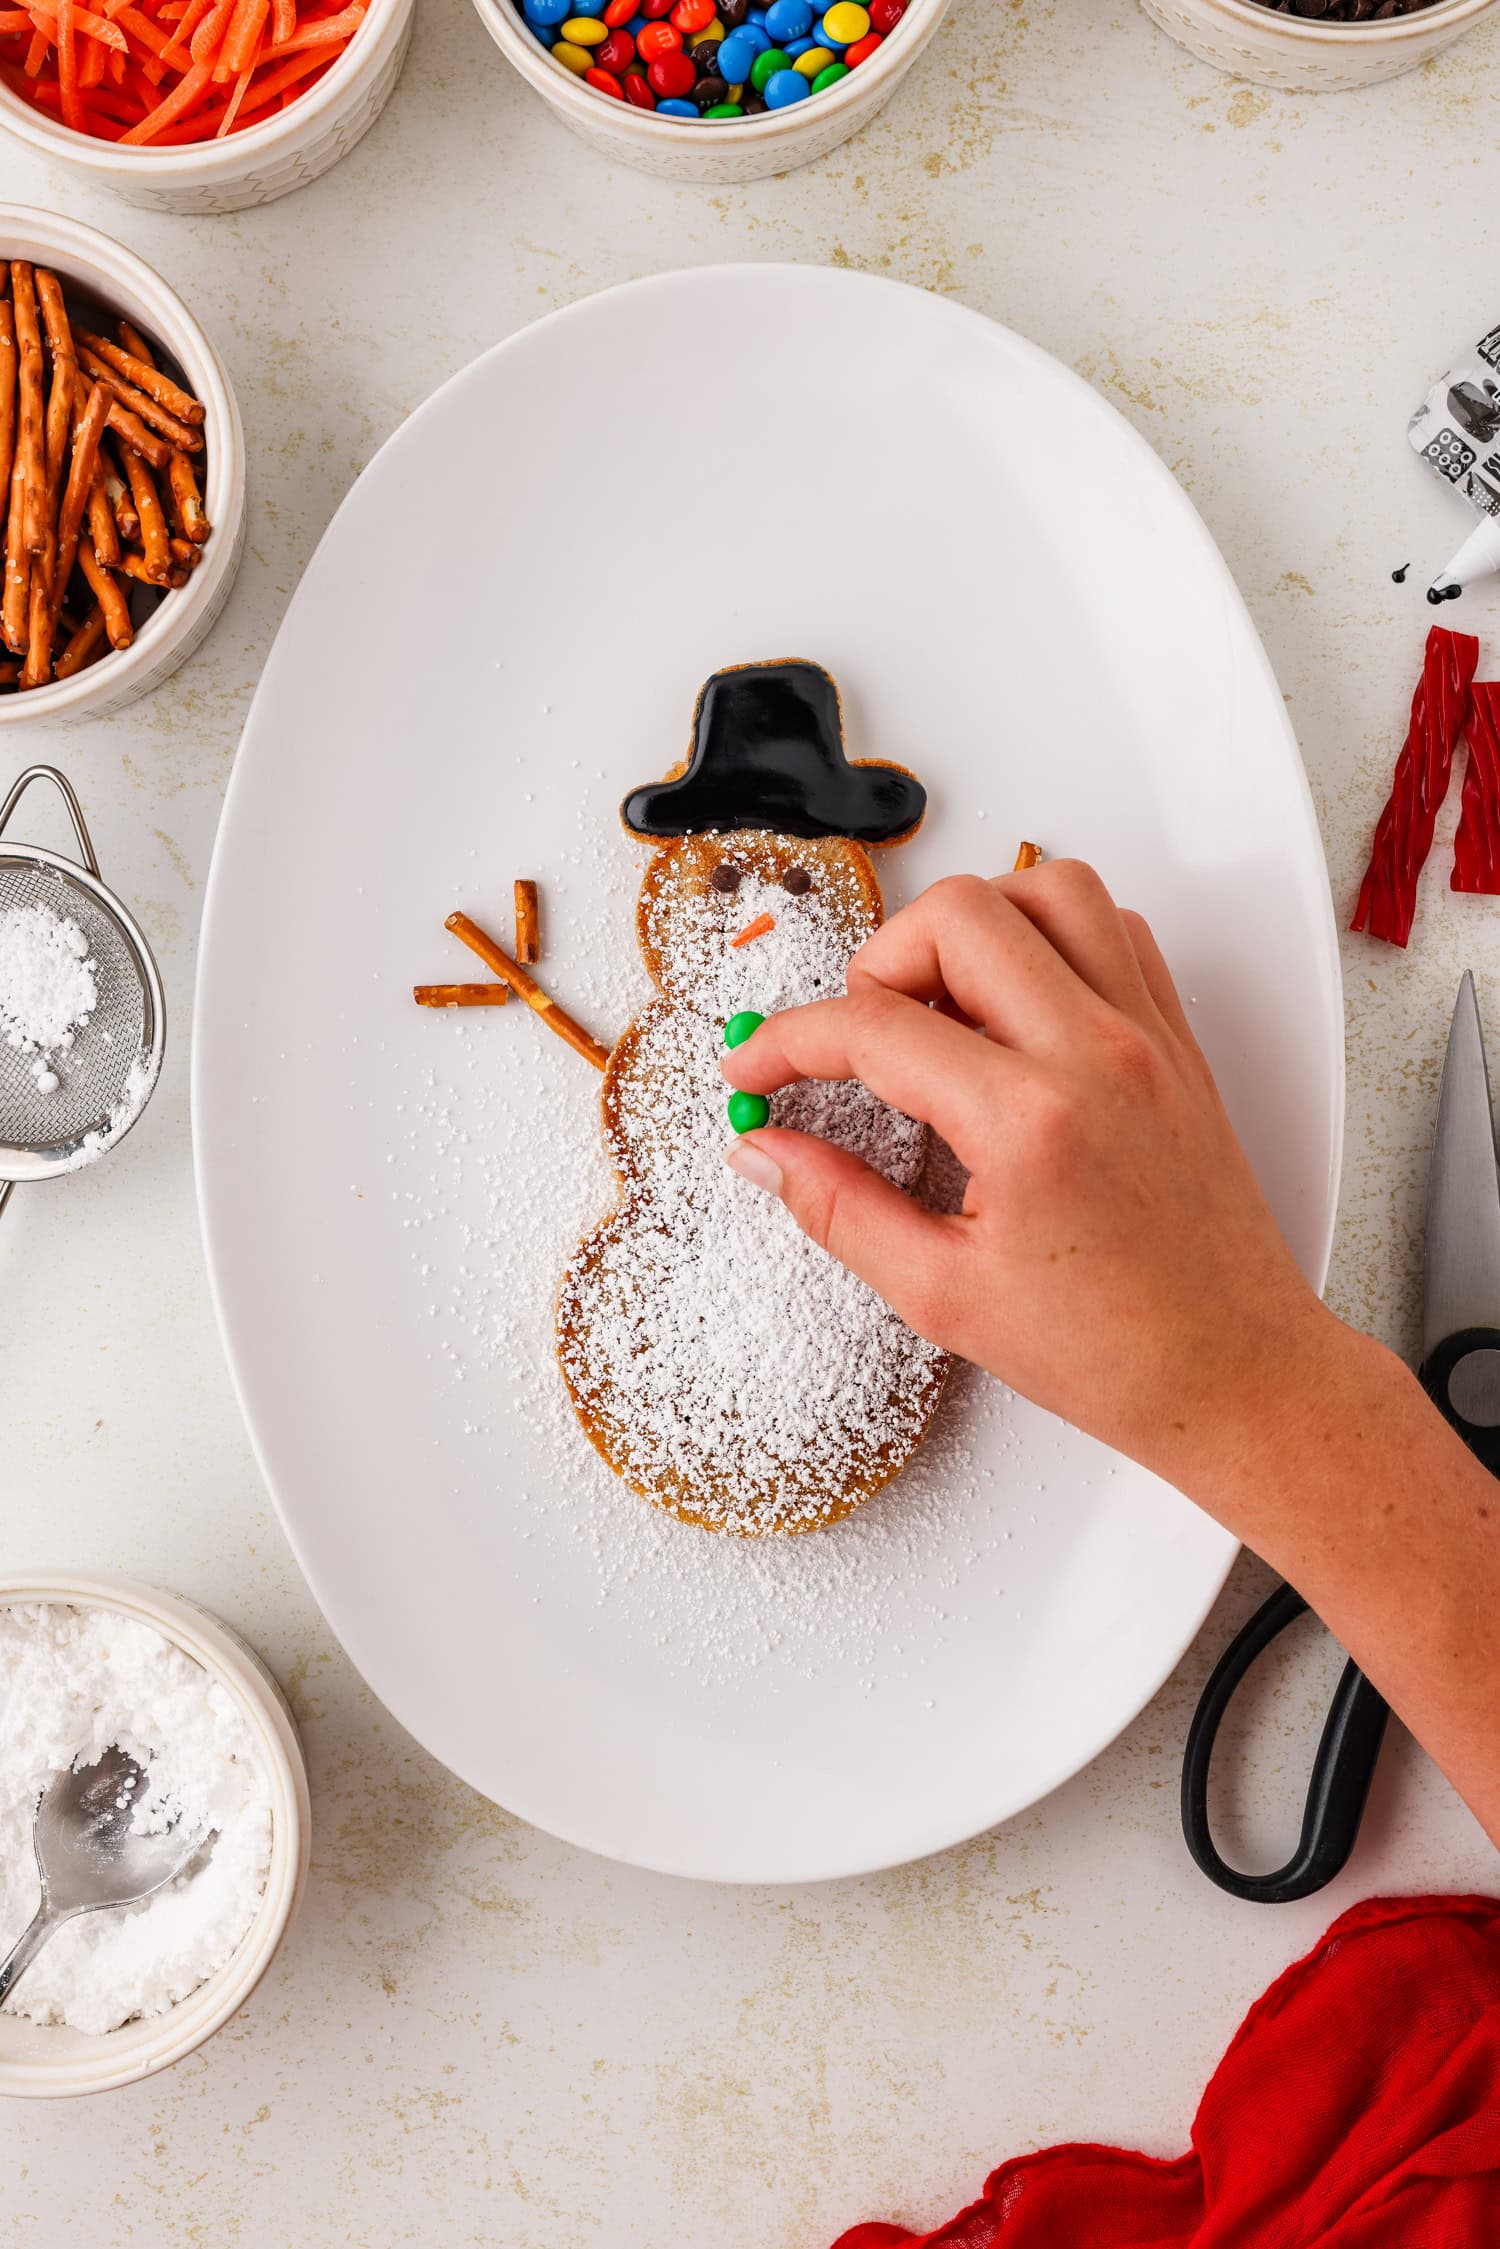
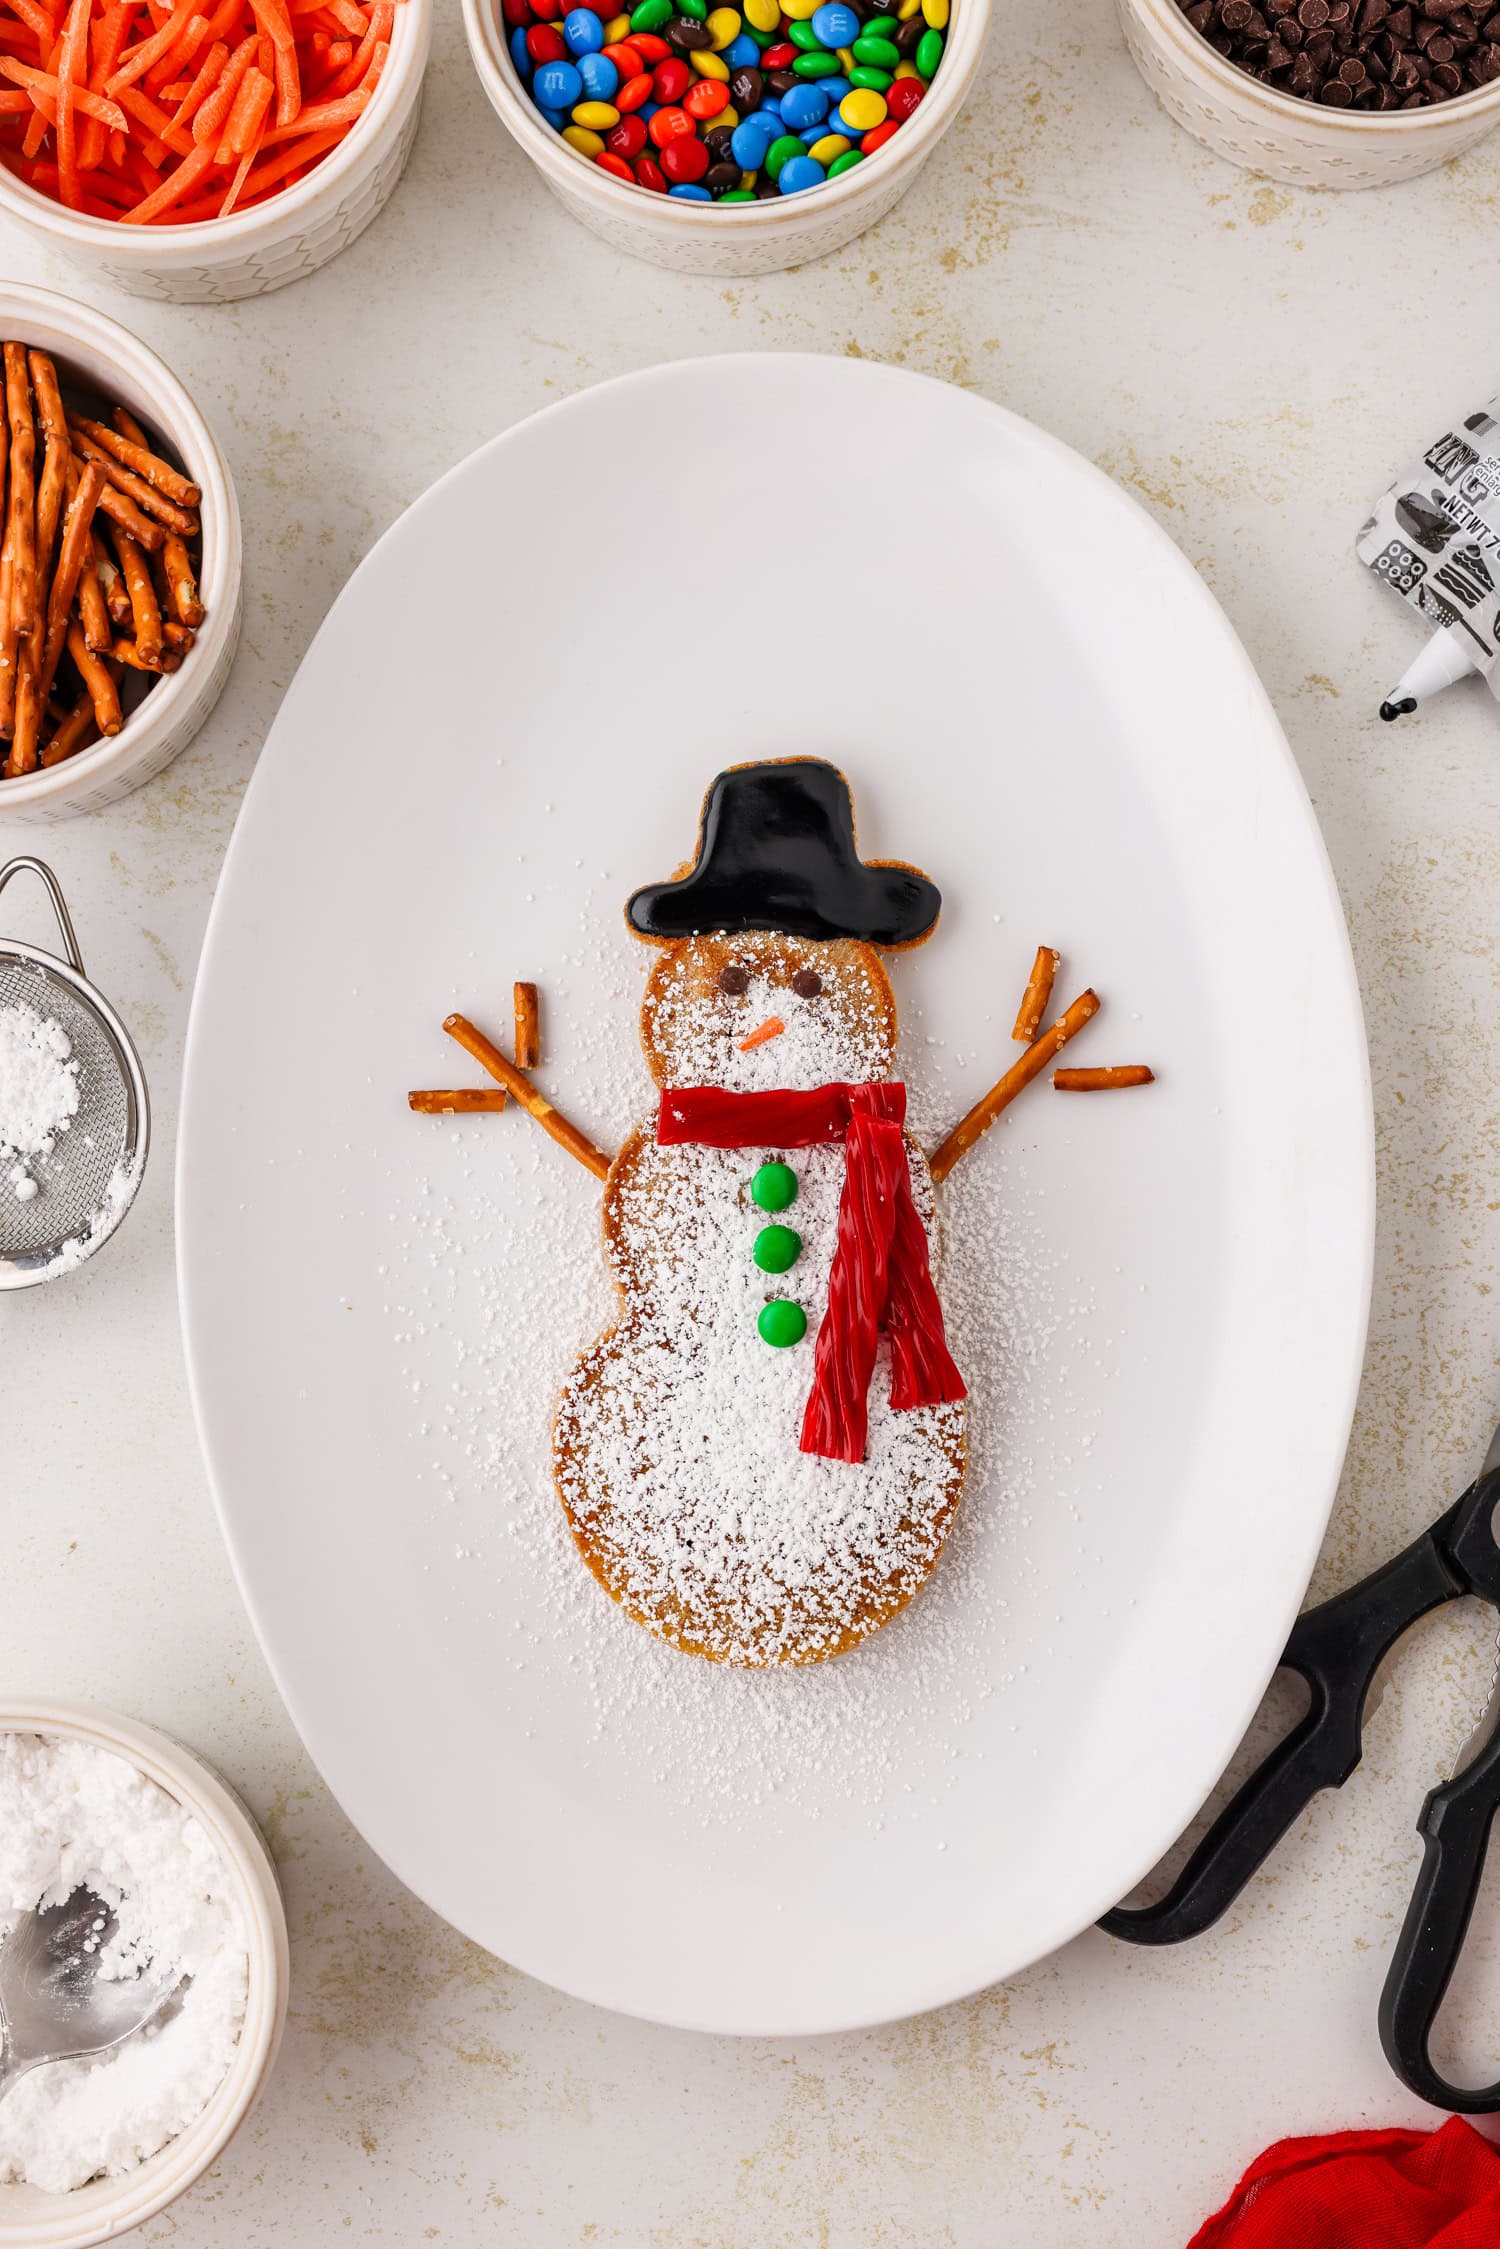
Now it’s time to decorate! Use a sifter to sprinkle powdered sugar over each snowman for a snowy effect. Decorate with candy eyes and buttons, pinch off the tip of a shredded carrot to make the cutest little nose, fill in the hat using cookie icing, and fashion your snowman with a scarf made of Twizzlers! Break some pretzel sticks to form the arms, and finish the scene with a dollop of whipped cream to look like snow!
For a fresh, healthy version of snowman pancakes, garnish your snowman with fresh or frozen fruit! Blueberries can be used for buttons, strawberries can be thinly sliced to make a scarf, you can even use raisins for eyes.
Serve and enjoy!
How to Store Leftover Snowman Pancakes
Make sure your pancakes completely cool to room temperature before storing them. If you store them when they’re still hot, it will create condensation on the pancakes that will make them soggy. For best results, store snowman pancakes plain and without toppings.
REFRIGERATION: After your undecorated snowman pancakes have cooled to room temperature, wrap them in aluminum foil or store them in an airtight container in the refrigerator with parchment paper between the layers. Leftover pancakes will keep in the refrigerator for up to a week.
FREEZER: Another option is to freeze any leftover snowman pancakes. Just wrap them tightly in plastic wrap then place into a freezer-safe bag. They will keep in the freezer for up to three months.
How to Reheat Snowman Pancakes
I like to reheat my pancakes in the toaster or toaster oven to keep them a nice, fluffy texture. However, you can microwave your leftovers on a microwave-safe plate if you want! You can reheat from frozen or thaw before reheating, both methods work.
What to Serve with Snowman Pancakes
Warm maple syrup, or another pancake syrup, is perfect with these pancakes! I love to simply serve pancakes with eggs and bacon. But you can also serve it up with something like a tater tot breakfast casserole or ham and cheese egg muffins.
Serve these pancakes with some mini quiche bites or sheet pan breakfast for something a little different.
More Fun Toppings and Decorations
While I like to use the listed ingredients and decorations on my snowman pancakes, you can change things up a bit and use some different toppings! Here’s a few tasty ideas:
- peanut butter chips
- sprinkles
- lemon zest
- sliced banana
- chocolate sauce
- shredded coconut
- peanut butter
Pro Tips for the Best Snowman Pancakes!
- Let your kiddos decorate their own pancakes! That kid creativity comes in handy here. Plus, what kind wouldn’t love being allowed to play with their food?
- I use a Vitamix and it can handle all of the dry ingredients at one time, but if needed, you can pour half of the dry mixture in, blend, and then add the rest and blend again.
- The skillet should be hot enough that the batter bubbles very lightly. It should not be so hot that it sizzles loudly when the batter touches the skillet. You can also use an electric griddle!
- It may take a few tries to really get the hang of making the snowman, but the frosting bulb makes it super easy! As long as everything is connected and you give the batter enough time to cook before flipping, the pancakes should flip pretty easily!
- If you have any extra batter at the end, you could try making snowflakes by making the shape of an asterisk *. These are such a fun way to use up the extra batter and decorate around the snowman!
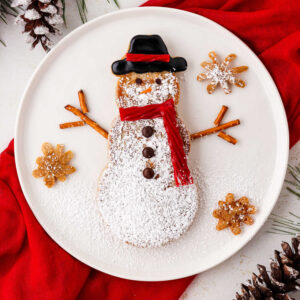
The snowy effect from the powdered sugar is my favorite part! Make however many snowmen you want and then enjoy your breakfast!
More Breakfast Recipes You’ll Love!
- Make some rich and sweet Chocolate Pancakes for a fun breakfast that the whole family will rave about!
- Cinnamon Roll Waffles will be your new favorite breakfast creation. Super easy and so yummy!
- Need an on-the-go breakfast treat? Then make these Peanut Butter Banana Muffins.
- These Pancake Bites are something every kid will enjoy! You can make tons of different flavors too.
Snowman Pancakes
Ingredients
Pancake Ingredients
- 1 cup whole wheat flour
- 1 cup unbleached all-purpose flour
- 3 Tablespoons sugar
- 2 teaspoons ground cinnamon
- 2 teaspoons baking powder
- 1 teaspoon baking soda
- 1 teaspoon sea salt
- 1 ½ cups whole milk
- 2 large eggs
- 4 Tablespoons vegetable oil + extra for cooking
Decorating Ingredients:
- Powdered sugar
- Mini chocolate chips
- Fresh shredded carrots
- Black cookie icing
- Twizzlers
- Mini M&M’s
- Pretzel sticks
- Strawberries
- Blueberries
- Whipped cream
Instructions
- Measure all of the dry pancake ingredients (flours, sugar, cinnamon, baking powder, baking soda, salt) and pour into a medium size bowl. Whisk. Set aside.
- Measure all of the wet ingredients (milk, eggs, oil) and pour into a blender. Blend on medium speed until they are completely blended, about 20-30 seconds.
- Slowly pour the dry ingredients into the blender. I use a Vitamix and it can handle all of the dry ingredients at one time, but if needed, you can pour half of the dry mixture in, blend, and then add the rest and blend again. Blend starting on low and work your way up to high power. Blend for 20-30 seconds. If needed, scrape down the sides of the blender using a rubber spatula and then blend again. Blend well, making sure all ingredients are fully incorporated. Blend until there are no lumps.
- Place a medium size skillet on the stovetop and pour about ½ tablespoon of vegetable oil in it. Turn the burner on medium heat. On an electric stove, I recommend using setting 3. Let the skillet get nice and hot while you prep the batter in the next step.
- Fill your frosting bulb with the pancake batter and place the round frosting tip on the bulb. This frosting bulb makes forming the snowmen so easy, and I can’t recommend this set enough! They are very convenient, and they work so much better than a traditional piping bag… especially when little hands are helping!
- Once the skillet is nice and hot, use a spatula to spread the oil around to make a nice, even layer. Use the frosting bulb to squeeze in some pancake batter. The first step is to form the head of the snowman. Starting near the top of the skillet, squeeze out enough batter to form a circle that is about 2 inches in diameter. No need to make a circle. The batter will spread out nicely! The skillet should be hot enough that the batter bubbles very lightly. You don’t want it so hot that it sizzles loudly when the batter touches the skillet.
- Right after forming the head, move down to form the snowman’s body. Make another circle that connects to the head. Make it just slightly bigger than the head.
- Right after forming the body, move down to form the third circle in the same way you formed the head and the body, making sure it is connected. Make it just a little bit bigger than the other 2 circles.
- Finally, move to the top of the head to form the snowman’s top hat. First make a line right over the snowman’s head, making sure it connects to the head. This is the brim of the snowman’s hat. Then draw a small outline of a square right over the line and fill it in to complete the snowman’s hat. Cook until bubbles begin to form and pop on the body of the snowman. About 2-3 minutes.
- Flip the pancake and cook for 1-2 minutes on the opposite side. The pancakes should be a light, golden brown color when finished cooking. Remove from the skillet and place in a single layer on a large plate or platter while you cook the rest. Parchment paper on a cooling rack works nicely, too! The pancakes will need to cool slightly before decorating. It may take a few tries to really get the hang of making the snowman, but the bulb makes it super easy! As long as everything is connected and you give the batter enough time to cook before flipping, they actually flip pretty easily!
- Before adding more batter to the skillet each time, make sure you have a thin, even layer of oil spread around the skillet. This will help the snowmen cook well and prevent sticking, making them super easy to flip!
- Repeat steps 6-11 until you have used up all the batter, refilling the frosting bulb as needed. We could make about 3 snowman pancakes between fillings. This recipe should make about 12-15 snowman pancakes, each about 7-8 inches in total length!
- If you have any extra batter at the end, you could try making snowflakes by making the shape of an asterisk *. These are such a fun way to use up the extra batter and decorate around the snowman!
- Time to decorate! Use a sifter to sprinkle powdered sugar over each snowman. Decorate with candy eyes and buttons, pinch off the tip of a shredded carrot to make the cutest little nose, fill in the hat using cookie icing, and fashion your snowman with a scarf made of Twizzlers! Break some pretzel sticks to form the arms, and finish the scene with a dollop of whipped cream to look like snow! For a fresh, healthy version of snowman pancakes, garnish your snowman with fresh or frozen fruit! Blueberries can be used for buttons, strawberries can be thinly sliced to make a scarf, you can even use raisins for eyes.