Leprechaun Trap
St. Patrick’s Day is coming up soon so it’s time to time to try to catch a leprechaun. This easy DIY Leprechaun Trap is full of rainbows lots green and gold to be as eye-catching and enticing as possible for the little gold-lover. We even made him a little ladder to help him scurry up and land right on the trap door!
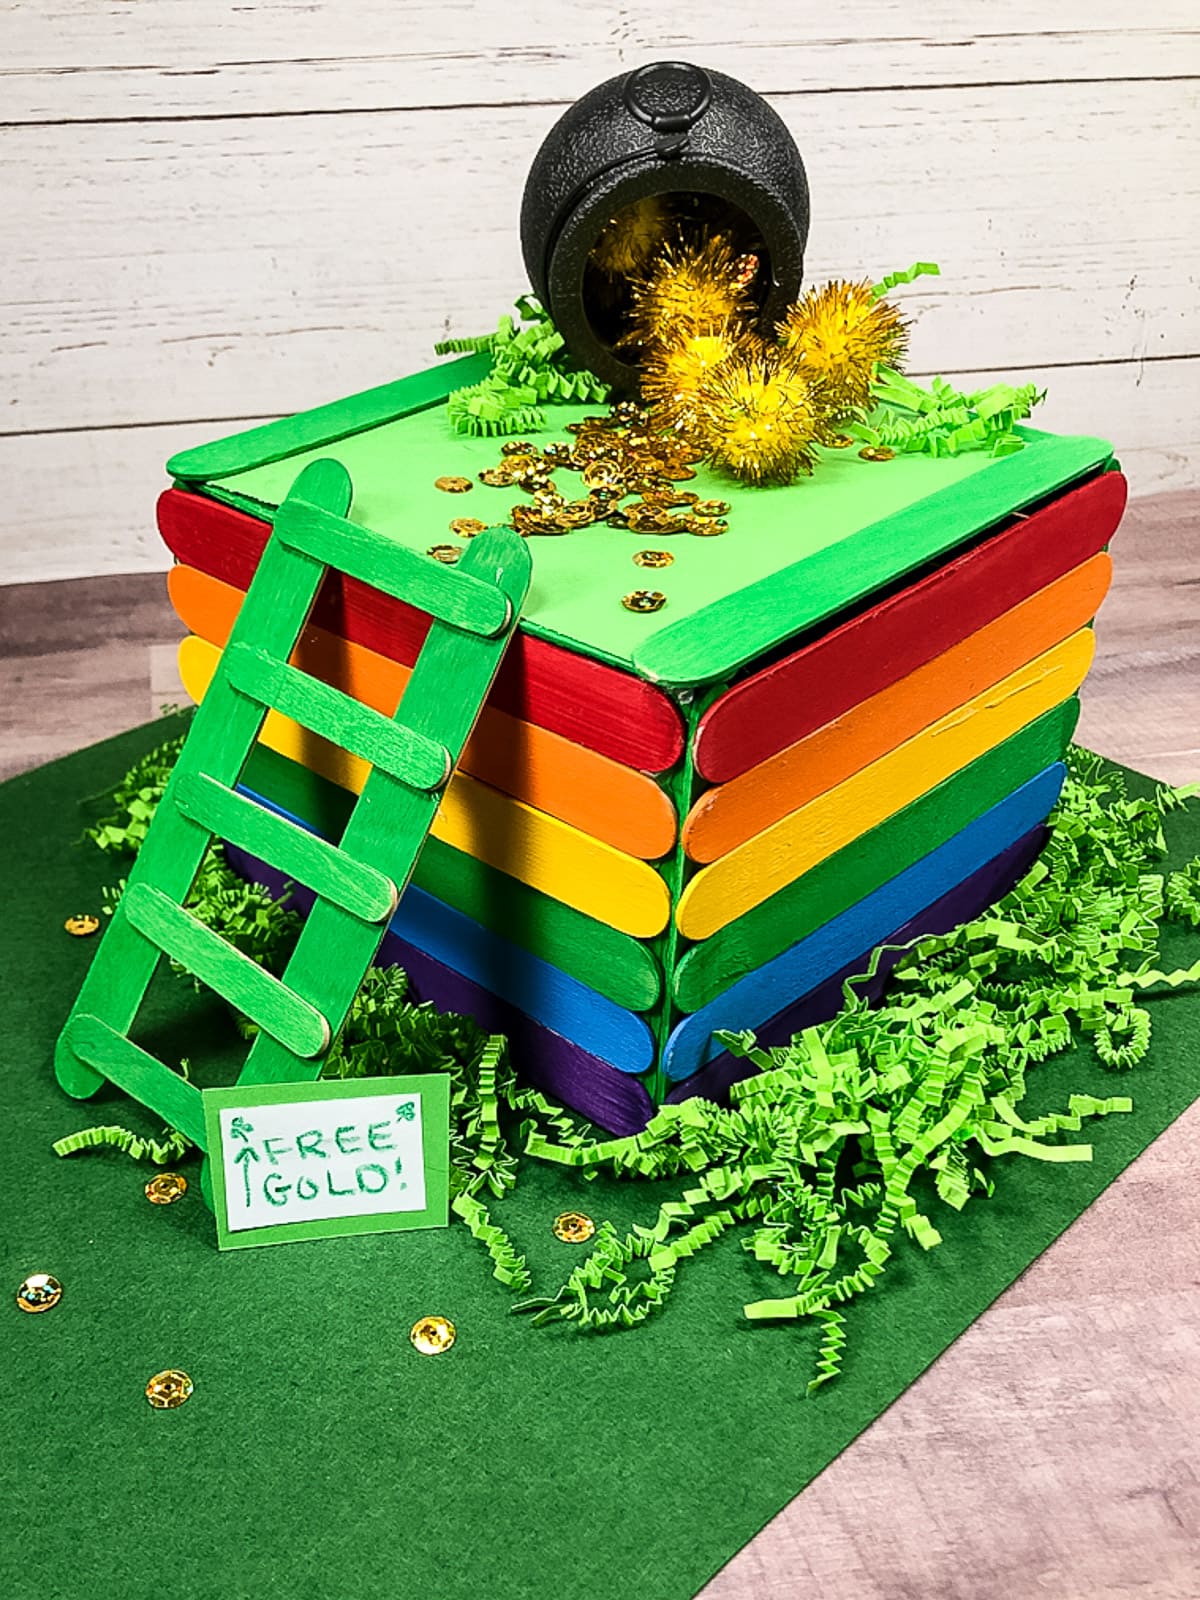
And what Leprechaun is going to pass up free gold?
If your kids want to trap a leprechaun, show them this easy project idea and let’s get to work!
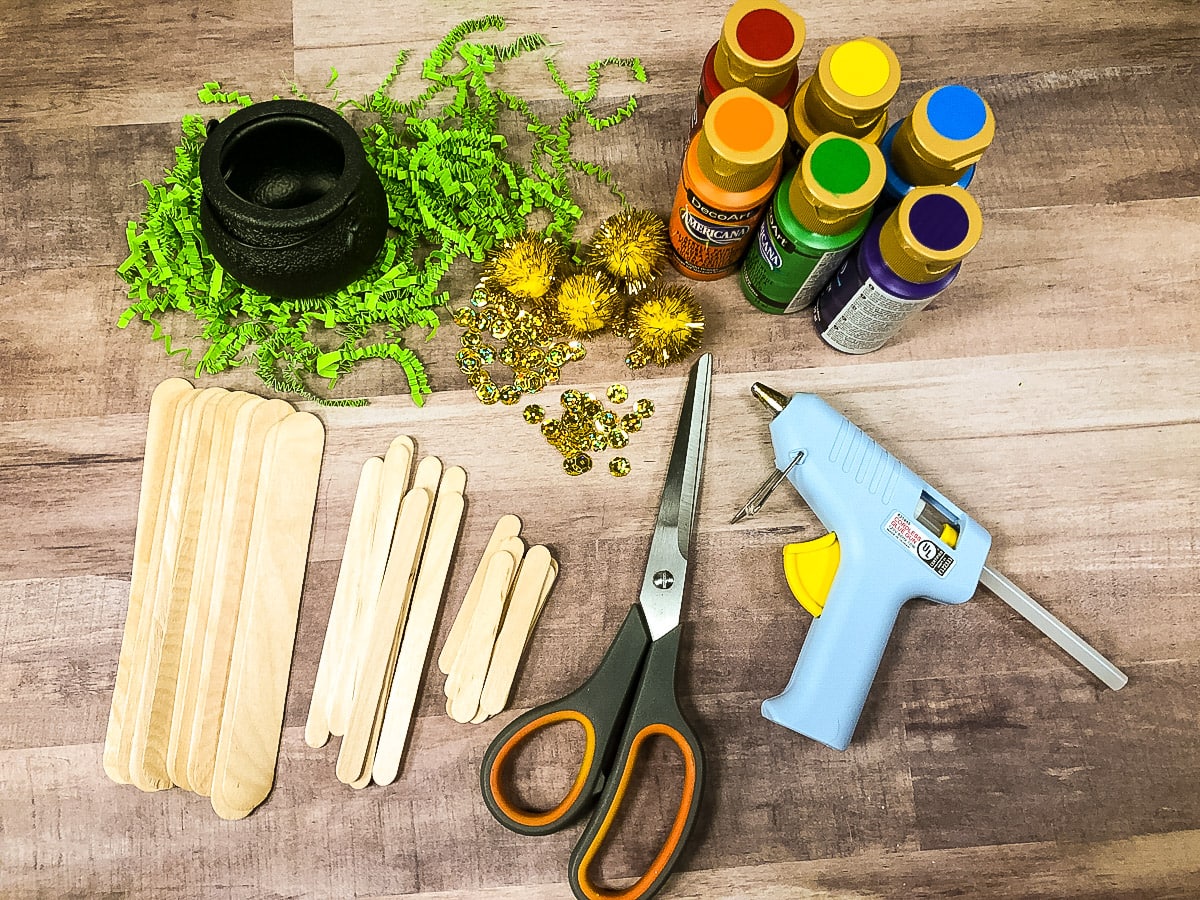
Supplies for this Project
- Jumbo popsicle sticks
- Regular Popsicle Sticks
- Mini Popsicle Sticks (You could also cut regular sized ones in thirds to replace the mini ones)
- Acrylic paint in rainbow colors
- Green construction paper or cardstock.
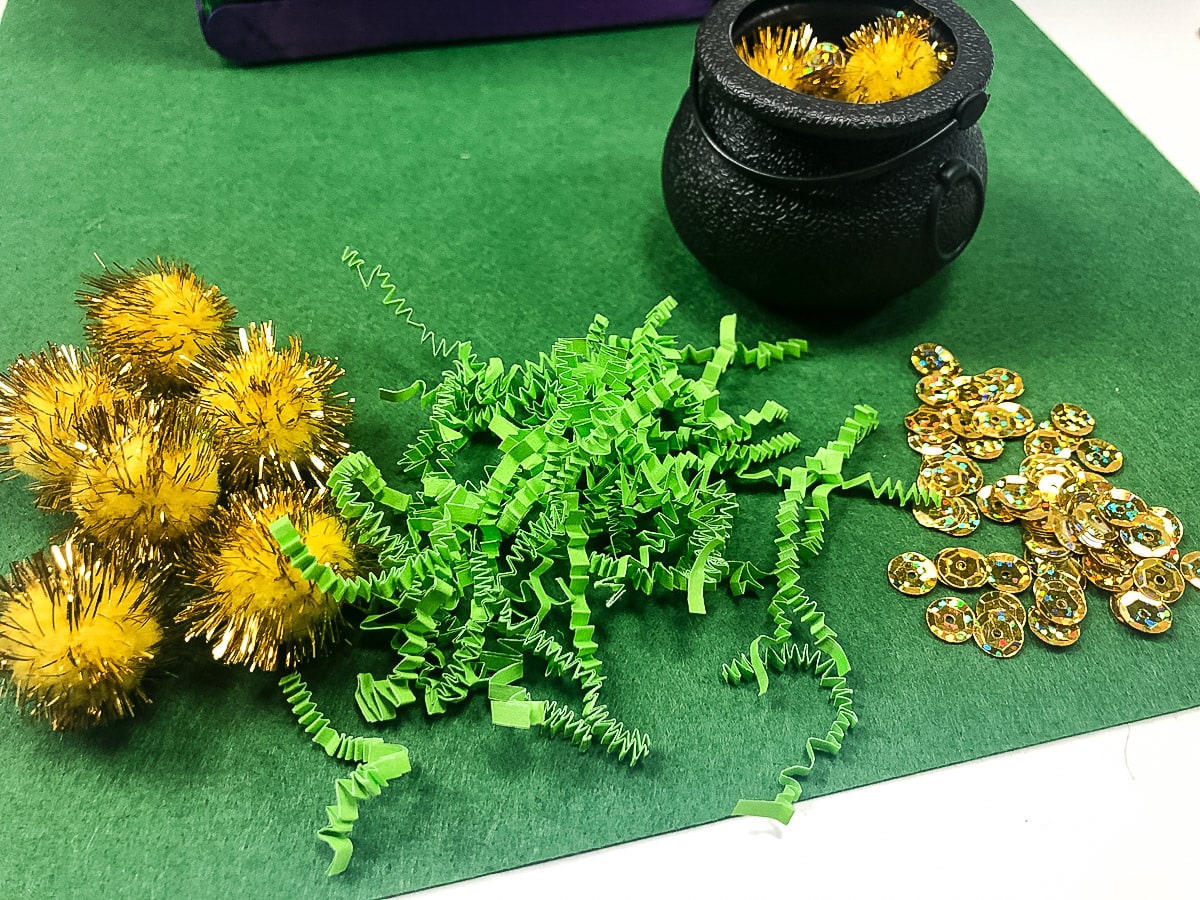
- Plastic cauldron
- Gold sequins
- Green crinkle paper for grass
- Gold Pom Poms
- Exacto knife or scissors
- Hot glue gun
- Paintbrushes

Leprechaun Trap Step-by-Step Tutorial
This is a fun and creative activity for kids, but there is a lot of hot glue involved, so make sure you can be around to help them during these steps!

Building the Walls
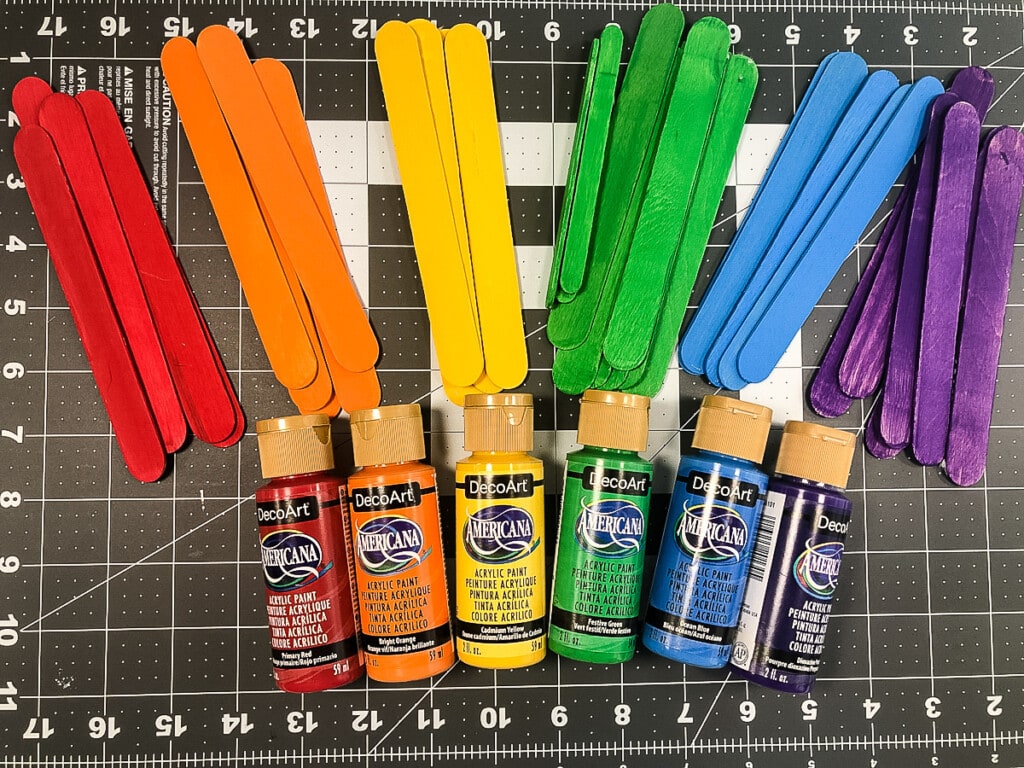
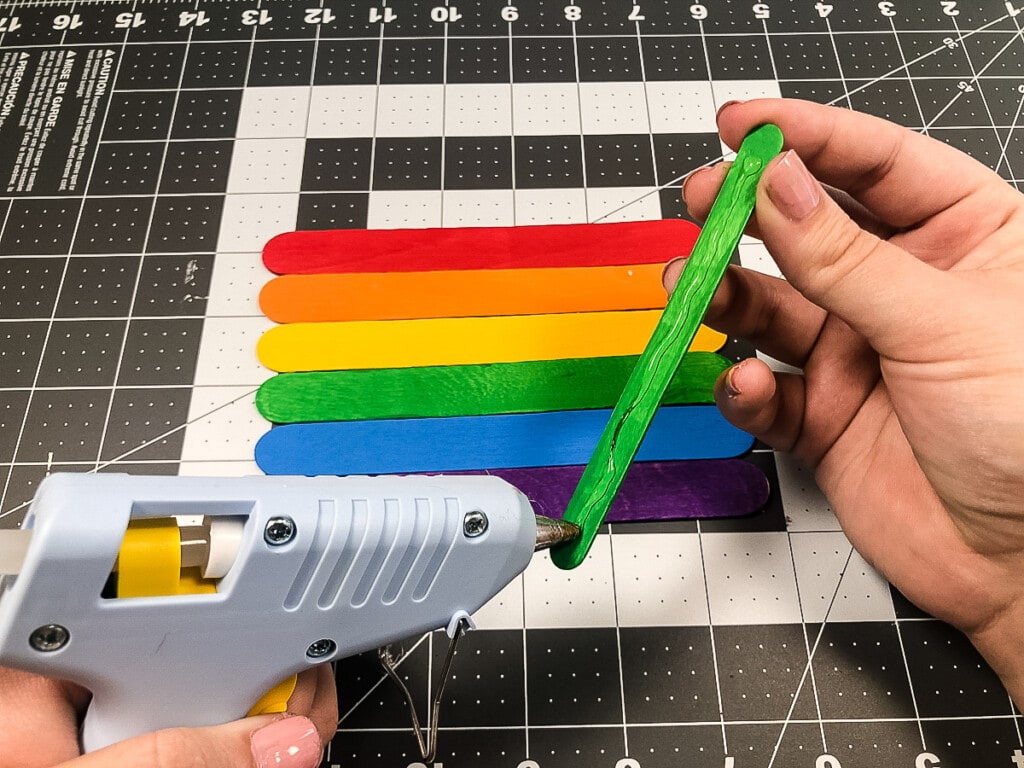
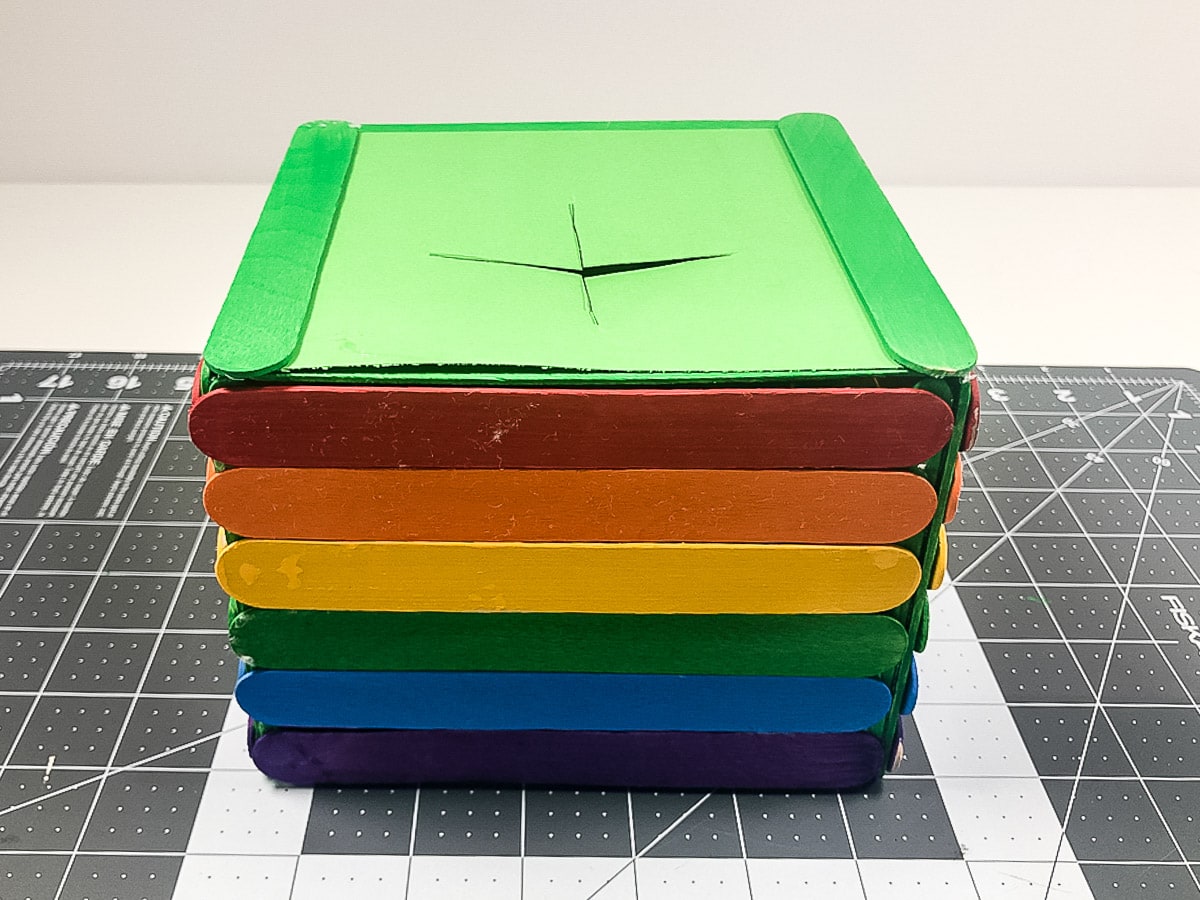
- Start by painting your popsicle sticks to make the base of your trap. You’ll need 4 jumbo sticks of each color, plus 6 extra green ones. You’ll also need 8 regular sized and 5 mini sized sticks painted green.
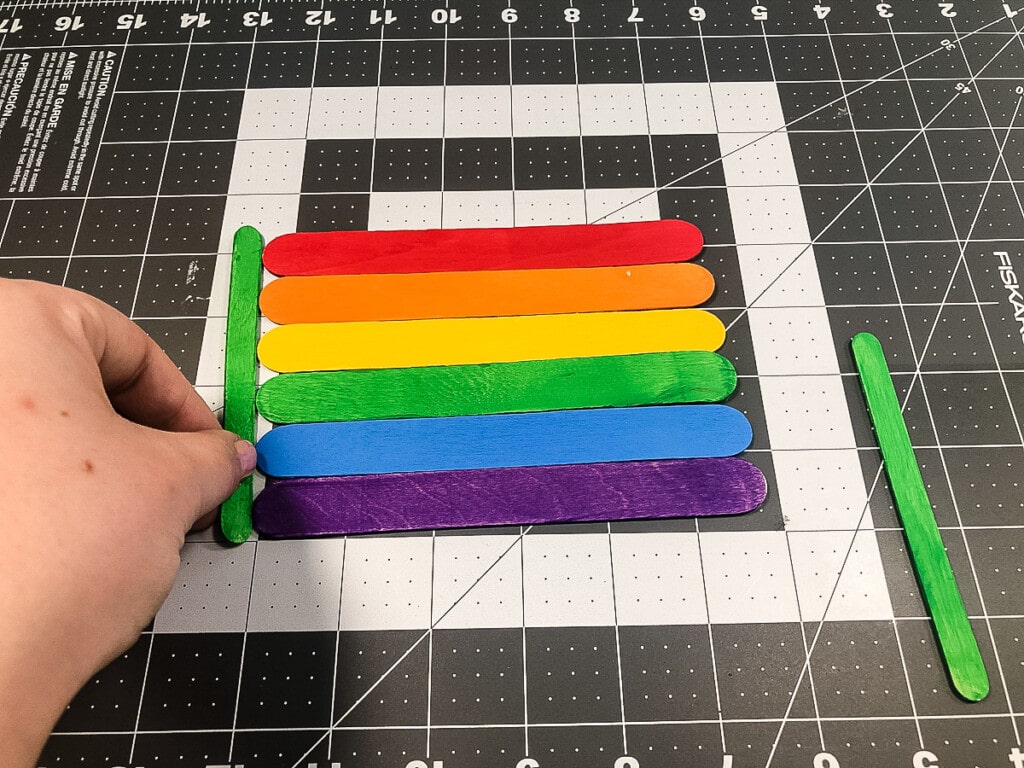
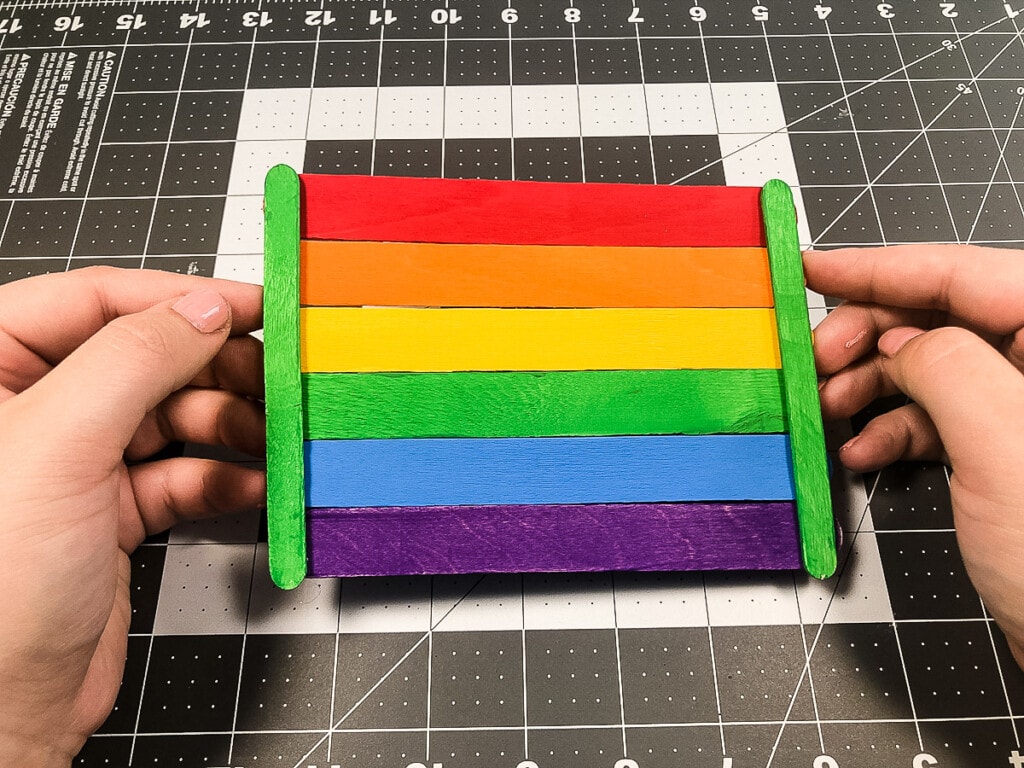
- Make your walls by laying one of each color jumbo stick side-by-side in rainbow order. Use a popsicle stick to make sure the ends are lined up straight.
- Then hot glue one regular sized stick across each end of the wall. Repeat this step until you have four walls.
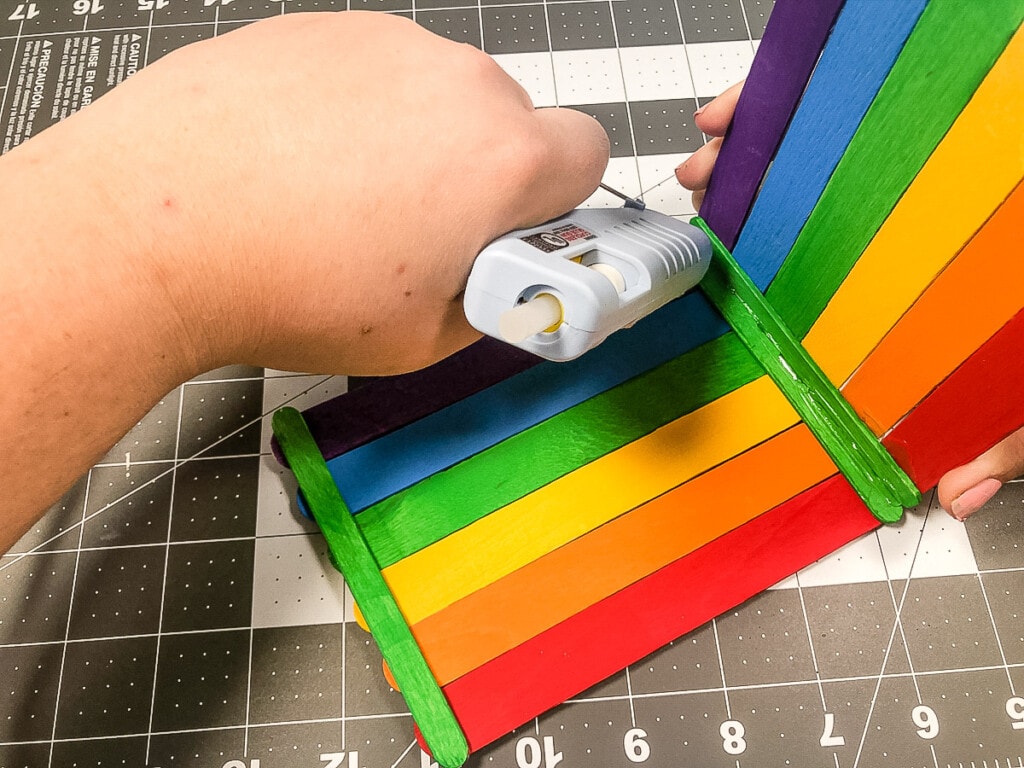
- To connect the walls, make a thin line of hot glue on the side of one green stick and press it down onto the top of the green stick from the next wall.
- You can make it more sturdy by running a line of glue down the corner created by the two walls. Let this dry on its side until the glue dries.
- Then continue adding walls all the way around. To add the last wall, you will put glue on both sides at once before pressing it into place. If there is some warping in your popsicle sticks, you may have to glue an extra one into one or two of the corners to help them connect and stay glued.
- Just add a plain one on and paint it green after the glue dries. It will blend right in.
Quick Tip: Grab these Jumbo Colored Popsicle Sticks so you don’t have to paint yours!


Building The Trap Door and Ladder
The next step is to assemble the Leprechaun Traps Door and Ladder!
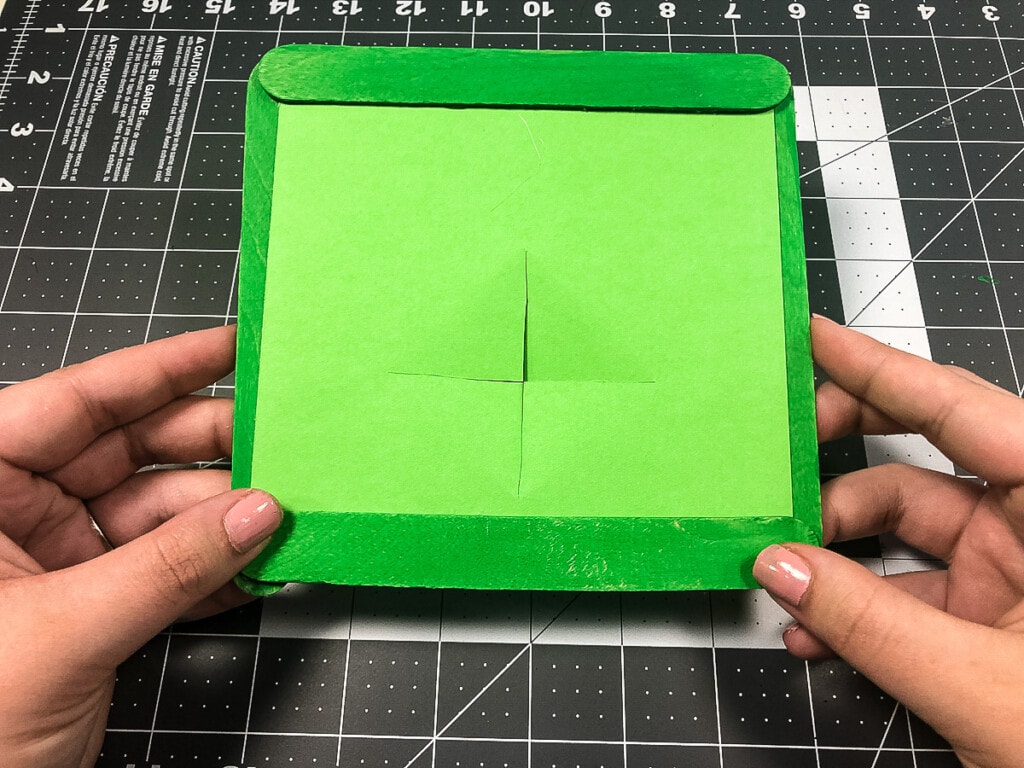
- First make the trap door ceiling by cutting a piece of cardstock or construction paper into a 5.5” square.
- Then mark a cross shape into the middle and cut along the lines with an exacto knife to create a trap door.
- Glue one jumbo popsicle stick on two opposite sides of the paper. Then flip it over and glue two more jumbo sticks on the other two sides. Once it’s dry, set it on top of the walls.
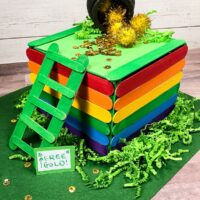
- Next glue the green mini sticks onto the two remaining jumbo sticks to create a ladder. Lean that up against the front of the trap so the leprechaun can get to his gold!
Assemble the Trap!
- The final step is to glue the trap door on the base of the trap and then decorate.
- You will also want to glue the ladder to the front of the trap at this time.
Decorating your Leprechaun Trap
Now it’s time to decorate!
- Start by gluing the cauldron onto the paper and filling it with gold pom poms and sequins.
- Then sprinkle some more in front of the cauldron so that the spilled gold covers the trap door.
- Add some crinkle paper around the back of the cauldron and around the bottom of the walls for grass.
- Make your trap even more enticing for a passing leprechaun by adding a few sequins in front of the ladder and a “free gold” sign.

And there’s your trap!
Encourage your kids to have fun with this project and use their imagination. Ask them what they think will get the leprechaun to fall for their trick and what will happen once he’s stuck inside.
Oh, and be sure to save any leftover popsicle sticks to make this Scarecrow Craft in the fall!
If you take a picture and share them on Instagram make sure to #kidsactivityzone or tag us @kidsactivityzoneblog so we can see them!
Leprechaun Trap
Ingredients
- Jumbo popsicle sticks
- Regular Popsicle Sticks
- Mini Popsicle Sticks You could also cut regular sized ones in thirds to replace the mini ones
- Acrylic paint in rainbow colors
- Green construction paper or cardstock.
- Plastic cauldron
- Gold sequins
- Green crinkle paper for grass
- Gold Pom Poms
Instructions
- Paint popsicle sticks. You’ll need 4 jumbo sticks of each color, plus 6 extra green ones. You’ll also need 8 regular sized and 5 mini sized sticks painted green.
- Make your walls by laying one of each color jumbo stick side-by-side in rainbow order. Use a popsicle stick to make sure the ends are lined up straight. Then hot glue one regular sized stick across each end of the wall. Repeat this step until you have four walls.
- To connect the walls, make a thin line of hot glue on the side of one green stick and press it down onto the top of the green stick from the next wall. You can make it more sturdy by running a line of glue down the corner created by the two walls. Let this dry on its side until the glue dries. Then continue adding walls all the way around. To add the last wall, you will put glue on both sides at once before pressing it into place. If there is some warping in your popsicle sticks, you may have to glue an extra one into one or two of the corners to help them connect and stay glued. Just add a plain one on and paint it green after the glue dries. It will blend right in.
- Next make the trap door ceiling by cutting a piece of cardstock or construction paper into a 5.5” square. Then mark a cross shape into the middle and cut along the lines with an exacto knife to create a trap door.
- Glue one jumbo popsicle stick on two opposite sides of the paper. Then flip it over and glue two more jumbo sticks on the other two sides. Once it’s dry, set it on top of the walls.
- Next glue the green mini sticks onto the two remaining jumbo sticks to create a ladder. Lean that up against the front of the trap so the leprechaun can get to his gold!
- Now it’s time to decorate! Start by gluing the cauldron onto the paper and filling it with gold pom poms and sequins. Then sprinkle some more in front of the cauldron so that the spilled gold covers the trap door. Add some crinkle paper around the back of the cauldron and around the bottom of the walls for grass.
- Make your trap even more enticing for a passing leprechaun by adding a few sequins in front of the ladder and a “free gold” sign.