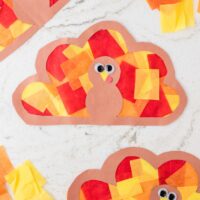
Turkey Suncatchers
With a few supplies you will have so much fun crafting these Turkey Suncatchers for an easy fall craft.
Print
Pin
Servings: 1 Turkey Suncatcher
Ingredients
- Heavy-duty construction paper brown, red, and yellow
- Pencil
- Scissors
- Tissue paper red, yellow and orange
- Contact paper clear
- Glue stick
- Googly eyes large
- Turkey Template
Instructions
- Let’s start by printing out the turkey template and cutting it out.
- Place the cut-out turkey template on top of a piece of brown construction paper and trace the outline inside and out. Cut your tracing and set aside.
- Next, cut your red, yellow, and orange tissue paper into 2-inch squares. Set aside.
- Take your clear contact paper and cut a piece slightly larger than the turkey. Place the turkey underneath the contact paper with the sticky side up. Place the previously cut tissue paper squares on the contact paper, filling all the negative spaces inside the turkey template. Feel free to overlap the tissue paper squares and press them to secure using additional glue if necessary.
- Place some glue on the back of your turkey template and lay it over your tissue-covered contact paper. Align the turkey so the tissue paper acts as stained glass and no gaps are showing. Cut the excess contact paper and place a book or heavy object on the turkey to secure it for a few minutes.
- Cut your “beak” and “wattle” out of yellow and red construction paper using the templates provided.
- Glue the “beak” and “wattle” to the face of the turkey. Then, glue the googly eyes just above the beak. Allow a few minutes to dry.
- Place on your favorite door or window and watch the sun shine through this cute Turkey Suncatcher!
Notes
- If you don’t have a printer, this turkey design is easy to draw freehand.
- If working with smaller children, cutting the template beforehand saves time with this activity as it uses fine motor skills.
Tried this recipe?Please leave a comment below or pin it to your Pinterest account!