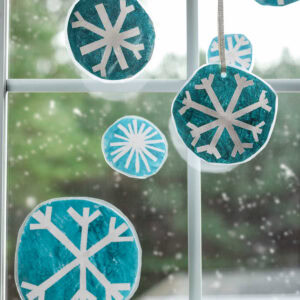
Tape Resist Snowflakes Craft
Create beautiful winter art with this easy Tape Resist Snowflake Craft! Using simple supplies like tape, paint, and paper, kids can make magical snowflake designs. It’s a fun, creative activity perfect for winter days indoors!
Print
Pin
Ingredients
- Blue paint acrylic or washable is fine
- Painter’s tape
- Paint sponges
- Glitter
- Cardstock paper 80lb thickness works great
- Hole puncher
- Con-Tact self-adhesive paper clear (shelf liner)
- Ribbon or yarn
- Scissors
Instructions
- Cut the painter’s tape into strips as you make snowflake shapes and patterns on the cardstock paper. You can make the snowflakes as big or small as you like! Get creative and have fun making symmetrical patterns… Just like real snowflakes!
- Once you have finished making all the snowflake patterns, use a paint sponge to dab a thin layer of paint all over each snowflake. Make sure to paint over the strips of painter’s tape to make the snowflake pattern stand out.
- Sprinkle glitter over each snowflake.
- Allow the paint to dry.
- When the paint is dry, cut around each snowflake. Then remove the painter’s tape to reveal your one-of-a-kind snowflake!
- Place a large piece of contact paper on your work surface and remove the backing. Lay the sticky side facing up and begin placing your snowflakes on top.
- Cut another piece of contact paper to the same size as the first and peel off the backing. Place the contact paper over the snowflakes, sticky side down, making sure the sticky sides of the contact papers are touching each other and the snowflakes are in between. Press firmly all around the snowflakes to seal them in. The contact paper isn’t necessary, but I like to use it for two reasons: It preserves the snowflakes for years to come, and it also helps to contain any loose glitter! This is similar to laminating the snowflakes, which would work, as well!
- Cut around each snowflake. Leave a little edge of the contact paper all around each snowflake. This will help to seal them in better and preserve your work of art!
- Use a hole puncher to make a hole in the top of the snowflakes about an inch from the top. Make sure to leave enough space at the top so that the hole doesn’t rip through.
- Cut a piece of ribbon or yarn long enough to tie it up and hang your snowflake for display. Insert one end of the ribbon through the hole and tie a knot at the top to form a loop. You can also use double-sided sticky tape or sticky dots to display the snowflakes in a window!
- Hang up your snowflakes for display! If you hang them up in a window, you can enjoy the sunshine coming through them!
Tried this recipe?Please leave a comment below or pin it to your Pinterest account!