Snowman Craft
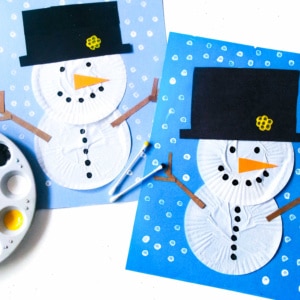
Easy snowman craft perfect for the winter using cupcake liners, paint and art supplies to craft. Perfect for young kids.
Print
Pin
Servings: 1 snowman
Ingredients
- White cupcake liners
- Paint black, yellow
- Q-tips
- Cardstock - black orange, brown, background color of choice
- Scissors
- Glue stick
Instructions
- Begin by flattening two white cupcake liners.
- Glue the cupcake liners to a sheet of cardstock. We chose blue for an obvious choice. Make sure the cupcake liners are overlapping in the center to form a snowman.
- Now, cut a strip of black cardstock and simple rectangle for the hat.
- Glue the hat in place.
- Cut a simple triangle from orange cardstock for the nose. Also, cut some thin strips out of brown cardstock to make stick arms.
- Glue the nose in place. Glue the stick arms in place, too, by gluing a longer strip and then two smaller branches coming off the longer strip.
- Then, gather your paints and qtips. You will need a qtip for every color used.
- Start with the black paint. Dip a qtip in the paint then use it to stamp eyes.
- Continue by stamping a mouth and buttons, too.
- Next, use white paint and a qtip to stamp snowflakes falling around the snowman.
- Finally, we used another qtip and yellow paint to finish off our snowman with a qtip stamped flower. Make one stamp in the center, then stamp 6 circles around it to form the flower and complete this fun winter art project.
Tried this recipe?Please leave a comment below or pin it to your Pinterest account!