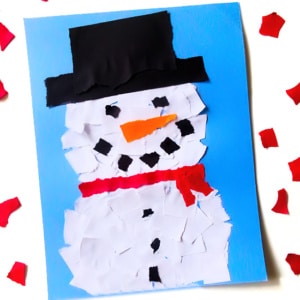
Ripped Paper Snowman Craft
Quick and easy Snowman Craft for kids using torn paper!
Print
Pin
Servings: 1 snowman
Instructions
- Choose your background color of cardstock. You want this paper to be thicker, so that it holds up to the glue better.
- Rip white paper into a bunch of pieces of different shapes and sizes.
- Spread glue in a snowman shape on cardstock.
- Begin placing the ripped pieces of white paper onto the glue to make a snowman. We like to start with the edges first and fill them in.
- Tear a strip of black paper and a rectangle of black paper.
- Glue both pieces of ripped black paper in place for the snowman's hat.
- Rip about small pieces of black paper. Glue 5 of these in place for the mouth. The rest are buttons going down the front of the snowman.
- Rip a triangle from orange paper and glue in place for the carrot nose.
- Rip a strip from the paper of your choice and two smaller strips.
- Glue these in place for the snowman’s scarf and that completes this super cute, easy, and fun winter toddler craft.
Tried this recipe?Please leave a comment below or pin it to your Pinterest account!