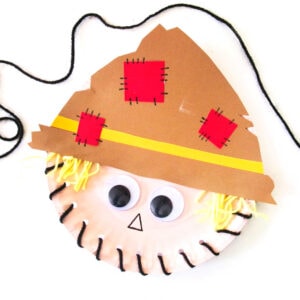
Paper Plate Scarecrow
Get into the fall spirit with this fun and easy paper plate scarecrow craft for kids!
Print
Pin
Servings: 1
Ingredients
- Scarecrow Hat Template
- Paper plates
- Tan acrylic paint
- Black marker
- Cardstock colors of choice
- Yarn black and yellow
- Googly eyes medium-large
- Single hole punch
- Tape
- Scissors
- Glue
Instructions
- Begin by painting a paper plate tan. Let the paint dry completely.
- When the paint is dry, punch holes around half the plate.
- Gather a long strand of black yarn and use tape to secure the end to the back of the paper plate. Now, begin lacing the black yarn around and through each hole until complete. Tape the final end to the back of the paper plate.
- Next, cut some small strands of yellow yarn for the straw hair. Glue the hair to the sides of the paper plate, right where the black lacing ends.
- Then, while the glue is drying, print the hat template and cut out the pieces. Trace the pieces on whatever color cardstock you would like and cut out. You will also need a thin strip from a different color cardstock for the belt of the hat.
- Glue all the pieces in place. Trim the excess from the sides of the belt.
- Cut some raggedy notches randomly around the edges of the hat.
- Cut some squares from a different color of cardstock and glue those like patches on the hat.
- Use a black marker to draw some sew lines keeping the patches in place.
- Glue the hat to the top of the paper plate.
- Finally, finish the scarecrow face by adding googly eyes.
- The very last step is to use the black marker to draw a simple triangle nose.
Tried this recipe?Please leave a comment below or pin it to your Pinterest account!