Paper Pinwheels
Create bright and playful paper pinwheels with this simple craft idea! It’s an easy and fun project for kids to get creative!
Print
Pin
Ingredients
- Cardstock paper
- Paper straws
- Paper fastener brads
- Hole puncher
- Scissors
- Pen/pencil
- Paintbrush
- Paper cutter
- Coin nickel or quarter
Instructions
- Cut the cardstock down to a 6-inch by 6-inch square. Use the extra strip of cardstock to make a cover for your pinwheel by tracing around a coin and cutting it out. Use a hole puncher to make a hole in the middle of the circle. Set aside.
- Fold the square in half diagonally to form a triangle. Press flat. Open it back up and fold it in half again to form another triangle using the opposite corners. Press flat. Punch a hole right in the middle of the paper on the edge of the paper.
- Open the square back up. You should have an X running right through the middle of the square, from corner to corner, and a hole in the middle of the square.
- Use scissors to cut along the lines of the X, starting at the corners of the square. Stop about 1 inch shy of the hole in the middle of the paper.
- Use the hole puncher to make a hole on the left side of each line that you just cut. Be sure to leave enough space between the hole and the edge of the paper so that the paper won’t rip through easily. You should have 5 holes total; one in the middle of the square, and 1 hole along each edge of the square to the left of the diagonal lines you just cut.
- Flatten one end of the paper straw and punch a hole through it.
- Use the end of a paintbrush (or a pencil/pen/skewer, etc.) to help assemble the paper pinwheel. *NOTE: If your paper isn’t a solid color or patterned on both sides, begin this step with the white side facing up so that you see the patterns when the pinwheel is complete. Stick the paintbrush through the hole in the middle of the square. Working with one corner of the square at a time, align the holes over the paintbrush. Carefully bend the paper as you put each hole over the paintbrush. Be careful not to press the paper and make a crease, though you can gently press it to flatten it out some.
- Once all the holes are aligned, add the circle cover you cut out in step 1.
- While holding all of the pieces in place, remove the paintbrush and place the brad fastener through the opening. Open the back prongs and press flat to hold everything in place!
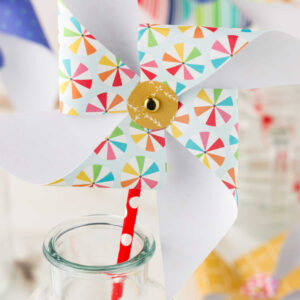
- Your paper pinwheel is complete! Take them out and enjoy watching them spin! You can also use them for a fun springtime decoration by setting them in a flower vase.
Tried this recipe?Please leave a comment below or pin it to your Pinterest account!