Ingredients
- 1 cup baking soda
- ½ cup citric acid
- ½ cup corn starch
- ½ cup Epsom salt
- 2 Tablespoons coconut oil melted
- 1 Tablespoon water
- Food coloring optional
Instructions
- Choose small toys or trinkets that are waterproof and safe for the bath. Wash and dry the toys thoroughly. Set aside.
- Combine the baking soda, citric acid, cornstarch, and Epsom salt in a large bowl. Mix the dry ingredients well, ensuring there are no lumps.
- Mix the melted coconut oil, water, and a few drops of food coloring, if desired, in a separate small bowl.
- Slowly add the wet ingredients to the dry ingredients, stirring continuously. Be careful not to add too much liquid at once to avoid premature fizzing.
- Take a small amount of the mixture and squeeze it in your hand. It should stick together without crumbling. If it is too dry, add a little more water.
- Place a heaping amount of the mixture into the bath bomb mold.
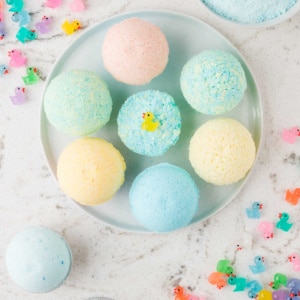
- Add a small toy or trinket in the center, ensuring it's centered and doesn't touch the sides of the mold. Top the mold with more of the mixture. Fill the other side of the mold with another heaping amount of the mix. Squeeze the 2 molds together firmly to pack the bath bomb.
- Gently remove the bombs from the molds and place them on a flat surface to dry for at least 24 hours.
- Drop one of your DIY bath bombs into a warm bath and watch it fizz. The surprise toy inside will make bath time even more enjoyable for the kids!
Notes
The great thing about bath bombs is that they have a long shelf life when stored properly. Place them into an airtight container and store for up to 6 months in a cool, dry place. You can store them in plastic bags if you prefer, but they may not last as long.
Tried this recipe?Please leave a comment below or pin it to your Pinterest account!