Snowflake Suncatcher Craft


Need a quick and easy winter craft to keep the kids busy? This Snowflake Suncatcher Craft is such an easy craft. Simply start by making a snowflake out of paper, then apply it to contact paper and decorate with tissue paper and finish it with another piece of contact paper on the back. They look so pretty hanging up in your windows!
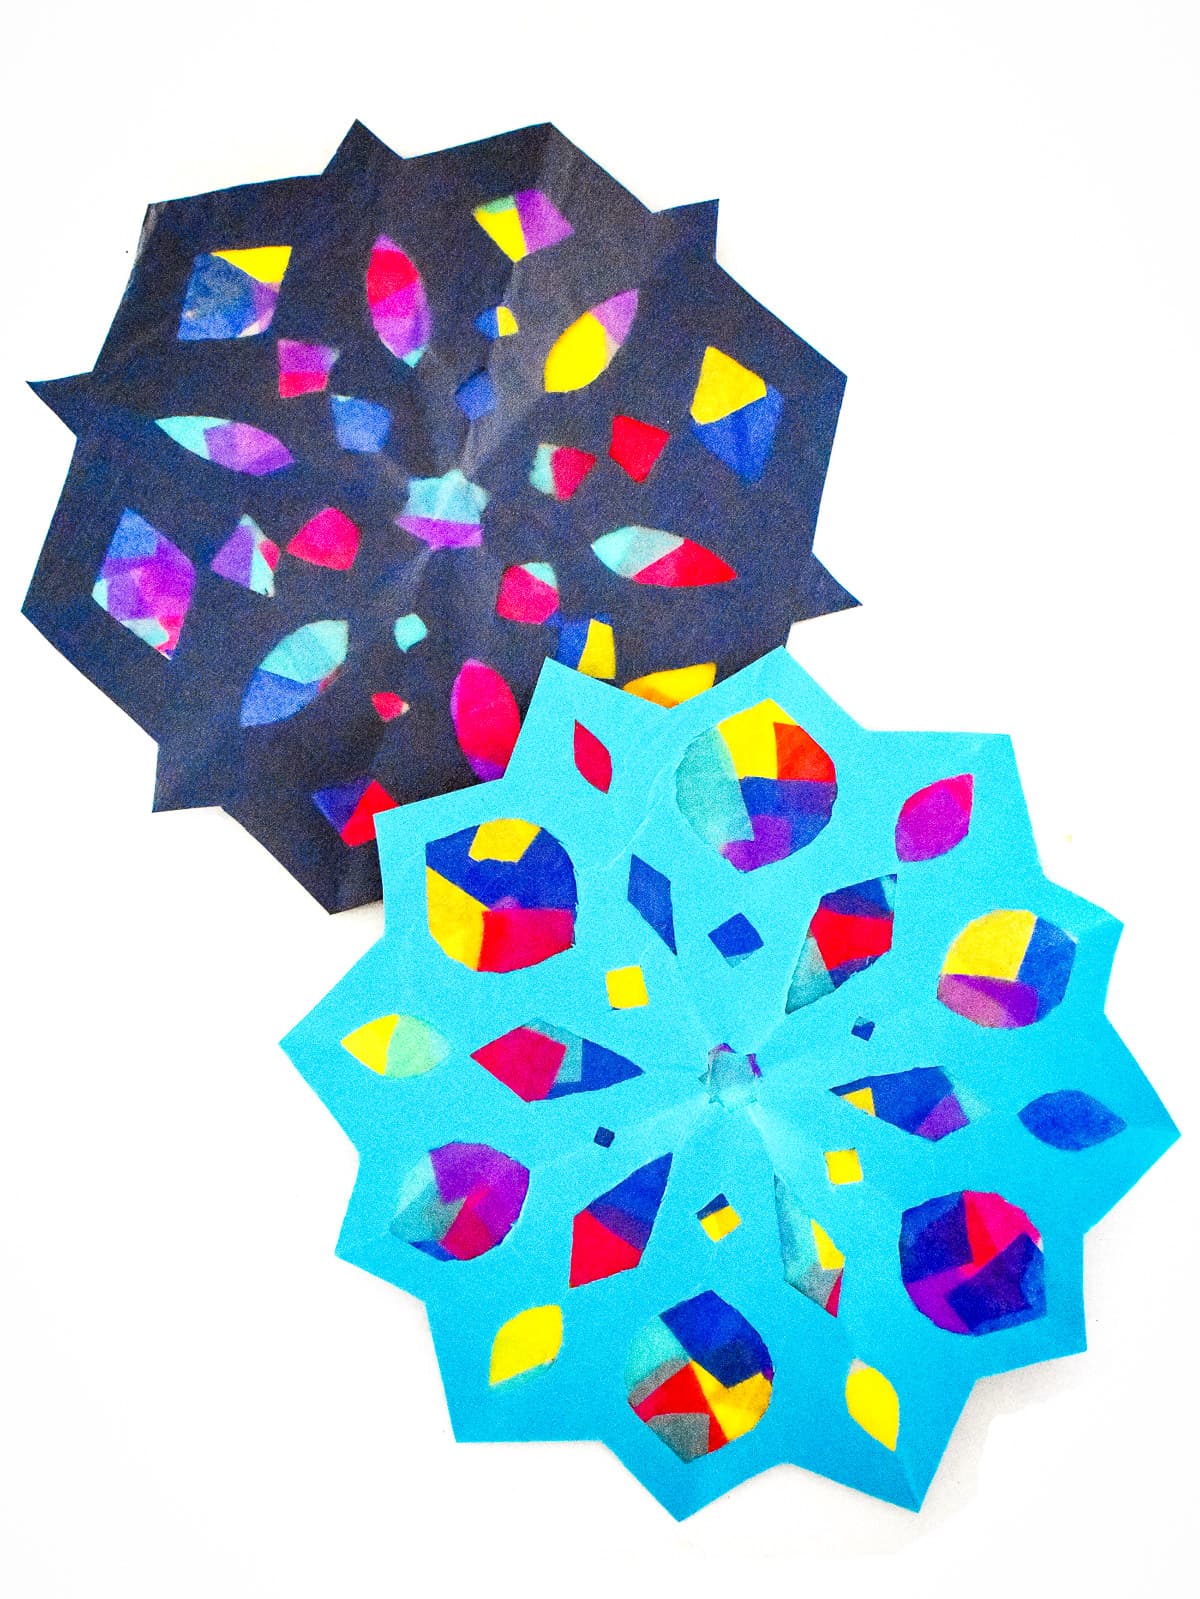
Got the winter blues? Chase them away by making this cute and easy winter craft. This Snowflake Suncatcher Craft is an easy craft for cold winter days. After you are done making them hang them up in your windows to brighten your day.
Suncatchers are so easy to make and each one is unique. It’s one of the easiest kids crafts to make at home. You need minimal supplies, they are quick and easy!
Plus, you can display them in your windows to add a festive and fun decoration. For an extra festive display, make this Christmas Tree Sun Catcher to hang next to your snowflakes!

Supplies Needed for Snowflake Suncatcher Craft
- Press n Seal Wrap or Clear Contact Paper
- Blue paper
- Tissue paper – assorted colors
- Scissors


How to Make a Paper Snowflake
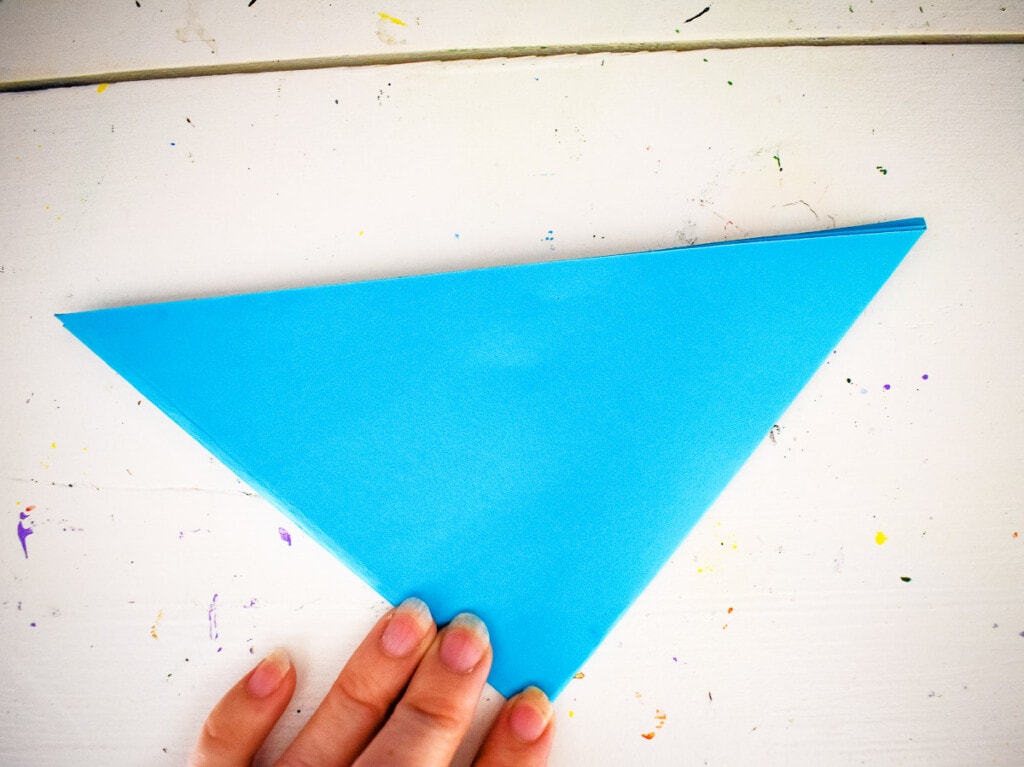
Begin by making your snowflake. To start, fold one corner of a sheet of blue paper into a triangle.
Cut the excess strip.
Fold over into another triangle.
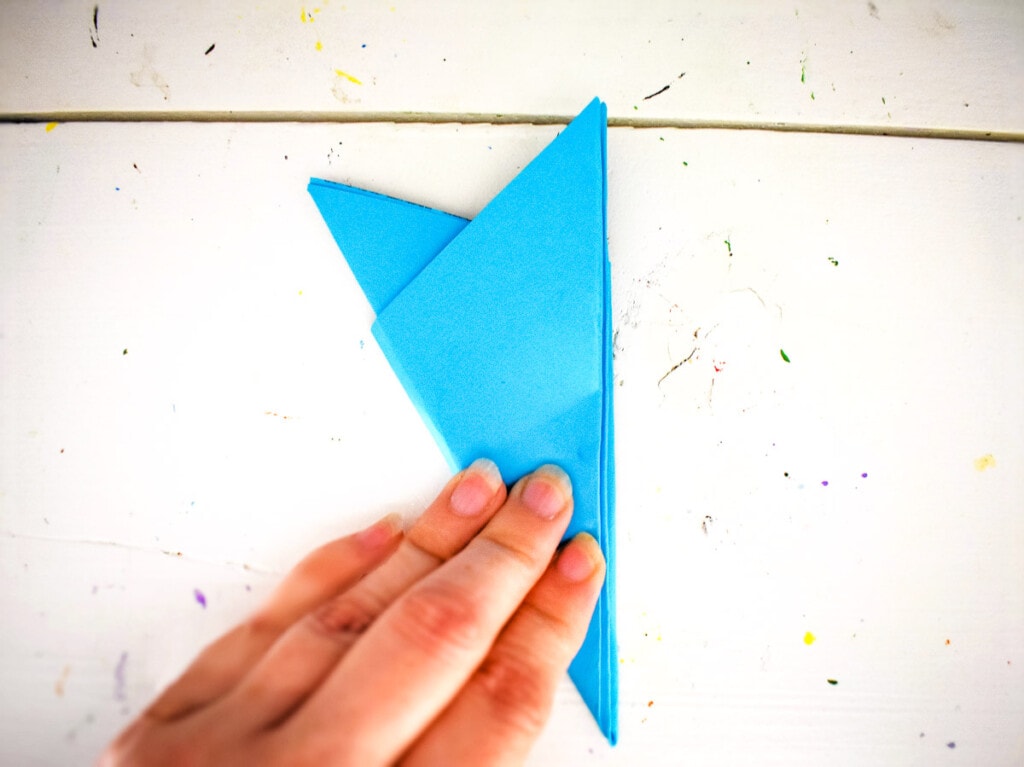
Now, fold one side over to a point.
And fold over the other side.
Cut the top.
From here, begin cutting patterns into the edges of the paper. All snowflakes are unique so make yours however you want.
Once cut, unfold the paper to see your design.

Cut Tissue Paper
Pick out the colors of tissue paper you want to use to decorate your Snowflake Suncatcher Craft and cut them into small squares.


Finish Snowflake
Now, tear a sheet of press n seal wrap. You could also use clear contact paper instead.
Press the snowflake into the wrap.
Next, cut a bunch of squares of tissue paper.
Press the tissue paper into the open spaces of the snowflake.
Once finished applying the tissue paper, tear another sheet of wrap and position over the tissue paper, sealing in place.
Trim all the excess wrap from around the snowflake. Make sure your scissors are clean or they may stick, making it difficult to cut.
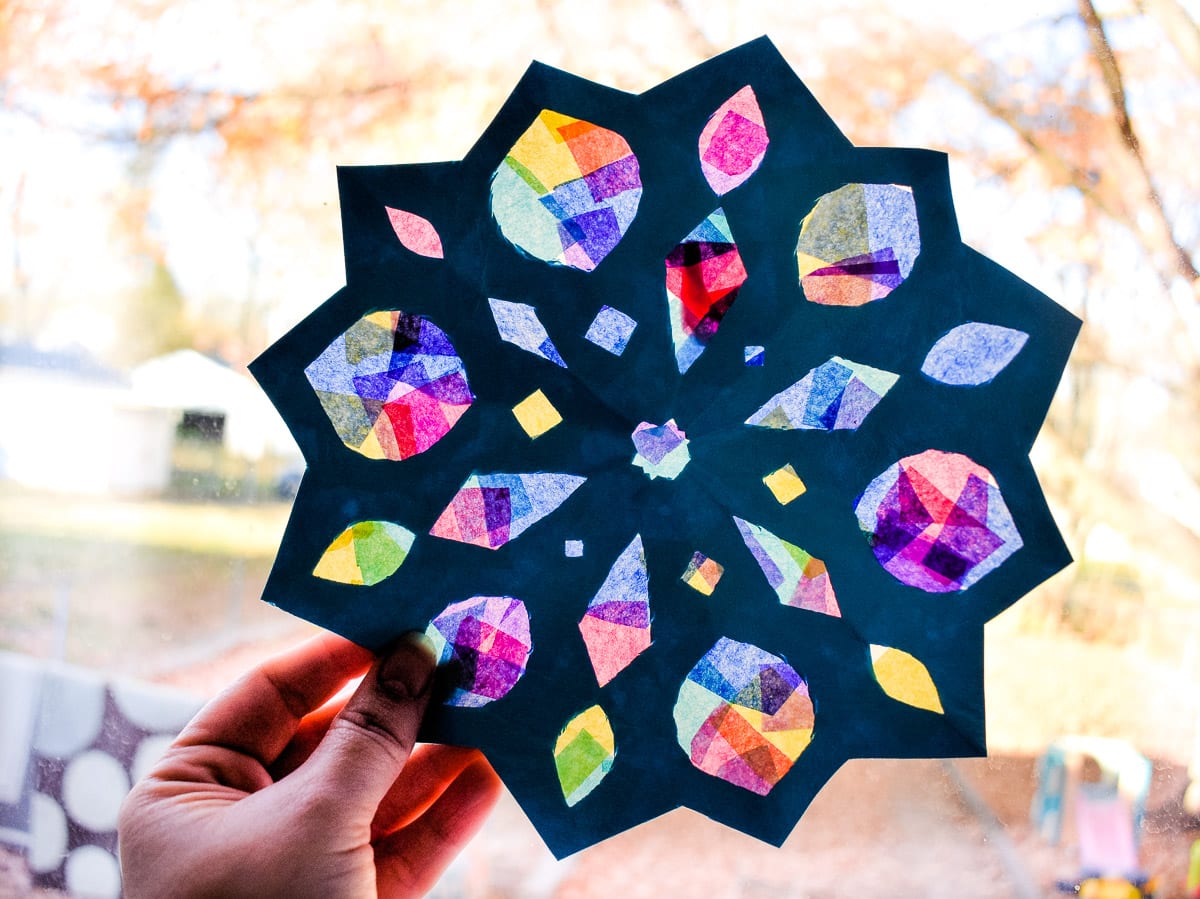
Continue with more uniquely beautiful snowflakes with more fun colors of tissue paper. Hold against the window to watch how the light makes the colors glow!

More Winter Craft Ideas!
- Quick and easy Paper Loop Snowmen are a fun activity to do on a cold winter day!
- Adorable Paper Polar Bear Craft is perfect for kids curious about animals!
- This Star Suncatcher is winter themed, but change the colors of tissue paper and it will be!
If you take a picture and share them on Instagram make sure to #kidsactivityzone or tag us @kidsactivityzoneblog so we can see them!

Snowflake Suncatcher Craft
Equipment
Instructions
- Begin by making your snowflake. To start, fold one corner of a sheet of blue paper into a triangle.
- Cut the excess strip.
- Fold over into another triangle.
- Now, fold one side over to a point.
- And fold over the other side.
- Cut the top.
- From here, begin cutting patterns into the edges of the paper. All snowflakes are unique so make yours however you want.
- Once cut, unfold the paper to see your design.
- Now, tear a sheet of press n seal wrap. You could also use clear contact paper instead.
- Press the snowflake into the wrap.
- Next, cut a bunch of squares of tissue paper.
- Press the tissue paper into the open spaces of the snowflake.
- Once finished applying the tissue paper, tear another sheet of wrap and position over the tissue paper, sealing in place.
- Trim all the excess wrap from around the snowflake. Make sure your scissors are clean or they may stick, making it difficult to cut.
- Continue with more uniquely beautiful snowflakes with more fun colors of tissue paper. Hold against the window to watch how the light makes the colors glow!
Julie,
These are great ideas! Thank you for making a printable page!
I’m so glad that is helpful!!
Loved this craft! Did it with my seniors at the Assisted Living community where I work. It was not too childish and wasn’t too difficult for those with dexterity concerns. I am so glad I stumbled upon your site. I will definitely be sharing more of your clever ideas with them. Thank you.
Thank you Lana for your comment! I’m so glad you enjoyed our craft!