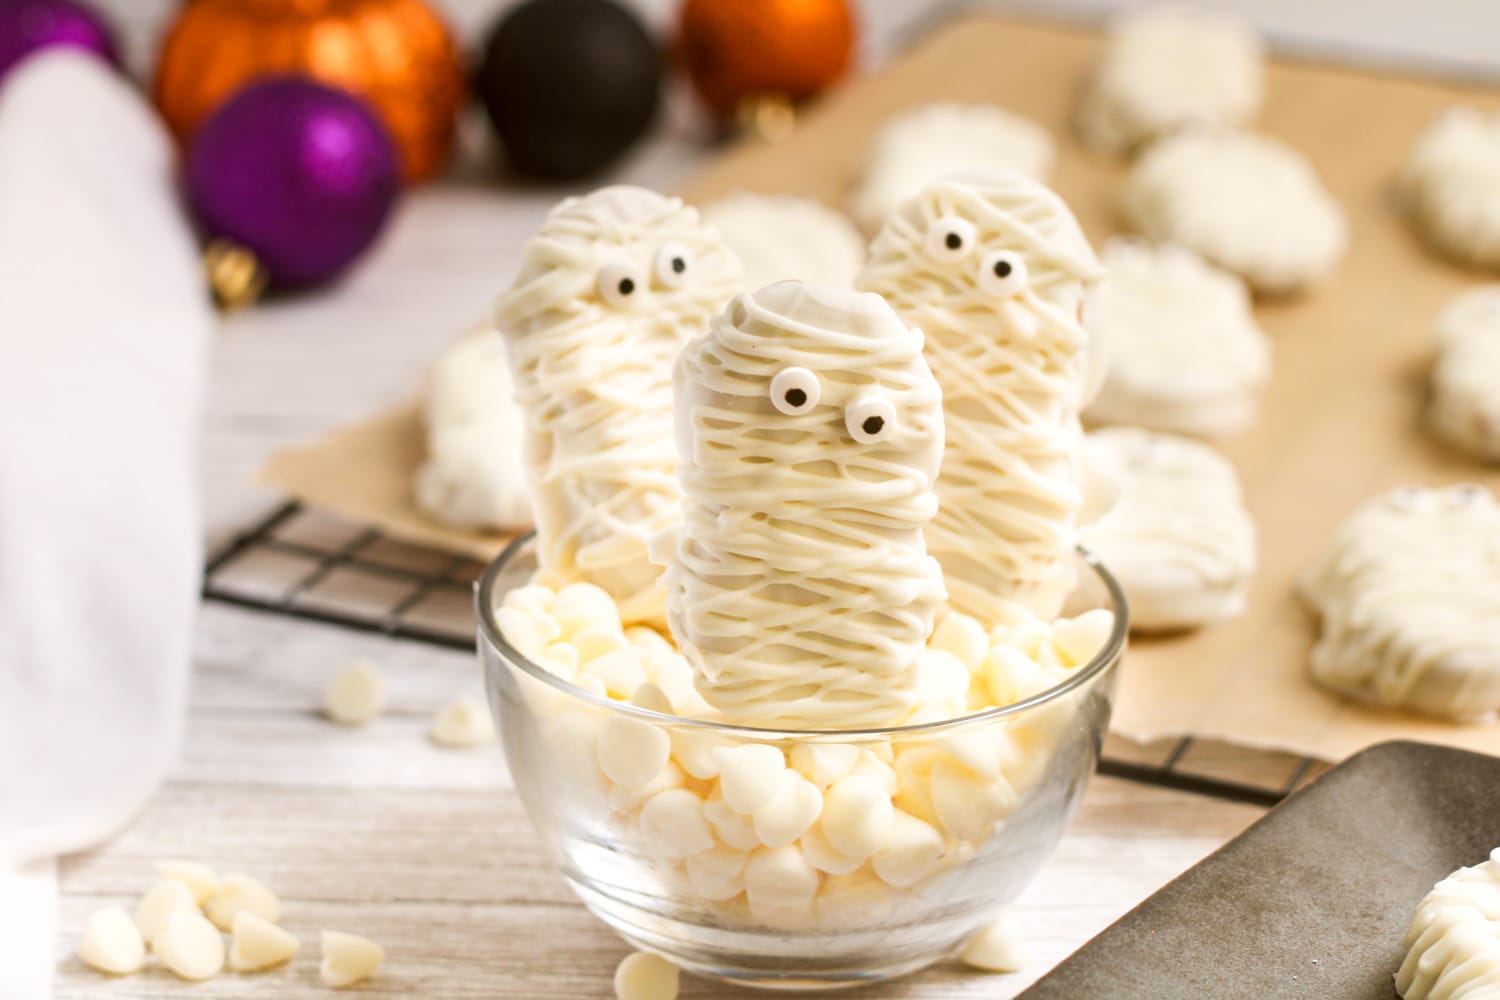
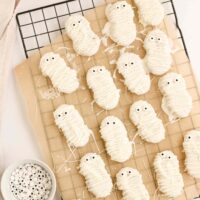
Nutter Butter Mummies
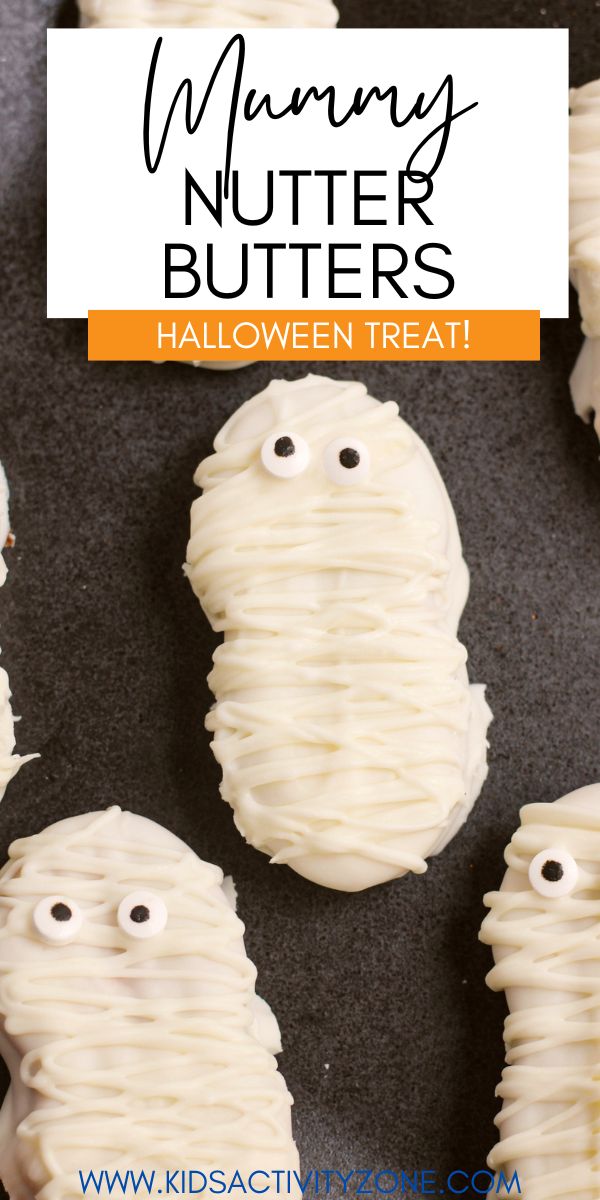
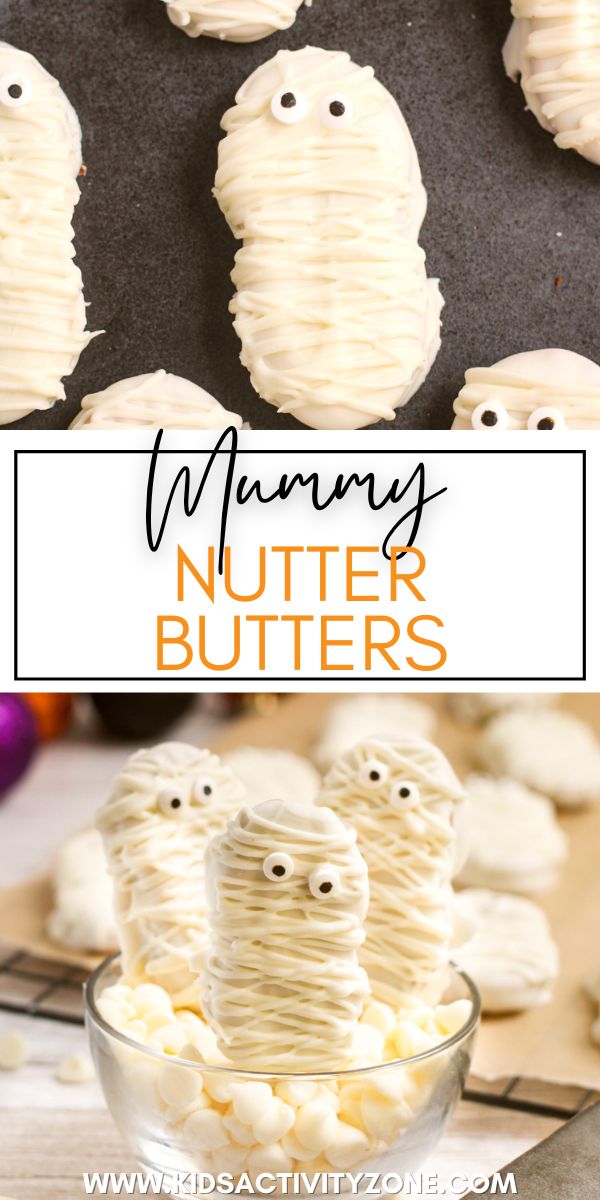
Quick and easy no bake Mummy Nutter Butters are the perfect Halloween Treat! Simply dip your Nutter Butter Cookie in white almond bark, then drizzled with more almond bark and garnish with candy eyes to look like a Mummy! They are so quick and easy, plus the kids will flip for them!
Want even more mummy ideas? You have to try our mummy brownies and mummy hot dogs after you give these Nutter Butter mummies a try!
4 Ingredient Halloween Treat!
This is such an easy recipe – the perfect spooky treat when you need something quick for Halloween!
All you do is melt, dip, and decorate! Using Nutter Butters makes these so easy. You’ll have a batch ready in no time.
They’re perfect for Halloween parties or for gifting. Or just make a batch as a fun activity leading up to the spooky holiday. The kids will love to help make them!
Ingredients Nutter Butter Mummies
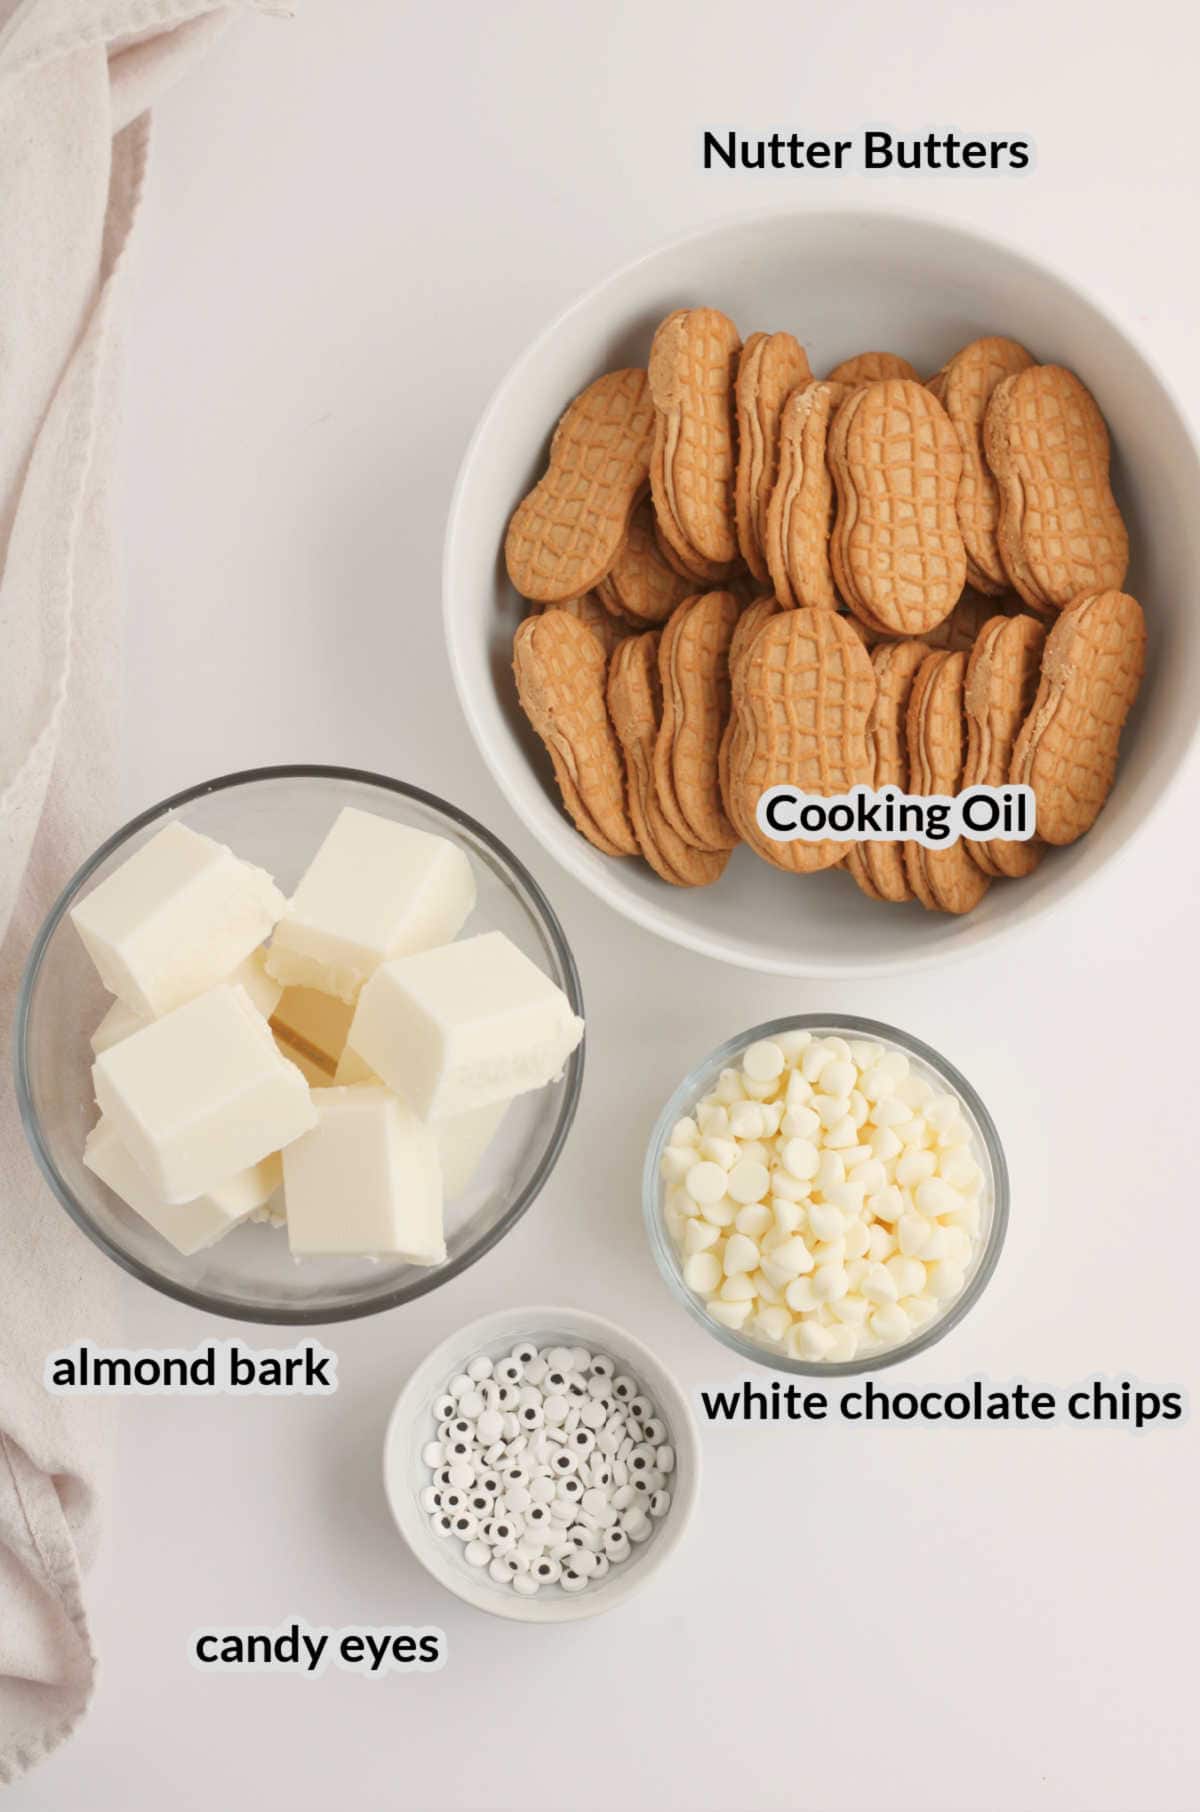
- Nutter Butter cookies – You will need 32 cookies for this recipe.
- Almond bark – This is used to coat the cookies. It melts like a dream and sets perfectly!
- White chocolate chips – These are melted to make the bandages. The color is a little different from the candy bark so the drizzles (aka bandages!) stand out more.
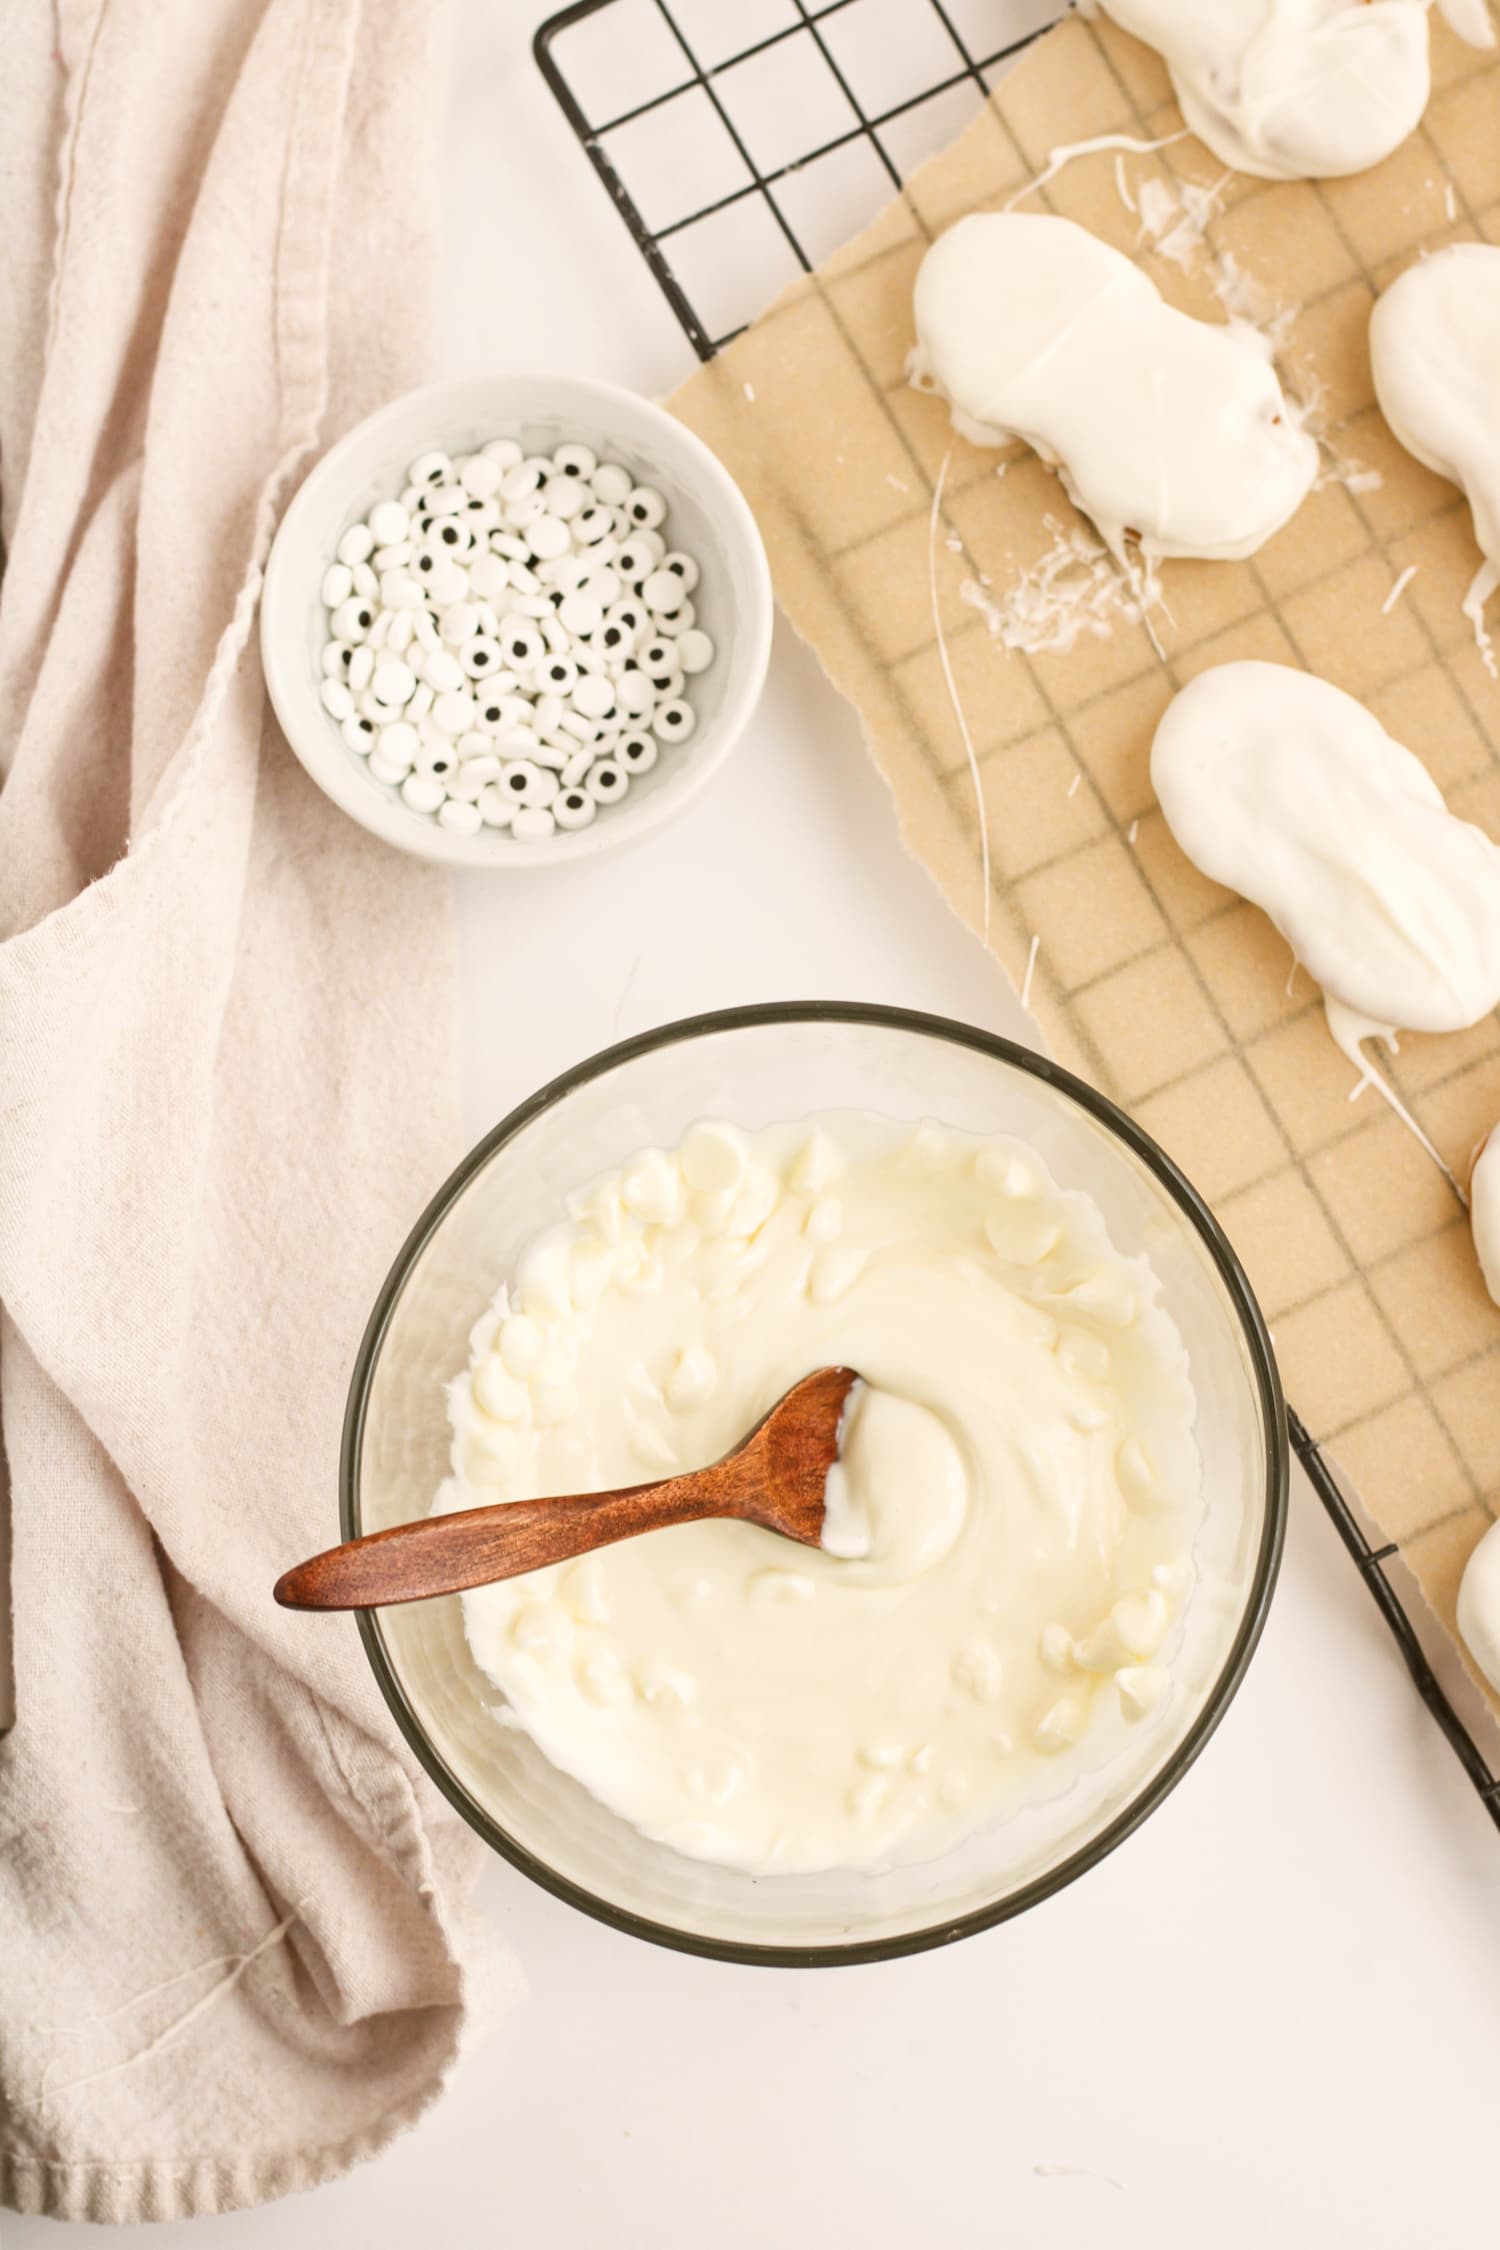
- Candy eyeballs – Look for these in the baking aisle or at craft stores. You can also order them online.
Can you use Oreos instead of Nutter Butters?
Yes, you can make adorable mummy faces using Oreos! You can use any Oreo flavor you like and just follow the same recipe steps.
Helpful Tools
How to Make Mummy Cookies
Melt: Place the candy bark in a microwave-safe bowl and warm it following the package instructions.
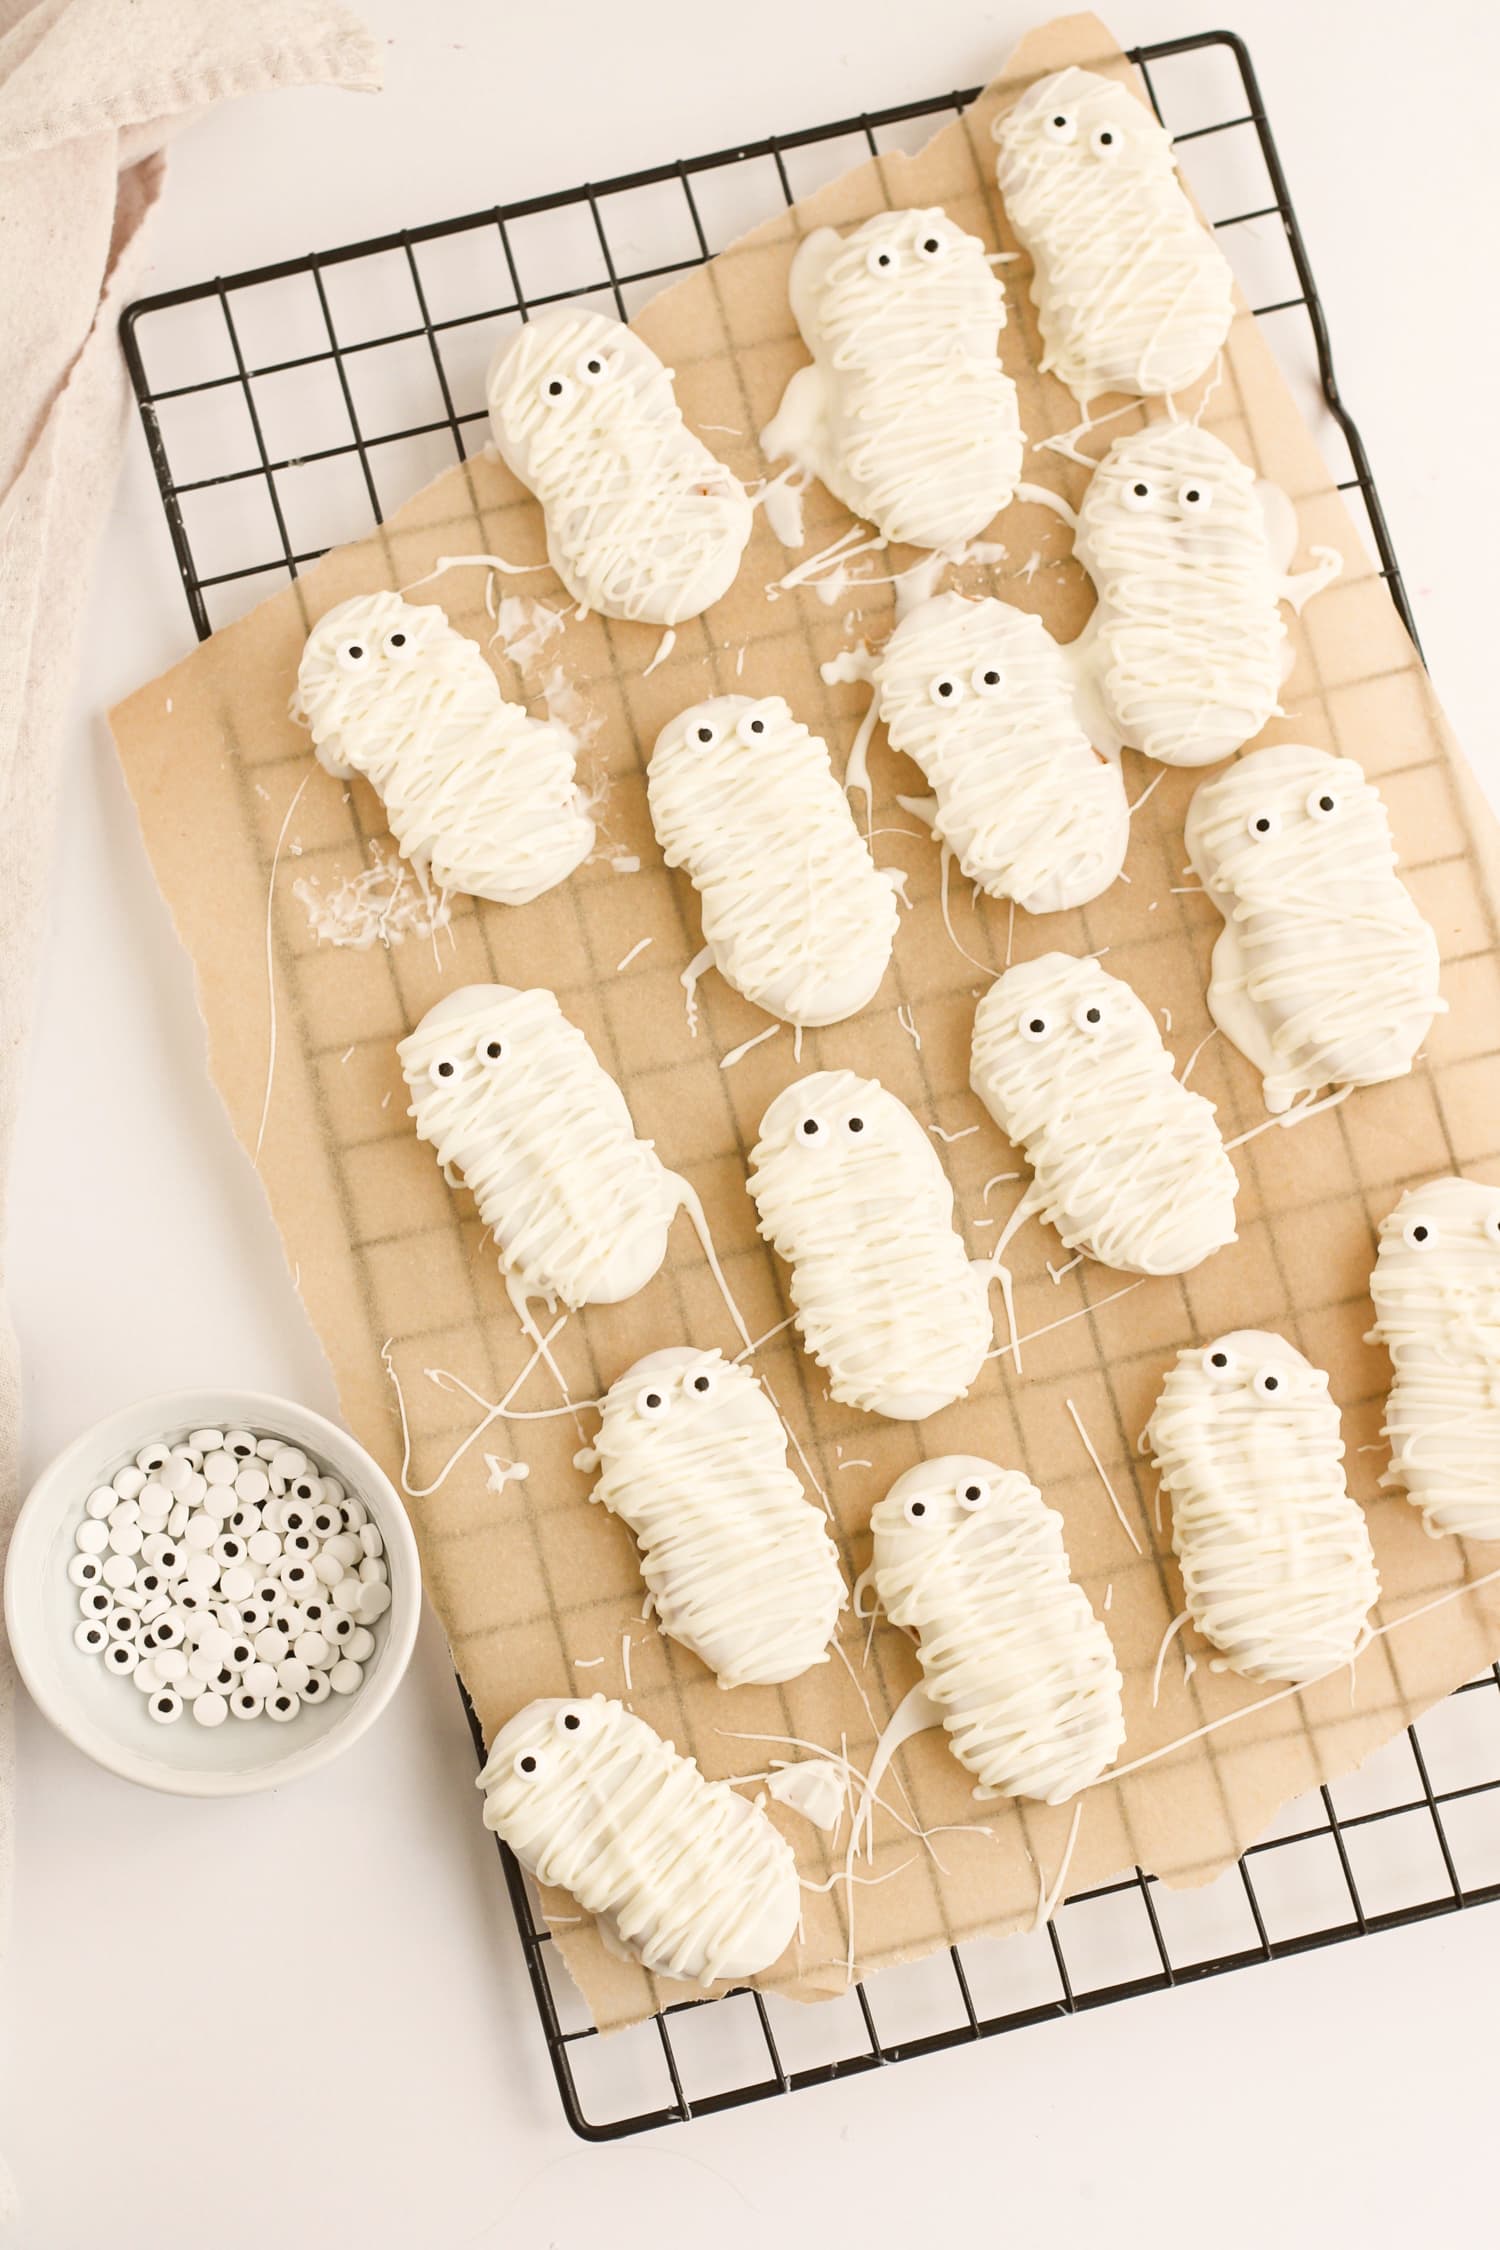
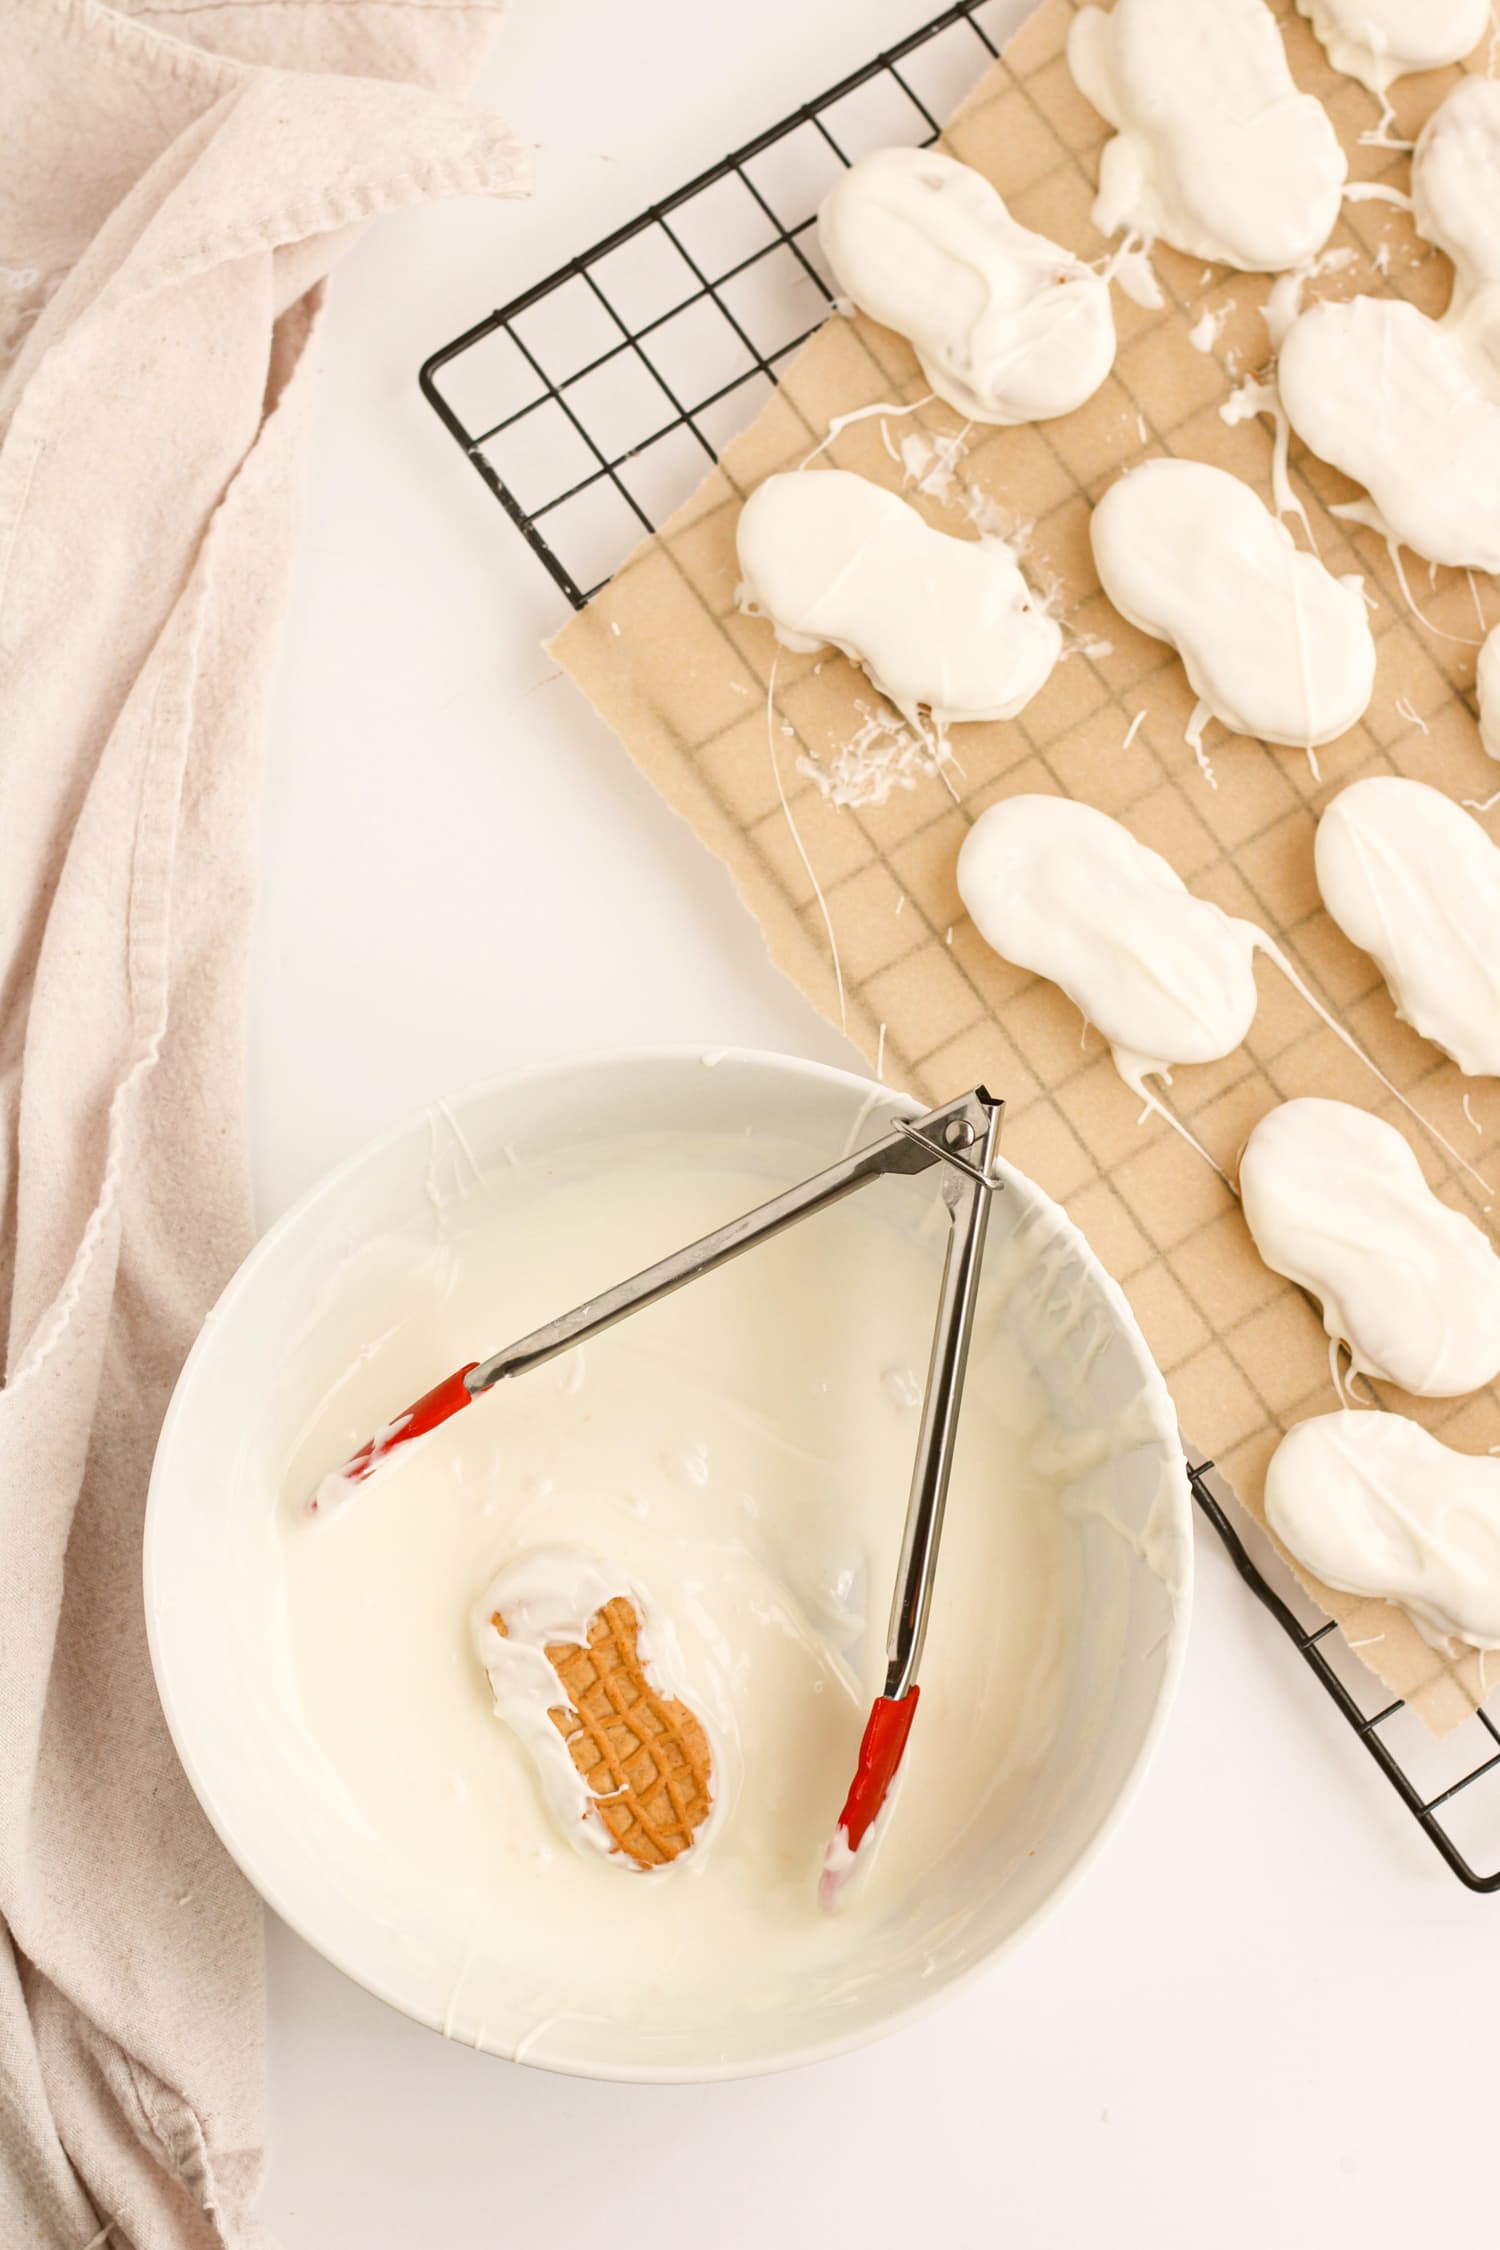
Dip: Use tongs to dip the cookies in the melted bark. Dip one side of each cookie so the whole side is coated leaving the other side plain. Once coated, place the cookies with the coating side up on a sheet pan lined with parchment paper. Let them set for 10 minutes.
Melt again! Place the white chocolate chips in a microwave-safe bowl. Warm them in the microwave in 20-second increments, stirring between each, until smooth.
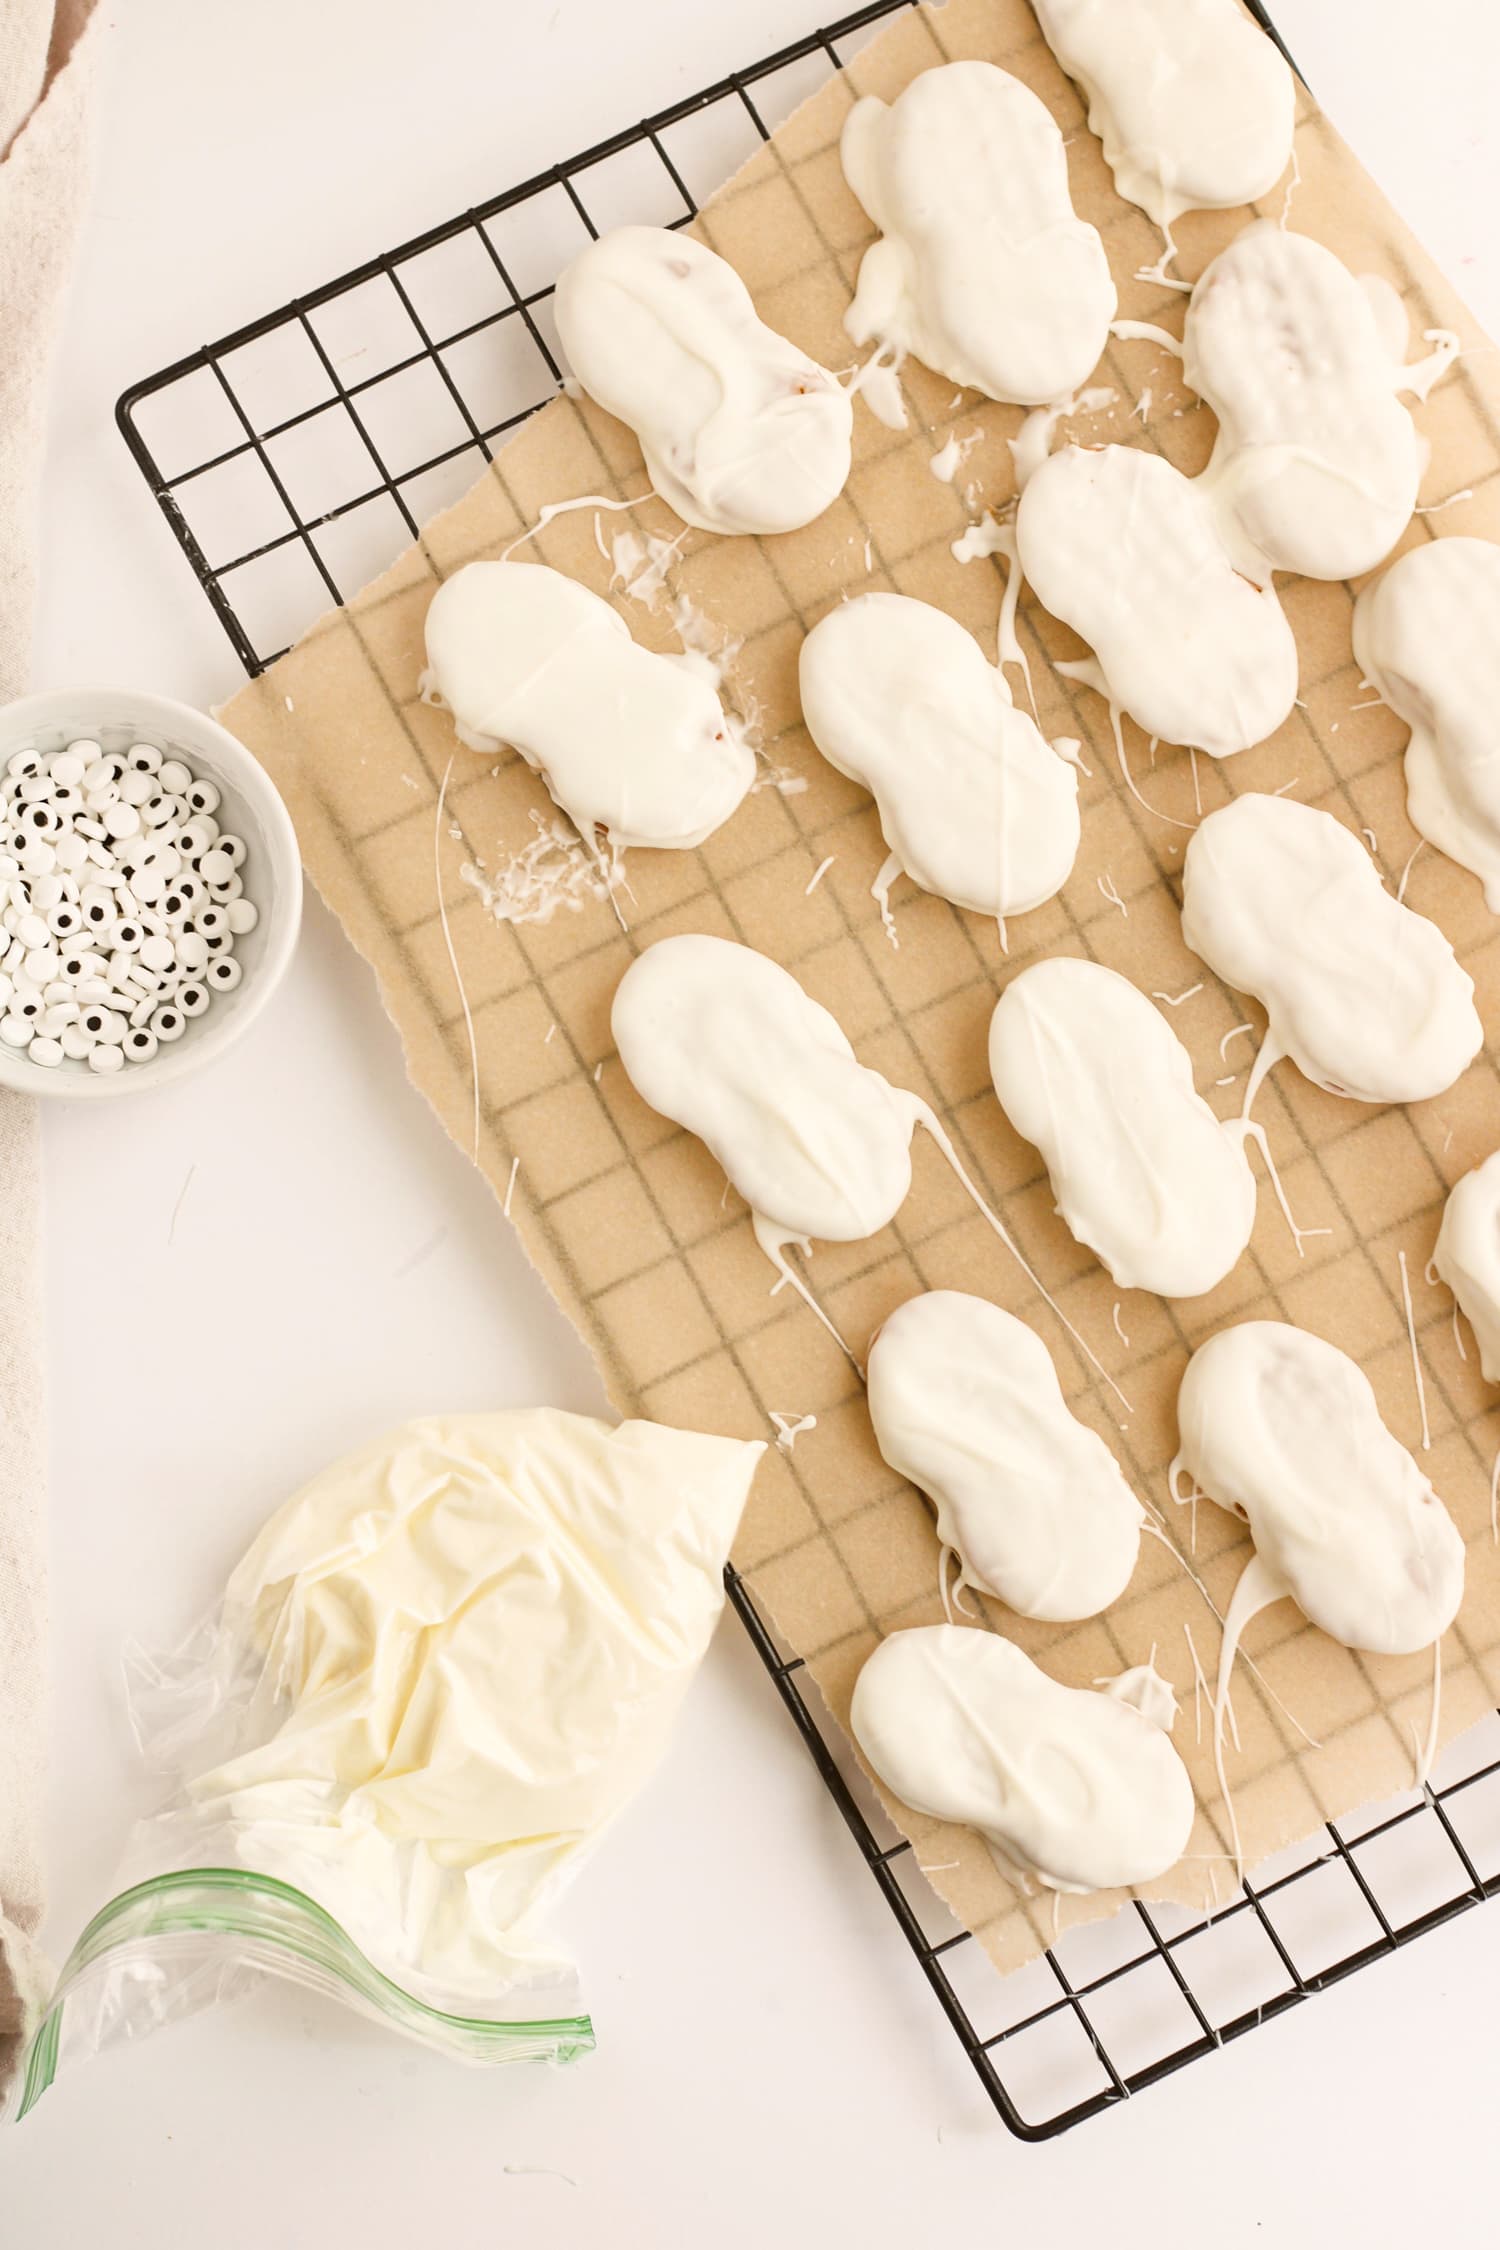
Drizzle: Spoon the melted chocolate into a resealable bag. Snip off one corn and pipe the chocolate over the cookies in a back and forth pattern to create bandages.
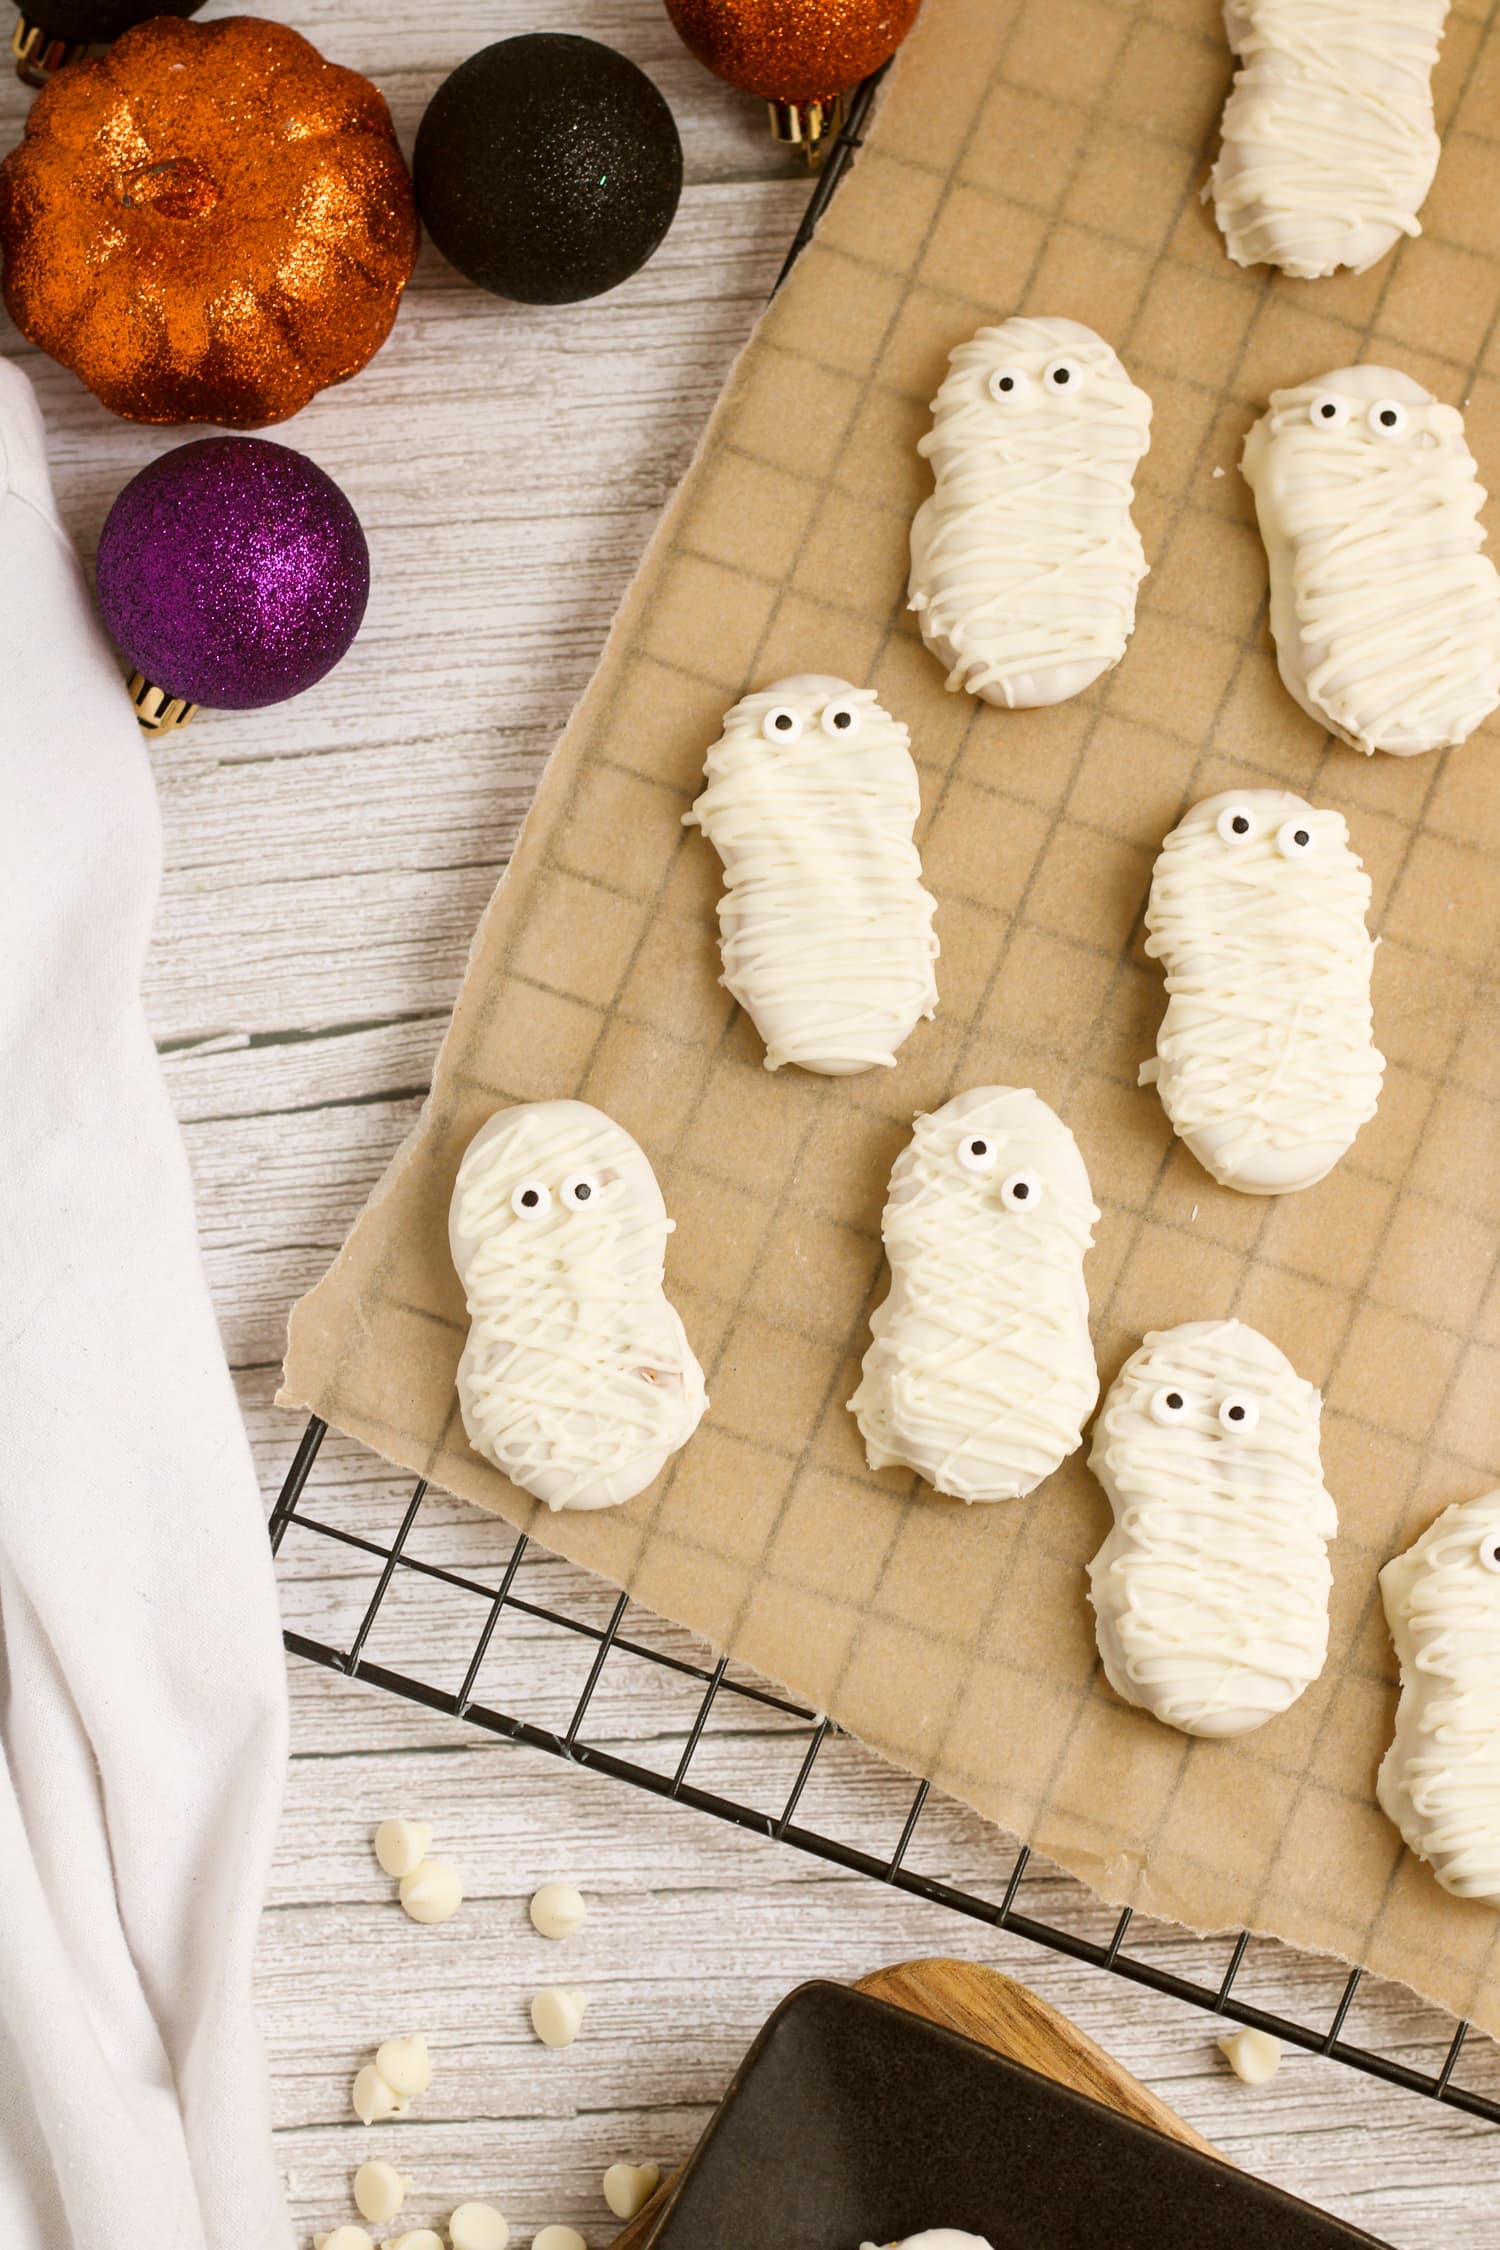
Finish them up! Place the candy eyes while the white chocolate is wet and then let them set again until the chocolate is firm.
Storage Tips
- Once the coating is completely set, transfer the Nutter Butter mummies to an airtight container. I like to use parchment paper to separate the layers so the cookies don’t stick.
You can store them at room temperature for up to a week or in the refrigerator for even longer.
Don’t Forget These Tips!
- Only coat one side of the cookies – it’s much easier to keep them looking nice!
- When you melt the white chocolate chips be careful not to heat them too much. They can scorch easily, so warm them in increments and stir between each one.
- When you pipe the white chocolate, you can snip a hole in the bag depending on how wide you want the bandages to be. It’s easier to start a little smaller and widen the hole if needed.
More Ways to Use Candy Melts
I love to use candy melts and almond bark to make fun and easy treats for the kids! Here are more ideas so be sure to stock up the next time you’re at the store.
- Halloween Bark is made with chocolate almond bark and fun Halloween candy for an easy no-bake treat.
- Rice Krispie Treat Pops are your favorite cereal bar coated in candy melts for a fun holiday dessert!
- Oreo Pops are another easy recipe that we love to make. Turn Oreos into adorable reindeer pops!
- Use white candy melts to make Red, White, and Blue Candy Bark. It’s perfect for any patriotic party or holiday!
If you take a picture and share it Instagram make sure to #kidsactivityzone or tag us @kidsactivityzoneblog so we can see them!
Nutter Butter Mummies
Equipment
Ingredients
- 32 Nutter Butter Cookies (1 package)
- 24 ounces white almond bark
- 1 cup white chocolate chips
- 64 candy eyeballs
Instructions
- Melt the almond bark in a microwave-safe dish for 20 seconds and mix. Repeat until all the bark is melted.
- Dip the Nutter Butter cookies into the melted bark. Use tongs to press to fully coat the cookies. Remove the cookies and place the side without melted bark onto the parchment paper. Repeat until all cookies are dipped.
- Allow the bark to completely cool for 10 minutes.
- Once the bark is completely cooled melt the white chocolate chips in a microwave-safe dish for 20 seconds and mix. Repeat until all the chocolate chips are melted.
- Carefully spoon the melted chocolate into a plastic storage bag. Cut a small hole or poke a hole in the corner of the bag depending on how thick you want your mummy stripes to be.
- Pipe the white chocolate over the cookies in a back and forth zigzag pattern to create the look of a mummy.
- Complete the mummies by adding two candy eyes.
Notes
- The white chocolate chips are used, as there is a slight difference in color from the bark. There is enough almond bark if you don’t want to use the chocolate chips.
- Please note that every white chocolate and almond bark all have different shades and some are even identical in shade.
- Start with a small hole first and practice on a plate to see if you like the thickness.